When you click on links to various merchants on this site and make a purchase, this can result in this site earning a commission. Affiliate programs and affiliations include, but are not limited to, the eBay Partner Network.
It's been a while since this has been updated, so here goes.
This car hasn't gotten a lot of love since it's main man left (Hi Kyle), but I'm trying to take over (biting off more than I can chew, LETS GO!).
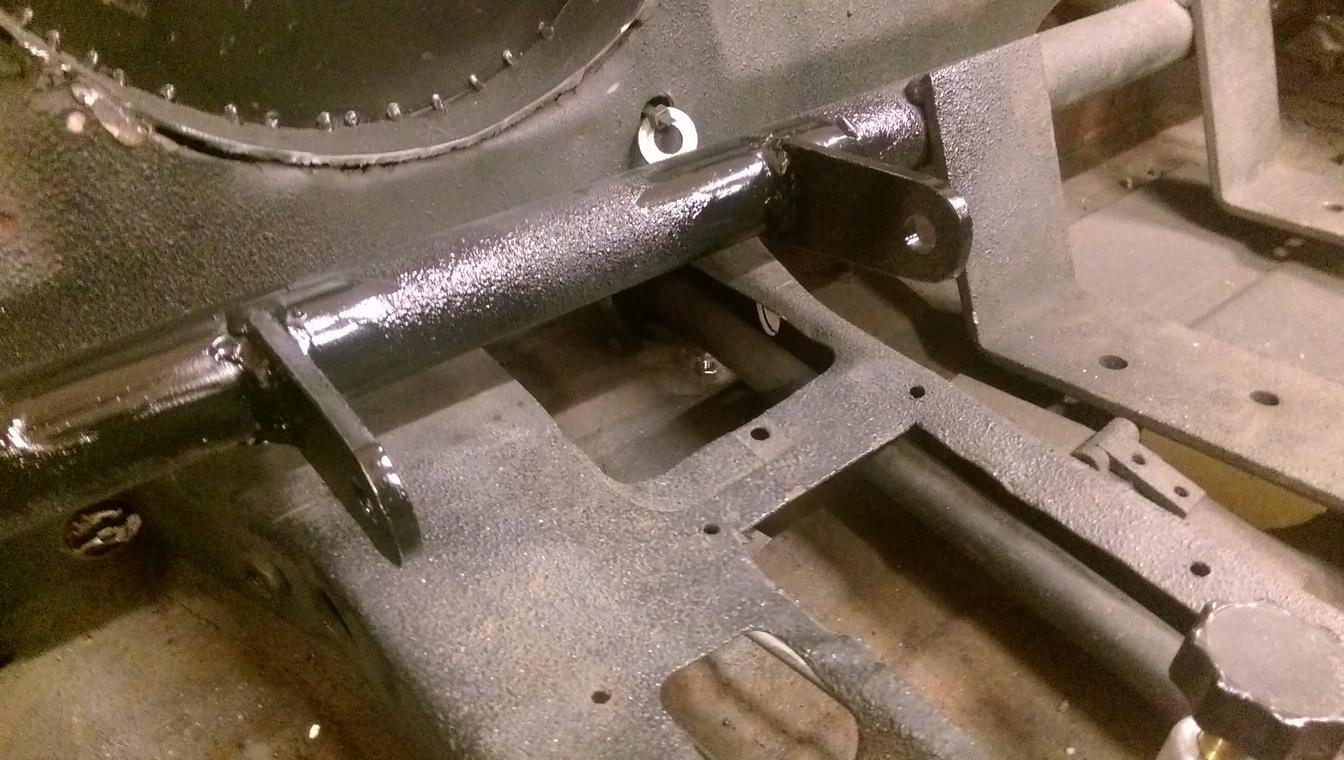
After the clutch and gas cables broke, the next problem was a nasty grinding/squeal when the car turned left. The rear caliper wasn't shimmed in the right spot, so it trashed (read: FULLY DESTROYED) the rotor where the two touched.
I checked the front brakes while I was in there, and found this:
These rotors bolt to the hub, and that one isn't attached. This meant that we drove the car for a bit with one of the front brakes completely detached!
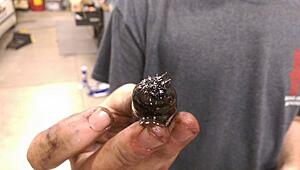
After new rotors all around, I discovered we were missing all of the pins that keep the pads in; after few minutes on the lathe the pads are secure.
The next steps are to get new harnesses and get it running better and broken in.
(I already hate Microtech ECUs )
Props on getting the brake system figured out! I did I very basic test. Had the car in the air, wheels turning, hit brakes and they stopped. That was good enough for me to test drive it.
If you need help with the Ecu, I can try to help. You can also reach out to microtech support. Just keep in mind that they're in Australia.
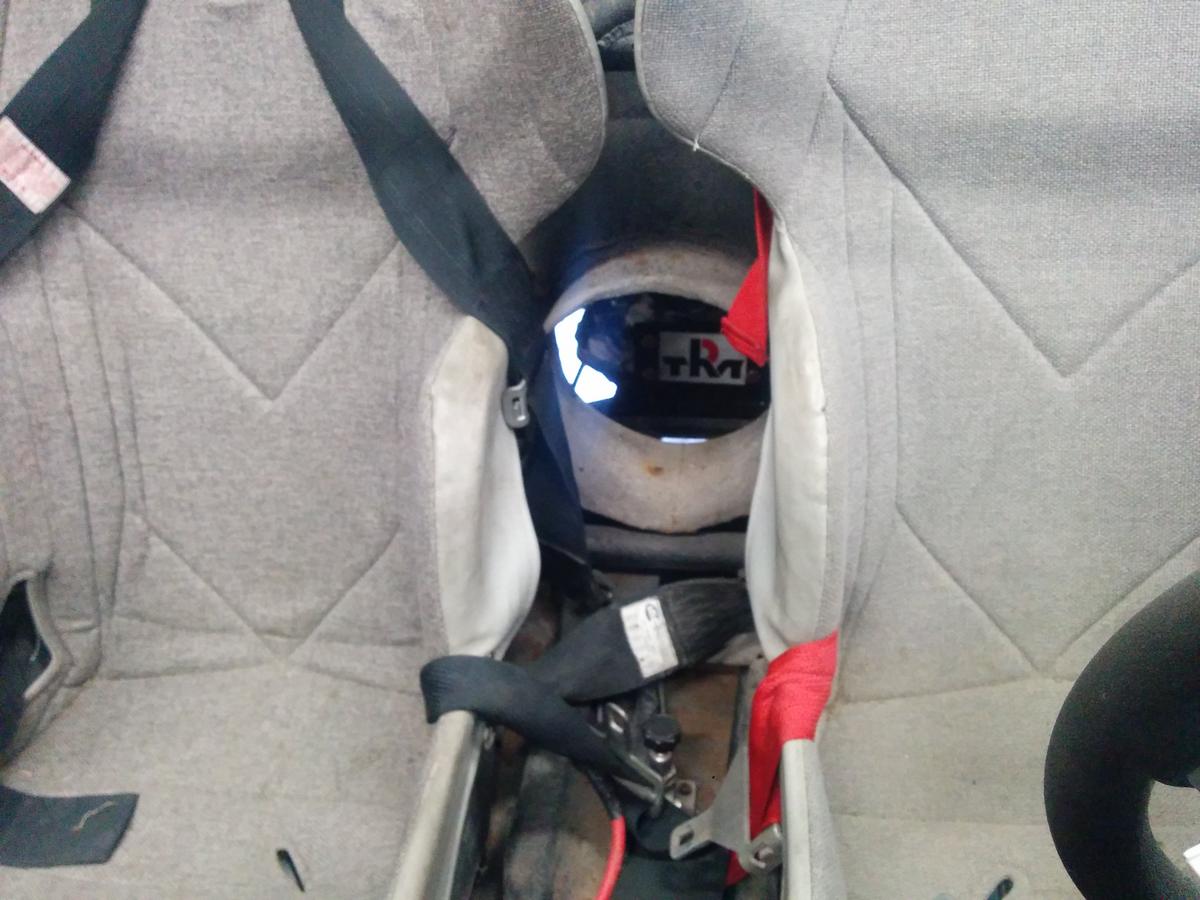
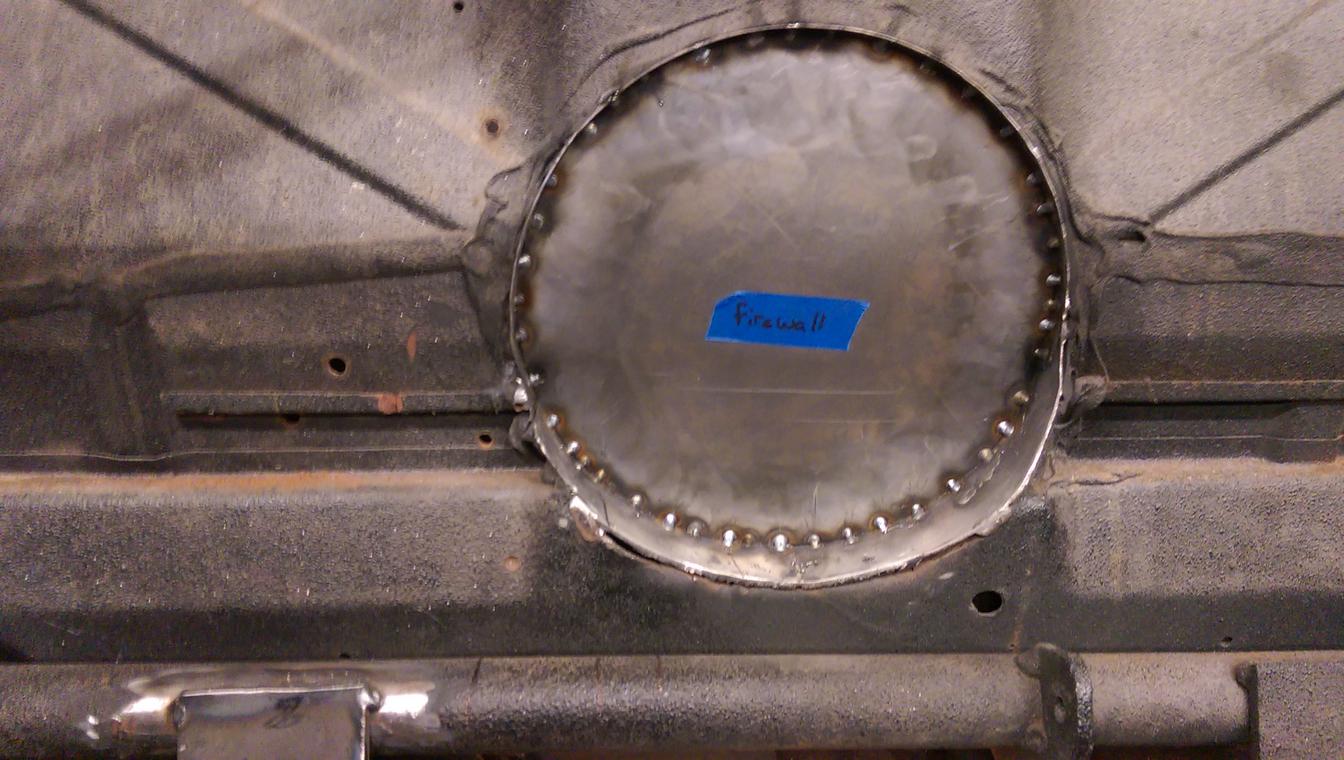
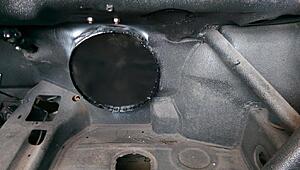
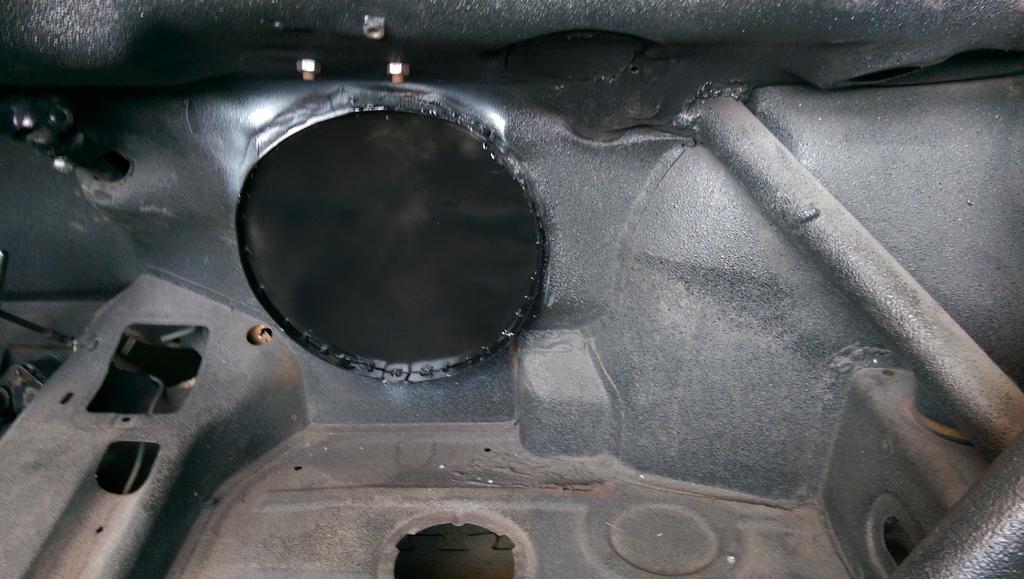
The car was formerly air-cooled, so someone put an air duct through the center of the car to feed the engine. Since it has a radiator now, all these holes do is blast people with gravel. Formerly cool, now not cool. Also, dangerous- you can touch the accessory belts from the seats.
Process to fill holes:
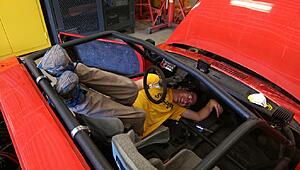
This was the main reason I tore into the car this summer, but while I was curled up upside down inside (it's REALLY tight in there) I found a few more things that needed to be done properly.
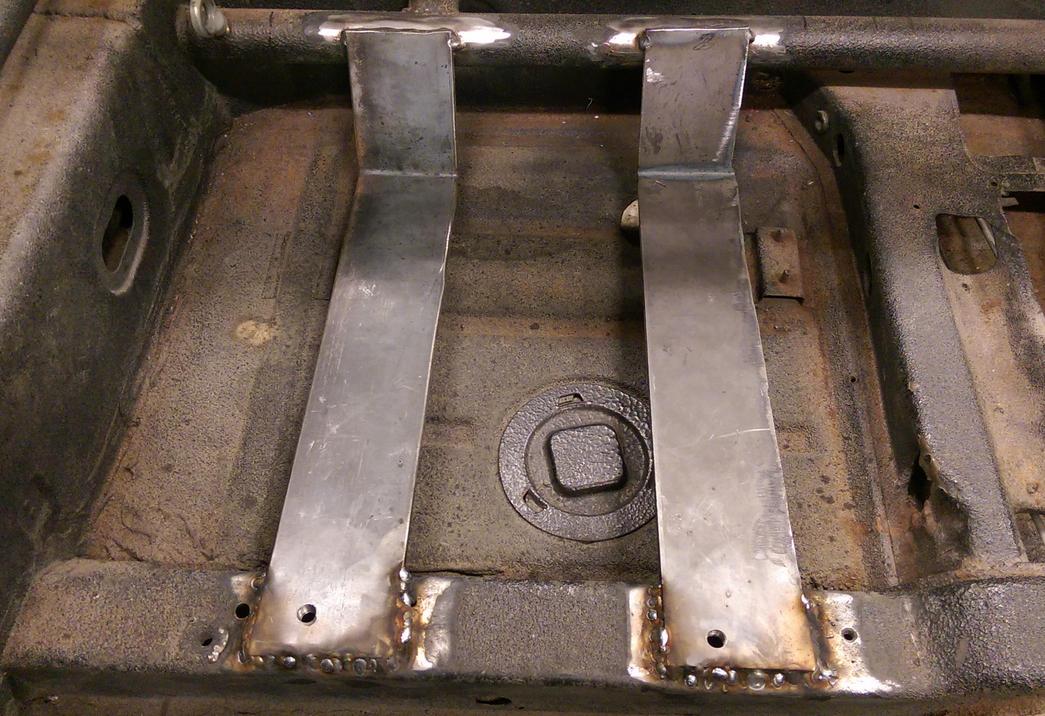
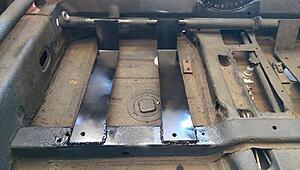
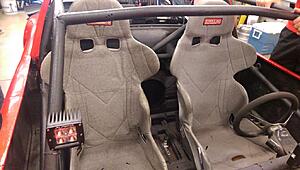
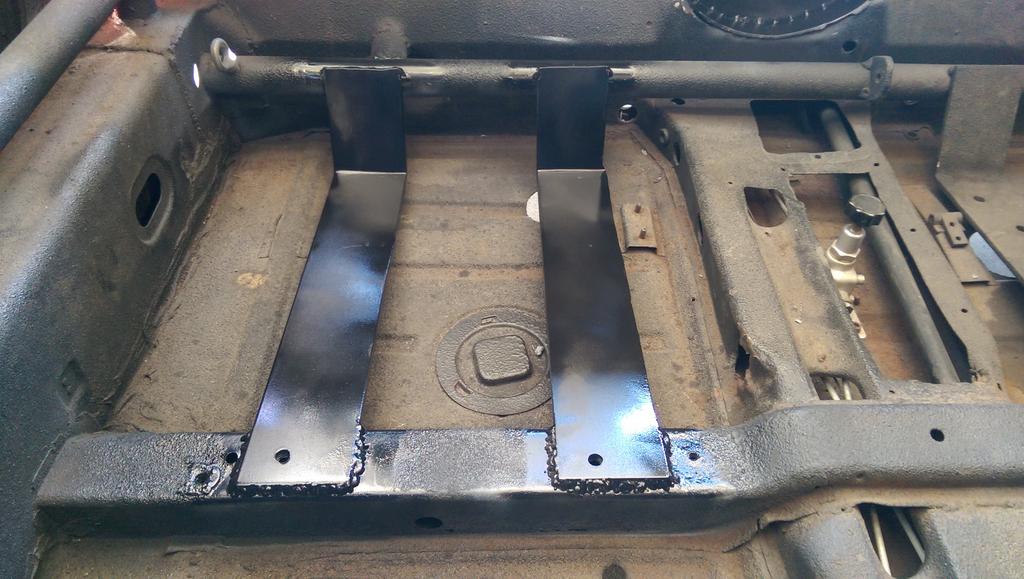
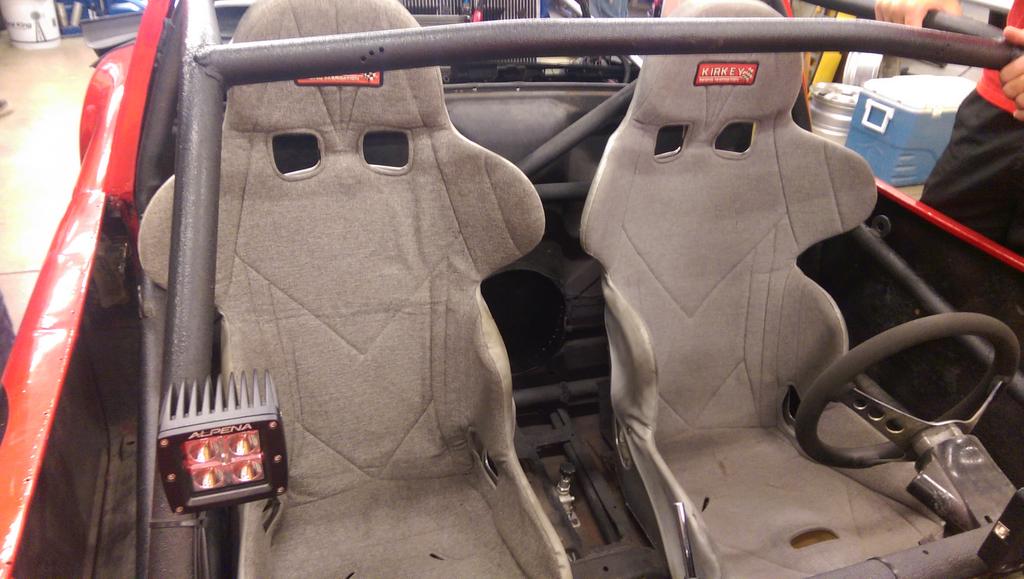
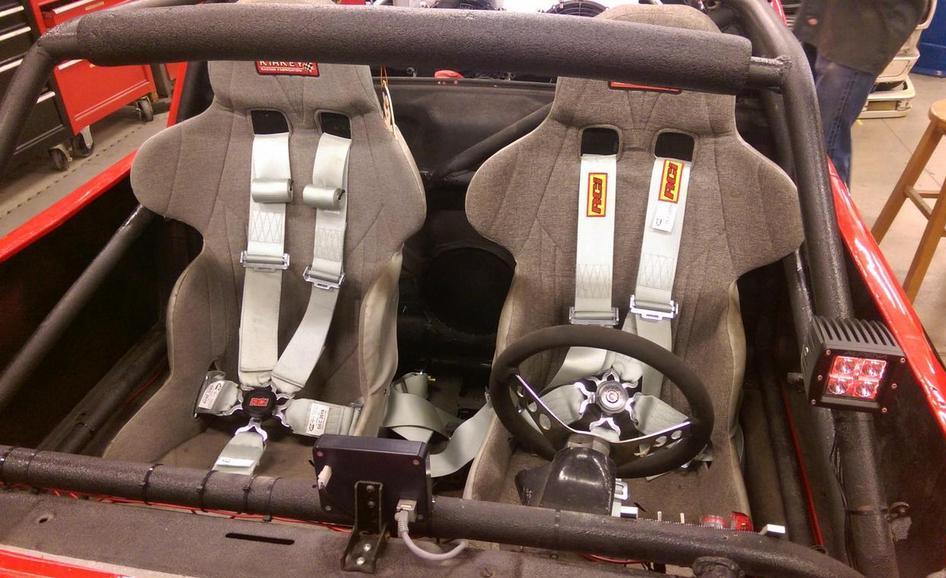
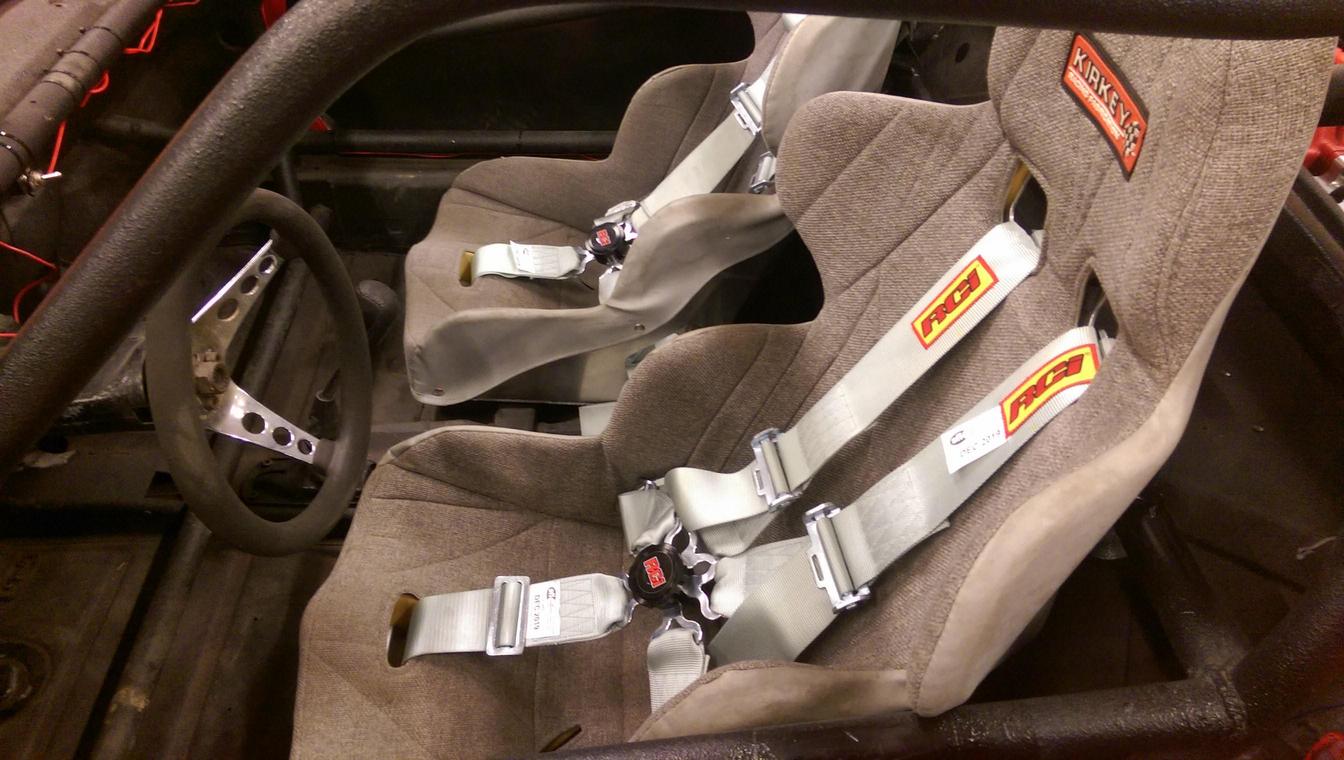
The seats were attached precariously, so improved mounts were in order. I copied the mounting rails added to the driver side, with some overkill 1/4" steel.
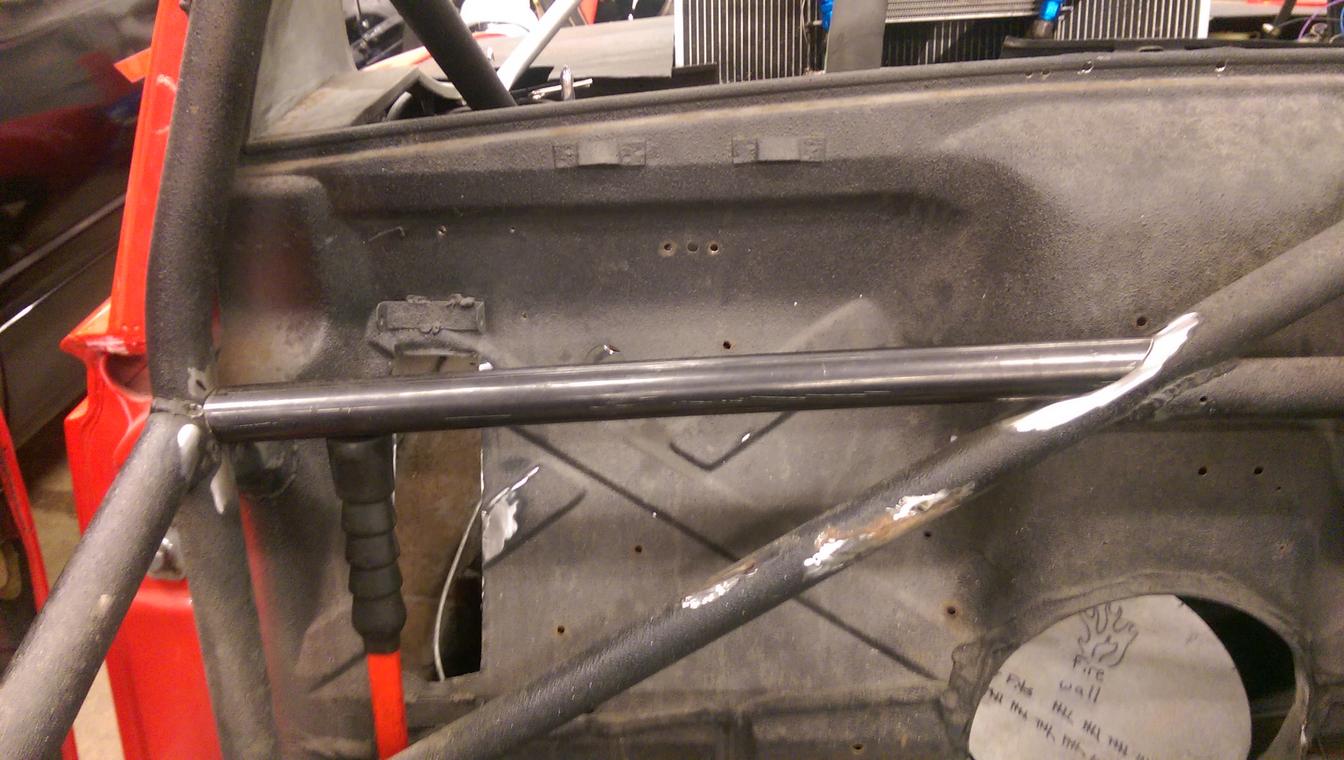
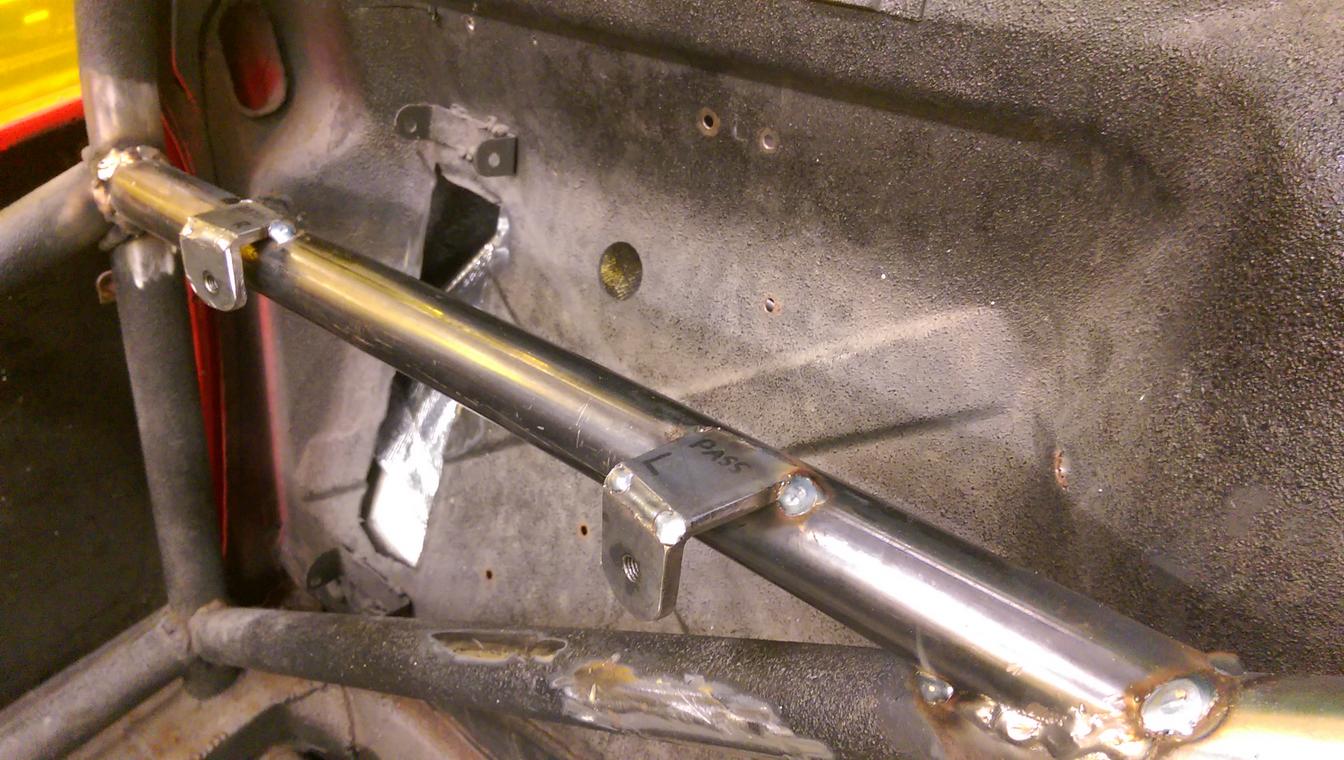
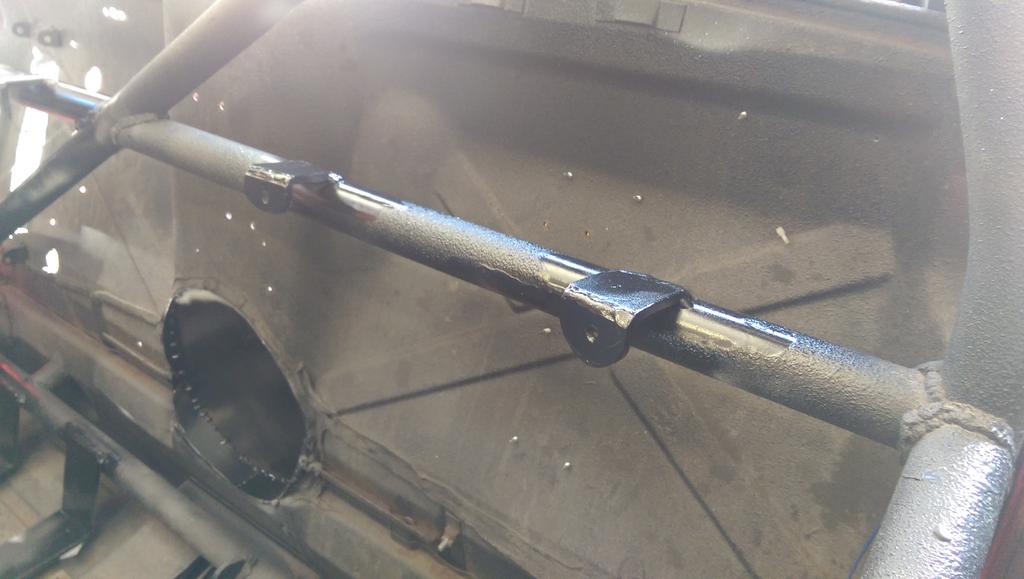
There wasn't a harness bar for the passenger since it was built as a single seater, so that went in too.
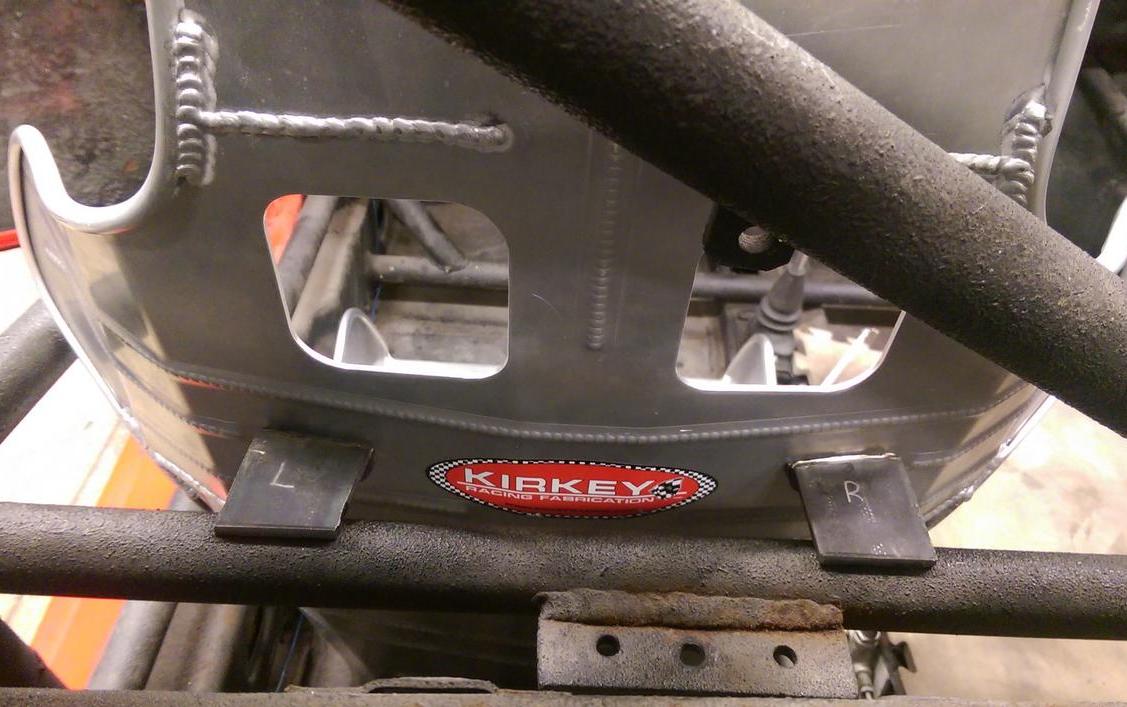
Both seats shoulders got mounted to the harness bar with more beefy tabs
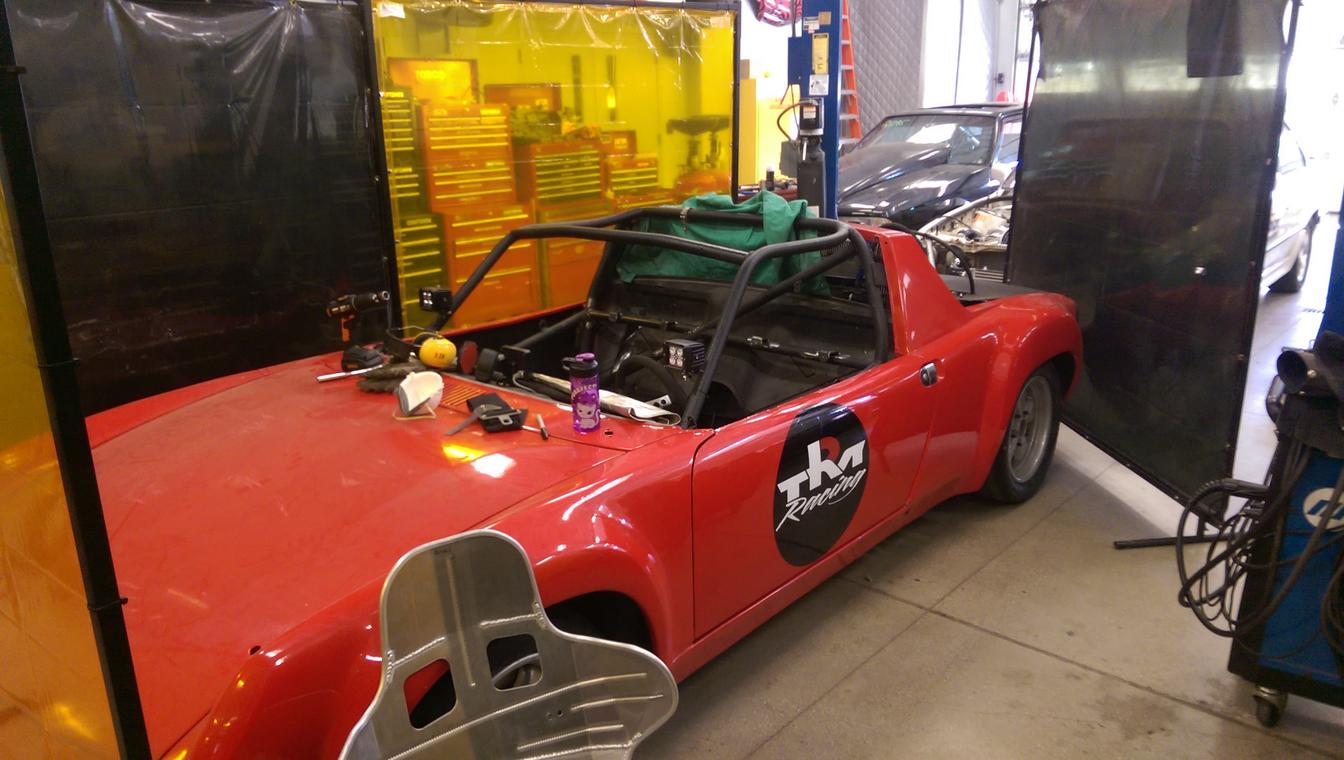
Here's a pic of the welding setup, well just because
The last step to finishing the interior (exterior, really) were harnesses. The ones in there before expired in 1987. Sooo, that meant new tabs to bolt them in, because the old ones didn't fit. Viola!
And installed: 4 total, for the lap belts. These insure that the belts are actually installed with the correct hardware, and are at better angles. Do your homework and install harnesses properly.
They look cool too. Also it's nice to know you won't die if you hit a speed bump.
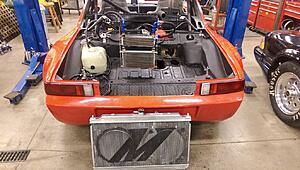
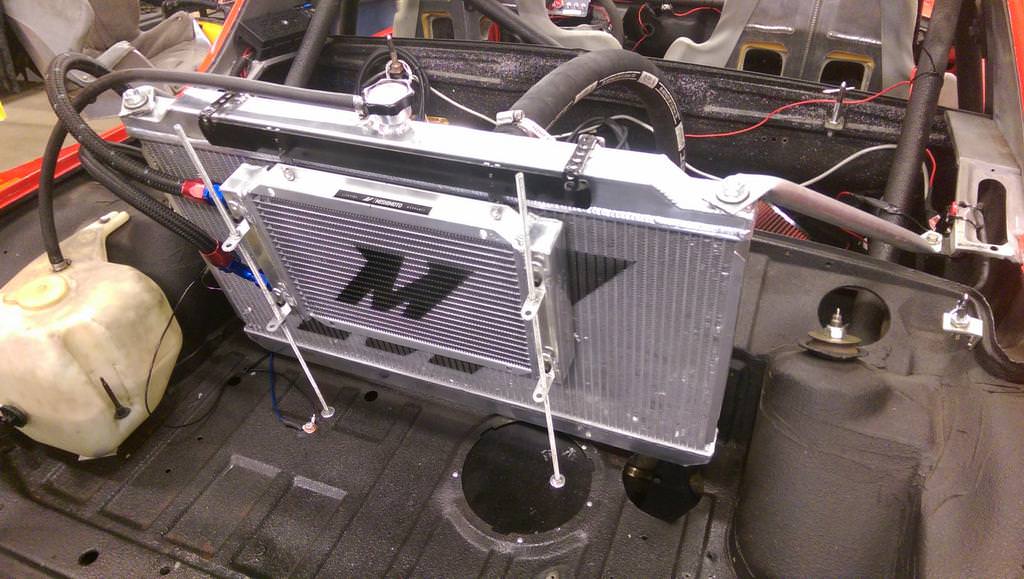
Now let's get to the real reason the car has been out of commission. The left radiator fan wanted to leave it's mark on the world, and chose our radiator to do so.
That mark was a quarter inch deep impression of itself unfortunately.. Catastrophic failure. Coolant everywhere...
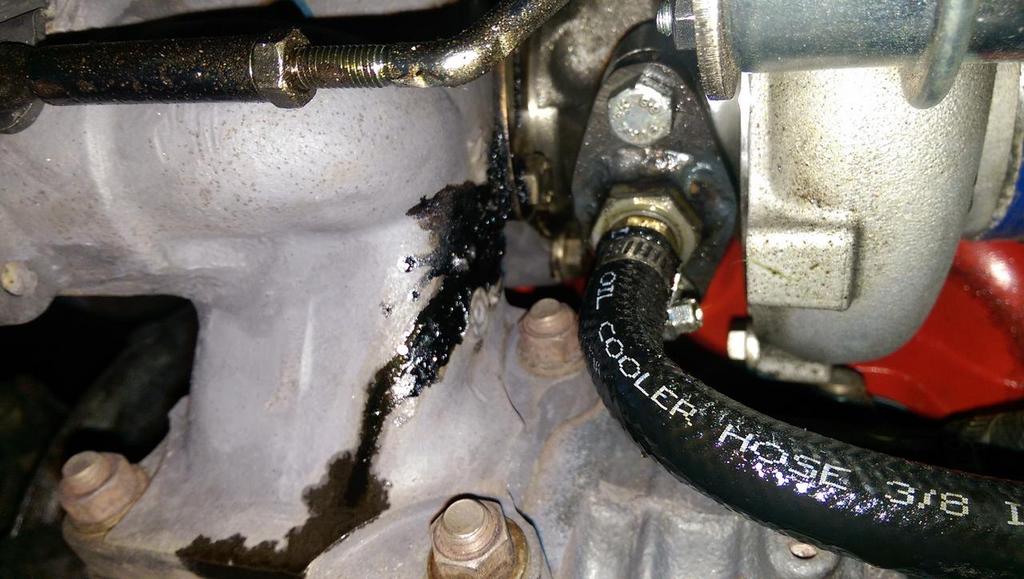
And several months of work later: Also, the oil coolers have always leaked, so in went a shiny new leak free part. Logo tuning on point.
This is the most second most frustrating issue I have come across on this car, whenever it drove, it left an actual, full-on cloud behind it. (VapeNation?)
Below you can see the drain line coming from the turbo, and the baked on aftermath. Noe shown is how it curved upward. Needless to say, the turbo did not drain. Hence, the ridiculous smokescreen.
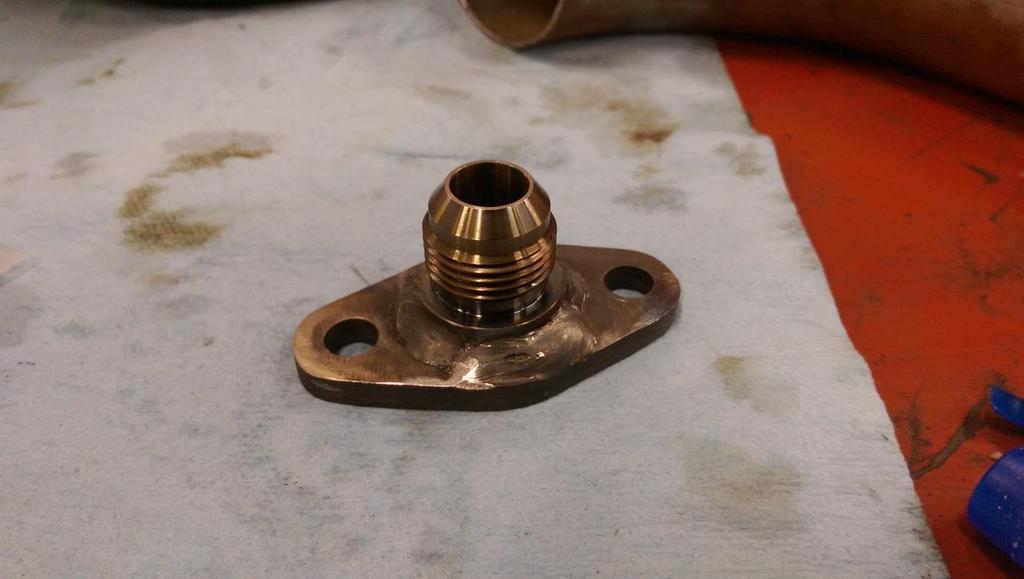
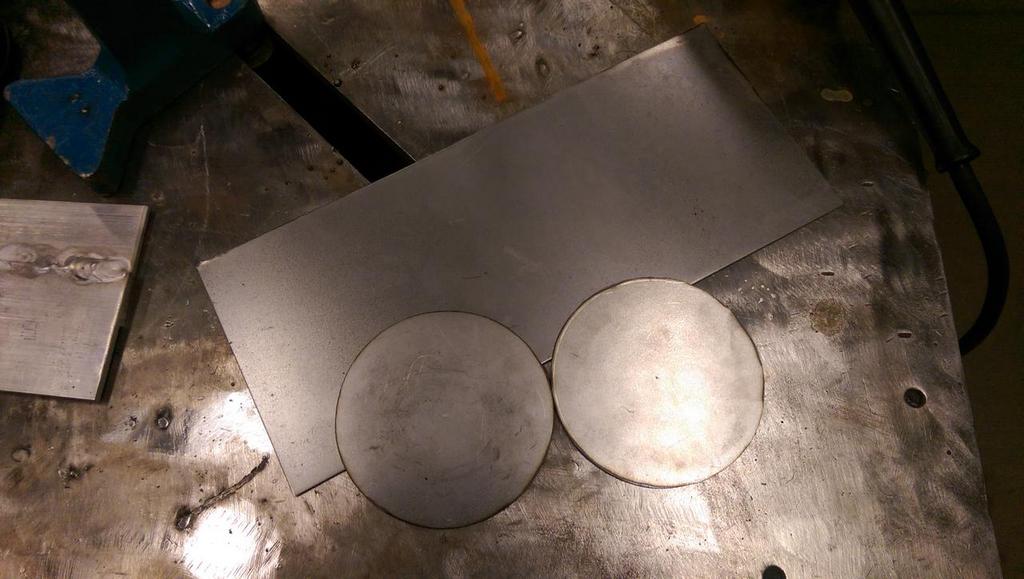
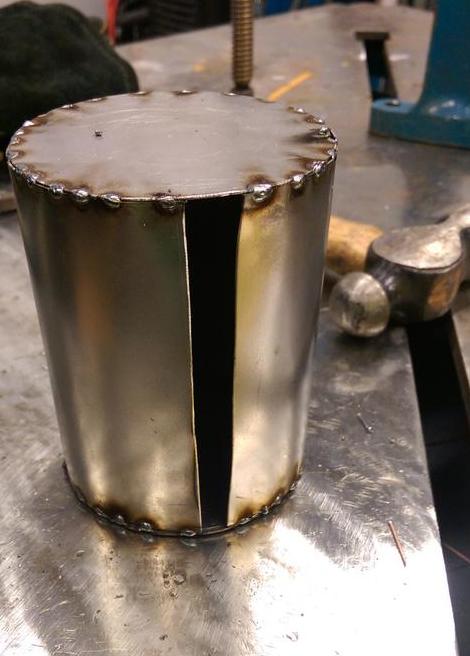
I found this recipe for scavenge pump installation in the deep web:
First we need a fitting: Check!
And some steel: Check!
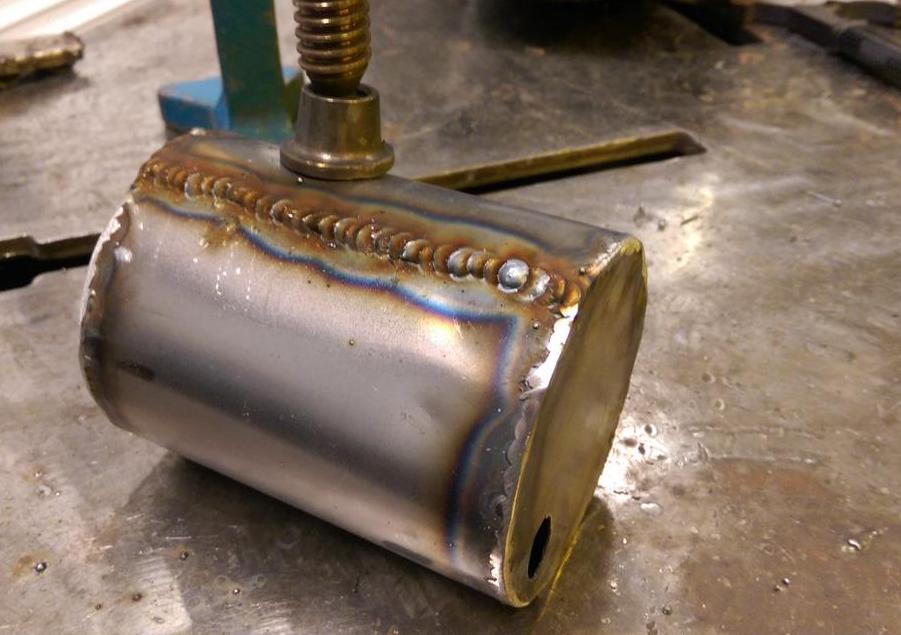
Let that simmer for a while...
Uh oh.
Let's back up and try that step again...
That's more like it!
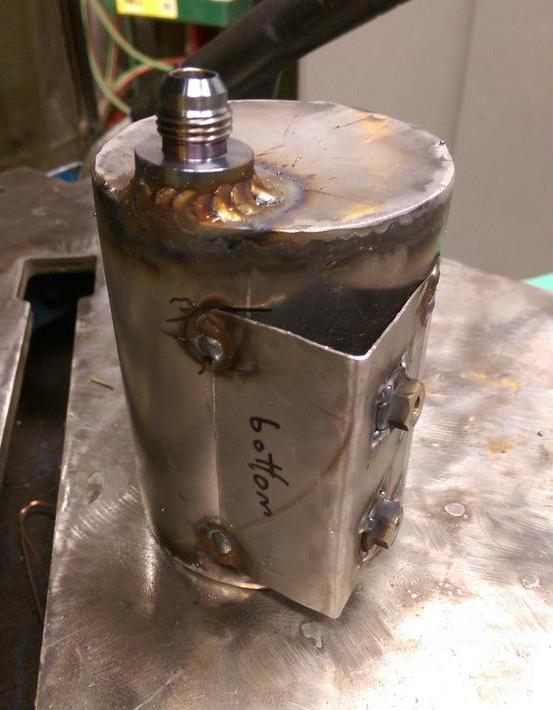
Add a dash (-6 in this case) of seasonings, and done!
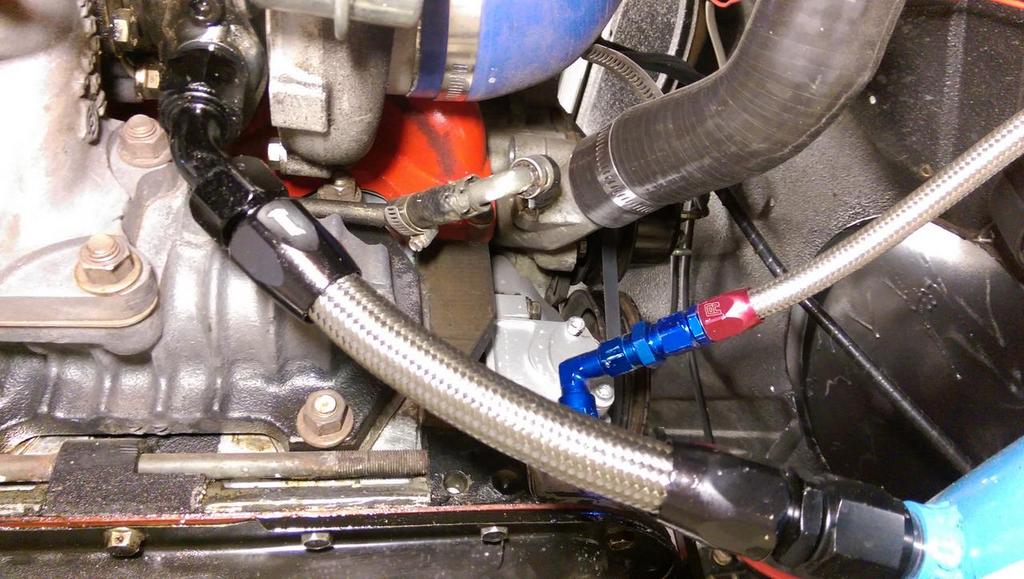
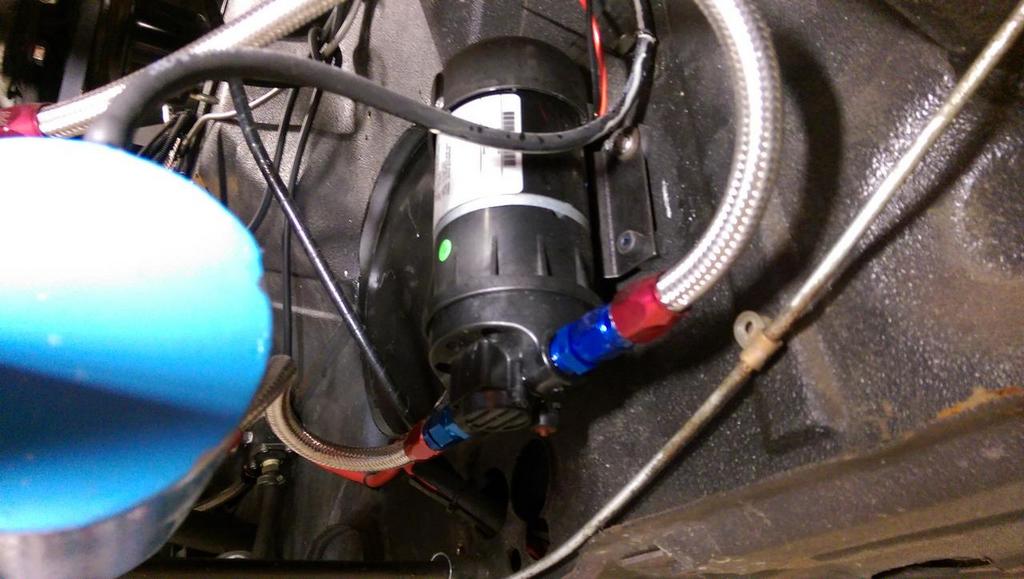
The art you see above is actually a reservoir for the oil draining out of the turbo. It gravity feeds in to that small tank, then the scavenge pump sucks up and spits it out into the oil pan, where it belongs (not on my exhaust housing!). Actually installed, it looks like this:
Turbo to reservoir
Reservoir up to pump
And taking it nicely full circle, the blue AN line in the background of the first picture is the fitting to the oil pan. (I told you this is art)
Some technical notes: This took months to figure out and plan.
The pump is triggered by the ECU to run whenever the engine is running.
It pumps more than comes out of the tank, so there's a vent on the reservoir to let air in. A catch can is needed now, because there's a bunch of fresh air being pumped into the crankcase (rotor housing?).
The -10AN is still not large enough to flow all the oil, so even after all this, it still leaks...
You still need oil flow through the turbo after the engine is off, look up oil coking.
For the next iteration (third try), it should end up something closer to this.
We've also been messing with the shifter and clutch, and inexplicably improved the shift pattern. Don't ask me about this one, I can't explain it.
Old:
New:
Kudos for building the oil drain setup, but I'm not sure that's your issue. Your turbo isn’t mounted any lower than most peoples’ turbos. It is more likely a crank vent issue or an actual turbo seal issue. It's tough to diagnose now that there is oil in the exhaust since it will take some time to burn off the residual oil and see any improvement. If the engine has a lot of blowby from seal clearances, it can make the smoke even worse.
Your turbo isn’t mounted any lower than most peoples’ turbos. It is more likely a crank vent issue or an actual turbo seal issue. It's tough to diagnose now that there is oil in the exhaust since it will take some time to burn off the residual oil and see any improvement. If the engine has a lot of blowby from seal clearances, it can make the smoke even worse.
Thanks for the reply, this is interesting. For some reason that never occurred to me; if my turbo isn't any different, what do other people do for oil drains? The car has done enough driving to burn out all the leftover oil, and as long as the scavenge pump is on it doesn't produce giant clouds, so I conclude the scavenge pump is working. However, it still leaks oil from the center housing at a slow rate, coating the drain system and the entire underside of the car. I'm don't think it's caused by blow-by because it's a recent rebuild. (Or are the clearances larger because it's not broken in yet?).
I know the engine is venting, whenever the scavenge pump is on, it blows light oil vapor from a vent on the oil fill port. I don't believe the innards of the engine are pressurized.
The turbo seals could be the culprit. I have not found a conclusive answer to if they are permanently damaged from running with poor oil drainage.
I've always ran a 10AN drain to the front cover similar to how you have it. Have you verified that there isn't excessive shaft play on the turbo?
If I were you, I'd consider rebuilding the turbo. You can find rebuild kits online for $50-100. Rebuilding a journal bearing turbo is pretty dang easy. You just need standard hard tools, snap ring pliers, and a pick. Watch a few youtube videos and take your time.
Sit down (criss cross applesauce preferably), gather 'round, it's story time!
I finally got around to editing some videos of the (lack of) progress. We start fall 2017 after the car has been sitting all summer (getting some schweet new seats, might I add). We were chasing around why it wouldn't start - I guessed the super rich tune was just dumping fuel and flooding it. I cut out a lot of cranking and temperature fuel enrichment, but to no avail. We checked three of the four ingredients of combustion (air, fuel, spark) and all were present. That left us with, uh-oh, compression.
That test did not have strong results... Considering how little the engine ran since it was rebuilt, catastrophic failure was not likely, so we pressed on. I was still hanging onto the flooding idea, so we opted for the extreme method of Unflooding a heavily flooded 2gen.
MIRACLES ARE REAL, PEOPLE. Once it was alive, we found another issue though, which is the last clip.
That was the smokescreen of oil not draining from the turbo. To fix this, I built the oil reservoir in the posts above. It still leaked (small drips), but it didn't blow smoke so we continued driving it around. That noise sure is something.
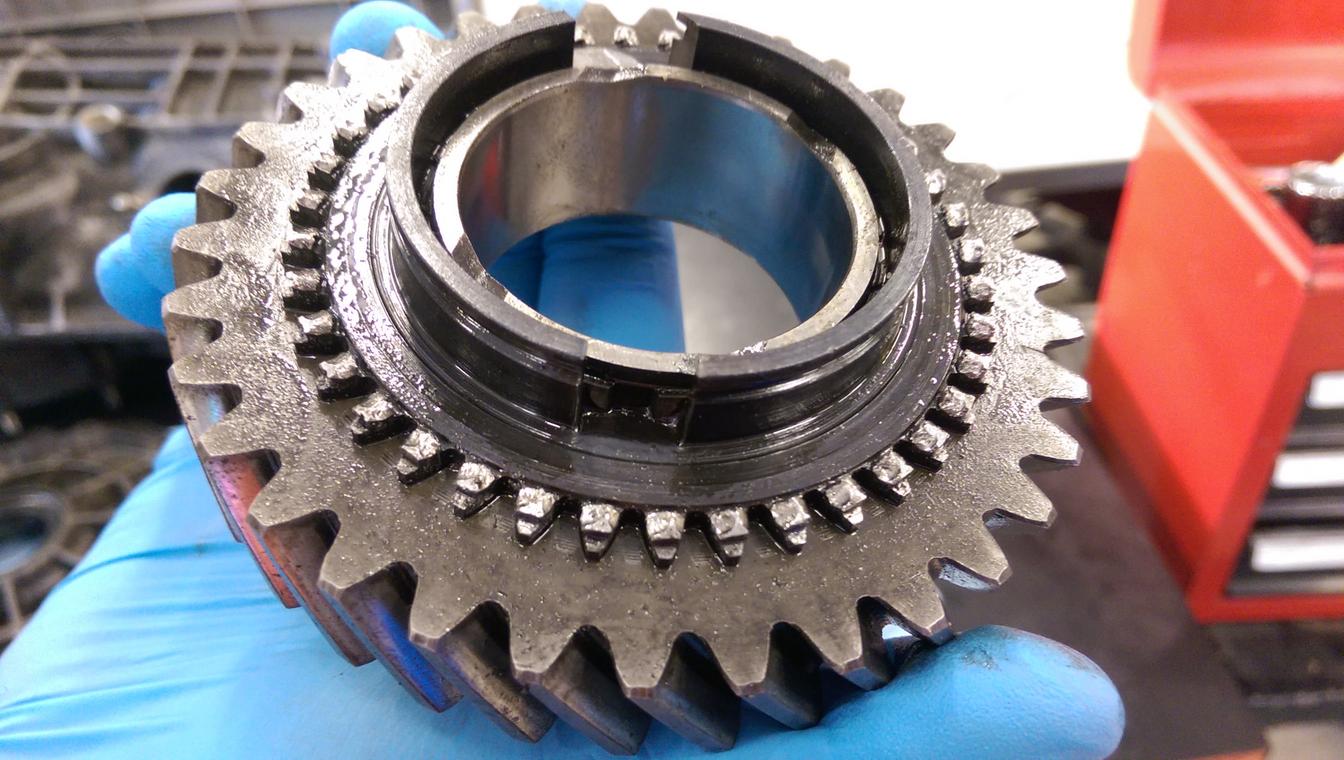
That poor trans has been raced (read: abused) for a great portion of it's life, and since the rotary is right on the gearbox torque limit, we knew it was bound to happen. Witness the carnage. RIP 901.
1st/Reverse Synchro. No teeth left.
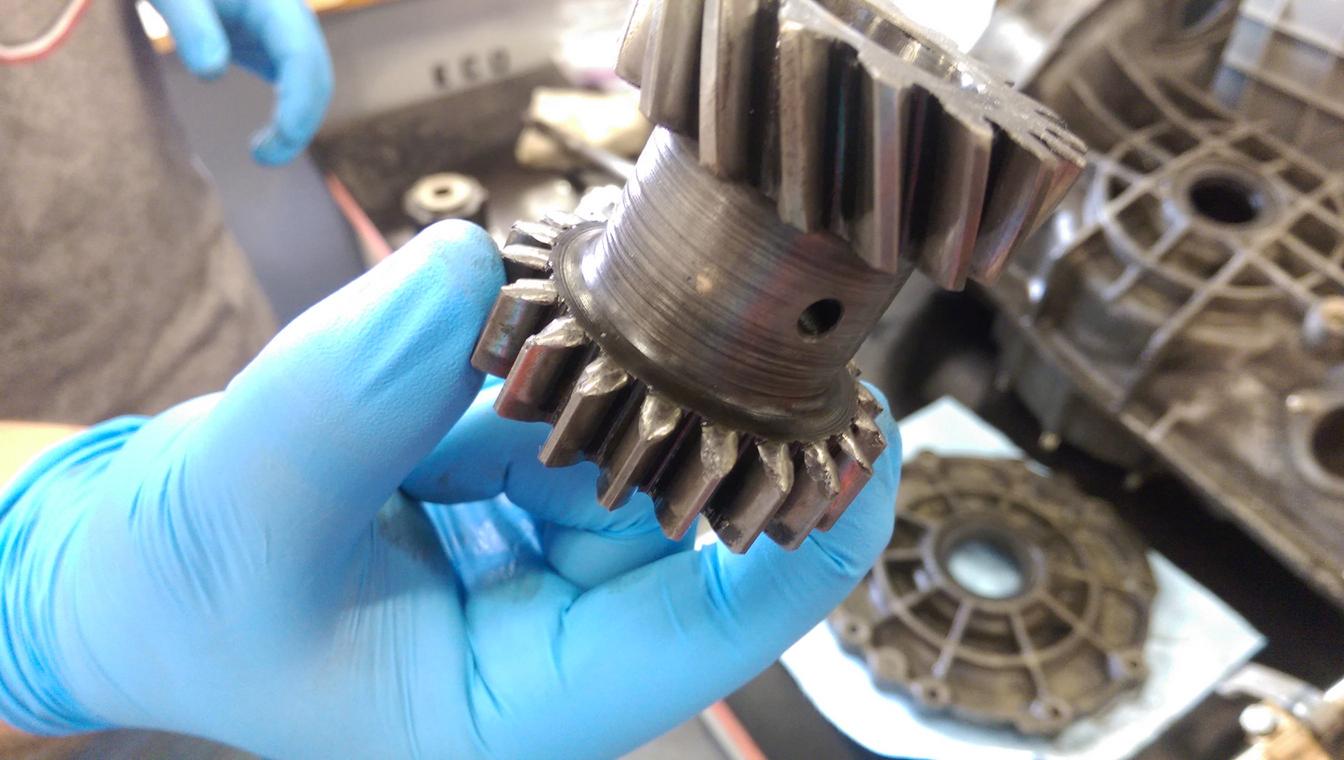
Reverse Idler and Gear. Teeth chipped and rounded (they are rounded from factory, but not this bad)
Where did the teeth go? Oh, right to the magnetic drain plug.
The car has been chilling in the bay since then, awaiting our fix. We bought a transaxle from a Cayman to replace it, but the sticking point (read: poor planning) is the starter motor placement. The rotary starter is transmission side, but the Cayman starter is engine side. Not sure where to go from here.
Hey everyone!
Was reviewing this thread and saw that it hasn't been updated in a while, so thought I'd give it a go. I'm Conner, currently a sophomore Mechanical Engineering student at Rose, and I've been Secretary of Team Rose Motorsports for the past year and will be Safety & Inventory officer for next year. Since the last update in... wow almost 5 years, a lot but not much has changed with the car. Since the last update, here are the major things that have happened with the RX-914
- Transmission rebuilt and upgraded by California Motorsports
- Last tuned in the Summer of 2019 by Banzai Racing
- The radiator has been moved upwards in the trunk for more cooling
- Turbo rebuilt by BNR
- Turbo drain fitting to the oil pan was changed to a 10 AN fitting for better flow
Those are the major updates that I can think of. Since I have been a member of the club (1.5 years now), the car has mainly been out of commission, sitting in the bay all sad. The last time it was taken to an event (Fall 2021) which was autocross, it ran pretty well but had some cooling and starting issues. We upgraded the starter to a 1.4kW high torque one and changed the battery to a deep cycle marine one because the long cranking time was killing our battery and messing with the ECU voltage.
The next time the car ran was a little more than a year ago when we got it idling, and then immediately had the turbo shipped out to be rebuilt. The car has not run since sadly. For most of last school year, the car sat in a permanent backlog of "waiting for parts" where things took forever (covid delays) and nothing was really done. So at the start of this school year, I decided to take charge on the project to get this car up and running again. Before we got the turbo back, we decided to fix some leaking from the oil pan which was caused by 2 or so oil pan bolts not being used, because the block was stripped (I love aluminum!). The problem we ran into, is that the engine mounts (if you can even call them that) bolt directly to the front cross member on the front timing cover, which is part of where the oil pan bolts to. So in order to fix the oil pan issues, we had to remove the whole engine from the car.
So when we finally had time, this winter we got to it and decided it was time to pull the engine. We removed all of the accessory drives, piping, intake, and exhaust. Next, we got a conveniently-placed pallet and put some wood blocks on it, and lowered the car until the front cross member was supported by the wood. The transmission bolts were removed, and the bolts connecting the cross member to the frame were loosened. We dropped the car some more, and with the help of a couple of pry bars and a lot of muscle, we were able to get the engine on a pallet and out of the car! And it only took maybe ~4 hours on a Saturday.
After the engine was out of the car and on the pallet, we "Modified" an existing engine stand (thanks Jack) to fit the rotary, connecting to 3 bolt holes on the spark side of the engine. We lifted it up with 3 people (only about 250 lbs!) and put it on the stand. We measured the endplay and found it to be really excessive (like, 30x excessive!) so I decided to get to the bottom of the issue.
We removed the pressure plate, flywheel, main eccentric shaft bolt, front pulley, front timing cover, distributor gear, spacer, front stationary gear, and all the bearings and spacers. Using the Mazda Factory Service Manual (and a little bit of Youtube), I inspected all of the parts for wear or damage. The only notable stuff I found was some wearing on the front stationary gear, which as I read on some posts here, could be caused by the water pump pulley being too tight.
Other than that, everything checked out and looked good, so I followed the factory procedure and reassembled everything using some oil as lube. Everything was torqued to Mazda OEM spec with a torque wrench, a new front timing cover gasket was made (and we slapped some RTV on there for good measure), and the big eccentric shaft bolt was Red-Loctite'd so that sucker ain't going nowhere. The flywheel had some weird-looking spots on it, but the clutch looked fine and still had a lot of life left in it. For good measure, I resurfaced the flywheel with some sandpaper and a flat block up to 3000 grit, and most of the spots are gone now. The flywheel was put back on with Red Loctite and torqued to spec. I used a 10mm socket and a 3/8 to 1/2" extension as my clutch pilot bearing alignment tool, and the clutch and pressure plate were aligned, and the pressure plate was Blue-Loctite'd and torqued to spec.
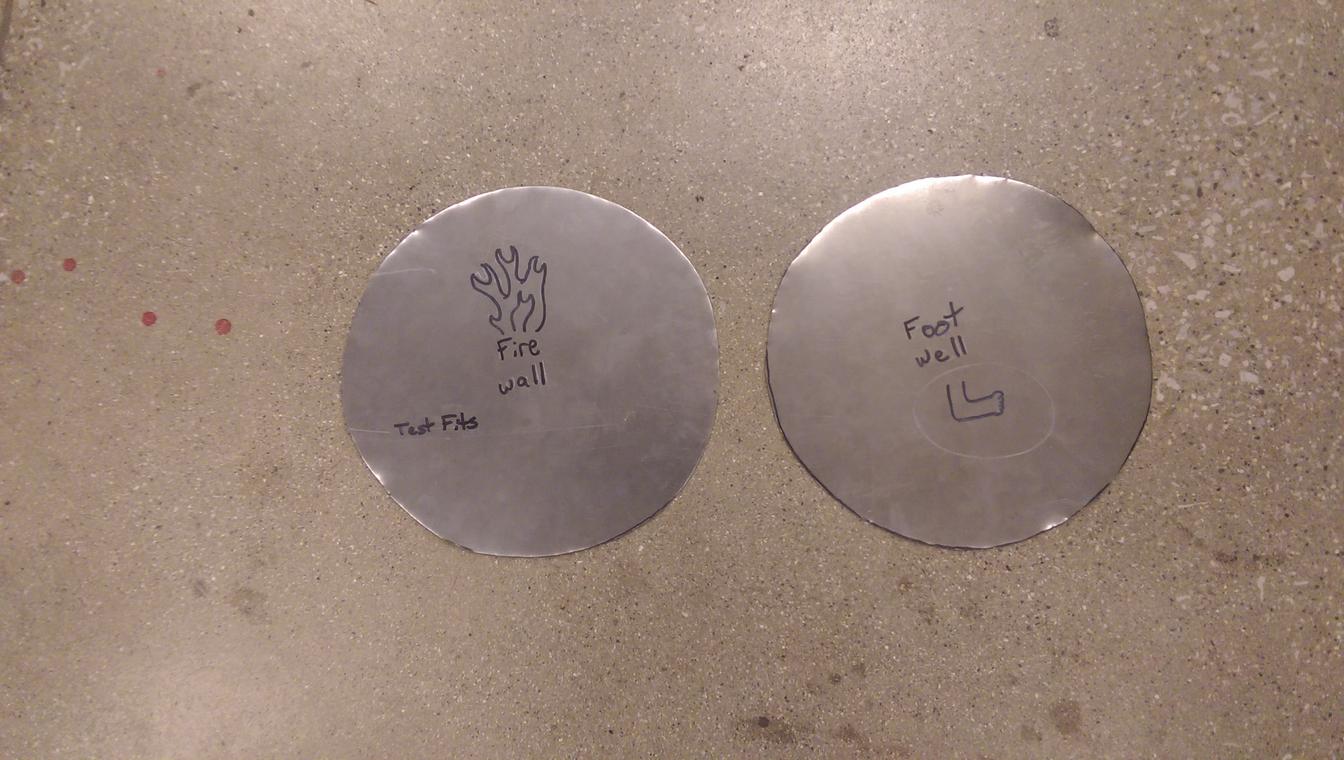
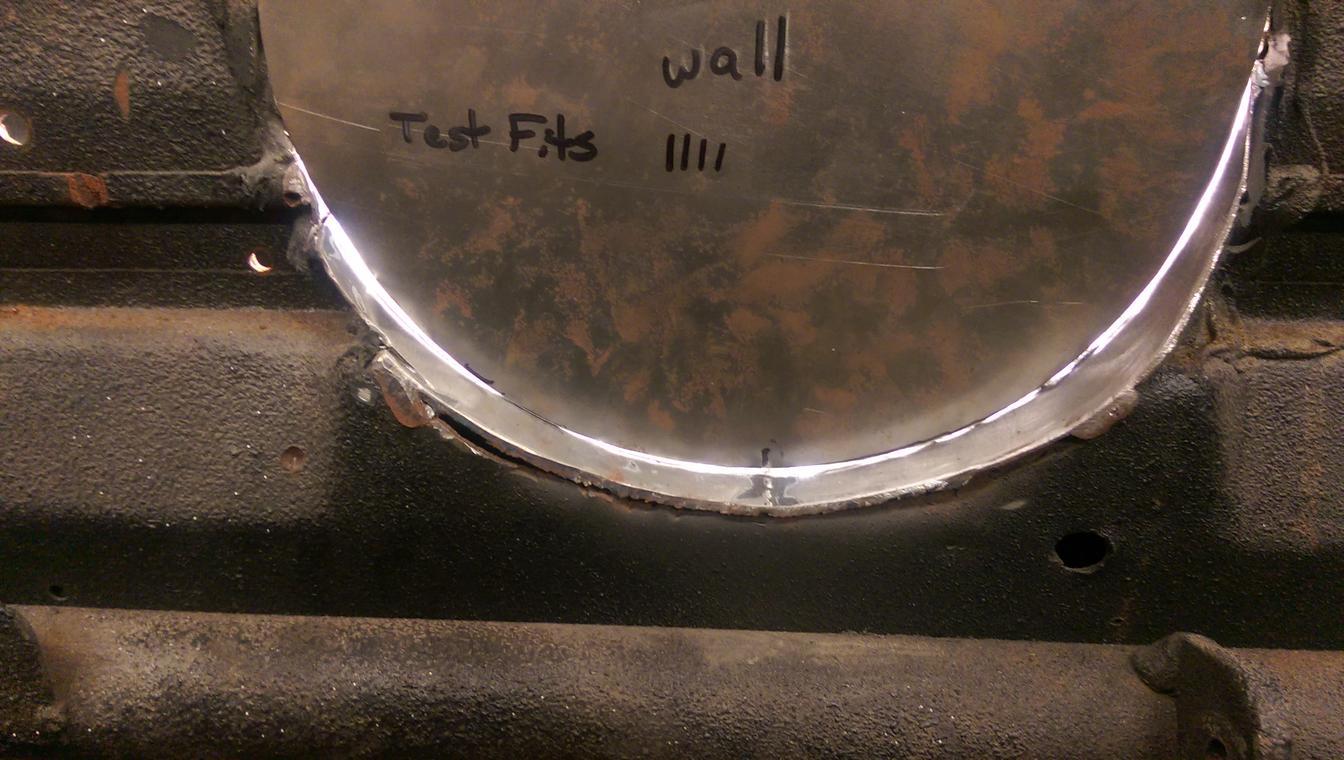
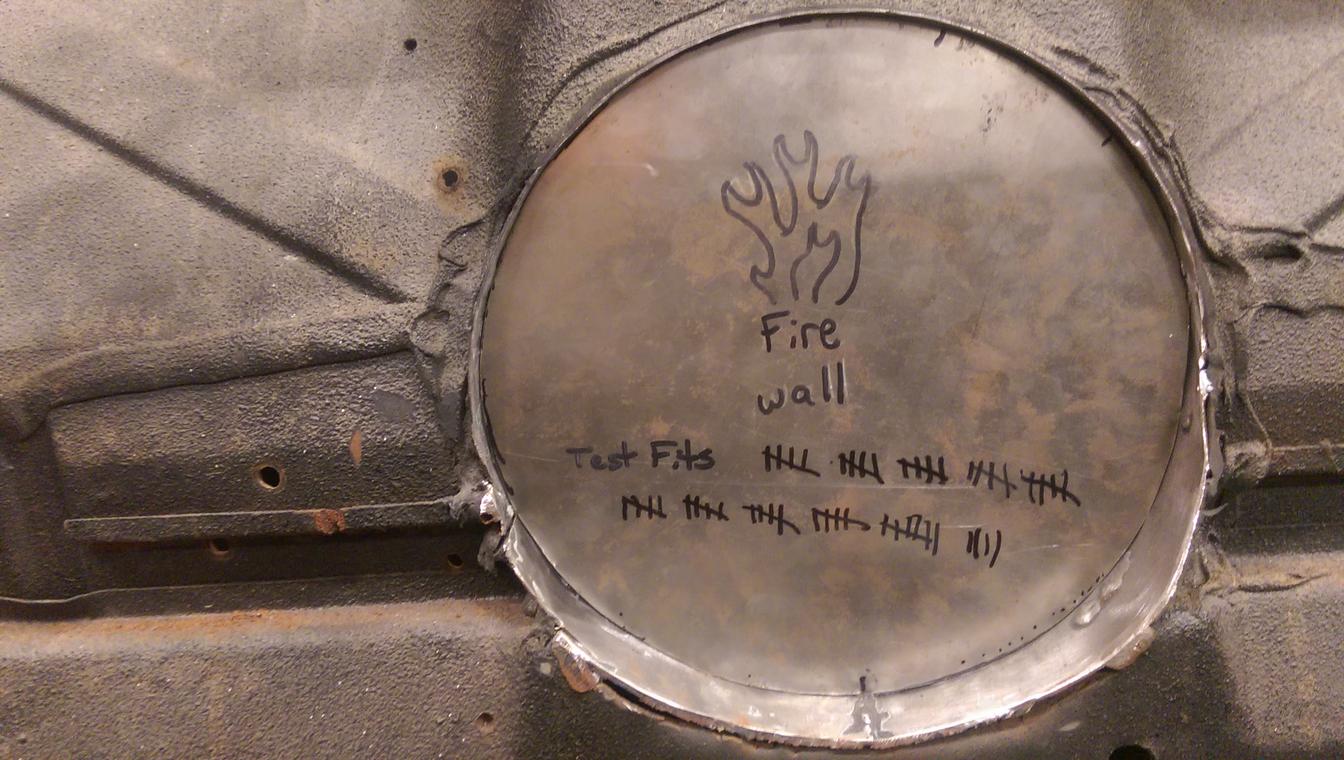
So this puts us to almost present-day. We ordered a thread repair kit to fix the oil pan bolt threads in the block, but there was an issue with it so we are waiting to hear back on that. Also last night we decided to open up the oil pan baffle plate that has been sitting in its packaging for over a year to test fit it. To our WONDERFUL surprise, whoever ordered it got the wrong one (Braden...) and it is too short. The current plan is for me to CAD up a new baffle plate to be cut out of some sheet metal, so we just need to source some stock for that to happen. Then we'll fix the threads, put on the baffle plate and oil pan, and start the process of reassembly and putting the engine back into the Porsche.
I also looked around a little bit with the Microtech ECU and looked at the tune (last updated by Banzai in 2019) to familiarize myself with it, since I think that may be the cause of some of our starting issues. I'm very excited to finally get this project up and running again, as it combines two of my favorite things, Rotary engines, and Porsches! Big thanks to everyone who worked on this in the past (Kyle, Gabe, etc.) to get us to the point where we are now. I'm gonna try and upload some pictures of stuff. Let me know if you have any questions or advice!
Pics below! Last time the RX-914 ran All of the club's car (minus 1) LS1-swapped E30 351 Cleveland Foxbody for drag racing S5 13B-swapped Porsche 914 removing the engine! still removing.. the engine is out! woo!! Engine on the pallet oil pan off Turns out there was stilll a *little* coolant hiding in the block eccentric shaft wear on front stationary gear baffle plate that doesn't fit
Glad to see the club is still kicking. My greatest disappointment from my time there was not being able to drive the Porsche at an autocross. At the two we took it to I drove other vehicles and only managed a ride-along. We were all set for getting it tuned and having a fantastic spring quarter and autox season - then we all got sent home.
Yea, I'm glad the club still exists lol. Because of the new officers, we've been focused on improving the club for future students (i.e, not blowing up motors) and planning for the long term. And hey, maybe once the rotary is up and running again and if you're close, I'm sure nobody would object to alumni having a spin!
After learning that the baffle plate we ordered didn't fit, I decided that we didn't have time to wait for a new one to come in, so I made one myself! I loaded up SolidWorks, measured the bolt locations, and took some *heavy* inspiration from existing baffle plates. I turned it into a .dxf file, found some aluminum sheet stock, and had it cut out with a water jet. To my surprise, it fit nearly perfectly, only needing to file out a few of the holes. We then cleaned the surfaces, applied some Permatex ultra black, and slapped it together with the oil pan, and torqued to spec.
After classes today we got the engine off the stand and onto a pallet (which has been in my room for half a year, you never know when you need a pallet!). Tomorrow begins the exciting process of putting all the stuff back on the block, and hopefully, the engine will be back in the car by the end of the day. I'll be sure to keep this updated
New aluminum baffle plate OPOO! Oil pan officially on!
Hey everyone! it's been a little while since the last update and boy has a lot happened since then. When we last left off, the engine was still on the stand and just had the oil pan put on. We were able to get it back on a pallet to finish installing all of the accessories (turbo, alternator, water pump, etc) before it was ready to go back in the car. Most of the accessories went on smoothly, but some oil routing to the turbo was a little difficult.
After we got all of the accessories on, it was time to put the engine back in! We did this by raising the car on our lift, ad sliding the pallet underneath with a pallet jack, then lowering the whole car onto the engine. We slid the transmission bolts in, and then after a lot of elbow grease and cursing it was in (the actual process took like 6 hours total lmao).
Once we got the engine in, we hooked up all the coolant, oil, and vacuum lines which weren't too bad. Then we connected the shifter linkage and adjusted the clutch cable which took a little while. So, everything was connected and should be ready to start!! Well, as many of you know it's never that simple. We tried starting it up and it would sputter a little bit, but wouldn't catch. We deflooded many many times, changed spark plugs, and adjusted the fuel crank map, but she still wouldn't start!! So we had some investigating to do...
Me checking for injector ticking (they were!)
Injectors were firing, but we found something else...
Fuel in the upper intake manifold! In case you don't know, fuel is definitely not supposed to be there. We also found a decent puddle of fuel in the lower manifold as well. It took a little while to figure out, but eventually, we found the cause. When we primed the fuel pump, we noticed a hole squirting fuel right behind the throttle plate. We traced the hole, and it turns out that it was supposed to be a vacuum line... strange. The vacuum line was a boost pressure reference line for the fuel regulator. In short, the diaphragm for the fuel pressure regulator had a small hole in it, and this caused our boost reference line to turn into a fuel delivery line!
We ordered a new fuel pressure regulator and got it installed pretty quickly. And right after that was installed, and after a little fiddling with the fuel map, we got our first startup of the rotary!!!
We had it running for a little bit and everything was working fine, until when I tried to burn a map to the ECU and it completely shat itself. The ECU was firing all of the outputs at once and wouldn't let me load a new map. We thought for a while that we would have to order a new Microtech ECU, but as a last-ditch effort, I tried to manually reset all of the tune values to what they were beforehand. And after I changed enough of the values, it magically started working again and allowed me to load a new map. Phew!!!
We were able to get it started up again and so some more idle tuning, but then something else happened. It wouldn't start up anymore. IT would kick over a little bit but wouldn't go back 400rpm and idle. After checking some stuff, turns out we had fried a coil. So we ordered a full set of new coils and replaced those, and now it's running better than it ever has before. I working on the crank map and idle tuning, and she starts right up cold AND hot!!! Just today we took it around the lot for a little bit and it ran great! We plan to take it to the fairgrounds nearby for a little autocross and some tuning, and then we can turn up the boost!!
 09-15-17, 08:46 AM


 )
)