Rotary MX-5 Nordschleife Build Thread
 05-17-18, 06:45 PM
#26
OG Member
Well, as far as I know they won't fall out, however someone gave me advice on there being rumors that the seals will start to "bend down" because the port is so big and wear down absurdly quick. But it has not been confirmed, and then again I did not port in any other direction, so maybe it will be fine? Unless anyone can say for sure, I'm willing to try! Worst case, the seals would probably wear uneven and the engine would lose compression after a while, in which case I would switch to 12A irons. 
That sounds like a great engine man!
That sounds like a great engine man!


 05-18-18, 11:32 AM
#27
Rotary Enthusiast

Nah the corner seal wont fall out if he didn't port it in either direction like he said. Its not a popular mod as its now one giant port that kills velocity and wont make power down low and wont make up the different without revving it way too high.
05-18-18, 04:33 PM
#28
OG Member
ya I never heard of anyone doing that. 6ports already have a generous amount of port timing stock. Power band will be above 9000rpm.
05-29-18, 04:52 AM
#30
Junior Member
Thread Starter
I talked to a french guy who put a 13B in his miata too
if you wanna see what it looks like : https://www.mx5france.com/forum/viewtopic.php?f=83&t=24126&hilit=mx13
Keep it up !
if you wanna see what it looks like : https://www.mx5france.com/forum/viewtopic.php?f=83&t=24126&hilit=mx13
Keep it up !
@Holdfast Your build looks clean, amazing man, a dream setup.
Regarding corner seals, I don't think they will fall out, actually there is still alot of material that could be removed towards the opening edge of the port, but I do not intend to do this. So far only the divider has been removed and the closing edge a bit rounded off.
So here's my thinking. From what I understand about intake ports, technically, what matters is runner diameter and port timing. Compared to a peripheral port, the closing timing should be about the same, and the runner diameter should still be smaller (even when you add up the primaries), but then again the opening timing is later. So I think it adds up. If it works, cool, if it doesn't I will switch to 12A irons, no problem. I have not found any evidence that this does not work, apparently Yaw Power tried it but this was before my time and now the website is gone. I will share my results with everyone so it should prove entertaining.
Sadly I dont have much to report, I spent alot of time working on other cars recently. Hopefully I will get to build motor mounts soon.
Please keep the debate up, I highly value the input!
EDIT: Oh yeah, one more thing, so my target RPM limit is 9000. As you guys suggested, the ports will want a higher RPM range. When I read through the book "Street Rotary" and it had a few graphs about how intake runner length directly affected where peak power would be, so I think in order to keep the peak power in this range, I will try a few rather long lengths on the dyno to get it where it needs to be
Last edited by Kraid; 05-29-18 at 04:56 AM.
05-29-18, 07:35 AM
#31
Sounds great.
Can't wait to see it done. Good luck!
ahah, I'm also reading the 'street rotary' book, for another purpose though.
Can't wait to see it done. Good luck!
ahah, I'm also reading the 'street rotary' book, for another purpose though.
06-04-18, 04:55 AM
#32
Junior Member
Thread Starter
So I got to do some more work.
BTW, all of my posts have larger images included. Right Click -> Open Link in New Tab to open images in full scale.
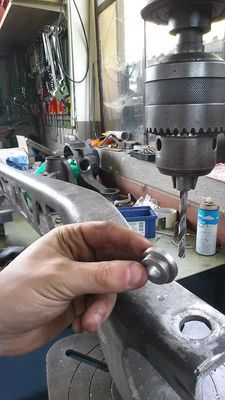
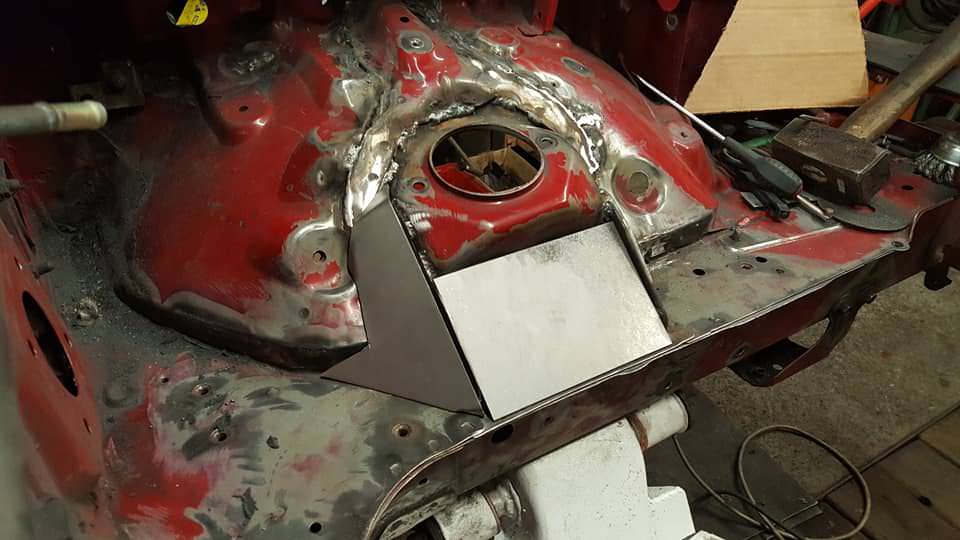
First, I cut the PPF short and drilled new holes. Now that the small bolt is sitting in a big hole, I milled a centering cap.
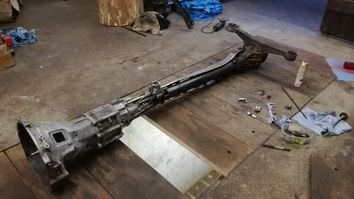
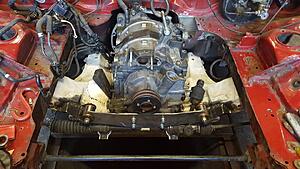
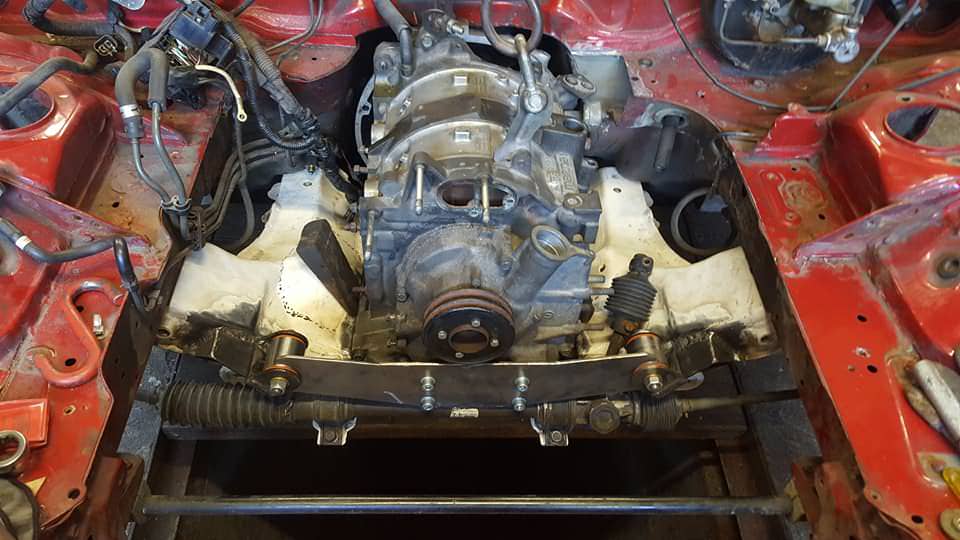
A mockup assembly outside the car. It now uses the RX7 driveshaft. Fits perfectly!
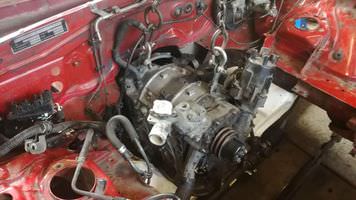
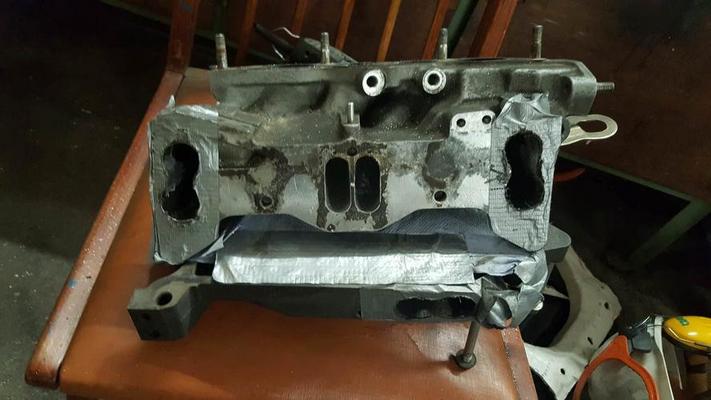
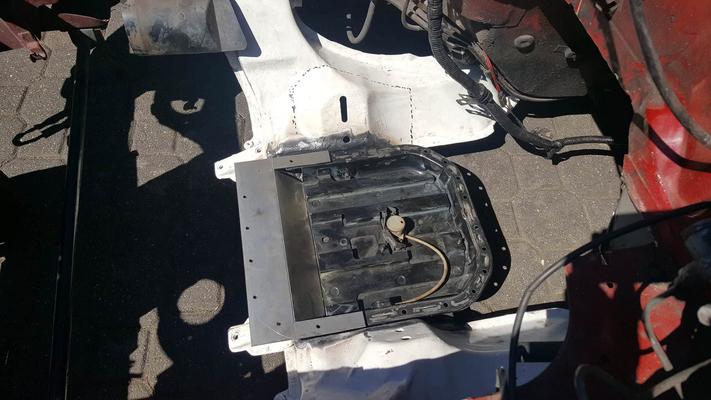
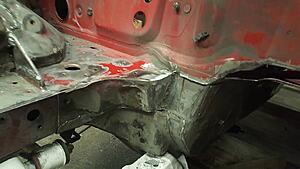
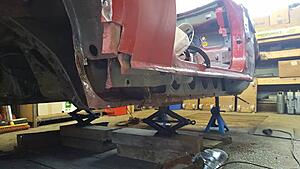
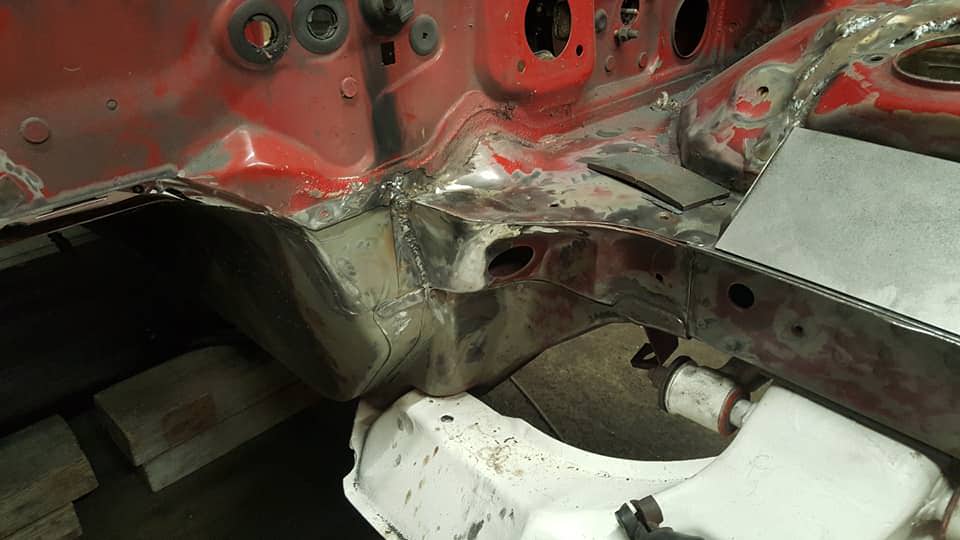
Test-fitting the engine without oilpan. As you can see I had to cut a piece away from the chassis around the oil filter area to make it fit.
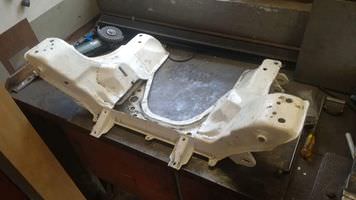
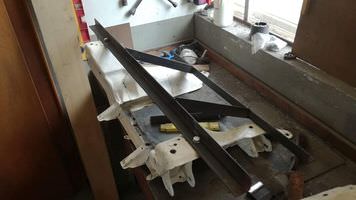
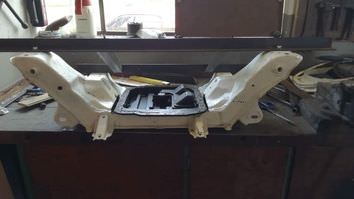
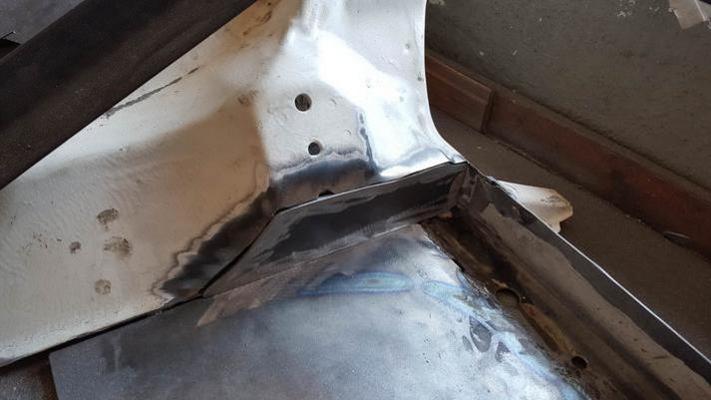
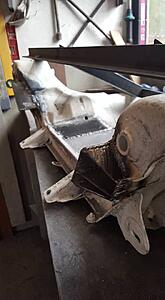
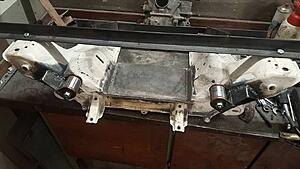
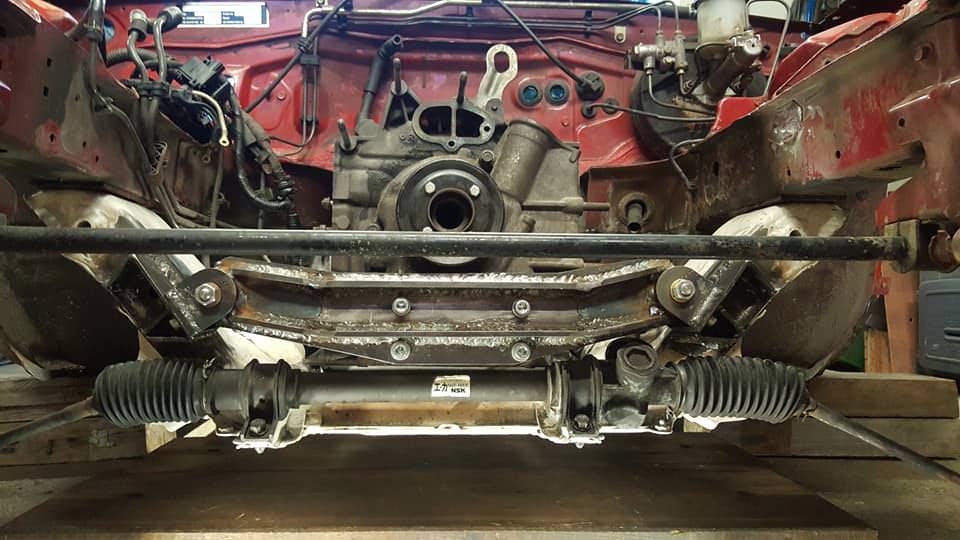
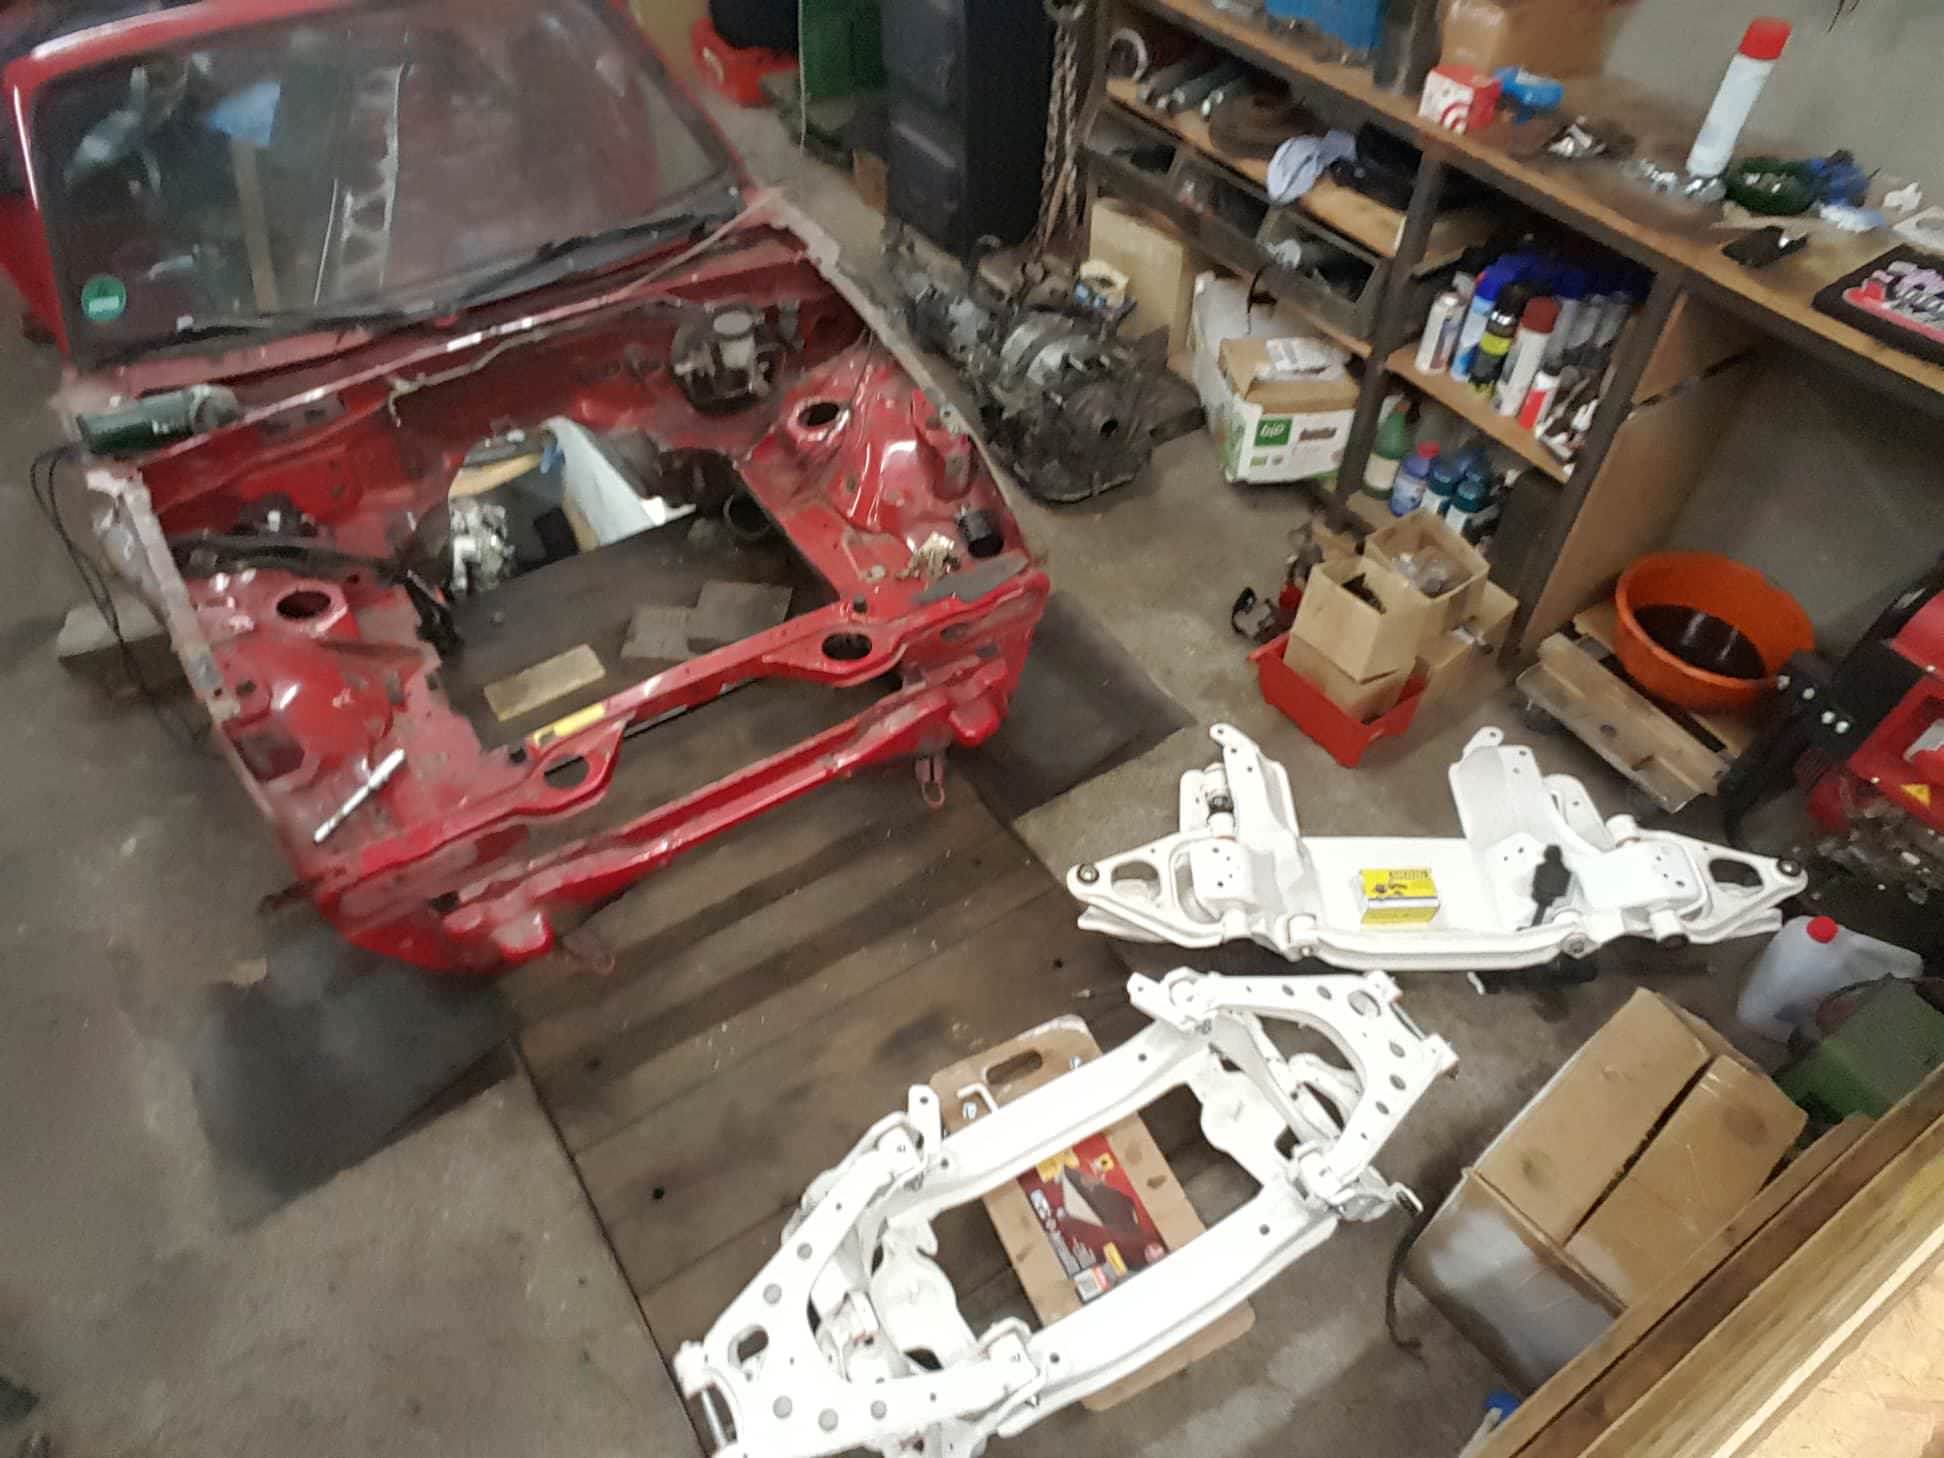
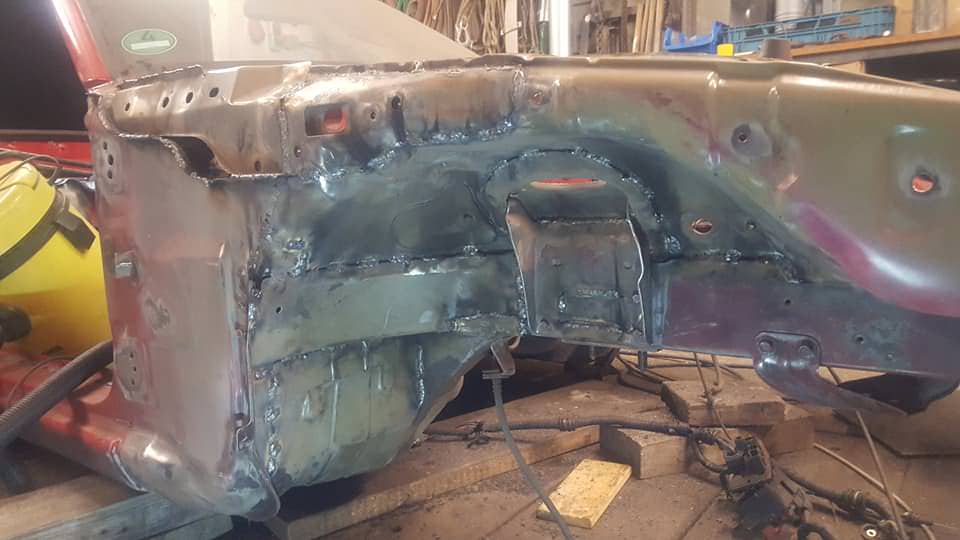
Time to do the ugly work. Cut the subframe apart.
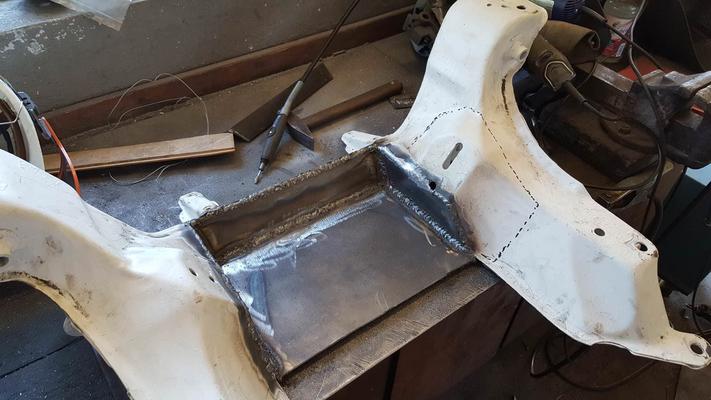
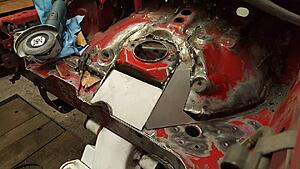
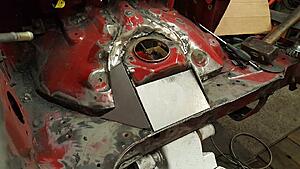
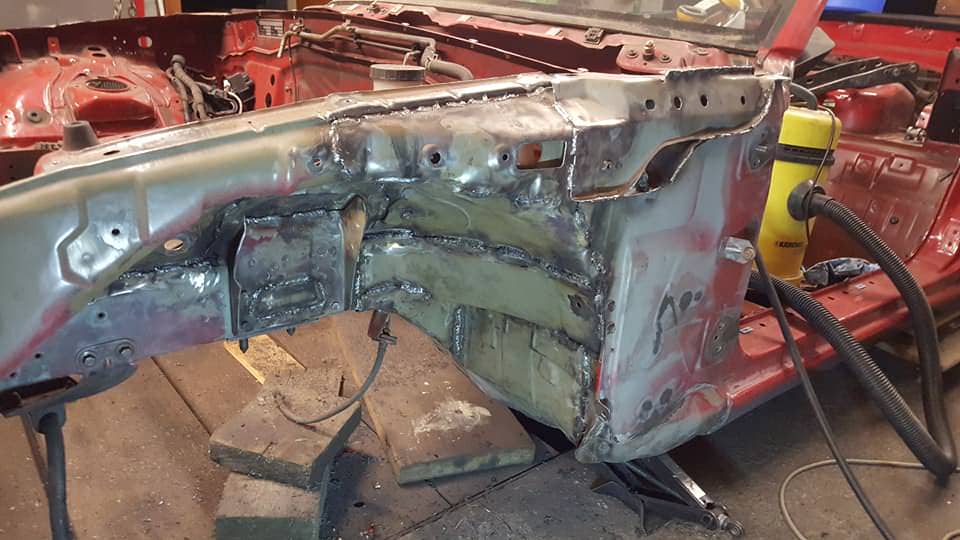
After putting the subframe back in the car, I spot-welded a plate on, pulled it back out, then built this frame to help minimize bending, and finished up the welds outside.
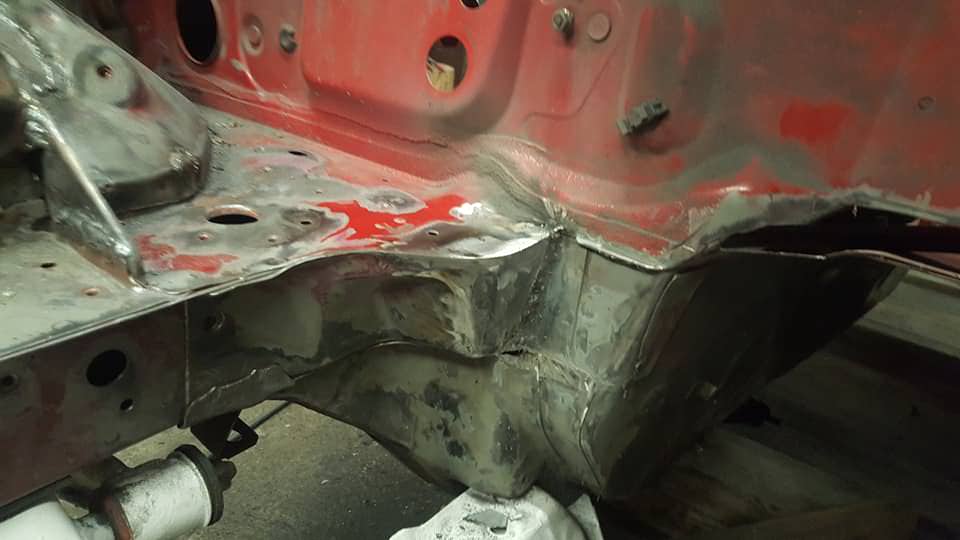
The Oilpan fits nicely now, thanks to the modified subframe as well as moving the engine back. More work needs to be done soon to properly close and strengthen the subframe. It's tough

Last edited by Kraid; 06-04-18 at 05:01 AM.
The following users liked this post:
fidelity101 (11-12-18)
06-05-18, 10:54 AM
#34
Rotary Enthusiast
That Yaw Power picture is exactly what I have seen from the limited amount of SCCA Eprod motors that I could find pics of. They make over 200hp on a 48-51mm IDA webber with 42mm chokes on a "dual Y" manifold... No one uses the other option which is a street port with stock intake manifold and EFI. There is also alot more little things done on these race motors that all add up to make that kind of power...
06-05-18, 12:43 PM
#35
spoon!
The FCs with the S5 intake manifold sometimes run EFI as it works well enough, but on the GSL-SE manifold, the runner length is too long and you're not allowed to shorten it. Have a friend who tried that and was down a lot of power.
I've seen a lot more EProd engines with the divider left in place than not.
I've seen a lot more EProd engines with the divider left in place than not.
06-05-18, 02:53 PM
#36
That Yaw Power picture is exactly what I have seen from the limited amount of SCCA Eprod motors that I could find pics of. They make over 200hp on a 48-51mm IDA webber with 42mm chokes on a "dual Y" manifold... No one uses the other option which is a street port with stock intake manifold and EFI. There is also alot more little things done on these race motors that all add up to make that kind of power...
06-05-18, 07:21 PM
#37
spoon!
I really wish I'd saved pictures - Mazdatrix had rotor housings from one of their ***** to the wall EProd motors on ebay at one point. They had made a mandrel to reshape the exhaust inserts... see, you're allowed to modify them but not add material or replace them. So they cut out the diffuser dealie, then pounded the inserts over the mandrel so the rotor side of the inserts matched up to the exhaust ports which were... well, large.
07-01-18, 06:03 PM
#38
Junior Member
Thread Starter
Sorry for the long absence, anyway here is some small progress.
Opened up the LIM, combined secondaries as well as ported the primaries to closer match the 12A irons.
Time to fill these holes.

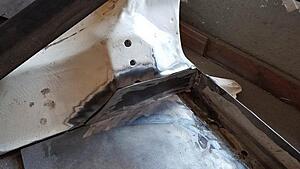
That's how far I got. As you can see I rounded the welds off in one spot. This will help in getting it road legal.
Glad to hear that this setup worked well for other people. I understand it requires all other components to play along.

Opened up the LIM, combined secondaries as well as ported the primaries to closer match the 12A irons.
Time to fill these holes.
That's how far I got. As you can see I rounded the welds off in one spot. This will help in getting it road legal.
Glad to hear that this setup worked well for other people. I understand it requires all other components to play along.
07-01-18, 08:00 PM
#39
Moderator
iTrader: (3)
Join Date: Mar 2001
Location: https://www2.mazda.com/en/100th/
Posts: 30,770
Received 2,562 Likes
on
1,822 Posts
US.
U.
 07-08-18, 06:06 PM
#40
Junior Member
Thread Starter
 07-16-18, 04:17 AM
#41
Junior Member
Thread Starter
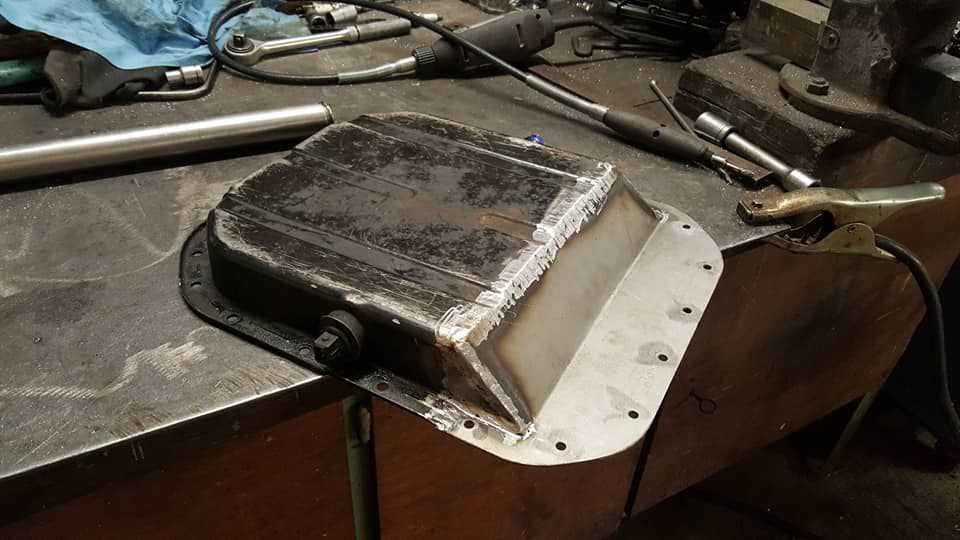
It was soooo hot during this weekend, I barely got anything done. But progress is progress
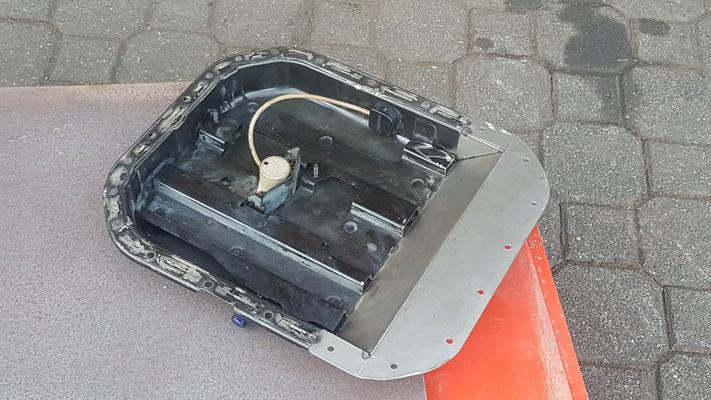
Welded up the oilpan
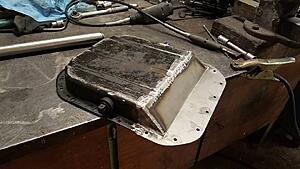
Will need to relocate the oil drain plug as well as the oil level switch next.
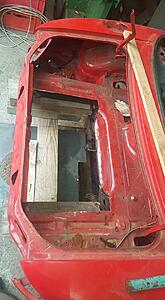
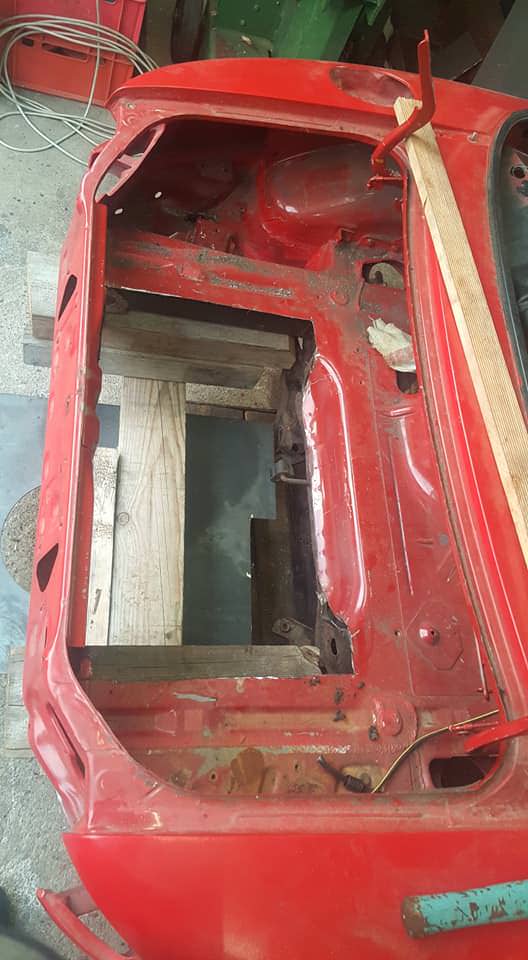
Cut the trunk out so the exhaust has enough room
Welded up the oilpan
Will need to relocate the oil drain plug as well as the oil level switch next.
Cut the trunk out so the exhaust has enough room
08-06-18, 03:53 AM
#42
Junior Member
Thread Starter
sweet progress!
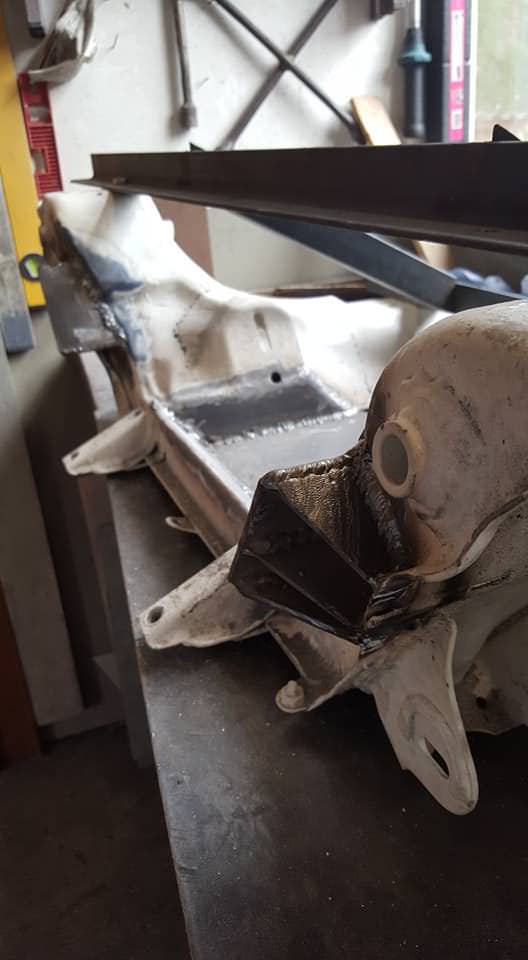
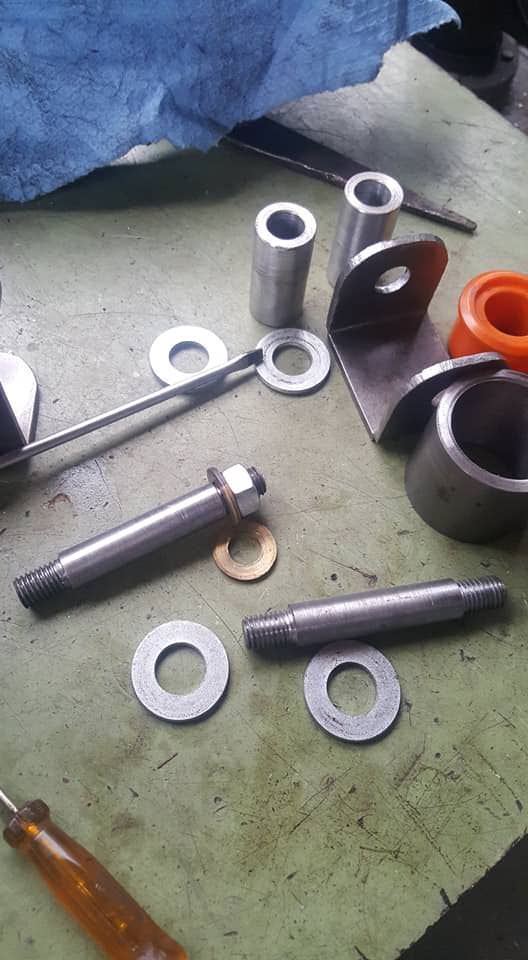
podests fabricated.
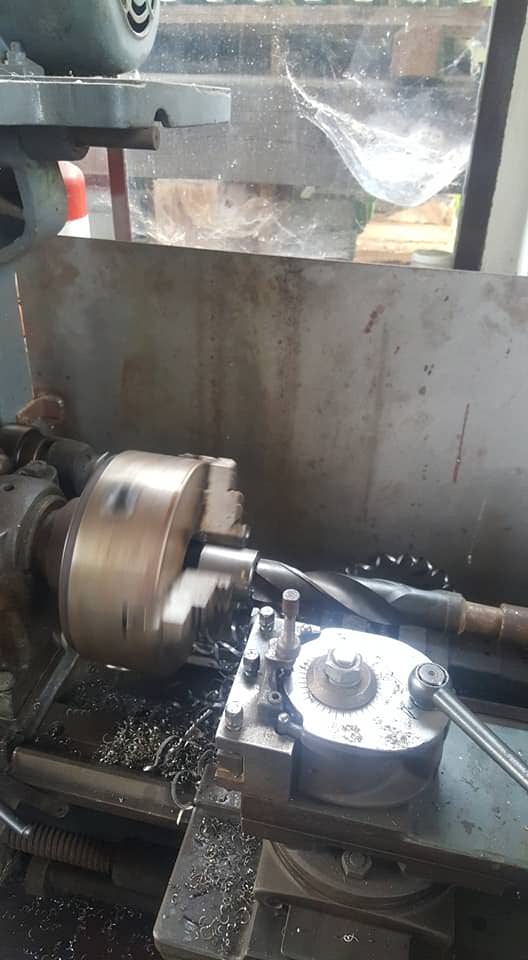
time to build the mounts! I took PU bushings intended for suspension, took round iron to create both the bushing case as well as bolts, built C-clamps and screwed them onto the podests.

engine is perfectly leveled and the brace has been fabricated
next, the brace has to be slightly bent backwards and structurally reinforced before it gets welded up.
we're almost there!
podests fabricated.
time to build the mounts! I took PU bushings intended for suspension, took round iron to create both the bushing case as well as bolts, built C-clamps and screwed them onto the podests.


engine is perfectly leveled and the brace has been fabricated
next, the brace has to be slightly bent backwards and structurally reinforced before it gets welded up.
we're almost there!
The following users liked this post:
fidelity101 (11-12-18)
08-06-18, 04:11 AM
#43
Wow ! such a good step forward !
it looks pretty fine, very impressive !
it looks pretty fine, very impressive !
08-13-18, 03:36 AM
#45
Junior Member
Thread Starter
Thanks guys, I appreciate it!
The engine mount is fully welded up and the engine is now sitting in place by itself!

Yeah. It's pretty beefy, but this will help in the extremely hard to pass regulations to get it street legal.
Then I proceeded to do a quick test-fit.

The oil cooler will be somewhere in front of the radiator. They will have their own dedicated passage that vents through a big hold in the hood. At least that's the plan
The engine mount is fully welded up and the engine is now sitting in place by itself!
Yeah. It's pretty beefy, but this will help in the extremely hard to pass regulations to get it street legal.
Then I proceeded to do a quick test-fit.
The oil cooler will be somewhere in front of the radiator. They will have their own dedicated passage that vents through a big hold in the hood. At least that's the plan
11-06-18, 07:43 AM
#46
Junior Member
Thread Starter
Hey, it's been a while, but I have some progress to report. It's nothing engine related, but tons of work nonetheless.
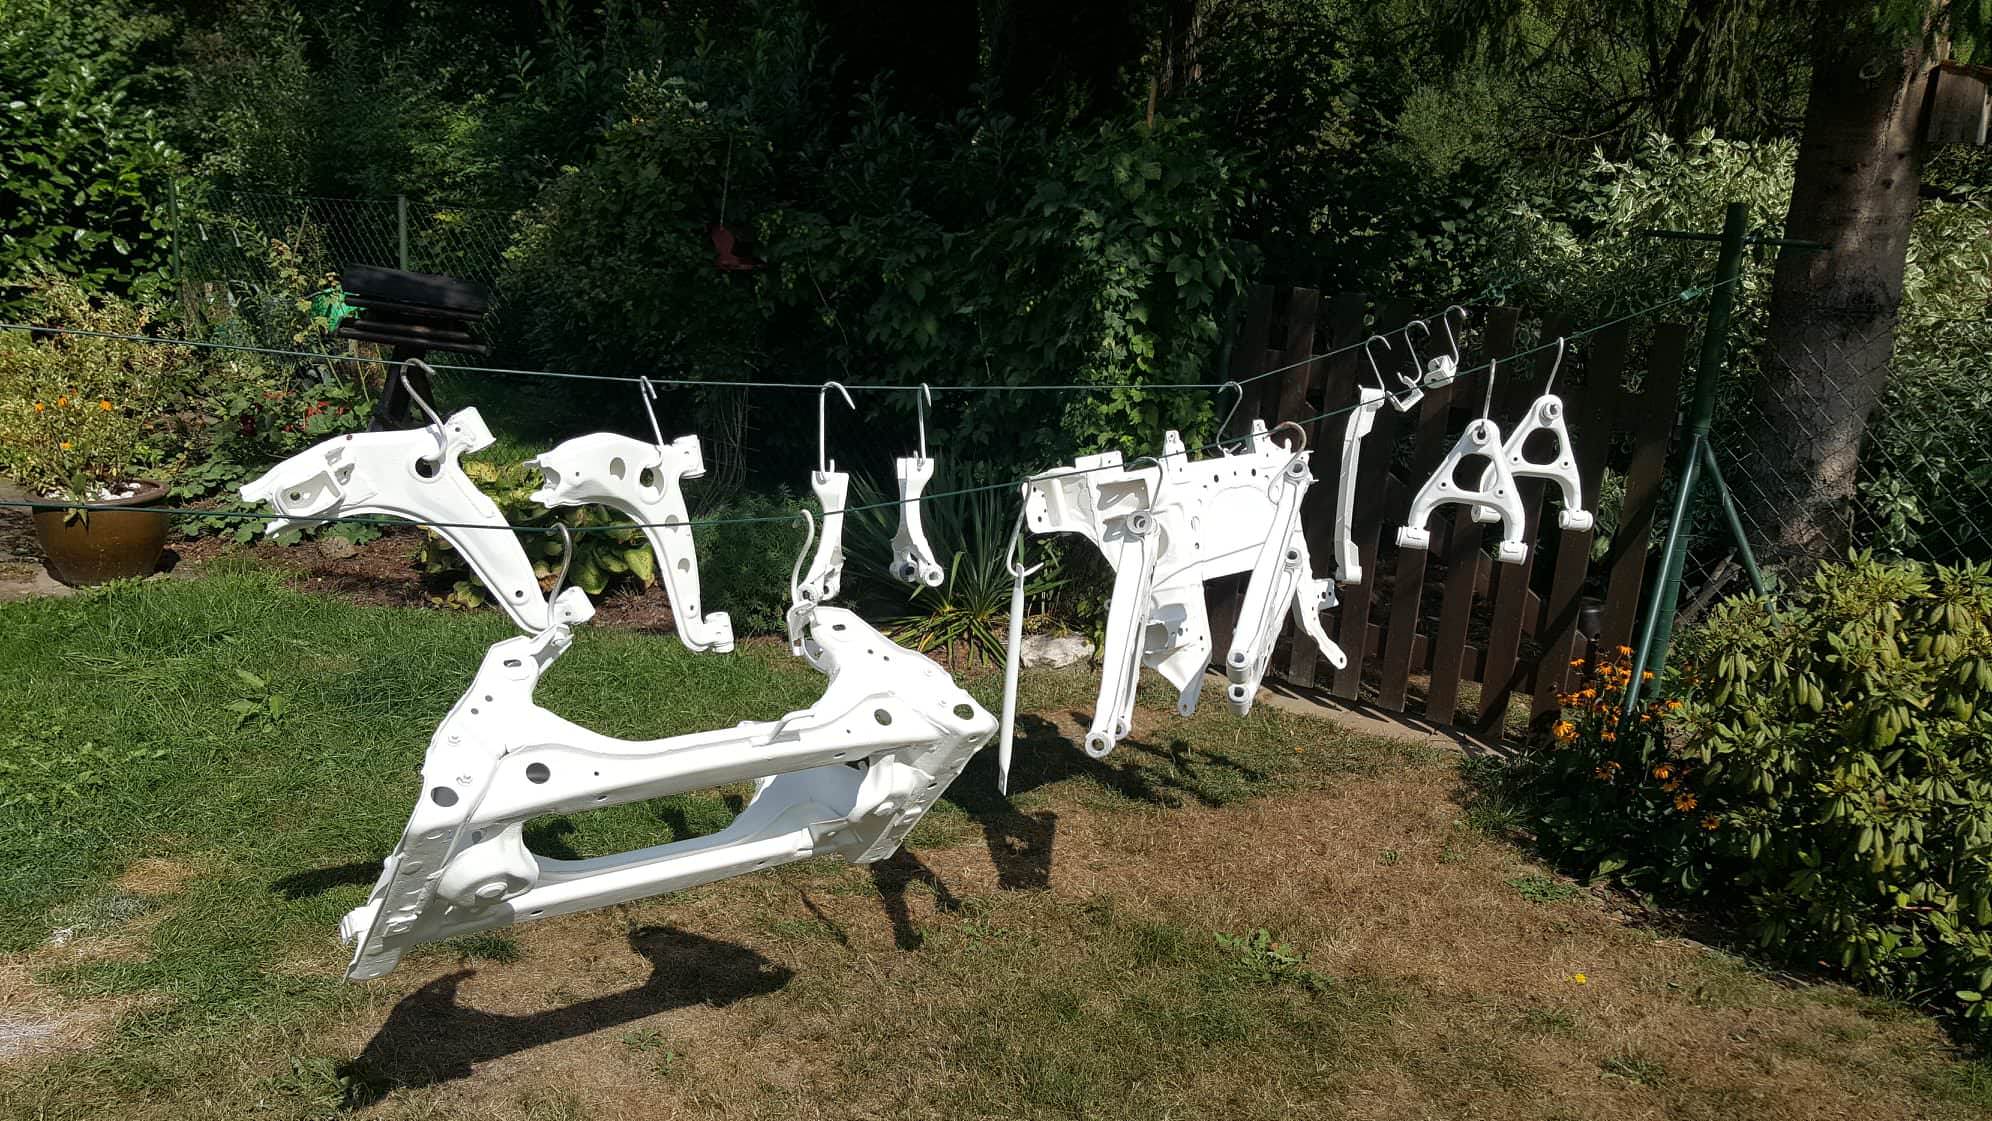
parts painted and pu bushings assembled

stitch welded fenders


modified the rails to make room for the width of the rotary

reinforced strut towers
started rust removal/replacement process
parts painted and pu bushings assembled
stitch welded fenders
modified the rails to make room for the width of the rotary
reinforced strut towers

started rust removal/replacement process

The following users liked this post:
tomatoto (11-06-18)
02-06-19, 08:45 AM
#47
Junior Member
Thread Starter
I haven't reported in a while, so here I am. There has been a ton of progress, but it is mainly chassis restoration related, so in case you're interested, the full history is here in my facebook album. From now on, I will keep this thread exclusively related to the rotary drivetrain.
That said, work has begun on the header and exhaust. There's this part in the street rotary book that touches on primary tube lengths.
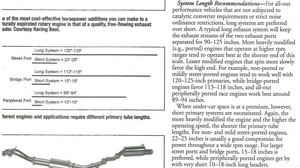
I was wondering, what the technical reasoning is behind the primary tube length, and why for a BP it has to be specifically EITHER 15-18 OR 113-118 inches. The thing is that in a miata, considering the primary tube lengths should be equal, the only real space for a collector is about 40 inches away.
Does anyone have any information or good tips on this? Help would be greatly appreciated!
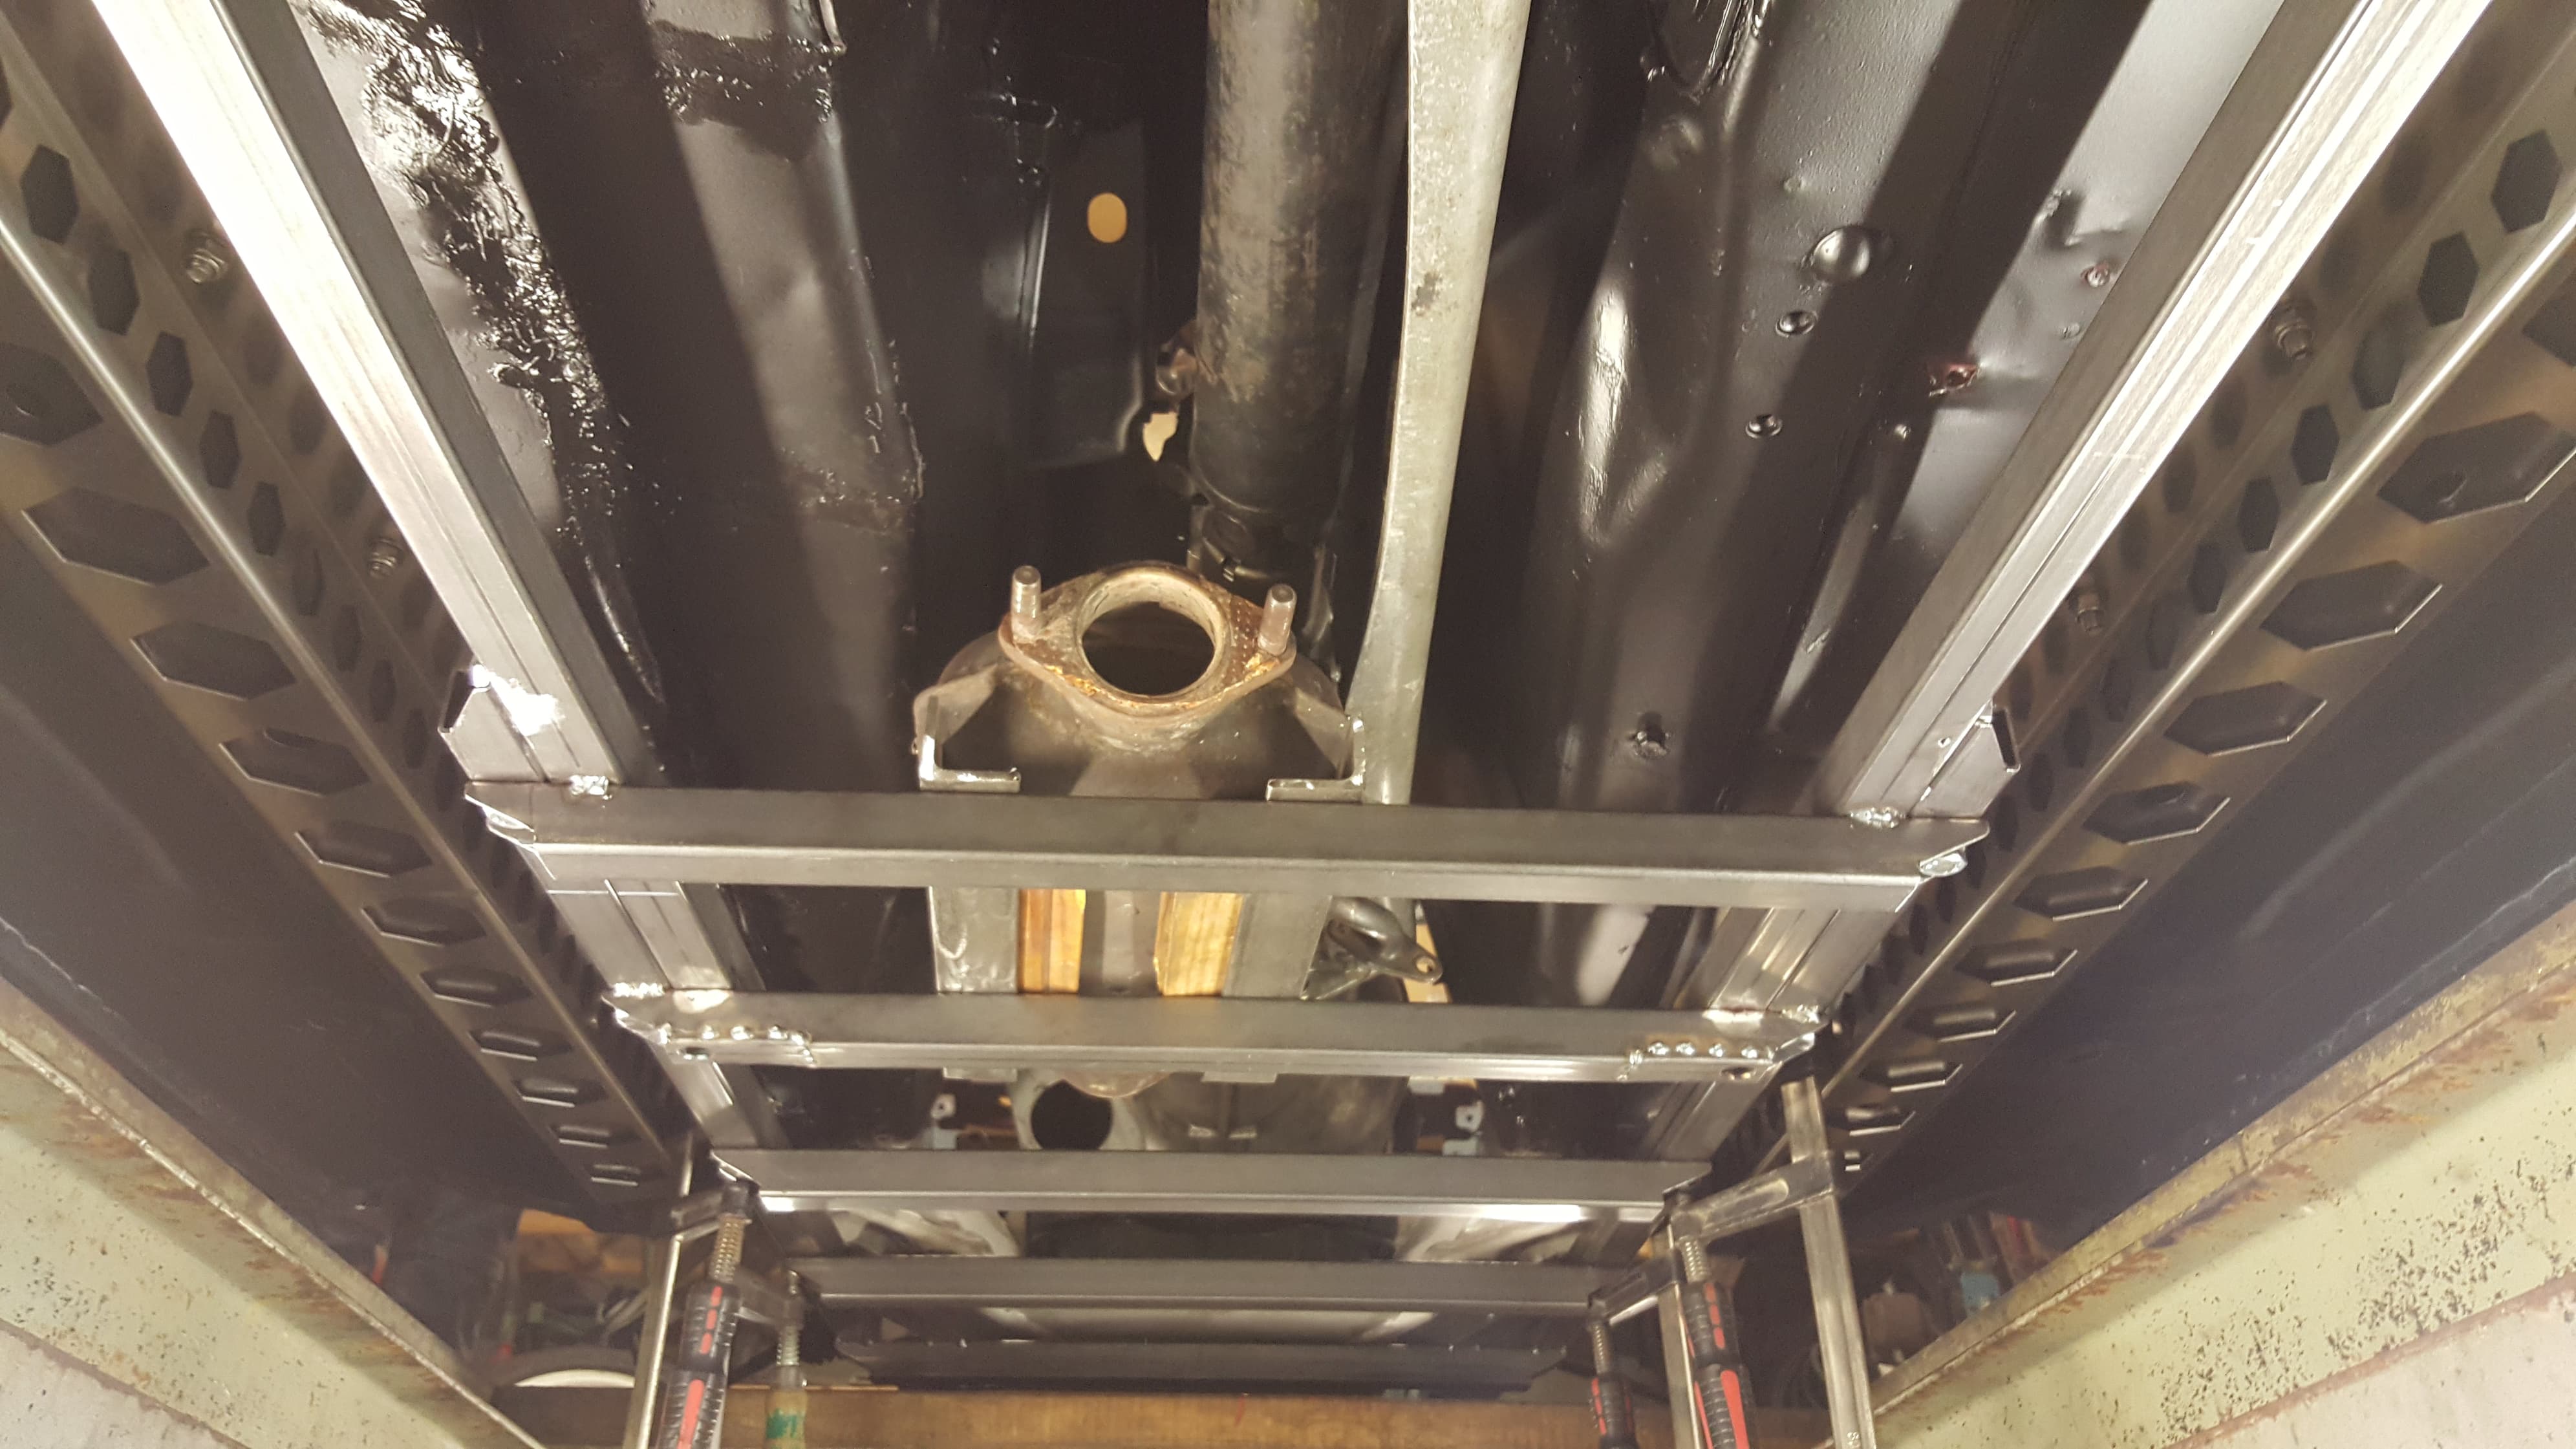
Here's a picture of the cool exhaust frame we use to build the exhaust

Cheers
That said, work has begun on the header and exhaust. There's this part in the street rotary book that touches on primary tube lengths.
I was wondering, what the technical reasoning is behind the primary tube length, and why for a BP it has to be specifically EITHER 15-18 OR 113-118 inches. The thing is that in a miata, considering the primary tube lengths should be equal, the only real space for a collector is about 40 inches away.
Does anyone have any information or good tips on this? Help would be greatly appreciated!
Here's a picture of the cool exhaust frame we use to build the exhaust
Cheers
02-06-19, 10:05 AM
#48
spoon!
So the "long" systems are basically tuning for first harmonic which is the strongest reflection, which is almost never done when there's a lot of cylinders but is kind of practical to package on RX-7s. The "short" systems are tuning for something like the 4th harmonic which won't have as much of an effect but is obviously easier to package. There's a lot of other lengths that work (if you look at the Defined Autoworks headers they're in the 40" range) but usually on RX-7s you're either in a situation where you're packaging compromised enough to need the "short" systems or you can fit the "long" ones.
02-07-19, 04:27 AM
#49
Junior Member
Thread Starter
Thanks Kenku, this is valuable info! The thing about harmonics makes sense and made me better understand what's going on.
I should elaborate, by now I have decided to scrap the combined-port idea and go with 12a irons all around and a classic full bridge, hence why I'm making such a big fuzz since because of the overlap, the exhaust should be built somewhat right.
A rotary friend told me that when tuned right, the improved harmonics and power benefit should be in the rev range of about 2000rpm and cause a guesstimate of about 7% better chamber filling. However since there are so many variables like the custom intake for example, as he says it is nigh impossible to guess the ideal primary tube length so that the effective rev range ends up just before the rev limiter. If the exhuast is not tuned and developed on a dyno, he recommended not connecting them at all and running two pipes all the way to the back, so that the harmonics at least neither benefit nor hinder each other.
It's interesting that the Defined Autoworks header is designed with such a length and still works well. I dunno, maybe I'm overcomplicating things.
From what I gathered, these are my options:
- Connect primaries at about 40" length and hope for the best
- Connect primaries at the recommended 15-18", which will work but due to the space available in the miata requires a slightly more cramped header with tigther bends and less length of the straight part right after the flange
- Don't connect primaries at all and run both all the way to the end, requiring two effective mufflers and catalytic converters ($$$)
Not sure what to do. I guess any of them will work well enough, I'm not looking to exclusively extract the best possible performance, honestly I just want things to work out well enough and be reliable.
Do you have any recommendations?
02-07-19, 08:42 AM
#50
spoon!
So, doing a very quick back of the envelope approximation; every halving of the primary will be the next reflection. So 116" is the average bridgeport length for the long system and let's assume that's the first reflection, then 58" will be the second, 29" the third, and 14.5" the fourth; or 116" can be the second reflection, it doesn't matter. In the real world the exhaust will be cooling (cold gases have lower speed of sound) so add a bit to the shorter lengths which explains why the 14.5" short primary calculated from that is on the "high RPM" side of the suggested bridgeport exhaust rather than in the middle... but all of those options should be in the right ballpark for something that should work. Taking a ruler to a web image of the DAW header I'm guestimating around 34" from the port to collector which is in the right range considering it's for a street port.
Of course I could be wrong! The "right" way would be to build a system where you can try a bunch of different primary lengths on the dyno, but again, it should work.
Of course I could be wrong!
The "right" way would be to build a system where you can try a bunch of different primary lengths on the dyno, but again, it should work.

