RECOVERING My Shift Knob/Wheel/E-brake...
 07-02-10, 09:26 PM
#1
RECOVERING My Shift ****/Wheel/E-brake...
Hey all,
Just thought I would share a few photos and info on some work I have done recently on my car’s leather.
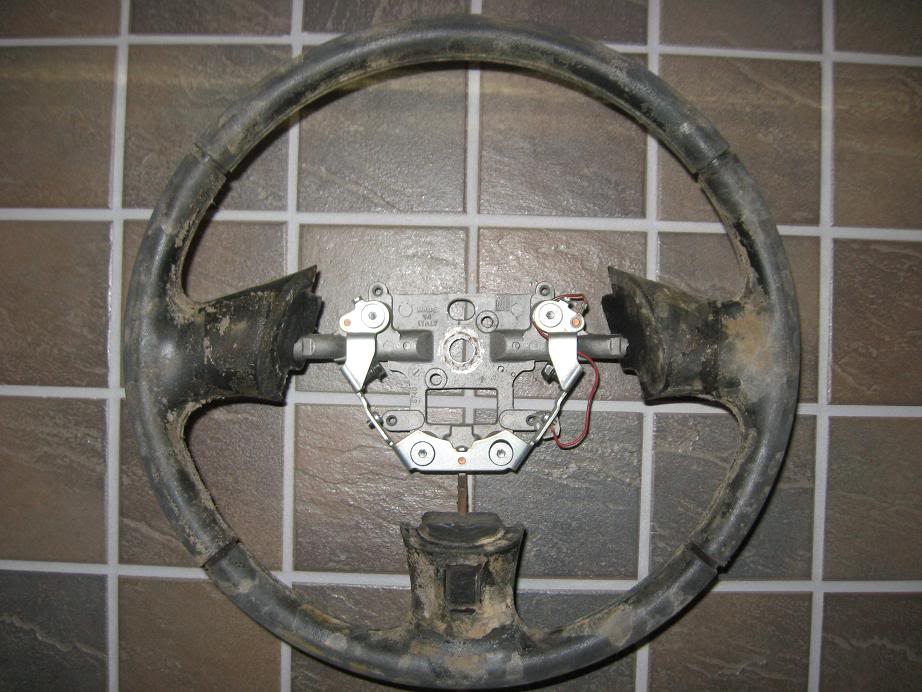
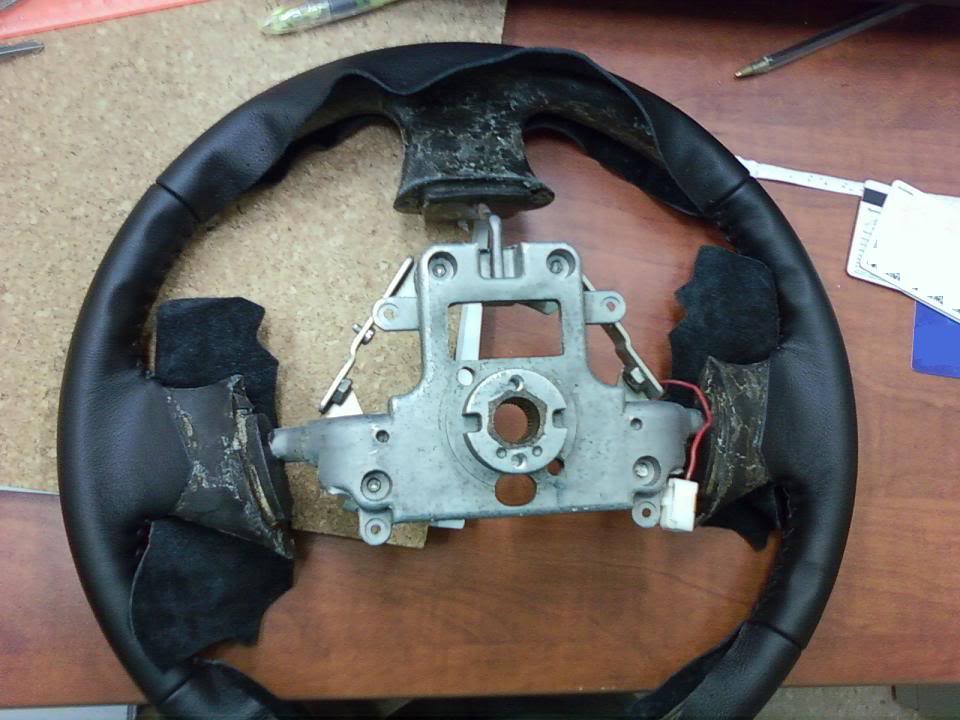
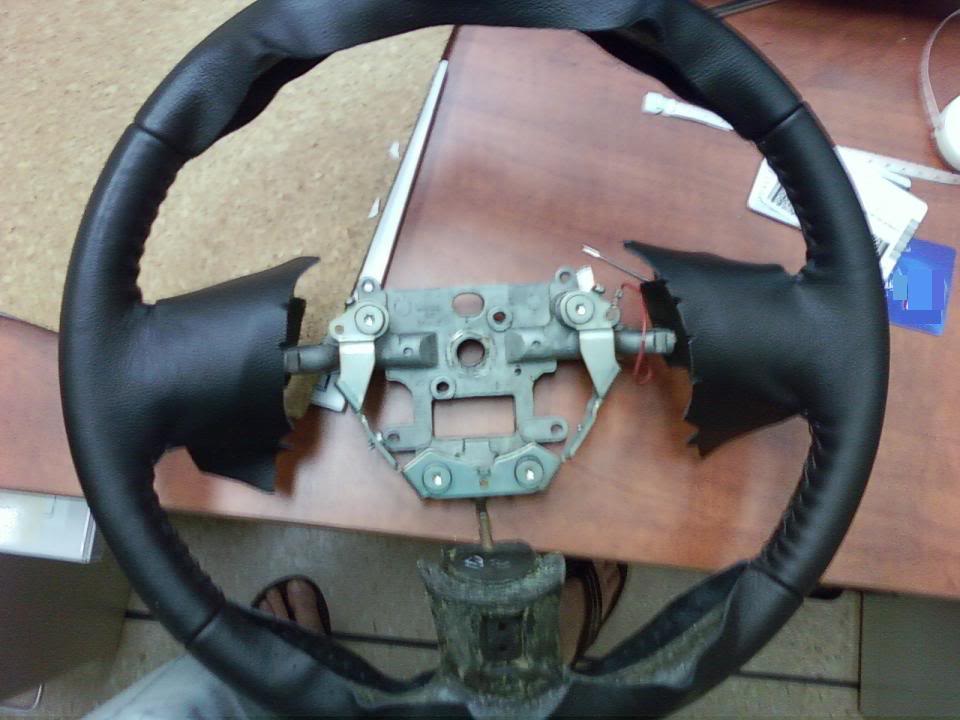
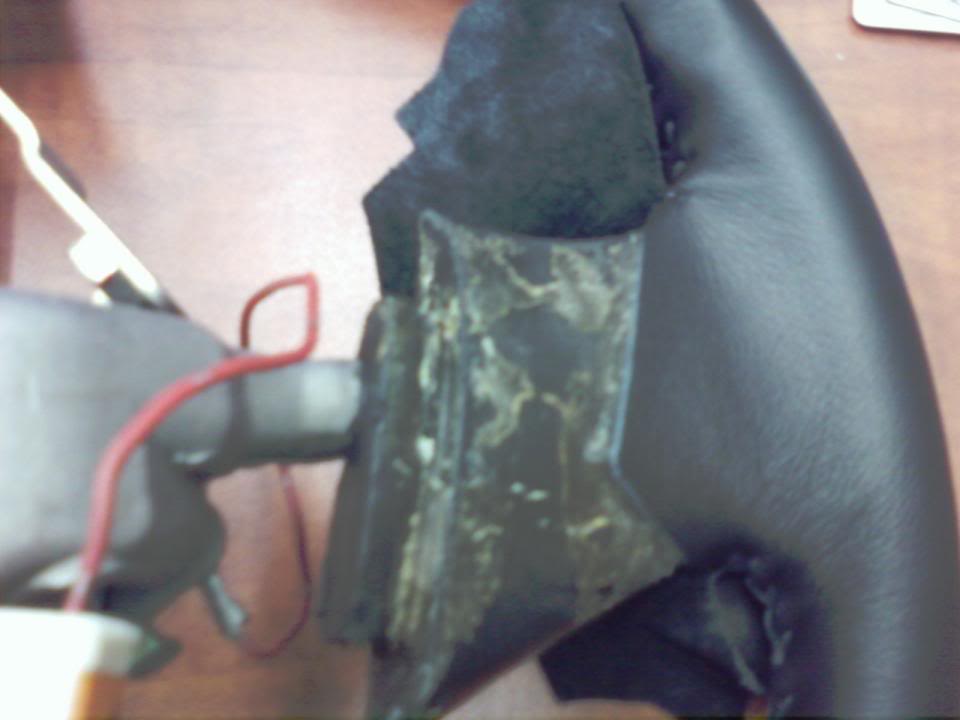
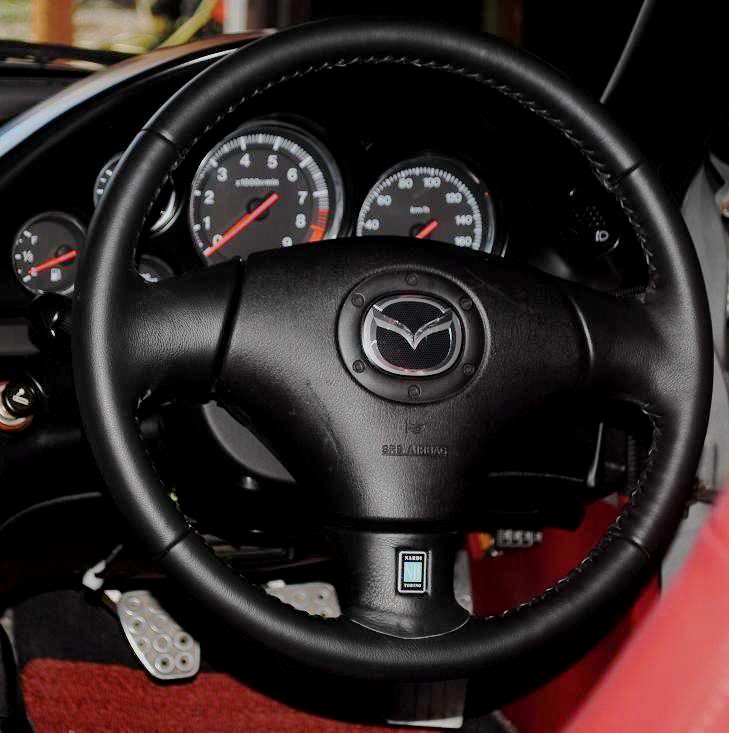
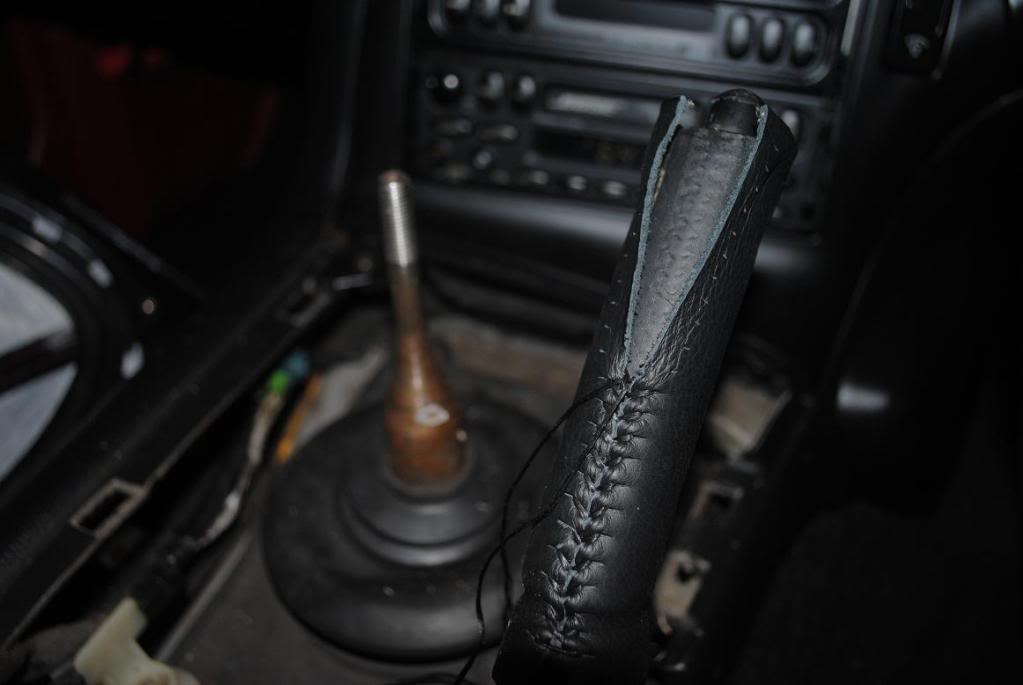
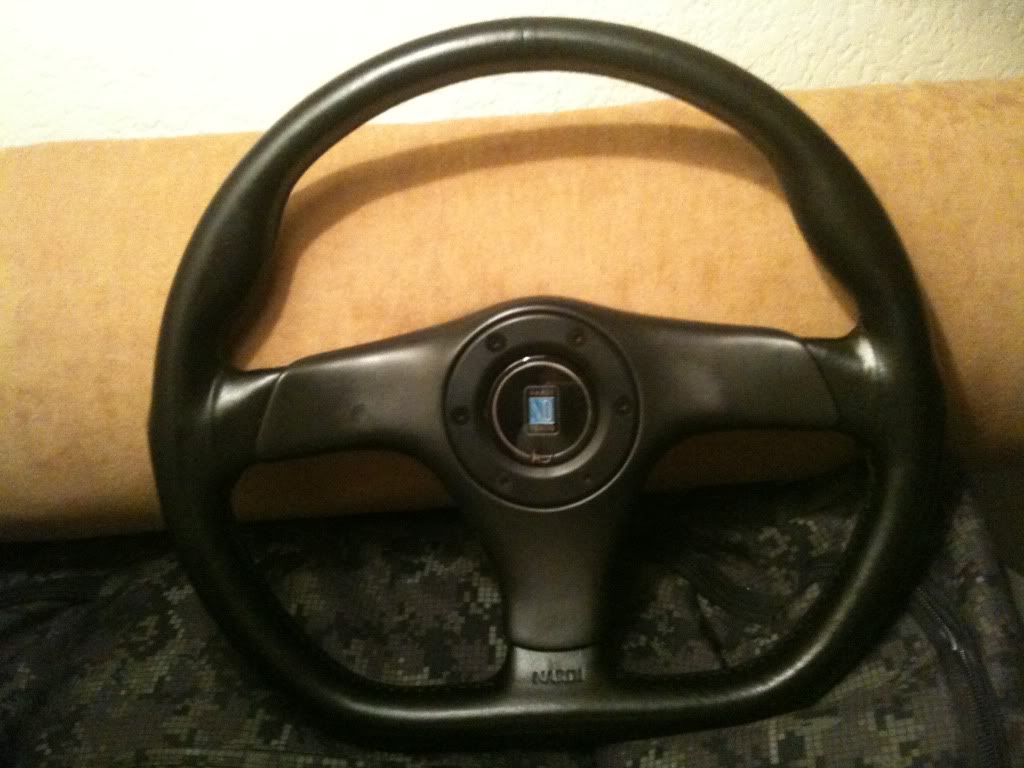
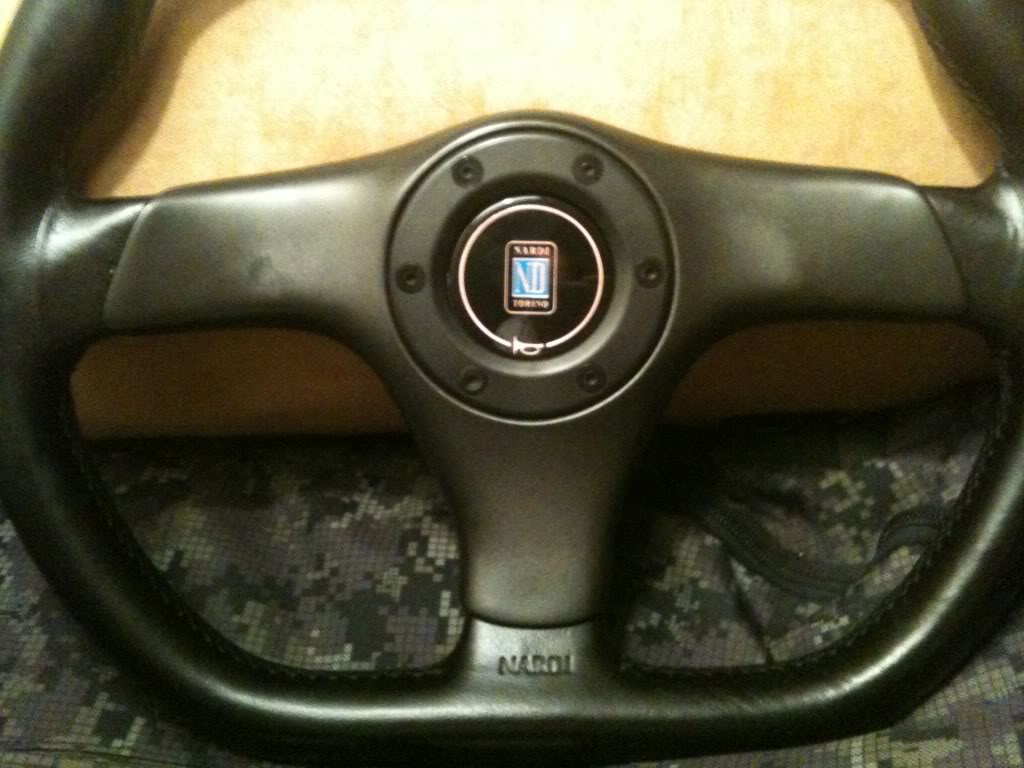
As I’m sure most of you can imagine my leather shift **** and parking brake lever’s leather was very worn out. I had also purchased a Nardi Torino steering wheel from a Spirit R, which had been heavily damaged at whatever scrap yard it came from.
Having done a nice bit of leather work in the past on my previous vehicles and a bit here and there for friends, I decided to clean up the fd.
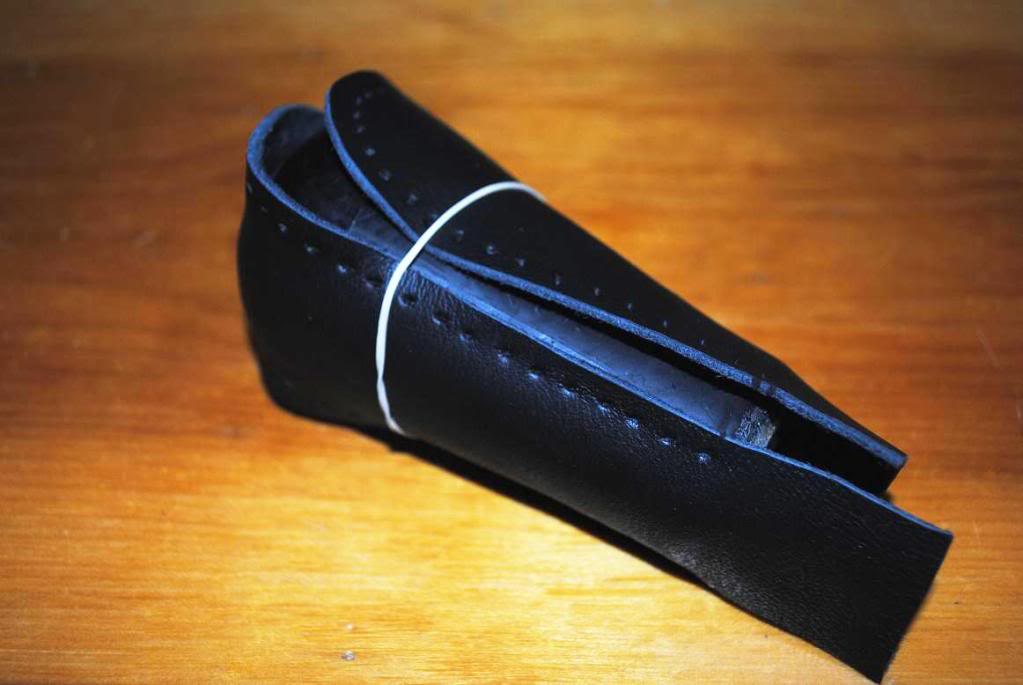
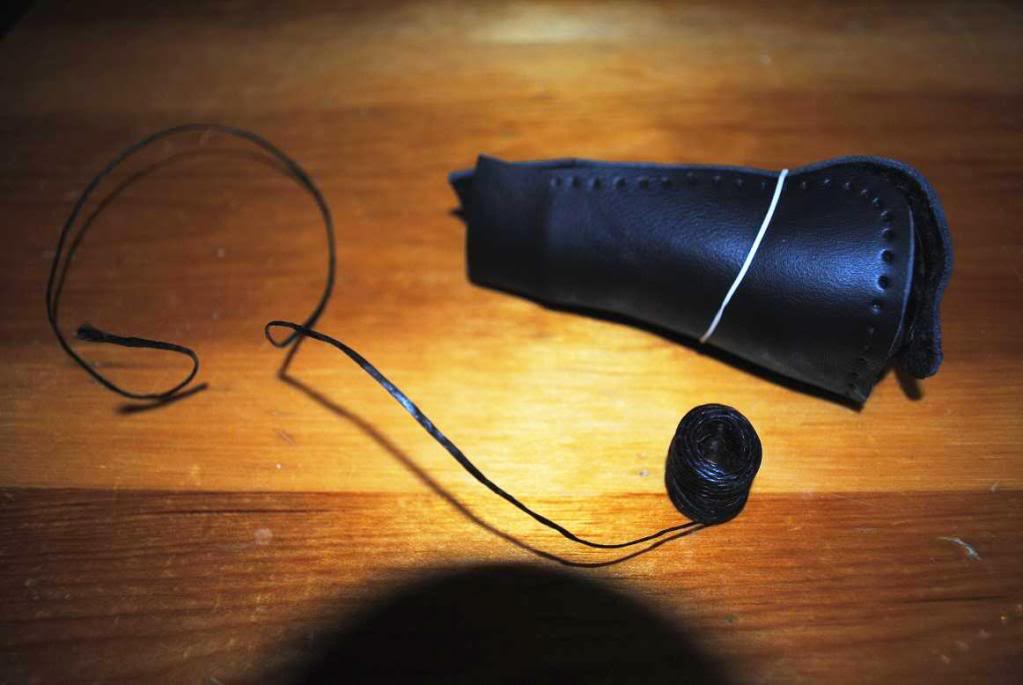
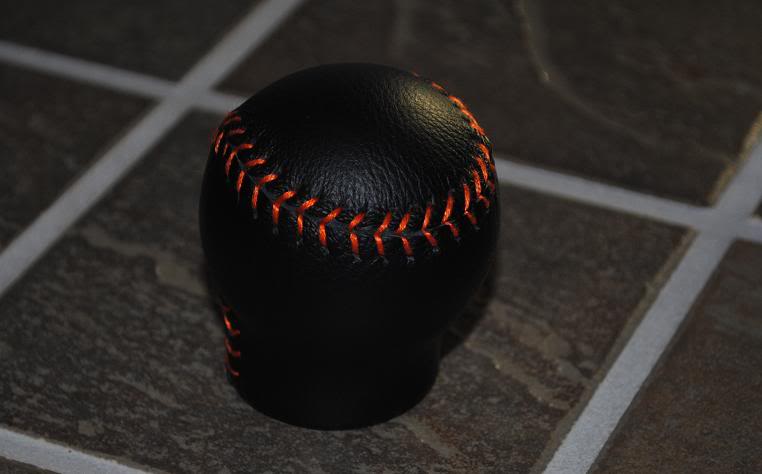
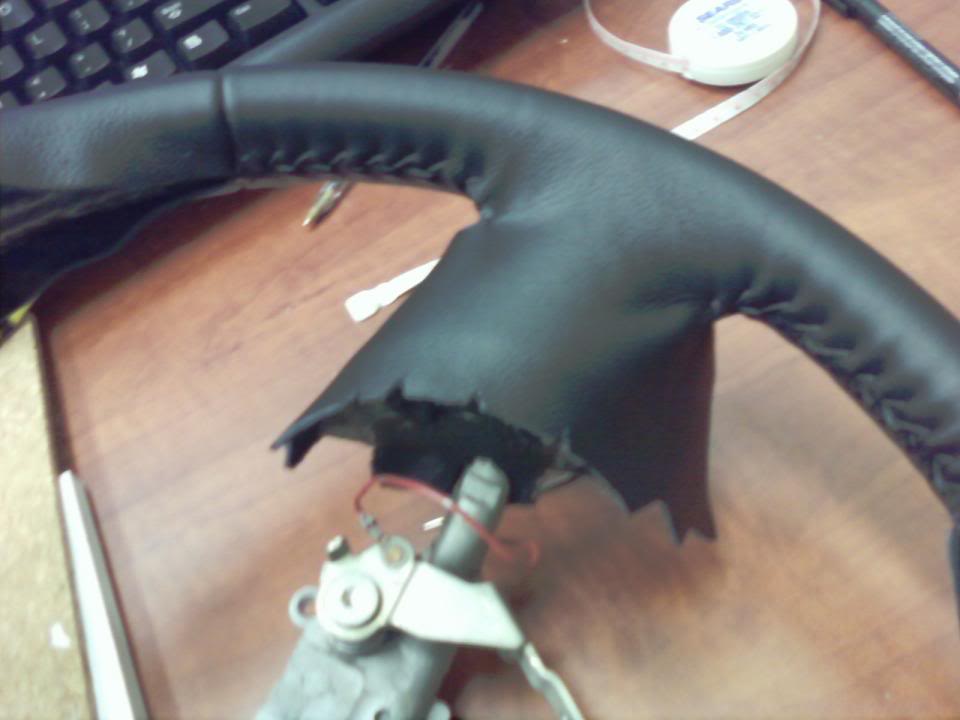
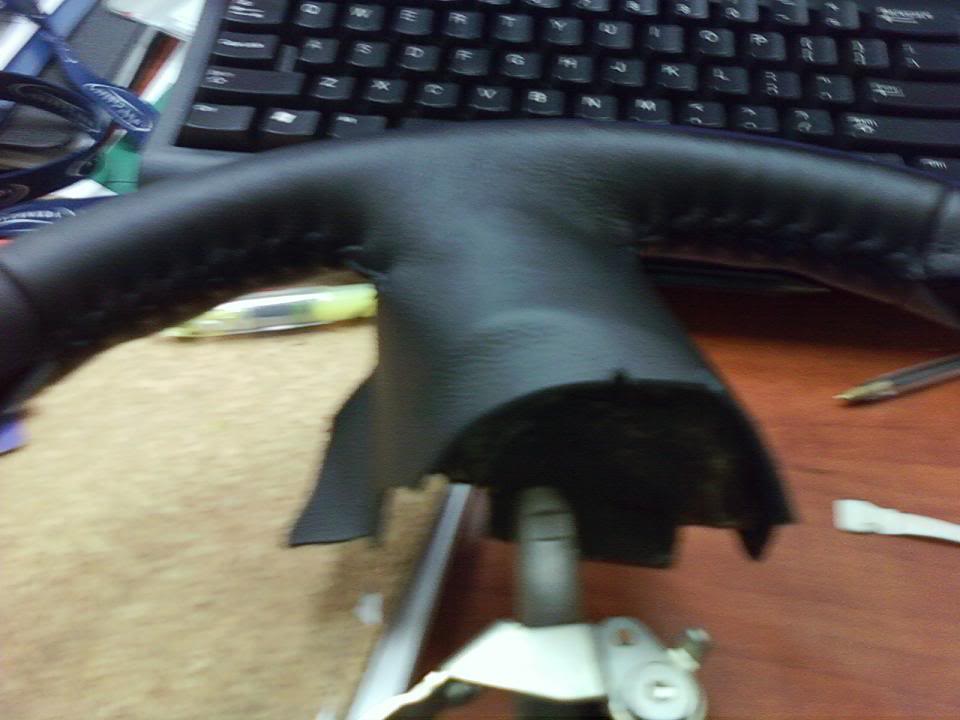
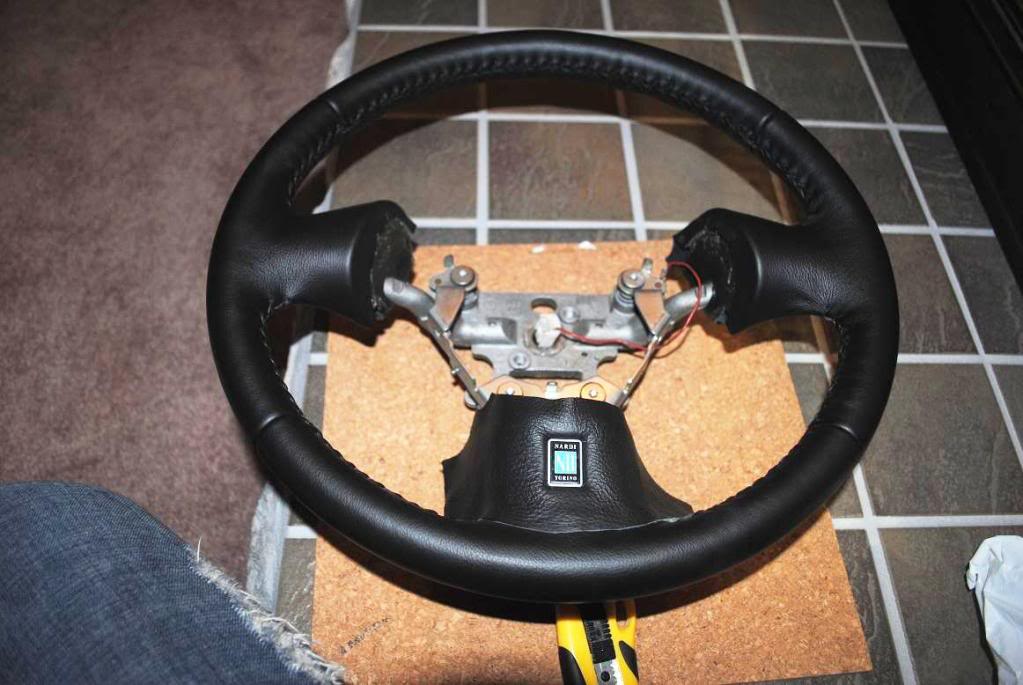
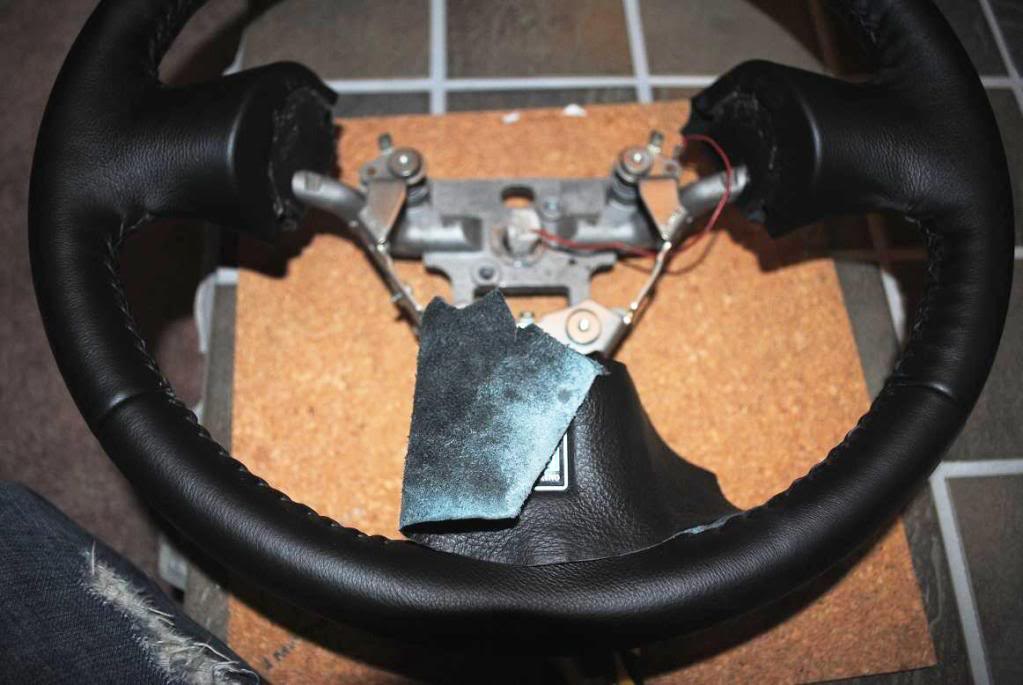
I ordered another full hide from a trusted retailer and started. I used flat black leather to match the rest of the interior and waxed nylon thread to lace. I also have an industrial sewing machine that was used to stitch the wheel cover seams together.
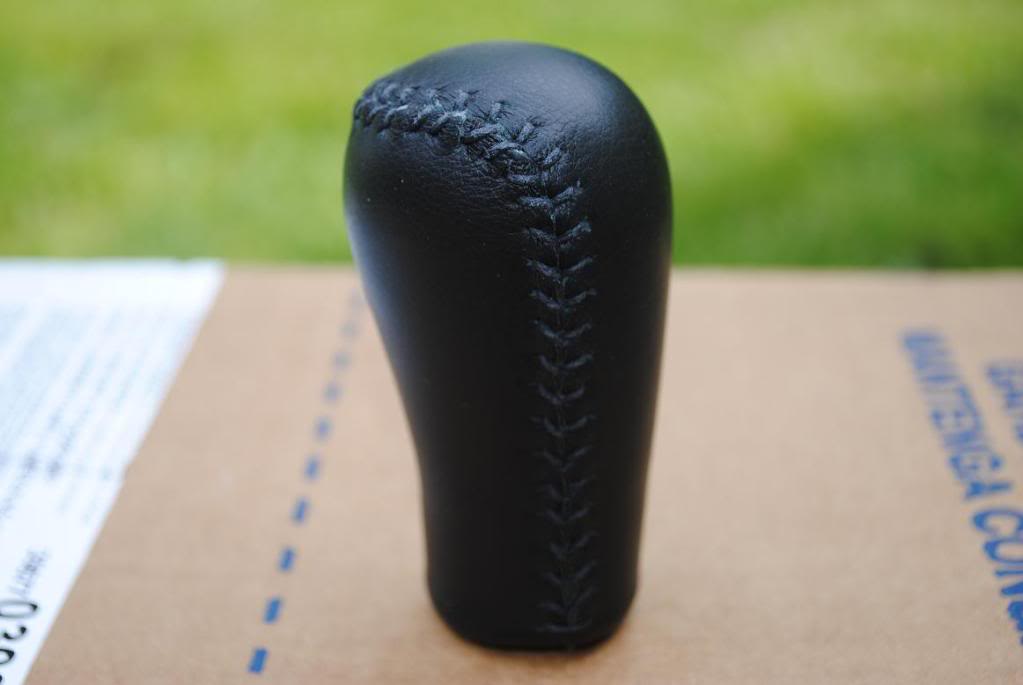
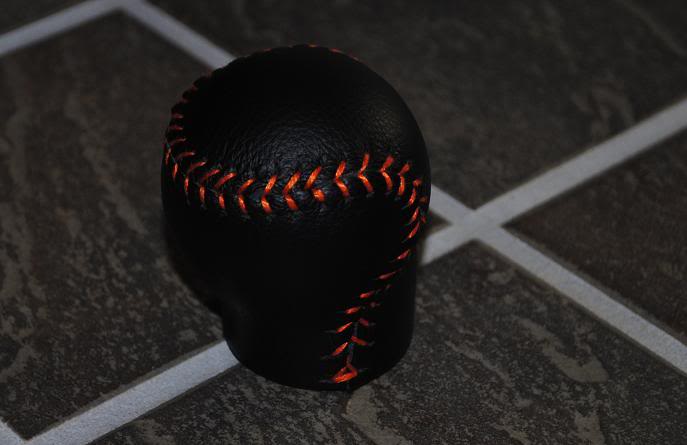
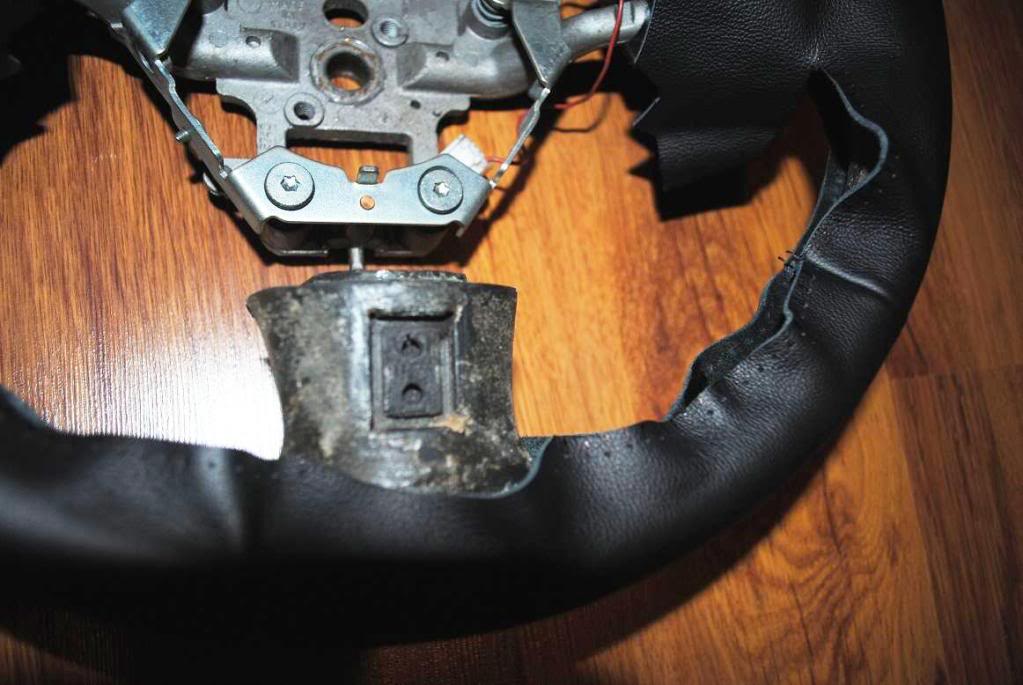
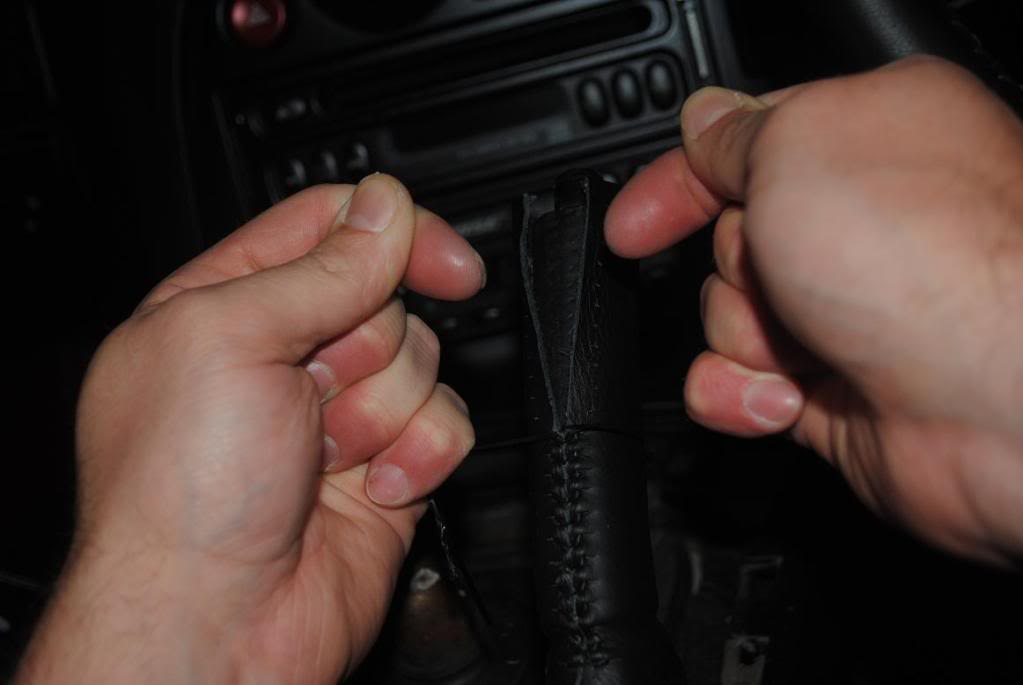
I used the original pattern for the shift ****, modified a bit to overcome the stretching as well as most of the original cover for the wheel. All the holes were measured 5mm apart using a flexible ruler and the amount of holes were matched on both sides and pieces as seen in the pictures. The holes were made with a leather punch. Once the leather was positioned and glued in place, it was laced using a baseball stitch.
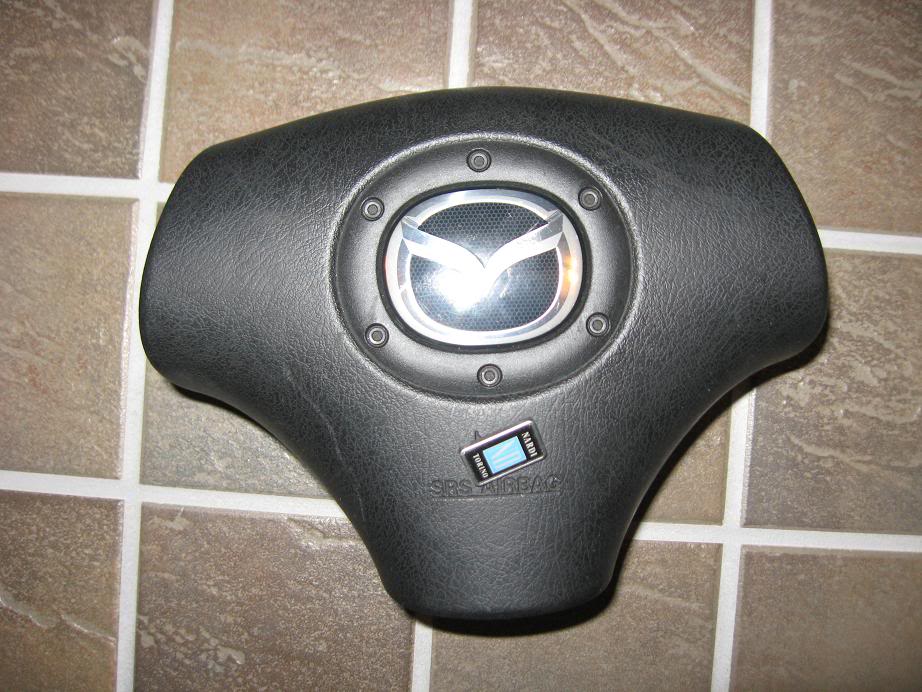
The Nardi wheel was originally stitched in red using a European Diamond Stitch, but I decided I would use the conventional black baseball stitch to further match the factory interior.
A few pictures of my FD’s shift **** and a shift **** I did for a friend a few days ago:
.................................................. ...............
Just thought I would share a few photos and info on some work I have done recently on my car’s leather.
As I’m sure most of you can imagine my leather shift **** and parking brake lever’s leather was very worn out. I had also purchased a Nardi Torino steering wheel from a Spirit R, which had been heavily damaged at whatever scrap yard it came from.
Having done a nice bit of leather work in the past on my previous vehicles and a bit here and there for friends, I decided to clean up the fd.
I ordered another full hide from a trusted retailer and started. I used flat black leather to match the rest of the interior and waxed nylon thread to lace. I also have an industrial sewing machine that was used to stitch the wheel cover seams together.
I used the original pattern for the shift ****, modified a bit to overcome the stretching as well as most of the original cover for the wheel. All the holes were measured 5mm apart using a flexible ruler and the amount of holes were matched on both sides and pieces as seen in the pictures. The holes were made with a leather punch. Once the leather was positioned and glued in place, it was laced using a baseball stitch.
The Nardi wheel was originally stitched in red using a European Diamond Stitch, but I decided I would use the conventional black baseball stitch to further match the factory interior.
A few pictures of my FD’s shift **** and a shift **** I did for a friend a few days ago:
.................................................. ...............


 07-02-10, 09:28 PM
#3
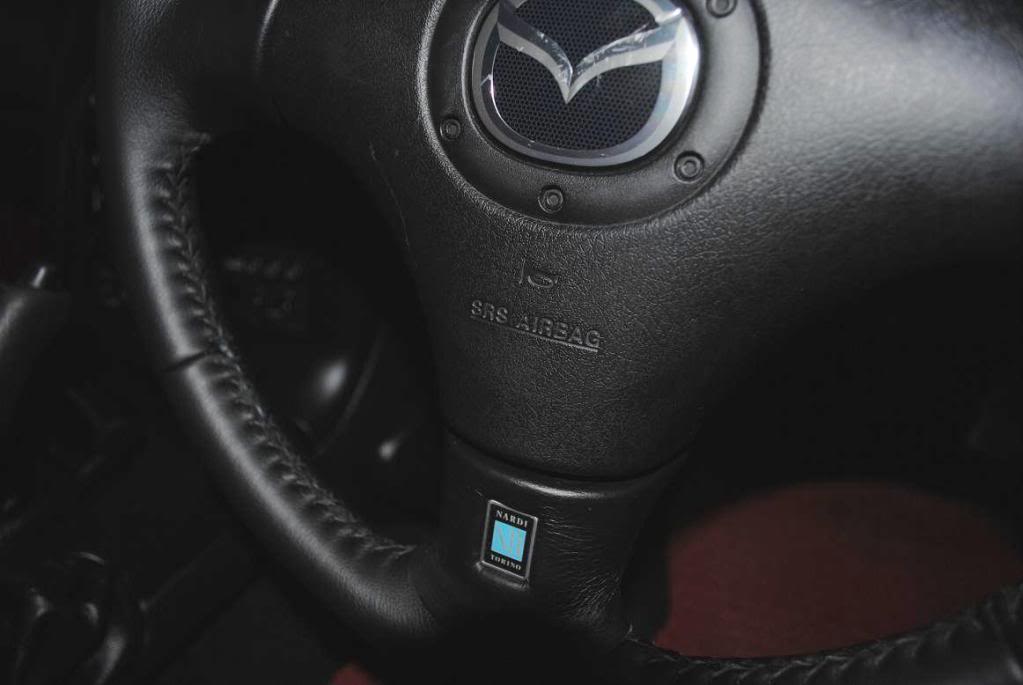
It was necessary to taper the leather on the bottom spoke to match the original pattern, so I used the bench grinder to taper it to obtain a half hidden edge.

Parking brake lever:
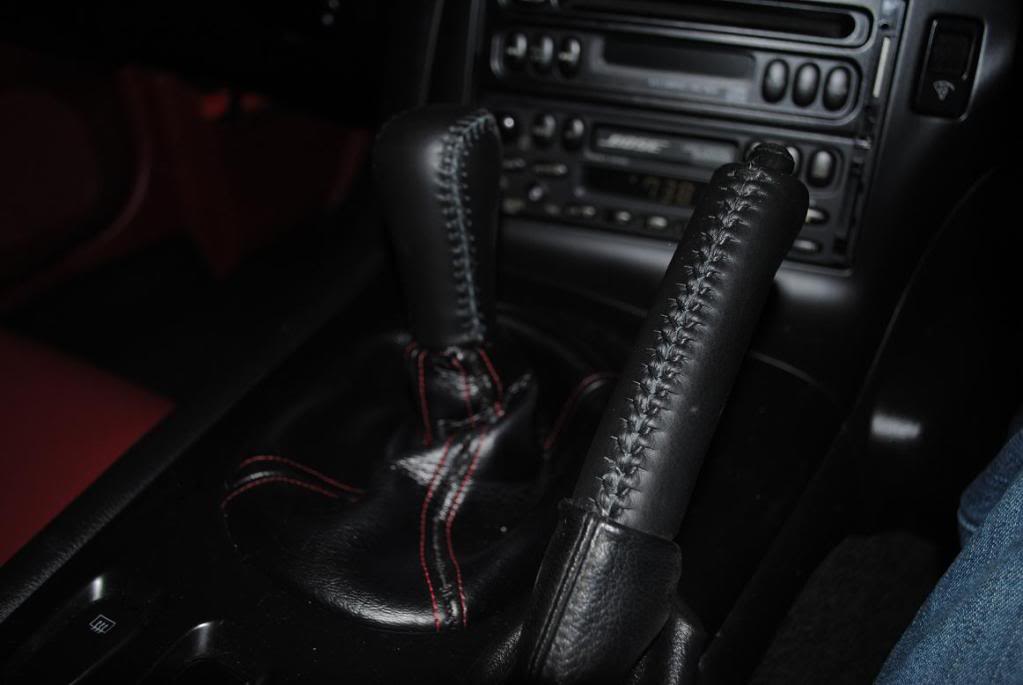
I still have almost a full hide left over, wonder what's next!
Hope everyone likes it. It isn't very hard once you get the hang of it.
Thanks!
Parking brake lever:
I still have almost a full hide left over, wonder what's next!
Hope everyone likes it. It isn't very hard once you get the hang of it.
Thanks!
07-03-10, 07:15 PM
#7
Very nice craftsmanship! Any chance you would be interested in doing this as a business? The parts are small enough to ship back & forth, so if you have the time it might be a good opportunity for you, and a needed service to the RX-7 community. The stock shift **** in my FC is in need of recovery, as is the e-brake handle -- I just lack the talent and the heavy duty sewing machine to DIY the job.
Pete,
'89T2
Pete,
'89T2
Trending Topics
07-03-10, 09:30 PM
#8
Hey Pete,
Thanks for the comment. I had never thought about doing this for a business as I just don't have quick access to the materials such as different color leather etc. That being said, I would be more than happy to help a few people out, but not for profit. I do have almost a full hide of black leather left that could be used, as well as an almost infinite supply of the waxed nylon thread in almost any color.
The levers and ***** are pretty simple and can be done in a few hours whereas steering wheels take days.
I would be more than happy to recover your fc's shift **** and brake lever. If you want to send it to me I can pm you my address.
Do you still have the original leather on your shift **** and e-brake lever? If not I can still recover it, but the pattern makes it easier.
Thanks Pete,
Matt
07-04-10, 06:33 AM
#9
Hey Pete,
Thanks for the comment. I had never thought about doing this for a business as I just don't have quick access to the materials such as different color leather etc. That being said, I would be more than happy to help a few people out, but not for profit. I do have almost a full hide of black leather left that could be used, as well as an almost infinite supply of the waxed nylon thread in almost any color.
The levers and ***** are pretty simple and can be done in a few hours whereas steering wheels take days.
I would be more than happy to recover your fc's shift **** and brake lever. If you want to send it to me I can pm you my address.
Do you still have the original leather on your shift **** and e-brake lever? If not I can still recover it, but the pattern makes it easier.
Thanks Pete,
Matt
Thanks for the comment. I had never thought about doing this for a business as I just don't have quick access to the materials such as different color leather etc. That being said, I would be more than happy to help a few people out, but not for profit. I do have almost a full hide of black leather left that could be used, as well as an almost infinite supply of the waxed nylon thread in almost any color.
The levers and ***** are pretty simple and can be done in a few hours whereas steering wheels take days.
I would be more than happy to recover your fc's shift **** and brake lever. If you want to send it to me I can pm you my address.
Do you still have the original leather on your shift **** and e-brake lever? If not I can still recover it, but the pattern makes it easier.
Thanks Pete,
Matt
 07-05-10, 01:47 PM
#14
This wheel originally had a red European Diamond stitch like the photo below (I don't think I have a picture of the original, but I'll have a look). I rather the baseball stitch and decided to use that as it matches the oem interior.
To do the Diamond Stitch, both sides are sewn on the machine and you basically stitch through the loop of the machine sewn seam to pull the leather together. It's actually very easy and does allow the leather to lay completely flat unlike the baseball stitch.
07-06-10, 08:21 AM
#19
That is actually the original pattern. I am not sure why the bottom spoke is separate, but I wanted the pattern to be the same as the original. It may have something to do with the nardi logo. It also hides the tie off point for the lacing on the bottom, which I guess they didn't want visible. The wheel was wrapped very differently from other wheels I have done. The back of the pokes were wrapped and glued together as opposed to being stitch all the way in to the airbag.
07-12-10, 07:15 PM
#21
Snowboarding Whistler!
iTrader: (24)
Join Date: Nov 2002
Location: Whistler, BC
Posts: 1,285
Likes: 0
Received 0 Likes
on
0 Posts
Very cool! planning to do some wrapping on a steering wheel as well, very inspiring.
Last edited by Fortune_Seven; 07-12-10 at 07:22 PM. Reason: content
07-14-10, 12:52 AM
#25
Snowboarding Whistler!
iTrader: (24)
Join Date: Nov 2002
Location: Whistler, BC
Posts: 1,285
Likes: 0
Received 0 Likes
on
0 Posts
I have the red seats as well, but want to wrap part of my Nardi wheel with red leather that will look just as worn. I don't think I'll get the same effect with new leather. So I'm thinking leather from a used set would look perfect. The horn surround is the area I'm thinking.
Would you be willing to sell me one cover or part of one big enough to cover the area?

Let me know what you think.
Would you be willing to sell me one cover or part of one big enough to cover the area?
Let me know what you think.