Sft3303's contribution (agonizingly slow s5 n/a/t build)
 01-03-13, 05:32 PM
#51
Moderator
iTrader: (3)
Join Date: Mar 2001
Location: https://www2.mazda.com/en/100th/
Posts: 30,802
Received 2,577 Likes
on
1,831 Posts
nice build! for the metering thing, the amount you need to inject makes an EFI style system totally impractical, you'd need like 4.6cc injectors.... plus its complex.
the best solution was to have a tank and some way to just pump some into the gas at a fill up. the spare tire well is a great place for something like this...
the best solution was to have a tank and some way to just pump some into the gas at a fill up. the spare tire well is a great place for something like this...

 01-03-13, 06:41 PM
#53
Full Member
Thread Starter

Originally Posted by j9fd3s
nice build! for the metering thing, the amount you need to inject makes an EFI style system totally impractical, you'd need like 4.6cc injectors.... plus its complex.
the best solution was to have a tank and some way to just pump some into the gas at a fill up. the spare tire well is a great place for something like this...
the best solution was to have a tank and some way to just pump some into the gas at a fill up. the spare tire well is a great place for something like this...
Originally Posted by Kewtdz
I've been reading your thread for a while and I'm pretty impressed. Keep up the good work.
Last edited by sft3303; 01-03-13 at 06:53 PM.
01-04-13, 12:59 AM
#54
Full Member
Thread Starter
More stuff from today:
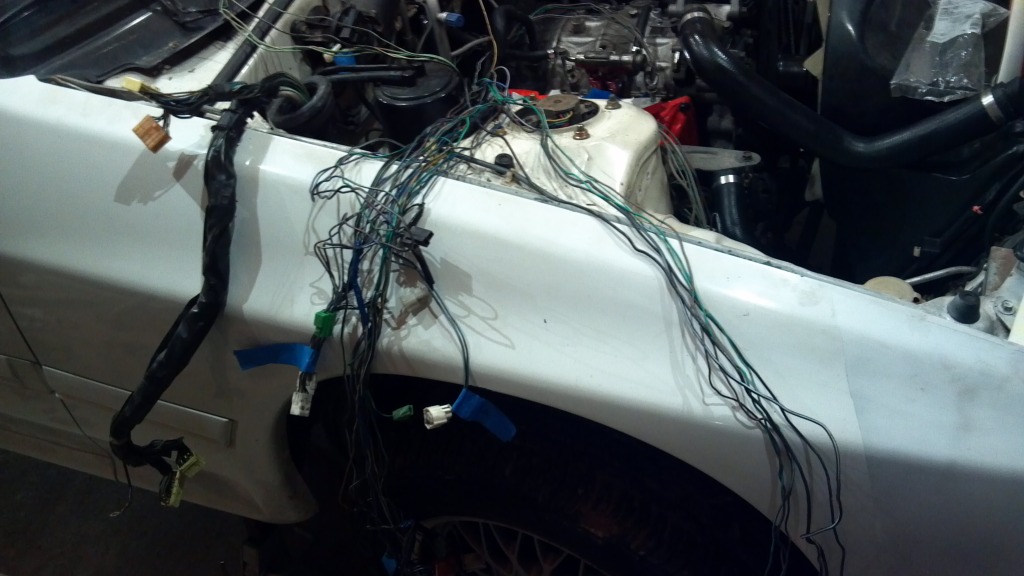
Started to tear into the wiring more. I accomplished the task of de-looming the stock EFI harness, so I could pull out the unused circuits and re-route the ones I wanted to keep. It was rather irritating, as it seems like a bunch of plugs share common grounds, and instead of running all the grounds back to a common grounding plug, they just jump from one plug, to the next, to the next, like christmas tree lights almost.
This frustrates me the most with the IAC, whose ground is tied to the solenoid rack grounds. Which I'm not using. So I'll have to run a new ground wire for that in order to get the IAC plug away from those plugs.
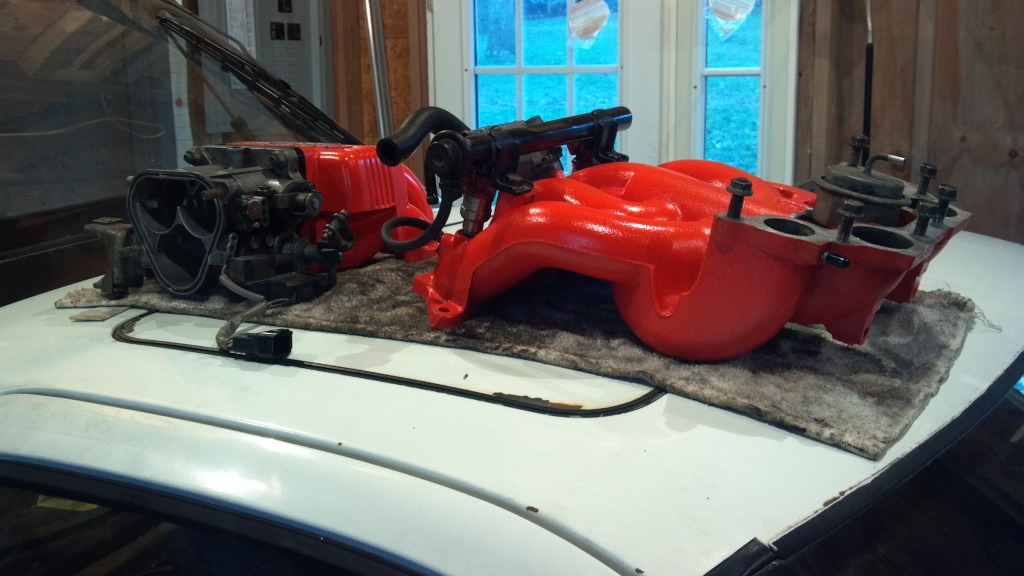
I went ahead and assembled the middle and upper intakes/throttle body, and checked out one of my TPS's to ensure the long range sensor would be in good enough condition to work with the Megasquirt. Thankfully, one of them was fine. The other had a little hitch around 2k ohm where it would just jump to infinite resistance and then continue down to 1k, etc... Guess I got lucky in having a spare. Came with the "new" engine.
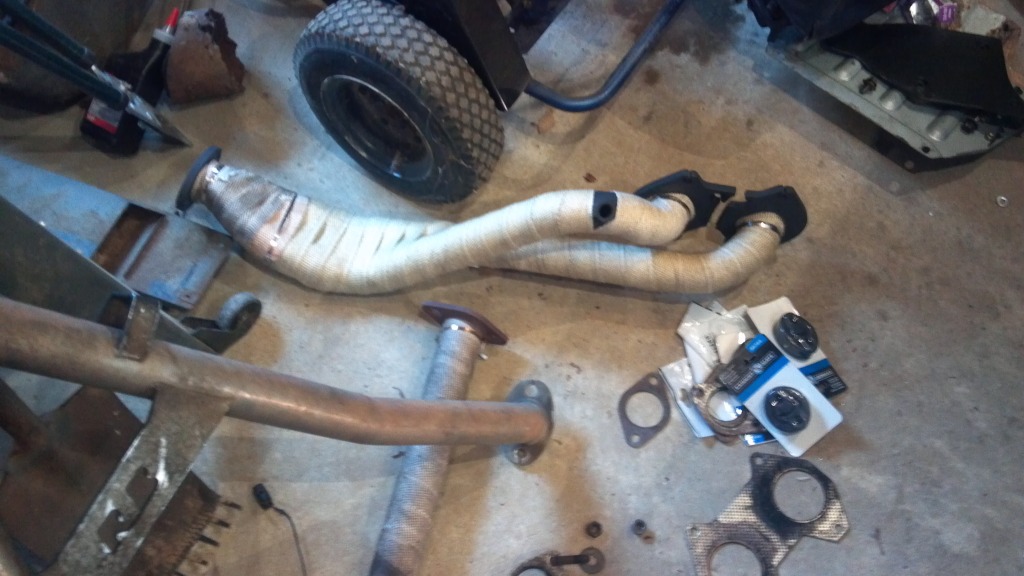
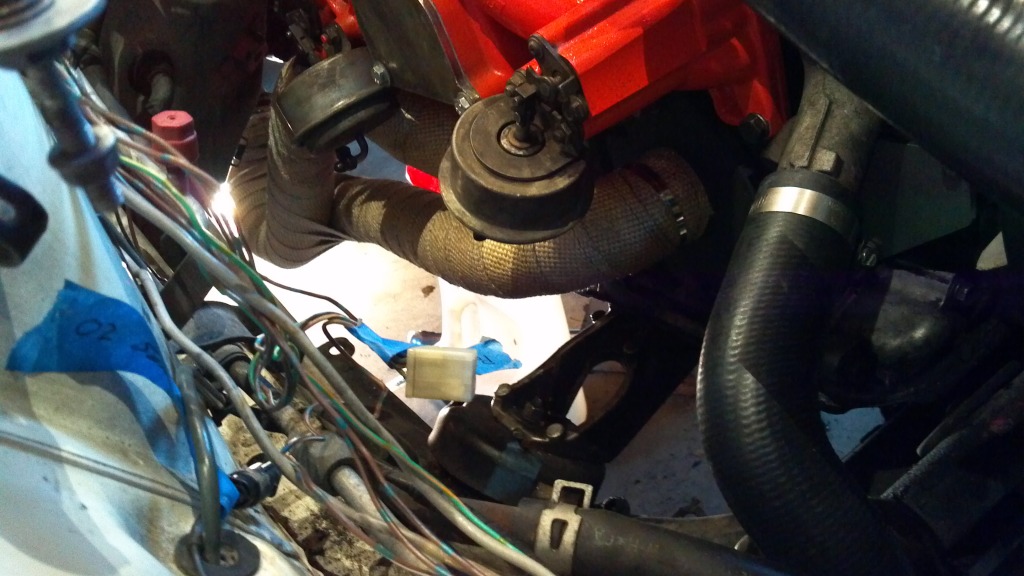
Anyways, pics of today's damage, along with some of the header now wrapped:
So glad to get all this crap out of my engine bay:
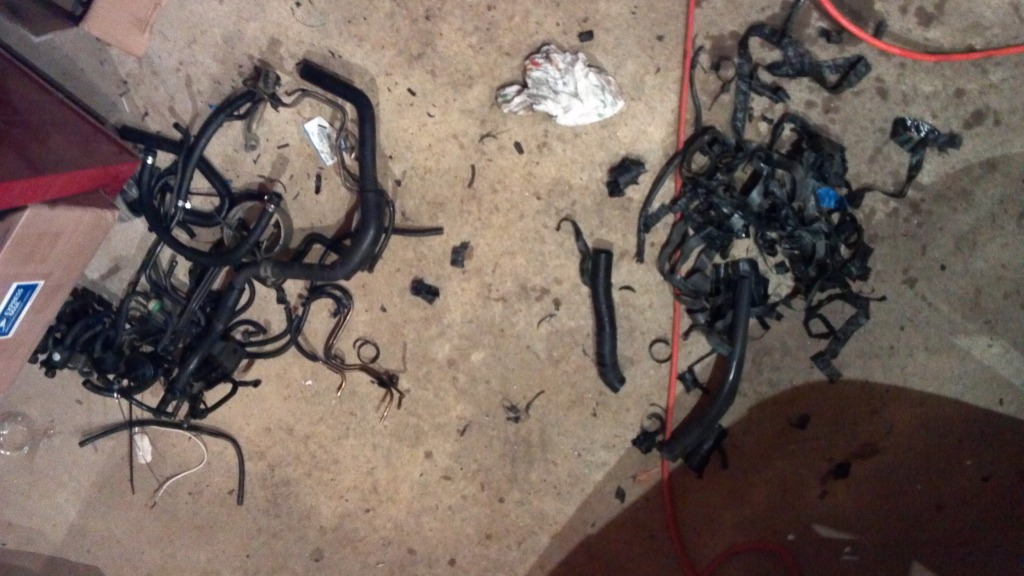
The middle jumble here (hanging over the shock tower) is all of the circuits i WON'T be using. Except for the IAC, which has a shared ground...
Intake set up:
Hopefully I can do a bit more wiring tomorrow, but plans are changing rapidly and it seems as though I'll be needed to move out tomorrow. School starts wednesday. The car will more than likely not be together by then. And it will then go on the back burner. Which makes me a sad panda.
Started to tear into the wiring more. I accomplished the task of de-looming the stock EFI harness, so I could pull out the unused circuits and re-route the ones I wanted to keep. It was rather irritating, as it seems like a bunch of plugs share common grounds, and instead of running all the grounds back to a common grounding plug, they just jump from one plug, to the next, to the next, like christmas tree lights almost.
This frustrates me the most with the IAC, whose ground is tied to the solenoid rack grounds. Which I'm not using. So I'll have to run a new ground wire for that in order to get the IAC plug away from those plugs.
I went ahead and assembled the middle and upper intakes/throttle body, and checked out one of my TPS's to ensure the long range sensor would be in good enough condition to work with the Megasquirt. Thankfully, one of them was fine. The other had a little hitch around 2k ohm where it would just jump to infinite resistance and then continue down to 1k, etc... Guess I got lucky in having a spare. Came with the "new" engine.
Anyways, pics of today's damage, along with some of the header now wrapped:
So glad to get all this crap out of my engine bay:
The middle jumble here (hanging over the shock tower) is all of the circuits i WON'T be using. Except for the IAC, which has a shared ground...
Intake set up:
Hopefully I can do a bit more wiring tomorrow, but plans are changing rapidly and it seems as though I'll be needed to move out tomorrow. School starts wednesday. The car will more than likely not be together by then. And it will then go on the back burner. Which makes me a sad panda.
01-29-13, 01:46 PM
#55
Full Member
Thread Starter
It's been a while, but some progress has been made. School is in full swing, and taking 18 hours while working on the Formula SAE car leaves little time for thinking of the rx7.
Nevertheless, I was able to make it home MLK day weekend, and got some things accomplished.
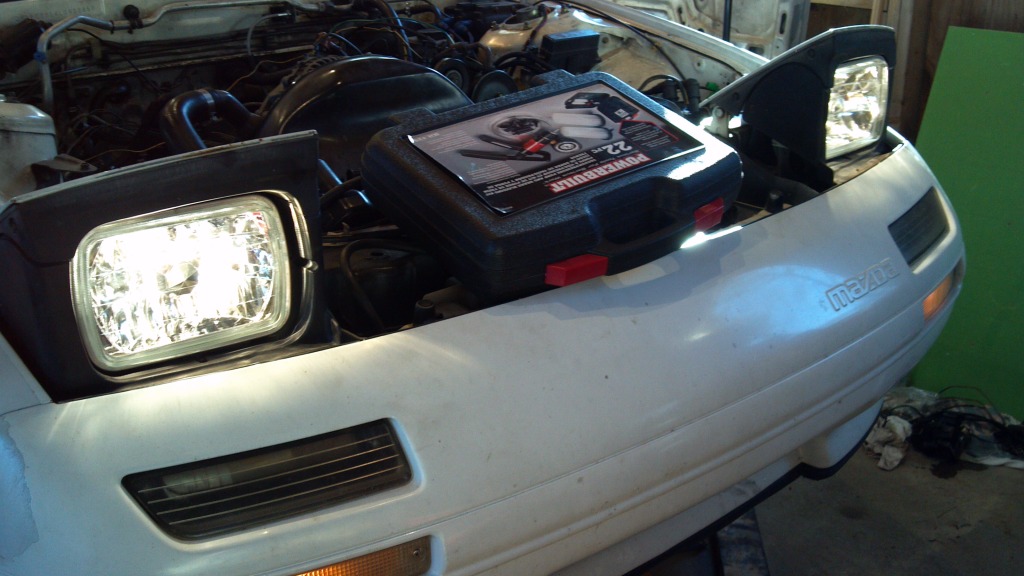
As inconsequential as it may be at the moment, I installed new H4 housings. Was quick and easy, and provided immediate gratification. Felt good to get them in, and I'm sure they're better than the old sealed beams I had before.
In bigger news, the trans got put in. After an attempt of using a standard floor jack, a sore back, and several muffled curses, I went and asked a friend to use his trans jack. It made a world of difference. Went in within 30 minutes.
It seems as though I don't have a picture of that to upload (At school, can't run out and snap any). But that did let me get the clutch hydraulics sorted out, the neutral/reverse switches wired up, the starter installed, and the exhaust.
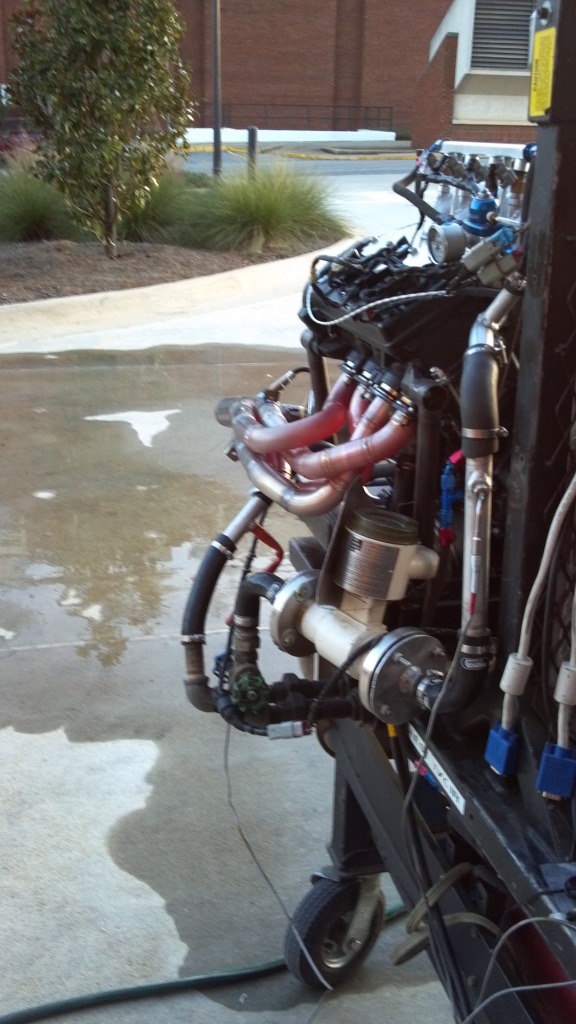
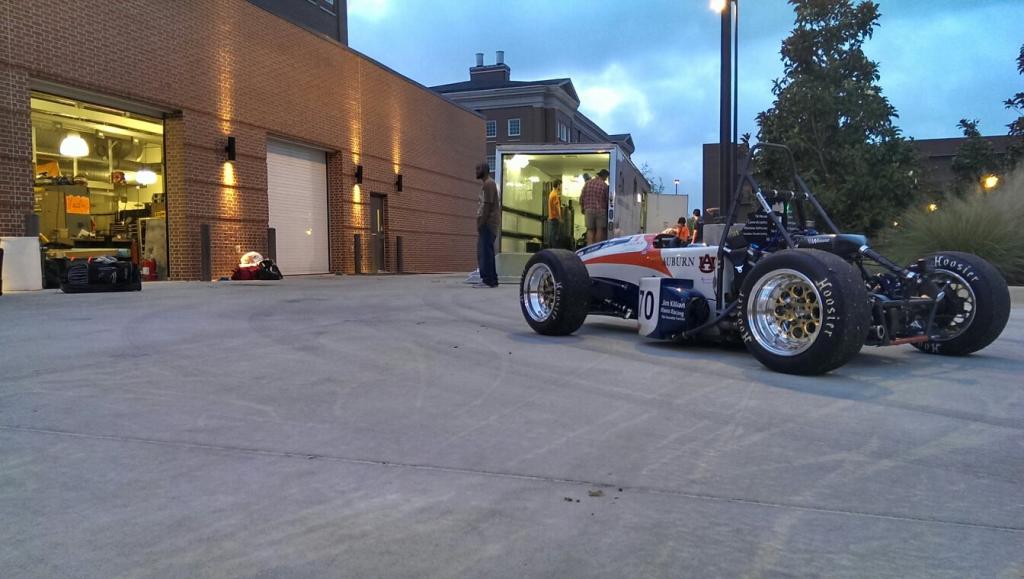
In other news, my *other* project car has been making some exciting progress. Here's a picture of the fsae motor being dyno tuned (sorting out a fuel map this week)
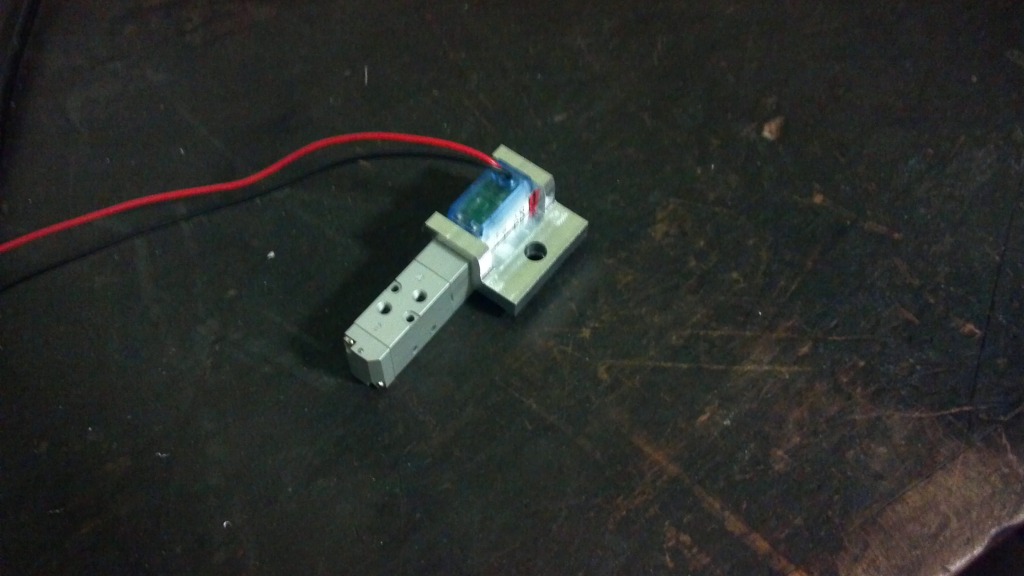
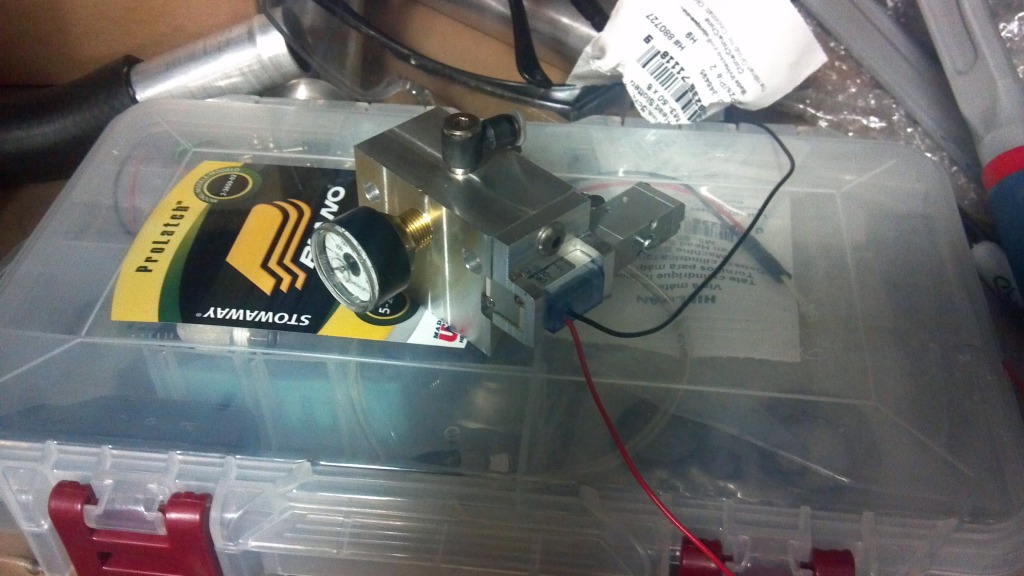
And then there's my section, pnuematics:

That's about it for now, more as it comes.
Nevertheless, I was able to make it home MLK day weekend, and got some things accomplished.
As inconsequential as it may be at the moment, I installed new H4 housings. Was quick and easy, and provided immediate gratification. Felt good to get them in, and I'm sure they're better than the old sealed beams I had before.
In bigger news, the trans got put in. After an attempt of using a standard floor jack, a sore back, and several muffled curses, I went and asked a friend to use his trans jack. It made a world of difference. Went in within 30 minutes.
It seems as though I don't have a picture of that to upload (At school, can't run out and snap any). But that did let me get the clutch hydraulics sorted out, the neutral/reverse switches wired up, the starter installed, and the exhaust.
In other news, my *other* project car has been making some exciting progress. Here's a picture of the fsae motor being dyno tuned (sorting out a fuel map this week)
And then there's my section, pnuematics:
That's about it for now, more as it comes.
02-09-13, 06:44 AM
#56
Full Member
Thread Starter
Progress!
...on something.
The formula sae car has been stretched a bit past it's due date, so there's been some fab-fests going on over at the ME department...
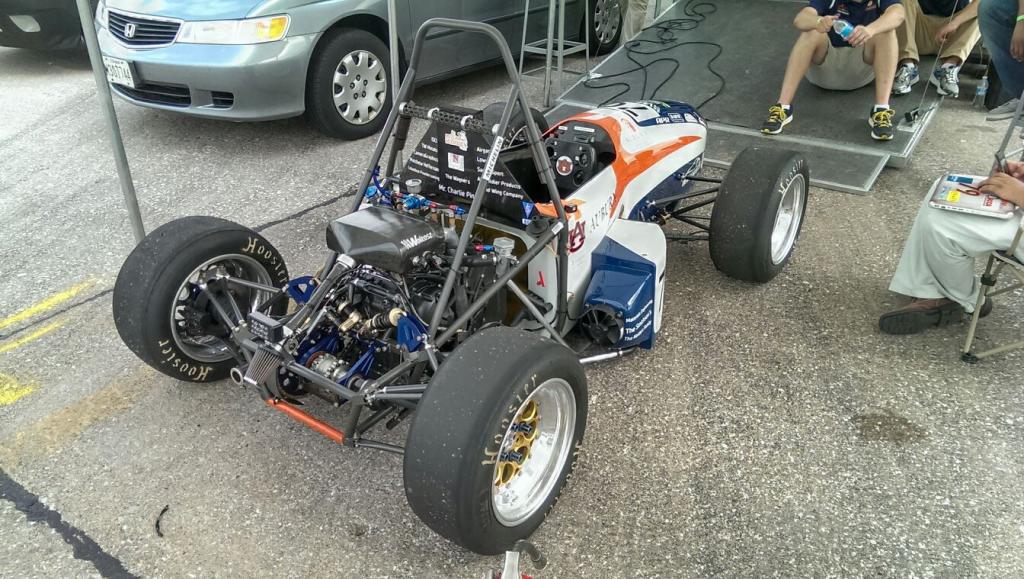
I was given the task of designing/fabricating a clutch system for the car. The motor is a 600 cc yamaha R6 engine, employing a standard cable clutch pull. Given that we have no third pedal (no space for one) the clutch has traditionally been used by one's right hand, in a pulling-a-handle sort of manner.
This has its pro's and con's. It's simple, it works well with the cable as is, but it can be a pain to launch the car with, and if one were to spin out (as often happens when pushing this car to it's limits with "inexperienced" drivers) one would have to remove their right hand from the wheel, "search" for the clutch handle, and pull it to keep from stalling when the car came to rest.
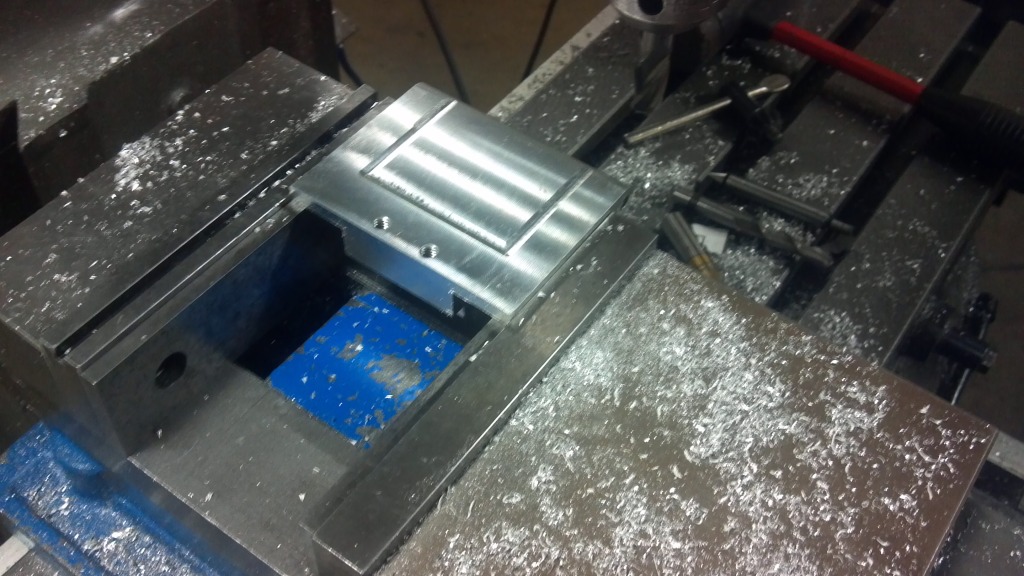
So. The objective this year, employ a clutch handle that would follow the steering wheel. This presented some difficulties, as the steering wheel must be removable, but we've seemed to come up with a workable solution. I'll have more/better pictures and descriptions of what all is going on, but for now these will do:
(Yes, that is the team's mascot standing atop the intake)
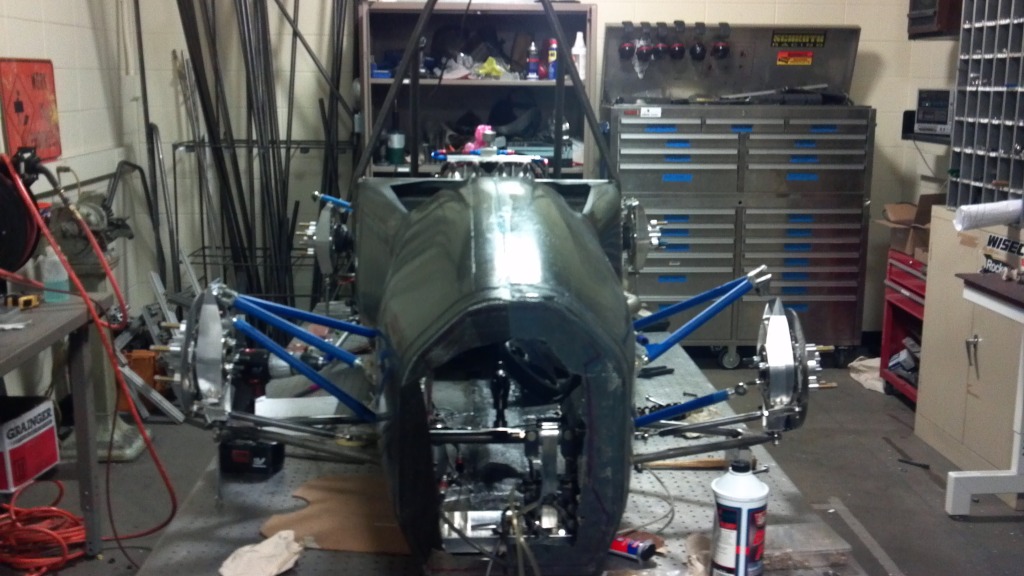
Clutch stuff:
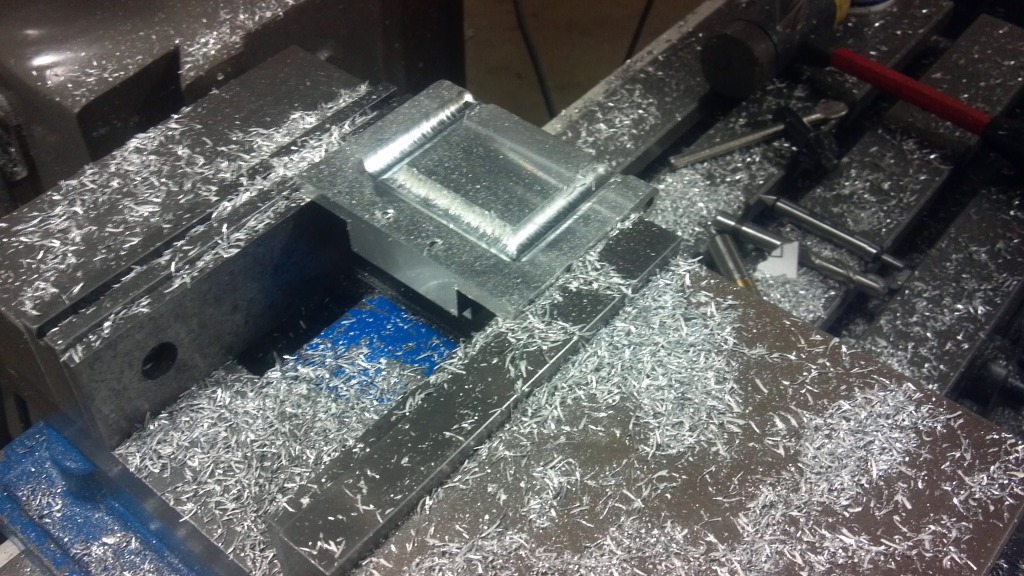

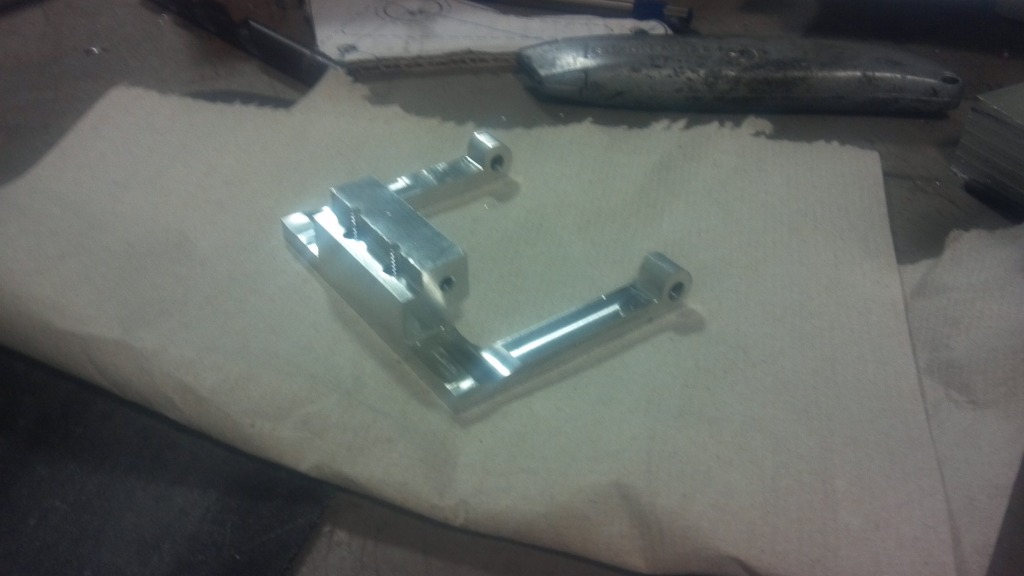

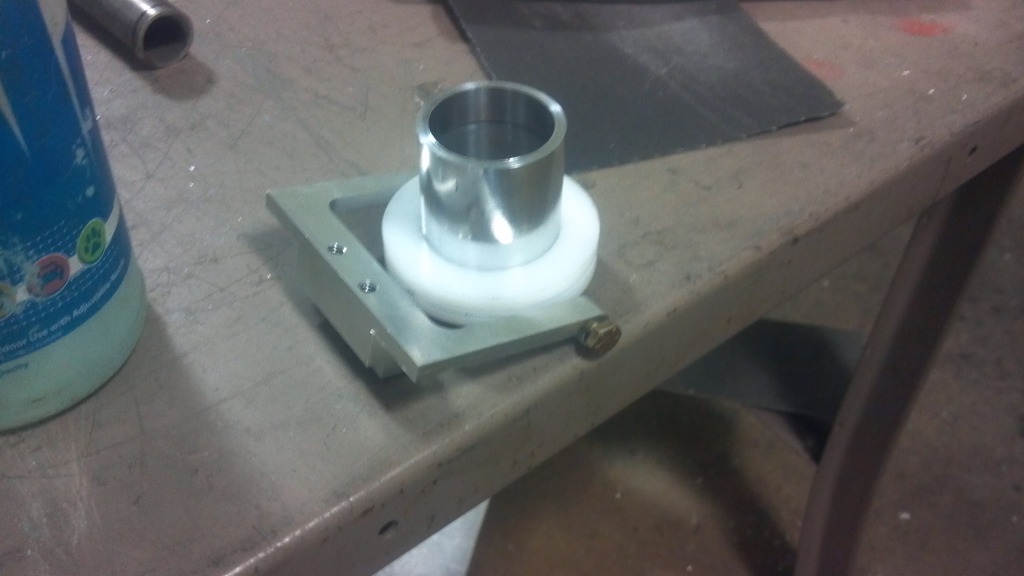
More to come! and next weekend I plan on heading home, so hopefully more progress on a more "relevant" vehicle will be made
...on something.
The formula sae car has been stretched a bit past it's due date, so there's been some fab-fests going on over at the ME department...
I was given the task of designing/fabricating a clutch system for the car. The motor is a 600 cc yamaha R6 engine, employing a standard cable clutch pull. Given that we have no third pedal (no space for one) the clutch has traditionally been used by one's right hand, in a pulling-a-handle sort of manner.
This has its pro's and con's. It's simple, it works well with the cable as is, but it can be a pain to launch the car with, and if one were to spin out (as often happens when pushing this car to it's limits with "inexperienced" drivers) one would have to remove their right hand from the wheel, "search" for the clutch handle, and pull it to keep from stalling when the car came to rest.
So. The objective this year, employ a clutch handle that would follow the steering wheel. This presented some difficulties, as the steering wheel must be removable, but we've seemed to come up with a workable solution. I'll have more/better pictures and descriptions of what all is going on, but for now these will do:
(Yes, that is the team's mascot standing atop the intake)
Clutch stuff:
More to come! and next weekend I plan on heading home, so hopefully more progress on a more "relevant" vehicle will be made
03-30-14, 05:27 PM
#57
Full Member
Thread Starter
So it's been over a year, so I've got a lot to catch us up on.
So as for the formula car, it got finished and tested and won 2nd place at the Lincoln, NE, setting many school records! (Fastest Acceleration times at Competition, Highest overall place, and a couple more)
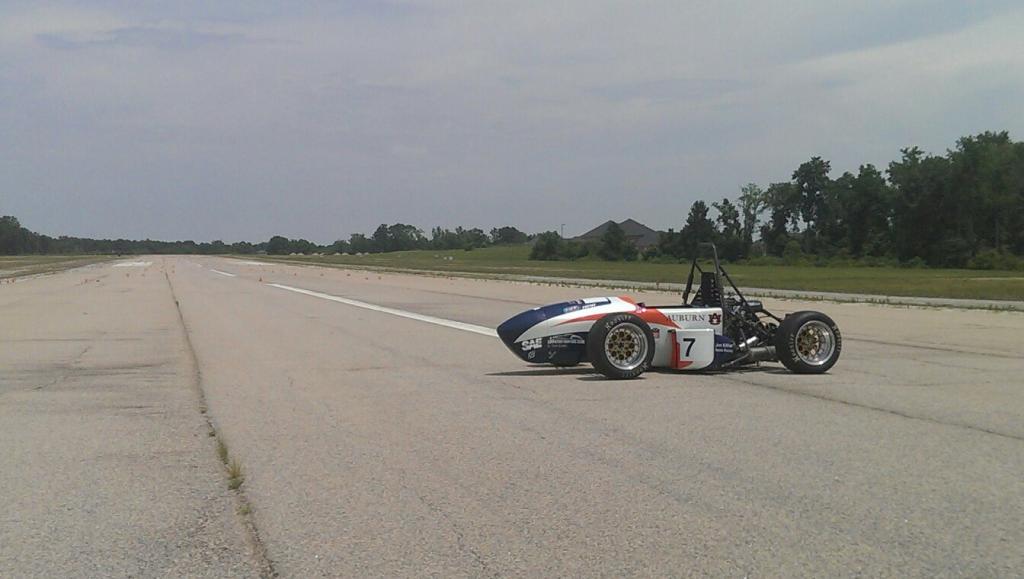
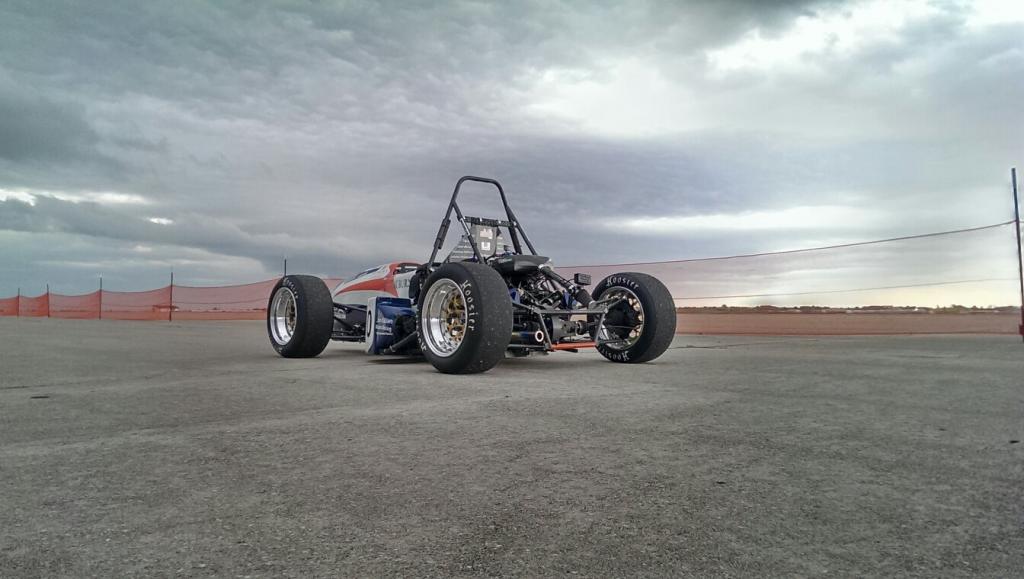

So as for the formula car, it got finished and tested and won 2nd place at the Lincoln, NE, setting many school records! (Fastest Acceleration times at Competition, Highest overall place, and a couple more)


 03-30-14, 05:43 PM
#58
Full Member
Thread Starter
All the formula stuff aside, the RX7 had a worse summer than that.
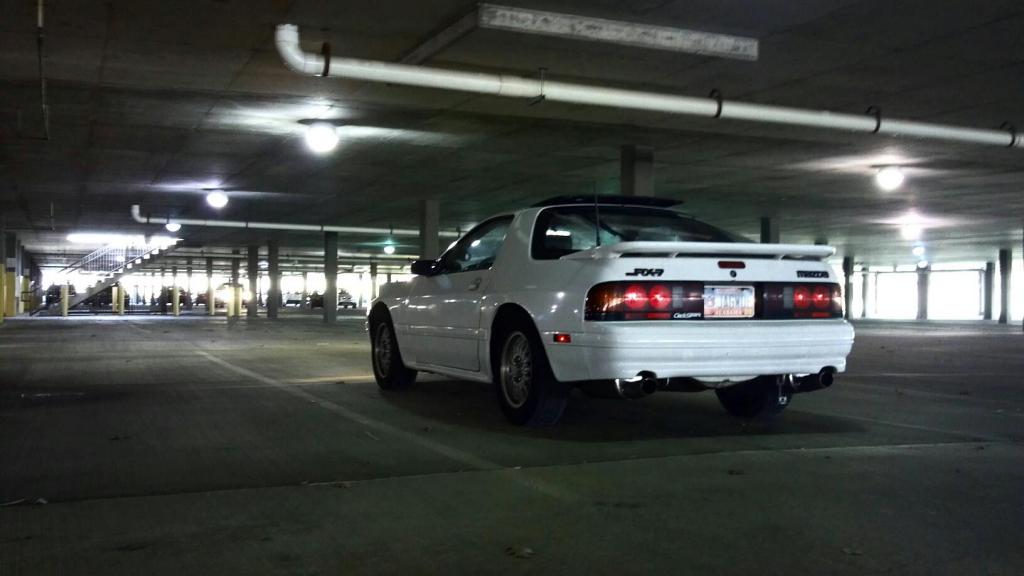
So I drove the car daily to work, and it was wonderful. The car drove magnificently through spring and summer. Looked good too, in my humble opinion:
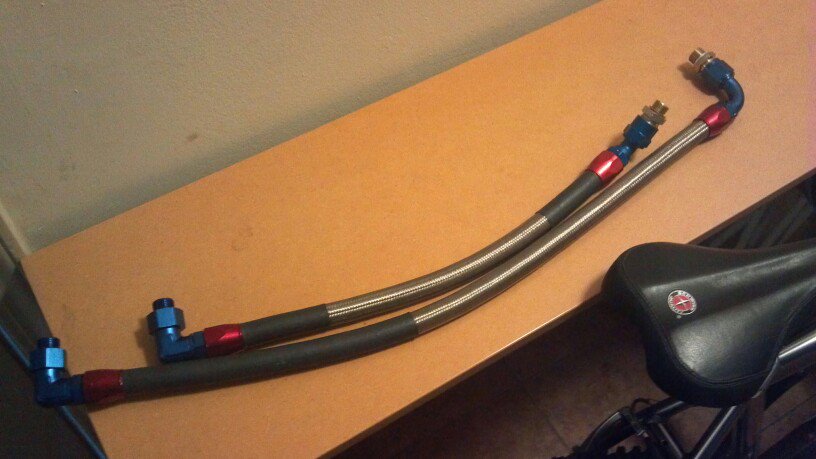
...And then my oil cooler lines decided they'd had enough and it was time for them to retire. It was rather embarrassing to explain my car's incontinence to my roomates, but I shortly had some -10 AN lines from Racing Beat ordered up and I threw them in over a weekend.
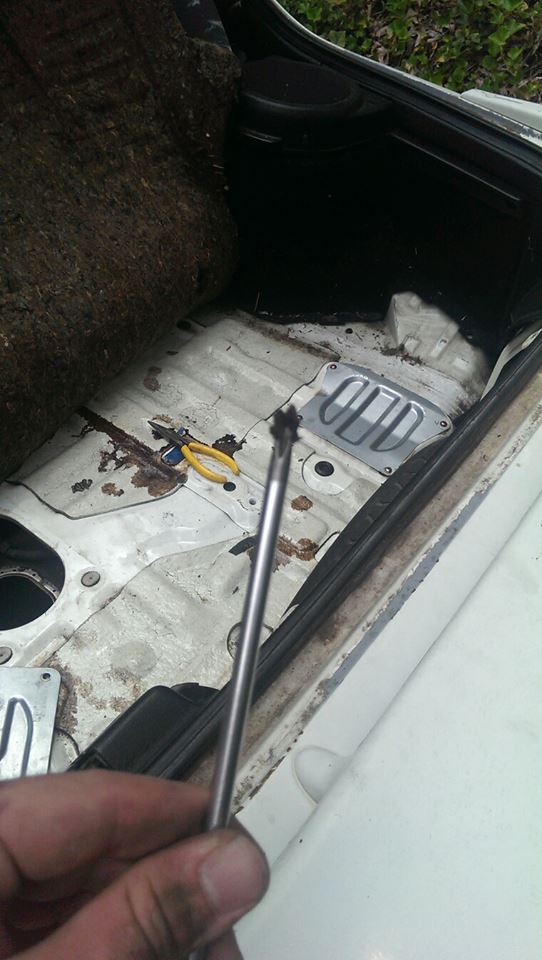
While that was all good and well, I made the mistake of running it below a quarter tank on the way to work one morning, and sucked a slug of rust into my fuel pump. So the car sat again, and had to be retired to the parents house (where, ashamedly, it still sits).
I've since been at work to remedy this situation once and for all, however. Given the problem is rust in the tank, I removed the tank and cleaned it thoroughly and coated it with a POR-15 gas tank coating kit. This should take care of any rust problems for years to come.
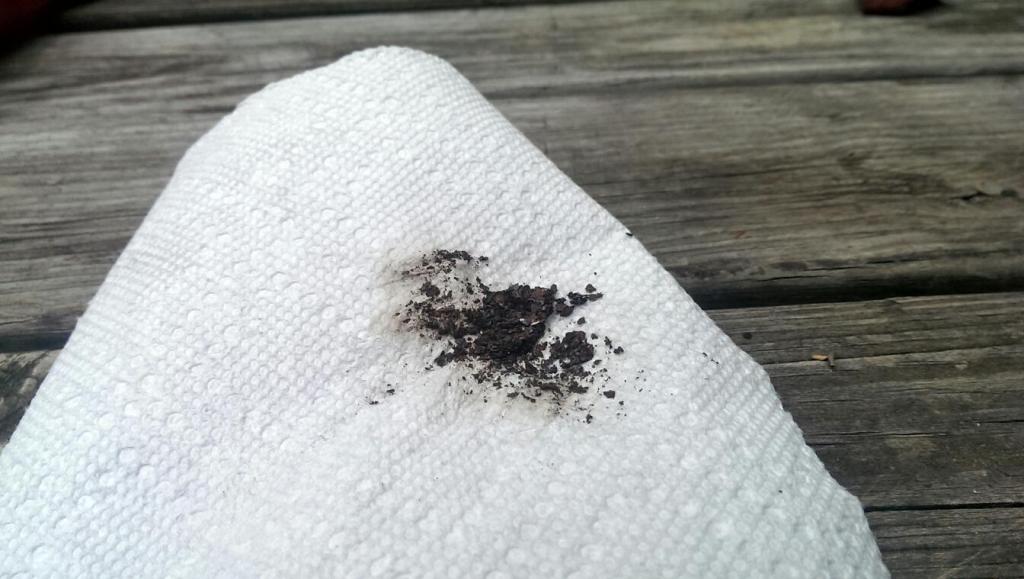
What I found on my initial inspection. That's all rust that's stuck to the magnetic end of a screwdriver that I pulled out of the gas tank:
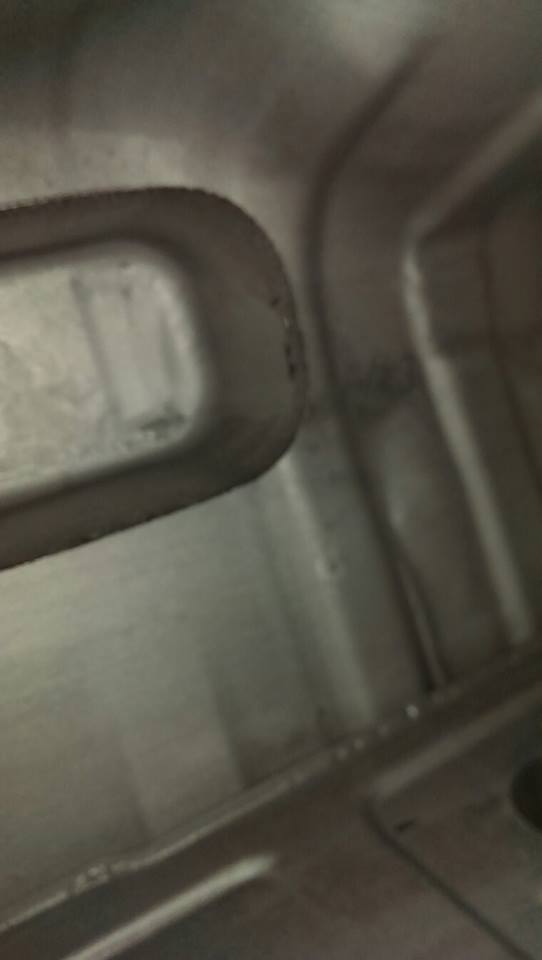
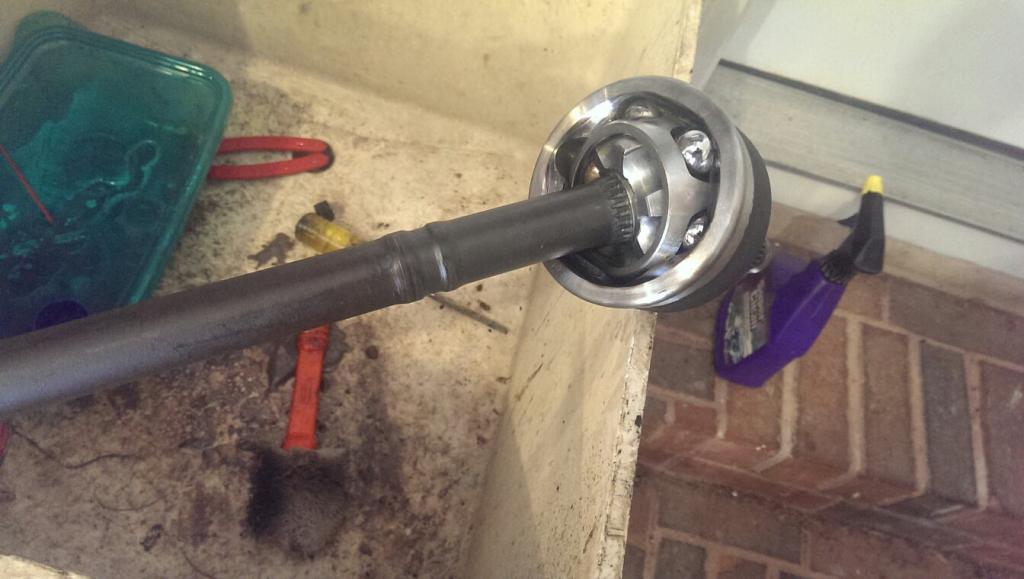
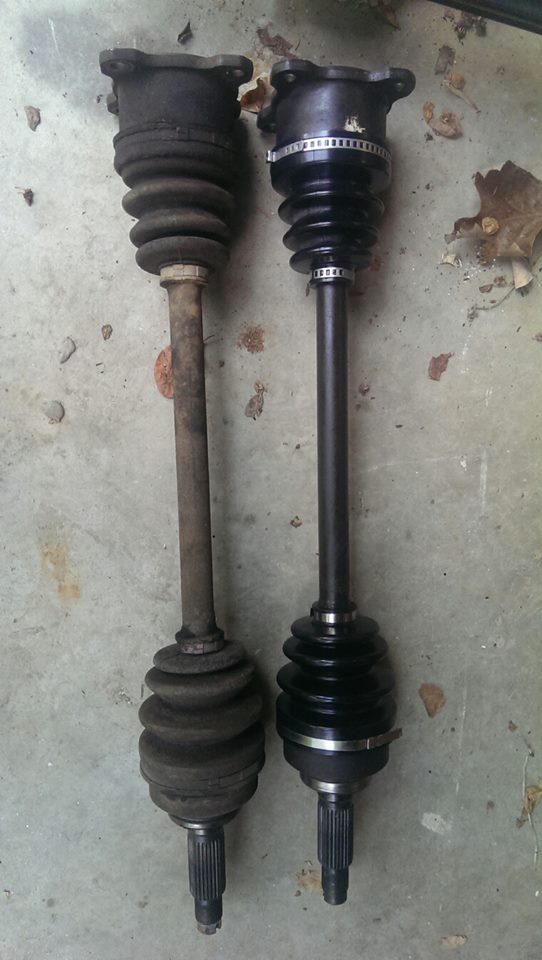
While I was under there, I noticed the grease boots on the CV joints were starting to open up. There was a nice ring of grease expanding radially away from the boots connecting to the diff. So those got a nice little rebuild, and it only cost me $40 and a few hours of my own labor!
Anyways, I got that all put back in about 4:00 on a sunday, and had to be back on the road by 4:30. I didn't manage to get the car started by the time I had to be back on my way to school, and unfortunately it's had to sit since then.
So I drove the car daily to work, and it was wonderful. The car drove magnificently through spring and summer. Looked good too, in my humble opinion:

...And then my oil cooler lines decided they'd had enough and it was time for them to retire. It was rather embarrassing to explain my car's incontinence to my roomates, but I shortly had some -10 AN lines from Racing Beat ordered up and I threw them in over a weekend.

While that was all good and well, I made the mistake of running it below a quarter tank on the way to work one morning, and sucked a slug of rust into my fuel pump. So the car sat again, and had to be retired to the parents house (where, ashamedly, it still sits).
I've since been at work to remedy this situation once and for all, however. Given the problem is rust in the tank, I removed the tank and cleaned it thoroughly and coated it with a POR-15 gas tank coating kit. This should take care of any rust problems for years to come.
What I found on my initial inspection. That's all rust that's stuck to the magnetic end of a screwdriver that I pulled out of the gas tank:


While I was under there, I noticed the grease boots on the CV joints were starting to open up. There was a nice ring of grease expanding radially away from the boots connecting to the diff. So those got a nice little rebuild, and it only cost me $40 and a few hours of my own labor!


Anyways, I got that all put back in about 4:00 on a sunday, and had to be back on the road by 4:30. I didn't manage to get the car started by the time I had to be back on my way to school, and unfortunately it's had to sit since then.
03-30-14, 06:04 PM
#59
Full Member
Thread Starter
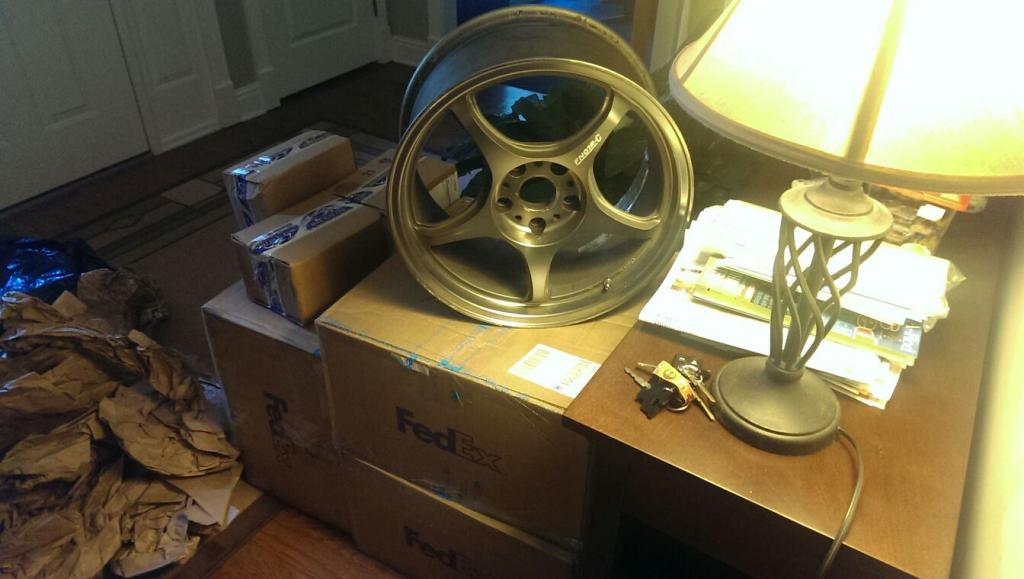
So the car's been sitting, but that hasn't kept me from tinkerings or put a halt to my plans. While I can't work on the car from school or from my internship, I've got some parts that have been delivered home that will go on the car within the next year and I've been tinkering with some electronics components on my desk at school
Some nice 17's for whenever I can get some suspension to handle them:
Some tinkering to the gauge cluster:
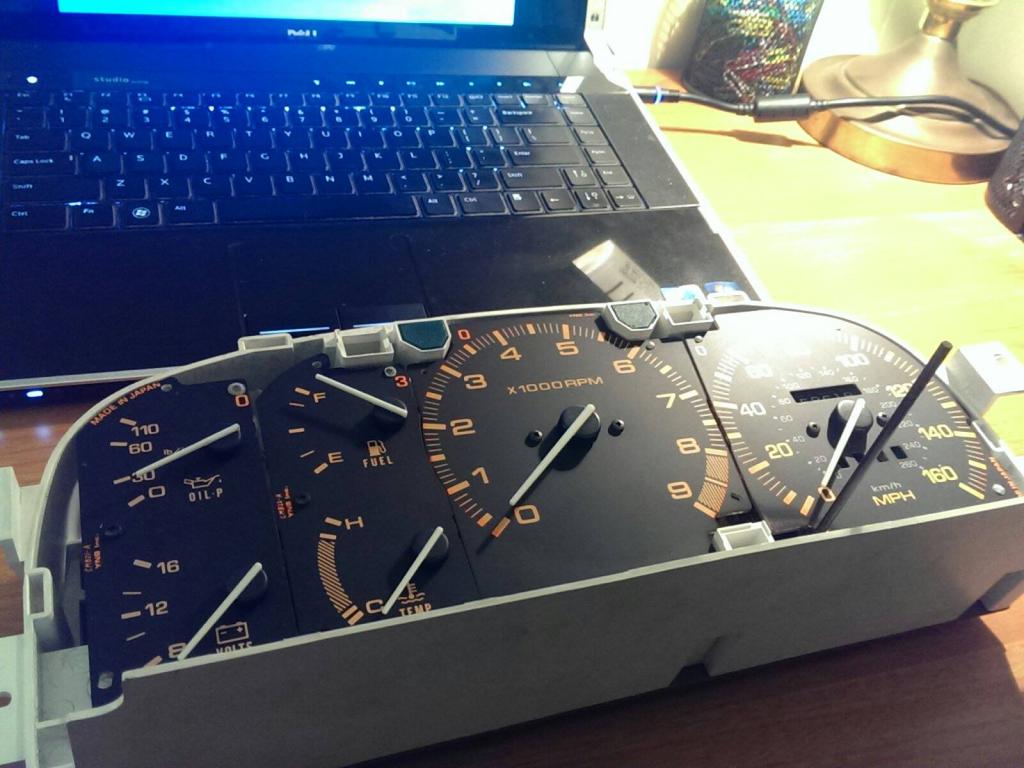
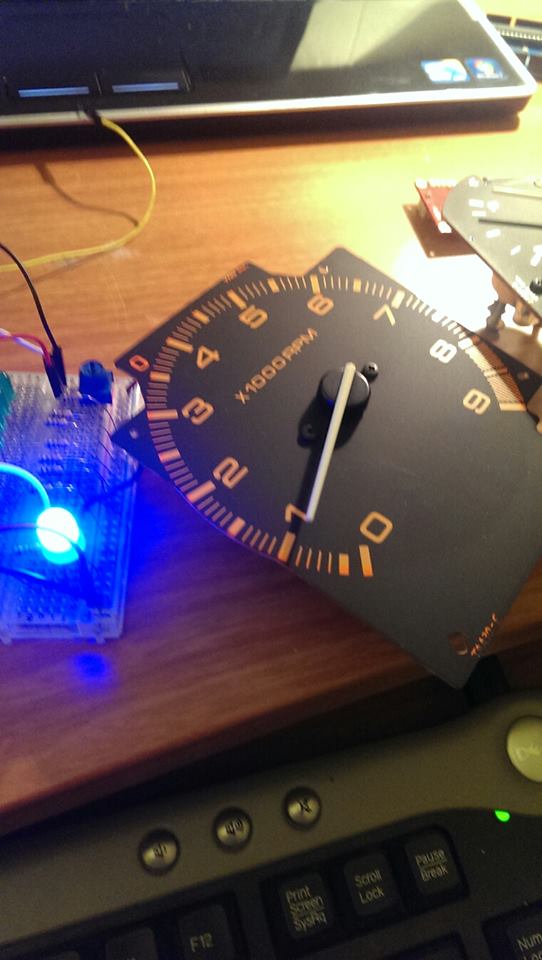
So the plan is to ditch the stock speedo and maybe all of the 4 smaller gauges with color screens and then control the tach with a microcontroller. It would all still be seen through the round holes in the original cluster cover, which i think will give it a very clean look.
I'm getting all the data from the megasquirt anyways, so i should be able to implement this with just a couple of wires (simple serial connection) to the megasquirt.
Speedo Cable will probably be ditched, I'm thinking about a hall effect sensor near the axle attachment bolts (e.g. counting pulses as the bolts rotate and pass by the sensor, which will be spinning at wheel RPM, giving me a ground speed).
I've got a power distribution module in the works as well to replace some faulty wiring in the headlights (I mean come on, it's 24 years old). It's been having a habit *only* the headlights running when switched on. (E.G. No interior lights, no tail lights other than when breaking) The window electrics have been kind of finicky as well, not to mention the wipers having a mind of their own.
More to come in the following months, including a turbo engine build (Taking an engines course for Mechanical Engineering minor, including rebuilding the motor as well as building a computer simulation to explore benefits of porting, boost, engine dynamics, etc...). Stay tuned!
Some nice 17's for whenever I can get some suspension to handle them:

Some tinkering to the gauge cluster:


So the plan is to ditch the stock speedo and maybe all of the 4 smaller gauges with color screens and then control the tach with a microcontroller. It would all still be seen through the round holes in the original cluster cover, which i think will give it a very clean look.
I'm getting all the data from the megasquirt anyways, so i should be able to implement this with just a couple of wires (simple serial connection) to the megasquirt.
Speedo Cable will probably be ditched, I'm thinking about a hall effect sensor near the axle attachment bolts (e.g. counting pulses as the bolts rotate and pass by the sensor, which will be spinning at wheel RPM, giving me a ground speed).
I've got a power distribution module in the works as well to replace some faulty wiring in the headlights (I mean come on, it's 24 years old). It's been having a habit *only* the headlights running when switched on. (E.G. No interior lights, no tail lights other than when breaking) The window electrics have been kind of finicky as well, not to mention the wipers having a mind of their own.
More to come in the following months, including a turbo engine build (Taking an engines course for Mechanical Engineering minor, including rebuilding the motor as well as building a computer simulation to explore benefits of porting, boost, engine dynamics, etc...). Stay tuned!
04-13-14, 11:25 AM
#60
Full Member
Thread Starter
So even though I'm 700 miles away from the car, I'm still getting some stuff done. I'm working on a dashboard interface that will communicate with the megasquirt, give me all the data I want (since my gauges are systematically crapping out on me).
I'm building a second for a friend which will help root bugs out quicker, might consider building more if people are interested.
But in the meantime, here's what I've got:
Should just need 2 wires to the megasquirt, but there's some other data the megasquirt doesn't get that i'll have to figure out on my own. Thinking wheelspeeds, might need to find some donor parts from an ABS car that has the trigger wheels on the hubs...
Option two is a little less clean (since i'd have to add non-oem parts, as opposed to the ABS wheels) and involves putting a hall effect sensor at the diff, counting the halfshaft bolts as they pass by. Every 4th pulse is another rotation, every rotation is certain distance (set by tire diameter*pi), and distance/time = speed. Easy peasy.

Thread
Thread Starter
Forum
Replies
Last Post
Jeff20B
1st Generation Specific (1979-1985)
73
09-16-18 07:16 PM