Naomi: Can't keep a good bitch down!
 06-17-12, 05:33 PM
#51
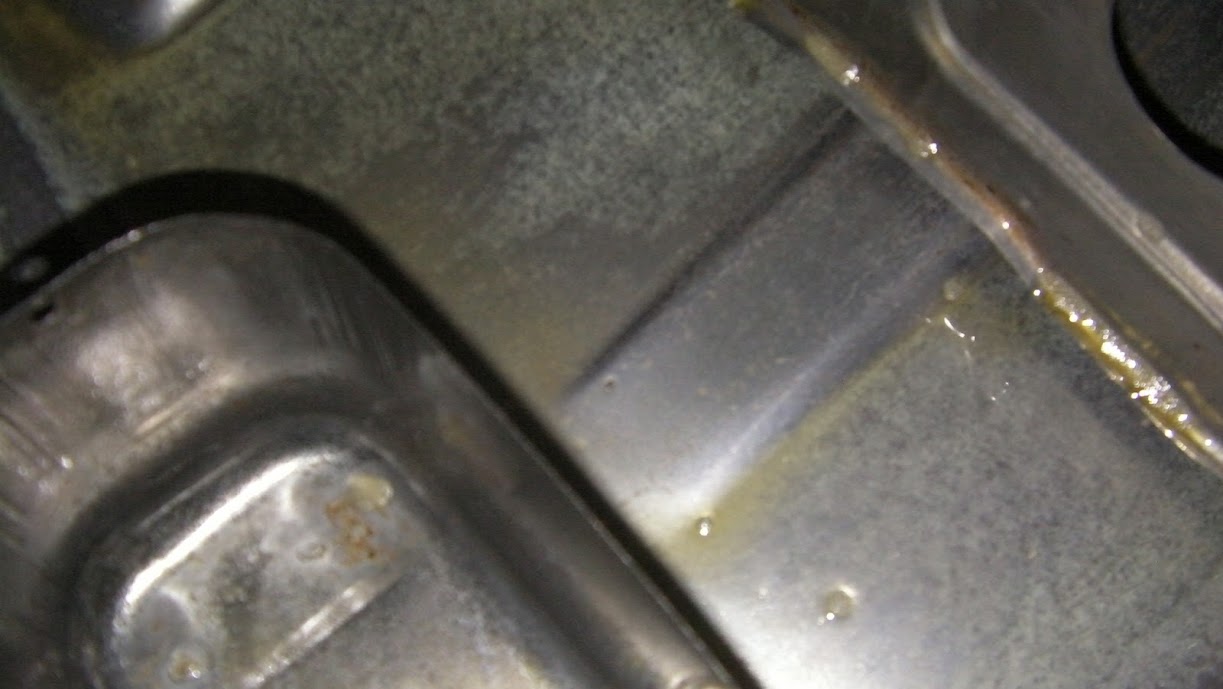
Remember back when I broke that OMP line removing the LIM? Well i eventually had to fix it and for cheap (as always). After searching for Turbo omp lines for a while and considering ording the supplies to build my own I found a great deal (free since I was ordering something else) from a forum member for some n/a lines. Unlike ss line which can bend the stock lines are molded, especially used ones. Fortunately these had a little give in them and I was able to make them work.

So, for the record N/A omp lines will work on a turbo block. The one caveat being that they don't go to the same injector location they would on the n/a block, but as long as injector has a line I'm happy.
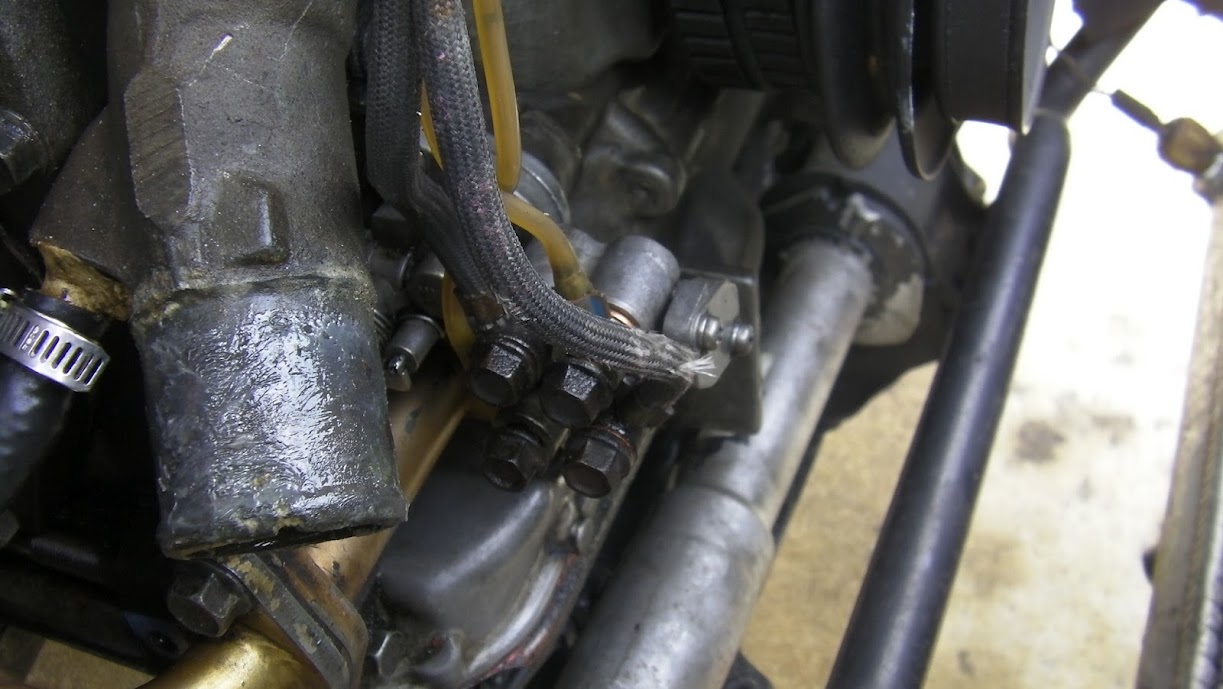

The lines were color coded (not sure if this is a factory application or something the PO did to assist with his installation ).
).

So, for the record N/A omp lines will work on a turbo block. The one caveat being that they don't go to the same injector location they would on the n/a block, but as long as injector has a line I'm happy.
The lines were color coded (not sure if this is a factory application or something the PO did to assist with his installation
).
Last edited by sharingan 19; 06-17-12 at 05:35 PM. Reason: add title
 06-20-12, 11:14 AM
#54
So, after freeing up both the intake and exhaust I was greeted with the pleasant surprise of crisp throttle response, more power, better acceleration, and a wonderful sound. I was also greeted with the unpleasant surprise of the stock ecu's 8.5 psi fuel cut 
It was fine while the weather was warm but when it started to cool down I would have to shift early to avoid hitting fuel cut, and when it actually got cold it was so bad that I couldn't even merge into traffic. So I babied her around for months saving for an ecu (I did not an still don't trust band aids like fuel cut defenders).
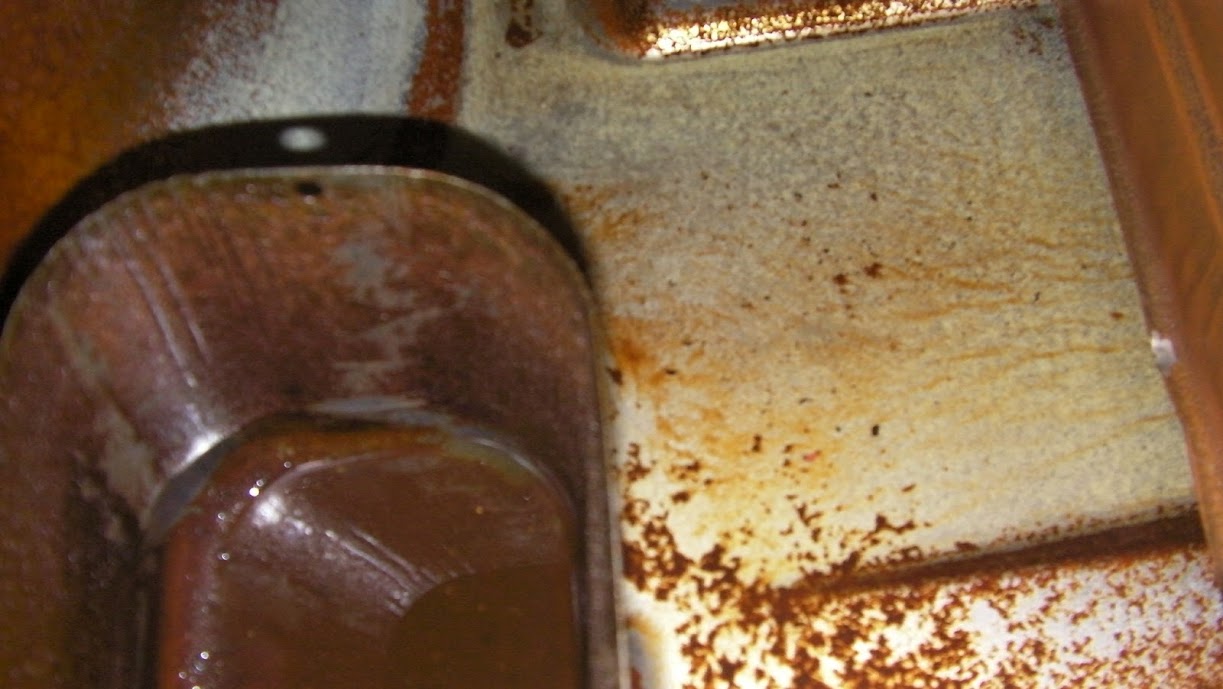
well, apparently secondary injectors don't like going unused for long periods of time so when the weather warmed up and I tried to boost I was getting all kinds of bucking, studdering and hesitation. I changed the fuel pump...no help. So next on the lest was the in-tank fuel pump sock, I cracked it open and discovered a fair amount of rust , varnish and sediment.
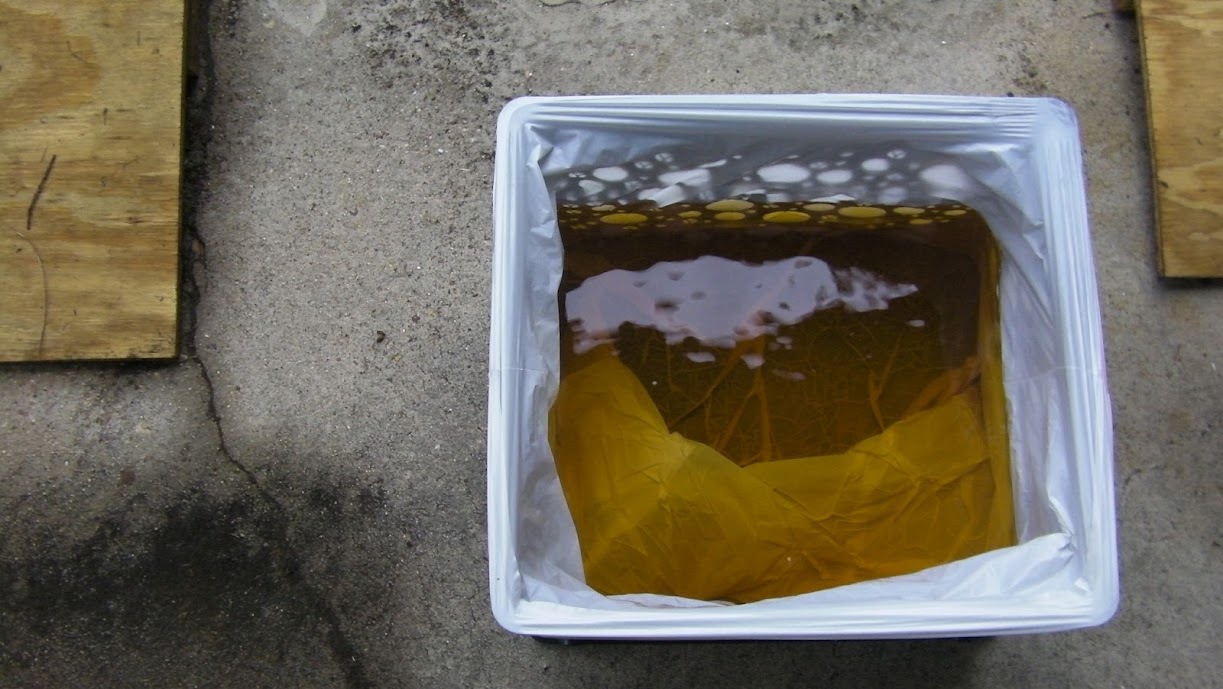
First step was to drain the gas. Make shift fuel can FTW!
Then the insides:
I wan't going to pay to have it cleaned, so I researched/tried various DIY methods:
There were some guys (apparently malnurished contortionists children) who reached in an scrubed their tanks...no real man can do this.
There was a redneck on youtube shaking his tank with small rocks and old gas inside....tried it, it does NOT work.
There were some VW guys putting acid in their tanks...as a general rule nothing VW guys do is a good idea, lol
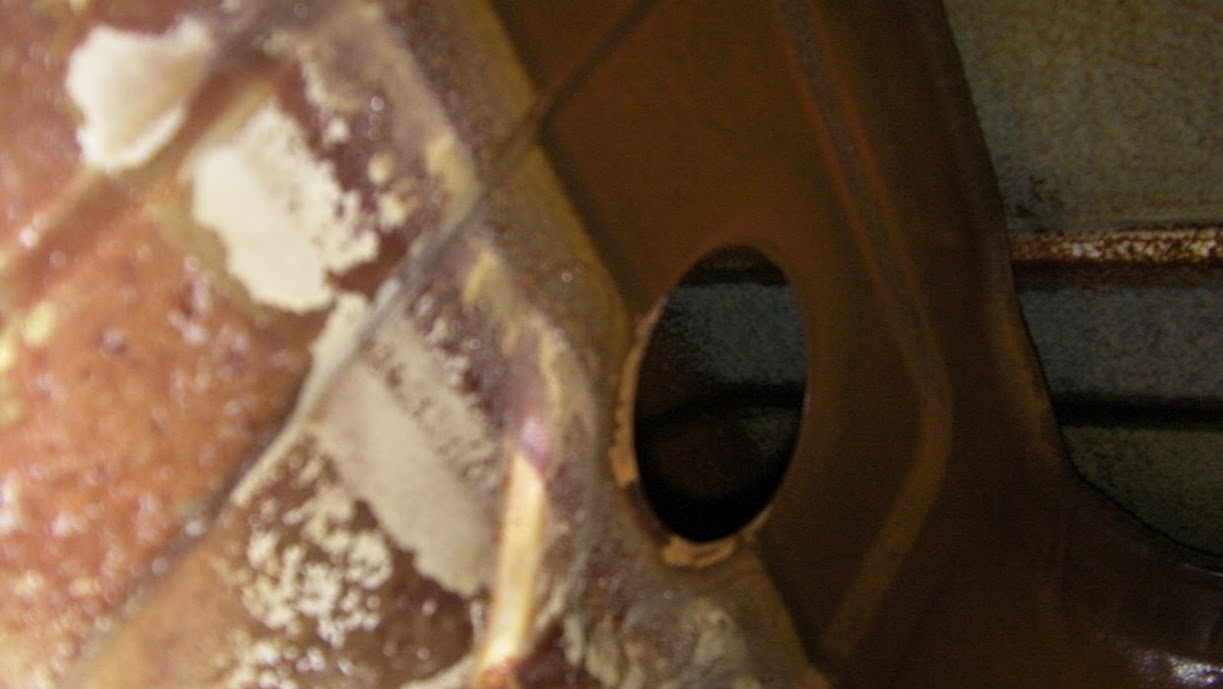
Finally I ran across a product called evapo-rust That made some pretty bold claims and has been used by motorcycle guys with good success.
All I can say is WOW! I picked up a gallon ( I would recommend 2) , poured it in and proceed to rotate the tank into a variety of positions over the next 3 days allow roughly 6-10 hours in each position.

It was fine while the weather was warm but when it started to cool down I would have to shift early to avoid hitting fuel cut, and when it actually got cold it was so bad that I couldn't even merge into traffic. So I babied her around for months saving for an ecu (I did not an still don't trust band aids like fuel cut defenders).
well, apparently secondary injectors don't like going unused for long periods of time so when the weather warmed up and I tried to boost I was getting all kinds of bucking, studdering and hesitation. I changed the fuel pump...no help. So next on the lest was the in-tank fuel pump sock, I cracked it open and discovered a fair amount of rust , varnish and sediment.
First step was to drain the gas. Make shift fuel can FTW!
Then the insides:
I wan't going to pay to have it cleaned, so I researched/tried various DIY methods:
There were some guys (apparently malnurished contortionists children) who reached in an scrubed their tanks...no real man can do this.
There was a redneck on youtube shaking his tank with small rocks and old gas inside....tried it, it does NOT work.
There were some VW guys putting acid in their tanks...as a general rule nothing VW guys do is a good idea, lol
Finally I ran across a product called evapo-rust That made some pretty bold claims and has been used by motorcycle guys with good success.
All I can say is WOW! I picked up a gallon ( I would recommend 2) , poured it in and proceed to rotate the tank into a variety of positions over the next 3 days allow roughly 6-10 hours in each position.
06-20-12, 01:00 PM
#57
In preparation from my future ecu upgrade I used this as an opportunity to revamp the entire fuel system:
I found a set of used 720's and sent them off with the stock 550's to be cleaned and flow tested at Injector Rehab.
Unfortunately during the process of removing the primary fuel rail one of the bolts snapped. I was in a rush so I tried to bolt down the other side tight enough to hold the rail.....DON'T do this. Fuel leaked like I had a bad PD. I then tried to use and easy out to remove the bolt....DON'T do this. It snapped and it took 3 rather expensive drill bits to eventually drill out the easy out and bolt .
- Areomotive A1000 fpr with fluid filled gauge
- -6 lines/fittings
- Converted the fuel system to parallel flow
- New fuel filter
- New fuel pump outlet hose
- Flushed the hard lines
Unfortunately during the process of removing the primary fuel rail one of the bolts snapped. I was in a rush so I tried to bolt down the other side tight enough to hold the rail.....DON'T do this. Fuel leaked like I had a bad PD. I then tried to use and easy out to remove the bolt....DON'T do this. It snapped and it took 3 rather expensive drill bits to eventually drill out the easy out and bolt .
06-20-12, 01:42 PM
#58
Intercooler Brainstorming...
Also in preparation for my ecu (and eventually a turbo) upgrade, I decided to do something about that restrictive heatsoak-prone top mount. As with everything else, I set out to do this in a cost effective manner, so I gathered some supplies:


The next thought was doing a middle mount setup, positioning the IC above the oil cooler but still in front of the rad. The piping would be shorter and thus easier to route and less laggy. However the core was too large for that and I would have no place for the a/c condenser.

Finally I placed in in a VMIC configuration....like it was meant to be. Shortest possible piping, easiest routing, plenty of space for the condenser, and it looked like the pieces I had would be enough to get the job done. The problem with the v mount is that cutting and welding of the IC core became a requirement as well as fashioning mounts for the rad (at least)

Decisions decisions....
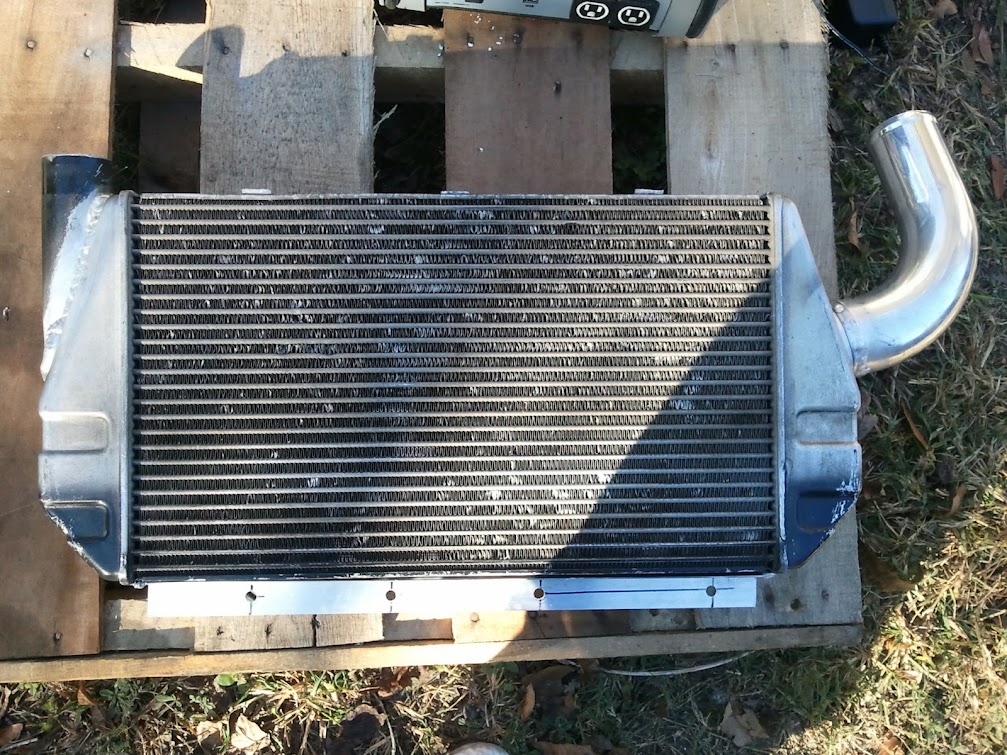
- Evo 9 IC $50
- Various 80's-90's Volvo IC pipes and clamps $30
The next thought was doing a middle mount setup, positioning the IC above the oil cooler but still in front of the rad. The piping would be shorter and thus easier to route and less laggy. However the core was too large for that and I would have no place for the a/c condenser.
Finally I placed in in a VMIC configuration....like it was meant to be. Shortest possible piping, easiest routing, plenty of space for the condenser, and it looked like the pieces I had would be enough to get the job done. The problem with the v mount is that cutting and welding of the IC core became a requirement as well as fashioning mounts for the rad (at least)
Decisions decisions....
Last edited by sharingan 19; 06-20-12 at 01:46 PM. Reason: add pic
06-20-12, 02:11 PM
#59
Interior Revamp!
While trying to figure out The IC situation I decided to handle something a little more straight forward. As part of the "No 10ae left behind act" I vowed to use ever part that I could from the one I found in the yard, that included the interior.
Stripping out the old interior

The Red sun roof you see here is a replacement for the original which was rusted through near the drain. This water ran down the A-pillar and pooled in the floor...or more accurately absorbed into the spongy material under the carpet, which made removal a bit of a mess.

Progress! I thought for a split second about grabbing some dry ice to tear out the sound deadening, but i was pressed for time and came to the conclusion that in a daily, the minor reduction in weight isn't worth the hassle.

The old carpet next to the new one

Installed

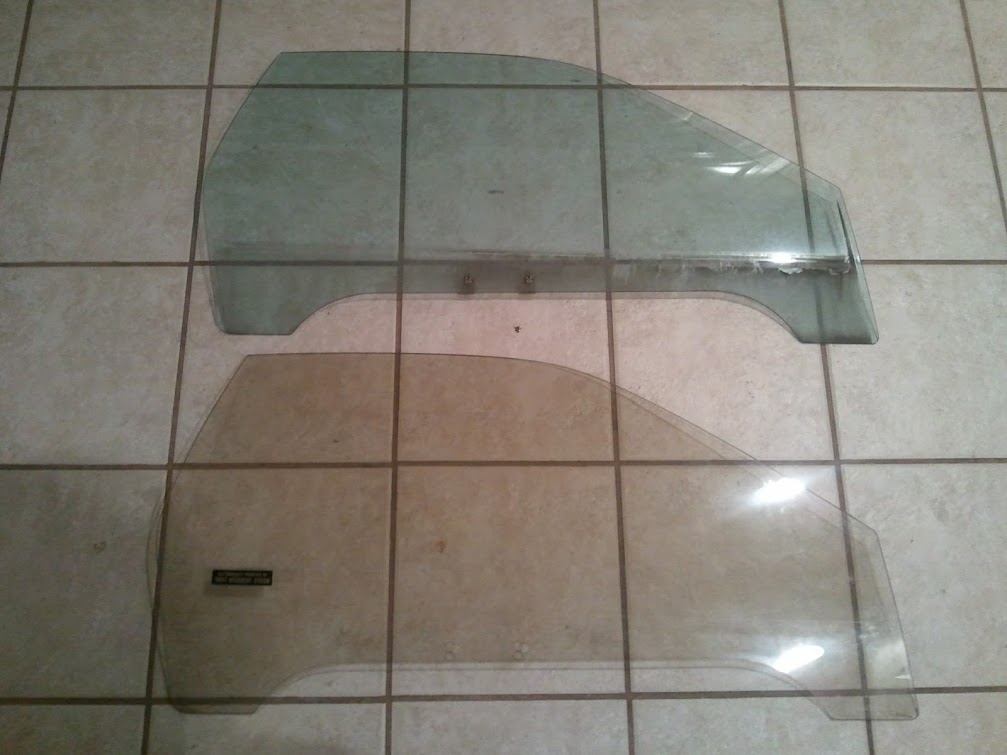
As mentioned previously the 10ae (and Infini) had bronze tinted glass. One more item saved from an ignominious death at the junk yard
Installed with new door panels on the right, old ones on the left

Stripping out the old interior
The Red sun roof you see here is a replacement for the original which was rusted through near the drain. This water ran down the A-pillar and pooled in the floor...or more accurately absorbed into the spongy material under the carpet, which made removal a bit of a mess.
Progress! I thought for a split second about grabbing some dry ice to tear out the sound deadening, but i was pressed for time and came to the conclusion that in a daily, the minor reduction in weight isn't worth the hassle.
The old carpet next to the new one
Installed
As mentioned previously the 10ae (and Infini) had bronze tinted glass. One more item saved from an ignominious death at the junk yard
Installed with new door panels on the right, old ones on the left
06-21-12, 05:39 PM
#62
Battery Relocation and Interior LED's
So I made up my mind, V-mount for sure! In order to make more room for the necessary fabrication (and clean up the clutter in the engine bay....and improve weight balance) I decided to relocate the batter to the passenger storage bin. I also scooped up a pre-87 coolant reservoir which is located on the drive strut tower instead of right in front of the radiator.

Leveling the mounding brackets for the battery box

150amp breaker...check.
2 gauge welding cable...check

Platinum Power!

Since I had the interior largely disassembled and I was playing with electricity I figured I'd go ahead and replace the tired old and hot incandescent bulbs with LEDs
Map lights are 30* cone single "amber" LED's from SuperbrightLEDs.com They aren't the brightest but them provide enough light to read....a map. If anyone these days is still competent enough to use one /rant. But they are dim enough to keep on without them being distracting kinda like an "attack mode" of sorts

Decided to touch up the sunroof switch since I had it removed. Not sure why mazda made these white in the first place?

Dome light is a 4-LED wide cone unit that slips right into the factory fuse-style socket. Yes, its as bright as it looks

Leveling the mounding brackets for the battery box
150amp breaker...check.
2 gauge welding cable...check
Platinum Power!
Since I had the interior largely disassembled and I was playing with electricity I figured I'd go ahead and replace the tired old and hot incandescent bulbs with LEDs
Map lights are 30* cone single "amber" LED's from SuperbrightLEDs.com They aren't the brightest but them provide enough light to read....a map. If anyone these days is still competent enough to use one /rant. But they are dim enough to keep on without them being distracting kinda like an "attack mode" of sorts
Decided to touch up the sunroof switch since I had it removed. Not sure why mazda made these white in the first place?
Dome light is a 4-LED wide cone unit that slips right into the factory fuse-style socket. Yes, its as bright as it looks
06-25-12, 09:11 PM
#63
V-mount Fab: Part 1
Finally got around to getting the V-mount fabbed up, no easy task as this is my daily, but when there's a will, there's a way. While I had the basic concept and most of the parts necessary, the devil is in the details and I did not possess the welding skill to make it happen. So I enlisted the help of a fellow forum member, and this was the mock up.


More details on the K-Tec V-mount setup can be found here: https://www.rx7club.com/2nd-generation-non-technical-pictures-198/want-v-mount-dont-want-give-up-anything-%5E-ktec-%5E-933572/
More details on the K-Tec V-mount setup can be found here: https://www.rx7club.com/2nd-generation-non-technical-pictures-198/want-v-mount-dont-want-give-up-anything-%5E-ktec-%5E-933572/
06-25-12, 10:29 PM
#64
V-mount Fab: Part 2
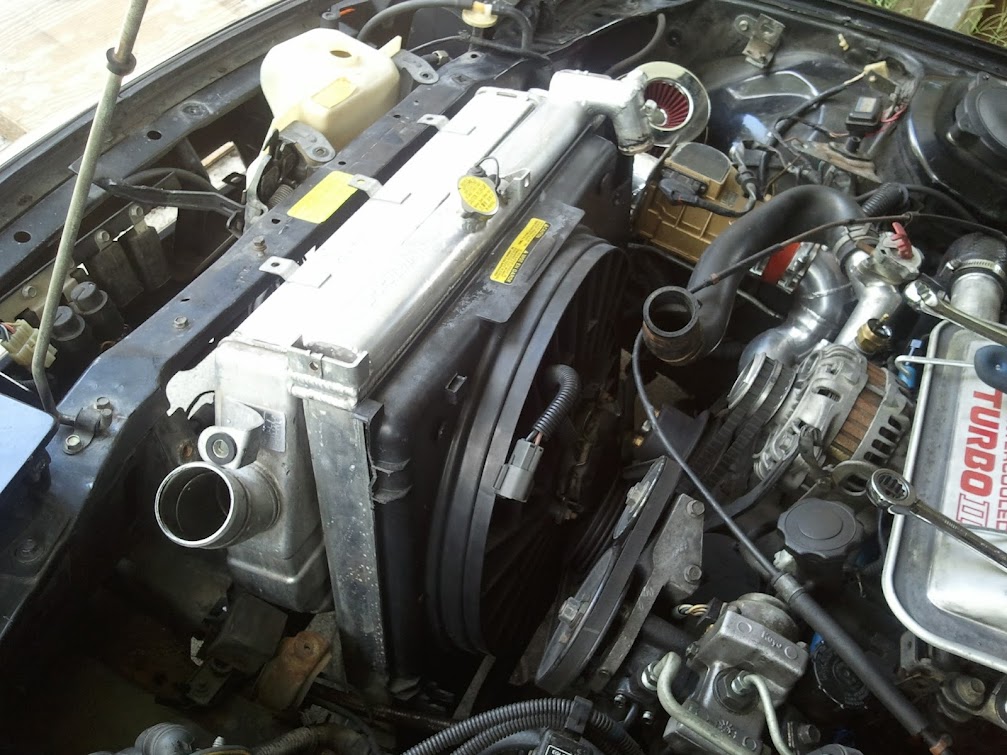
Once the mount locations were finalized and the pipe routing was worked out the project started really coming together. The fans were placed on top of the a/c condenser because it was believed there wasn't enough room to fit them between the cross bar and the top tank of the rad

IC uses a 2" inlet because that is the outlet size of the stock (as well as hybrid) turbos. and the outlet is 2.5"
Going to have to work on clearing out this area. Removing the stock coolant overflow was a big help, but there is still plenty of obstruction left. Testing would reveal how much a problem it really is
06-25-12, 10:39 PM
#66
V-mount Fab: Part 3
A seemingly minor, yet important change to the setup, I swapped the fans from pushers (inefficient) to pullers (more efficient) and moved them between the cross bar and top tank of the rad. They BARELY fit, but them fit.


In an effort to provide additional cooling I also made some bumper vents. These are the V1 prototypes and while not exactly stylish they do keep temps in check on the highway

In an effort to provide additional cooling I also made some bumper vents. These are the V1 prototypes and while not exactly stylish they do keep temps in check on the highway
06-25-12, 10:50 PM
#67
- I ran a switched (+) from the green plug by the driver shock tower to power the relay.
- I ran a constant (+) directly from the battery lug (fused of course) to the fan motors.
- I ran the ground (-) from the base of the hood latch support to the relay. This was the switched connection to the fans that caused them to turn on.
- I ran a switch inside the car to a ground to turn the relay on/off.
I wired then fan and relay to operate using a switched ground (instead of switched power). So the fans always had power, but when the relay was activated they also had a ground. I did this to minimize the length of "hot" wire I had to run as well as reduce strain on the relay.
I later employed a temp switch mounted in the thermostat housing instead of the manually operated switch.
 06-28-12, 10:08 PM
#69
Through a relay (the only smart way, lol). Actually in that pic directly above your post you can see the relay I used. It came from a the mercury villager I got my efan from, it was damned effective, but I had to ditch it because of the space constraints of the v-mount.
I wired then fan and relay to operate using a switched ground (instead of switched power). So the fans always had power, but when the relay was activated they also had a ground. I did this to minimize the length of "hot" wire I had to run as well as reduce strain on the relay.
I later employed a temp switch mounted in the thermostat housing instead of the manually operated switch.
- I ran a switched (+) from the green plug by the driver shock tower to power the relay.
- I ran a constant (+) directly from the battery lug (fused of course) to the fan motors.
- I ran the ground (-) from the base of the hood latch support to the relay. This was the switched connection to the fans that caused them to turn on.
- I ran a switch inside the car to a ground to turn the relay on/off.
I wired then fan and relay to operate using a switched ground (instead of switched power). So the fans always had power, but when the relay was activated they also had a ground. I did this to minimize the length of "hot" wire I had to run as well as reduce strain on the relay.
I later employed a temp switch mounted in the thermostat housing instead of the manually operated switch.
would this essentially have the same results as yours?
http://www.summitracing.com/parts/HD...-7&prefilter=1
06-29-12, 10:22 AM
#71
Thanks bro
would this essentially have the same results as yours?
http://www.summitracing.com/parts/HD...-7&prefilter=1
would this essentially have the same results as yours?
http://www.summitracing.com/parts/HD...-7&prefilter=1
Word of warning though, those Hayden controllers are pretty fragile, make sure you mount it in an area far away from heat and protected from all moisture.
They are almost worth more than the car
but its worth it, they are the perfect compromise of comfort and support...and the fact that they look badass doesn't hurt.


 06-29-12, 12:04 PM
#74
Even the the "Shiruken Seats" are "stock" they didn't just bolt to the stock rails completely without incident. 3 of the 4 mounting points were fine, but there was one that just refused to cooperate.

Nothing a little ball bearing action can't fix.....
A little vacuum before final install

Nothing a little ball bearing action can't fix.....
A little vacuum before final install
