Don't Be a Menace to South Central While Drinking Your Juice in the Hood
 02-19-20, 08:08 AM
#1
Starting a build thread to post all of my rx7 exploits. Let's take it back to 2011.


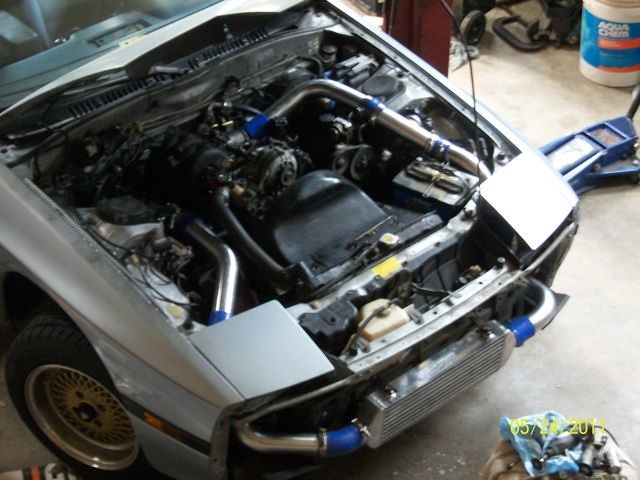
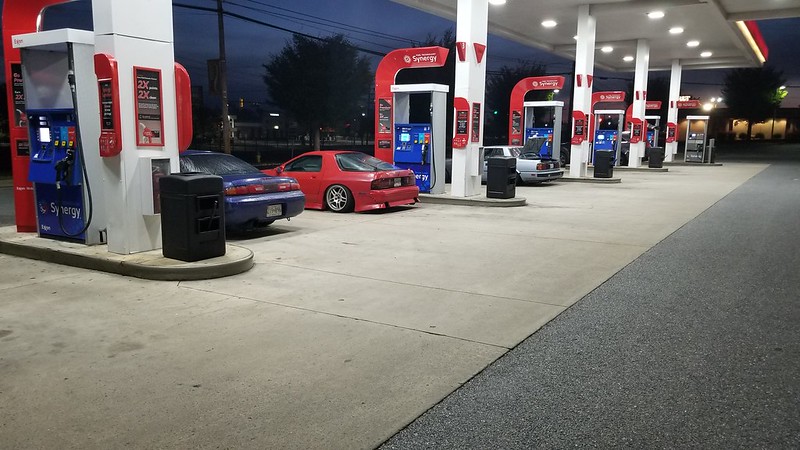
Here it is, in all its 80s nostalgia glory. Complete with enkei 92s, bubble tires, and an NA-t build performed in my moms garage while I worked at dominos delivering pizza. I sold this car when I got a new job so I could buy an is300, always regret getting rid of it.
Unfortunately these are the only pics I have of this car thanks to imageshack throwing away all my pictures.
 02-19-20, 08:28 AM
#2
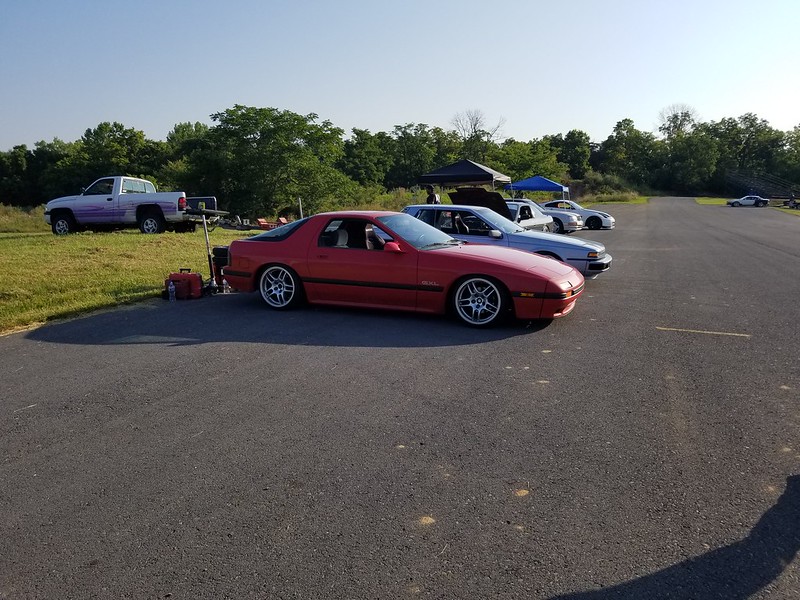
Fast forward to 2017...
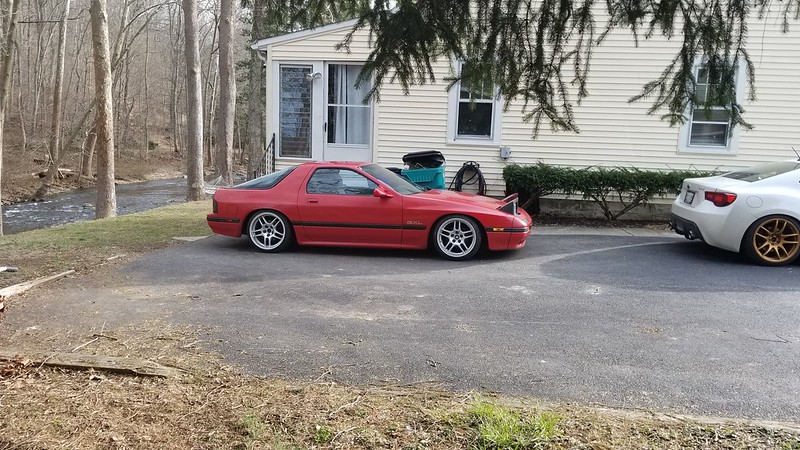
A 1987 gxl shell pops up on craigslist, and it's red. I was super broke at the time, but my friends were nice enough to put $300 together for me to go pick it up. Car was in really good shape other than missing a bunch of parts. Previous owner had kept it in an aircraft hanger for five or so years, so no rust at all.
(10/21/2017)

My house doesn't have a garage, so I stuck it in the basement for the time being.

(12/9/2017)
I found an s4 NA engine on craigslist for I think around $600 so I went and loaded it up in the back of my 4runner to bring home. Guy pulled it so he could put his dad's mustang moter in his car or somthing after he spray painted it matte black and put hoonagan stickers all over it, so I figured it was going to a better home.

Yes, my ceiling is very low.


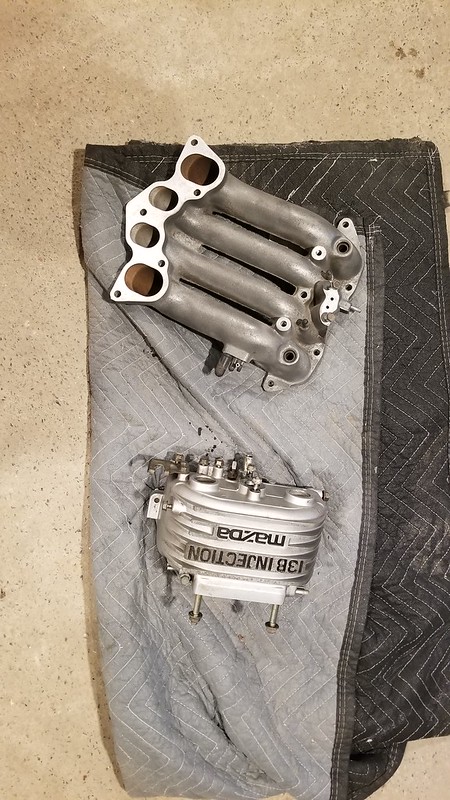
I didn't take a bunch of pics of the accessorys, but they all had to be removed and cleaned up due to the PO of this engine taking a spray can to the entire thing. But here is one of the UIM cleaned up.
A 1987 gxl shell pops up on craigslist, and it's red. I was super broke at the time, but my friends were nice enough to put $300 together for me to go pick it up. Car was in really good shape other than missing a bunch of parts. Previous owner had kept it in an aircraft hanger for five or so years, so no rust at all.
(10/21/2017)
My house doesn't have a garage, so I stuck it in the basement for the time being.
(12/9/2017)
I found an s4 NA engine on craigslist for I think around $600 so I went and loaded it up in the back of my 4runner to bring home. Guy pulled it so he could put his dad's mustang moter in his car or somthing after he spray painted it matte black and put hoonagan stickers all over it, so I figured it was going to a better home.
Yes, my ceiling is very low.
I didn't take a bunch of pics of the accessorys, but they all had to be removed and cleaned up due to the PO of this engine taking a spray can to the entire thing. But here is one of the UIM cleaned up.
Last edited by F1ashpoinT; 02-19-20 at 08:32 AM.
02-19-20, 09:07 AM
#3
(12/28/2017)
Most of the emissions equipment was either missing on broken, so block off plates were installed.
(12/30/2018)
Engine bay close to being buttoned up.

(1/28/2018)
My car still wasn't running so I decided to pick up some coilovers for it. Re-amemiya coilovers I found on ebay for $300.

(2/11/2018)
Cooling system was the last thing that needed addressed before the car could run, so I picked up an all aluminum radiator. Couldn't find OEM radiator brackets for anywhere close to a reasonable price, so I welded up my own.

The PO of this car was super dumb and ruined the copper heater core lines pulling out the engine. So I made a loop for it out of some 1/2" copper pipe. No, it isn't still like this.

(3/10/2018)
Car finally moved under it's own power.

(3/23/2018)
Since the car was running, I needed to buy tires so I could actually drive it. I wanted to get some r33 wheels, but you need spacers to fit the front of an FC. So instead I opted for square g33 wheels since the offset is a little better anywho.

Most of the emissions equipment was either missing on broken, so block off plates were installed.
(12/30/2018)
Engine bay close to being buttoned up.
(1/28/2018)
My car still wasn't running so I decided to pick up some coilovers for it. Re-amemiya coilovers I found on ebay for $300.
(2/11/2018)
Cooling system was the last thing that needed addressed before the car could run, so I picked up an all aluminum radiator. Couldn't find OEM radiator brackets for anywhere close to a reasonable price, so I welded up my own.
The PO of this car was super dumb and ruined the copper heater core lines pulling out the engine. So I made a loop for it out of some 1/2" copper pipe. No, it isn't still like this.
(3/10/2018)
Car finally moved under it's own power.
(3/23/2018)
Since the car was running, I needed to buy tires so I could actually drive it. I wanted to get some r33 wheels, but you need spacers to fit the front of an FC. So instead I opted for square g33 wheels since the offset is a little better anywho.
02-19-20, 09:19 AM
#4
(4/1/2018)
Finally got the car out of my basement and got tags on it.

(5/7/2018)
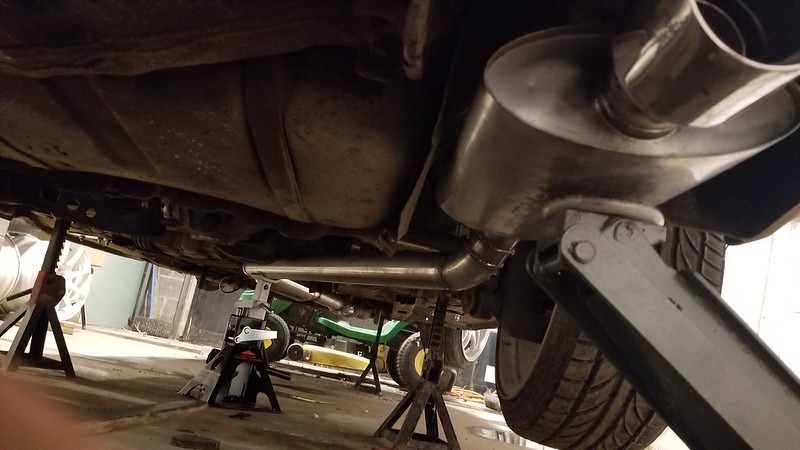
One of my mufflers was broken off and the rest of the exhaust was full of holes so I needed to replace it. Fortunately I found this sweet homemade ogdon pipe on craigslist for FREE. Not exactly the exhaust I wanted, but atleast it sealed.

(5/11/2018)
The rear alignment was trash on my car so I opted for some PBM parts to fix the issue.


Finally got the car out of my basement and got tags on it.
(5/7/2018)
One of my mufflers was broken off and the rest of the exhaust was full of holes so I needed to replace it. Fortunately I found this sweet homemade ogdon pipe on craigslist for FREE. Not exactly the exhaust I wanted, but atleast it sealed.
(5/11/2018)
The rear alignment was trash on my car so I opted for some PBM parts to fix the issue.
02-19-20, 09:55 AM
#5
(6/9/2018)
I really wanted to skid my car and look cool for the internet so I bought a shitty Taiwanese bride replica seat.

Went with a nagisa auto seat slider to get the seat as low as possible.


(6/13/2018)
Got some mustake wheels for spares off craigslist.

They fit okay

(7/1/2018)
First drift event prep and dtss eliminator install.


(7/14/2018)
My first drift nirvana event. Car survived.


I really wanted to skid my car and look cool for the internet so I bought a shitty Taiwanese bride replica seat.
Went with a nagisa auto seat slider to get the seat as low as possible.
(6/13/2018)
Got some mustake wheels for spares off craigslist.
They fit okay
(7/1/2018)
First drift event prep and dtss eliminator install.
(7/14/2018)
My first drift nirvana event. Car survived.


Trending Topics
02-19-20, 10:20 AM
#8
I had a bunch of electrical gremlins, so over winter break I repaired and rewrapped my wiring harness. Also built an exhaust to replace mine (the muffler split open like a tin can) and installed an autopower roll cage. The exhaust is 2.5in stainless with a vibrant resonator back to a borla muffler with some random tip off amazon.


At some point, I installed a racing beat header, poly engine mounts, and new injectors too.


At some point, I installed a racing beat header, poly engine mounts, and new injectors too.
02-19-20, 10:34 AM
#9
(3/16/2019)
Found another rx7 shell for sale in my price range so I picked it up. This one is in a lot tougher shape, but should be fun. I think I'll let it sit in my basement for the better part of a year.

 [/url]
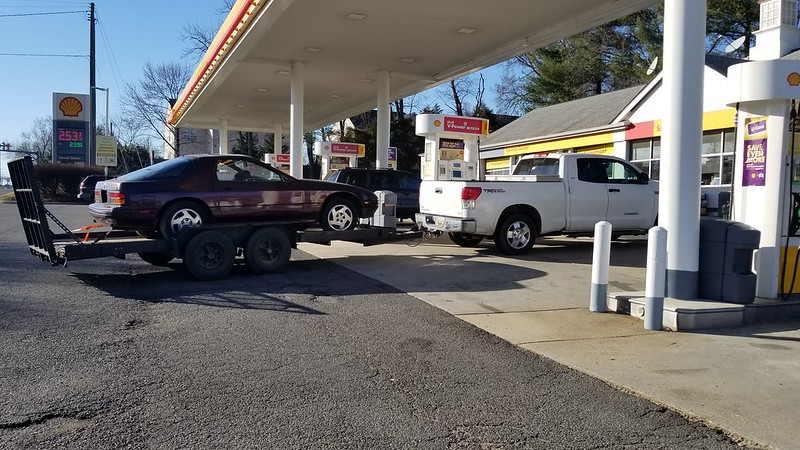
This is what taking your rx7 to the track looks like.

(5/15/2019)
Did a little refresh on the front end of my car. PBM tie rod spacers, new ball joints, boots, and poly bushings for the control arms.

Even just a lil more angle is awesome on fcs

I can fit two rx7s in my basement

Found another rx7 shell for sale in my price range so I picked it up. This one is in a lot tougher shape, but should be fun. I think I'll let it sit in my basement for the better part of a year.
[/url]This is what taking your rx7 to the track looks like.
(5/15/2019)
Did a little refresh on the front end of my car. PBM tie rod spacers, new ball joints, boots, and poly bushings for the control arms.
Even just a lil more angle is awesome on fcs
I can fit two rx7s in my basement
02-19-20, 10:48 AM
#10
Picked up another engine/trans for the purple car from some hillybilly that took it out to put in a v8. Luckilly he had a dellorto carburetor on it that I was able to sell for me than I paid for the engine. Not sure the condition of the engine yet. It has compression, but he claims it was ported so I'm skeptical about the job that was done.

(7/14/2019]

(7/26/2019)
I bought probabally the crappiest replica kit that money can buy on ebay and spray painted it outside.


(8/10/2019)

(8/27/2019)
Installed an LRB undertray on my car, this thing looks sweet and really helps out with underhood temps.

(7/14/2019]
(7/26/2019)
I bought probabally the crappiest replica kit that money can buy on ebay and spray painted it outside.
(8/10/2019)
(8/27/2019)
Installed an LRB undertray on my car, this thing looks sweet and really helps out with underhood temps.
02-19-20, 10:54 AM
#11

I broke most of this kit immediately.


Picked up a parts car because it had some bits on it worth more than the car.

Mainly just wanted the stock s5 rear bumper for my car.

That pretty much wraps up 2019 as far as the red car is concerned.
Last edited by F1ashpoinT; 02-19-20 at 10:59 AM.
02-19-20, 11:22 AM
#12
(10/29/2019)
Finally started working on the purple car and tore everything off the front end. Including the suspension.

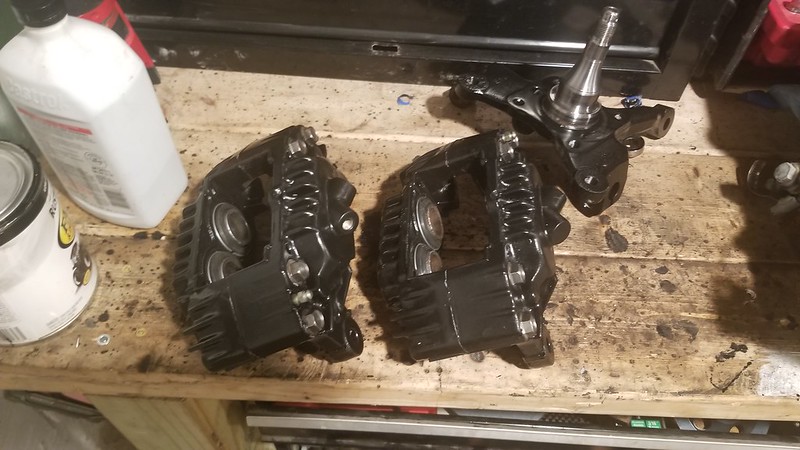
Tore the hubs down to rebuild.

Rebuilt and painted the calipers

Took all the suspension components that I'm keeping to work and sandblasted them.

And painted

I wanted to go will all mazda competition rubber bushings, but I couldn't justify the cost when the energy suspension poly bushing kit was so cheap.

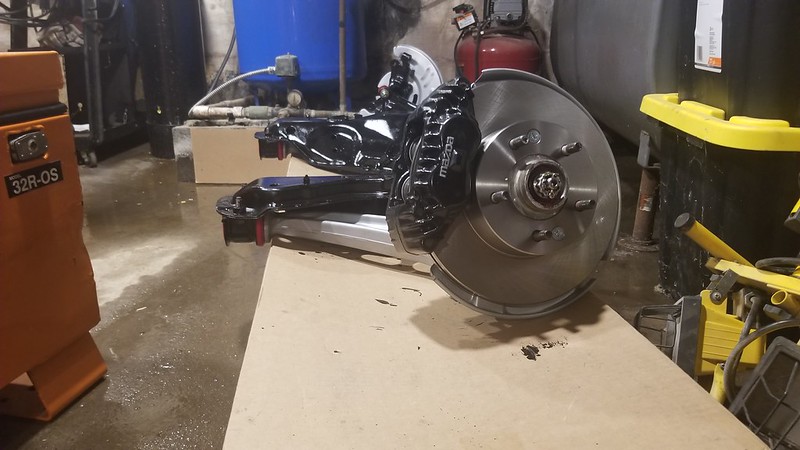
Rebuilt subframe assembly
I spent way too much time getting the engine bay prepped for paint.

Finally started working on the purple car and tore everything off the front end. Including the suspension.
Tore the hubs down to rebuild.
Rebuilt and painted the calipers
Took all the suspension components that I'm keeping to work and sandblasted them.
And painted
I wanted to go will all mazda competition rubber bushings, but I couldn't justify the cost when the energy suspension poly bushing kit was so cheap.
Rebuilt subframe assembly
I spent way too much time getting the engine bay prepped for paint.
02-19-20, 11:31 AM
#13
Unfortunately the battery must have leaked in this car and it ate a good section of the frame.

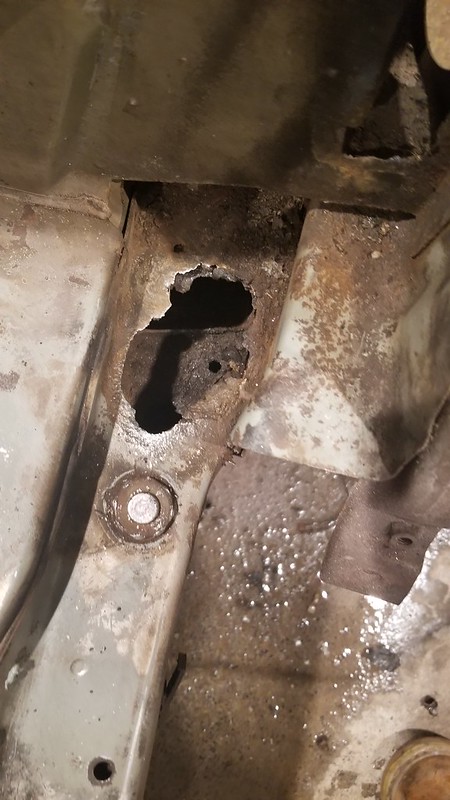
I did my best to cut out all the rust and make a patch panel for the area. I cut the metal out on a table top bandsaw, and bent it with a hammer, so all things considered it doesn't look that bad.

Patch welded in
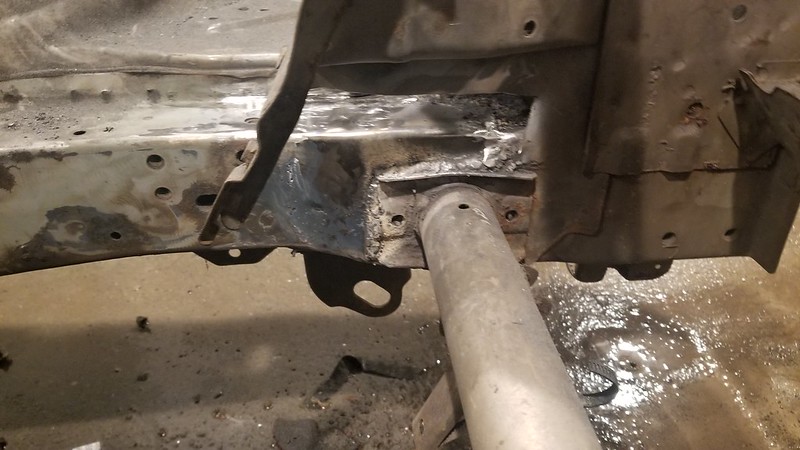

Good enough for somthing that is going to be hidden under the battery.

I did my best to cut out all the rust and make a patch panel for the area. I cut the metal out on a table top bandsaw, and bent it with a hammer, so all things considered it doesn't look that bad.
Patch welded in
Good enough for somthing that is going to be hidden under the battery.
02-19-20, 11:38 AM
#14
Painted the engine bay with por15. In typical me painting something fashion, I managed to botch it. I had to open up the basement doors because the fumes were too strong in my house. Unfortunately this led to the por15 drying improperly because of the temperature. So the engine bay came out with a bunch of textured areas. I did my best to fix the worst of it, but after 15+ hours of prep in this engine bay I'm not re-doing it. It's one color now, and after all, this is not a show car.


Subframe is reinstalled as well.

Subframe is reinstalled as well.


 02-22-20, 01:37 PM
#16
'My hood latch was super rusty and wouldn't open unless you had someone pulling the release while another person pulled the safety catch so I decided to rebuild it. I didn't take any pics of it before, but I'm sure most of you know what a rusty hood latch looks like. I drilled out all the factory "rivet" like hardware, pulled everything apart, and sandblasted everything. Here's what I was left with:

Removing the factory hardware left me with a few issues. The rivet actually acted as a spacer for the actuator arms. So without the rivet, the latch would have way to much play in it to lock the hood down. In order to remedy the situation, I turned down some nylon spacers on the lathe at work. The OD is just a hair smaller than the hole, the ID a hair larger than the 5mm hardware that will be used for reassembly, and the length slightly larger than the width of the metal it was going in to. This actually provides tighter tolerances than the OEM hardware.


Here's the back of the latch after reassembly.


Another issue was the center stud that holds the safety catch handle in. Unfortunately it was also press in. after drilling it out you are left with a hexagonal hole in the latch body. An m6 bolt was ground down to fit under the metal parts on the inside, in order to hold it from spinning (and keep it centered) an m5 nut was ground down and welded to the bolt. Rather than turning out another spacer on the lathe, the oem spacer had the stud cut off and was drilled out to fit the through bolt.

Fits well
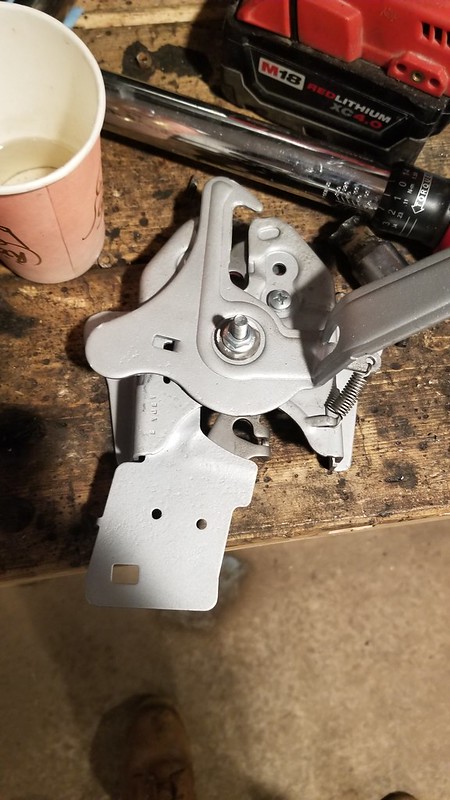
Assembled and reinstalled

Removing the factory hardware left me with a few issues. The rivet actually acted as a spacer for the actuator arms. So without the rivet, the latch would have way to much play in it to lock the hood down. In order to remedy the situation, I turned down some nylon spacers on the lathe at work. The OD is just a hair smaller than the hole, the ID a hair larger than the 5mm hardware that will be used for reassembly, and the length slightly larger than the width of the metal it was going in to. This actually provides tighter tolerances than the OEM hardware.
Here's the back of the latch after reassembly.
Another issue was the center stud that holds the safety catch handle in. Unfortunately it was also press in. after drilling it out you are left with a hexagonal hole in the latch body. An m6 bolt was ground down to fit under the metal parts on the inside, in order to hold it from spinning (and keep it centered) an m5 nut was ground down and welded to the bolt. Rather than turning out another spacer on the lathe, the oem spacer had the stud cut off and was drilled out to fit the through bolt.
Fits well
Assembled and reinstalled
 02-25-20, 11:13 AM
#18
With the front being back down on its wheels for the first time in months, I decided to throw a set of spares on the back to get the car off the furniture dollies that were holding it. Then the furnature dollies were swapped with wheel dollies.

I couldn't have the front wheels flopping around since it now had dollies under the wheels, so the steering rack was reinstalled. New boots, tie rods, rack mounts, and ends.

Brake booster was painted and reinstalled, along with a fresh master cylinder.
I finally got around to painting my hood hinges, so I was able to actually get the fenders and hood bolted on. The hood that was on the car was in crap condition so I threw the red one on since I bought a t2 hood for the other car anyway.


Next up is brake lines, chassis wiring harness, headlights, and bumper. I might also throw the rear coilovers on even though I still need to pull out all the rear suspension to refinish.
I couldn't have the front wheels flopping around since it now had dollies under the wheels, so the steering rack was reinstalled. New boots, tie rods, rack mounts, and ends.
Brake booster was painted and reinstalled, along with a fresh master cylinder.
I finally got around to painting my hood hinges, so I was able to actually get the fenders and hood bolted on. The hood that was on the car was in crap condition so I threw the red one on since I bought a t2 hood for the other car anyway.
Next up is brake lines, chassis wiring harness, headlights, and bumper. I might also throw the rear coilovers on even though I still need to pull out all the rear suspension to refinish.
Last edited by F1ashpoinT; 02-25-20 at 11:21 AM.
03-05-20, 10:20 AM
#19
I have this spare 13b sitting around. No idea what condition it's in other than it has compression... so I decided to whip up somthing to pressure test the coolant seals. I'm well aware you can just buy a tool that does the same thing, but this only cost around 6 bucks to build. The plate is made out of a nylon block, may remake it in aluminum, but I had the nylon laying around. Plus its easier to cut on my tiny bandsaw.

Need to pick up some RTV to actually test it, but it should work.
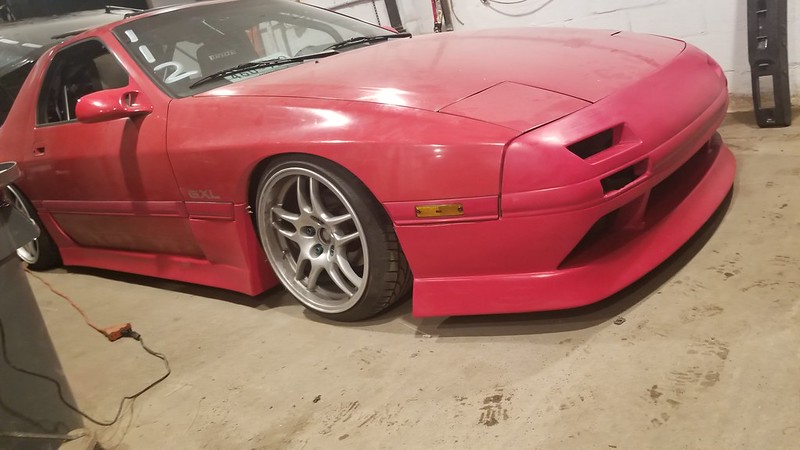
Shine front lip showed up for the red car. Paint is ordered, so hopefully I can mount this stuff somtime soon.

First drift nirvana event of the season is coming up, so getting the red car ready now. Swapped a couple tires onto my wheels so I have a full set for the first time in a while.

Need to pick up some RTV to actually test it, but it should work.
Shine front lip showed up for the red car. Paint is ordered, so hopefully I can mount this stuff somtime soon.
First drift nirvana event of the season is coming up, so getting the red car ready now. Swapped a couple tires onto my wheels so I have a full set for the first time in a while.
03-16-20, 08:03 AM
#20
Little update, I've been working on the shop lately and haven't been able to mess with the car much.
Shop got two new workbenches to accommodate for all the equipment I didn't have space for. Went from 6ft of workbench to having 16 ft.

Red car got an oem spoiler I had lying around. All the mounts were broken off of it, so I just fiberglassed the legs solid and double sided taped it to the car. I'll be taking it off to paint since it's pretty chipped up, but I like how it looks.

The purple car had a bunch of broken hard line clips from the PO removing stuff from the car so I decided to try and recreate them with a block of nylon. They came out pretty well considering I made them using a tabletop band saw and drill press.
Here's part of the drawing I made.

And the somewhat finished product.

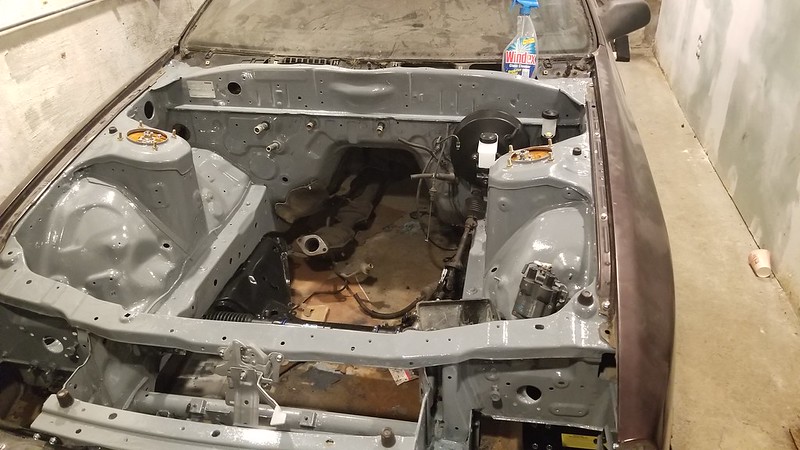
Here's currently how the engine bay sits. You can see a couple of the hardline clips I made in the bay. I pulled the wiring harness back in this weekend aswell. Hood latch cable reinstalled. All brake lines back in (minus soft lines because the cheap coilovers have no hose bracket on them) I also threw in my spare koyo rad to get it off the floor.


Shop got two new workbenches to accommodate for all the equipment I didn't have space for. Went from 6ft of workbench to having 16 ft.
Red car got an oem spoiler I had lying around. All the mounts were broken off of it, so I just fiberglassed the legs solid and double sided taped it to the car. I'll be taking it off to paint since it's pretty chipped up, but I like how it looks.
The purple car had a bunch of broken hard line clips from the PO removing stuff from the car so I decided to try and recreate them with a block of nylon. They came out pretty well considering I made them using a tabletop band saw and drill press.
Here's part of the drawing I made.
And the somewhat finished product.
Here's currently how the engine bay sits. You can see a couple of the hardline clips I made in the bay. I pulled the wiring harness back in this weekend aswell. Hood latch cable reinstalled. All brake lines back in (minus soft lines because the cheap coilovers have no hose bracket on them) I also threw in my spare koyo rad to get it off the floor.
03-29-20, 04:15 PM
#22
Kind of a boring update, but I took my headlights buckets apart and painted them because the PO oversprayed purple all over them. Exterior of the car will probabally be black, so I just went ahead painted them black aswell.


I forgot to take pics, but I coolant pressure tested the engine I had and the coolant seals are still in good shape. Also bolted a transmission and starter up to it to compression test. Compression was above 80psi on all facets so I guess I'll go ahead and toss it in soon.

