infernosg's N/A build


 02-02-18, 02:49 PM
#102
Full Member
Thread Starter
I've considered this. The first one lasted me 1400 miles after sitting for who knows how long. I'm more concerned about understanding why it failed than a more durable solution at this point. I'm wondering if I backfired through the intake. My tune is still rough at this point so it's possible. Still, after looking at pictures online of the IAT sensor I can't understand how the thermistor got out of its cage without being blown to bits. If that were the case, I'd expect to see some damage to the filter as well. I'm hoping it just broke off inside its cage and for some reason I didn't see it sitting in there.
 04-02-18, 08:34 AM
#104
Full Member
Thread Starter
It's been a little while since I've updated this. The weather is getting warmer, which means the car is so much nicer to drive. I'm over 1600 miles now and I've made some changes since the last update. The first big change was I had the engine harness re-done. Before my ignition sub-harness was spiraling around the engine bay so I had that changed. A few other leads were shortened/lengthened to clean up the bay a little:
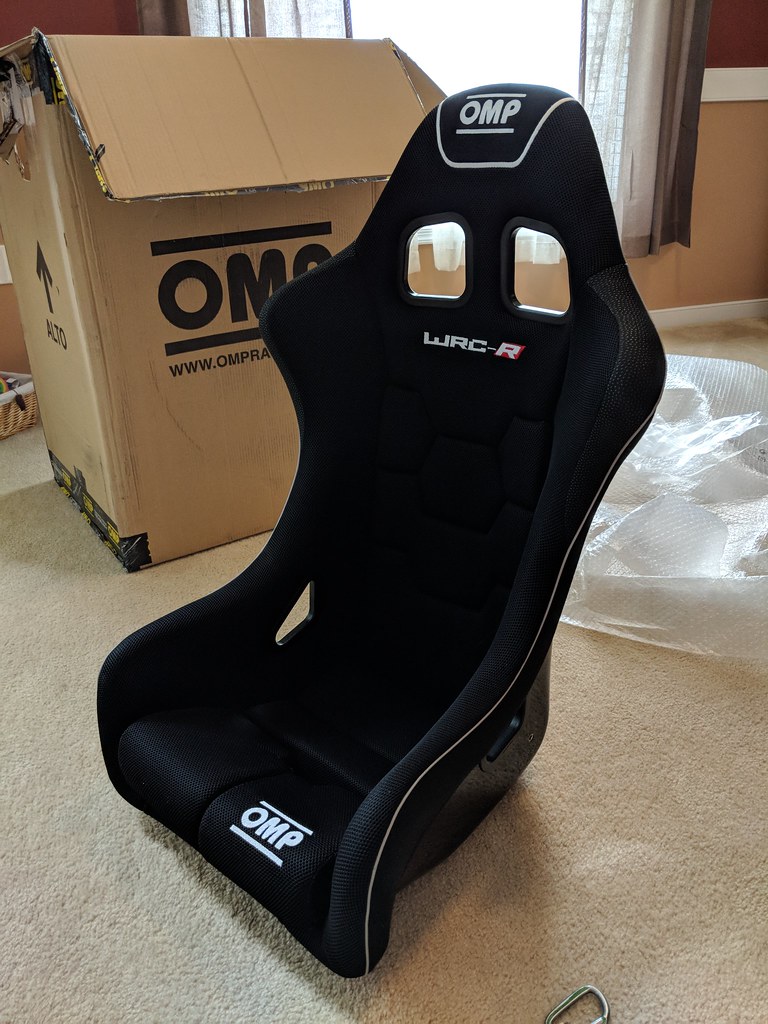
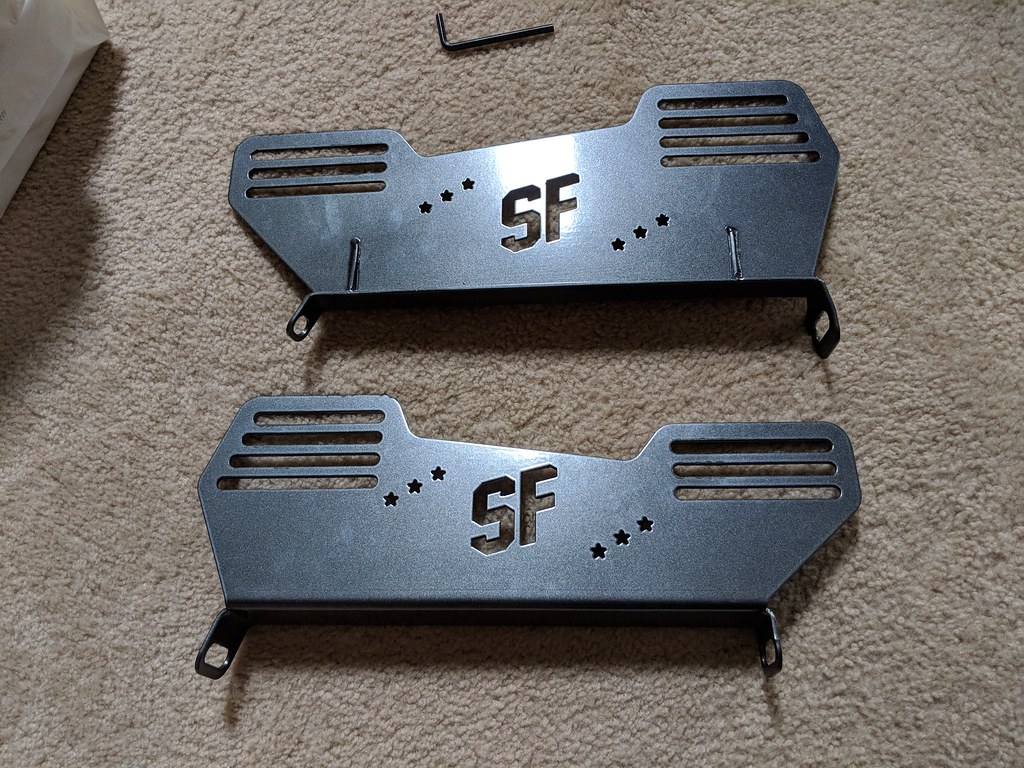
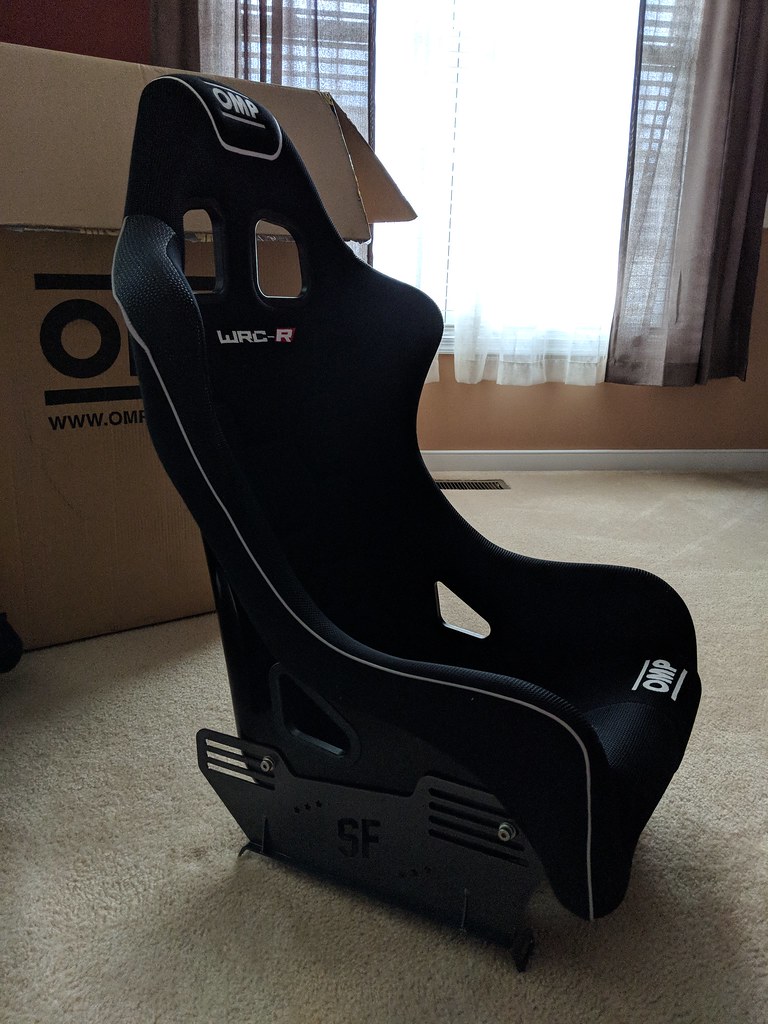
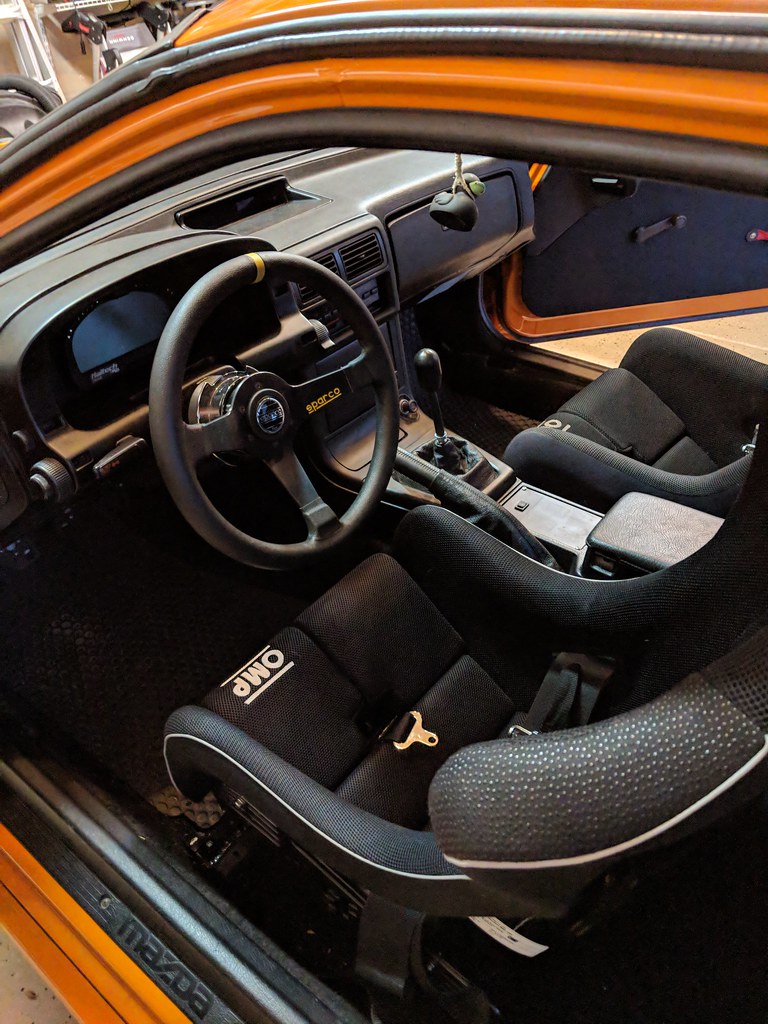
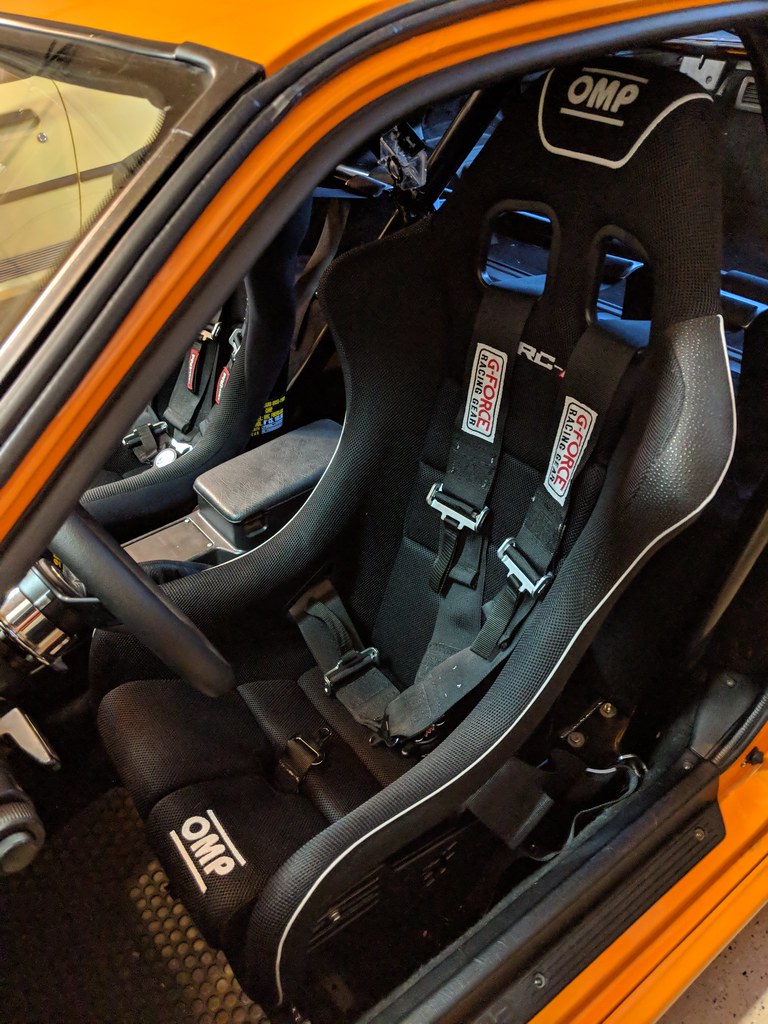
I decided it was time to complete the interior so I picked up another OMP WRC seat and G-Force harness. Now was the time to finally install the Street Faction seat brackets as well.
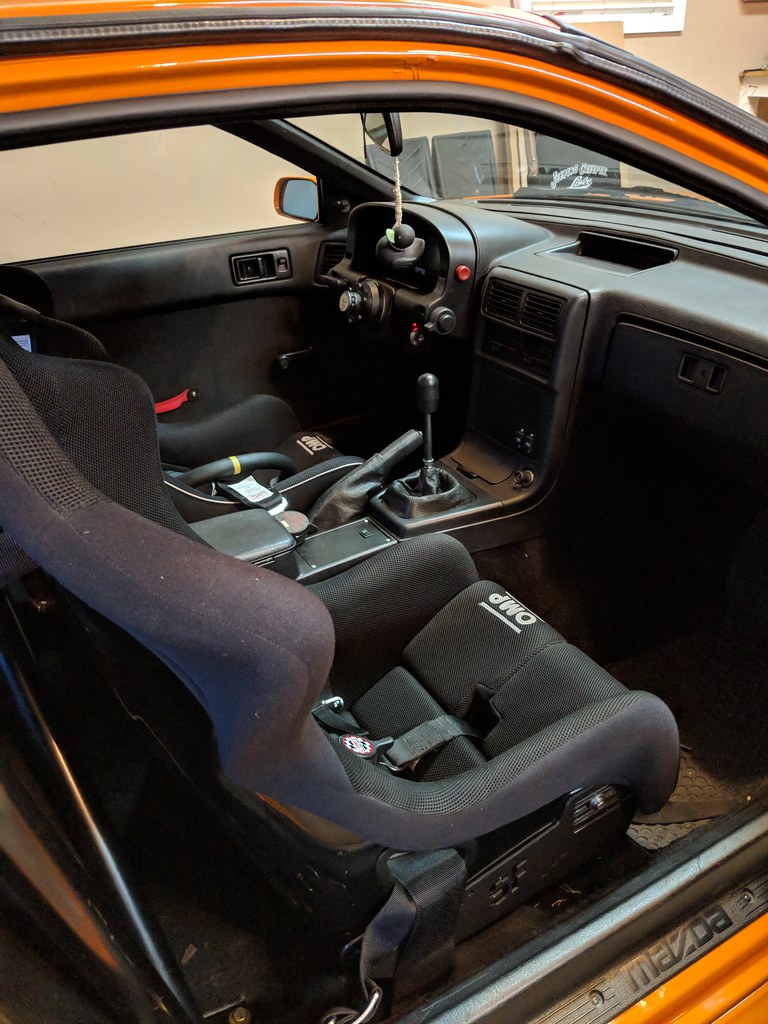
Since the old seat and harness are expired I move them over to the passenger's side. I'm kind of annoyed OMP and G-Force changed their product designs but I guess that's what I get for ordering parts in 2012/13 and not finishing the car until 2017. Overall, the interior turned at pretty good.
I have an actual black carpet from an S5 that I'll eventually use to replace my "dyed" gray S4 one. The "dye" isn't holding up as well as I'd like and the gray is starting to show again. I'm not in the mood to remove the entire interior again so I'll save that for some rainy day...
I finally replaced the leaking water pump about a month ago. The process is such a pain in the *** with the aftermarket main pulley, FFE trigger kit and custom fan shroud. I had an "oh ****" moment when the woodruff key came partially out with the main pulley causing the front counterweight to fall out-of-alignment. Fortunately, I was able to rotate the engine until I found the key way in the counterweight. It's so nice to not have a water pump leaking coolant all over the front of the engine. Unfortunately, the leak cause some of the paint to lift on the front cover so the engine doesn't look as nice...
I finally got the car aligned and weighed last week. I went with -3/-2 degrees of F/R camber and zero toe all around. Its weight with about a half tank of fuel is 2325 lb according to the print out. That's a lot lower than I was expecting (~2500 lb) and means the car will be around 2500 lb total in track trim with me in it. I did notice the car pulling to the right more after the alignment. I don't doubt the shop's numbers so I'm looking at the car itself. Front wheel bearing play and pre-load exceeded the FSM limits so I pulled disassembled, cleaned and inspected everything. The bearings and races actually look pretty good for having ~105k miles and several track days on them so I decided to re-use them. The bearings were re-packed with Mobil 1 grease and pre-load was set per the FSM. This eliminated all the play in the bearings. I'll check again in 100 miles or so. I also finally addressed the squeaking suspension heard in the videos I posted. It turned out to be the rear swaybar. I pulled the brackets and polyurethane bushings, cleaned and re-greased them and the squeaking is gone.
Aside from completing the break in and getting a final tune the last big project I have is to address the transmission noise and vibration. I get bearing noise in neutral with the clutch engaged (pedal up) and driving in 4th gear, good vibration in 5th gear at highway speeds, and a little vibration in 3rd at higher engine speeds. The plan is to replace the front and rear bearings in the transmission and check/re-set 5th gear end spacing. I probably should be replacing the center bearings but that's an order-of-magnitude more transmission disassembly and I'm trying to make it to a car show on 4/21 and DGRR the following week.

I decided it was time to complete the interior so I picked up another OMP WRC seat and G-Force harness. Now was the time to finally install the Street Faction seat brackets as well.
Since the old seat and harness are expired I move them over to the passenger's side. I'm kind of annoyed OMP and G-Force changed their product designs but I guess that's what I get for ordering parts in 2012/13 and not finishing the car until 2017. Overall, the interior turned at pretty good.
I have an actual black carpet from an S5 that I'll eventually use to replace my "dyed" gray S4 one. The "dye" isn't holding up as well as I'd like and the gray is starting to show again. I'm not in the mood to remove the entire interior again so I'll save that for some rainy day...
I finally replaced the leaking water pump about a month ago. The process is such a pain in the *** with the aftermarket main pulley, FFE trigger kit and custom fan shroud. I had an "oh ****" moment when the woodruff key came partially out with the main pulley causing the front counterweight to fall out-of-alignment. Fortunately, I was able to rotate the engine until I found the key way in the counterweight. It's so nice to not have a water pump leaking coolant all over the front of the engine. Unfortunately, the leak cause some of the paint to lift on the front cover so the engine doesn't look as nice...
I finally got the car aligned and weighed last week. I went with -3/-2 degrees of F/R camber and zero toe all around. Its weight with about a half tank of fuel is 2325 lb according to the print out. That's a lot lower than I was expecting (~2500 lb) and means the car will be around 2500 lb total in track trim with me in it. I did notice the car pulling to the right more after the alignment. I don't doubt the shop's numbers so I'm looking at the car itself. Front wheel bearing play and pre-load exceeded the FSM limits so I pulled disassembled, cleaned and inspected everything. The bearings and races actually look pretty good for having ~105k miles and several track days on them so I decided to re-use them. The bearings were re-packed with Mobil 1 grease and pre-load was set per the FSM. This eliminated all the play in the bearings. I'll check again in 100 miles or so. I also finally addressed the squeaking suspension heard in the videos I posted. It turned out to be the rear swaybar. I pulled the brackets and polyurethane bushings, cleaned and re-greased them and the squeaking is gone.
Aside from completing the break in and getting a final tune the last big project I have is to address the transmission noise and vibration. I get bearing noise in neutral with the clutch engaged (pedal up) and driving in 4th gear, good vibration in 5th gear at highway speeds, and a little vibration in 3rd at higher engine speeds. The plan is to replace the front and rear bearings in the transmission and check/re-set 5th gear end spacing. I probably should be replacing the center bearings but that's an order-of-magnitude more transmission disassembly and I'm trying to make it to a car show on 4/21 and DGRR the following week.
04-02-18, 09:19 AM
#105
Man, that thing looks great. Did the pulling stop after you redid the bearings? Who did you end up getting it tuned by?
You trying to do the Japanese Classics Open House? There's also a cruise to the Blue Ridge that day with a local Japanese car group, if you're interested.
You trying to do the Japanese Classics Open House? There's also a cruise to the Blue Ridge that day with a local Japanese car group, if you're interested.
04-02-18, 09:59 AM
#106
Full Member
Thread Starter
When is the open house? Might be better to take my SA to that one.
04-02-18, 10:11 AM
#107
I think it improved but it hasn't gone away. I almost wonder if my steering wheel is off by like one tooth or something as well. It's hard to tell because sometimes it seems like it wants to pull badly then other times it tracks straight.
When is the open house? Might be better to take my SA to that one.
When is the open house? Might be better to take my SA to that one.
The Japanese Classics open house is on 4/21. I thought that was the show you mentioned you were trying to get to.
04-02-18, 10:33 AM
#108
Full Member
Thread Starter
No, I'm headed out to western VA with some old college friends on the same day.
04-02-18, 01:09 PM
#109
Full Member

Looking fantastic! Definitely my favourite build on here.
How is the ITB set up running now? I'm considering going down the same route with my own NA so I'm interested in how its working out for you?
How is the ITB set up running now? I'm considering going down the same route with my own NA so I'm interested in how its working out for you?
04-03-18, 08:08 AM
#110
Full Member
Thread Starter
Thanks! It's been a long work-in-progress.
It's running as well as can be expected since I'm running a break-in tune: rich fuel mixture, conservative timing, etc. It starts, idles, and cruises fine in warmer weather. I have no idle control so cold starts are rough and it wants to stall while coming to a stop if the oil temperature is less than 140 deg. I don't have the transient throttle map finely tuned so it doesn't like very quick throttle inputs. I have no issues driving around town and in traffic though. I see no reason why a properly set up and tuned ITB arrangement couldn't be daily-driven.
I think a big issue with a lot of the ITB setups is they put the injectors upstream in the intake just behind the throttle plates. This works okay with the off-the-shelf setups with short intake runners from Racing Beat, Mazdatrix, etc. In my case the injectors are located ~12 in. from the intake ports. Combine that with large changes in airflow associated with small changes in throttle position and I think that's where my transient throttle hesitation comes from. It takes too long for the fuel enrichment to hit the intake ports after the throttle is opened. I'm hoping we can tune around this with the asynchronous injection settings. If not, I have a FFE primary fuel rail and ID725 injectors I can install and run a parallel, staged setup. I may end up doing this anyway because with injectors in the stock primary location I know I could achieve a stable idle at lower RPM and leaner air-to-fuel ratios.
I think a big issue with a lot of the ITB setups is they put the injectors upstream in the intake just behind the throttle plates. This works okay with the off-the-shelf setups with short intake runners from Racing Beat, Mazdatrix, etc. In my case the injectors are located ~12 in. from the intake ports. Combine that with large changes in airflow associated with small changes in throttle position and I think that's where my transient throttle hesitation comes from. It takes too long for the fuel enrichment to hit the intake ports after the throttle is opened. I'm hoping we can tune around this with the asynchronous injection settings. If not, I have a FFE primary fuel rail and ID725 injectors I can install and run a parallel, staged setup. I may end up doing this anyway because with injectors in the stock primary location I know I could achieve a stable idle at lower RPM and leaner air-to-fuel ratios.
04-03-18, 11:47 AM
#111
I think the problem you mention can be tuned out, although I haven't solved it yet on my build. I think you need to approach in the same way people mod the Nikki carb for mechanical secondaries. First you need a lot more fuel, so they add gaskets to increase volume. Second you need to spread that fuel out over a longer duration, so they modify the linkage to spread that fuel out.
My Adaptronic ECU tries to use map prediction for the majority of the transients, but it has some compensation values: asynchronous gain %, transition time, and persistence. There isn't a ton of documentation but what I think it represents is the extra fuel to squirt as a percentage of the current map reading VE, the duration to provide that extra squirt, and how quickly it should taper off. I can get plenty of fuel on initial tip in, but I'm at the point where it goes a touch rich, full lean, then settles back in. I think I need less squirt and more persistence, but it's easier said than done when you don't have the vehicle sitting on a dyno. I've flooded it a number of times trying to get it right.
My Adaptronic ECU tries to use map prediction for the majority of the transients, but it has some compensation values: asynchronous gain %, transition time, and persistence. There isn't a ton of documentation but what I think it represents is the extra fuel to squirt as a percentage of the current map reading VE, the duration to provide that extra squirt, and how quickly it should taper off. I can get plenty of fuel on initial tip in, but I'm at the point where it goes a touch rich, full lean, then settles back in. I think I need less squirt and more persistence, but it's easier said than done when you don't have the vehicle sitting on a dyno. I've flooded it a number of times trying to get it right.
04-03-18, 02:09 PM
#112
Full Member
Thread Starter
I think the problem you mention can be tuned out, although I haven't solved it yet on my build. I think you need to approach in the same way people mod the Nikki carb for mechanical secondaries. First you need a lot more fuel, so they add gaskets to increase volume. Second you need to spread that fuel out over a longer duration, so they modify the linkage to spread that fuel out.
My Adaptronic ECU tries to use map prediction for the majority of the transients, but it has some compensation values: asynchronous gain %, transition time, and persistence. There isn't a ton of documentation but what I think it represents is the extra fuel to squirt as a percentage of the current map reading VE, the duration to provide that extra squirt, and how quickly it should taper off. I can get plenty of fuel on initial tip in, but I'm at the point where it goes a touch rich, full lean, then settles back in. I think I need less squirt and more persistence, but it's easier said than done when you don't have the vehicle sitting on a dyno. I've flooded it a number of times trying to get it right.
My Adaptronic ECU tries to use map prediction for the majority of the transients, but it has some compensation values: asynchronous gain %, transition time, and persistence. There isn't a ton of documentation but what I think it represents is the extra fuel to squirt as a percentage of the current map reading VE, the duration to provide that extra squirt, and how quickly it should taper off. I can get plenty of fuel on initial tip in, but I'm at the point where it goes a touch rich, full lean, then settles back in. I think I need less squirt and more persistence, but it's easier said than done when you don't have the vehicle sitting on a dyno. I've flooded it a number of times trying to get it right.
04-04-18, 08:06 AM
#113
I'm sure you'll figure it out. I think for my next build (12a for the 1st gen) I'm going to dual stage it with very small primary injectors as close as possible. I should have had the motor built with an SE center plate but i didn't think of it until later. Having them closer should resolve the "wetting" issue of a long runner. Anyway, keep at it and share the settings you end up with. I'm sure others will find it useful. When I crack the issue on my Adaptronic I'll post a new thread.
04-04-18, 03:15 PM
#114
Full Member
Thread Starter
I'm sure you'll figure it out. I think for my next build (12a for the 1st gen) I'm going to dual stage it with very small primary injectors as close as possible. I should have had the motor built with an SE center plate but i didn't think of it until later. Having them closer should resolve the "wetting" issue of a long runner. Anyway, keep at it and share the settings you end up with. I'm sure others will find it useful. When I crack the issue on my Adaptronic I'll post a new thread.
Even with the new brackets I wasn't able to get the driver's seat low enough to prevent the steering wheel from blocking the shift lights and turn signals, so I gave in a bought a larger wheel.
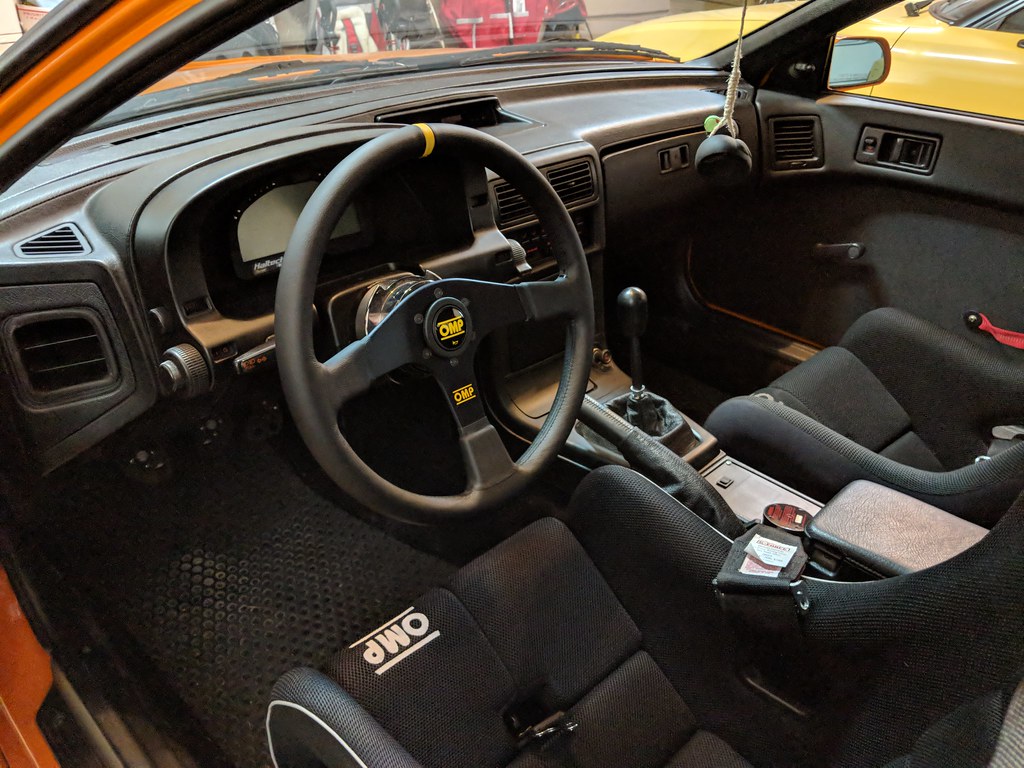
OMP Velocita 380. At 380 mm it's noticeably larger than my 350 mm Sparco R345. It also has "zero" dish instead of the 65 mm of the Sparco. Overall it puts the steering wheel in a more comfortable position and I can finally see my full display; notably the shift lights. The larger diameter also helps with low speed turning.
I want to make it to DGRR this year and in order to do so I have two things to accomplish:
1) Get headlights aimed properly
2) Replace front and rear bearings in the transmission and check end play.
(1) is easy and I'll have that done this weekend. (2) is still waiting on parts to come in. It looks like I'll be pulling some long nights in the near future.
 04-07-18, 07:49 PM
#117
Full Member
Thread Starter
You'll note the number of pictures decreased as time went on. A lot of times, though, I took photographs so I knew how stuff was supposed to go back together. Someday I'll probably print some of the more notable pictures and hang them in the garage/office.
04-20-18, 11:57 AM
#119
I'm glad to see this build is still progressing! Fantastic work. We have basically the same engine/ throttle set up so when mine's complete, I'd be interested to see the power difference. Albeit, mine is a peripheral port.
I apologize if you've already covered this, but what seat rails are you using (sliders, fixed, etc). I'm having a hell of time getting my Momo seat to fit without my head hitting the roof and I'm only 5' 10".
*Edit: I see you're using Street Faction brackets. Are rails still necessary?*
I apologize if you've already covered this, but what seat rails are you using (sliders, fixed, etc). I'm having a hell of time getting my Momo seat to fit without my head hitting the roof and I'm only 5' 10".
*Edit: I see you're using Street Faction brackets. Are rails still necessary?*
Last edited by djSL; 04-20-18 at 12:00 PM.
04-22-18, 09:30 AM
#120
Rotary Freak

I have an actual black carpet from an S5 that I'll eventually use to replace my "dyed" gray S4 one. The "dye" isn't holding up as well as I'd like and the gray is starting to show again. I'm not in the mood to remove the entire interior again so I'll save that for some rainy day...
04-22-18, 03:19 PM
#121
Full Member
Thread Starter
I'm glad to see this build is still progressing! Fantastic work. We have basically the same engine/ throttle set up so when mine's complete, I'd be interested to see the power difference. Albeit, mine is a peripheral port.
I apologize if you've already covered this, but what seat rails are you using (sliders, fixed, etc). I'm having a hell of time getting my Momo seat to fit without my head hitting the roof and I'm only 5' 10".
*Edit: I see you're using Street Faction brackets. Are rails still necessary?*
I apologize if you've already covered this, but what seat rails are you using (sliders, fixed, etc). I'm having a hell of time getting my Momo seat to fit without my head hitting the roof and I'm only 5' 10".
*Edit: I see you're using Street Faction brackets. Are rails still necessary?*
Out of curiosity, how did you dye the carpet? I've been investigating the possibility of dying mine black, and people seem to recommend RIT (though it isn't made for synthetic fibres), or SEM Color Coat (rattle can vinyl/fabric dye). And if it isn't holding up, what would you do differently next time?
05-17-18, 10:39 AM
#123
Full Member
Thread Starter
I've taken some time off since DGRR. Spring/Early Summer is a busy time for me so I haven't had much opportunity to work on the car. I'm in the process of reinstalling the evaporative emissions equipment (charcoal canister, PCV, etc.) though. I'm sick of the garage always smelling like gasoline. Hopefully my engine generates enough pre-throttle body vacuum to open the top port on the PCV. After that I need to address a leaking inner CV joint. The next big task is to pull and formally rebuild the transmission with all new bearings, etc. I just need some time for my bank account to recover.
In the meantime I continue to drive the car and work on the tune. It's completely broken in now. I really need to get on a dyno and tune the ignition map because I'm sure I have something like 10-15 degrees of advance I could add. At DGRR I discovered my base fuel map was way too lean and closed loop control was masking the issue. I've made some changes and gotten the base map closer to where it needs to be and that has greatly improved throttle response. I'm toying with the idea of moving my injectors to the primary location though. It would significantly improve idle and light throttle smoothness and also clean up the engine bay by stuffing everything under the intake manifold. The only unknown is if it would hurt higher-RPM performance since the fuel would have less time to mix with incoming air. I really don't want to run secondary injectors because the two ID1000's have proven to be sufficient at maximum power while also being stable enough at low duty cycles for idle. I already have a set of ID725's but I think 2x ID725 as primaries and 2X ID1000 for secondaries would be overkill. In that case I could completely shut off the primaries and only run on the ID1000's if it were proven that the higher location is better at higher RPM.
In the meantime I continue to drive the car and work on the tune. It's completely broken in now. I really need to get on a dyno and tune the ignition map because I'm sure I have something like 10-15 degrees of advance I could add. At DGRR I discovered my base fuel map was way too lean and closed loop control was masking the issue. I've made some changes and gotten the base map closer to where it needs to be and that has greatly improved throttle response. I'm toying with the idea of moving my injectors to the primary location though. It would significantly improve idle and light throttle smoothness and also clean up the engine bay by stuffing everything under the intake manifold. The only unknown is if it would hurt higher-RPM performance since the fuel would have less time to mix with incoming air. I really don't want to run secondary injectors because the two ID1000's have proven to be sufficient at maximum power while also being stable enough at low duty cycles for idle. I already have a set of ID725's but I think 2x ID725 as primaries and 2X ID1000 for secondaries would be overkill. In that case I could completely shut off the primaries and only run on the ID1000's if it were proven that the higher location is better at higher RPM.
05-17-18, 11:37 AM
#124
Regarding fuel smell. I bet you have a fuel leak somewhere. My garage never smells like fuel and I don't have anything set up for PCV or charcoal canister. And if something smells in my garage, the whole house smells. My wife would let me know. She'll yell at me for using brake cleaner.
05-18-18, 12:46 PM
#125
Full Member
Thread Starter
Regarding fuel smell. I bet you have a fuel leak somewhere. My garage never smells like fuel and I don't have anything set up for PCV or charcoal canister. And if something smells in my garage, the whole house smells. My wife would let me know. She'll yell at me for using brake cleaner.