When you click on links to various merchants on this site and make a purchase, this can result in this site earning a commission. Affiliate programs and affiliations include, but are not limited to, the eBay Partner Network.
I've never had to do a return with RockAuto, but I did ask for a replacement alternator since the plastic on the one they shipped me was broken. They sent the new one right out and didn't even ask for the damaged one back.
So far they sent me the wrong clutch alignment tool, (it didn't fit the disc they sent me, but the part # on the clutch alignment tool confirmed it would through many websites, so someone must have mis packaged it, tried with two clutch discs, no dice. Luckily found one locally.
Bought an Airtex SI fuel pump from them that looked like some sort of series I and Series II rx8 hybrid that didnt fit in any way shape or form, and now this master cylinder.
for the most part they have been awesome. Maybe I just have bad luck. Either way, I know they will make good on their customer service, so thats the most important thing.
Also, anyone thats done a five speed swap, is it easier to pull the ATF lines from the tranny or at the radiator?
Small update. Entire exhaust has been pulled minus the manifold, and the ATF cooler lines have been disconnected from the tranny. All but one of the bellhousing bolts are out.
The only bolt I am having trouble with is that damn 'Hook' bolt. which is the top center. So far i've only been able to get at it from the top with a wrench, but i need more leverage than just the wrench. I've been busy with work the past few days, so as soon as I get another chance i'll double up on a wrench and hopefully crack it loose.
That is literally the only bolt holding the transmission on. Well, that as well as the cross member, but that's a matter of four bolts and three minutes tops.
A special word of warning for those that might find themselves performing this swap in the future: There are grounds that you need to pay attention to. One is connected to the long bolt of the starter. The other is connected to the top left bellhousing bolt (the one behind the oil filter.) Take care in remembering that these get hooked back up in between the bolt and the bellhousing when you bolt the new tranny up, or you will run into complications.
Thats all for now, more info/pics to come after I get the tranny dropped.
Progress! After finally getting some clearance on my wrench to get the top hook bolt out, things went (mostly) well. The best way to get at it in my honest opinion is a 14mm wrench from up top. Just be careful of the hose that is right in front of it, that is a vac line that will need to be plugged. (also take note, when removing the tranny you can accidentally disconnect some vac lines, I need to break out my hose diagram so i can find where one lines home goes.
Be prepared for ALOT of atf if you did not drain it before hand. That stuff is annoying when it gets in your hair, ask me how I know.
Once the bellhousing bolts are out, double and triple check for any connected harness plugs you might have missed, shifter linkage, tranny fluid level dipstick pipe, hard lines, etc, then check again. I made the mistake of scratching my head wondering why it wouldnt drop when I forgot a tiny hard line on the drivers side. Trust me, save yourself the four letter words and just make sure everything is clear before you start trying to separate the transmission from the engine.
After much pulling and finesse, out she went, and the bellhousing found its impact point on the ground right on top of my thumb.
Tranny separated from the engine, and out from under the car (set your jackstands as high as possible on this one, trust me. Even I had to use my floorjack to get that extra inch of clearance because my jackstands were maxed out.
Your days are numbered TorqueConverter/Flexplate...I'm coming for you.
I spent mostly my one day off this week cleaning up the work space around the car a bit, making sure all bolts were organized from what they came off of (I personally find it easier like I said prior to replace the bolts back into a component you take off into the body, prevents losing them, and you wont mix them up for going somewhere else)
I succeeded in moving the auto tranny from the side of the car to behind it in the drive way (surprised I didn't give myself a hernia in the process.) and detached the auto tranny mount from the auto tranny in preparation for the adapter fabrication.
Pulled the speedo gear, as I will be retaining the auto rear end for the time being. Its held on by one 10mm bolt by the tailshaft, after the bolt is out a gentle twist once or twice will loosen it right up, and it will pull out. I put mine in a ziplock back to prevent any contamination from grease, etc.
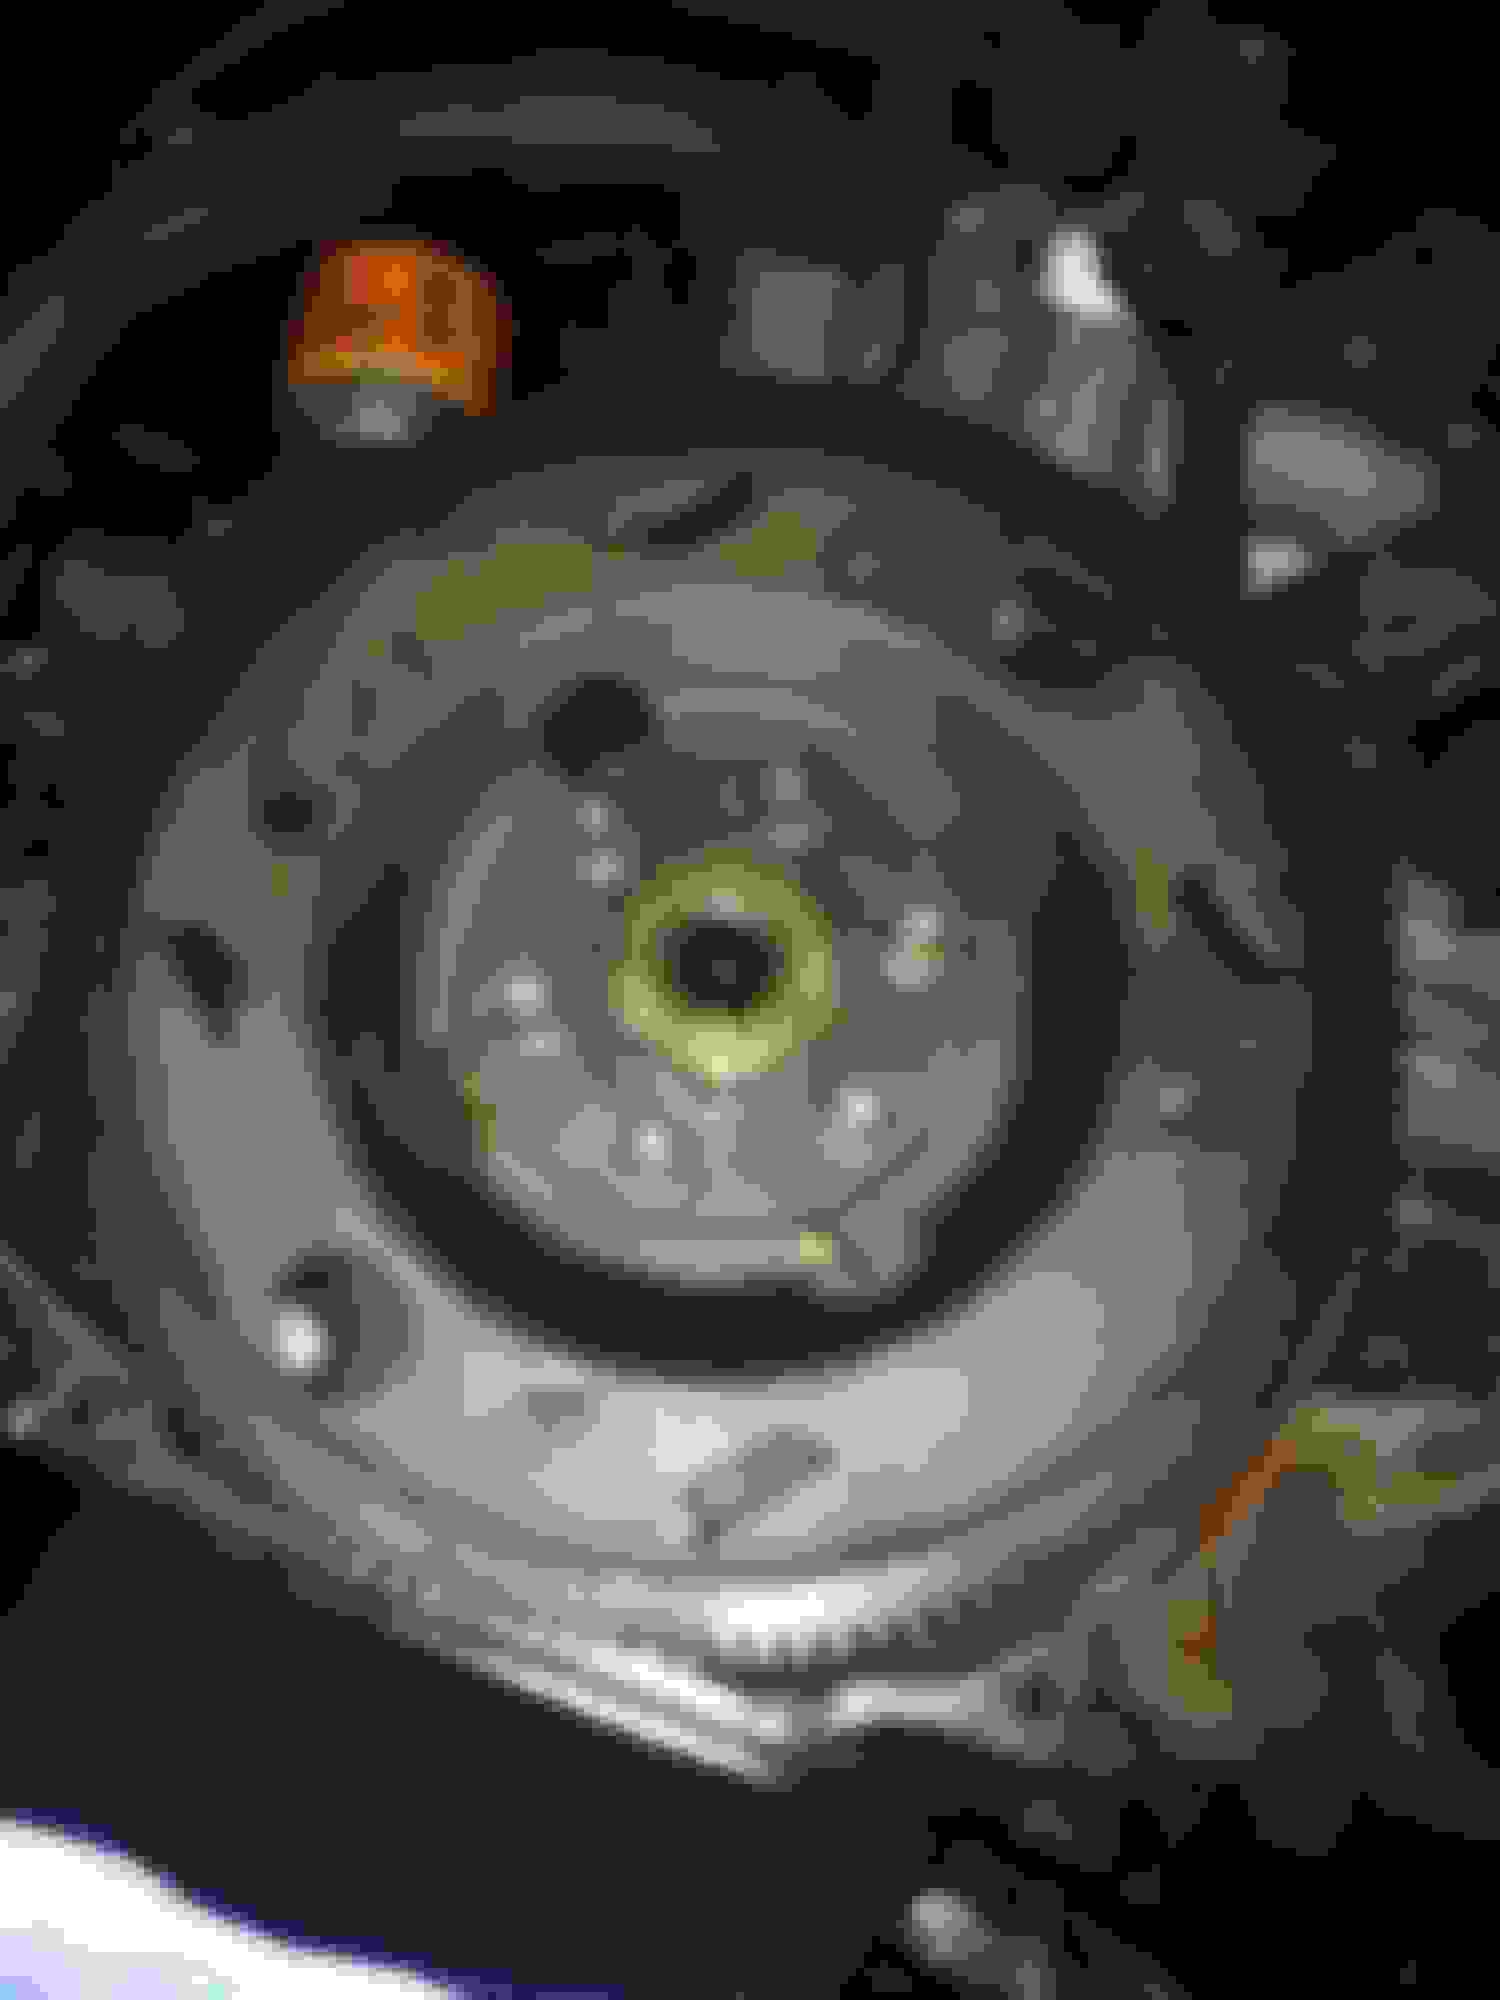
Next up, that smug son of a bitch attached to my engine, that ridiculous torque converter. The torque converter is held on by four bolts that thread in on the back side of the torque converter towards the rear of the car. (the heads for the bolts face the front, and they thread in to the back.)
I automatically knew as soon as I tried to crack these off, the torque converter would move, and I would get nowhere. Well, long story short, the torque converter moved, and I got nowhere.
Luckily for me I happened to have a wrench laying around that was long enough to rest the box end on a rather thick nut on the drivers side of a car, and the wrench was just long enough for the spanner to wedge itself in between the teeth on the flexplate.
With that strategy in motion, the torque converter was off in under ten minutes. You will need to use a breaker bar and 14mm wrench, make damn sure the box end of the wrench is on there correctly. If you round those off you are going to have a horrible time.
Back of the car looking down the tranny tunnel towards the torque converter.
Wrench with the box end secured on a bolt on the chassis, with the spanner wedged in between the teeth on the flexplate to stop it from moving.
Torque converter out of the car, as you can see there are the four bolts holding it together, this is the engine/flexplate side.
Note the markings on the torque converter
Auto tranny, exhaust, and torque converter out of the way.
Markings on the tranny, indicating they were probably sourced from a recycling yard.
The driveshaft itself has markings too. This car had to have had its entire drivetrain replaced from the torque converter back to the driveshaft for some weird reason, because all of those components (torque converter, transmission, driveshaft) all have the markings you would find that a salvage yard would put on them when sold.
Flywheel and flexplate visible with torque converter removed...that nut is going to be a pain in the ***, I can already tell.
Maybe I can try the wrench trick to get the counterweight bolts off after I zap that nut off with an impact gun.
Wiring
For those of you following Rotaryresurrections article on the five speed swap, here are the two plugs in question that you need to run the wires from in order to get your reverse lights to work.
Thats all for now, Just have to get that flexplate off and the flywheel on.
Went and picked up most of my remaining parts and equipment today, so tomorrow should be an official all day event of working on the car.
Managed to get the adapter made out of a piece of Channel Iron, took it to a machine shop and slid the guy a 20 to drill out the holes. Also got the flexplate bolts off as well.
I have yet to run into a circumstance where I've needed to purchase a flywheel stopper. When dropping the torque converter I used a wrench with the boxed end on a nut and the spanner wedged against the flexplate (pictures in earlier post), and for the counterweight bolts, since the engine will want to rotate the opposite way, I used a smaller wrench wedged between one of the studs on the flange where the exhaust manifold connects to the cat pipes.
A breaker bar was still needed to crack the flexplate bolts loose, as well as using my legs, not arms to apply force, but they all came off in roughly half an hour combined.
Tomorrow is D-Day, putting the harbor freight impact gun to the test. Box says max torque is 585 ft lbs. While I personally think they are probably over exaggerating a bit, as long as it gets the nut off and back on, I'm fine with it.
If all goes well, the car will be fully swapped and running by sundown.
Adapter ready to be fitted to tranny. Also having my friend fab up V8KILR's design, I will try both and report back on the results
Materials!
Impact gun and 1/2 - 3/4 adapter for that 54mm socket.
If that impact takes the flywheel nut off i'll be impressed, my buddies earthquake which is a tough SOB wouldn't touch mine. I had to torch it and hit it with a chisel. Granted i need a new nut now, but its a slow rebuild....very slow
If that impact takes the flywheel nut off i'll be impressed, my buddies earthquake which is a tough SOB wouldn't touch mine. I had to torch it and hit it with a chisel. Granted i need a new nut now, but its a slow rebuild....very slow
Surprisingly the gun zapped it off just fine. Let the Air Compressor build up to 120 PSI, dropped some oil into the impact gun, nut was off in four seconds flat. Although I had the force set to max. Harbor freight claims I think 585 ft lbs max, but if I had to guess I'd say those numbers are inflated. To be honest I'm more concerned if it torqued it back ON with enough force. I held it on there until the flywheel started turning with it, then put one hand against the flywheel to stop that and held it wide open for another few seconds after that.
Although on an interesting note, like I mentioned previously, Both the tranny, torque converter, and driveshaft all had junkyard markings on them (the type they mark parts with when you buy them.) So at some point almost the entire AT driveline was replaced in that car...and it only has 107,000 miles on it.
Flywheel and flexplate that I ordered from the salvage yard, had to have been sitting bolted together on the shelf for ten years, minimum.
Counterweight and flexplate removed.
FSM says to use sandpaper to clear up the Pressureplate and Flywheel, so I took some carb cleaner to get the dirt and grease off, dried it off nicely, then took a sanding block and some 300 grit to the flywheel surface and flexplate, here is the end result. I probably should have went a little lower on the sandpaper grade, but I didnt want to cause any scoring. They look like they could be in better shape, but paired with a new clutch disc and a good break in I'm hoping it will hold up to just daily driving.
And last but not least, the five speed tranny *IN* the car. I need to make a trip to the hardware store tomorrow to get a longer bolt to finish the crossmember adapter, but at this point the tranny is pretty much bolted to the engine, just have to install the top hook bolt, and starter.
A word to those installing the tranny: Assuming your clutch is aligned, learn from my advice and what you have probably read elsewhere on the forum. JACK UP THE FRONT OF THE ENGINE. It will be damn near impossible (it was impossible for me) to get that transmission to mate to the engine without doing it.
I managed this by taking the undertray off, and using the same C Channel I was using for the adapter to jack the motor up by the crank pulley. After that i just put the transmission on my legs, lifted it up with my knees, and it went right in, less than five minutes.
Misc stuff remaining, bolt up master cylinder to firewall and clutch pedal, wire up reverse and neutral safety switch, fill tranny with fluid, connect shifter to tranny, remove AT lines to radiator, reinstall heatshields and driveshaft and tranny bracket, reinstall exhaust reinstall under tray, and done. Car should be done by tomorrow.
Nope, Went secondhand on the pressureplate and flywheel. Clutch disc I got brand new for $3.04 from rock auto. My rx8 needs a rebuild, (well, it failed the comp test) so I need something to drive during the meantime.
The auto tranny in the FC was on its way out, so i decided to swap it to five speed and use that as a daily in the meantime while the eight gets a rebuild. I don't plan on keeping that flywheel and pressure plate on there, the FC will eventually get a Turbo II swap after the eight. But for now all that FC is going to see is mostly 45mph back roads and gentle driving.
Tranny and adapter bracket finally bolted up. I need to head back to the hardware store though, The threaded section of the transmission stud is one diameter, then when the threads stop the diameter increases. So I need to go source a few more large washers of that larger diameter to make it truly "solid".
A/T lines pulled out and disconnected from rad, shifter bolted in. If all goes well, by tomorrow I will actually have it off the jackstands. Just have to put the heatshield and exhaust back on, fill the tranny up, and fill and bleed the clutch system! (and connect the pushrod, that too)
Well, after a few days of working and trying to squeeze in some diagnosis here and there, The car is mostly done. It runs and drives, no overheating, no oil leaks (i'll get to that one in a minute), idle is a bit off, and i have to tie up a few loose ends, but for the most part everything is good to go.
If anyones been in the second gen section, you probably know what I mean when i say I had some issues after everything was bolted up. The auto starter had its posts facing the wrong way, so me being the idiot that I am hooked it up wrong, that played havok with the car not wanting to start. (Note, for future reference, when rotary resurrection says run a wire from the ignition side of the plug to the small terminal on the starter, small terminal means the top spade post where the factory black/red wire would slip onto.)
Fired the car up for the first time, and apart from it not knowing how to idle itself due to not having a heavy *** torque converter on it, I quickly noticed something flooding on my driveway, OIL! so i cut the car off right away, sure enough, the oil filter had sprung a leak at the top.
I have no idea how the hell this could have happened, as I didnt touch the oil filter at all during the swap, but I am now on the bandwagon of the fact that FRAM filters are horrible for our car. Case and point.
After replacing the filter and double checking my wiring, the car now fires up right away, idles a bit shaky though, I need to troubleshoot that, could be possibly in part to my brake booster hose that I replaced leaking, which i think is a good contributor.
Only other issue I could think of is the flywheel not being torqued on all the way, which, if my impact gun got it off, full throttle for a few seconds with it wide open until the flywheel started turning, then me holding the flywheel for another second should have done it to proper spec.
Anyway, Car just needs to go back together, do a coolant flush, replace the improv bolt i had on the clutch slave, and troubleshoot that shaking and vacc problem, but otherwise after adjusting the idle, she sits at around 1k, high, yes, but stable at 1k. so after those issues are addressed it should hopefully fall back down to factory levels, that and calibrate the tps.
Here are some semi final pictures of the five speed swap! the build is of course ongoing. But a milestone nonetheless!
Full assembly with clutch pad on (that bare metal was annoying me, believe it of not the dealer actually had it in stock. weird)
sitting pretty, ashtray is in passengers seat. And the passenger kickpanel is off because I had to disconnect the auto computer.
she runs. Idles high, but runs. and yes I know it looks bare, as I said I'm still in the process of putting it back together.
Been awhile! The five speed swap was completed, and just recently we had the means to get a Jspec S5 Turbo II Longblock and transmission.
Picked up the motor and tranny, (inspected beforehand for obvious signs of failure.) Checked plugs, turbo, turbine fins, etc. All looked well. S5 nonturbo motor and tranny are out, prep work on the jspec is nearly complete, and the motor should go in shortly!
The swap begins. Motor unloaded. Pulling the NA motor and trans. Manifolds removed for easier access to wiring harness. Annnd its out.
Update on the progress thus far! I'd say the swap is about 85% complete. Motor needs to be bolted in, drive shaft and transmission adapter bracket bolts torqued down, oil and coolant lines/hoses connected, wiring harness connected, the two wires that need to be run, putting the manifolds/intake plumbing/radiator/fan shroud back on,PS lines, belts, and swapping the N370 ECU in, fill with fluids, and she should be ready to fire up. I'm guessing a day or two of work remaining before the swap is finished.
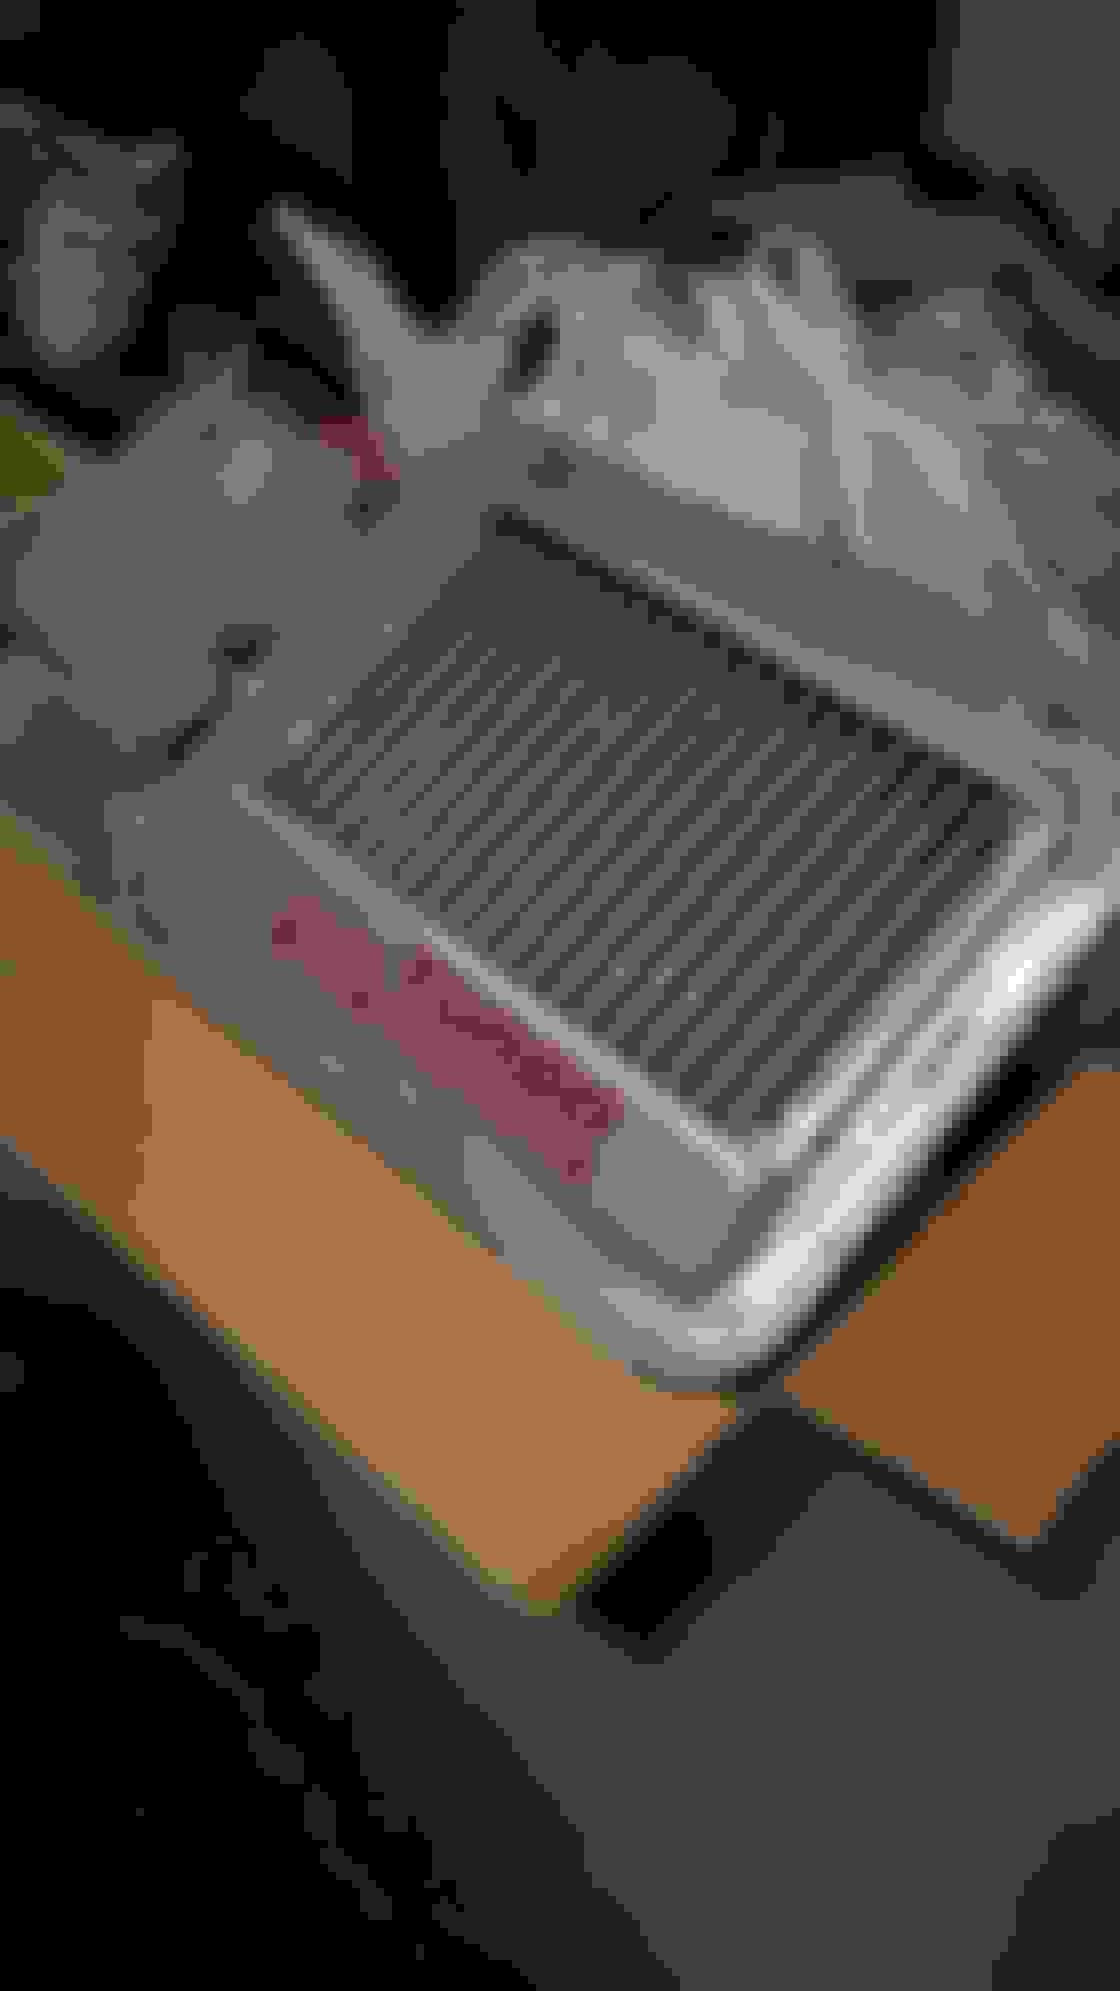
Engine bay after a good degreasing. Jspec motor with the upper intake manifold off. Cleaned the throttle body out (it needed it, badly.) Sprayed the harness plugs down with electrical contact cleaner numerous times over the course of a few days to help alleviate any broken connectors when the time comes to connect the NA harness. Intercooler off, going to polish it up and get it nice and clean looking. Motor and tranny on the motor mounts in the car, coming together nicely! Nearly there! Turbo is in good shape, no issues with spinning freely, no bent fins on the compressor or turbine side, virtually no shaft play either!
Engine is in. Everything is bolted up. However, I have ran into a snag regarding the engine leaking coolant out of both sides when I was attempting to fill. Given this occurrence, It looks like a coolant seal is to blame, so I have not started the engine to prevent further damage. Before purchasing the engine, I did examine the Leading plugs, as well as the leading plug holes while rotating the engine. There was no evidence of coolant inside the housings themselves.
Given this, due to budgetary restraints, I poured about 1/4 a quart of oil into each leading plug hole, replaced the plugs, removed the EGI fuse, and turned the motor over to help preserve and protect against any coolant that might have entered the rotor housings when attempting to fill the engine with coolant. I have been repeating this process of turning the motor over with the starter every few days to ensure it is a lubricated as possible. The rebuild will begin within the next two weeks most likely. Given its a Jspec, i'd say i came out fortunate considering longblock cost was 1600, and there were no signs of apex seal damage (no bent turbine fins.)
Turbo II engine on the motor mounts. Engine fully connected, minus airbox snorkel Turbo II hood on, awaiting a fresh rebuild.
So it is confirmed to be an outer coolant seal leak then, and not coolant leaking from somewhere up top?
I'm sorry to hear that. An outer coolant seal leak is rare too.
I mean, I'm not 100% certain its an outer coolant seal, but I did see coolant steadily running out from where the rear rotor housing connects to the iron on the drivers side, midway up. while i was filling it,system completely unpressurized.
What threw me for a loop though, was after that I drained the system entirely (block and radiator.) I removed the leading plug from the rear rotor, pulled the EGI fuse, and put my finger over the hole and had my girlfriend crank it. I did get a drop or two of the coolant that I had just poured into the motor(and drained) that shot onto my finger.
Its a bit confusing really, Leaking from both sides of the engine when adding coolant, system completely unpressurized. A drop or two of coolant ended up getting shot onto my finger when I held it over the leading plug hole of the rear rotorhousing while the motor was being cranked.Yet when I looked at the motor before It was bought, I removed both leading plugs and looked inside with a light as we turned the motor over. No rust whatsoever on the plugs, and no rust from what I could see at all inside. Generally when an outer seal fails isn't it typically only on one side, and usually the plug side?
Maybe the seals just went bad from sitting for so long? That's really my best guess at this point. Because if it blew a coolant seal, i'm betting I would have seen at least a trace of rust or orange liquid when I inspected it before purchase. Turbine fins were fine, so no apex seal damage. Virtually no play at all on the turbo.. Only hint of modification I can find on the motor was that between the nipple on the compressor outlet and wastegate nipple, there were two trust hoses not connected to anything, which I'm assuming went to an aftermarket boost controller.
Under what circumstances did you buy the engine? Was it advertised as used but running, or unknown condition?
Usually a coolant seal (inner) fails from either old coolant not being changed and corroding the channel the seal sits in, or a catastrophic overheat warping the metals apart and combustion gases burning the seals. The outer one can't really be exposed to gases, but once again in event of catastrophic overheat the metals can warp. But that's really rare.
I would suspect it was overheated and then pulled and sold as "running".
EDIT: Basically what KansasCityREPU said above, but I guess we typed at the same time.
It was bought from an engine distributor in person. Typical with Jspecs, as is, no warranty. I was aware of this risk going into the situation. It's likely a seal issue based on what you guys have chimed in with, due to possibly warped housings from overheating. Still, I figured with any kind of blown coolant seal or warping especially, there would have been rust visible inside the engine when I was looking through the plug holes. Rear rotor had a tiny tiny amount of oil on it, but aside from that, nothing indicative of coolant.
Interesting though, I was just looking over the swap pics I have posted. In one of them i took a picture directly above the Jspec when it was out of the car, TB & UIM were removed, so you were looking right down the lower intake manifold...there was a good amount of dry white powder inside there, and inside the TB and UIM....Does that mean anything to anyone?
Well it's possible that after they realized there was coolant in the combustion chamber, they cleaned it out as best they could and then sprayed some oil in to keep it from rusting. And that would be the oil you found in the rear chamber. It's worth noting though that it may not have been the engine distributor themselves, but the people they imported it from beforehand who did that.
Regarding the white powder, it's hard to tell without seeing it but if you have ever removed a coolant hose that was filled with gross old coolant (like the one on the throttle body, for example), it is usually a white or white green powder. It's a pretty safe assumption that it is coolant in there.
When you said earlier that you pulled the spark plug and cranked it, did you also pull the injection fuse? It could be gasoline that sprayed on your finger, not coolant. But if the coolant looks like it is coming from between the housing and iron, I would just make absolutely sure that it is the outer coolant seal before rebuilding it. Again, its a rare failure. Before tearing it down, just make absolutely sure that it is not dripping down from somewhere above. It would be a shame to rebuild a good engine.
Last edited by WondrousBread; 10-31-17 at 08:55 AM.
Well it's possible that after they realized there was coolant in the combustion chamber, they cleaned it out as best they could and then sprayed some oil in to keep it from rusting. And that would be the oil you found in the rear chamber. It's worth noting though that it may not have been the engine distributor themselves, but the people they imported it from beforehand who did that.
Regarding the white powder, it's hard to tell without seeing it but if you have ever removed a coolant hose that was filled with gross old coolant (like the one on the throttle body, for example), it is usually a white or white green powder. It's a pretty safe assumption that it is coolant in there.
When you said earlier that you pulled the spark plug and cranked it, did you also pull the injection fuse? It could be gasoline that sprayed on your finger, not coolant. But if the coolant looks like it is coming from between the housing and iron, I would just make absolutely sure that it is the outer coolant seal before rebuilding it. Again, its a rare failure. Before tearing it down, just make absolutely sure that it is not dripping down from somewhere above. It would be a shame to rebuild a good engine.
Good call to make sure I pulled the EGI fuse, but yes. that was the first thing I did when I started noticing the coolant stream. At no point was the key turned from the off position with that EGI fuse in place. I'm 100% sure it was coolant. It was maybe a drop or two, but enough that it made me uncomfortable to the point I fed about 1/4 a quart of oil into each leading plug hole and cranked it. I've been cranking it repeatedly about once a week to make sure the oil stays present and prevents rust.
I'm most likely going to end up replacing the rotorhousings anyway. Mazdacomp has them far cheaper than anywhere else, and if its coming apart anyway, I might as well.
But yeah, its just so baffling. Granted the car was up on jackstands on the front only. But in a completely unpressurized system, pouring coolant into the thermostat housing it was just dripping out continuously. If you look at the drivers side of the engine, the left side of the rear rotor housing, right where it connects to the iron is where it started, right at that seal. about midway up where the oil dipstick housing is on the engine (for reference of how far up.) All along that line where the housing and iron meet, it leaked perfectly down that line, and from there found its way on the oil pan and started dripping to the ground from that point (remember, front of car on jackstands at this point.) So at that point it was falling off the oil pan because of the incline.
As for the other side, it was nearly impossible to tell where the leak was coming from. it was still leaking from the passengers side, not nearly as bad, but due to the turbo and manifold I couldn't see where. However, its last point of flow before it started dripping was on the bottom of the turbo manifold, visible from under the car. Interestingly enough, when I bolted the downpipe on (jspec downpipe, not USDM so its longer and has no precat.) the coolant due to the incline of the car started dripping off the flange of the downpipe where it would meed the rest of the exhaust midway back.
Honestly im just baffled. I'll snap some pictures and a video of me cranking it right now.
As promised, here is a short video of me cranking the car with the EGI fuse removed. Apologize for the camera shaking. Its difficult to hear because of the coolant buzzer going off, but there is definitely a "gulp" that you can hear as its being cranked. Most likely due to the oil I placed in the housings?
Rear rotor housing, Trailing spark plug visible. it was leaking immediately to the left of the plug, exactly where the housing and iron meet, and running directly down that seal path.
I think the only way you're really going to know what is going on is with a tear-down of the engine block unfortunately. The sound you mentioned isn't really audible on the video. Anyways, if the coolant really is leaking from the crack between the housing and iron, it's a definite rebuild.
I mean if you want to do a test of the inner coolant seals, you can try buying one of those rad cap pressure testing adapters and pressurizing the system, but the problem is if there are any leaks at all (coolant seal or otherwise) you will not hold pressure. So if the outer seal is broken (which it appears to be based on your description and the accompanying photograph), you will never hold pressure anyways. So a disassembly and rebuild is the only way to find out what went wrong.
Honestly I agree with you, It does not look like it will hold pressure whatsoever, especially since it was leaking out when the system was unpressurized and I was just adding coolant prior to (at that time before i noticed the leak) finish topping off all of the fluids and start it up.
One thing crossed my mind, complete 180 in the other direction of what we've been talking about. What about if the water/coolant (whatever this motor had in it last time it ran) froze due to not enough antifreeze being present in the system? Either way, food for thought at this point. What it boils down to (no pun intended.) is a disassembly and rebuild.
The engine should be out of the car and disassembled within two weeks & rebuilt. Hopefully anyway. I need to get in touch with Mazdamotorsports and get two housings ordered.
Definitely will take pics of the disassembly and rebuild and failure analysis. I'm intrigued as to what the problem was. All in all, super frustrating to go through all that trouble. But I knew when the motor was bought what the risks were, and to be honest, 1600 for a S5 jspec longblock isn't bad. It came with the pressure sensor (that alone is about 1/4 the price of the engine) N374 ECU, and an uncut Jspec harness (not that I could use those obviously, but maybe someone here on the forums can. I sourced an S5 N370 ECU) After the rebuild the peace of mind will be nice knowing its fresh and healthy.
So we met with the engine builder today for the teardown of the engine. I was expecting two rotor housings worst case. I have better pictures I will post later, but this is what was found
Engine coming apart.. Sludge everywhere. After I had noticed the coolant pouring out when I installed the engine, I poured oil into the housings and turned the motor with the EGI fuse pulled somewhat regularly. Side housing.. Rear rotor housing Rear rotor...Apex seal chewed it up nicely. Front rotor.
Failure analysis summed up by the engine builder "The engine had been severely overheated several times and was unusable. Not only that, the rear rotor showed that an apex seal failure had occurred as well.."
Apparently whoever ran this engine, ran it hard to the point it blew and apex seal and overheated it multiple times, warping the rotor housing to the point even when the coolant system was unpressurized it was pouring coolant out of where the rotor housing meets the side housing. The side housings were overheated to the point the material had turned blue.
...Very frustrating, and upsetting. But we aren't giving up on this one. Luckily the engine builder is going to source us a core and we will go from here. As it stands now, the engine shortblock is almost completely un salvageable.
 12-05-15, 07:32 AM