
Widebody Turbo Swap - My Dream FB Build is Finally Happening!

Thread Starter
Joined: Aug 2011
Posts: 3,078
Likes: 42
From: Cambridge, Minnesota
I got a whole lot more done on the car today, mainly just wiring stuff so far.
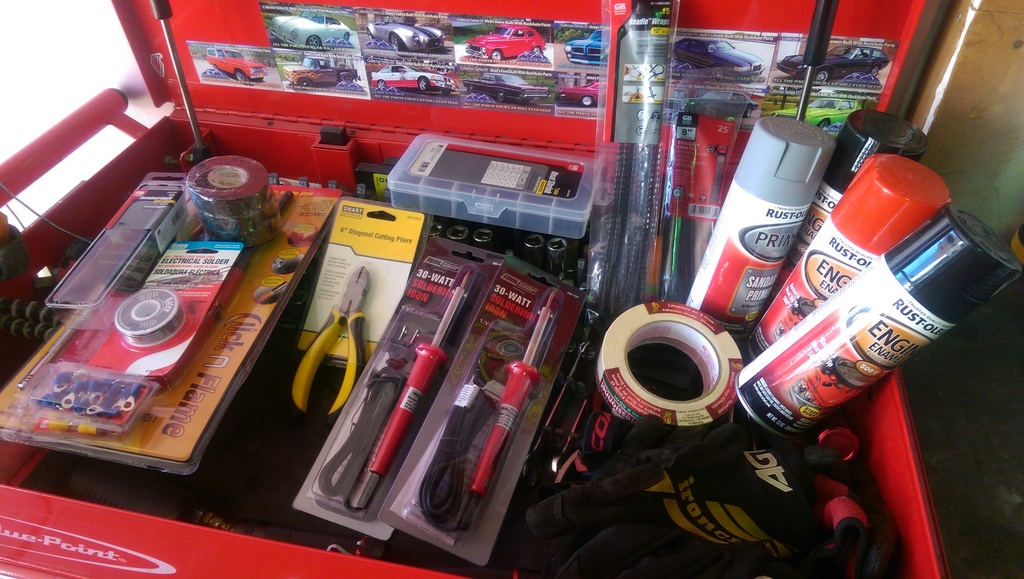
Had to go get a whole bunch of wiring supplies and paint from Menard's, the hardware store and the local paint shop. I grabbed some POR-15 as well so I can solve the rear bin rust issue - man that stuff is expensive!
Soldering the choke/check relay since I accidentally cut it out before really thinking about it.
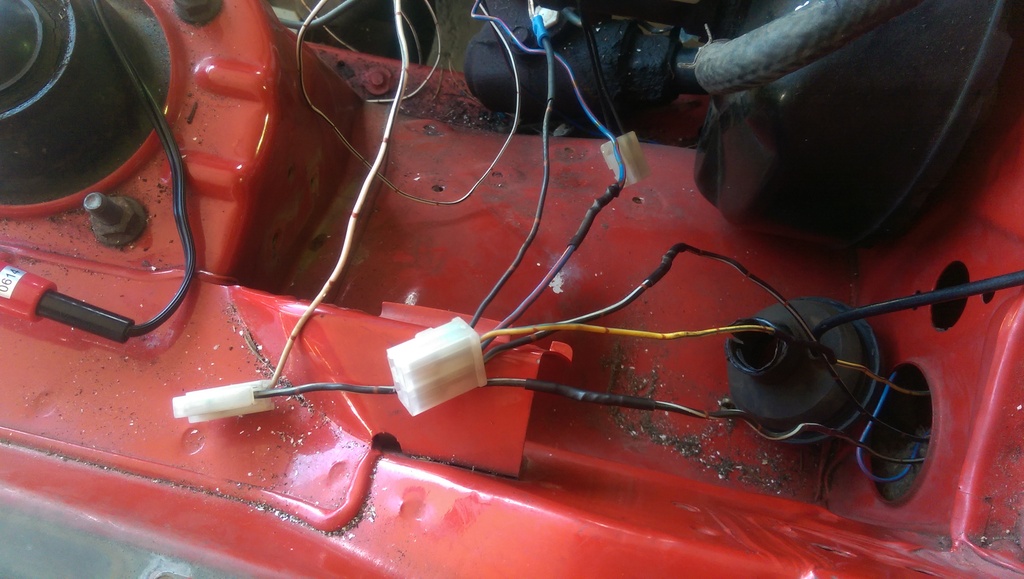
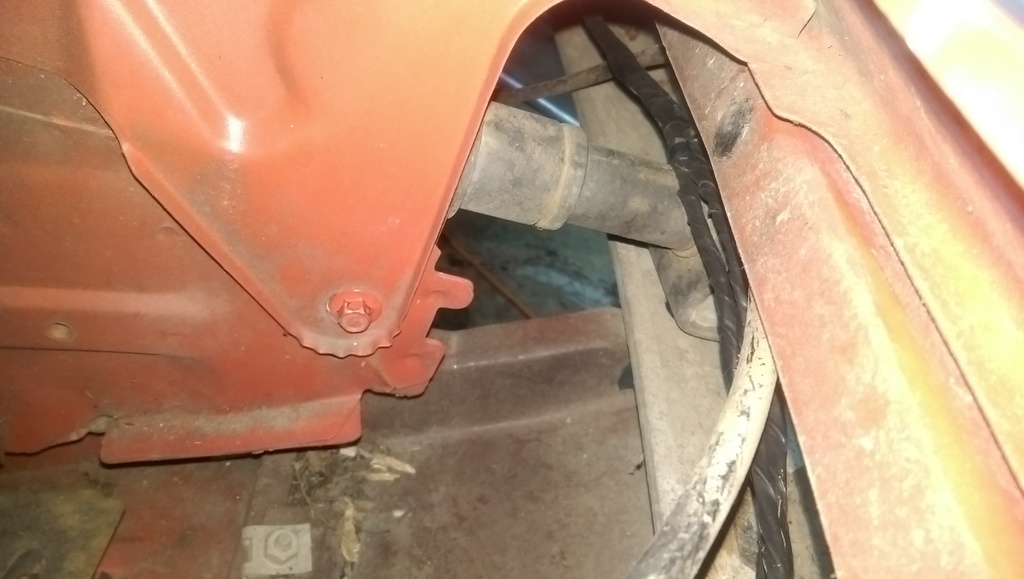
Got the wires run for the tuck!
There's a little lip behind the strut tower and coil spot there - the worst part of the tuck.
How I got the wires to sit in there;
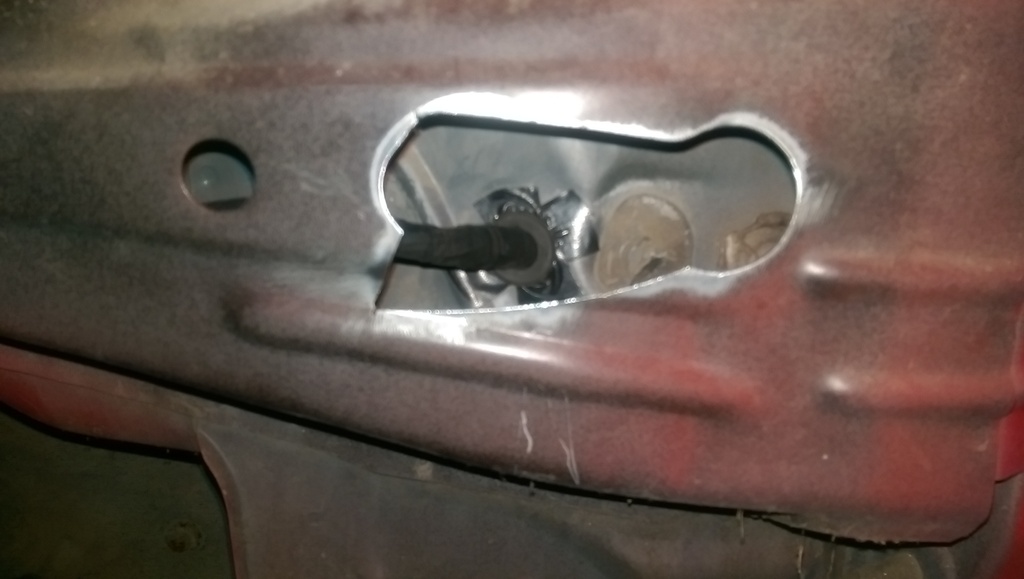
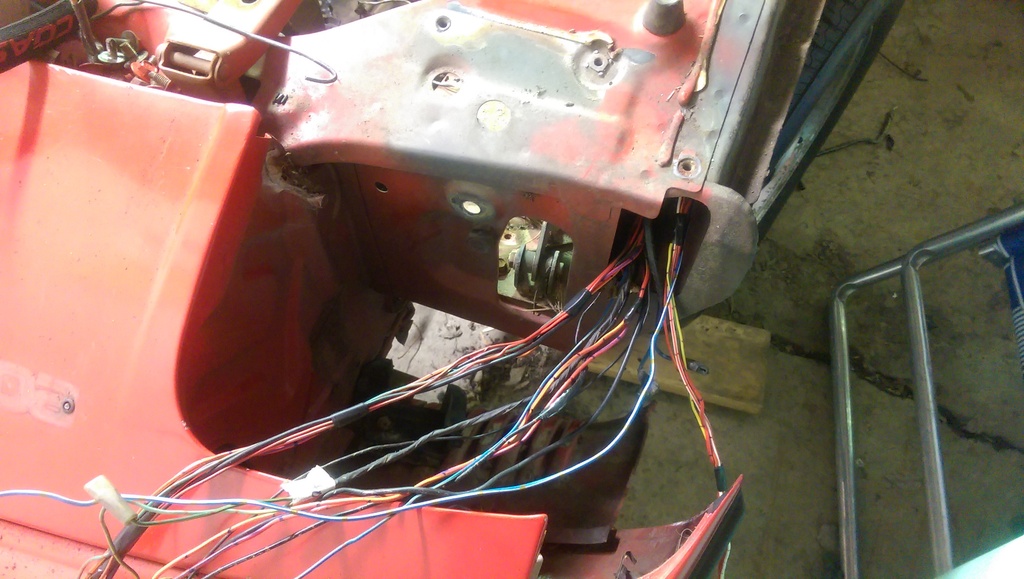
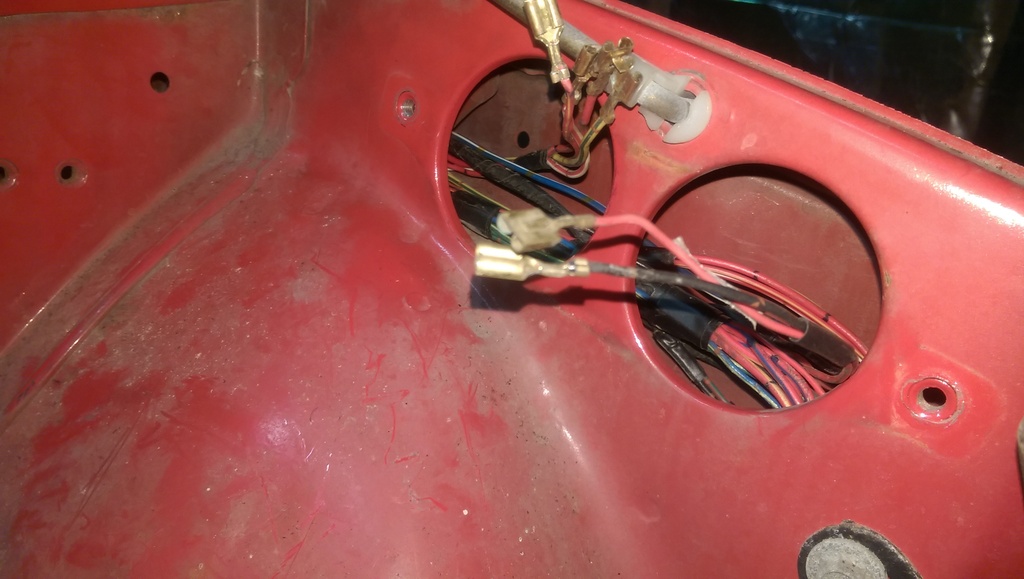
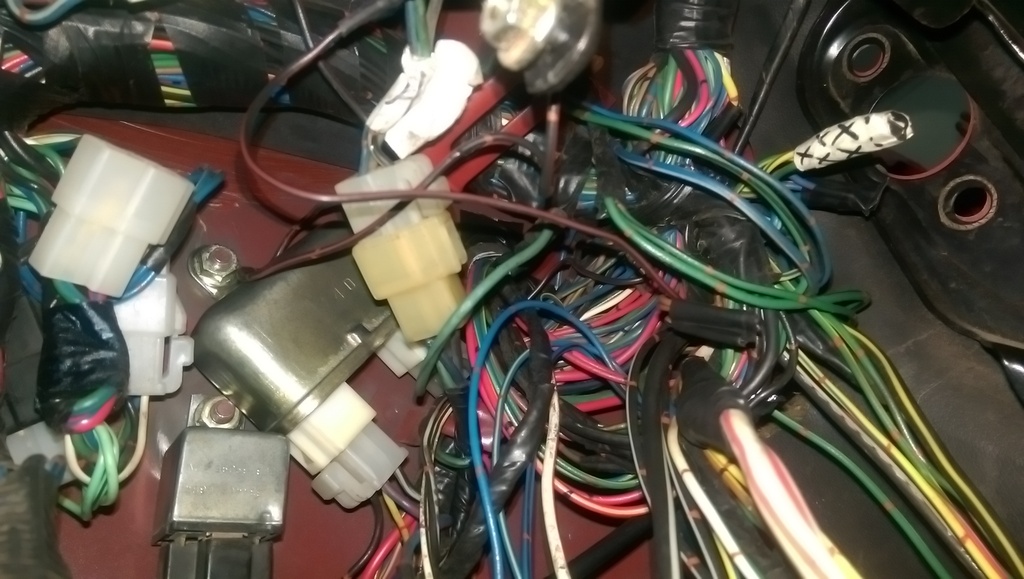
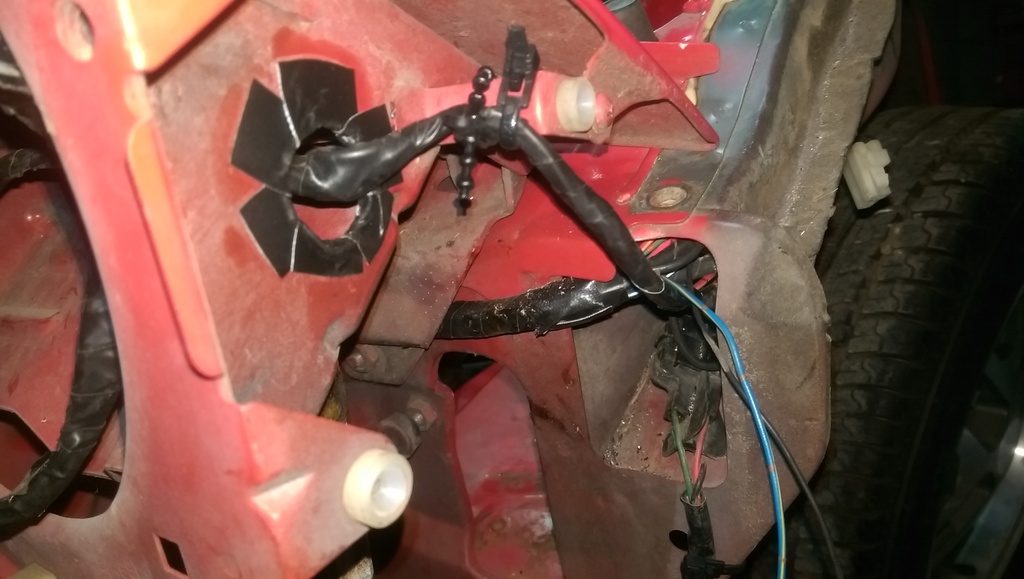
The wiring disaster in there right now, going to get cleaned up and sorted out next.
So next up on the list is running the wires I won't be using on the left side of the harness, over the transmission tunnel and to the right passenger side for the stock FB wiring. Then I'll have to start in on the FC wiring right away, not sure if I'll drop the engine in there first or not. I need to make a Mazdatrix order for the front cover o-ring and thermal pellet and install those before putting the engine in.
I also started a series on the swap, hopefully someone finds it helpful
Had to go get a whole bunch of wiring supplies and paint from Menard's, the hardware store and the local paint shop. I grabbed some POR-15 as well so I can solve the rear bin rust issue - man that stuff is expensive!

Soldering the choke/check relay since I accidentally cut it out before really thinking about it.

Got the wires run for the tuck!

There's a little lip behind the strut tower and coil spot there - the worst part of the tuck.

How I got the wires to sit in there;

The wiring disaster in there right now, going to get cleaned up and sorted out next.

So next up on the list is running the wires I won't be using on the left side of the harness, over the transmission tunnel and to the right passenger side for the stock FB wiring. Then I'll have to start in on the FC wiring right away, not sure if I'll drop the engine in there first or not. I need to make a Mazdatrix order for the front cover o-ring and thermal pellet and install those before putting the engine in.
I also started a series on the swap, hopefully someone finds it helpful
Thread Starter
Joined: Aug 2011
Posts: 3,078
Likes: 42
From: Cambridge, Minnesota
^This idiot...me...reposted that here. It was supposed to go in another thread, whoops. And at least the DST change is screwing with the servers so I don't have time to edit it. Ah well - what can ya do?
Yeah, it totally sucks. With some really hard work, countless hours and a ridiculous budget it could be brought back to life. But I have none of those things available to me right now so it'll go away for good.
Going to be getting an Odyssey PC545 Extreme racing battery for the rear bin, and get all the wiring done in the next few days I hope. I'll probably attack the FB wiring first thing tomorrow and eliminate that from the list. Then once that's all sorted out I'll start in on the FC wiring. Should be pretty straight forward since I've got everything de-pinned, separated and ready to go.
Dream , definatley going to be following this . Im stalled on my T2 SA build with no time but your going to be a help going forward. Wasnt considering doing a tuck .... but maybe will now
1) if you lengthen the wires and run them to the same fuses/box or move the box/fuses, does this require you to change any of the gauge wiring?
2) does splicing the wires cause any potential problems with current flow?
3) if something goes wrong with the wiring, how will you pinpoint the location of the problem with wires being tucked?
I believe all the aforementioned questions were covered in the 3rd gen section, but it's always something to consider.


One suggestion before you scrap that old wide body. There are several sensors for the auto to clutch conversion you will need.
Also, just for the heck of it, cut out the trans mounts from the wide body. They can be welded in to the red car and give it factory trans mounting location. Otherwise you need to make a trans mount. I found that making a trans mount that spans the 5-6 inch gap between the 1984/1985 auto the manual conversion has a lot of flex. Welding in the factory mounts gets around this. When cutting out the old trans mount from the black car, get the entire mount. I just used a saws-all and cut out more then needed and then drilled out the spot welds.
Also, just for the heck of it, cut out the trans mounts from the wide body. They can be welded in to the red car and give it factory trans mounting location. Otherwise you need to make a trans mount. I found that making a trans mount that spans the 5-6 inch gap between the 1984/1985 auto the manual conversion has a lot of flex. Welding in the factory mounts gets around this. When cutting out the old trans mount from the black car, get the entire mount. I just used a saws-all and cut out more then needed and then drilled out the spot welds.
Thread Starter
Joined: Aug 2011
Posts: 3,078
Likes: 42
From: Cambridge, Minnesota
One thing you need to worry about when doing a tuck Is this:
1) if you lengthen the wires and run them to the same fuses/box or move the box/fuses, does this require you to change any of the gauge wiring?
2) does splicing the wires cause any potential problems with current flow?
3) if something goes wrong with the wiring, how will you pinpoint the location of the problem with wires being tucked?
I believe all the aforementioned questions were covered in the 3rd gen section, but it's always something to consider.
In response to those, here are my thoughts:
Q1. "If you lengthen the wires and run them to the same fuses/box or move the box/fuses, does this require you to change any of the gauge wiring?"
A1. Part 1. FB Wiring
I don't believe that the lengths that I'm extending these wires will cause much, or any, voltage drop due to the added length. The longest extension that I'll be making is in the ?4? (my best guess) gauge wiring that goes to the "Main Fuse" in the fuse box. And even so, that extension is only maybe 4 feet long at most - but it's closer to the ignition switch which could actually help the battery connection. The longest extension that I'll be making is for the "Headlight Retractor" fuse and that wire gauge is only about 12 from what I recall. I will worry about voltage drop on that one - but since it'll mainly be a daily driven, not nightly driven, car I'm not too concerned about that one. The last extension on the FB wiring for the fuses is the "Head" but that is another 12 gauge wire that will only have maybe 2 extra feet of wire added on. Because of those short extensions I'm not too worried about power loss at the fuses, battery or the components that get powered through the fuses. Now, as far as the front harness that will run all the lights, most of those wires are 14 gauge. The extensions I need to add for the right headlight, right turn signal, right marker light, right headlight motor are the longest. I'm still going to have to see what else gets extended and what can stay the same length. I will worry a little about the extensions for that right side but I'm not going to lose sleep over it. The longest extension there might be 4 feet but I don't know if it'll need to even be that long. So voltage drop at the right side light system shouldn't be an issue, or very minimal if there is any.
A1. Part 2. FC Wiring
And now, since I'm doing the tuck in a swap, the FC wiring will come next in order to run the FC engine and ECU. The way that I'm running the Main Relay, Knock Control Unit, Boost Pressure Sensor, Atmospheric Pressure Sensor, and ECU all on one panel - I think that it'll have better connections than it did in the FC chassis to start out with. The wiring will actually be shortened to those components, so if there was any lag to begin with - there won't be any in my system. The injector wiring from the ECU will actually be shortened as well by probably a foot or two since the ECU wiring will be closer to the engine than it normally is in the FC chassis. All that's left for the FC wiring components are the Circuit Opening Relay and Fuel Pump Relay/Resistor. My plan with those is to mount them in the driver's side bin right next to the battery and fuse block. This enables the leads to the fuel pump to be only 12" long instead of darn near 12' (" = inches, ' = feet, just in case you're confused) in the FC chassis. So the fuel pump will have no voltage drop whatsoever since the COR and FPR/R will be mounted together in one place, right next to the fuel pump. Because of these intended locations I have no worries whatsoever about the wiring tuck as far as the FC wiring goes.
Q2. "Does splicing the wires cause any potential problems with current flow?"
A2. In my last build, I did a truly terrible job on the soldering wires together. Most of them were just wound together and electrical taped and left alone. So, because of my learning experience with that build, I'm soldering EVERY SINGLE CONNECTION in this car, not one will be left unsoldered. I'm no electrical expert by any means, so I'm not sure if there are dire effects of cutting and splicing wires. I'm sure if you didn't have a good splice it can cause major issues - but I plan on making every connection as healthy as possible so I don't have to worry about it later. My mentality with this one is to do it right the first time and never have to worry about it again.
Q3. "If something goes wrong with the wiring, how will you pinpoint the location of the problem with wires being tucked?"
A3. See, that's my main concern summed up in one question. My thoughts were as follows:
1. I left the FB wiring completely stock to this point.
2. I didn't add any extensions to the stock wiring from the chassis.
3. The wires are the same as they already were in the original configuration, just run through a different hole.
4. I plan on powering up the car before wrapping and finalizing the tuck.
---1. Since the FB wiring is entirely stock right now, I don't worry about there being a functional error in the system. I tested the lights and they worked before I did this project, so they should after as well.
---2. I didn't cut the wires by the firewall and add extensions there with the intent of only having to extend the plugs. My reasons for that are to avoid any issues inside the fender channel, the worst place to have a problem. If I do have an issue I can look at the extension that will be from the plug to the harness which will not be covered up somewhere that I can't get to.
---3. The reason I wanted to just run the stock wires through a different hole was to be able to diagnose problems as they arose looking at stock wiring diagrams. That will allow me to quickly see what's wrong and where I should start my diagnosis if something does go awry in the wiring.
---4. It might sound crazy, but I plan on powering on the entire car before actually adding wiring insulation and protectors when finalizing the tuck, in order to see if there are any issues that need to be resolved. This might sound counter intuitive since I won't have the motor in, but it'll let me get the whole wiring swap out of the way before focusing solely on the engine. I know that part will be much quicker than what I'm doing now with the wiring project.
One suggestion before you scrap that old wide body. There are several sensors for the auto to clutch conversion you will need.
Also, just for the heck of it, cut out the trans mounts from the wide body. They can be welded in to the red car and give it factory trans mounting location. Otherwise you need to make a trans mount. I found that making a trans mount that spans the 5-6 inch gap between the 1984/1985 auto the manual conversion has a lot of flex. Welding in the factory mounts gets around this. When cutting out the old trans mount from the black car, get the entire mount. I just used a saws-all and cut out more then needed and then drilled out the spot welds.
Also, just for the heck of it, cut out the trans mounts from the wide body. They can be welded in to the red car and give it factory trans mounting location. Otherwise you need to make a trans mount. I found that making a trans mount that spans the 5-6 inch gap between the 1984/1985 auto the manual conversion has a lot of flex. Welding in the factory mounts gets around this. When cutting out the old trans mount from the black car, get the entire mount. I just used a saws-all and cut out more then needed and then drilled out the spot welds.
82transam and I were discussing that a while back and trying to figure out what I should do. I said I wanted to weld up some transmission mounts just like stock, but they'll be behind the auto tranny mounts since the manual transmission mounts behind the stock auto mounts. That's a great idea! I'll make sure to cut them out before sending the car off to the junker. That would be much easier to drill out the stock spot welds on the mounts and welding them into the red chassis will make it super easy for me. I won't have to do the geometry and make sure that everything lines up the way it should using flat sheet metal under there - much better idea to use the stock mounts from that other car. Thanks again for that suggestion, you just saved me a lot of headache!
Perfect example of an outside opinion being a big help there, everybody else feel free to call me out on that stuff! I have a hard time seeing what's right in front of me sometimes.
Thread Starter
Joined: Aug 2011
Posts: 3,078
Likes: 42
From: Cambridge, Minnesota
Well, I can pretty much say now that the wiring tuck is done. Pictures that follow are what I got done today, and it was a long and tedious day to say the least. I've got a video that will be in segments coming of how I did the wiring tuck in the car - because there are over 6 hours of video that I recorded. Don't worry, most of those hours will be timelapsed but it should get the point across of how long it really takes to get this done.
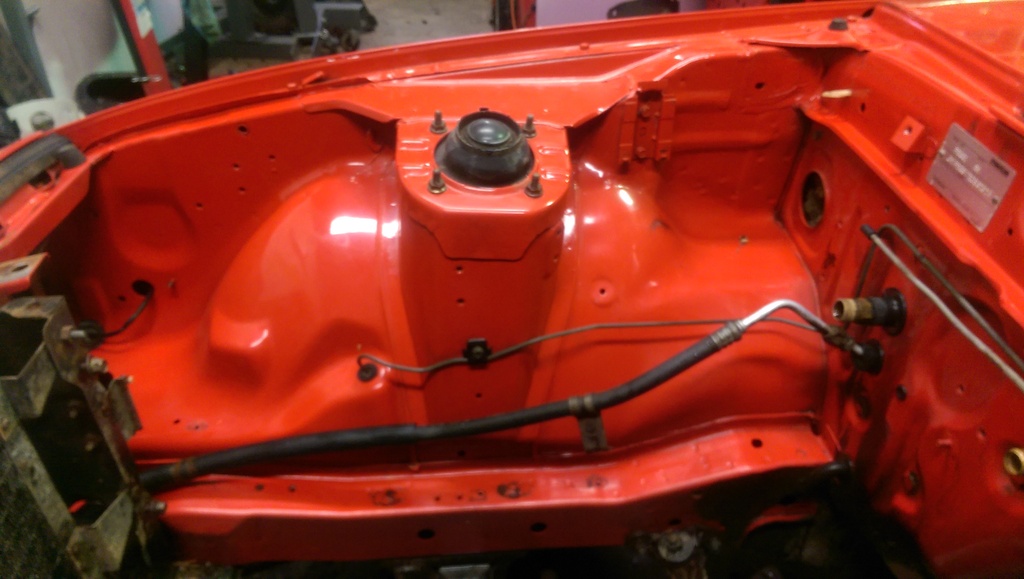
Engine bay, mainly the fenders, were filthy - so I decided to clean them up because I couldn't stand it anymore and wanted the tuck to look awesome.
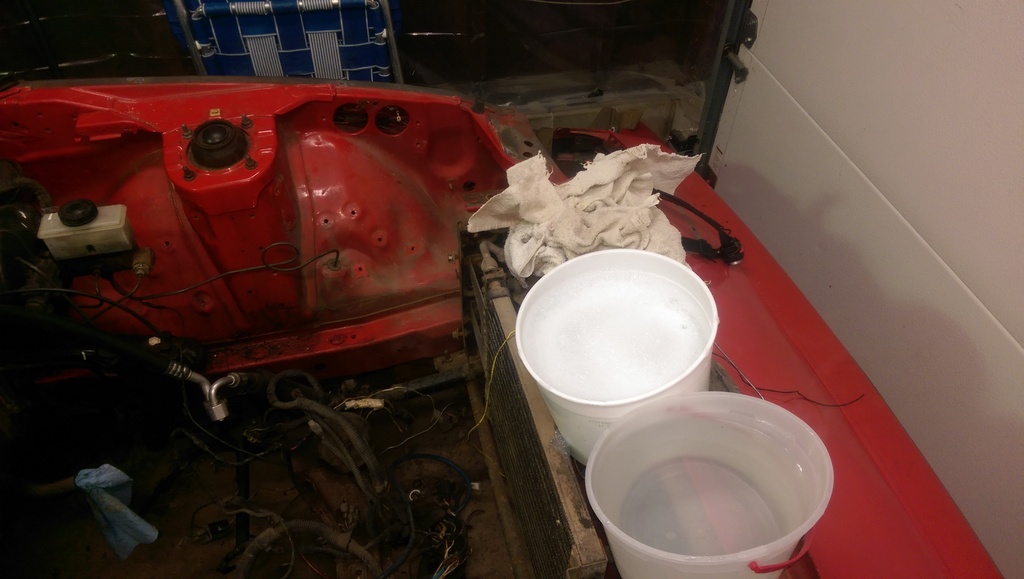
This side didn't clean up as well as the other one, not sure if battery acid leaked onto the paint in the bottom corner there or what. It's still pretty clean and looks much better than it did, but that dirty spot is gonna drive me nuts. Ah well, it'll get painted over next winter anyways.
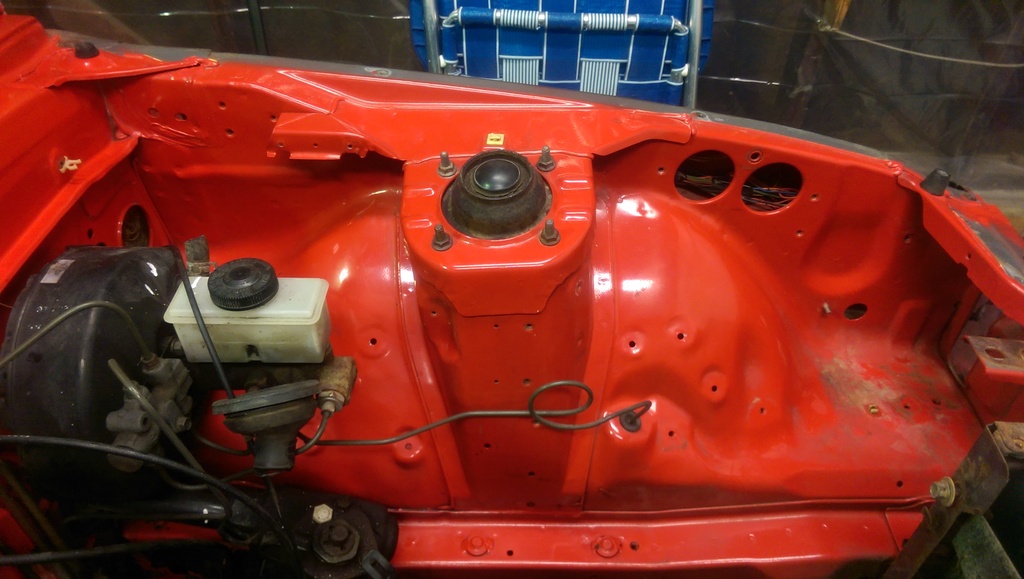
So clean!
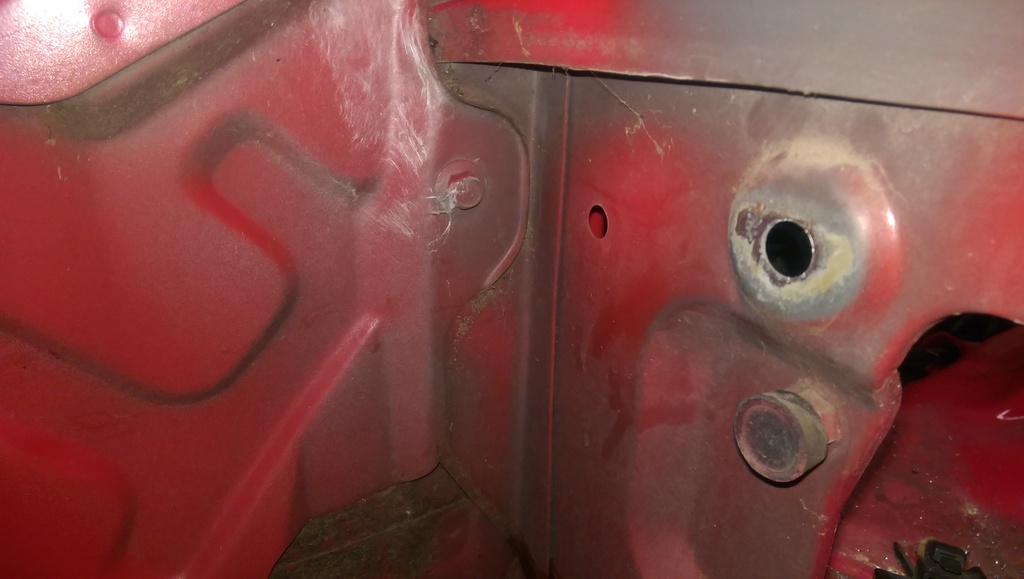
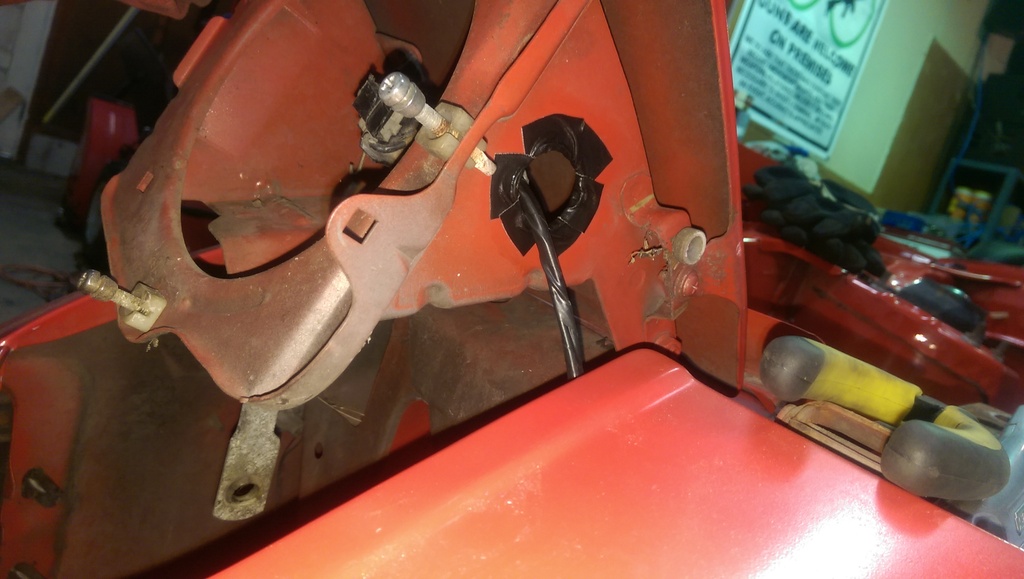
Underneath the right side headlight bucket, before putting any wires through there.
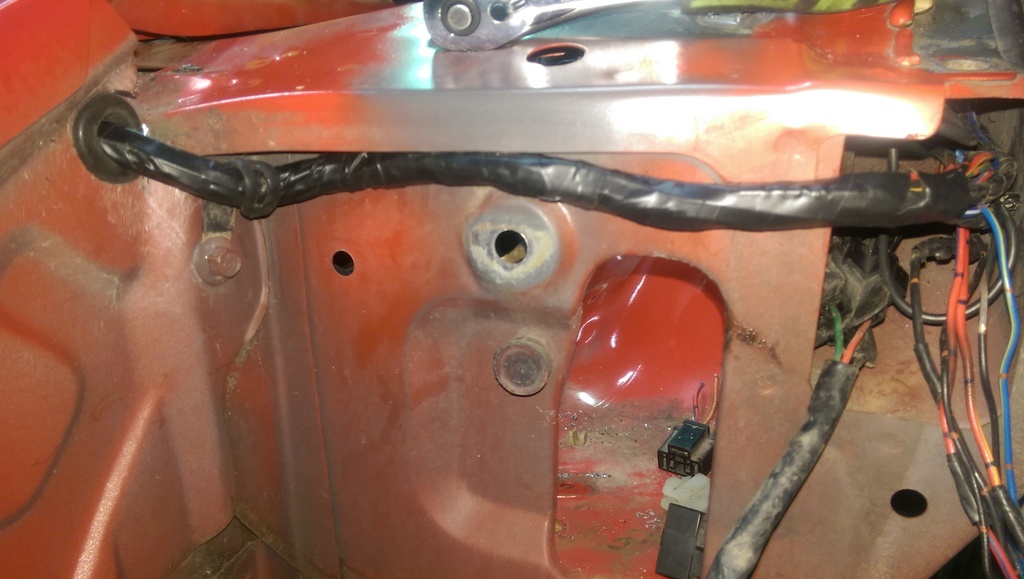
After the routing, once I had decided how I wanted to run the wires. Yes - I had to cut a hole in the nose piece and then saw it out in order to slide the wires in and out during assembly/dissassembly of the nose piece. Believe it or not, it was the easiest and best way to hide the wires that I could find so I went that route.
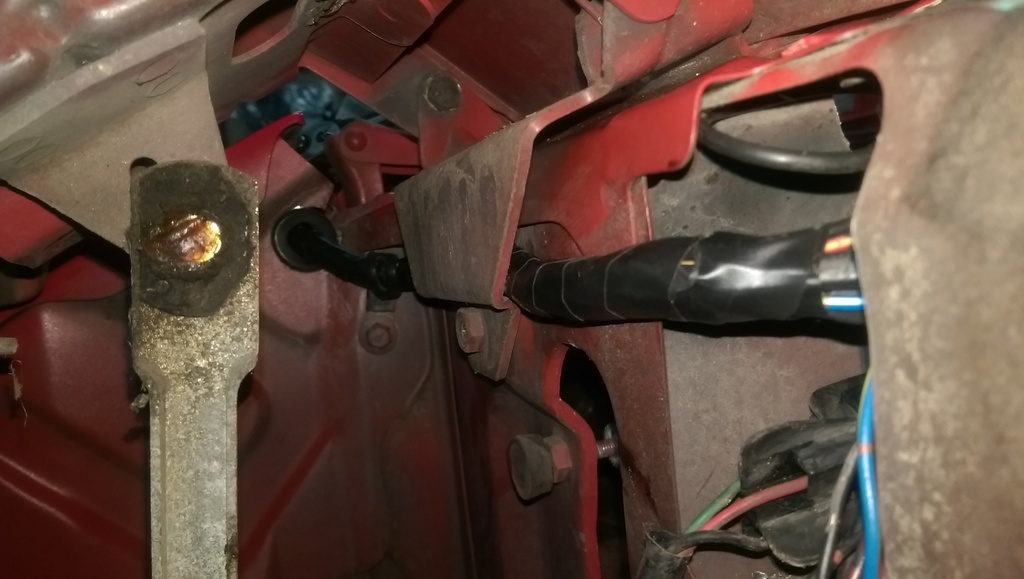
With the headlight installed, the wiring fits like a glove and is protected by the headlight bucket bracket itself. And there isn't any worry of the movement of the light cutting into any wires either, which is a huge bonus.

Looking from the right side headlight towards the left side of the car - this side was super simple. Only four components needed to be wired in here, headlight, headlight motor, turn signal and marker light.
Since in the original format the wiring runs underneath the headlight cover and through to the headlight, that wouldn't work anymore since I'm trying to hide all of the wires. So I had to cut holes in the sides of the headlight buckets and run the wiring through there. This actually made for an awesome system because the wires will be hidden by the headlight covers that go over the sides of the headlights, and it'll make for a good protector and guide for the wiring so that it doesn't go where it's not supposed to.
Passenger's side headlight modification.
Picture as I left her today - I was too tired to clean up.
If you'll notice, I completely forgot to get a picture of the wiring underneath the nose piece. I took video of the tucked harness I made and explain it in detail so you'll just have to wait for that to see how it's running underneath there. Lately I have to remember to take pictures after shooting video, whereas I used to only take pictures and no video. So it's a weird transition for me right now to be sure. I'll try to get better at it in the future though.
I'm going to quickly edit Episode 3 - Picking an Engine right now and start uploading it to YouTube tonight. Should hopefully be up by tomorrow morning and I'll start in on Episode 4 - Wiring after that. I'm thinking it'll be in at least 3 or 4 parts minimum, so be warned.
Engine bay, mainly the fenders, were filthy - so I decided to clean them up because I couldn't stand it anymore and wanted the tuck to look awesome.

This side didn't clean up as well as the other one, not sure if battery acid leaked onto the paint in the bottom corner there or what. It's still pretty clean and looks much better than it did, but that dirty spot is gonna drive me nuts. Ah well, it'll get painted over next winter anyways.

So clean!

Underneath the right side headlight bucket, before putting any wires through there.

After the routing, once I had decided how I wanted to run the wires. Yes - I had to cut a hole in the nose piece and then saw it out in order to slide the wires in and out during assembly/dissassembly of the nose piece. Believe it or not, it was the easiest and best way to hide the wires that I could find so I went that route.

With the headlight installed, the wiring fits like a glove and is protected by the headlight bucket bracket itself. And there isn't any worry of the movement of the light cutting into any wires either, which is a huge bonus.


Looking from the right side headlight towards the left side of the car - this side was super simple. Only four components needed to be wired in here, headlight, headlight motor, turn signal and marker light.

Since in the original format the wiring runs underneath the headlight cover and through to the headlight, that wouldn't work anymore since I'm trying to hide all of the wires. So I had to cut holes in the sides of the headlight buckets and run the wiring through there. This actually made for an awesome system because the wires will be hidden by the headlight covers that go over the sides of the headlights, and it'll make for a good protector and guide for the wiring so that it doesn't go where it's not supposed to.

Passenger's side headlight modification.

Picture as I left her today - I was too tired to clean up.

If you'll notice, I completely forgot to get a picture of the wiring underneath the nose piece. I took video of the tucked harness I made and explain it in detail so you'll just have to wait for that to see how it's running underneath there. Lately I have to remember to take pictures after shooting video, whereas I used to only take pictures and no video. So it's a weird transition for me right now to be sure. I'll try to get better at it in the future though.
I'm going to quickly edit Episode 3 - Picking an Engine right now and start uploading it to YouTube tonight. Should hopefully be up by tomorrow morning and I'll start in on Episode 4 - Wiring after that. I'm thinking it'll be in at least 3 or 4 parts minimum, so be warned.
Looking good.  Yeah I would definitely chop those trans mounts off the other car, would be the cleanest way to do the swap.
^Agree with broke a, use some split tubing or small hose with a slit in it to protect those openings in the headlight bucket. Tape is temporary at best in that situation...
Yeah I would definitely chop those trans mounts off the other car, would be the cleanest way to do the swap.^Agree with broke a, use some split tubing or small hose with a slit in it to protect those openings in the headlight bucket. Tape is temporary at best in that situation...
And another thing, get rubber grommets at the hardware store. My biggest pet peeve is when people take all this time to make something look nice and don't take the time to do the small things.
I'm sure you just threw it up for right now, but you should get a grommet that fits the hole you cut and run the wires through that.
When you do it properly the first time you won't have to worry as much in the future.
Lastly, remember that if you ever sell this car you do not want the person to buy this to look at your work and say "WTF did this person do a shitty wiring job."
For example, on my silver FD, I found that the brilliant people at RS Motors used monster cable with three splices to relocate a batter. And they even took the time to splice the hks ignition into the fd harness without spending the $50 for a direct plug and play harness!
Not only will I never take my cars to RS motors, but it made me feel those guys don't know what the heck they are doing (not calling anyone out, but I'm seriously disgusted in the work and want to warn people of what crappy work I've seen).
Anyways, just take the time to sleeve up the wires. You mentioned you did a bad job or whatever on your last fb. You've managed to do a cleaner job on this one from my understanding, but do not cheap out when it comes to protection on the wiring.
I use raychem dr-25 sleeving material with adjoining splitters.
I like the stuff and chase bays uses the same product.
Ill stop complaining now.
Good luck brother!
I'm sure you just threw it up for right now, but you should get a grommet that fits the hole you cut and run the wires through that.
When you do it properly the first time you won't have to worry as much in the future.
Lastly, remember that if you ever sell this car you do not want the person to buy this to look at your work and say "WTF did this person do a shitty wiring job."
For example, on my silver FD, I found that the brilliant people at RS Motors used monster cable with three splices to relocate a batter. And they even took the time to splice the hks ignition into the fd harness without spending the $50 for a direct plug and play harness!
Not only will I never take my cars to RS motors, but it made me feel those guys don't know what the heck they are doing (not calling anyone out, but I'm seriously disgusted in the work and want to warn people of what crappy work I've seen).
Anyways, just take the time to sleeve up the wires. You mentioned you did a bad job or whatever on your last fb. You've managed to do a cleaner job on this one from my understanding, but do not cheap out when it comes to protection on the wiring.
I use raychem dr-25 sleeving material with adjoining splitters.
I like the stuff and chase bays uses the same product.
Ill stop complaining now
.Good luck brother!
Thread Starter
Joined: Aug 2011
Posts: 3,078
Likes: 42
From: Cambridge, Minnesota
And another thing, get rubber grommets at the hardware store. My biggest pet peeve is when people take all this time to make something look nice and don't take the time to do the small things.
I'm sure you just threw it up for right now, but you should get a grommet that fits the hole you cut and run the wires through that.
When you do it properly the first time you won't have to worry as much in the future.
Lastly, remember that if you ever sell this car you do not want the person to buy this to look at your work and say "WTF did this person do a shitty wiring job."

Q3. "If something goes wrong with the wiring, how will you pinpoint the location of the problem with wires being tucked?"
A3. See, that's my main concern summed up in one question. My thoughts were as follows:
4. I plan on powering up the car before wrapping and finalizing the tuck.
---4. It might sound crazy, but I plan on powering on the entire car before actually adding wiring insulation and protectors when finalizing the tuck, in order to see if there are any issues that need to be resolved. This might sound counter intuitive since I won't have the motor in, but it'll let me get the whole wiring swap out of the way before focusing solely on the engine. I know that part will be much quicker than what I'm doing now with the wiring project.

I have a few spare rubber grommets from the hardware store but I'm not installing the ones that are for testing. The only ones I've installed so far are the ones that I know won't have to get moved. After a few test runs with the wiring in place I'll install the grommets for the headlight buckets, once I know the location will work.
For example, on my silver FD, I found that the brilliant people at RS Motors used monster cable with three splices to relocate a batter. And they even took the time to splice the hks ignition into the fd harness without spending the $50 for a direct plug and play harness!
Not only will I never take my cars to RS motors, but it made me feel those guys don't know what the heck they are doing (not calling anyone out, but I'm seriously disgusted in the work and want to warn people of what crappy work I've seen).
Anyways, just take the time to sleeve up the wires. You mentioned you did a bad job or whatever on your last fb. You've managed to do a cleaner job on this one from my understanding, but do not cheap out when it comes to protection on the wiring.
I use raychem dr-25 sleeving material with adjoining splitters.
I like the stuff and chase bays uses the same product.
Ill stop complaining now.
Good luck brother!
Not only will I never take my cars to RS motors, but it made me feel those guys don't know what the heck they are doing (not calling anyone out, but I'm seriously disgusted in the work and want to warn people of what crappy work I've seen).
Anyways, just take the time to sleeve up the wires. You mentioned you did a bad job or whatever on your last fb. You've managed to do a cleaner job on this one from my understanding, but do not cheap out when it comes to protection on the wiring.
I use raychem dr-25 sleeving material with adjoining splitters.
I like the stuff and chase bays uses the same product.
Ill stop complaining now
.Good luck brother!
Man that Raychem is expensive though...I'm sure it's super high quality for the money though, since it seems like the best stuff on the market.

So in response to you two;
1. Yes, electrical tape is a crappy and cheap way out of using proper wiring protectors.
2. Do I know that it's cheap, tacky and crappy? Yes.
3. Why did I use it then? In order to make dissassembly easy should I run into wiring problems when I power the car on for the first time.
4. Am I going to fix it with the correct stuff? Yes.
Remember, I said that this was going to be temporary while I do wiring testing. I'm not gonna go wrapping this harness in the best stuff money can buy before testing the whole system. The nice thing about electrical tape is it wraps off really easily for me most days.
Thread Starter
Joined: Aug 2011
Posts: 3,078
Likes: 42
From: Cambridge, Minnesota
Episode 3 is up, in case you care to hear me blabber on and on about engines. Really it's just a test to see if my new settings in Adobe Premiere work to correctly put out 1080p video. Turns out it does! So now I can make the rest of the videos in true HD instead of the crappy 480p that the others are in. I'm really tempted to make the other ones in 1080 and re-upload them...
Yeah chase bays stuff is incredible. Not a whole lot in the way of rx7 parts, but they are popular with the S chassis guys among many others. Lots of really clean LS1 wiring harnesses and such.
Thread Starter
Joined: Aug 2011
Posts: 3,078
Likes: 42
From: Cambridge, Minnesota

I made a bunch more progress on the car tonight, and I'm starting on the FC wiring soon.
Left headlight before the restore

Right headlight before restoration

Left headlight after restoring

Right headlight after restoring

Everything put back on the front of the car, in order to make sure that the whole system works correctly.

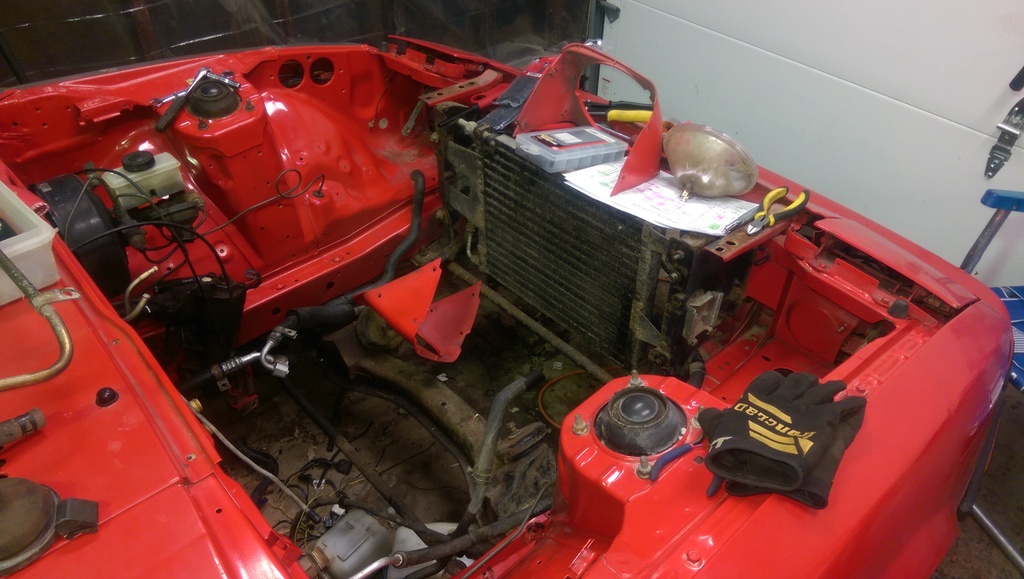
Whole bay is cleaned up nicely now, pretty happy with the results.


Fuel pump shutoff switch installed, will be running through the Circuit Opening Relay in order to help should I run into a flooding situation.

Making progress on routing and finishing up the FB wiring harness. Should be done next time I get in the car.

I'm too lazy to watch videos right now, but looking good so far. Brake tuck next .
Another thing, you can swap the front subframe with a fc subframe right?
I've sold many of those to fb guys over the years and was trying to figure out why they needed it.
.Another thing, you can swap the front subframe with a fc subframe right?
I've sold many of those to fb guys over the years and was trying to figure out why they needed it.
Thread Starter
Joined: Aug 2011
Posts: 3,078
Likes: 42
From: Cambridge, Minnesota
Correct on the subframe swap, I can throw an FC subframe underneath this car if I really want to. I'd run the 4x114.3 4 lug front setup in order to match the GSL-SE 4x114.3 rear end that this car is getting. Sean (82transam) is, in my opinion, one of the pioneers in that subframe swap regard. The reason I decided not to this go round was because then I'd have to get an FC steering column and all the other components along with it. I'm considering going that route next winter if I really feel up to it. But since this FB subframe will have all new steering components and polyurethane bushings I think I'll just stay with the FB stuff for now.
 .
.
Thread Starter
Joined: Aug 2011
Posts: 3,078
Likes: 42
From: Cambridge, Minnesota
I'd only want a non-powered S4 manual rack anyways. I'll have to heavily weigh the options, I'm already easily $150 into this FB steering setup as it is. R&P steering would be so nice though...
Joined: Jun 2006
Posts: 4,815
Likes: 24
From: Columbia, Tennessee
Bay looks good. The cherry on top would be to refinish the cross member in glossy black and lower air panel in silver. Are you going to paint the headlight trim satin black?

