Huyler's Street & HPDE Build
 03-12-19, 08:02 AM
#101

That depends, are you the guy putting a beehive on a 13b?
If you would like to offer some constructive criticism on how I can do things better please elaborate on what I have done wrong that makes my build worse than yours. I'm not building a show car, just reliable street and track upgrades.
If you would like to offer some constructive criticism on how I can do things better please elaborate on what I have done wrong that makes my build worse than yours. I'm not building a show car, just reliable street and track upgrades.
Last edited by chuyler1; 03-12-19 at 08:09 AM.
 03-13-19, 06:03 AM
#102
seattle seven
That depends, are you the guy putting a beehive on a 13b?
If you would like to offer some constructive criticism on how I can do things better please elaborate on what I have done wrong that makes my build worse than yours. I'm not building a show car, just reliable street and track upgrades.
If you would like to offer some constructive criticism on how I can do things better please elaborate on what I have done wrong that makes my build worse than yours. I'm not building a show car, just reliable street and track upgrades.
03-13-19, 09:47 AM
#103
Thanks, yours is coming along nicely. Take your time and keep it up with the details like that paint on the housings. I wanted to at least detail the 12a lettering on mine but I didn't have extra paint handy and have been trying to make progress with the install.
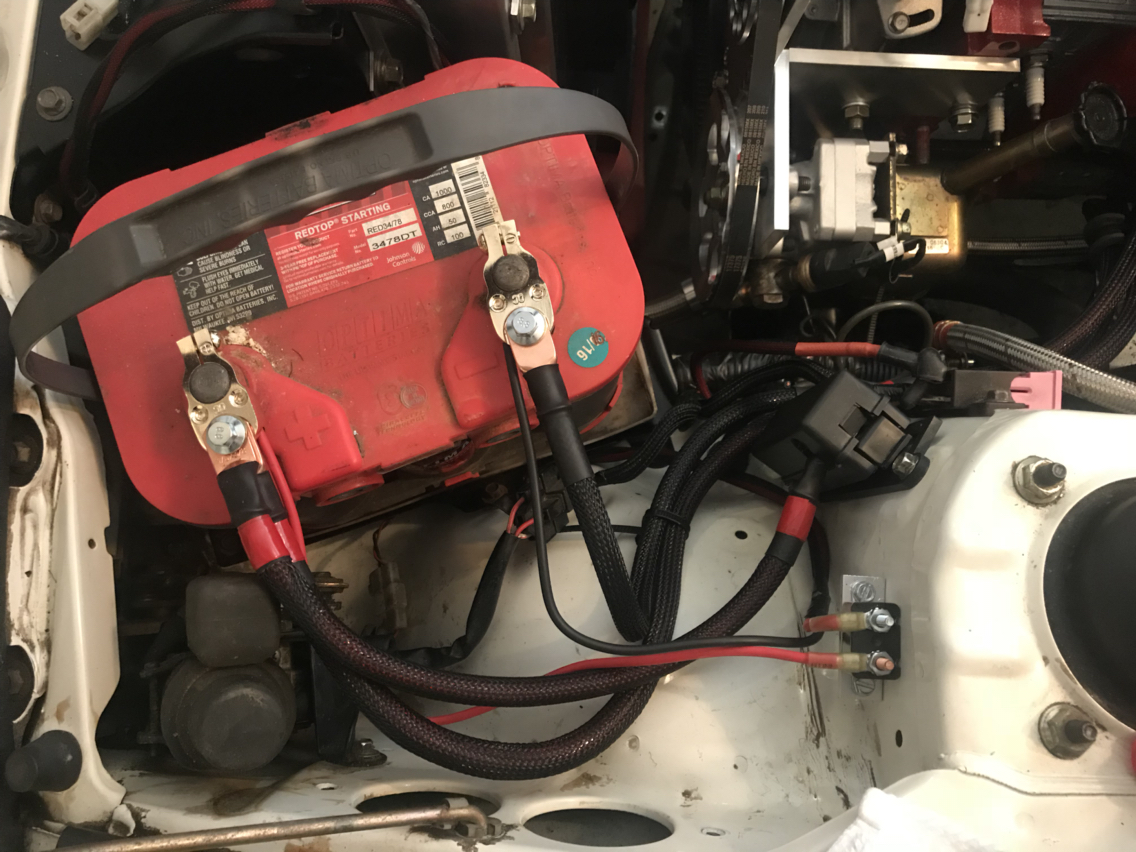
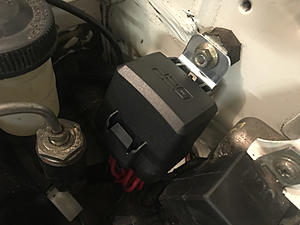
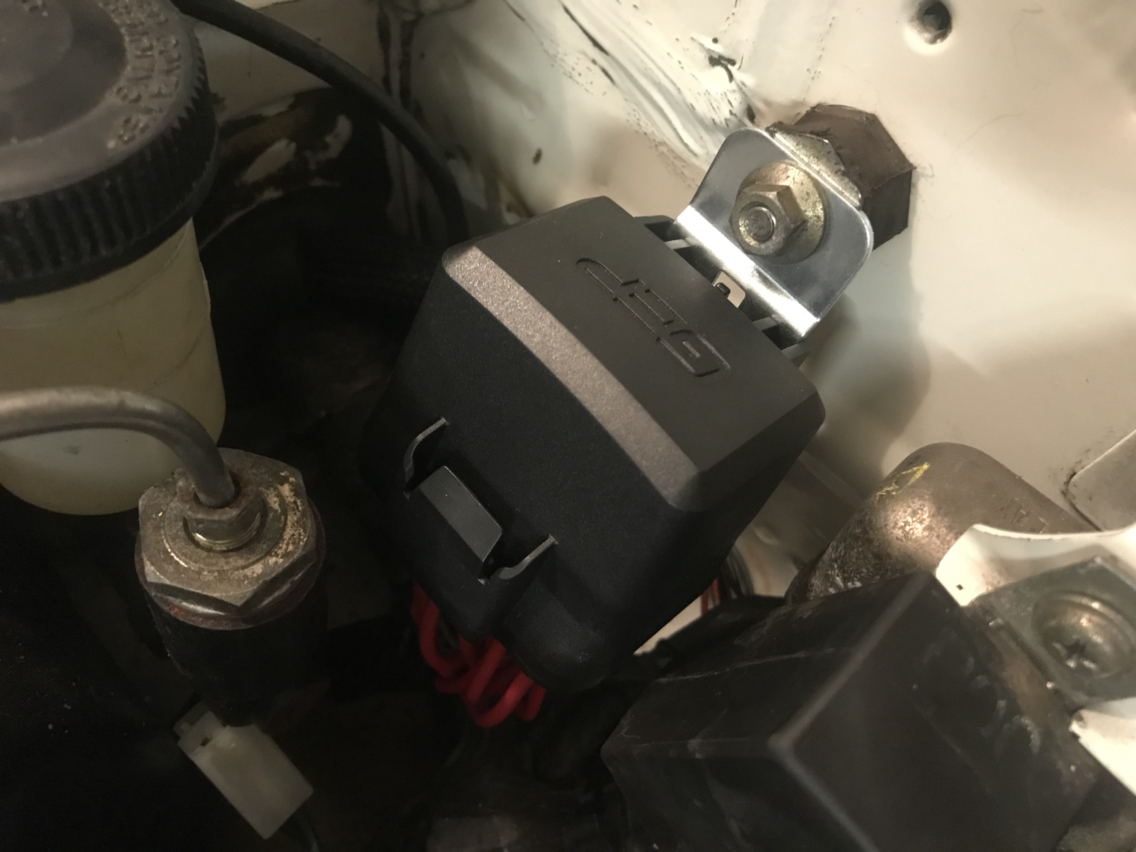
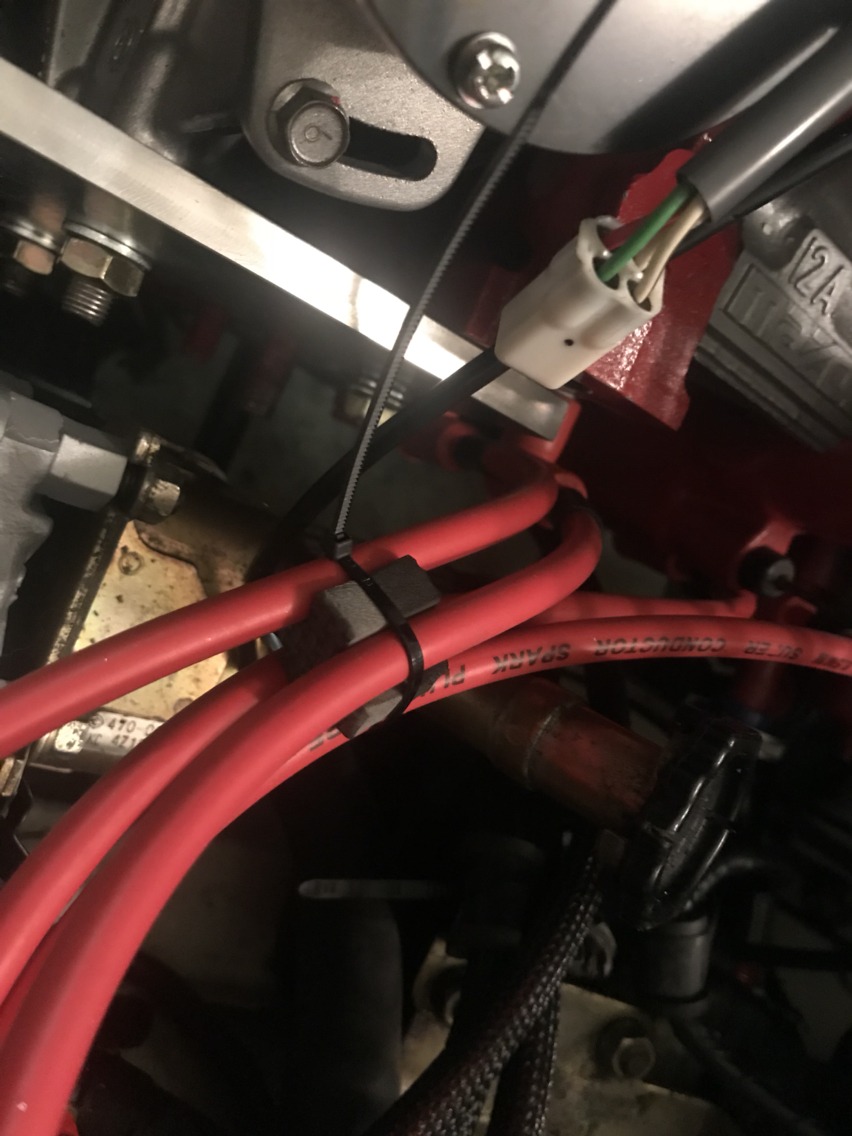
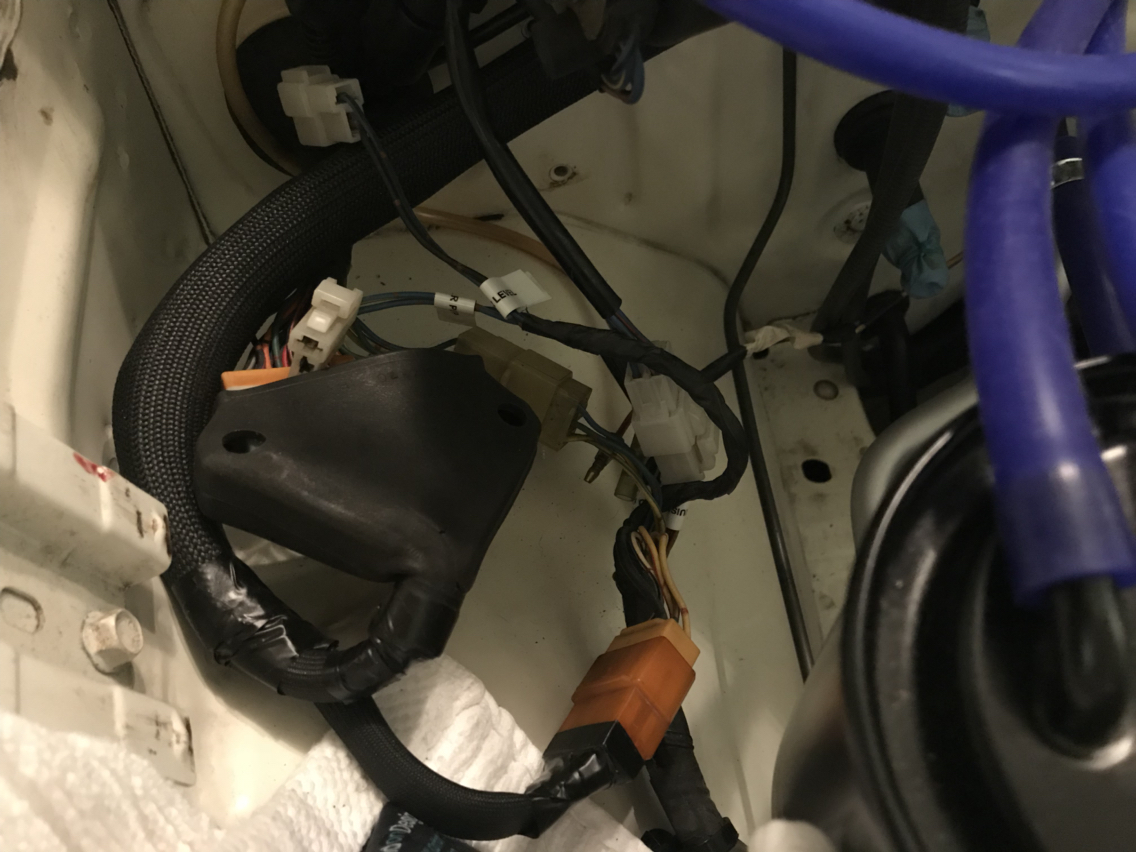
Speaking of which, had some other stuff to do last night so all I got to was completing the wiring for the fan. I'm super paranoid about chaffing so I just ran the wires along the factory route with the factory clips. In my effort to not drill any new holes, I made a little bracket to hold the circuit breaker. Instructions for the fan, if I don't want to void the warranty, require it be connected directly to the battery.
The fan controller. I'm going to use the positive wire for temp sensor No.2 for the override. This wire goes all the way back to Emissions computer where I will be tapping in my new ECU. My ECU can trigger the fan to run at 60% in certain situations like if the fan's sensor fails and I sense water temps increasing, or I sense hot intake temps while in traffic and need to pull in some cooler air, or if I end up putting the A/C back in.
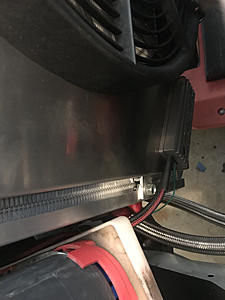
Factory routing
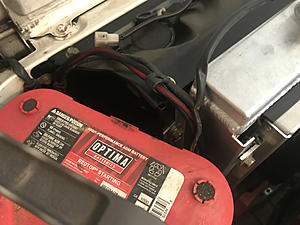
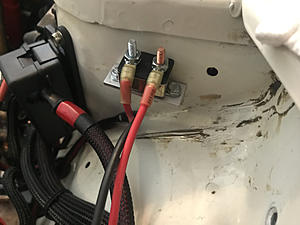
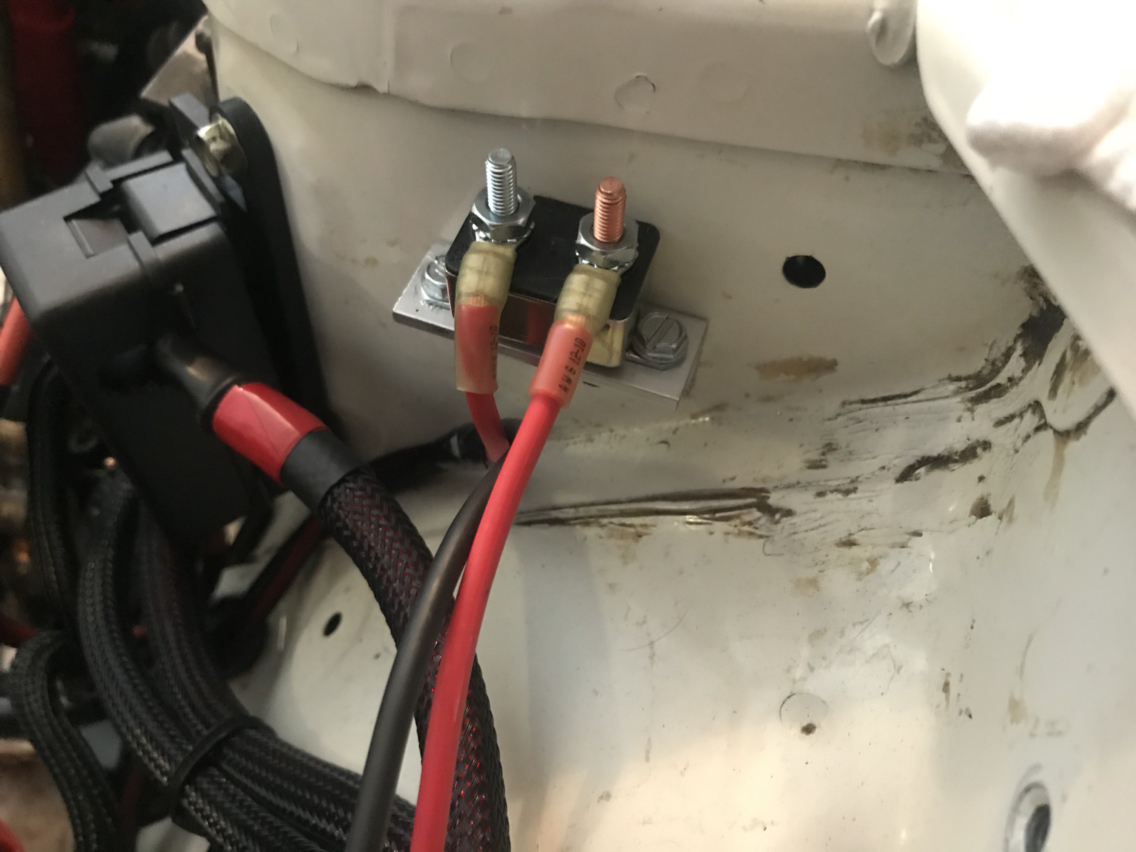
Circuit breaker mounted to some angle aluminum so I could mount it with the two existing threaded screw holes.
Power wires connected directly to auxiliary set screws on the new battery terminals.

Speaking of which, had some other stuff to do last night so all I got to was completing the wiring for the fan. I'm super paranoid about chaffing so I just ran the wires along the factory route with the factory clips. In my effort to not drill any new holes, I made a little bracket to hold the circuit breaker. Instructions for the fan, if I don't want to void the warranty, require it be connected directly to the battery.
The fan controller. I'm going to use the positive wire for temp sensor No.2 for the override. This wire goes all the way back to Emissions computer where I will be tapping in my new ECU. My ECU can trigger the fan to run at 60% in certain situations like if the fan's sensor fails and I sense water temps increasing, or I sense hot intake temps while in traffic and need to pull in some cooler air, or if I end up putting the A/C back in.

Factory routing

Circuit breaker mounted to some angle aluminum so I could mount it with the two existing threaded screw holes.
Power wires connected directly to auxiliary set screws on the new battery terminals.
 03-14-19, 05:09 PM
#105

Looking great.
Like the clean wiring in the engine bay!!
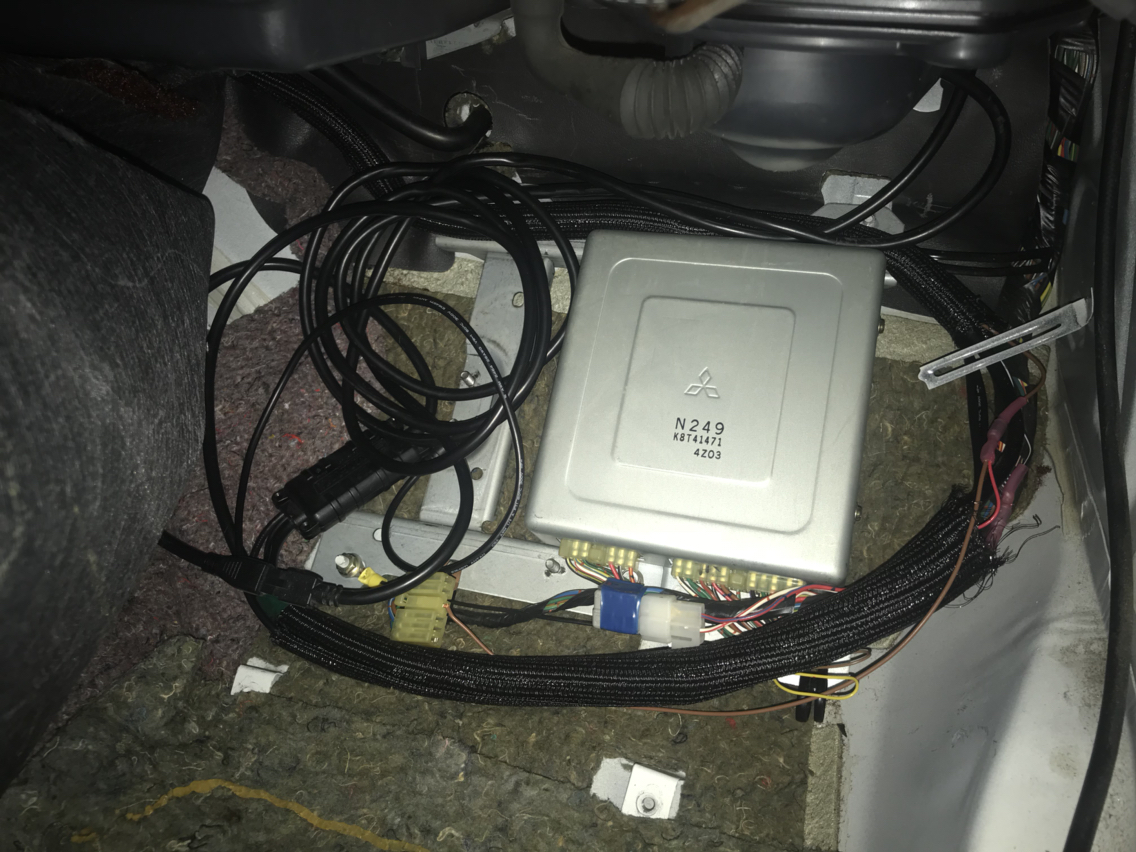
What is that component that was originally mounted in the passenger footwell?
I thought the "ECU" was mounted in the rear storage bin. Or at least for 82 cars..
Also, I used rubber vacuum caps and black heat shrink insulation to cover up the breaker terminals. I found another breaker on Summit that includes a rubber cover and got one of those for more wiring.
Like the clean wiring in the engine bay!!
What is that component that was originally mounted in the passenger footwell?
I thought the "ECU" was mounted in the rear storage bin. Or at least for 82 cars..
Also, I used rubber vacuum caps and black heat shrink insulation to cover up the breaker terminals. I found another breaker on Summit that includes a rubber cover and got one of those for more wiring.
03-14-19, 07:16 PM
#106
Lol, we think alike, I already ordered a cap from Amazon...ordered a few since I have some of these on our Jeep's trailer harness.
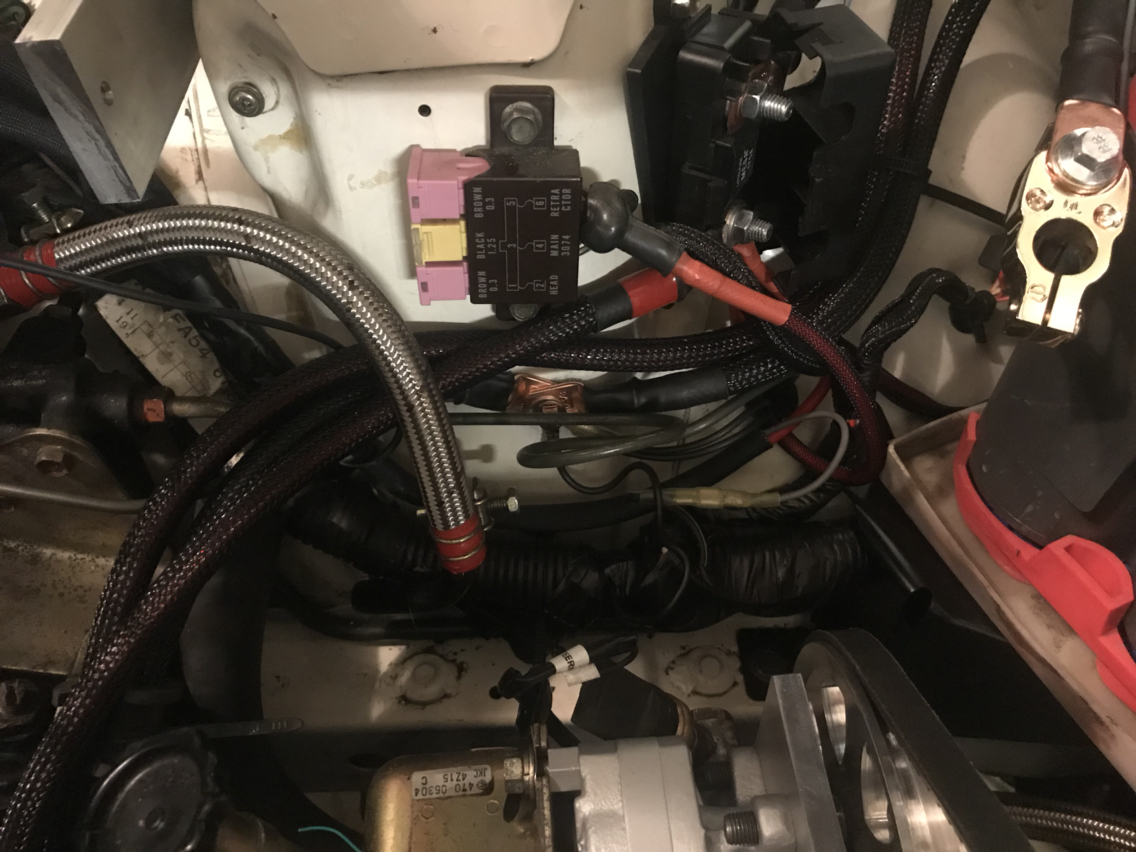
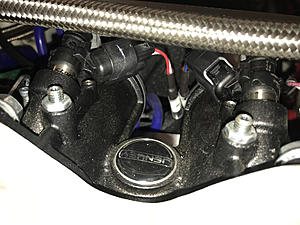
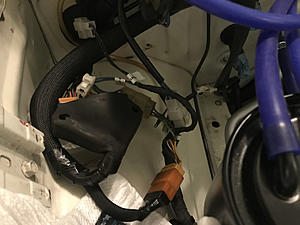
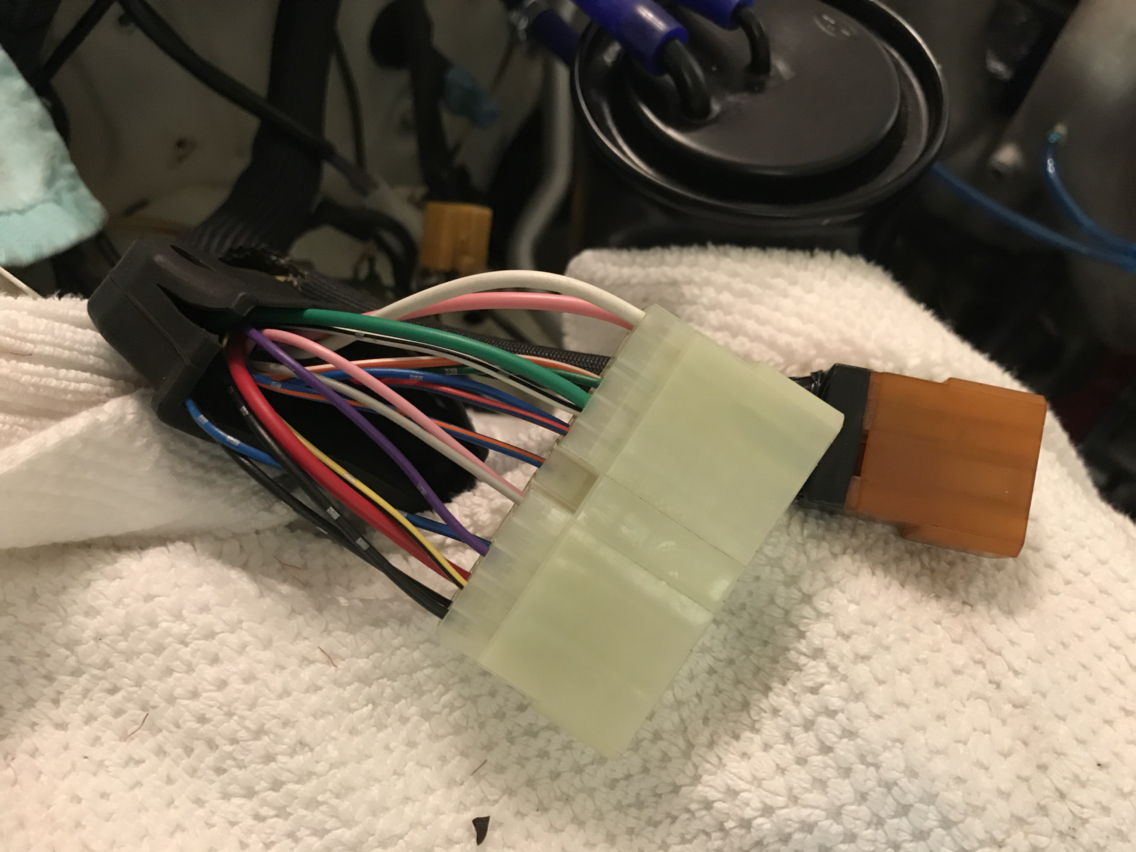
The box is the emissions computer. It would control the solenoids, fuel pump relay, etc. Great place to tap into the various sensors like neutral switch, clutch switch, speed sensor, etc. Might be located somewhere else on your 82 I haven't looked at that wiring diagram as much as the '85 diagram.
The box is the emissions computer. It would control the solenoids, fuel pump relay, etc. Great place to tap into the various sensors like neutral switch, clutch switch, speed sensor, etc. Might be located somewhere else on your 82 I haven't looked at that wiring diagram as much as the '85 diagram.
03-16-19, 07:08 PM
#107
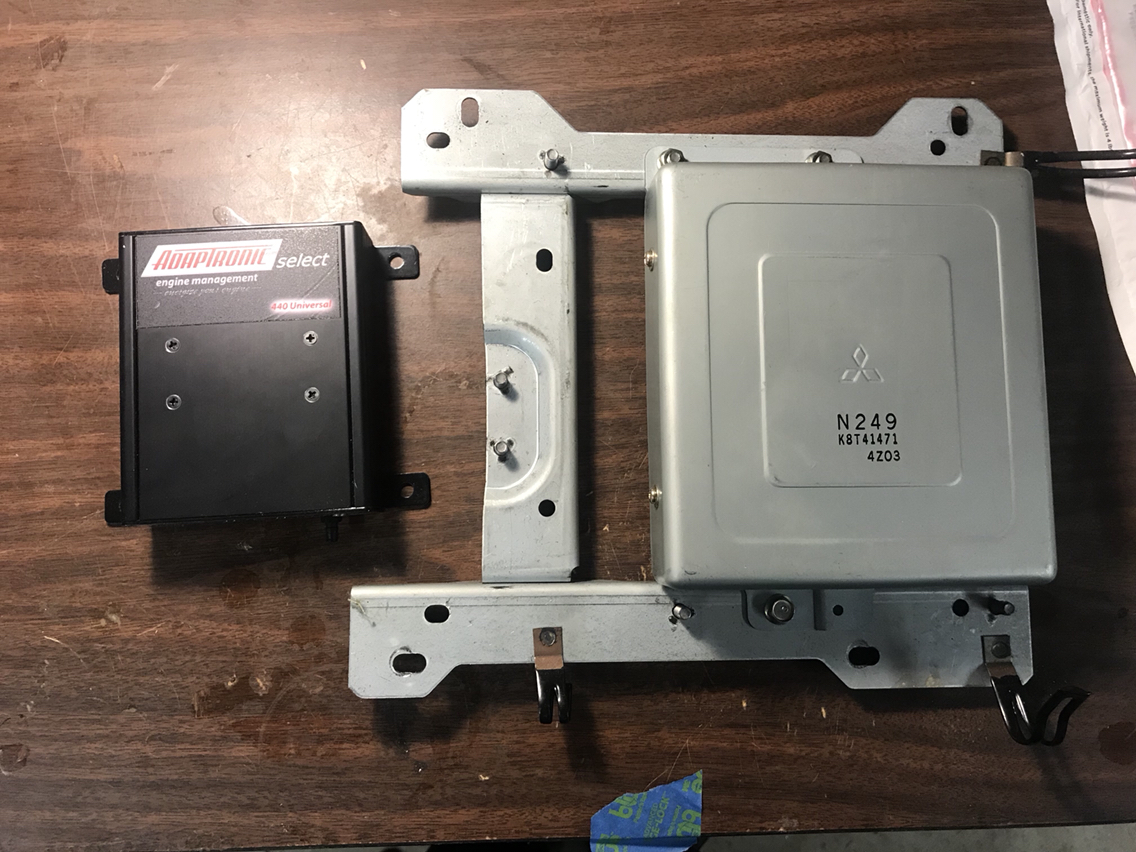
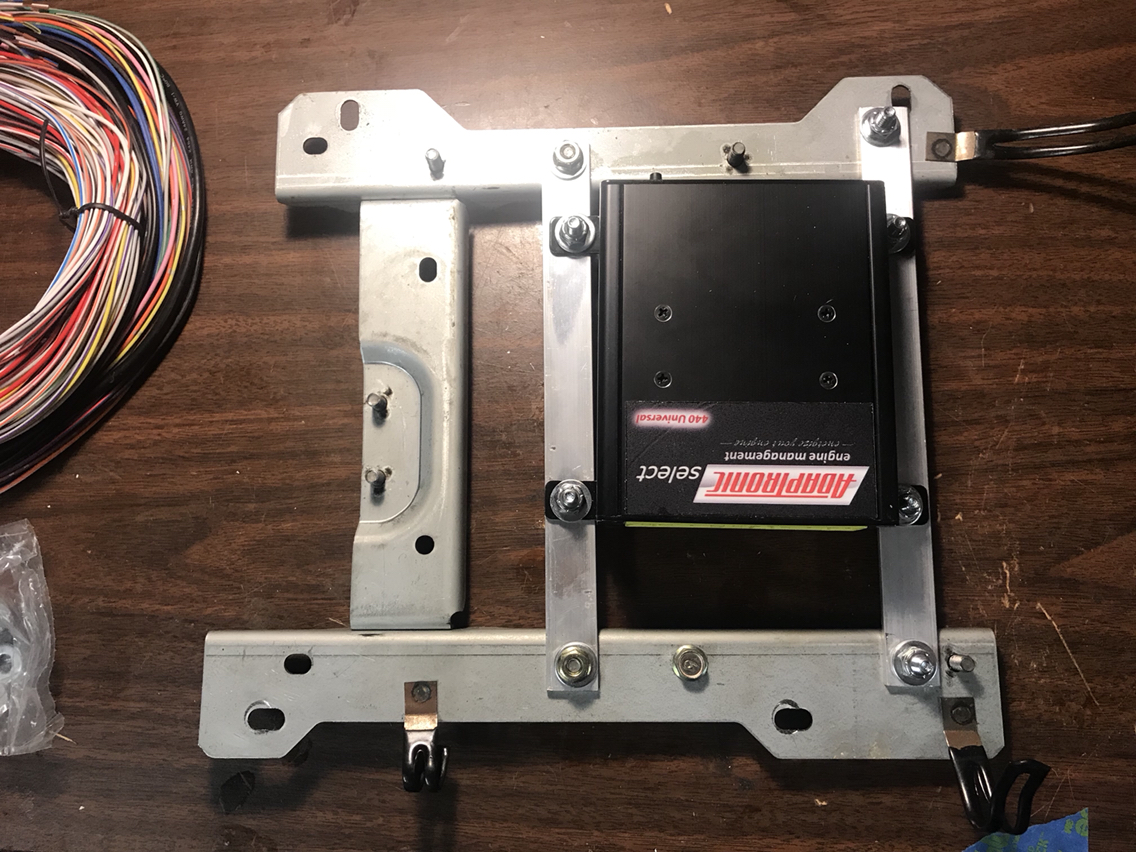
ECU is ready to go in. I double checked a few connections. Tach is going to work via 550ohm resistor. The heat hazard light on the dash can be controlled by the ECU. I'll use that to warn me of any overheating. Couldn't test the speed sensor, hope I got that right. The relay is for sending +12v to the fan controller since the 440d can only activate via ground. Everything else goes to the engine bay and I'll work on that next.


 03-18-19, 07:55 PM
#110
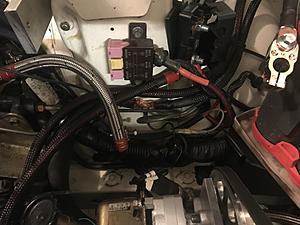
Very soon, very soon, heading down to the garage now to work on the engine side of the harness. I am done with everything along the driver's side, bundle is run to the passenger floor, ECU is plugged in. Wideband hooked up (that was installed previously but not linked to ECU), and I have all the vacuum lines hooked up. I'm literally down to alternator, crank sensor, temp sensors, engine grounds, then fluids and fire it up!


The following users liked this post:
Qingdao (03-19-19)
03-21-19, 08:04 AM
#112
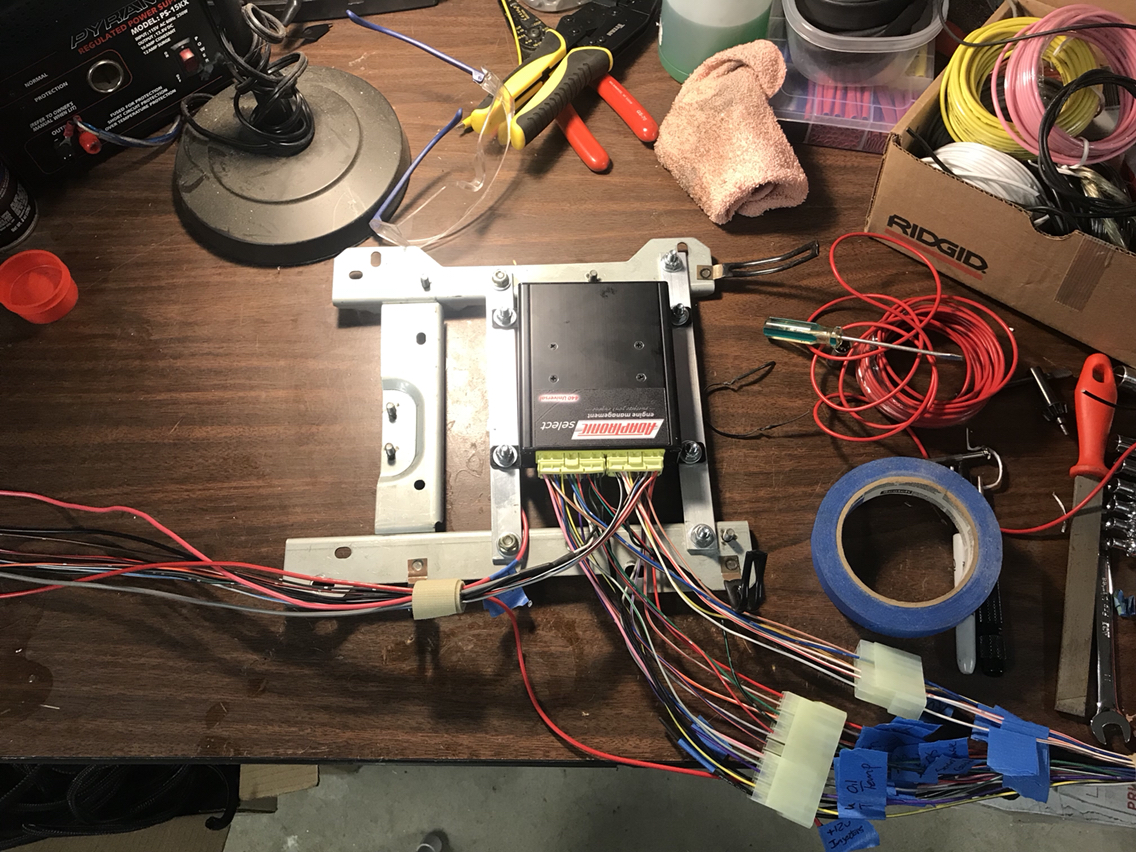
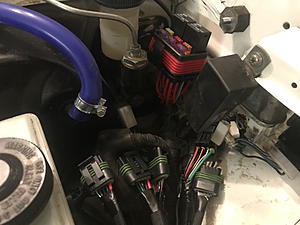
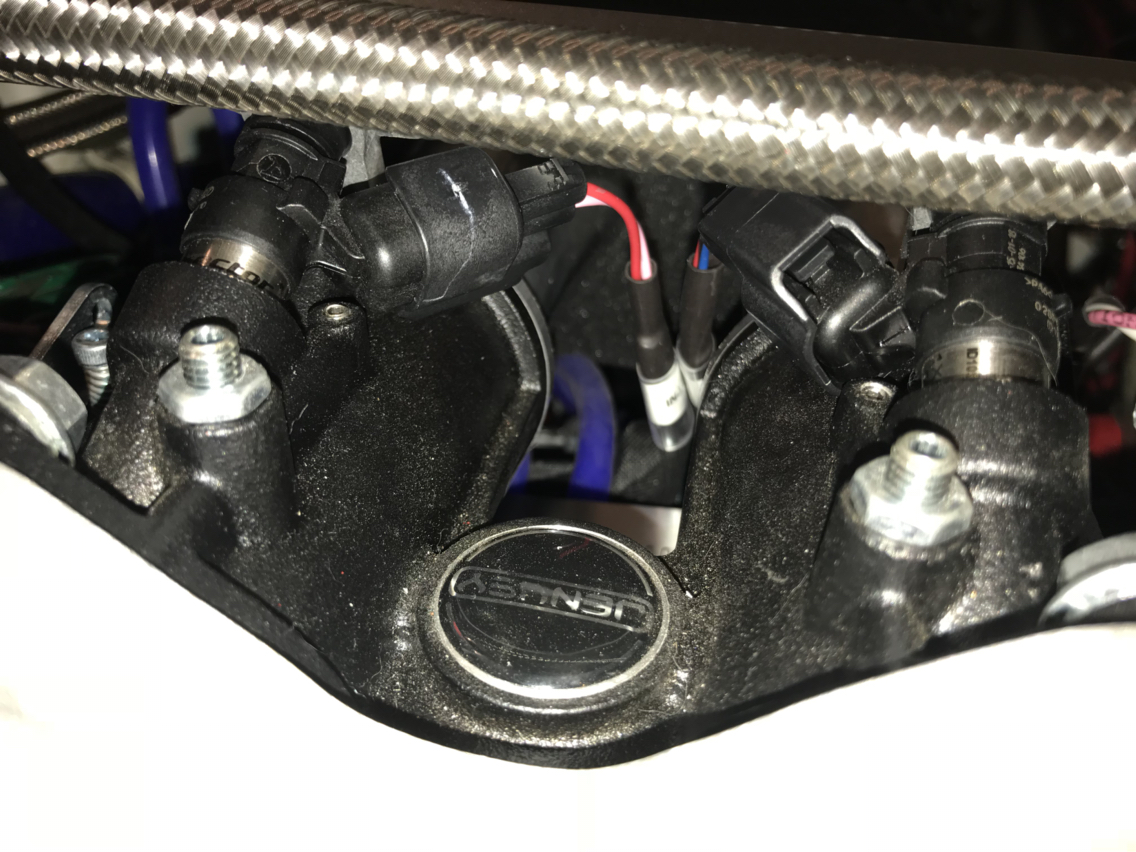
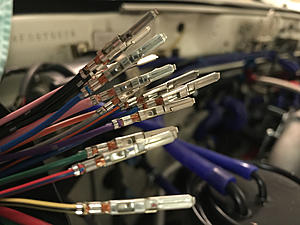
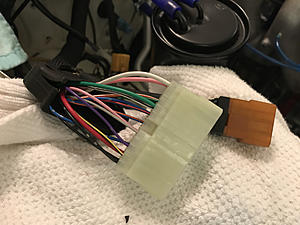
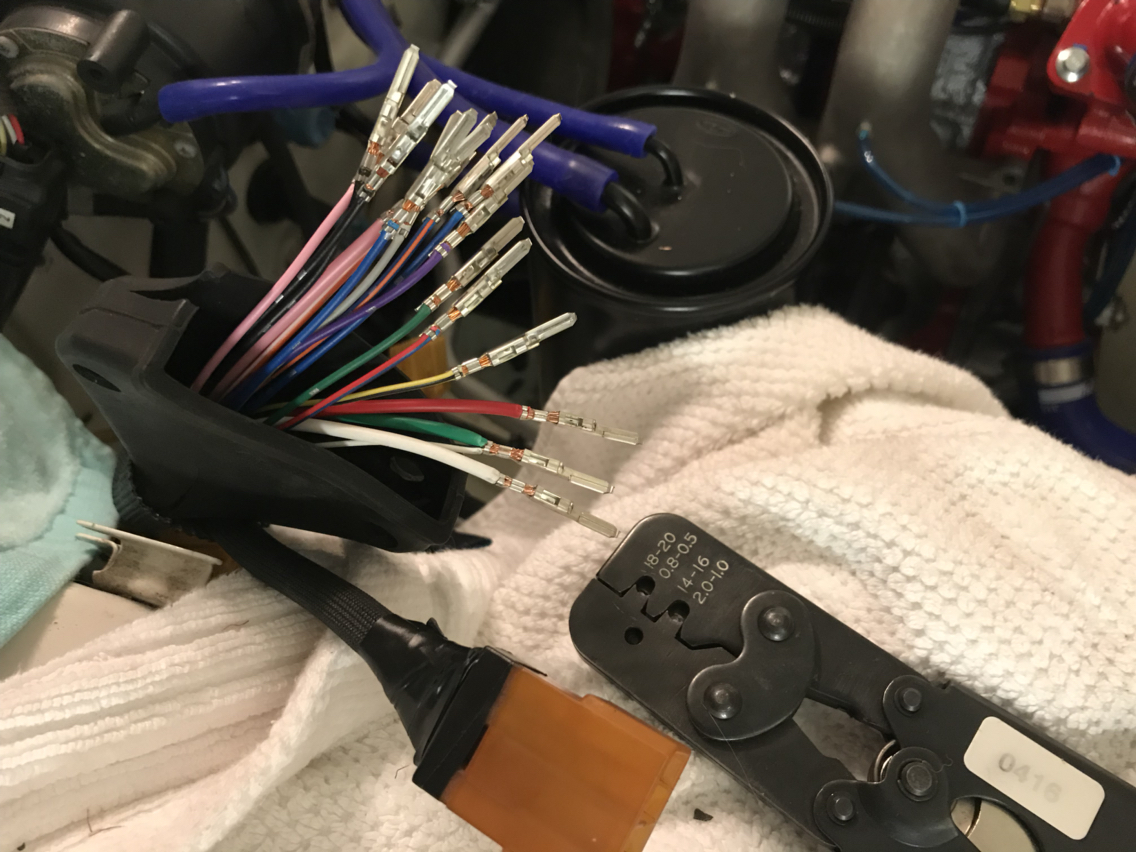
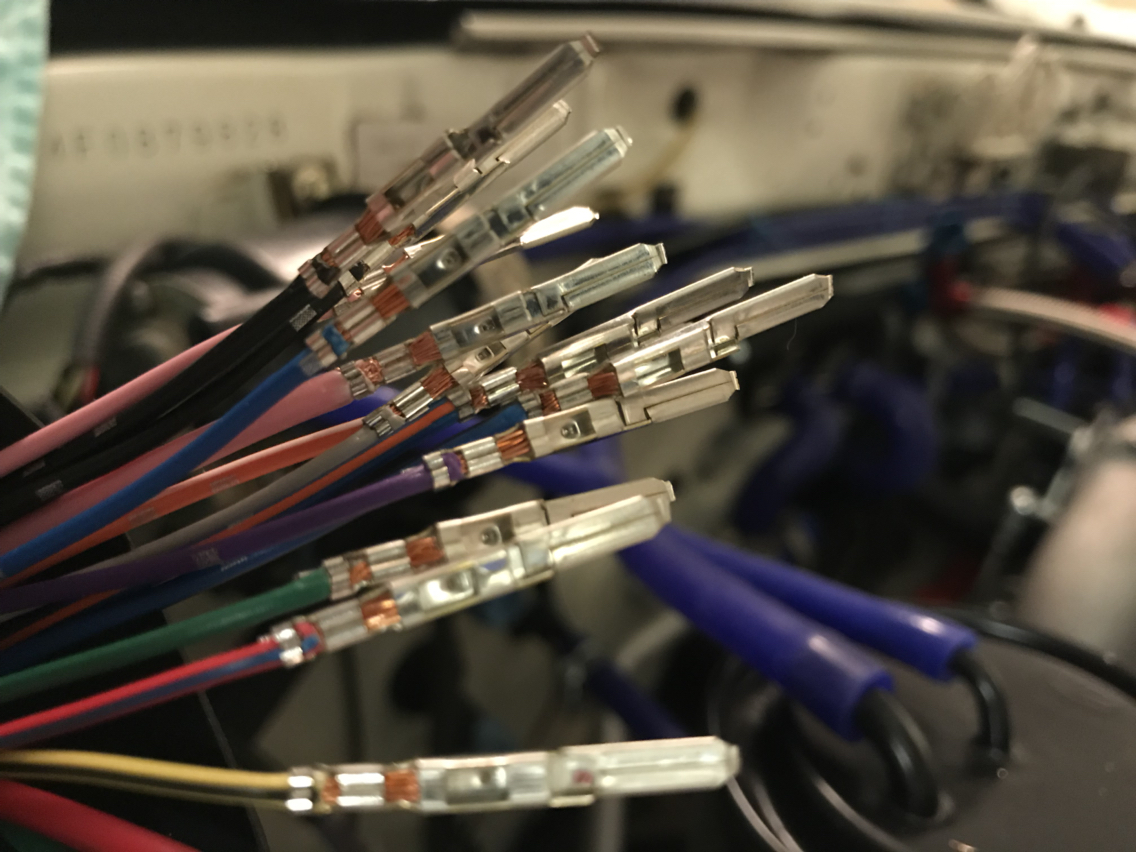
I didn't get many photos of the engine harness as I did the final assembly in the car to get the lengths just right. It's tucked in nicely across the top. I tossed my garage apart looking for the 3-pin connector for the TPS sensor only to give up and check my email and realize i never ordered it. I guess I assumed it would come with the sensor. I don't have the patience to wait for the one from Jenvey so I ordered a generic weather tight kit that has 3 pin connectors and I'll use one of those.
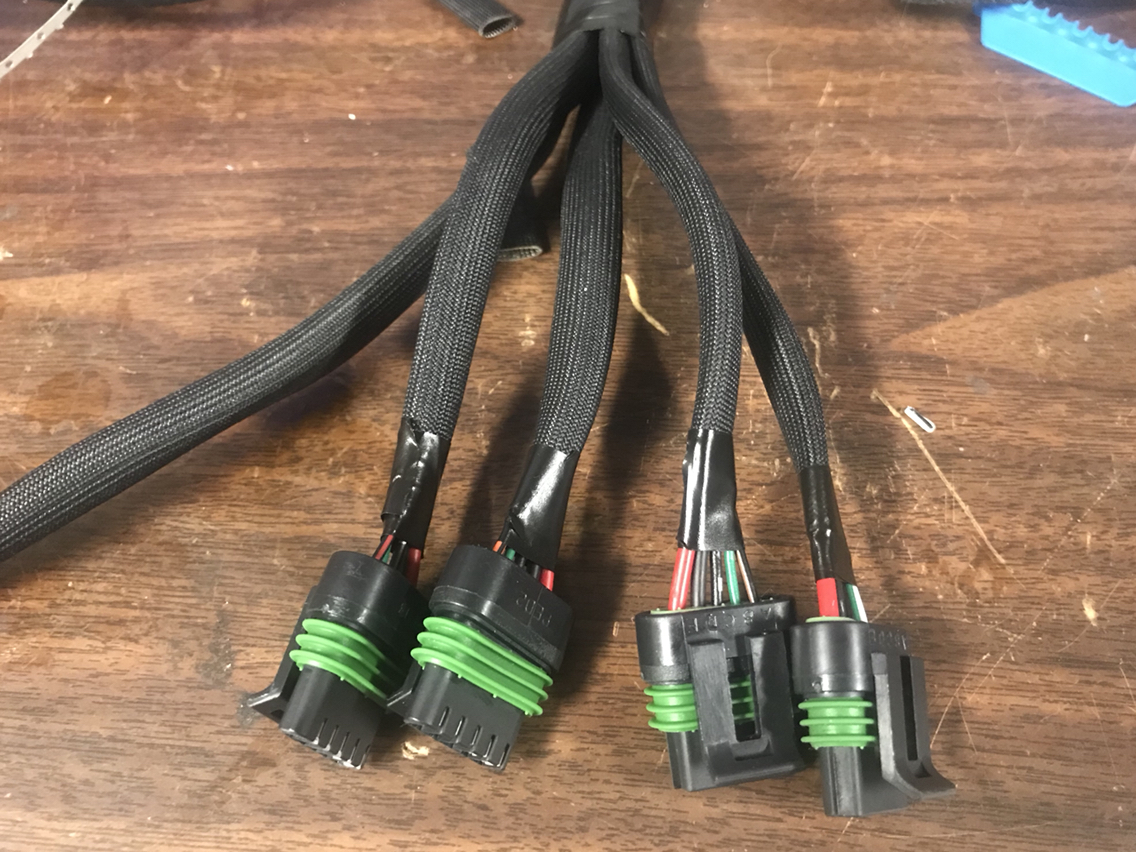
Anyway, everything is protected by techflex thermaflex, heat shrink ends, labels printed, then clear heat shrink over the label. I ran wires for 4 injectors but dead headed two for now since I'll only be running two.
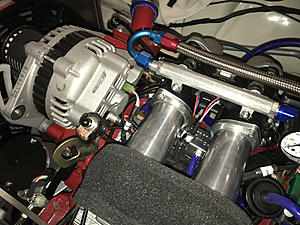
Anyway, everything is protected by techflex thermaflex, heat shrink ends, labels printed, then clear heat shrink over the label. I ran wires for 4 injectors but dead headed two for now since I'll only be running two.


 03-21-19, 12:31 PM
#114
This weekend. As I said above, I was missing the connector for the TPS, plus the other end of this nice wire bundle isn't pinned and connected yet. I've got tonight to finish that off, and the connector should arrive Friday. If things go well tonight, I'll at least be able to set the timing, fuel pressure, and verify the sensors all report back to the ECU and gauges. I can probably start it without the TPS, but I don't think I'll get that far tonight.
03-21-19, 10:11 PM
#115
Senior Member
When I wrote that I didn't see the full post for some reason. Garage talk app is awful sometimes. Glad it's coming along nicely. Going to be a very rewarding feeling hearing that run for the first time.
03-22-19, 07:24 AM
#116
Yeah, for some reason GarageTalk always messes up displaying posts with lots of photos and puts ads over the last post on a page. I hate it, but it does make attaching photos a little easier. The app is outdated by like 5 years. I wish we could use Tapatalk instead.
Anyway, the connector set came in and it was kind of junk but i did manage to get the TPS sensor connected and i finished up the last harness connector. I really don't know where all the time goes, because that doesn't sound like 3 hours of work.
I had just enough time to power up the ECU, flash the software version, and program the inputs and outputs. I flipped the key to the on position and saw that the TPS works, the dash lights all come on (that wasn't happening before because they are tied into the alternator wiring), the fuel pump cycled, clutch switch and neutral switch work. I'm on the home stretch now! Gotta verify ignition timing, temp sensors, and injectors, add some gas, verify fuel pressure, and start her up!
 03-22-19, 04:53 PM
#118
Rotary Enthusiast
Ha! This is great. Someone's gonna be, skipping meals & breaks and staying late in the garage!
03-22-19, 07:24 PM
#119
Couldn't get it started today. Pretty sure the timing pulley is on wrong. I pulled the rear leading plug and spun the motor until I caught the apex seal passing, the timing marks were a good quarter turn off. So yeah, I'll address that tomorrow. It's movie night 
03-22-19, 11:30 PM
#120
I took one more look at it. Pulled the spark plugs and checked the location of the apex seals in relation to the timing marks. Everything looks good compared to my spare motor. I checked the location of the counter weight and it's on the spark plug side at TDC as described by others. So as far as I can tell, the timing is correct. Must be a fuel or ECU issue...but I can smell fuel and I'm getting readings from all the sensors.
03-25-19, 10:07 AM
#121
At this point I am down to it being a compression issue. I wired up all the plugs so I could make sure firing order was correct. I had already verified this with the timing light but I started second guessing myself. First I pulsed them with the ECU, then I fired up the motor (video below).
I'm certain it isn't timing since I rotated the CAS and tried starting from every position. At one position I did get some audible back fires. It sounded like maybe one or two faces had barely enough compression but it wasn't a consistent backfire every cycle.
It's getting fuel because the plugs are coming out wet. I have no idea if it's the right amount of fuel, but the settings for the injectors are correct as far as I know.
I've tried a few deflooding techniques. Squirting oil in from the leading plugs, squirting oil down the intake manifold, using ATF instead of oil, etc. the last backyard technique I can think of is to pull the car down the street. But I'm hesitant to do that for fear of ruining the motor...and also leaving a smoke screen through the neighborhood.
03-25-19, 03:03 PM
#122
ancient wizard...

Not a big fan of pull starting myself-especially on a fresh motor. Always a worry for me is extended cranking of an unfired engine with injected fuel in rotor housings washing off any lubricating oil film and possible damage incurred from that. To avoid this worry as i go about trying to resolve the no start,i add engine oil to rotor housings and turn engine by hand to distribute periodically. Not a fan of ATF for this as i feel its lubricity is not that of oil.
I watched both your videos,in the 1st,i noted the engine was cranking then slowed dramatically for a very short time and then resumed previous cranking speed-like it had fired a plug(s) at an improper time in combustion cycle,as in much too early,partially ignited and killed rpm while doing so. Have you noticed this and done this more than once?
Don't know if you're looking for input,but maybe some suggestions...
1st,are you CERTAIN the engine is statically timed correctly?
2nd,is there a possibility plugs are not being fired in correct order? In your 2nd video i watched,i really couldn't make out the color of spark at plugs for certain,they didn't look blue to me. I don't know what your coil output is supposed to be,how they're driven or dwell time. Wondering if not enough grunt to fire those plugs,both of which need a high power ignition to fire them reliably/comfortably. A suggestion,pull those plugs and install some oe type 12A or SE plugs to attempt to start/get engine running, Check their color as you did in your video.
Last in this "segment"... Is the engine cranking fast enough,doesn't sound like it is. This and marginal spark make starting a fresh engine more difficult to start and why some resort to pull starting. Even more so on a ported engine. Is battery fully charged/new? I have jumper cabled another larger battery to assist on initial start of new engine,even used my truck with dual batteries for this. Some engines are a bitch to start 1st time,you do what you have to do.
Have to take care of something,be back later.
Last edited by GSLSEforme; 03-25-19 at 03:08 PM.
03-25-19, 04:39 PM
#123
I made progress, got it to run for 1 minute, but then it stalled, and I couldn't get it running again. I'm charging the battery and letting it cool down before I give it another try. It started on the last bit of ATF I had in my squirt bottle. I refilled it with premix and after several attempts it never caught, so I'm going back to the ATF.
Anyway, the issue...I didn't connect the second injector properly. I used injector 2 output, and it always worked when I clicked the test button...but injector 2 output is actually the secondary for rotor 1. I swapped the pin between injector 2 and 3 and it started catching a little bit, I knew I was close. Kept squirting a little ATF in via the OMP line bungs and that's what got it going. I just need to do it all again later and get it to run in for longer. Then of course the tuning begins, I may just get it running well enough to take it to a shop though. It takes so long to dial things in on the road. I don't mind paying for dyno time, I just didn't want to be paying hourly for stuff i could eventually figure out myself.
Anyway, the issue...I didn't connect the second injector properly. I used injector 2 output, and it always worked when I clicked the test button...but injector 2 output is actually the secondary for rotor 1. I swapped the pin between injector 2 and 3 and it started catching a little bit, I knew I was close. Kept squirting a little ATF in via the OMP line bungs and that's what got it going. I just need to do it all again later and get it to run in for longer. Then of course the tuning begins, I may just get it running well enough to take it to a shop though. It takes so long to dial things in on the road. I don't mind paying for dyno time, I just didn't want to be paying hourly for stuff i could eventually figure out myself.
03-25-19, 11:42 PM
#124
Got it running for longer this evening, ran it at operating temp for about 15 minutes.
Oil temp stabilized around 205. I found two oil leaks. First was just an oil line that needed tightening. Second I haven't found. One of the drive belts sprayed a very small amount on the fenders but I couldn't source it. Best guess is the o-ring for the crank sensor as i found a bit of oil there. I cleaned it all off and will check again after the next run.
Water temp crept up to 205 as well before my ECU override kicked on the fan. However I don't know that it was actually warmed up at that point because the fan dropped the temp dramatically. Later, the fan controller took over once temps exiting the radiator were hot enough....and that dropped temps almost too low, so I think both the fan controller and the override need to be a little higher so it settles closer to 185. I noticed this with the REPU as well but placing the temp sensor on the water neck heats up prematurely, but once the thermostat is open the reading is pretty accurate. Anyone else experience that, or do people usually put the temp sensor after the thermostat?
ECU will need some tuning before I pull it onto the road but I need to build up some compression first. The AFR gauge isn't hooked up right, I think I probably connected it to the wrong serial port. The intake temp is way off so i have the wrong settings for the GM sensor.
One last thing i noticed was that at 1700RPM, 12AFR, the ID1050x injectors are running at around 2ms duty. Might be tough to get these to idle at 13AFR like the Nikki was doing, but plenty of variables to mess with once I get the compression high enough so it will idle lower.
03-27-19, 05:24 PM
#125
Break-in run #2
1) There is an oil leak. I traced it down to the o-rings on the oil filter pedestal. I just ordered new ones. I think in my haste I attempted to use the old ones. Whoops.
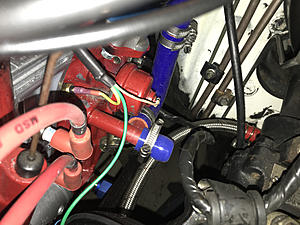
2) The oil cooler lines were weeping oil at the connection to the cooler. It was coming from between the screw cap of the fitting and the body of the fitting (not the hose side). I assume this means they weren't tight enough so I torqued them down a little more. Will check again later.
3) There is a coolant leak, I think it's between the front housing and center plate but I cannot be sure. I've seen a small pool of water in this area and it's definitely coolant. I don't know if this is something that will go away with running in. I'm watching the coolant level closely. It's not much, more than a bottle cap, less than a dixie cup.
4) The ECU is not getting the AFR signal from the LC-2 controller. Not sure what is up there. I'll have to make sure I actually plugged in the other end of the serial cable adapter tonight. That means no closed loop until I resolve that.
5) The ECU is not getting any vehicle speed information. I'll have to double check the settings, I don't think it's necessary, but it would be nice for logging.
6) I stabilized the coolant temp by adjusting the Derale fan controller potentiometer. Car was idling around 1000-1200 RPM. With the OEM temp gauge reading dead center, the ECU gets a reading of 175F from the water neck and the fan starts spinning at it's lowest speed. It stayed like this for a few minutes without changing. Oil temps stabilized around 195. Intake temp sensor is still off. I need to manually adjust the numbers or do my own calibration as the values I got online don't appear to be accurate.
Test Drive #1
The leaks weren't bad enough of an issue to stop me driving it and I only had a few gallons of gas in it so I went a few miles to get gas. Initial impressions, the clutch is grippy, flywheel light, and throttle sensitive. It'll take some getting used to, mainly giving it more revs than usually to pull away. Oh does it sound sweet with the gilmer drive belt. With the hood down it isn't obnoxious, but you know it's there. The ITBs give off a nice rumble too. I kept it under 4,000 RPM though, will put a few more miles before I venture into the upper revs. However, it's quite a dog down low.
Hot starts and cold starts are rough, I don't really know how to tune the fuel delivery for quick start. I also didn't incorporate a idle control valve so I've been tipping the throttle in a bit. I assume that's what I should do? Or if I get the mixture right will it just fast idle with some extra timing?
It runs pig rich below 50% throttle, but goes lean over 50%. The few times I tried to accelerate the AFR gauge jumped to 15-17 but the motor didn't stumble. I wonder if the purge valve opening above 2,000RPM was causing the issue. Maybe I'll disable that until I have the AFRs under control. Still lots to do. I just need to get it good enough to drive to the tuner shop. I honestly don't know that I'm capable of tuning it from scratch to the standard of a daily driver...and I hazard to guess the time I spend tuning will just get done over again by them. I'll verify all the sensors work and the basic settings are right, then I'll probably hand it off.
1) There is an oil leak. I traced it down to the o-rings on the oil filter pedestal. I just ordered new ones. I think in my haste I attempted to use the old ones. Whoops.
2) The oil cooler lines were weeping oil at the connection to the cooler. It was coming from between the screw cap of the fitting and the body of the fitting (not the hose side). I assume this means they weren't tight enough so I torqued them down a little more. Will check again later.
3) There is a coolant leak, I think it's between the front housing and center plate but I cannot be sure. I've seen a small pool of water in this area and it's definitely coolant. I don't know if this is something that will go away with running in. I'm watching the coolant level closely. It's not much, more than a bottle cap, less than a dixie cup.
4) The ECU is not getting the AFR signal from the LC-2 controller. Not sure what is up there. I'll have to make sure I actually plugged in the other end of the serial cable adapter tonight. That means no closed loop until I resolve that.
5) The ECU is not getting any vehicle speed information. I'll have to double check the settings, I don't think it's necessary, but it would be nice for logging.
6) I stabilized the coolant temp by adjusting the Derale fan controller potentiometer. Car was idling around 1000-1200 RPM. With the OEM temp gauge reading dead center, the ECU gets a reading of 175F from the water neck and the fan starts spinning at it's lowest speed. It stayed like this for a few minutes without changing. Oil temps stabilized around 195. Intake temp sensor is still off. I need to manually adjust the numbers or do my own calibration as the values I got online don't appear to be accurate.
Test Drive #1
The leaks weren't bad enough of an issue to stop me driving it and I only had a few gallons of gas in it so I went a few miles to get gas. Initial impressions, the clutch is grippy, flywheel light, and throttle sensitive. It'll take some getting used to, mainly giving it more revs than usually to pull away. Oh does it sound sweet with the gilmer drive belt. With the hood down it isn't obnoxious, but you know it's there. The ITBs give off a nice rumble too. I kept it under 4,000 RPM though, will put a few more miles before I venture into the upper revs. However, it's quite a dog down low.
Hot starts and cold starts are rough, I don't really know how to tune the fuel delivery for quick start. I also didn't incorporate a idle control valve so I've been tipping the throttle in a bit. I assume that's what I should do? Or if I get the mixture right will it just fast idle with some extra timing?
It runs pig rich below 50% throttle, but goes lean over 50%. The few times I tried to accelerate the AFR gauge jumped to 15-17 but the motor didn't stumble. I wonder if the purge valve opening above 2,000RPM was causing the issue. Maybe I'll disable that until I have the AFRs under control. Still lots to do. I just need to get it good enough to drive to the tuner shop. I honestly don't know that I'm capable of tuning it from scratch to the standard of a daily driver...and I hazard to guess the time I spend tuning will just get done over again by them. I'll verify all the sensors work and the basic settings are right, then I'll probably hand it off.

