Huyler's Street & HPDE Build


 03-28-18, 08:12 PM
#27

Echoing previous comments, but bravo on the stereo! Very cool! I definitely will be contemplating trying something similar, but I have no knowledge/skill with where to even start. That stock head unit is too baller to get rid of!
Did you end up eliminating the joy stick?
Everything else looks great as well!
Aaaand that REPU is sick. Wow!
Did you end up eliminating the joy stick?
Everything else looks great as well!
Aaaand that REPU is sick. Wow!
03-28-18, 08:58 PM
#28
Yes, I eliminated the joy stick. It's definitely a weak point in the audio signal. The changes I made just require a steady hand with a soldering iron and some connectors from Amazon. Search for "din connector" and the total number of pins. If you can't find it, I have a bag of extras. From there, it's just analyzing the wiring diagrams in the FSM.
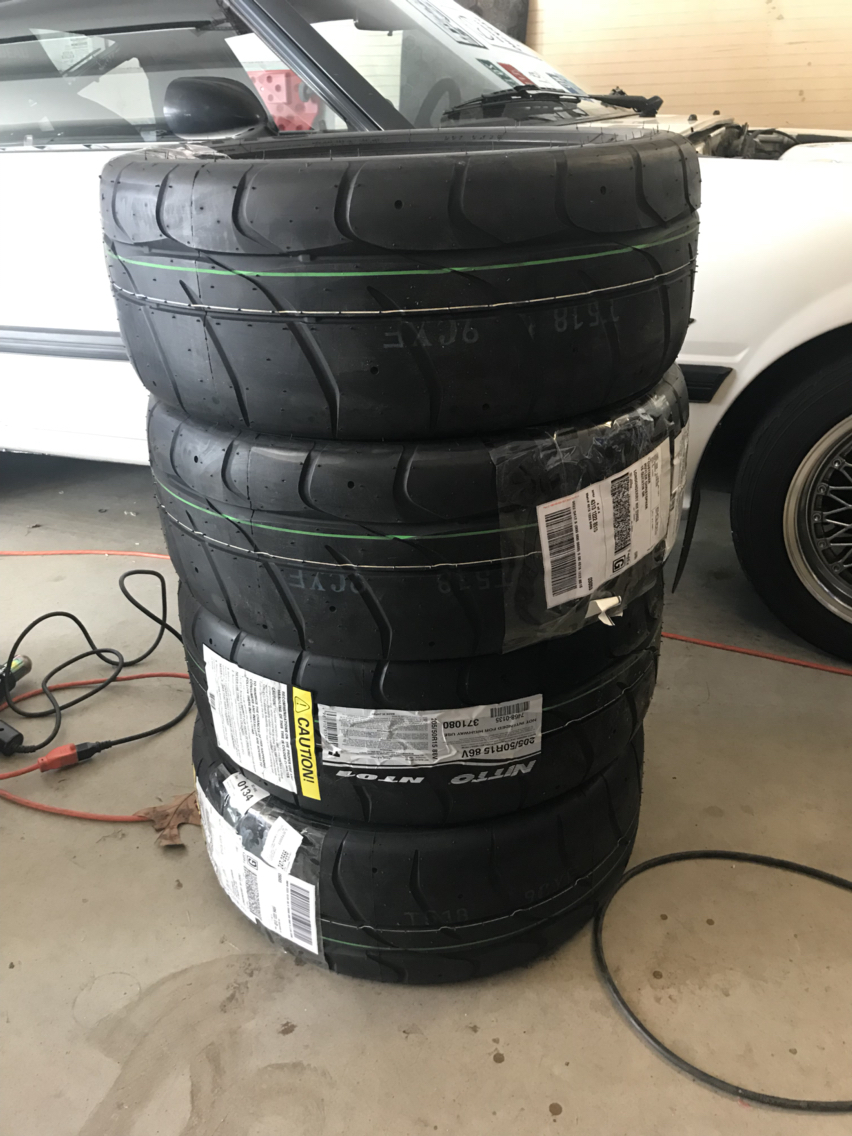
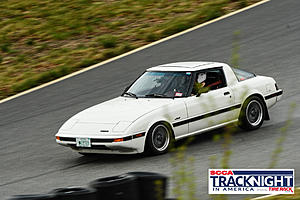
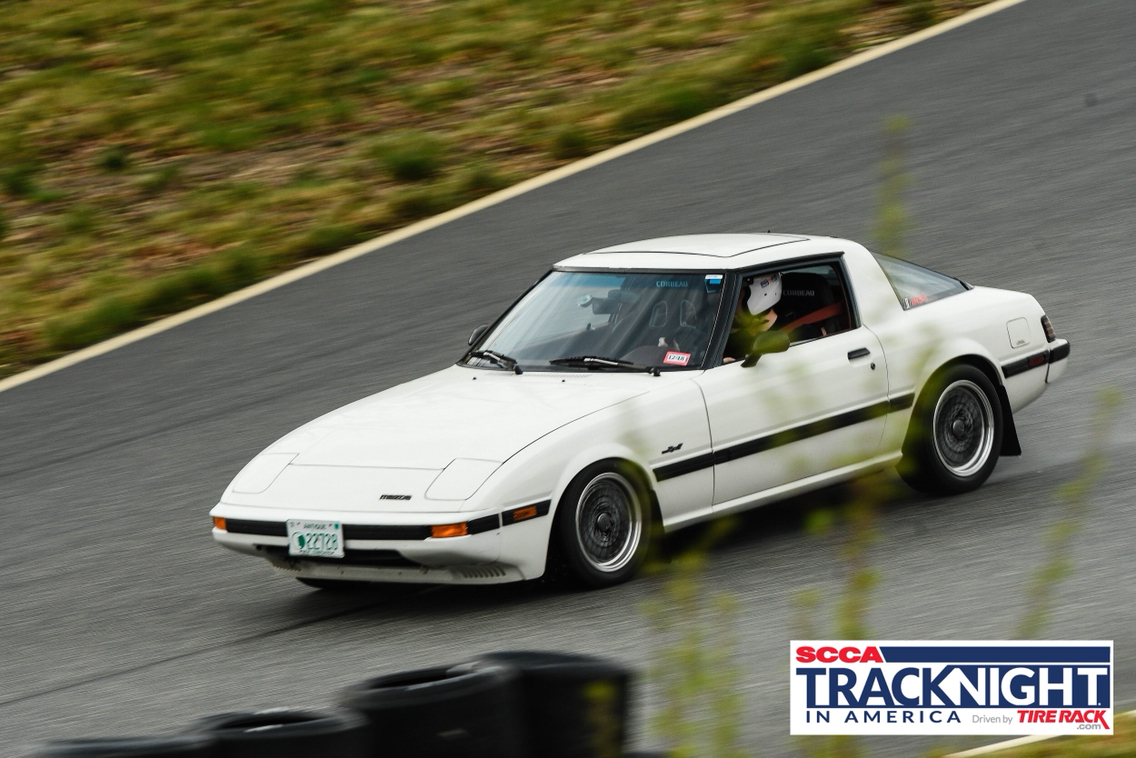
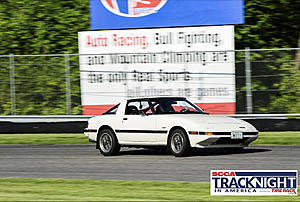
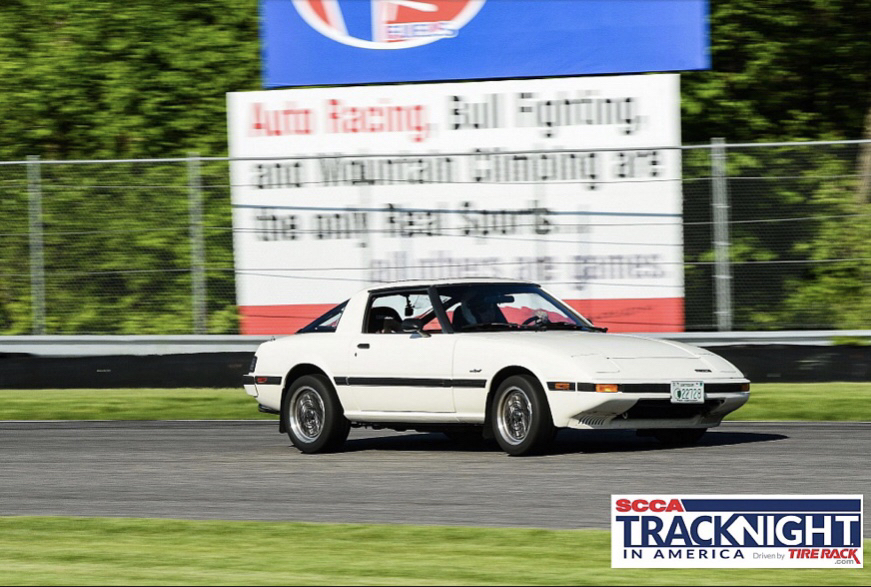
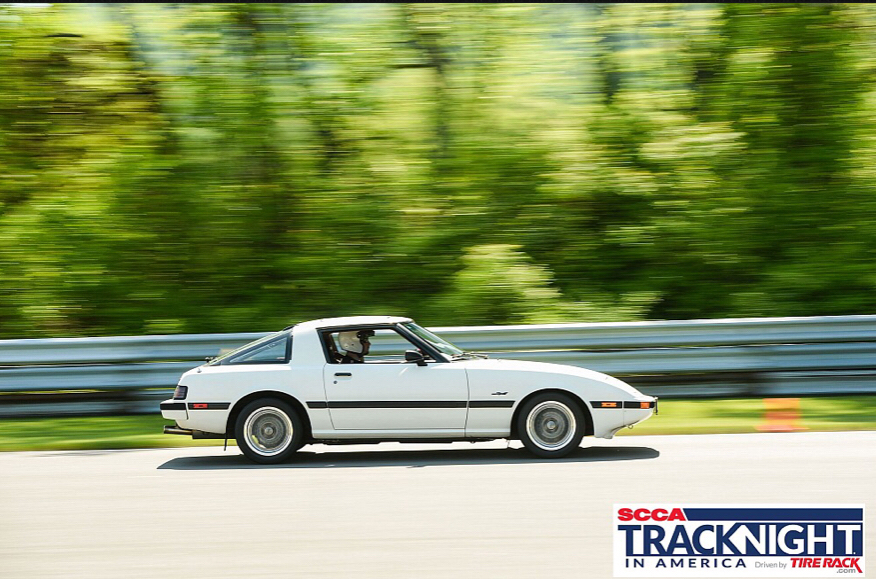
Today I got the car inspected and had some new rubber put on. These are way overkill for the current suspension setup but i don't care. I only drive it in nice weather and HPDE events. The local SCCA IT7 racers use this as their spec tire so I will be able to compare my times to what they are running...if I don't start beating their times with all the changes I'm making, then I know I need to work on my driving.

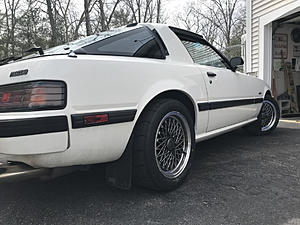
Today I got the car inspected and had some new rubber put on. These are way overkill for the current suspension setup but i don't care. I only drive it in nice weather and HPDE events. The local SCCA IT7 racers use this as their spec tire so I will be able to compare my times to what they are running...if I don't start beating their times with all the changes I'm making, then I know I need to work on my driving.
 03-28-18, 09:03 PM
#29
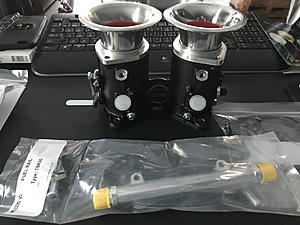
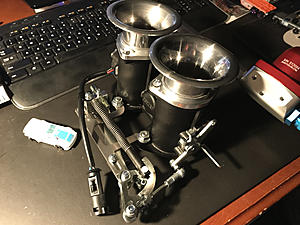
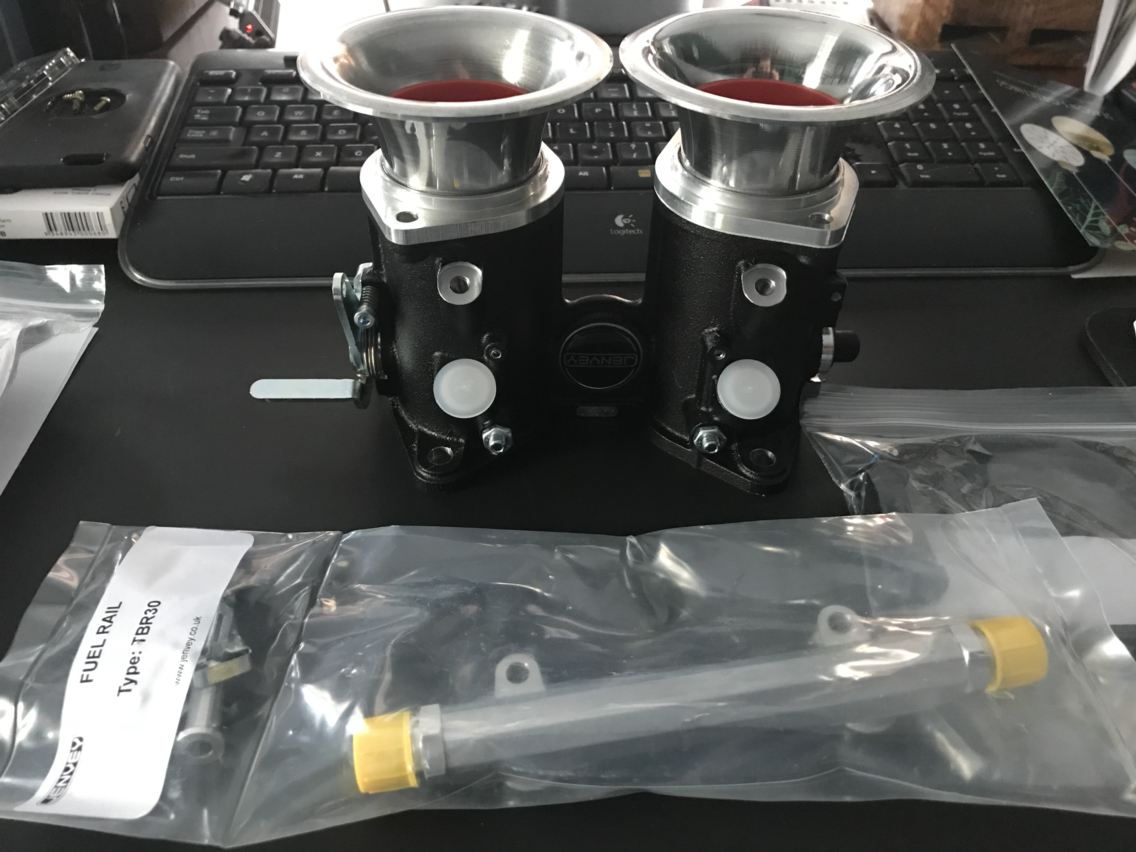
The new throttle body kit came in as well. I was hoping to swap the throttle lever to the other side but Jenvey doesn't recommend people doing it themselves, and it doesn't look like the lever is symmetrical, so I'm going to have to send it back. Anyway, here's the basic mock-up. Just picture it mounted to a wrap around side draft, with the rail on top and linkage below (I'll double check clearance this weekend). With the lever moved to the front I can connect the OMP linkage right to it.

 05-06-18, 09:58 AM
#30
I'm still waiting for the new motor to be complete but I did make it out to my first HPDE event of the season at Palmer Motorsports Park. Unfortunately the track was wet so I couldn't compare my lap times directly to last year. Only change is the tires and new seats anyway. Personal best in the dry last year was 2:02 and i managed the following:
Session 1 - drizzling, no standing water - 2:13.86
Session 2 - damp, but racing line was dry - 2:04.87
Session 3 - pouring, standing water everywhere - 2:45.71
Although the Nitto NT01 tires handled damp conditions well and roll fine on the highway and back roads in the rain, the combination of built up rubber, running streams of water across the banked track, and the course pavement's overall refusal to drain was too much to overcome. I lost all steering nearly everywhere on the track and struggled to find grip even on the more straight portions of track. It was all understeer which I handled OK. There was only two close calls where I almost ran out of pavement. A Saturn Sky didn't fair as well. He did a few 360s down the front straight and bent a rim in the dirt, could have been much worse considering how little run-off this track has.
During the driest session the Nittos still seemed to understeer more than my previous Yokohama S.Drives. I'll hold my final thoughts until I get a completely dry session though. I'd also add that I only have 1 degree of front camber and I think they really need about 3 degrees.

 05-18-18, 07:24 AM
#31
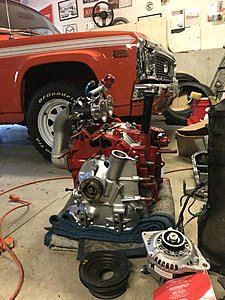
I picked up the new motor yesterday. I still need to pick up a few parts like water pump, pulleys, and a clutch so I can basically do a quick swap and keep the original motor in one piece. Anyway, some teaser photos of the porting done by Wankelworks. I stressed to Lui that the car still needed to be streetable so he went bigger than a typical street port, but not as big as a race port. I'm excited because the project is now back in my hands.

 05-19-18, 05:43 PM
#32
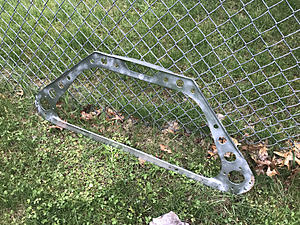
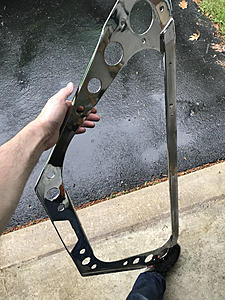
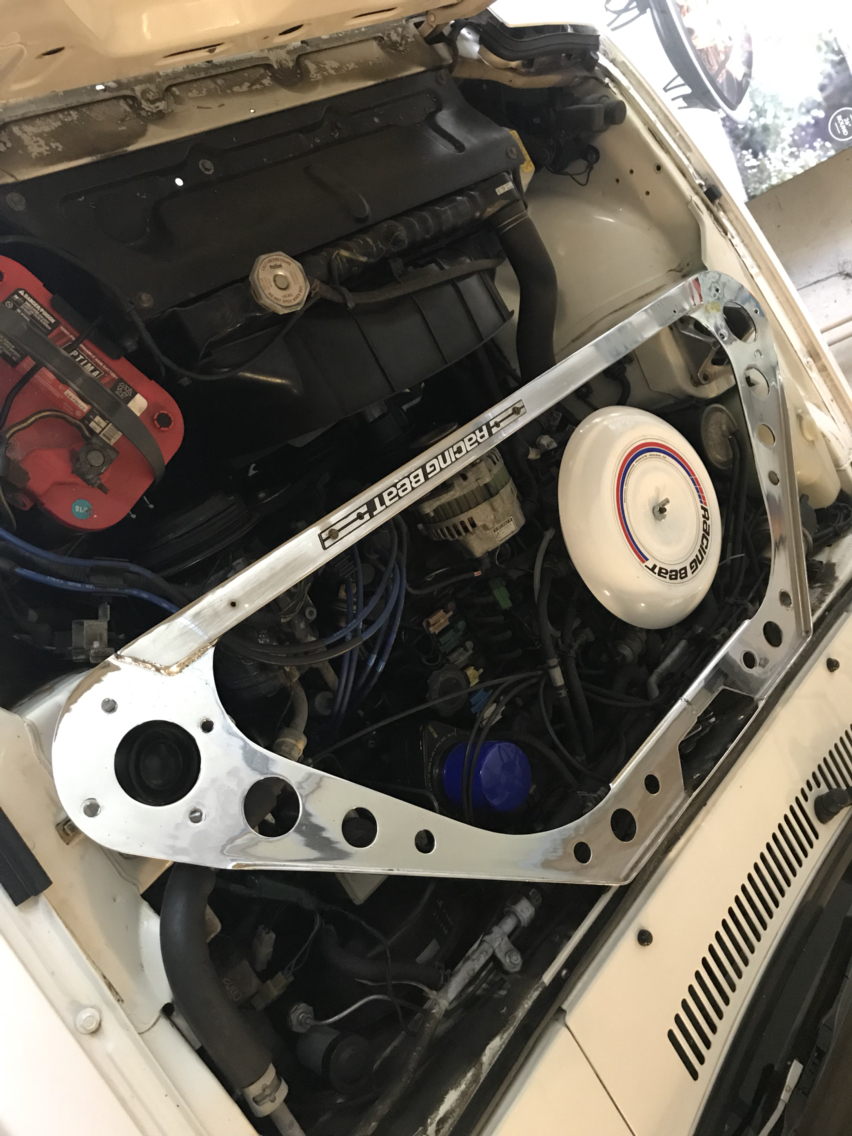
A while back, I bought a tired looking Racing Beat strut tower brace. The seller had an engine fire and it left soot all over the gold paint that was on it. I knew gold wasn't the original color so I bought it anyway figuring I could just paint it. It sat in the corner of my garage for almost 2 years.
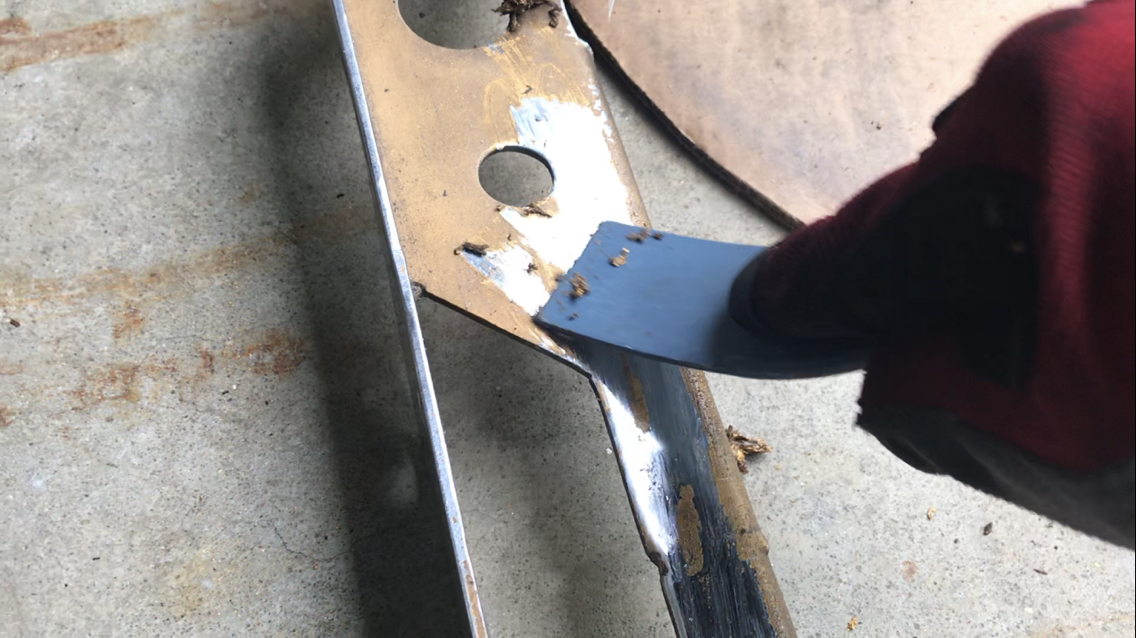
Today I decided I was going to paint it, so I started scuffing it up a little, when the paint flakes off. So I grab a wire brush wheel and try to get a little more off and it looked completely buffed out...wait a second, are these chrome?
Some paint remover and an hour or so later, I had a chrome strut brace and pretty good condition. Only problem, I need longer bolts to mount it. So it will have to wait until another day.


 05-31-18, 07:26 AM
#33
Last week I got my first laps in at historic Limerock Park. I've driven the track in iRacing but it is totally insane IRL. After 3 sessions I worked down to a consistent 1:10 lap time. Afterward I talked to some of the drivers who race in the SCCA IT7 class and they run 1:05-1:09 with the class record being a 1:04. But still, my car has a full interior, A/C, and nearly stock suspension setup compared to what they run. I'm sure there is more time to find but my springs were too soft to really dive hard into turn 1 and that's the only place you have to brake.

Parts have been rolling in for the new motor and I've been painting stuff so it looks nice when it goes in. It'll sort of be a red/blue Racing Beat theme. Rather than cannibalize my current motor, I'm trying to source all new parts so I can just swap one out and one back in. Waiting on a Flywheel bolt kit from Racing Beat, a pulley kit from Australia, and some longer horns from Jenvey in U.K. I still don't know what to do about throttle linkage. I'd like to keep the cruise control and some sort of cold/hot start assist. I also plan to keep the OMP so I need a rod to link it to the other side of the throttle body.

Parts have been rolling in for the new motor and I've been painting stuff so it looks nice when it goes in. It'll sort of be a red/blue Racing Beat theme. Rather than cannibalize my current motor, I'm trying to source all new parts so I can just swap one out and one back in. Waiting on a Flywheel bolt kit from Racing Beat, a pulley kit from Australia, and some longer horns from Jenvey in U.K. I still don't know what to do about throttle linkage. I'd like to keep the cruise control and some sort of cold/hot start assist. I also plan to keep the OMP so I need a rod to link it to the other side of the throttle body.
 11-03-18, 01:11 PM
#34
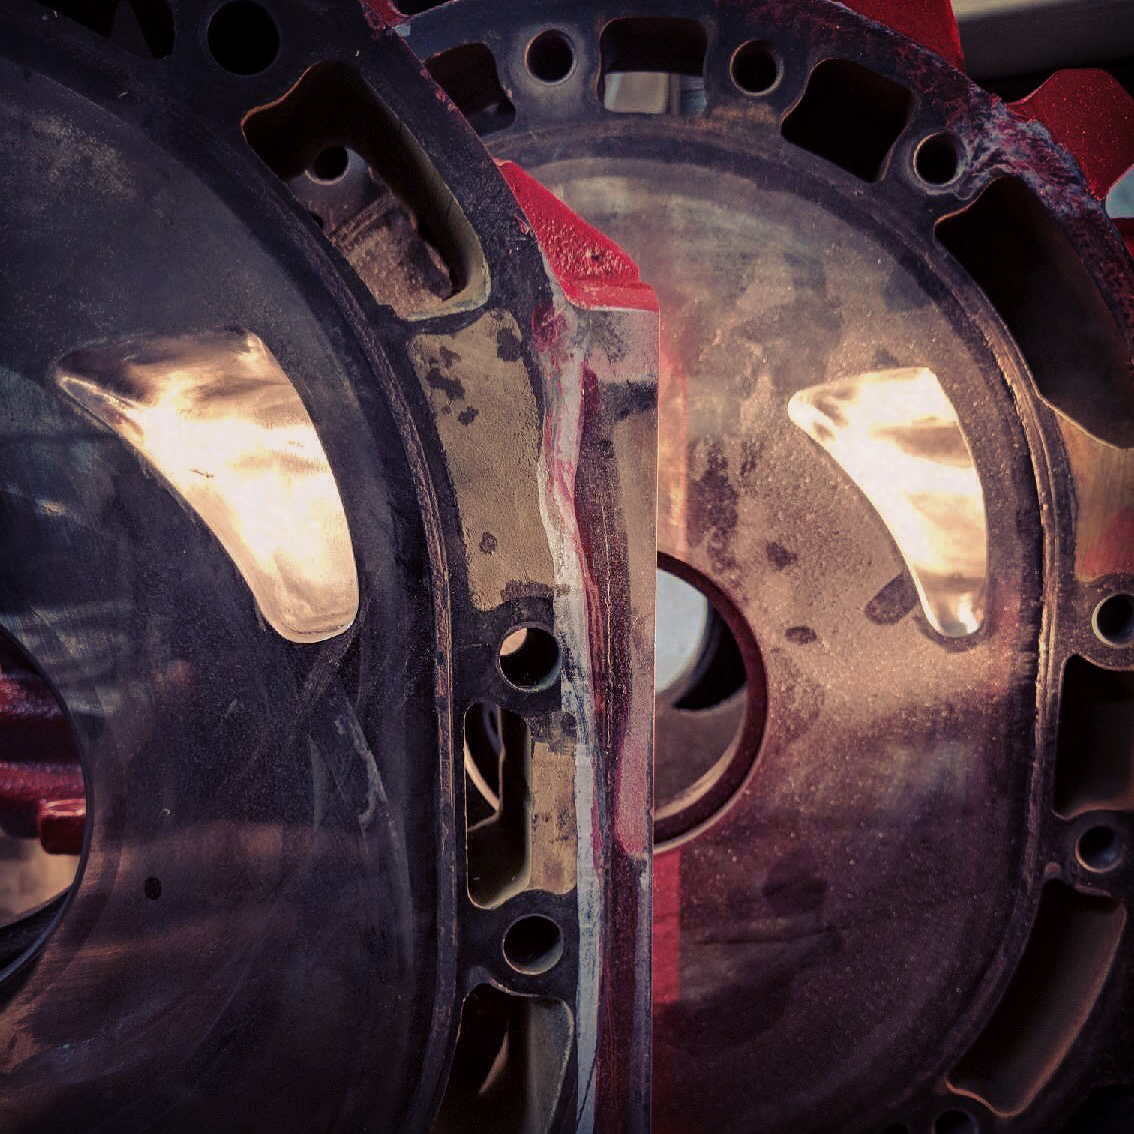
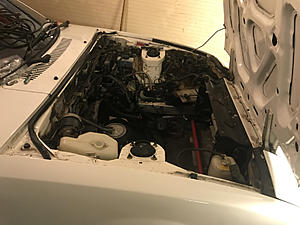
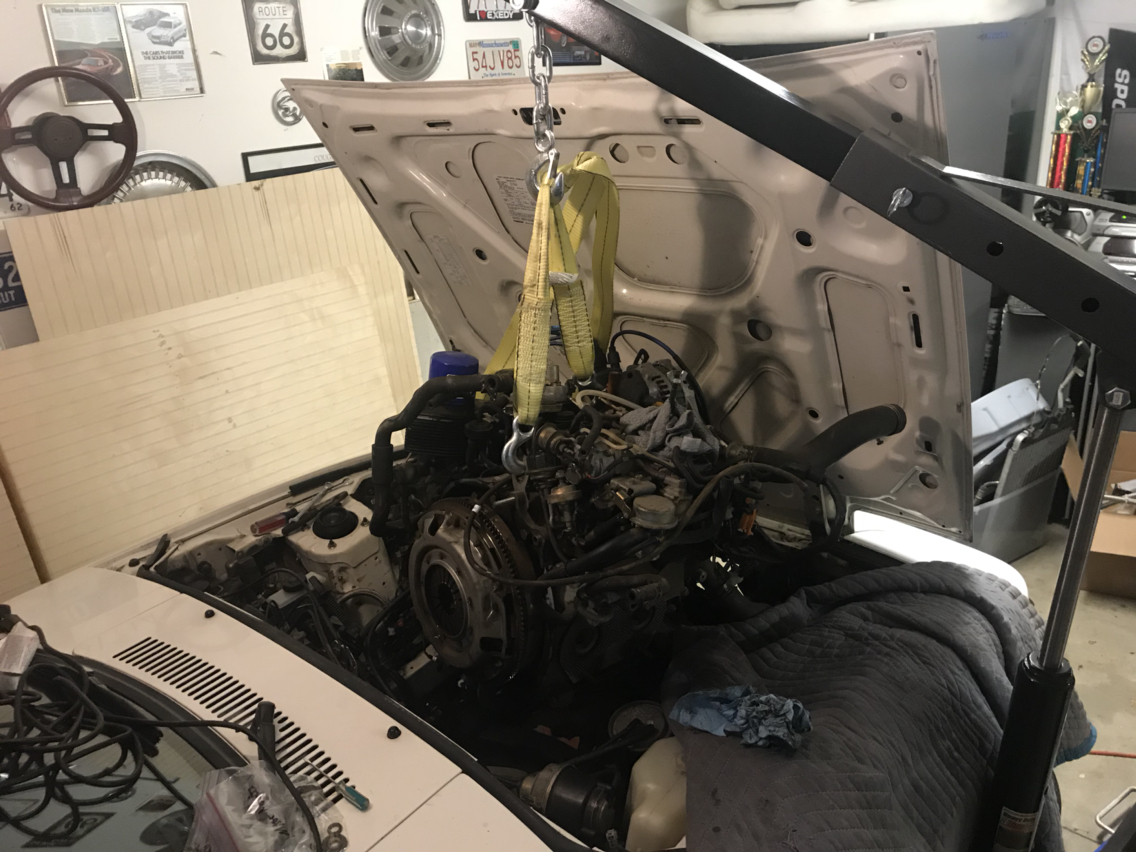
Winter is here, so it's time to get to work swapping that motor in. This is the first time I've ever pulled a motor before...I'm a late bloomer. Anyway, kudos to me for not screwing it up. I'm actually amazed the car ran this long with such tired looking hoses and weeping seals. It looks messy, but ran strong. I'm going to set it aside for a future project.


 11-05-18, 11:00 AM
#36
The new motor or the old one? I'm still mocking things up on the new motor. The old one is pretty grimey. I guess I haven't been keeping up with this thread, so let me go back through some old photos...
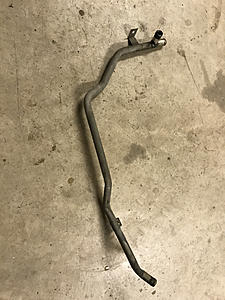
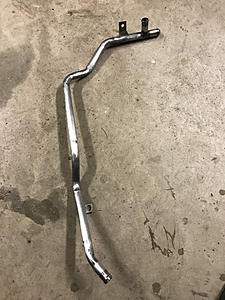
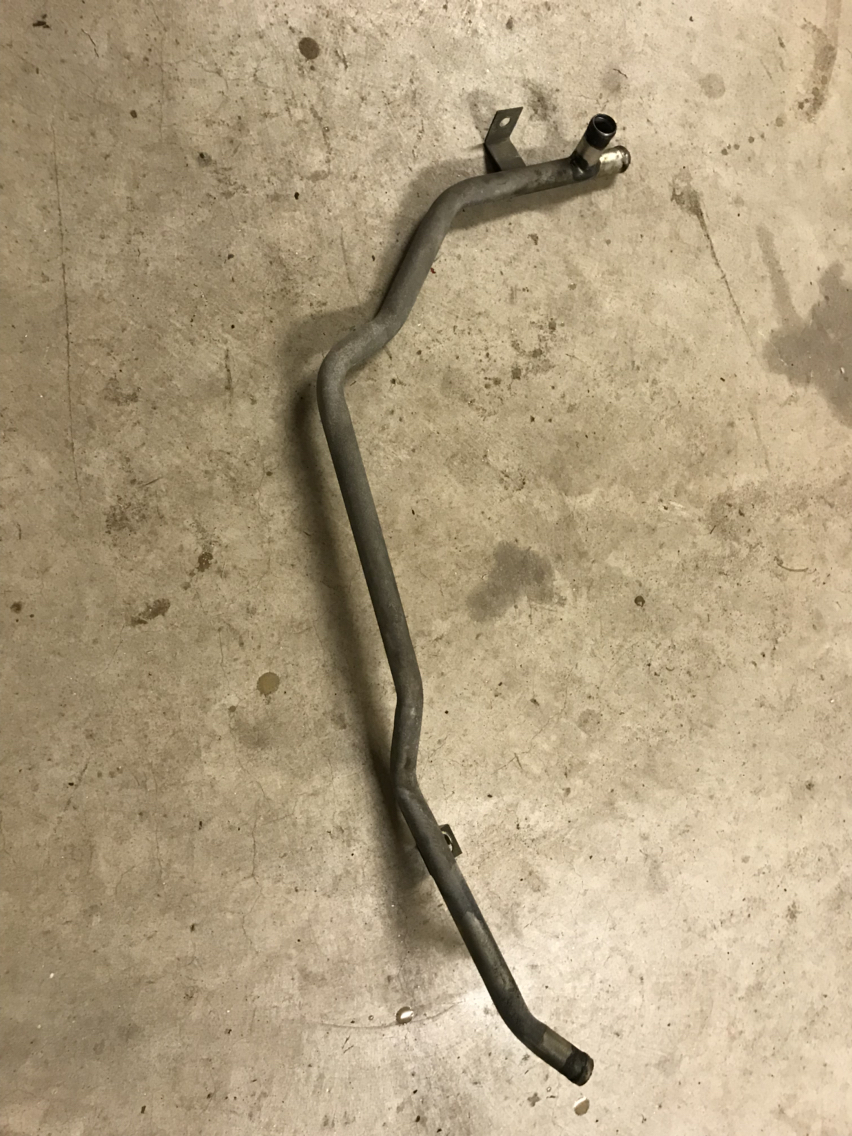
At one point over the summer I had to address the power steering leaks. This is what the original low pressure hose looked like when I pulled it off. I sized up some steel braided line to replace it, but didn't get a photo. You'll see them in some up coming photos I'm sure.

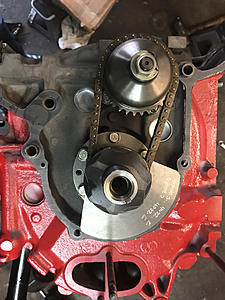
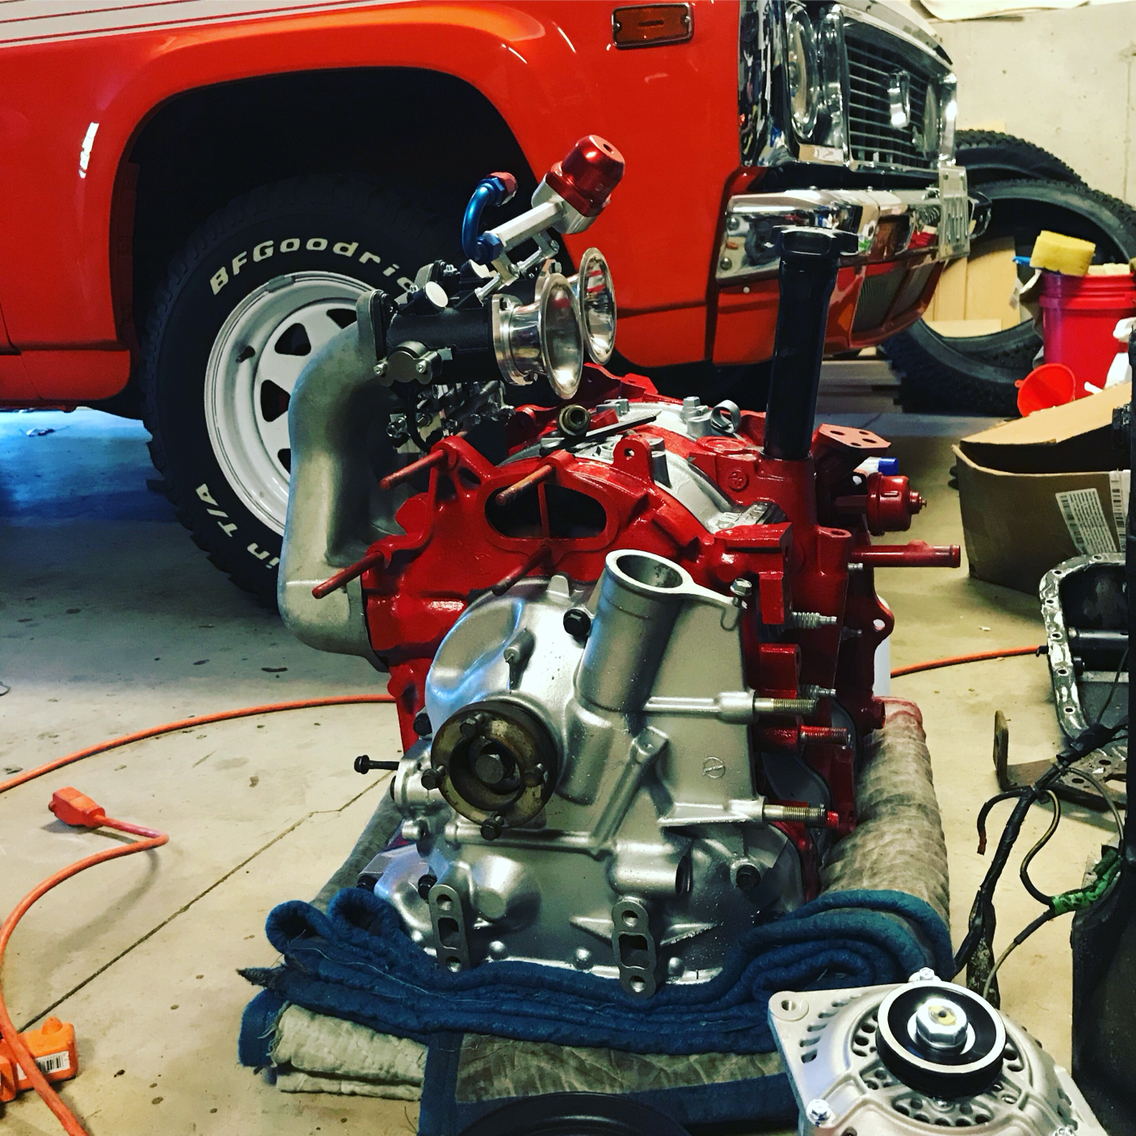
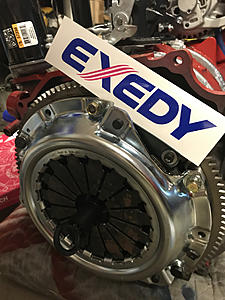
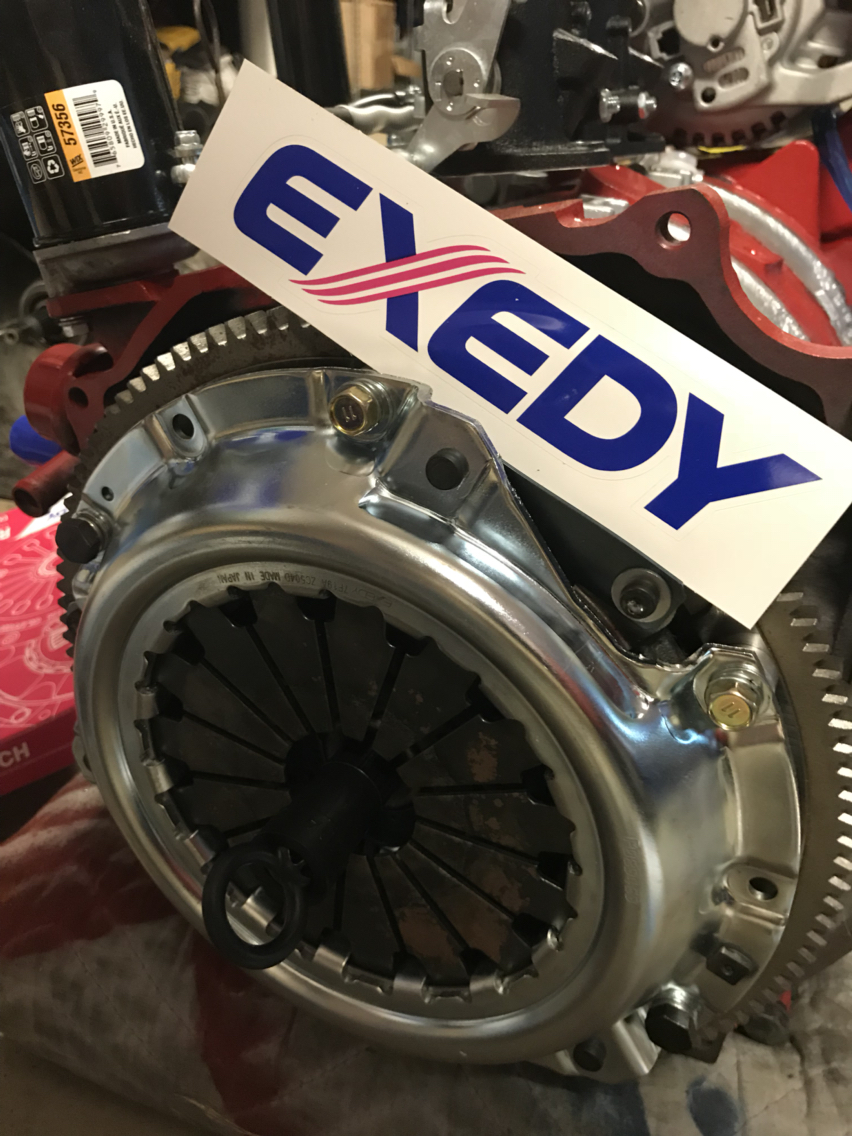
Back to the new motor...Exedy clutch and RB lightweight flywheel installed.
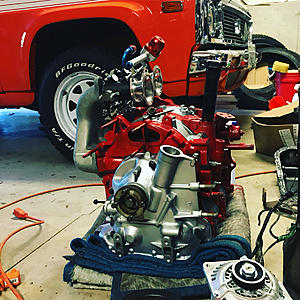
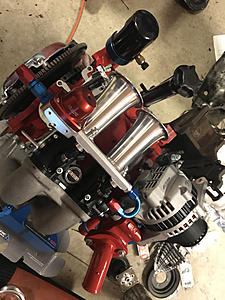
Mocking up some parts. Yes, that the REPU in the background. That truck is at the shop right now getting a new transmission (long story) and dyno tune.
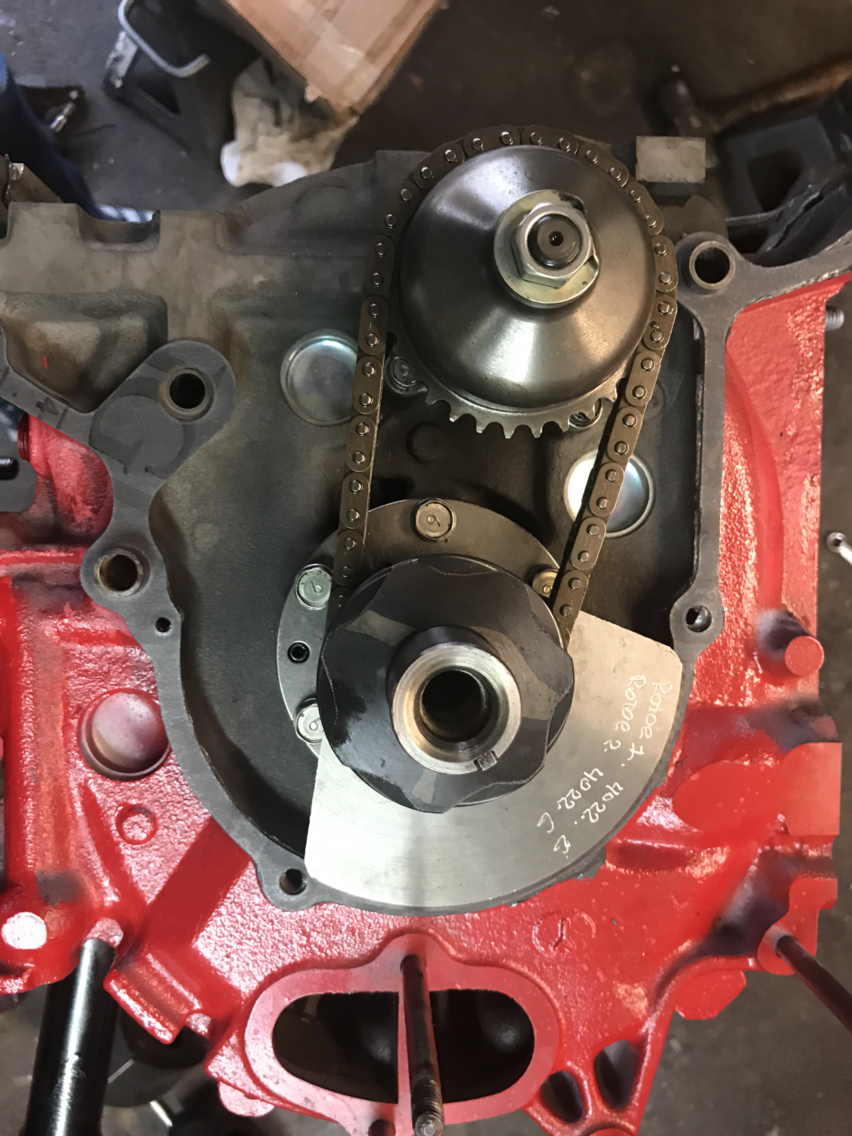
Water pump housing all cleaned up

Gilmer Drive pulley kit from Australia (not the cheap one you get on eBay).

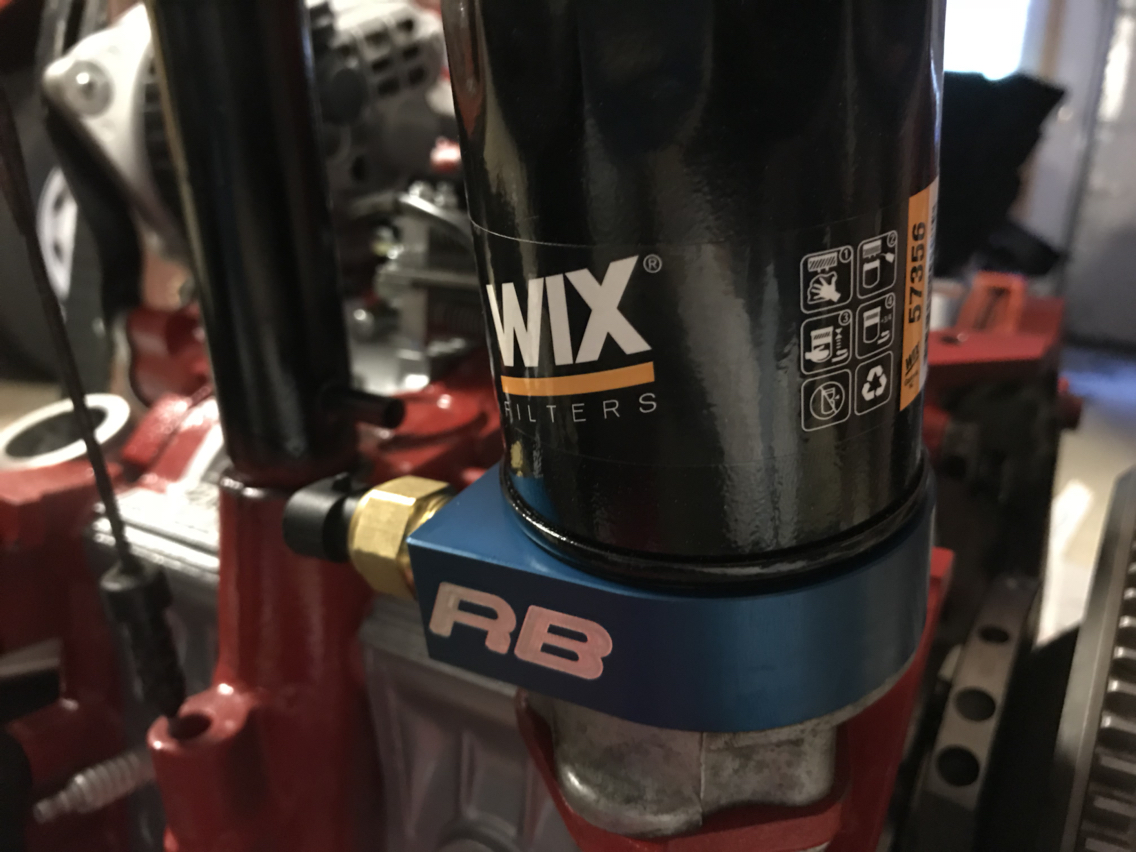
SE pedestal to delete the beehive along with a RB adapter so I can monitor oil temp with the ECU. It's got a spot for oil pressure too but for now I'm just going to stick with the stock oil pressure sensor.

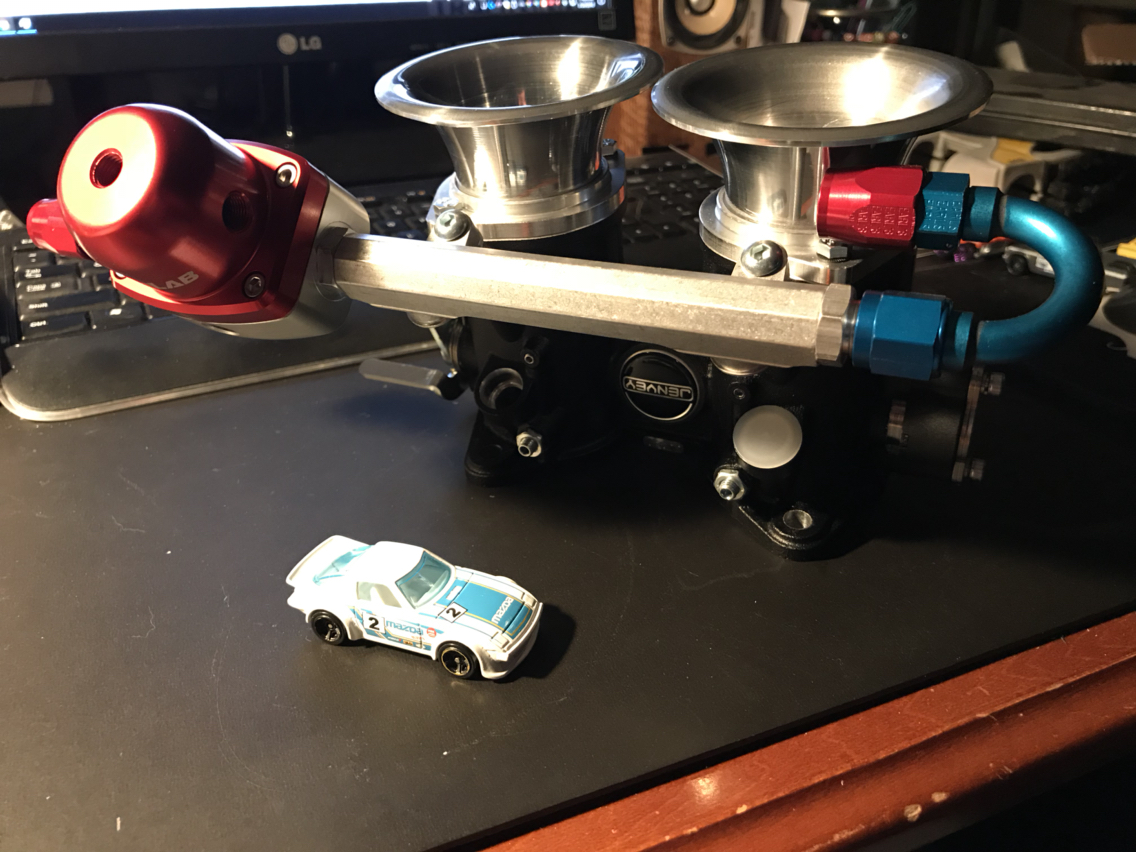
Mock up of the longer velocity stacks I picked up. Not sure if the fuel pressure regulator will stay there, I just tacked it on as an idea. I'll see if there is clearance when I get it in the car.
At one point over the summer I had to address the power steering leaks. This is what the original low pressure hose looked like when I pulled it off. I sized up some steel braided line to replace it, but didn't get a photo. You'll see them in some up coming photos I'm sure.
Back to the new motor...Exedy clutch and RB lightweight flywheel installed.
Mocking up some parts. Yes, that the REPU in the background. That truck is at the shop right now getting a new transmission (long story) and dyno tune.

Water pump housing all cleaned up

Gilmer Drive pulley kit from Australia (not the cheap one you get on eBay).
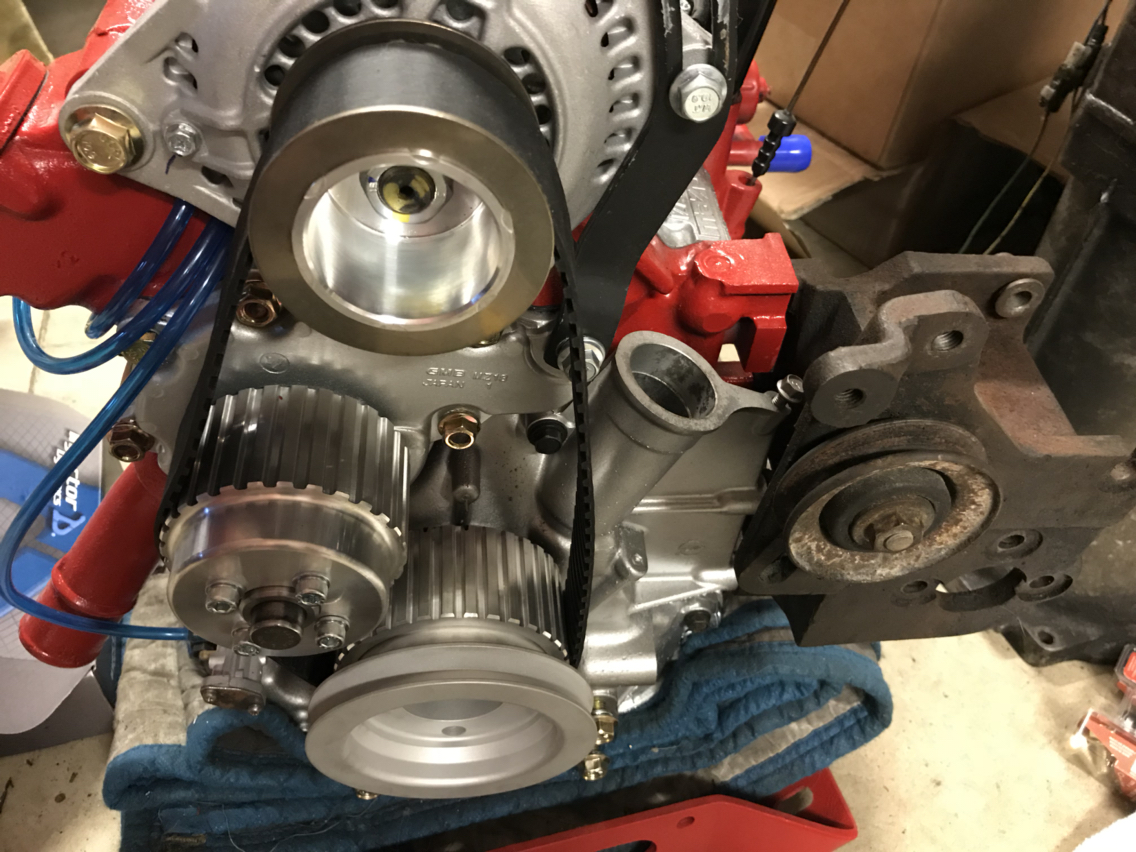
SE pedestal to delete the beehive along with a RB adapter so I can monitor oil temp with the ECU. It's got a spot for oil pressure too but for now I'm just going to stick with the stock oil pressure sensor.
Mock up of the longer velocity stacks I picked up. Not sure if the fuel pressure regulator will stay there, I just tacked it on as an idea. I'll see if there is clearance when I get it in the car.

 11-14-18, 11:05 AM
#38
I dropped the motor off with a local friend that is starting his own machine shop. He's going to make me a custom bracket and some pulleys so I can keep the p/s with the gilmer kit. It may take a few weeks before I get it back because he only works in his basement shop nights and weekends.
In the meantime. I have been pulling parts off the engine bay and cleaning everything up. The paint is in good shape and I'd like to keep it original. However there is some rust preventative stuff that isn't coming off very easily.


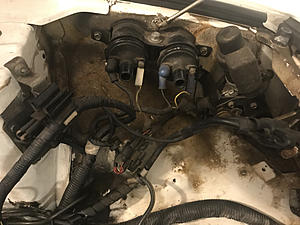
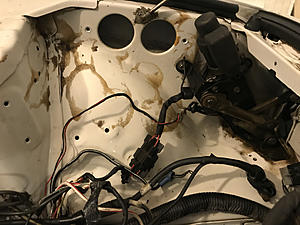
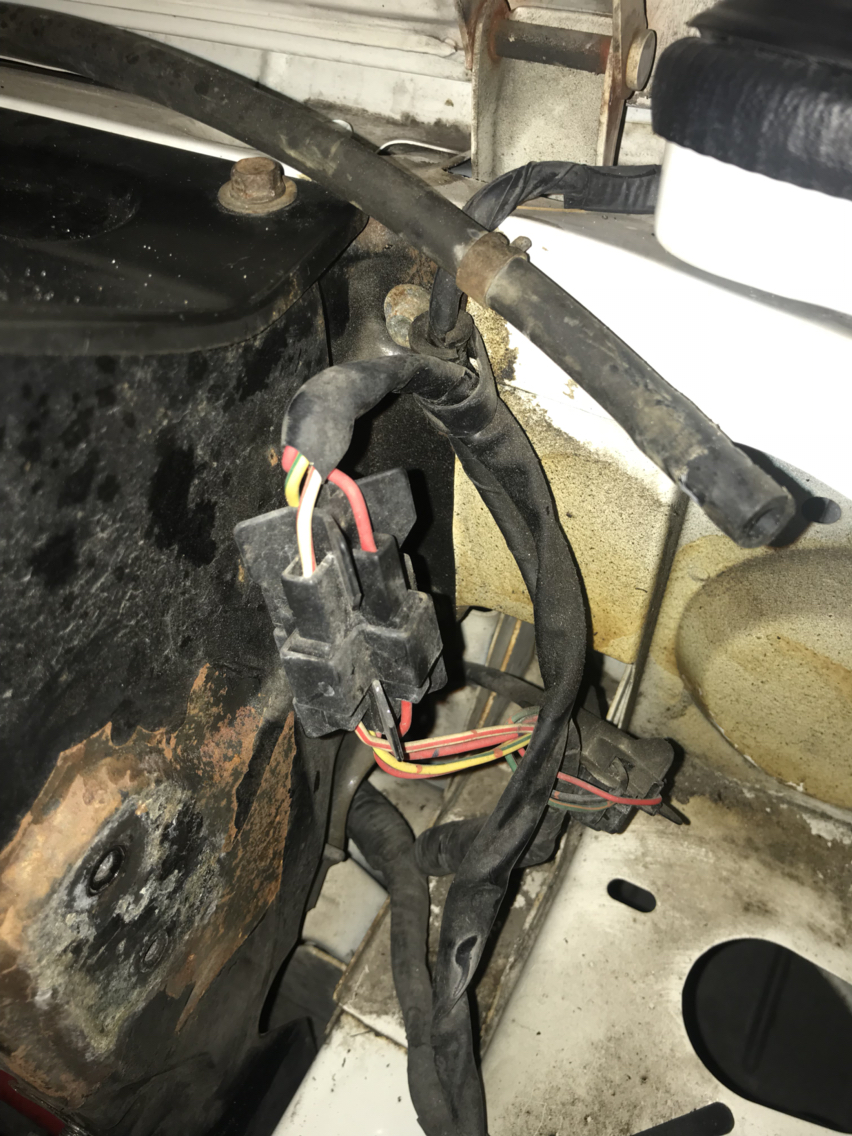
Another thing I'm trying to do is preserve the factory harness as much as possible. I don't know why, I'll likely never bring this car back to original spec. I guess it will just make future maintenance easier. With that said, I did have to clip a few wires because I don't want to pull the harness completely out of the car and some of the wires go all the way back to the fuse box or ignition and I won't be using them for my ignition system.
In the meantime. I have been pulling parts off the engine bay and cleaning everything up. The paint is in good shape and I'd like to keep it original. However there is some rust preventative stuff that isn't coming off very easily.


Another thing I'm trying to do is preserve the factory harness as much as possible. I don't know why, I'll likely never bring this car back to original spec. I guess it will just make future maintenance easier. With that said, I did have to clip a few wires because I don't want to pull the harness completely out of the car and some of the wires go all the way back to the fuse box or ignition and I won't be using them for my ignition system.
11-14-18, 08:19 PM
#39

Awesome thread!!
Great work, like how it has progressed. Similar story to my FB, minus the Fuel Injection.
We both managed to find rust free FB's on the North.
I am looking for a used intake like that to replace my Racing Beat sidedraft that I am running with a Dell 48.
Can you take a measurement or a picture with a ruler to show how much room is between the intake manifold (lower carb bolt holes) and the highest point of the rotor housing? Thanks!
Last edited by tommyeflight89; 11-14-18 at 08:23 PM.
11-14-18, 09:32 PM
#40
I don't have the motor right now but I can get a measurement when it gets back. I think it's lower than the RB 2-piece manifold that you likely have. There isn't much space. I won't be hiding the IGN-1A coils underneath that's for sure.
 11-20-18, 11:24 AM
#43
Rotary Enthusiast
Great work.
11-24-18, 02:33 PM
#44

The RB manifold is so low that even a very short air filter plate needs to be clearanced to avoid hitting the rotor housing.
This vid shows a 12A with (I think) the same one piece manifold. Plenty of room with the ITG filter which I already bought and want to run on my car.
https://www.youtube.com/watch?v=VW4brQOWT2g\
Currently running foam filter "socks".
11-29-18, 10:06 AM
#45
Based on your photo and the proximity of the intake to your alternator, I'm guessing my intake as a little more clearance. I still don't have it back yet so I can't get you a measurement.
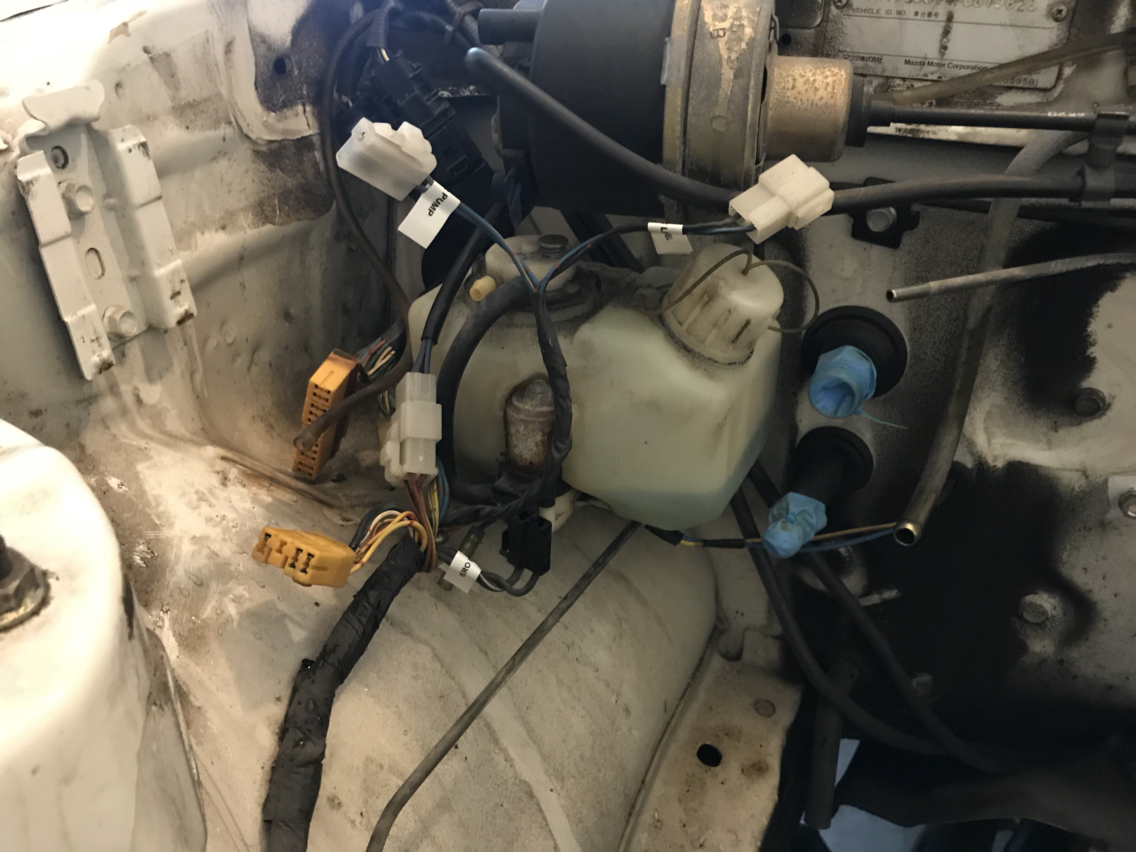
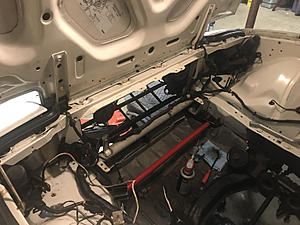
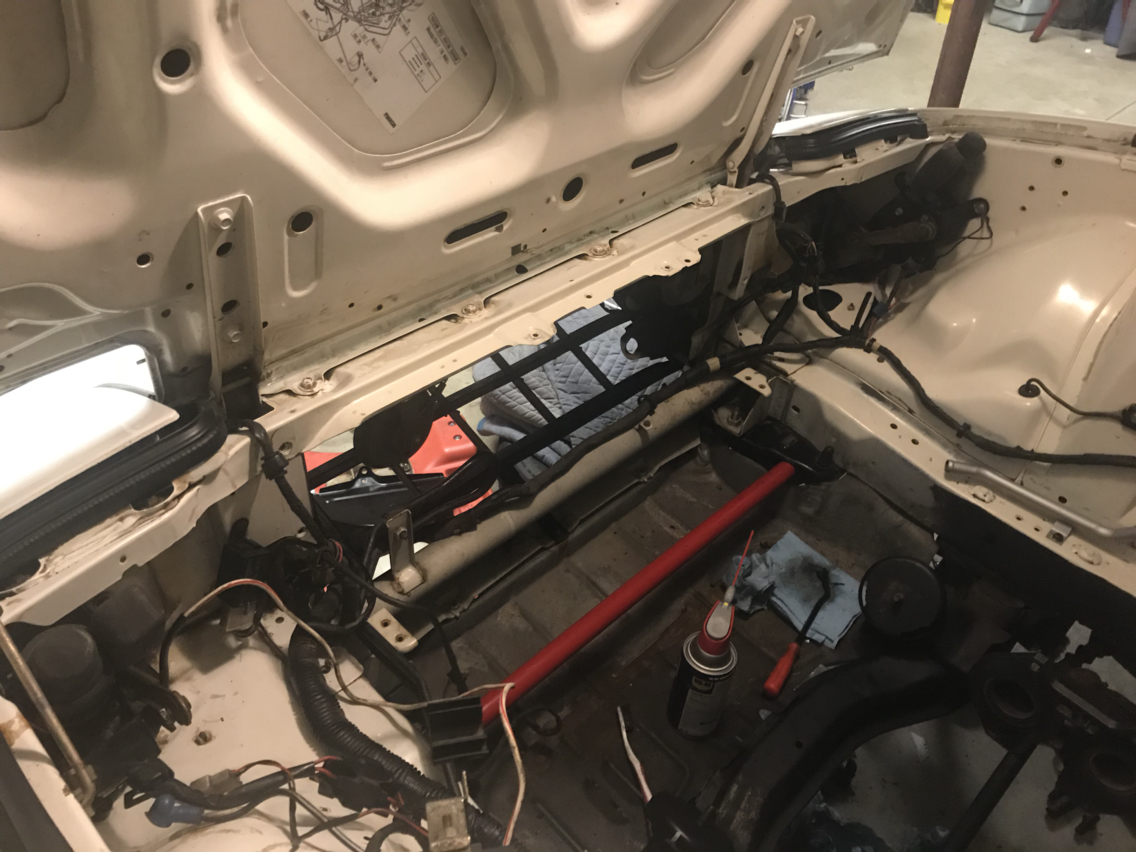
I've been spending an hour here, and hour there, cleaning various parts of the engine bay. I still have some hard crusty goo that won't come off with solvents. I tried some more aggressive goo remover in a small spot but it ruined the paint. I also tried a heat gun to warm it but that did nothing. Dry ice might work, but I think I'm just going to leave it and consider repainting the engine bay at some future point.
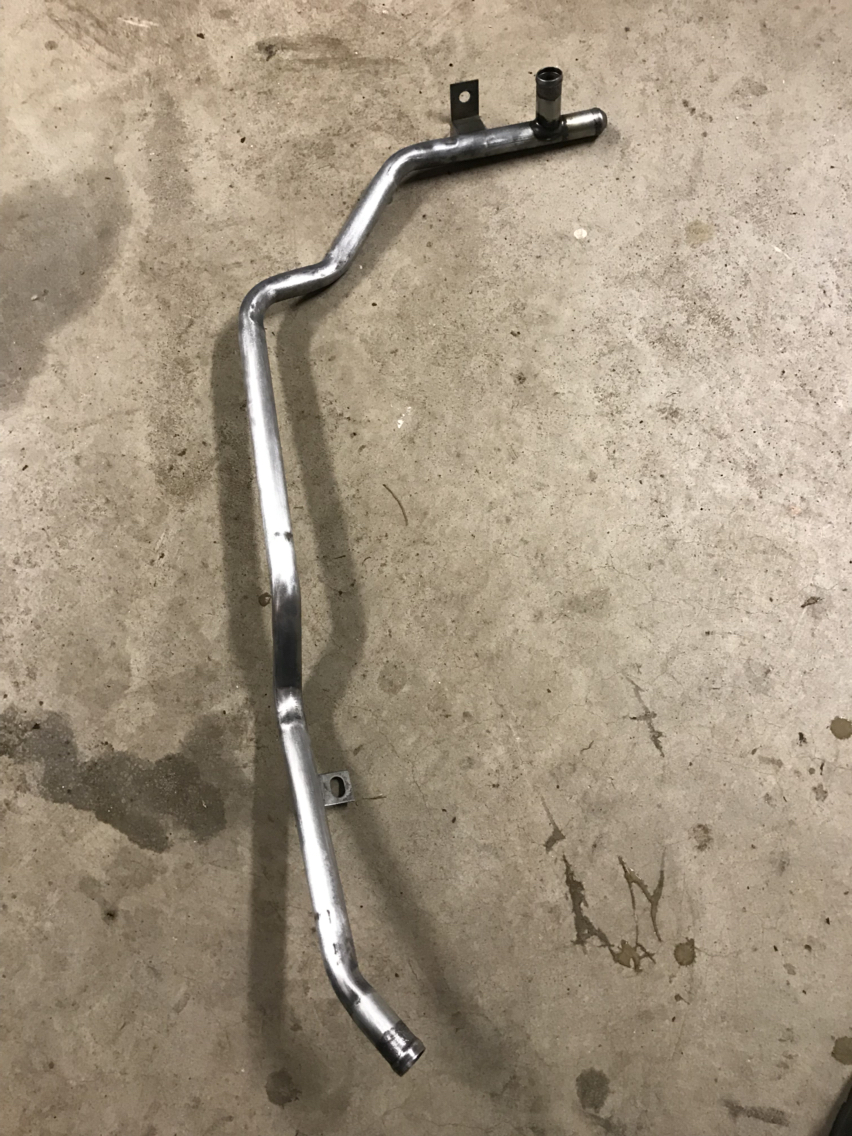
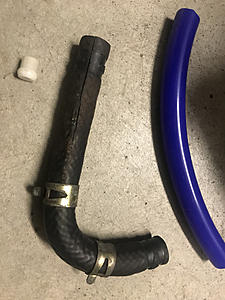
Heater line finished with some high temp paint and reinstalled with a new hose. I thought about getting some parts re-plated but this will still be a "driver" and paint will hold up just fine. If it doesn't, it won't be too much work to pull them out and send off to plating next winter. Goal this winter is just running driving EFI street port.
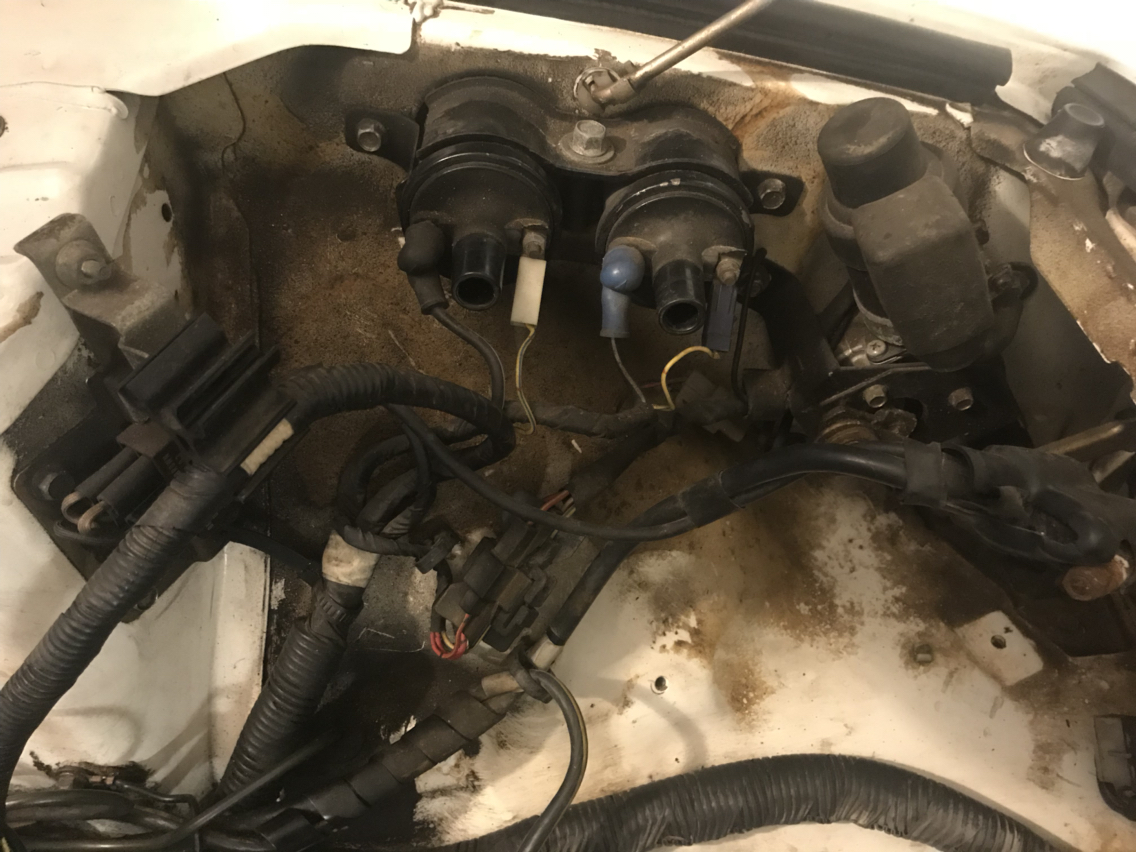
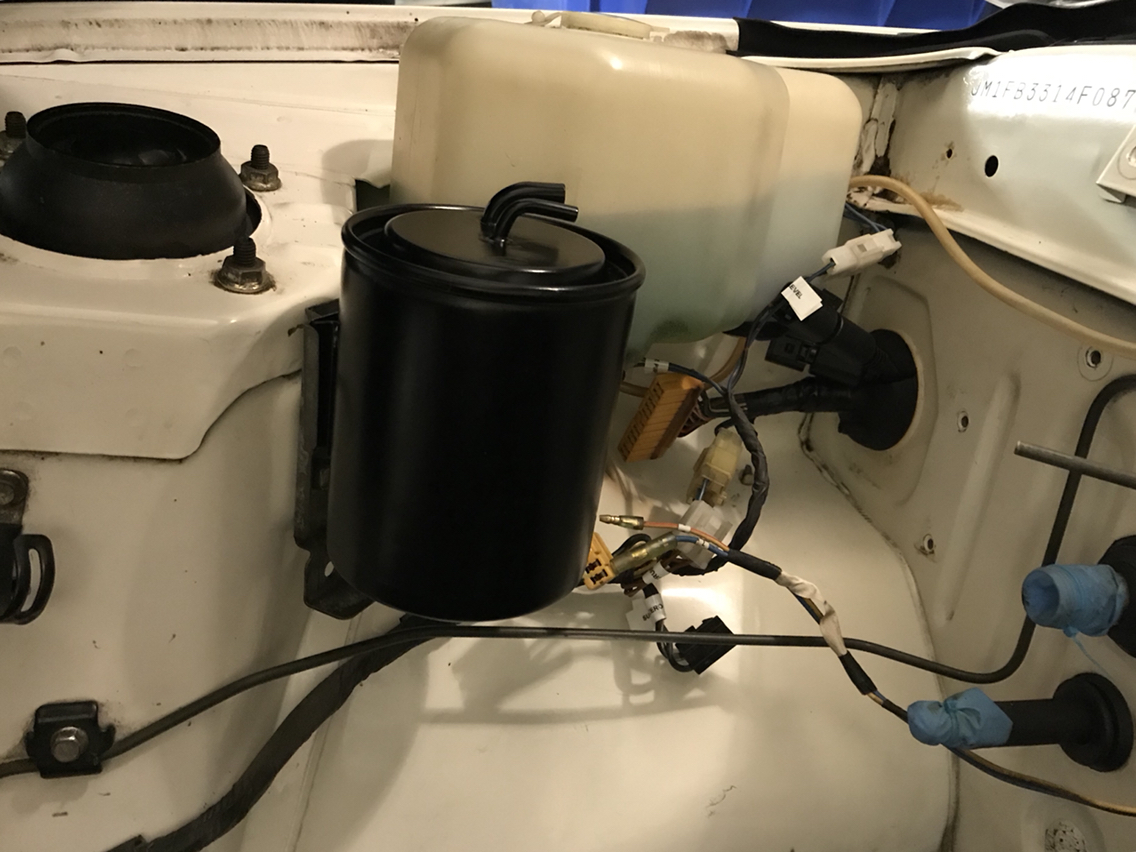
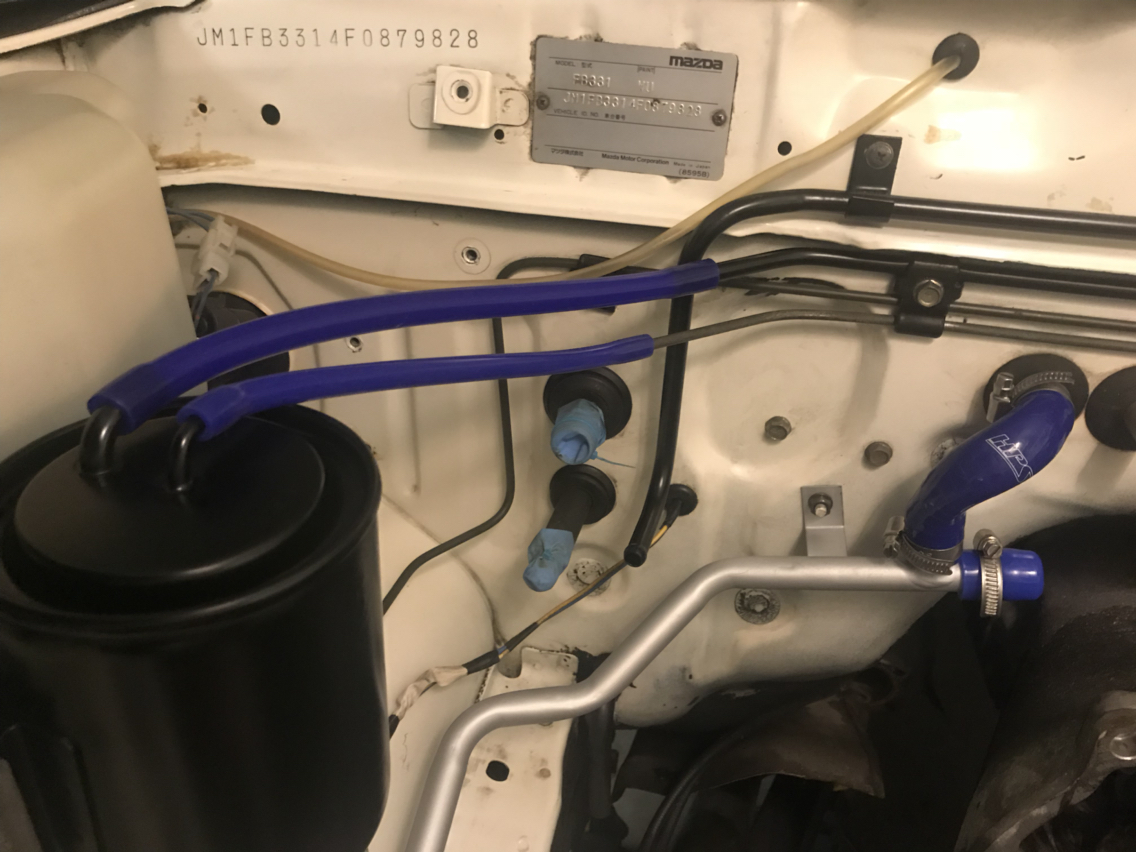
I'm keeping the charcoal canister and EVAP system.

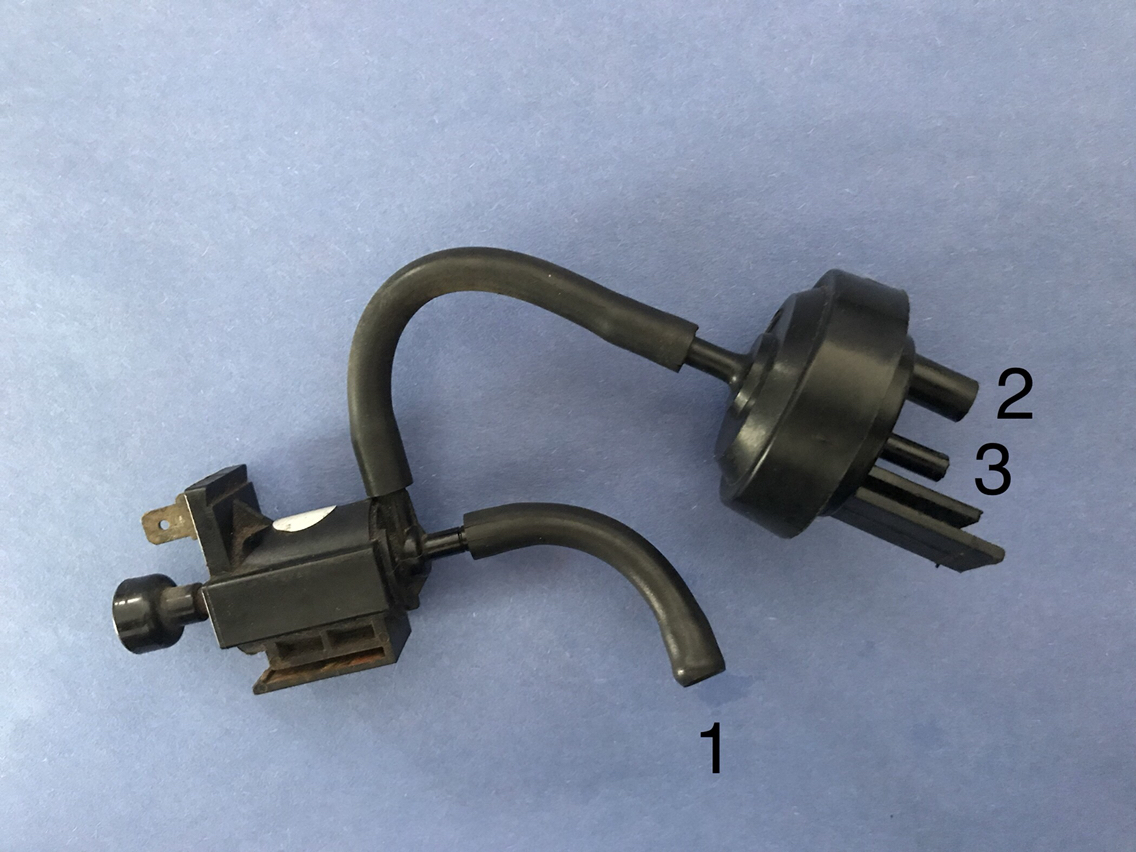
I outlined in another thread my plan for the purge valve but long story short, the original system used a port on the throttle body that only saw vacuum under light throttle. To mimic this with an aftermarket throttle body and ECU, I am going to use one of the rats nest solenoids and activate it above 1,500RPM. This should pop the valve open and allow the intake to pull air from the canister.

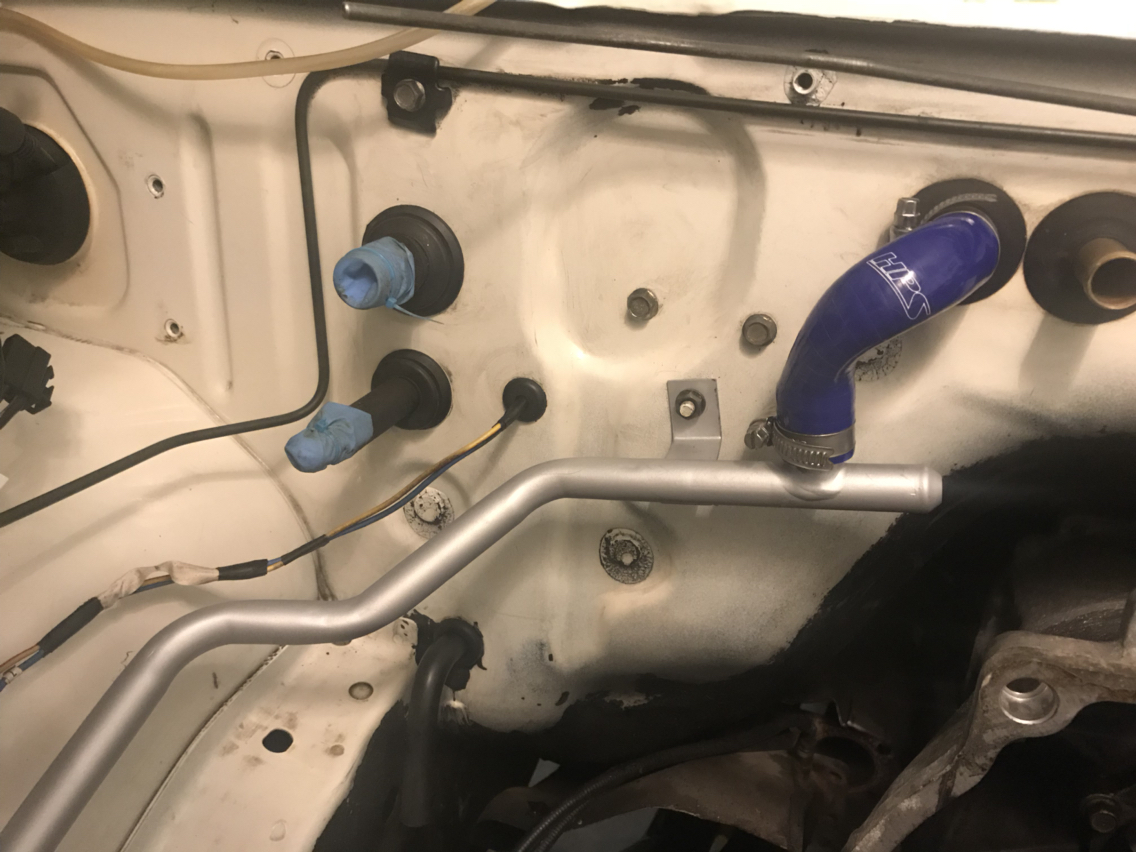
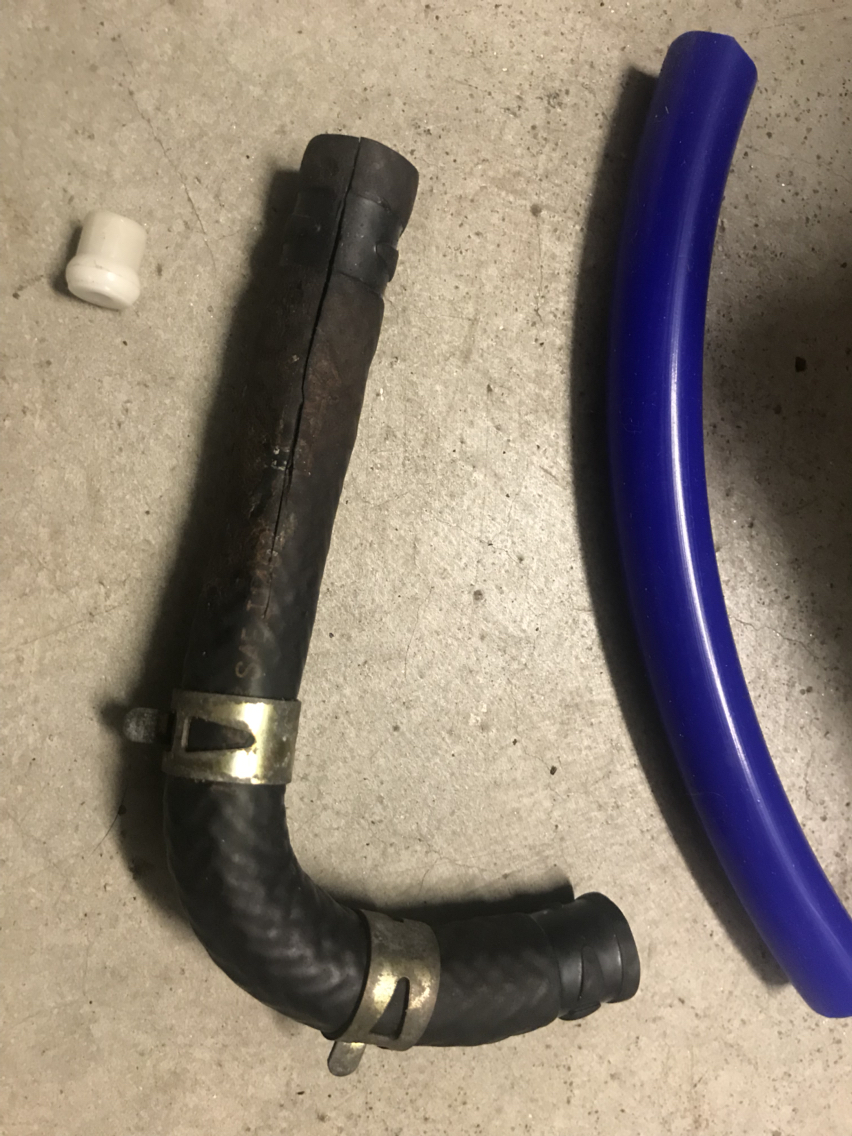
New brake booster hose. I discovered a check valve in the original hose so I cut it open and dropped it into the new hose.

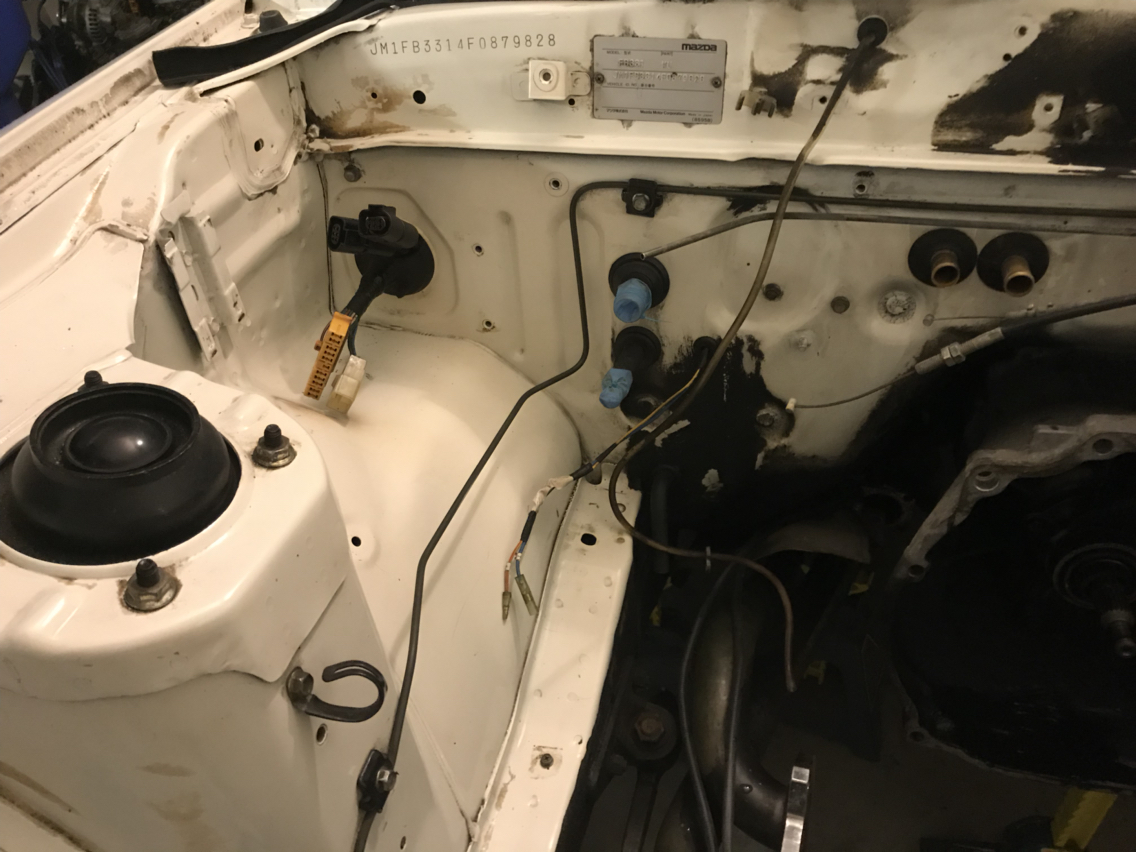
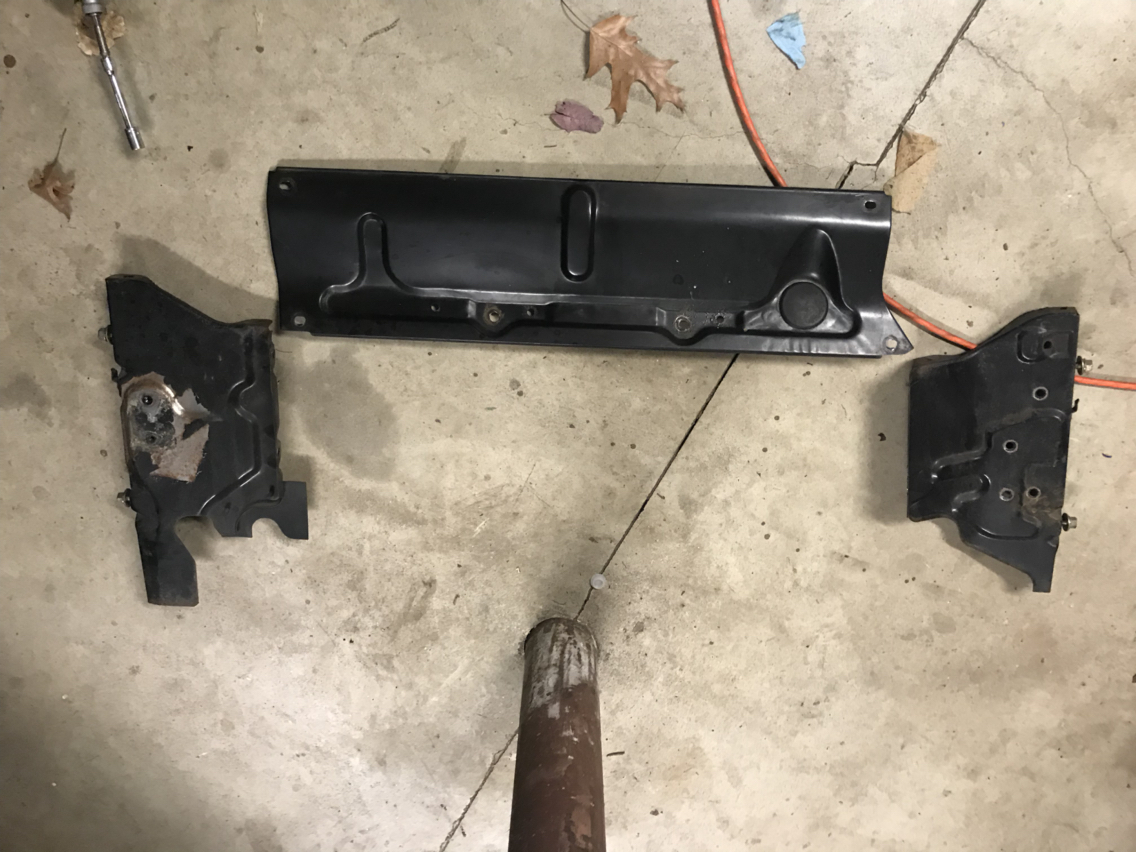
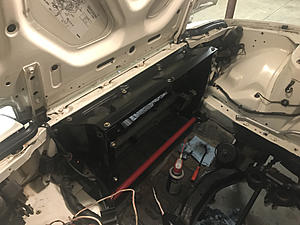
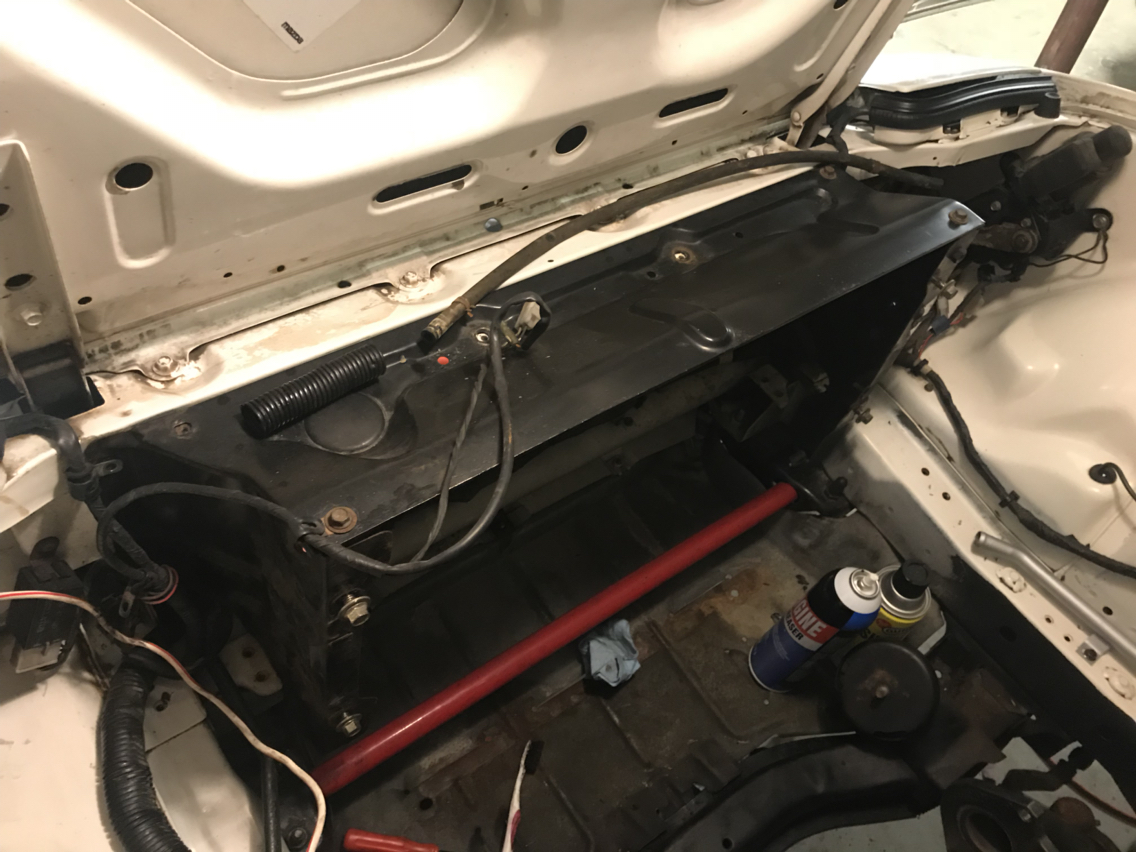
Last night I got as far as removing the radiator supports and cleaning them up so I can give them a fresh coat of paint.


I've been spending an hour here, and hour there, cleaning various parts of the engine bay. I still have some hard crusty goo that won't come off with solvents. I tried some more aggressive goo remover in a small spot but it ruined the paint. I also tried a heat gun to warm it but that did nothing. Dry ice might work, but I think I'm just going to leave it and consider repainting the engine bay at some future point.
Heater line finished with some high temp paint and reinstalled with a new hose. I thought about getting some parts re-plated but this will still be a "driver" and paint will hold up just fine. If it doesn't, it won't be too much work to pull them out and send off to plating next winter. Goal this winter is just running driving EFI street port.
I'm keeping the charcoal canister and EVAP system.
I outlined in another thread my plan for the purge valve but long story short, the original system used a port on the throttle body that only saw vacuum under light throttle. To mimic this with an aftermarket throttle body and ECU, I am going to use one of the rats nest solenoids and activate it above 1,500RPM. This should pop the valve open and allow the intake to pull air from the canister.
New brake booster hose. I discovered a check valve in the original hose so I cut it open and dropped it into the new hose.

Last night I got as far as removing the radiator supports and cleaning them up so I can give them a fresh coat of paint.

 11-30-18, 10:10 PM
#46
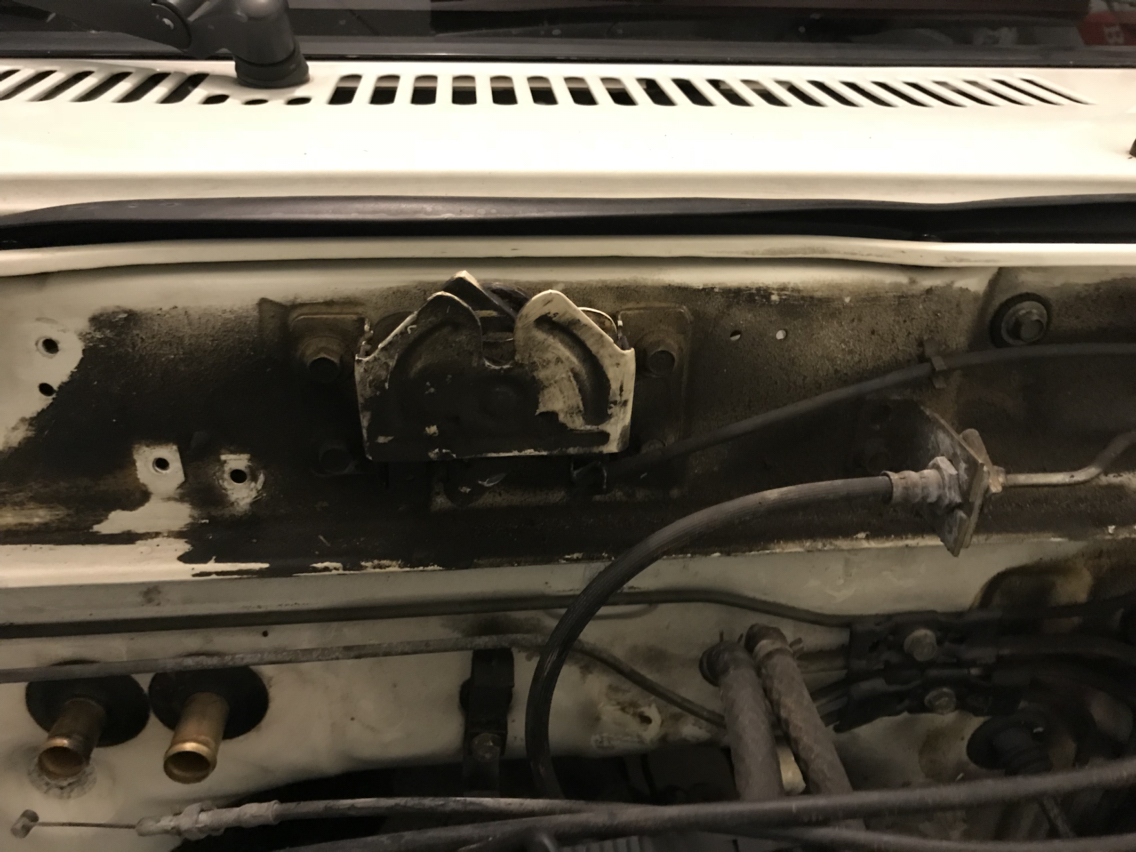
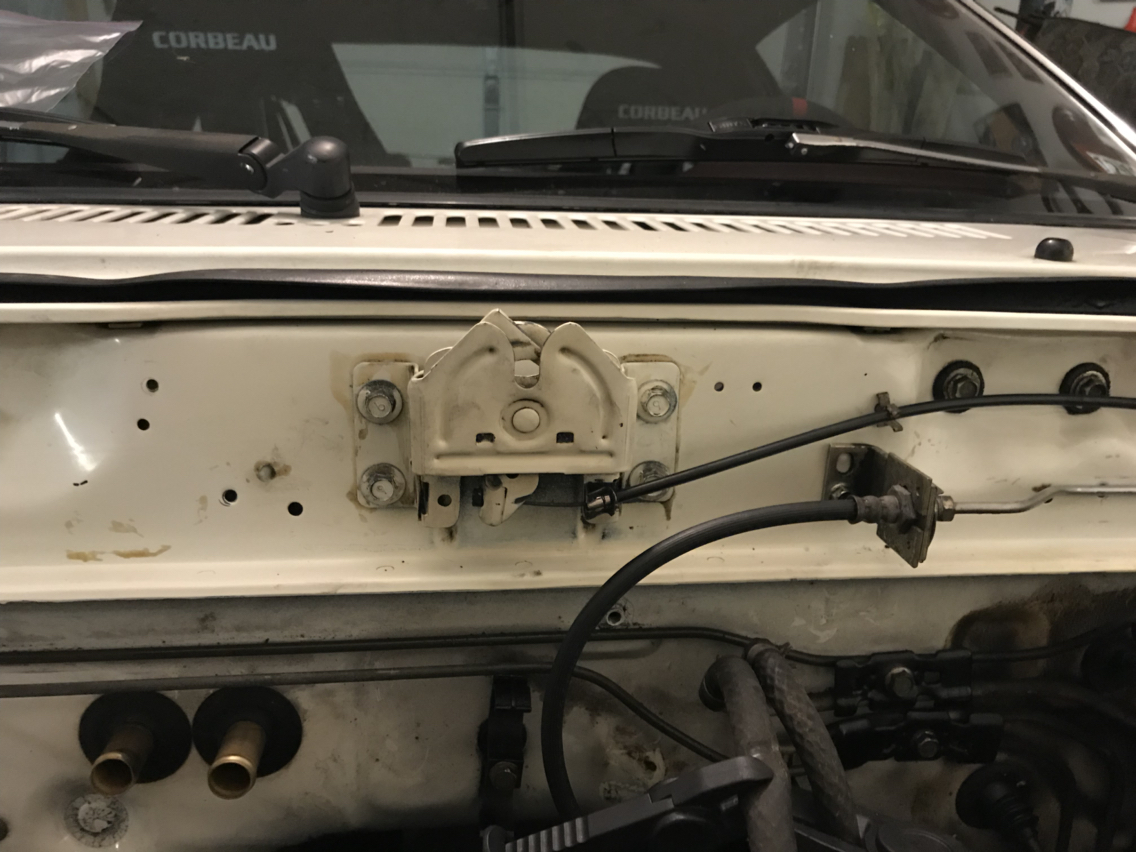
The radiator support is all cleaned up.
This section here where the paint had completely peeled off is what prompted me to give it a fresh coat of paint.

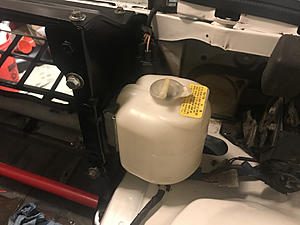
Overflow tank is all cleaned up too, man was that filthy inside. I should have taken a photo before I started cleaning it.
Before

During, I cleaned off as much of the rust proofing as I could but there is still some hardened goo that won't come off unless I take the paint off too. I could use suggestions on products to try, otherwise next winter I'll plan to just strip and repaint the whole engine bay.
After
This section here where the paint had completely peeled off is what prompted me to give it a fresh coat of paint.
Overflow tank is all cleaned up too, man was that filthy inside. I should have taken a photo before I started cleaning it.

Before
During, I cleaned off as much of the rust proofing as I could but there is still some hardened goo that won't come off unless I take the paint off too. I could use suggestions on products to try, otherwise next winter I'll plan to just strip and repaint the whole engine bay.
After
 12-06-18, 12:59 PM
#49
Brake cleaner takes a little bit of it off...but it also takes the paint off. I tried on a small section, won't be doing that again. Honestly, my finger nail seems to be the only thing that will get the hardened goo off. It's like 30 yr old dried tree sap. I've cleaned as much as I intend to...when everything else is back in place, I may take a second pass at places that are still visible.
At this point I'm waiting to get the motor back from my friend. But I've been poking around the garage with two projects buzzing around my head.
The first is the throttle linkage. I really want to keep the cruise control. It operates on a separate cable that is vacuum actuated. I need to either canibalize the two spare Nikkis I have to create a similar linkage that eventually connects to my Jenvey throttle body, or I need to modify Jenvey's dual throttle cable kit to perform the same function. I also want it to look clean and tidy.
The second is the wiring harness. I may have mentioned before my plan is to remove the emissions computer and replace it with an Adaptronic 440d. I'm going with direct fire as well. I think I can use the original harness connections between the passenger footwell and engine bay for the majority of the wires. All the connections for solenoids and carburetor electronics would be repurposed for injectors and sensors. There aren't enough wires for the coils so I'd need to make a supplementary harness on the driver's side which contains a relay for EFI (ECU, injectors, O2 sensor, etc), a relay for the electric fan, and possibly a relay for the fuel pump. This harness will pass power to the passenger footwell as well as cary signal wires for the coils back from the ECU. I think I'm going to throw together a graphic to explain it all. The goal is basic plug-and-play that I could pull from this car and put in another '84-85 car should the need ever arise.
12-06-18, 03:57 PM
#50
ancient wizard...

Try putting a smear of vaseline on the area with the goo and and let it sit undisturbed as long as you can. It will do no harm to the paint. I've done this on my own cars that i found something? had dripped and dried on finish when parked. Short of using a buffer with compound,nothing would touch it. The vaseline thing over about a 5 week period with periodic scrubbing the area with an old toothbrush to take off the softened top layer,then putting another dab on and letting it sit for few more days,then another rub with toothbrush and the vaseline again.
I think 3 times i did this and in the end it was gone, buffed in some glazing compound on that panel and then buffed in a coat of wax and the spots were as before. Only other option was to repaint,this worked,was very happy. Need patience.
I think 3 times i did this and in the end it was gone, buffed in some glazing compound on that panel and then buffed in a coat of wax and the spots were as before. Only other option was to repaint,this worked,was very happy. Need patience.