Gen 1 RX7 into tarmac rally Car - Group C Replica


 03-03-14, 03:27 AM
#53
Full Member
Join Date: Feb 2014
Location: Australia
Posts: 50
Likes: 0
Received 0 Likes
on
0 Posts
Mate i am loving the build of the car. The quality of the workmanship looks amazing.
I was wondering if you were able to post some more pictures of the steering column and show which parts are FC and which parts are FC. I am doing the sub frame swap and i really want the steering column to look as factory as possible so i need as many ideas as i can get
Thanks
Go luck with the car out racing
03-04-14, 03:59 AM
#54
Full Member
Thread Starter
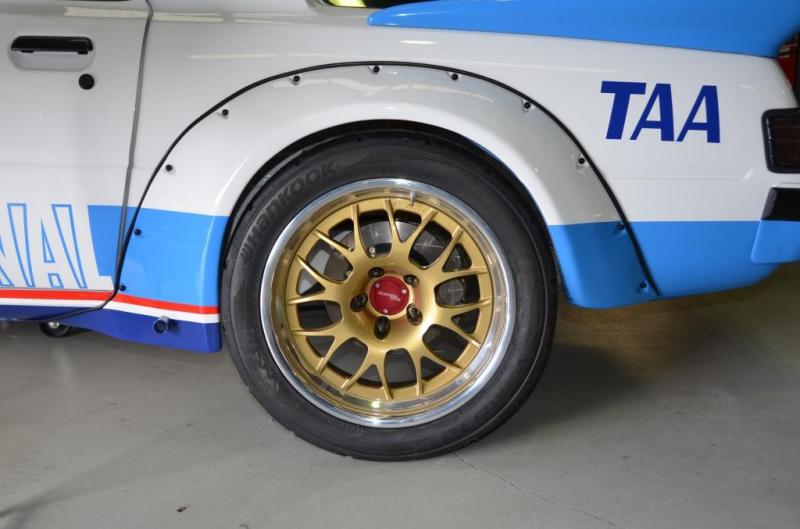
Sorry for slow reply. Am running a 17 x 8 as the rules limit me to that. But could easily squeeze a 10" rim under it. I think they raced on 12s at the rear back in the day.
 03-04-14, 04:00 AM
#55
Full Member
Thread Starter
Mate i am loving the build of the car. The quality of the workmanship looks amazing.
I was wondering if you were able to post some more pictures of the steering column and show which parts are FC and which parts are FC. I am doing the sub frame swap and i really want the steering column to look as factory as possible so i need as many ideas as i can get
Thanks
Go luck with the car out racing
I was wondering if you were able to post some more pictures of the steering column and show which parts are FC and which parts are FC. I am doing the sub frame swap and i really want the steering column to look as factory as possible so i need as many ideas as i can get
Thanks
Go luck with the car out racing
03-12-14, 07:34 PM
#56
Full Member
Join Date: Feb 2014
Location: Australia
Posts: 50
Likes: 0
Received 0 Likes
on
0 Posts
Thanks mate
I cant wait to see this car out competing. Do you have your first event planned? or is still a matter of getting the car finished and tested before worrying about which events to enter?
cheers
I cant wait to see this car out competing. Do you have your first event planned? or is still a matter of getting the car finished and tested before worrying about which events to enter?
cheers
03-19-14, 02:14 AM
#57
Full Member
Thread Starter
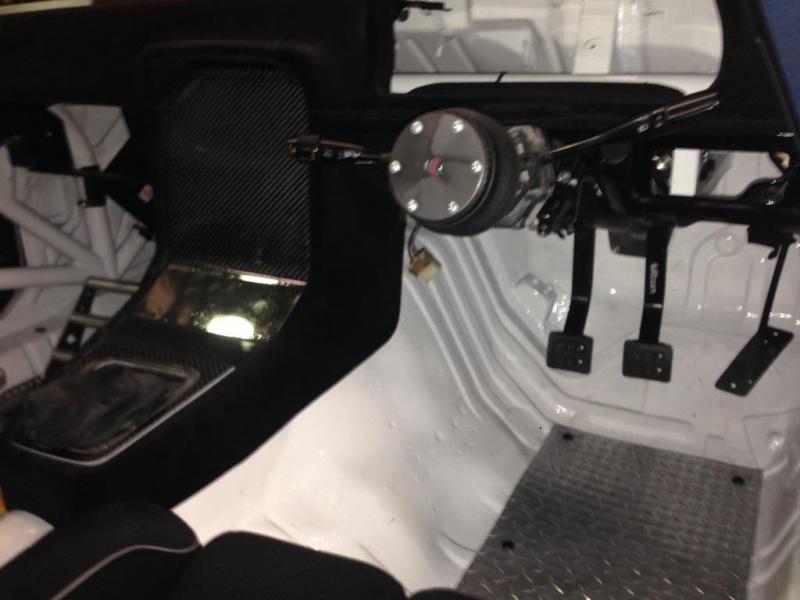
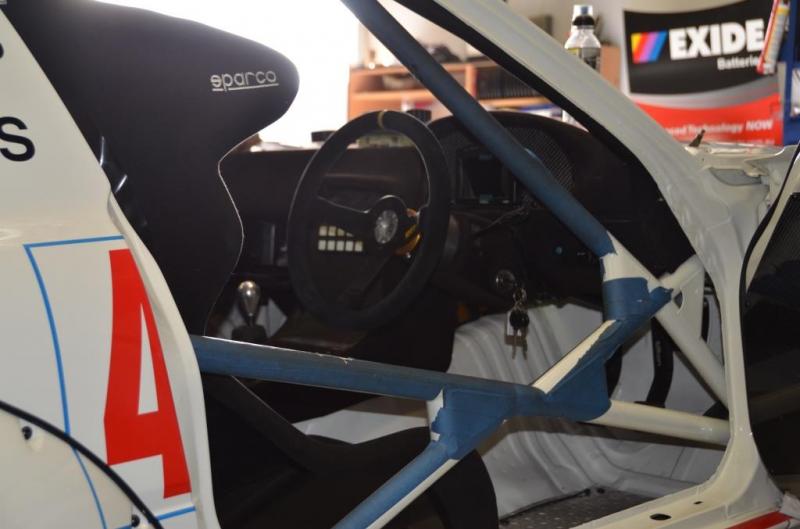
the low down on the steering column is, we cut the FB column at the end out in the engine bay and welded on the spline off the end of the FC one. From there down to the connection at the rack its all FC. Some pics below.
Re events I really want to be at Targa High Country in October. Car will need some significant shaking down prior to then. Hoping it will be on the dyno by end of April.
edit: apoligies for orientation of pics...photobucket is being a bitch

 03-31-14, 12:47 AM
#59
Full Member
Thread Starter
Cheers again for the feedback fellas. Has been a while between updates. Was waiting until some decent progress is made. So where are we at??
I got a quick crash course (poor choice of words probably) in speedflow fittings and got to work on all the braided brake lines. Hydraulic handbrake and pedal box are in. They are all completely plumbed up front and rear and ready to go. Haven't actually added fluid yet though as the dash/reservoirs have been in and out a bit. I guess we will find out then how I went soon.
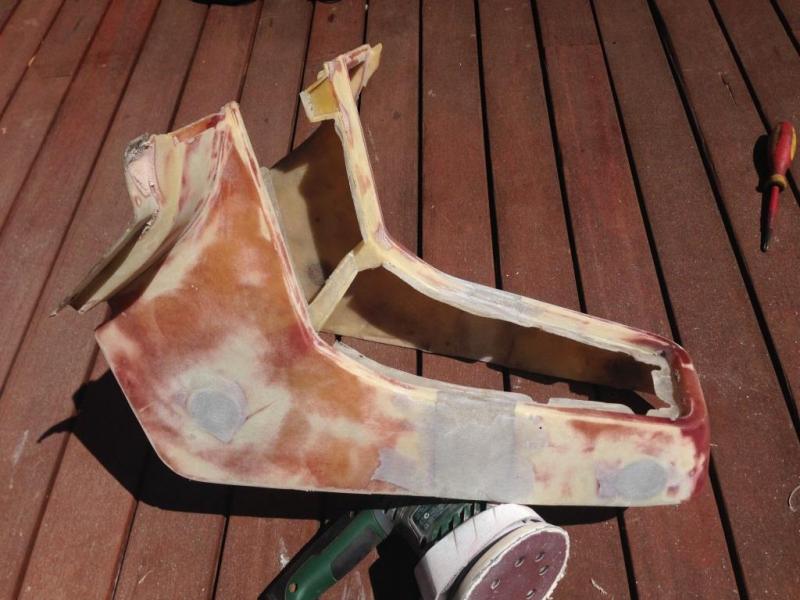
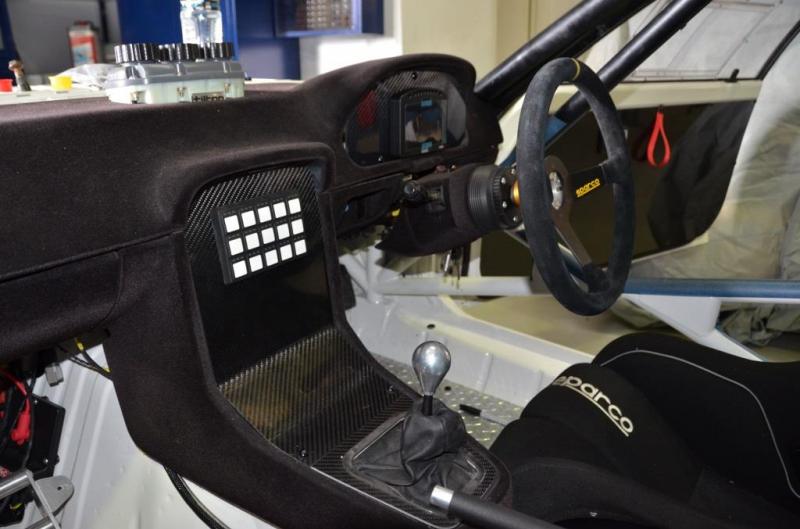
I got busy bogging and sanding the dash and have since had it flocked. Cut and extended the centre section that reaches back to the gearshift to get the shifter back in the right spot after moving the engine back to the firewall and using a series 5 turbo box. Has come up nicely. It will be complete with glovebox and other trims when finished to give it a factory and complete look. Have a blank carbon panel in the centre console and will mount a switch panel from racegrade along with the isolator and will put a blank sheet where the main instruments were to mount the digital dash.

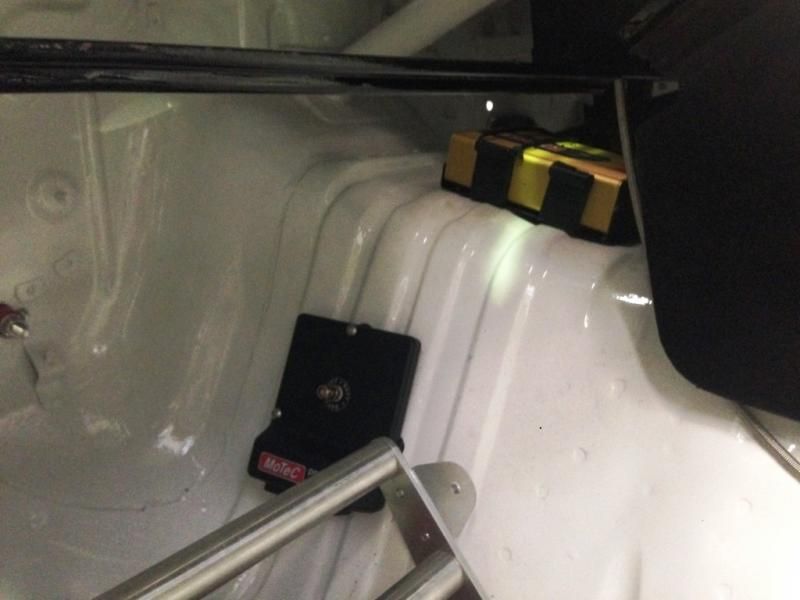
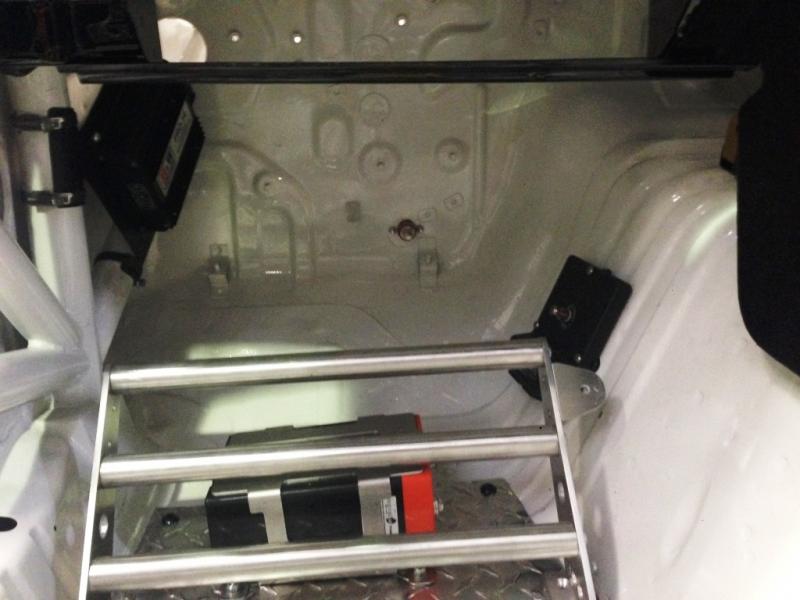
Also got some other interior stuff done. Some propellor plate ali scuff plates in the foot wells. The foot rest for the co driver in. Have got the super B battery, PDM, CDI and MoTeC M800 box all mounted ready for the wiring to start.
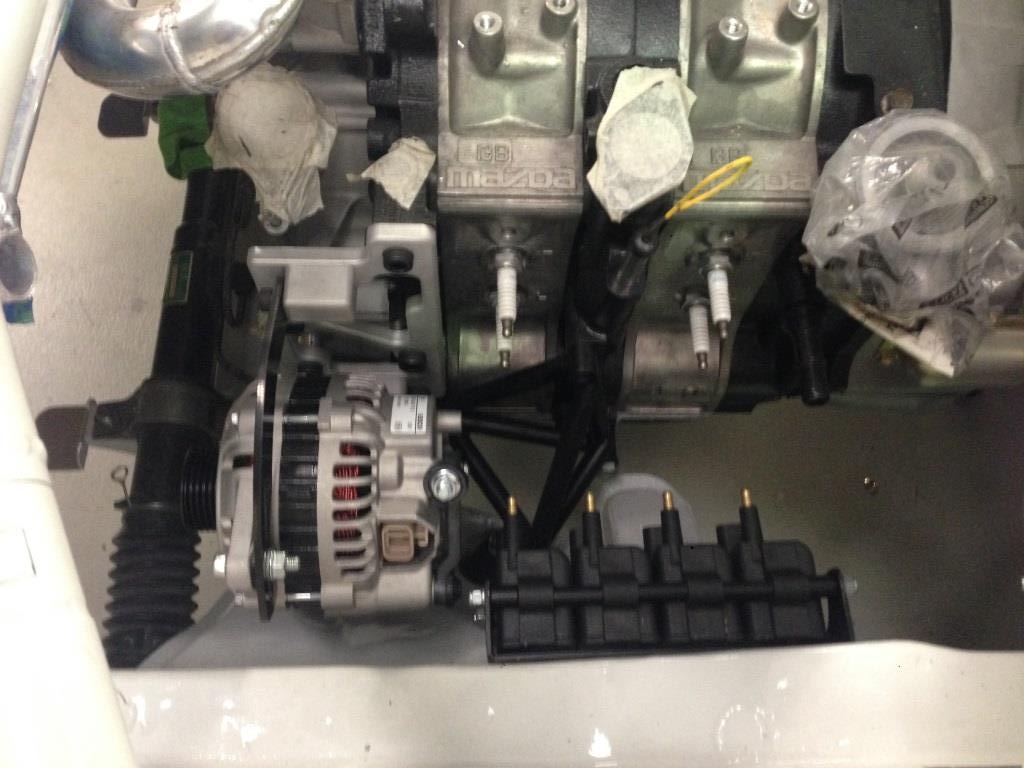
In the engine bay, the engine is in. Have mounted the coil packs. Dump pipe and waste gate pipes have been fabricated. Electric water pump mounted and plumbing completed. Dual series 6 oil coolers mounted and power steering cooler mounted along with the electric hydraulic power steer pump. Low mount alternator fitted. Basically anything that needed wiring needed to find its home.
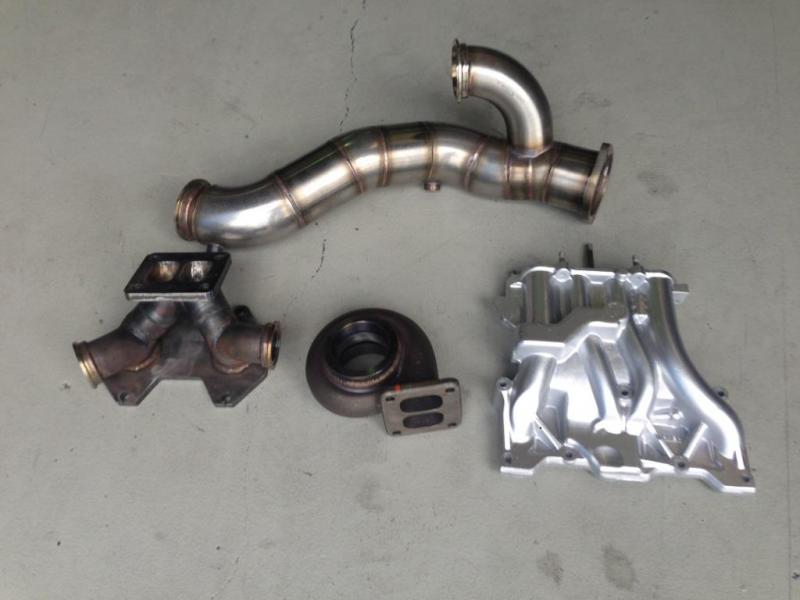
With the fuel system the tank, push pump and twin 044's with surge tank are in. Just need to plumb the lines. Waiting on the intake manifold etc to come back form coating to drop that in to place permanently and install injectors. have sent out the manifold, dump pipe, turbo hotside and the lower intake manifold for coating. Am anticipating a bit of work managing the heat in the engine bay and transferring into the drivers foot well.
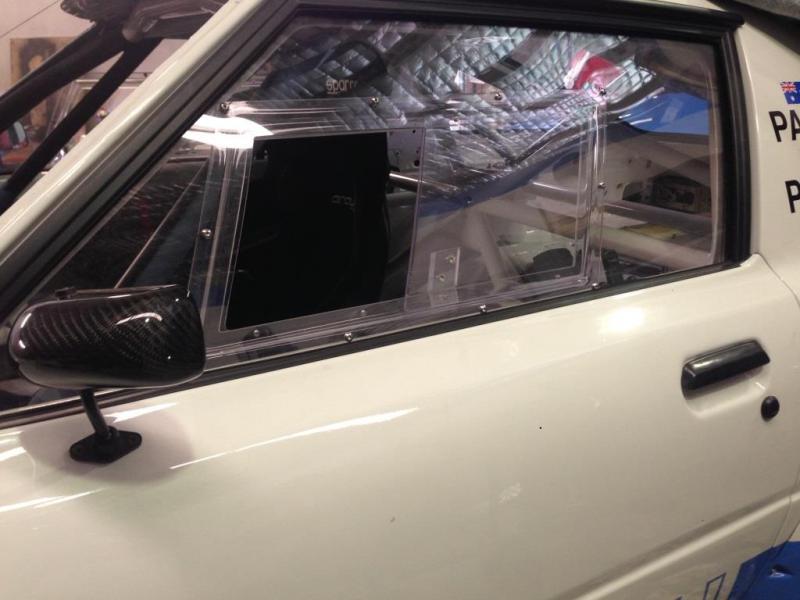
Externally, all the lexan windows are in. Got a local mob to thermo form a rear hatch and then did my own rear quarters and front windows. Ended up doing sliders for the front windows. Looked into making them myself but found a mob in the UK that does a complete kit. Is a few $$ but is a nicely made bolt in solution and they also precurve the frame and insert to suit the curvature of the window frame.
So externally the car is very close. Just a bit of work putting the rubber piping in the joint between body and flares, some aero catches, heated screen in etc and do final assembly.
Mechanically, need to assemble engine ancillaries, complete wiring (outsourced to Glen Baker at autosport electronics) fab a prop shaft, complete exhaust fab, complete intercooler and intake piping and a few other minor jobs. So still a way to go but are certainly getting closer to turning the key.
I got a quick crash course (poor choice of words probably) in speedflow fittings and got to work on all the braided brake lines. Hydraulic handbrake and pedal box are in. They are all completely plumbed up front and rear and ready to go. Haven't actually added fluid yet though as the dash/reservoirs have been in and out a bit. I guess we will find out then how I went soon.
I got busy bogging and sanding the dash and have since had it flocked. Cut and extended the centre section that reaches back to the gearshift to get the shifter back in the right spot after moving the engine back to the firewall and using a series 5 turbo box. Has come up nicely. It will be complete with glovebox and other trims when finished to give it a factory and complete look. Have a blank carbon panel in the centre console and will mount a switch panel from racegrade along with the isolator and will put a blank sheet where the main instruments were to mount the digital dash.


Also got some other interior stuff done. Some propellor plate ali scuff plates in the foot wells. The foot rest for the co driver in. Have got the super B battery, PDM, CDI and MoTeC M800 box all mounted ready for the wiring to start.


In the engine bay, the engine is in. Have mounted the coil packs. Dump pipe and waste gate pipes have been fabricated. Electric water pump mounted and plumbing completed. Dual series 6 oil coolers mounted and power steering cooler mounted along with the electric hydraulic power steer pump. Low mount alternator fitted. Basically anything that needed wiring needed to find its home.


With the fuel system the tank, push pump and twin 044's with surge tank are in. Just need to plumb the lines. Waiting on the intake manifold etc to come back form coating to drop that in to place permanently and install injectors. have sent out the manifold, dump pipe, turbo hotside and the lower intake manifold for coating. Am anticipating a bit of work managing the heat in the engine bay and transferring into the drivers foot well.

Externally, all the lexan windows are in. Got a local mob to thermo form a rear hatch and then did my own rear quarters and front windows. Ended up doing sliders for the front windows. Looked into making them myself but found a mob in the UK that does a complete kit. Is a few $$ but is a nicely made bolt in solution and they also precurve the frame and insert to suit the curvature of the window frame.

So externally the car is very close. Just a bit of work putting the rubber piping in the joint between body and flares, some aero catches, heated screen in etc and do final assembly.
Mechanically, need to assemble engine ancillaries, complete wiring (outsourced to Glen Baker at autosport electronics) fab a prop shaft, complete exhaust fab, complete intercooler and intake piping and a few other minor jobs. So still a way to go but are certainly getting closer to turning the key.
 04-02-14, 04:55 PM
#61
Full Member
Thread Starter
 05-09-14, 05:16 AM
#65
Full Member
Thread Starter
Oh and TDX61 has been removed in favour of a borg efr 8374.
06-14-14, 11:31 PM
#67
Full Member
Thread Starter
Well,
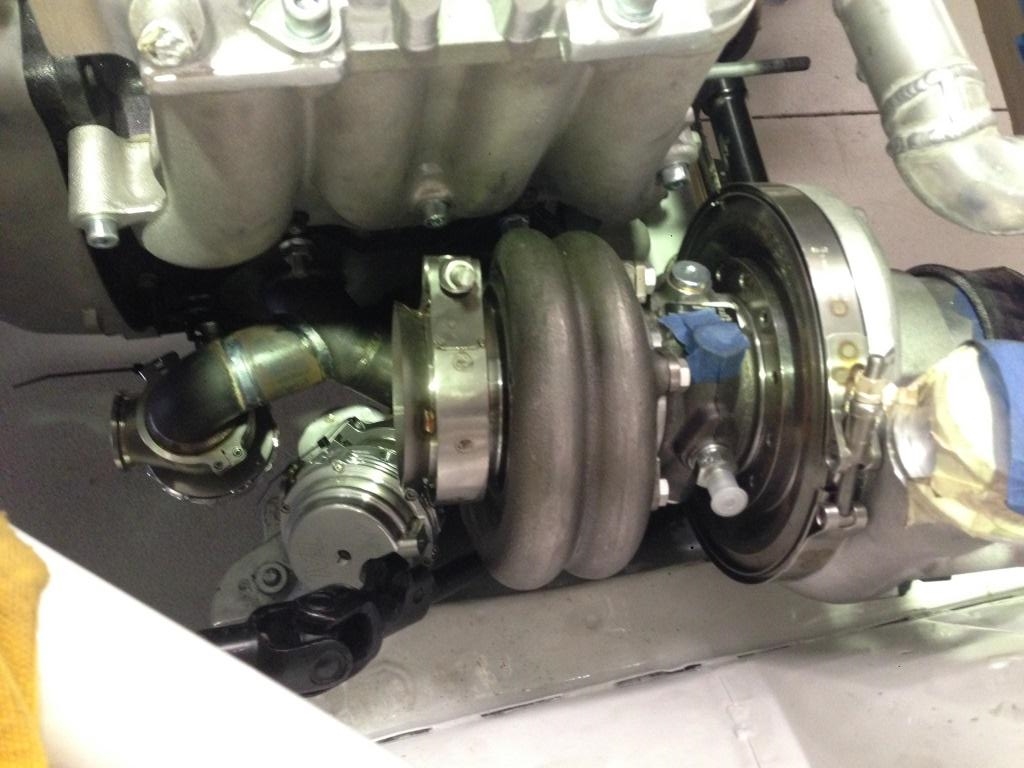
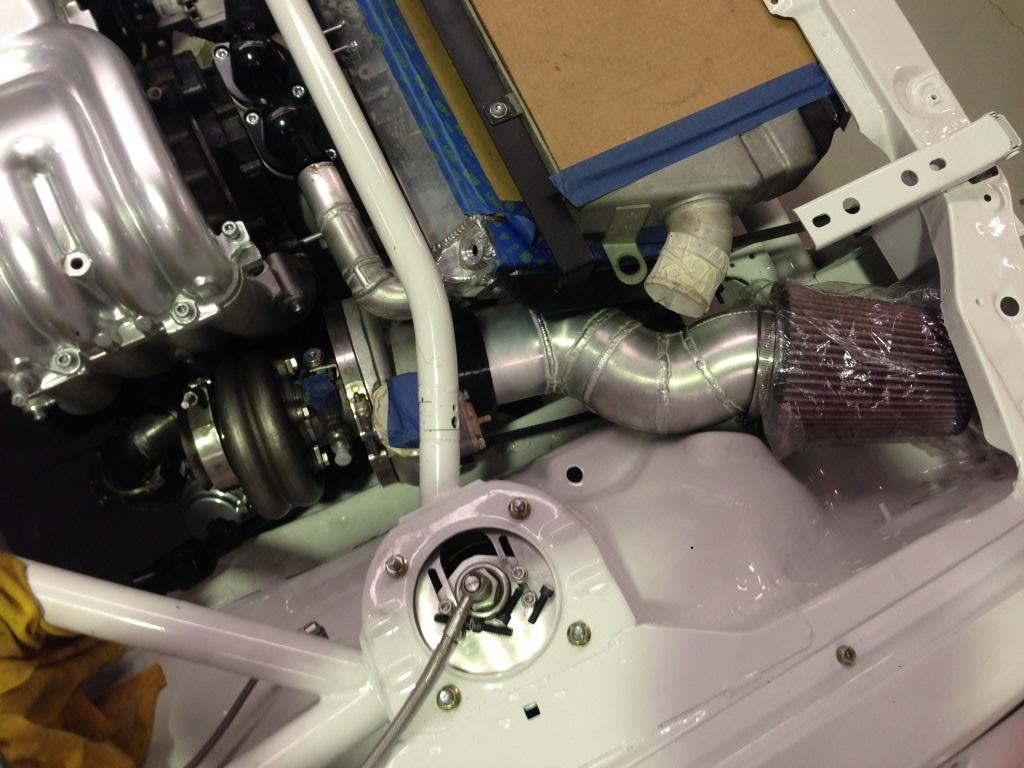
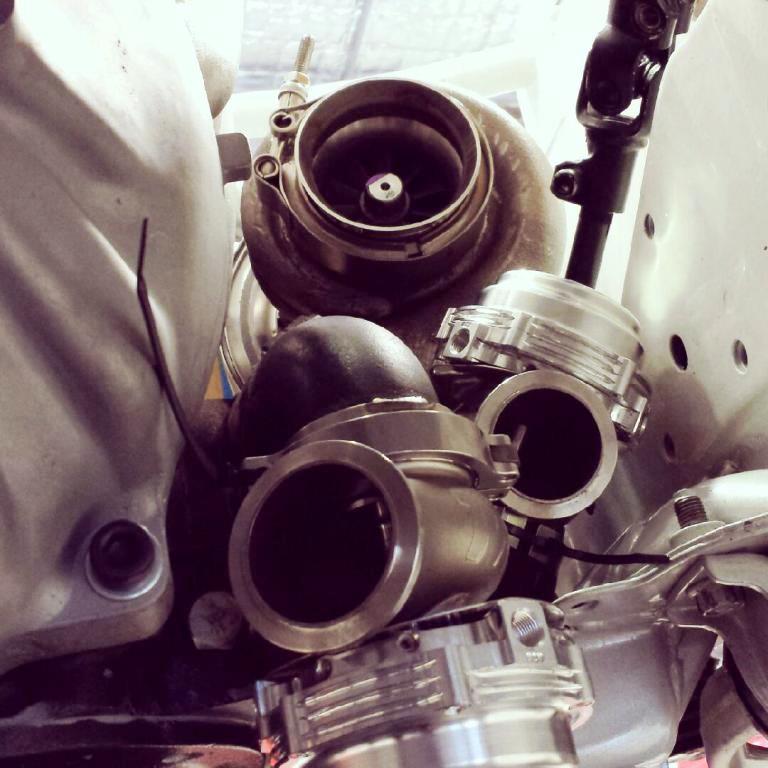
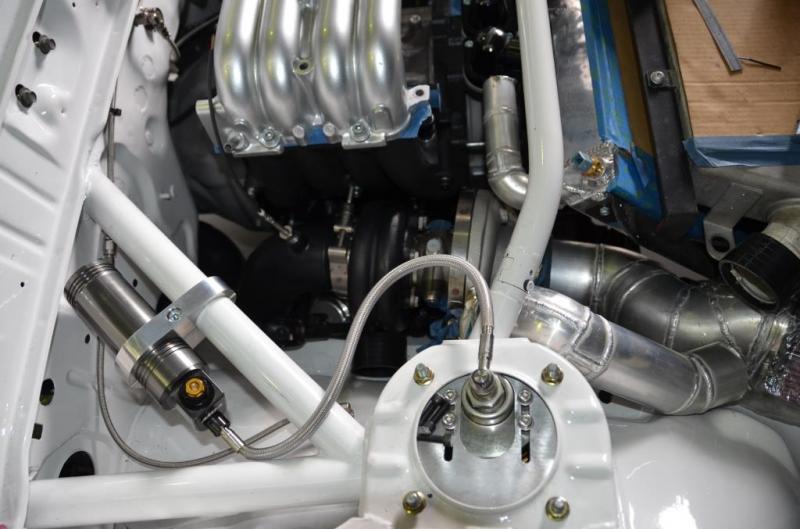
this thing is still moving forward. Had originally wanted to run a Borg EFR turbo, but they were hard to get hold of and the results were relatively unknown. Now there are some solid results out and the turbos are easy to get hold of. Farkin hate redundant work, but at the same time didnt want to get to the end goin "i like it but really wish I had that turbo on...." So out with the GTX and in with the EFR 8374.
A couple of pics of the EFR in place. Its a tighter fit than the GTX35. Have gone for the same equal length twin gate fully divided manifold.
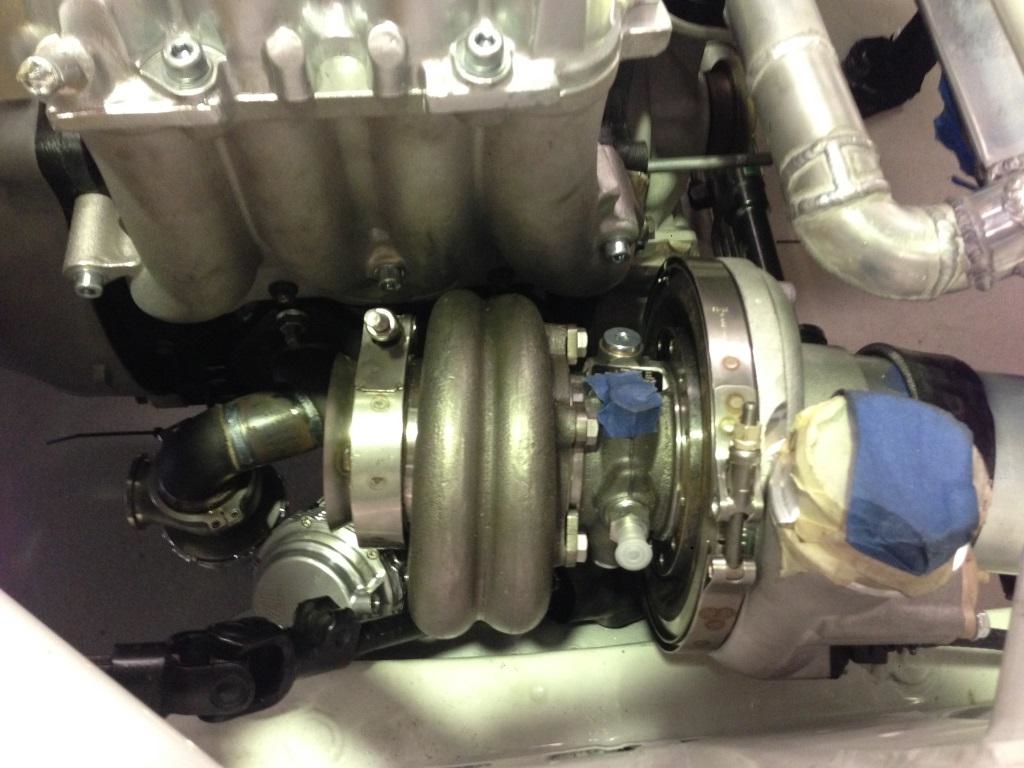
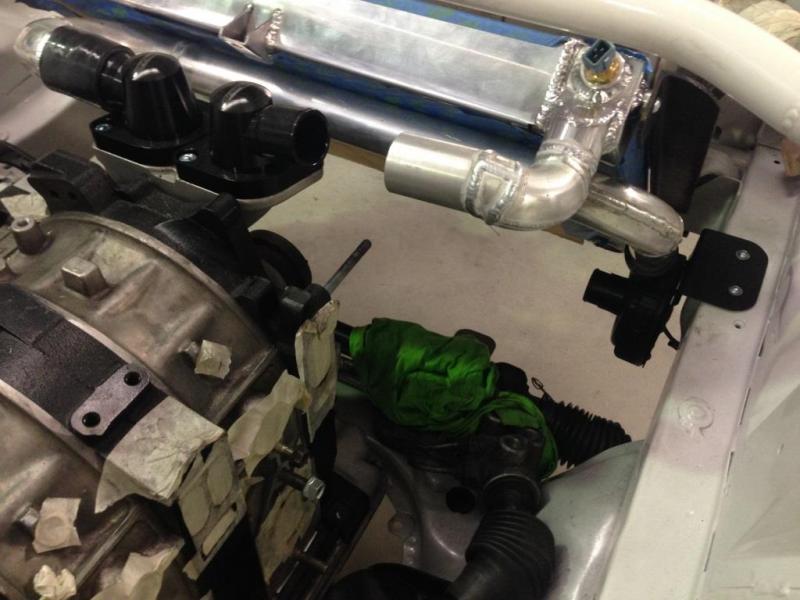
And a pic of the intake pipe to the turbo along with some of the water pipes completed.
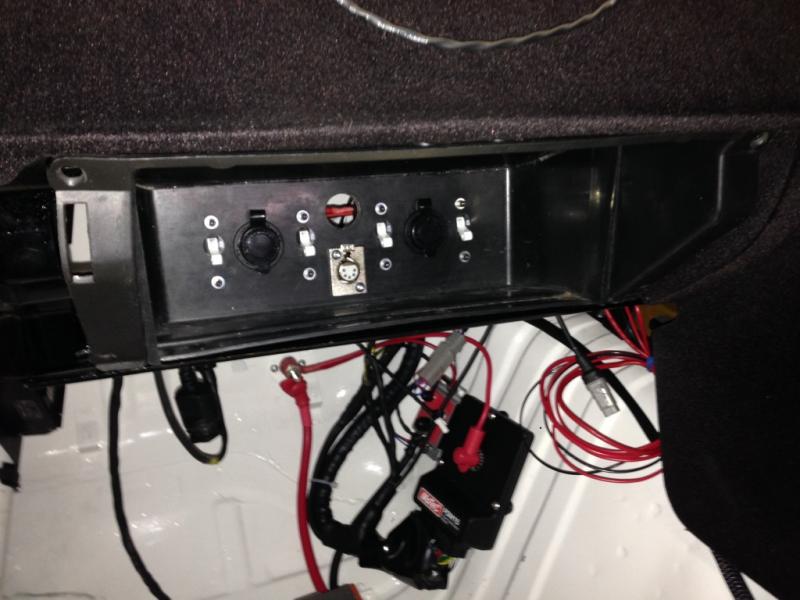
Here is a snap of the glovebox. Have installed a cig lighter, usb socket and MoTeC plug point into the rear of it along with some non critical circuit breakers (heated screen, elec hydraulic power steer) to ease the load on the PDM as it only has limited number of functions and would rather have it controlling fuel pumps etc. Obviously plenty of tidying up to be done.
Meanwhile pre pump and surge tank is in (no pics) and the fuel lines are being run. Still very committed to doing Targa High Country in November, but wont bother unless I have had time to get it all sorted and make sure it is a good thing. Far to far to ship a car to have a **** mech gremlin on day 1...or mech fail and chuck it in the bush.
To finish list looks like....
Complete fuel system
complete engine bay wiring
complete IC piping and exhaust
tail shaft
fit front sway bar
fabricate rear sway bar
then a million other little fiddly jobs
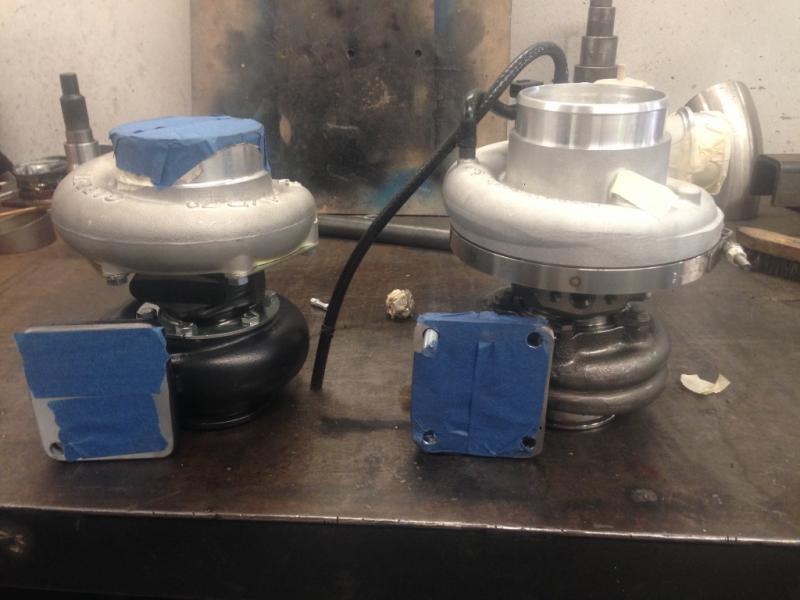
Oh,
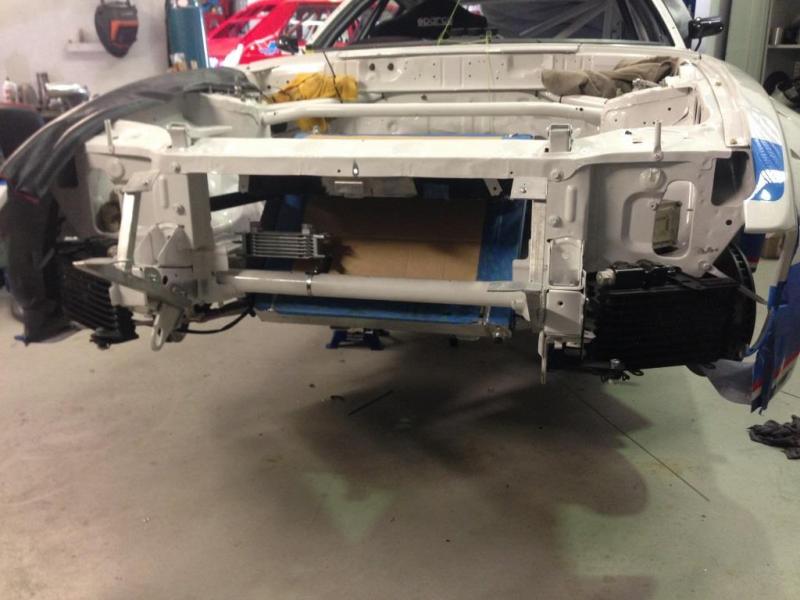
and a pic illustrating the difference in physical size between the EFR and the GTX35R.
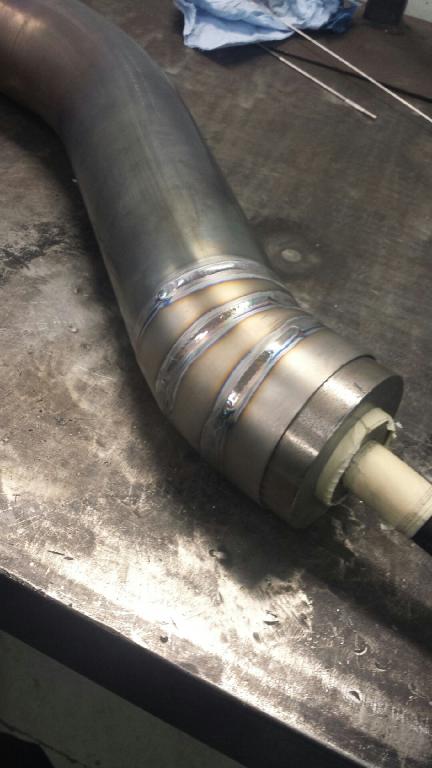
And to give some sense of the fabrication going into it........ I have created a few fabrication challenges for my "mate" Tom (use of commas to indicate the friendship is probably getting stretched ) at Racing Dynamics. Gotta say he is really stepping up to the plate. The first curve ball was the packaging challenge of the bigger turbo. To keep the pipe short and get the turbo to fit the exhaust manifold pipes actually cross over each other and run full separated to the T4 flange. And somewhere in among that the twin gates were squeezed in.
Managed to pick up a second hand Ti cat back exhaust off a GTR. Also got a couple of lengths of Ti tube, a flange and some filler rods. So Tom did the dump with twin gates plumbed back in out of stainless. Now the challenge is to get the catback to integrate. Couldn't get any Ti bends so it is all pie cuts and lobster tails. Has to go up and over the diff. Will be tight.
So if you needed any reasons why this is all taking so long, here is one of them.
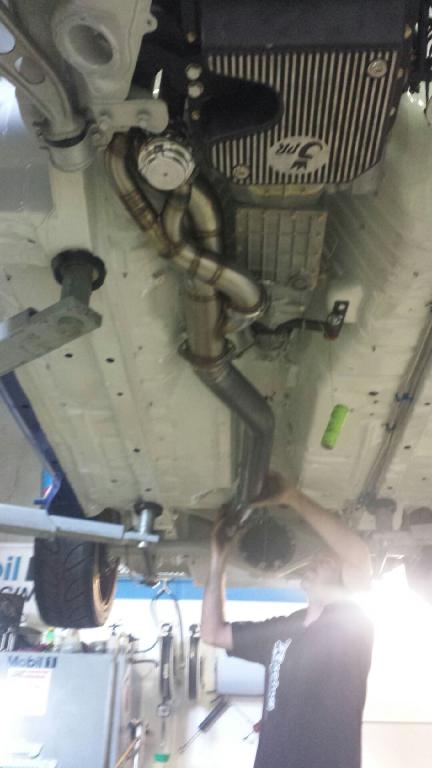
Little peek up her skirt
this thing is still moving forward. Had originally wanted to run a Borg EFR turbo, but they were hard to get hold of and the results were relatively unknown. Now there are some solid results out and the turbos are easy to get hold of. Farkin hate redundant work, but at the same time didnt want to get to the end goin "i like it but really wish I had that turbo on...." So out with the GTX and in with the EFR 8374.
A couple of pics of the EFR in place. Its a tighter fit than the GTX35. Have gone for the same equal length twin gate fully divided manifold.


And a pic of the intake pipe to the turbo along with some of the water pipes completed.

Here is a snap of the glovebox. Have installed a cig lighter, usb socket and MoTeC plug point into the rear of it along with some non critical circuit breakers (heated screen, elec hydraulic power steer) to ease the load on the PDM as it only has limited number of functions and would rather have it controlling fuel pumps etc. Obviously plenty of tidying up to be done.

Meanwhile pre pump and surge tank is in (no pics) and the fuel lines are being run. Still very committed to doing Targa High Country in November, but wont bother unless I have had time to get it all sorted and make sure it is a good thing. Far to far to ship a car to have a **** mech gremlin on day 1...or mech fail and chuck it in the bush.
To finish list looks like....
Complete fuel system
complete engine bay wiring
complete IC piping and exhaust
tail shaft
fit front sway bar
fabricate rear sway bar
then a million other little fiddly jobs
Oh,
and a pic illustrating the difference in physical size between the EFR and the GTX35R.

And to give some sense of the fabrication going into it........ I have created a few fabrication challenges for my "mate" Tom (use of commas to indicate the friendship is probably getting stretched
) at Racing Dynamics. Gotta say he is really stepping up to the plate. The first curve ball was the packaging challenge of the bigger turbo. To keep the pipe short and get the turbo to fit the exhaust manifold pipes actually cross over each other and run full separated to the T4 flange. And somewhere in among that the twin gates were squeezed in. Managed to pick up a second hand Ti cat back exhaust off a GTR. Also got a couple of lengths of Ti tube, a flange and some filler rods. So Tom did the dump with twin gates plumbed back in out of stainless. Now the challenge is to get the catback to integrate. Couldn't get any Ti bends so it is all pie cuts and lobster tails. Has to go up and over the diff. Will be tight.
So if you needed any reasons why this is all taking so long, here is one of them.


Little peek up her skirt
 06-15-14, 09:58 PM
#68
Full Member
Join Date: Aug 2013
Location: Trinidad & Tobago
Posts: 178
Likes: 0
Received 0 Likes
on
0 Posts
Wow everything looks amazing. That pipe work is art. Keep up the great work. Would love to see a walk around start up vid sometime when it's sorted. Looks mint
07-13-14, 11:41 PM
#69
Full Member
Thread Starter
Soooo,
I have finally found my way back to town as I had been working away. Popped in to see the car and took the SLR along for some decent pics. Really happy with how its progressing. Looks awesome in the metal. Hopefully something slightly better than phone pics of some of the minor details I like about it.
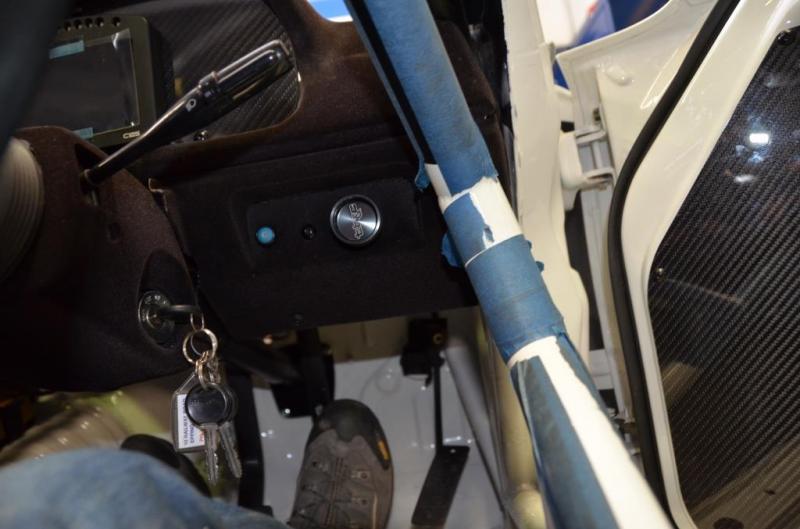
The dash work is complete. Minor detail I like is having the brake bias **** mounted within easy reach where some factory controls were previously. Glassed and bogged the original holes prior to flocking to make a new space. Battery isolator button is the blue guy next to it.
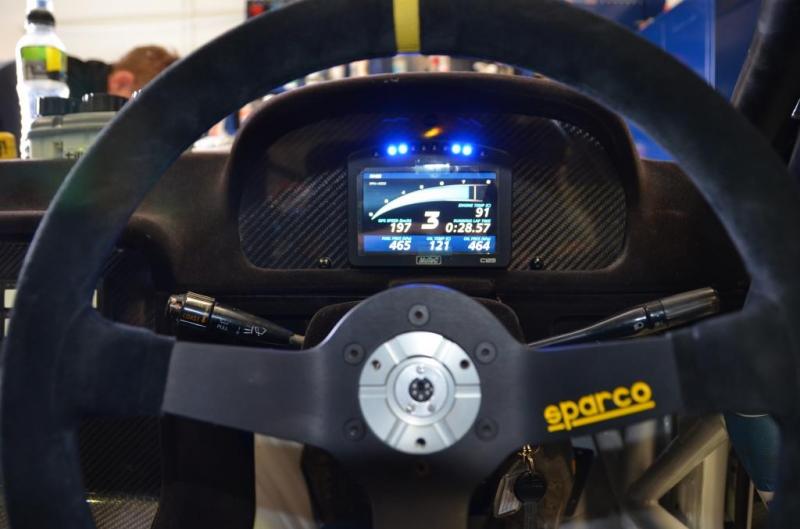
The MoTeC dash is in. The shift lights will be programmed to provide indicator flashers etc so wont be anything further mounted on the carbon backing plate. Clean and simple.
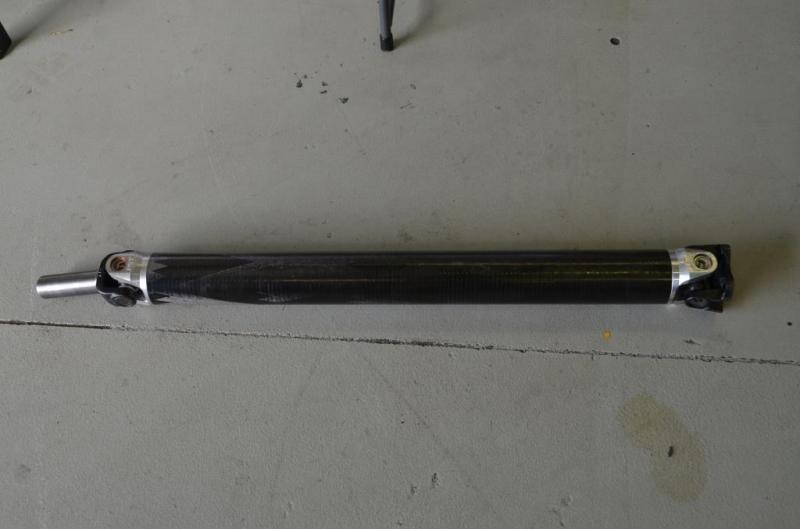
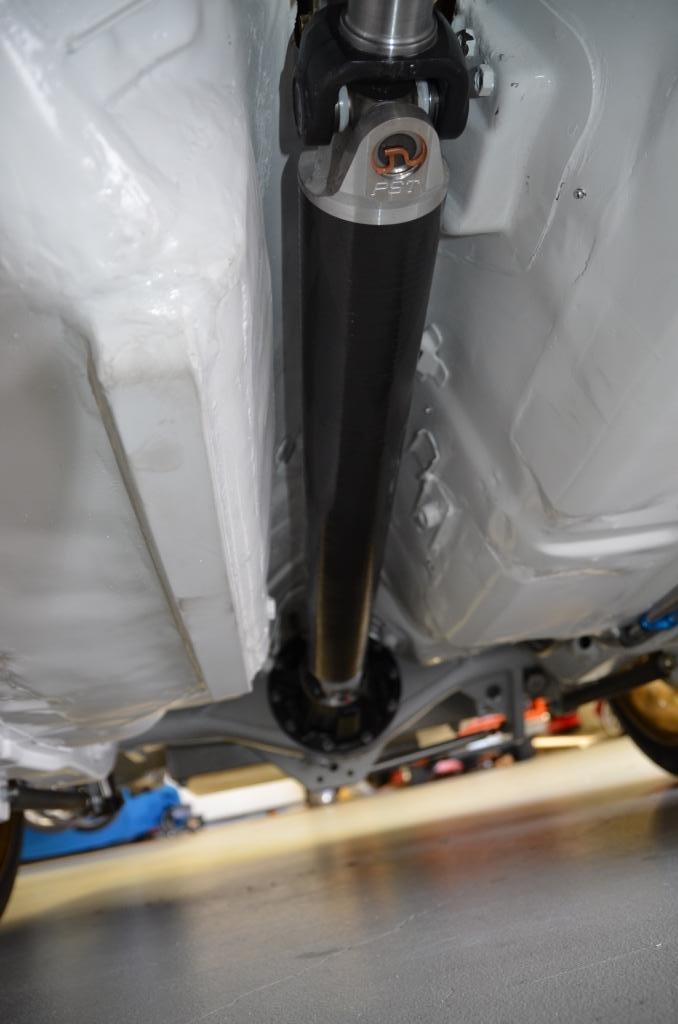
Carbon drive shaft arrived. Cannot say enough good things about these guys. (Sourced from PST over there in the US) Very quick and clear communication, great price and fast shipping. Very nice bit of kit. Total weight 4.5 kg. Perfect fit and nicely made.
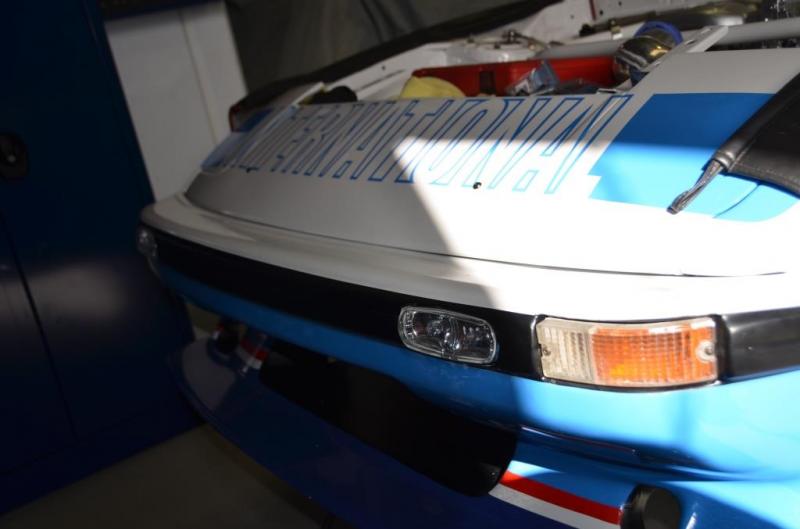
To save some weight I deleted all of the pop up headlight mechanism, motors and lights etc. Fair bit of weight in them. Nose cone is now a complete fibre glass infill panel that mimics the pop up light covers. To provide the required lighting we found a small hella unit that does both low and high beam and cut them into the front bar. Probably not ideal aesthetically but will do the job required and save heaps of weight
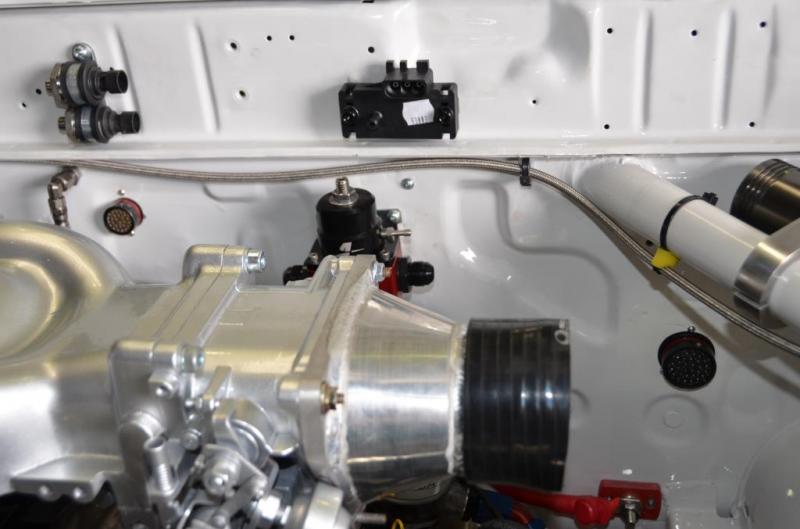
For the wiring we are using bulkhead connectors on the loom. So engine out should be very easy. I can hear all the rotary haters now thinking thats probabaly a good thing
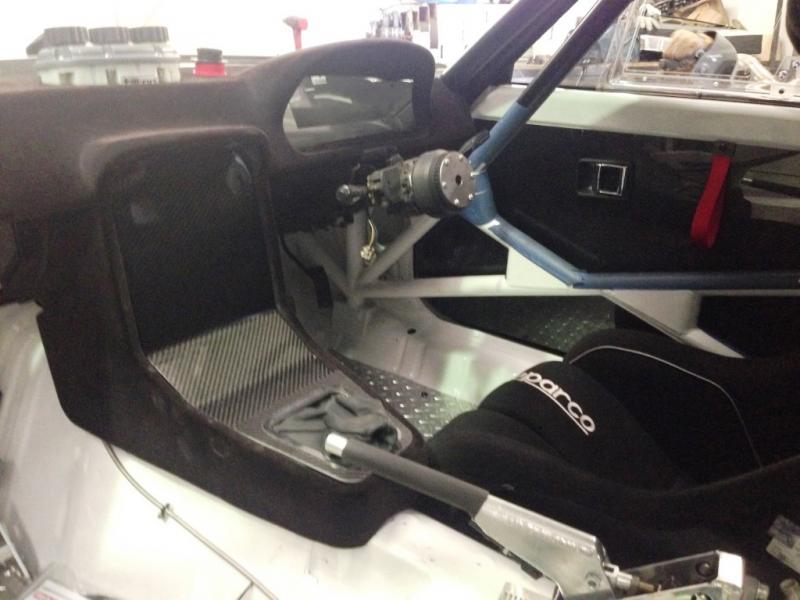
Cockpit is coming along really well. All the work to lower the seat in the floor and adjust the steering column, change to a hung pedal box etc has all been worth it. Its a very good fit for me and a nice place to be.
All the ceramic coating is complete on the hotside and it is all back in place. Just waiting on the inconnel to do some heat shielding and will also hit the firewall with some DEI reflectagold. Am anticipating a fair bit of heat so dont want any issues on longer stages.
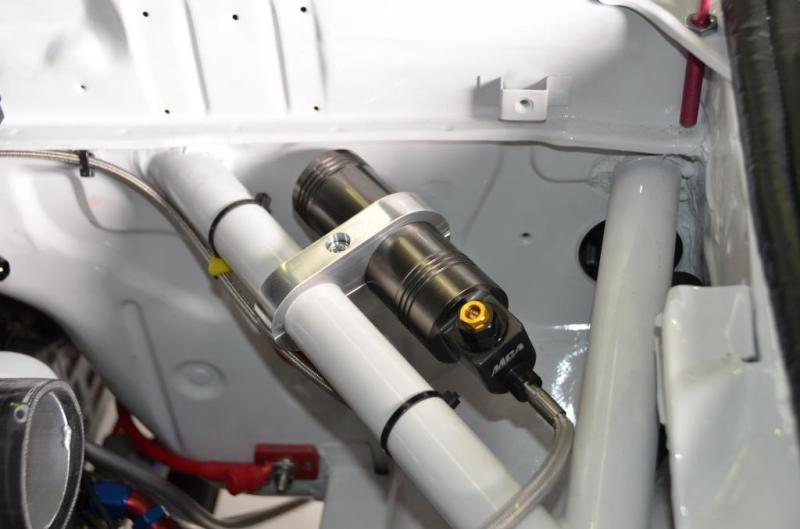
Had some billet ali mounts for the remote canisters fabbed up at high speed engineering. Gives a good solid mount and easy reach to the adjusters in the mounted position. Also nice and tidy and light.
Got some of the rubber flare insert beading snot into the flares. Does a nice job to tidy up the junction of the fibreglass flare and the body. Have them bolted in pace with lightweight anodized ali fixings.
I have finally found my way back to town as I had been working away. Popped in to see the car and took the SLR along for some decent pics. Really happy with how its progressing. Looks awesome in the metal. Hopefully something slightly better than phone pics of some of the minor details I like about it.
The dash work is complete. Minor detail I like is having the brake bias **** mounted within easy reach where some factory controls were previously. Glassed and bogged the original holes prior to flocking to make a new space. Battery isolator button is the blue guy next to it.

The MoTeC dash is in. The shift lights will be programmed to provide indicator flashers etc so wont be anything further mounted on the carbon backing plate. Clean and simple.

Carbon drive shaft arrived. Cannot say enough good things about these guys. (Sourced from PST over there in the US) Very quick and clear communication, great price and fast shipping. Very nice bit of kit. Total weight 4.5 kg. Perfect fit and nicely made.


To save some weight I deleted all of the pop up headlight mechanism, motors and lights etc. Fair bit of weight in them. Nose cone is now a complete fibre glass infill panel that mimics the pop up light covers. To provide the required lighting we found a small hella unit that does both low and high beam and cut them into the front bar. Probably not ideal aesthetically but will do the job required and save heaps of weight

For the wiring we are using bulkhead connectors on the loom. So engine out should be very easy. I can hear all the rotary haters now thinking thats probabaly a good thing

Cockpit is coming along really well. All the work to lower the seat in the floor and adjust the steering column, change to a hung pedal box etc has all been worth it. Its a very good fit for me and a nice place to be.


All the ceramic coating is complete on the hotside and it is all back in place. Just waiting on the inconnel to do some heat shielding and will also hit the firewall with some DEI reflectagold. Am anticipating a fair bit of heat so dont want any issues on longer stages.

Had some billet ali mounts for the remote canisters fabbed up at high speed engineering. Gives a good solid mount and easy reach to the adjusters in the mounted position. Also nice and tidy and light.

Got some of the rubber flare insert beading snot into the flares. Does a nice job to tidy up the junction of the fibreglass flare and the body. Have them bolted in pace with lightweight anodized ali fixings.

