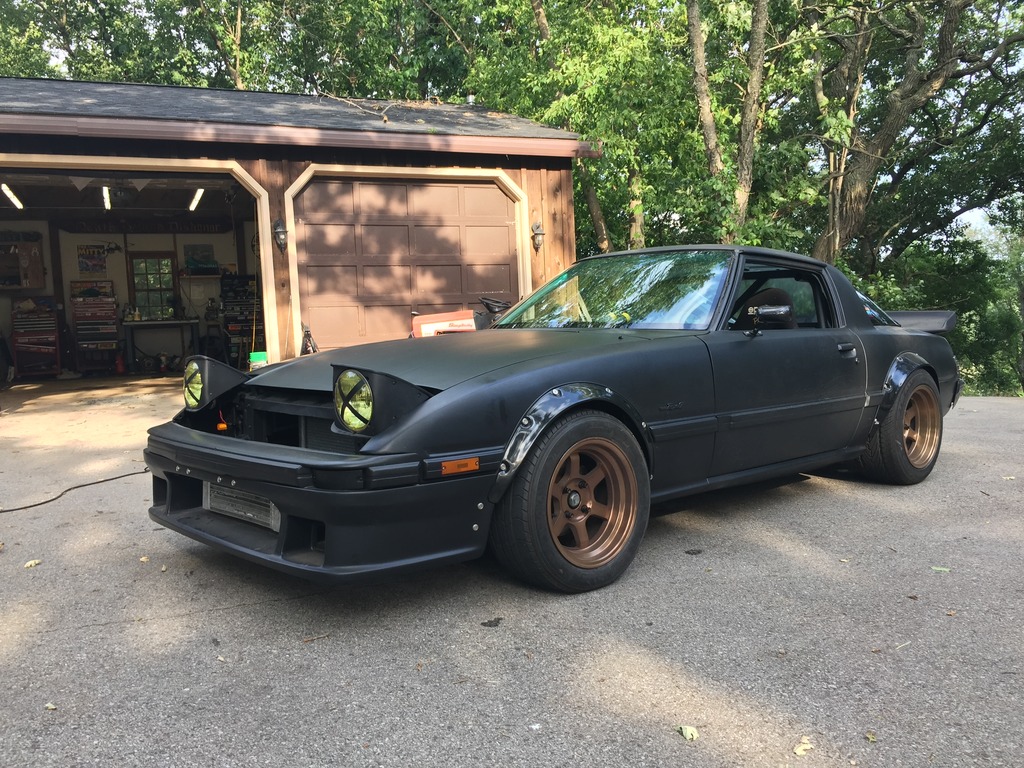
84 12a bridgeport drift car


 05-18-15, 08:32 PM
#77
Full Member
Thread Starter

Ran into an unexpected water leak where I plugged the "T" coolant fitting at the rear iron. I did a crappy job when I drilled and tapped for the plug and apparently I cracked the rear iron along the machined flat surface next to the plug shown.

So i pulled the engine back out of the car again... so depressing

Decided it was too risky to try and weld the crack so I filled the plugged port from the inside out through the water jacket with Devcon putty. Hopefully that holds. Forgot to take any pics of that process but pretty self explanatory. Pulled the rear iron off and left everything else alone. Inside of the oil pan and rear housing looked good so I think we are all set with a decent engine.
Put the engine back together and back into the car AGAIN

Working on brakes now. Found out that the rebuilt calipers I got from Rock Auto are SAE 3/16 thread and no longer the normal M10x1.0 so thats a bit of a pain, figuring out lines and adapters.
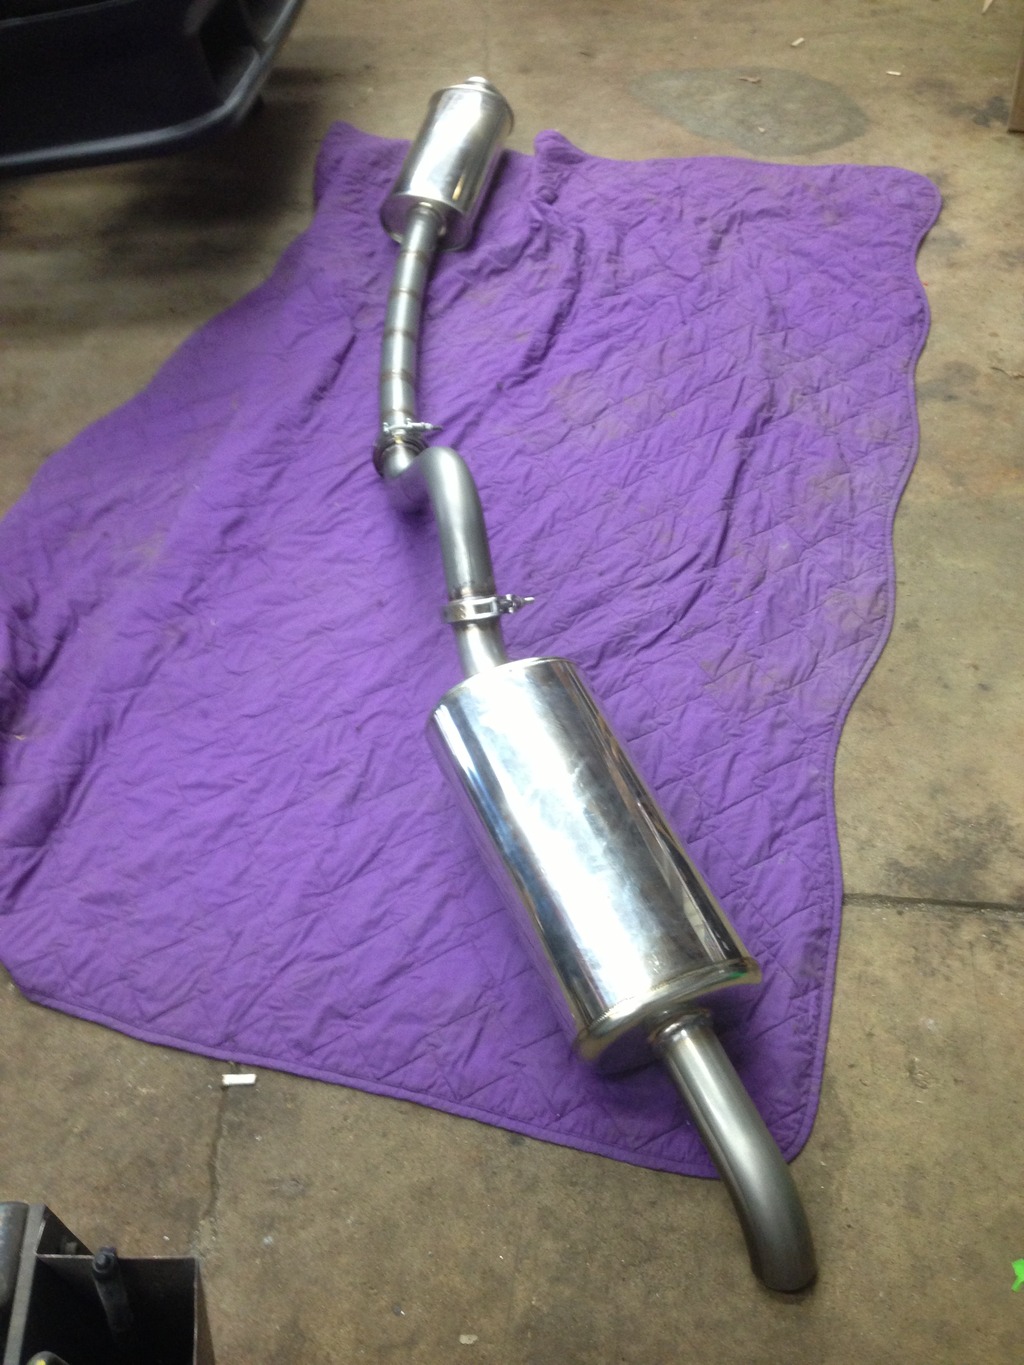
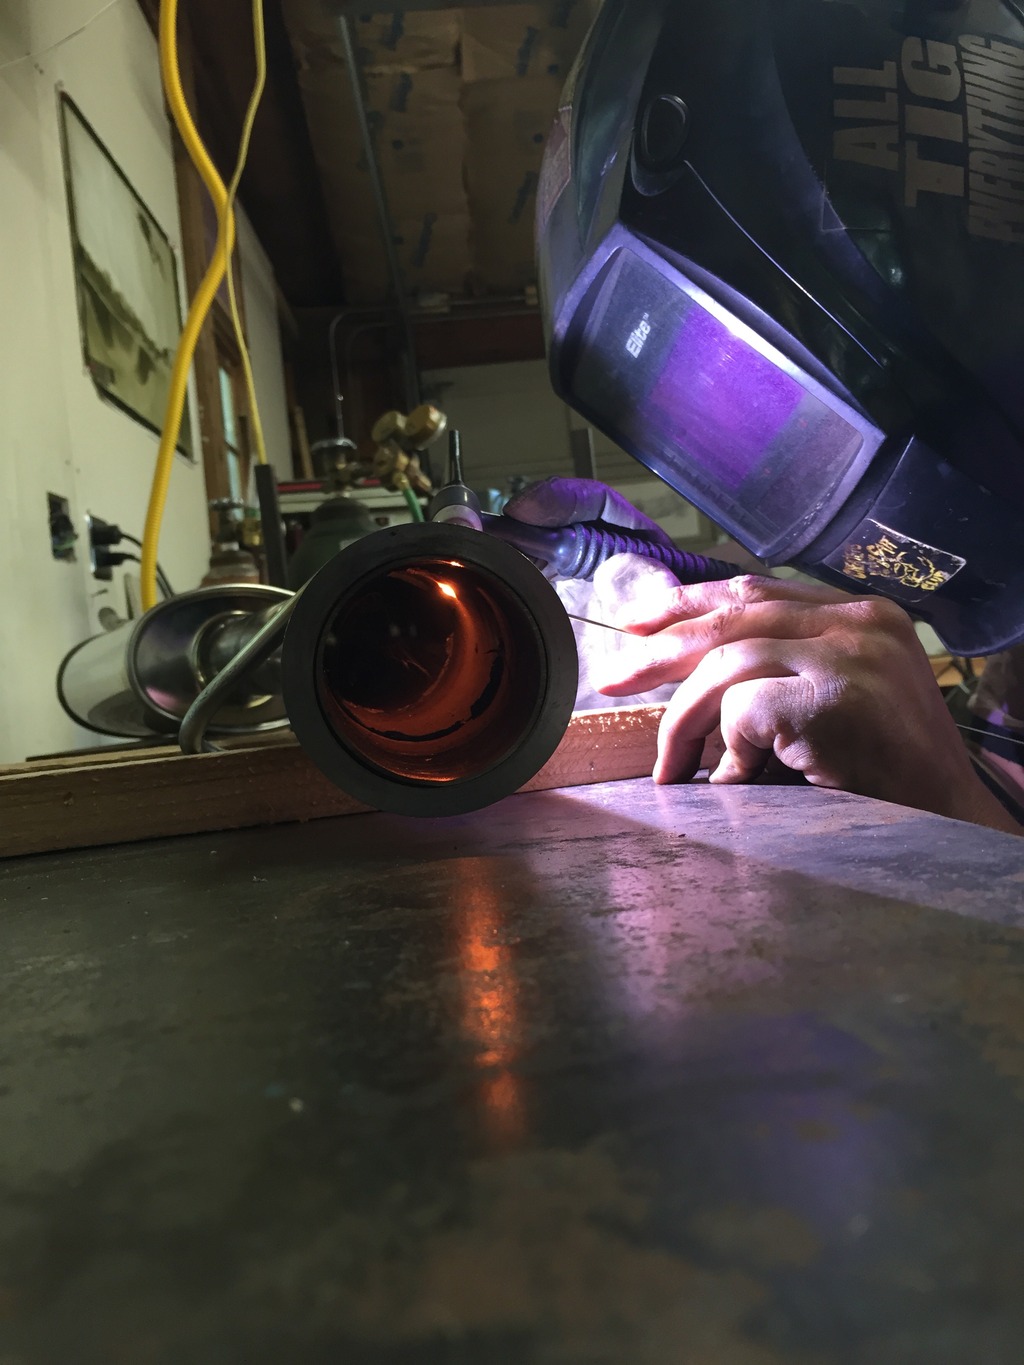
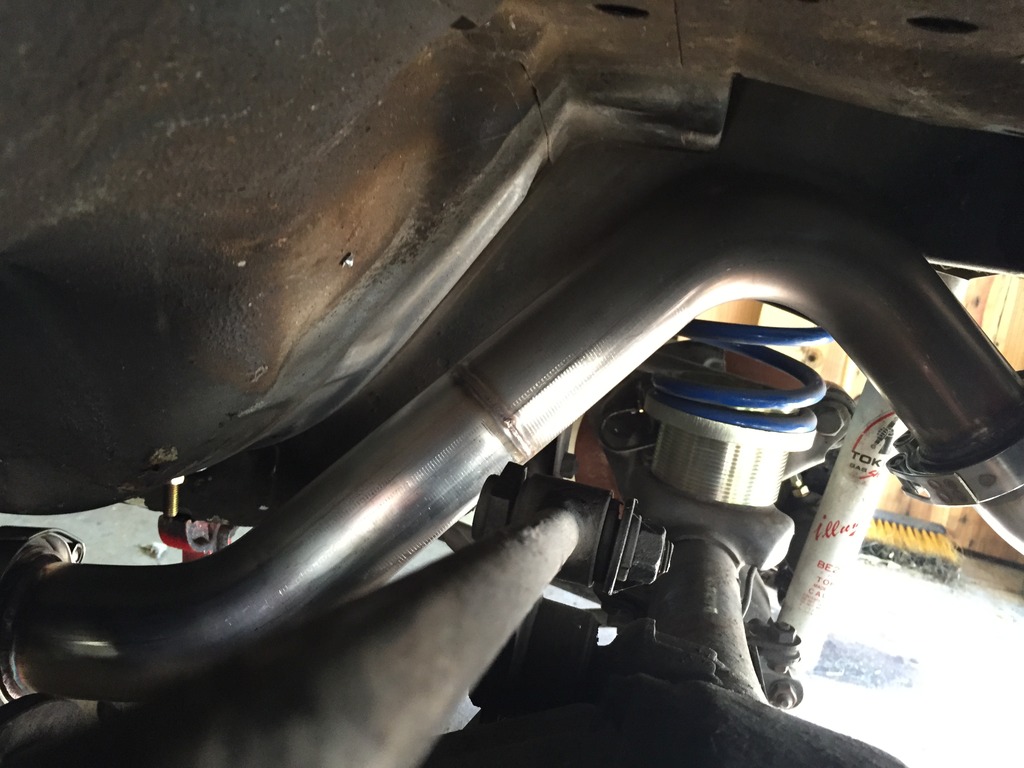
Had a very talented friend of mine come over to help out welding the stainless on my exhaust. Went with 2.5" and racing beat's universal resonator and muffler. Pretty happy with what we have so far, still have to weldup O2 and EGT bungs and make exhaust hangers but here's a sneak peak
 05-18-15, 10:37 PM
#78
Moderator
iTrader: (3)
Join Date: Mar 2001
Location: https://www2.mazda.com/en/100th/
Posts: 30,792
Received 2,573 Likes
on
1,829 Posts
Thanks man!
Ran into an unexpected water leak where I plugged the "T" coolant fitting at the rear iron. I did a crappy job when I drilled and tapped for the plug and apparently I cracked the rear iron along the machined flat surface next to the plug shown. [/URL]/IMG][/URL]
Ran into an unexpected water leak where I plugged the "T" coolant fitting at the rear iron. I did a crappy job when I drilled and tapped for the plug and apparently I cracked the rear iron along the machined flat surface next to the plug shown. [/URL]/IMG][/URL]
05-21-15, 08:16 AM
#81
locked timing is kind of nice because you can just set the timing to like 18BTDC and be done. however if you actually go tune the thing, i think you'd find that it wants a timing curve, although not necessarily the stock one.
for the rev limiter, you need to be a little careful, if you're going to hit it once in a while, its fine to do anything, but if you are going to hit it for long periods of time, it is often better to not have one. the stop/start of the rev limiter can cause huge catastrophic damage. this is an engine that decided it didn't like the 8250rpm limiter FC3S Pro v2.0:  K2RD HOF
cutting the trailing plugs only might actually be a good idea though, instead of scattering the engine, you'd just get a drop in power.
That's some damage.
05-28-15, 10:15 AM
#82
Full Member
Thread Starter
Exhaust
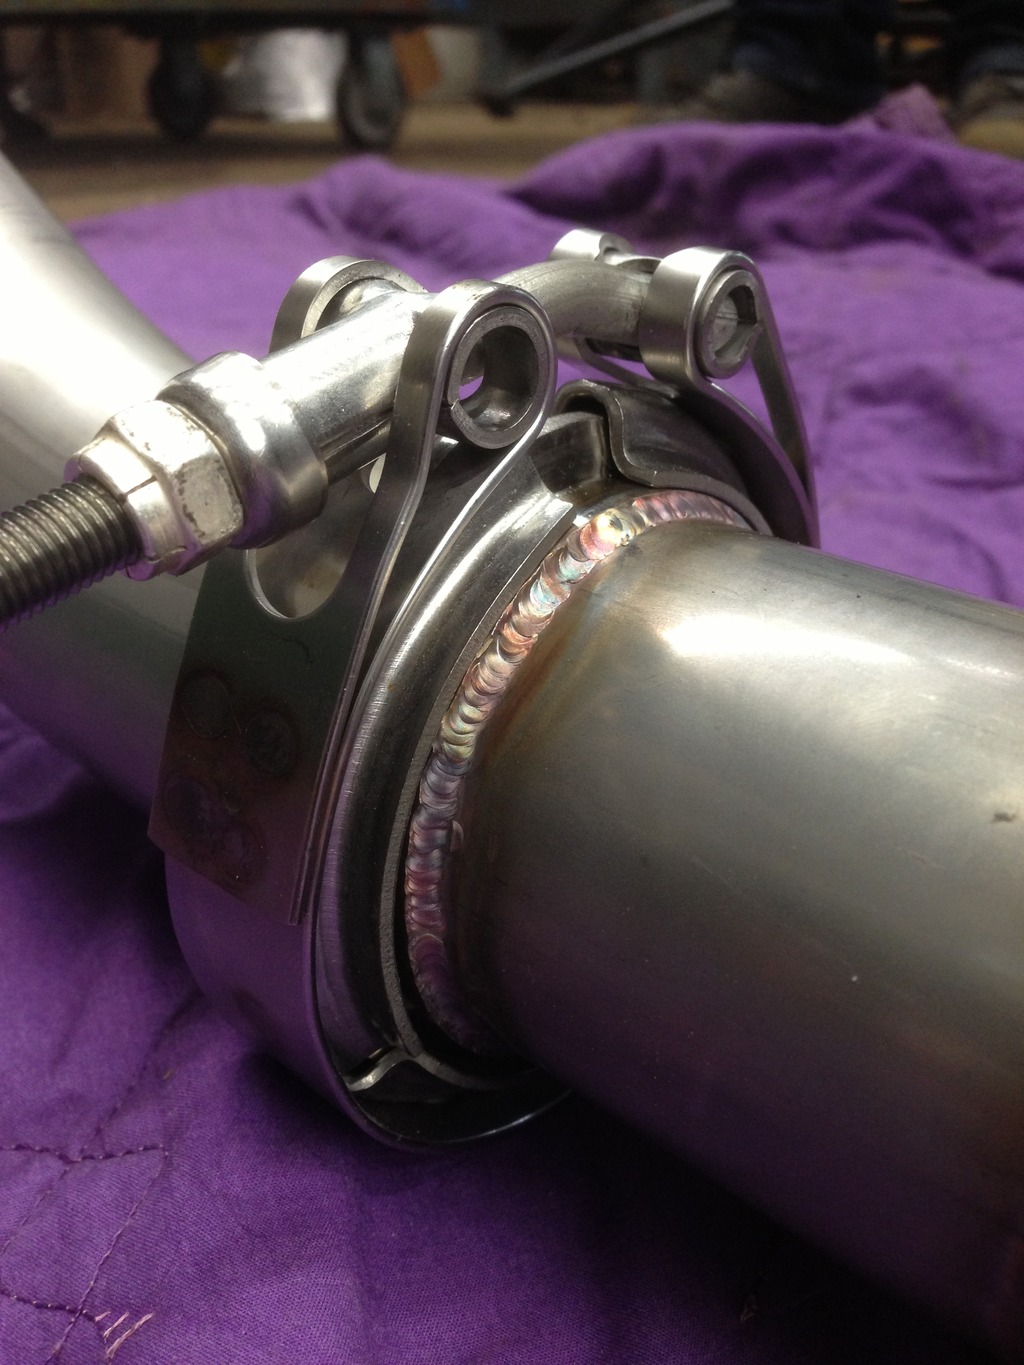
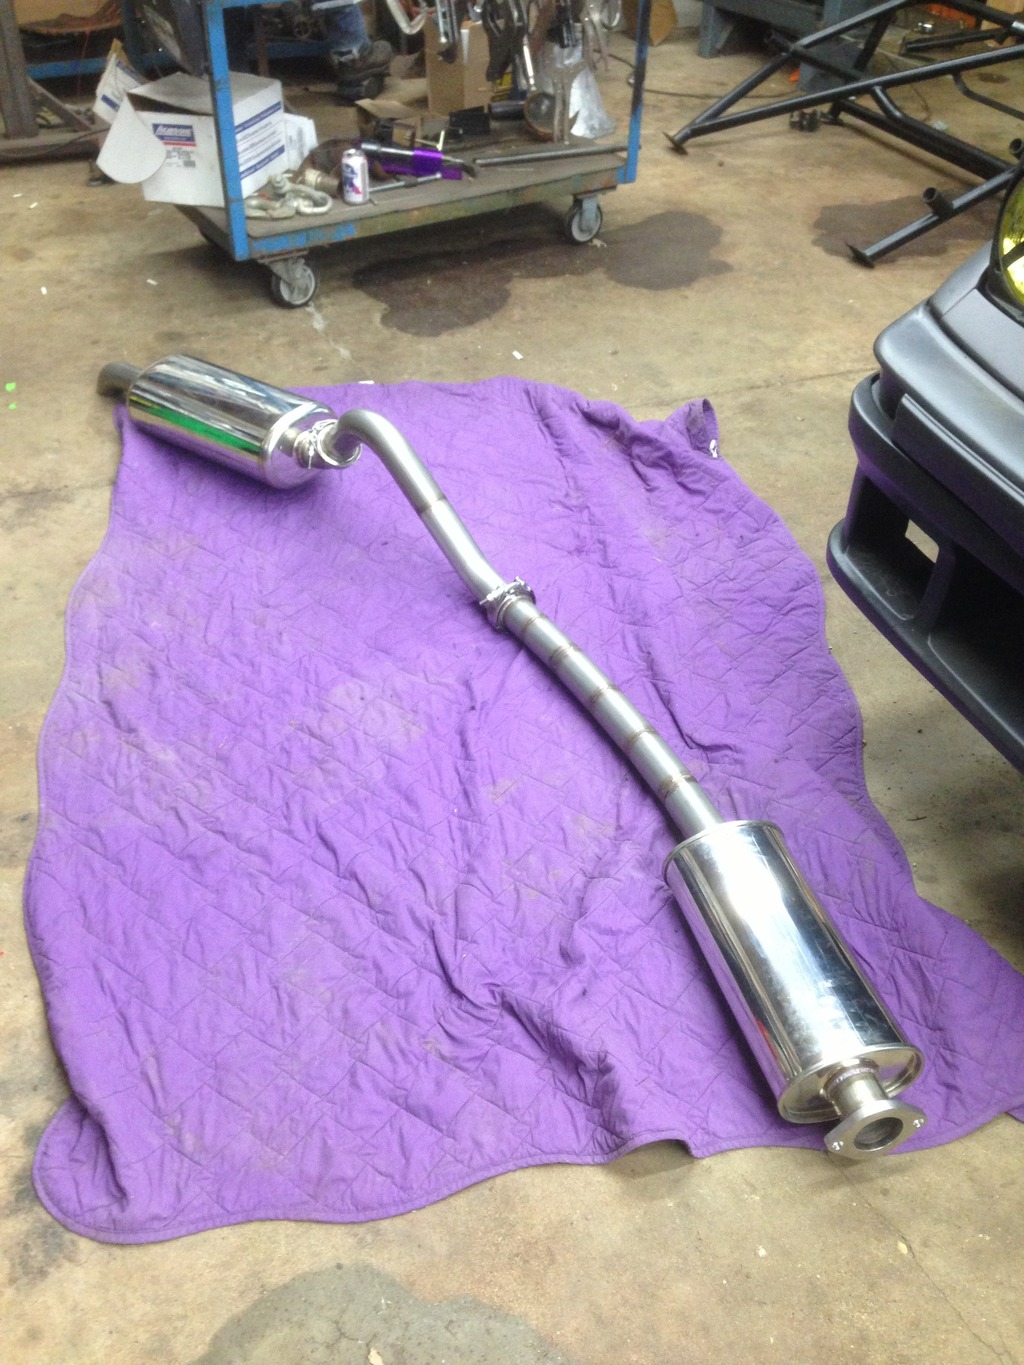
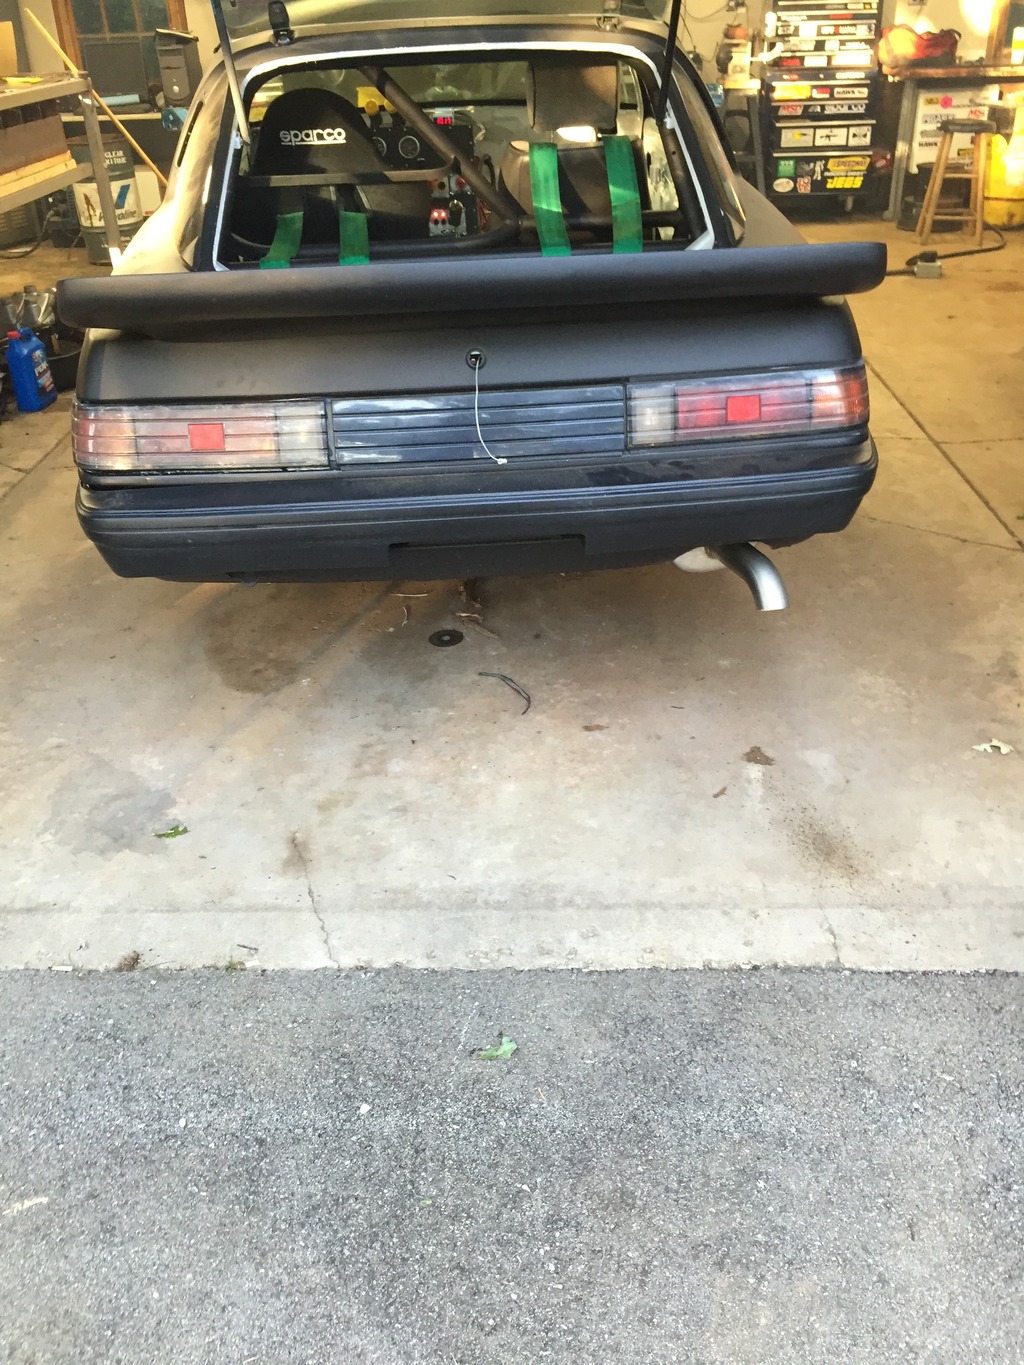
Almost done with the exhaust, still have to decide on hanger placement but the exhaust itself is welded and complete. The 2" to 2.5" stepup off the header isnt included in the pictures but I also have O2 and EGT sensor bungs welded into that piece until I find time to make my own header which will attach directly to the system shown. System is 2.5" stainless with v band connections and Racing Beat's universal presilencer and muffler. Haven't fired the car up with it yet but I'll get a video when I do.
So at this point I'm pretty close to having the car finished, need to redo my harness bar and find a brake caliper bracket and I should be good. I am finding out how difficult it is to find a drivers rear GSL-SE brake caliper bracket.... Nothing online, on the forums, ebay etc and its unavailable at all the major parts stores I've searched at. No luck at local junkyards either. Can find the caliper but not the bracket so the project is stalled till I get that to finish the brake system. If you know of one somewhere please help me out! Thanks


So at this point I'm pretty close to having the car finished, need to redo my harness bar and find a brake caliper bracket and I should be good. I am finding out how difficult it is to find a drivers rear GSL-SE brake caliper bracket.... Nothing online, on the forums, ebay etc and its unavailable at all the major parts stores I've searched at. No luck at local junkyards either. Can find the caliper but not the bracket so the project is stalled till I get that to finish the brake system. If you know of one somewhere please help me out! Thanks
05-28-15, 10:46 AM
#83
SE brake parts are a real pain in the *** to find. Keep searching, something will come up! That exhaust looks great btw, that header flange is beefy as hell! I have the RB universal muffler on one of my T2 FB's, but with a cat instead of presilencer (has to pass smog) and it sounds heavenly. I love it
05-28-15, 11:33 AM
#84
I was looking for this exact part recently and couldn't get one anywhere. I have also used car-part to find ECU's.
You will find varying prices, I'm guessing the bracket will be $40-60.
I recommend calling the yards and making sure they know you want the bracket not just the caliper. Usually when I buy parts on here I pick the highest rated junk yard.
 08-03-15, 11:58 AM
#90
Full Member
Thread Starter
Well after a long search for a brake caliper bracket a member on here came through and I was finally able to get the car together! Devcon putty fix on the rear iron worked like a charm, no more water leak. Put everything back together and finally got the new exhaust hung up under the car. I regret not taking better pics of the complete system with hangers but heres a couple to get the idea.

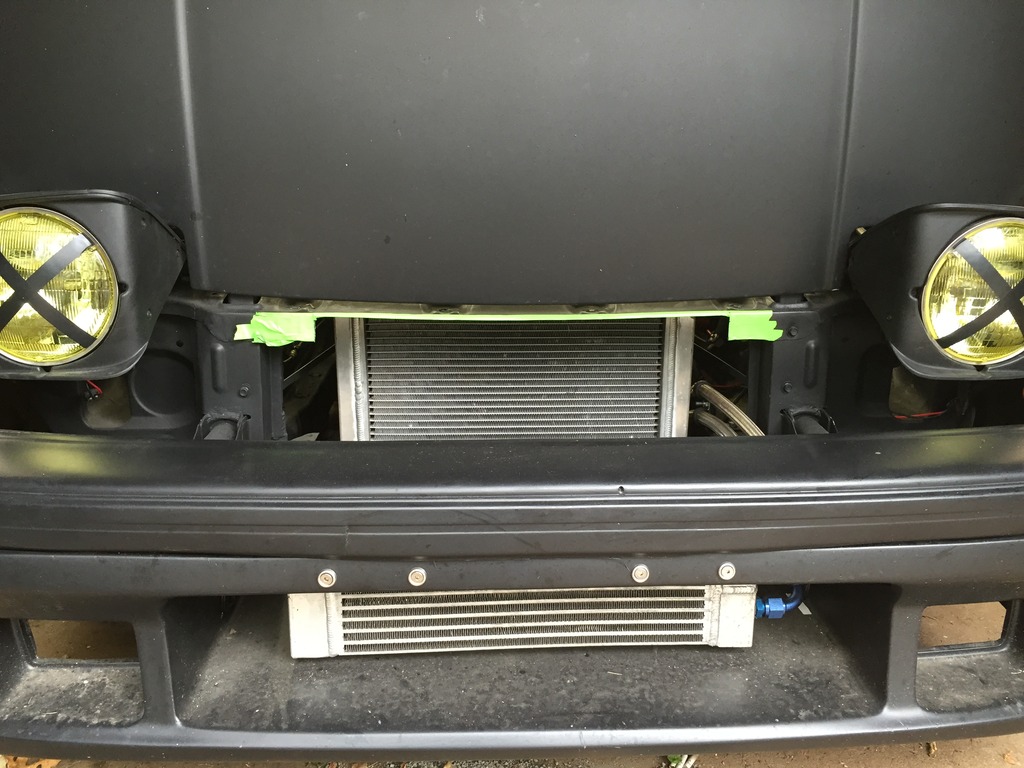
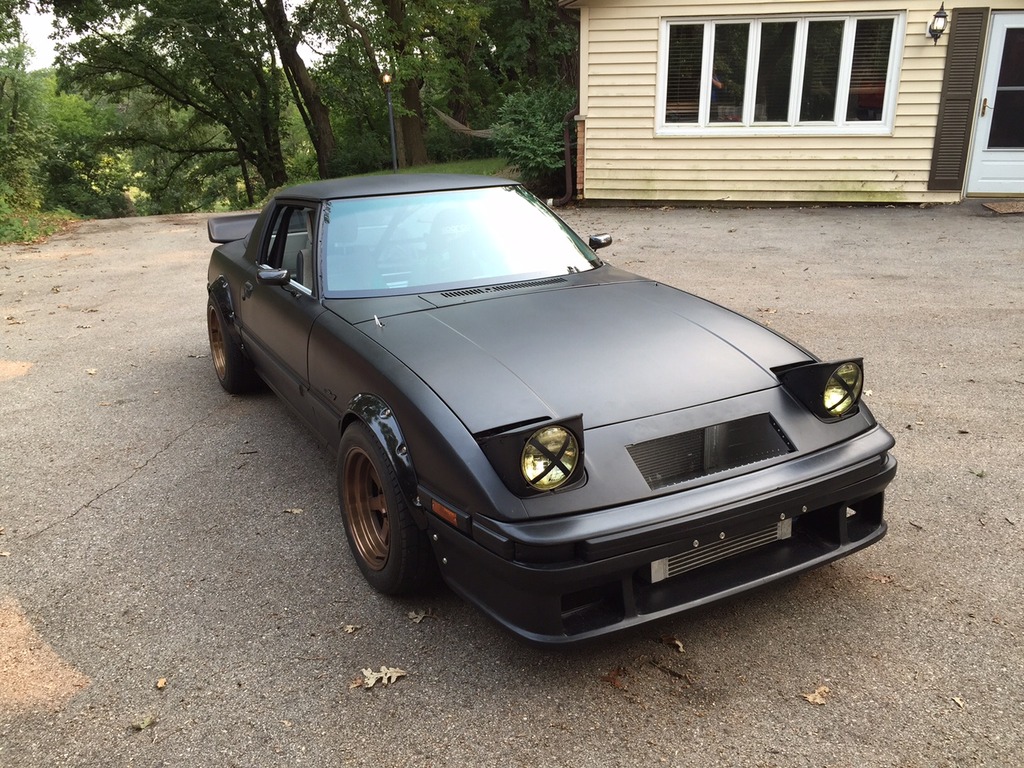
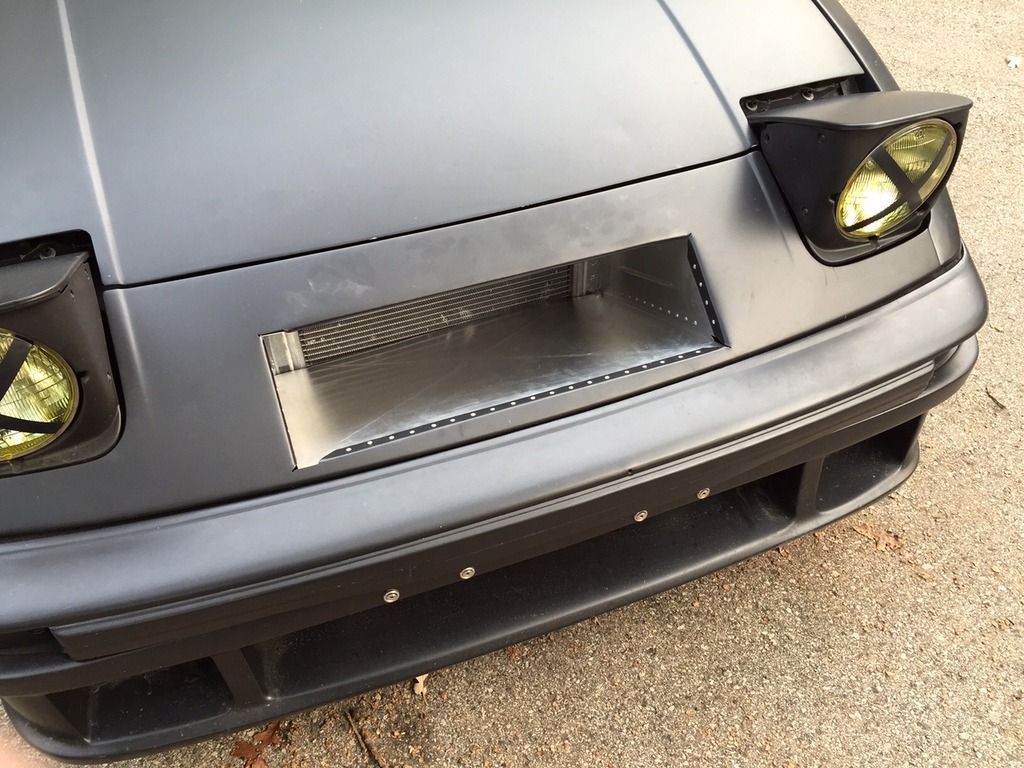
Big difference in sound compared to the straight pipe! No more ear plugs in the car. Mainly you just hear the gilmer belt drive whine and the carb. I'll work on getting a video up once I figure that out. Still running pig rich and my wideband either is covered in wet fuel or not working cause it reads 10.17 all the time... But at least fat is safe for now, still need to set timing and play with carb some. Coolant temps were getting over 200 on the quick couple runs I took it on so I pulled the body piece between the headlights trying to get some more air flow to the radiator. Still gradually creeping up warmer and warmer so I'll need to figure something out, not sure what is acceptable for coolant temps, hearing that 200 or less is best. Been shutting it down when I see 210. Might try and duct the radiator better but its getting alot of real estate up front currently. Good news is oil temp is staying below 190 so thats working correctly. Trying to keep revs down through the break in period but I can tell this little engine just wants to rev, one little movement of the throttle and its at 5k already. Good oil pressure throughout and it starts easy even hot so all seems well. Kinda tough trying to drive a pucked clutch with zero torque and no revs but I'm stoked on having the thing running! I'll post a ton of a pics here and keep working on it, get through all the teething pains. Definitely will need a new steering solution soon as the factory box is super loppy, (about 10:30 to 1:30 oclock free movement.... like your gramps RV built out of a bus from the 60s.) But damn is it fun to move under Rotary power, first time I've ever driven one and I built it myself so I'm happy as can be!

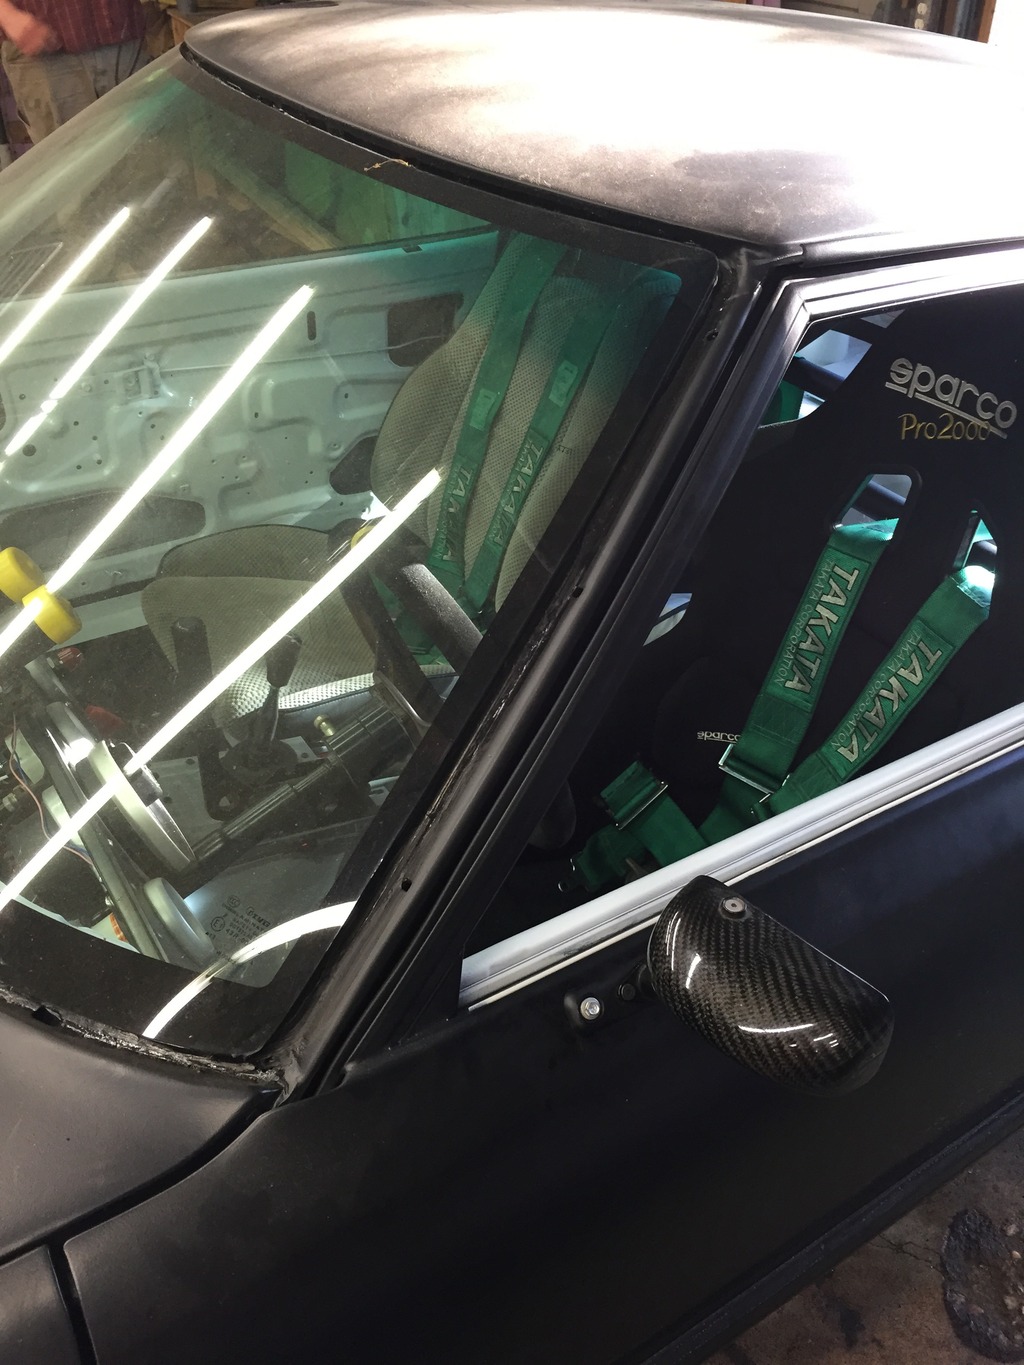


Big difference in sound compared to the straight pipe! No more ear plugs in the car. Mainly you just hear the gilmer belt drive whine and the carb. I'll work on getting a video up once I figure that out. Still running pig rich and my wideband either is covered in wet fuel or not working cause it reads 10.17 all the time... But at least fat is safe for now, still need to set timing and play with carb some. Coolant temps were getting over 200 on the quick couple runs I took it on so I pulled the body piece between the headlights trying to get some more air flow to the radiator. Still gradually creeping up warmer and warmer so I'll need to figure something out, not sure what is acceptable for coolant temps, hearing that 200 or less is best. Been shutting it down when I see 210. Might try and duct the radiator better but its getting alot of real estate up front currently. Good news is oil temp is staying below 190 so thats working correctly. Trying to keep revs down through the break in period but I can tell this little engine just wants to rev, one little movement of the throttle and its at 5k already. Good oil pressure throughout and it starts easy even hot so all seems well. Kinda tough trying to drive a pucked clutch with zero torque and no revs but I'm stoked on having the thing running! I'll post a ton of a pics here and keep working on it, get through all the teething pains. Definitely will need a new steering solution soon as the factory box is super loppy, (about 10:30 to 1:30 oclock free movement.... like your gramps RV built out of a bus from the 60s.) But damn is it fun to move under Rotary power, first time I've ever driven one and I built it myself so I'm happy as can be!


 08-25-15, 12:18 PM
#92
Full Member
Thread Starter
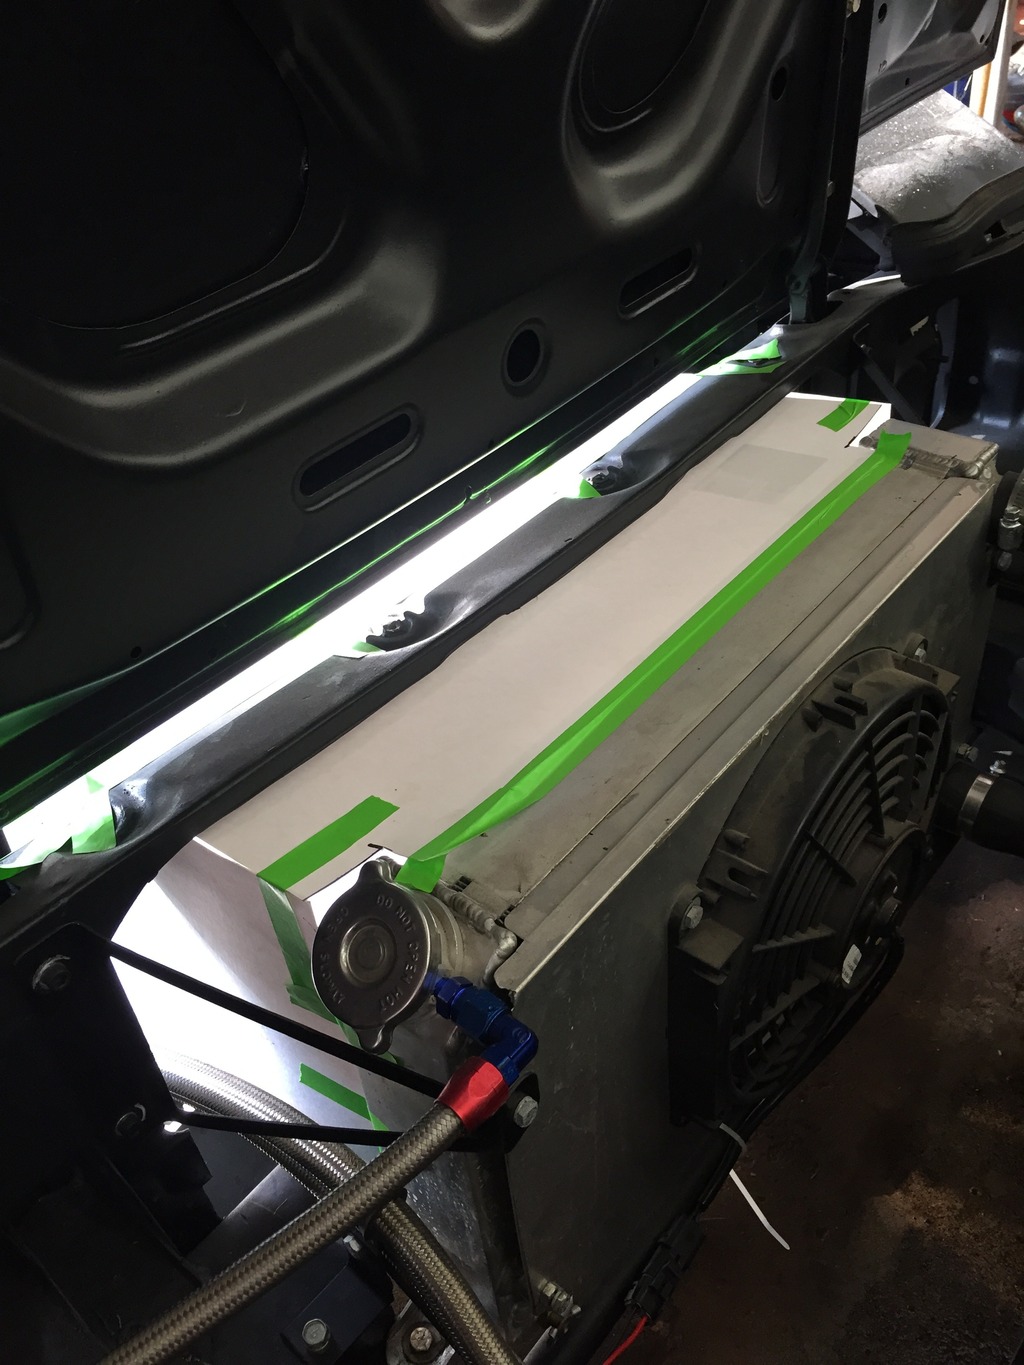
Radiator air duct fab
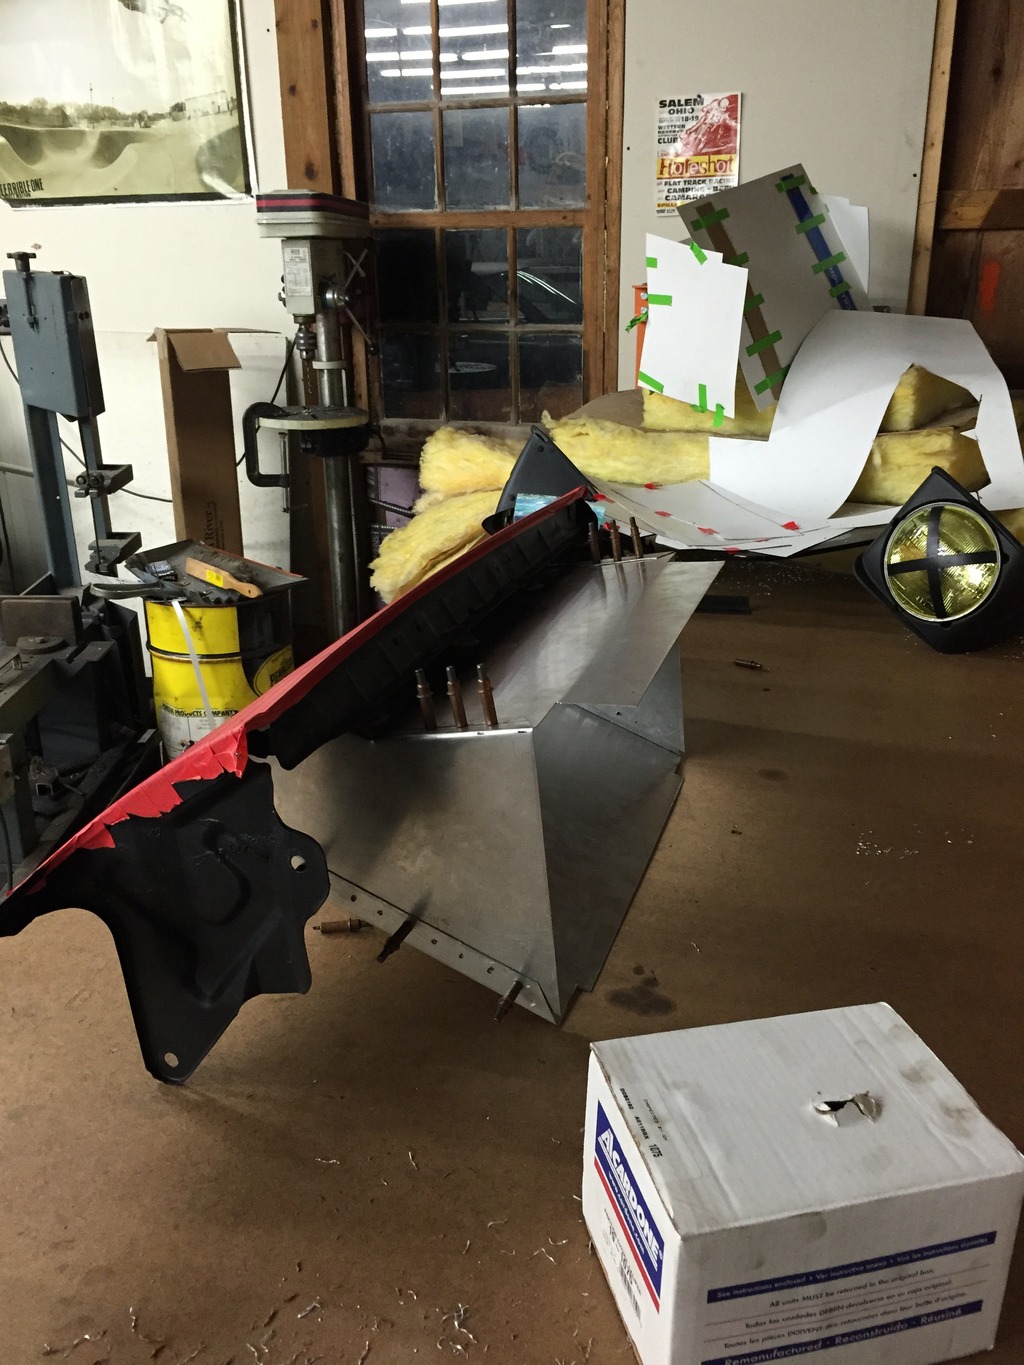
So as I mentioned in the previous post I decided to do something about the air flow to the radiator in hopes that it would improve my cooling. I'm always terrible about documenting the process as I make something so I made sure to take decent pictures this time around. A little picture heavy on this post but hopefully it helps explain the process.
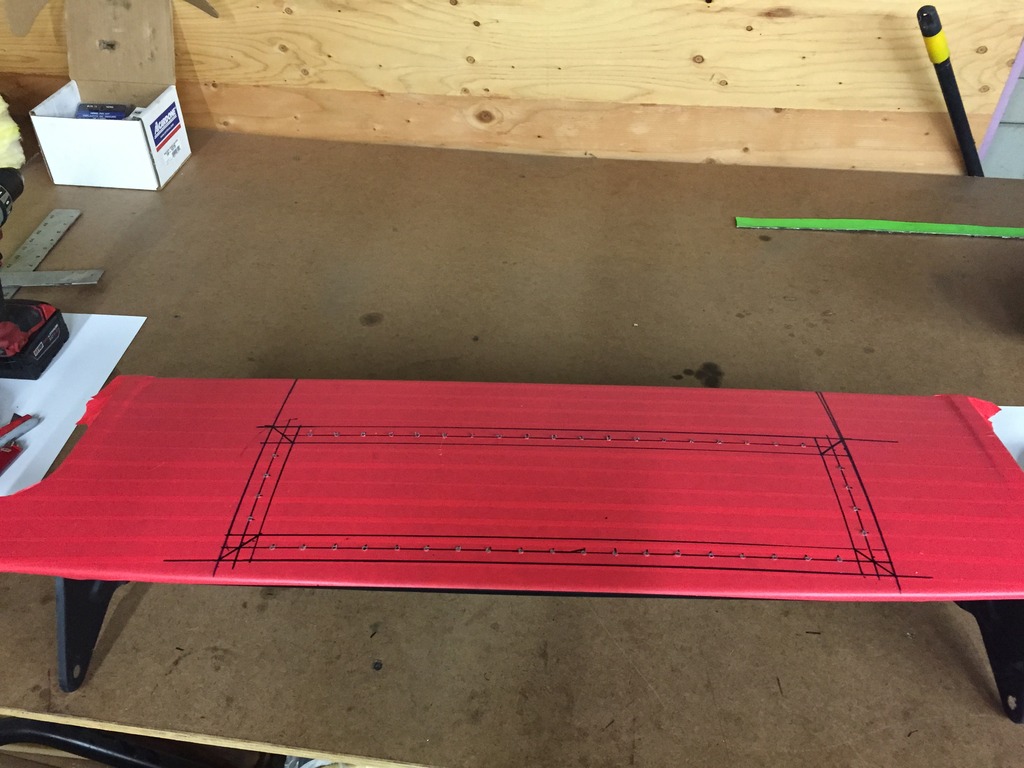
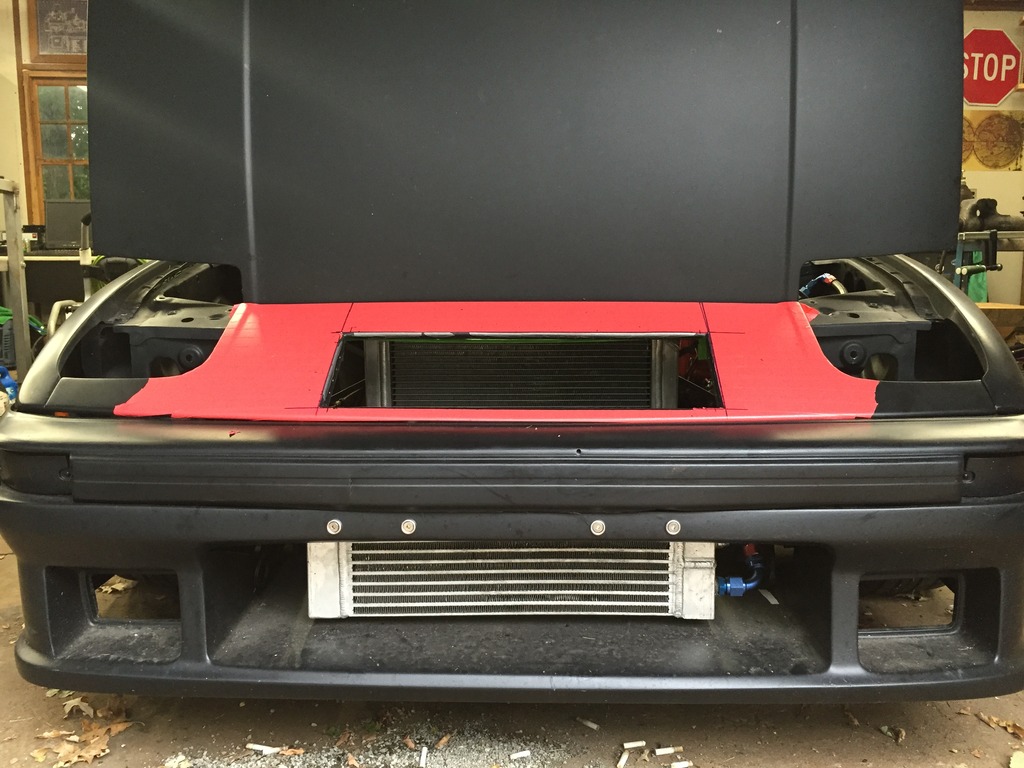
So with the oil cooler hogging the majority of the "frontal area" of the car I decided to cut the body piece between the headlights into a duct. I started with a rough idea of what I planned to do with poster board

This gave me a rough concept and approximate location to cut the front body piece. I laid it out first and then drilled all the holes where I plan to attach the duct to
then i drilled out the spot welds for the support bracing (since my duct will run right through that area), and then I added some simple tube bracing to stop the piece from turning into a potato chip curl as I cut the material out and bent tabs etc. This bracing is temporary and is far enough out of the way I can still work the surface of the steel.
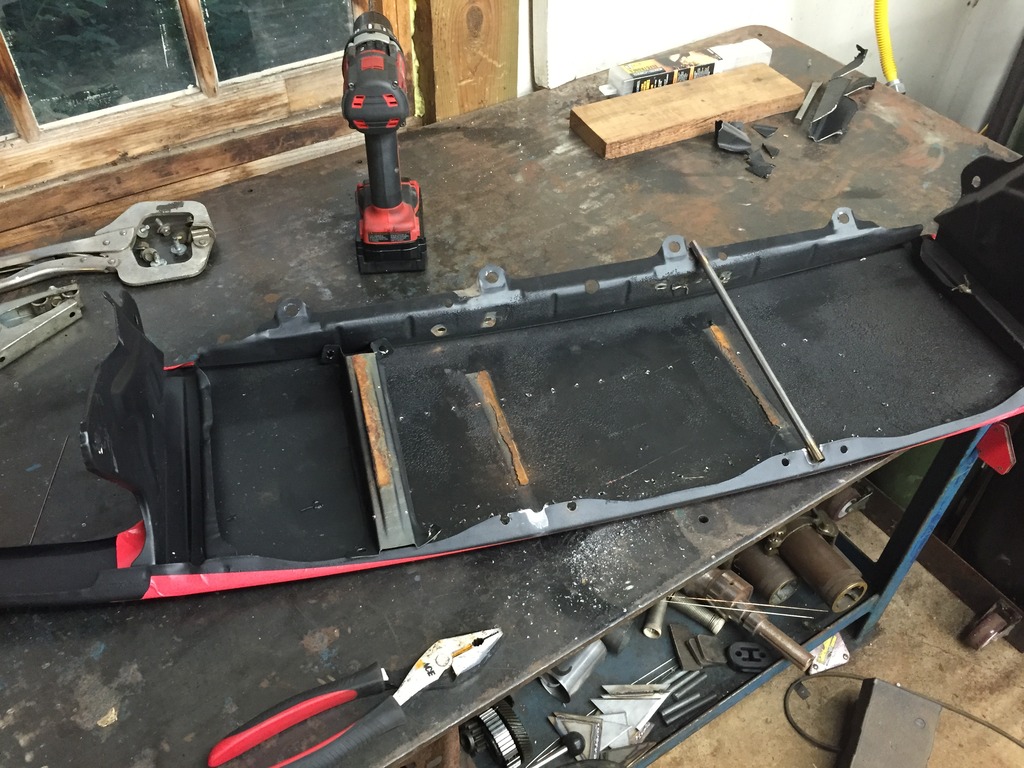
Then I cut a slit into a piece of steel 1" deep and the width of the sheet metal so it will serve as a lever to bend the tab inwards for attaching the duct to. Really slow process, kinda like rolling a fender, just a little bump at a time working back and forth.
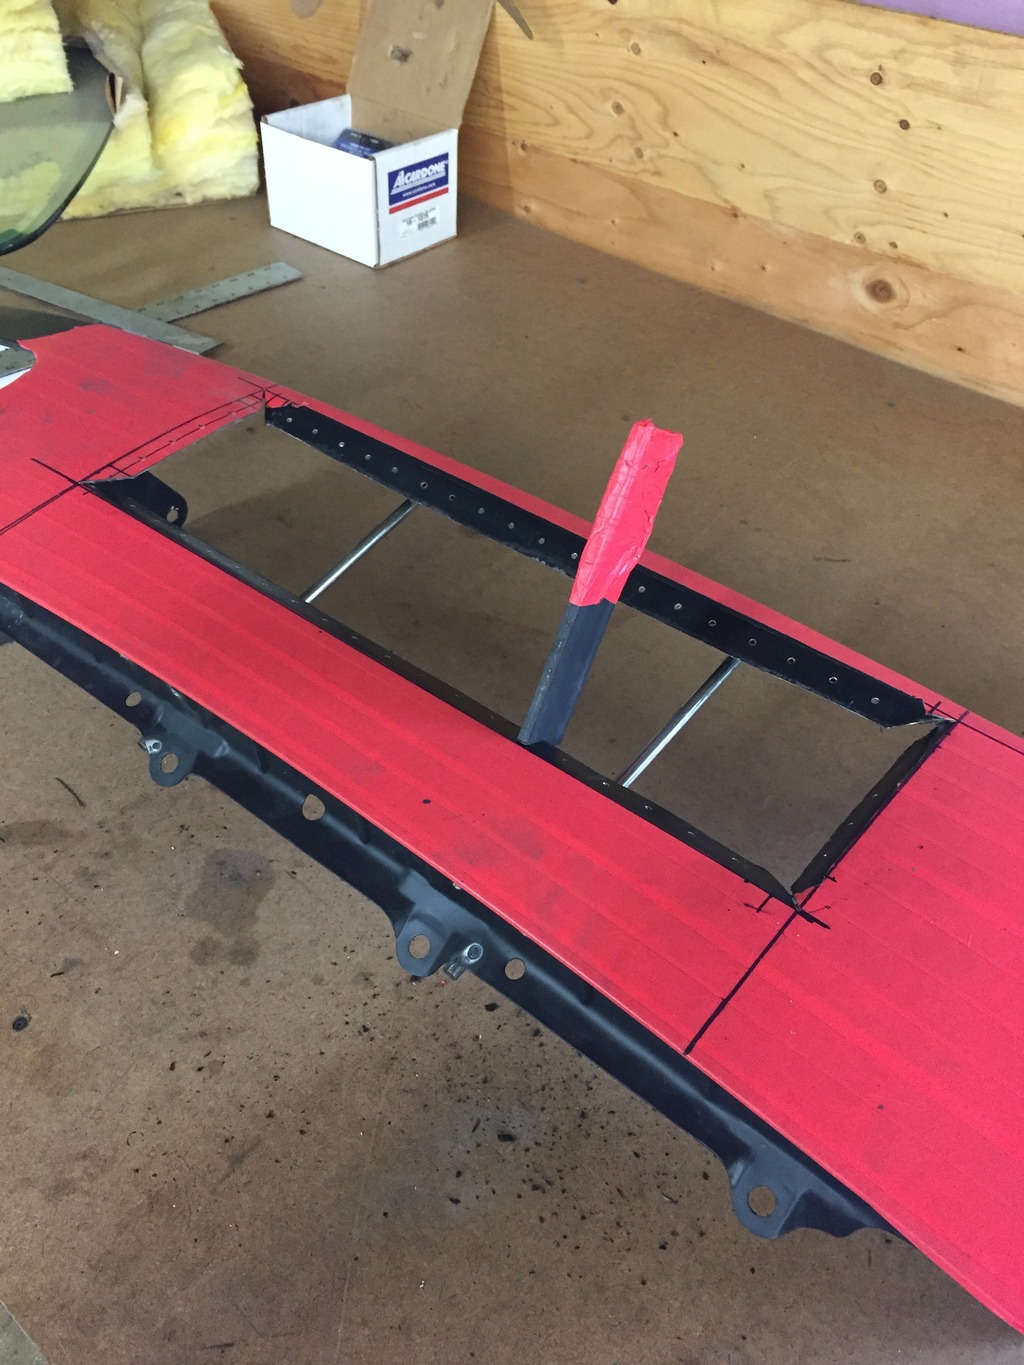
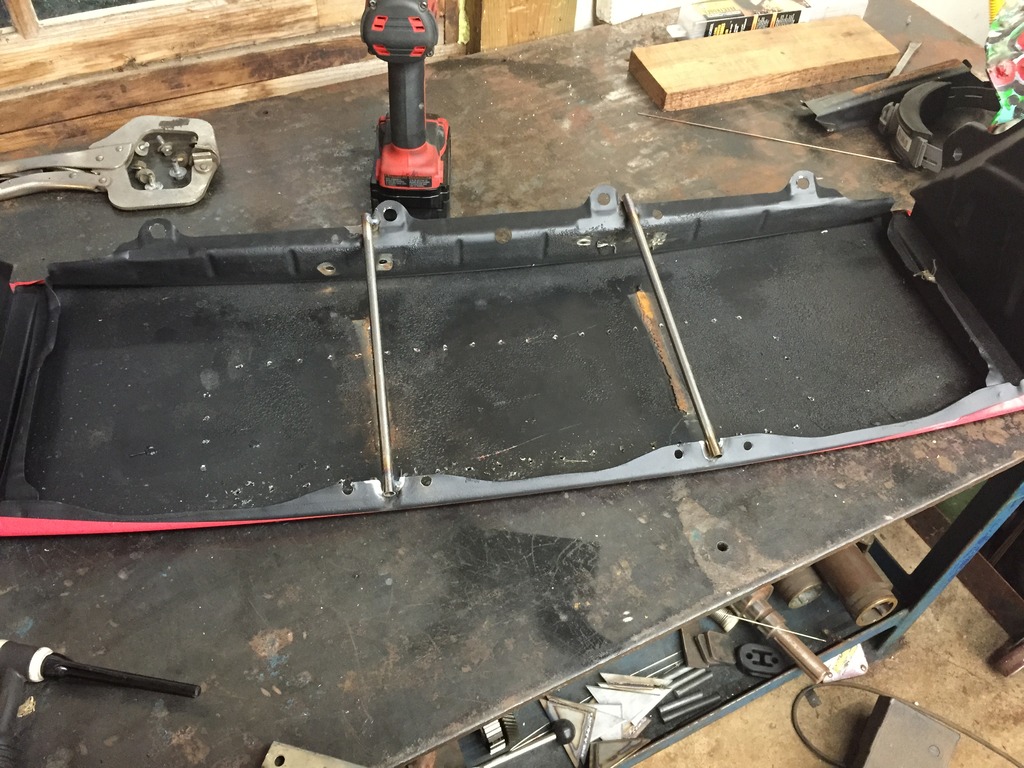
Heres a shot showing the amount of material I trimmed away off the front to give the duct a little more straight forward path.
And the duct installed to check alignment angle of the tabs
Then I started to make the pieces. Chose aluminum 3000 series to work with. Heres the start of the top piece
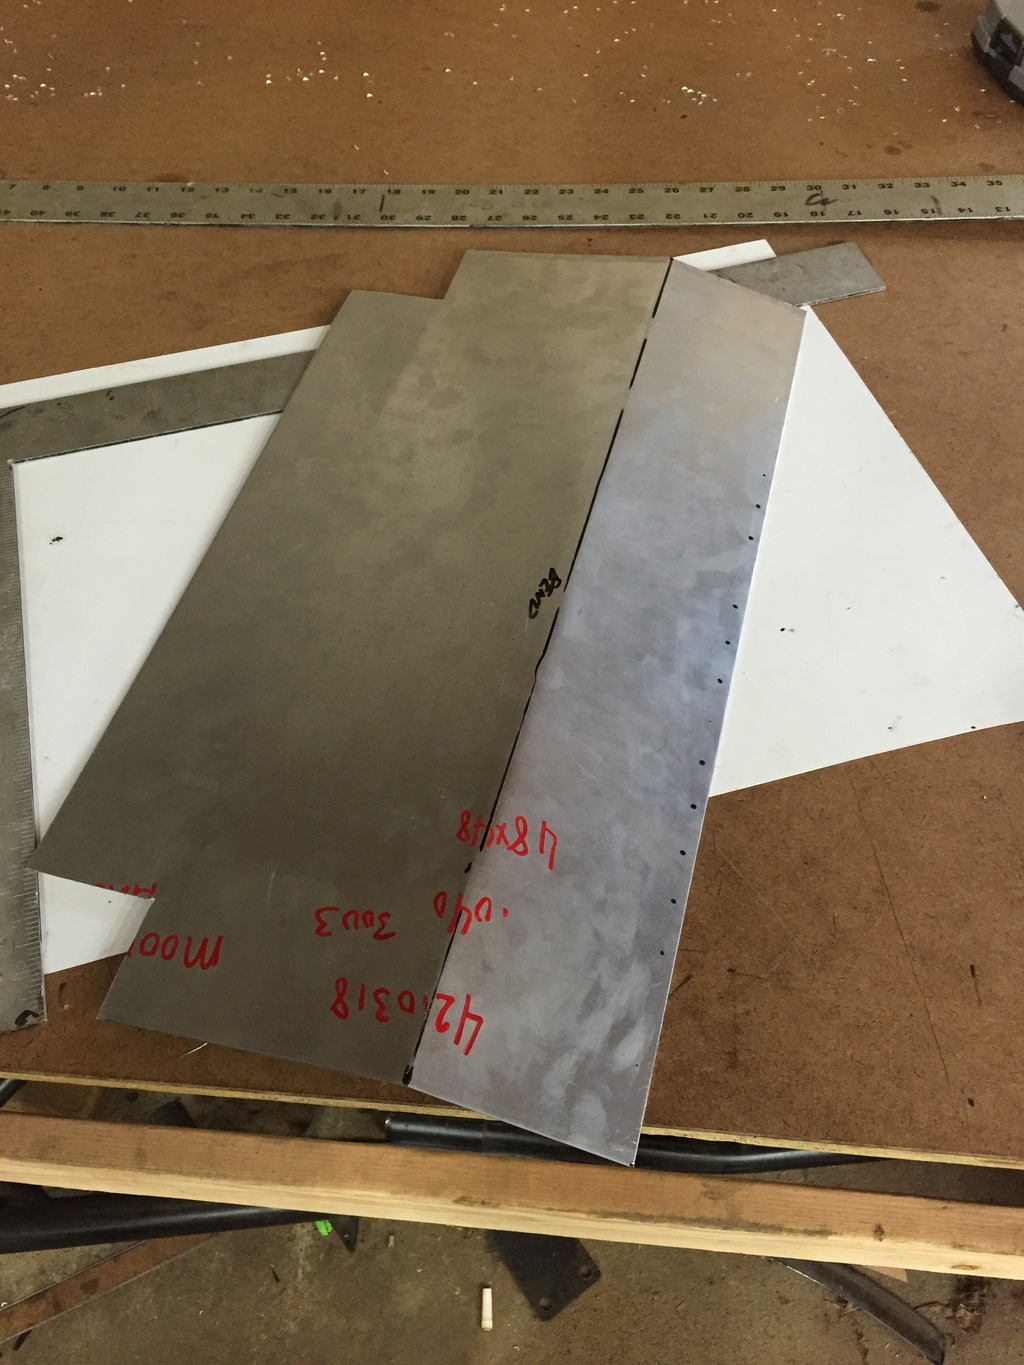
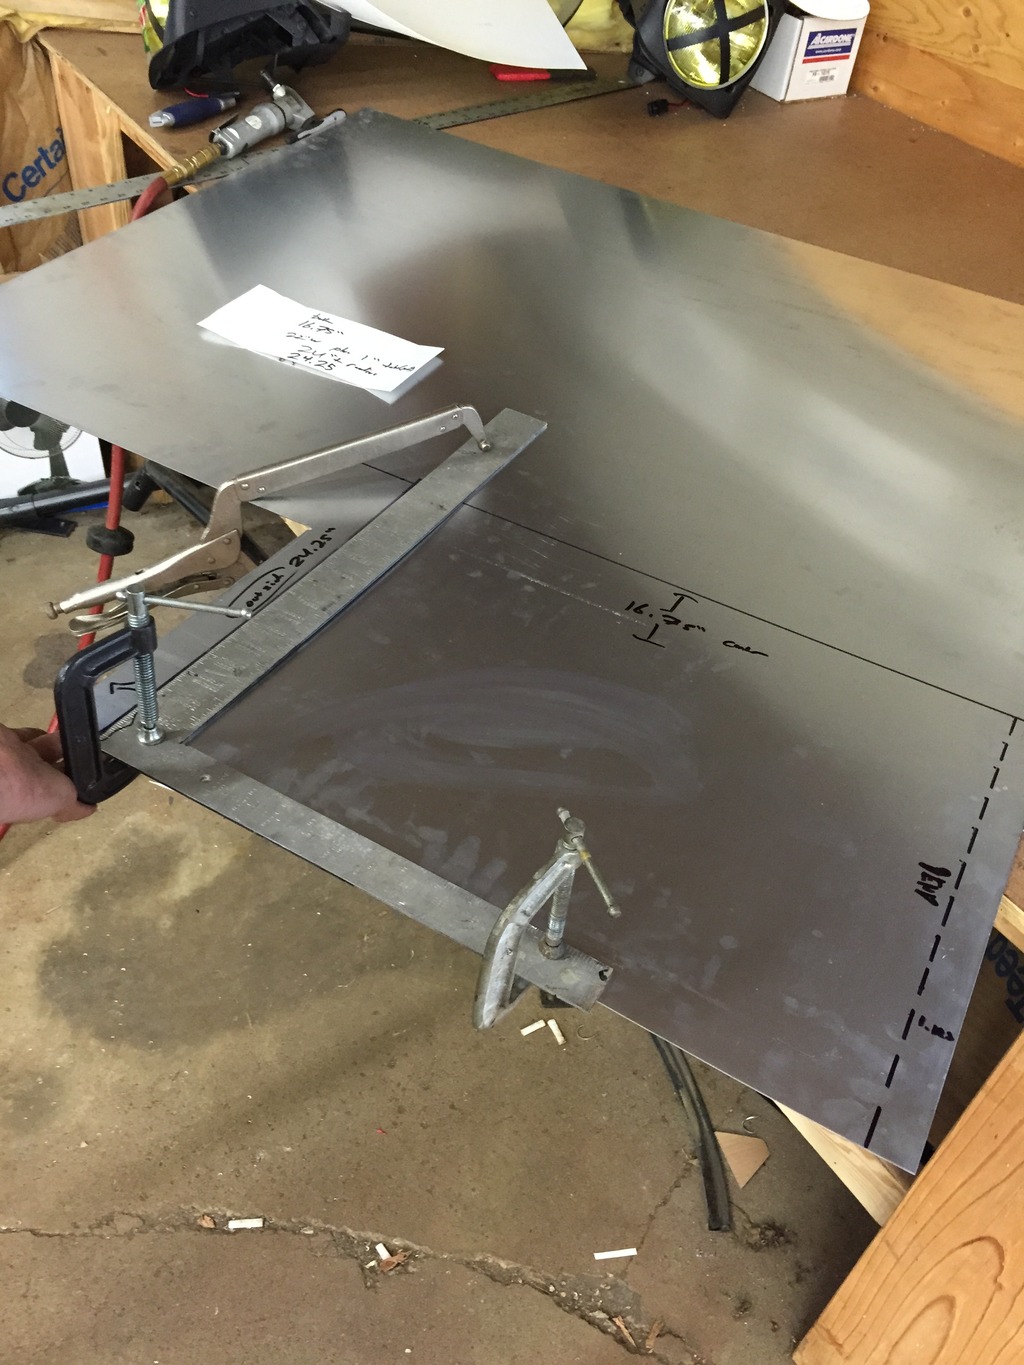
Heres the method I use for cutting straight lines since I dont have a stomp shear or anything like that. I use the $20 harbor freight air nibbler and then offset a ruler or straight edge the distance of the cut to the edge of the tool and then push the tool along this "fence" to make a straight line.
URL]
So with the oil cooler hogging the majority of the "frontal area" of the car I decided to cut the body piece between the headlights into a duct. I started with a rough idea of what I planned to do with poster board


This gave me a rough concept and approximate location to cut the front body piece. I laid it out first and then drilled all the holes where I plan to attach the duct to


then i drilled out the spot welds for the support bracing (since my duct will run right through that area), and then I added some simple tube bracing to stop the piece from turning into a potato chip curl as I cut the material out and bent tabs etc. This bracing is temporary and is far enough out of the way I can still work the surface of the steel.


Then I cut a slit into a piece of steel 1" deep and the width of the sheet metal so it will serve as a lever to bend the tab inwards for attaching the duct to. Really slow process, kinda like rolling a fender, just a little bump at a time working back and forth.


Heres a shot showing the amount of material I trimmed away off the front to give the duct a little more straight forward path.

And the duct installed to check alignment angle of the tabs

Then I started to make the pieces. Chose aluminum 3000 series to work with. Heres the start of the top piece

Heres the method I use for cutting straight lines since I dont have a stomp shear or anything like that. I use the $20 harbor freight air nibbler and then offset a ruler or straight edge the distance of the cut to the edge of the tool and then push the tool along this "fence" to make a straight line.

URL]
08-25-15, 12:22 PM
#93
Full Member
Thread Starter
------- Continued post--- more pics
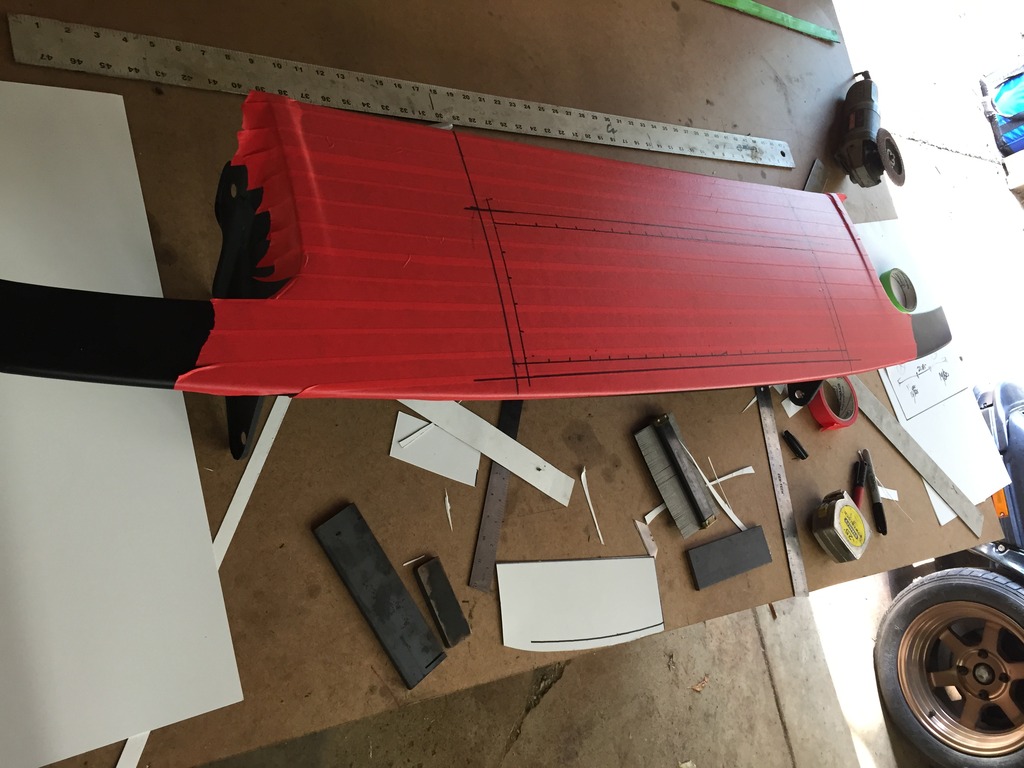
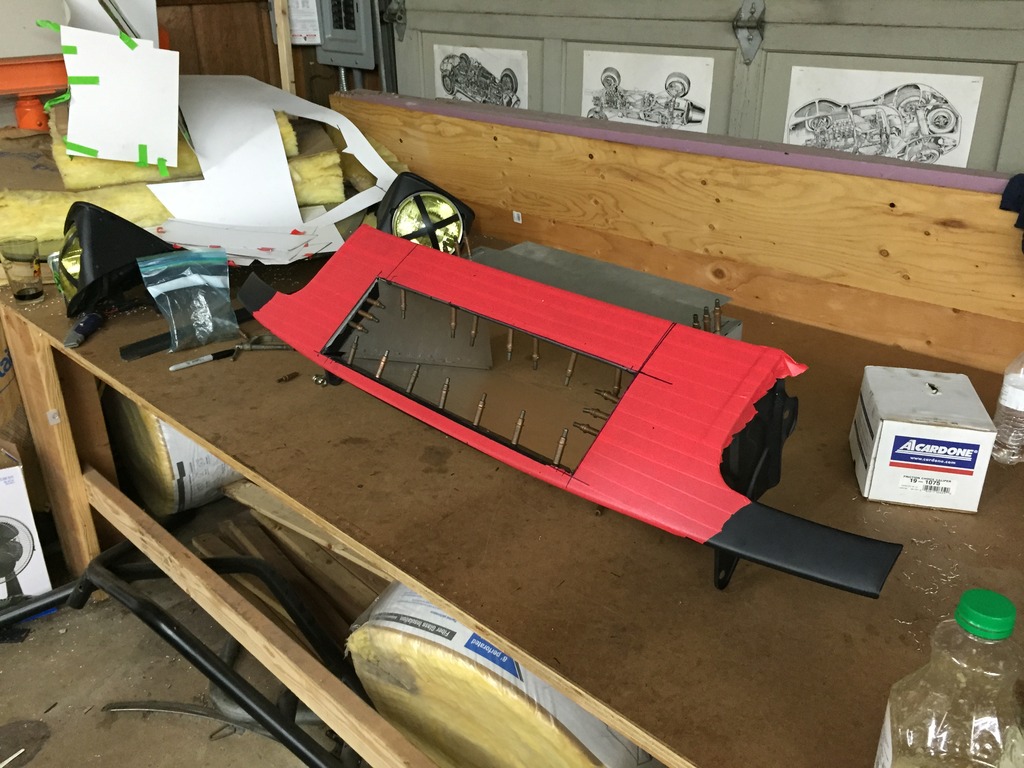
I used posterboard to make templates for the pieces I want to cut and then trace them out

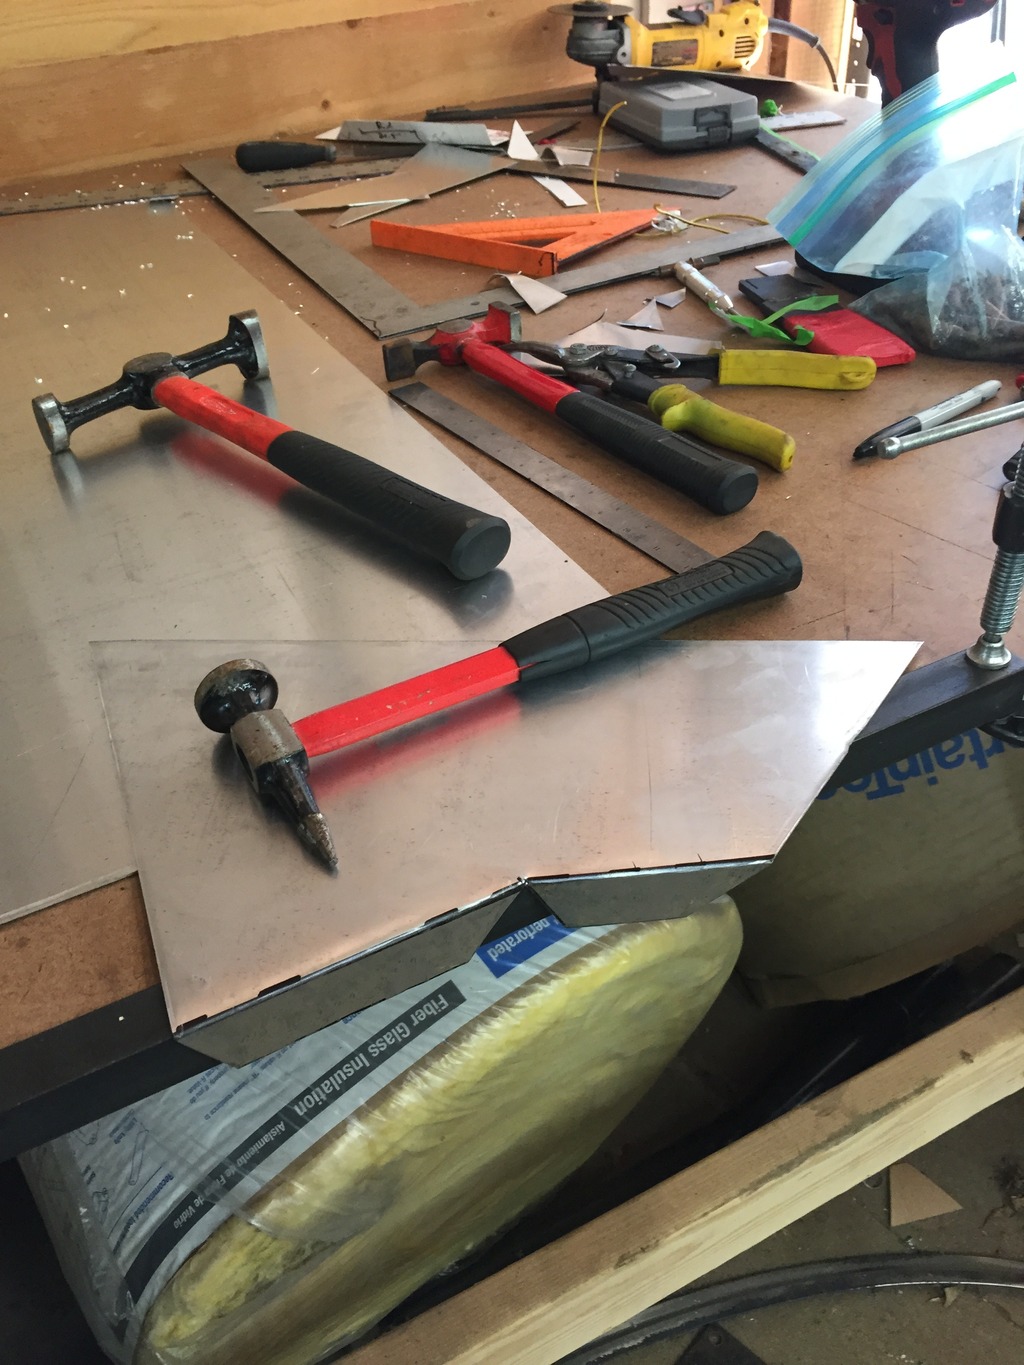
I dont have a fancy magnetic finger brake or anything but aluminum is pretty easy to work with. For the bends I just clamped a piece of angle iron over the edge of a table and worked it over with a hammer.
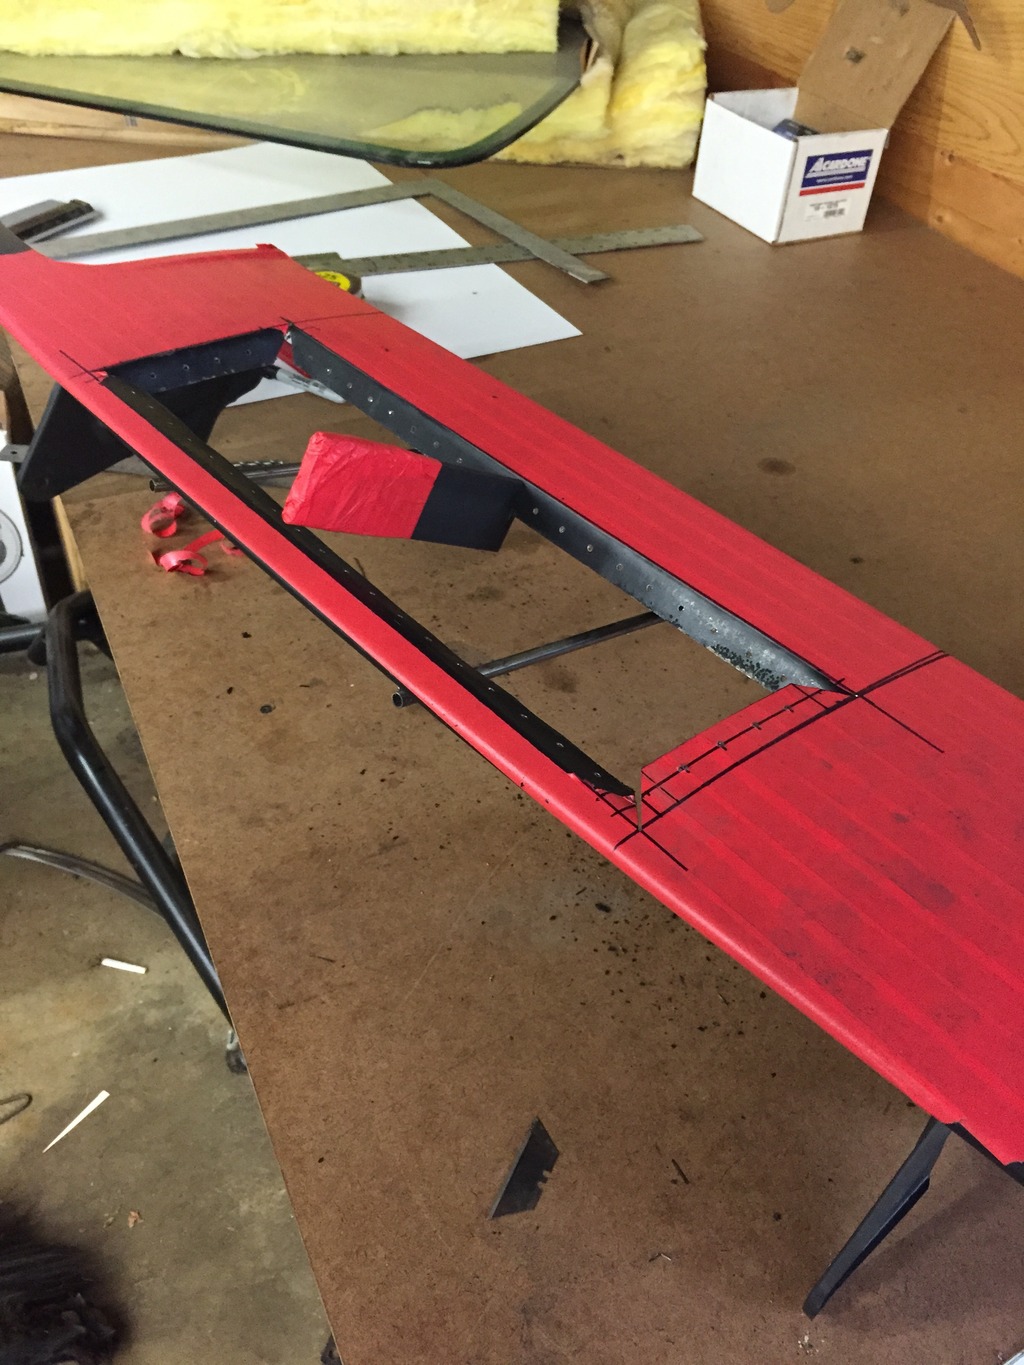
Starting to come together, checking fitment. It's a little oversized on purpose, plan on sealing the edges with HVAC high temp tape.
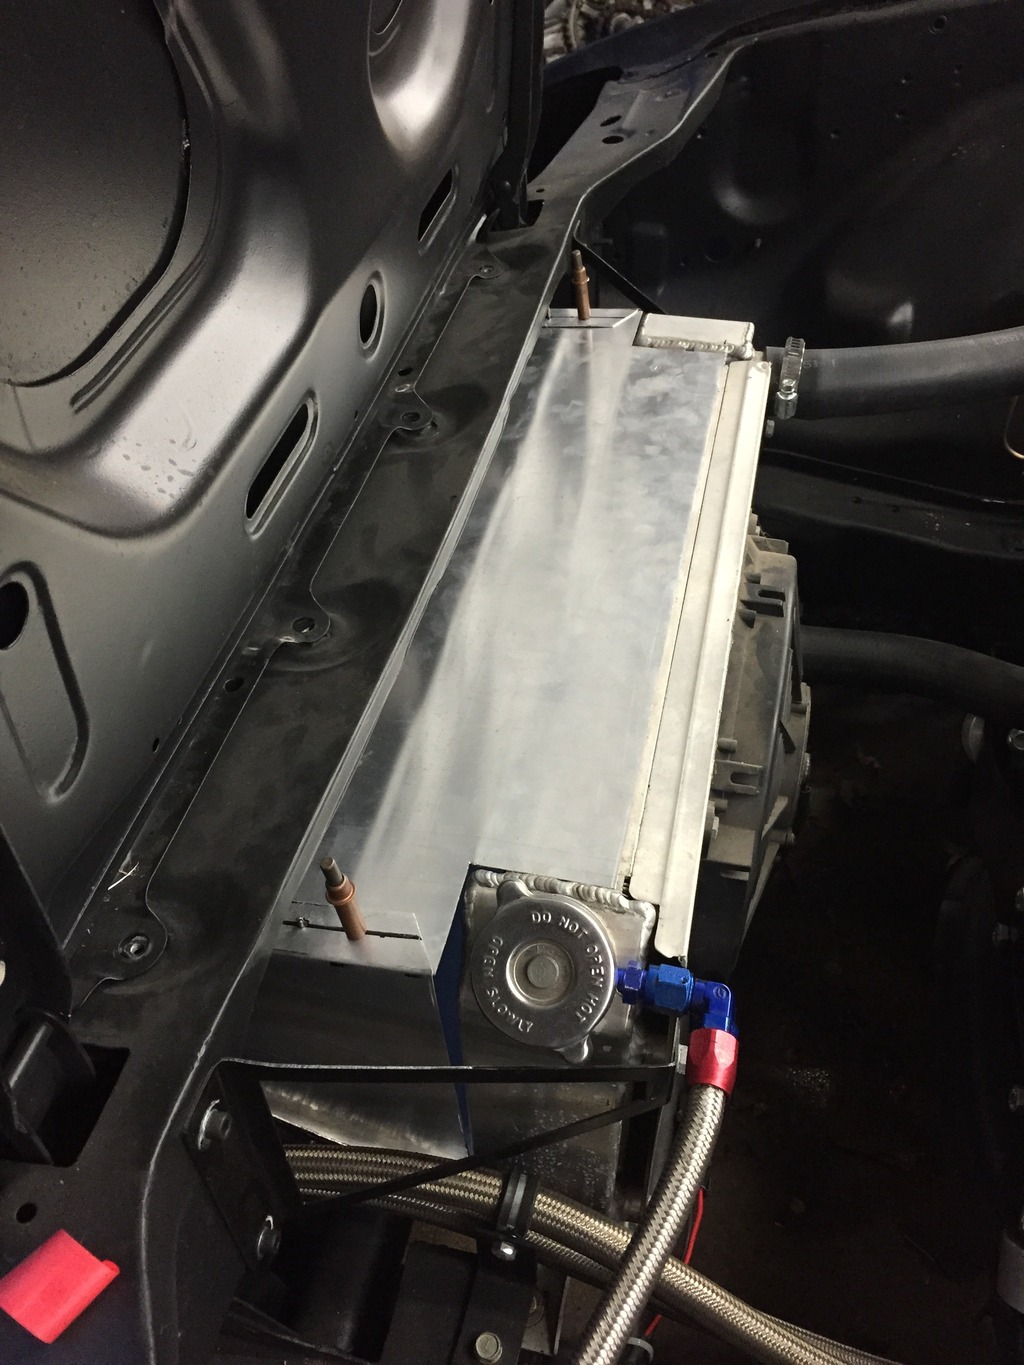
Here you can see the overall shape and concept pretty well
Then lastly I laid out some lines for beadrolling to give it some more rigidity
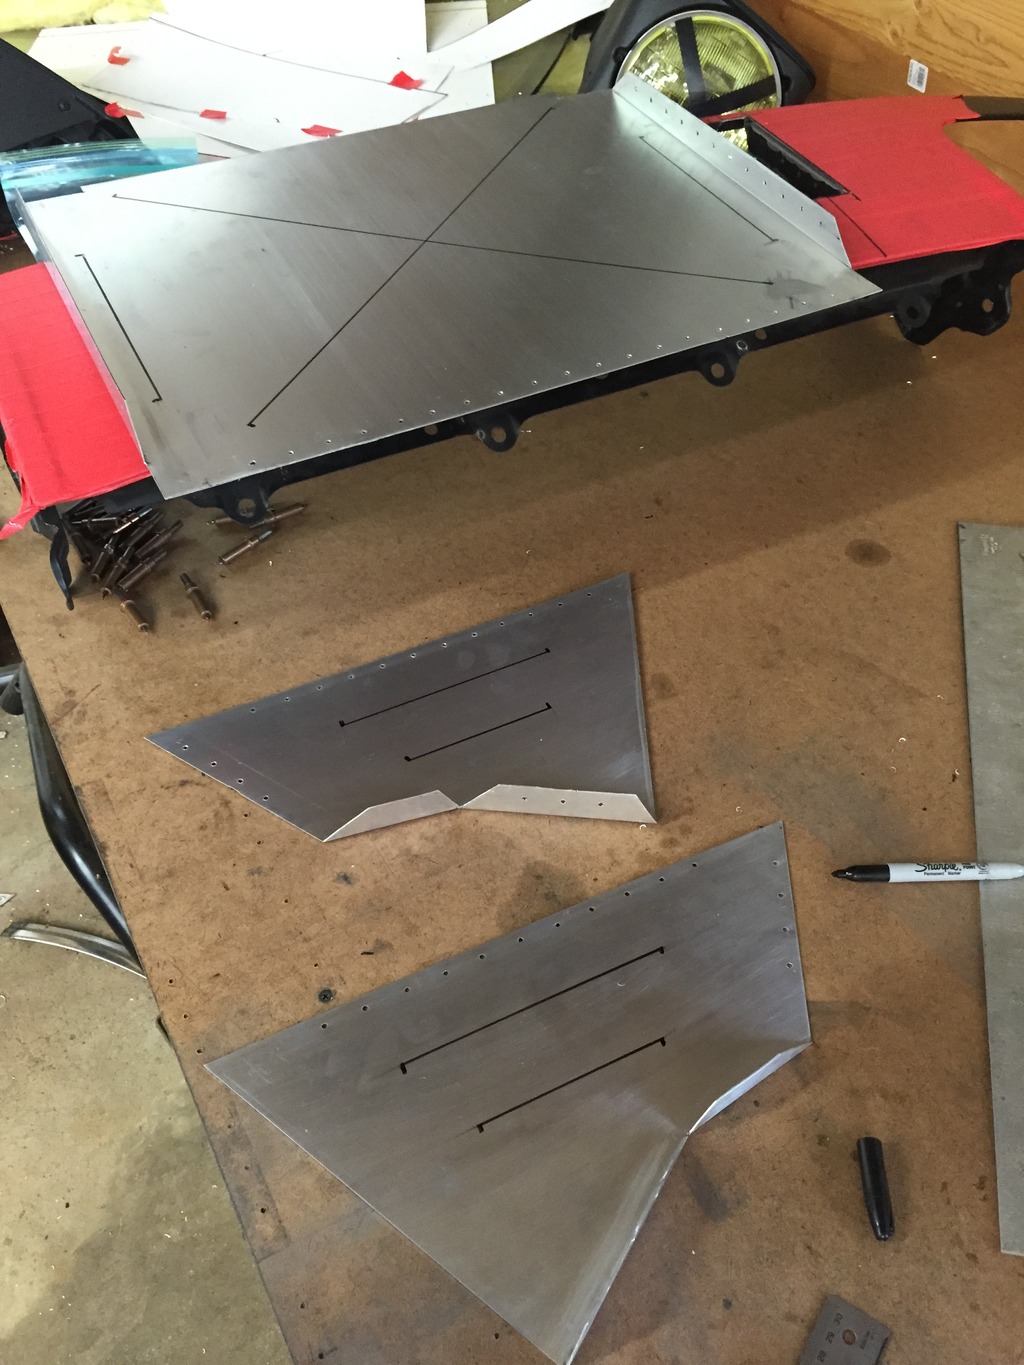
Ran those through the bead roller and then put everything backtogether for a final trial fit.
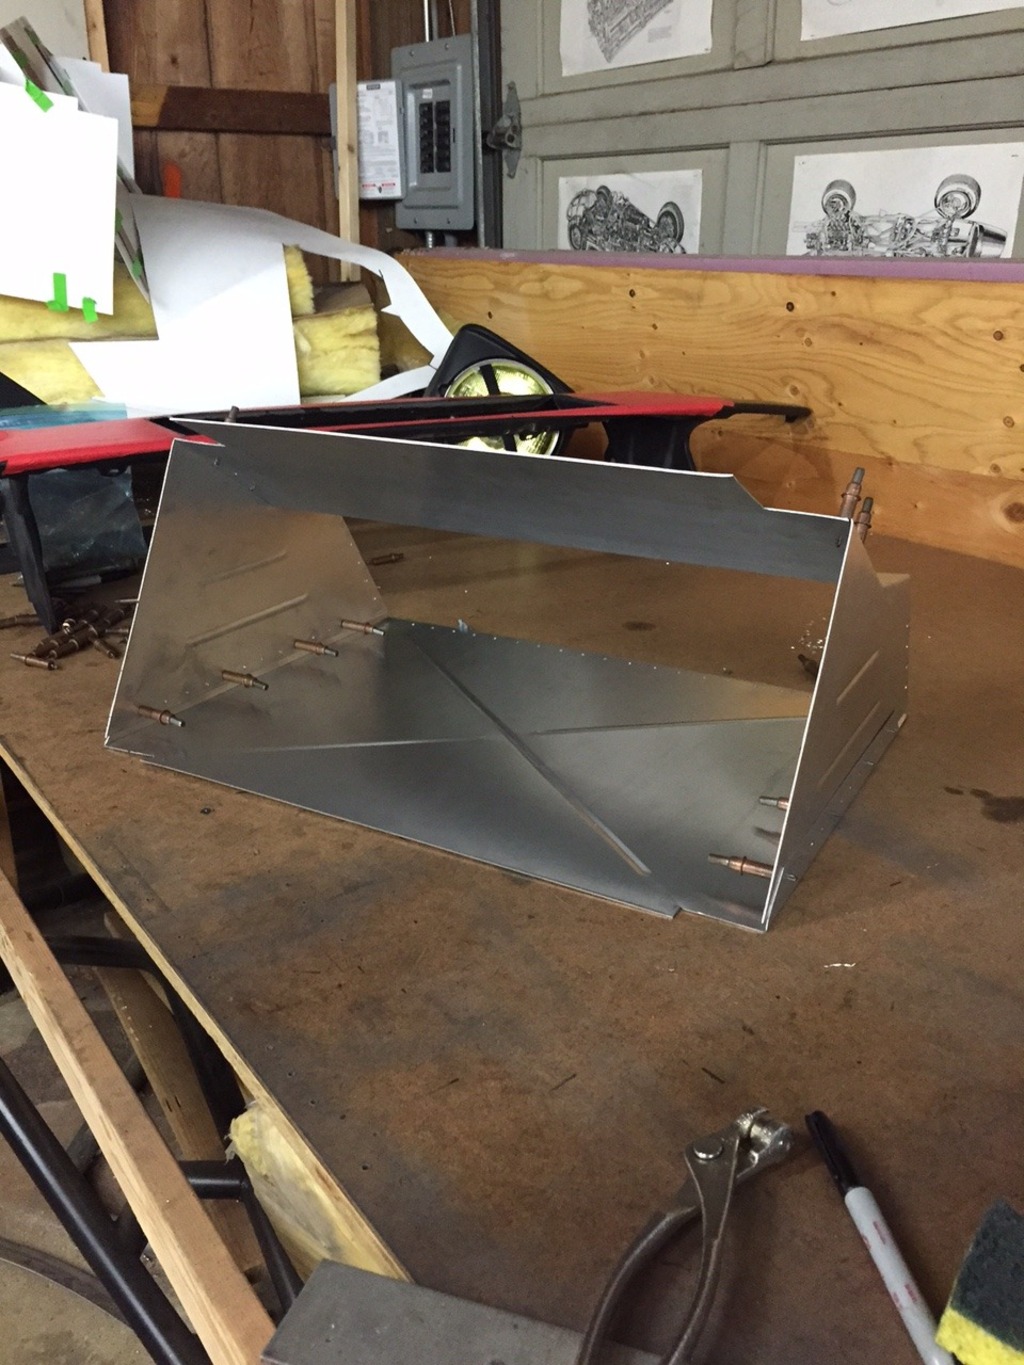
Pretty happy with the final product, first time fabbing with aluminum sheet. Sending the front body piece to paint tonight so they can fix where the paint cracked where I bent the tabs over and then I'll put it all together with rivets on the car. Hope it makes a big difference on the temp, will report back when I do.
I used posterboard to make templates for the pieces I want to cut and then trace them out

I dont have a fancy magnetic finger brake or anything but aluminum is pretty easy to work with. For the bends I just clamped a piece of angle iron over the edge of a table and worked it over with a hammer.

Starting to come together, checking fitment. It's a little oversized on purpose, plan on sealing the edges with HVAC high temp tape.


Here you can see the overall shape and concept pretty well


Then lastly I laid out some lines for beadrolling to give it some more rigidity

Ran those through the bead roller and then put everything backtogether for a final trial fit.

Pretty happy with the final product, first time fabbing with aluminum sheet. Sending the front body piece to paint tonight so they can fix where the paint cracked where I bent the tabs over and then I'll put it all together with rivets on the car. Hope it makes a big difference on the temp, will report back when I do.
08-26-15, 09:40 AM
#95
Full Member
Thread Starter
Yeah definitely find some method of cutting the steel straight while keeping it flat during the process. Tin snips dont work well over large cuts and body saws/ jig saws are difficult to use on thin material in my experience. The air nibbler seemed to be the most cost effective solution when compared to stomp shears or throatless shears (beverly etc.) The whole thing is only 0.040" thick aluminum so its no problem for the nibbler. It does send a million sharp little cresent moon shaped chips flying everywhere which is the only downside.
08-31-15, 11:35 AM
#96
Full Member
Thread Starter
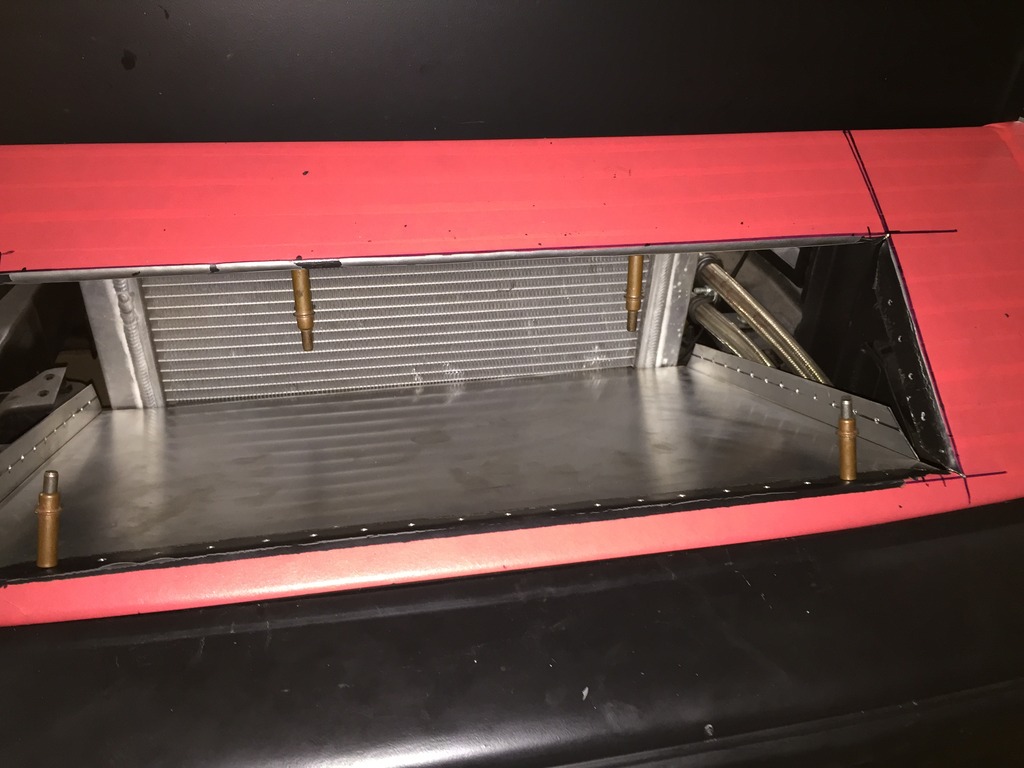
It works!
Got the front piece back from a quick paint respray and riveted the ductwork into place. Sealed the edges with some high temp duct tape and sent it off down the road. Water temp sitting steady at 190 degrees F now with no issues. Can even turn the fan off and drive around and it cools just fine. Oil temps dropped about 20 degrees as well!
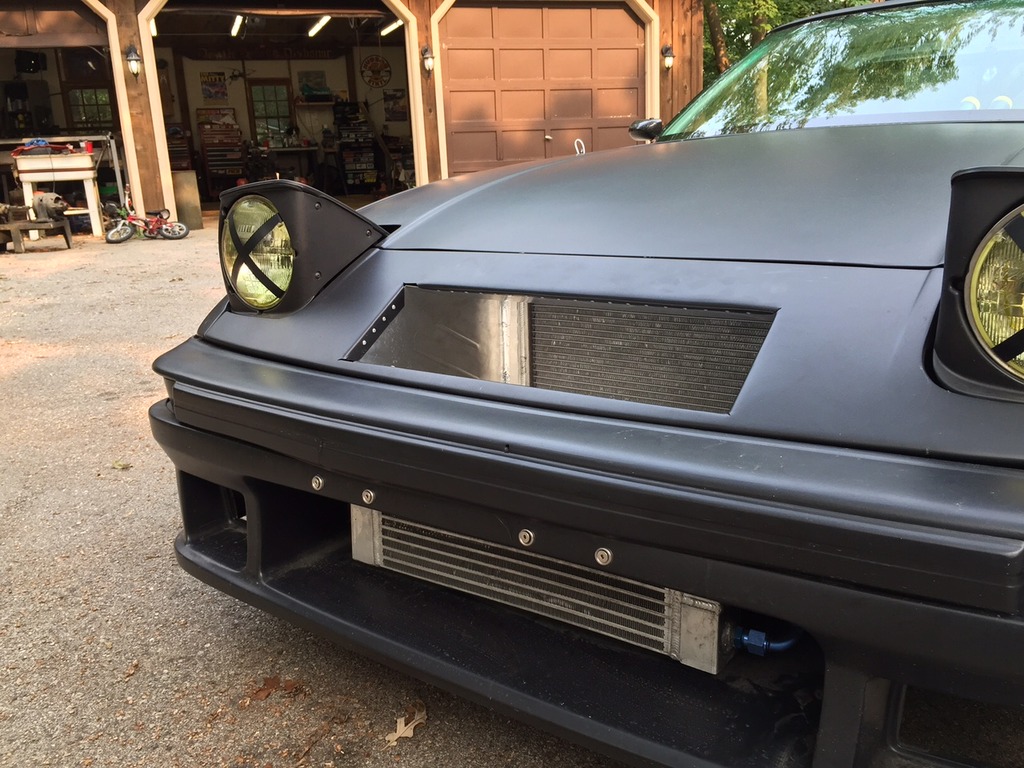
So next to get some break in miles happening and get through the rest of the little issues. Small oil leak from the crush washer on the drain plug and the carb needs some attention once I get my wideband to start working correctly. Still keeping revs under 5-6k and taking it easy for now.
Got the front piece back from a quick paint respray and riveted the ductwork into place. Sealed the edges with some high temp duct tape and sent it off down the road. Water temp sitting steady at 190 degrees F now with no issues. Can even turn the fan off and drive around and it cools just fine. Oil temps dropped about 20 degrees as well!


So next to get some break in miles happening and get through the rest of the little issues. Small oil leak from the crush washer on the drain plug and the carb needs some attention once I get my wideband to start working correctly. Still keeping revs under 5-6k and taking it easy for now.
08-31-15, 12:29 PM
#97
Saw your 7 at the LS Brewhaus show this weekend, looks awesome! didn't have the chance to meet you but I'm sure I'll see you around at other events in the future. Nice work!
08-31-15, 06:33 PM
#98
Full Member
Thread Starter
Thanks man! Last minute rush to get it there but was glad i went. Sorry I missed you, was that REPU in the spectator lot yours by chance? Was checking that out, pretty rad!
09-07-15, 05:12 PM
#100
I'm curious as to why you didn't properly duct the oem radiator opening before you cut the filler panel and ducted that? With how car back you radiator is mounted I bet all the air was going right around it.
The oil cooler will obviously benefit from the same treatment if you ever find yourself with oil temp issues. Coolers only work with a pressure differential.
Anyways, awesome build, I always like seeing people do everything themselves.
The oil cooler will obviously benefit from the same treatment if you ever find yourself with oil temp issues. Coolers only work with a pressure differential.
Anyways, awesome build, I always like seeing people do everything themselves.