
Mannykillers/ AAPARKAH Street/time Attack/Drift Build (heavy Pics) #Thisisthewolf


I am responding to the spooling of the turbo responses. I have a short runner manifold. I would think that the fluid dynamics of a shorter manifold would be better than that of a longer. shoter more direct, hotter gas hitting the turbo than slower moving, cooler gas. But I am no turbo expert.
anyway, I did tune my car myself. The tune can have a MAJOR effect on spool of the turbo. I run pretty lean during cruise 15.3 AFR. I created two maps. a lean cruise map, and a max power 13.5AFR cruise section to see the difference myself.
the lower AFR spools the turbo like a bat out of hell, the lean tune is much worse in spool times.
I also played with vacuum tubing size, and having smaller vacuum tubing and less works a lot better than long large tubing (well duh right). but it does have an effect.
V-mount, size of intercooler, the tune, turbo A/R, etc I am sure all have an effect. But the tune is probably one of the larger effects, because it was a HUGE difference for me.
I ended up doing high AFR in very light throttle and ramp it to 13.0AFR at 0 boost/vacuum and continue to ramp to 10.8AFR at max boost. this seems to be the best compromise of power/spool/fuel economy.
There have been some moves made recently. A few things started to come in and I actually ordered some New manifold material. I originally wanted to go ahead and keep my manifold but With the new Turbo being IWG It would be a waste to have two waste gate ports just capped off... not to mention ugly. SO I sold my manifold and waste gates. I got some of the smaller parts in for the New manifold....and the turbo as well.
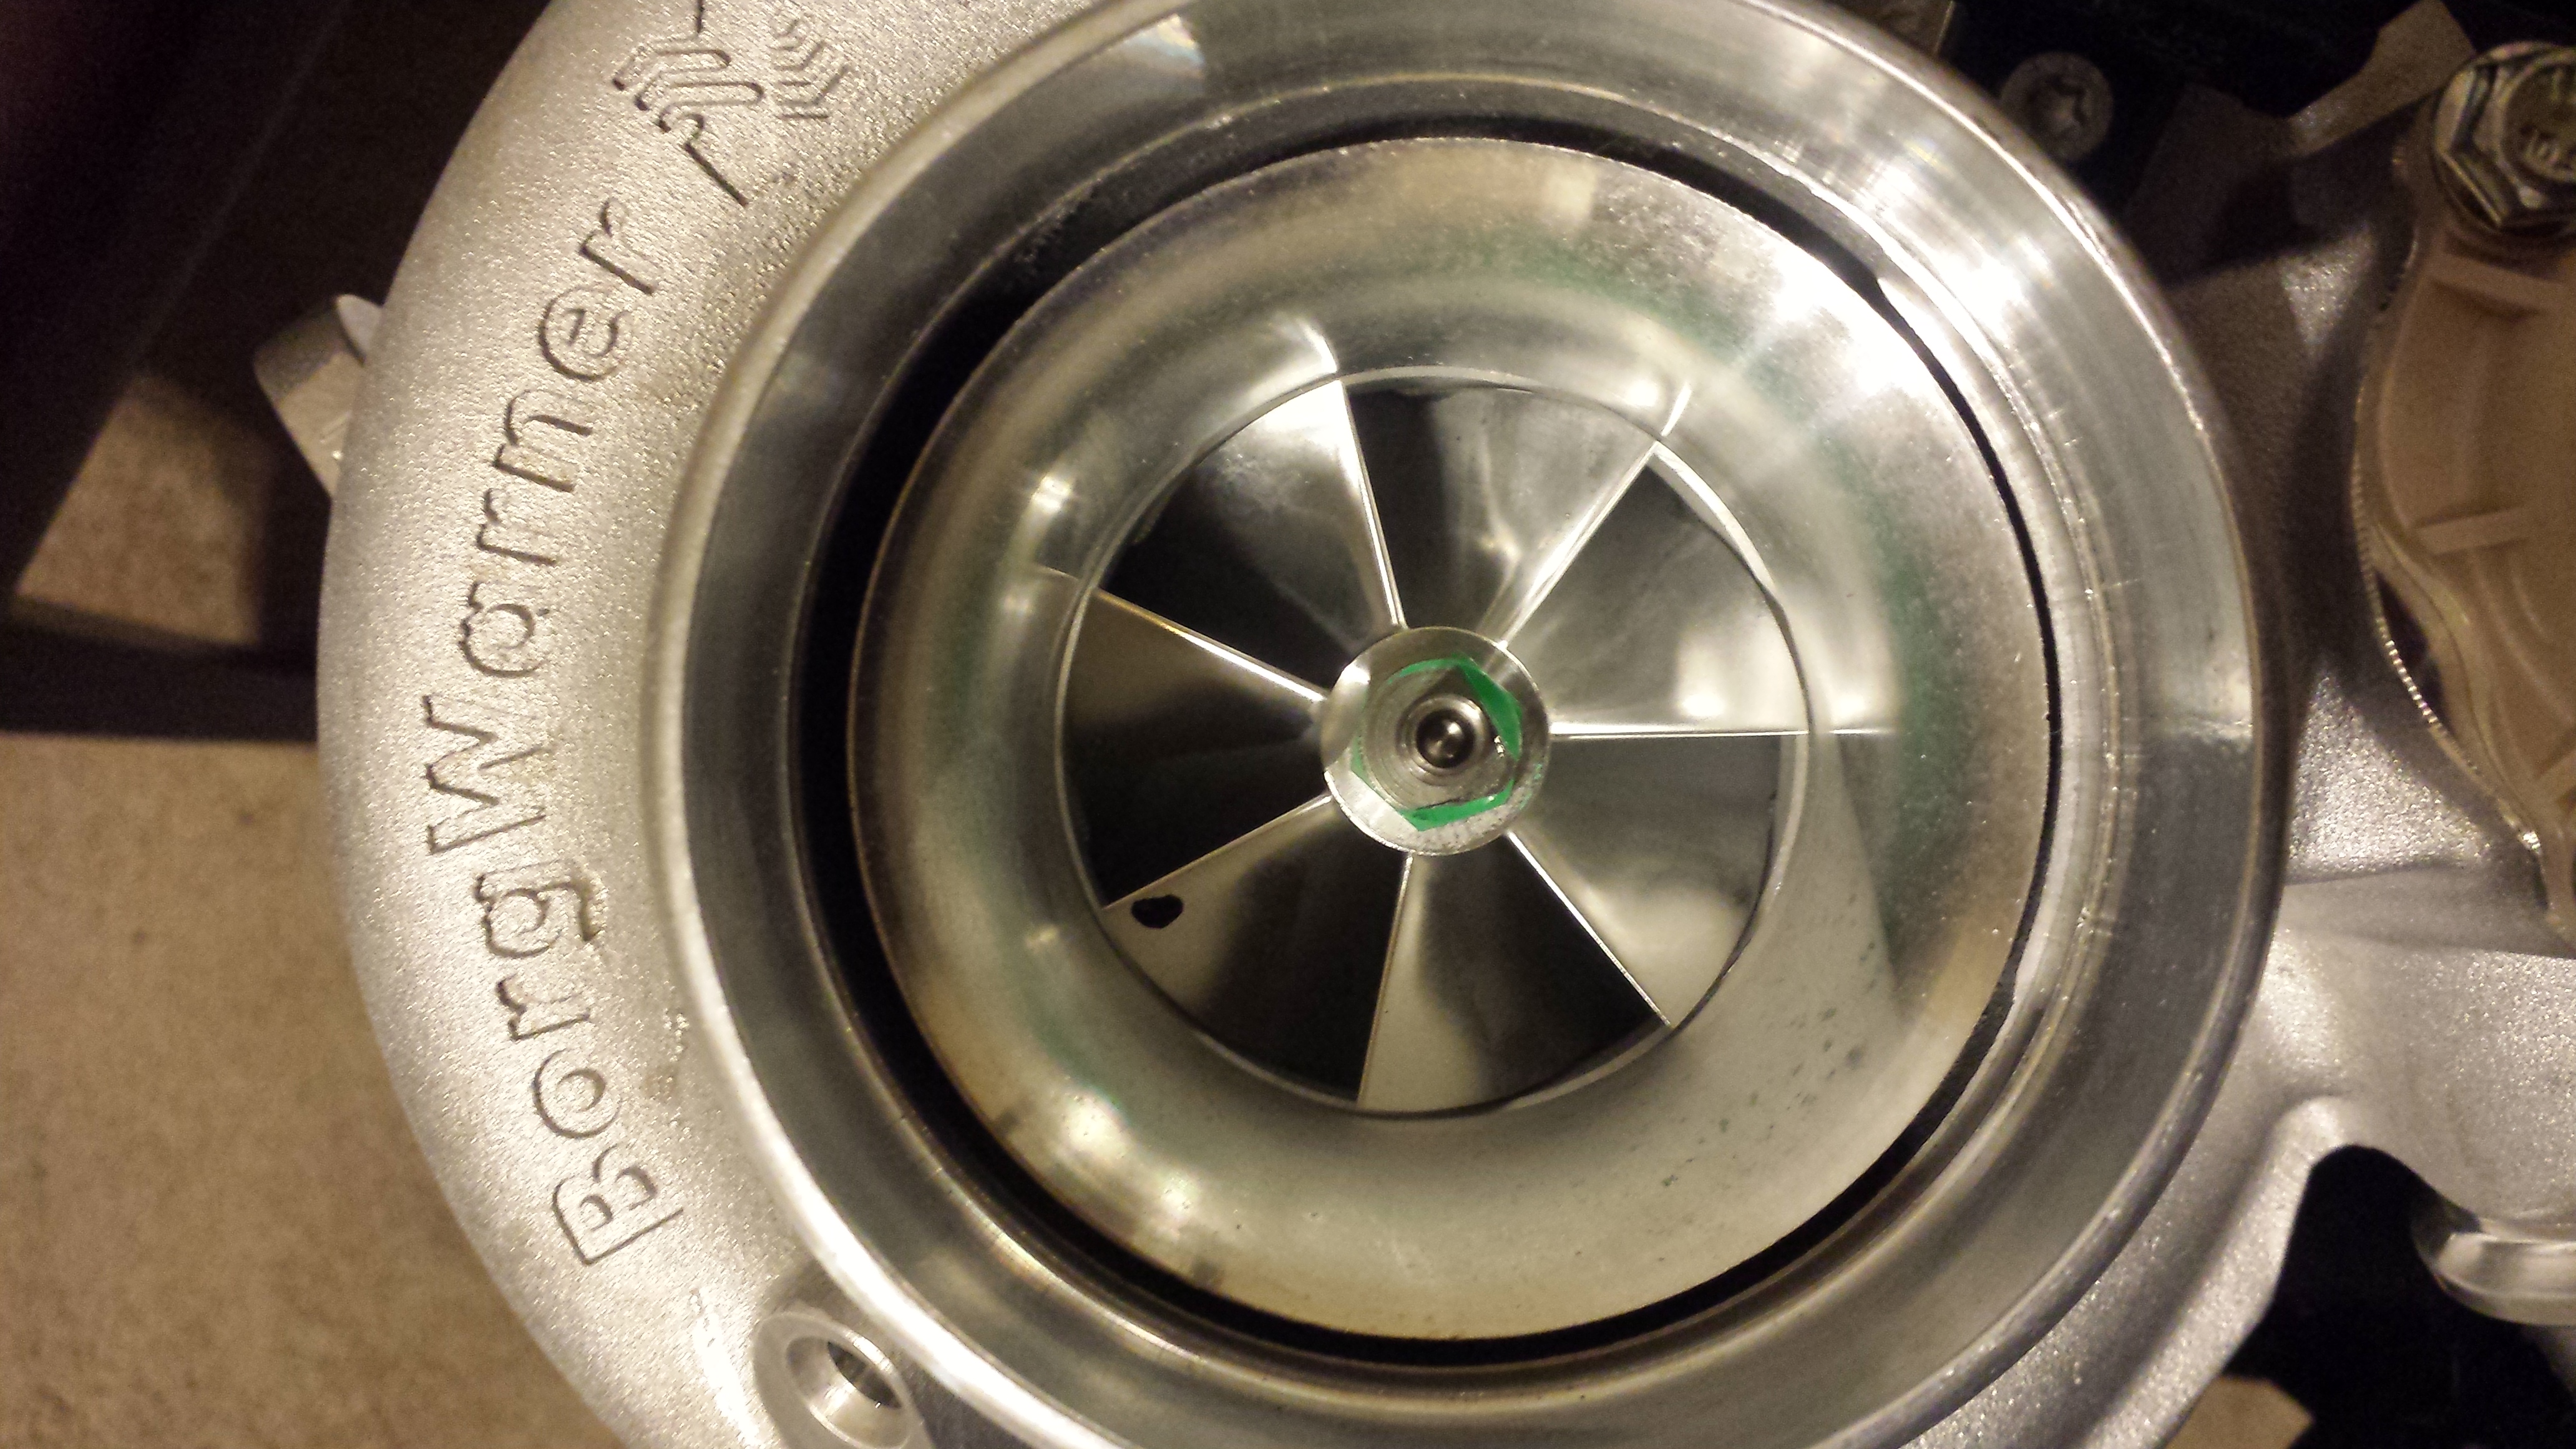
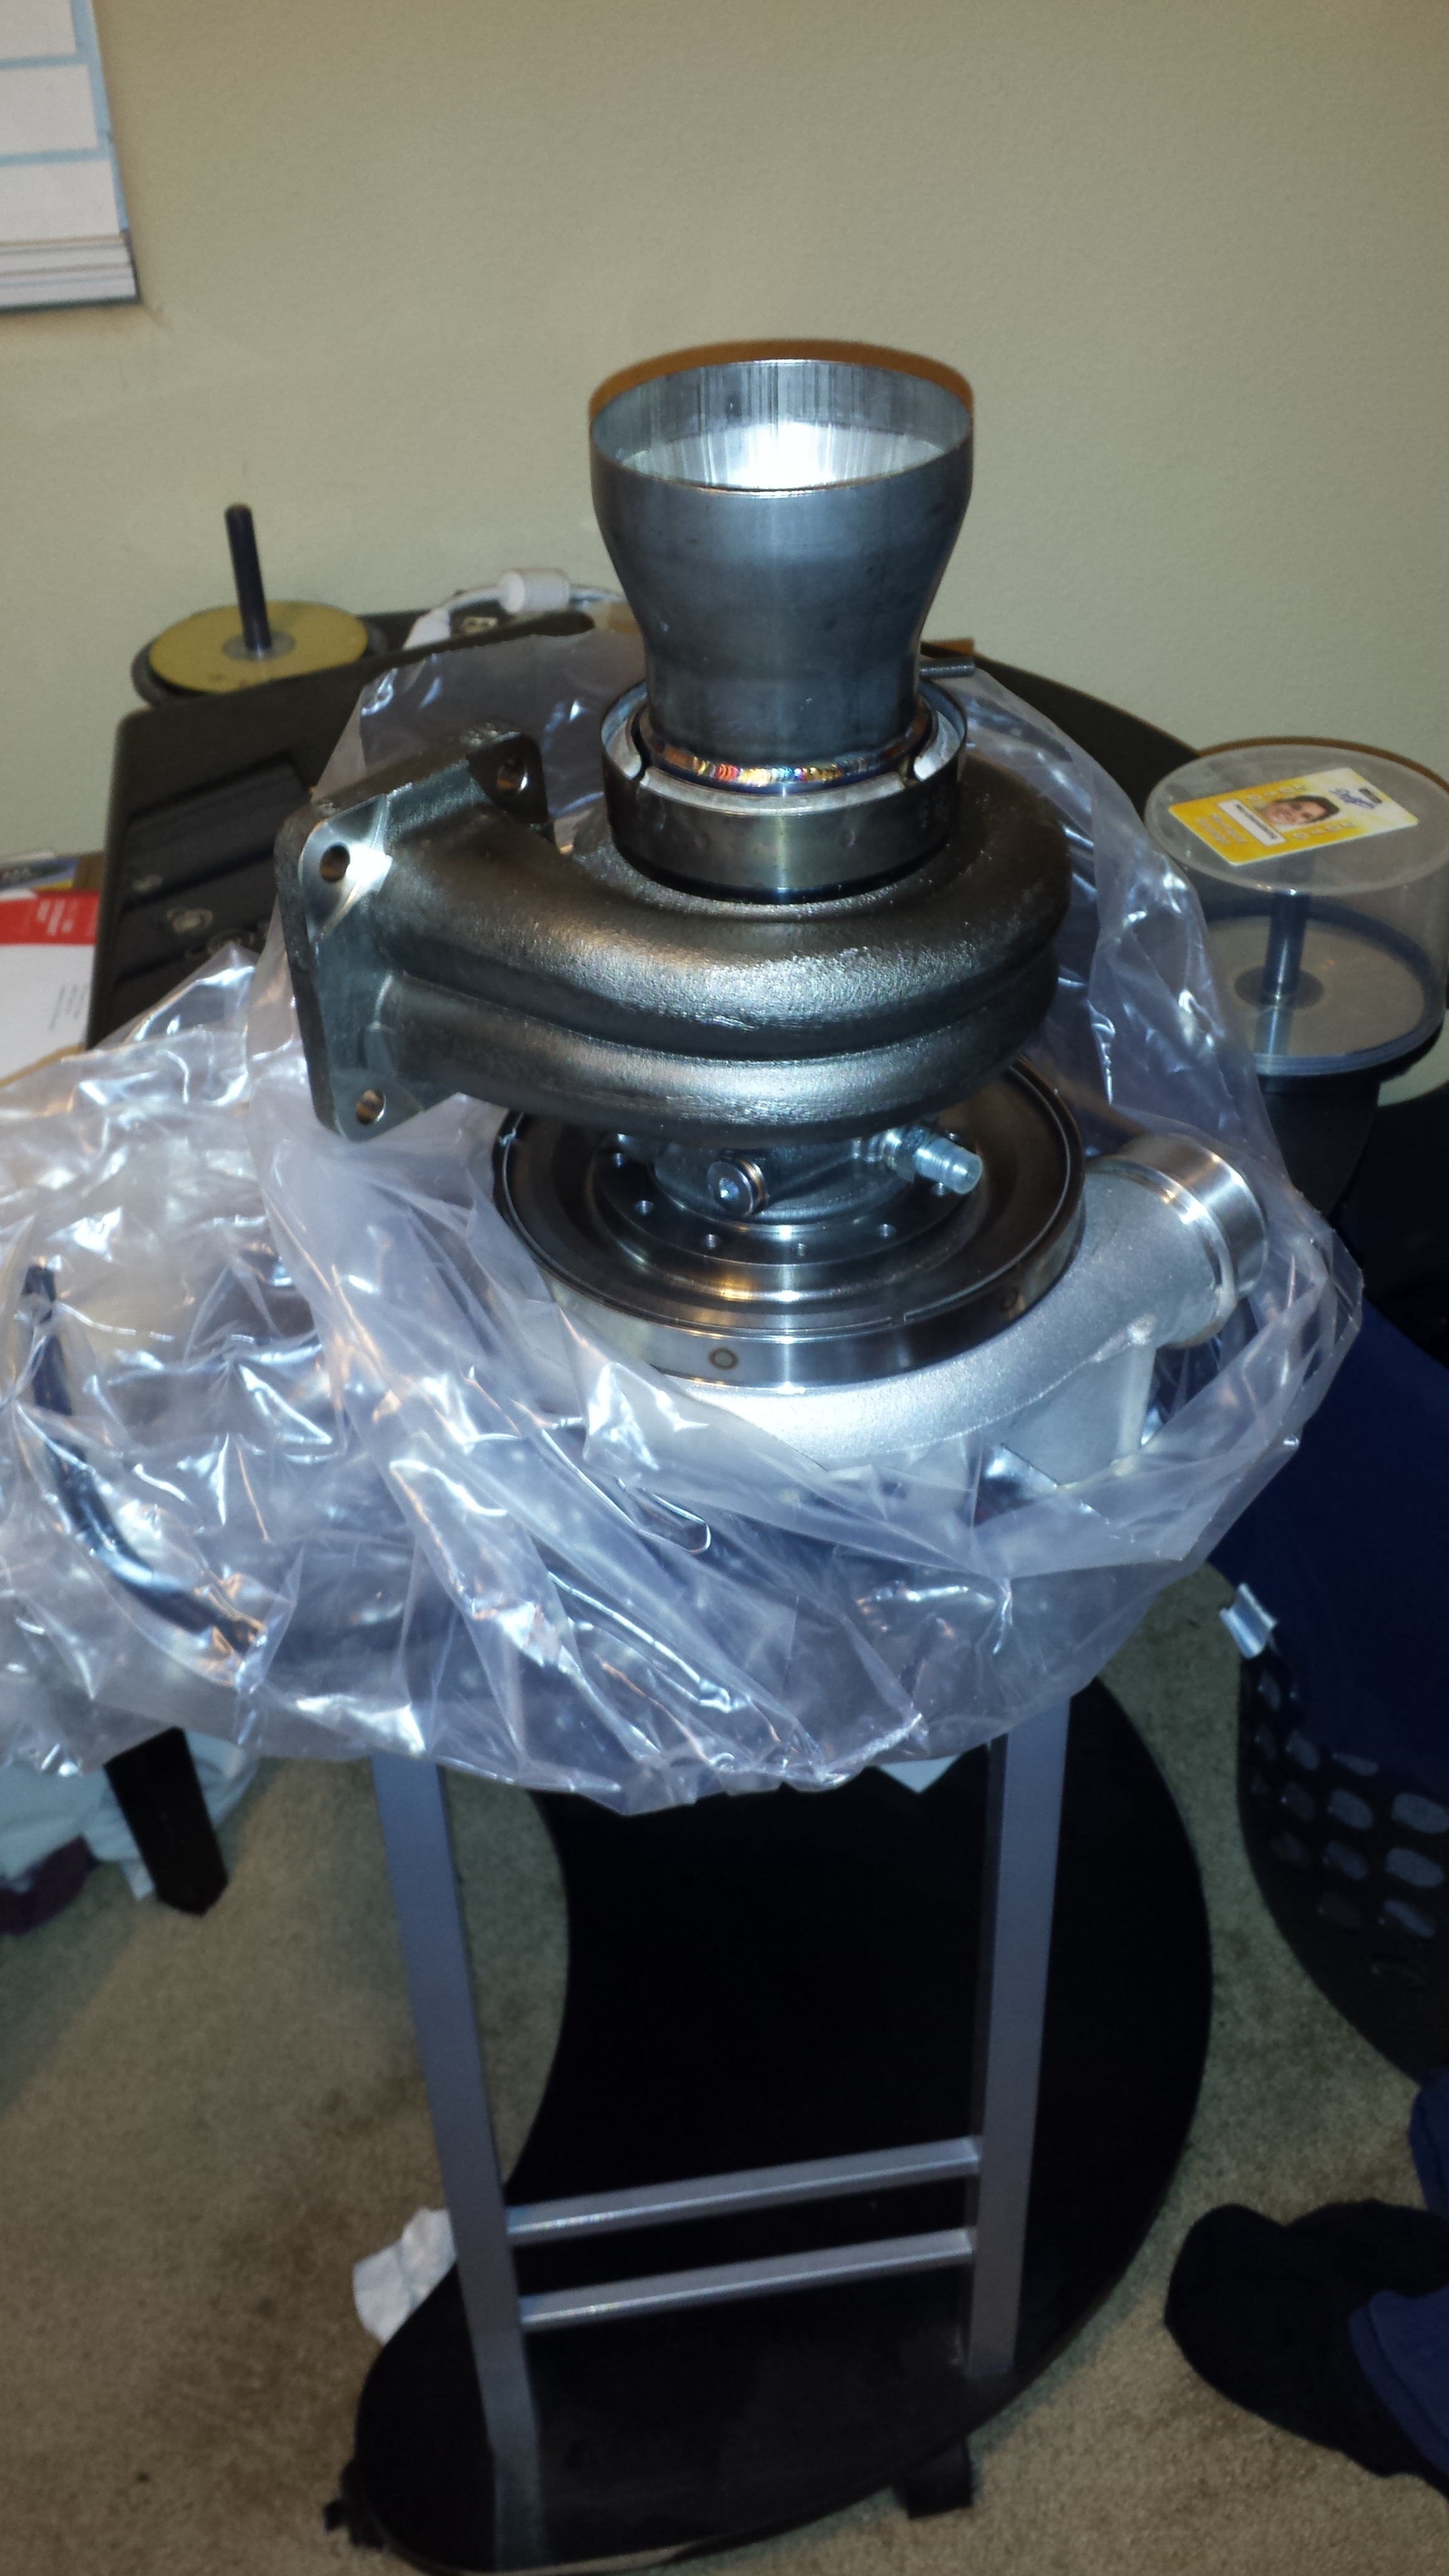
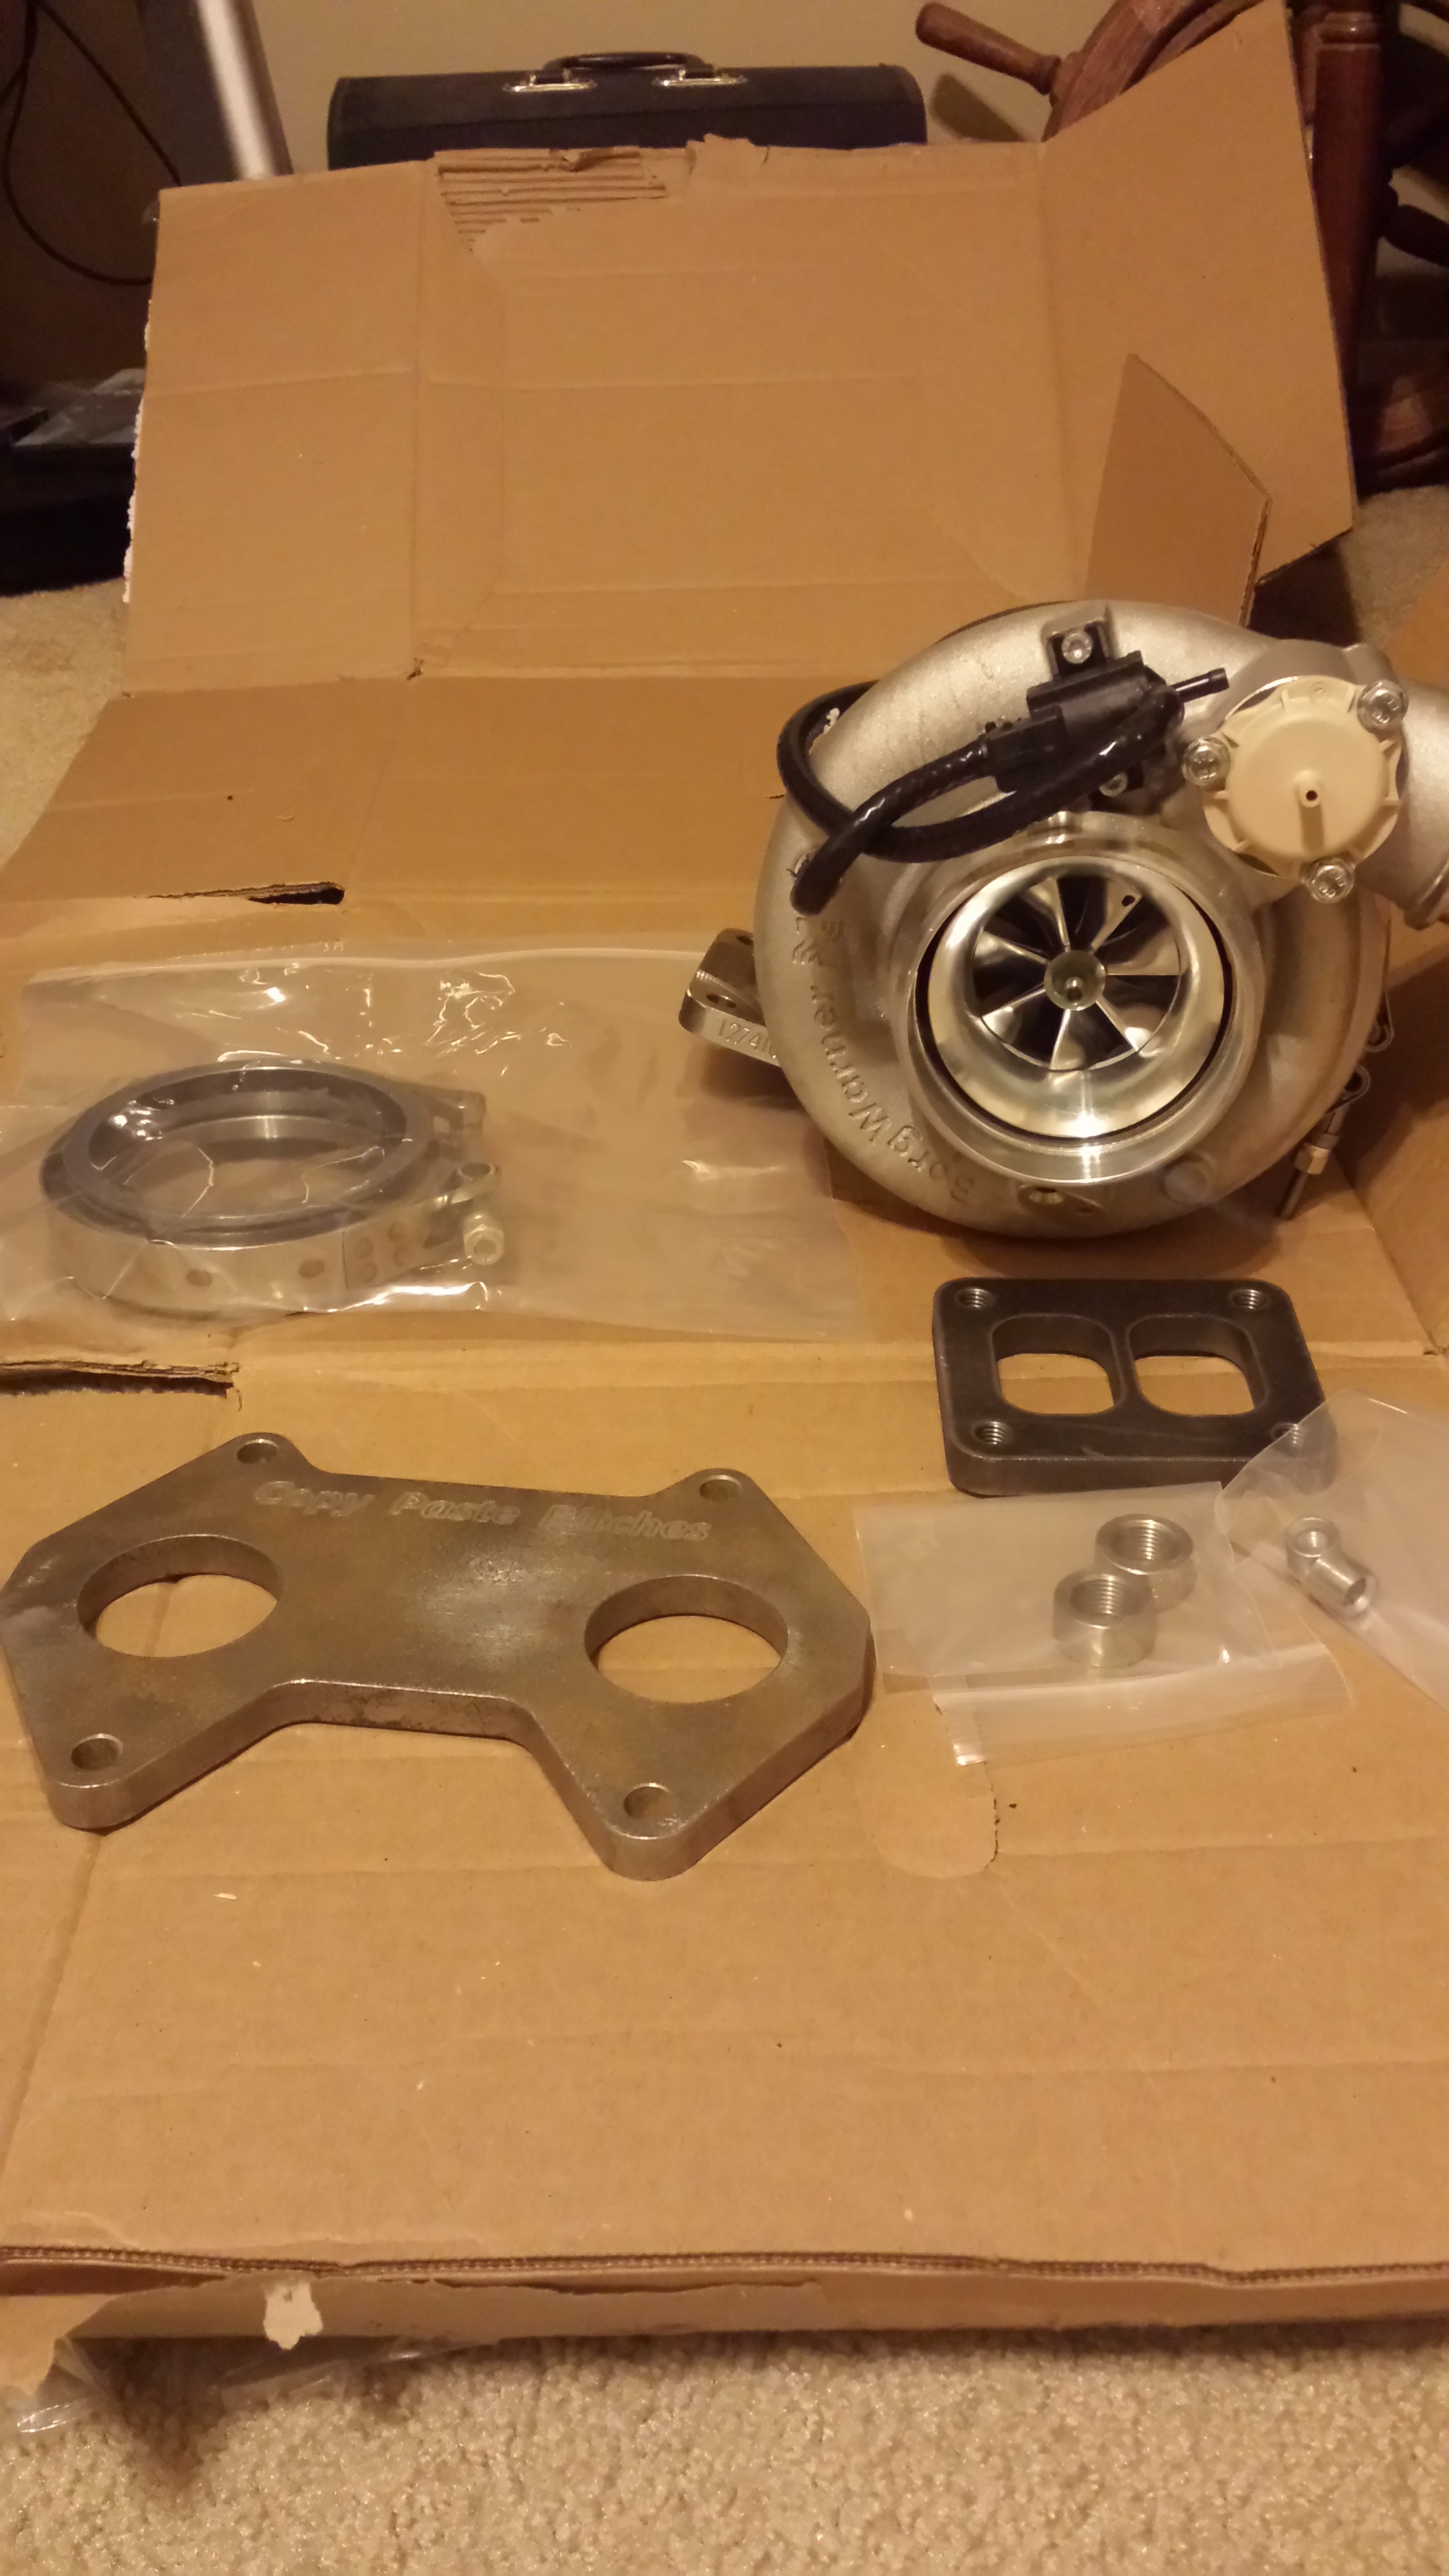
BorgWarner EFR 8374 1.05 A/R Externally Gated...LOL Couldn't step away from external gates...and figured the internal probly works great...but i just didn't want to be the test mule.
And I got in some tid-bits from ATP turbo...
a 3" to 4" transition..which has a flat spot in it... I was wondering why the hell they did that..but a buddy shed some light on the way...It's a machine weld.. so the machine probly needed a flat surface in order for it to be rotated (thanks Justin). So I'm going to cut it and have the flat section pulled out. It's un-necessary.
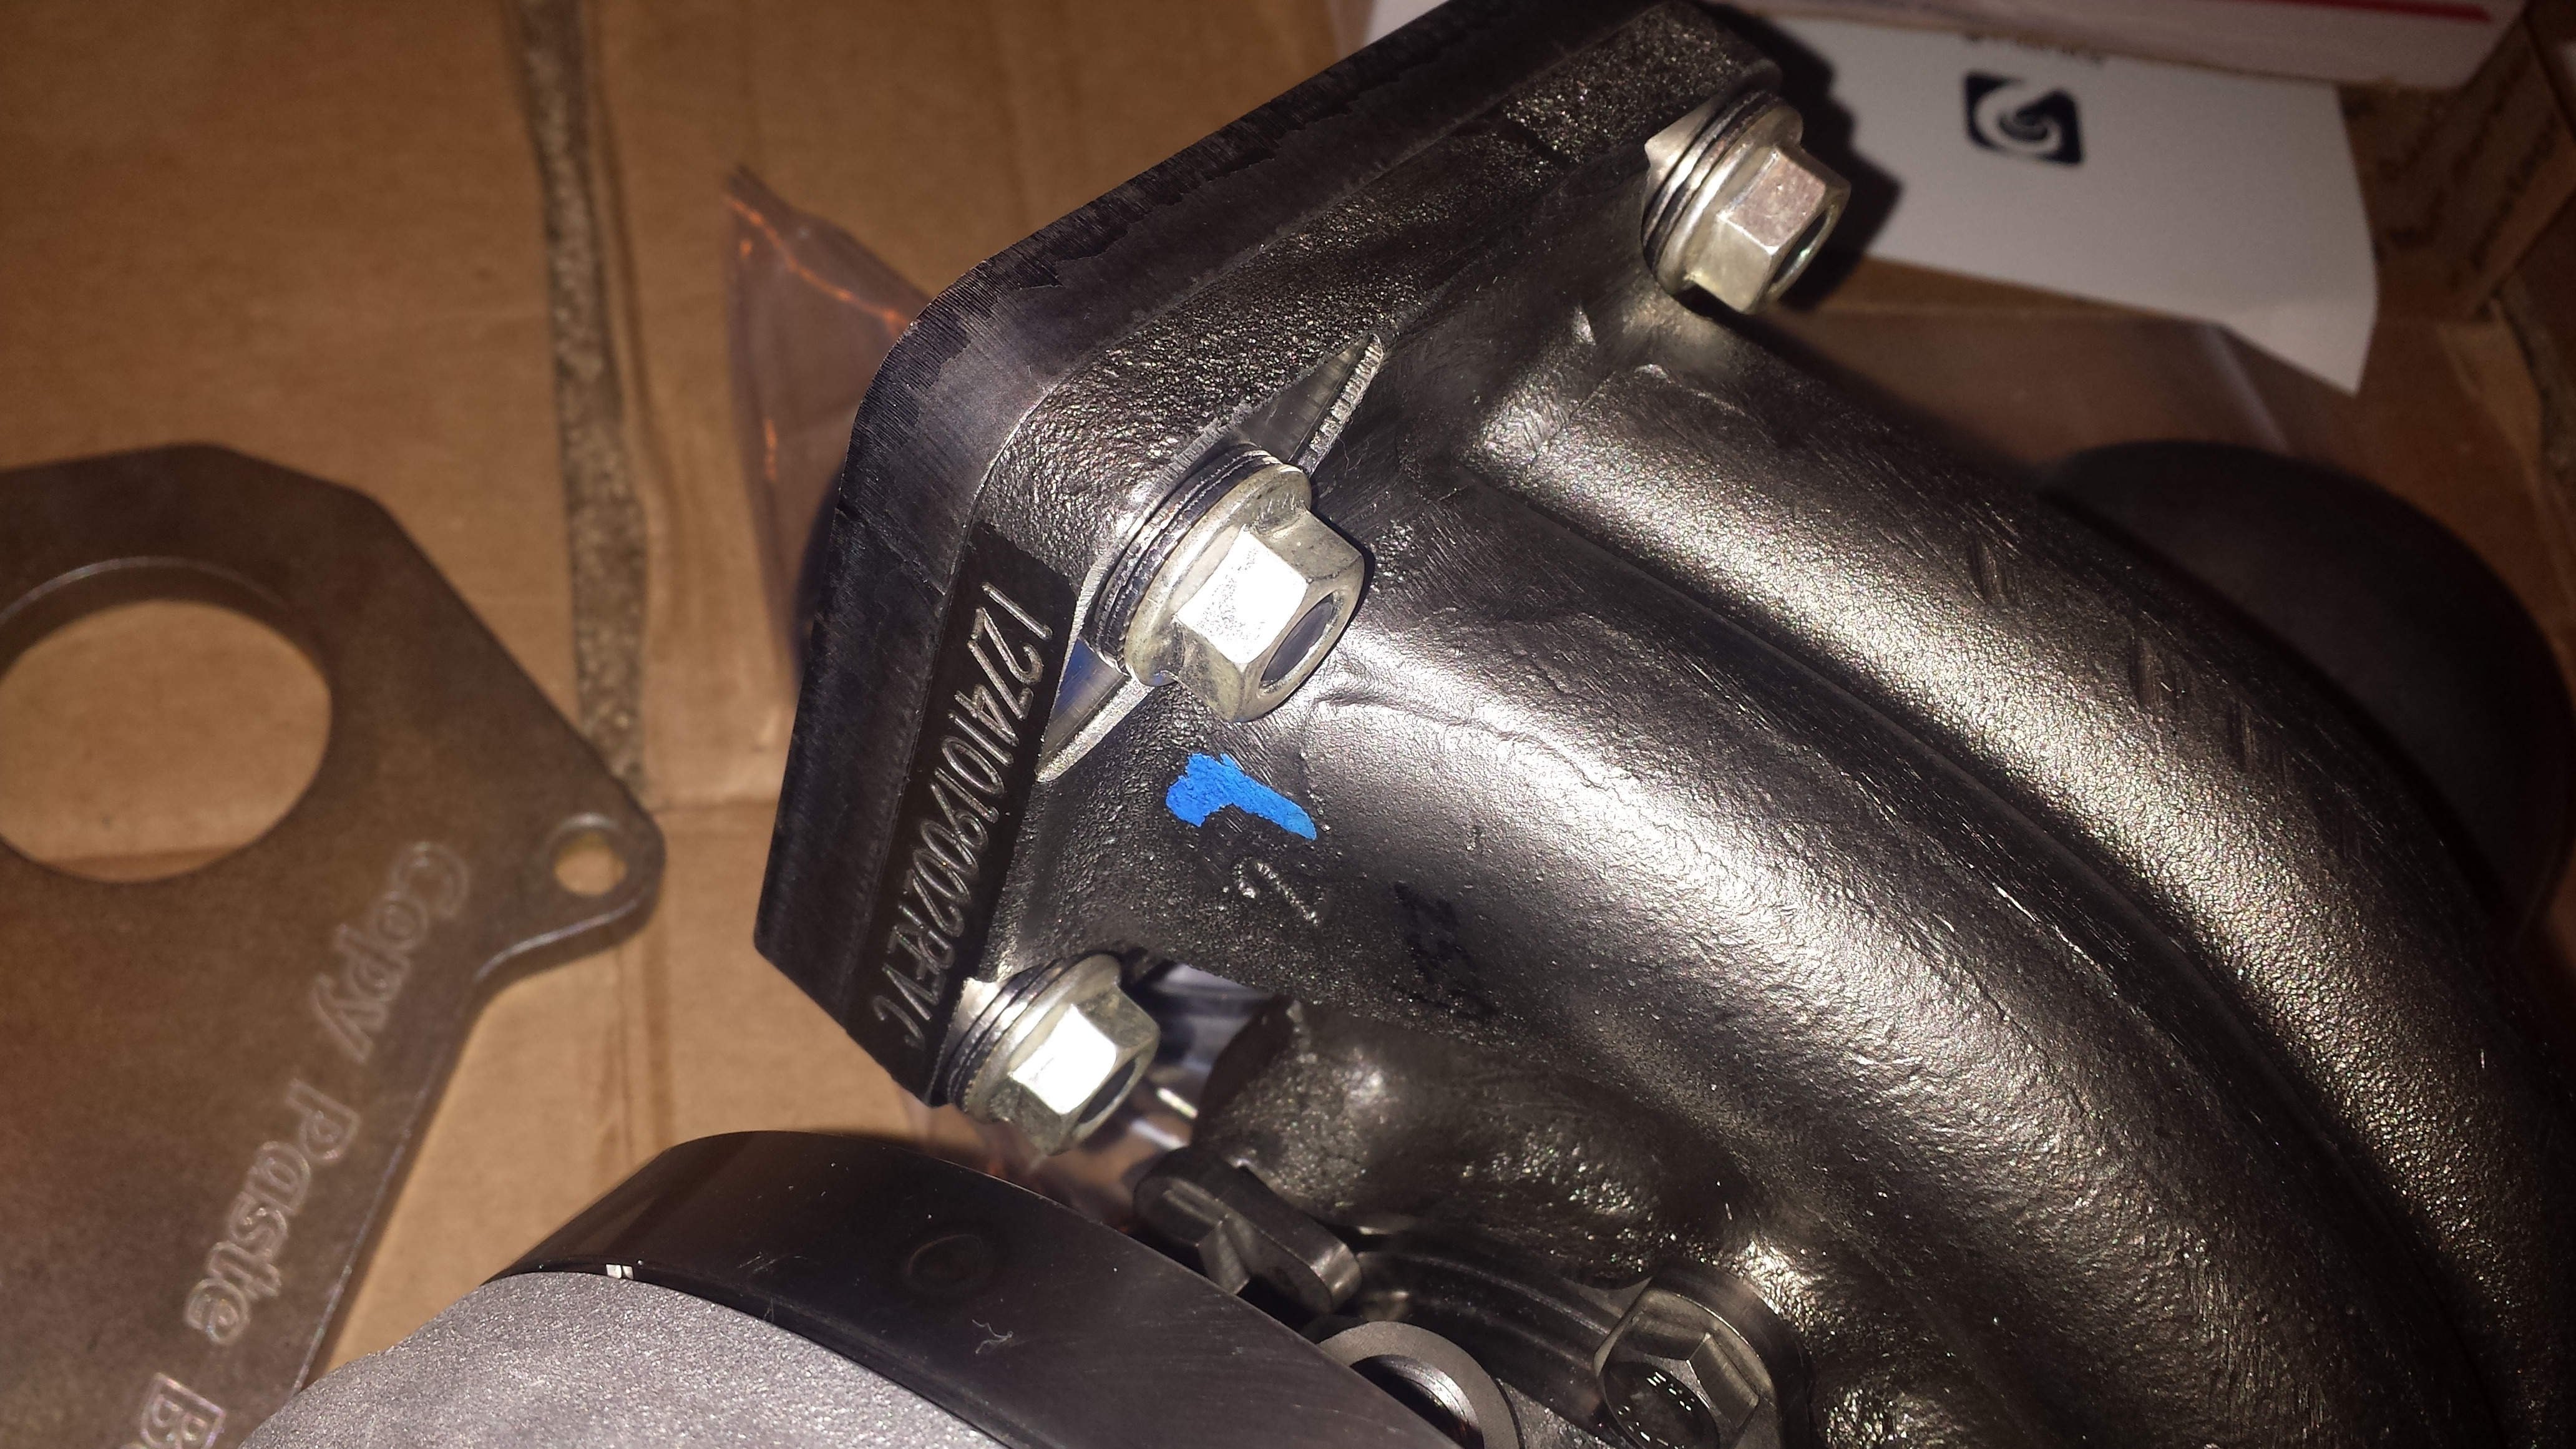
Also Got a T4 Divided Mild Steel Threaded Turbo flange. I like the idea of not having to worry about 8 Bolts, ...I like the idea of being able to have less hardware and not having to worry about the install or room to get nuts on etc Thats a pain. This way I have 4 studs and 4 Nuts. Buying the Full-Race INconel Hardware as well. Says you don't need anti-zeize but I'll most likely use it anyhow.
Along with 2x EGT Bungs and 2x Wideband Bungs, a 4" V-band Clamp set.... And just waiting on some Custom Pipe I ordered.
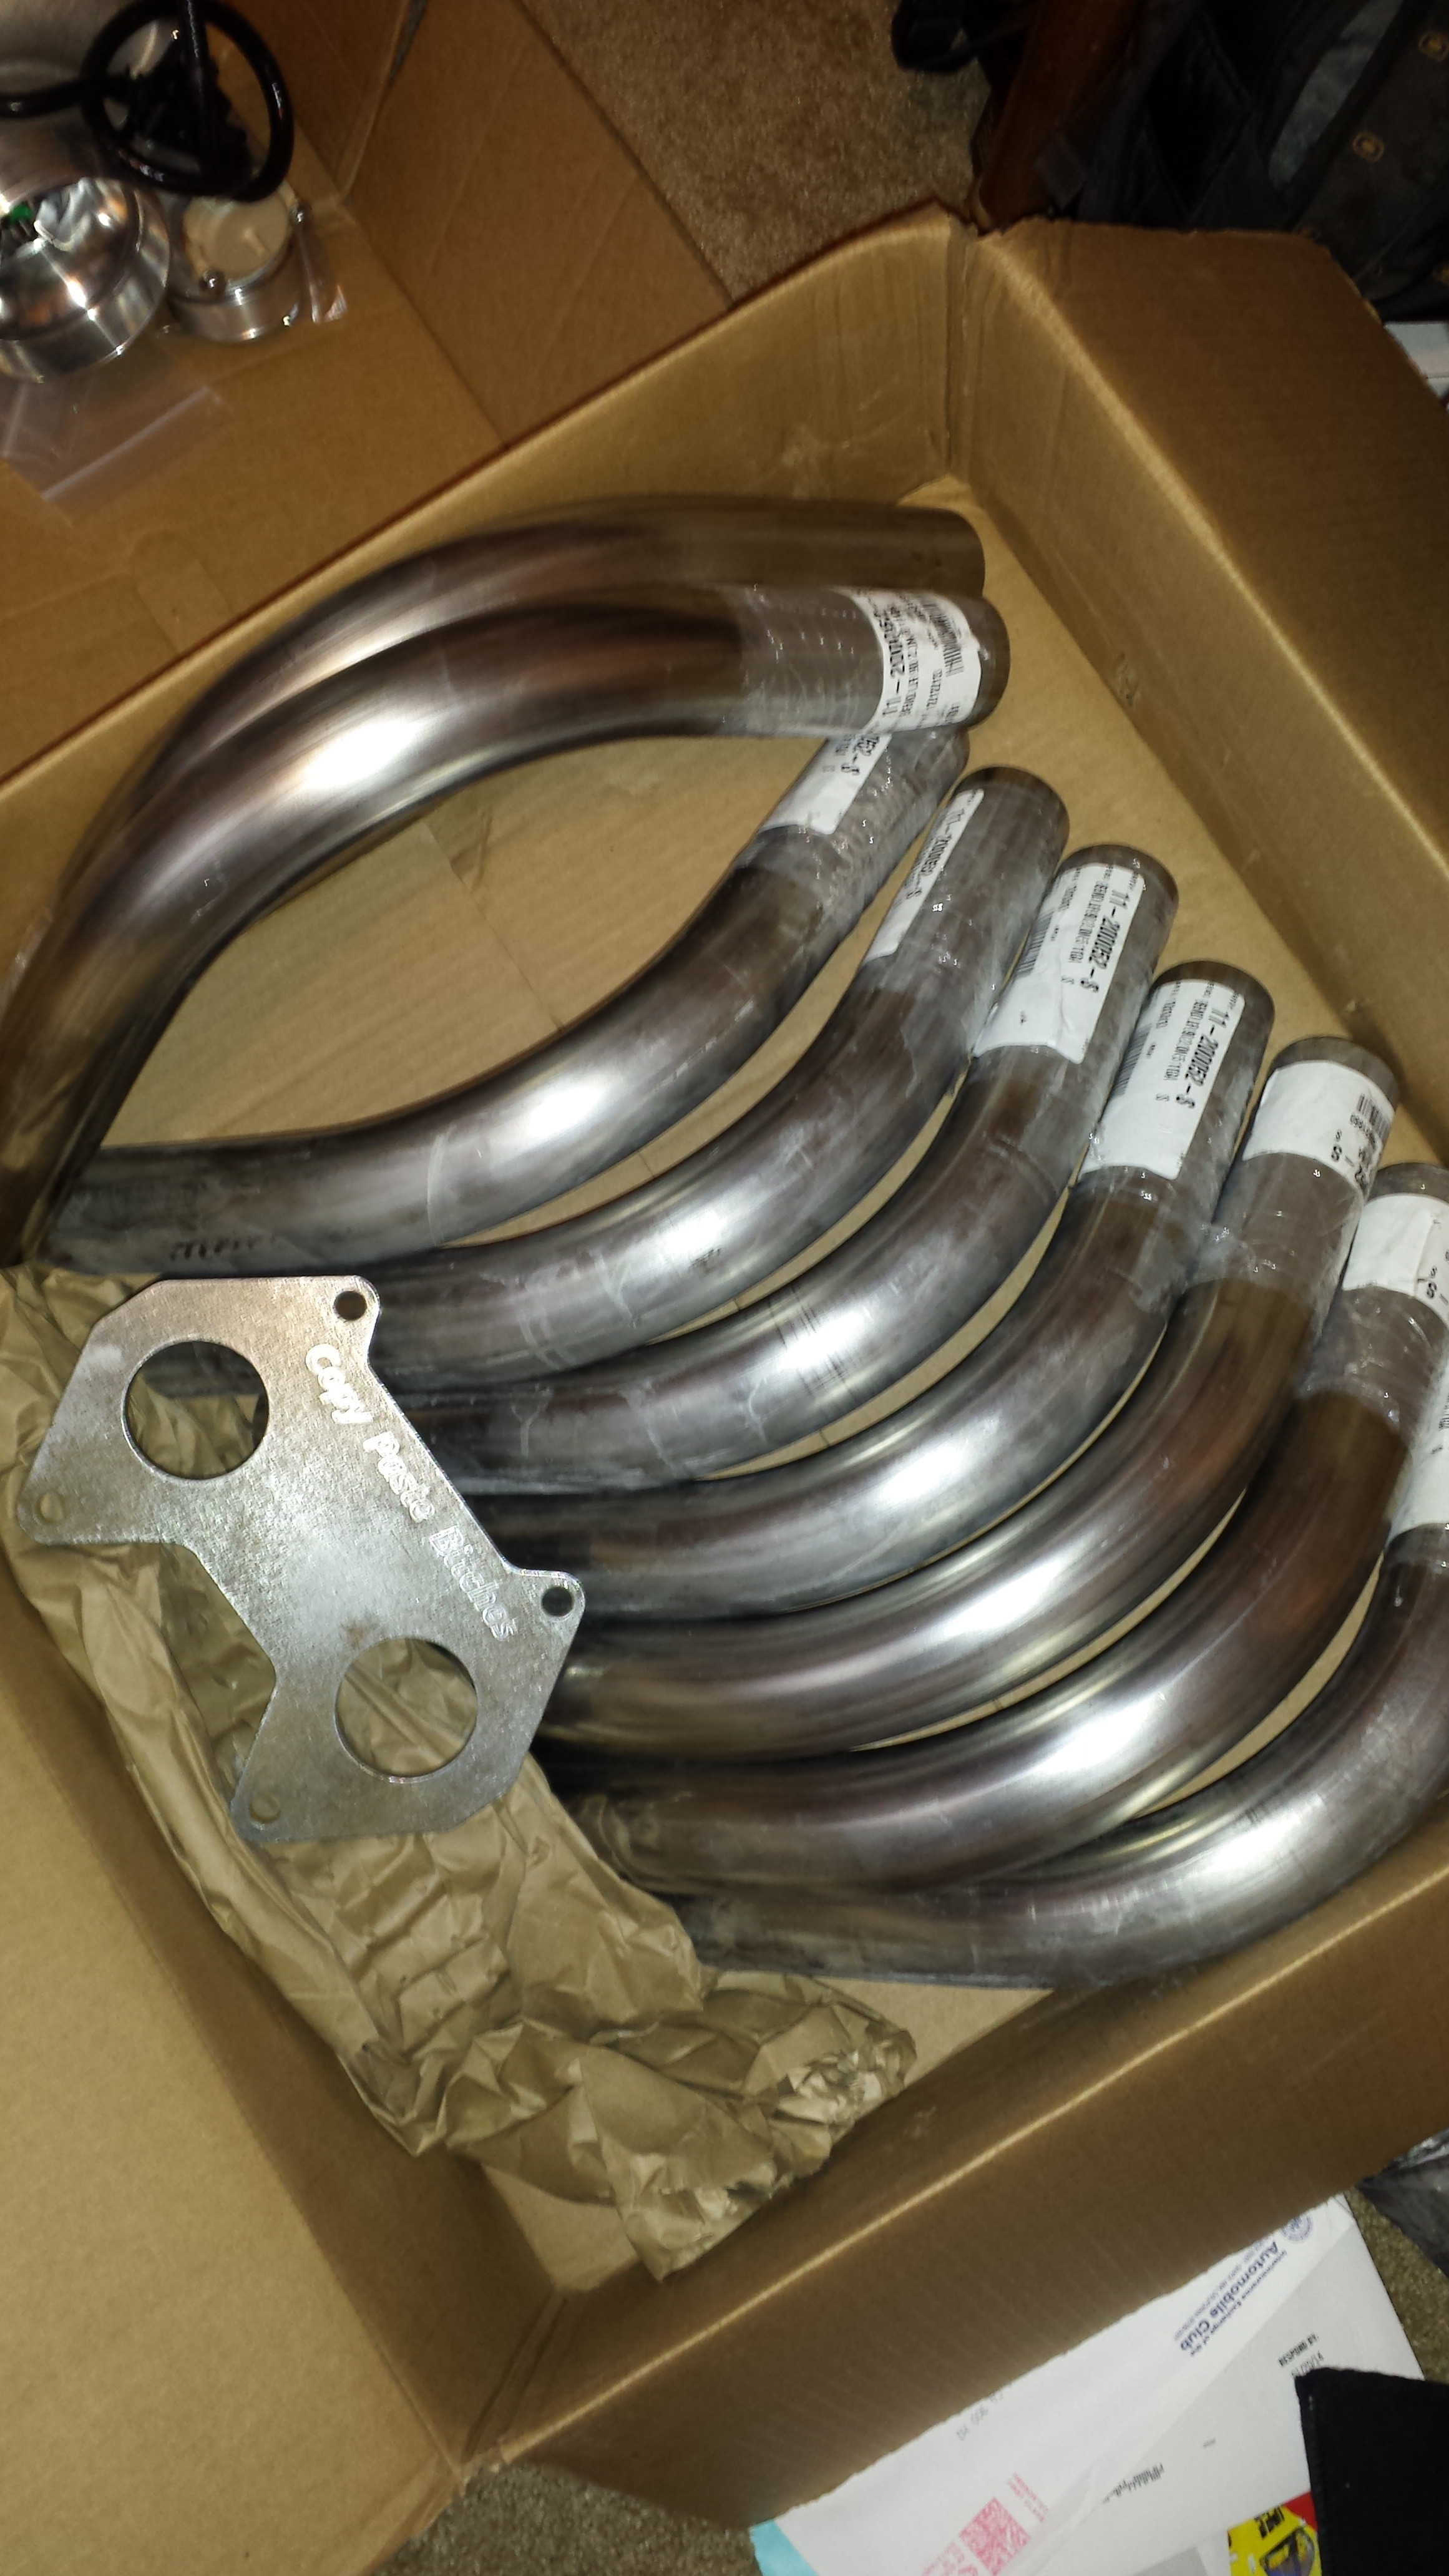
I ordered 2" .120 Wall 304 Stainless Steel 90 degree Bends...with two different CLR Measurements....6" Center line radius and 5" CLR. Inside Diameter will be 2.00 minus .240 (120-120) To equal 1.76 I.D. This should keep Exhaust Gas Velocity Up for a nice snappy responsive set up. Most of you guys would disagree but I've talked to people, and done a lot of research and a long runner manifold is the direction i'm going for sure. Taking advantage of exhaust gas Expansion to it's fullest...and still keeping heat inside has gotten me to shorten the overall length but i'm still keeping it at a target of about 18". I'll keep you guys updated with the build of the manifold when the material comes in...takes about 9 days for the order to ship after the bends are made.
Stay Tuned!!! Le'Wolfe Will breathe Fire again!
BorgWarner EFR 8374 1.05 A/R Externally Gated...LOL Couldn't step away from external gates...and figured the internal probly works great...but i just didn't want to be the test mule.
And I got in some tid-bits from ATP turbo...
a 3" to 4" transition..which has a flat spot in it... I was wondering why the hell they did that..but a buddy shed some light on the way...It's a machine weld.. so the machine probly needed a flat surface in order for it to be rotated (thanks Justin). So I'm going to cut it and have the flat section pulled out. It's un-necessary.
Also Got a T4 Divided Mild Steel Threaded Turbo flange. I like the idea of not having to worry about 8 Bolts, ...I like the idea of being able to have less hardware and not having to worry about the install or room to get nuts on etc Thats a pain. This way I have 4 studs and 4 Nuts. Buying the Full-Race INconel Hardware as well. Says you don't need anti-zeize but I'll most likely use it anyhow.
Along with 2x EGT Bungs and 2x Wideband Bungs, a 4" V-band Clamp set.... And just waiting on some Custom Pipe I ordered.
I ordered 2" .120 Wall 304 Stainless Steel 90 degree Bends...with two different CLR Measurements....6" Center line radius and 5" CLR. Inside Diameter will be 2.00 minus .240 (120-120) To equal 1.76 I.D. This should keep Exhaust Gas Velocity Up for a nice snappy responsive set up. Most of you guys would disagree but I've talked to people, and done a lot of research and a long runner manifold is the direction i'm going for sure. Taking advantage of exhaust gas Expansion to it's fullest...and still keeping heat inside has gotten me to shorten the overall length but i'm still keeping it at a target of about 18". I'll keep you guys updated with the build of the manifold when the material comes in...takes about 9 days for the order to ship after the bends are made.
Stay Tuned!!! Le'Wolfe Will breathe Fire again!


looks good... I suppose it's too late now but when I did my 4" downpipe I found that a 3" vband flange from vibrant is pretty much a press fit into 4" tube - makes for a MUCH shorter transition
Senior Member
Joined: Feb 2013
Posts: 273
Likes: 0
From: Fort Worth, TX.
Looking forward to seeing some results from the efr turbo, one day I want to take the plunge on one, but I think I will test out the internal wastegate. I like the idea that the efr turbo's include the wastegate and blowoff valve, essentially your saving your self a couple hundred dollars. Good luck with the build.
So yeah... we've had our (numerous) disagreements, but I've been looking at this thread the past day or two and when I came on the above post....
Sorry to hear about your motor man. Losing an engine that you've put so much time and effort into, so early in it's "life", really really sucks. I was in the same situation directly after DGRR this past spring, so I know your pain. I hope your next one survives longer!!!
Sorry to hear about your motor man. Losing an engine that you've put so much time and effort into, so early in it's "life", really really sucks. I was in the same situation directly after DGRR this past spring, so I know your pain. I hope your next one survives longer!!!
Yea I know man, I'm really just trying to completely forget about it... Is that even possible? damn shame. Thanks for the support

Small Update:
Little Bits and pieces that make the biggest difference.
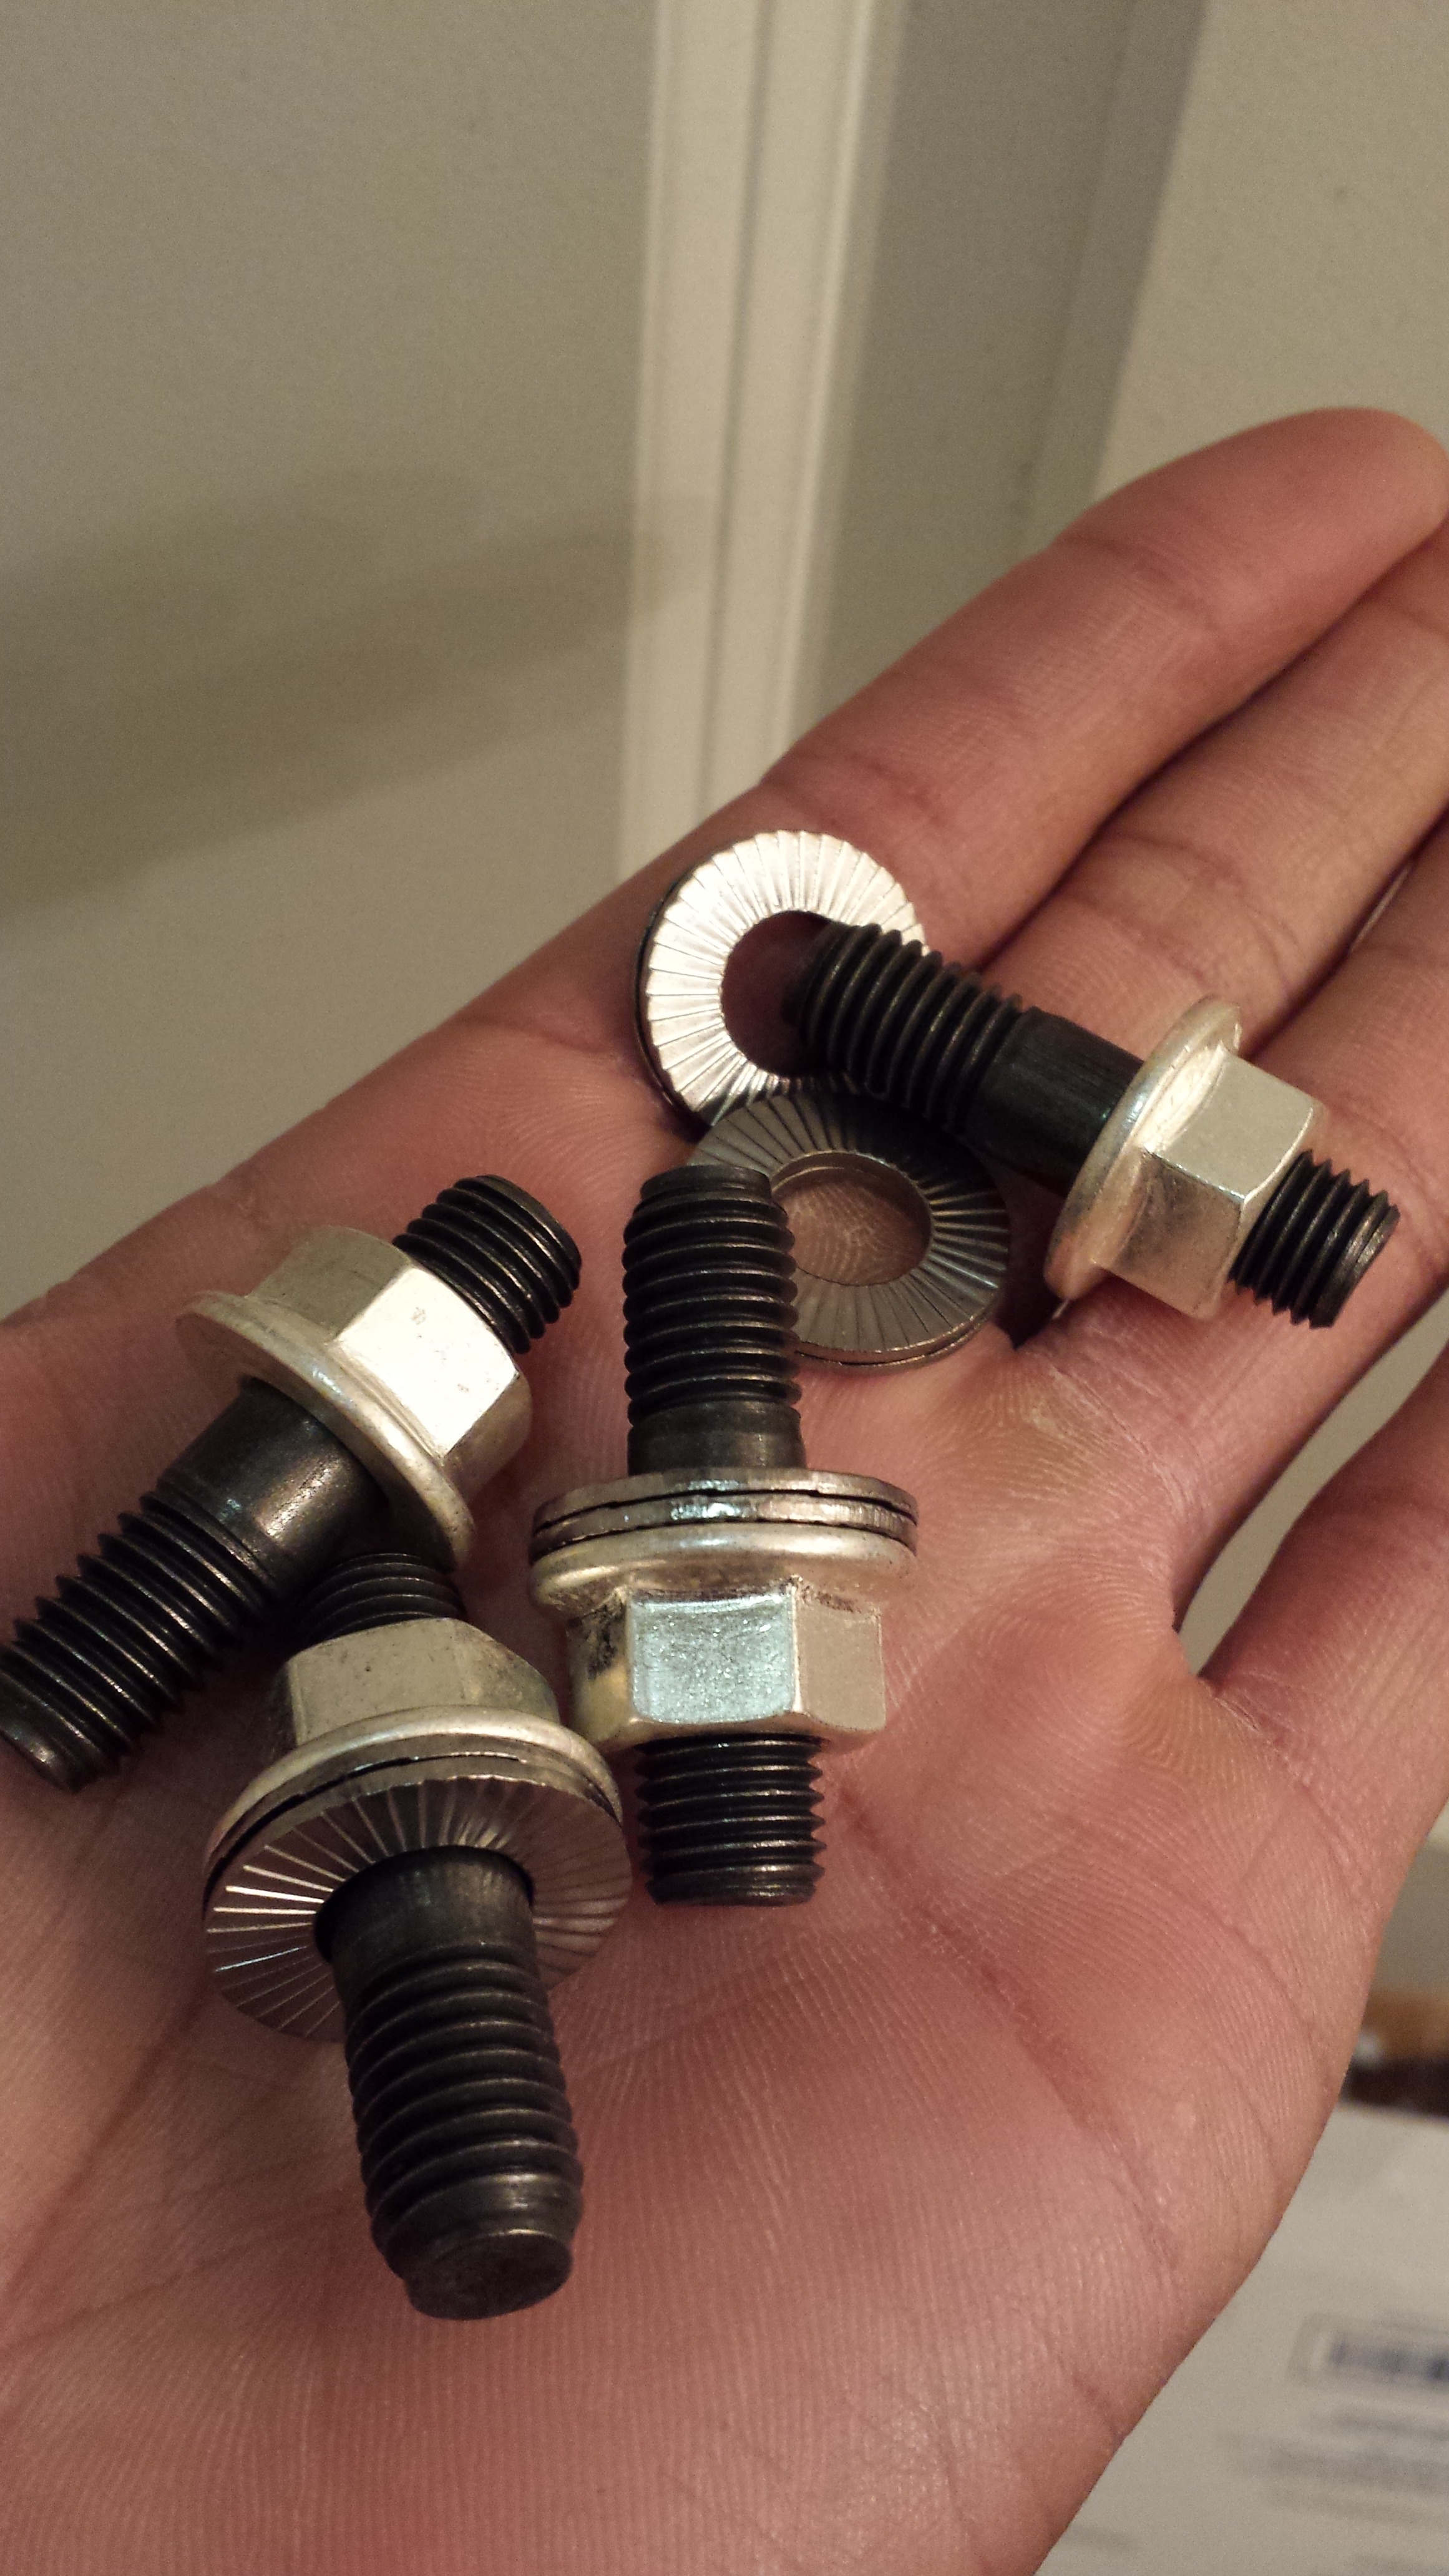
Got a set of Full-Race Inconel Nuts and high Grade Studs. I'm amped because I no longer have to deal with 8 bolt fasteners. I simply thread the studs into the flange and use the Inconel lock washers and nuts.

Little Bits and pieces that make the biggest difference.
Got a set of Full-Race Inconel Nuts and high Grade Studs. I'm amped because I no longer have to deal with 8 bolt fasteners. I simply thread the studs into the flange and use the Inconel lock washers and nuts.

^ none. The threads are different for the manifold flange (they're larger) and the turbo side has thinner threads for the Inconel nuts. this will insure the studs stay in on the mani side and I won't be messing with backing out probs etc.. Full-race really did a good job with this little kit.


Joined: Oct 2001
Posts: 6,279
Likes: 728
From: Florence, Alabama
really nice hardware Aaron. i am going to have to look at Geoff's kit for my manifolds. your motor is coming apart this aft so let's hope for minimal damage.
howard
howard
The Turbo hardware is excellent, I don't think you could go wrong with it. Seems like the bases are all covered
It came with them like that...glued together with a dot of adhesive.. the insides have different patterns on them and I'm assuming the insides with this pattern are to stay together in this configuration.
^ well there you go haha.
Update:
Salt in my wound....
a little damage
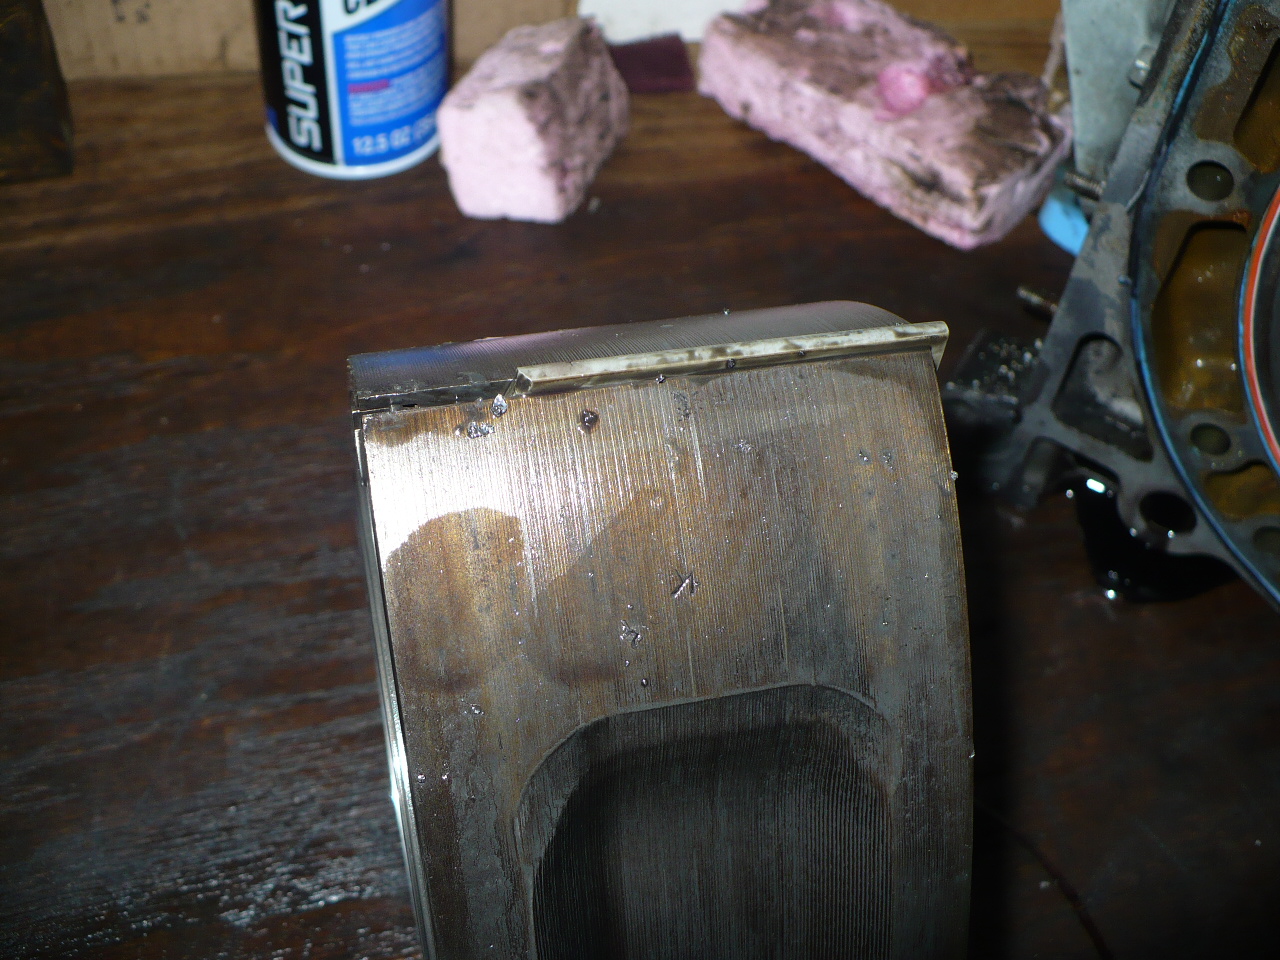
And good news is my custom Mandrel Bends came in!!...STAY POSITIVE!!! These should make for a much easier, cleaner, all around better manifold design. But I think I accidently ordered too much... didn't realize the Tangent length was as long as it was. The website said 2-4 inches..but they're all 4". I have enough 304 to make 3 manifolds haha. Anyone want to buy some good stainless?
Salt in my wound....
a little damage
And good news is my custom Mandrel Bends came in!!...STAY POSITIVE!!! These should make for a much easier, cleaner, all around better manifold design. But I think I accidently ordered too much... didn't realize the Tangent length was as long as it was. The website said 2-4 inches..but they're all 4". I have enough 304 to make 3 manifolds haha. Anyone want to buy some good stainless?
 how's the rest look? This thread is inspiring! Keep up the great work man
just get a set of E&J Seals for the new motor...pm me and I will hook you up
if you detonate really bad the worst you will do is warp a seal and not damage any internals or the turbo
if you detonate really bad the worst you will do is warp a seal and not damage any internals or the turbo

Sorry to hear about your troubles, but the outcome will
be well worth it. Making mistakes is what makes us stronger
smarter.
The only tip I can give you that will be the best route,
do not steere from the ceramics, install steel seals get the
engine going tune it all working perfect, pop engine remove steel
seals and install ceramics. Once you go that route. You will
come back and thank me.
Reason to why, you will learn and se why you
are doing the seal swap opening engine up and runing
with the ceramic.
Last tip, take your time don't rush it. The ceramic broke not because it's garbage,
hardware fault and lack of comen sense of tuner.
Ceramic are only installed after you have all your bugs delt with,
not in a new untuned engine.
Stick in there your project will be all you wanted it to be.
Thanks
Chip U
Happy Holidays And Have A Kick *** New Year!
Thanks Chip! thats some excellent advice! I'll need 3 more Ceramics but I'll keep my eye out for another set.

