Rotary-Works V-mount Install
 12-02-10, 02:26 PM
#1
Senior Member
Thread Starter
iTrader: (1)
Join Date: Oct 2003
Location: Atlanta, GA
Posts: 413
Likes: 0
Received 0 Likes
on
0 Posts
Rotary-Works V-mount Install
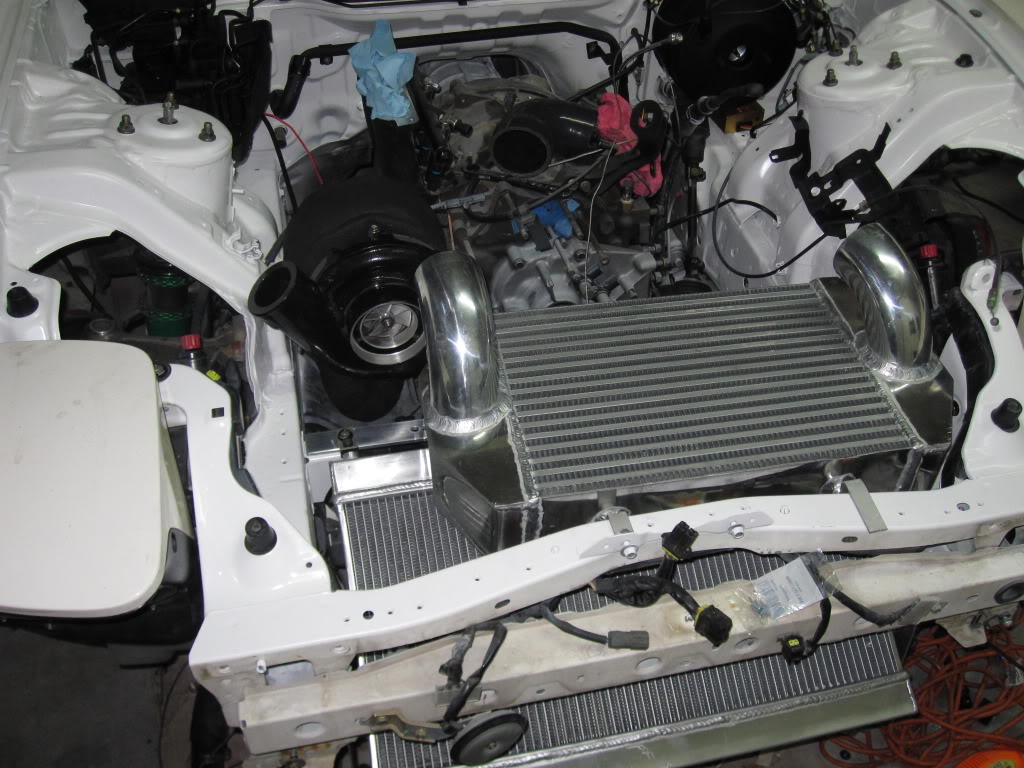
Installed the Rotary-Works vmount over the weekend. The kit looks very nice. Everything is polished, IC core and radiator are really thick. The IC core is so thick it makes me worry a bit about pressure drop, but we'll see...
This kit is really cheap, er, I mean inexpensive. It was packed well, but was woefully lacking any form of installation instructions. In fact, their is only one picture I could find of the kit installed, and it was from above not showing how anything was mounted.
When I did start trying to figure out where things went I noticed that none of the brackets that were sent would work without a little grinding. So be prepared to do a little modification if you plan on using this kit.
My pain, however, will be your gain if you choose to buy the kit. I took pictures of how it's mounted so no one else has to suffer the way my friends who helped me install it and I did... :-p

 12-02-10, 02:49 PM
#4
Senior Member
Thread Starter
iTrader: (1)
Join Date: Oct 2003
Location: Atlanta, GA
Posts: 413
Likes: 0
Received 0 Likes
on
0 Posts
I didn't take pictures at every step, but here are the general instructions:
Steps:
1. Have your AC system evaporated before you start as you have to remove the condensor.
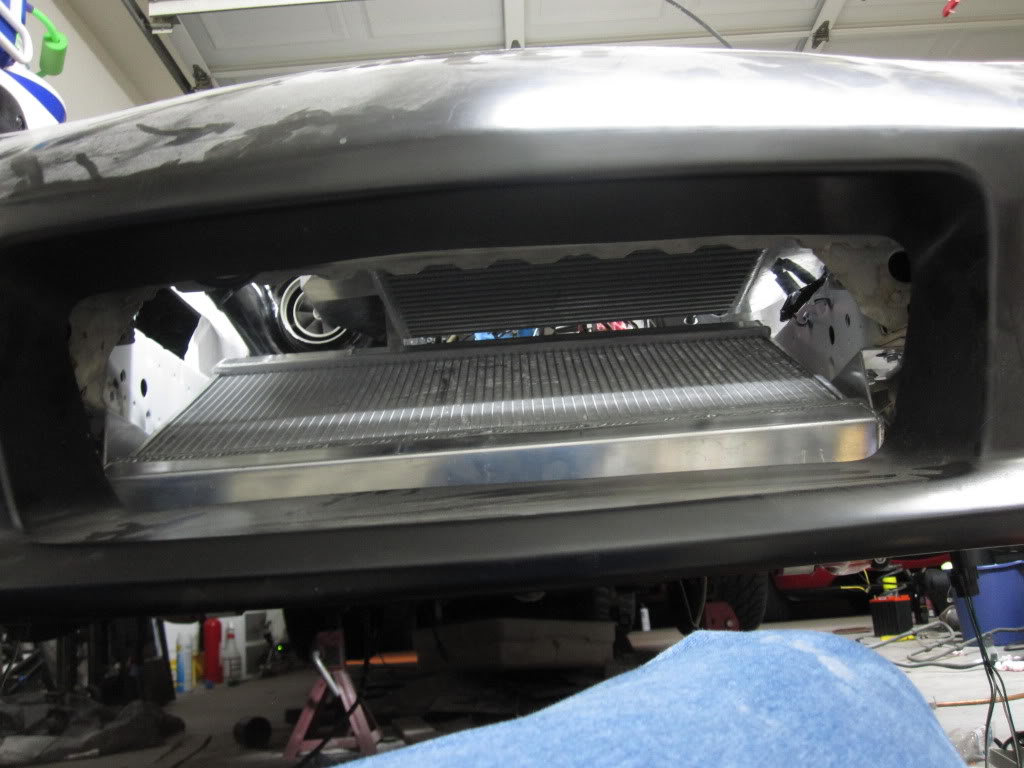
2. Remove your bumper.
3. Remove the snaking, S- shaped metal power steering tube/pipe. A lot of PS fluid will come out so you should get something to catch it before disconnecting the rubber hose from the metal line.
4. Remove the AC condensor, and radiator. I am pretty sure I removed the AC condensor first, but I don't remember. It's pretty straightforward.
6. Remove the cross bar that connects the frame rails.
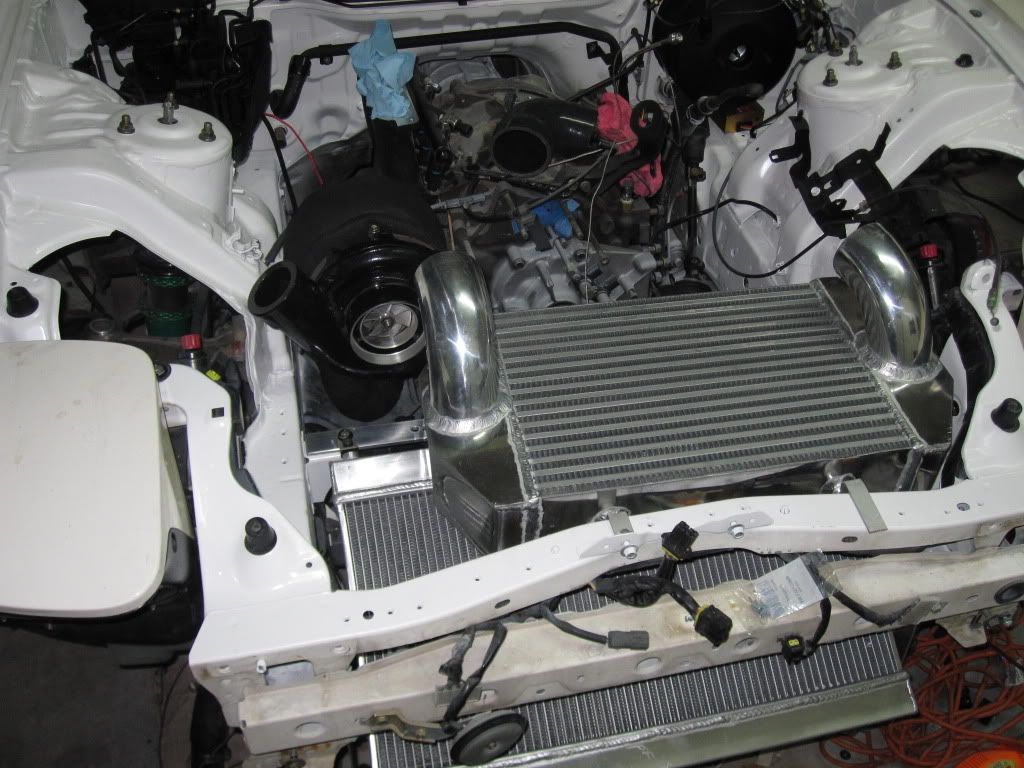
7. Replace it with the shiny metal piece they provide. Refer to the pictures to see the correct orientation.
8. Mount the brackets as shown in the pictures. She short brackets hold the top of the radiator, the long brackets hold the base of the intercooler. The large L-bracket with 4 holes across the top mounts next to the hood latch. All brackets required some modification so test fit first to see if you need to remove any material.
9. Mount the L-brackets on the bottom of the frame rails. IMPORTANT: They do not ship the correct size screws. You will need 2 m10X1.25 screws for the passenger side, and 2 m8X1.25 or M6X1.00 (can't remember) for the driver's side. You'll also need large washers to hold the bracket.
10. The radiator outlets point down at the ground.
11. I bought a hand full of
I need to move the relay box as well as their is no longer room for it. Next will be finding radiator hoses, getting new hose and reconnecting the power steering lines, and figuring out how on earth I'm going to mount the AC condenser to this new radiator.
I'd also like to find some rubber grommets to isolate vibration. I am not sure if I mentioned it previously but they don't ship the correct screws. I had to take a trip to Home Depot to find the correct ones. You will likely have to do the same as I lost the receipt that had the screw sizes on it, and my car lives an hour south of where I do.
Steps:
1. Have your AC system evaporated before you start as you have to remove the condensor.
2. Remove your bumper.
3. Remove the snaking, S- shaped metal power steering tube/pipe. A lot of PS fluid will come out so you should get something to catch it before disconnecting the rubber hose from the metal line.
4. Remove the AC condensor, and radiator. I am pretty sure I removed the AC condensor first, but I don't remember. It's pretty straightforward.
6. Remove the cross bar that connects the frame rails.
7. Replace it with the shiny metal piece they provide. Refer to the pictures to see the correct orientation.
8. Mount the brackets as shown in the pictures. She short brackets hold the top of the radiator, the long brackets hold the base of the intercooler. The large L-bracket with 4 holes across the top mounts next to the hood latch. All brackets required some modification so test fit first to see if you need to remove any material.
9. Mount the L-brackets on the bottom of the frame rails. IMPORTANT: They do not ship the correct size screws. You will need 2 m10X1.25 screws for the passenger side, and 2 m8X1.25 or M6X1.00 (can't remember) for the driver's side. You'll also need large washers to hold the bracket.
10. The radiator outlets point down at the ground.
11. I bought a hand full of
I need to move the relay box as well as their is no longer room for it. Next will be finding radiator hoses, getting new hose and reconnecting the power steering lines, and figuring out how on earth I'm going to mount the AC condenser to this new radiator.
I'd also like to find some rubber grommets to isolate vibration. I am not sure if I mentioned it previously but they don't ship the correct screws. I had to take a trip to Home Depot to find the correct ones. You will likely have to do the same as I lost the receipt that had the screw sizes on it, and my car lives an hour south of where I do.
12-02-10, 08:26 PM
#7
Retired Moderator, RIP
iTrader: (142)
Join Date: Sep 2005
Location: Smiths Falls.(near Ottawa!.Mapquest IT!)
Posts: 25,581
Likes: 0
Received 131 Likes
on
114 Posts
QUOTE: "It was packed well, but was woefully lacking any form of installation instructions"
They do Seems to think that you should be able to Put stuff on the car through Telepathy.
I got a Pulley kit that had absolutely ZERO instructions..The fitment Is Crap and the belt Was too Small..
I was able to Get it on after buying another Belt($55 CDN).No Thanks to them,at all.
I'm glad you could install your parts.
It's Kind of Sad that they have good stuff but they won't take the time to make instructions.
Trending Topics
12-03-10, 06:16 PM
#10
Word of advice... Air will rush through the path of least resistance. You need to block that massive gap in between the IC and radiator or your cooling will be severely hindered... You want to make it so that air has no choice but to go through the IC and radiator. So block off the middle, sides and top. One exception is if you can feed your air intake to a place to receive fresh air.
12-04-10, 09:37 PM
#11
Full Member
iTrader: (1)
Join Date: Oct 2008
Location: Mesa, AZ
Posts: 67
Likes: 0
Received 0 Likes
on
0 Posts
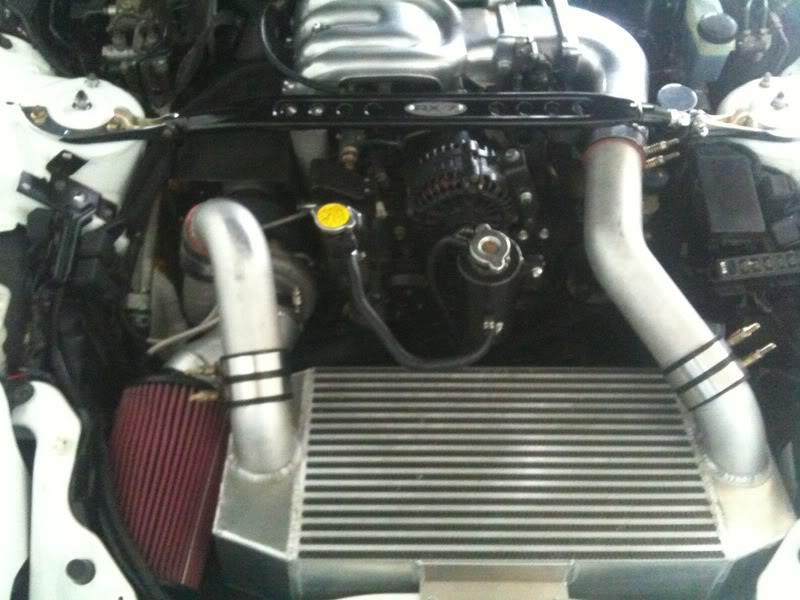
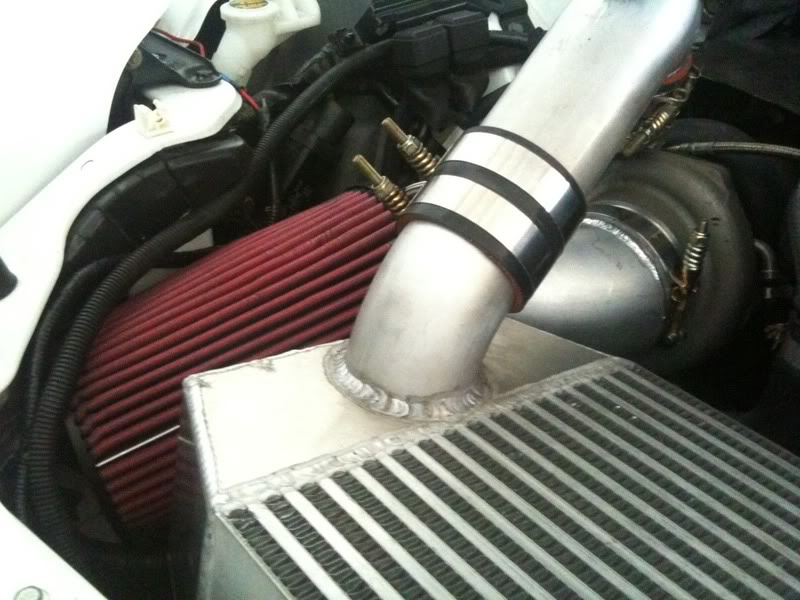
Here's my setup:
I'm shifting the intercooler over toward the driver side to give me gobs of room for a ram/cold air intake for the turbo (my manifold sits the turbo pretty far forward). Pretty easy to do this tweak with this kit if you have some aluminum from Ace Hardware, a vice to bend some new brackets, and a drill.
I'm planning on a fiberglass project to clean up the air gaps and to also make a air splitter.
--Joff
Last edited by MrsJoff; 12-04-10 at 09:38 PM. Reason: accidentally posted with my wife's login

 12-20-10, 04:34 PM
#14
The Dirty Mexican
iTrader: (1)
Join Date: Mar 2005
Location: Californian refugee taking shelter in Texas
Posts: 231
Likes: 0
Received 0 Likes
on
0 Posts
I too was waiting for others to bite the bullet before jumping in. The only thing missing now is some performance reviews.
Thanks for the tips, Ehron!
Thanks for the tips, Ehron!
01-06-11, 10:15 AM
#15
This is a very helpful thread, much appreciated Ehron 
I'm surprised Rotary Works themselves have not commented on this thread when it is the 1st.
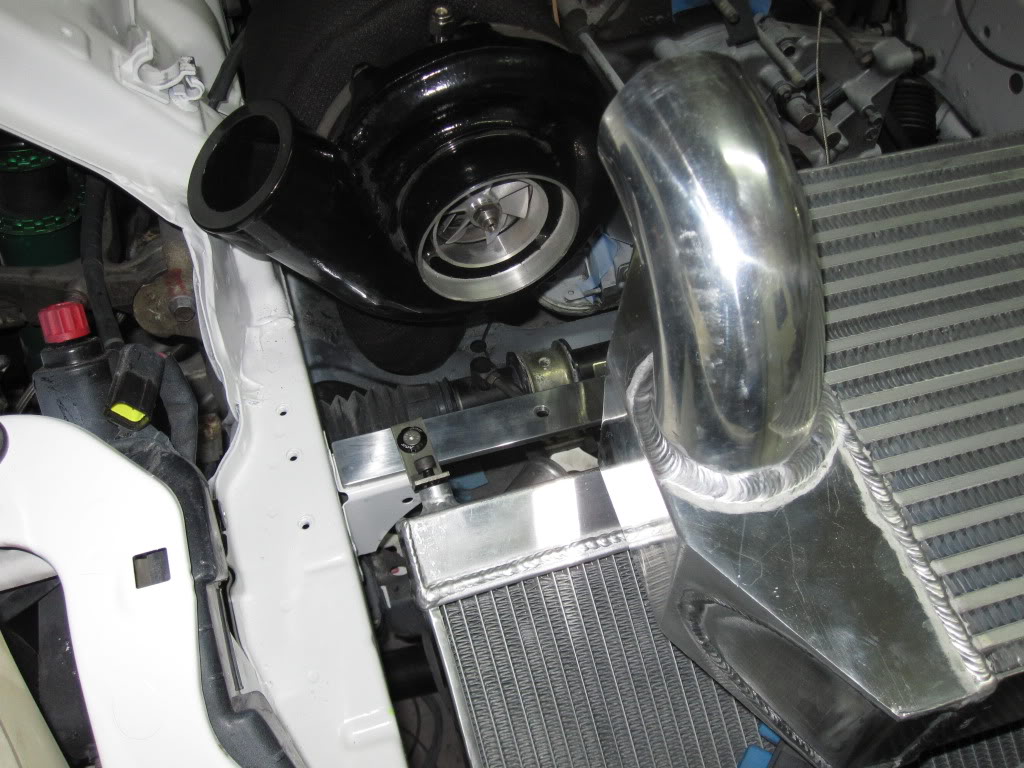
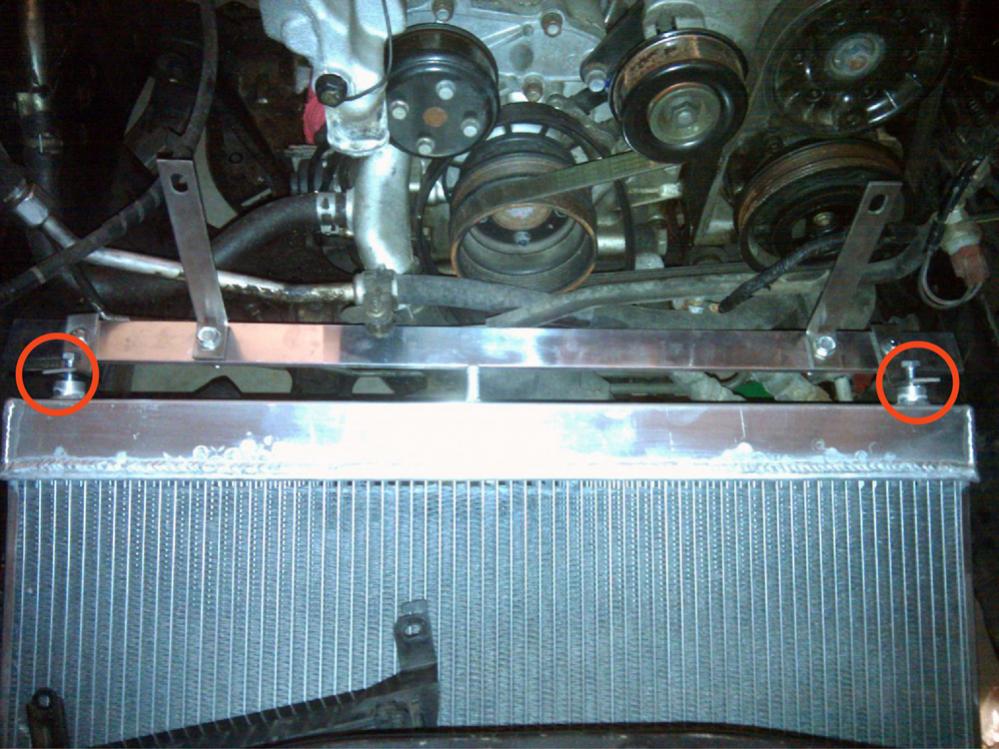
What I would do to close that gap between the rad and the intercooler is to drill an additional hole on each of the brackets I have marked on the photo. If you drill them higher you can raise the rad higher which will close the gap between the two. Just my opinion
I'm surprised Rotary Works themselves have not commented on this thread when it is the 1st.
What I would do to close that gap between the rad and the intercooler is to drill an additional hole on each of the brackets I have marked on the photo. If you drill them higher you can raise the rad higher which will close the gap between the two. Just my opinion
01-06-11, 10:05 PM
#16

900!!!
This is a very good kit for 900. It really helps when you can weld your own parts to help save the customers money. Both their FC and FD vmounts are priced very fairly for what you get.
Props to Ehron for the thread and Rotary Works for offering affordable vmounts.
This is a very good kit for 900. It really helps when you can weld your own parts to help save the customers money. Both their FC and FD vmounts are priced very fairly for what you get.
Props to Ehron for the thread and Rotary Works for offering affordable vmounts.


 01-08-11, 07:23 AM
#21
LOL hahha, man my cost is already over 2k.
Besides, have you even seen my new kits in person to see what comes with it.
Well this thread belongs to the install of the rotary works FD vmount install.
I really should not be discussing my product in here.
If anyone else has questions just hit me up.
Besides, have you even seen my new kits in person to see what comes with it.
Well this thread belongs to the install of the rotary works FD vmount install.
I really should not be discussing my product in here.
If anyone else has questions just hit me up.
01-10-11, 11:38 AM
#22
^From what I understand, the Rotary Extreme kit fits and installs w/o requiring any fabrication which can get expensive. I have seen the Rotary Extreme kits many times in person and they fit very well and perform well also. Plus they keep the A/C and power steering.
01-10-11, 09:22 PM
#23
Thanks for your comments, I appriciate it.
RW's kit lets you keep ac and ps also, but like you said you have to put some work into it.
I like the RW FD vmount because for 900 bucks it can not be beat. I believe my I/C alone: core, piping, t-bolt clamps, silicone hoses and fabrication cost I pay for is like 900...lol
Thanks again for the install instructions on the RW vmount.