Writeup: ABS pump removal with pics
 03-22-11, 03:10 PM
#1
Writeup: ABS pump removal with pics
A common problem for many FC owners is a leaky ABS pump. After scanning through the archives, it is clear these pumps are prone to failure. The ABS pump on my 1988 Turbo II was leaking badly and needed replacement. The replacement cost for a new pump is nearly as much as I paid for the car. Since the Turbo models came with optional ABS, I decided to simply remove the pump and convert it to a non-ABS system. For this project, I simply removed the faulty pump and the ABS computer. All other ABS related components such as wiring, wheel speed sensors, etc were left on the car.
As a disclaimer: I do NOT recommend removing a normal functioning ABS pump if your car is equipped with one.
Many of the threads I researched mention using Mazdatrix�s ABS delete kit which consists of a t-distribution block and a rubber extension line. The threads that mention it are full of complaints about the way it looks, and I wanted to keep that area looking as stock as possible.
Since the FC had both ABS and non-ABS models, the conversion simply involved removing the ABS pump, the lines that run from it, and the master cylinder. I retained the Turbo brake booster and the proportioning valve. I read that the boosters were the same for all cars with 4-pot brakes and slightly smaller for the others. I can�t confirm that, but maybe someone else here can.
Mazda confirmed that the part numbers for the proportioning bypass valve was the same on both ABS and non-ABS models. The valve limits pressure to the rear wheels during braking to prevent wheel lockup. This post I found in this thread does a better job of explaining why keeping the stock bypass valve is good idea and convinced me to keep the it over an aftermarket one.
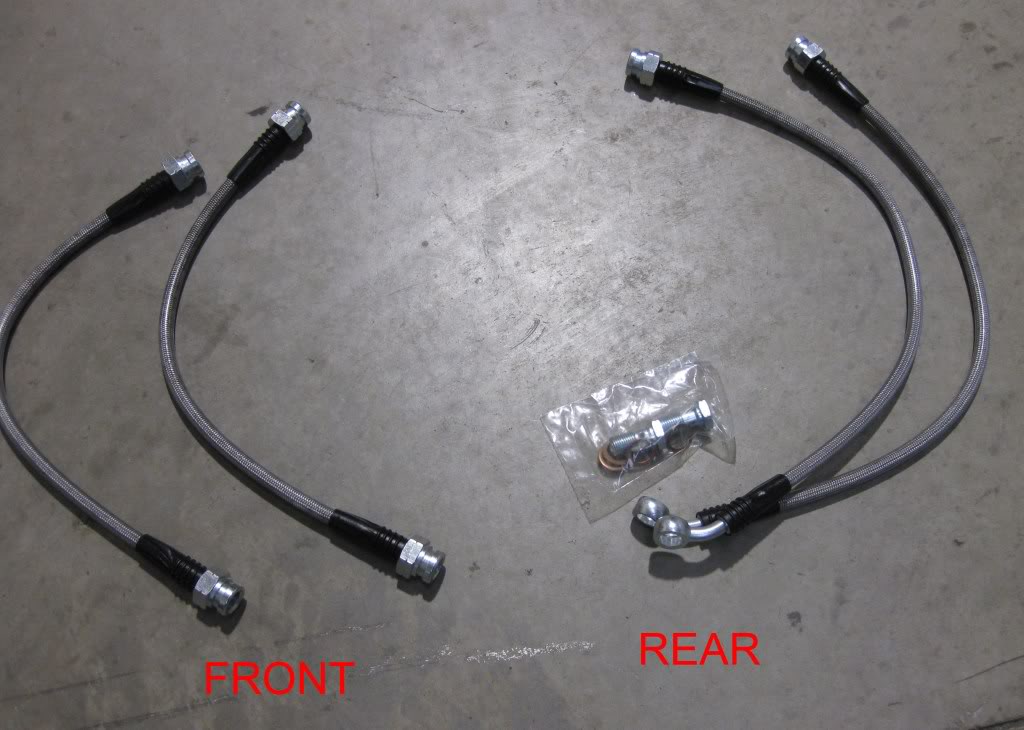
I decided to go ahead and replace the rubber lines at the wheels with some SS lines I picked up from Mazdatrix since I was removing the pump and running new hardlines, . I could have replaced them with OEM parts, but I decided to spend a little more for the SS. Both front brakes were rebuilt using Mazdatrix�s rebuild kit since this was as perfect a time as any to do so. I spent a little extra to make sure every other component was in good working order since I was taking out a major safety component. While it may not have been totally necessary, I spent the time going over any potential weak points in the system.
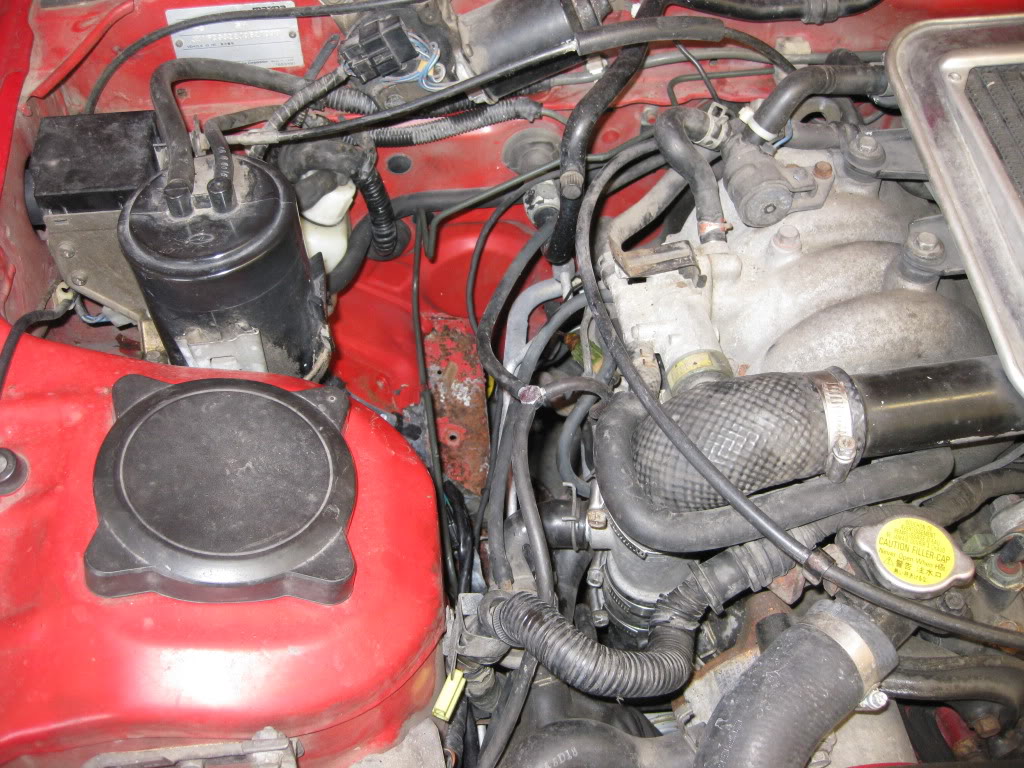
I searched several threads for info on removing a leaky ABS pump. One very helpful thread was the Clean & Simple ABS removal thread...especially with the non-ABS brake line parts numbers. I find write-up threads very helpful when pictures are included so I thought I�d document my weekend project in case anyone else is looking for a solution to dealing with a leaking ABS pump. I�ve included the parts I used in the conversion below. I decided to replace the plugs and fuel and air filter since the car had spent the better part of the past year in the garage.
Parts list:
Three brake lines from Mazda:
Front-Left non-ABS - FB01-45-320
Front-Right non-ABS - FB01-45-280E
Rear Non-ABS - FB01-45-360C**
Front brake caliper rebuild kit - Mazdatrix
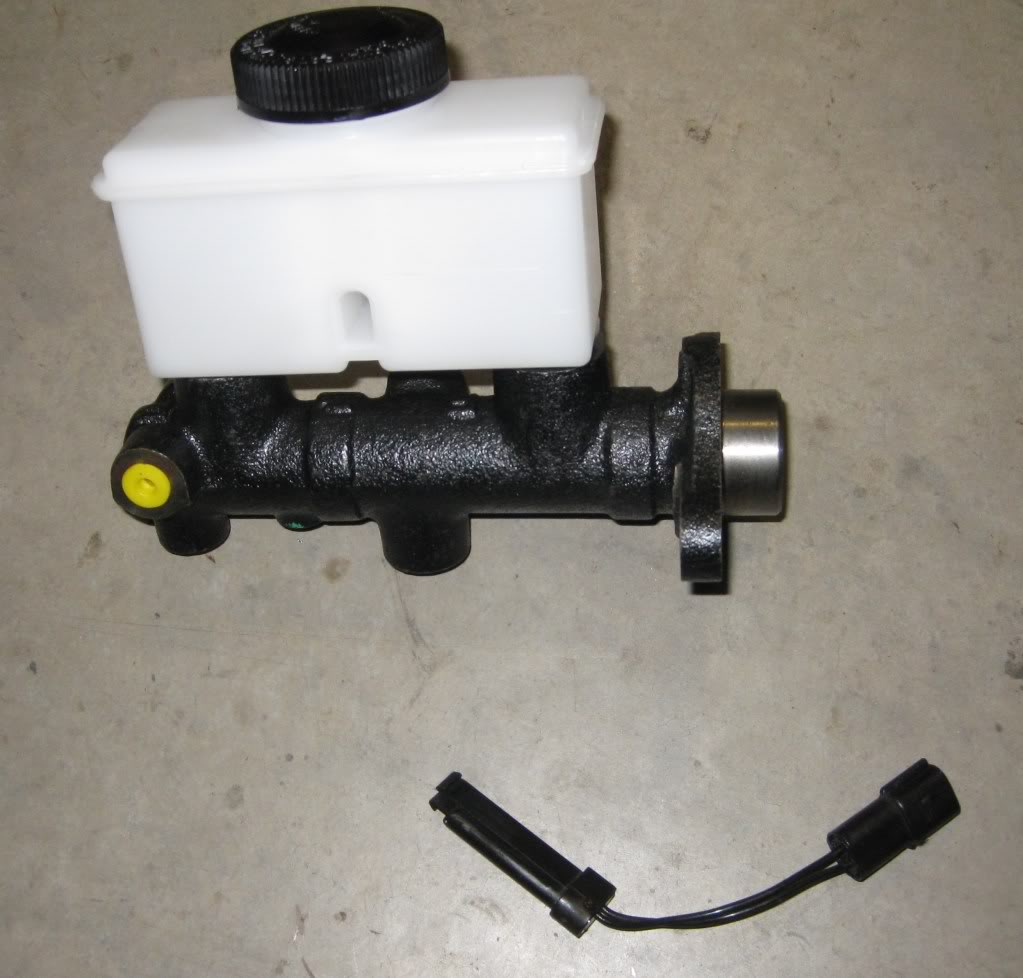
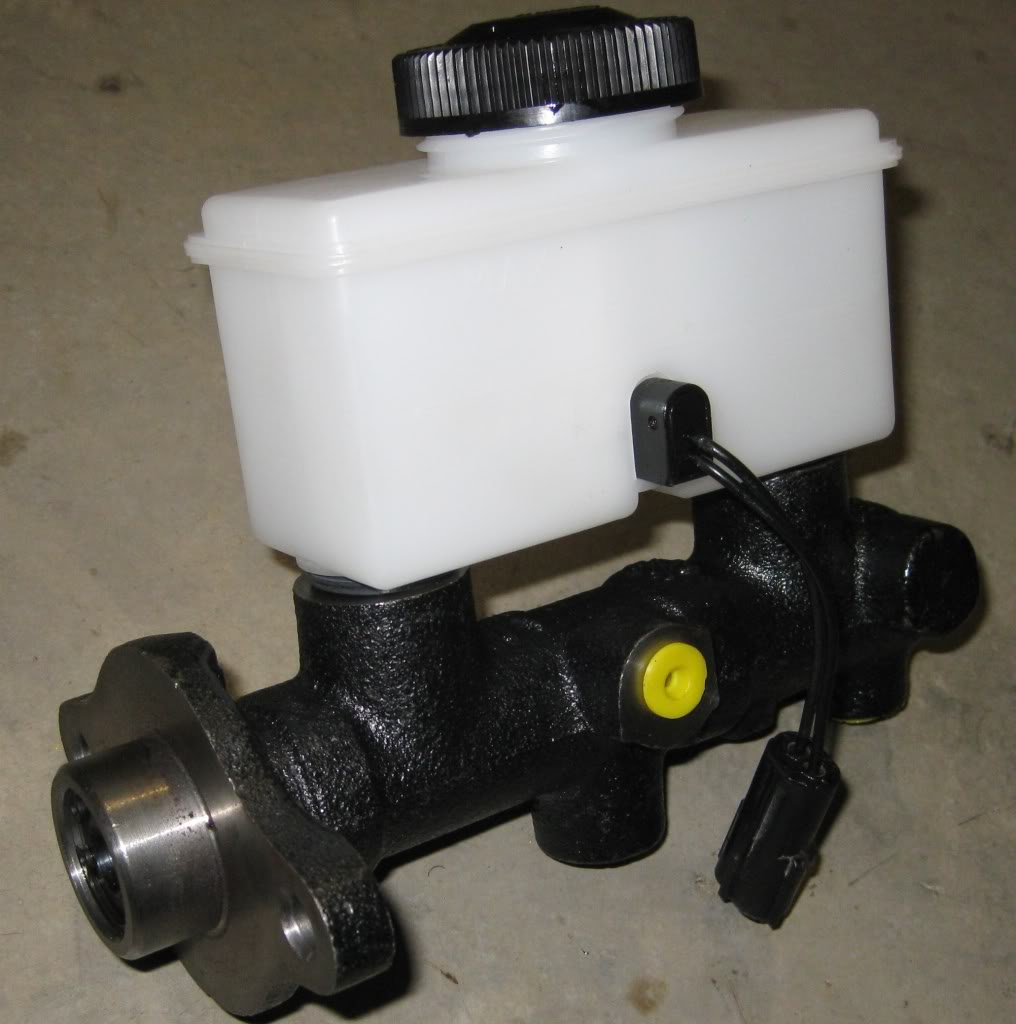
Non-ABS master cylinder (you may require a different MC depending on if you have the auto adjusting suspension) � RockAuto
SS Brake lines - Mazdatrix
New spark plugs � perfect time to do so when the master cylinder out of the way
Fuel filter � you will need to remove filter bracket to route the rear brake line up to the master cylinder.
** I have one caveat about the rear line. The one I received from the dealer was not a direct fit like the front two. It bent in the opposite direction of where the fuel lines were routed under the left side of the car. It wasn�t major challenge, but definitely noticeable. You can see in the pics that follow where this occurs. I assumed that the line was for a RHD car as it was bent in opposing directions of the other hardlines under the car. Despite the bending I still had good fitment and only needed minor adjustments.
If your car has had a leaky ABS pump for a while, you may want to prepare for a thorough cleanup, brake fluid eats away at your paint. It is hygroscopic and absorbs moisture which will rust away at the exposed metal. I chose to use a strong chemical cleaner first, then followed up with a lot of navel jelly. This was just a quick fix until I rebuild the engine and can properly media blast the bay. You will want to make sure you properly address the brake fluid issue if a lot has leaked out.
The pump below is clearly leaking and in need of replacement.
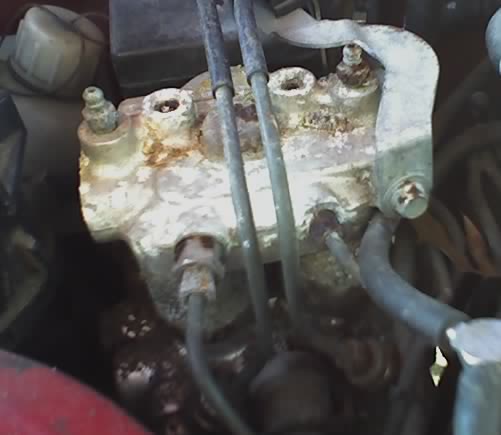
This is the damage that had been done to the car from the leaking fluid before I could remove the pump.
Before you begin, remove as much brake fluid from the system as you can by either bleeding or using a vacuum. It�s much easier to deal with removing brake components if it�s not dripping fluid everywhere.
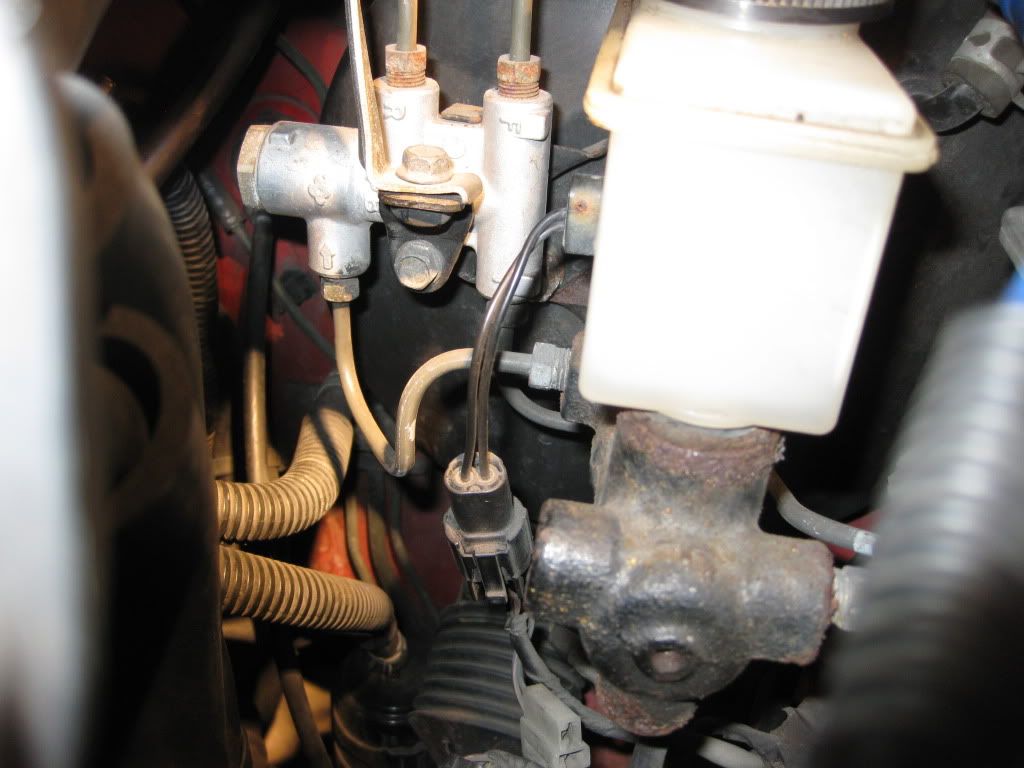
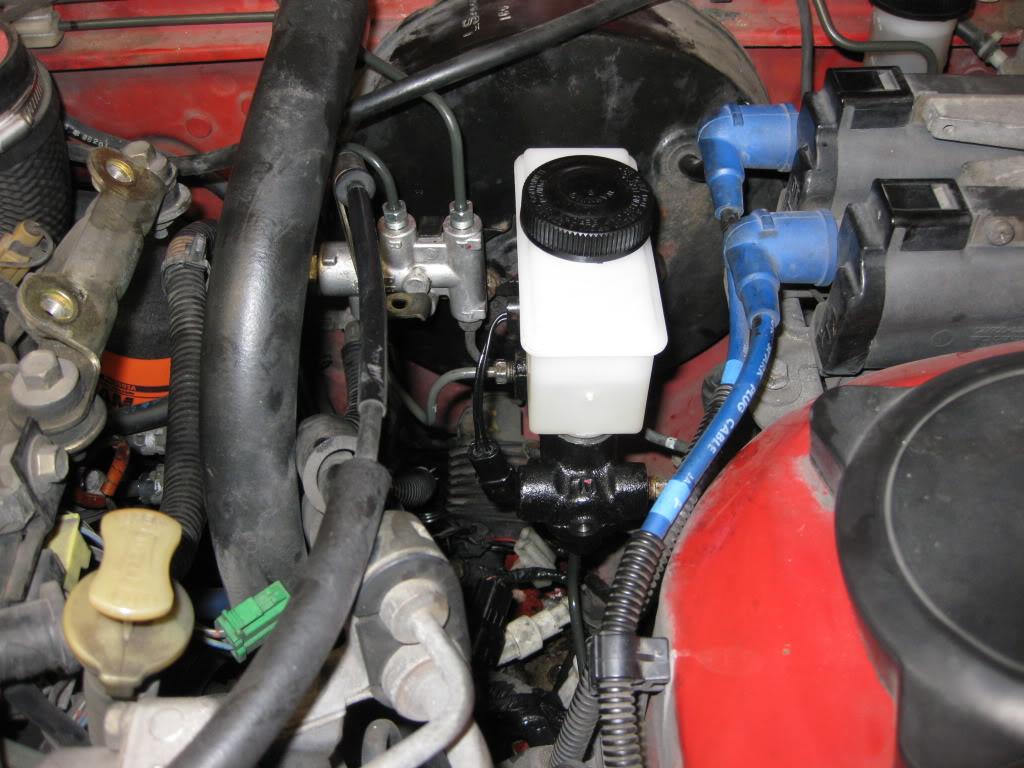
Loosen the lines connecting the master cylinder and proportioning valve. Remove the bracket holding the valve and the bolts holding the master cylinder to the booster.
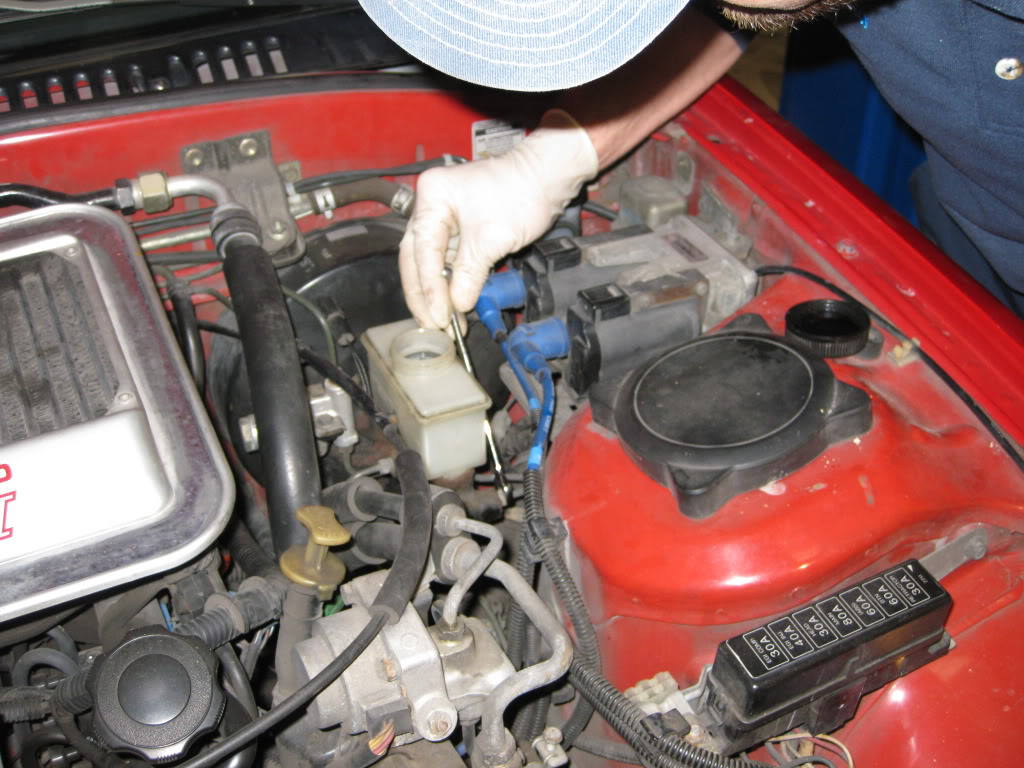
With the ABS MC off, remove the fluid level sensor from the old reservoir and insert it into the new, non-ABS MC.
As a disclaimer: I do NOT recommend removing a normal functioning ABS pump if your car is equipped with one.
Many of the threads I researched mention using Mazdatrix�s ABS delete kit which consists of a t-distribution block and a rubber extension line. The threads that mention it are full of complaints about the way it looks, and I wanted to keep that area looking as stock as possible.
Since the FC had both ABS and non-ABS models, the conversion simply involved removing the ABS pump, the lines that run from it, and the master cylinder. I retained the Turbo brake booster and the proportioning valve. I read that the boosters were the same for all cars with 4-pot brakes and slightly smaller for the others. I can�t confirm that, but maybe someone else here can.
Mazda confirmed that the part numbers for the proportioning bypass valve was the same on both ABS and non-ABS models. The valve limits pressure to the rear wheels during braking to prevent wheel lockup. This post I found in this thread does a better job of explaining why keeping the stock bypass valve is good idea and convinced me to keep the it over an aftermarket one.
I decided to go ahead and replace the rubber lines at the wheels with some SS lines I picked up from Mazdatrix since I was removing the pump and running new hardlines, . I could have replaced them with OEM parts, but I decided to spend a little more for the SS. Both front brakes were rebuilt using Mazdatrix�s rebuild kit since this was as perfect a time as any to do so. I spent a little extra to make sure every other component was in good working order since I was taking out a major safety component. While it may not have been totally necessary, I spent the time going over any potential weak points in the system.
I searched several threads for info on removing a leaky ABS pump. One very helpful thread was the Clean & Simple ABS removal thread...especially with the non-ABS brake line parts numbers. I find write-up threads very helpful when pictures are included so I thought I�d document my weekend project in case anyone else is looking for a solution to dealing with a leaking ABS pump. I�ve included the parts I used in the conversion below. I decided to replace the plugs and fuel and air filter since the car had spent the better part of the past year in the garage.
Parts list:
Three brake lines from Mazda:
Front-Left non-ABS - FB01-45-320
Front-Right non-ABS - FB01-45-280E
Rear Non-ABS - FB01-45-360C**
Front brake caliper rebuild kit - Mazdatrix
Non-ABS master cylinder (you may require a different MC depending on if you have the auto adjusting suspension) � RockAuto
SS Brake lines - Mazdatrix
New spark plugs � perfect time to do so when the master cylinder out of the way
Fuel filter � you will need to remove filter bracket to route the rear brake line up to the master cylinder.
** I have one caveat about the rear line. The one I received from the dealer was not a direct fit like the front two. It bent in the opposite direction of where the fuel lines were routed under the left side of the car. It wasn�t major challenge, but definitely noticeable. You can see in the pics that follow where this occurs. I assumed that the line was for a RHD car as it was bent in opposing directions of the other hardlines under the car. Despite the bending I still had good fitment and only needed minor adjustments.
If your car has had a leaky ABS pump for a while, you may want to prepare for a thorough cleanup, brake fluid eats away at your paint. It is hygroscopic and absorbs moisture which will rust away at the exposed metal. I chose to use a strong chemical cleaner first, then followed up with a lot of navel jelly. This was just a quick fix until I rebuild the engine and can properly media blast the bay. You will want to make sure you properly address the brake fluid issue if a lot has leaked out.
The pump below is clearly leaking and in need of replacement.
This is the damage that had been done to the car from the leaking fluid before I could remove the pump.
Before you begin, remove as much brake fluid from the system as you can by either bleeding or using a vacuum. It�s much easier to deal with removing brake components if it�s not dripping fluid everywhere.
Loosen the lines connecting the master cylinder and proportioning valve. Remove the bracket holding the valve and the bolts holding the master cylinder to the booster.
With the ABS MC off, remove the fluid level sensor from the old reservoir and insert it into the new, non-ABS MC.
 03-22-11, 03:10 PM
#2
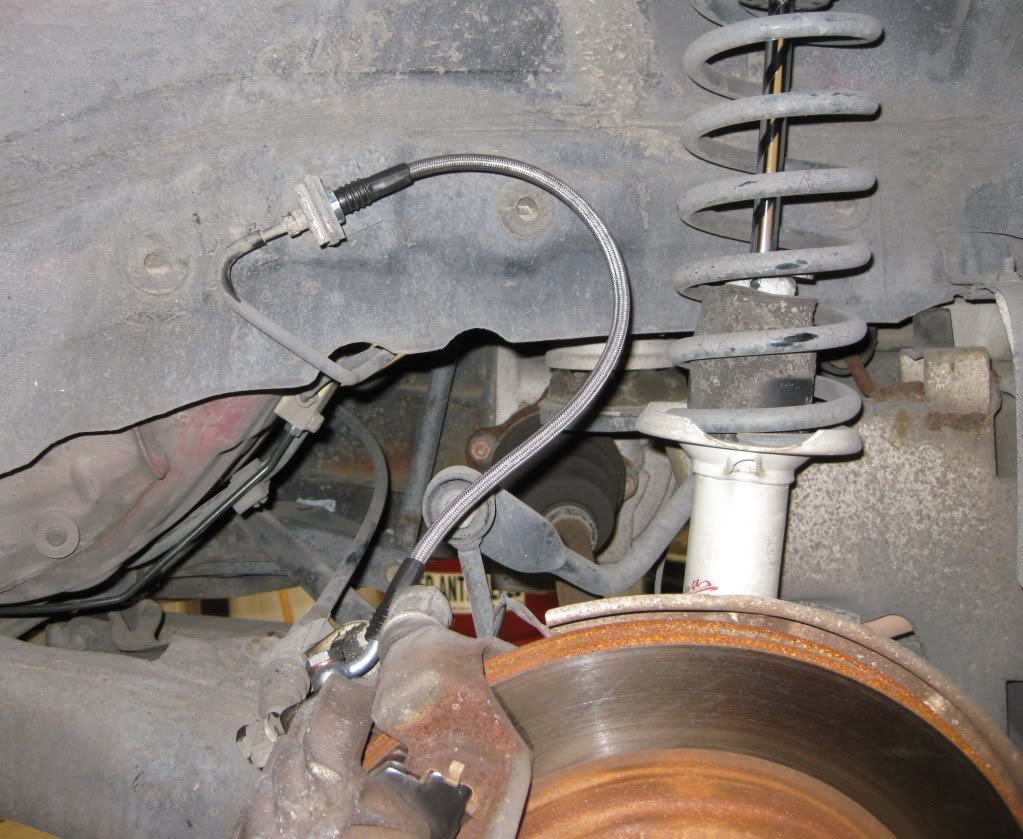
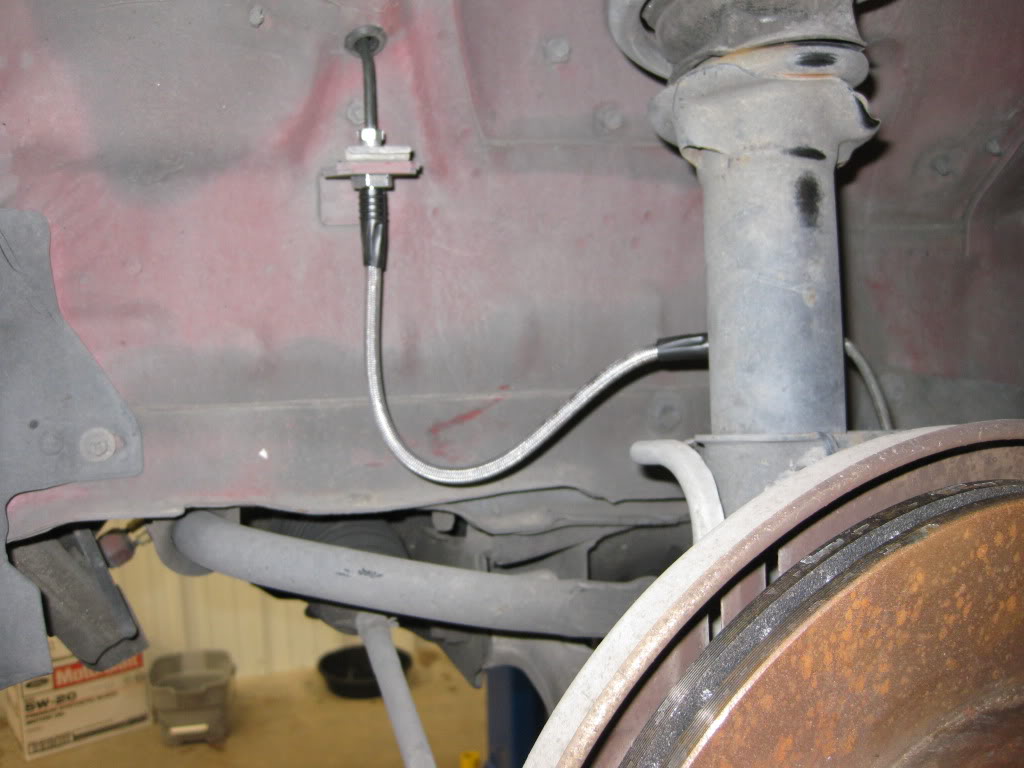
Remove the hardlines to each of the calipers. If you are installing new lines to the calipers, you can go ahead and remove them at this point.
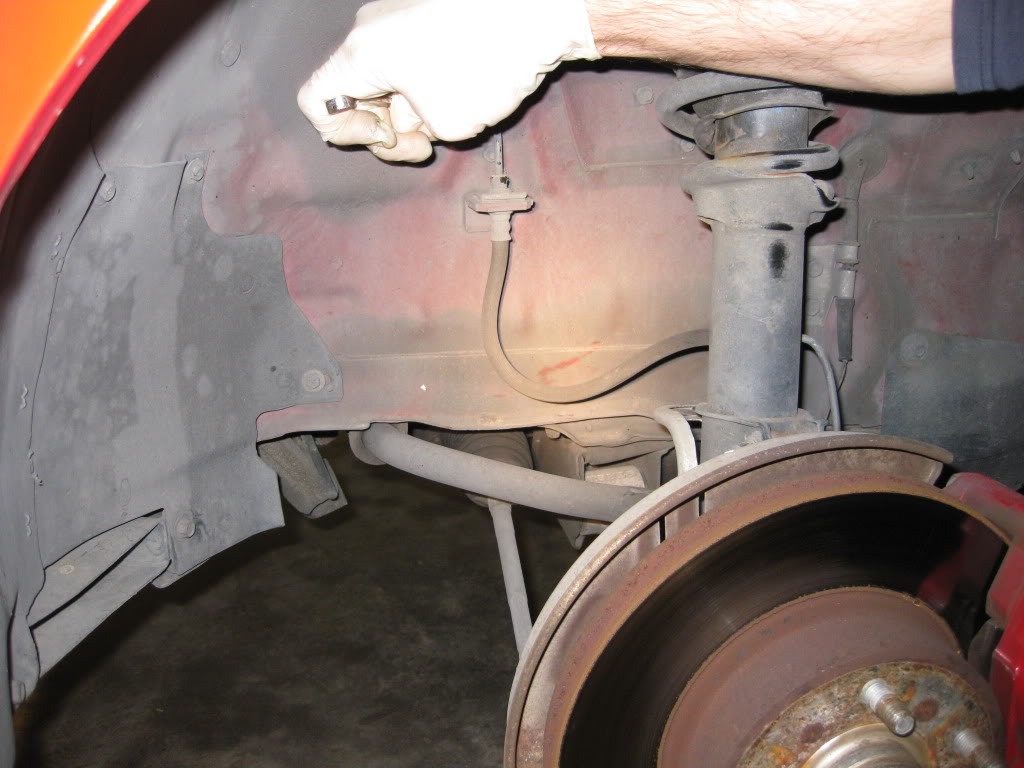
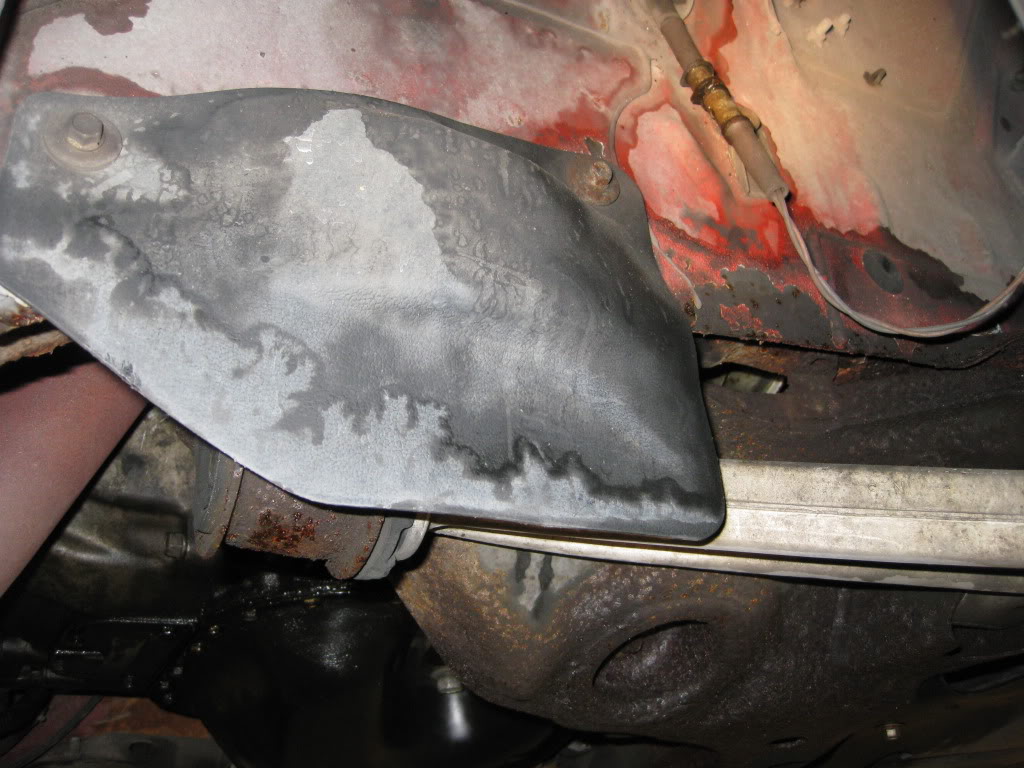
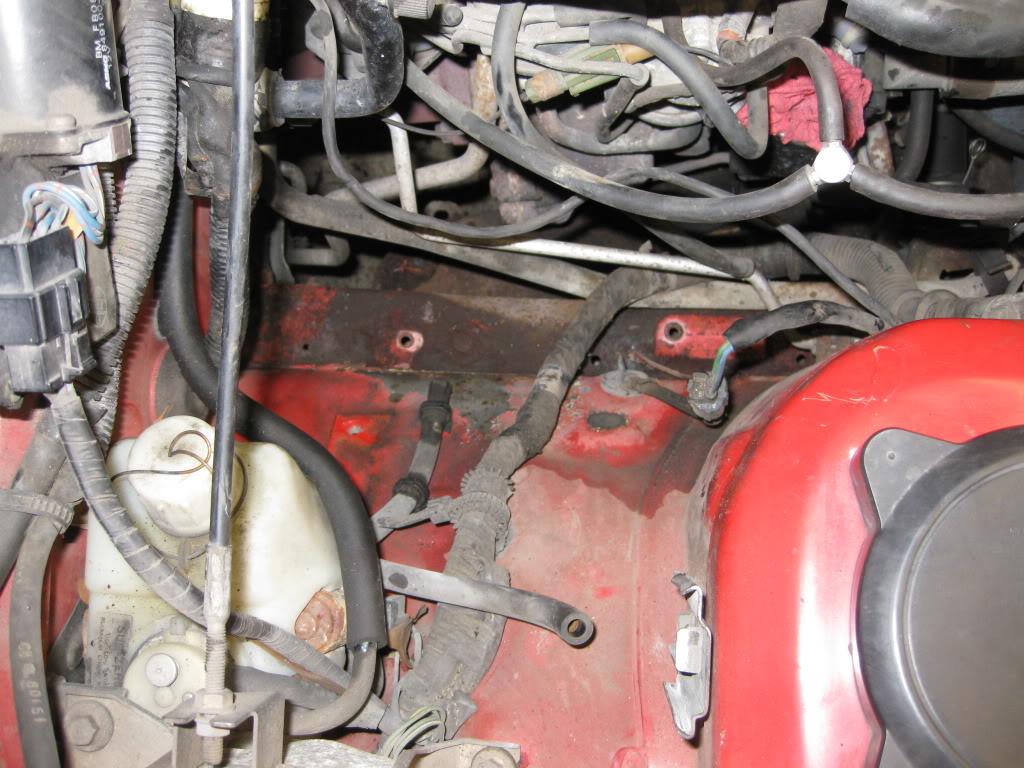
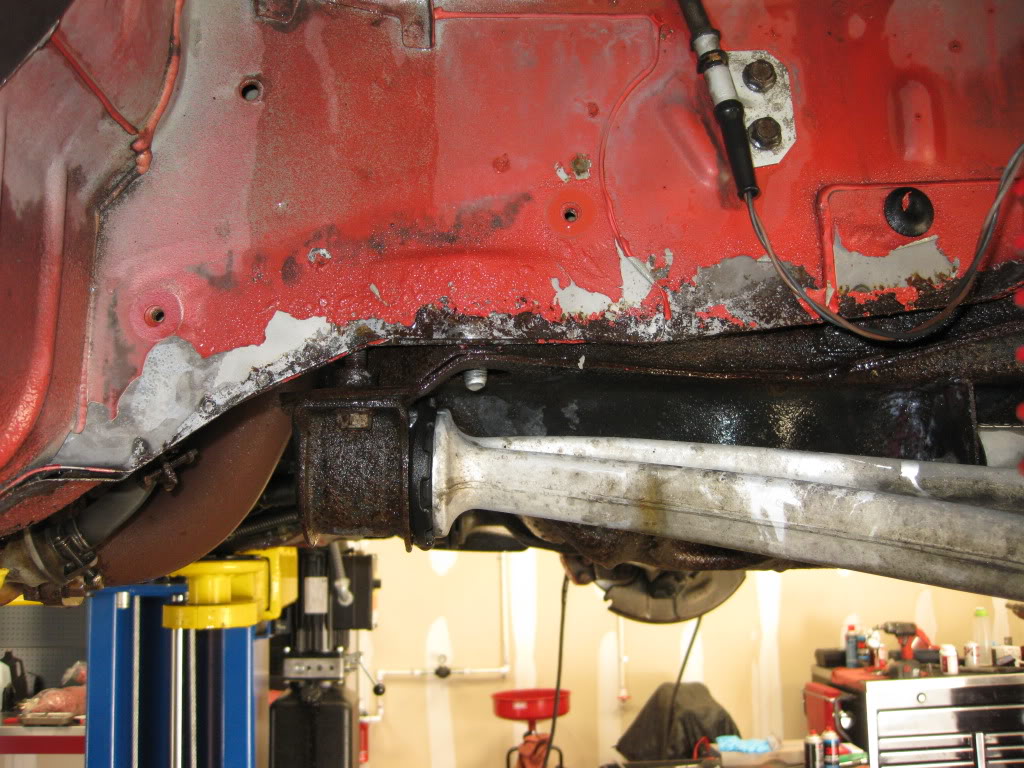
You can see here where brake fluid had leaked through the fender wall.
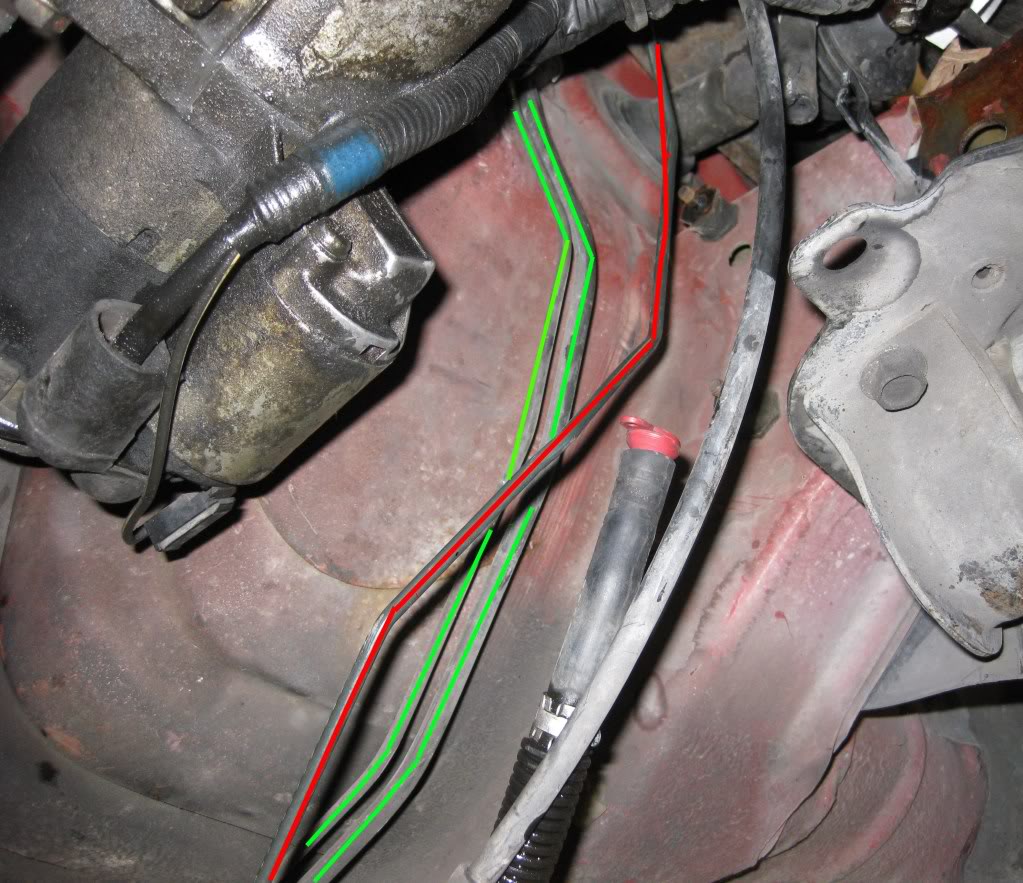
The brake line running across the firewall was a little tricky to remove. I found that it was easier to just cut the old lines as I was not planning to reuse them.
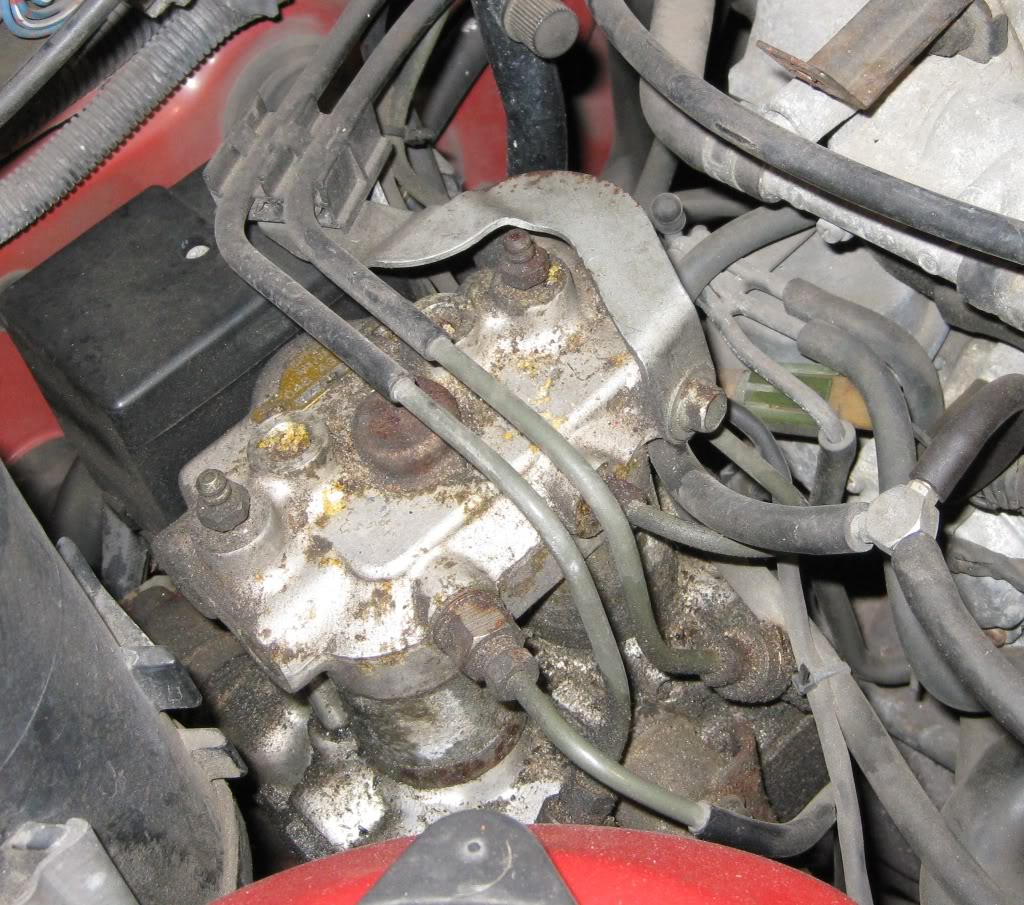
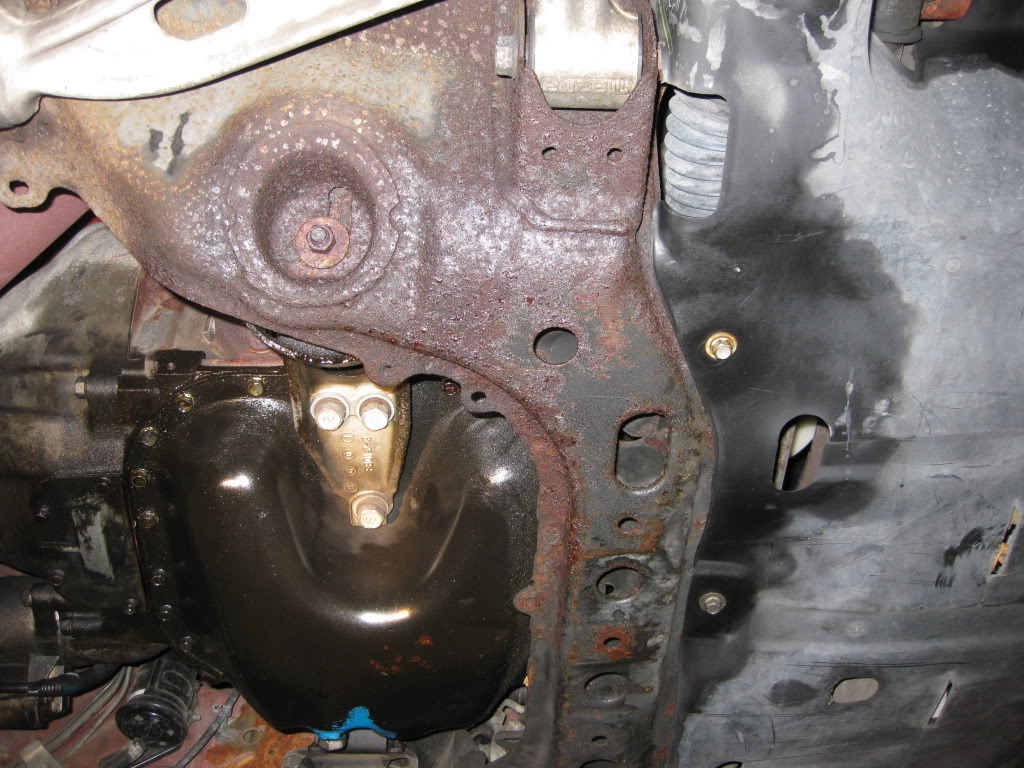
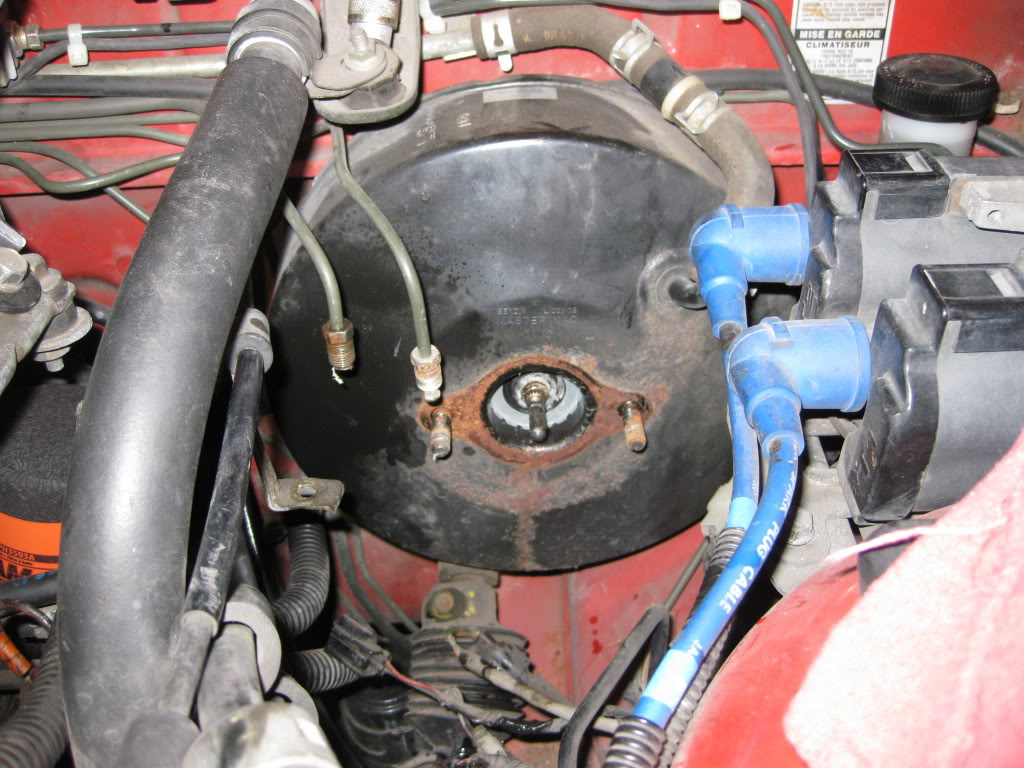
There are 3x10mm bolts securing the ABS pump on its bracket. Again, I cut the lines for easier removal of the unit. Don’t forget to unplug the two electrical connectors to the pump.
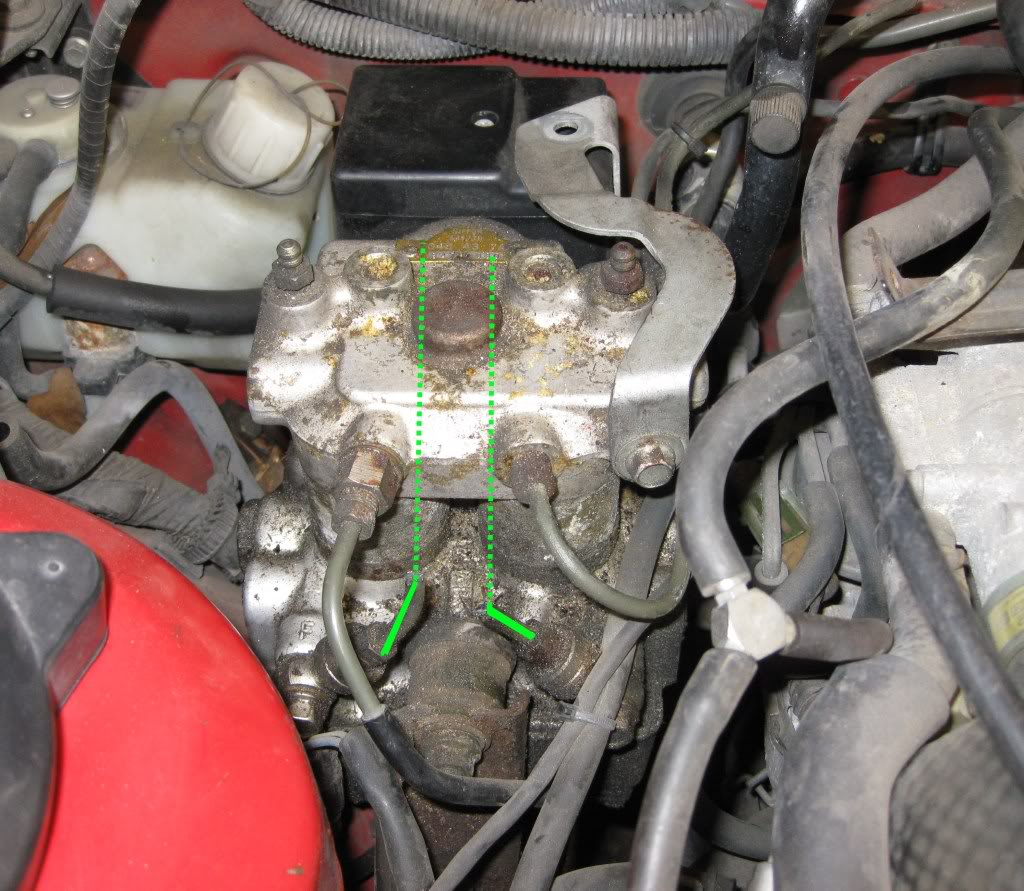
Here is the pump when fully removed. I didn’t weigh it, but it felt to be around 20 pounds of metal removed.
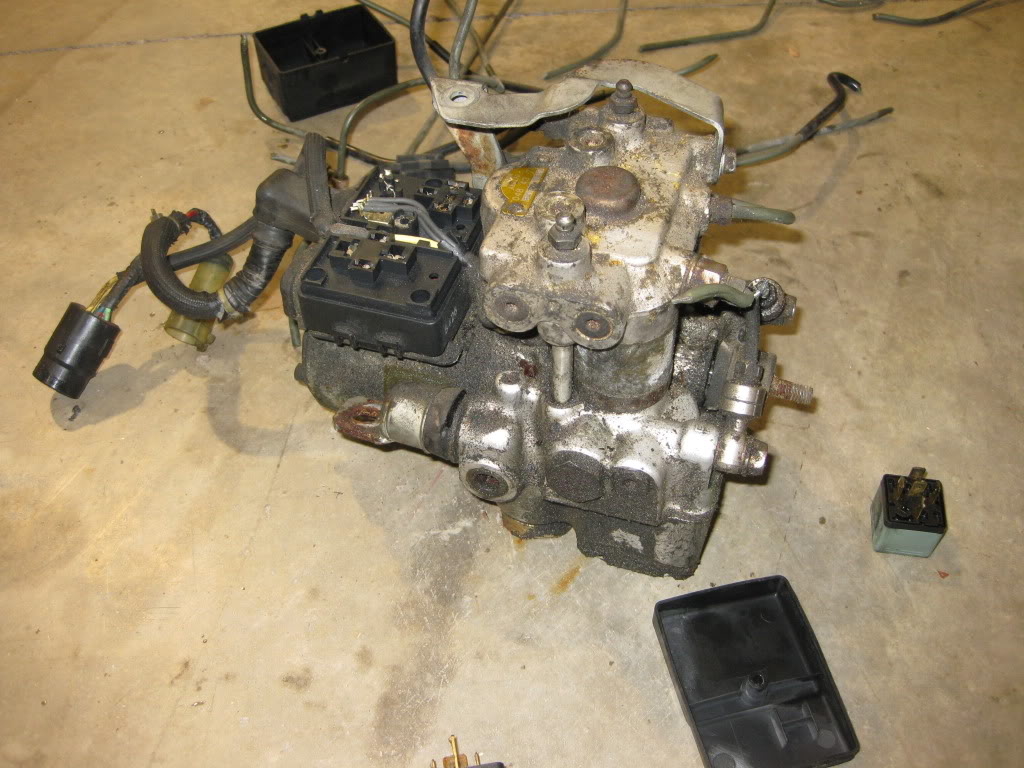
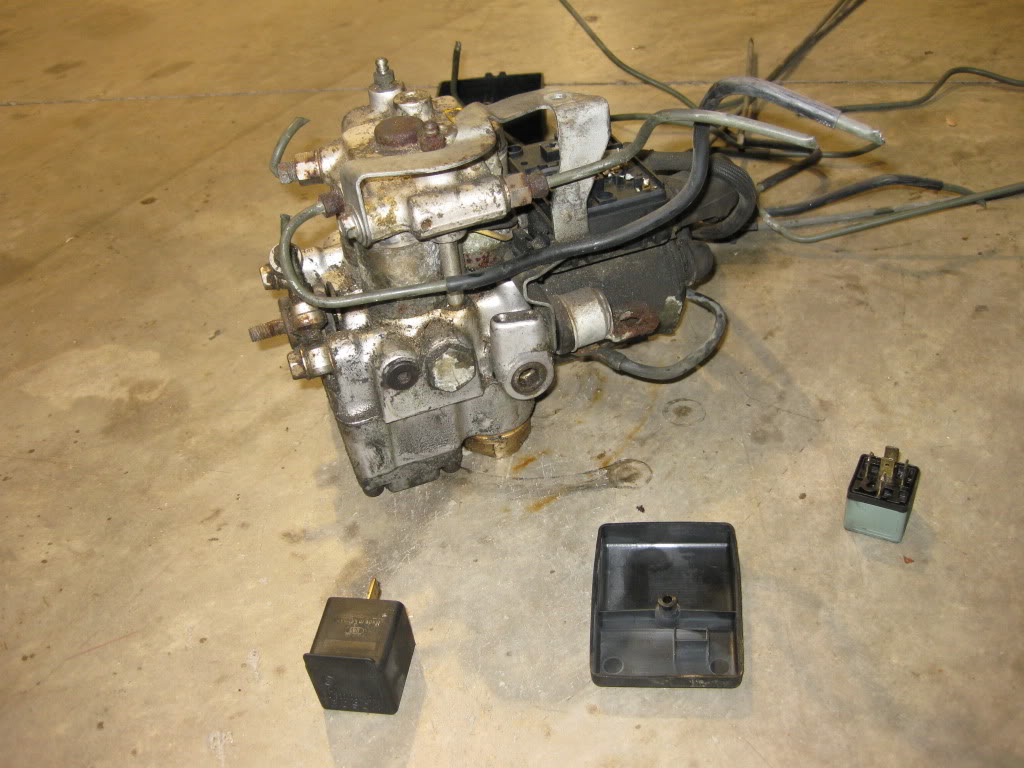
Here is the bracket that the ABS pump sits atop. IIRC, there were about 5x10mm bolts securing it.
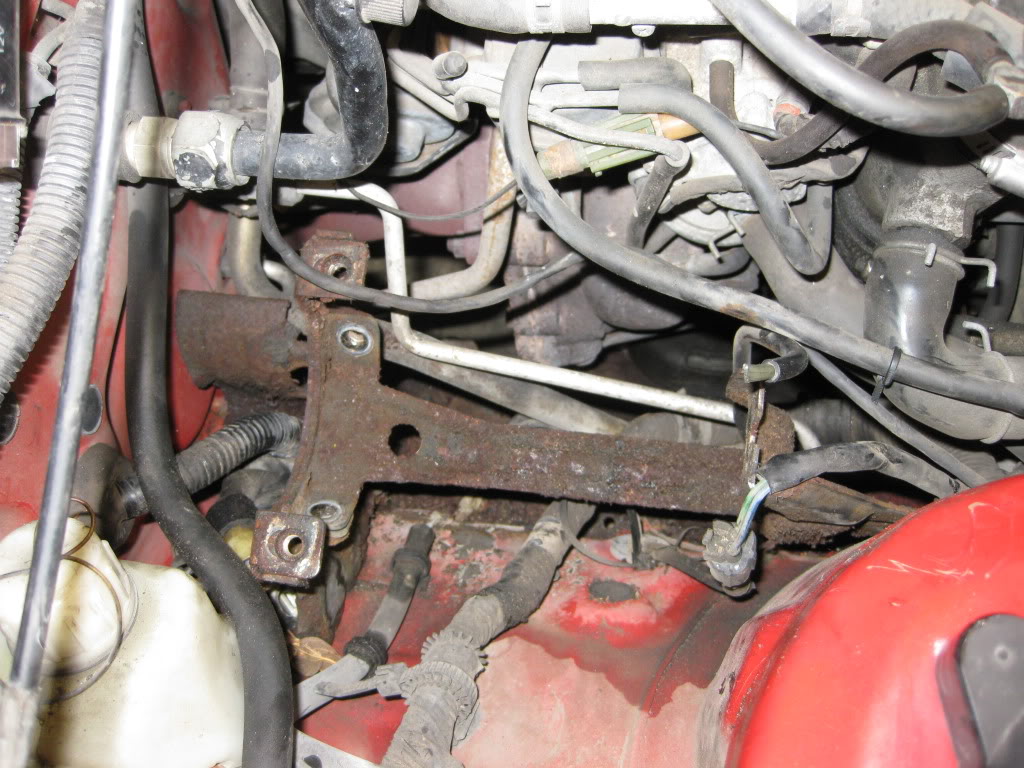
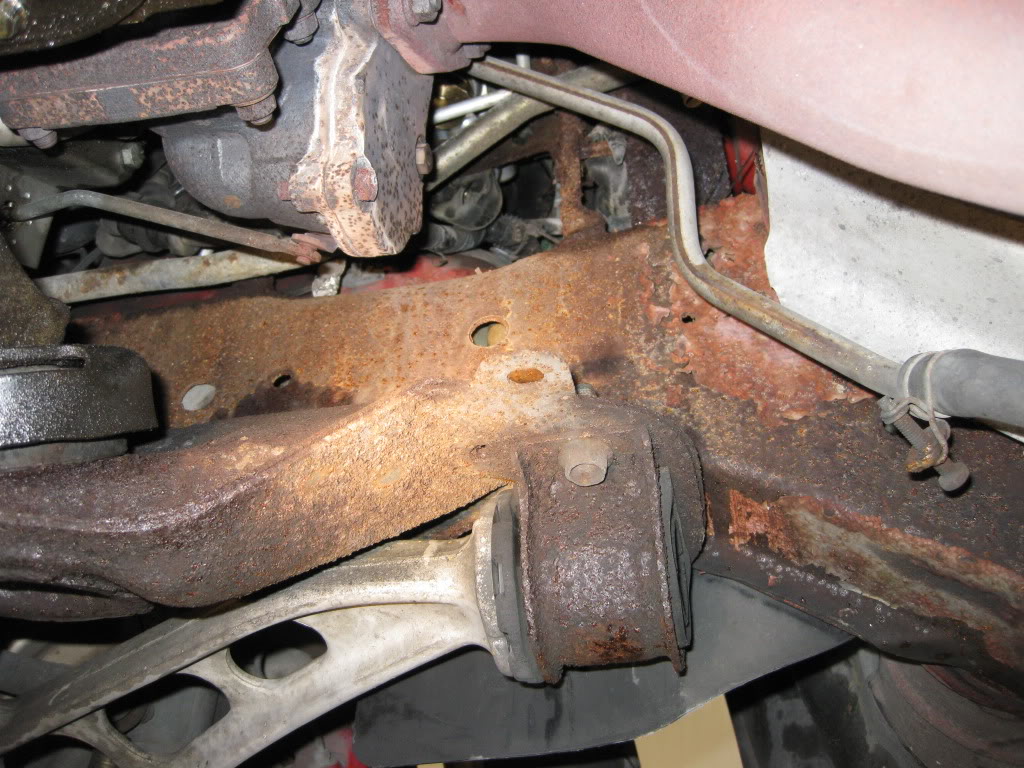
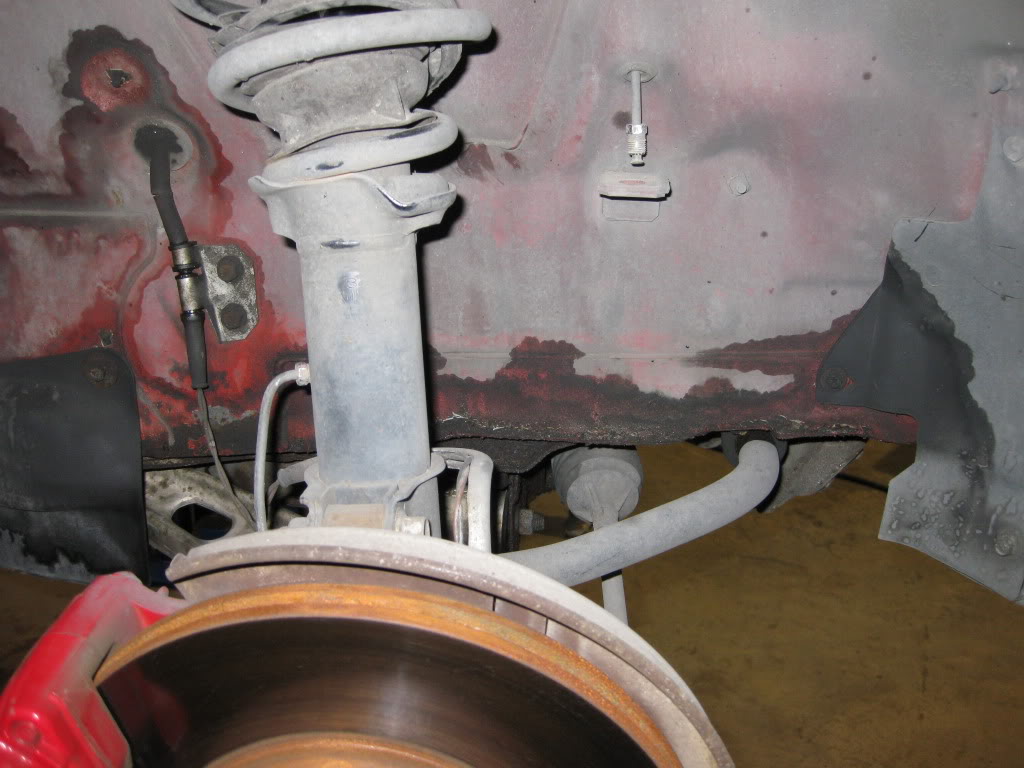
With the ABS pump removed, you can see the extent of the leaking on the lower half of the fender.
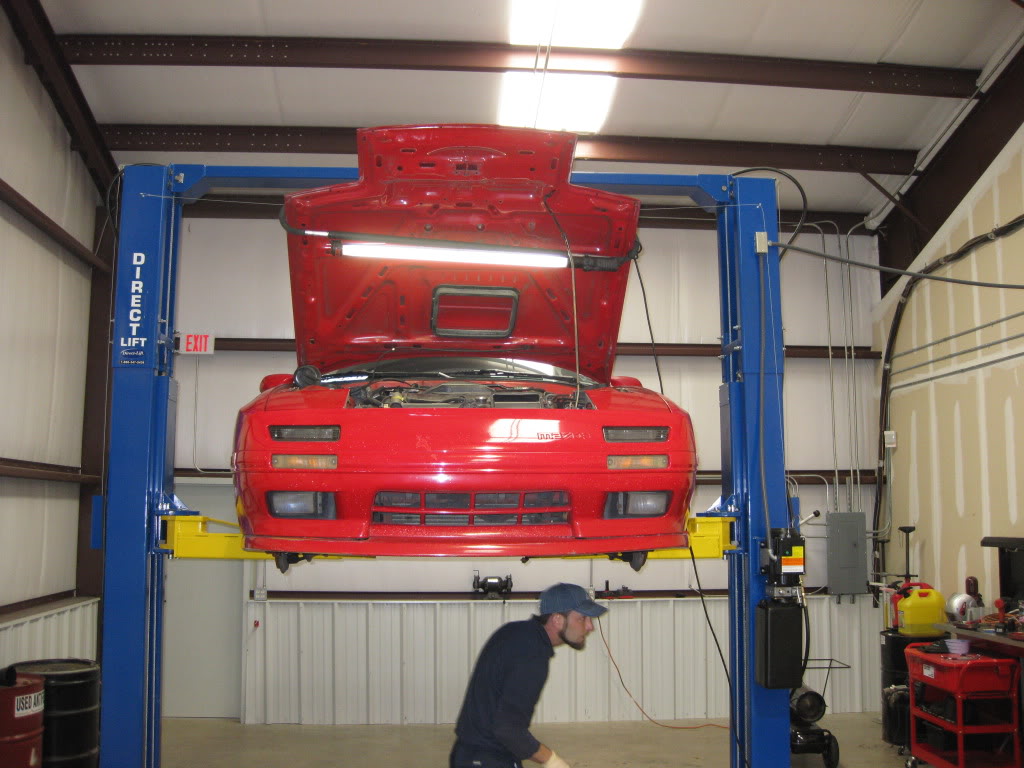
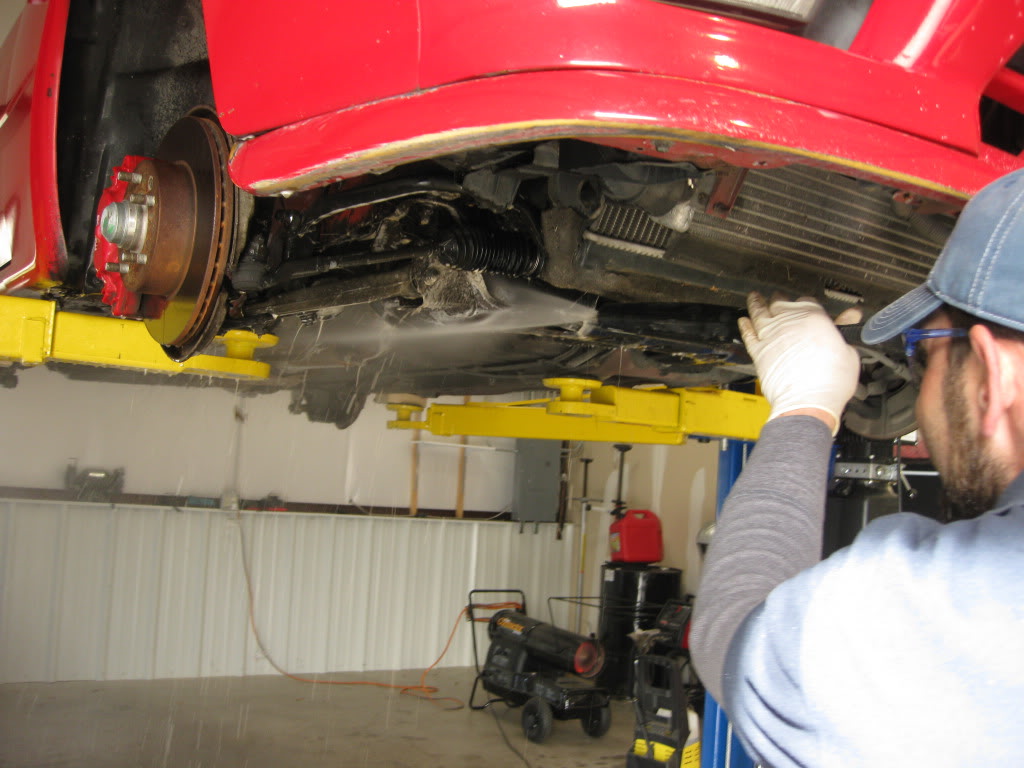
Being able to raise the car on a lift allowed for easier access to all the problem areas.
Leave the baggies on the ends of the brake lines as you install them to keep any contaminants out of the line. Don’t worry about tightening everything down until you know for sure everything is where it should be sitting. I used this time to install new plugs and a new fuel filter. It is much easier to do this maintenance with the MC removed.
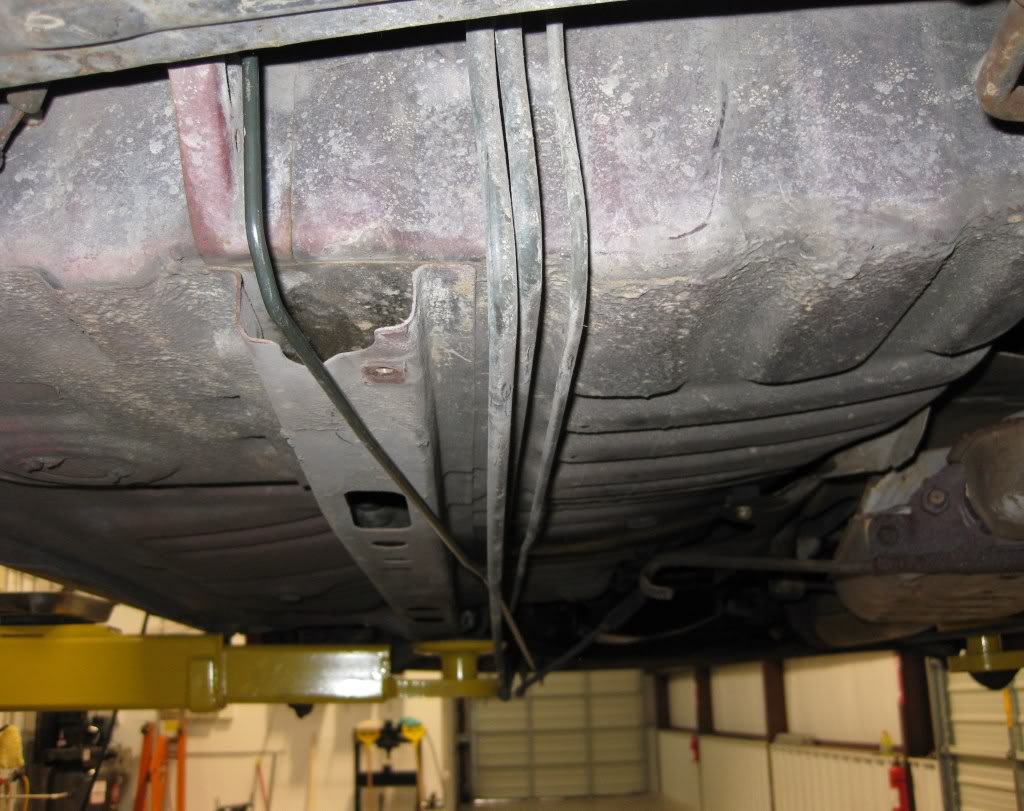
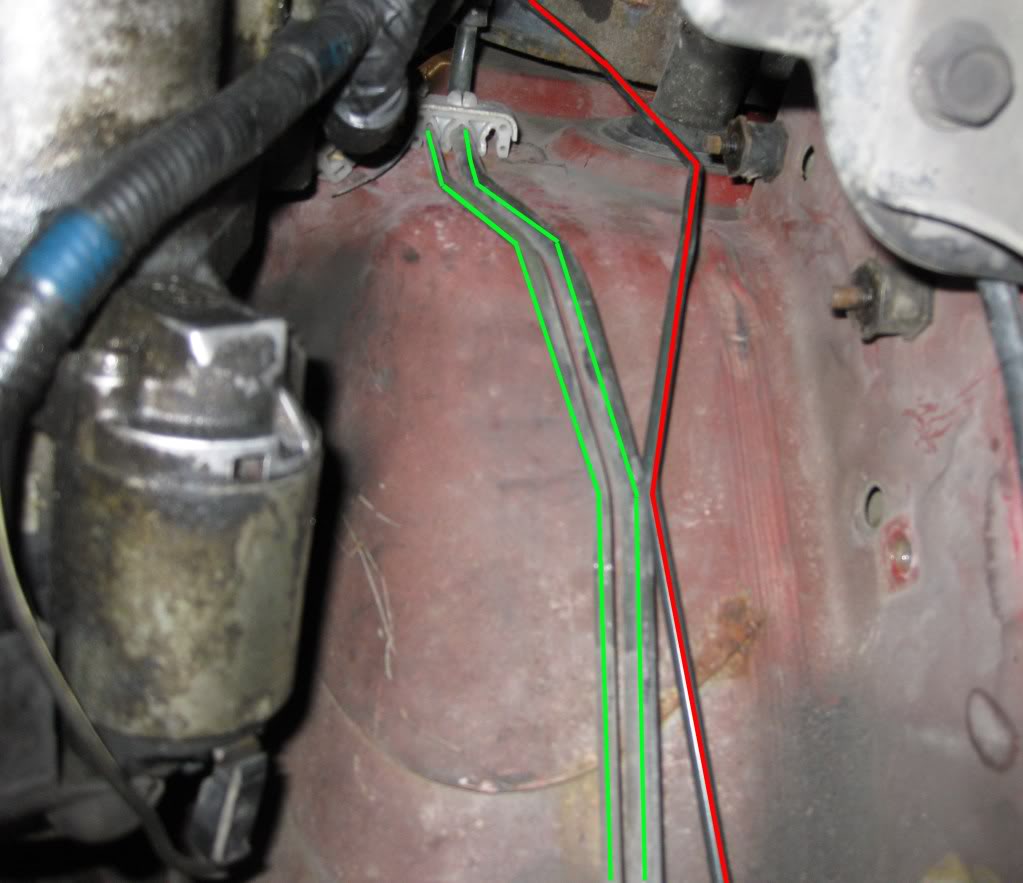
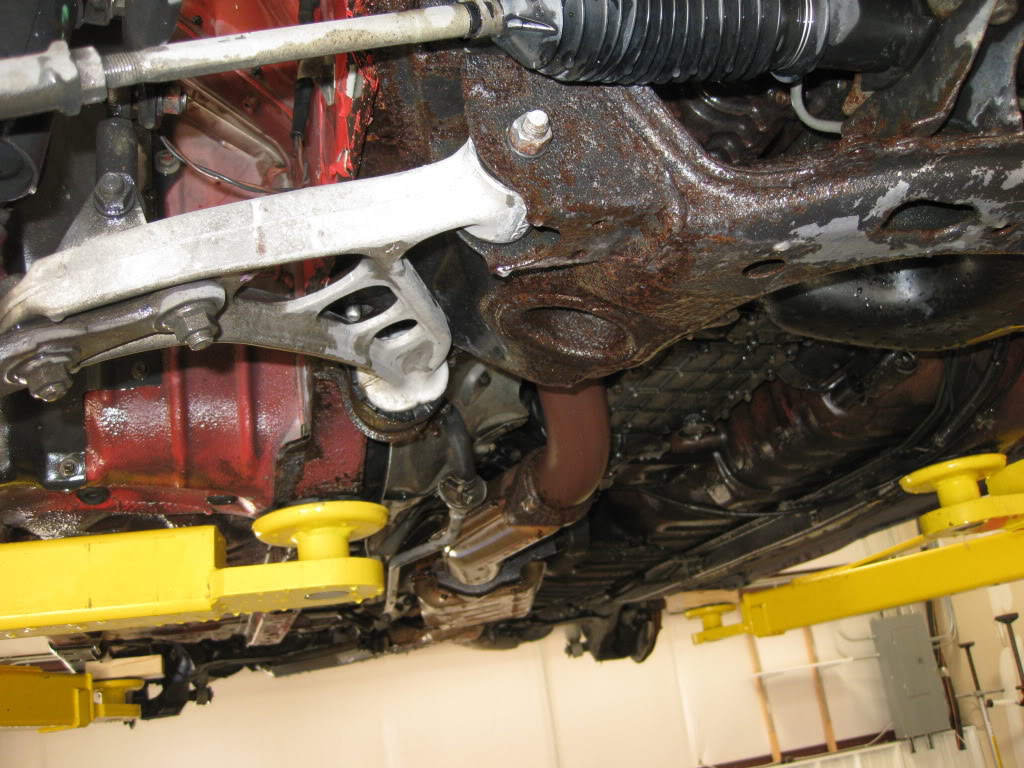
I found it easier to remove the brackets under the car for the rear hardline. This was when I noticed that the rear line may have been made for a RHD car as it did not match up with the brackets very well. It still fit, but some minor adjustment was needed.
You can see here where brake fluid had leaked through the fender wall.
The brake line running across the firewall was a little tricky to remove. I found that it was easier to just cut the old lines as I was not planning to reuse them.
There are 3x10mm bolts securing the ABS pump on its bracket. Again, I cut the lines for easier removal of the unit. Don’t forget to unplug the two electrical connectors to the pump.
Here is the pump when fully removed. I didn’t weigh it, but it felt to be around 20 pounds of metal removed.
Here is the bracket that the ABS pump sits atop. IIRC, there were about 5x10mm bolts securing it.
With the ABS pump removed, you can see the extent of the leaking on the lower half of the fender.
Being able to raise the car on a lift allowed for easier access to all the problem areas.
Leave the baggies on the ends of the brake lines as you install them to keep any contaminants out of the line. Don’t worry about tightening everything down until you know for sure everything is where it should be sitting. I used this time to install new plugs and a new fuel filter. It is much easier to do this maintenance with the MC removed.
I found it easier to remove the brackets under the car for the rear hardline. This was when I noticed that the rear line may have been made for a RHD car as it did not match up with the brackets very well. It still fit, but some minor adjustment was needed.
The following users liked this post:
BettsySlevin (08-16-17)
03-22-11, 03:11 PM
#3
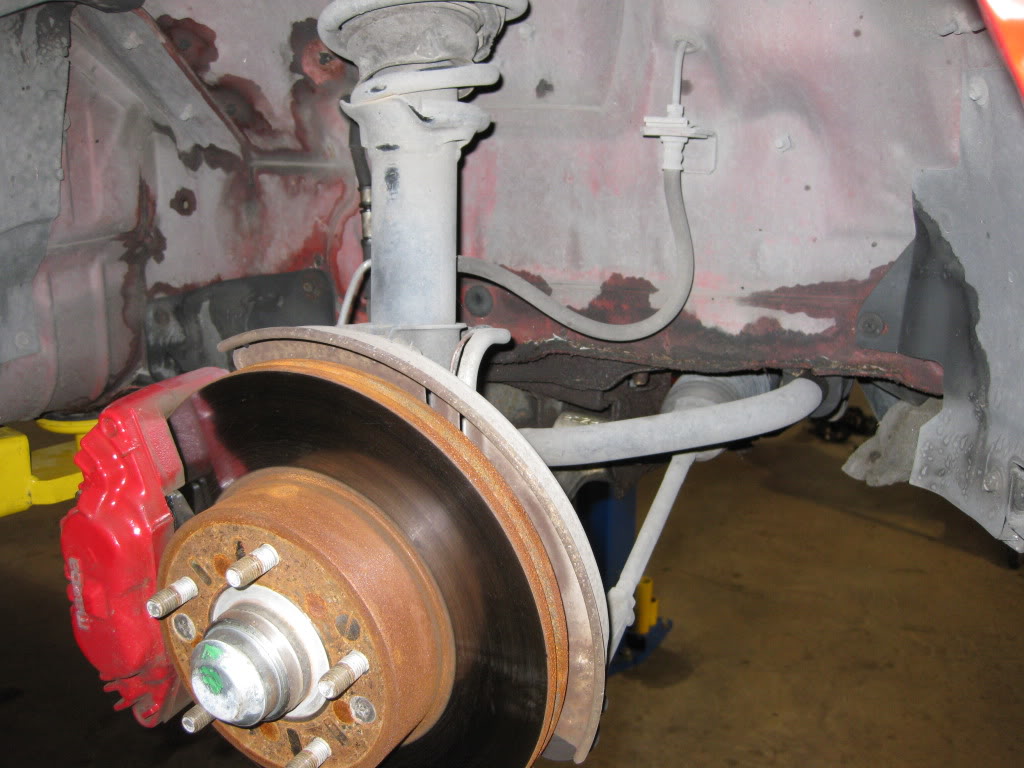
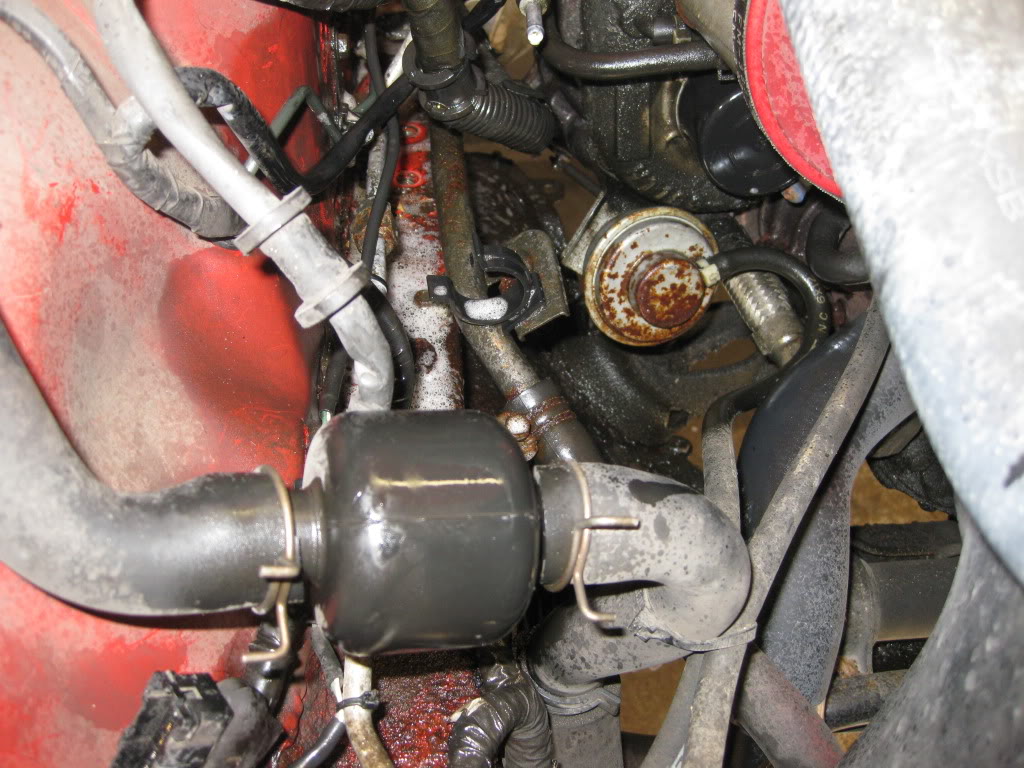
The splitter under the car is where the brake pressure from the front is distributed to each rear wheel. There is no need to touch either of those lines that run to the rear calipers.
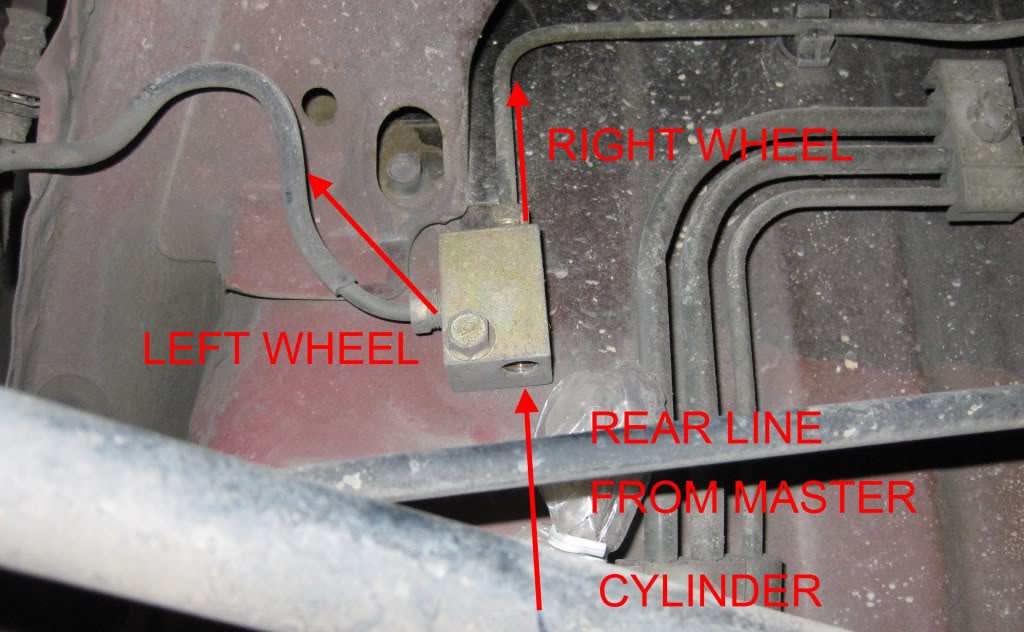
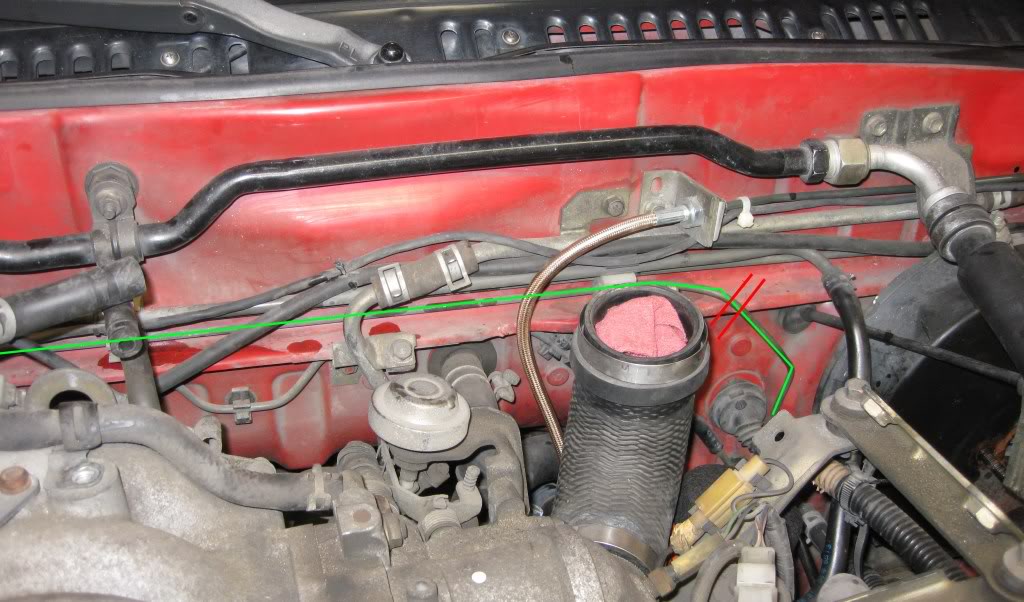
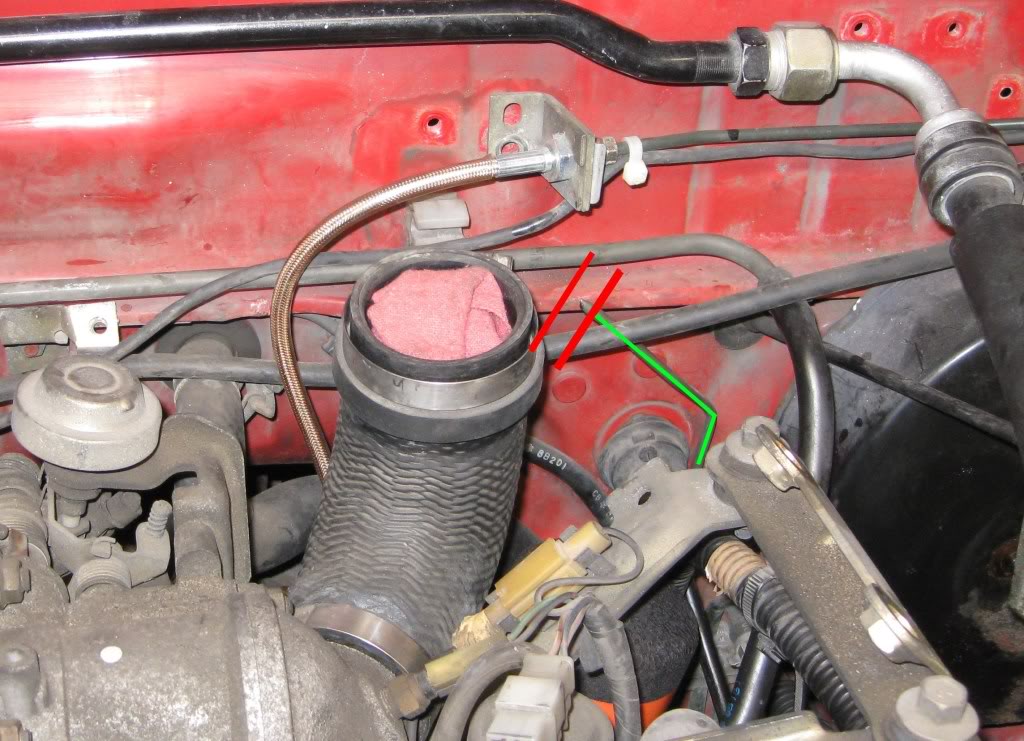
The bending I mentioned earlier is apparent in the following pics. I assumed that since the bends were opposite of what they should have been, that the line may have been for a RHD vehicle.
Be careful with the brake line as you snake it under the vehicle.
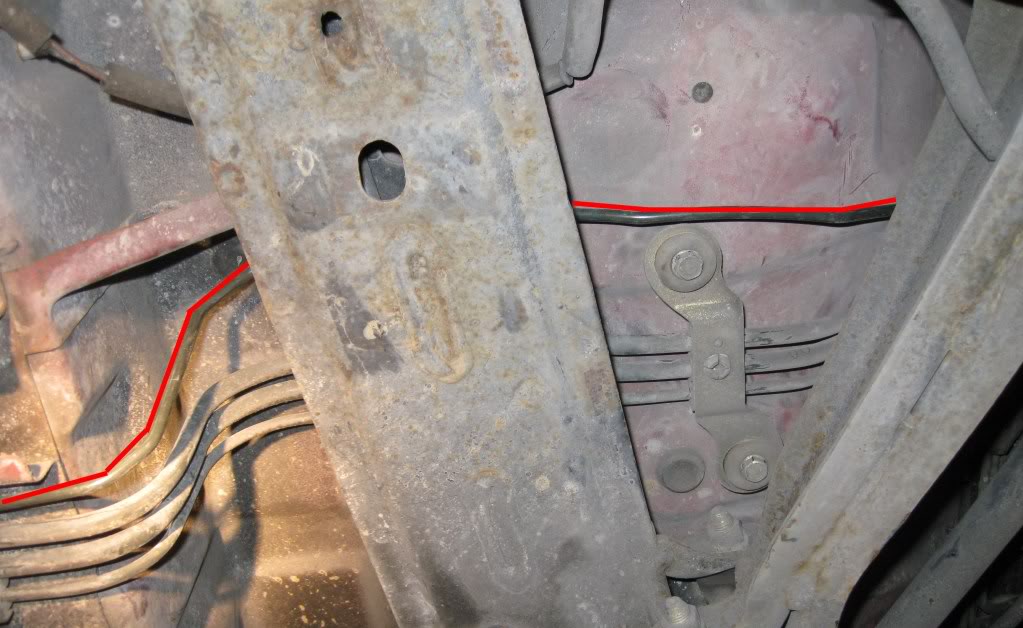
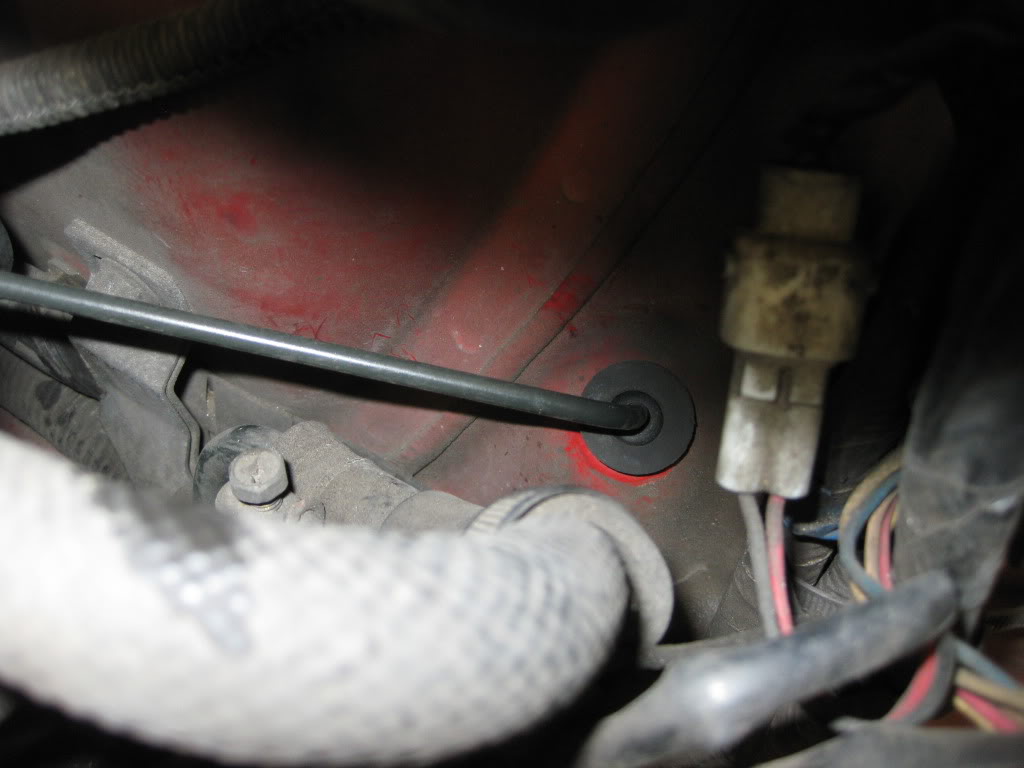
The brake lines should come with grommets to install in the fender. The hardline should sit evenly in the middle of the grommet and not squeezed against the side.
Install the other hardlines from MC to prop valve to FR and Rear and MC to FL.

You will need to bench bleed the MC before installing. Once it and the proportioning valve are installed, connect the rest of the hard lines.
The bending I mentioned earlier is apparent in the following pics. I assumed that since the bends were opposite of what they should have been, that the line may have been for a RHD vehicle.
Be careful with the brake line as you snake it under the vehicle.
The brake lines should come with grommets to install in the fender. The hardline should sit evenly in the middle of the grommet and not squeezed against the side.
Install the other hardlines from MC to prop valve to FR and Rear and MC to FL.
You will need to bench bleed the MC before installing. Once it and the proportioning valve are installed, connect the rest of the hard lines.
03-22-11, 03:12 PM
#4
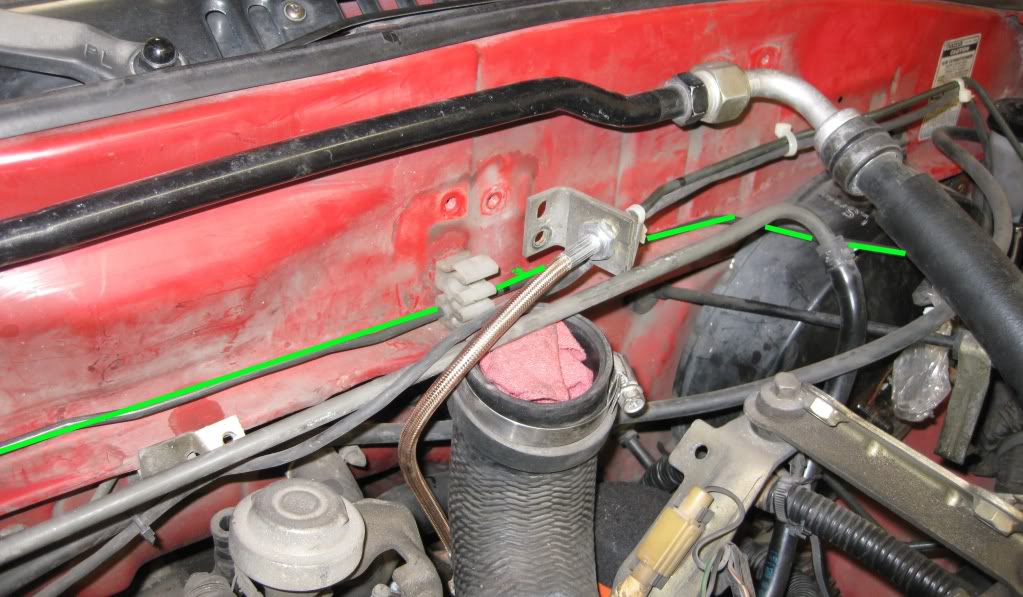
Reinstall brackets under car and along firewall to hold them in place. I took this time to install the SS lines on each of the wheels. Two different lines come in the kit. One pair is for the front and the other for the back.

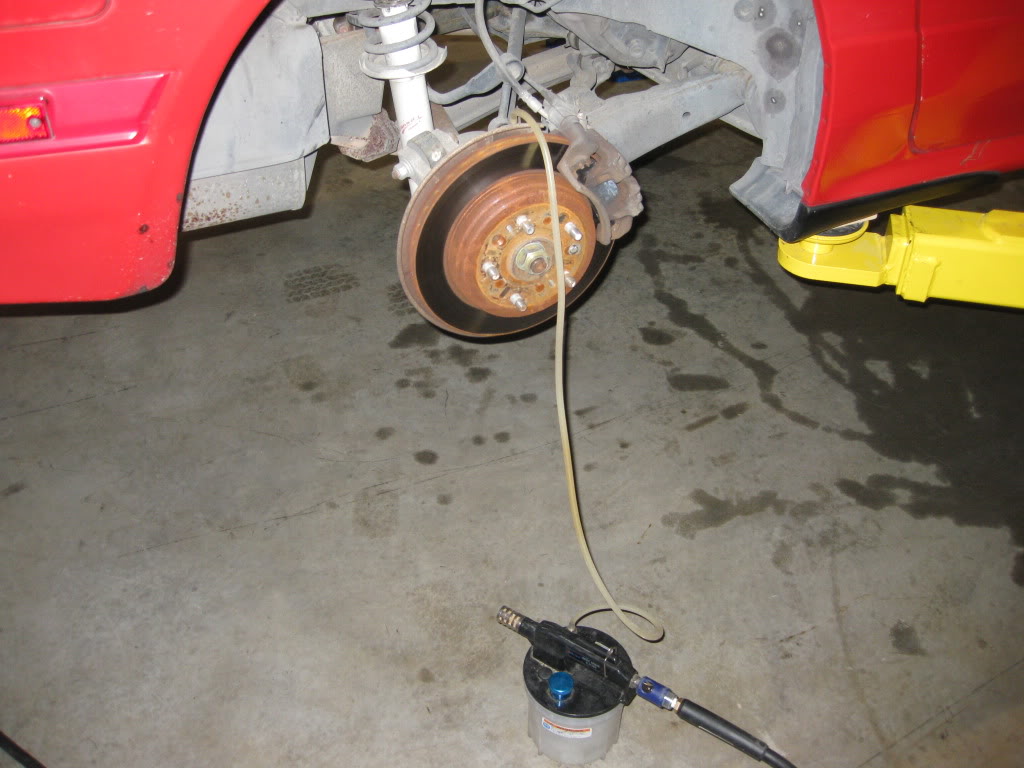
At this point I rebuilt the front calipers (sorry, did not take any pics of process). Reinstall everything and bleed the brakes in order from RR, LR, RF, LF. Make sure any and all air is expelled from the system. The pedal should be firm. Use caution the first time you try the brakes on a road test.
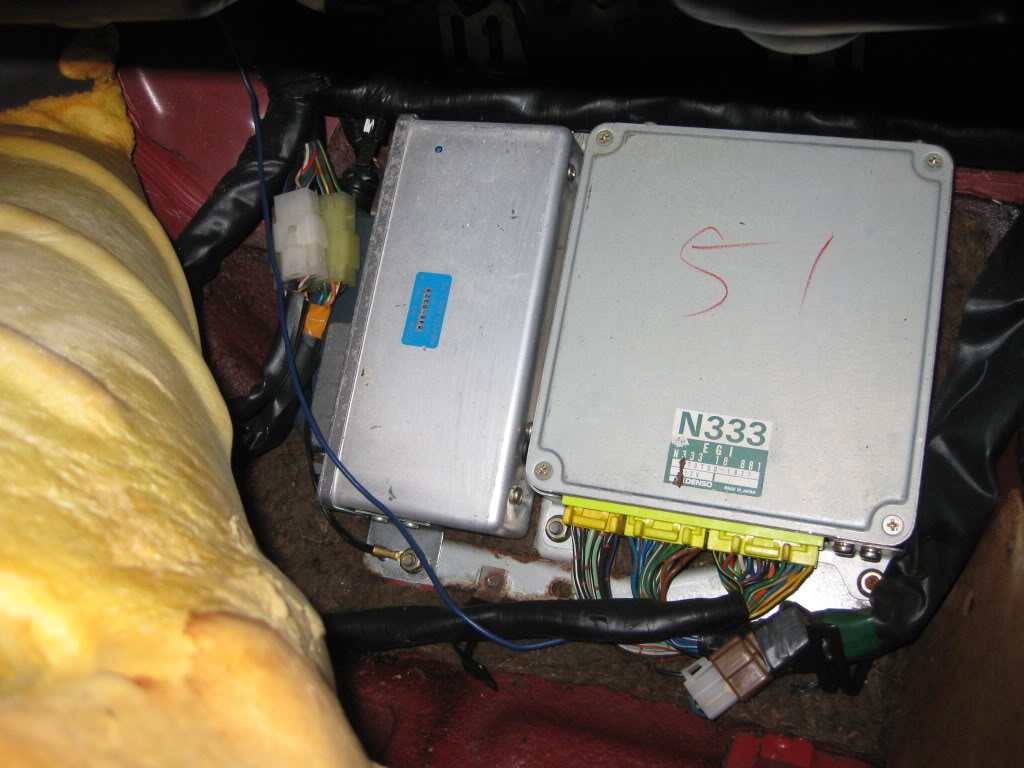
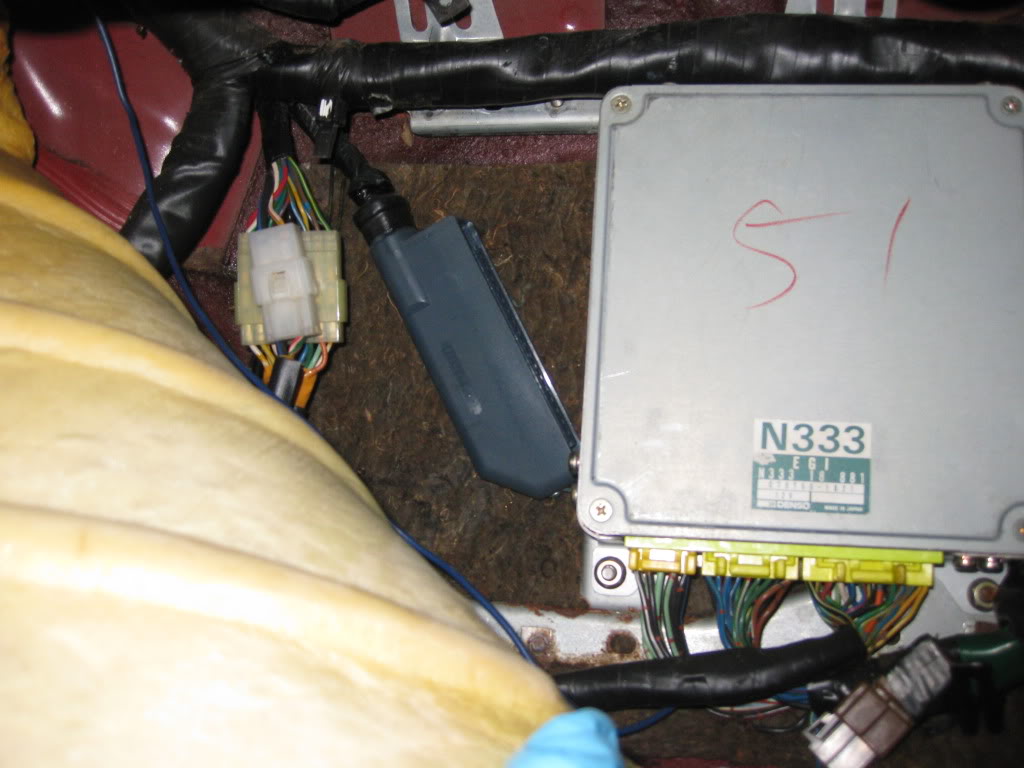
The ABS idiot light will obviously be illuminated if you disconnect the pump. The problem is that the ABS computer is looking for a now nonexistent system component. You will need to remove the ABS computer that sits next to your ECU to turn it off. You can access it by removing the passenger-side kick plate on the floor. There is no need to cut up your wiring harness, so I suggest leaving the connector there.
At this point I rebuilt the front calipers (sorry, did not take any pics of process). Reinstall everything and bleed the brakes in order from RR, LR, RF, LF. Make sure any and all air is expelled from the system. The pedal should be firm. Use caution the first time you try the brakes on a road test.
The ABS idiot light will obviously be illuminated if you disconnect the pump. The problem is that the ABS computer is looking for a now nonexistent system component. You will need to remove the ABS computer that sits next to your ECU to turn it off. You can access it by removing the passenger-side kick plate on the floor. There is no need to cut up your wiring harness, so I suggest leaving the connector there.
03-22-11, 03:16 PM
#5
Clean up
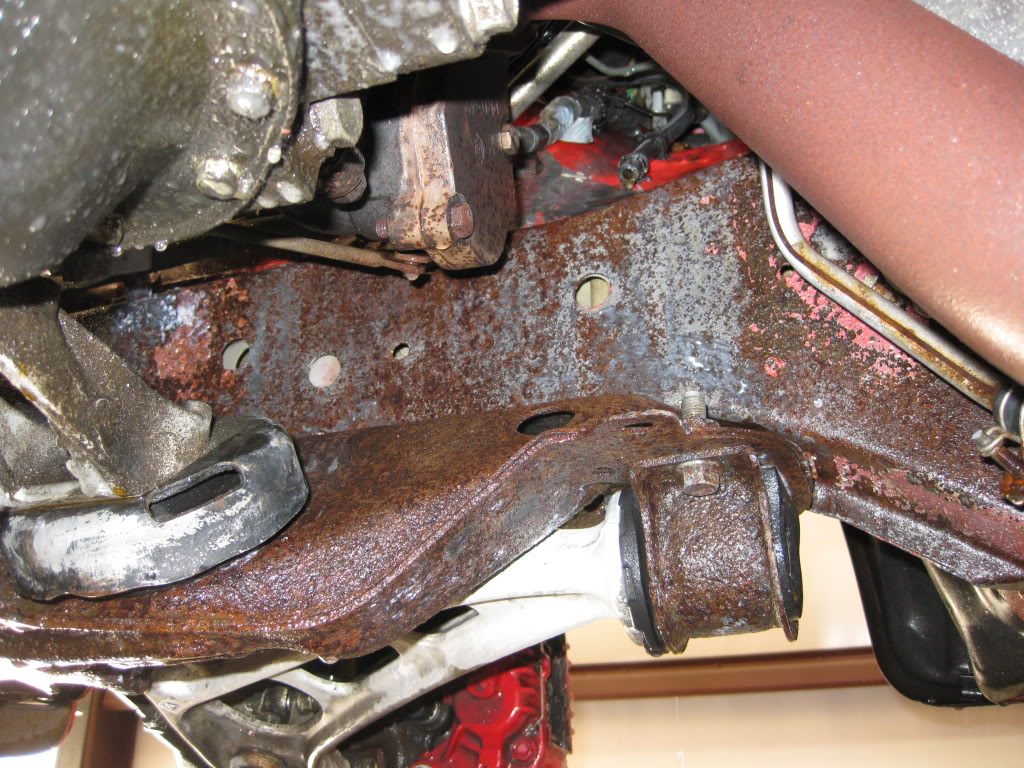
The pump on my car started leaking brake fluid substantially before I was able to address the issue. The PO had let the car sit for a while before I bought it and I did the same over the last year or so. Rust had already spread underneath the pump and onto the frame rail before I managed to gather all the parts needed for the conversion. The rust, though superficial, will continue to spread unless properly treated. I plan to fully treat the engine bay with a good media blasting and new protective coating when it’s time for a rebuild.
In the meantime, I did my best to clean the affected areas. The leaked fluid had plenty of time to get into every little crevice, so a thorough cleaning was a must. I used some navel jelly to treat the affected areas after a chemical cleaner was applied and rinsed off. Give it enough time to work and navel jelly can remove a good portion of the rust.
You can see in the pics below the extent of the damage. If you’re going to be spraying cleaner and/or water in the area, make sure all intake hoses are covered.
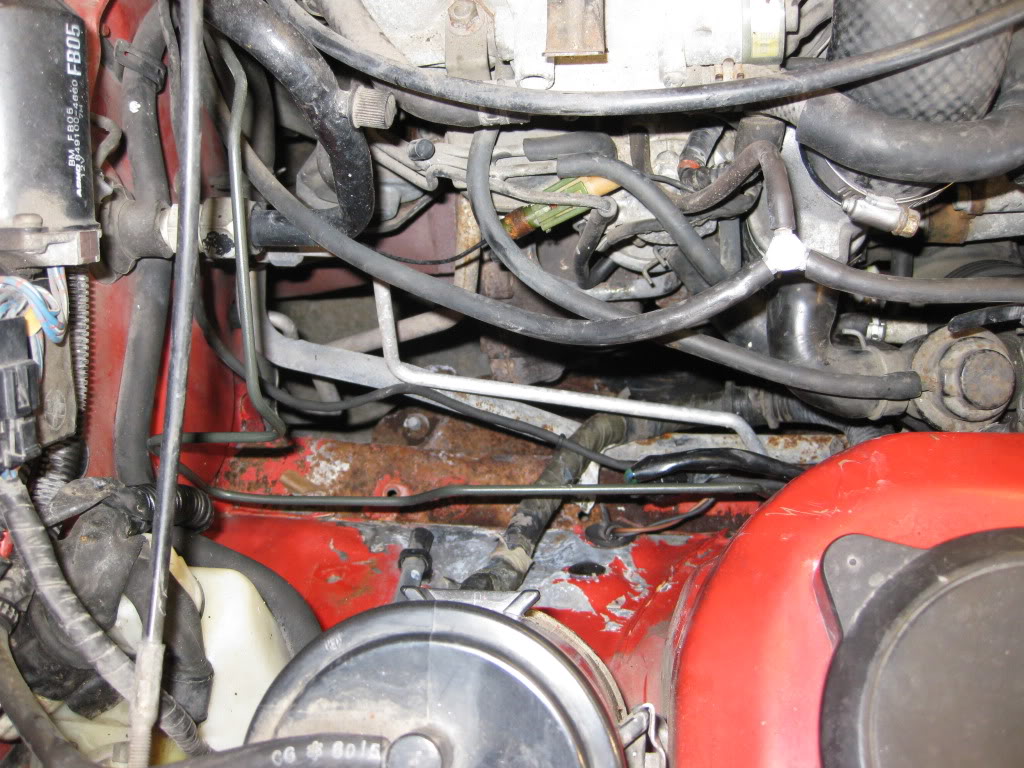
You can see how much space is freed up without the pump.
I have additional pics from the project if anyone is interested in viewing. You can access the album here.
The pump on my car started leaking brake fluid substantially before I was able to address the issue. The PO had let the car sit for a while before I bought it and I did the same over the last year or so. Rust had already spread underneath the pump and onto the frame rail before I managed to gather all the parts needed for the conversion. The rust, though superficial, will continue to spread unless properly treated. I plan to fully treat the engine bay with a good media blasting and new protective coating when it’s time for a rebuild.
In the meantime, I did my best to clean the affected areas. The leaked fluid had plenty of time to get into every little crevice, so a thorough cleaning was a must. I used some navel jelly to treat the affected areas after a chemical cleaner was applied and rinsed off. Give it enough time to work and navel jelly can remove a good portion of the rust.
You can see in the pics below the extent of the damage. If you’re going to be spraying cleaner and/or water in the area, make sure all intake hoses are covered.
You can see how much space is freed up without the pump.
I have additional pics from the project if anyone is interested in viewing. You can access the album here.

Trending Topics

 08-27-17, 07:41 PM
#11
Can Post Only in New Member Section

Join Date: Aug 2017
Location: Indiana
Posts: 3
Likes: 0
Received 0 Likes
on
0 Posts
Need help 🙁
I just did the abs pump removal as per this thread. I have 1990 tii. I just can't get the brakes to bleed. I bench bled the master cylinder but can't get the brakes to bleed at the calipers. I am wondering if there brake booster for non abs and abs models are different and the push rod lengths are not matching up? Any help is appreciated!
08-28-17, 04:58 AM
#12
Senior Member
well i bought the mazdatrix abs removal kit, ended up only using the Y block and ditched the hose and made some new copper pipes (can be bought by lenght from a shop also) works good but the pedal is really stiff (do not remember how it was with the abs pump)
anyway this is what i got from mazdatrix as instructions:
ABS PUMP BYPASS KIT
SEE INSTRUCTIONS BELOW-
THERE'S ONE LINE COMING FROM
THE MASTER CYL MARKED R, AND
ONE LINE COMING OUT OF THE ABS
PUMP GOING TO THE REAR.CONNECT
THESE TWO WITH THE HOSE. THERE
IS ONE COMING FROM MASTER CYL
MARKED F, AND TWO COMING FROM
ABS PUMP TO THE FRONT WHEELS-
CONNECT THESE THREE WITH THE
"T"
08-29-17, 09:44 AM
#13
Can Post Only in New Member Section
Join Date: Aug 2017
Location: Indiana
Posts: 3
Likes: 0
Received 0 Likes
on
0 Posts
I just did the abs pump removal as per this thread. I have 1990 tii. I just can't get the brakes to bleed. I bench bled the master cylinder but can't get the brakes to bleed at the calipers. I am wondering if there brake booster for non abs and abs models are different and the push rod lengths are not matching up? Any help is appreciated!

Excellent write up though!

Thread
Thread Starter
Forum
Replies
Last Post
trickster
2nd Generation Specific (1986-1992)
25
07-01-23 04:40 PM
Skeese
Adaptronic Engine Mgmt - AUS
65
03-28-17 03:30 PM