Aluminum Tire Trailer & Hitch Build
 05-19-10, 11:21 AM
#1
Aluminum Tire Trailer & Hitch Build
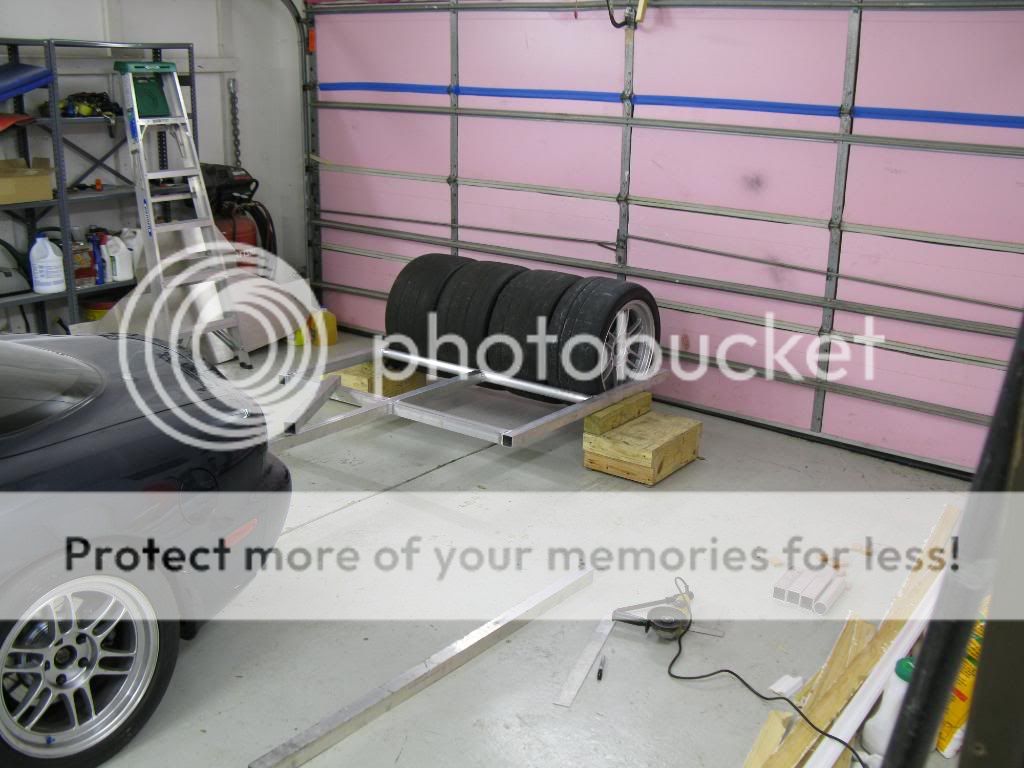
Well since I have a set of race wheels now I need a way to get them to the track. I can only fit one tire in my car (passenger seat), and thats even a stretch, so I knew a trailer of sorts was in order. Of course I could have bought one of those harbor freight ones, or a northern tool one, but thats just not my style.
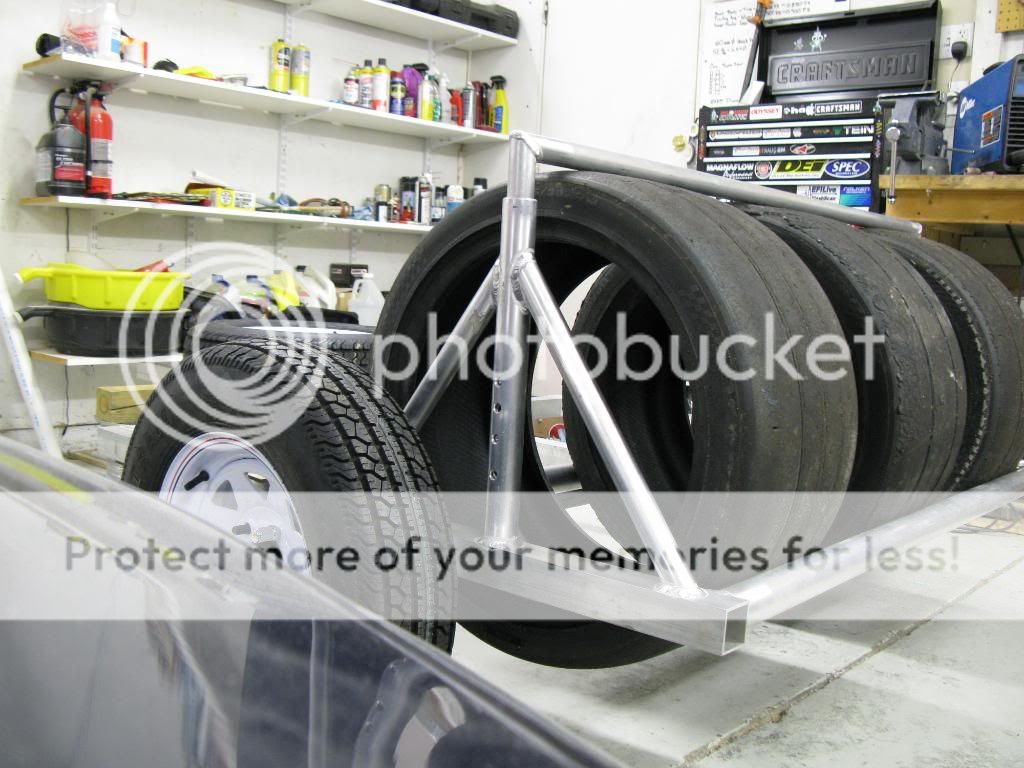
I figured an aluminum framed tire trailer would be much lighter to move around when its not hooked up to my car. So far the frame is less than 25 lbs. I'm estimating the whole thing will be 35 lbs when finished. Then I'll add a platform and tool box to the front, and a tire hold-down setup. This is all I could get finished this weekend. I'm going to be ordering up my axle tomorrow, custom from Dexter Axle. I'm going with an independent torsion axle, 600 lb capacity. Should be perfect for this trailer, which I estimate to weigh ~350-400 lbs fully loaded.
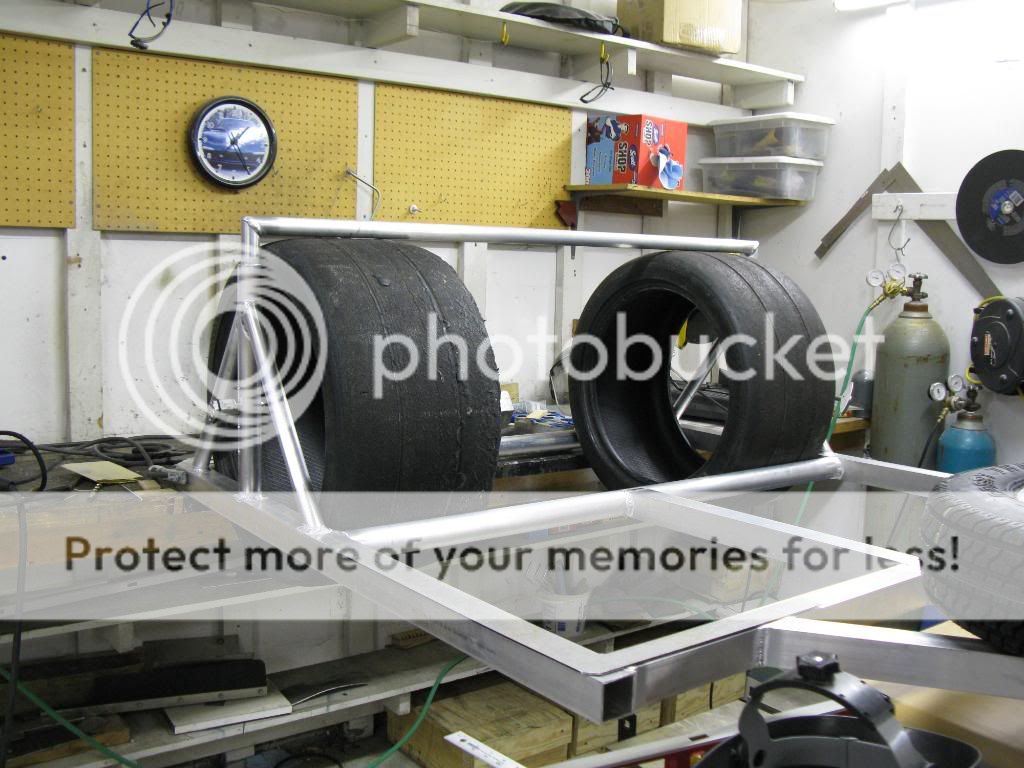
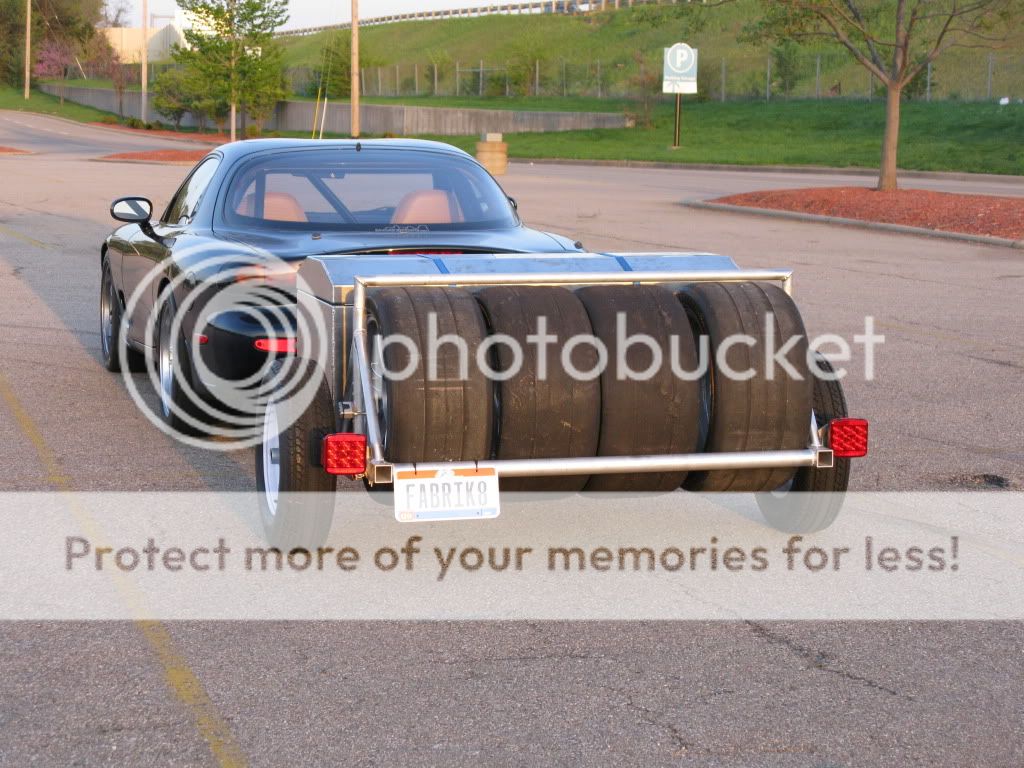
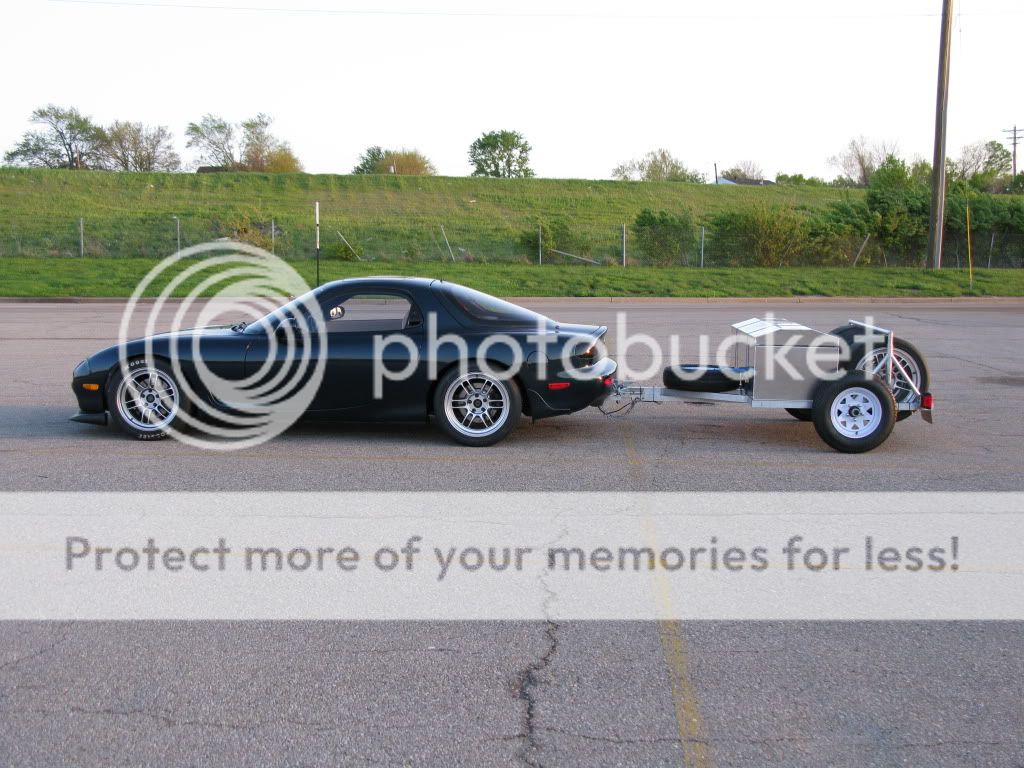
The frame is made from 6061-T6 aluminum tubing. Its 2"x2" square x 0.125" wall. Its just a touch under 8' long, and the inside of the frame rails are 51" to accommodate 4 315s. I have a bad back, so I wanted this to be as low profile and close to the ground as reasonably possible so I don't have to lift the tires much. I went with the torsion axle for this reason amongst others. Depending on what specs I pick for the axle, the bottom of the trailer will be close to 11" from the ground. The bottom of the tires will be 6" ground clearance. Plenty more than my car has, so I should be good.
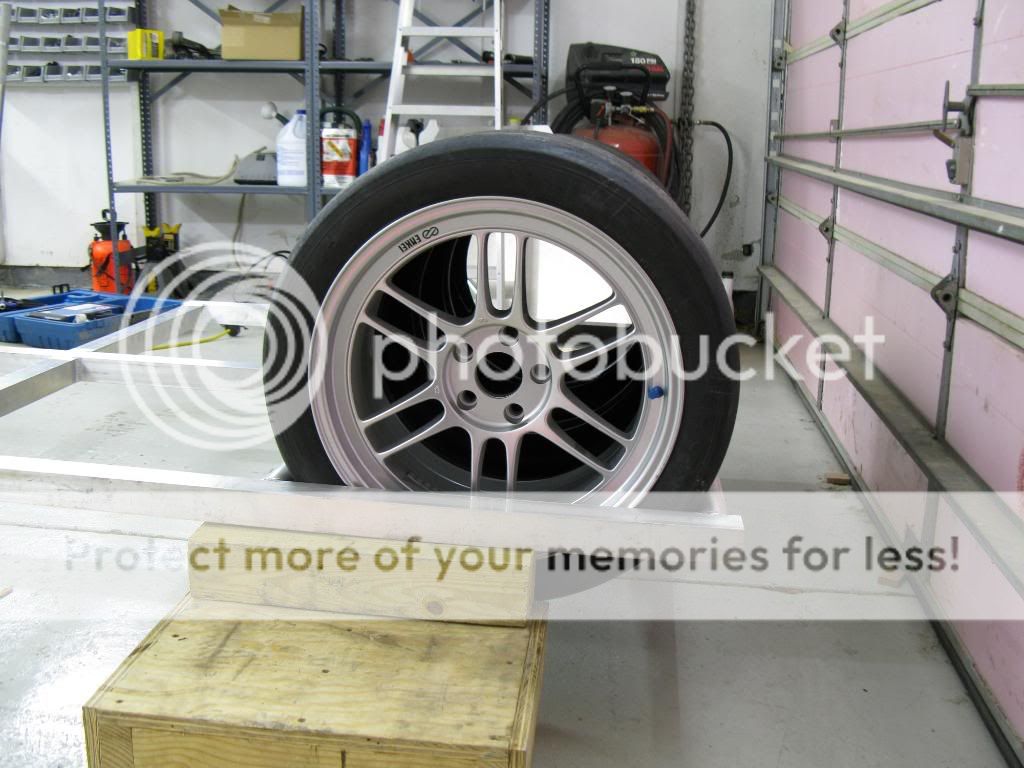
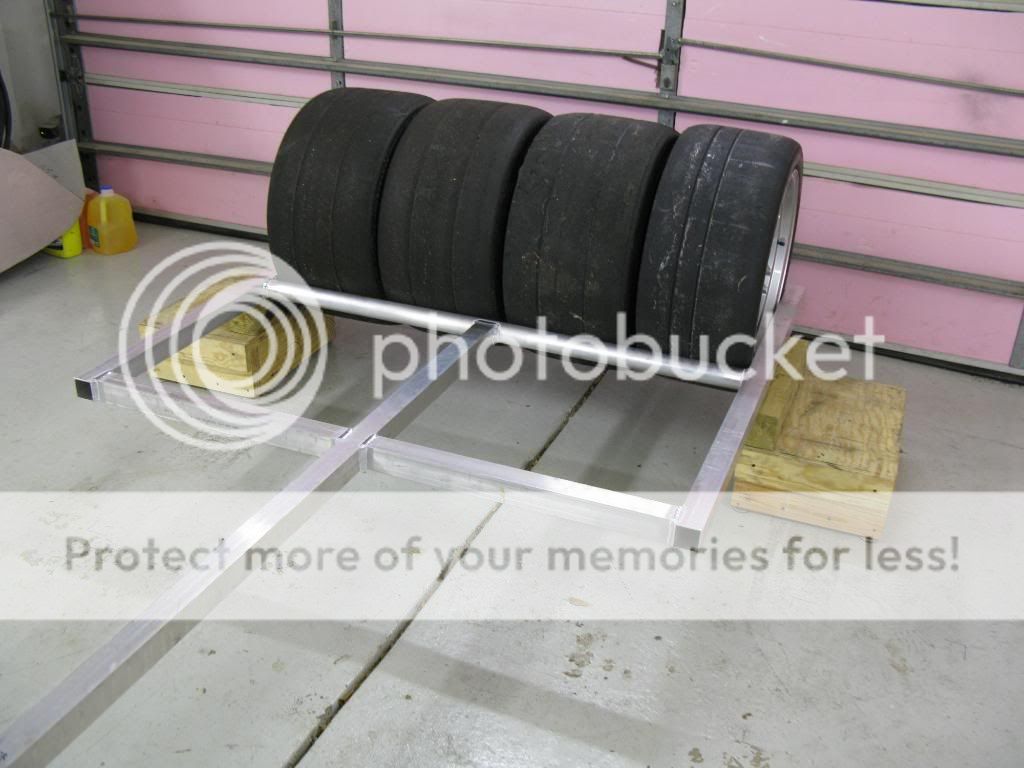
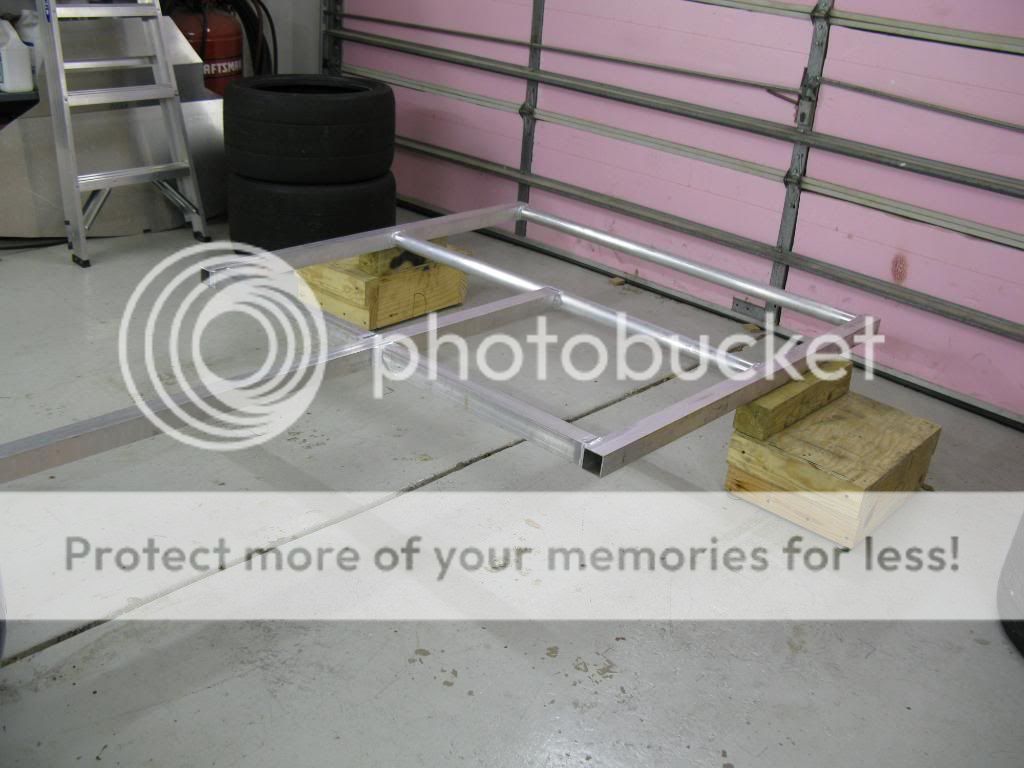
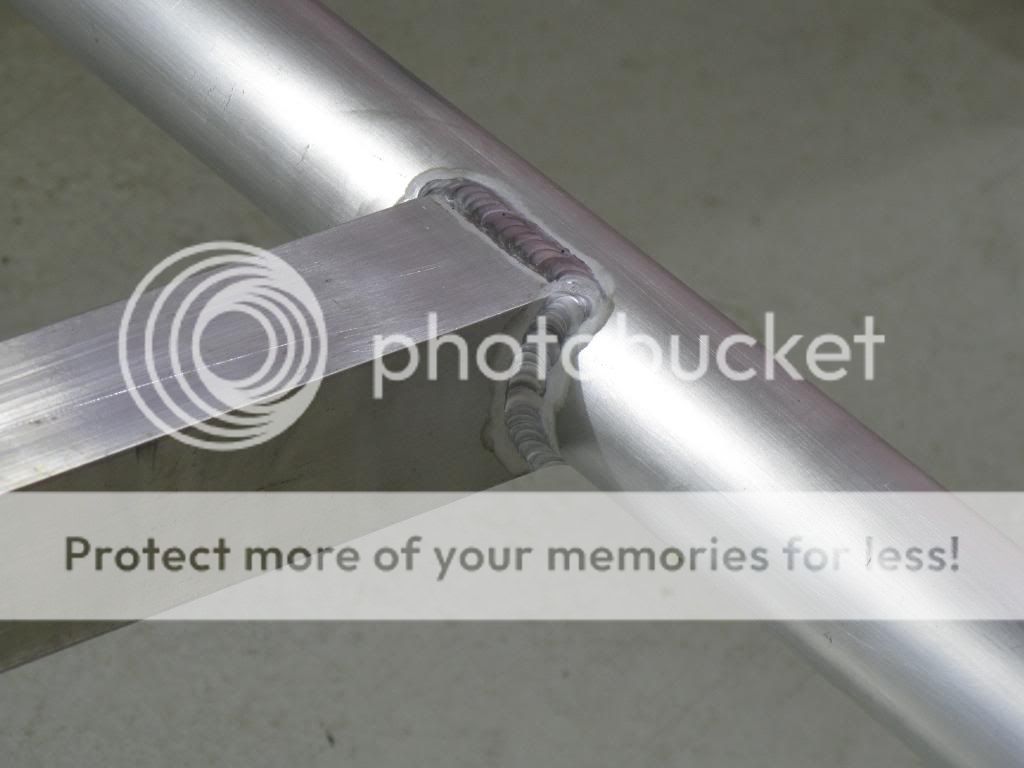

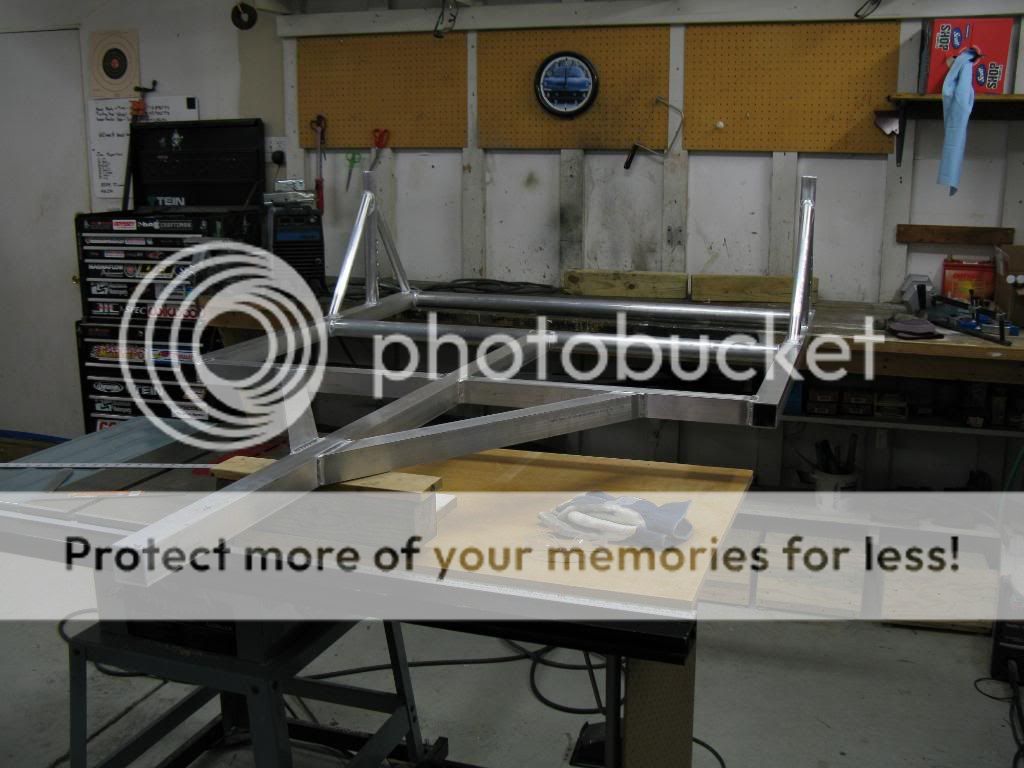
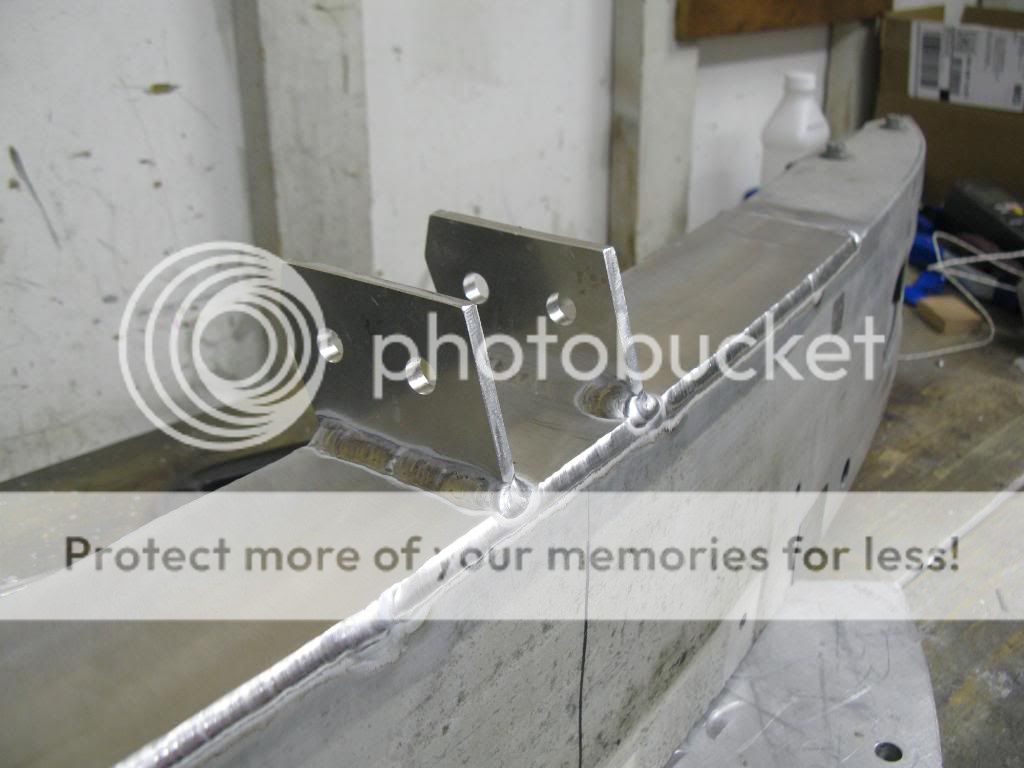
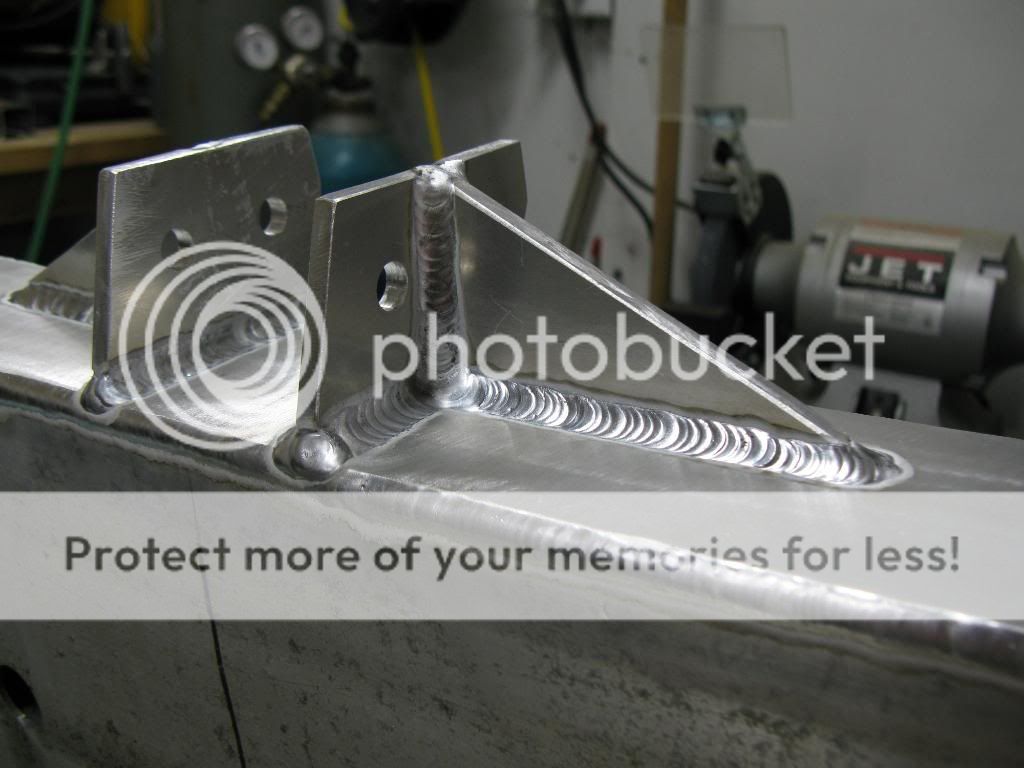
Made some progress over the several days. I got the tire hold-down pieces of the frame completed and welded on. I also added triangulation pieces to support the tongue of the trailer. I just need to add one more piece to the tongue support and I'll be ready to bolt on the tongue. I still need to make the piece that fits in the vertical towers that actually holds down the tires.

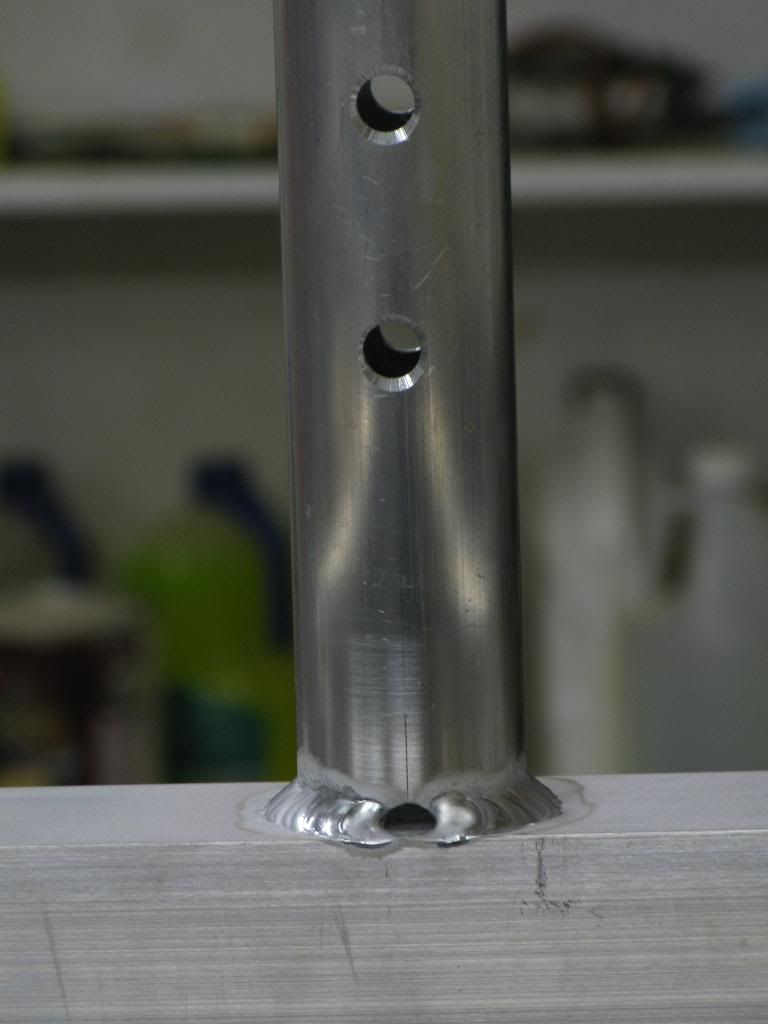
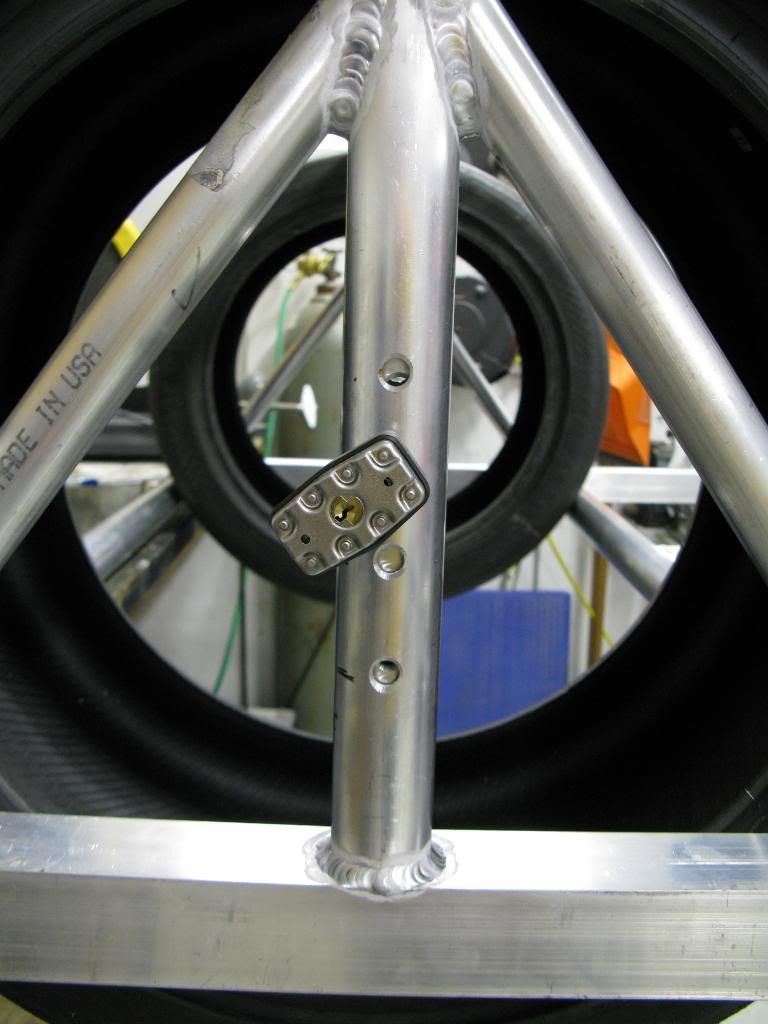
The spacing of the four holes is such that I have 1/4" adjustability.
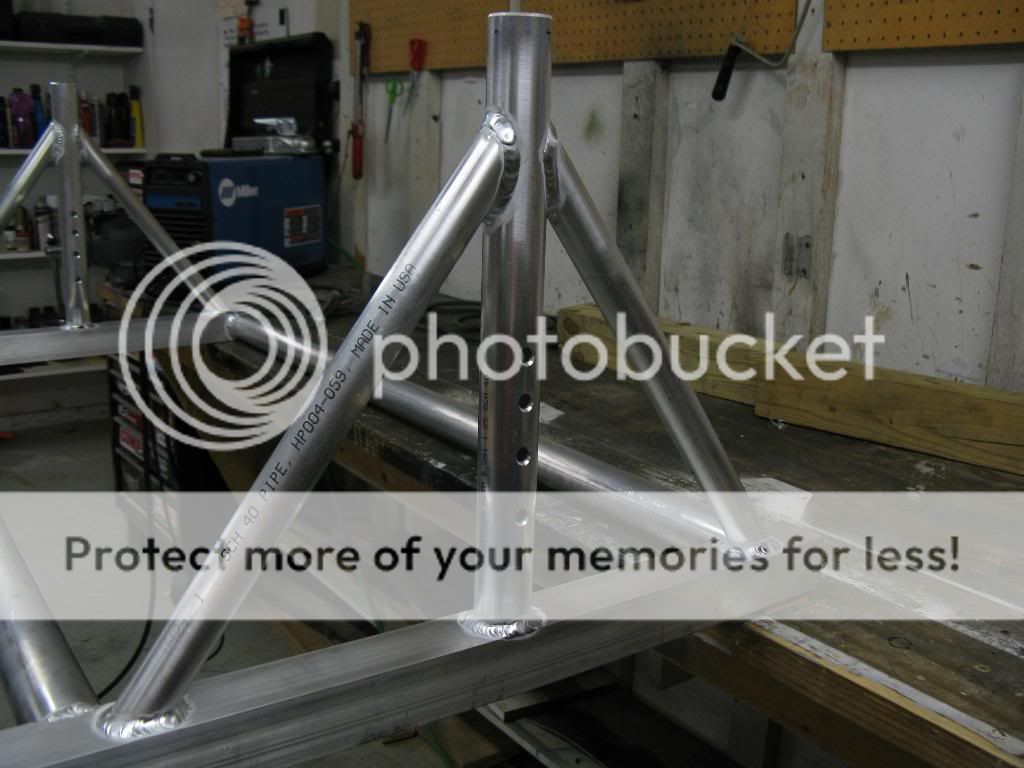
Notice the drain holes at the bottom of the vertical tubes. Don't want them filling up with water if it rains.
I finished up the tire hold down part of the trailer. Holds the tires perfectly. If you look closely at the second pic, you can see the 1/4" adjustability. One hole is almost lined up above and below.
I figured an aluminum framed tire trailer would be much lighter to move around when its not hooked up to my car. So far the frame is less than 25 lbs. I'm estimating the whole thing will be 35 lbs when finished. Then I'll add a platform and tool box to the front, and a tire hold-down setup. This is all I could get finished this weekend. I'm going to be ordering up my axle tomorrow, custom from Dexter Axle. I'm going with an independent torsion axle, 600 lb capacity. Should be perfect for this trailer, which I estimate to weigh ~350-400 lbs fully loaded.
The frame is made from 6061-T6 aluminum tubing. Its 2"x2" square x 0.125" wall. Its just a touch under 8' long, and the inside of the frame rails are 51" to accommodate 4 315s. I have a bad back, so I wanted this to be as low profile and close to the ground as reasonably possible so I don't have to lift the tires much. I went with the torsion axle for this reason amongst others. Depending on what specs I pick for the axle, the bottom of the trailer will be close to 11" from the ground. The bottom of the tires will be 6" ground clearance. Plenty more than my car has, so I should be good.
Made some progress over the several days. I got the tire hold-down pieces of the frame completed and welded on. I also added triangulation pieces to support the tongue of the trailer. I just need to add one more piece to the tongue support and I'll be ready to bolt on the tongue. I still need to make the piece that fits in the vertical towers that actually holds down the tires.
The spacing of the four holes is such that I have 1/4" adjustability.
Notice the drain holes at the bottom of the vertical tubes. Don't want them filling up with water if it rains.
I finished up the tire hold down part of the trailer. Holds the tires perfectly. If you look closely at the second pic, you can see the 1/4" adjustability. One hole is almost lined up above and below.
 05-19-10, 11:22 AM
#2
I still need to see about some sort of dry/non messy lubricant I can put where the aluminum slides. It wants to bind up if you don't pull it perfectly straight up. I was considering the removable piece hard anodized, but not sure what the cost of that would be. The other alternative would be to use a dry lubricant like a wax based lube, or something like that. I'm not sure what to do about that quite yet.
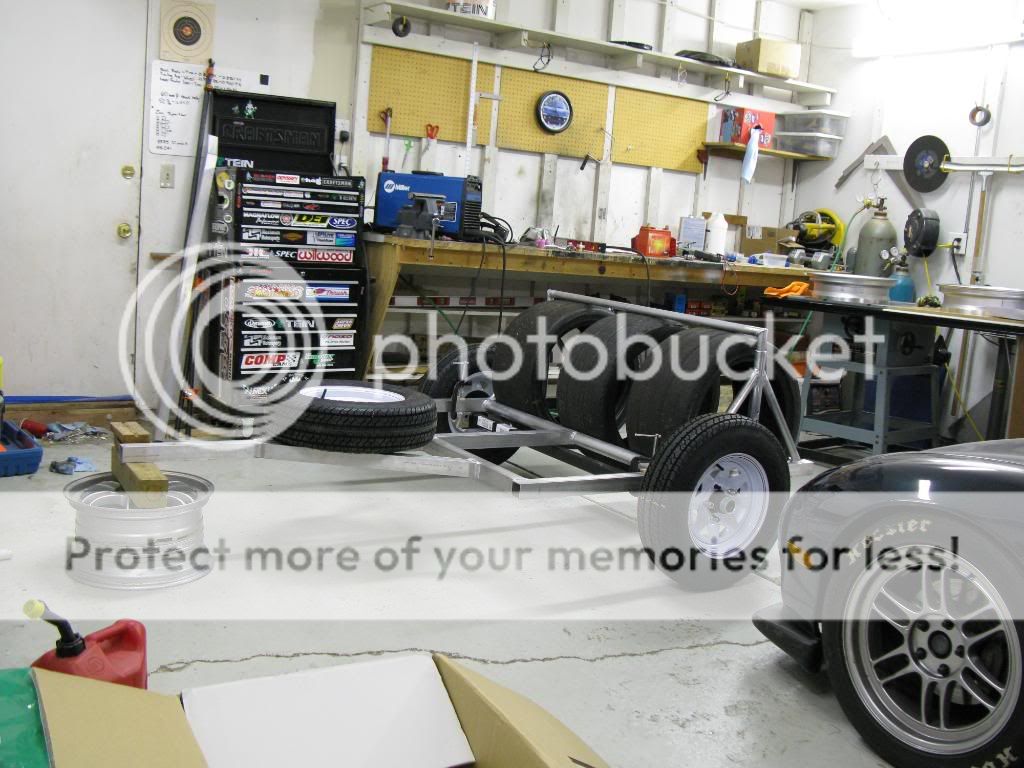
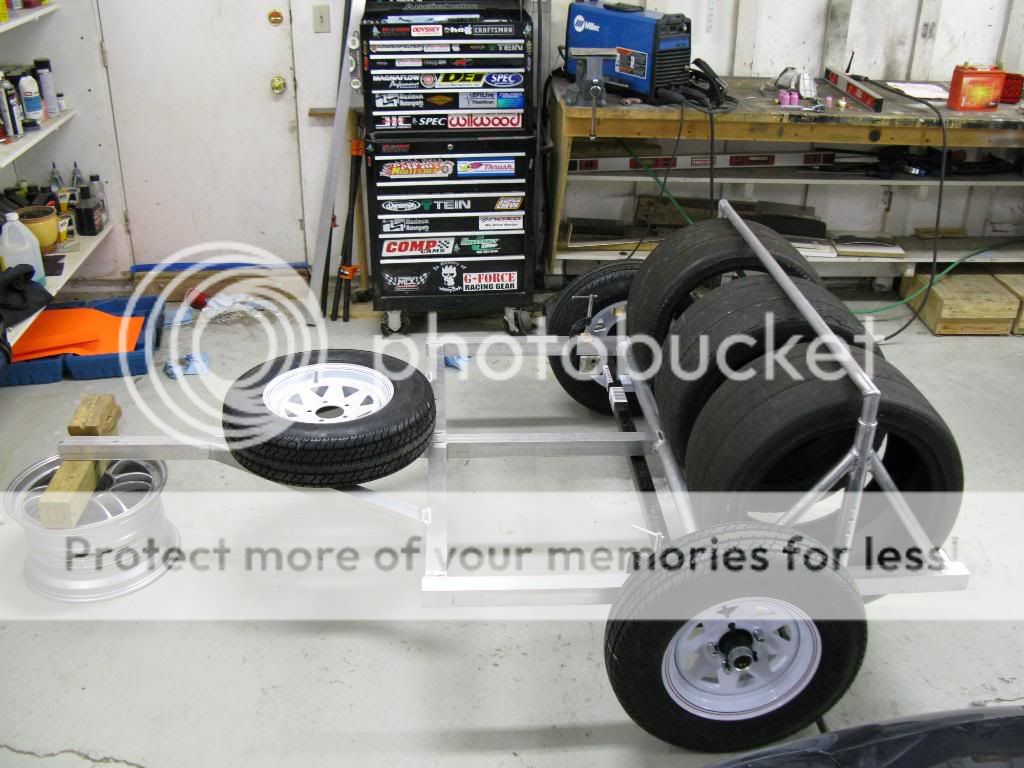
Got my axle today. Its a custom built Dexter axle. 600 lb capacity, independent torsion suspension. Its nice. The trailer will squat down probably another 1.5" fully loaded. The axle is just temporarily held in place with some C-clamps, and the location could change depending on the weight distribution.
If the axle remains near the location where is currently is, looks like putting fenders on will completely block some of the holes for the locks. DesignFail....... Now, is it required by law to have fenders on all trailers regardless of their weight? I could always do a flap sort of thing, but a full fender would be a difficult thing to pull off and not block the holes/locks.
Blah blah blah.....
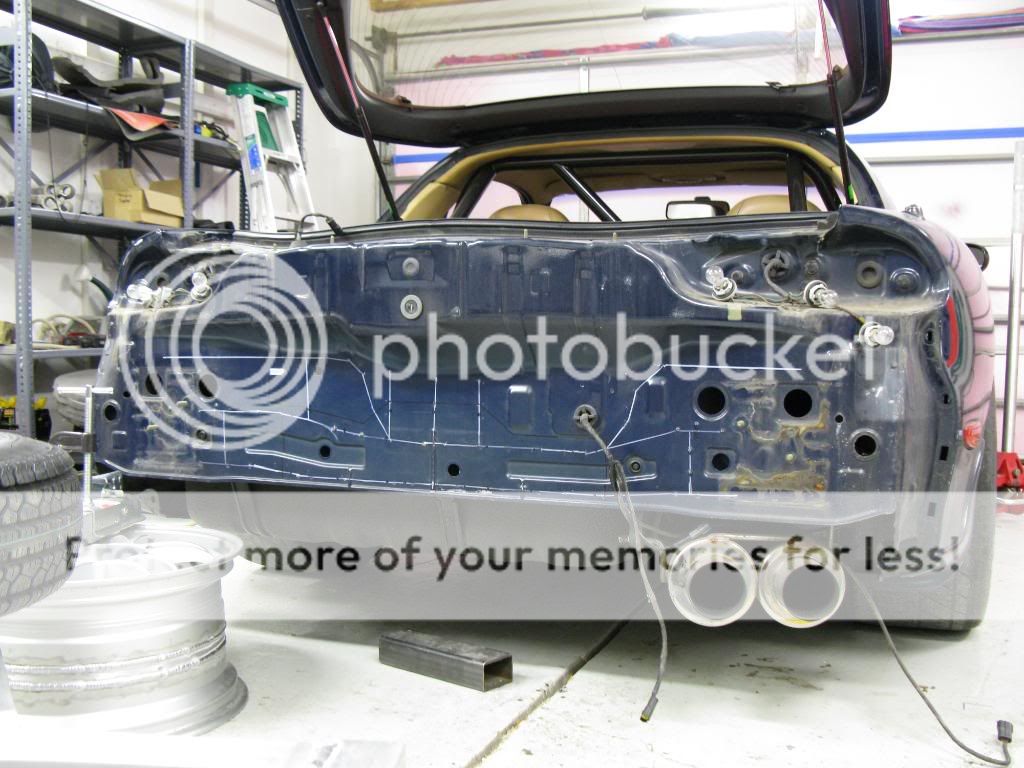
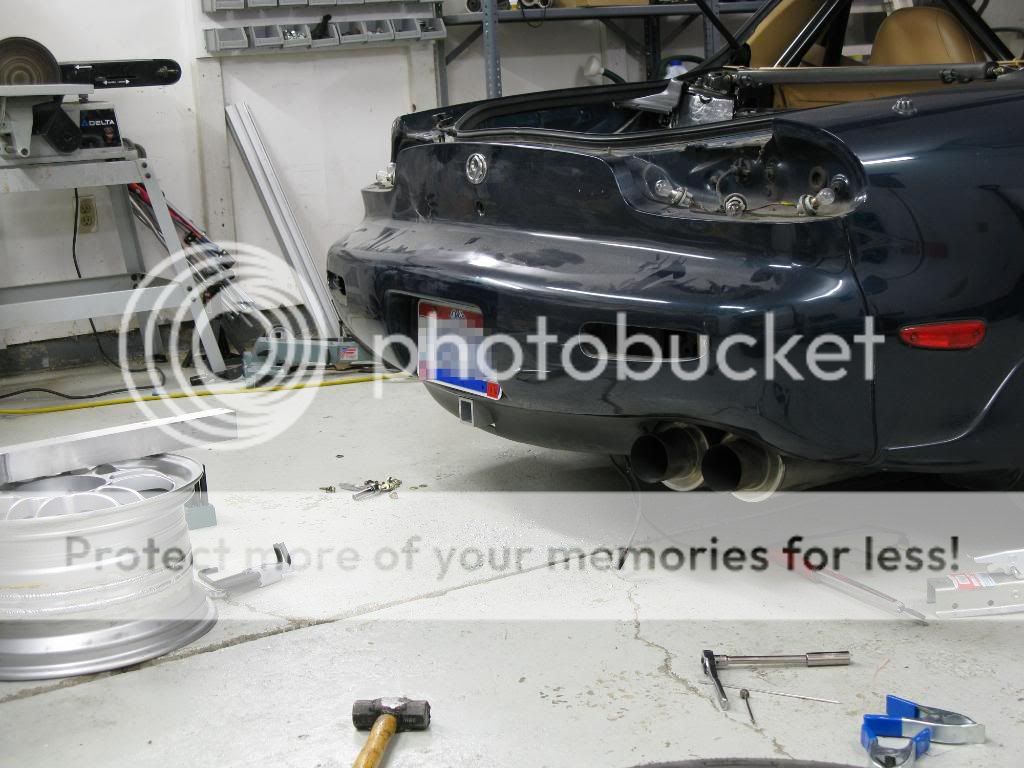
I got started on the trailer hitch. Here is what I've done so far.
I played connect the dots with the spot welds. If I connect to where the spot welds are, I'll be going through two metal thicknesses. Also, it helped visualize where the structure was behind the rear skin. There is a channel that runs across the rear of the car, between the "frame rails". I assume its to stiffen the chassis in torsion, and also provide gas tank protection from rear impact. There is also some pretty strong areas around where the spare tire/trunk metal meets up back there. I looked at it for a good long time before I understood what was back there, and how I would utilize the area best.
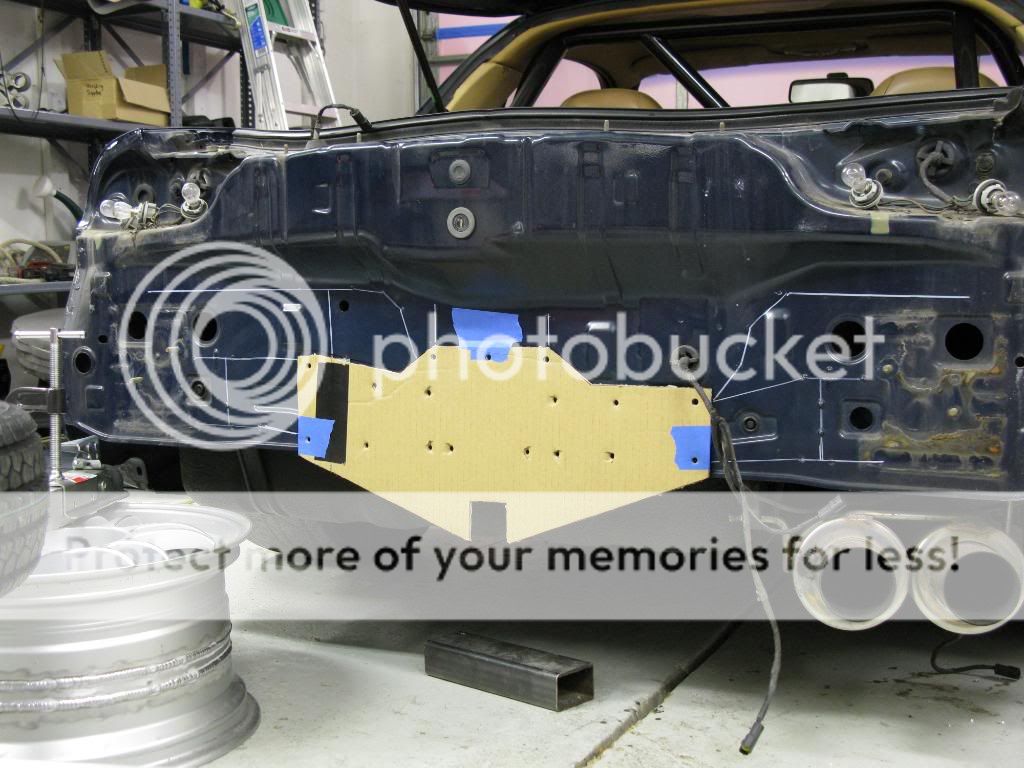
Then I went ahead and made up a template of how to spread the load out over a large area, utilizing a lot of the strong areas back there. I also had to make sure my bolt holes would align perfectly on my lines connecting the spot welds.

Then I made it out of cardboard since its stiffer and would help with the mockup. I punched holes in this piece so I could see that they lined up how I wanted. All looked well with this piece.
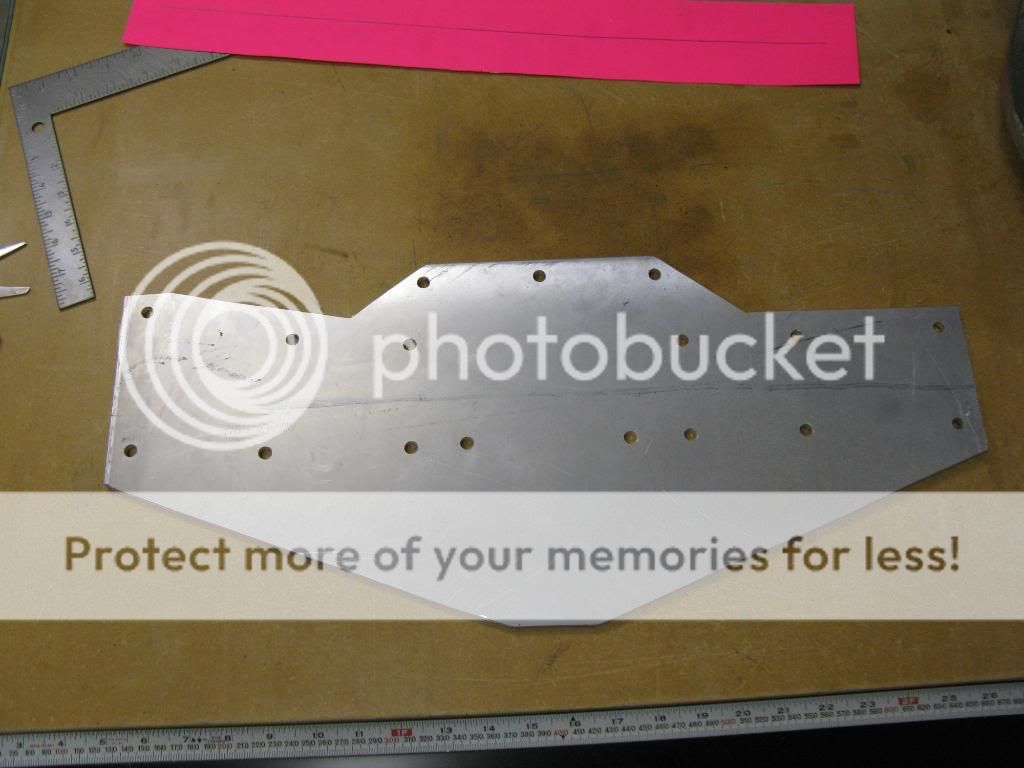
Then transfered the template to some 1/4" aluminum plate (1/4" thick) and drilled holes and cut out.
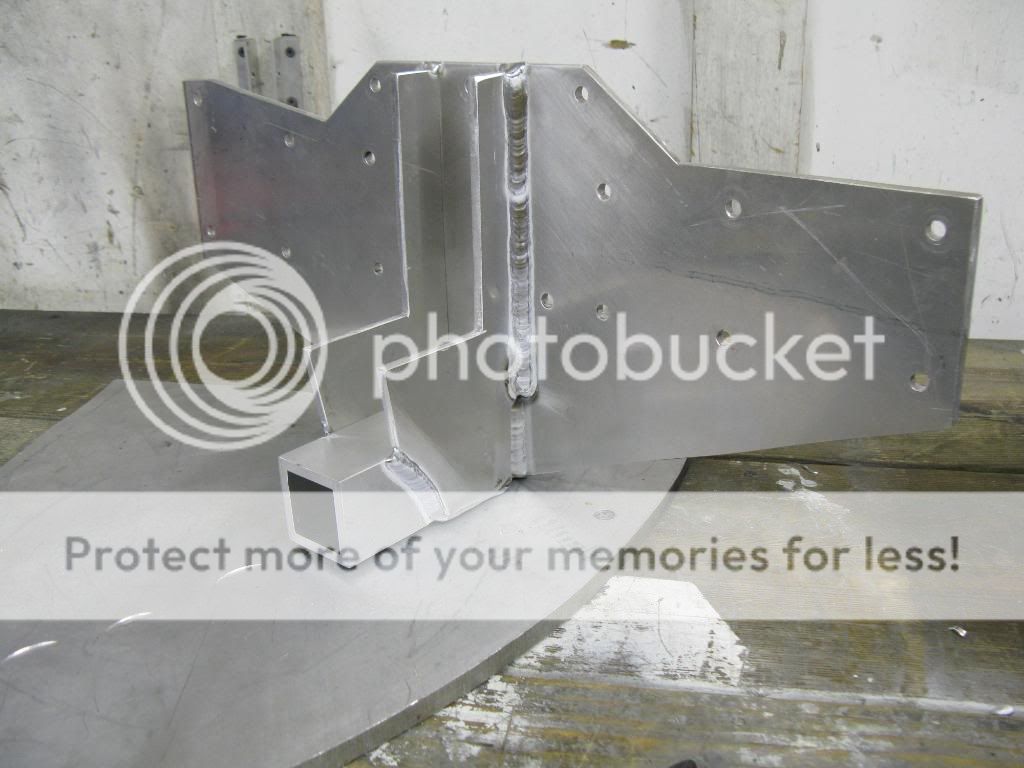
I then started modifying the rear aluminum bumper. I welded an aluminum plate on the bottom, to make a solid platform for me to place some brackets. The hitch will be attached to both the aluminum plate on the body, and the aluminum bumper. This bumper is a pretty thick aluminum extrusion with interior passages which make it very strong. Here is the plate welded around the edges. I drilled 5 5/8" holes so I could plug weld it on.
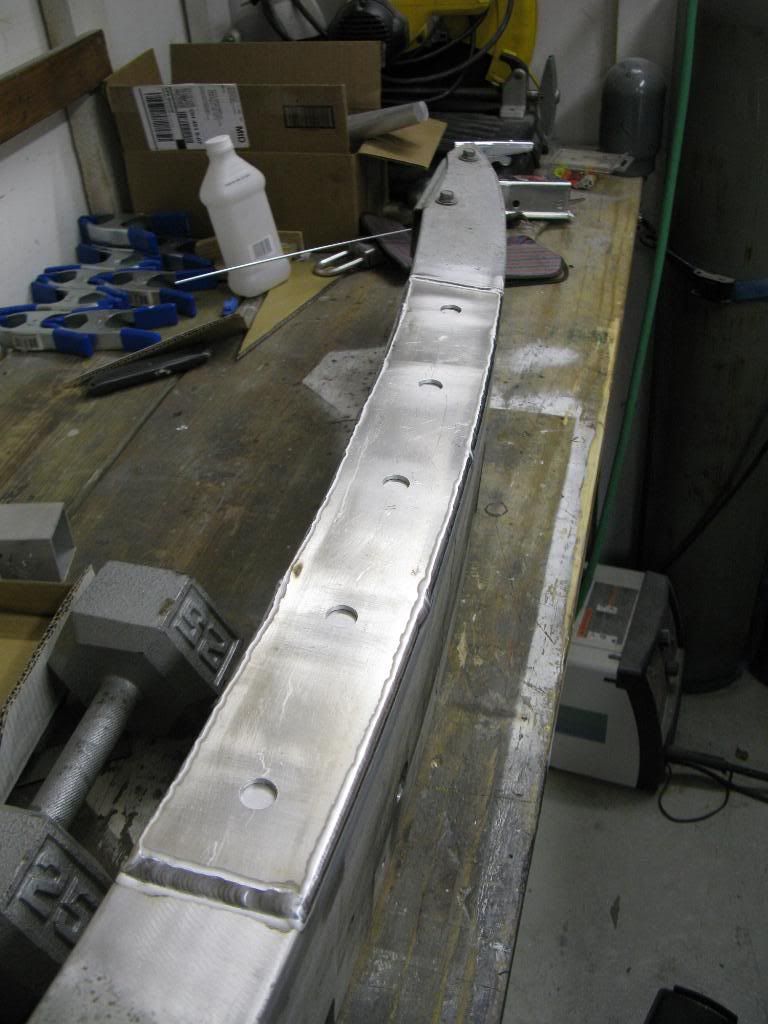
Here is a closeup of the weld (fusion only) around the edges.
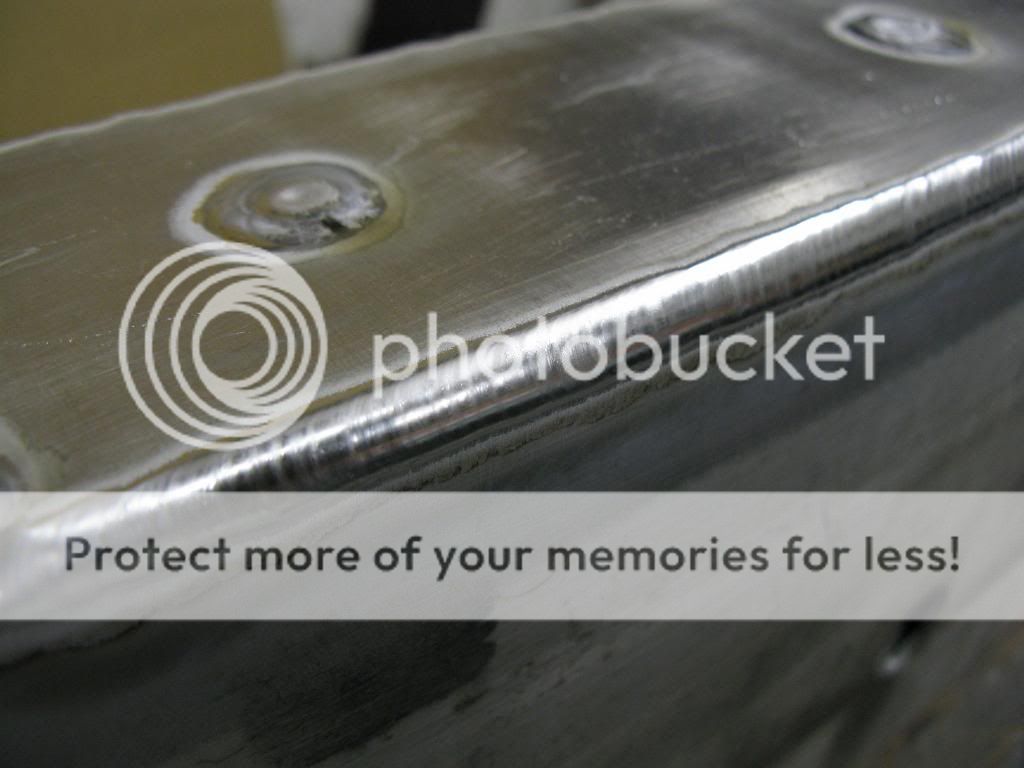
Plug welded all 5 holes.
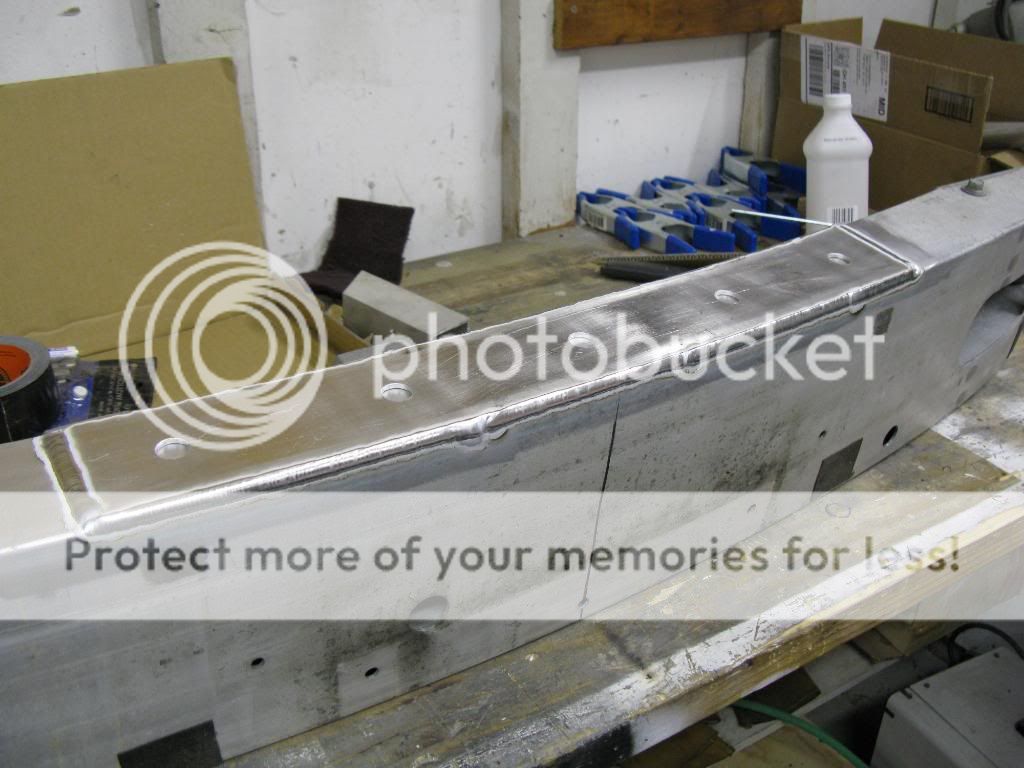
Plug welds sanded flush.
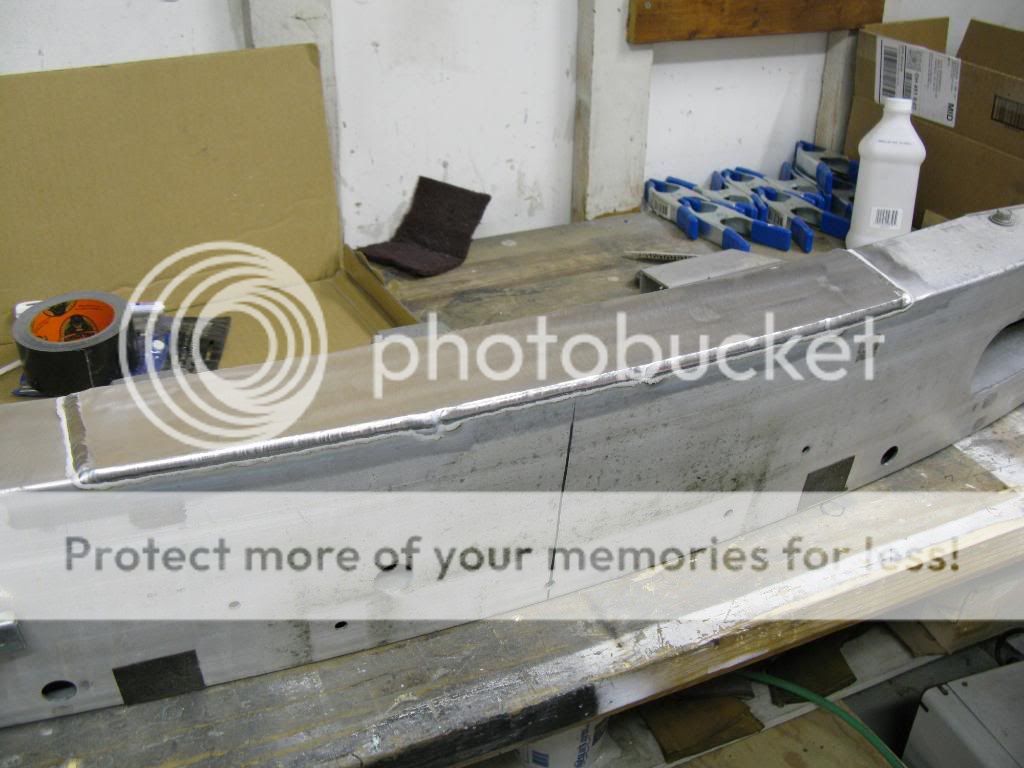
Its probably not clear what I'm doing as of now, but it will make more sense once I post the next update.
Made some more progress on it today/tonight. Soon enough you'll see how it all ties together with the aluminum bumper.
Got my axle today. Its a custom built Dexter axle. 600 lb capacity, independent torsion suspension. Its nice. The trailer will squat down probably another 1.5" fully loaded. The axle is just temporarily held in place with some C-clamps, and the location could change depending on the weight distribution.
If the axle remains near the location where is currently is, looks like putting fenders on will completely block some of the holes for the locks. DesignFail....... Now, is it required by law to have fenders on all trailers regardless of their weight? I could always do a flap sort of thing, but a full fender would be a difficult thing to pull off and not block the holes/locks.
Blah blah blah.....
I got started on the trailer hitch. Here is what I've done so far.
I played connect the dots with the spot welds. If I connect to where the spot welds are, I'll be going through two metal thicknesses. Also, it helped visualize where the structure was behind the rear skin. There is a channel that runs across the rear of the car, between the "frame rails". I assume its to stiffen the chassis in torsion, and also provide gas tank protection from rear impact. There is also some pretty strong areas around where the spare tire/trunk metal meets up back there. I looked at it for a good long time before I understood what was back there, and how I would utilize the area best.
Then I went ahead and made up a template of how to spread the load out over a large area, utilizing a lot of the strong areas back there. I also had to make sure my bolt holes would align perfectly on my lines connecting the spot welds.
Then I made it out of cardboard since its stiffer and would help with the mockup. I punched holes in this piece so I could see that they lined up how I wanted. All looked well with this piece.
Then transfered the template to some 1/4" aluminum plate (1/4" thick) and drilled holes and cut out.
I then started modifying the rear aluminum bumper. I welded an aluminum plate on the bottom, to make a solid platform for me to place some brackets. The hitch will be attached to both the aluminum plate on the body, and the aluminum bumper. This bumper is a pretty thick aluminum extrusion with interior passages which make it very strong. Here is the plate welded around the edges. I drilled 5 5/8" holes so I could plug weld it on.
Here is a closeup of the weld (fusion only) around the edges.
Plug welded all 5 holes.
Plug welds sanded flush.
Its probably not clear what I'm doing as of now, but it will make more sense once I post the next update.
Made some more progress on it today/tonight. Soon enough you'll see how it all ties together with the aluminum bumper.
05-19-10, 11:23 AM
#3
Busting **** out. Almost finished. I still need to drill the through hole for the drawbar, and maybe add a gusset or two in a few places I think may benefit from it. But its mostly finished. Whew. Then back to the wheels. Dangit, I don't have a whole lot of time to wrap this up before the 28th test and tune.
Tabs welded on the bottom of the bumper. I experimented with some new settings on my dynasty TIG, so it may look a bit off in places but overall went pretty well. I was trying a few things that would let me get more out of the machine when its maxxed out at 200A. Less cleaning, higher frequency, seemed to work pretty well. I may add a few gussets to these tabs.
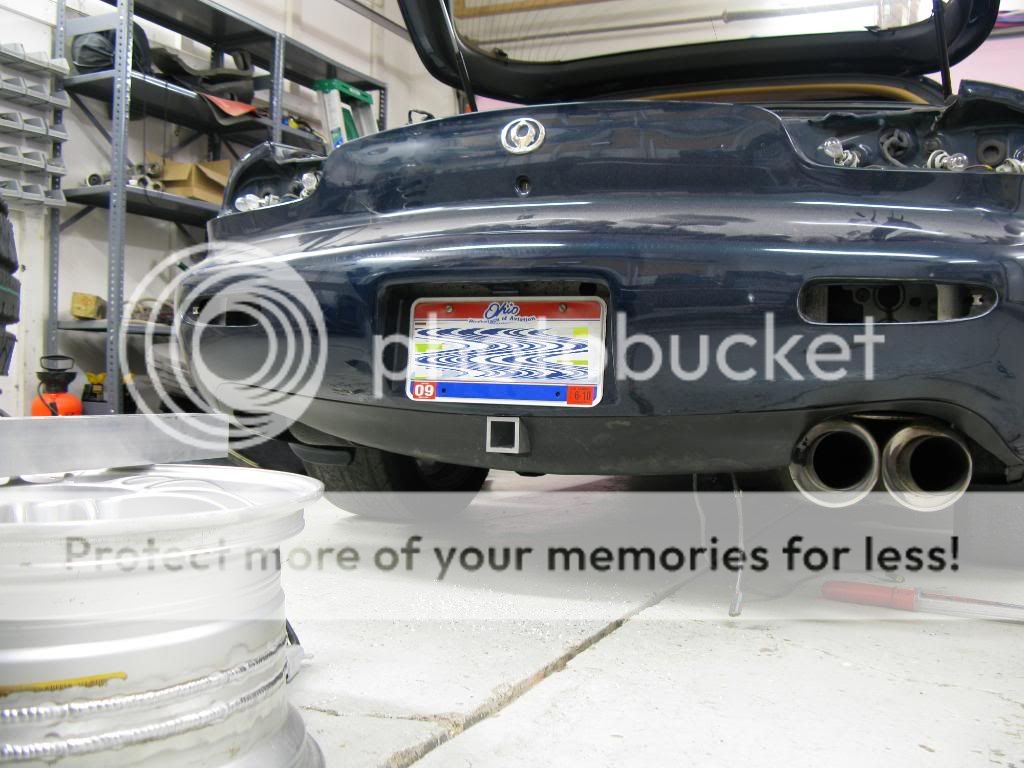
All bolted in the car.
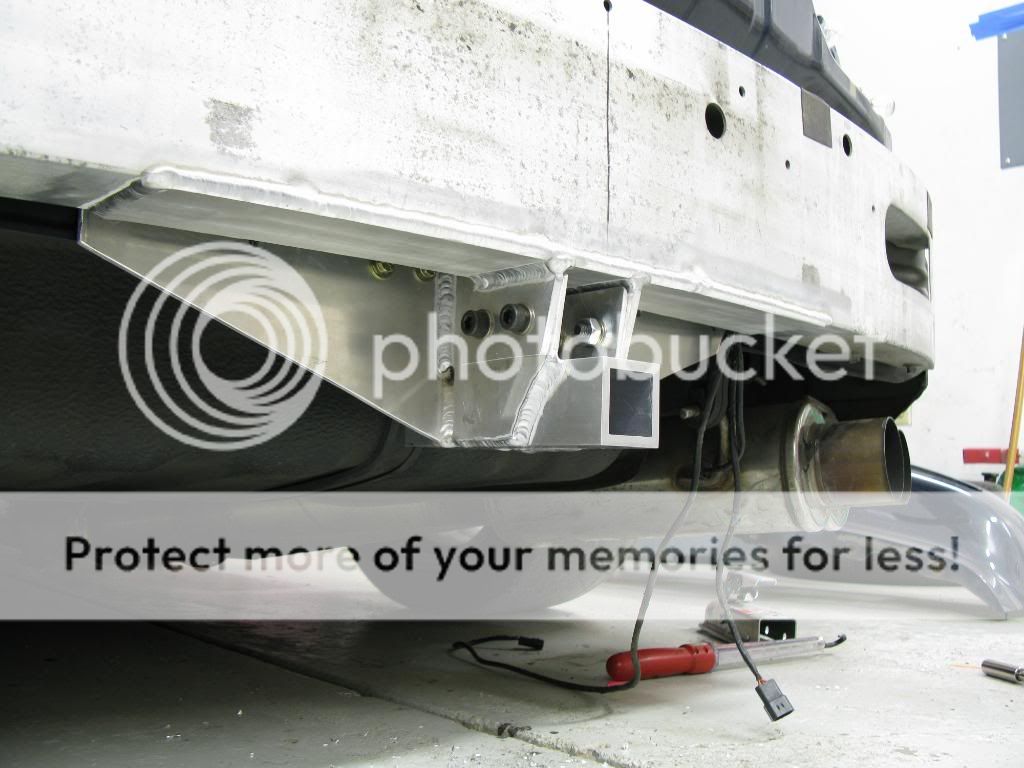
And some pics of how it comes through the bumper. I'm thinking of having the hitch anodized black or something. Not sure. The drawbar pin will be on the back side where I have those side plates welded. I did that so that the pin will be going through 1/2" thick material on both sides.
Put some gussets in, and drilled the drawbar hole. Played around more with machine settings, more balance (80 vs 70) seemed to help.
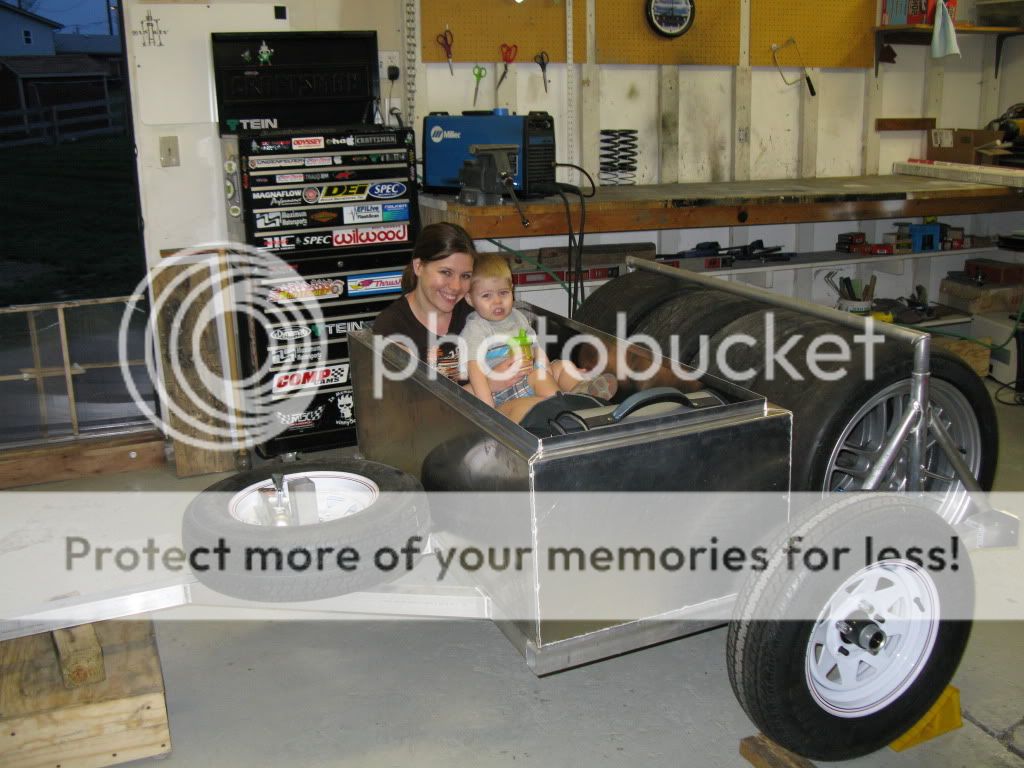
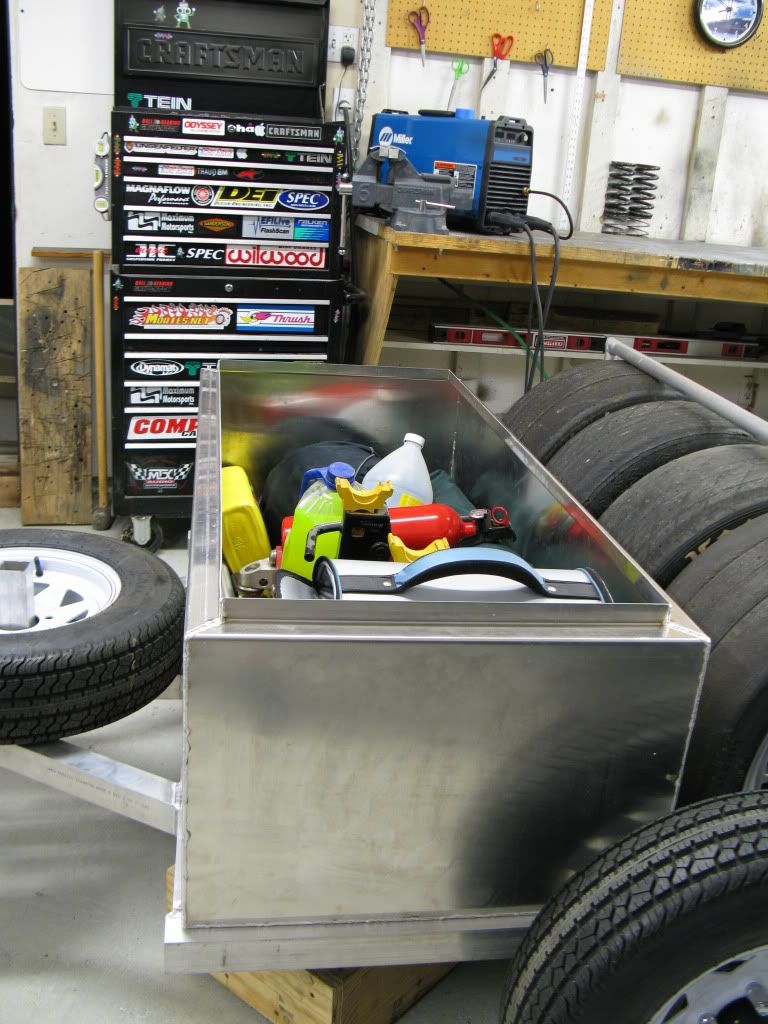
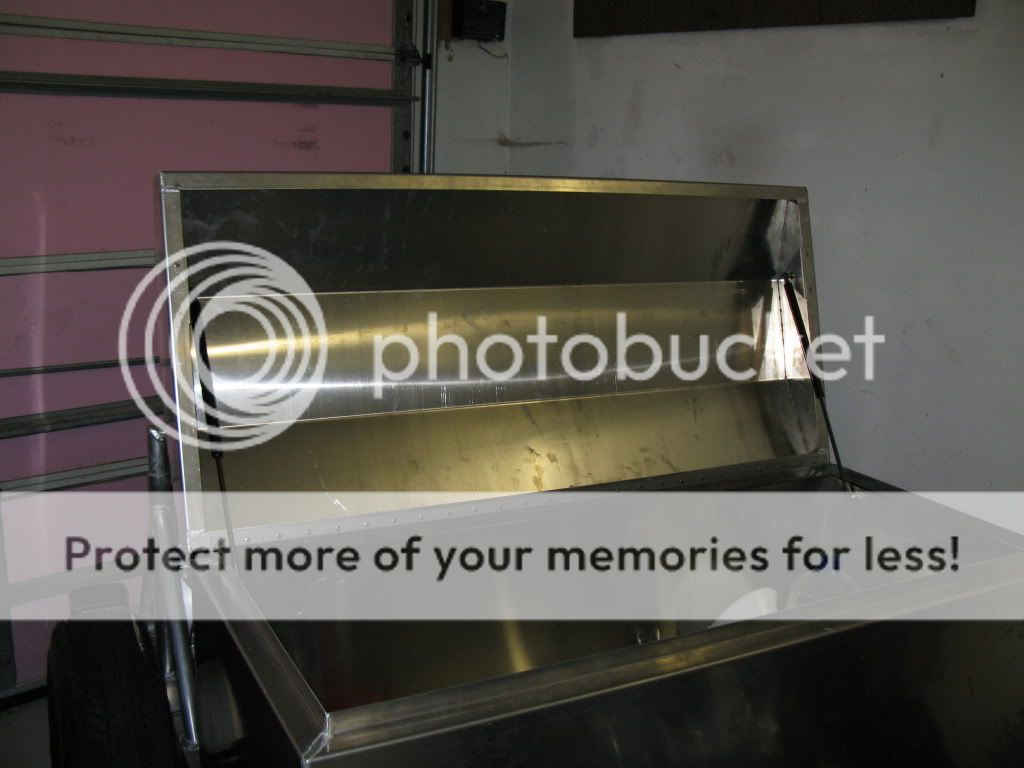
I made a big *** box. Took the better part of a full 5'x10' sheet. Its 5052 aluminum, 0.080" thick. I came up with the design, Hot Rod did some CAD work for me to figure bend allowances, etc. A friend of mine was gracious enough to let me and my dad (a sheet metal worker) use his shop for the press brake and shear, and he helped out a lot as well. I welded it up, and it was pretty much a pain in the butt but it turned out nice. I had to tack like every inch to avoid having it warp and look like ****. If you notice in one of the pics there is a scale. I was moving the axle location around to get ~10% of the trailer weight on the tongue (40 lbs).
Its gigantic. Its big enough to load full of tools, and bring the fam. Hahahha. Its not finished yet, I still need a hinge, and some latches and air shock things, etc.
I'll also need to come up with some sort of divider setup to keep stuff where I want it inside the cavernous toolbox.
Tabs welded on the bottom of the bumper. I experimented with some new settings on my dynasty TIG, so it may look a bit off in places but overall went pretty well. I was trying a few things that would let me get more out of the machine when its maxxed out at 200A. Less cleaning, higher frequency, seemed to work pretty well. I may add a few gussets to these tabs.
All bolted in the car.
And some pics of how it comes through the bumper. I'm thinking of having the hitch anodized black or something. Not sure. The drawbar pin will be on the back side where I have those side plates welded. I did that so that the pin will be going through 1/2" thick material on both sides.
Put some gussets in, and drilled the drawbar hole. Played around more with machine settings, more balance (80 vs 70) seemed to help.
I made a big *** box. Took the better part of a full 5'x10' sheet. Its 5052 aluminum, 0.080" thick. I came up with the design, Hot Rod did some CAD work for me to figure bend allowances, etc. A friend of mine was gracious enough to let me and my dad (a sheet metal worker) use his shop for the press brake and shear, and he helped out a lot as well. I welded it up, and it was pretty much a pain in the butt but it turned out nice. I had to tack like every inch to avoid having it warp and look like ****. If you notice in one of the pics there is a scale. I was moving the axle location around to get ~10% of the trailer weight on the tongue (40 lbs).
Its gigantic. Its big enough to load full of tools, and bring the fam. Hahahha. Its not finished yet, I still need a hinge, and some latches and air shock things, etc.
I'll also need to come up with some sort of divider setup to keep stuff where I want it inside the cavernous toolbox.
05-19-10, 11:24 AM
#4
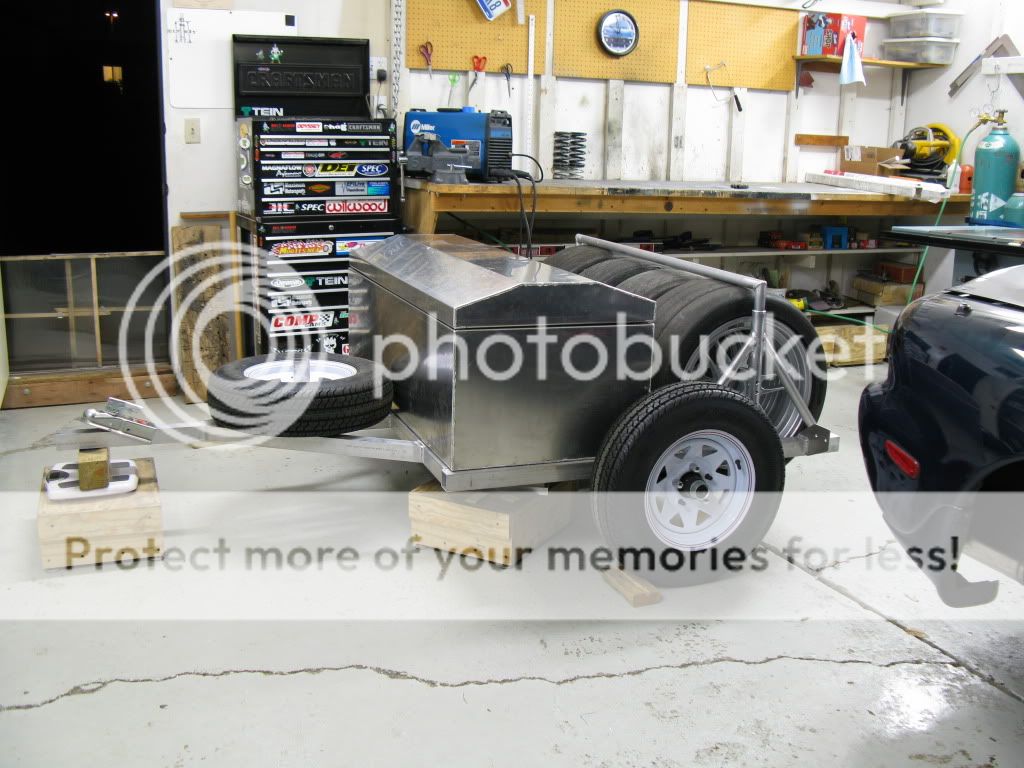
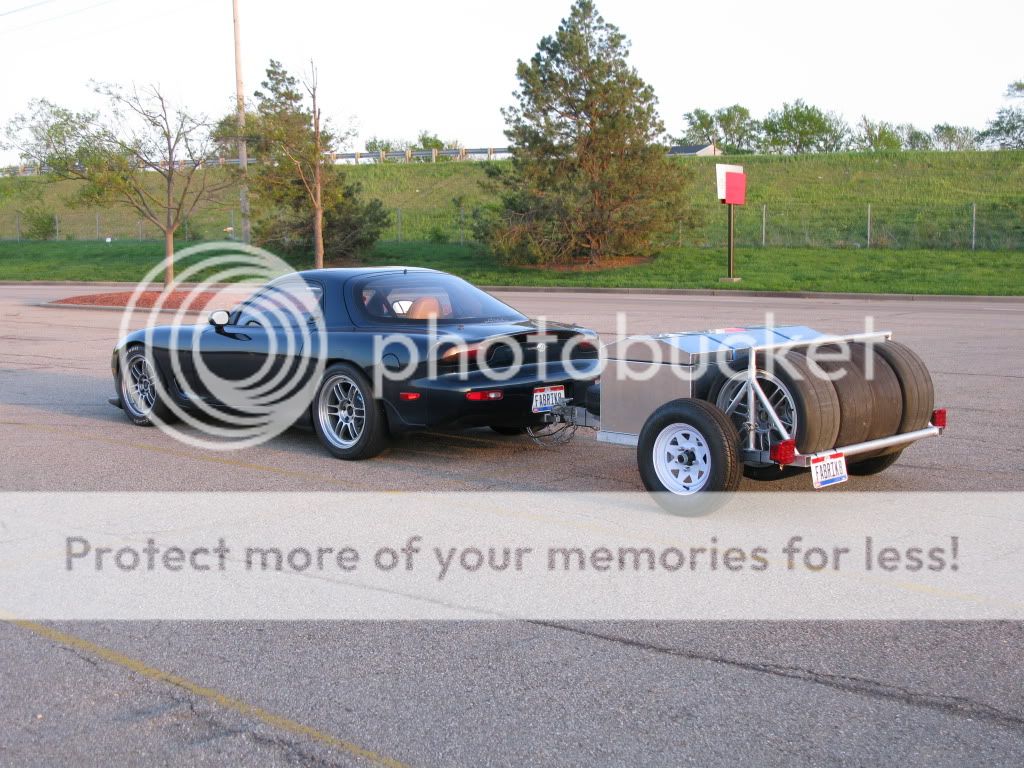
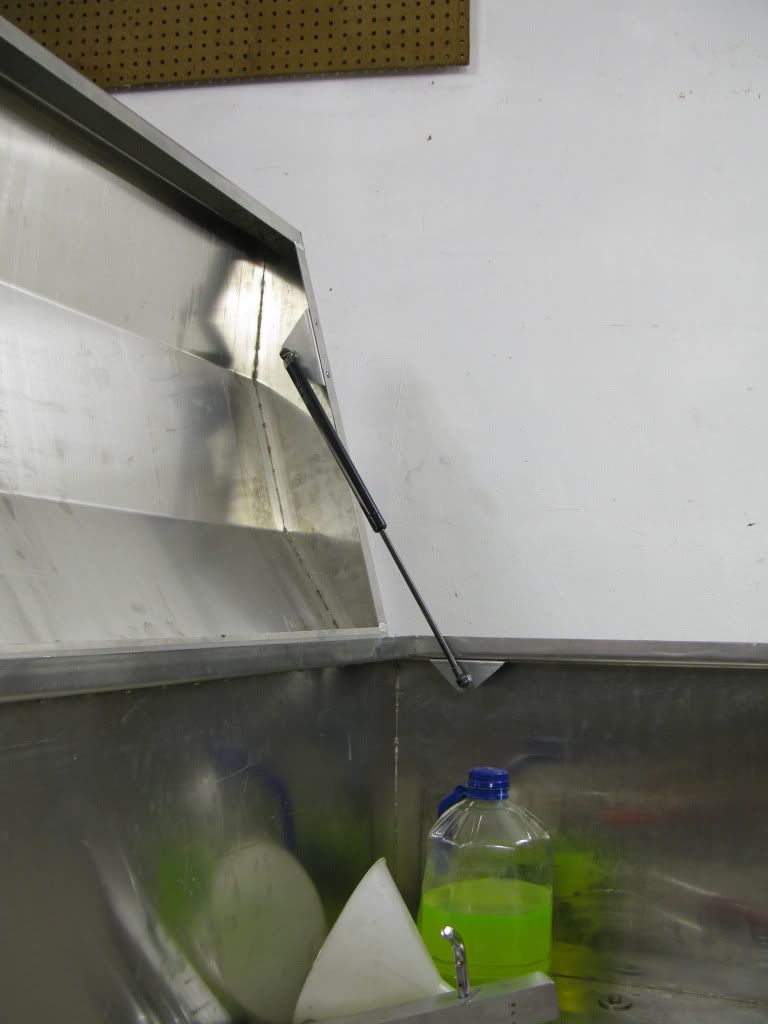
Getting down to finishing touches. Put some air shocks/springs on the toolbox for the lid.
The box now has some heavy duty latches, and a proper spare tire mount, I'll get some pics of that soon. Only thing it needs now is fenders or something.
The box now has some heavy duty latches, and a proper spare tire mount, I'll get some pics of that soon. Only thing it needs now is fenders or something.
Trending Topics

 05-20-10, 07:59 AM
#15
FB=OS Giken LSD
iTrader: (20)
Join Date: Apr 2001
Location: Wilmington, DE
Posts: 2,279
Likes: 0
Received 0 Likes
on
0 Posts
Beautiful! I would buy one.
If you do sell these one day as part of your retirement plan, I would suggest to make it slightly wider to give the user a little more flexibility on the tire size and make one with an option to run two sets of wheels that way those of us who bring rain tires to the track are covered.
Sign me up to be your first customer!
05-20-10, 08:17 AM
#16
You don't know how many times I've heard that. If I wasn't running way over my budget for this trailer I would have got a set. Oh well. FD spares would be cool though, and same bolt pattern. 
I've had a bunch of people wanting to buy one, but most people are turned away when I tell them how much money I've got just in materials to build this thing. If you added in labor for the insane amount of time this thing took, I'd never sell one. Hahahahahaah.
If you dudes want, I'll post my V8 build thread, with 8.8 cobra diff I build all from scratch. I'm not sure how that would go on this board though. I hate to ruffle feathers, I like to stay smooth like an enema.
Beautiful! I would buy one.
If you do sell these one day as part of your retirement plan, I would suggest to make it slightly wider to give the user a little more flexibility on the tire size and make one with an option to run two sets of wheels that way those of us who bring rain tires to the track are covered.
Sign me up to be your first customer!
If you do sell these one day as part of your retirement plan, I would suggest to make it slightly wider to give the user a little more flexibility on the tire size and make one with an option to run two sets of wheels that way those of us who bring rain tires to the track are covered.
Sign me up to be your first customer!
If you dudes want, I'll post my V8 build thread, with 8.8 cobra diff I build all from scratch. I'm not sure how that would go on this board though. I hate to ruffle feathers, I like to stay smooth like an enema.
05-20-10, 08:45 AM
#17
https://www.rx7club.com/other-engine-conversions-non-v-8-118/
05-20-10, 08:47 AM
#18
Oh......I had no idea that existed here. I was under the impression that I was considered the devils spawn here for the V8 swap. I'll post it up soon, probably within the next hour or so. Its a SUPER long build thread so be prepared to read for hours. hahahah.


 11-05-21, 12:35 AM
#25
Full Member
👍i like the alloy pipe " Made in USA" lettering. Really professional work.👌🏼
