1986 FC EP Race Car Build Thread
 11-14-16, 09:00 PM
#1
Full Member
Thread Starter
iTrader: (1)
Join Date: Mar 2014
Location: New Mexico
Posts: 66
Likes: 0
Received 0 Likes
on
0 Posts
1986 FC EP Race Car Build Thread
I figured I would share my RX7 race car project after reading and learning here for the last few years. I'm by no means an experienced racing driver nor a rotary expert but I enjoy rotaries and sport car racing.
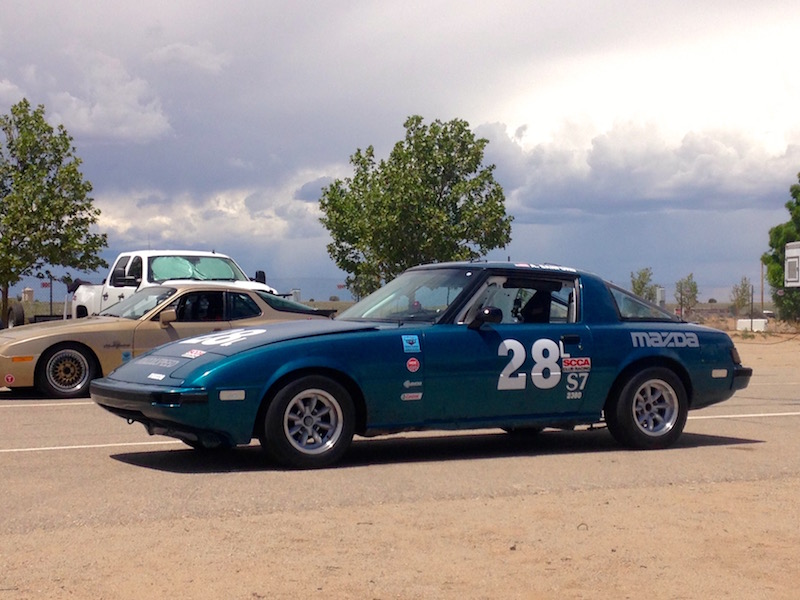
2 years ago I picked up a Colorado SCCA prep Spec7 to enter into learning about high performance driving. Since a kid I was always interested in Mazda rotary sports cars - from watching 4 rotor Kudzu Mazda prototypes in the mid 1990s to being treated to a PNW ICSCC HPDE driver training day with a good family friend in his Pro7 back when Pro7 had huge weekends. Long story short, I had a really good year learning with the Spec7 when my daily craigslist browsing presented a super bargain (ha) FC EP car. What started with casual 'hey, it's a good purchase because it has a welded roll cage' thinking rapidly grew into a trip to Phoenix with cash in hand.
It had EP stickers on the side (good) and was on mega discount (even better) as it was at an event during which the overnight low unexpectedly dropped below freezing with only water wetter and distilled water. So the engine was done but otherwise everything else was there.
The cheap and cheerful Spec7 that started it all.
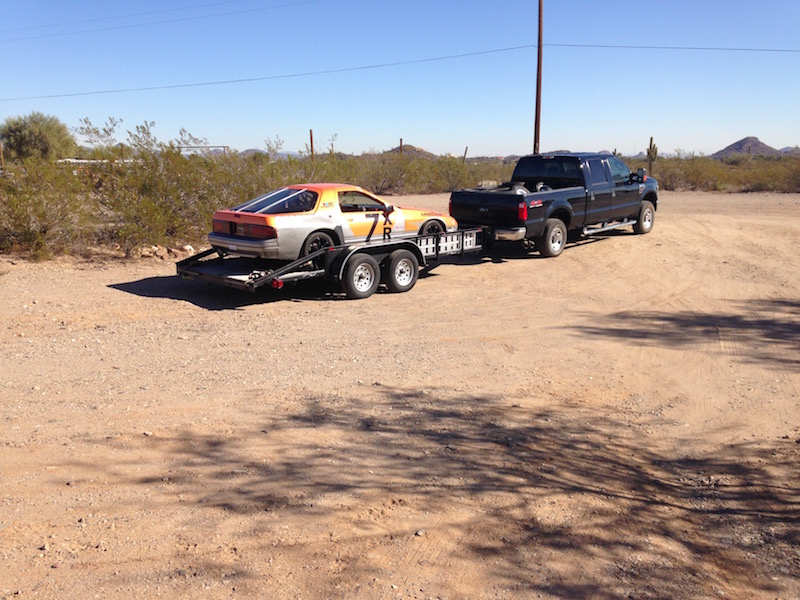
Loaded up in Phoenix ready to head back to NM.
2 years ago I picked up a Colorado SCCA prep Spec7 to enter into learning about high performance driving. Since a kid I was always interested in Mazda rotary sports cars - from watching 4 rotor Kudzu Mazda prototypes in the mid 1990s to being treated to a PNW ICSCC HPDE driver training day with a good family friend in his Pro7 back when Pro7 had huge weekends. Long story short, I had a really good year learning with the Spec7 when my daily craigslist browsing presented a super bargain (ha) FC EP car. What started with casual 'hey, it's a good purchase because it has a welded roll cage' thinking rapidly grew into a trip to Phoenix with cash in hand.
It had EP stickers on the side (good) and was on mega discount (even better) as it was at an event during which the overnight low unexpectedly dropped below freezing with only water wetter and distilled water. So the engine was done but otherwise everything else was there.
The cheap and cheerful Spec7 that started it all.
Loaded up in Phoenix ready to head back to NM.
Last edited by Andrew-s; 11-14-16 at 10:14 PM.
 11-14-16, 09:12 PM
#2
Full Member
Thread Starter
iTrader: (1)
Join Date: Mar 2014
Location: New Mexico
Posts: 66
Likes: 0
Received 0 Likes
on
0 Posts
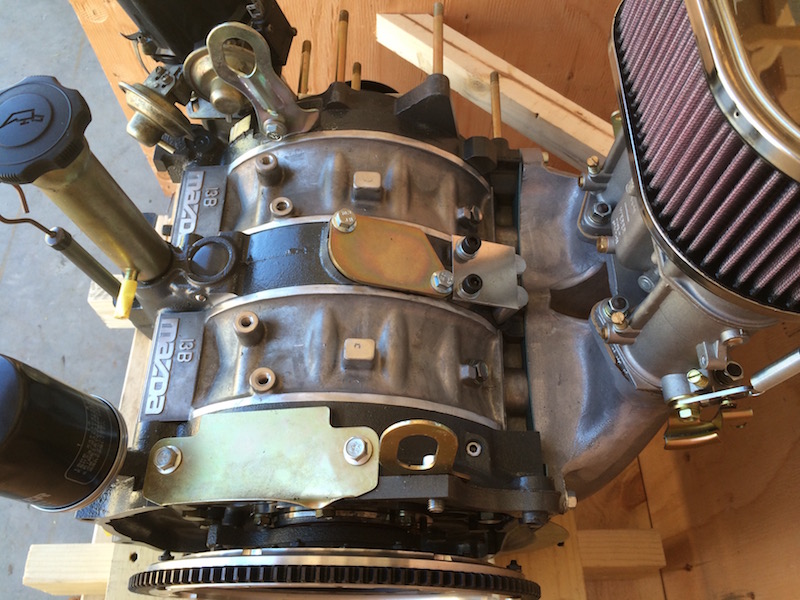
Once home, the first order of business was to replace the failed engine with a new engine. I had already learned the 'hard starting but runs great' rotary lesson with my Spec7 which measured < 70psi on most sides during compression testing. Half way into my season it lost an apex seal and after calling around I decided that I would go all-in and have an EP 13B built since even used 12A housings were outrageous (a very future minded decision!). In a hurry to keep going to events and continue learning I ended up with a crate from Mazdatrix (Dave was super friendly and helpful after we had the "yeah, this is going to cost more than you want to hear but you'll love the engine" conversation) supplying an engine I could drop in over a weekend and hit the track again.
On the stand at Mazdatrix
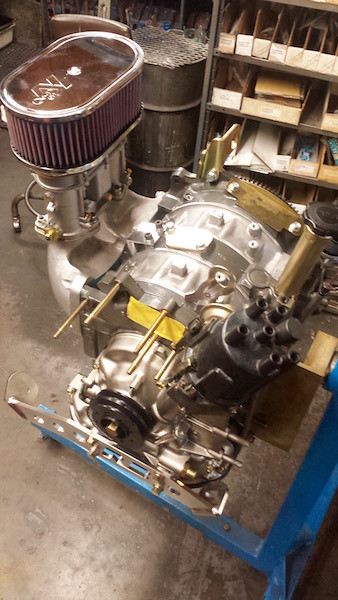
An exciting day opening the crate
On the stand at Mazdatrix
An exciting day opening the crate
Last edited by Andrew-s; 11-14-16 at 10:15 PM.
11-14-16, 09:17 PM
#3
Full Member
Thread Starter
iTrader: (1)
Join Date: Mar 2014
Location: New Mexico
Posts: 66
Likes: 0
Received 0 Likes
on
0 Posts
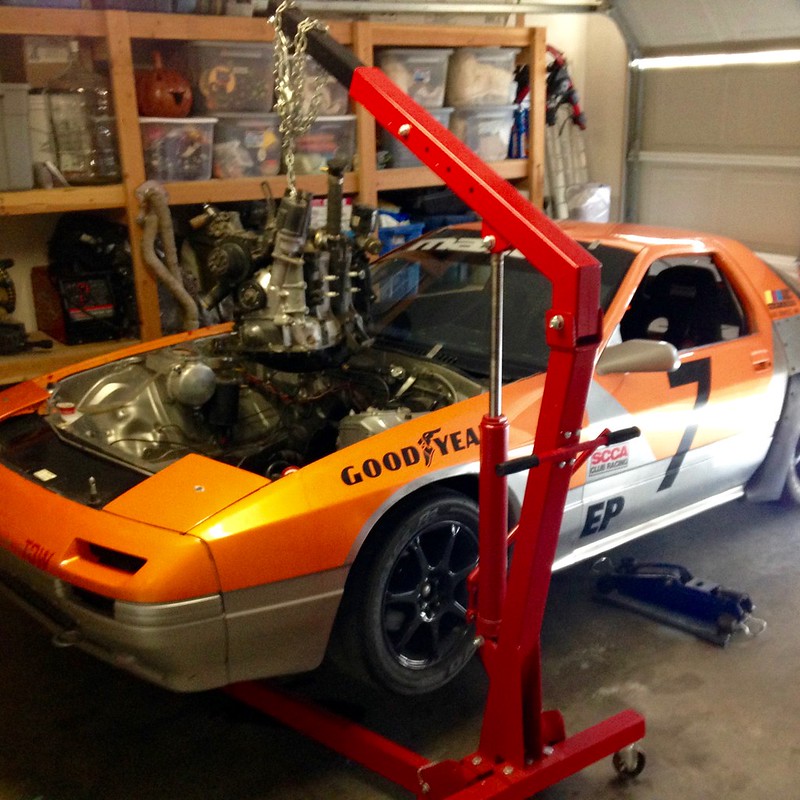
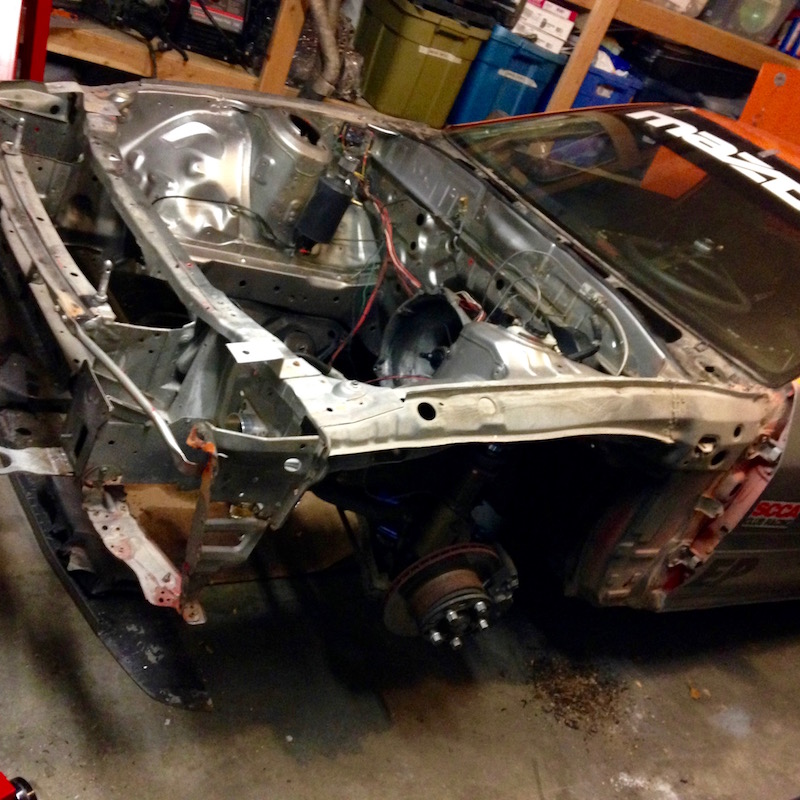
Ready to start getting the old engine out (a Tony Rivera street port 13B)

Up and out
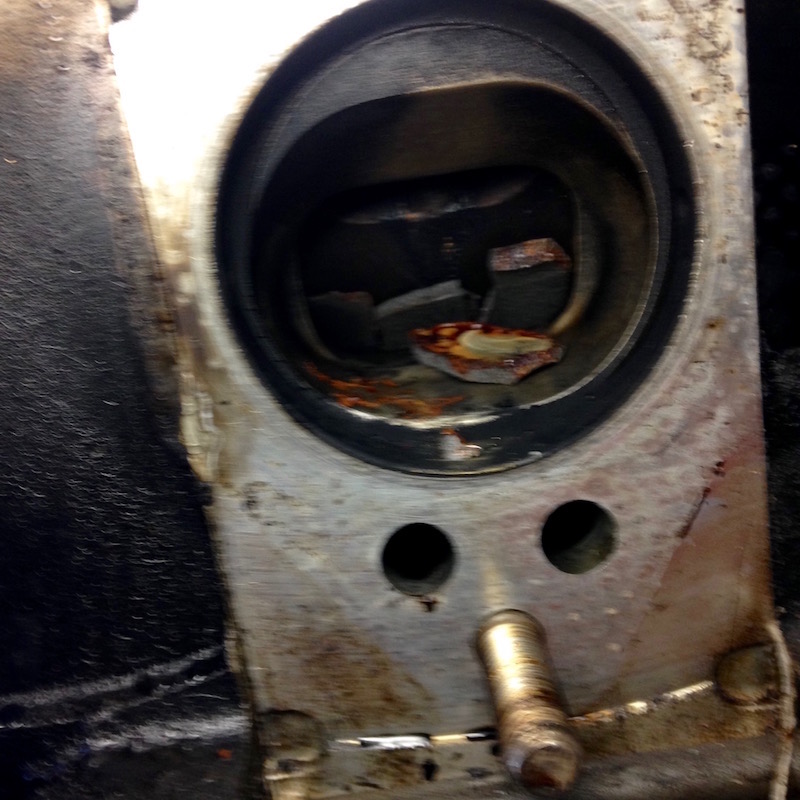
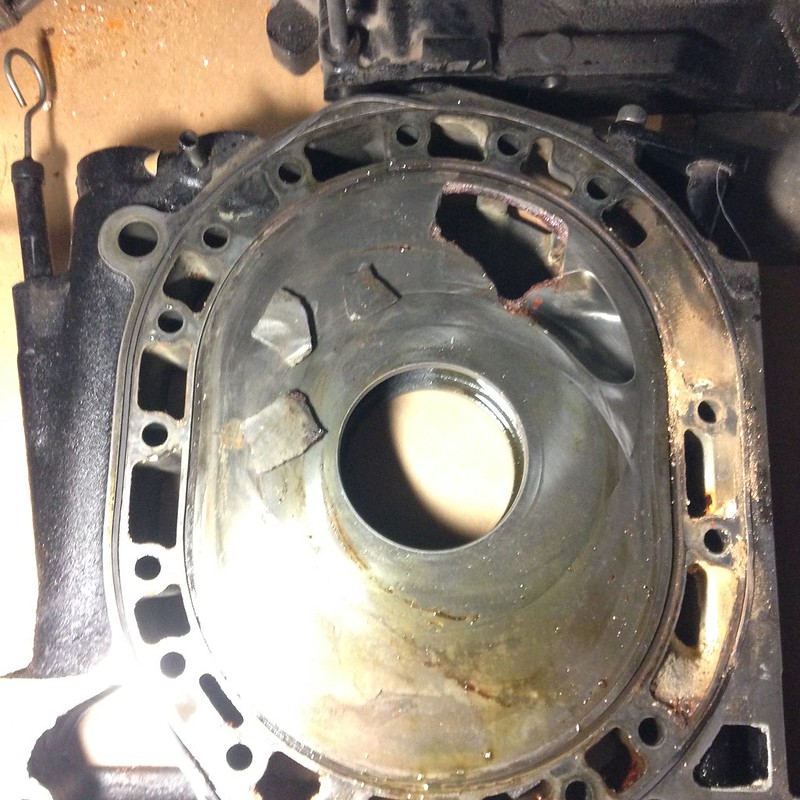
Ice frozen, hydraulically ruptured side housing material in the exhaust port
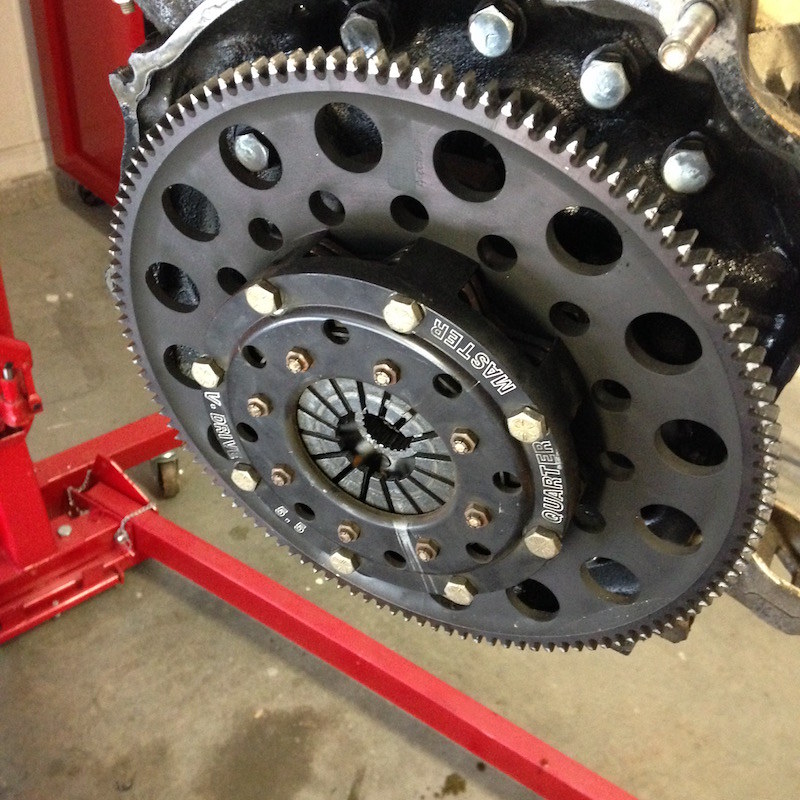
But at least the old engine had a super trick Mazdaspeed flywheel and Quartermaster clutch...all the things from the Mazdaspeed catalog from back in the day
Up and out
Ice frozen, hydraulically ruptured side housing material in the exhaust port
But at least the old engine had a super trick Mazdaspeed flywheel and Quartermaster clutch...all the things from the Mazdaspeed catalog from back in the day
Last edited by Andrew-s; 11-14-16 at 10:48 PM.
 11-14-16, 10:56 PM
#5
Full Member
Thread Starter
iTrader: (1)
Join Date: Mar 2014
Location: New Mexico
Posts: 66
Likes: 0
Received 0 Likes
on
0 Posts
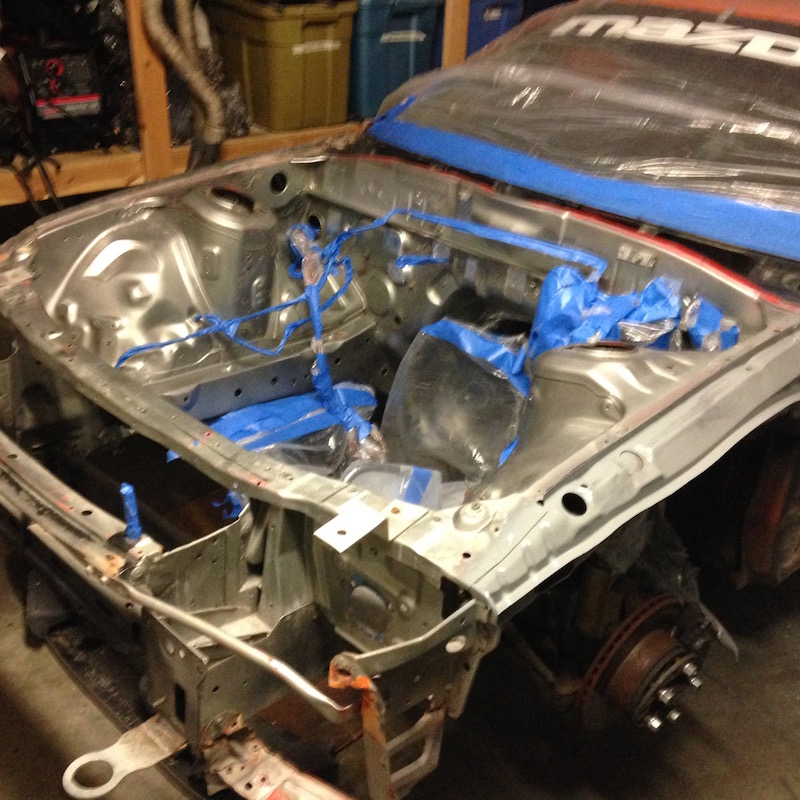
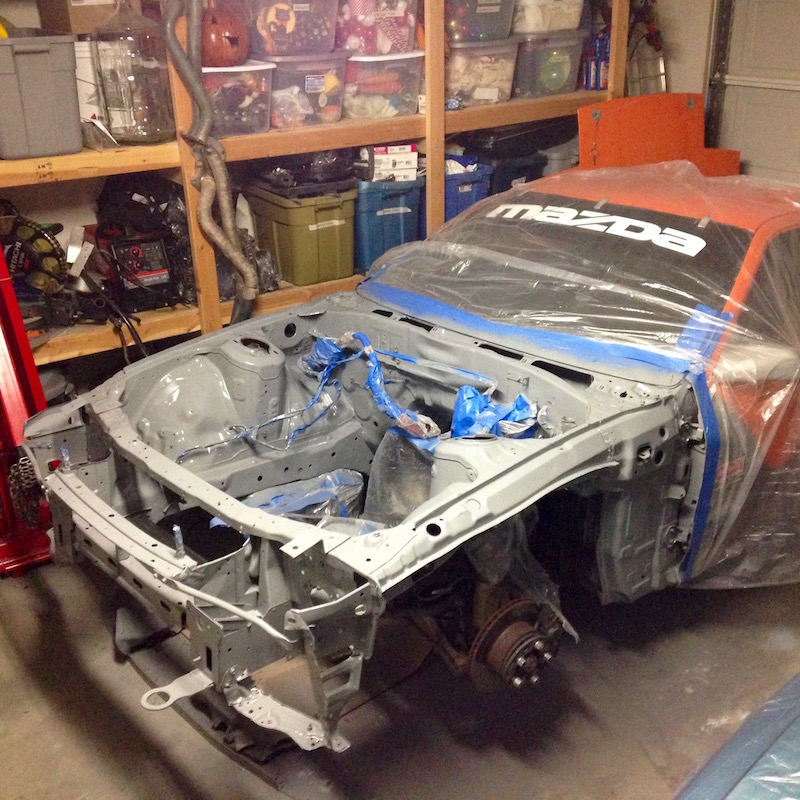
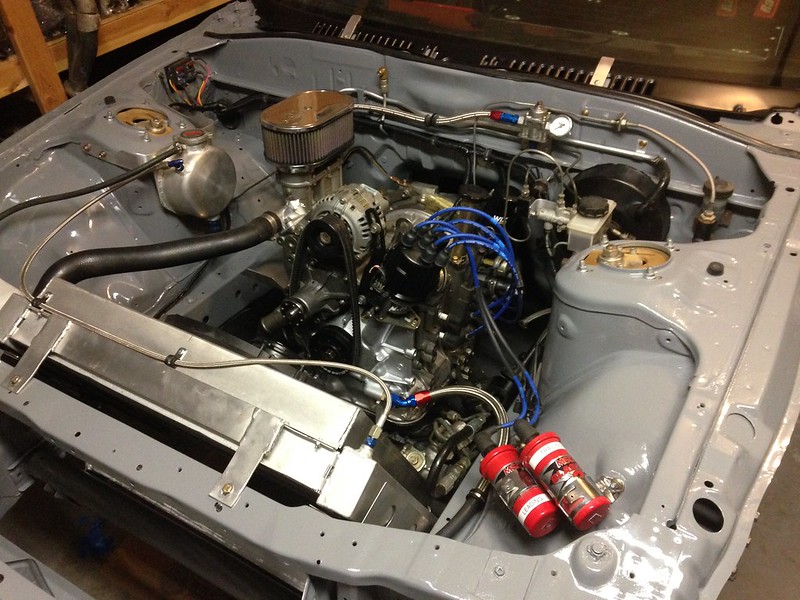
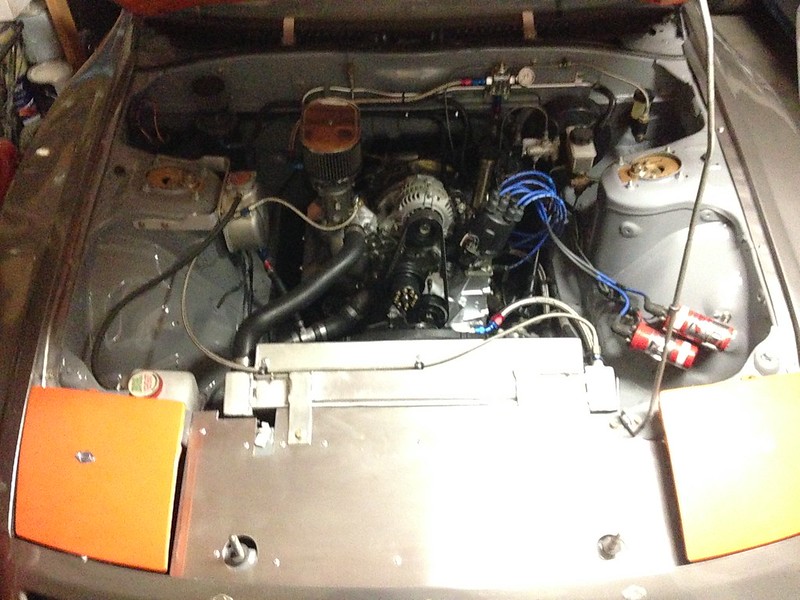
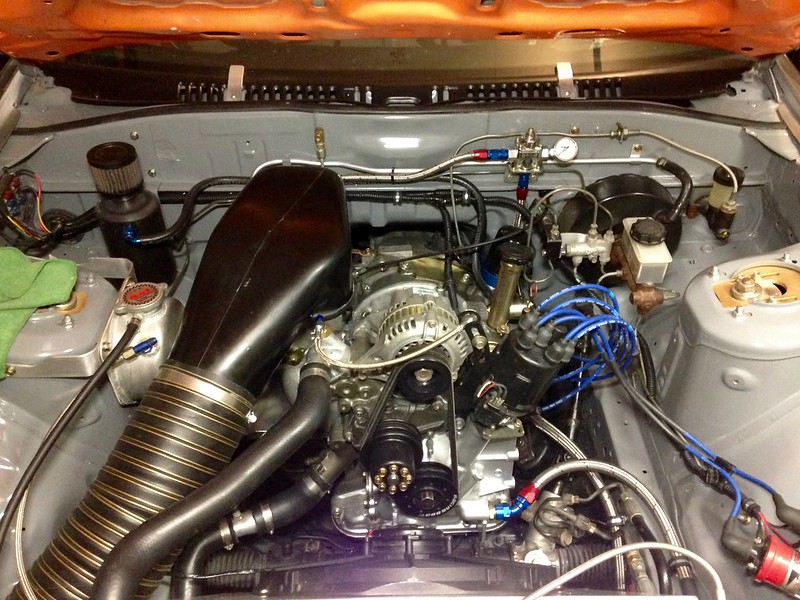
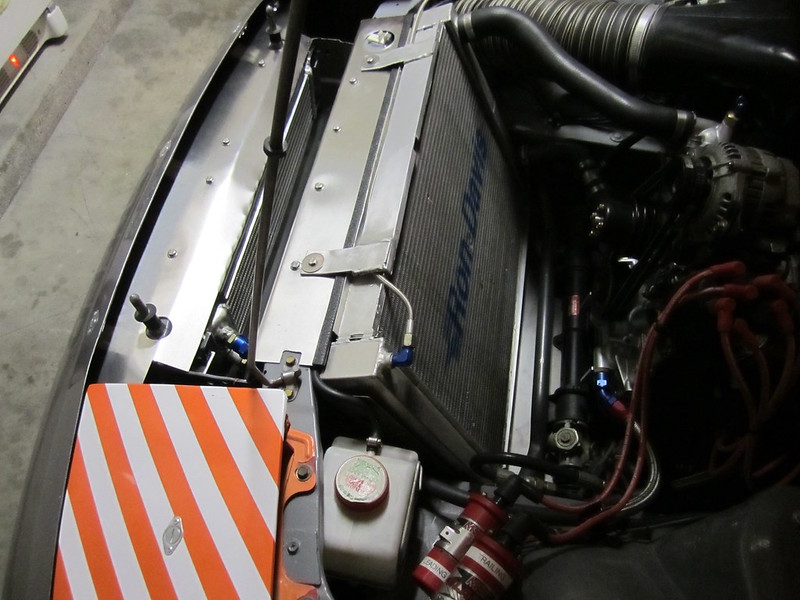
With painting done and the front cover and oil pan switched to the FC engine mount style, the Mazdatrix power plant was in its new home
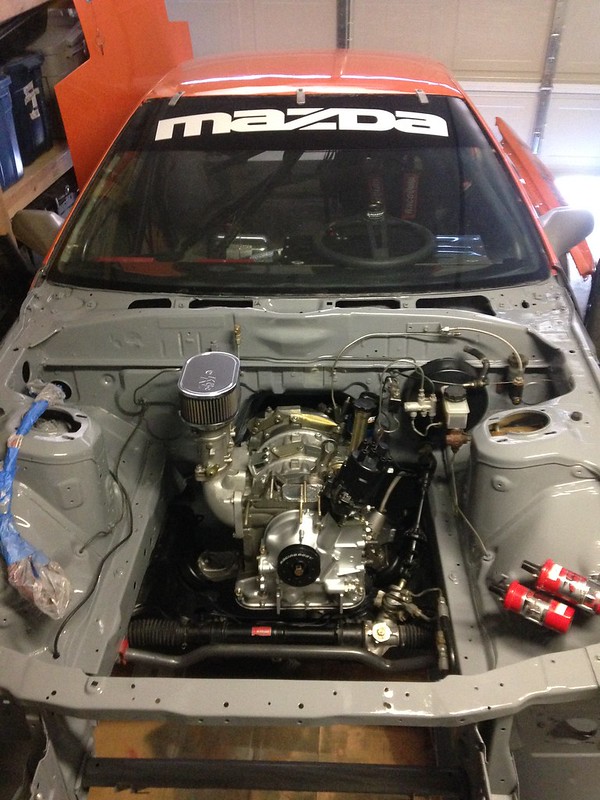
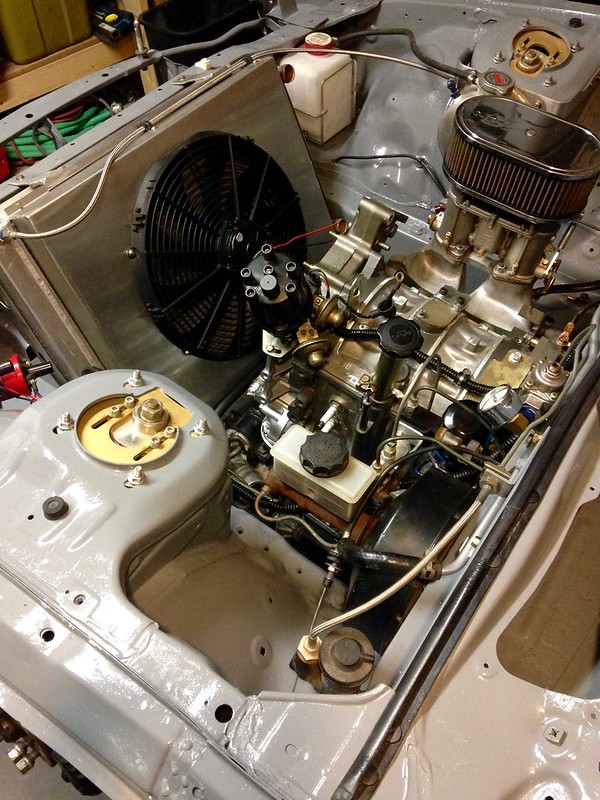
Reassembly progress...I have since ditched the fan and shroud to improve the flow-through in the desert heat. Again, more bits from peak of the Mazdaspeed rotary catalog years...AWR header tank and AWR/Ron Davis oversized radiator.
Far enough to successfully be started
Reassembly progress...I have since ditched the fan and shroud to improve the flow-through in the desert heat. Again, more bits from peak of the Mazdaspeed rotary catalog years...AWR header tank and AWR/Ron Davis oversized radiator.
Far enough to successfully be started
11-14-16, 11:04 PM
#6
Full Member
Thread Starter
iTrader: (1)
Join Date: Mar 2014
Location: New Mexico
Posts: 66
Likes: 0
Received 0 Likes
on
0 Posts
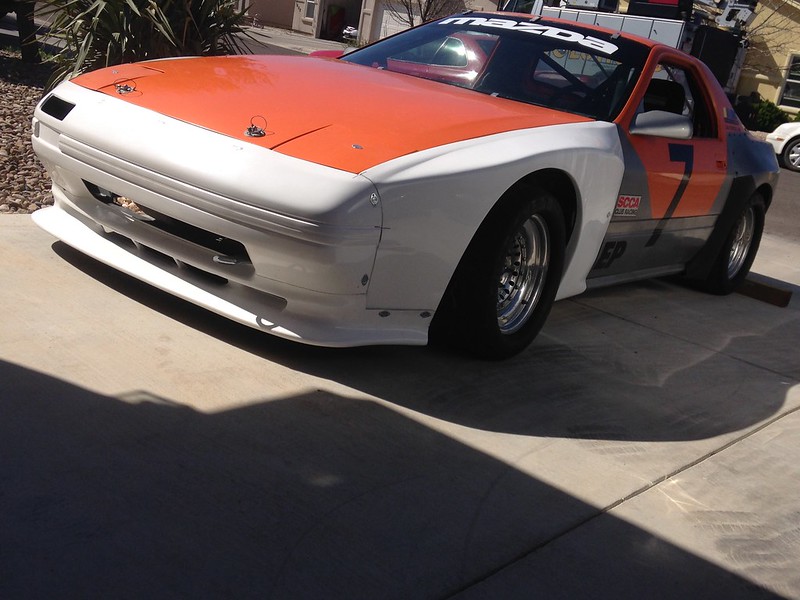
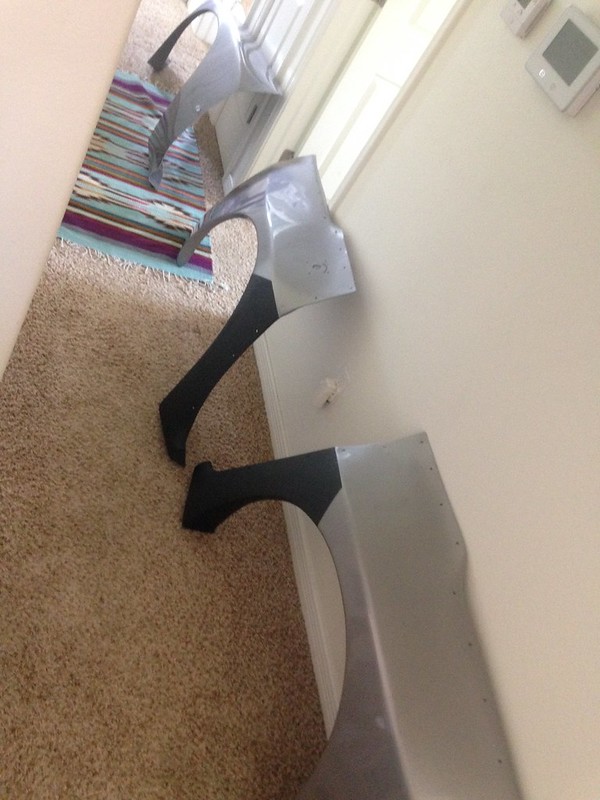
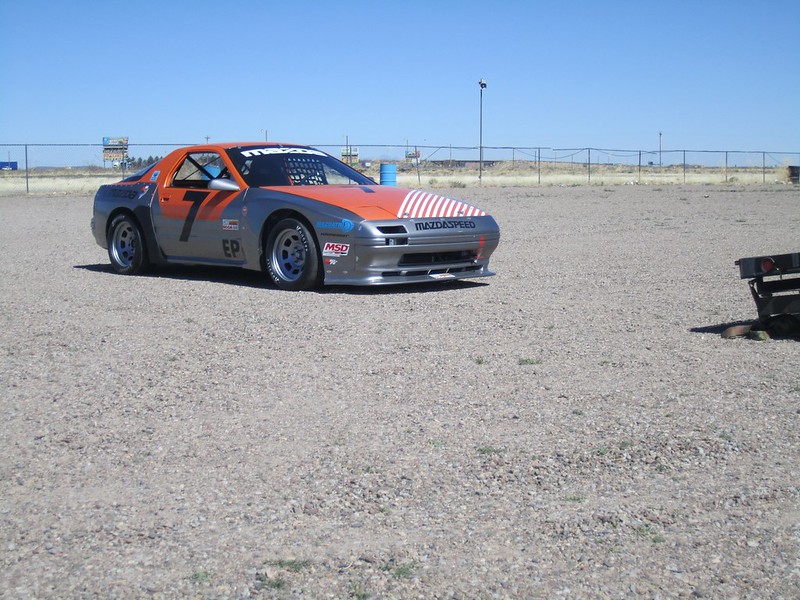
Looking through the photos in the SCCA log book that came with the car, when it was first built into an EP car it had wide fenders on all 4 corners and the usual 23 x 9 bias ply slicks. In the interest of 'restoring' it to its original glory, I found that AWR had passed their EP FC molds to DG Motorsports who was happy to make more fenders and front bumper/airdam
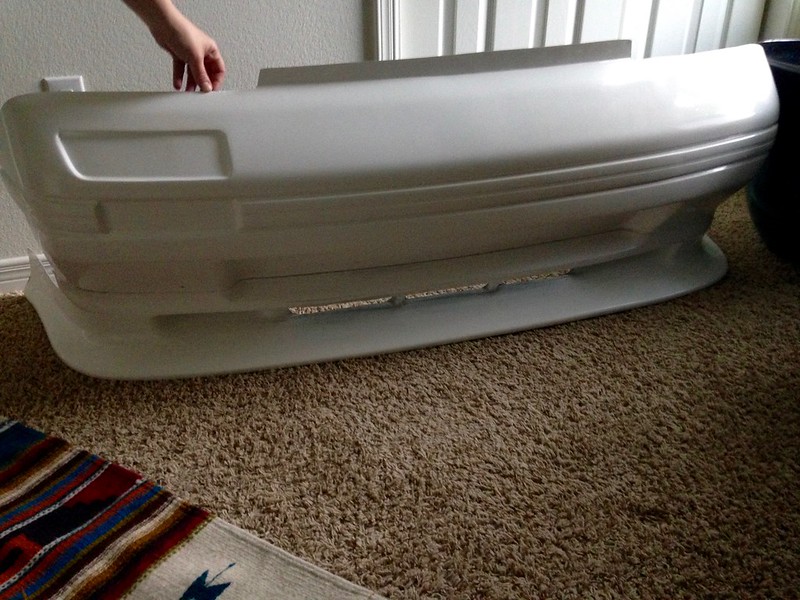
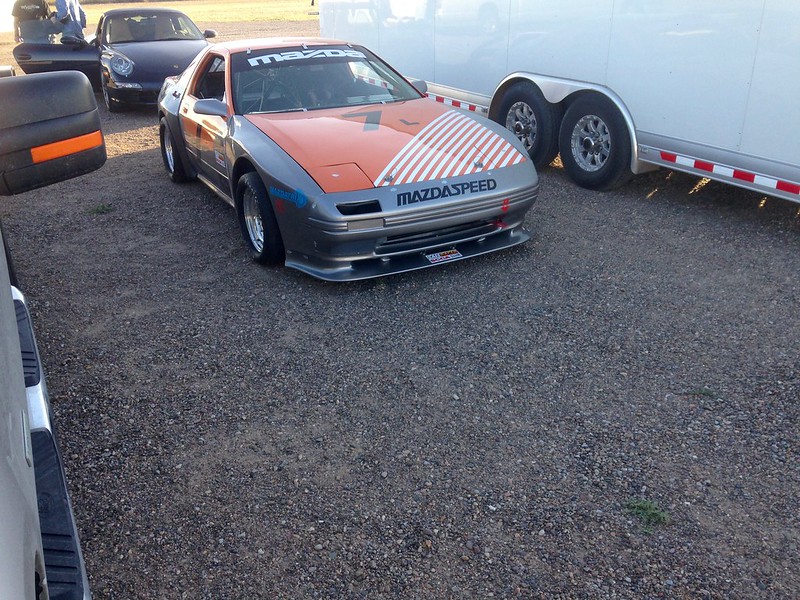
Sporting the cool EP look for a second time in its life
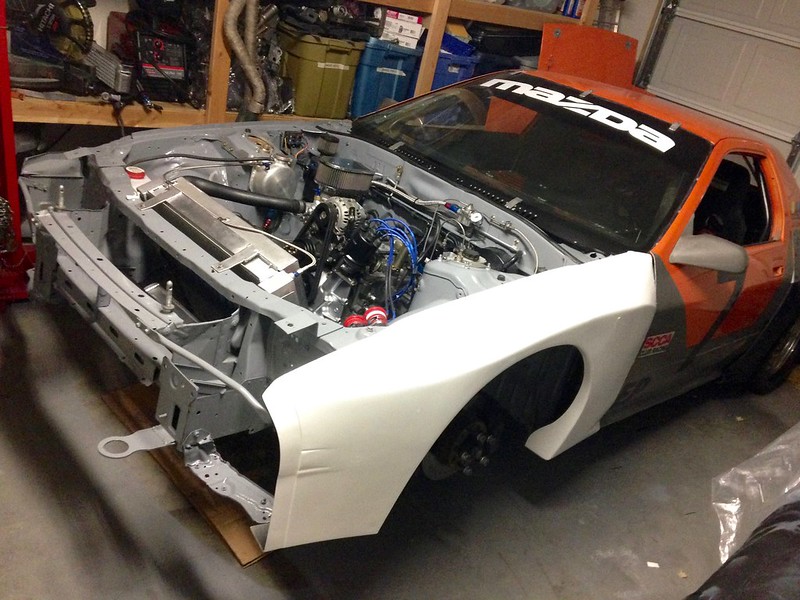
Many hours of positioning and then repositioning
After making many tabs to secure the new bodywork to the car with quarter-turn fasteners
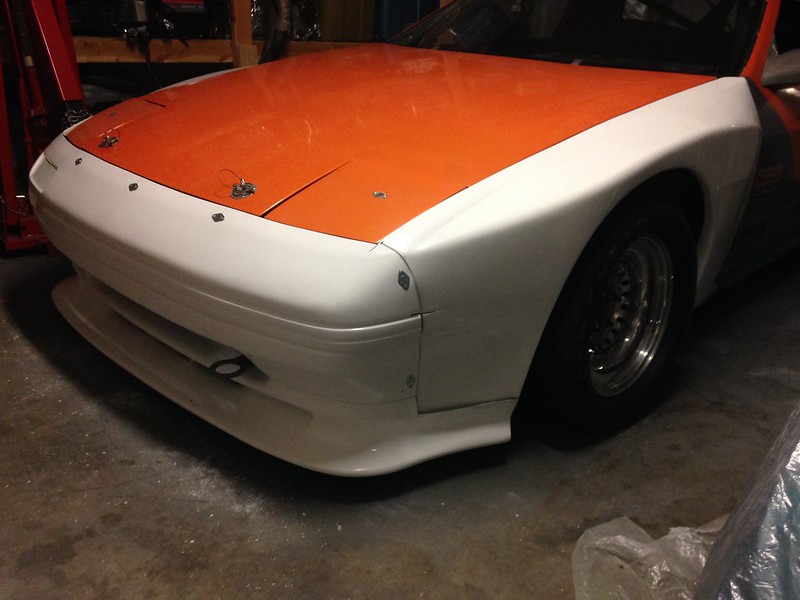
First time outside after a few months and many beers
Sporting the cool EP look for a second time in its life
Many hours of positioning and then repositioning
After making many tabs to secure the new bodywork to the car with quarter-turn fasteners
First time outside after a few months and many beers
11-14-16, 11:08 PM
#7
Full Member
Thread Starter
iTrader: (1)
Join Date: Mar 2014
Location: New Mexico
Posts: 66
Likes: 0
Received 0 Likes
on
0 Posts
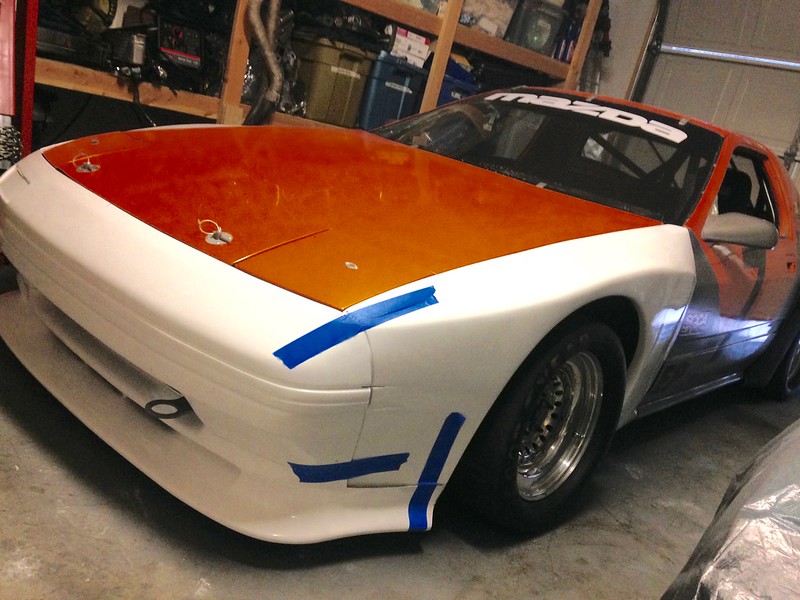
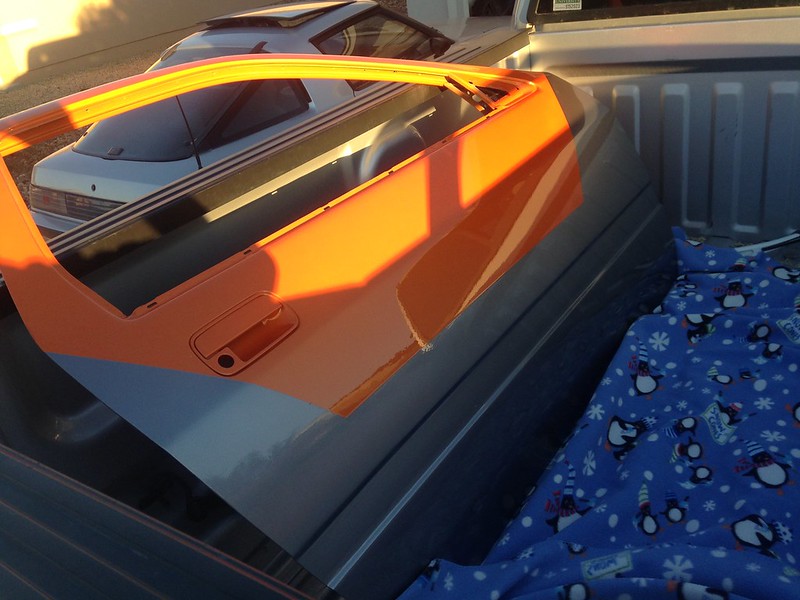
A friend of a friend did excellent paint work on the new parts and a few of the old parts to refresh everything
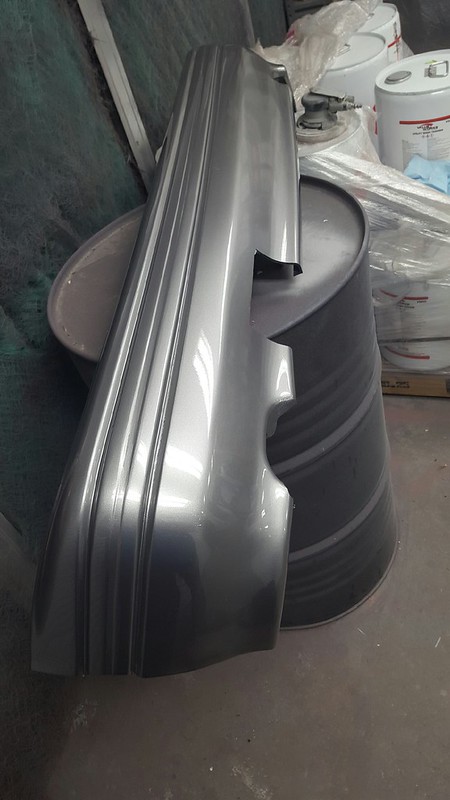
Pretty fancy for a race car...
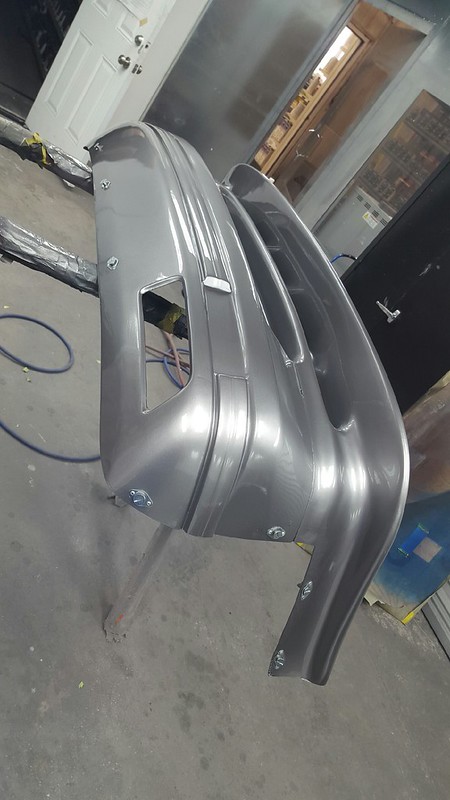
All the new paint curing in the house for a while
Pretty fancy for a race car...
All the new paint curing in the house for a while
Trending Topics
11-14-16, 11:15 PM
#8
Full Member
Thread Starter
iTrader: (1)
Join Date: Mar 2014
Location: New Mexico
Posts: 66
Likes: 0
Received 0 Likes
on
0 Posts
Fenders mounted and progress ducting air over the oil cooler and into the radiator
Doors fresh back from paint
Time for a beer
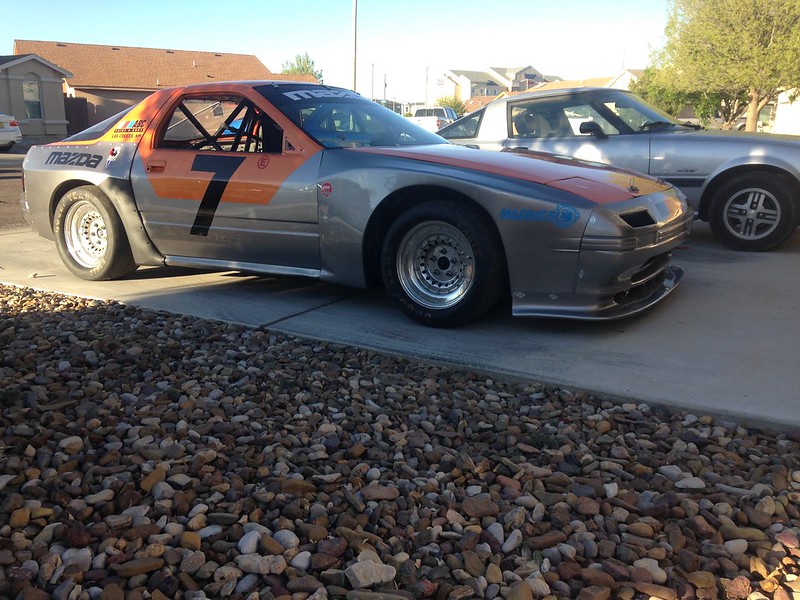
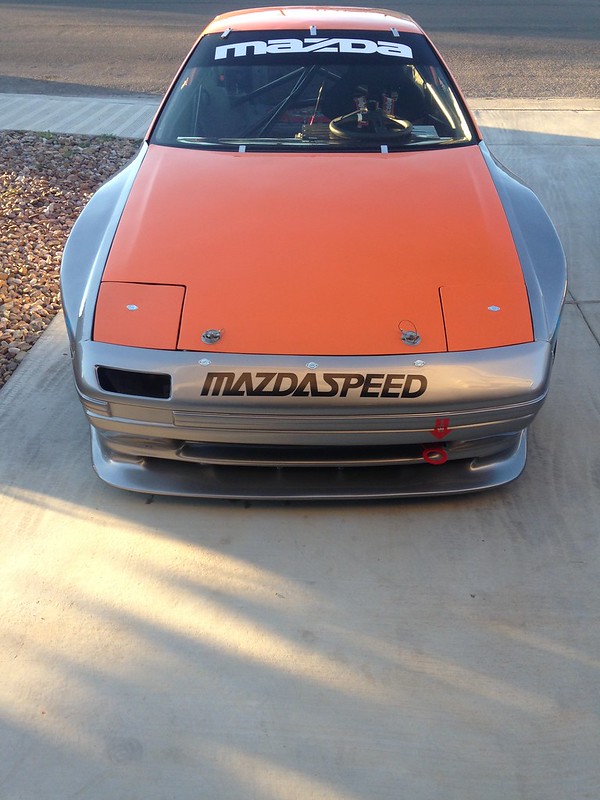
From this angle the FC looks like much more of a modern race car than its 30 year age
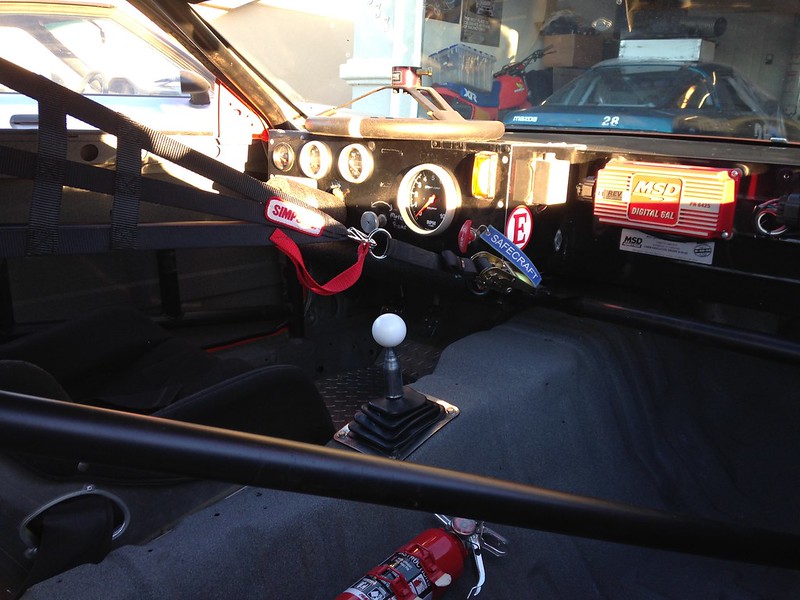
Quick interior shot - hidden is lots of straightened out wiring, new interior paint in many areas, for the first time an oil temperature gauge (!), and the must have delrin ball shifter
Doors fresh back from paint
Time for a beer
From this angle the FC looks like much more of a modern race car than its 30 year age
Quick interior shot - hidden is lots of straightened out wiring, new interior paint in many areas, for the first time an oil temperature gauge (!), and the must have delrin ball shifter
11-14-16, 11:23 PM
#9
Full Member
Thread Starter
iTrader: (1)
Join Date: Mar 2014
Location: New Mexico
Posts: 66
Likes: 0
Received 0 Likes
on
0 Posts
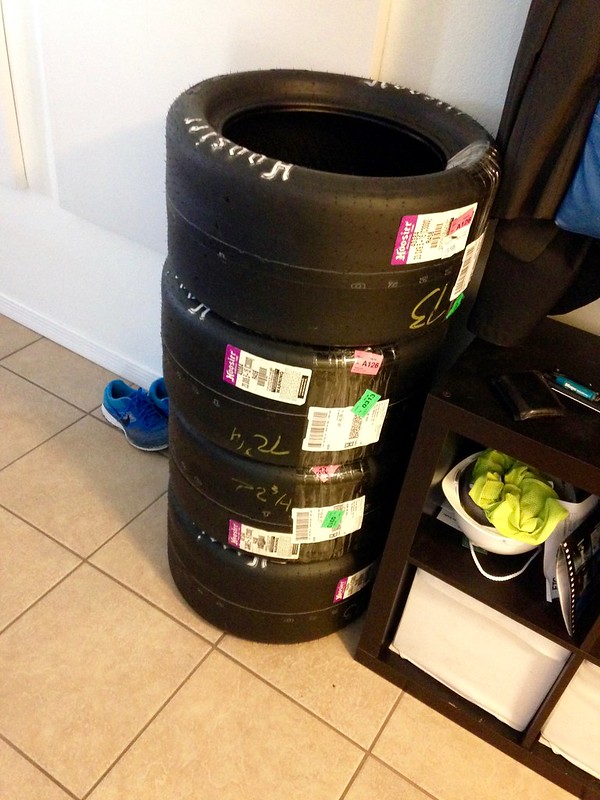
A fresh set of tires
I wanted to try my hand at laying up fiberglass but I would have never been able to craft up a set of molds as good as EFI Hardware so for the most exotic purchase of my life, I ended up with a Weber cold air box from the far away land of rotary fanatics
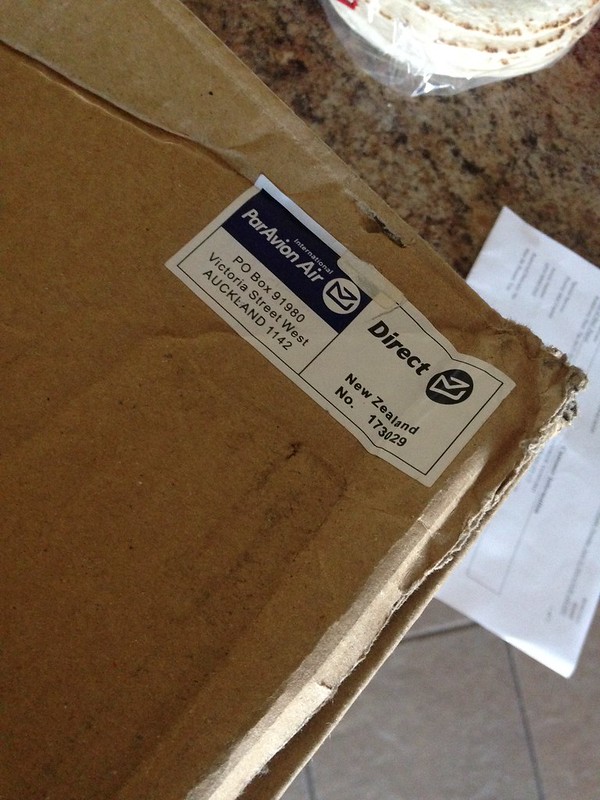
That new fiberglass smell...
Their air box is designed for MFR? PPort engines where the IDA is switched 180deg from its orientation on a Racing Beat IDA intake - some trimming and fabrication required
I wanted to try my hand at laying up fiberglass but I would have never been able to craft up a set of molds as good as EFI Hardware so for the most exotic purchase of my life, I ended up with a Weber cold air box from the far away land of rotary fanatics
That new fiberglass smell...
Their air box is designed for MFR? PPort engines where the IDA is switched 180deg from its orientation on a Racing Beat IDA intake - some trimming and fabrication required
11-19-16, 05:49 PM
#10
Full Member
Thread Starter
iTrader: (1)
Join Date: Mar 2014
Location: New Mexico
Posts: 66
Likes: 0
Received 0 Likes
on
0 Posts
In spring 2016 I had my first chance to take out the new car at Arroyo Seco Raceway. Overall, everything held together. I only had a few issues:
1) Water was never over 200 measured at the back of the thermostat housing but oil temperatures were ~250 at the oil filter pedestal so more oil cooling was needed
2) After constantly messing with the fuel height and jetting, the IDA was still not reaching what I felt could be its maximum potential
3) Based on tire wear at the inside edges of the rears, rear camber and toe were in need of further 'optimization'
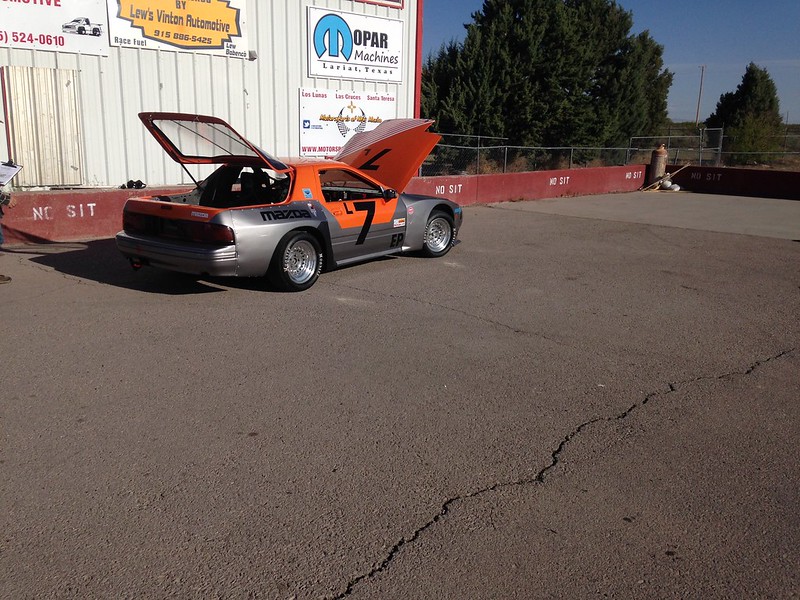
At the track.
Going through tech inspection.
1) Water was never over 200 measured at the back of the thermostat housing but oil temperatures were ~250 at the oil filter pedestal so more oil cooling was needed
2) After constantly messing with the fuel height and jetting, the IDA was still not reaching what I felt could be its maximum potential
3) Based on tire wear at the inside edges of the rears, rear camber and toe were in need of further 'optimization'
At the track.
Going through tech inspection.
Last edited by Andrew-s; 11-19-16 at 06:44 PM.
11-19-16, 05:54 PM
#11
Full Member
Thread Starter
iTrader: (1)
Join Date: Mar 2014
Location: New Mexico
Posts: 66
Likes: 0
Received 0 Likes
on
0 Posts
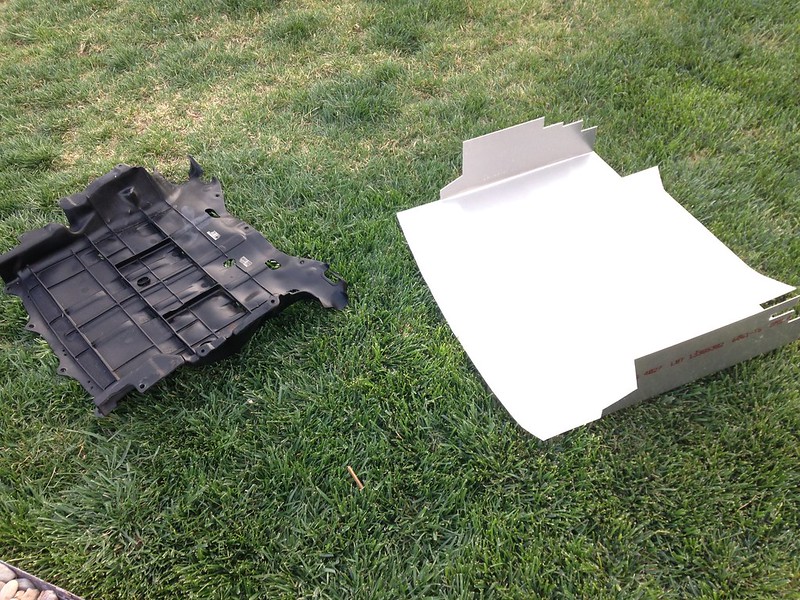
First order of business was to improve oil cooling. Looking at a few photos of Dave Lemon's car and Mustanghammer's STU car, I plumbed in a second GSL-SE oil cooler I had in parallel with the original oil cooler. I also tried to really seal off any chances of air 'short cutting' around any of the coolers/radiator with sheet aluminum.
The concept.
Done.
Start of new sheet aluminum under tray to properly manage air with the new front bumper/air dam.
The concept.
Done.
Start of new sheet aluminum under tray to properly manage air with the new front bumper/air dam.
Last edited by Andrew-s; 11-19-16 at 06:50 PM.
11-19-16, 06:06 PM
#12
Full Member
Thread Starter
iTrader: (1)
Join Date: Mar 2014
Location: New Mexico
Posts: 66
Likes: 0
Received 0 Likes
on
0 Posts
Next I had a free morning so I tore down the freeze damaged engine that came with the car to see what the overall damage was. I found the freeze damage but also learned a few other details.
1) The engine and car had been routinely agressively raced from 2005 to 2015 (a note in documents that came with the car said to shift at 9000) with the thermostat removed and the thermostat bypass unplugged, which I believe meant it ran hot its entire life
2) The car had never had an oil temperature gauge as far as I could tell so oil temps were never monitored but must have been outrageously high
Considering what must have been well in excess of the usual guidance on water and oil temps, all bearing and rotor housing surfaces looked fine. I know it seems the guidance points to 'direct damage' if temps are too high but as a tribute to a good design the rotary appears to quietly tolerate much more abuse than many give them credit for -- not that I would push one, though, more cooling is always better.
All apart.
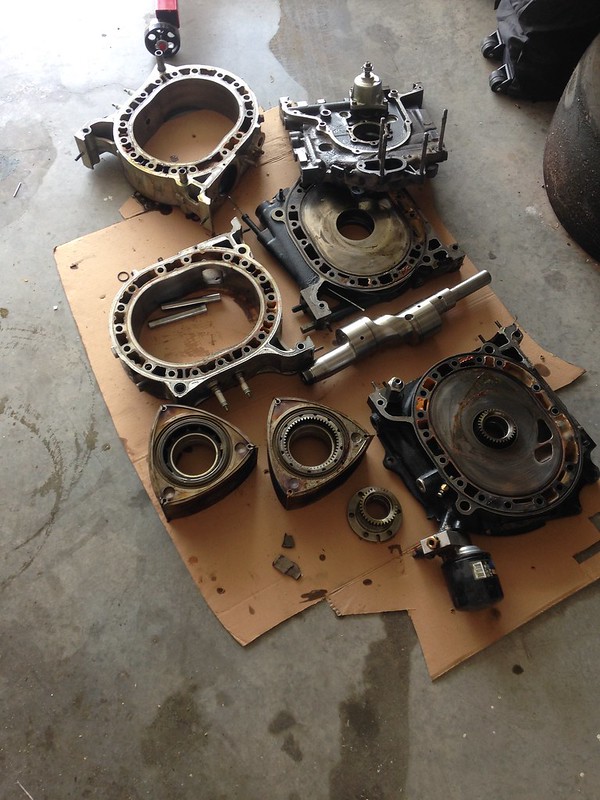
All that porting work ruined.
1) The engine and car had been routinely agressively raced from 2005 to 2015 (a note in documents that came with the car said to shift at 9000) with the thermostat removed and the thermostat bypass unplugged, which I believe meant it ran hot its entire life
2) The car had never had an oil temperature gauge as far as I could tell so oil temps were never monitored but must have been outrageously high
Considering what must have been well in excess of the usual guidance on water and oil temps, all bearing and rotor housing surfaces looked fine. I know it seems the guidance points to 'direct damage' if temps are too high but as a tribute to a good design the rotary appears to quietly tolerate much more abuse than many give them credit for -- not that I would push one, though, more cooling is always better.
All apart.
All that porting work ruined.
11-19-16, 06:10 PM
#13
Full Member
Thread Starter
iTrader: (1)
Join Date: Mar 2014
Location: New Mexico
Posts: 66
Likes: 0
Received 0 Likes
on
0 Posts
To work on the rear camber and toe issues, I first measured the starting camber and toe. Rear camber was -1.8deg per side and rear toe was 0.25" total toe in. The car came with AWR individual adjustable camber links (featuring seized, neglected bushings) but had the original rear subframe link so I removed the subframe to inspect everything and install an adjustable subframe link to further be able to try to reduce negative rear camber.
While everything was out, again cleaning, sanding, and paint.
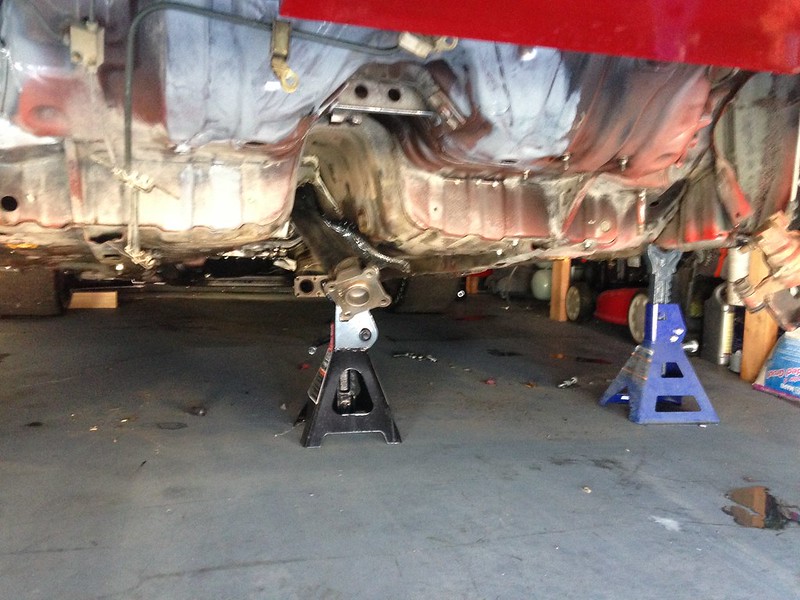
After.
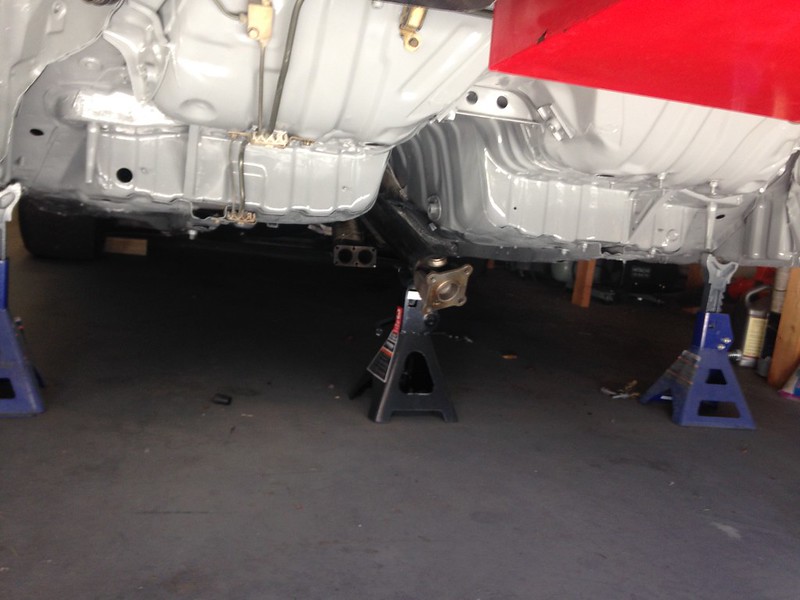
Subframe out - new delrin subframe and diff mounts while it was out.
While everything was out, again cleaning, sanding, and paint.
After.
Subframe out - new delrin subframe and diff mounts while it was out.
Last edited by Andrew-s; 11-19-16 at 06:35 PM.
11-19-16, 06:27 PM
#14
Full Member
Thread Starter
iTrader: (1)
Join Date: Mar 2014
Location: New Mexico
Posts: 66
Likes: 0
Received 0 Likes
on
0 Posts
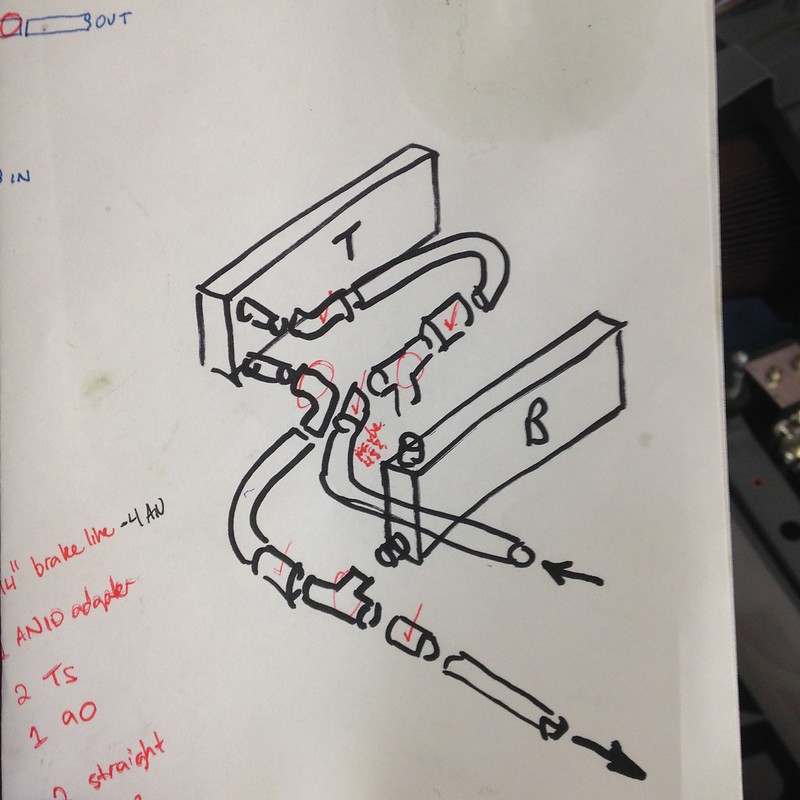
As received the car had the flexible and hardline sections of the clutch hydraulics swapped to give room for the fuel pressure regulator. So as to not have engine movement continue to strain and cold work the hardline, I 'reorganized' things such that the clutch would always be there upon pressing the pedal. This also reduced the fuel line head pressure via lowering the regulator to the same elevation of the float bowl.
That de-powered steering rack will be replaced with a manual rack I found at some point too.
New layout.
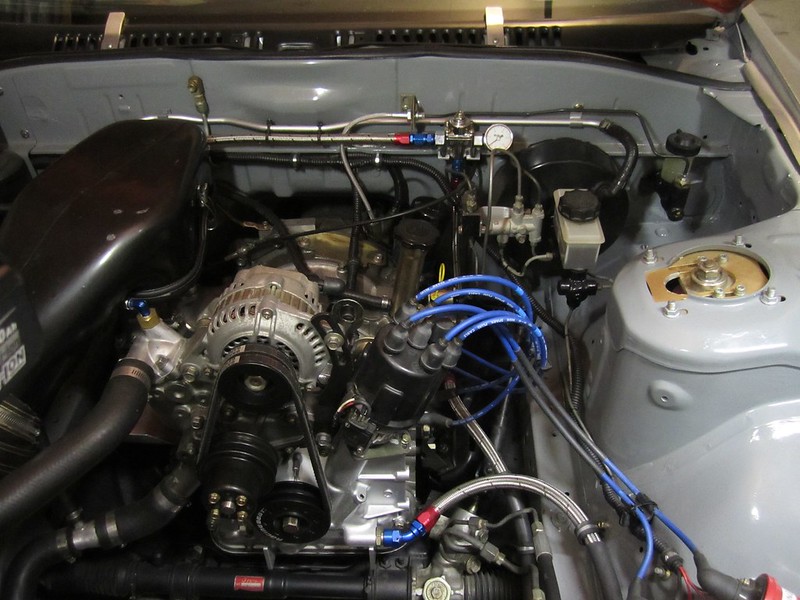
That de-powered steering rack will be replaced with a manual rack I found at some point too.
New layout.
 12-05-16, 02:03 PM
#17
Full Member
Thread Starter
iTrader: (1)
Join Date: Mar 2014
Location: New Mexico
Posts: 66
Likes: 0
Received 0 Likes
on
0 Posts
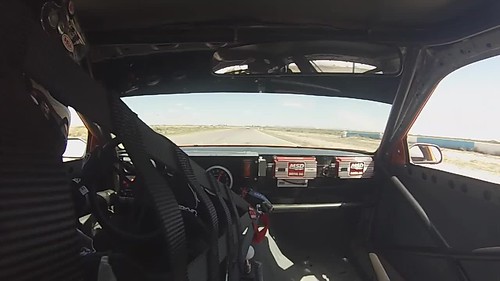
No race video yet. Earlier this year I finished logging the hours needed with my club (SouthWest MotorSports in Albuquerque) to move to novice and join the big dogs on the track. Up until now I have been circulating at full speed in my run group with passing via point-by only. However, my work schedule and the race schedules didn't mesh well this summer and so I haven't been able to put my novice license to the test; hopefully the schedules work out better in 2017.
In the mean time, continued parts, cleaning, and tinkering mixed with watching others on the forum.
In the mean time, continued parts, cleaning, and tinkering mixed with watching others on the forum.
04-09-17, 05:33 PM
#19
Full Member
Thread Starter
iTrader: (1)
Join Date: Mar 2014
Location: New Mexico
Posts: 66
Likes: 0
Received 0 Likes
on
0 Posts
WELL, after a 1 year break from tracking the car, the local club worked out good track contracts for 2017 and I'm back in action. For 2017 I now have my competition license (much different world to HPDE sessions!) and I survived my first weekend of racing.
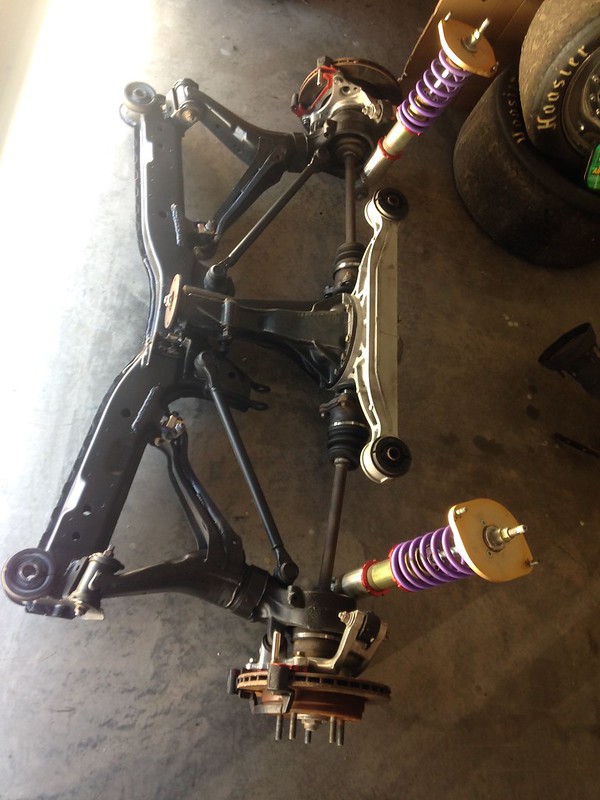
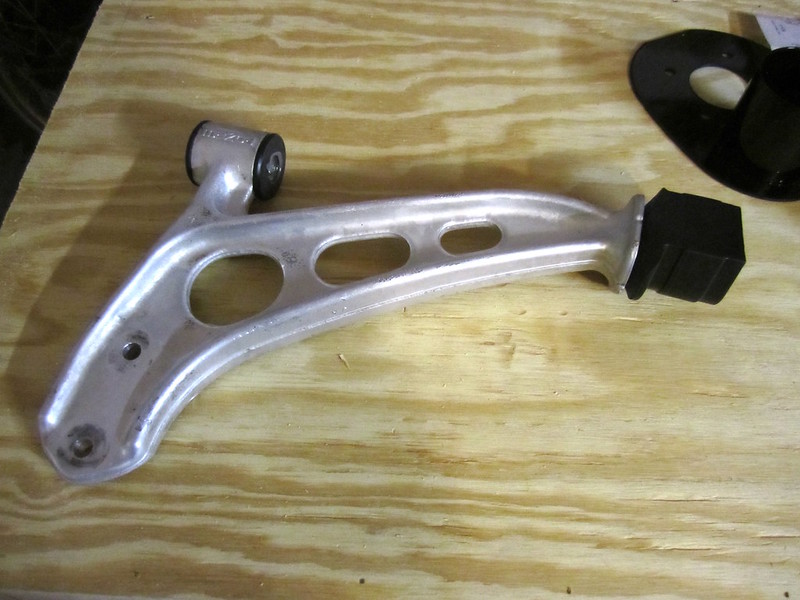
Prior to heading out, I needed to freshen up the front suspension and after searching and being on waitlists for delrin control arm bushings that never materialized, I went with poly bushings. I also added AWR brake cooling parts while I had it all apart.
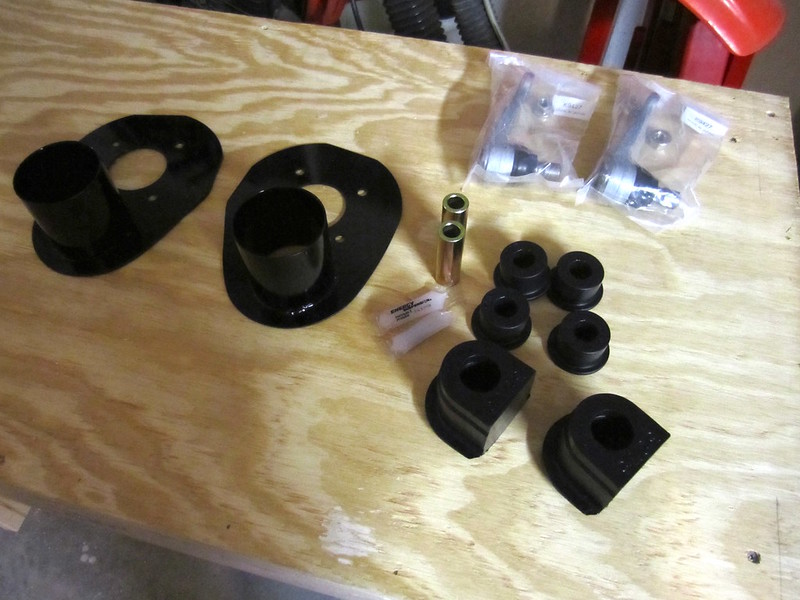
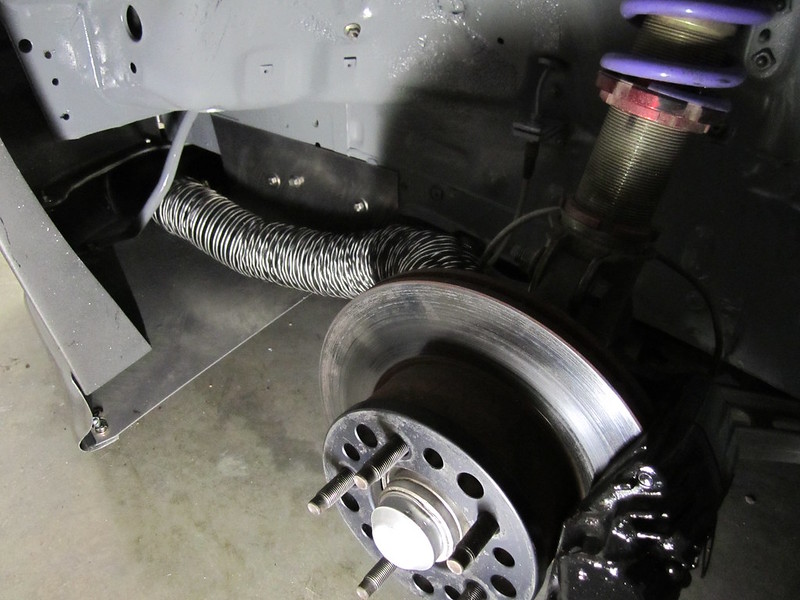
Nice to get it out of the garage and trackside.
Prior to heading out, I needed to freshen up the front suspension and after searching and being on waitlists for delrin control arm bushings that never materialized, I went with poly bushings. I also added AWR brake cooling parts while I had it all apart.
Nice to get it out of the garage and trackside.
Last edited by Andrew-s; 04-09-17 at 05:43 PM.
04-09-17, 05:39 PM
#20
Full Member
Thread Starter
iTrader: (1)
Join Date: Mar 2014
Location: New Mexico
Posts: 66
Likes: 0
Received 0 Likes
on
0 Posts
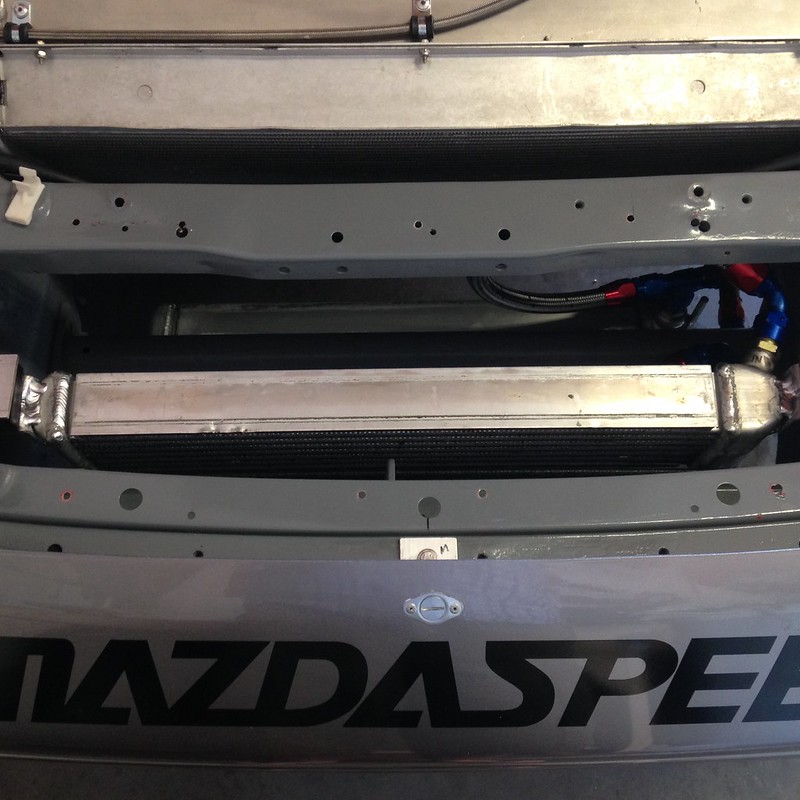
I hadn't driven the car to test the new dual oil coolers after installing them in parallel last year. I am happy for report that in 80f ambients the hottest I saw was 230f oil and 205f water. A big step in the right direction but oil was still higher than the '200ish' goal. So I tore the whole front apart and will be trying the 'Dave Lemon/Mazdatrix' EP oil locations and ducting. I made sure that the back sides of both oil coolers featured dedicated ducting to low pressure zones.
I still think that the upper oil cooler will not see enough fresh air being that it sits pretty high up from the main bumper opening. But it seems EP only allows 'bodywork openings where factory openings are'...I get to test it all out again at the next event later on in April.
The plan

Done with a few sheets of 0.050" aluminum.
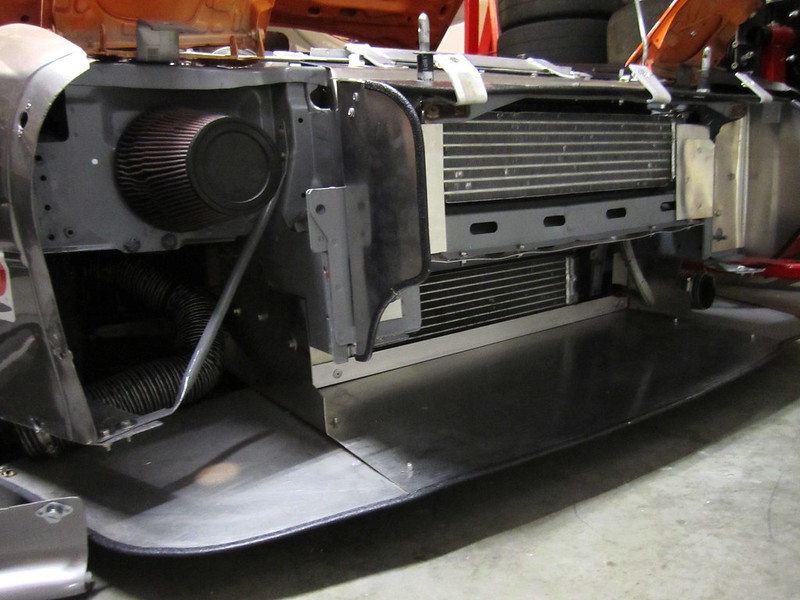
I still think that the upper oil cooler will not see enough fresh air being that it sits pretty high up from the main bumper opening. But it seems EP only allows 'bodywork openings where factory openings are'...I get to test it all out again at the next event later on in April.
The plan
Done with a few sheets of 0.050" aluminum.
 04-10-17, 10:30 AM
#22

Love the car! Your radiator and oil cooler ducting is a good start and not to criticize but the ducting leading into the coolers and radiator is way more important than the ducting after. The ideal inlet ducting size is about 1/3 the height of the cooler/radiator while also being full width. Interestingly enough this is pretty much exactly the size of the opening in the stock s4 bumper on my '86 GXL so I just made my ducting that height and width. This allows a low pressure zone at the entry of the bumper opening so that air actually wants to enter the front of the car and it also allows the air to slow down and spread out as it gets closer to the radiator. The goal is to get all the air to pass through the radiator/coolers without causing any re-circulation/turbulence leading to reduced cooling. You have plenty of room behind the radiator that is unobstructed so I wouldn't worry so much about the post ducting especially since you also have your intake air coming from the headlight area so that you don't have to worry about sucking in hot engine bay air.
Keep up the awesome build and I wish we lived closer so I could see that beast on the track!
Keep up the awesome build and I wish we lived closer so I could see that beast on the track!
Last edited by Lavitzlegend; 04-10-17 at 10:32 AM.
04-13-17, 10:40 PM
#23
Full Member
Thread Starter
iTrader: (1)
Join Date: Mar 2014
Location: New Mexico
Posts: 66
Likes: 0
Received 0 Likes
on
0 Posts
Thanks for the compliments!
I had a few different times where if I was really on the gas through through 2nd and 3rd gear it would run out of fuel. Reading around, there are some tricks for the IDA. So I drilled out the fuel inlet to 0.25" and removed the 'cone' the inlet filter sits on using a larger bit. I also ordered and used a 0.25" fluted end mill for my drill press to carefully remove a portion of the 'wall' between the bowl and the un-used accelerator pump well. Finally, I set the float to both satisfy the '23mm' fuel level and hold back 6psi.
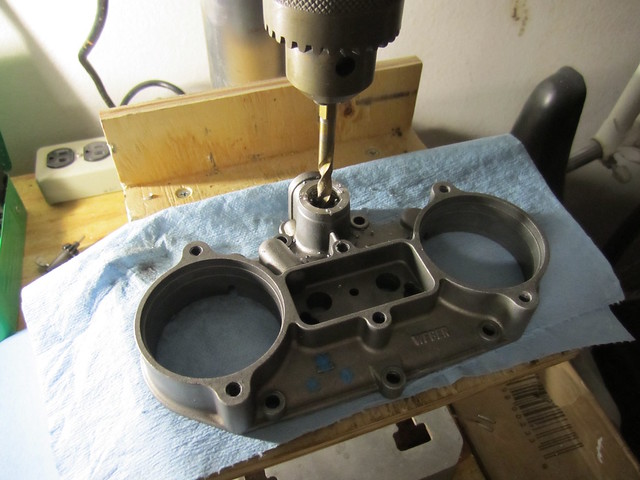
I also found this tool from the Porsche guys with Weber IDAs much more accurate to set the fuel height than the standard 'upside down' gauge plates. Especially considering that the required 3.2 grose glass ball needle changes the height measurements from the stock Weber needles.
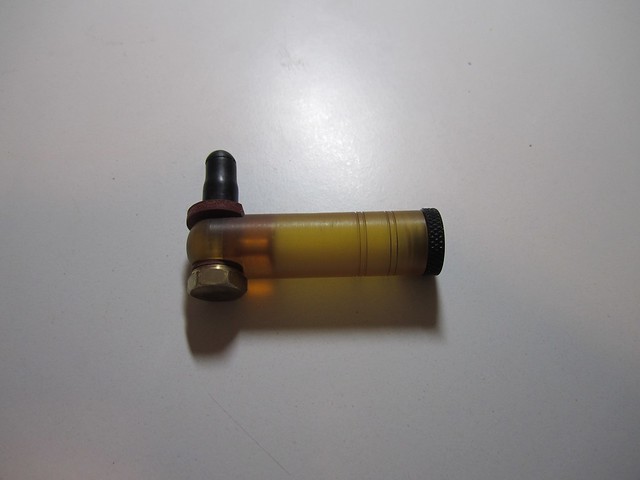
I had a few different times where if I was really on the gas through through 2nd and 3rd gear it would run out of fuel. Reading around, there are some tricks for the IDA. So I drilled out the fuel inlet to 0.25" and removed the 'cone' the inlet filter sits on using a larger bit. I also ordered and used a 0.25" fluted end mill for my drill press to carefully remove a portion of the 'wall' between the bowl and the un-used accelerator pump well. Finally, I set the float to both satisfy the '23mm' fuel level and hold back 6psi.
I also found this tool from the Porsche guys with Weber IDAs much more accurate to set the fuel height than the standard 'upside down' gauge plates. Especially considering that the required 3.2 grose glass ball needle changes the height measurements from the stock Weber needles.
Last edited by Andrew-s; 04-13-17 at 11:04 PM.
04-13-17, 10:44 PM
#24
Full Member
Thread Starter
iTrader: (1)
Join Date: Mar 2014
Location: New Mexico
Posts: 66
Likes: 0
Received 0 Likes
on
0 Posts
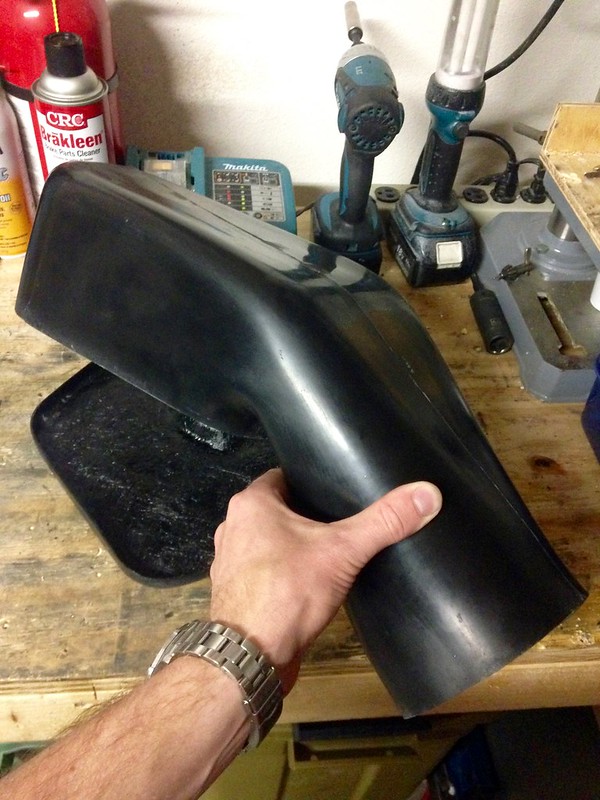
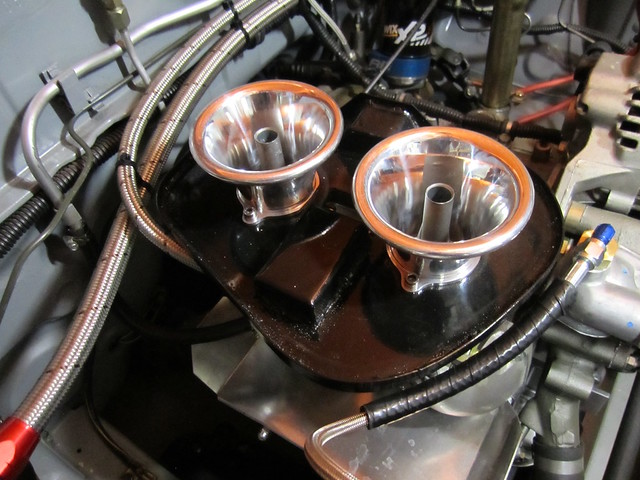
On a similar tangent, I could never get a good seal between the airbox and the air horns after I had to cut up the stock fiberglass bottom of the airbox to switch it from drivers-side to passengers-side fuel inlet. I welded up a new one out of 16ga steel and picked up some VW-market IDA air horns that feature a flange to seal the bottom of the airbox. We'll have to see what the larger parabolic funnel shape does for things.
Last edited by Andrew-s; 04-13-17 at 10:57 PM.
04-13-17, 10:48 PM
#25
Full Member
Thread Starter
iTrader: (1)
Join Date: Mar 2014
Location: New Mexico
Posts: 66
Likes: 0
Received 0 Likes
on
0 Posts
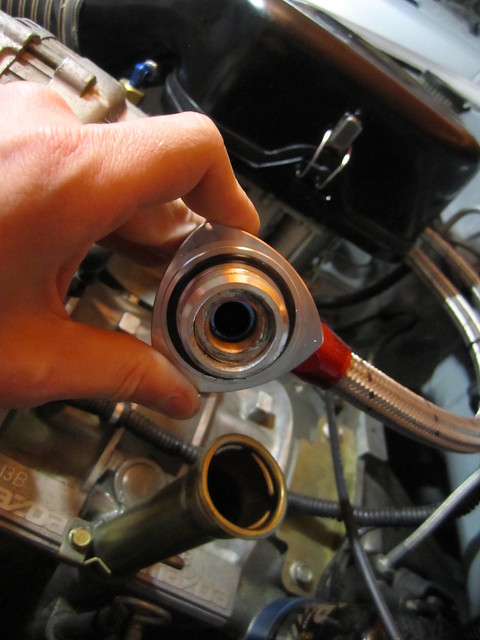
I originally used the stock blowby vent at the base of the oil filler neck and 3/8" hose. However, I was collecting ~ 1qt per weekend so I figured I would improve the setup to reduce the volume of oil filling the catch can. I ended up using a -10 vent hose from the top of oil filler after I welded the stock opening shut.
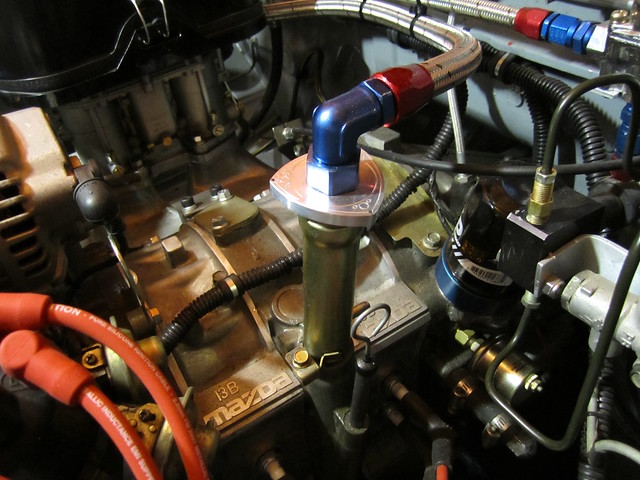
*Ignore the fact that the brake proportioning valve may be in parallel with the factory proportioning valve -- stuff you discover that needs investigation and fixing on used race cars, ha.
Using a grinder I rounded over the sides of a hex nut such that I could press it into the filler cap to give the AN fitting something to tighten against for a good seal.
Last edited by Andrew-s; 04-13-17 at 11:03 PM.