Aloevera's FDWTFN (Mildly Picture Heavy)
 02-13-13, 11:55 PM
#1
Junior Member
Thread Starter

Join Date: Feb 2013
Location: Canada
Posts: 23
Likes: 0
Received 0 Likes
on
0 Posts
Aloevera's FDWTFN (Mildly Picture Heavy)
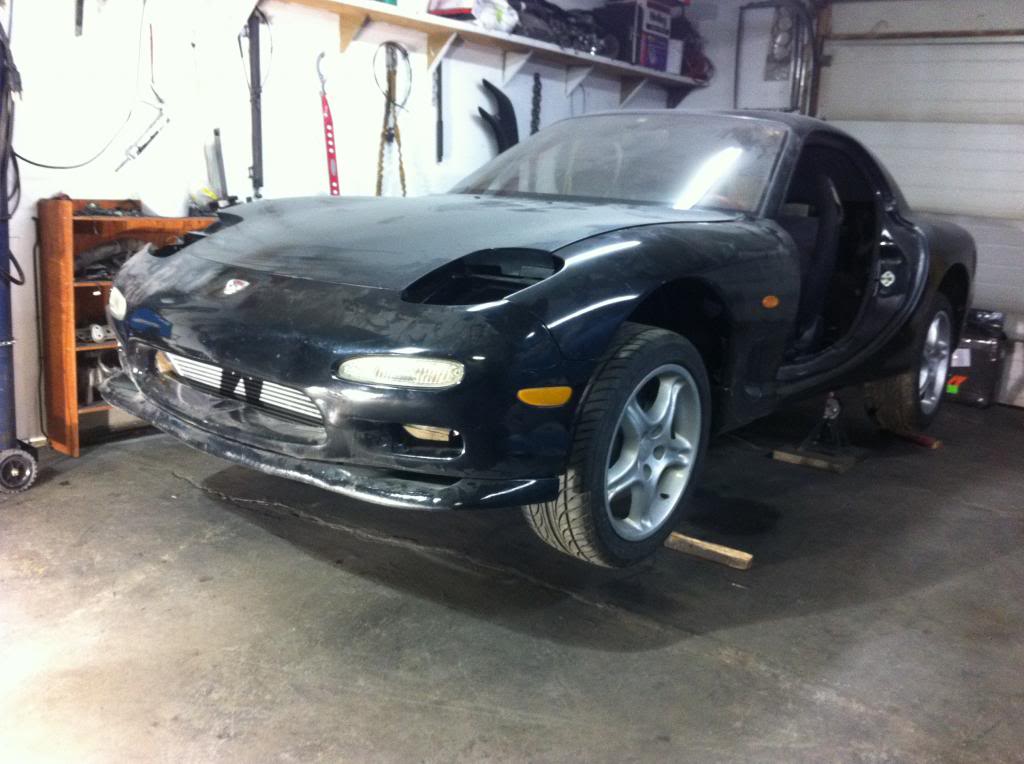
Hey guys my names steve, new here but who cares, this is my new project. 1993 Rx7 FD Enfini, came abused and destroyed right from japan. I had found it tucked in a corner having given up on its life in the back of an old japanese import lot. It was covered in years of neglict and bird s**t, windows stuck down and half pulled apart. The guys at the lot tried to bring it back to life only to find that the rear rotor was blown. They decided not to tell me this but did sell it for a decient price. Long story short I brought the thing home washed it up and started to dig in to it.
 02-14-13, 09:42 AM
#4
Junior Member
Thread Starter
Join Date: Feb 2013
Location: Canada
Posts: 23
Likes: 0
Received 0 Likes
on
0 Posts
Yeah it looked a lot better then i expected after washing it up, and pictures will be up soon! How would you guys attach them? I like when they are on the page instead of having to open the attachment. My guess is use photo bucket then use the insert image button. Ill have to play around with uploading them.
 02-14-13, 11:07 PM
#6
Junior Member
Thread Starter
Join Date: Feb 2013
Location: Canada
Posts: 23
Likes: 0
Received 0 Likes
on
0 Posts
Here is a few more, on the trailer ride home! It was nearly impossible to push it up the ramps and i really didnt want them to fork it up and drop it on the trailer so with a little muscle we pushed the b###h up!
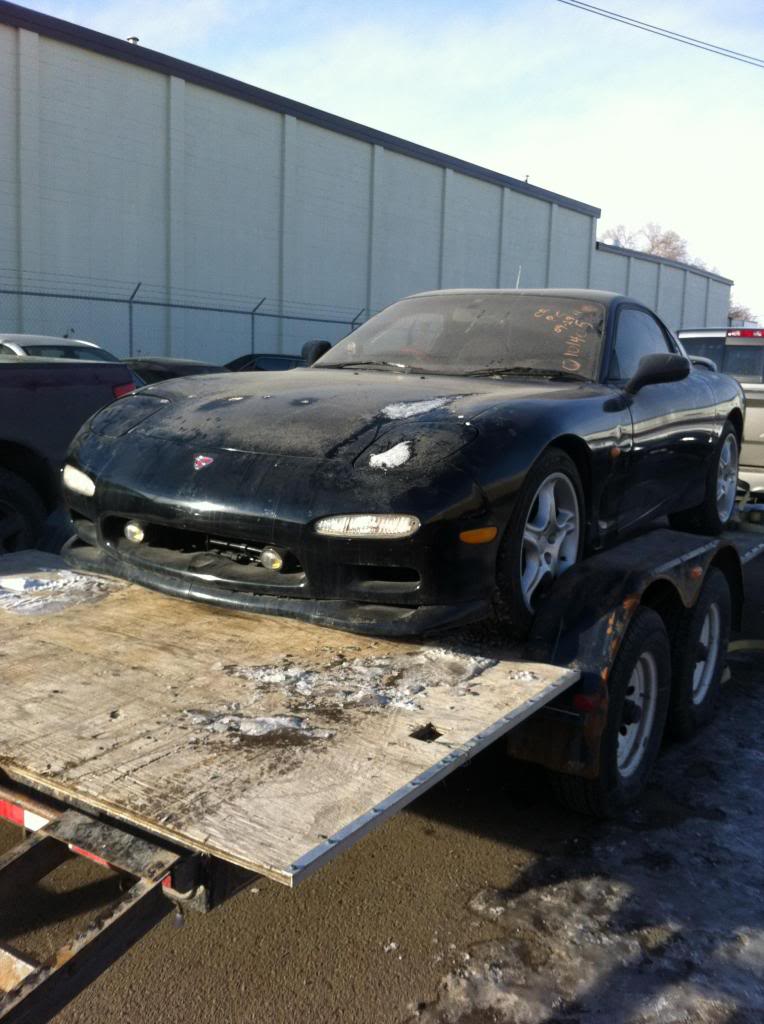
And another shot from the back once we got it home, and of course it is rhd...

And another shot from the back once we got it home, and of course it is rhd...
02-14-13, 11:16 PM
#7
Junior Member
Thread Starter
Join Date: Feb 2013
Location: Canada
Posts: 23
Likes: 0
Received 0 Likes
on
0 Posts
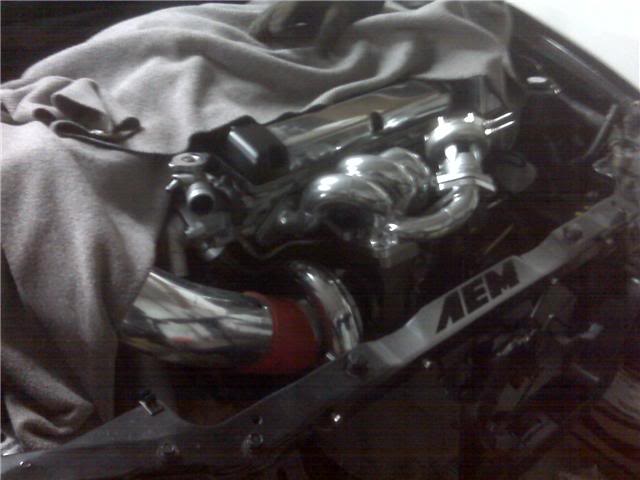
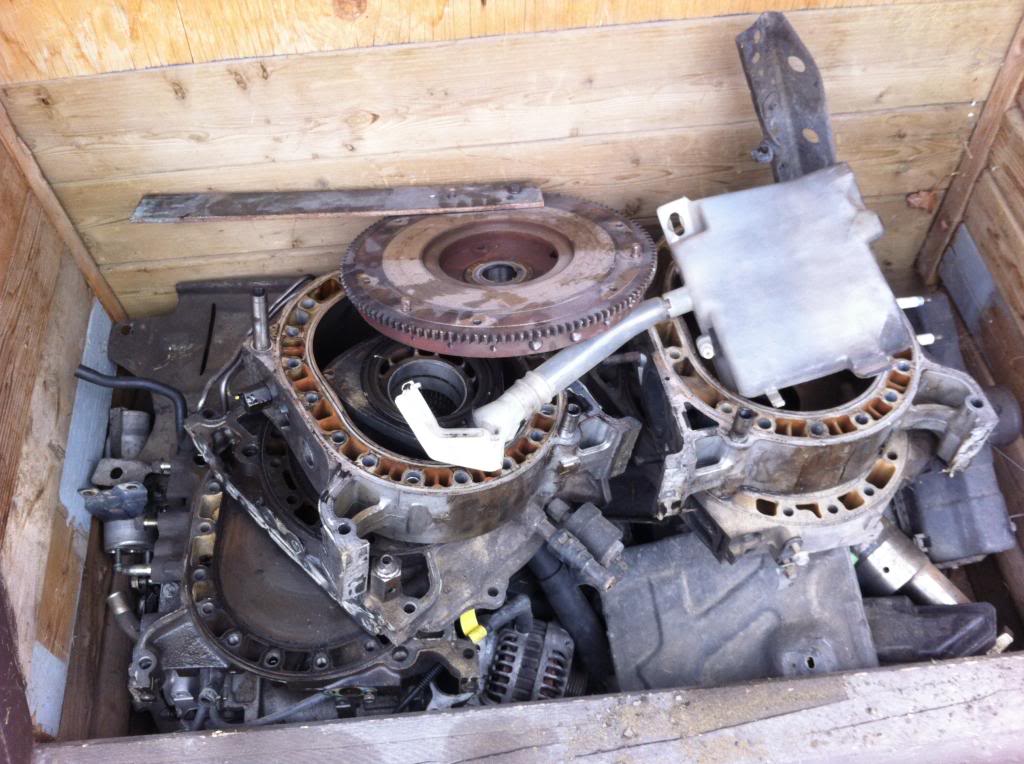
I ended up trying to breathe some life into the 13b with no avail. It would run with no power and back fire like there was no tomorrow. It actually ended up blowing out some of the steel wool out of the packing of the muffler.
So i began tearing in to it hoping it was a faulty sensor or a weak spark plug or something like that that would cause the issue. After hours of digging, vac line changing, new plugs and wires and a compression test it was found that the rear rotor was compressionless. There was barely an audible "woosh" that is suppose to be heard cranking over the rotary with out the spark plug installed. So the inevitable came, out with the power plant!
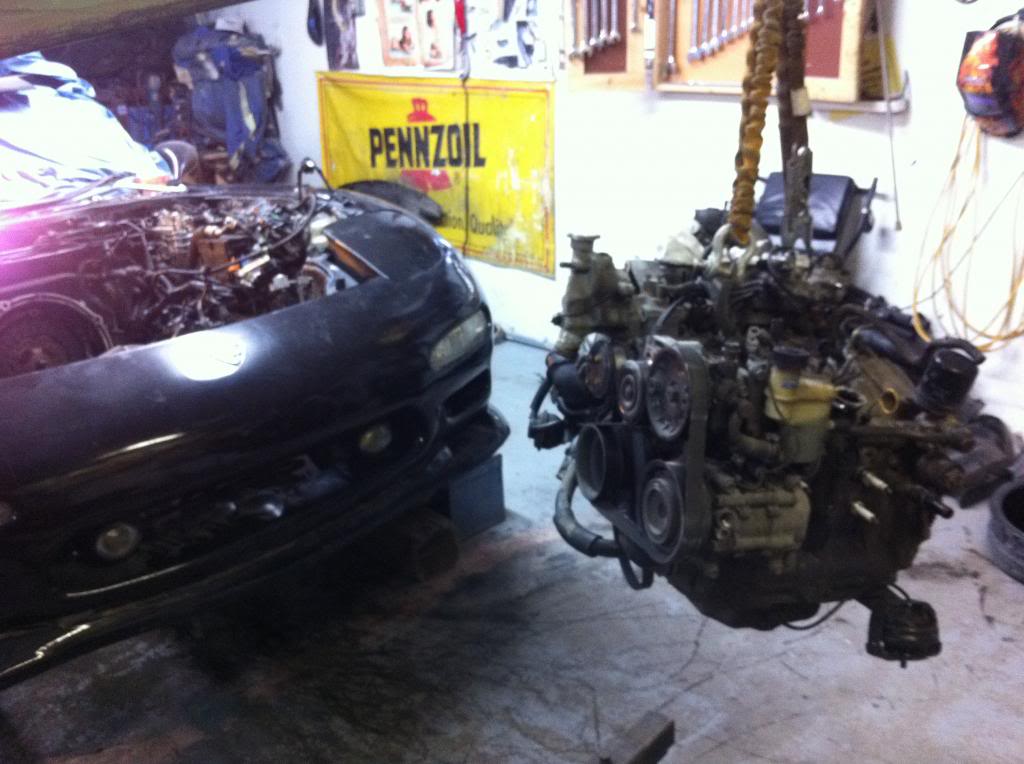
So i began tearing in to it hoping it was a faulty sensor or a weak spark plug or something like that that would cause the issue. After hours of digging, vac line changing, new plugs and wires and a compression test it was found that the rear rotor was compressionless. There was barely an audible "woosh" that is suppose to be heard cranking over the rotary with out the spark plug installed. So the inevitable came, out with the power plant!
Trending Topics
02-17-13, 09:18 AM
#8
Junior Member
Thread Starter
Join Date: Feb 2013
Location: Canada
Posts: 23
Likes: 0
Received 0 Likes
on
0 Posts
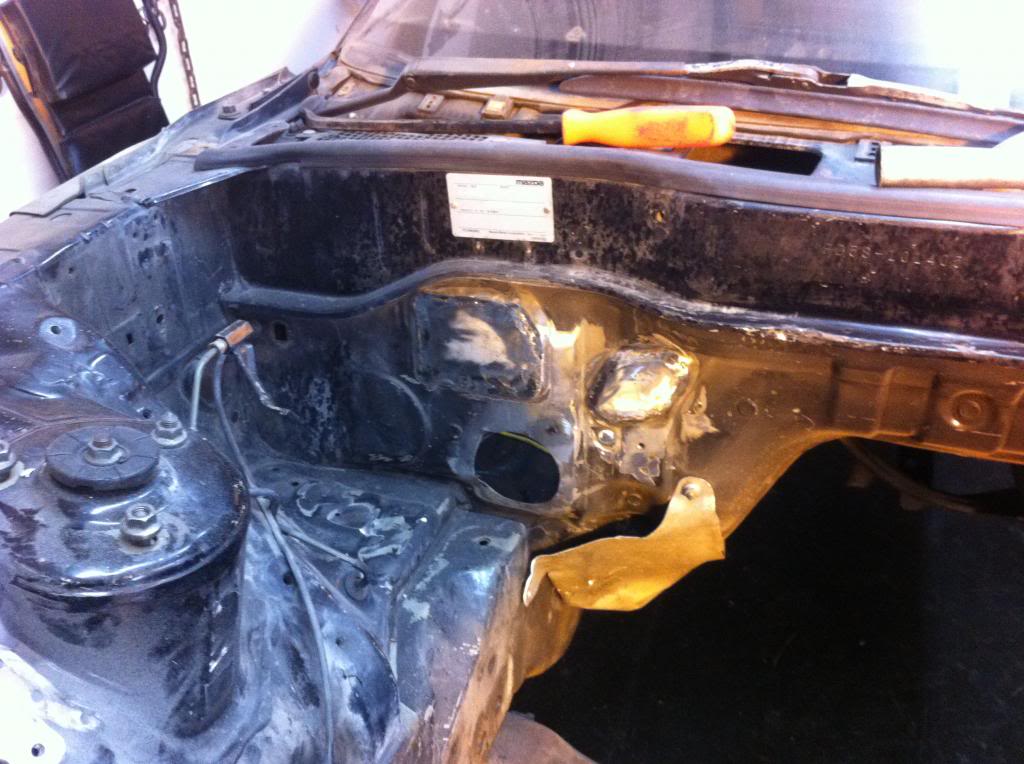
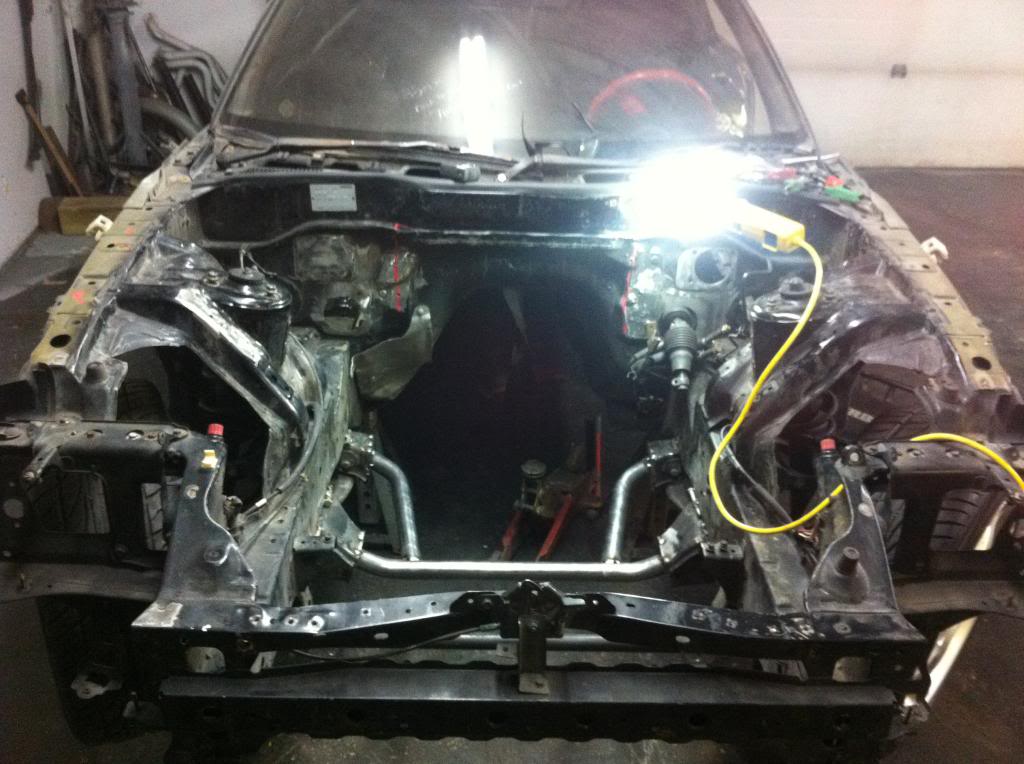
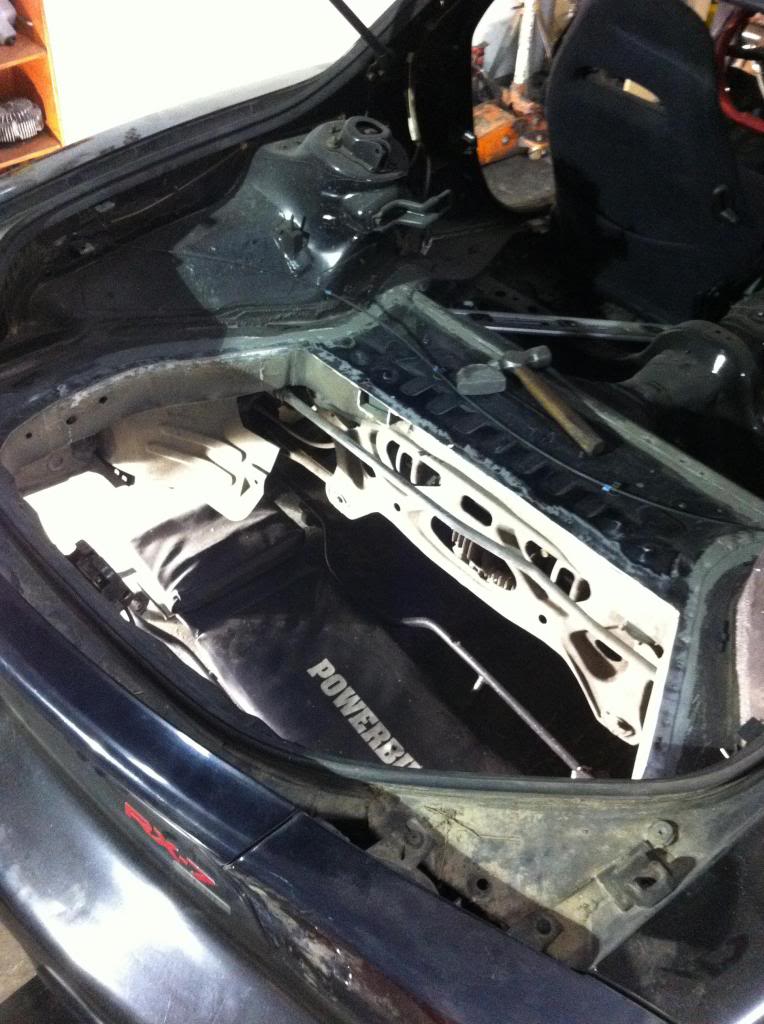
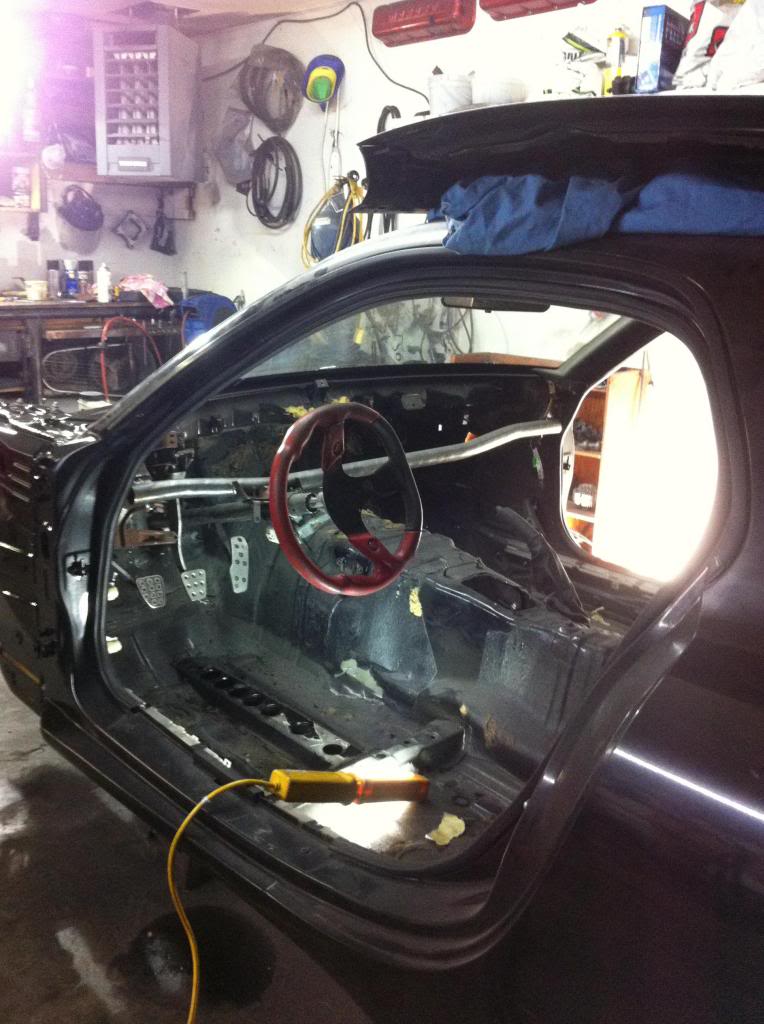
The tear down continued
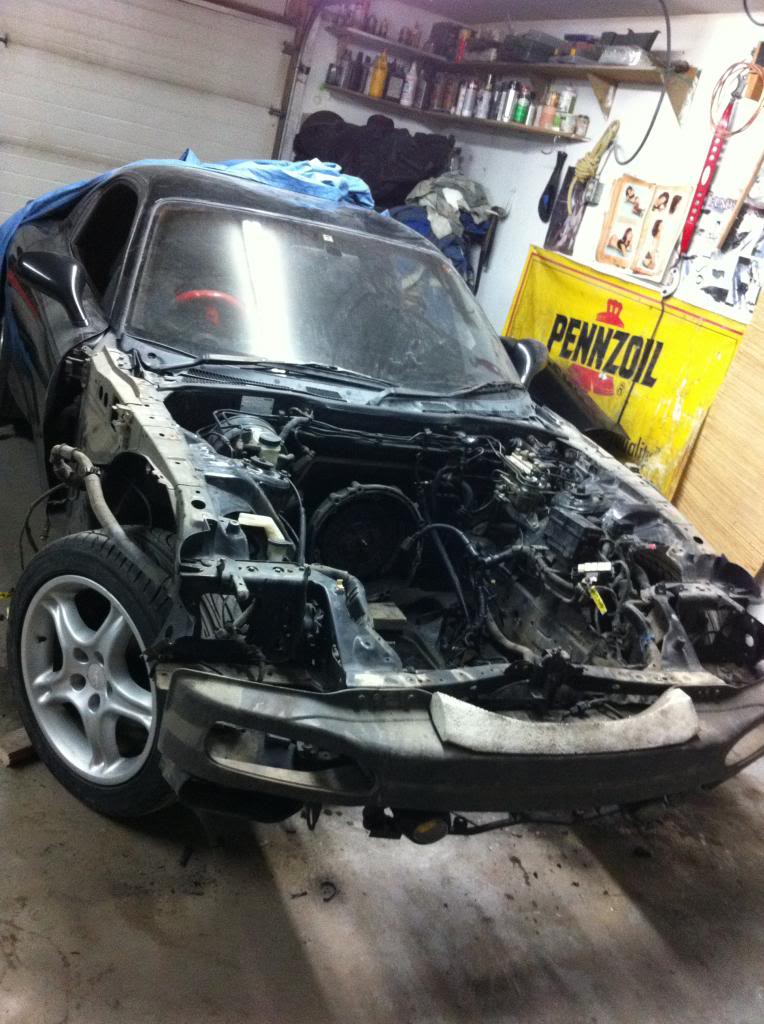
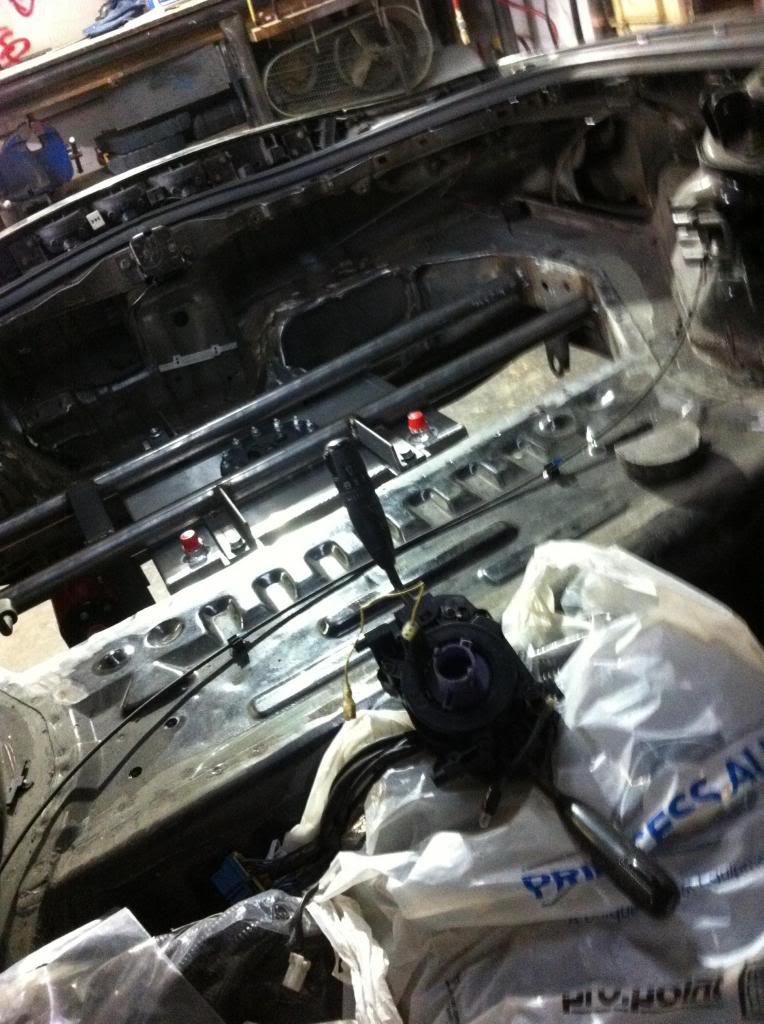
The beginning of the LHD conversion, steering fit up.
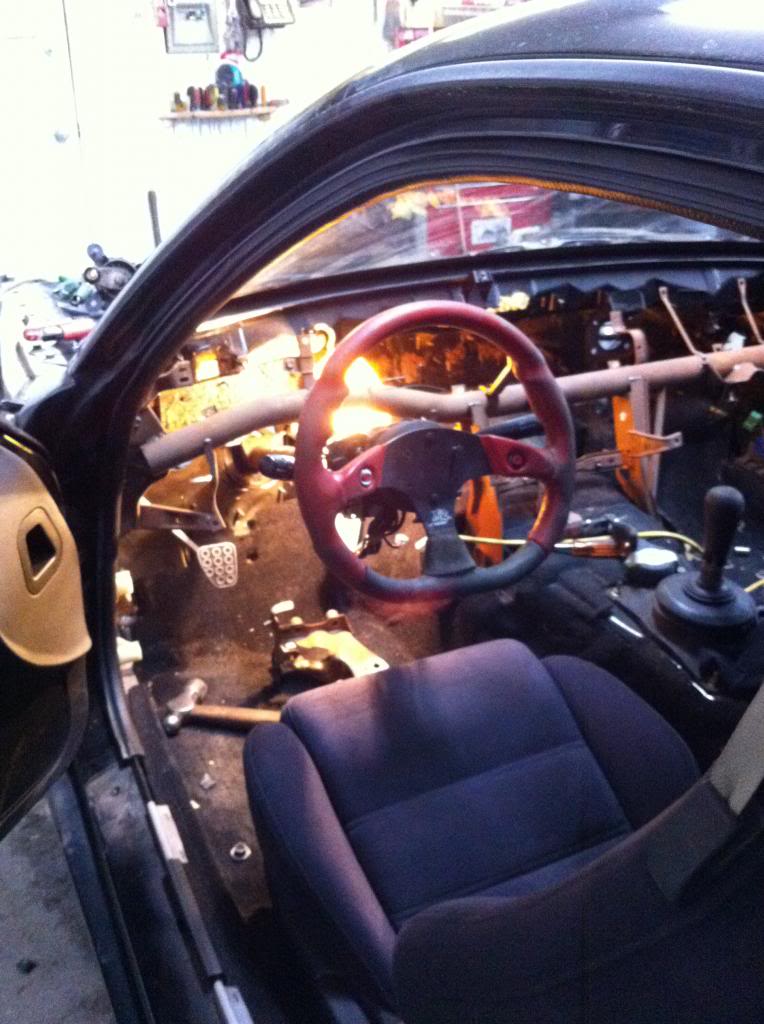
Need to buy a LHD.
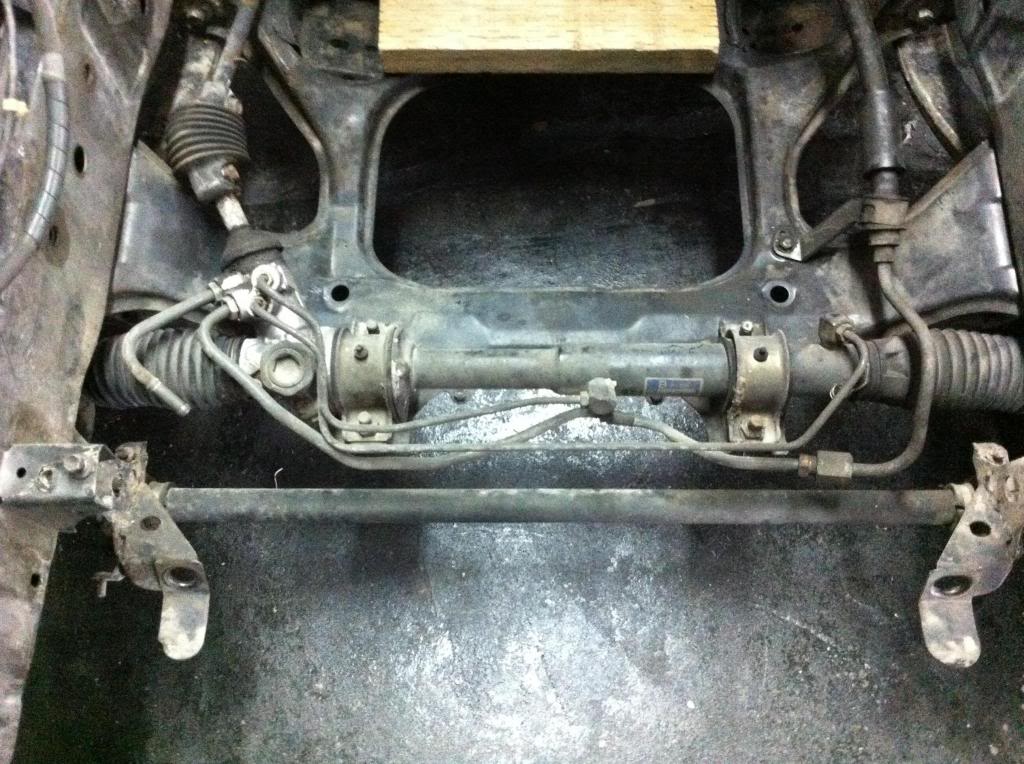
Patching the fire wall, and you can faintly see that i found a LHD rack for it. It was out of a older supra. I ended up getting something different all together though.
The beginning of the LHD conversion, steering fit up.
Need to buy a LHD.
Patching the fire wall, and you can faintly see that i found a LHD rack for it. It was out of a older supra. I ended up getting something different all together though.
02-17-13, 09:24 AM
#9
Junior Member
Thread Starter
Join Date: Feb 2013
Location: Canada
Posts: 23
Likes: 0
Received 0 Likes
on
0 Posts
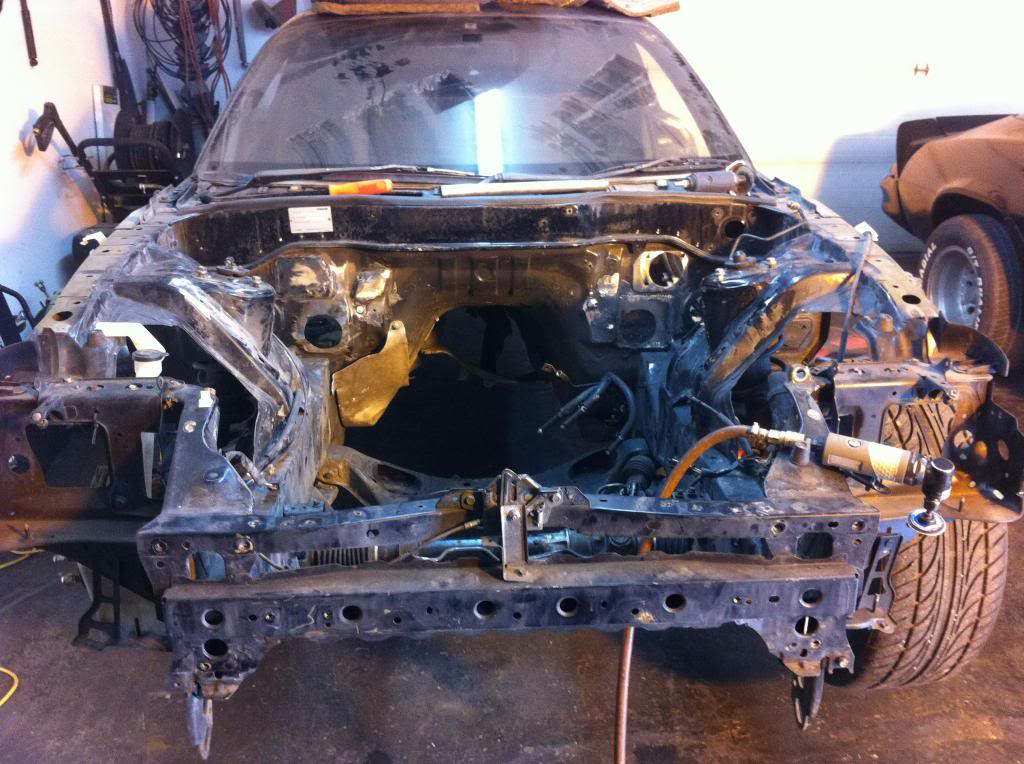
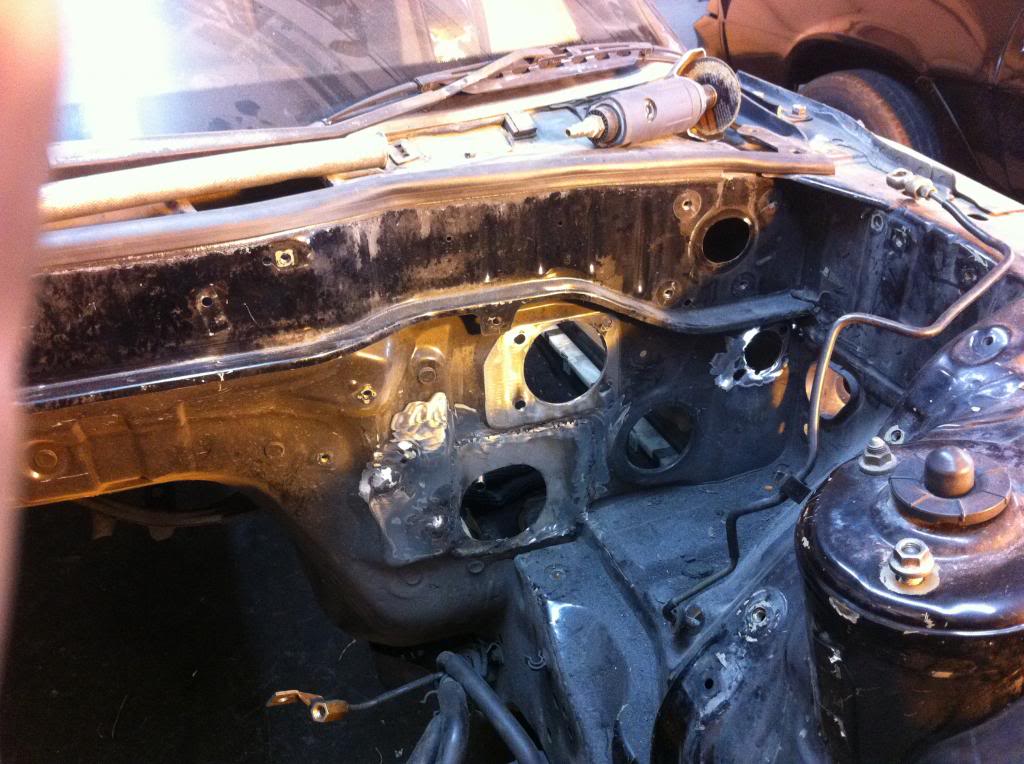
Fire wall continued. By the way i dont know if any one else has tried to weld or patch their fire walls but i found it near impossible. It looked like the fire wall was made of 2 really thing sheets of metal and when you tried to weld on it the first layer would explode into slag and the second layer would build up the weld.
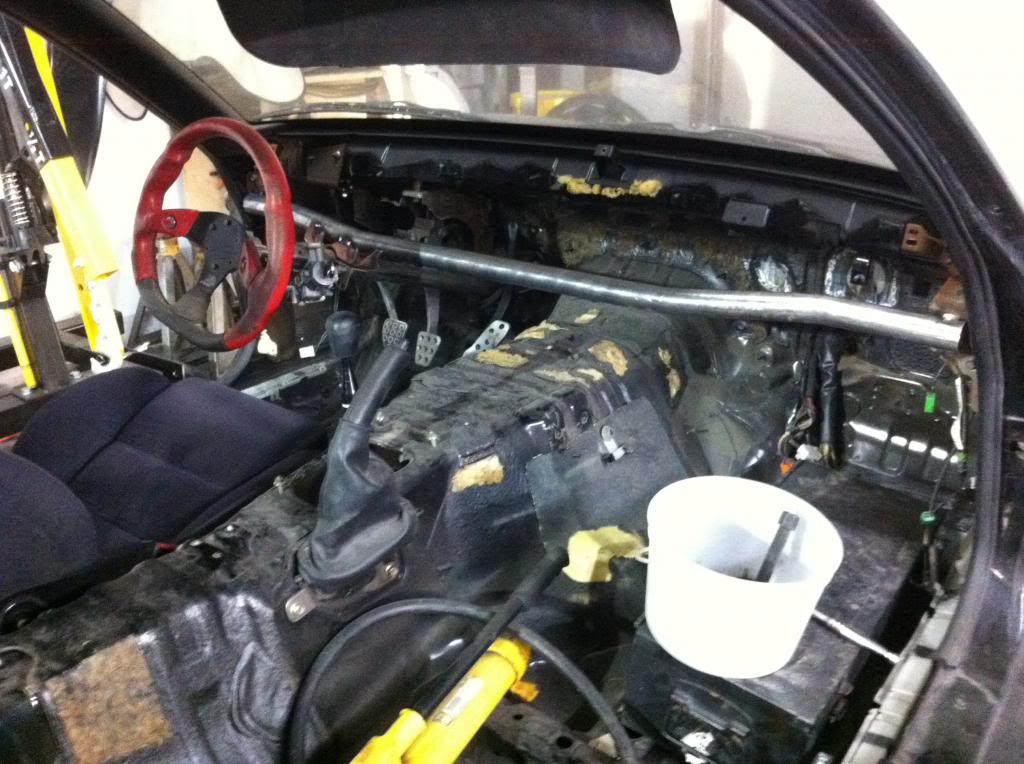
And we skip ahead a little further, car fully gutted!
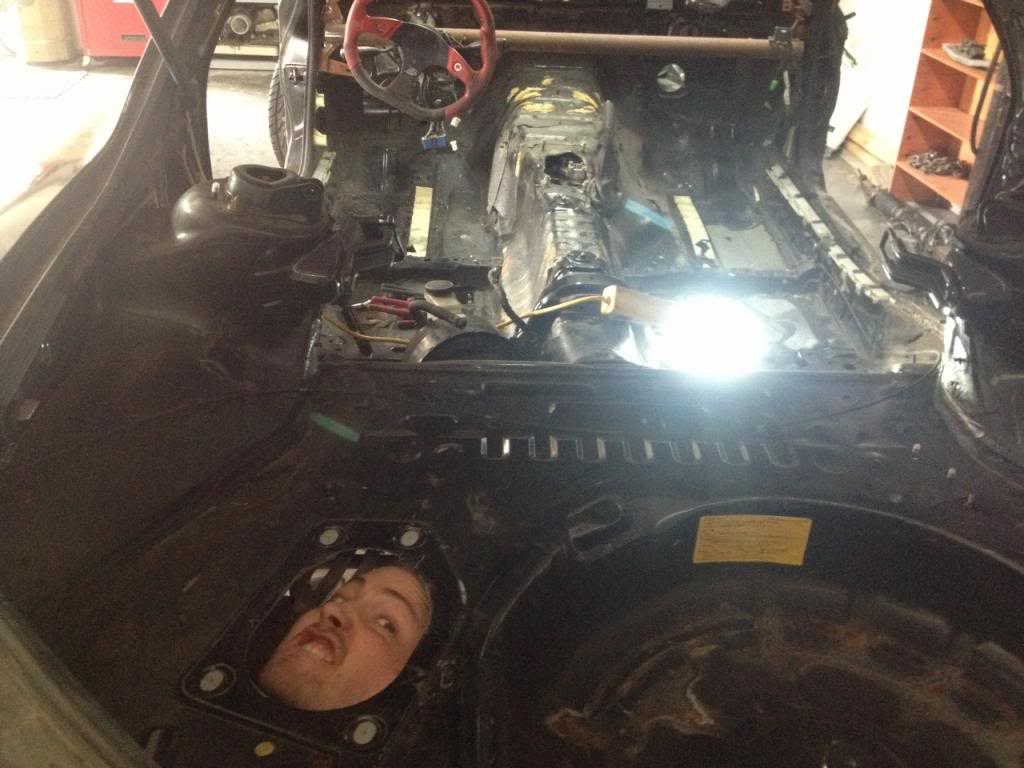
And we skip ahead a little further, car fully gutted!
02-17-13, 09:31 AM
#10
Junior Member
Thread Starter
Join Date: Feb 2013
Location: Canada
Posts: 23
Likes: 0
Received 0 Likes
on
0 Posts
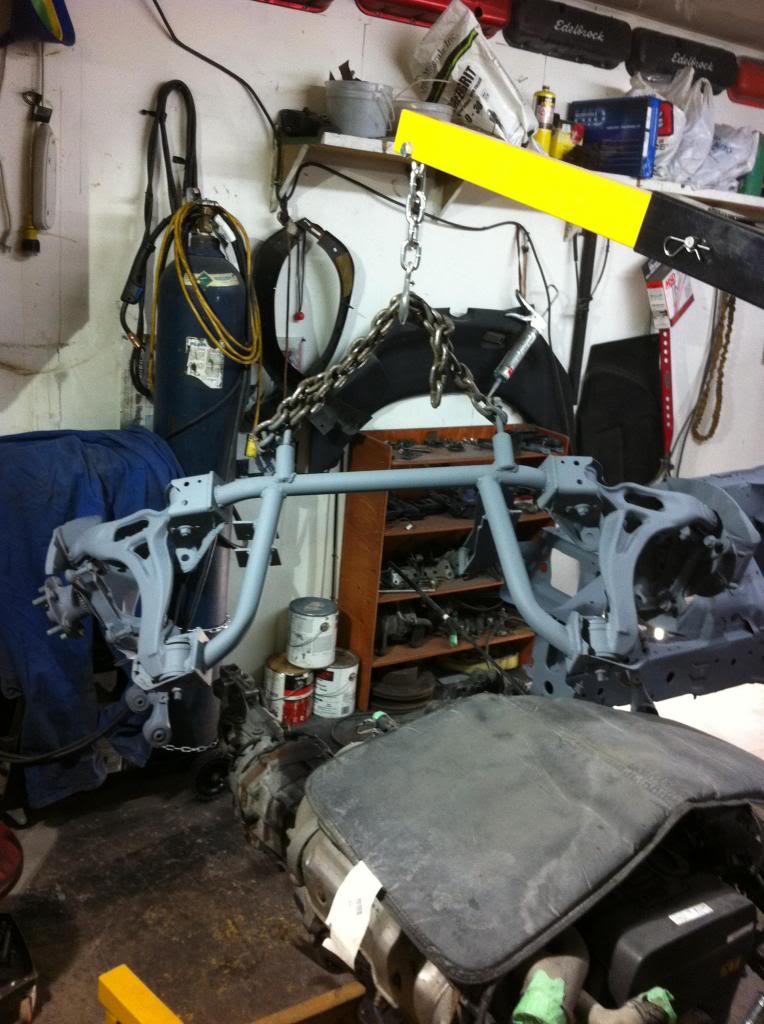
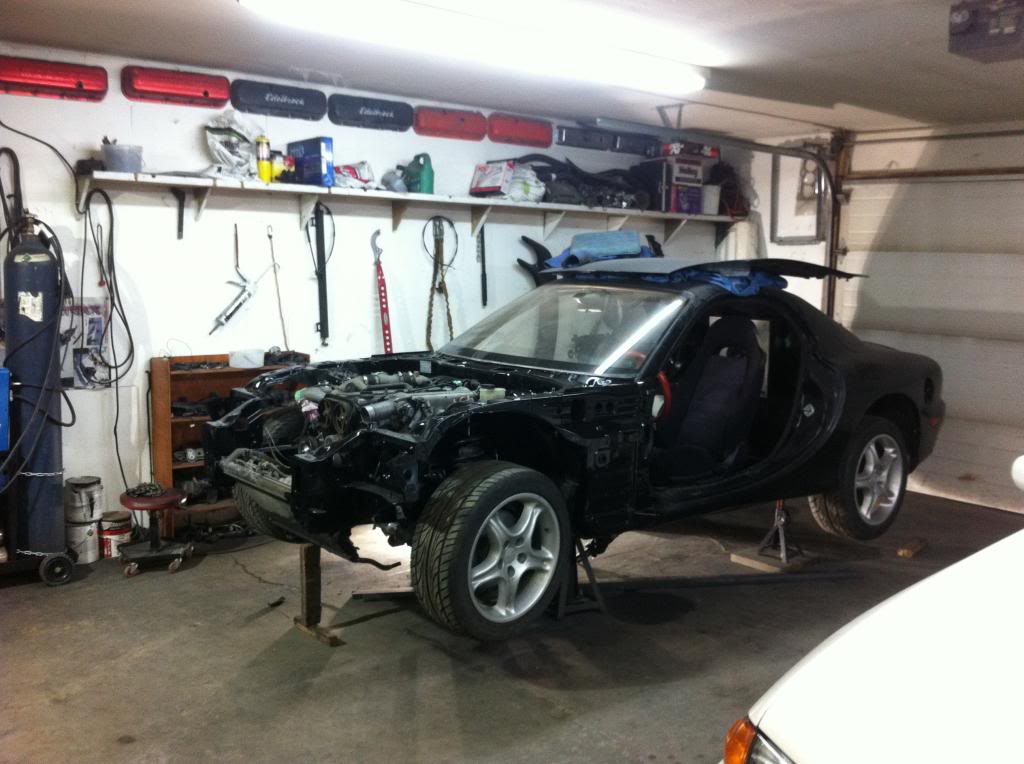
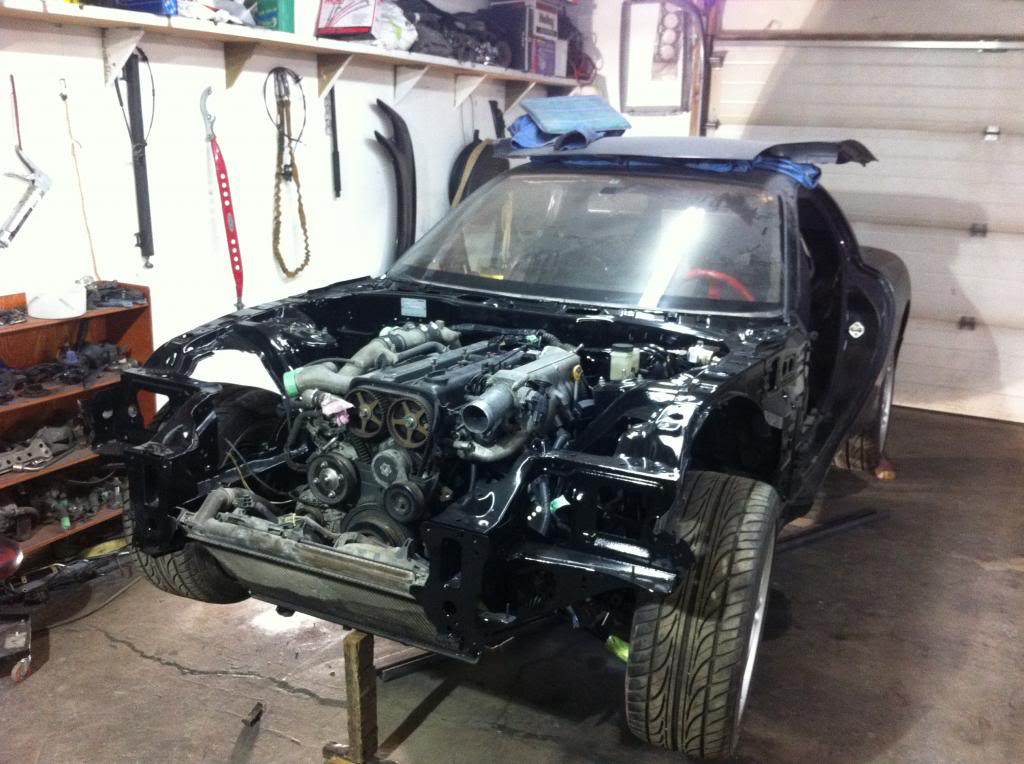
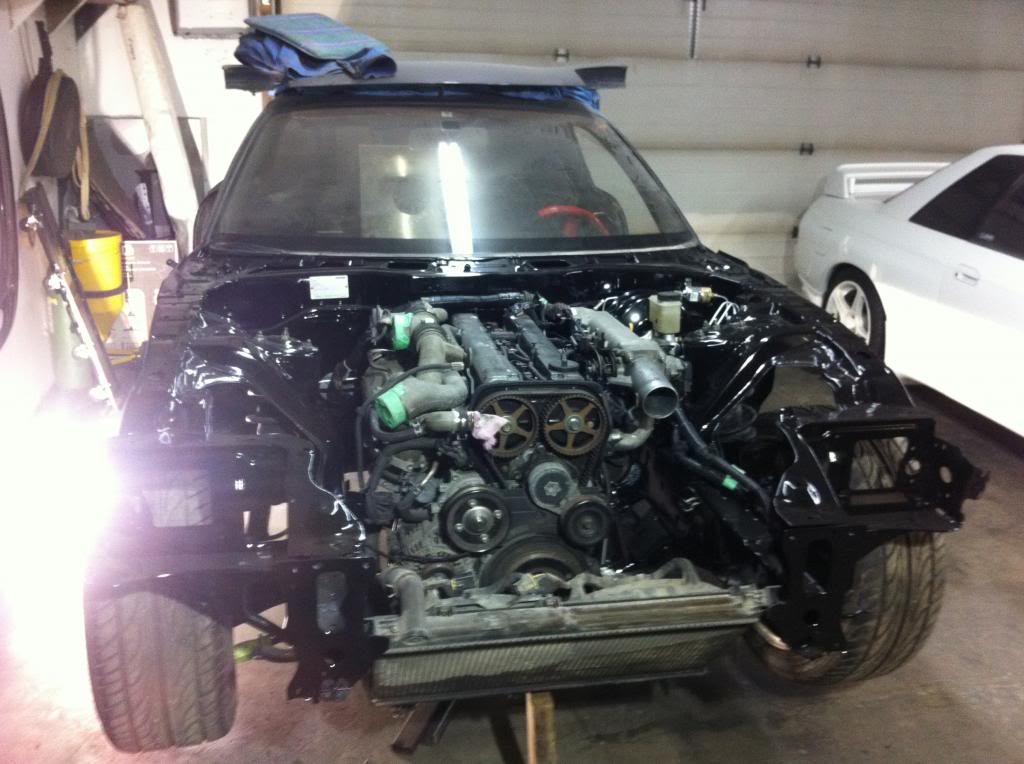
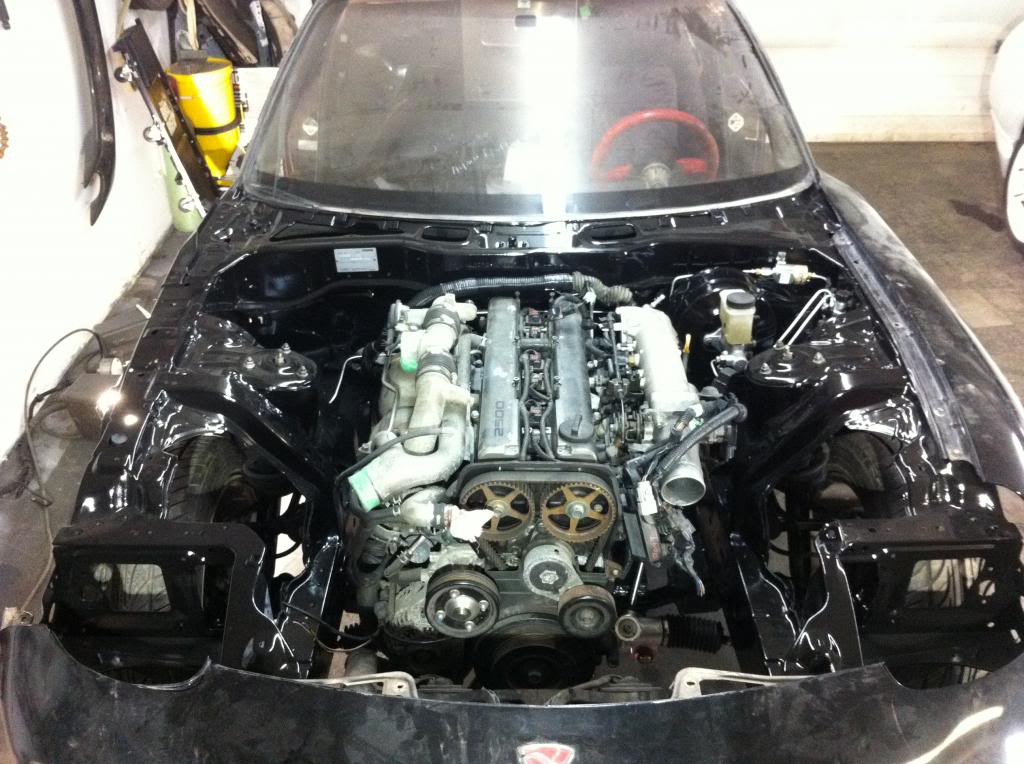
This part of the build really jumped ahead fast so unfortunately I didnt get many pictures of it. Any way I decided to go 1jz for an engine, and I went and made a tubular sub frame to accommodate!
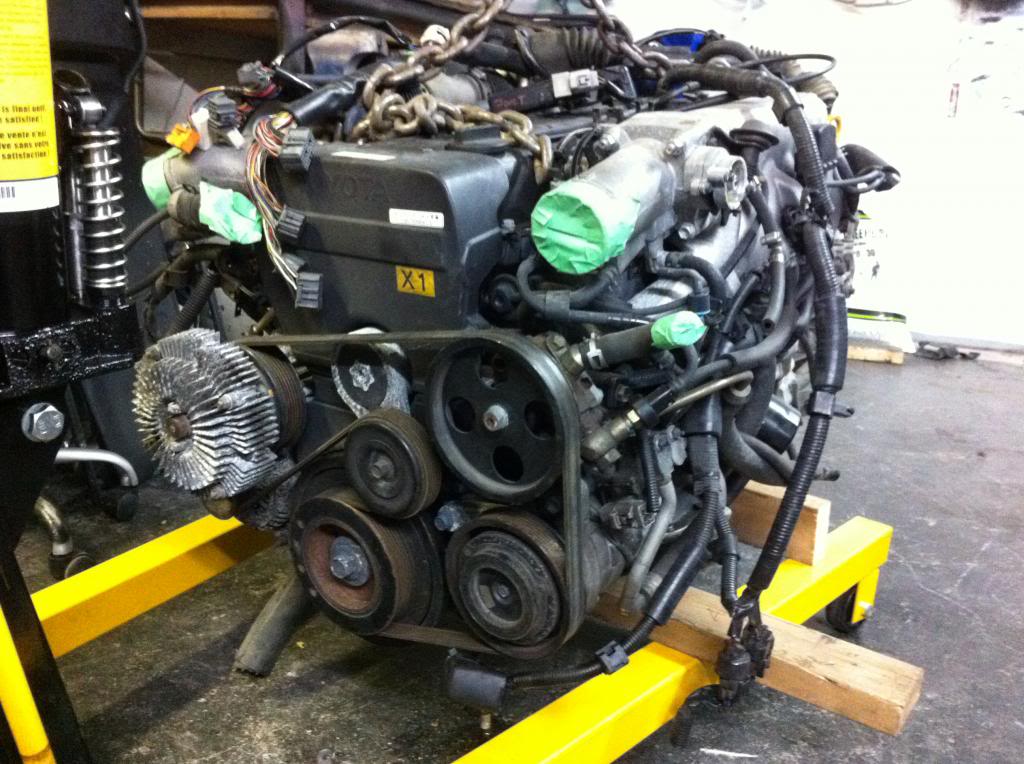
With the new sub frame the motor slipped down into the engine bay beautifully, i did cut and fold that lip on the fire wall though. I put the motor as far back as i could to help any off set in weight. From what i have read guys havent really had an issue with corner weights after the swap.
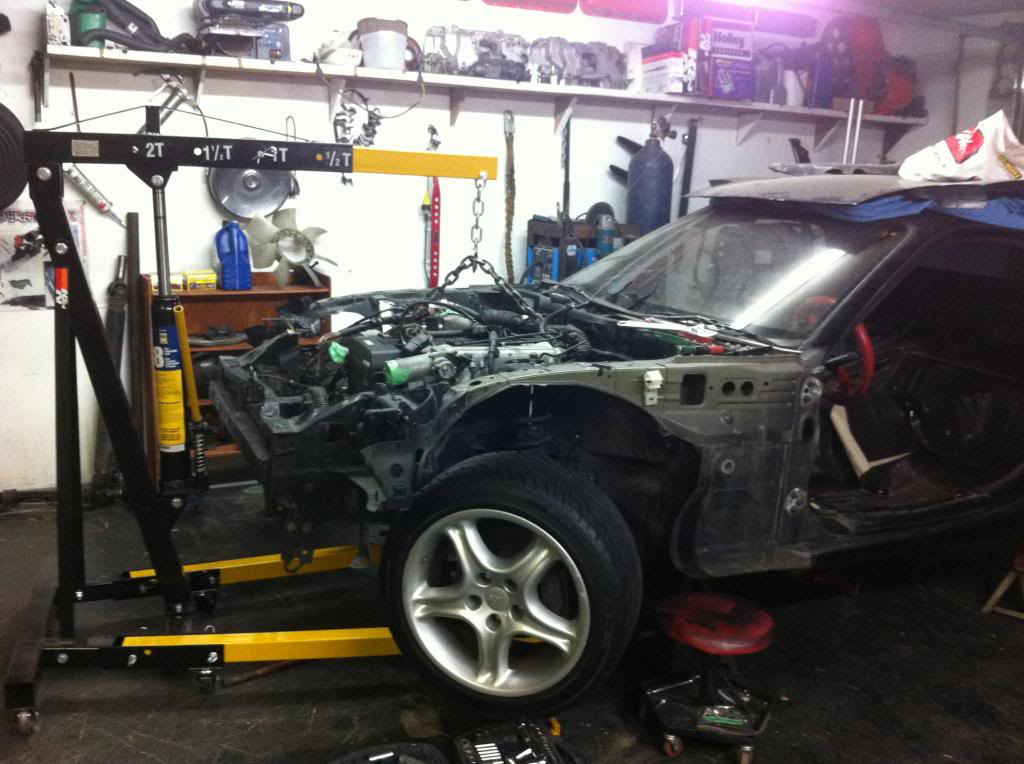
With the new sub frame the motor slipped down into the engine bay beautifully, i did cut and fold that lip on the fire wall though. I put the motor as far back as i could to help any off set in weight. From what i have read guys havent really had an issue with corner weights after the swap.
02-17-13, 09:43 AM
#11
Junior Member
Thread Starter
Join Date: Feb 2013
Location: Canada
Posts: 23
Likes: 0
Received 0 Likes
on
0 Posts
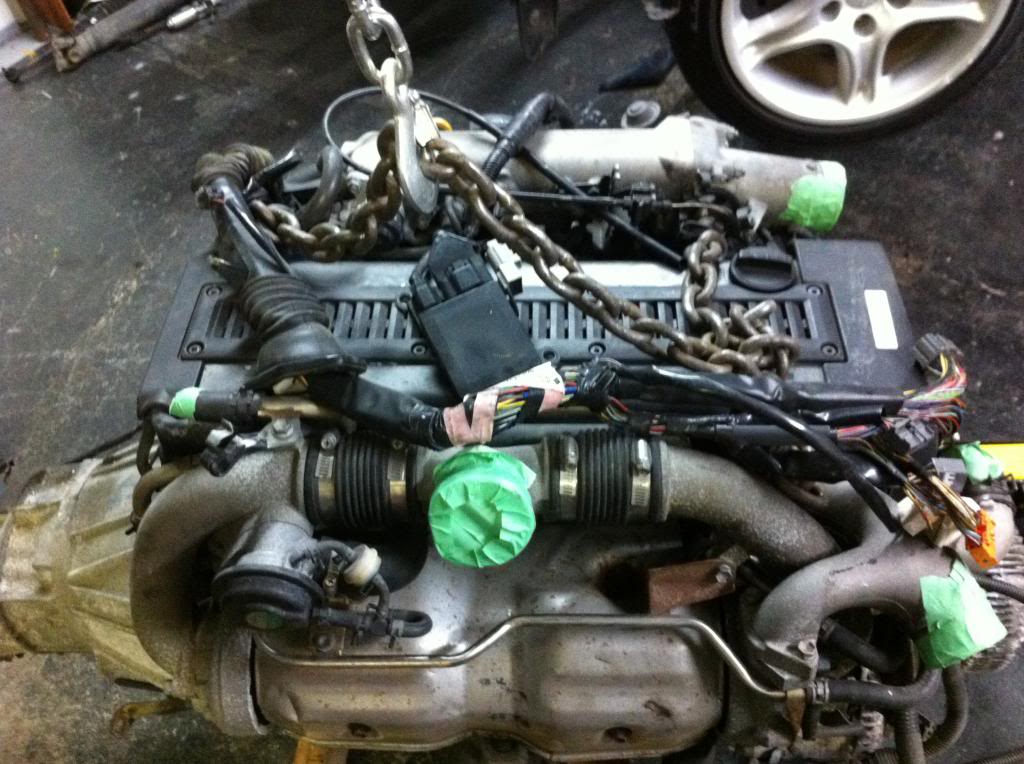
Hard to see but heres the subframe awaiting paint. Im going to try a manual steering rack, I bought a quick ratio one for a late model mustang, i also bought a bump steer kit to go with it. The new sub frame pushed the steering rack down about and 1 1/2". The motor looks a lot cleaner minus the ac and power steering, as well its two less loads for the engine to deal with.
02-17-13, 10:31 AM
#12
Junior Member
Thread Starter
Join Date: Feb 2013
Location: Canada
Posts: 23
Likes: 0
Received 0 Likes
on
0 Posts
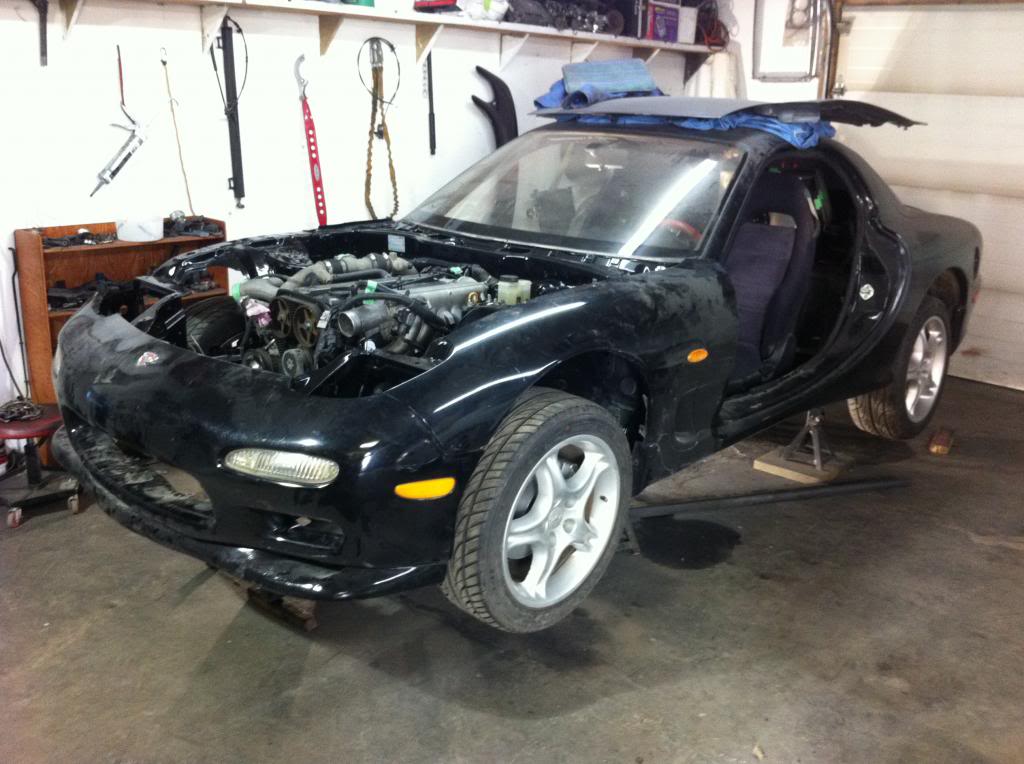
So here it is trial fit, and back on the floor. Motor fits good, trans mount sat good and the new diff mount is mounted lol. I will try to find the pictures of those I know i have them somwhere.

Stock hood shuts just fine as well.
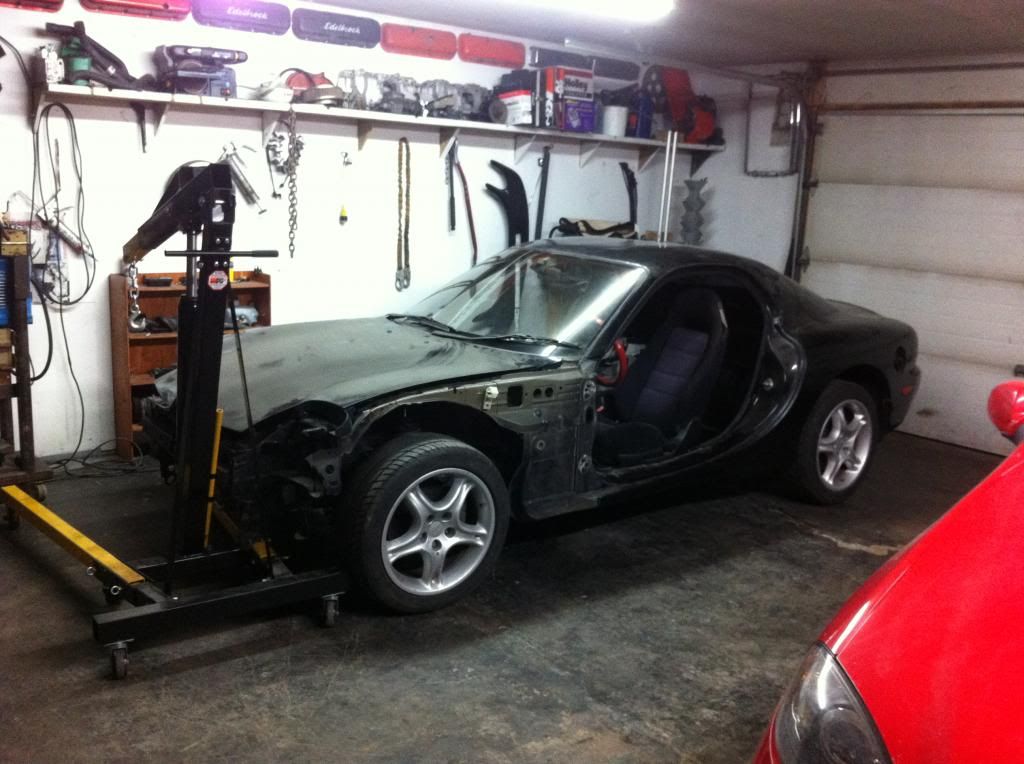
Stock hood shuts just fine as well.
02-17-13, 10:36 AM
#13
Junior Member
Thread Starter
Join Date: Feb 2013
Location: Canada
Posts: 23
Likes: 0
Received 0 Likes
on
0 Posts
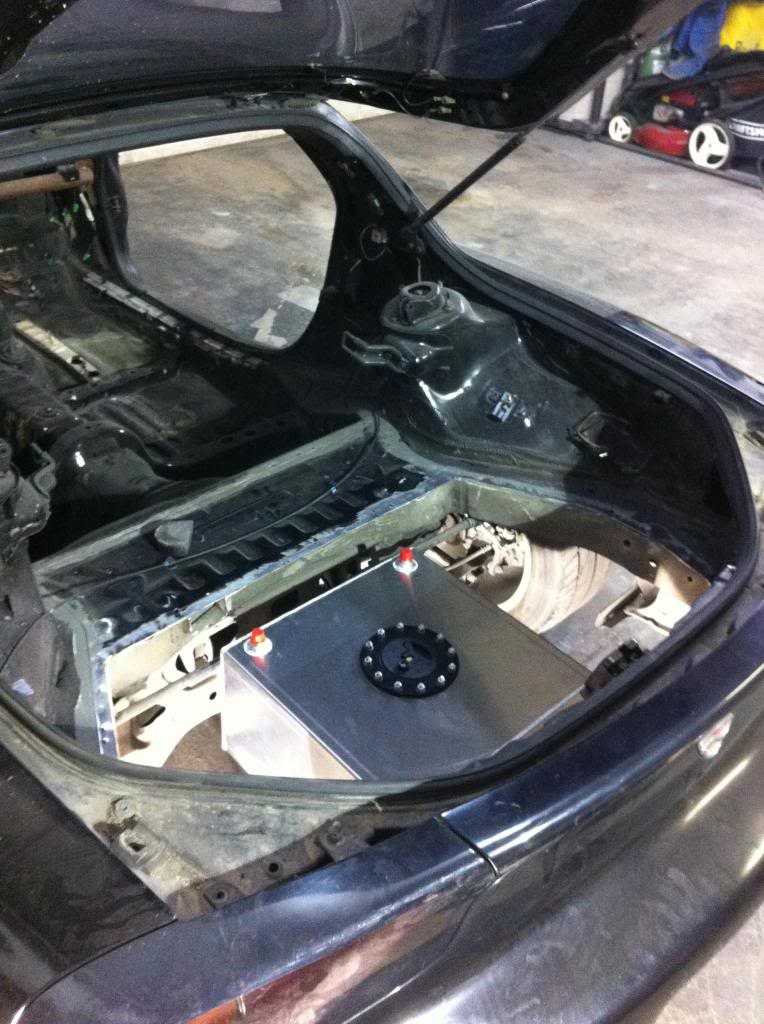
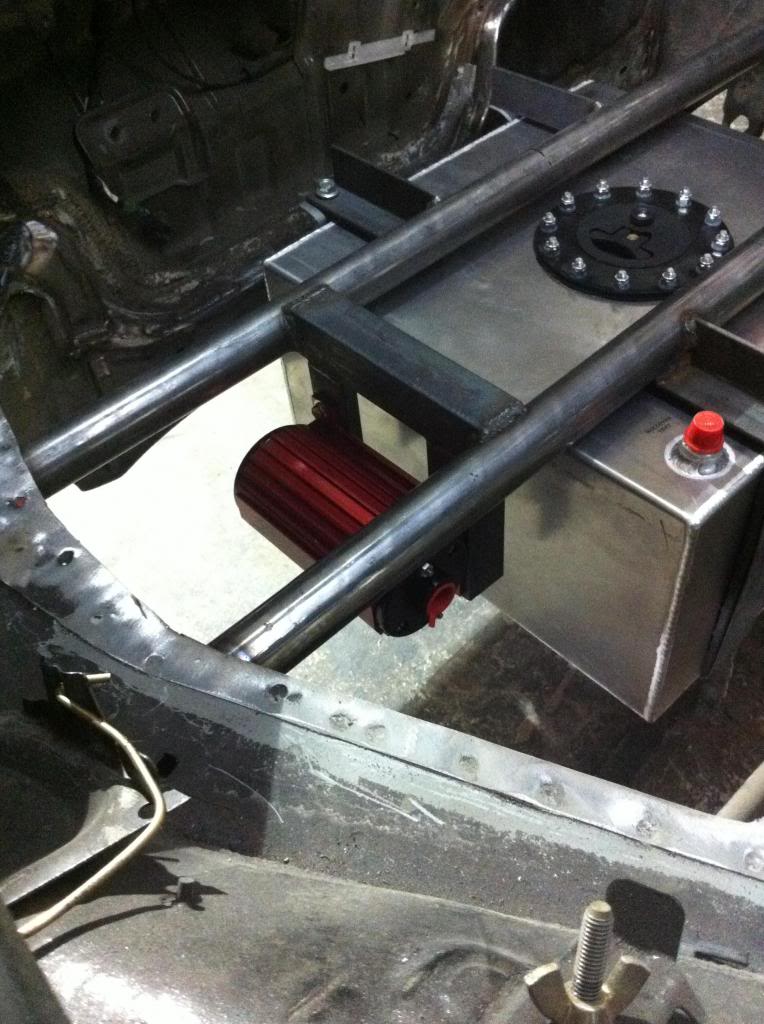
One to the fuel cell!
Sitting in place.
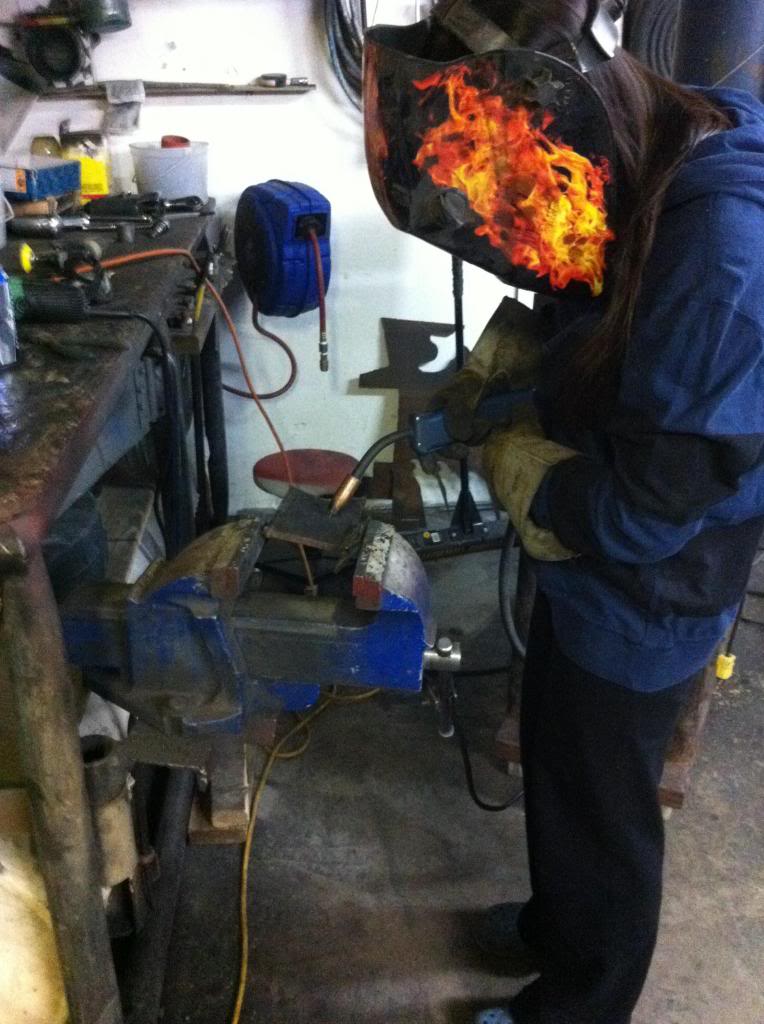
The woman came out to play around in the garage, her first time welding!
Tank mounted up, I made straps to hold the tank in place, i would have preferred tabs or something but thats ok.
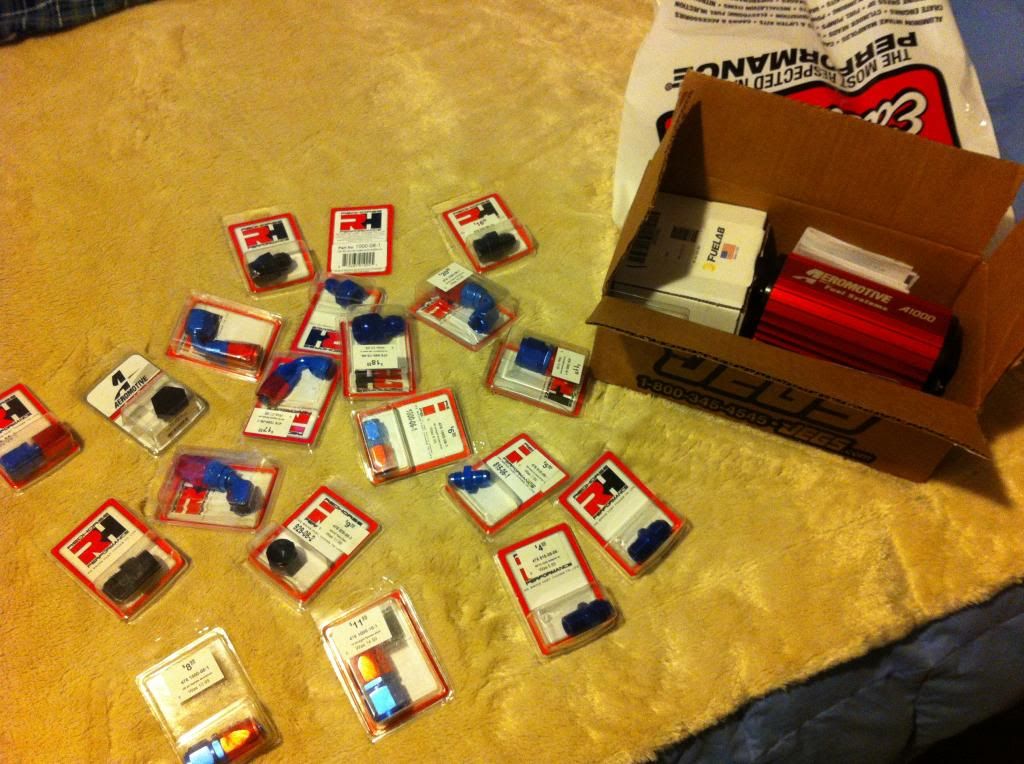
My A1000 peeking through.
Sitting in place.
The woman came out to play around in the garage, her first time welding!
Tank mounted up, I made straps to hold the tank in place, i would have preferred tabs or something but thats ok.
My A1000 peeking through.
02-17-13, 10:43 AM
#14
Junior Member
Thread Starter
Join Date: Feb 2013
Location: Canada
Posts: 23
Likes: 0
Received 0 Likes
on
0 Posts
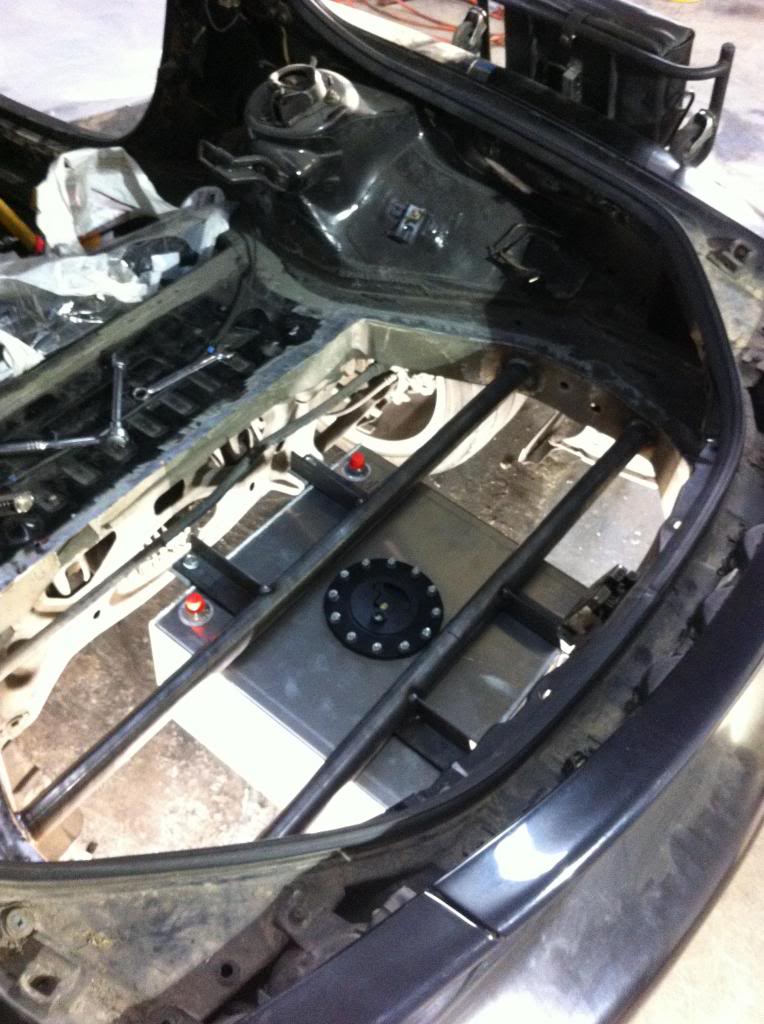
So the stock dash bar wasnt going to cut it so i got creative and made my own. This also drops the steering wheel down a bit more to my liking.
And another view of my fuel set up so far.
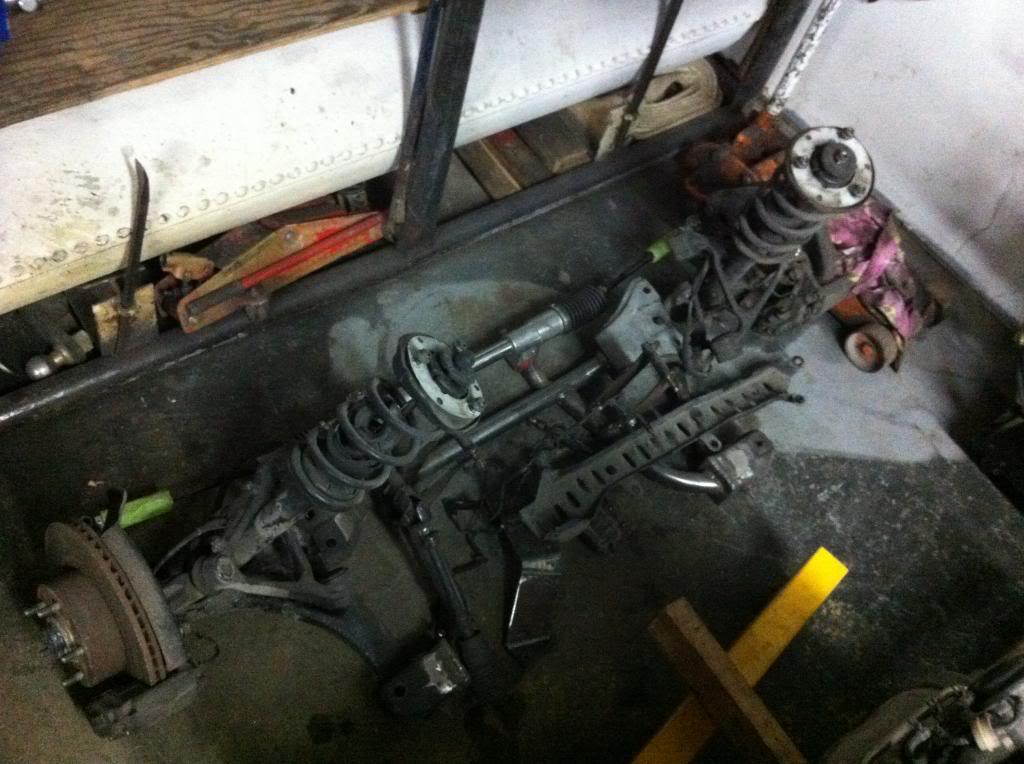
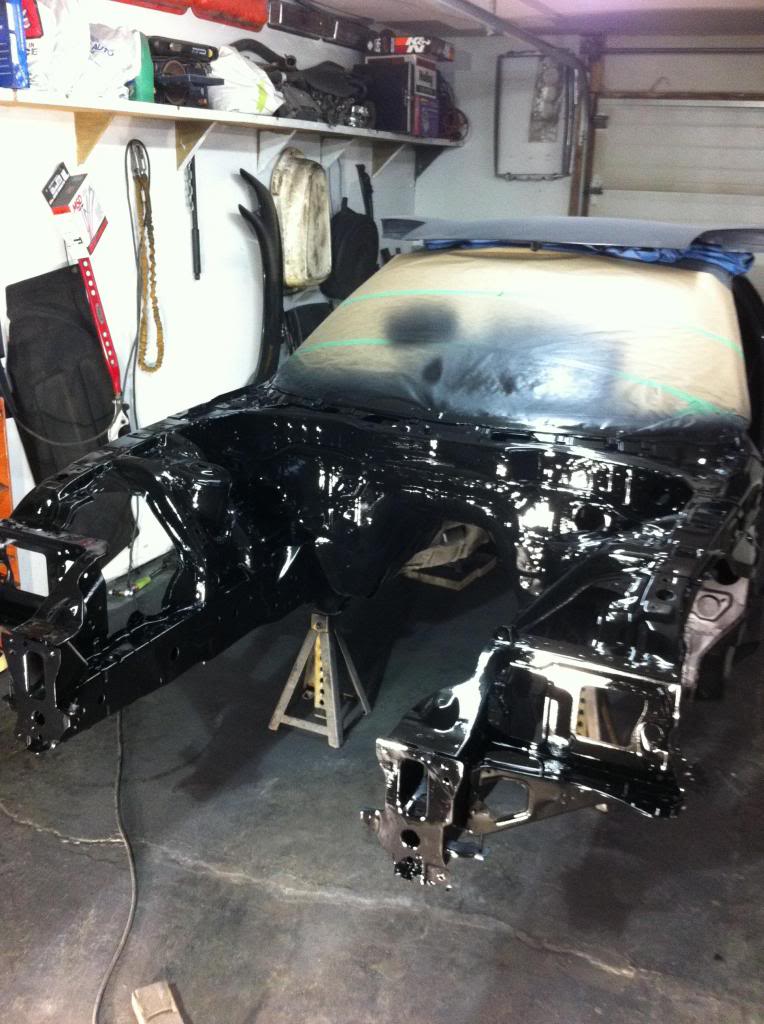
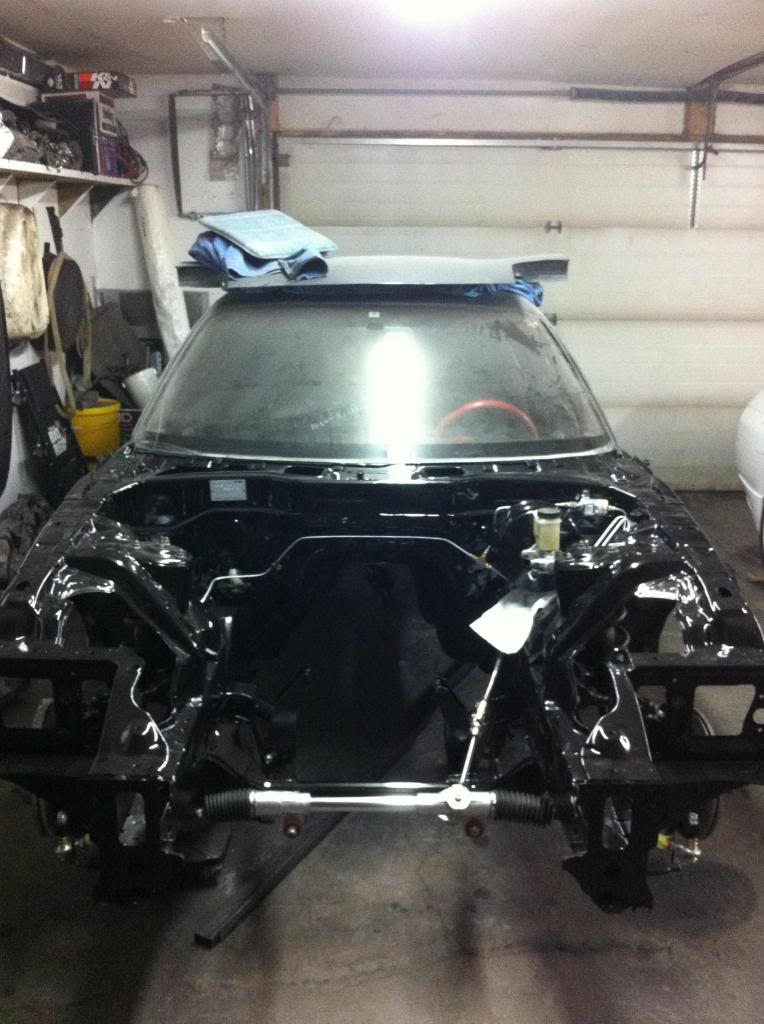
Ok so now we do another jump to disassembled again and prepping the engine bay for some paint. I took alot of time here to patch a few unnecessary holes, and scrape out the rubber seam sealer.

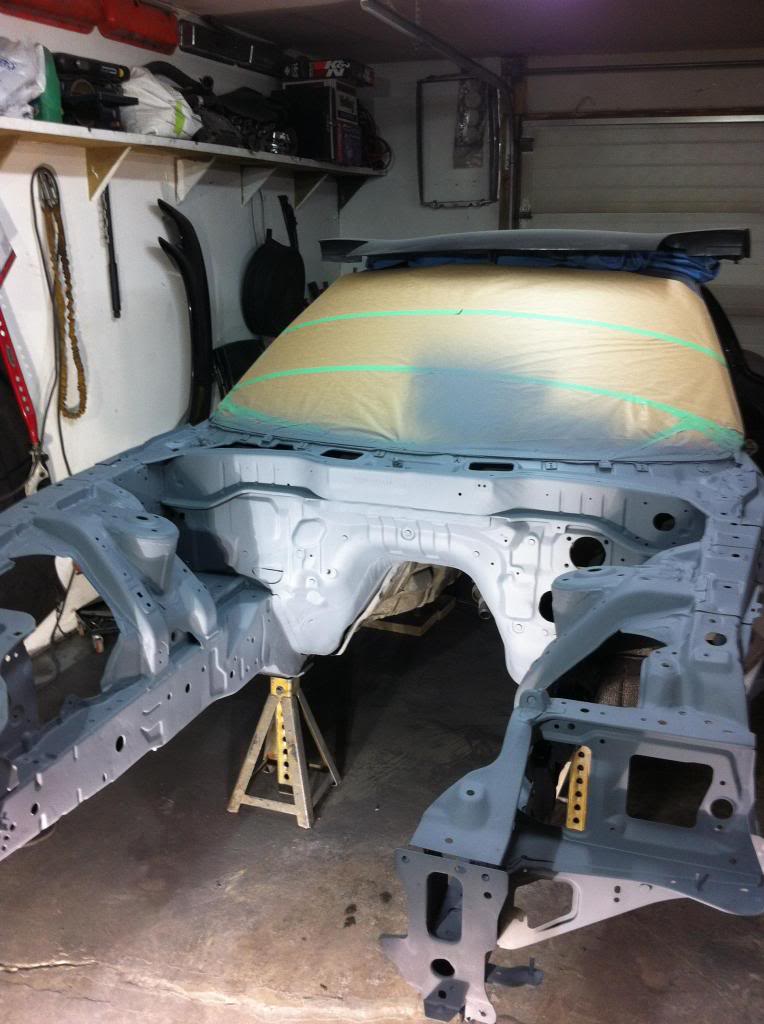
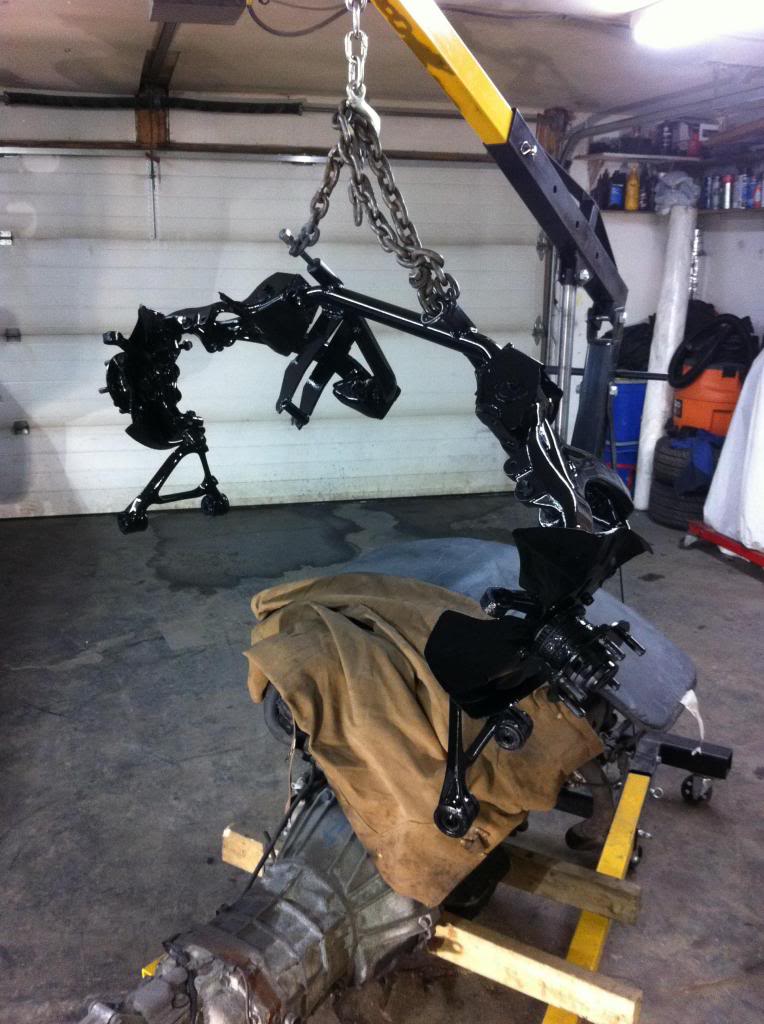
Sub frame as painted at the same time.
And painted!
And another view of my fuel set up so far.
Ok so now we do another jump to disassembled again and prepping the engine bay for some paint. I took alot of time here to patch a few unnecessary holes, and scrape out the rubber seam sealer.
Sub frame as painted at the same time.
And painted!
02-17-13, 10:47 AM
#15
Junior Member
Thread Starter
Join Date: Feb 2013
Location: Canada
Posts: 23
Likes: 0
Received 0 Likes
on
0 Posts
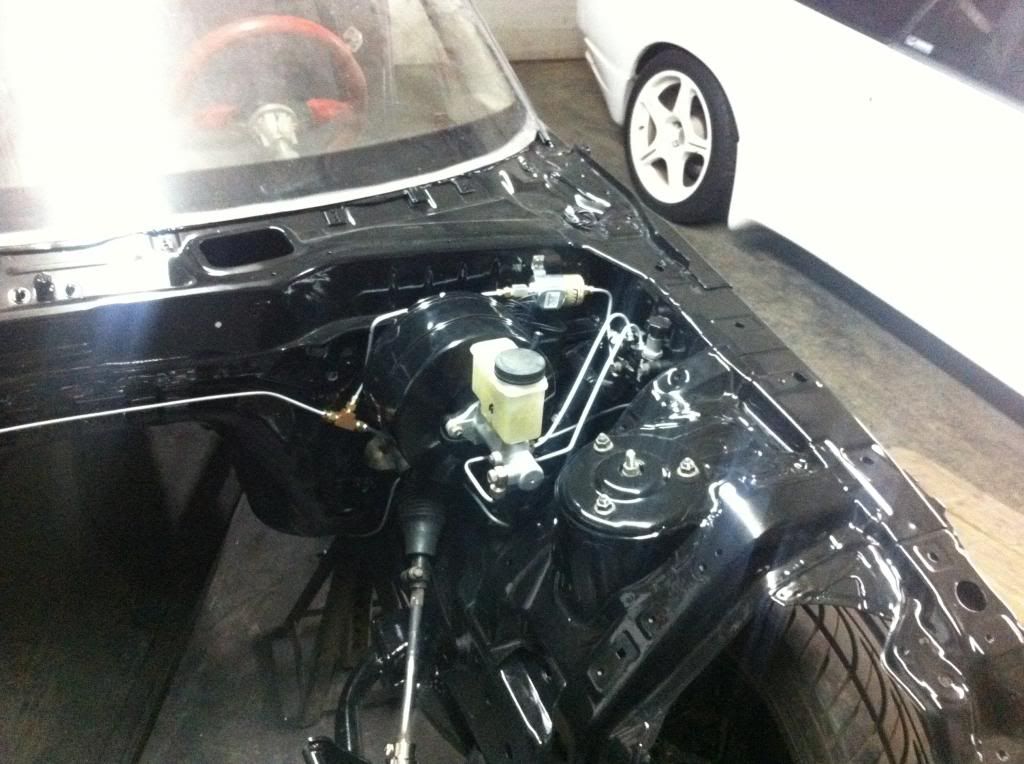
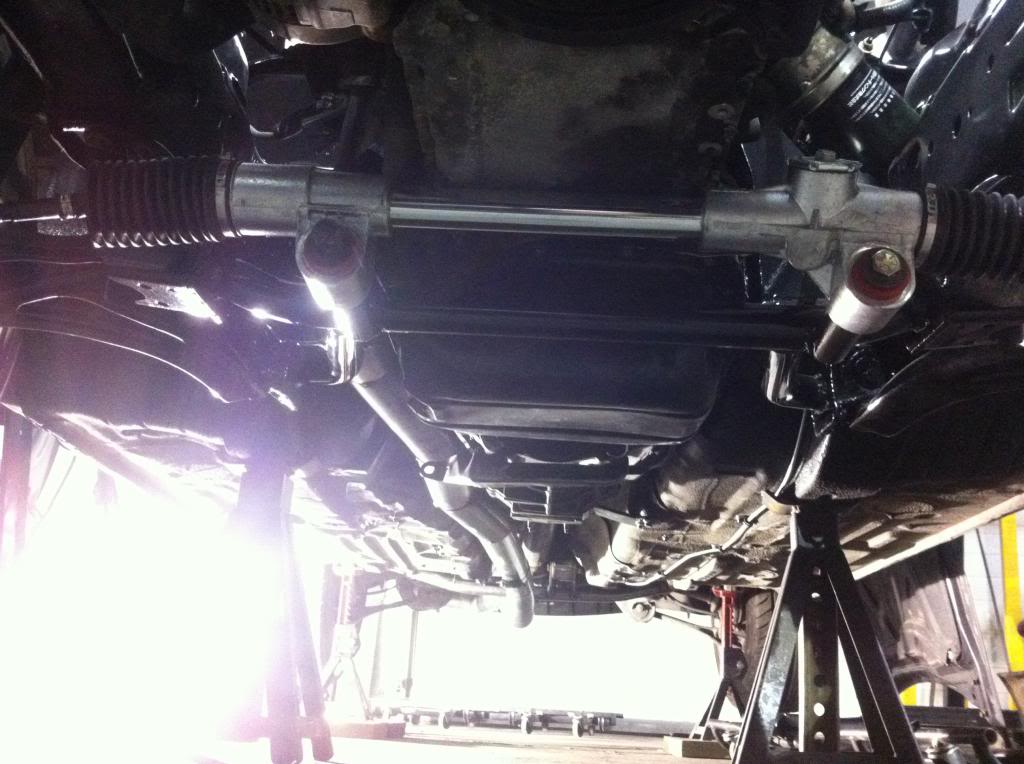
After a bit of dry time, i put it all back together. I cleaned up and painted the brake calipers as well.
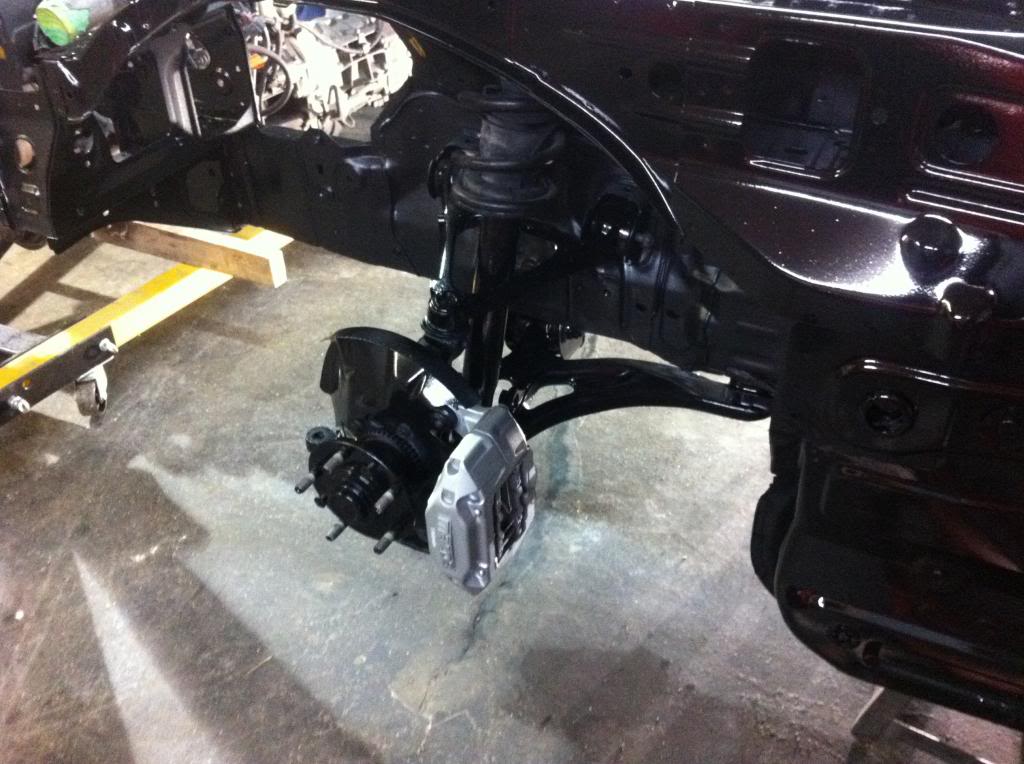
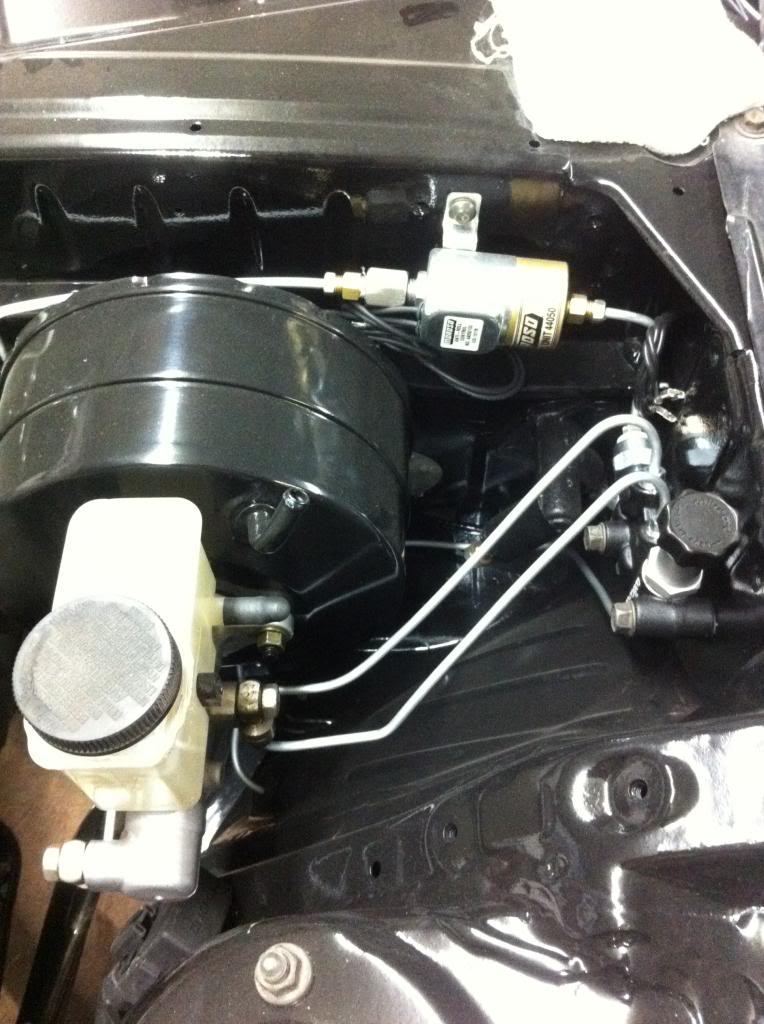
More assembly, a good shot of the new rack and the cleaned up brake cylinder and booster.
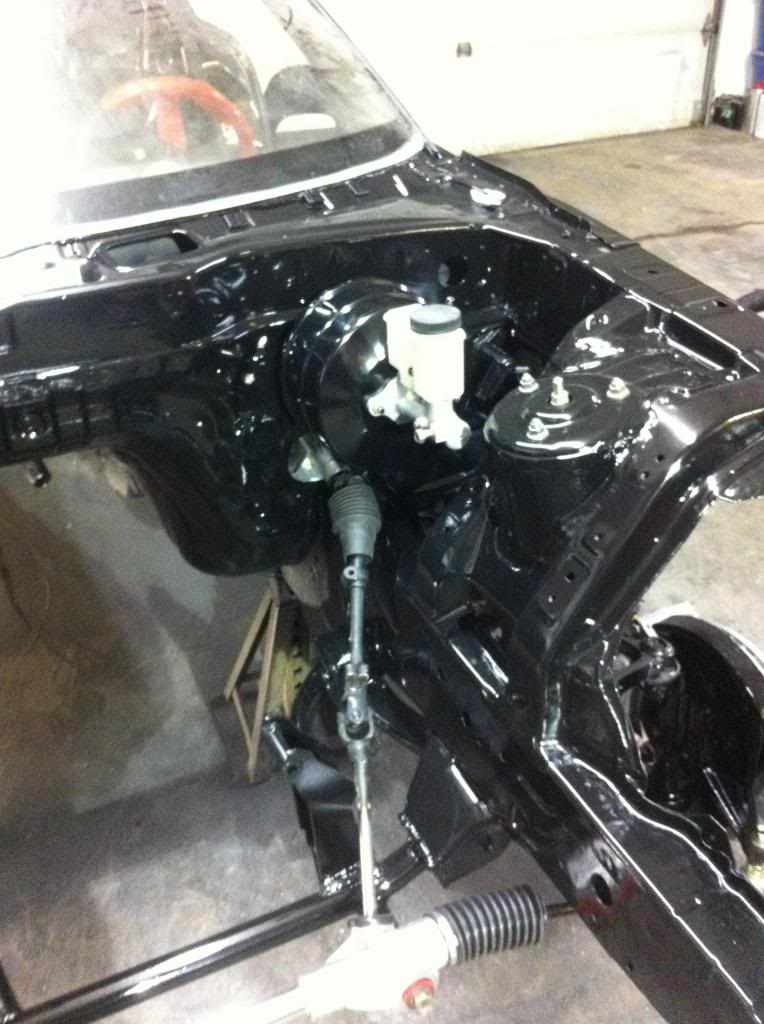
More assembly, a good shot of the new rack and the cleaned up brake cylinder and booster.
02-17-13, 10:56 AM
#16
Junior Member
Thread Starter
Join Date: Feb 2013
Location: Canada
Posts: 23
Likes: 0
Received 0 Likes
on
0 Posts
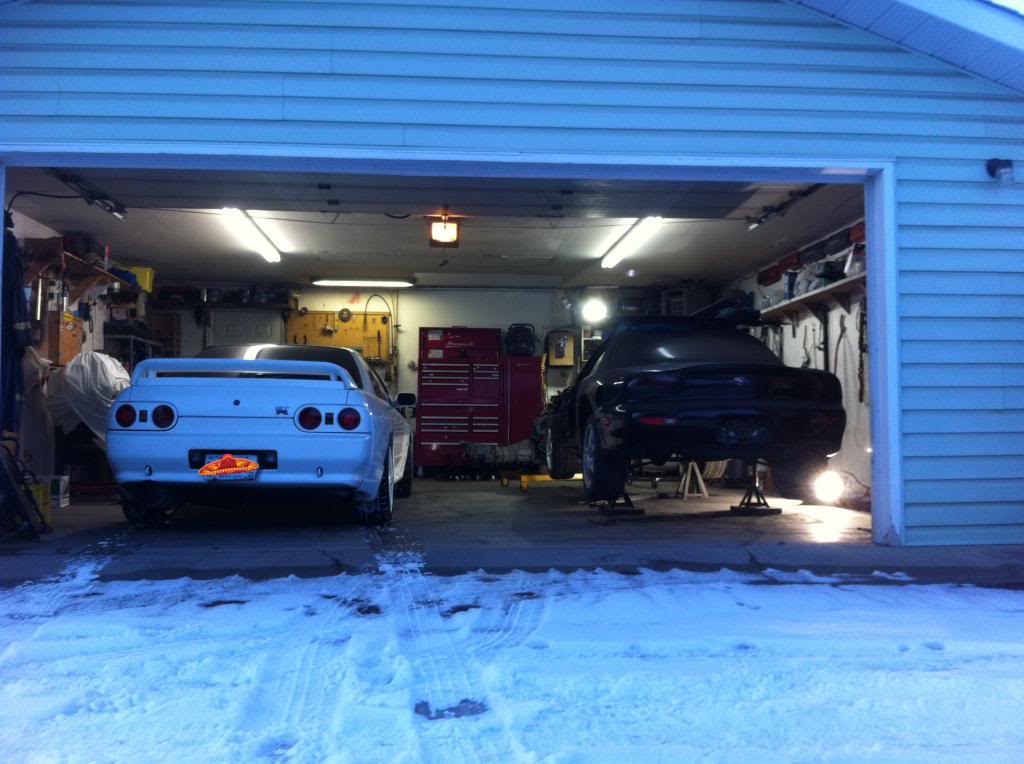
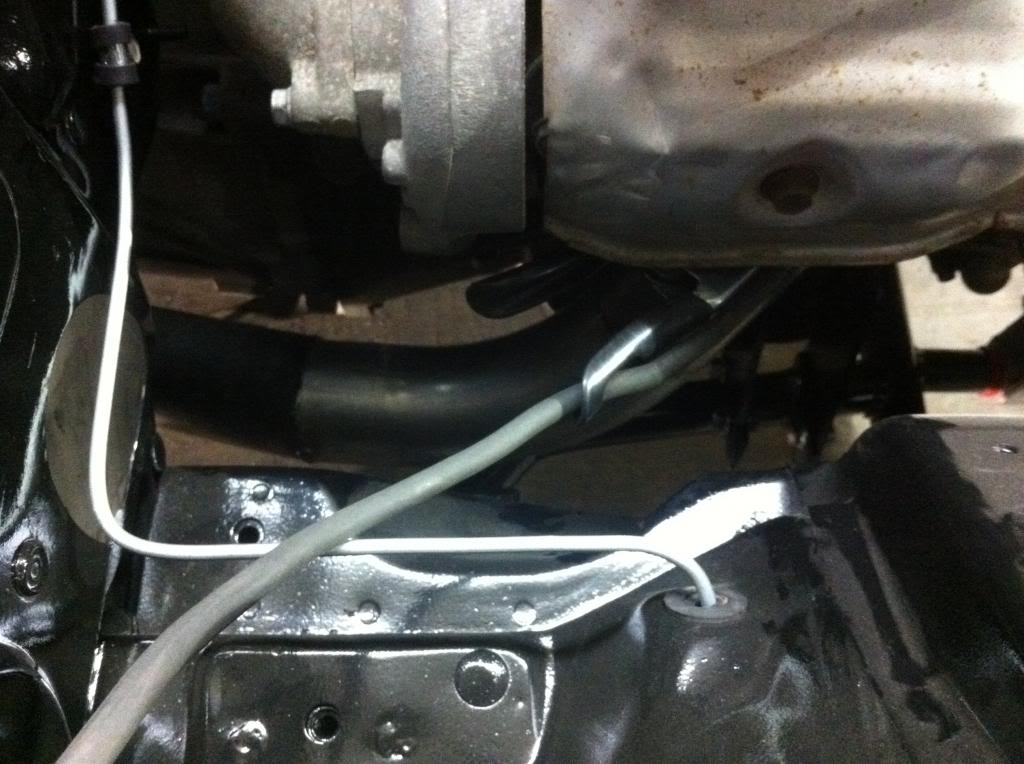
On to the brake lines. I removed the abs, and since i converted to LHD everything changed. So i picked up some brake line, a wilwood brake bias, and just for fun a moroso line lock kit.
A cool shot of our garage, the skylines is my bros.
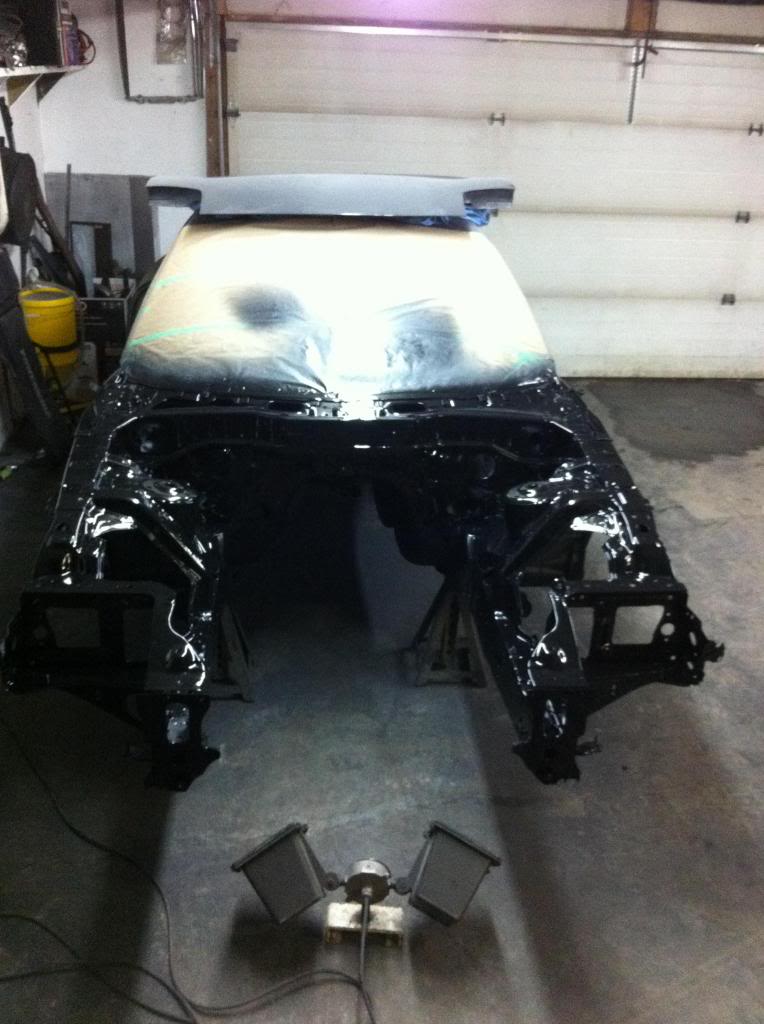
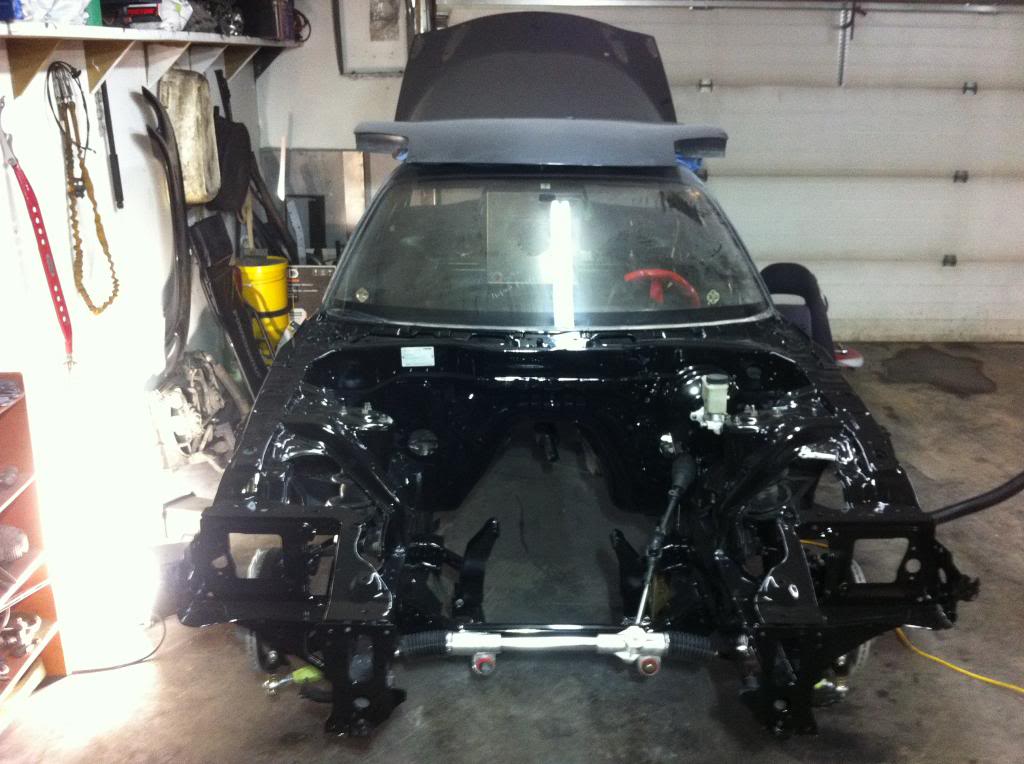
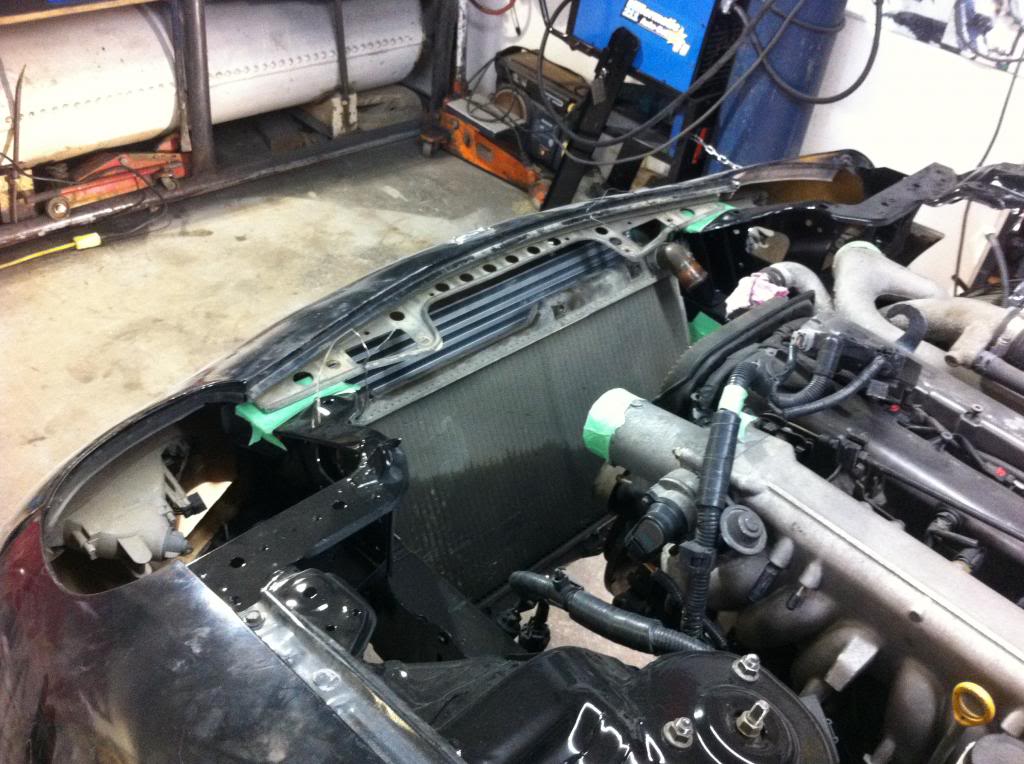
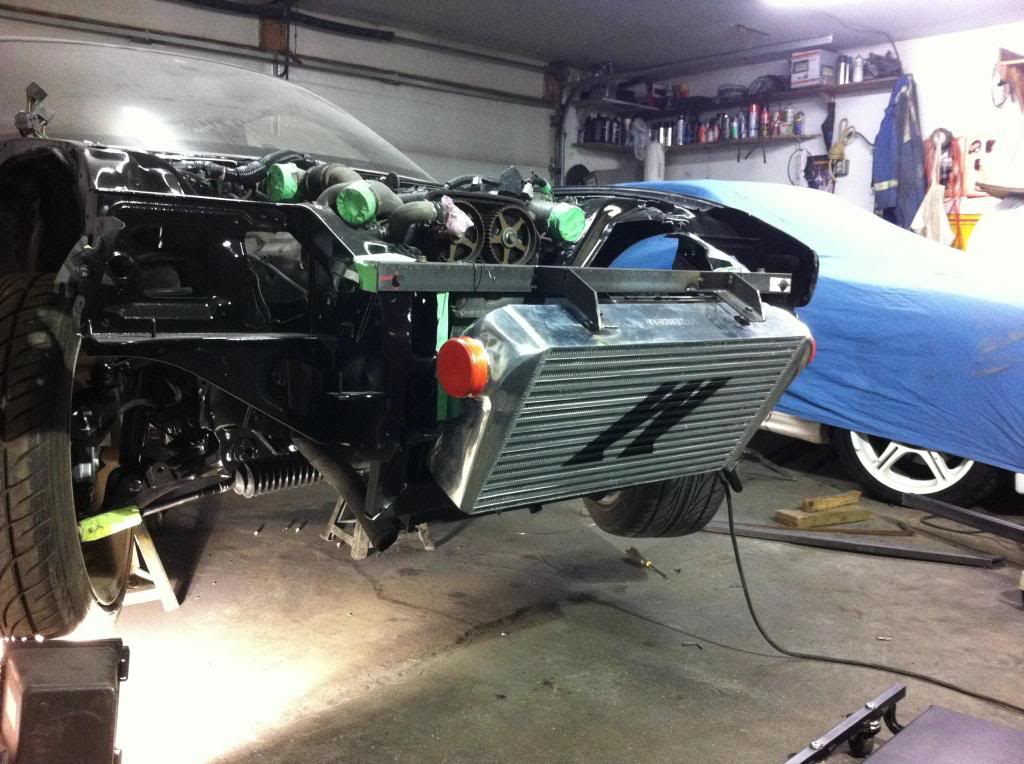
And yet another jump to fully assembled again, time to fit up the radiator and intercooler!
I was thinking about doing a V mount set up, but with the space i had i just didnt think it would be all that effective. So i went more the factory route.
A cool shot of our garage, the skylines is my bros.
And yet another jump to fully assembled again, time to fit up the radiator and intercooler!
I was thinking about doing a V mount set up, but with the space i had i just didnt think it would be all that effective. So i went more the factory route.
02-17-13, 11:02 AM
#17
Junior Member
Thread Starter
Join Date: Feb 2013
Location: Canada
Posts: 23
Likes: 0
Received 0 Likes
on
0 Posts
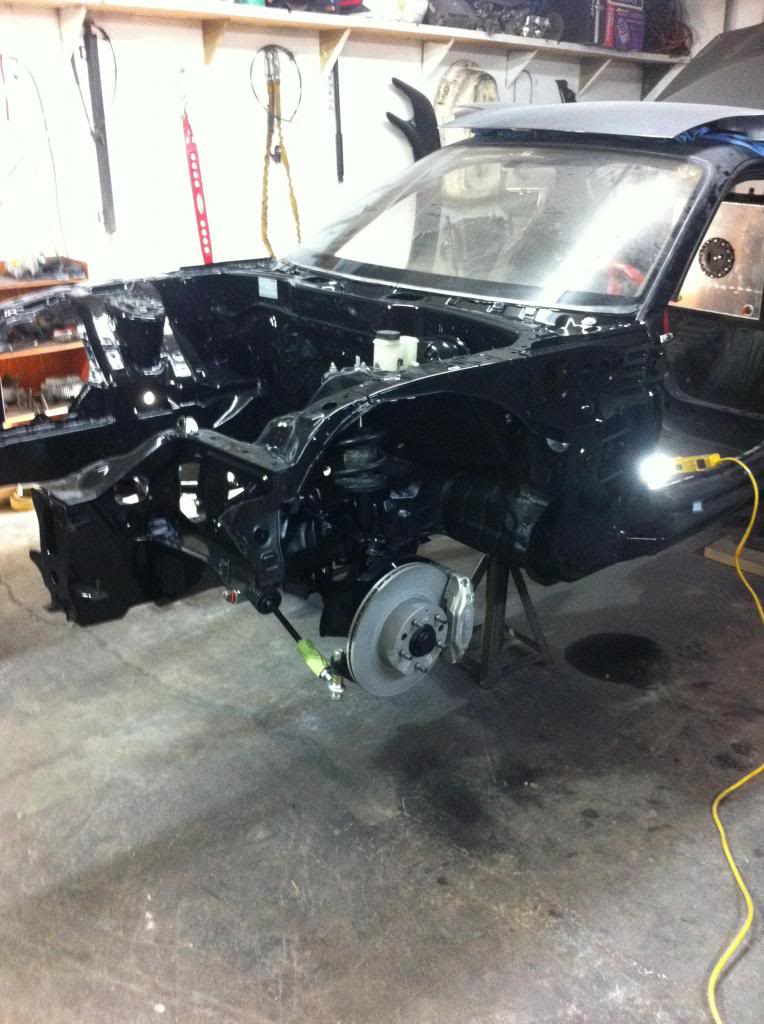
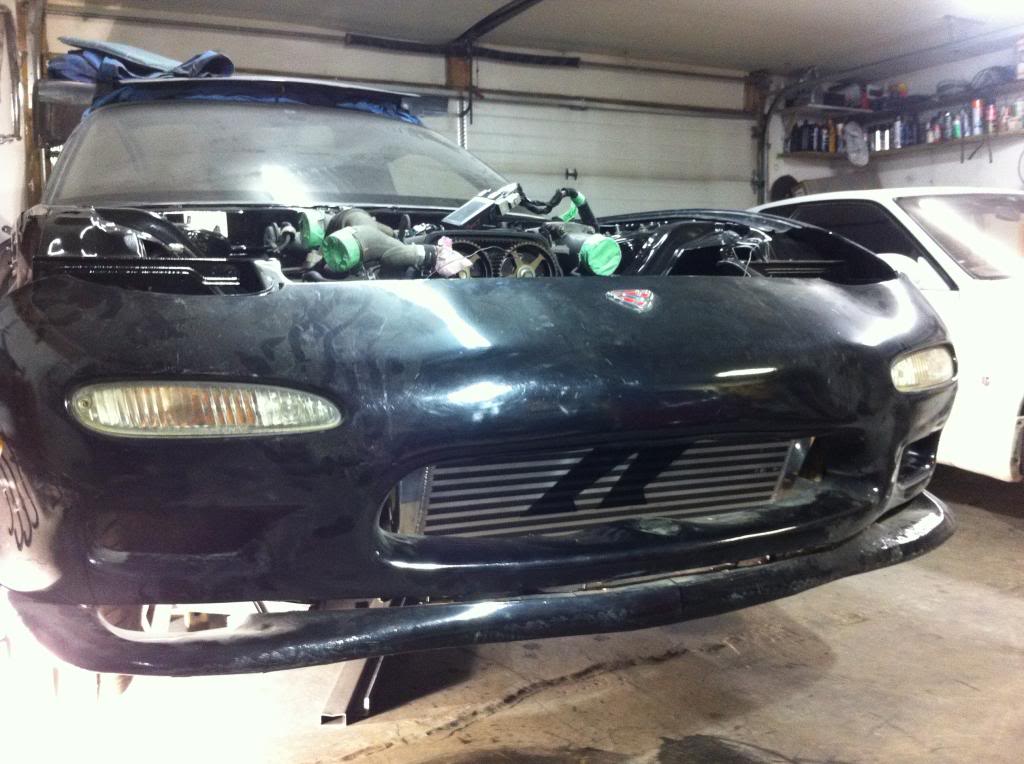
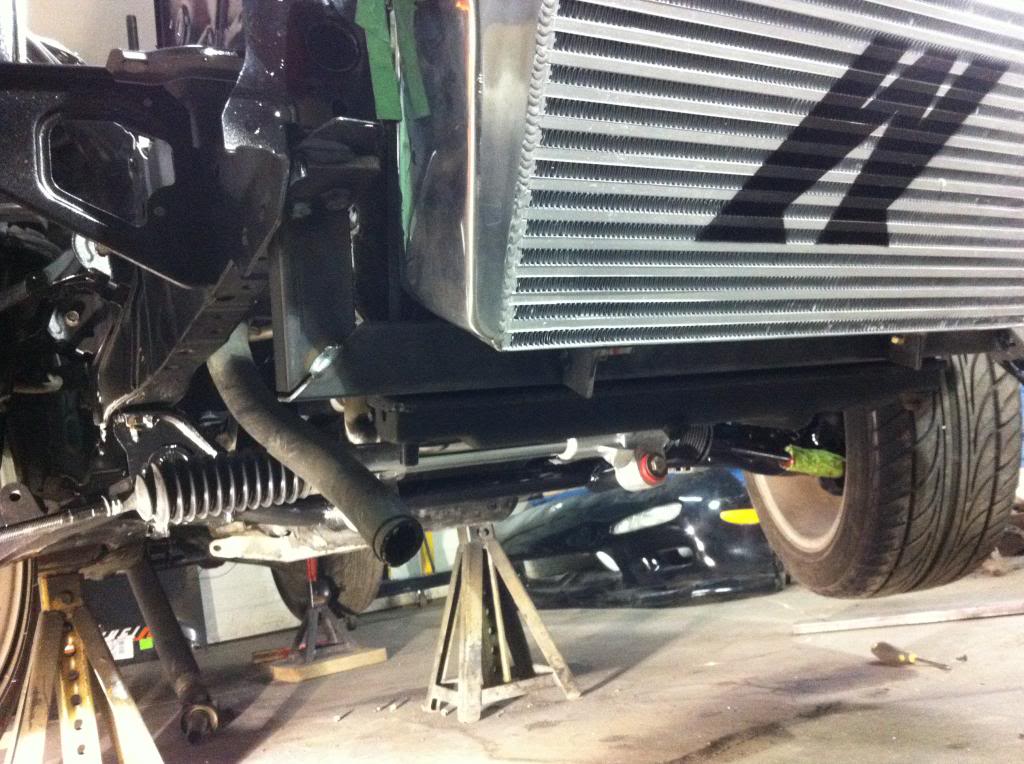
Hard to see ill get better pictures when i fully weld it, but i made a new front rad/IC support. It will also help stabilize the frame rails since i removed the front crash beam, and the hood latch support to. I made it un-boltable so it makes removing the engine a lot easier.
And where i am sitting currently!
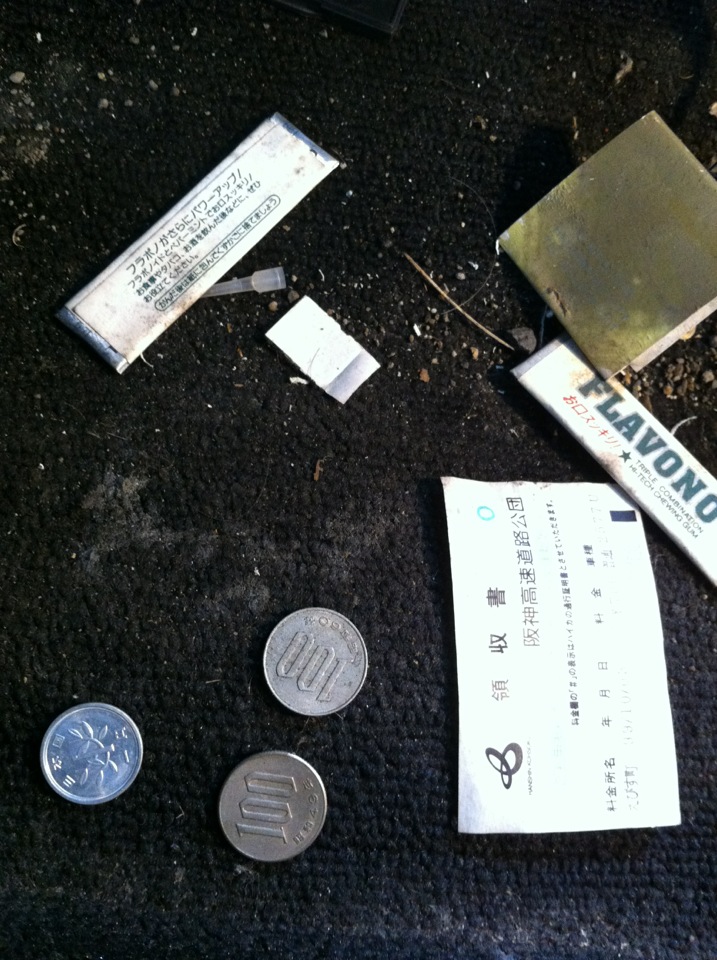
Oh i forgot, some japanese collectibles i found during tear down haha.
And where i am sitting currently!
Oh i forgot, some japanese collectibles i found during tear down haha.
02-17-13, 11:13 AM
#18
Junior Member
Thread Starter
Join Date: Feb 2013
Location: Canada
Posts: 23
Likes: 0
Received 0 Likes
on
0 Posts
The old 13b, still dont know what to do with it..
And the beginning of the fuel system
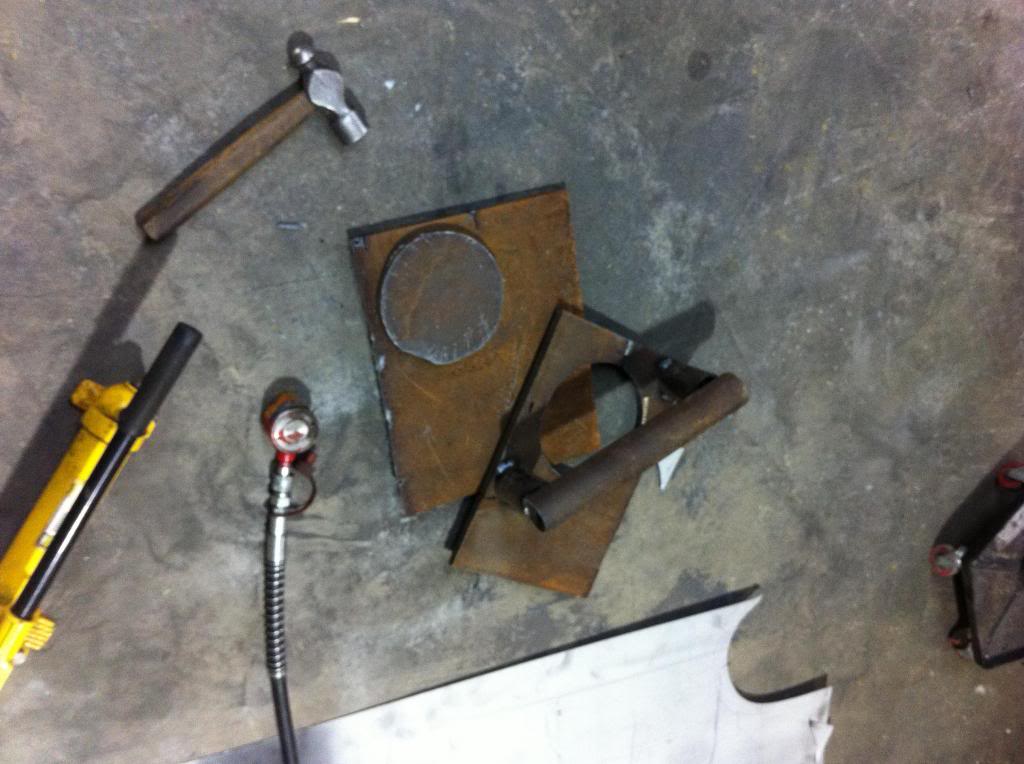
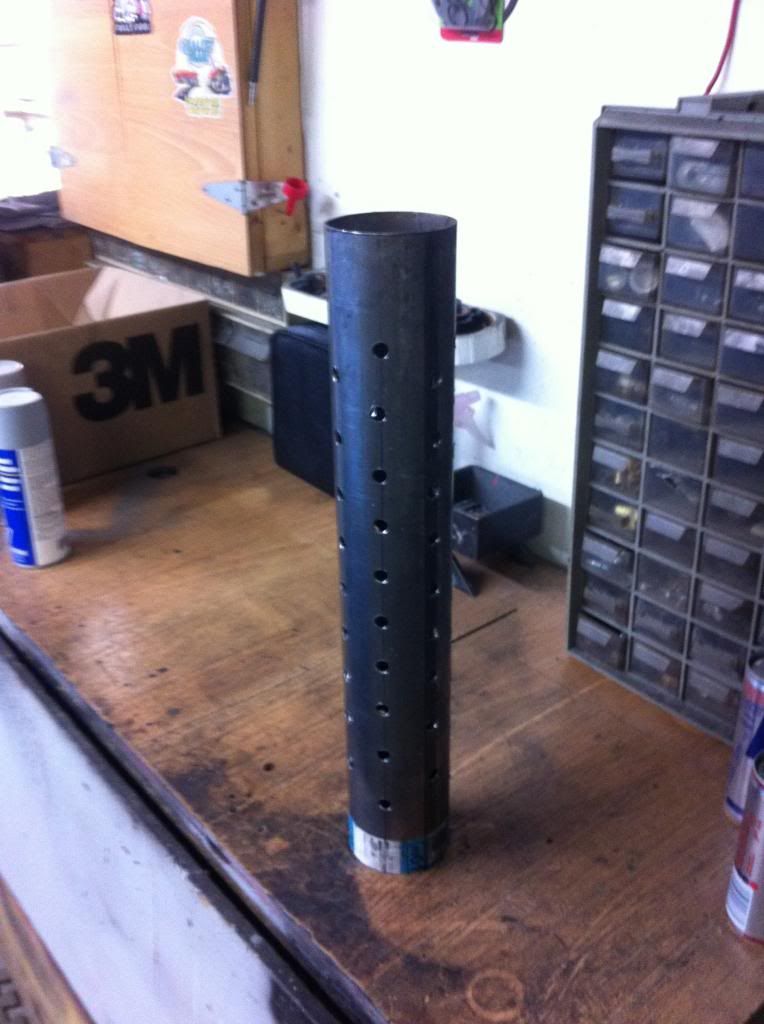
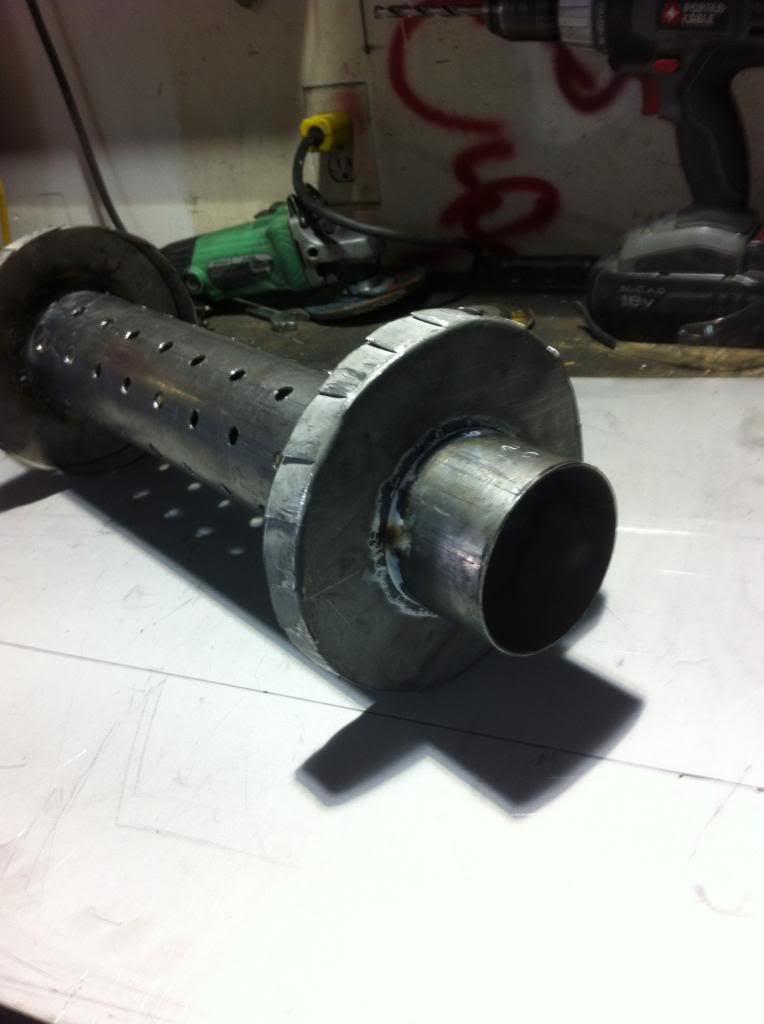
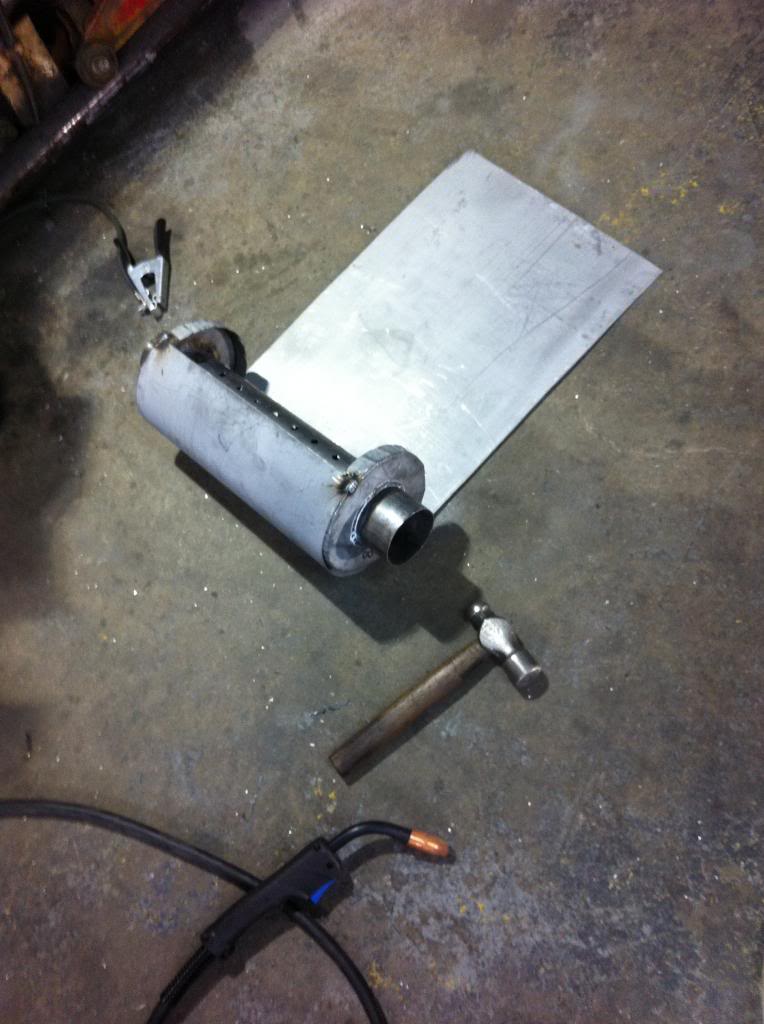
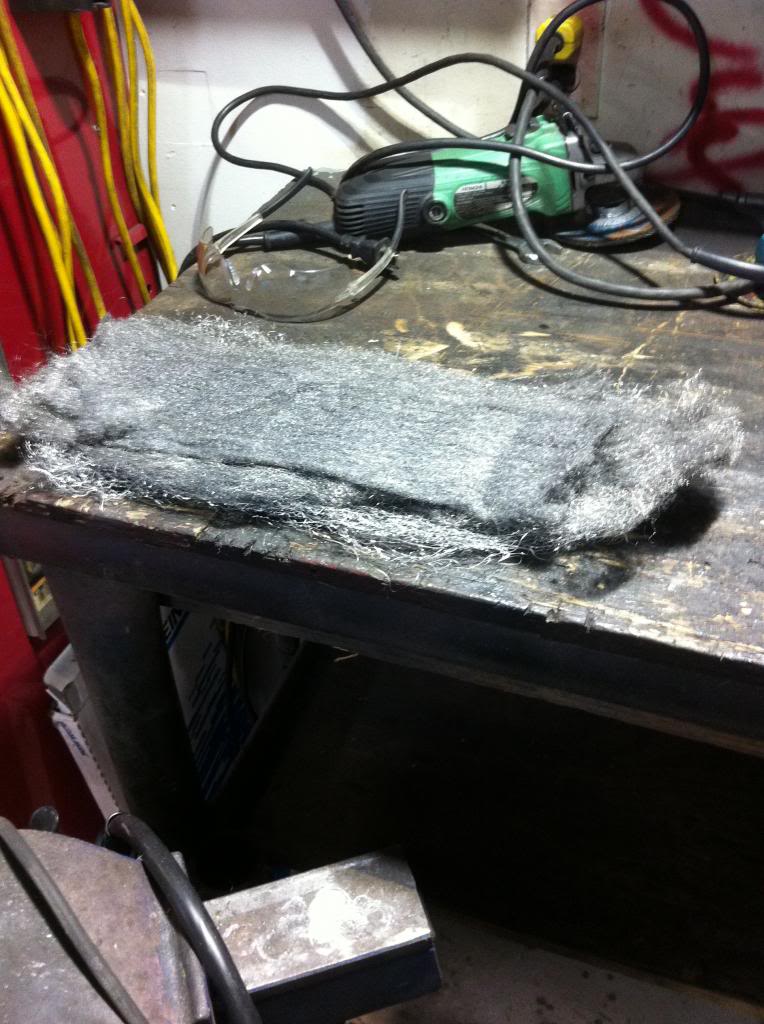
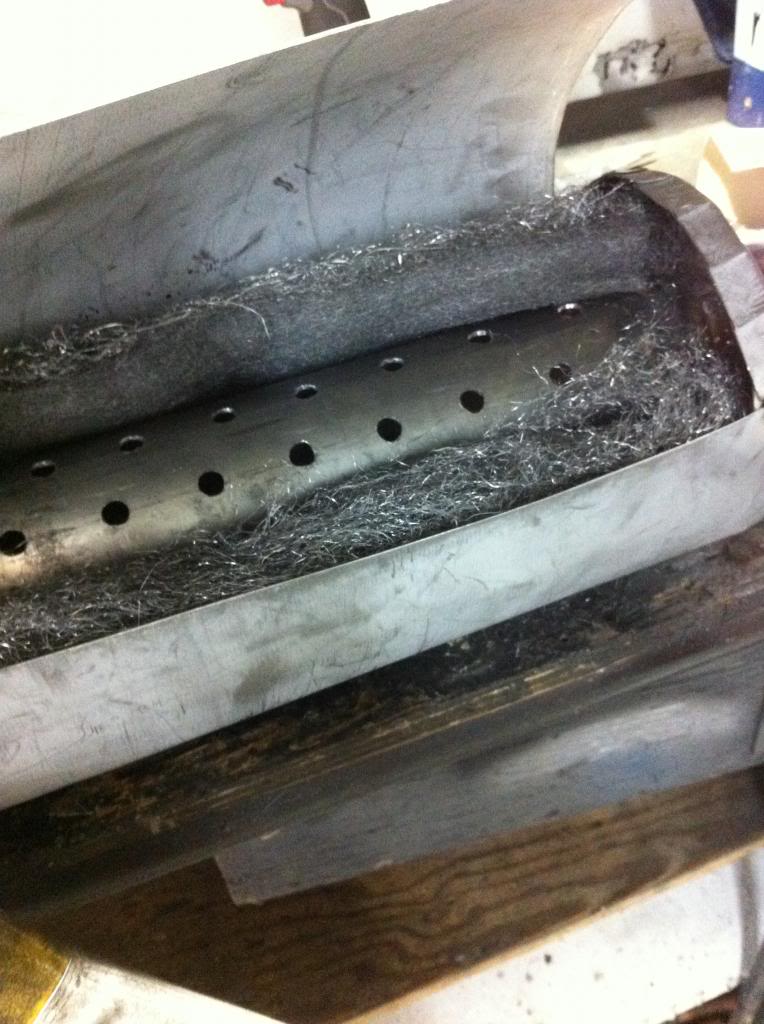
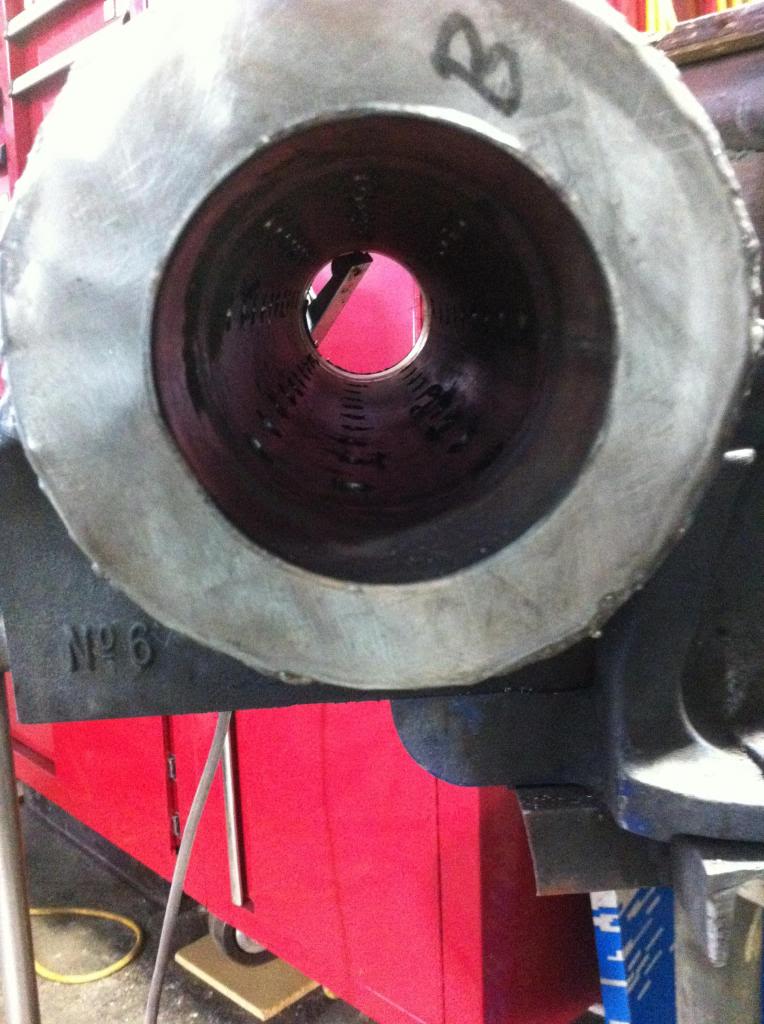
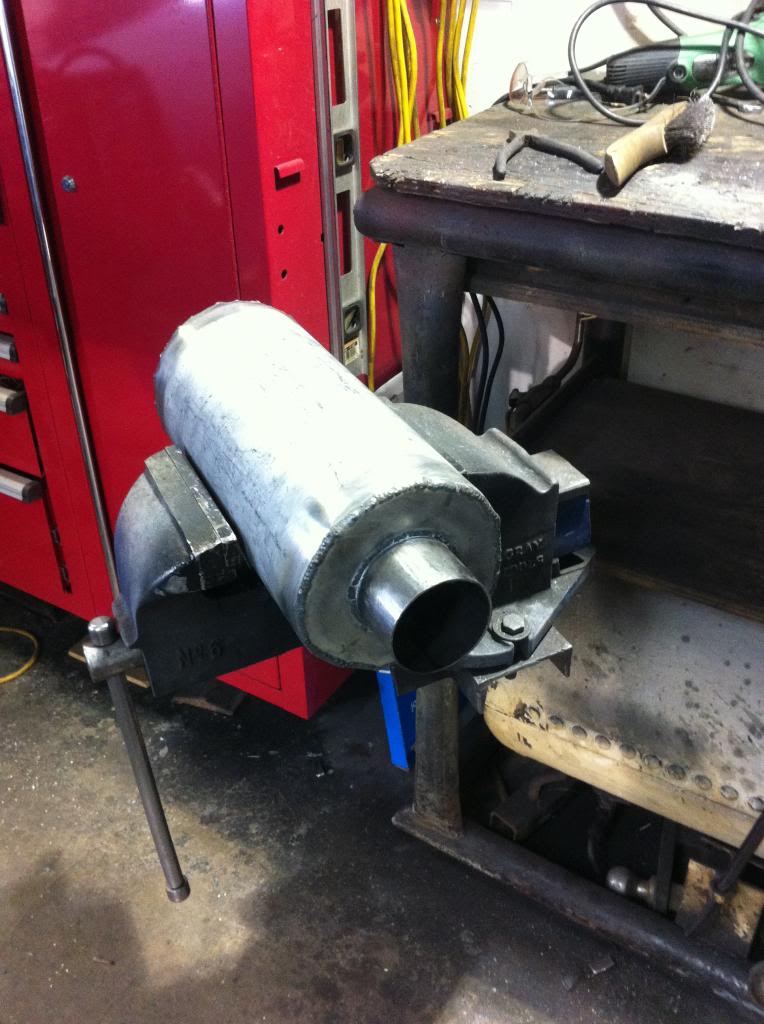
So this next part I made out of random, its not perfect but i think its pretty cool for my first one. I made my own muffler.
So i started by making a very ghetto press for the end caps.
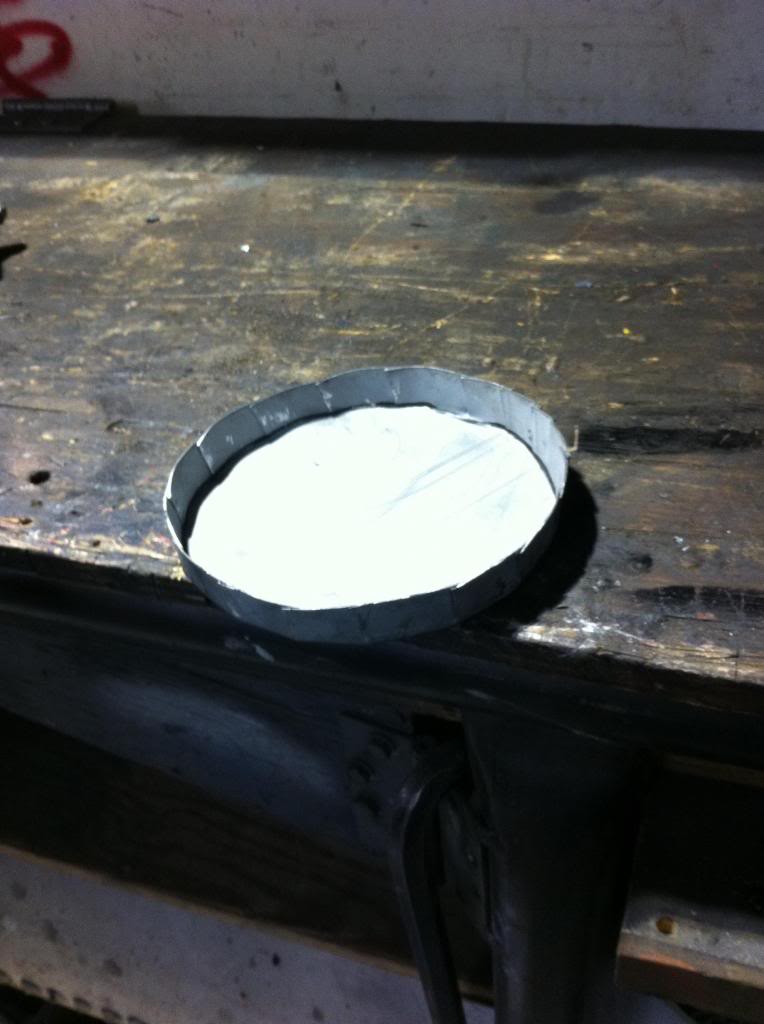
An end cap.

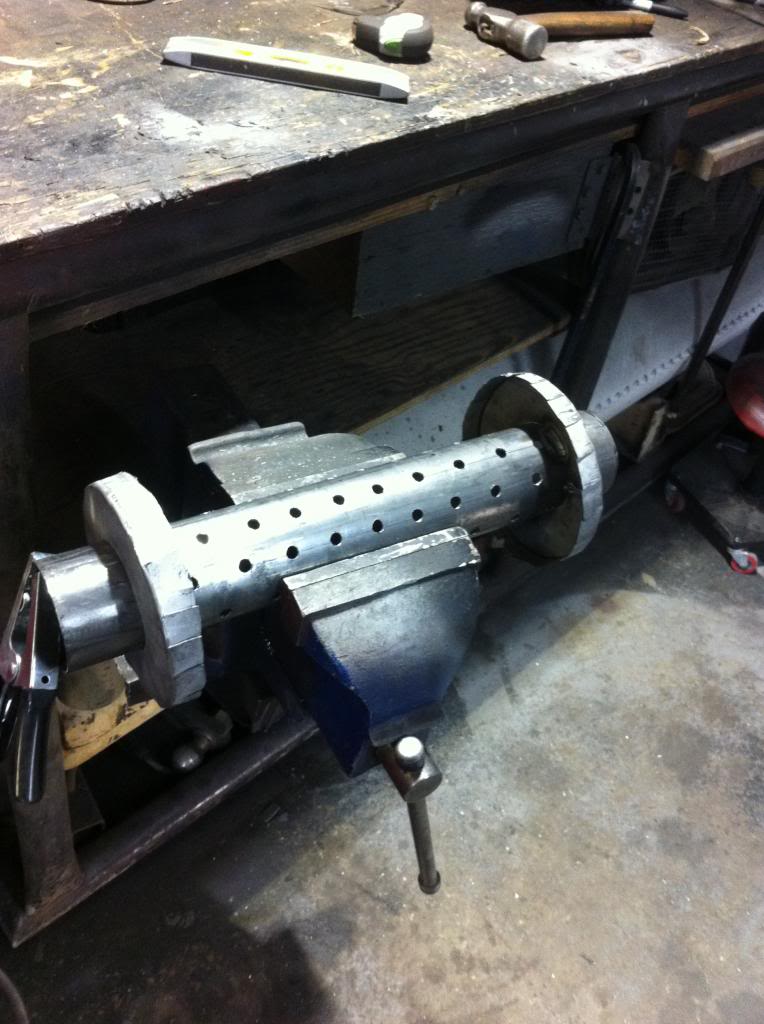
Welded them from the inside to hide one of the welds.
Oh close up of my brake set up.
Steel wool for packing, yeah itll rust over time but thats ok this is a trial muffler.
And the beginning of the fuel system
So this next part I made out of random, its not perfect but i think its pretty cool for my first one. I made my own muffler.
So i started by making a very ghetto press for the end caps.
An end cap.
Welded them from the inside to hide one of the welds.
Oh close up of my brake set up.
Steel wool for packing, yeah itll rust over time but thats ok this is a trial muffler.
 02-19-13, 10:41 PM
#22
Junior Member
Thread Starter
Join Date: Feb 2013
Location: Canada
Posts: 23
Likes: 0
Received 0 Likes
on
0 Posts
It was mostly preference i guess, not a big fan of rhd nothing against it just not my thing. And its a quick ratio 1989-93 mustang manual rack from jegs, flaming river makes them so we will see how it goes.
02-19-13, 11:03 PM
#23
Junior Member
Thread Starter
Join Date: Feb 2013
Location: Canada
Posts: 23
Likes: 0
Received 0 Likes
on
0 Posts
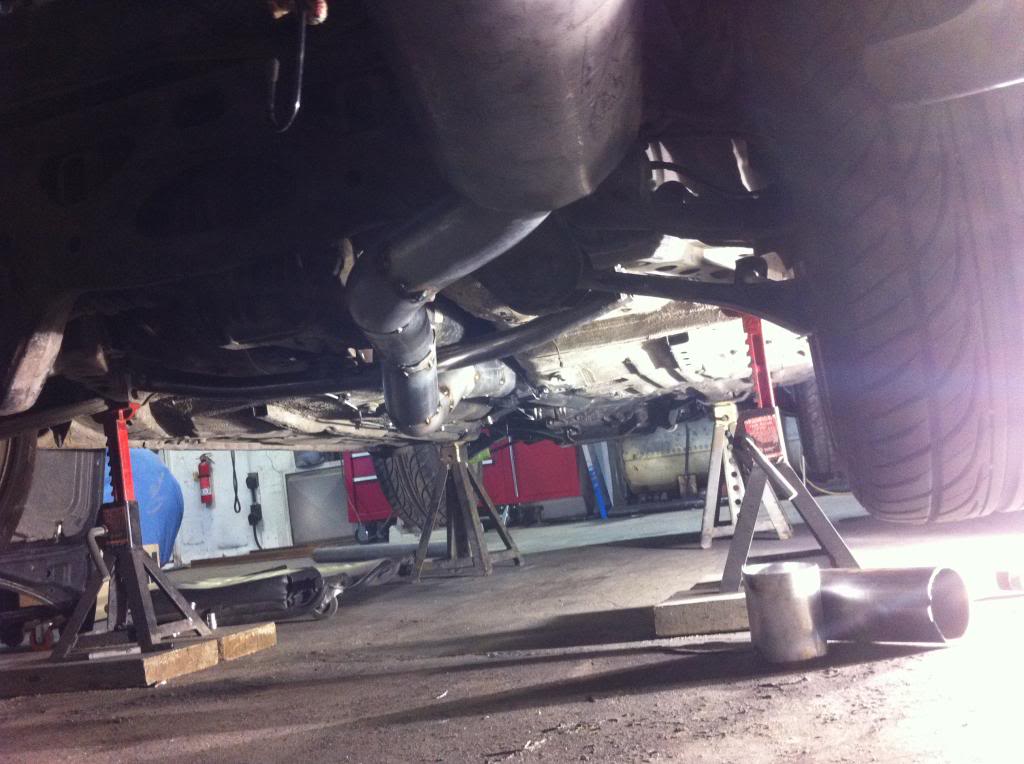
Did some exhaust work over the weekend, have it all tacked in place. Just need to make another flange break and buy a flex section. Starting to lose steam on this build though been going hard at it for a few months now.  Think a little break may be in order.
Think a little break may be in order.
 03-01-13, 02:20 PM
#25
Junior Member
Thread Starter
Join Date: Feb 2013
Location: Canada
Posts: 23
Likes: 0
Received 0 Likes
on
0 Posts
I just read that Joey guys thread. Now its got me worried about my own sub frame. I did use a similar design like the ls1 swap subframe, bevelled the ends of my tubing and welded it with a mig and argon/co2 mix. I dug back in to the welds and hot passed / capped them similar to oil field type process, so i did use some process to make it. But if any of the frame guys or other engineers check this thread out, give me your opinion on the design.