Project RX3 - An exercise in patience
 08-26-13, 05:02 PM
#1
Madaz
Thread Starter
iTrader: (1)
Join Date: May 2012
Location: Calgary
Posts: 104
Likes: 0
Received 0 Likes
on
0 Posts
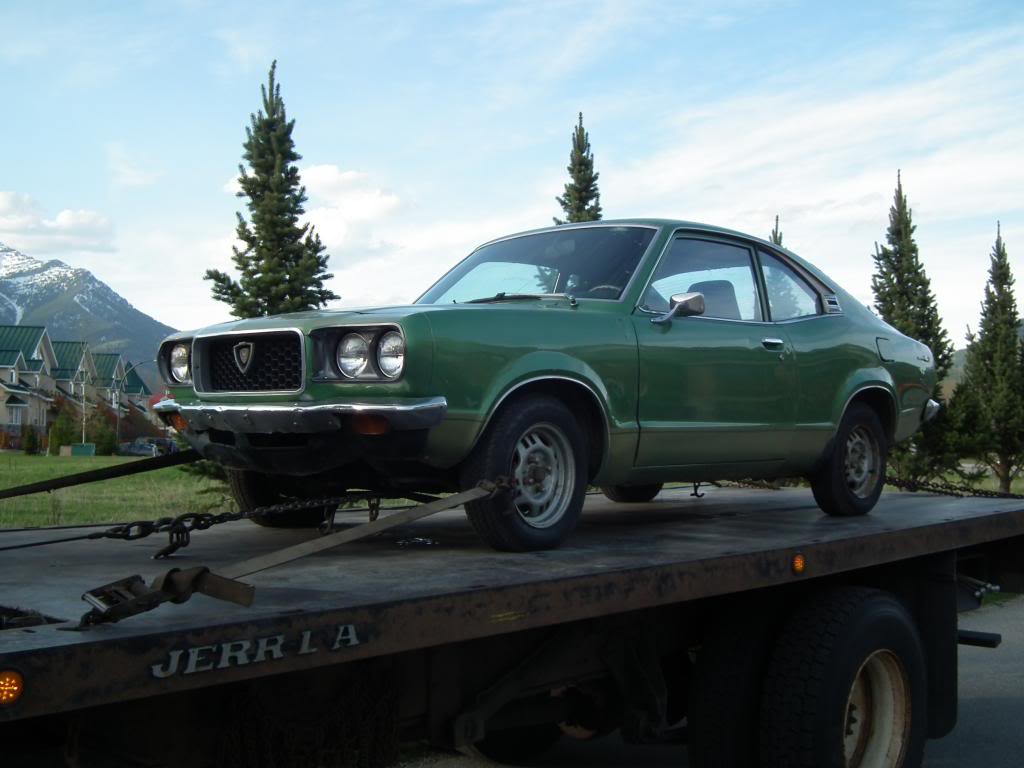
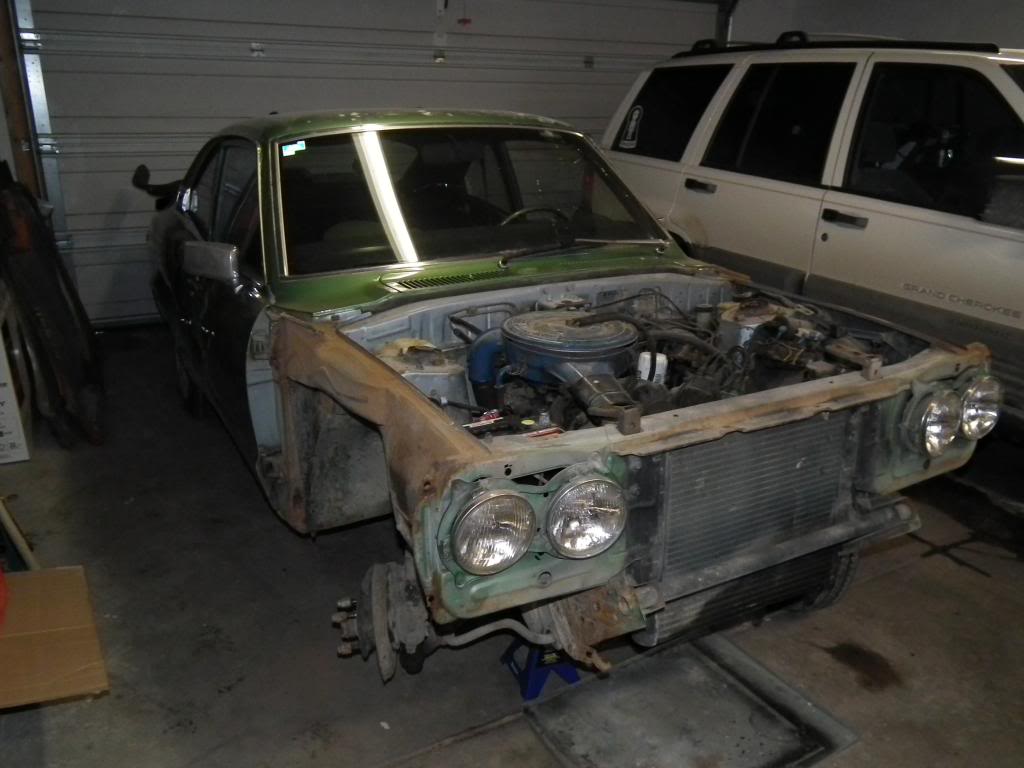
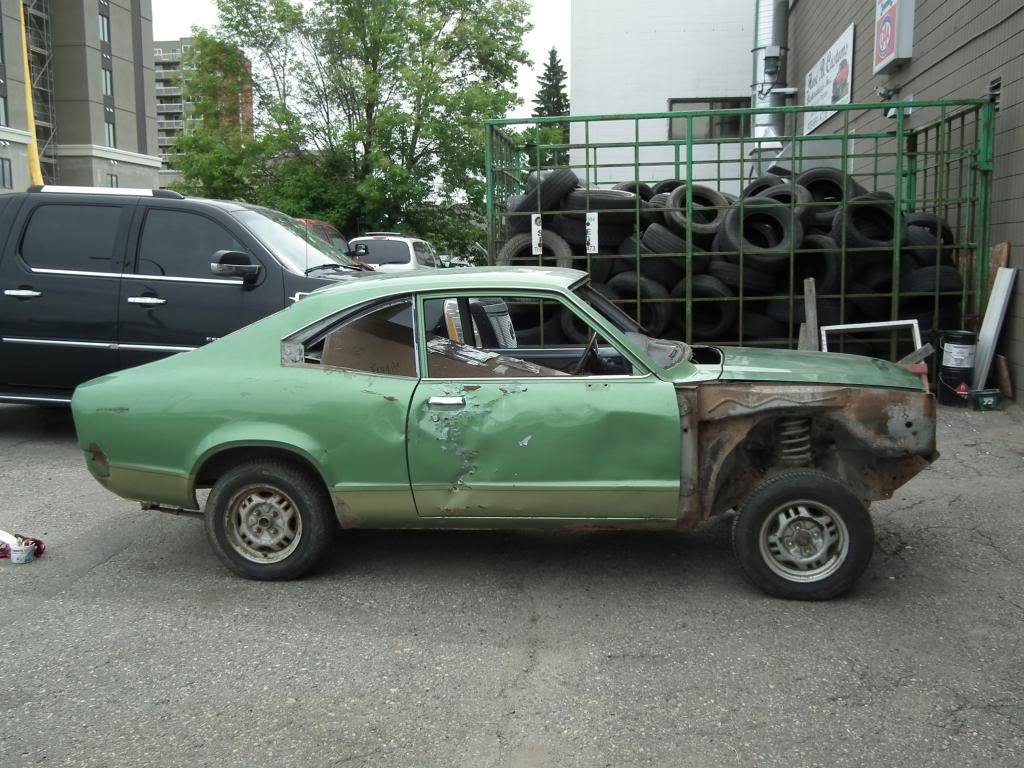
Although I have been working on this car for a little while now I have finally decided to post some pictures of the build.
I purchased the from a Craigslist ad in 2012 sight unseen. Having been around early model RXs for I knew what I was getting myself into and had resigned myself to the fact that a certain amount of work in certain areas is a given. So I paid some money and shipped myself a new project...
The new project being delivered
 08-26-13, 05:17 PM
#2
Madaz
Thread Starter
iTrader: (1)
Join Date: May 2012
Location: Calgary
Posts: 104
Likes: 0
Received 0 Likes
on
0 Posts
A quick walk around...
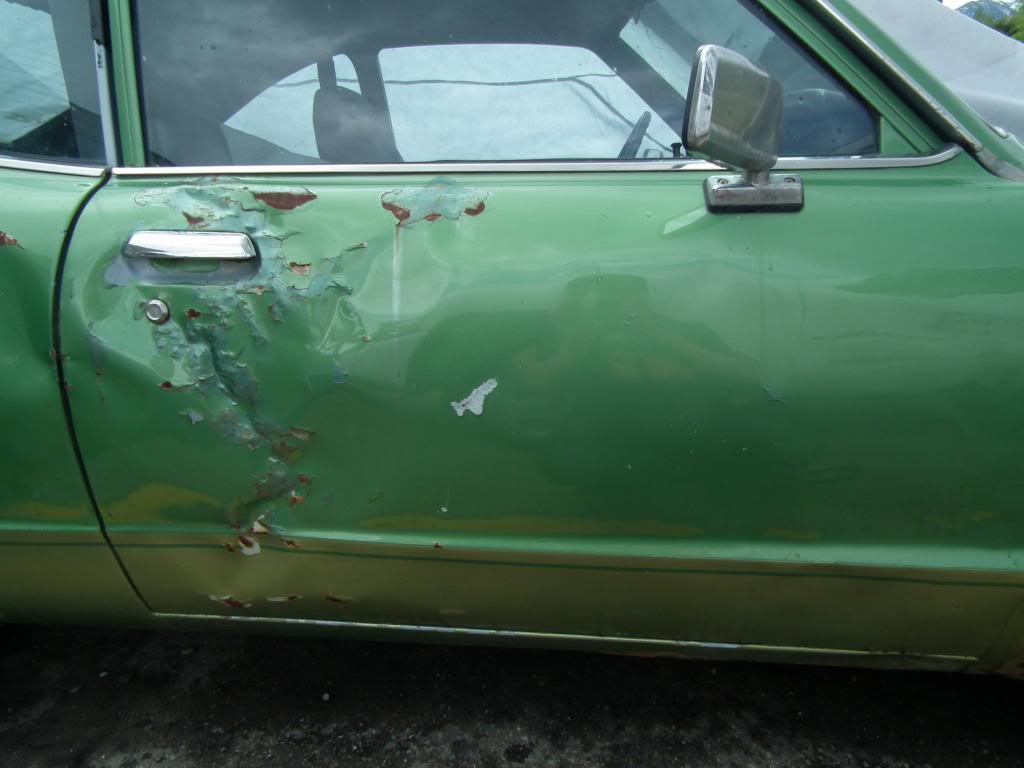
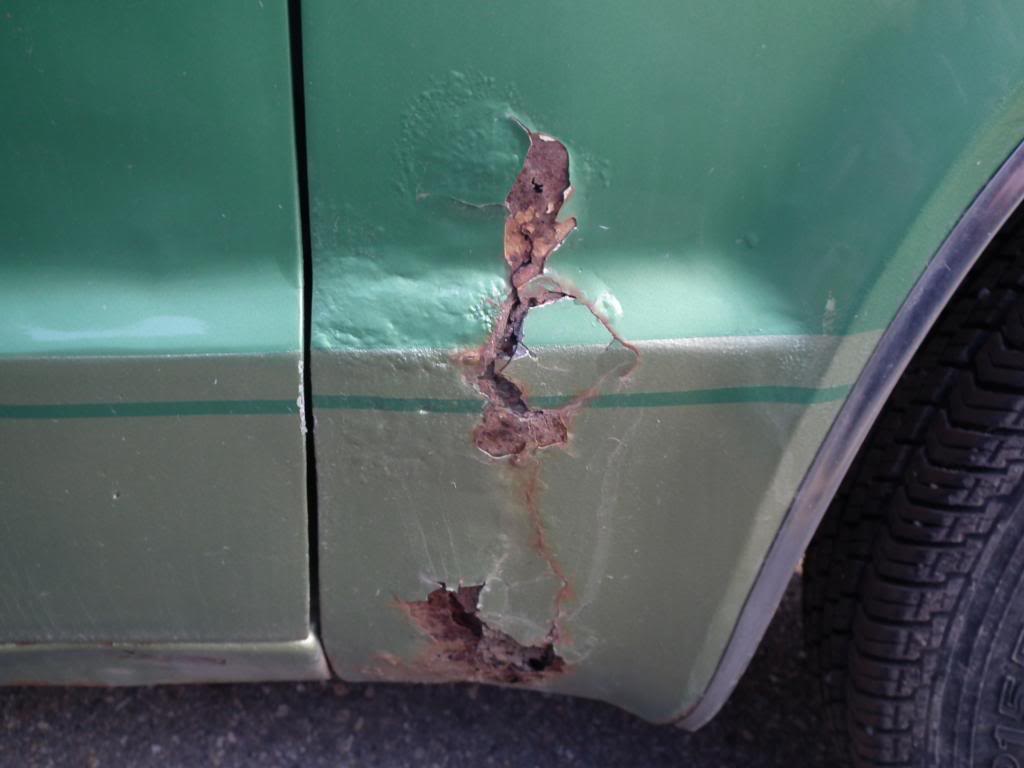
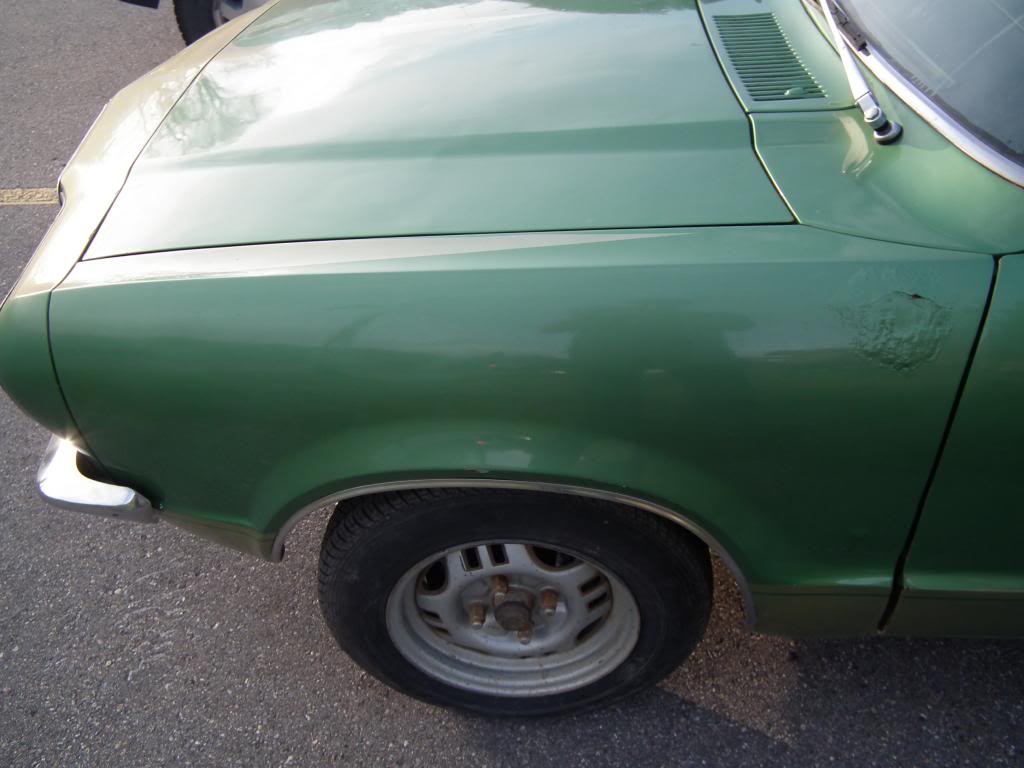
As I mentioned I expected a certain amount of issues that come with purchasing 40 year old Japanese tin. Upon walking around the car it had some less than impressive attributes but did look, mostly, solid. It had been resprayed sometime in the 80s with a bucket load of paint which, although poorly executed, had largely prevented rusting. The fenders and rockers had suffered from winter salted roads but that was expected so by and large I was happy. Some "creative," body work had occurred at some point so I new I was going to need to find some donor panels.
Passenger Door... Might buff out?
Usual Fender Rot...
Same on the drivers side
Passenger Door... Might buff out?
Usual Fender Rot...
Same on the drivers side
08-26-13, 05:22 PM
#5
Madaz
Thread Starter
iTrader: (1)
Join Date: May 2012
Location: Calgary
Posts: 104
Likes: 0
Received 0 Likes
on
0 Posts
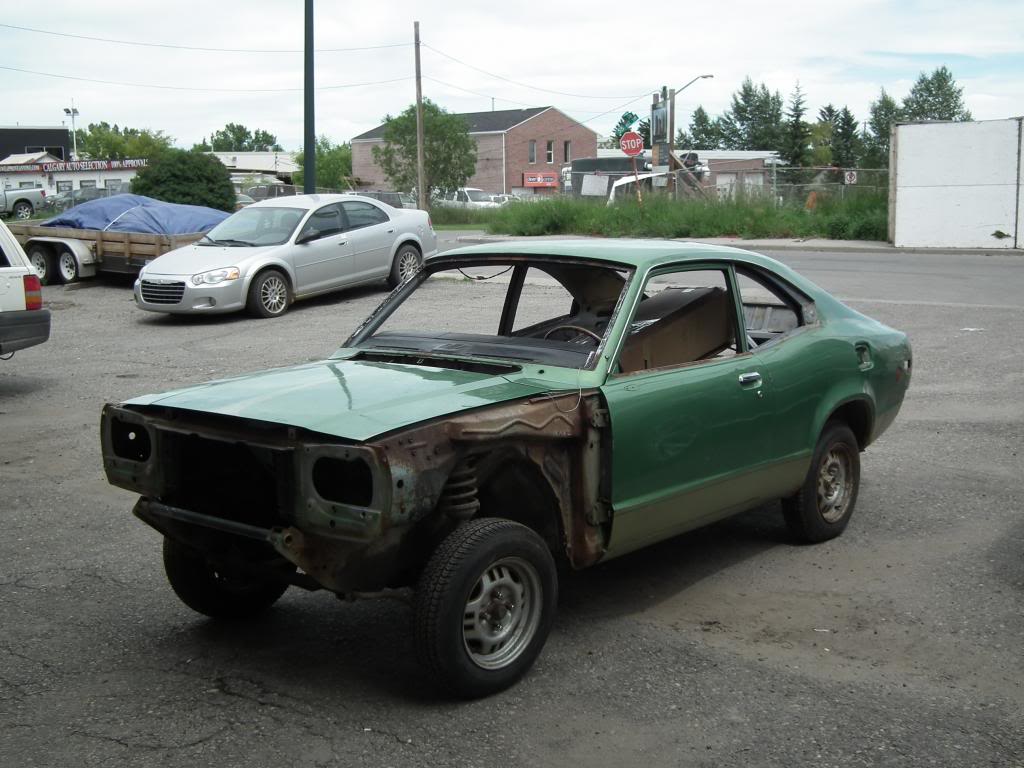
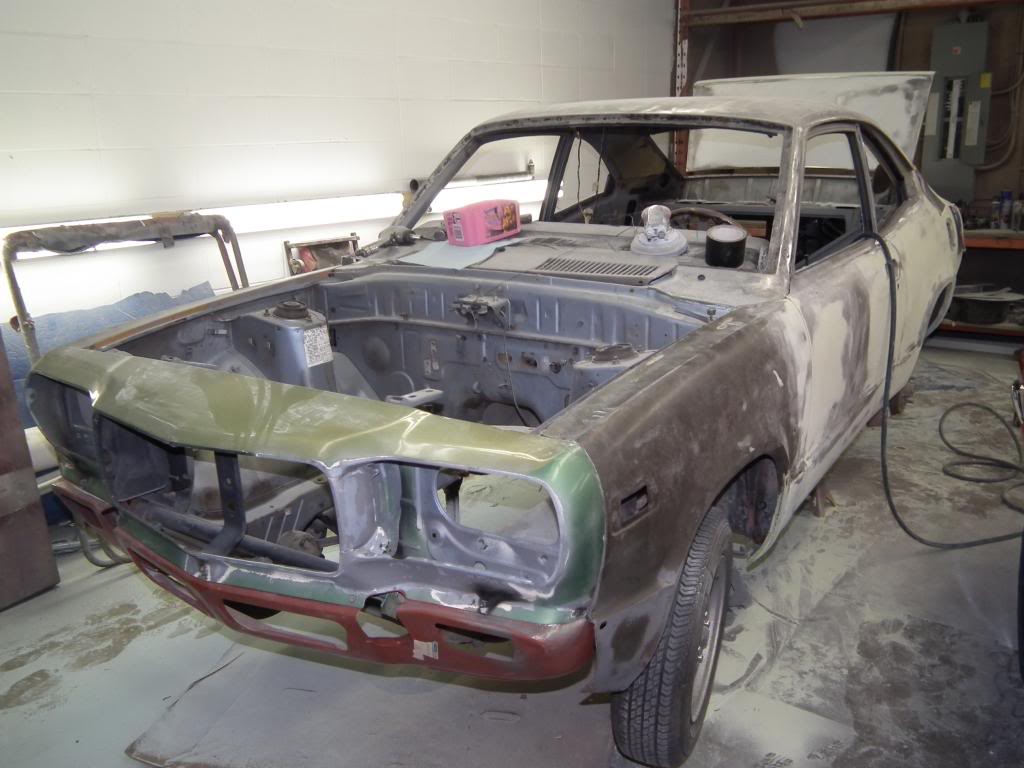
Unfortunately while I was living the dream in the Canadian Rockies I didn't have a garage to start the build. I purchased the car knowing I was relocating and therefore I started the search for a new residence with a suitable garage for the build. All the while the poor RX sat under a cover and about 3 feet of snow.
Once the new location was found I moved the car and started to strip her down...
The strip down begins.
Once the new location was found I moved the car and started to strip her down...
The strip down begins.
08-26-13, 05:29 PM
#6
Madaz
Thread Starter
iTrader: (1)
Join Date: May 2012
Location: Calgary
Posts: 104
Likes: 0
Received 0 Likes
on
0 Posts
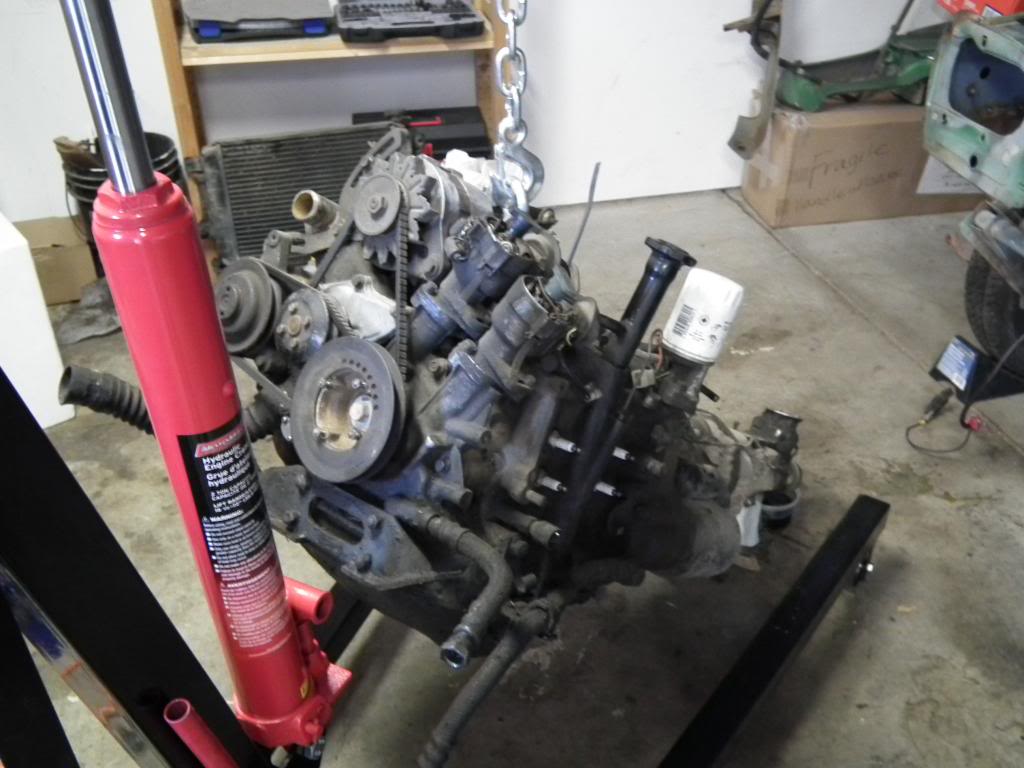
The car appeared to have the original engine still in it - It is showing 70 odd thousand miles on the clock. Not sure how many times it has been around the clock (if any) but I don't have any reason to believe that the motor has been pulled before. I was told by the previous owner that it would run. I cranked it a few times and while it spluttered a bit it wouldn't fire. Spark was weak and knowing I was going to rebuild it anyway I decided not to spend any effort getting it running.
Out it comes...
Out it comes...
08-26-13, 05:52 PM
#7
Madaz
Thread Starter
iTrader: (1)
Join Date: May 2012
Location: Calgary
Posts: 104
Likes: 0
Received 0 Likes
on
0 Posts
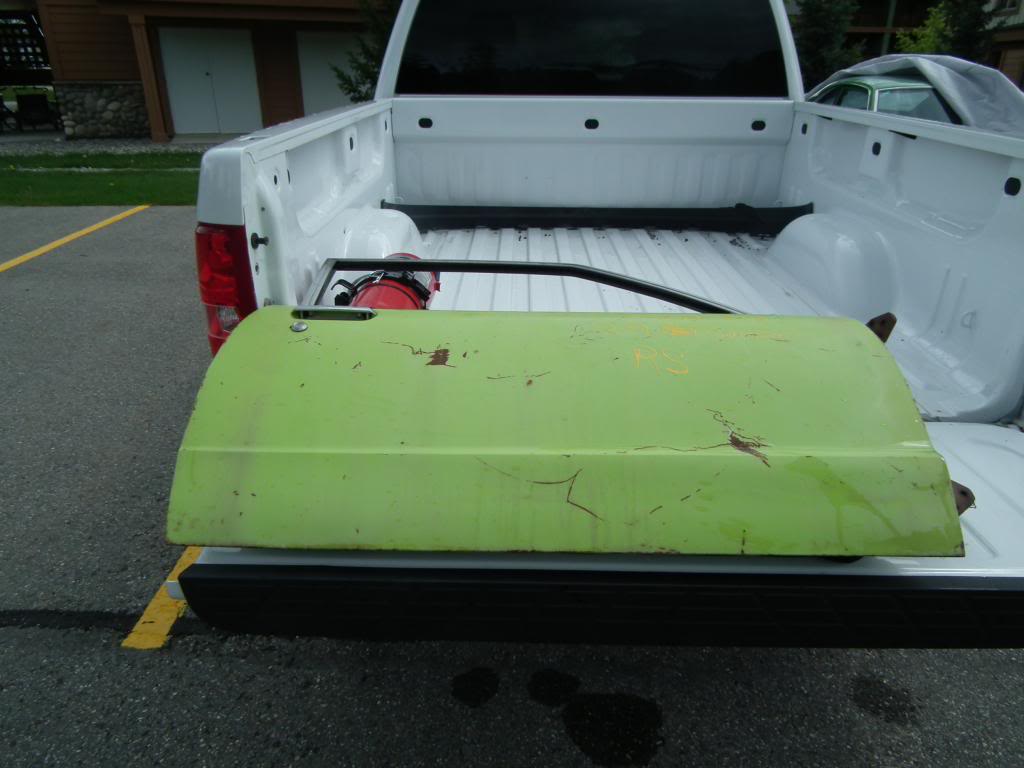
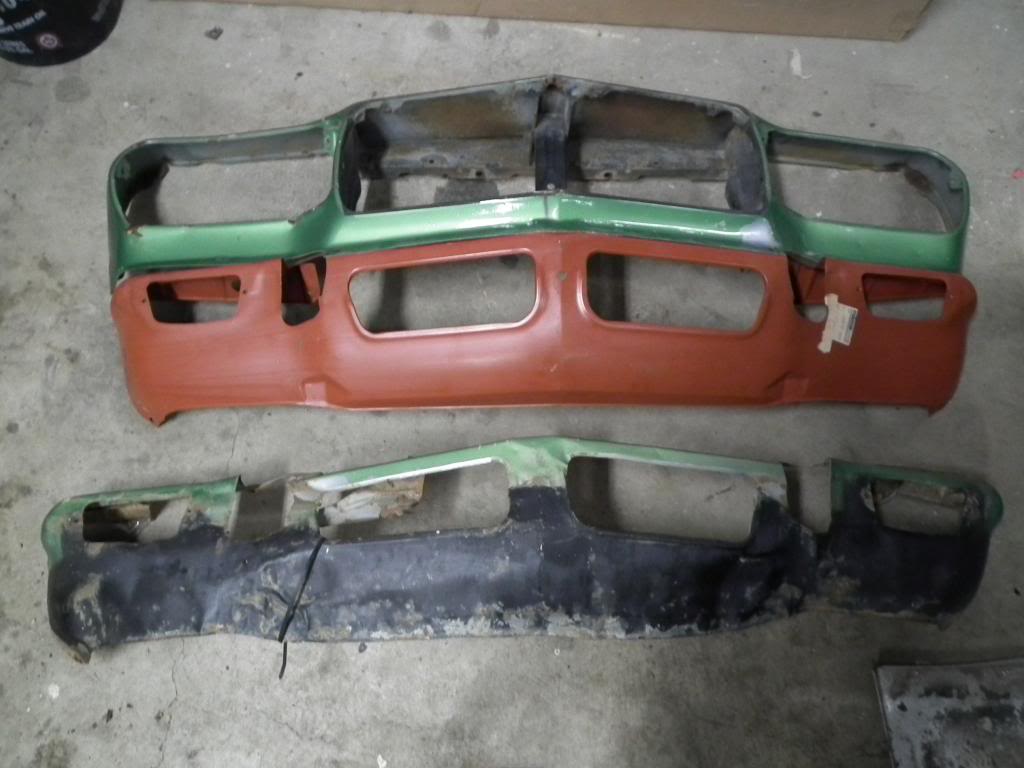
From a timing point of view I was aiming to get the body work completed over summer so she could be back in my garage to pick away at over the winter. Therefore the search began for donor panels. I didn't need much. Both front fenders and a passenger side door. The fenders could be repaired if I really had to but the inner supports were gone to so I started looking...
Replacement Door found at wrecker 70km from home... who would have thought.
They also had a tail light assembly with good lenses $20!!!
Replacement door
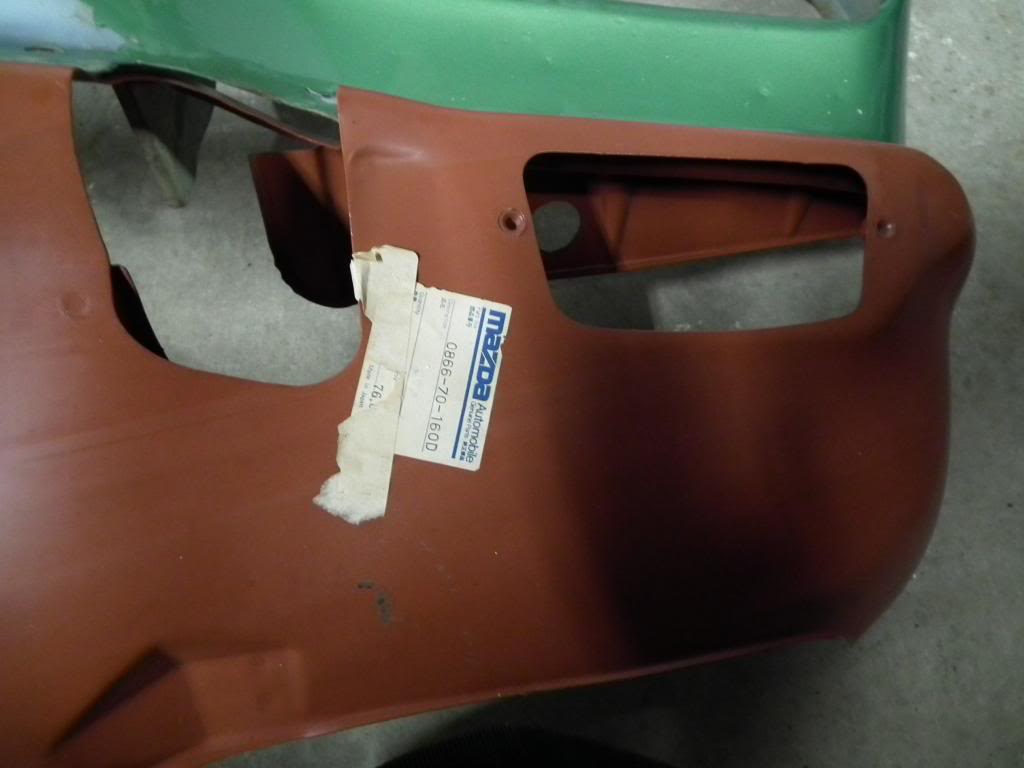
I found one fender in Idaho and another somewhere in Indiana? The right side was great the left still had the same rot but the inner structure was better.
While I was looking I also found this...
Brand new front valance ex-Florida.
Replacement Door found at wrecker 70km from home... who would have thought.
They also had a tail light assembly with good lenses $20!!!
Replacement door
I found one fender in Idaho and another somewhere in Indiana? The right side was great the left still had the same rot but the inner structure was better.
While I was looking I also found this...
Brand new front valance ex-Florida.
Trending Topics
 08-27-13, 10:22 AM
#12
Madaz
Thread Starter
iTrader: (1)
Join Date: May 2012
Location: Calgary
Posts: 104
Likes: 0
Received 0 Likes
on
0 Posts
The plan is to make this a period correct build. I purchased my first Rotary (RX-2 sedan) shortly before turning 17 and have some pretty fond memories of those times almost 20 years ago. I am trying to create a car where the modifications are correct for the vintage. Therefore back to the original color she will go.
08-27-13, 10:42 AM
#13
Madaz
Thread Starter
iTrader: (1)
Join Date: May 2012
Location: Calgary
Posts: 104
Likes: 0
Received 0 Likes
on
0 Posts
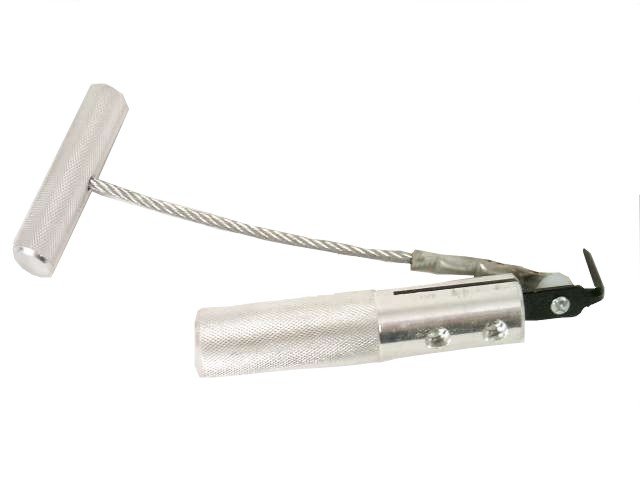
I removed the interior, the fuel tank and lines. The hardest part about pulling the coupe apart was disparately trying NOT to break the rear screen. Unfortunately the front was cracked all over so I practiced my technique on that one. It is common to see these old cars having had layer upon layer of silicon applied to stop leaks etc. This car was not exception. In parts there was almost an inch of silicon to remove and cut through.
I created a rather unorthodox method for removing the silicone. A folding wood saw - The type you would take camping etc. The course teeth made short work of chewing up the old silicone and dislodging it from the channel. Once the bulk of the material was removed I then used my trusty cold knife to cut behind the glass. I have had limited success using the wire pull method - It works well if a standard seal has been used but when you have that much silicone applied over the years - not so much. For those of you not familiar this is a cold knife. Very effective just make sure to angle the blade down when cutting to avoid chipping the edges of the glass.
After all the glass was out the coupe was loaded up on a truck and taken down to the body shop. Being a kiwi a long way from home I decided against doing the body work on this car. I didn't particularly want to purchase a new mid and spray gear given we will likely be heading back in the next year or two. Plus I wanted the body work completed by end of summer which would never happen if I was doing it.
Delivered to the body shop
08-27-13, 10:56 AM
#14
Madaz
Thread Starter
iTrader: (1)
Join Date: May 2012
Location: Calgary
Posts: 104
Likes: 0
Received 0 Likes
on
0 Posts
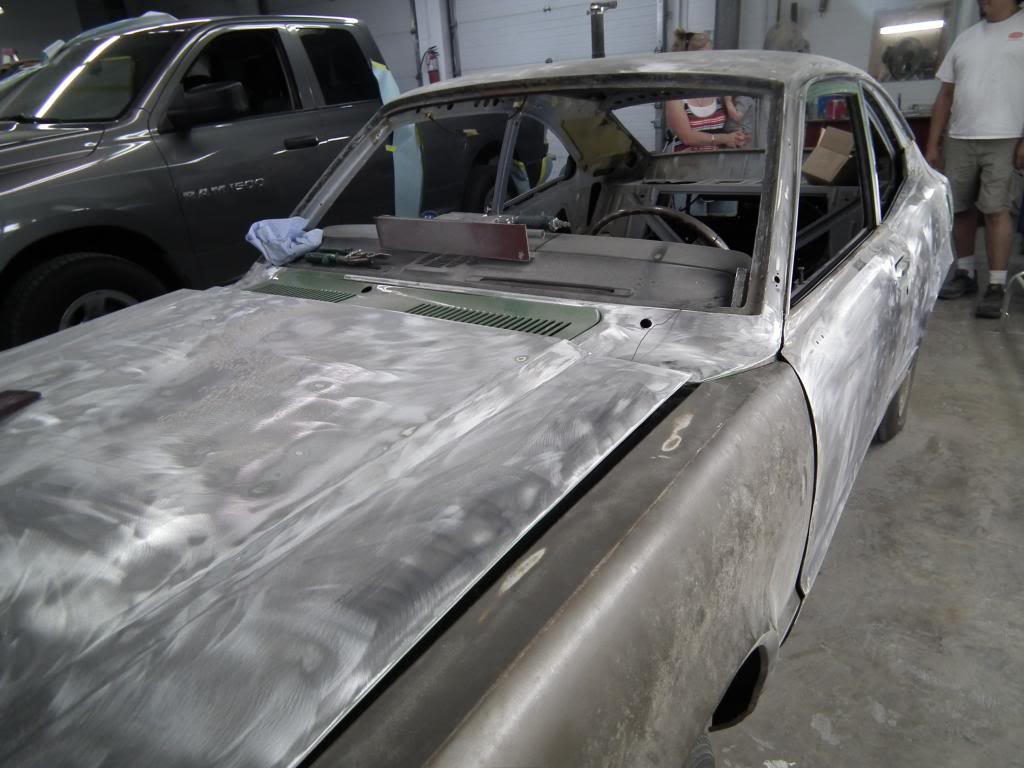
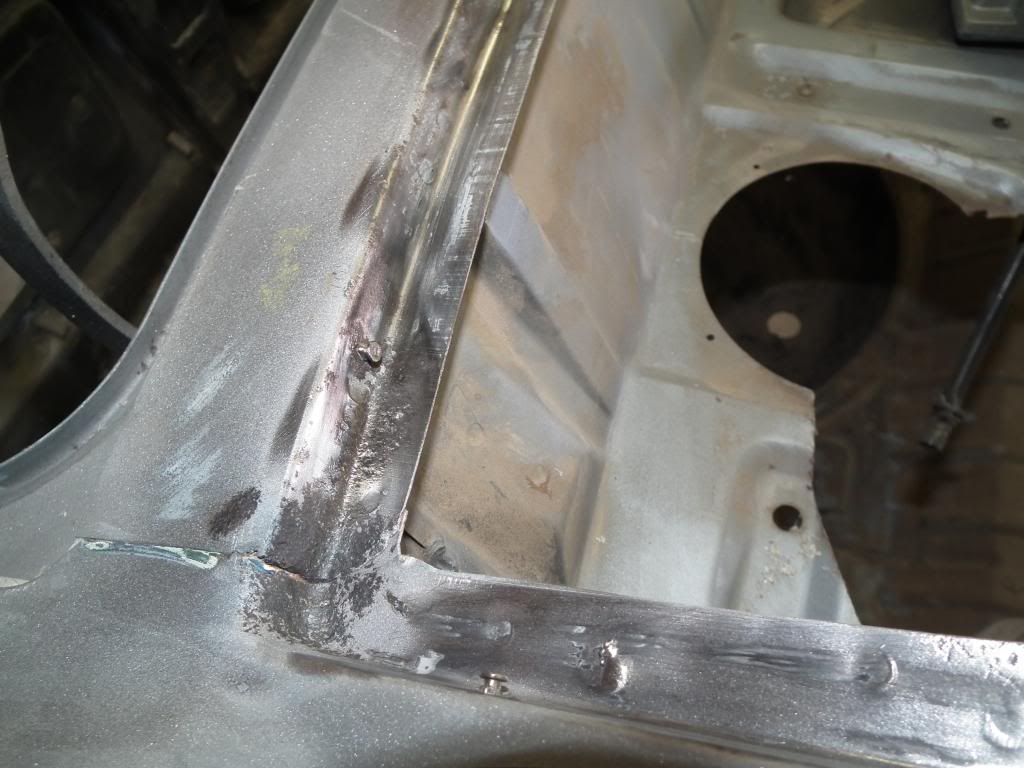
I originally selected this body shop due to the fact that they used water/sand blasting. Finding someone in Calgary that use plastic beads to blast was near impossible - I didn't want to use standard blasting techniques given the thin gauge metal. As it turns out the guy who does the blasting was totally booked up for the foreseeable future so it was taken back to metal by hand.

08-27-13, 11:02 AM
#15
Madaz
Thread Starter
iTrader: (1)
Join Date: May 2012
Location: Calgary
Posts: 104
Likes: 0
Received 0 Likes
on
0 Posts
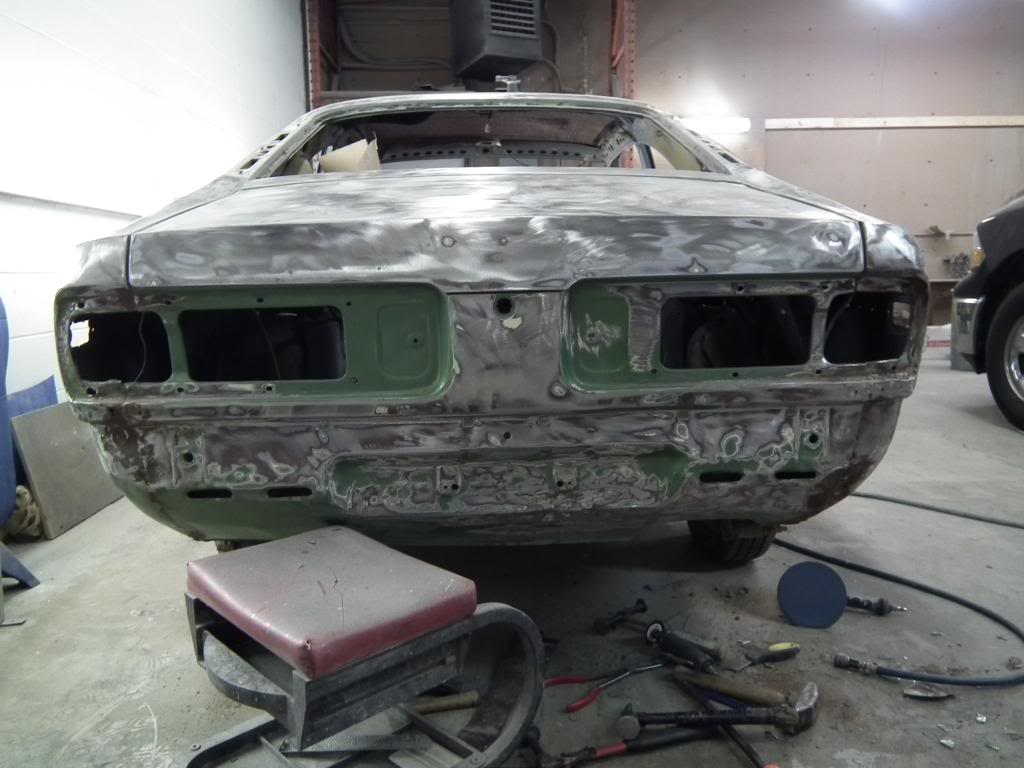
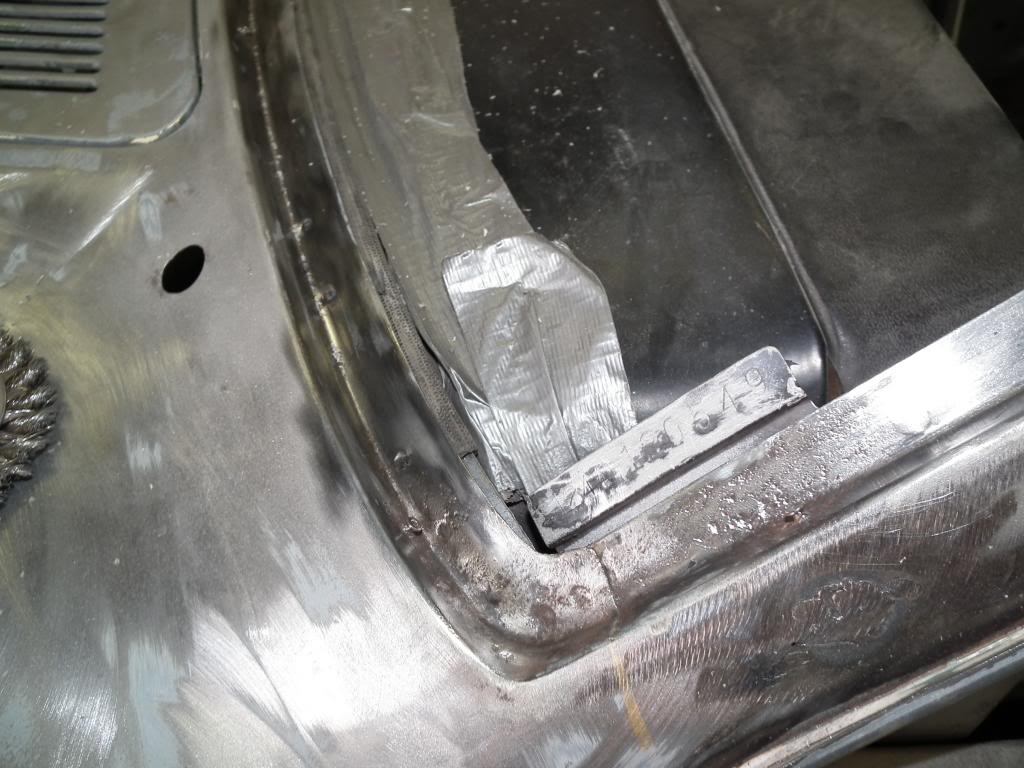
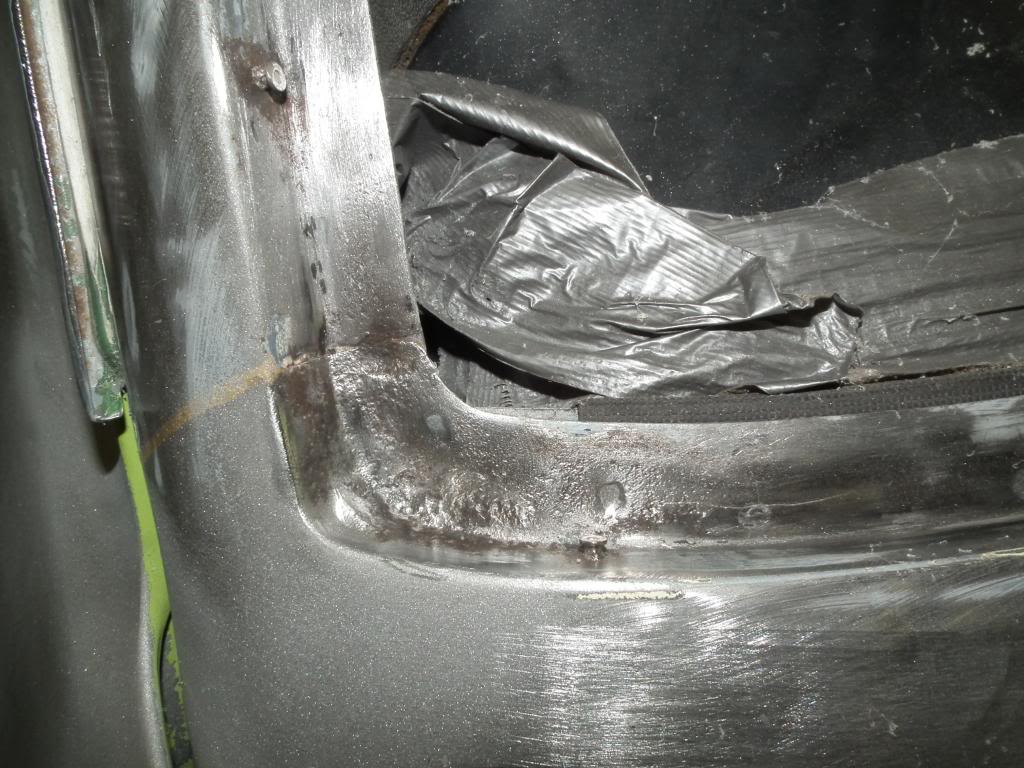
The rear valance looked to me to be the area that was going to be the most problematic. This area doesn't have much support behind it and normally looks the worse for wear after 40 years. Mine had both corners pushed in an filled with "Bondo." All the filler had long since cracked and started to fall out.
Upon stripping it back it was surprisingly good and just needed some massaging to get it all straight again. That said the body guy is 65+ and is pretty damn handy with a hammer and dolly!
Upon stripping it back it was surprisingly good and just needed some massaging to get it all straight again. That said the body guy is 65+ and is pretty damn handy with a hammer and dolly!
 08-28-13, 02:35 PM
#18
Madaz
Thread Starter
iTrader: (1)
Join Date: May 2012
Location: Calgary
Posts: 104
Likes: 0
Received 0 Likes
on
0 Posts
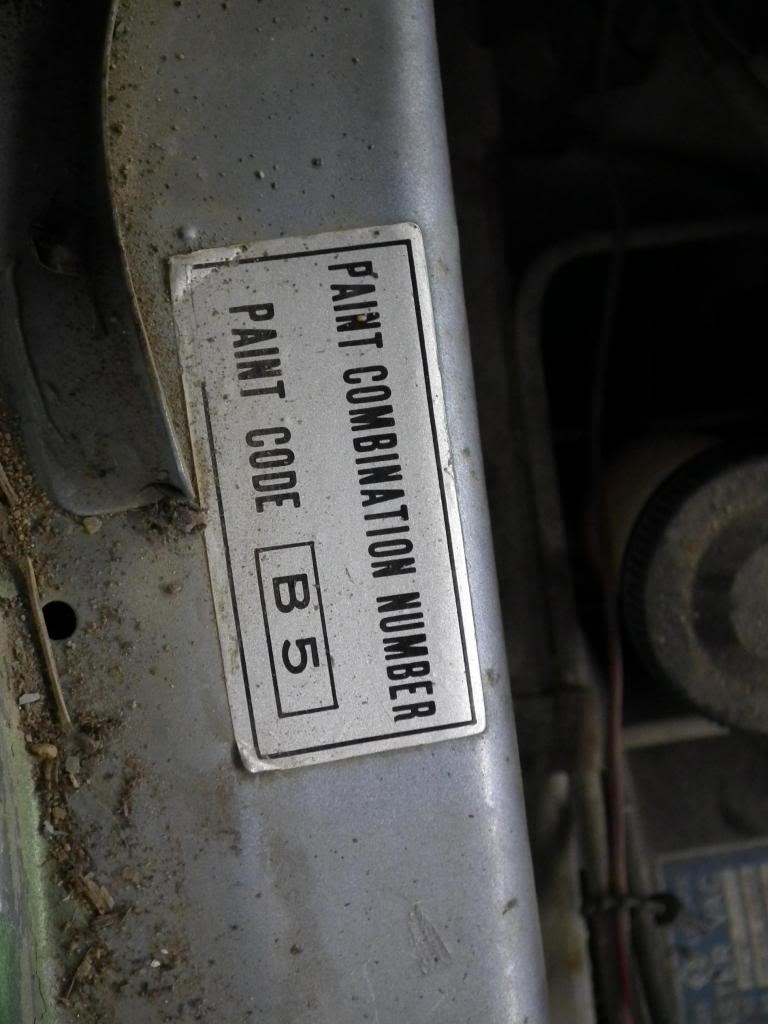
During the 80's the car was given a makeover - Badly.
The car was half painted in that the exterior was painted but the engine bay, trunk and inside doors all still wore the original B5 paint. I guess I don't want to complain as the amount of paint used probably saved it from more serious rust issues.
During this makeover the previous owner decided to do away with the front and rear markers. I can not fault this either as I think Mazda could have done a better job with making them look less obtrusive however as this is more of a restoration than a custom build I needed to put them back.
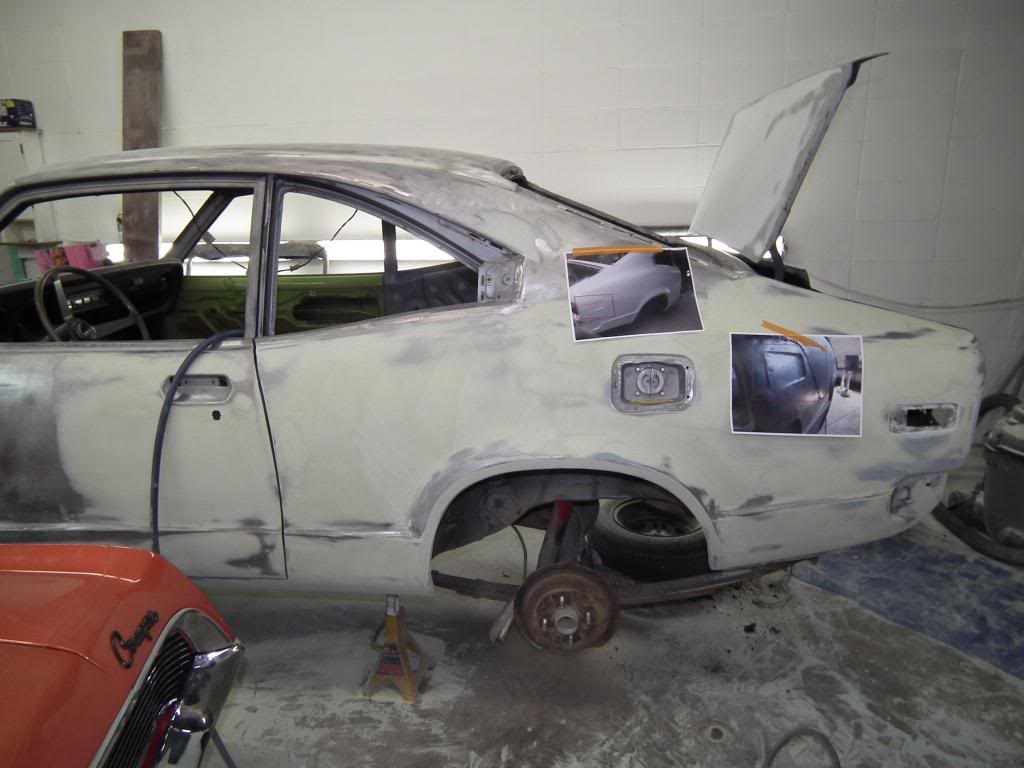
The method in which the markers were previously removed was largely, to tack a piece of metal to the inside of the recess and then fill with Bondo. Unfortunately they also hammered the rear contour flat. A quick call out to the RX7club forum for pics saw Nick (aka 73rx313b) provide me with how the contours should look.
Here you can see some reference pictures I left for the body guy... pretty sure he was sick of me already so I wasn't risking pissing him off anymore. (Seriously he's a good guy but likes to grumble a lot!)
The car was half painted in that the exterior was painted but the engine bay, trunk and inside doors all still wore the original B5 paint. I guess I don't want to complain as the amount of paint used probably saved it from more serious rust issues.
During this makeover the previous owner decided to do away with the front and rear markers. I can not fault this either as I think Mazda could have done a better job with making them look less obtrusive however as this is more of a restoration than a custom build I needed to put them back.
The method in which the markers were previously removed was largely, to tack a piece of metal to the inside of the recess and then fill with Bondo. Unfortunately they also hammered the rear contour flat. A quick call out to the RX7club forum for pics saw Nick (aka 73rx313b) provide me with how the contours should look.
Here you can see some reference pictures I left for the body guy... pretty sure he was sick of me already so I wasn't risking pissing him off anymore. (Seriously he's a good guy but likes to grumble a lot!)
08-28-13, 02:37 PM
#19
Madaz
Thread Starter
iTrader: (1)
Join Date: May 2012
Location: Calgary
Posts: 104
Likes: 0
Received 0 Likes
on
0 Posts
Did anyone notice the differences between the reference pictures and my car? Back home (NZ) and in Australia the markers were simply reflectors rather than indicators meaning there was no cut out simply and indentation. I hadn't noticed this before.
08-28-13, 02:47 PM
#20
Madaz
Thread Starter
iTrader: (1)
Join Date: May 2012
Location: Calgary
Posts: 104
Likes: 0
Received 0 Likes
on
0 Posts
This is old school rotary number eight for me. Technically I am obsessed by RX-2 coupes... love them! I would have built another if I could have found one for the same type of money and condition as the RX-3. (Not telling how much it cost but considerably less than I was used to paying)
Given my history I have NEVER had one that did not require rust work around the screens. After cleaning up I found some minor pitting and that is all. Definitely a first for me and pretty happy about it!
Given my history I have NEVER had one that did not require rust work around the screens. After cleaning up I found some minor pitting and that is all. Definitely a first for me and pretty happy about it!
08-29-13, 02:13 PM
#21
Full Member
iTrader: (1)

Join Date: Jun 2013
Location: Kelowna, British Columbia
Posts: 50
Likes: 0
Received 0 Likes
on
0 Posts
Coming along nicely.
That body guy seems to know his stuff... everything is looking spot on.
As for the markers, i'm not terribly surprised because in North America we have laws that state you must have marker lights on the sides of your vehicle, but that's not necessarily true of other countries. Even so, safety is not lost on manufacturers, and they'll save money while keeping a basic standard.....
I'm really enjoying this thread, please keep the updates coming!
08-29-13, 05:54 PM
#22
Madaz
Thread Starter
iTrader: (1)
Join Date: May 2012
Location: Calgary
Posts: 104
Likes: 0
Received 0 Likes
on
0 Posts
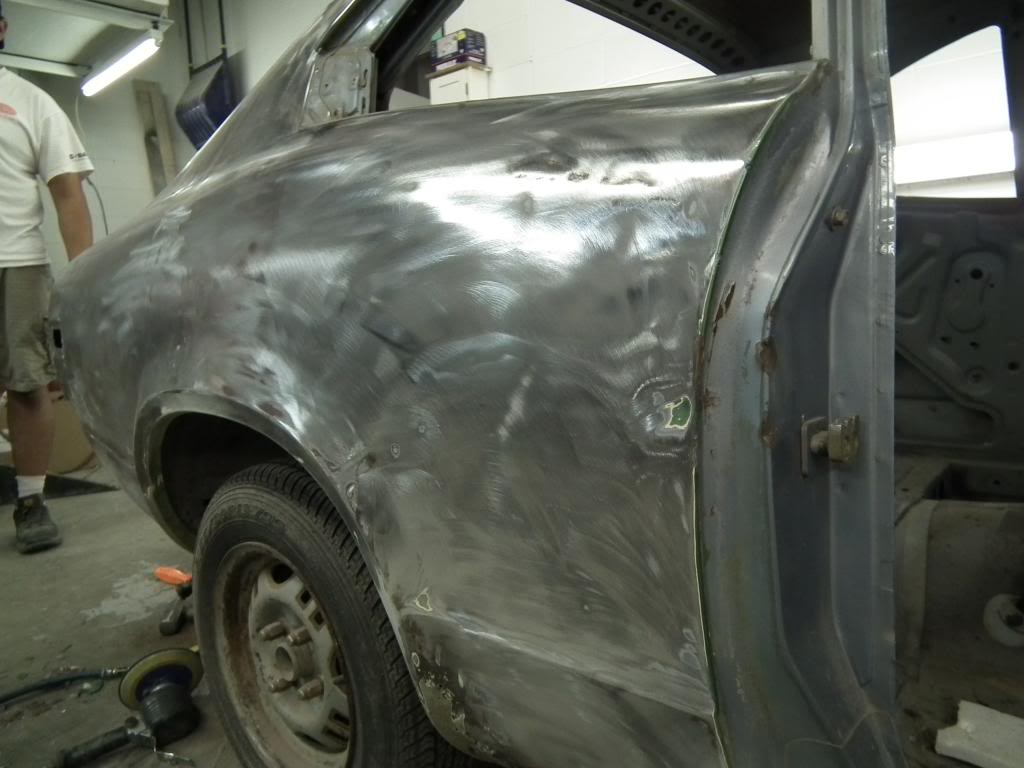
The Majority of the body work is done.
The major work included replacing both rocker panels, Left hand fender bottom section replacement. And a whole heap of trying to smooth out 40 years of blemishes.
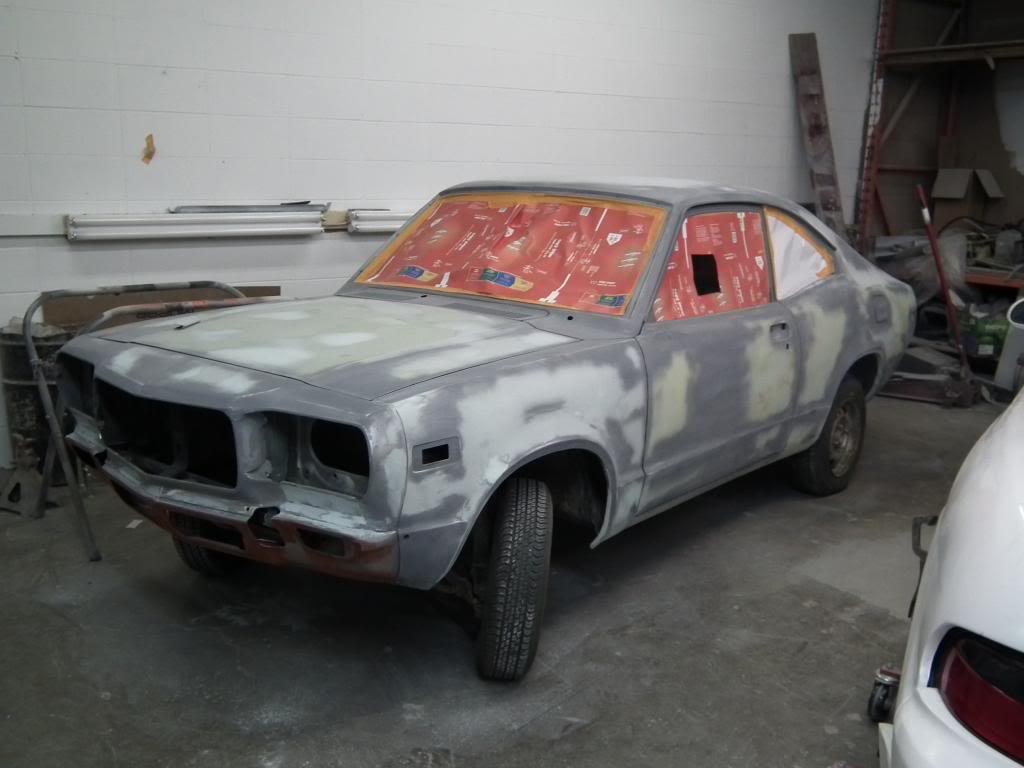
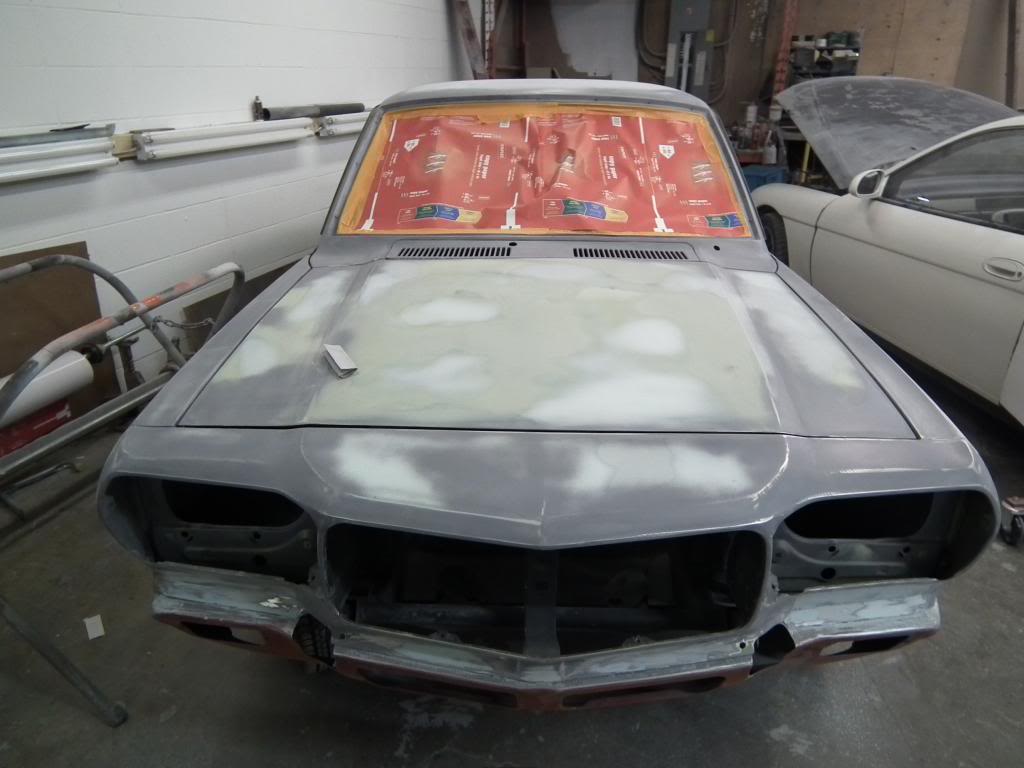
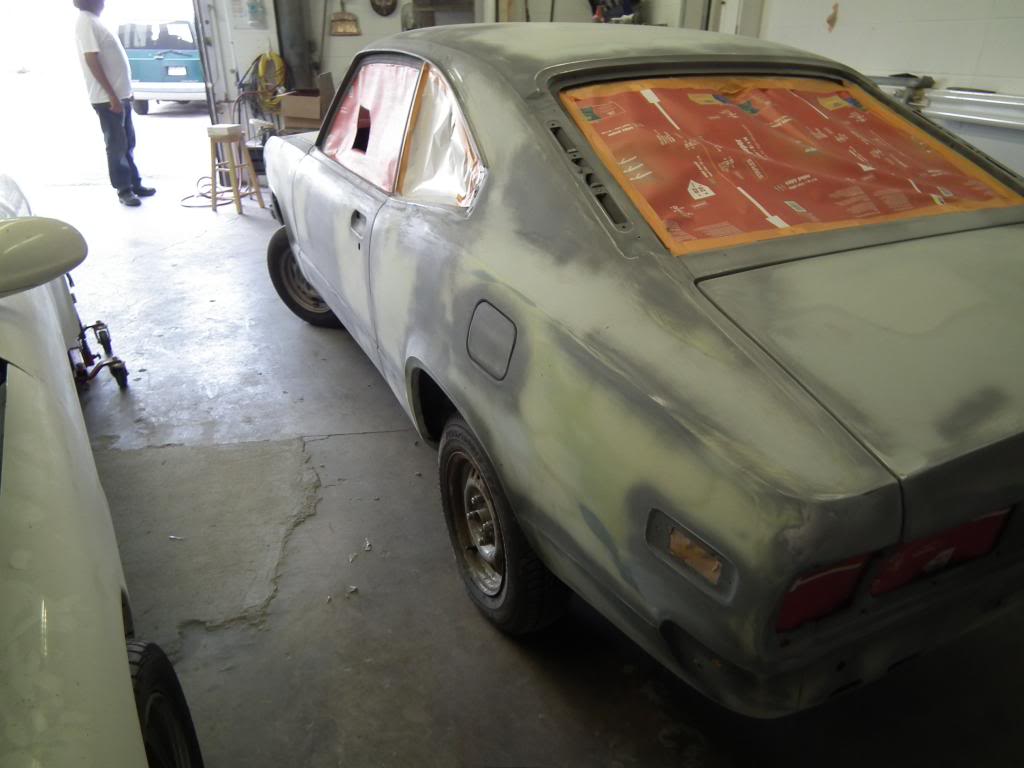
Notice in the above pic my body guy got creative with the fuel flap? Originally the outer skin of the fuel flap had rusted away and was replaced by a flat piece of metal. I managed to find a replacement flap from fellow RX7club member Ron (aka Redline-RX3) however it appeared to be from a post 74 vehicle. The difference I believe is that pre '74 the fuel flap had the fuel cap holder in the inner section. The solution was to separate the outer skin from the donor flap and graft to the original inner. When I checked on the progress my body shop guy had shaved the key hole. It appears this was a miscommunication between us. Seeing it was done I said to leave it as I could always use a chassis punch to put the hole back if required. Looks better without it but now I need to decide the best method of keeping it closed!
The major work included replacing both rocker panels, Left hand fender bottom section replacement. And a whole heap of trying to smooth out 40 years of blemishes.
Notice in the above pic my body guy got creative with the fuel flap? Originally the outer skin of the fuel flap had rusted away and was replaced by a flat piece of metal. I managed to find a replacement flap from fellow RX7club member Ron (aka Redline-RX3) however it appeared to be from a post 74 vehicle. The difference I believe is that pre '74 the fuel flap had the fuel cap holder in the inner section. The solution was to separate the outer skin from the donor flap and graft to the original inner. When I checked on the progress my body shop guy had shaved the key hole. It appears this was a miscommunication between us. Seeing it was done I said to leave it as I could always use a chassis punch to put the hole back if required. Looks better without it but now I need to decide the best method of keeping it closed!
08-29-13, 06:03 PM
#23
Madaz
Thread Starter
iTrader: (1)
Join Date: May 2012
Location: Calgary
Posts: 104
Likes: 0
Received 0 Likes
on
0 Posts
Hi dhennessey,
The body shop doing the work are a funny bunch. The owner is one of the most picky guys I have met. The story, as I recall, is that the guy was way too pedantic to be employed at a commercial shop where volume is key. IE The shop wanted to move the cars quicker and he wouldn't let them out until they were perfect. So he opened his own custom shop.
This is the kind of guy you want looking after a project like this. The guy doing the majority of the work is an older guy brought out of retirement and therefore does things the right way so again great to have working on my car. There is a trade off - They don't come cheap and we are probably at least 4 weeks past the initial time estimate without any color on the car yet.
08-30-13, 12:04 PM
#24
Full Member
iTrader: (1)
Join Date: Jun 2013
Location: Kelowna, British Columbia
Posts: 50
Likes: 0
Received 0 Likes
on
0 Posts
Yes, but in the end, you want something that is done correctly. By the looks of the way the panels line up now, i think they've done that, maybe even better than the factory.
You'll be happier knowing that your 40 year old car can now go another 40 years and probably be in better shape than it was after the first 40.
You'll be happier knowing that your 40 year old car can now go another 40 years and probably be in better shape than it was after the first 40.
