When you click on links to various merchants on this site and make a purchase, this can result in this site earning a commission. Affiliate programs and affiliations include, but are not limited to, the eBay Partner Network.
I notice there are now two bumber paints by duplicolor. There is flexible bumper paint. Then there is bumper and trim paint. Which one are u guys using. Thanks.
My painter uses some stuff from Mercedes that's a nice matte satin finish. He also said some of the Eastwood product was really good but I did t ask for specifics.
See my build thread for how my plastics turned out.
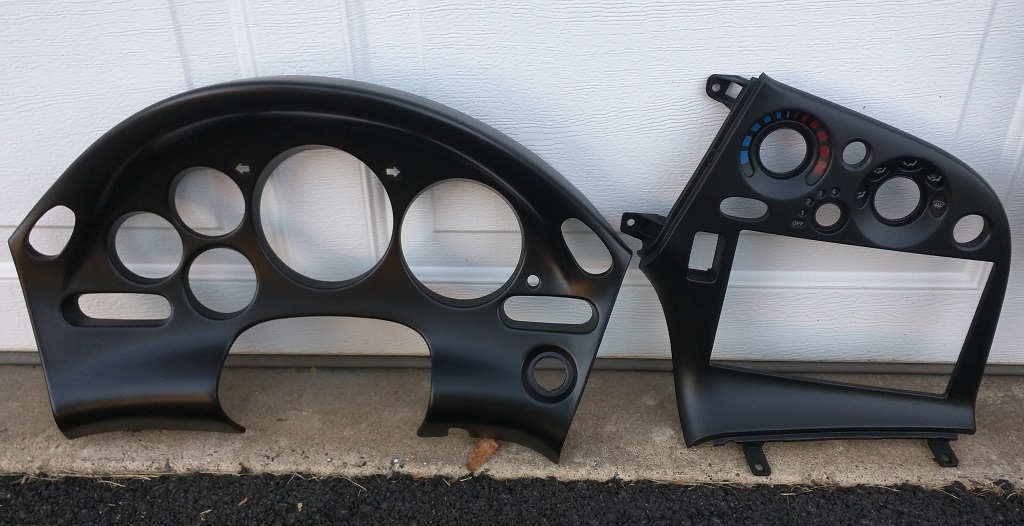
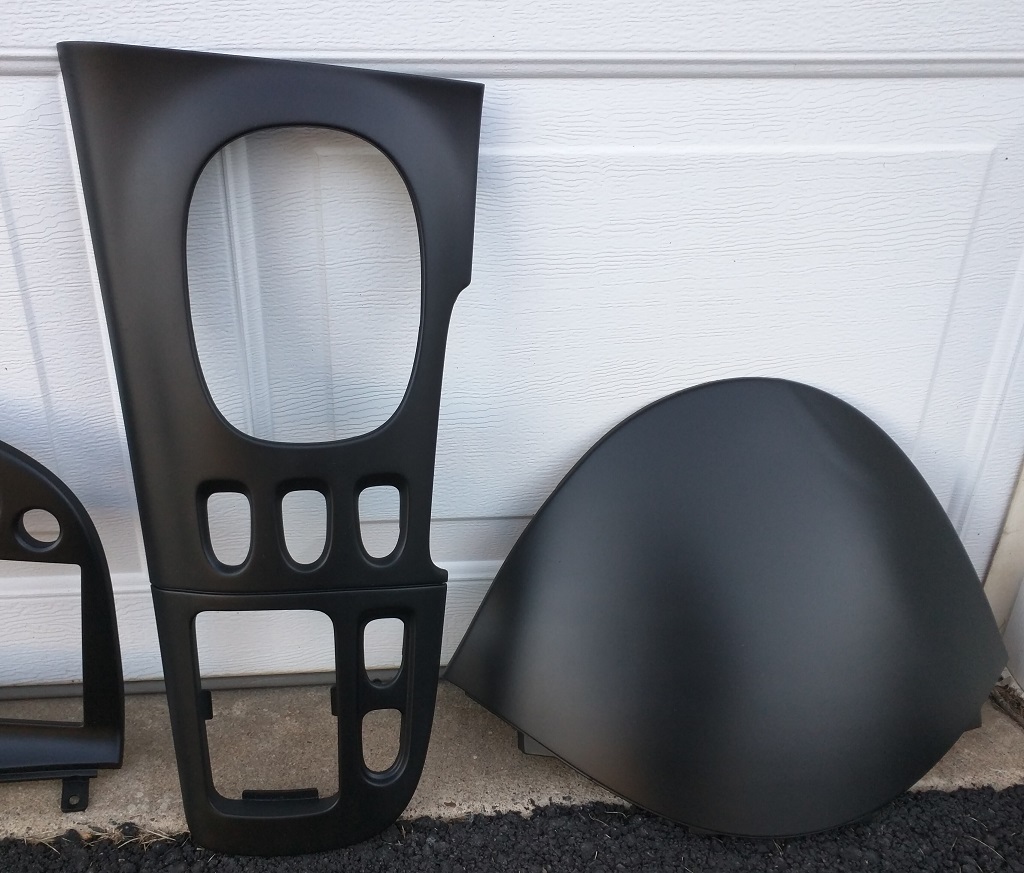
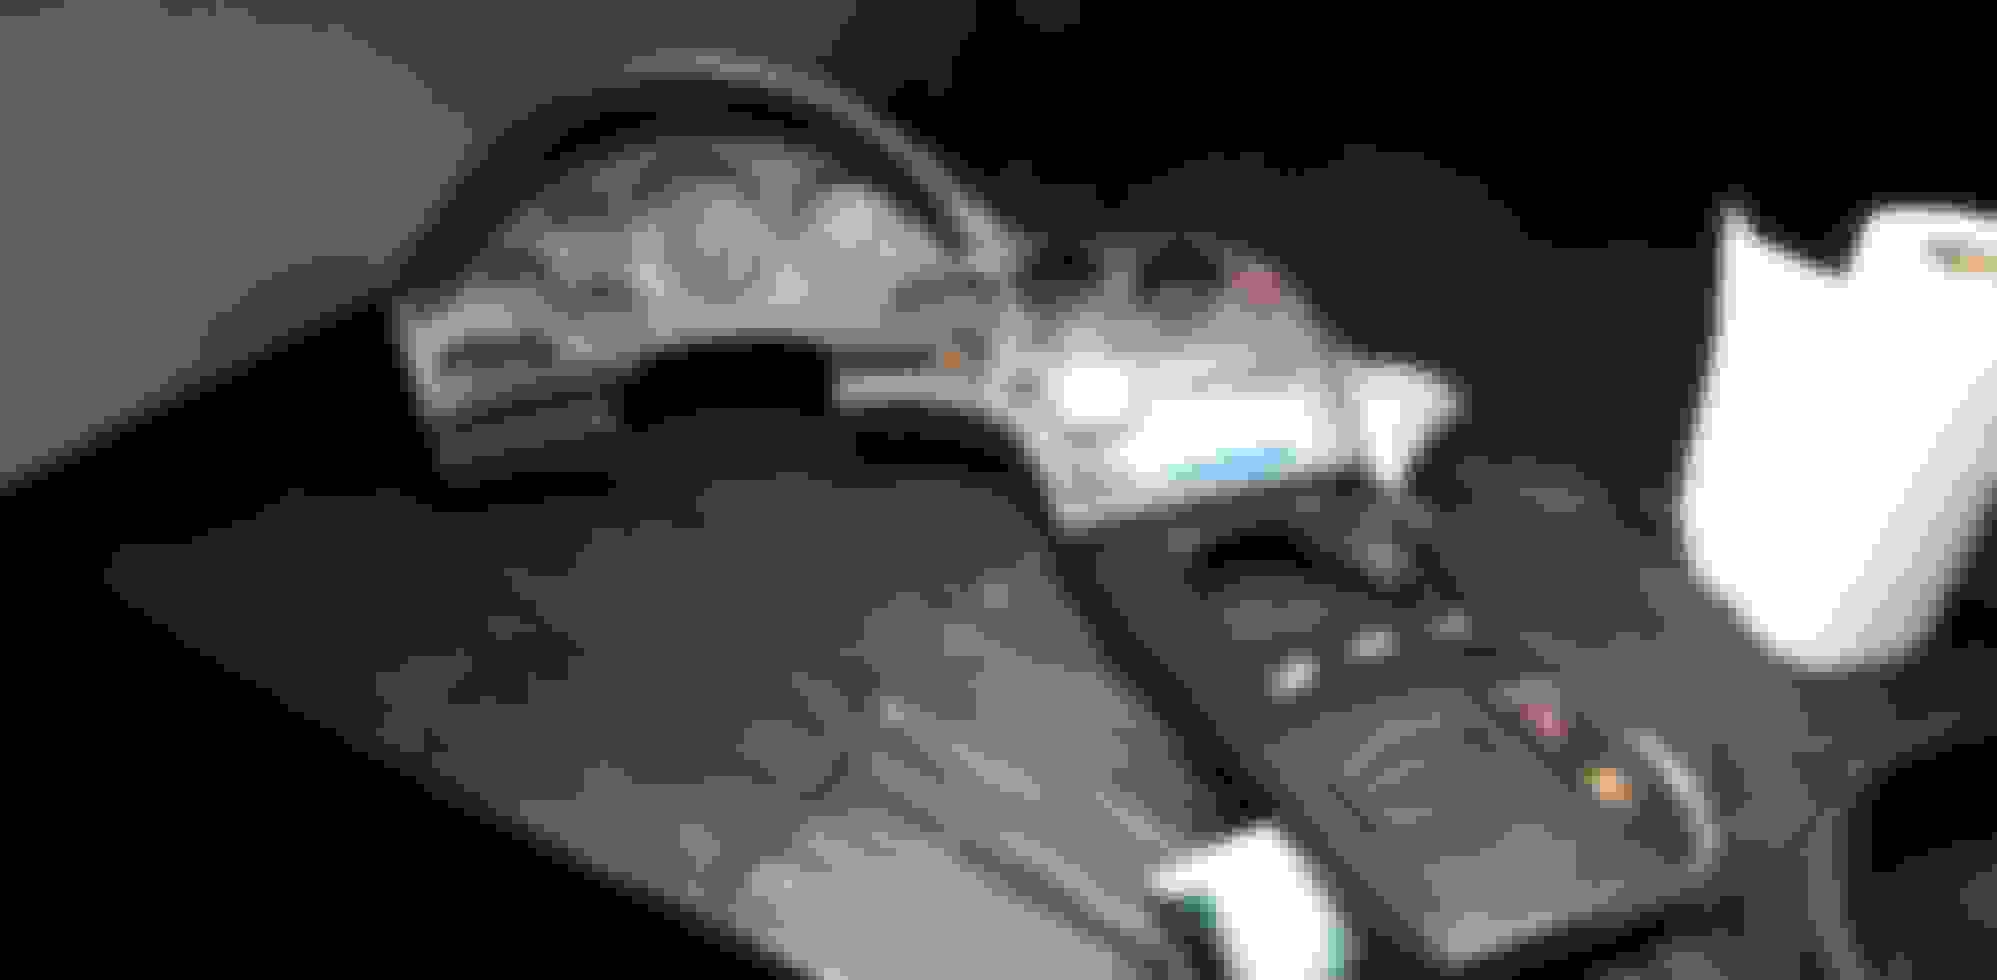
Just completed all of my dash plastics. Ugh, what a horrible job it is removing all the '93 gunk. Took the opportunity to repair nicks, cracks, and broken mounting tabs as well. I'm pretty happy with how it all came out. Wish I had some before pictures because the sticky film had become pretty nasty in places.
I followed the guidance from others in this thread. Used about 1/2 qt of acetone and blue shop towels to remove the bulk of the film layer. Then used scotch brite pads to scour all the surfaces evenly and remove any remaining goo. Getting it out of all the holes was the worst part. After that, I wet-sanded the entire surface with 400 grit. Wiped down with automotive prep-all, then 3 coats of rustoleum sandable primer, 2 coats of SEM satin black.
Just to add to the "removal" process. Easy Off oven cleaner takes the old film/goo off pretty easily. Spray, let it sit a moment, rub it off with a microfiber cloth... you just need a cloth with some "tooth", and rub it back and forth fairly vigorously to "roll" the goo off, and it's gone. A butt load easier than sanding, and a lot easier to come by (and safer) than acetone.
Easy Off also works great for removing anodizing from aluminum.
This thread was a godsend. Adding my findings also … I recently picked up a 1993 Base VR with 45,500 miles on it. The previous owner had installed an ugly E-bay carbon fiber overlay trim kit on the trim pieces when some pieces started to peel ....well we all know what happens next.
1. Slowly removed all carbon fiber pieces with a hair dryer to loosen up the glue underneath. Resulted in even more peeled surfaces and carbon fiber trim back material.
2. TIP #1 - Use your smart phone to take pictures of every dis-assembly so you can put everything back together properly.
3.TIP #2- I wish I knew this one earlier – cost me time and not so great a finish in these areas. BEFORE painting the trim pieces, instead of taping off the climate control symbols and turn signals… apply a thick layer of Vaseline (aka petroleum jelly) to them using a Q-tip. When done sanding and painting just use Q-tips to remove the protective layer of Vaseline. (tip came from lady at Pep boys – go figure)
4. I dissembled the trim from the car and doors. I first tried to remove the cf crap and glue using Gooff (for about 10 mins) from Home Depot. But that didn’t seem to work. (I think I used it incorrectly as I was scared it would ruin the pieces)
5. Wasted step! I then tried to sand off the glue, carbon fiber backer and plastic coating remaining. But this did not go too well and took too much time. Steps 3 and 4 cost me 3 days in the evening.
6. Tip #3 - I gave up and returned to the Gooff method. It would appear that Gooff does not harm the trim pieces. I tried it on one piece and let it sit on it for 3-4 hours. I Came back and run my fingers over the trim piece to see a nice thin layer of black plastic film. Hands down this has to be the fastest method without damaging any pieces. To the Utility Sink we go… the remaining film on the trim pieces were a cinch after this discovery… all stubborn layers were easily coaxed off using my thumbs or sanding paper and some lightly sprayed water. Be sure to sand all trim until smooth to the touch – if you leave something rough… it will show.
7. Get some good quality sanding Wet/Dry paper. I used 3M with 320 grit followed by 600 grit and then 800 grit.
8. When done with each sanding stage, wipe the trim with a damp cloth and then repeat for safety. When completely done, wash and dry your trim several times and let it dry in a covered and enclosed area. On my first couple of washes I used a light mix of dawn dishwashing liquid and water. Eventually, my last washes were with just water and a clean several clean rags.
9. For the painting process, I used: (a) 3 coats of dupli-color adhesion promoter/primer, (b) 4 coats of dupli-color matt black, and (c) 3 coats of SEM Low Luster Clear Coat. Follow the painting instructions religiously… or ELSE… yep…. You will have to start all over again.
10. TIP #4 – Start off by standing your paint cans in a bucket of warm water for at least 30 minutes and then start shaking….
11. Tip #5 – SEM makes a much better product- HANDS DOWN. If I had known this from the start, I would had used SEM throughout – so please don’t waste your money on any other type of paint - I should have evaluated the two properly before starting the project.
12. Tip #6 – DO NOT UNDER ANY CIRCUMSTANCES USE Dupli-Color Clear Coat paint to finish your work. It will damage your finished product and you will have to start all over again – TRUST ME ON THIS ONE…On my second attempt around, while I still used the dupli-color flat black, I finished the job off with the SEM Low Luster Clear Coat paint (yes, yes… I know its frowned upon to mix paints). I evaluated the SEM against the Dupli-Color and I can truly say the dupli-color was crap – it went on unevenly, damaged my prior paint job and was easy to scratch. SEM Clear Coats go on evenly and there were no uneven finishes.
13. Let the paint cure for a few days before mounting the trim back in the car. Wear gloves and place all trim on towels while re-assembling. Those pictures you took while disassembling the trim, dash and door will be mighty helpful at this stage.
I am truly happy with the results of my work – considering the parts purchase option would be around $1,200. Hands down, I would not hesitate to go this route again if I ever need to. Hope this helps anyone else.
BEFORE
AFTER
Last edited by Aarkaah; 12-06-17 at 04:52 PM.
Reason: full write-up
I have a 93 I have owned since new, and finally got around to refinishing the plastic trim which had turned to goo. ( Note: The cause of the finish deterioration was the use of Armor All. It took a while, but it eventually chemically changed to OEM finish.) I started the restoration with the center Console Panel since it was the easiest to remove. I had several chemicals in my workshop to choose from, but decided to start with Denatured Alcohol as the mildest of the choices. After testing it on the underside of the panel and found it did not attach the plastic, I wet a rag and began wiping the finish. SURPRISE! The old OEM finish wiped off slick as a whistle! Attached are photos of the finished panel after 10-15 minutes of wiping. Use plenty of alcohol and change to rag spot frequently, or you will just wipe the finish back on. The larger Rear Console also had some broken screw tabs that needed to be repaired. I picked up all the little pieces and carefully pieced them back together with the cyanoacrylate glue shown in the photo. The glue will practically weld the vinyl plastic parts together, but for added strength I used one layer of fiberglass cloth and 30 minute epoxy. Those tabs should last the life of the car. My apologies for the oversize photos, I have not yet figured out how to make sure photos are reasonably sized.
Just completed refinishing all the plastic bits and wanted to continbute to the thread. Above is a pic of all the products I used.
Oven cleaner got most of the original finish off and did not harm anything. I sprayed it and let it sit for a minute then scrubbed with a green scotch pad.
Once the the worst was removed I washed the panels with dawn dishwashing soap and let dry. After that there is only a thin residue left where I continued to scrub with rubbing alcohol to remove the rest.
Finally 400 and 800 grit sand to prep for painting.
It it really was not that bad and the results are amazing. Looks like new! I can�t say enough about SEM paint. There were moments when I thought I would have to restart and the paint leveled out nicely.
Bringing this back from the dead for some updates.
Zep commercial Heavy Duty Oven & Grill Cleaner the one in the white can was perfect in removing the 93 coating. Just spraying it on and hitting it with some high pressure water from the hose caused the paint to get soft and tear off. Helping it with a sponge caused it to kind of liquefy. Leaving behind a shiny undamaged black plastic. Ingredients in this Zep cleaner are 2-Butoxyethanol and Potassium hydroxide. It doesn't look like Zep sells this anymore.
Unfortunately this was an old can i had laying around and did not last long. I tried the Simple green heavy duty BBQ & grill cleaner and Great value heavy duty oven cleaner with no luck. Ended up having to finish the plastics I started with 400grit wet sanding.
Plan is to use SEM sand free and SEM Satin Black Color Coat
I wanted to add to this too.
93 sticky panels, the factory black coating was actually coming off and making my hands black.
Goof Off with blue shop towels. Magic eraser extra strength with water to clean it after the goof off. 400 grit, them 800 grit.
Dupli color adhesion promoter, and SEM satin blank finish.
how did you guys tape off the hvac control parts? Like the temp (blue and red dials) etc.
looks quite tricky to tape those small curved areas..
Originally Posted by ArmitageGVR4
Just completed all of my dash plastics. Ugh, what a horrible job it is removing all the '93 gunk. Took the opportunity to repair nicks, cracks, and broken mounting tabs as well. I'm pretty happy with how it all came out. Wish I had some before pictures because the sticky film had become pretty nasty in places.
some people put a thick layer of vaseline. dont quote me on that because I havent done it yet.
I tried that based on other posts, it didn't work so well.
If I was to try this again, I may just pull those pieces and order new ones from the place that makes Mazda gauge faces. They have the HVAC ones as well.
I tried that based on other posts, it didn't work so well.
If I was to try this again, I may just pull those pieces and order new ones from the place that makes Mazda gauge faces. They have the HVAC ones as well.
It's best to pull them. Try and heat them up to melt the glue. If they break you can order new ones as suggested. I was lucky and had a replacement panel already and the pieces came apart without any issues.
It's best to pull them. Try and heat them up to melt the glue. If they break you can order new ones as suggested. I was lucky and had a replacement panel already and the pieces came apart without any issues.
got them off� but where would or could we order new ones?
 01-17-16, 09:55 PM