87 TII interior restoration
 02-07-09, 09:52 PM
#1
mmm doritos
Thread Starter
iTrader: (4)
Join Date: Apr 2006
Location: lancaster PA
Posts: 2,107
Likes: 0
Received 0 Likes
on
0 Posts
Hello everyone, I've decided to do this write up on the full interior restoration of my 87 TII, i hope this will be interesting and give others some ideas or let you know what all is involved in doing this, id also like this to inspire others to restore they're RX7.
so lets get started with telling you a little about the car. I bought this car used from a local about 4 years ago, it was completely stock except for a lot of butchered wiring on the interior for gauges, turbo timer and a boost controller. i fell in love with the car the second i drove it so i knew there was a future of extensive modification that would have to be done to the car. So ill skip a lot of the engine/exterior mods as id like to focus this on the interior. but i will tell you that this car has a lot of engine modification bringing it up to 420+ WHP, it runs 11's all day at the track so the engine was done and i wanted to move onto the hideous red/faded maroon look of the interior.
I started by gutting the interior and planning on what i wanted it to look like when i was done. I knew i was going to be running this car at the track alot as well as on the street so i had to find a way to balance out the two factors. In the end i decided to install a 8 point roll cage. so with the inside gutted all but the dash i rolled it over to a friends garage for the roll bar installation. i purchased a roll bar kit from JEGS and used that to base the cage on. we changed a few things up to get what we wanted out of it. And im pretty happy with the way it turned out.
[IMG]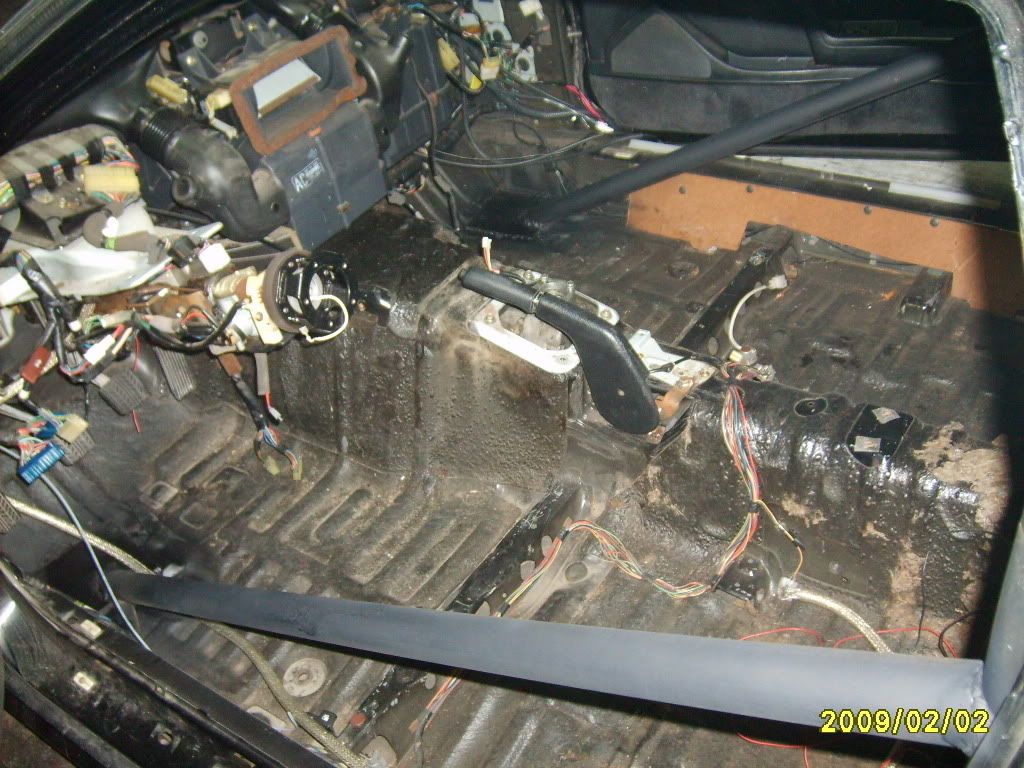 [/IMG]
[IMG]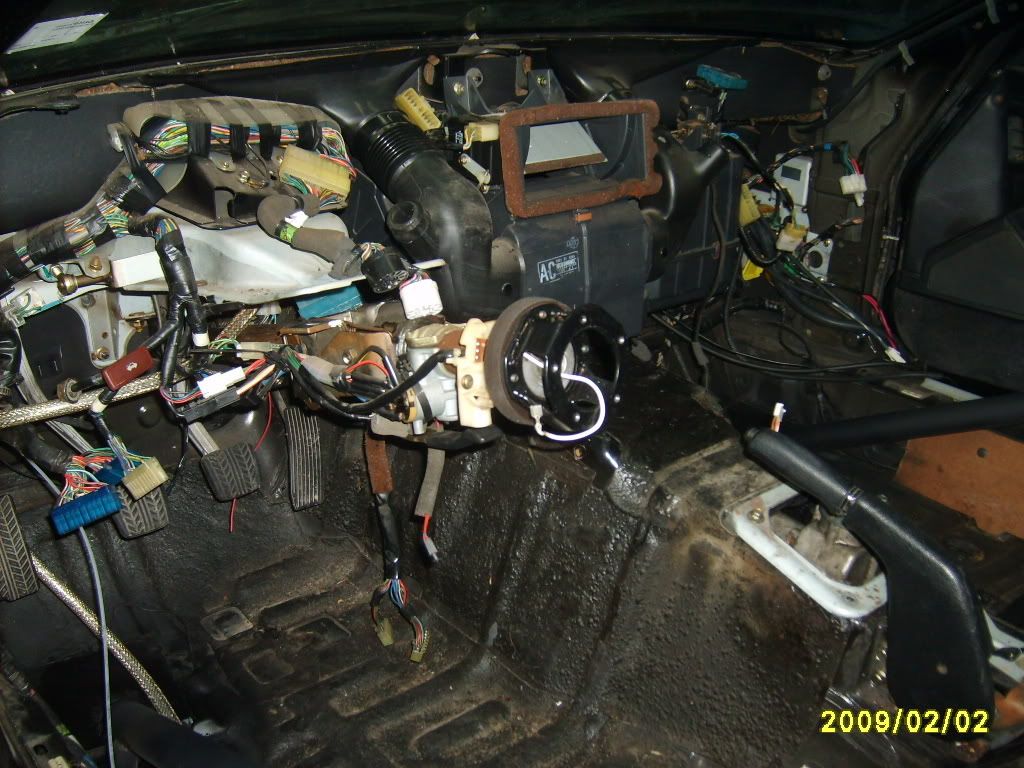 [/IMG]
[IMG]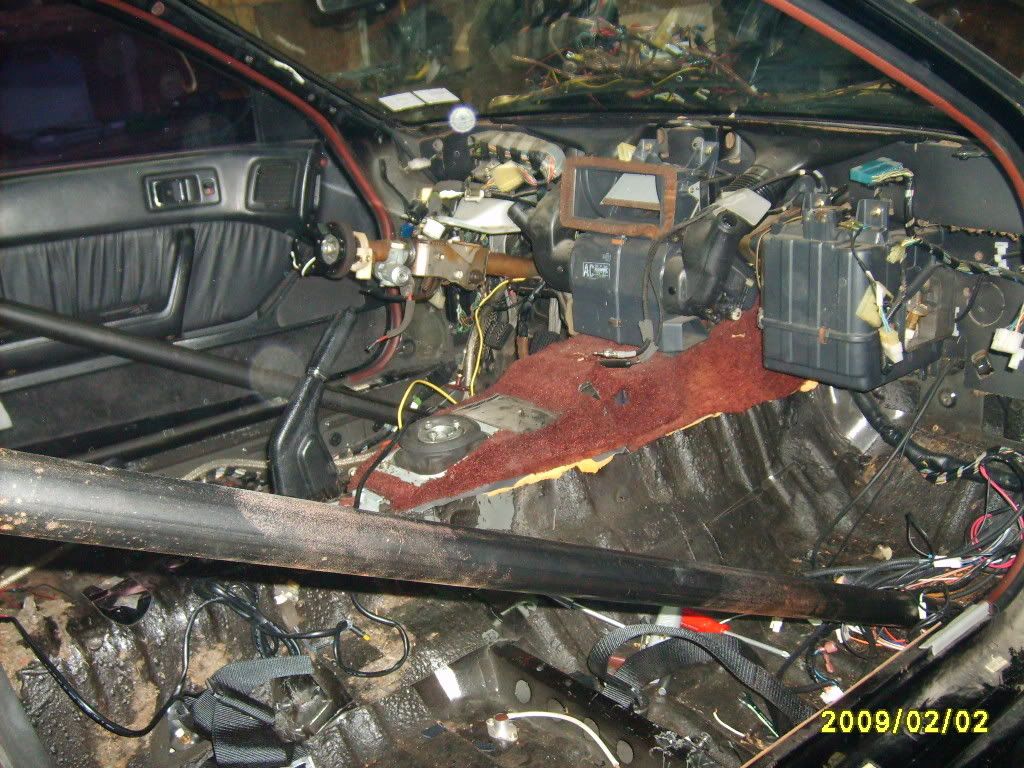 [/IMG]
[IMG]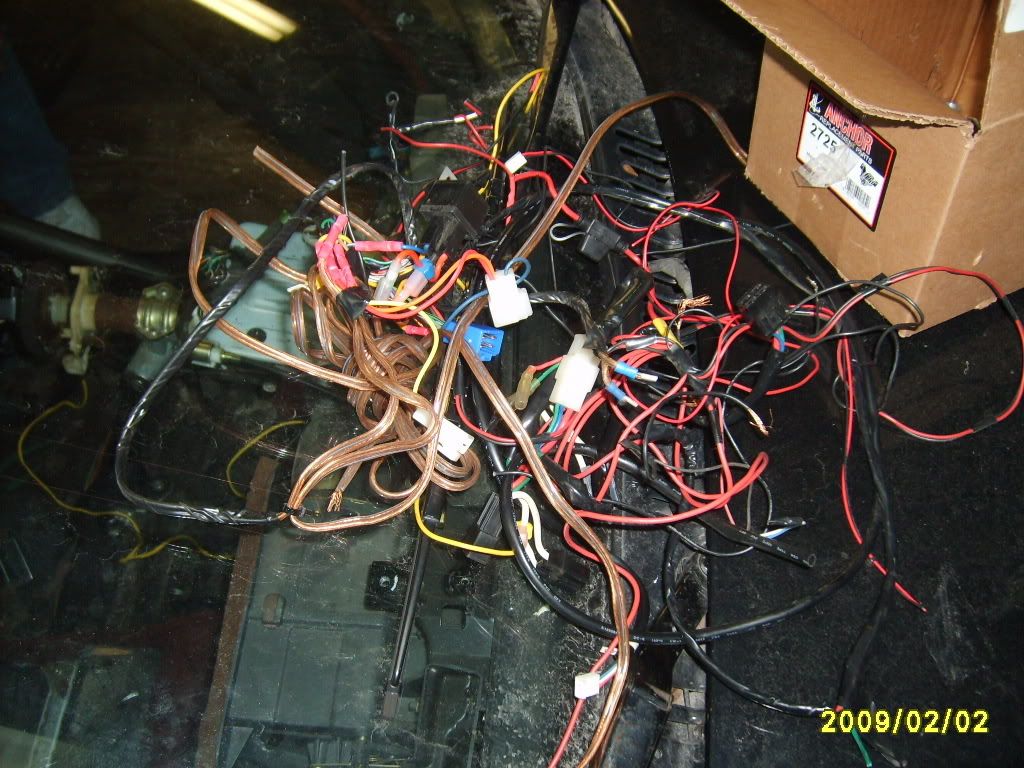 [/IMG]
[IMG]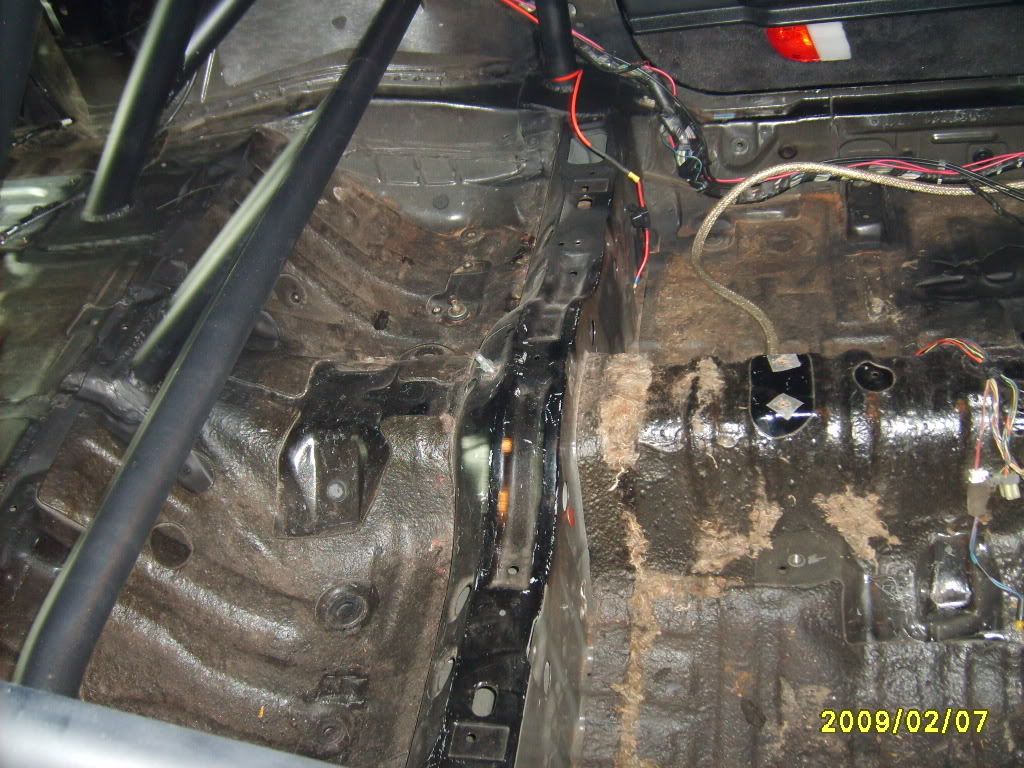 [/IMG]
[IMG]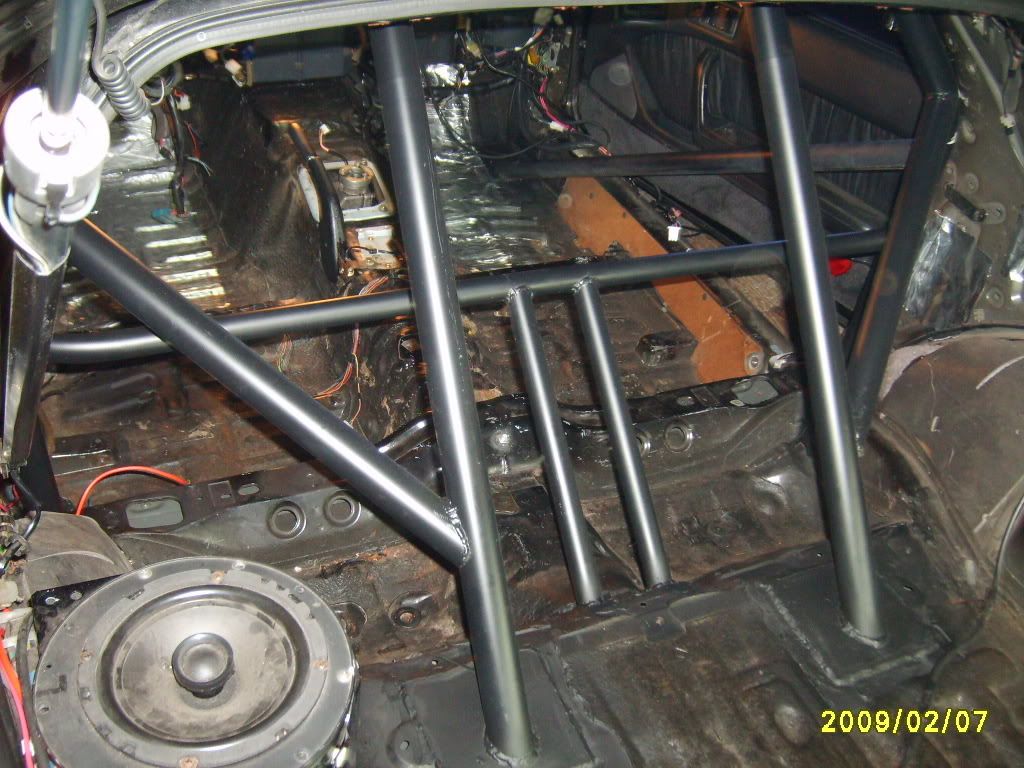 [/IMG]
Then came the huge task of gathering new and used black parts for the new interior. it took me a long time and ALOT of money to get everything i needed. i started with the seats. i bought a nice set of corbeau A1 black microsuede racing seats that would accommodate the SFI approved 5 point harnesses.
I then purchased a black dash, door panels and other plastic panels/covers. I found a OEM black carpet for the front and cargo area. i got an amazing deal on this carpet, the women i bought it from only had it in her car for about a year before the motor in the car blew and she decided to get rid of the car. She told me that she bought this carpet brand new from mazda japan because mazda usa could not even source this item. she paid $1400 for this carpet and it was in the car less then a year, i paid the amazingly low price of $275 for it!! i was very happy about getting this deal because i can tell you when it comes to carpet in these cars you do not want to go with anything but the OEM if your looking to have it look very nice and last for a long time. the big problem with the aftermarket carpets is they don't have the very thick foam underneath that is moulded to the floorboards, without this foam you will never get the carpet to fit and look original. I was also able to get a brand new OEM black headliner that was purchased at the same time the carpet was, she paid $475 for it and i paid $50 for it a year later, both the carpet and headliner were flawless with no damage or any signs of wear.
And so the restoration began. I started by cutting out every wire under the dash that was not factory, and i can tell you it was one heck of a rats nest. I then moved on to laying down some sound deadening material. i purchased this from secondskinaudio, they make some great products.
[IMG]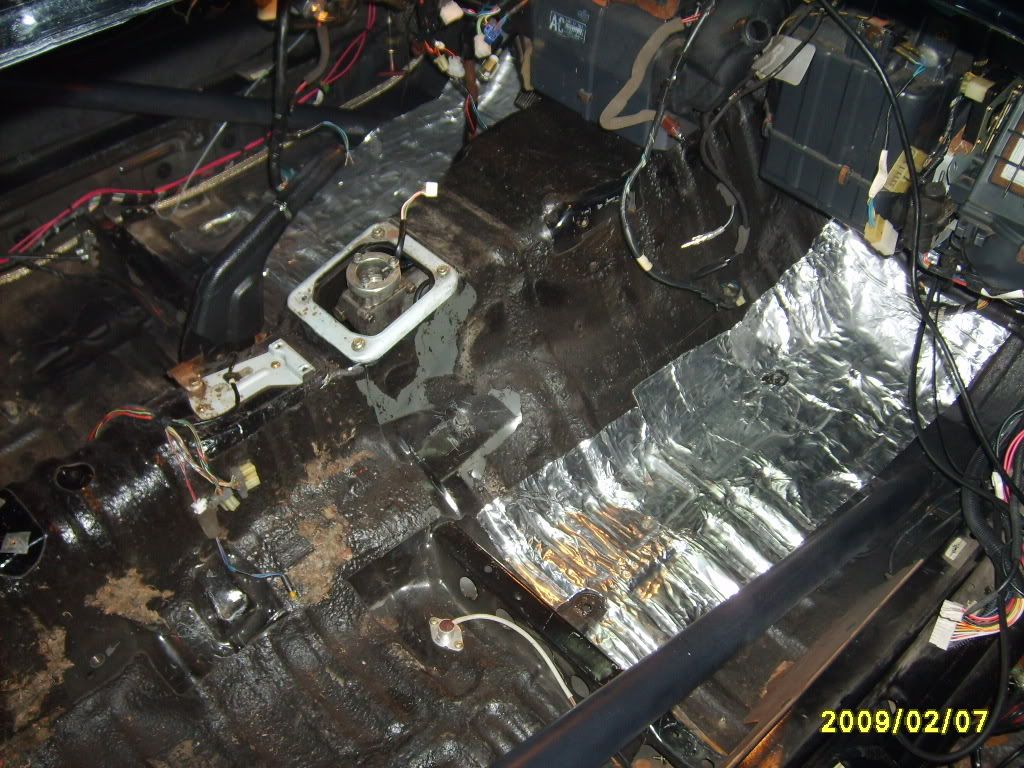 [/IMG]
It was time to move onto the fiberglass structures for the cargo bins behind the seats. i would have to cut these to fit them in around the rollcage. it was fairly easy to do this, i just measured and cut until they fit perfectly. then i could start installing the rear panels and cargo carpet. the carpet needed to be trimmed as well to fit around the roll cage. I took my time and was very careful with this step because one wrong cut and it would look really bad. In the end it turned out beautifully.
[IMG]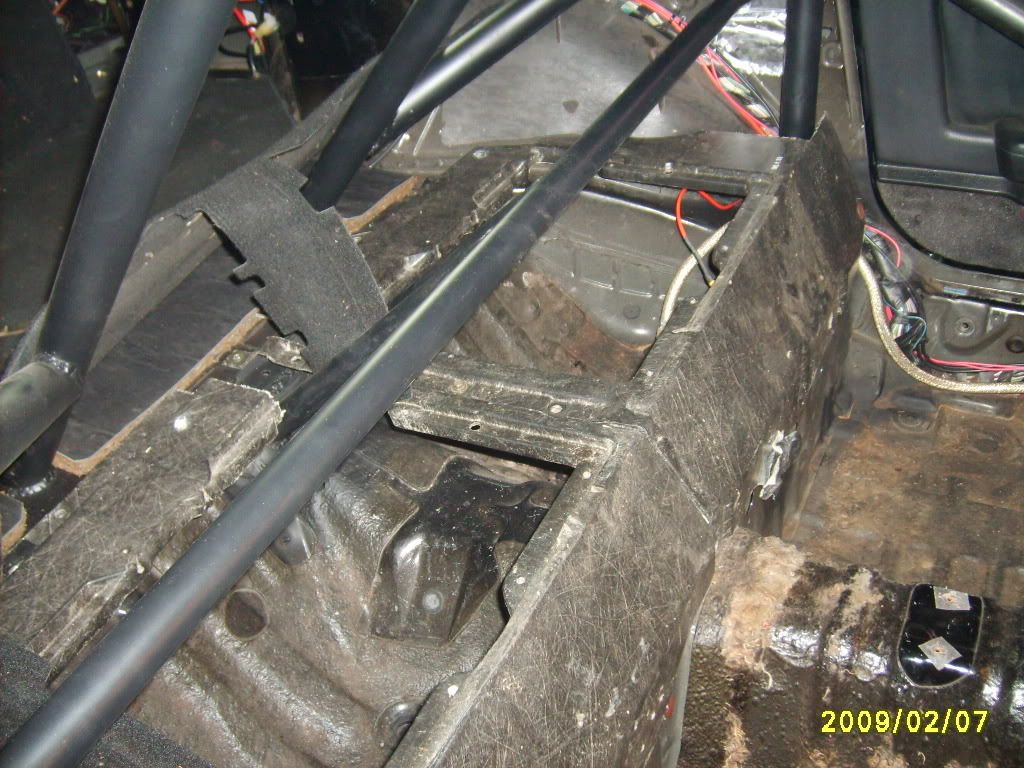 [/IMG]
[IMG]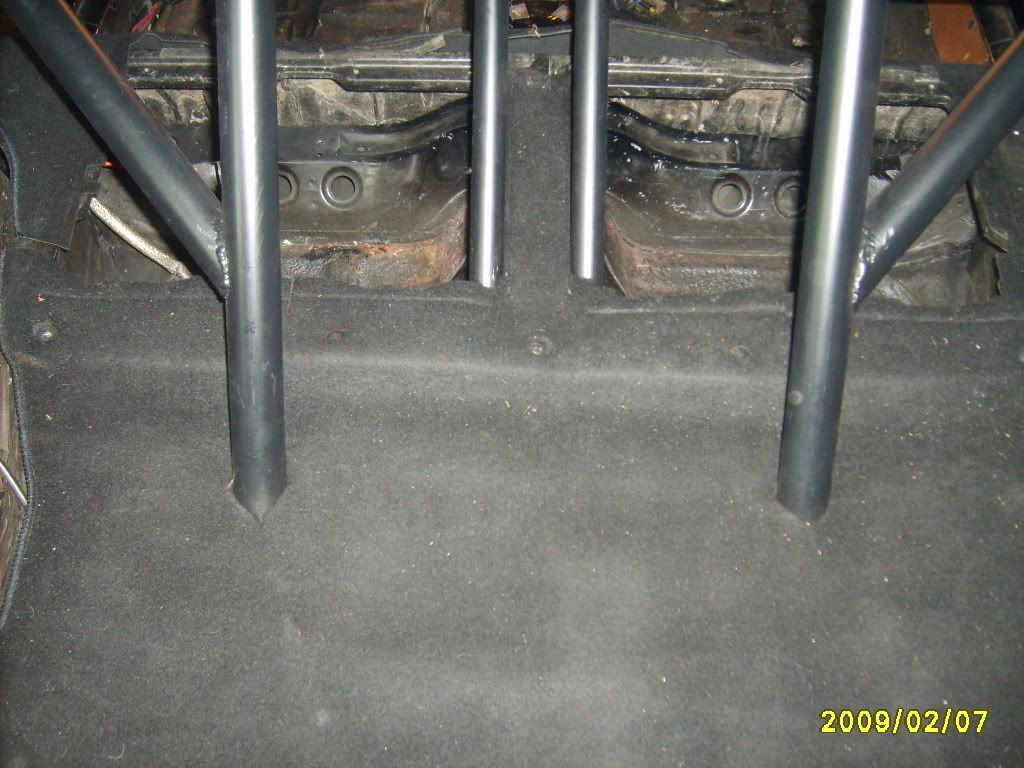 [/IMG]
I then started installing the front carpet. this was fairly easy and straight forward. the only problem was once again it needed to be trimmed to fit around the side bars of the cage where they meet the floor in the footwell area. This was quite difficult but you just have to measure and take your time.
[IMG]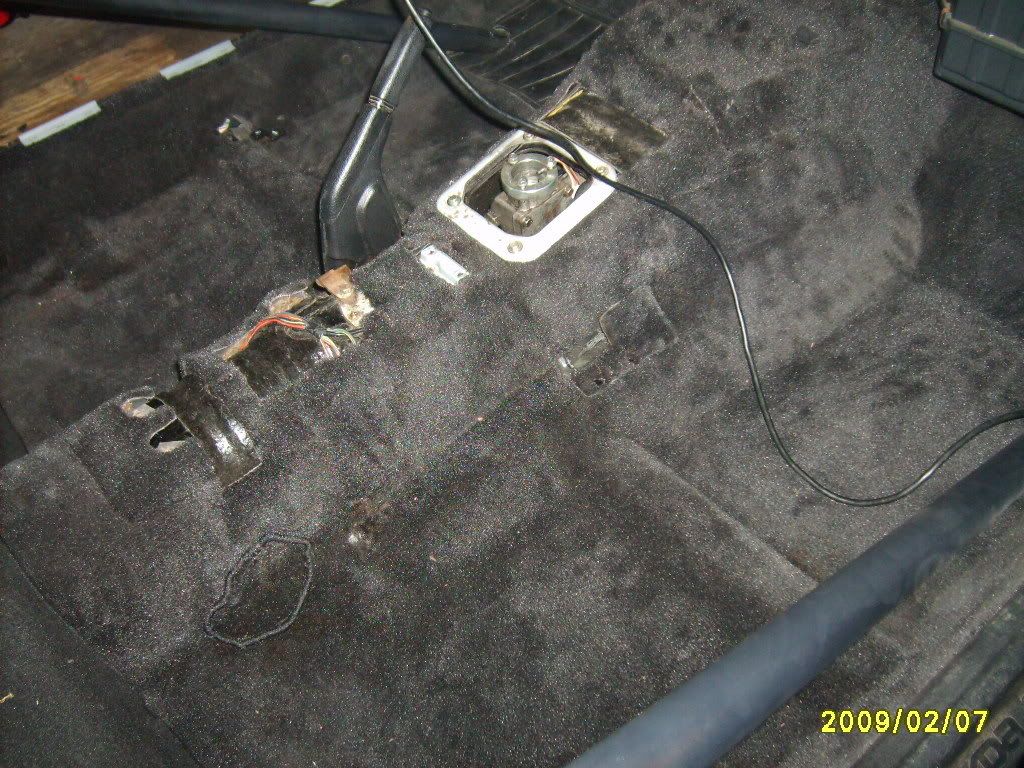 [/IMG]
[IMG]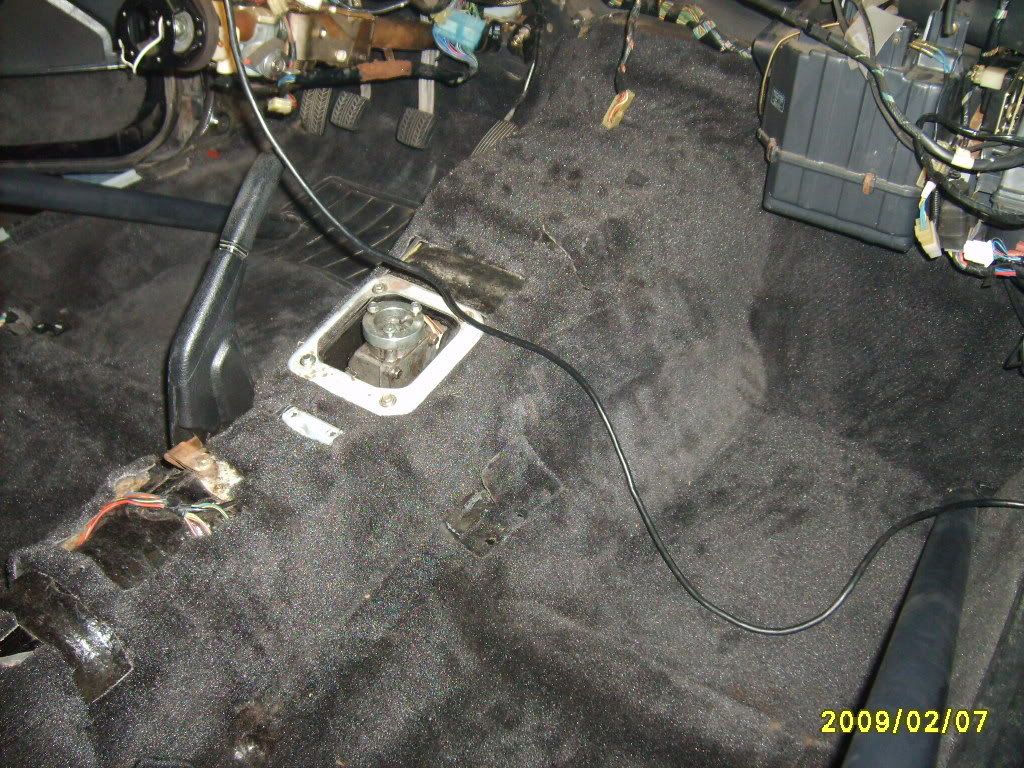 [/IMG]
so this is as far as I've gotten so far, i look forward to posting updates as the project moves along. i will keep you all posted
so lets get started with telling you a little about the car. I bought this car used from a local about 4 years ago, it was completely stock except for a lot of butchered wiring on the interior for gauges, turbo timer and a boost controller. i fell in love with the car the second i drove it so i knew there was a future of extensive modification that would have to be done to the car. So ill skip a lot of the engine/exterior mods as id like to focus this on the interior. but i will tell you that this car has a lot of engine modification bringing it up to 420+ WHP, it runs 11's all day at the track so the engine was done and i wanted to move onto the hideous red/faded maroon look of the interior.
I started by gutting the interior and planning on what i wanted it to look like when i was done. I knew i was going to be running this car at the track alot as well as on the street so i had to find a way to balance out the two factors. In the end i decided to install a 8 point roll cage. so with the inside gutted all but the dash i rolled it over to a friends garage for the roll bar installation. i purchased a roll bar kit from JEGS and used that to base the cage on. we changed a few things up to get what we wanted out of it. And im pretty happy with the way it turned out.
[IMG]
[/IMG][IMG]
[/IMG][IMG]
[/IMG][IMG]
[/IMG][IMG]
[/IMG][IMG]
[/IMG]Then came the huge task of gathering new and used black parts for the new interior. it took me a long time and ALOT of money to get everything i needed. i started with the seats. i bought a nice set of corbeau A1 black microsuede racing seats that would accommodate the SFI approved 5 point harnesses.
I then purchased a black dash, door panels and other plastic panels/covers. I found a OEM black carpet for the front and cargo area. i got an amazing deal on this carpet, the women i bought it from only had it in her car for about a year before the motor in the car blew and she decided to get rid of the car. She told me that she bought this carpet brand new from mazda japan because mazda usa could not even source this item. she paid $1400 for this carpet and it was in the car less then a year, i paid the amazingly low price of $275 for it!! i was very happy about getting this deal because i can tell you when it comes to carpet in these cars you do not want to go with anything but the OEM if your looking to have it look very nice and last for a long time. the big problem with the aftermarket carpets is they don't have the very thick foam underneath that is moulded to the floorboards, without this foam you will never get the carpet to fit and look original. I was also able to get a brand new OEM black headliner that was purchased at the same time the carpet was, she paid $475 for it and i paid $50 for it a year later, both the carpet and headliner were flawless with no damage or any signs of wear.
And so the restoration began. I started by cutting out every wire under the dash that was not factory, and i can tell you it was one heck of a rats nest. I then moved on to laying down some sound deadening material. i purchased this from secondskinaudio, they make some great products.
[IMG]
[/IMG]It was time to move onto the fiberglass structures for the cargo bins behind the seats. i would have to cut these to fit them in around the rollcage. it was fairly easy to do this, i just measured and cut until they fit perfectly. then i could start installing the rear panels and cargo carpet. the carpet needed to be trimmed as well to fit around the roll cage. I took my time and was very careful with this step because one wrong cut and it would look really bad. In the end it turned out beautifully.
[IMG]
[/IMG][IMG]
[/IMG]I then started installing the front carpet. this was fairly easy and straight forward. the only problem was once again it needed to be trimmed to fit around the side bars of the cage where they meet the floor in the footwell area. This was quite difficult but you just have to measure and take your time.
[IMG]
[/IMG][IMG]
[/IMG]so this is as far as I've gotten so far, i look forward to posting updates as the project moves along. i will keep you all posted
 02-08-09, 07:19 AM
#3
mmm doritos
Thread Starter
iTrader: (4)
Join Date: Apr 2006
Location: lancaster PA
Posts: 2,107
Likes: 0
Received 0 Likes
on
0 Posts
thanks.. those pictures dont even do it justice, the carpet looks much cleaner and alot darker in person..the pictures kind of make it look gray..
02-08-09, 09:20 PM
#6
mmm doritos
Thread Starter
iTrader: (4)
Join Date: Apr 2006
Location: lancaster PA
Posts: 2,107
Likes: 0
Received 0 Likes
on
0 Posts
so today i finished some under dash wiring and re foamed all the HVAC boxes and ducts. then swapped everything from the old dash over to the new black dash. this step was fairly easy but there was at least 40 screws holding the metal dash framing and the plastic ducts.
[IMG]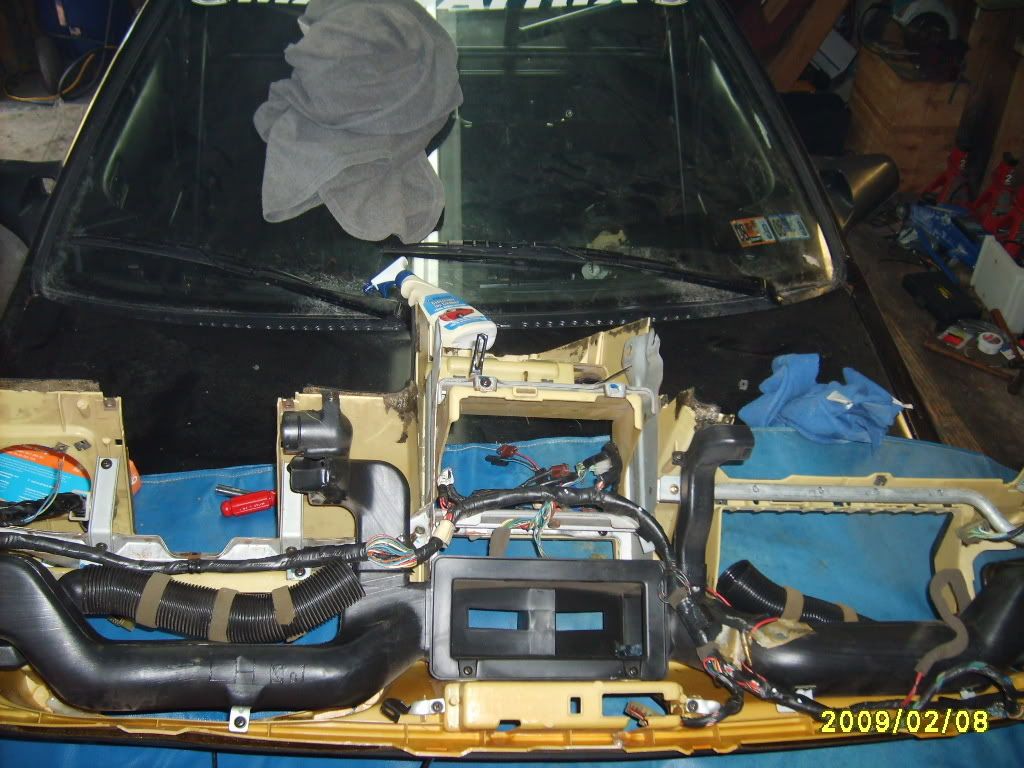 [/IMG]
[IMG]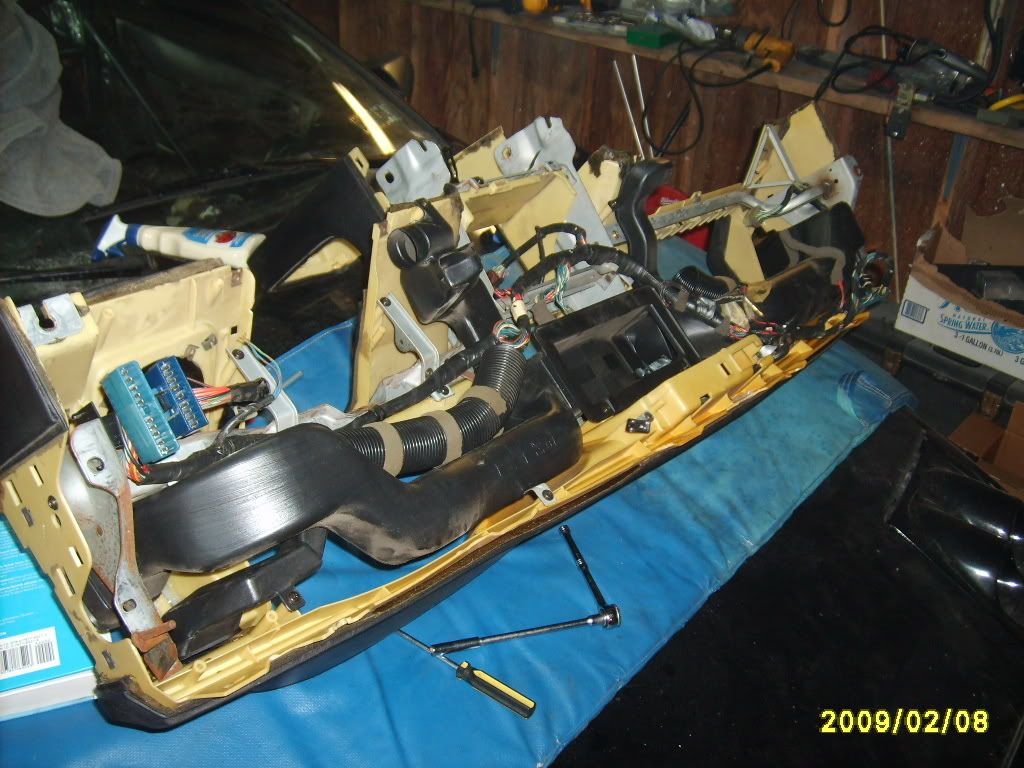 [/IMG]
[IMG]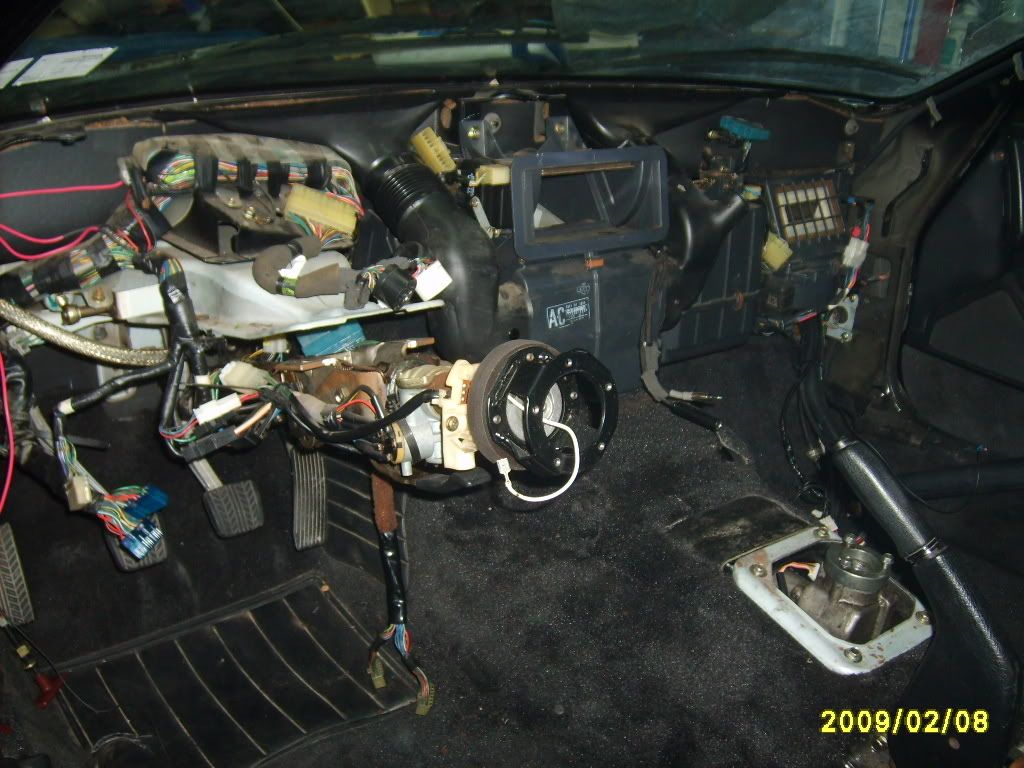 [/IMG]
[IMG]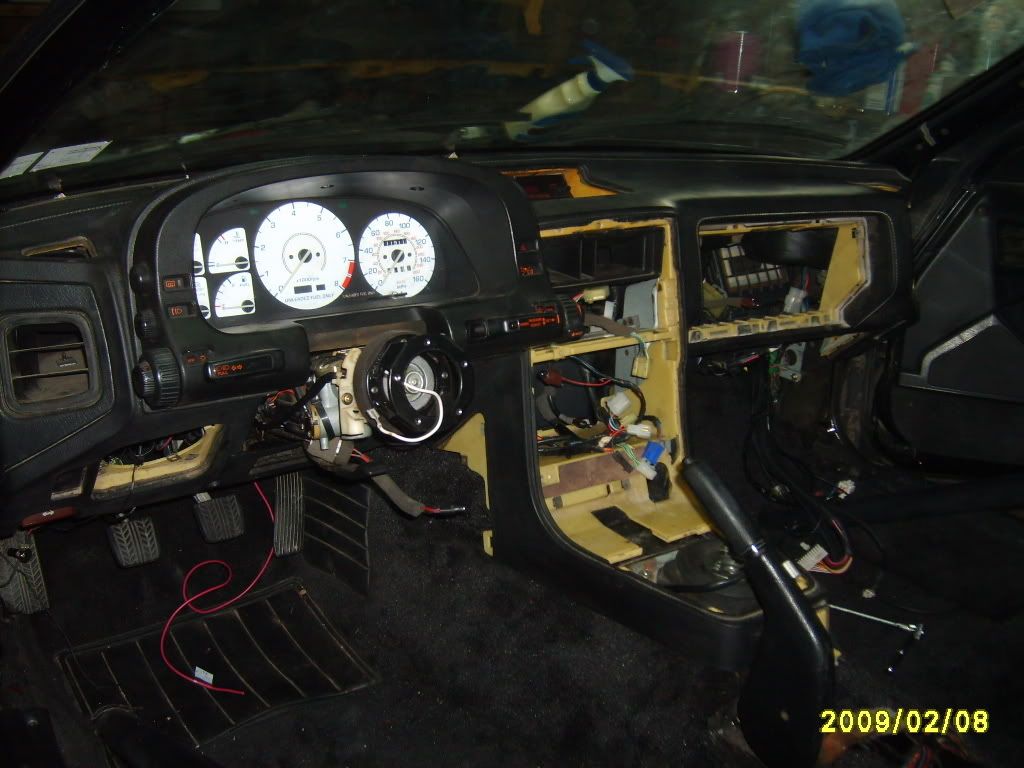 [/IMG]
[IMG]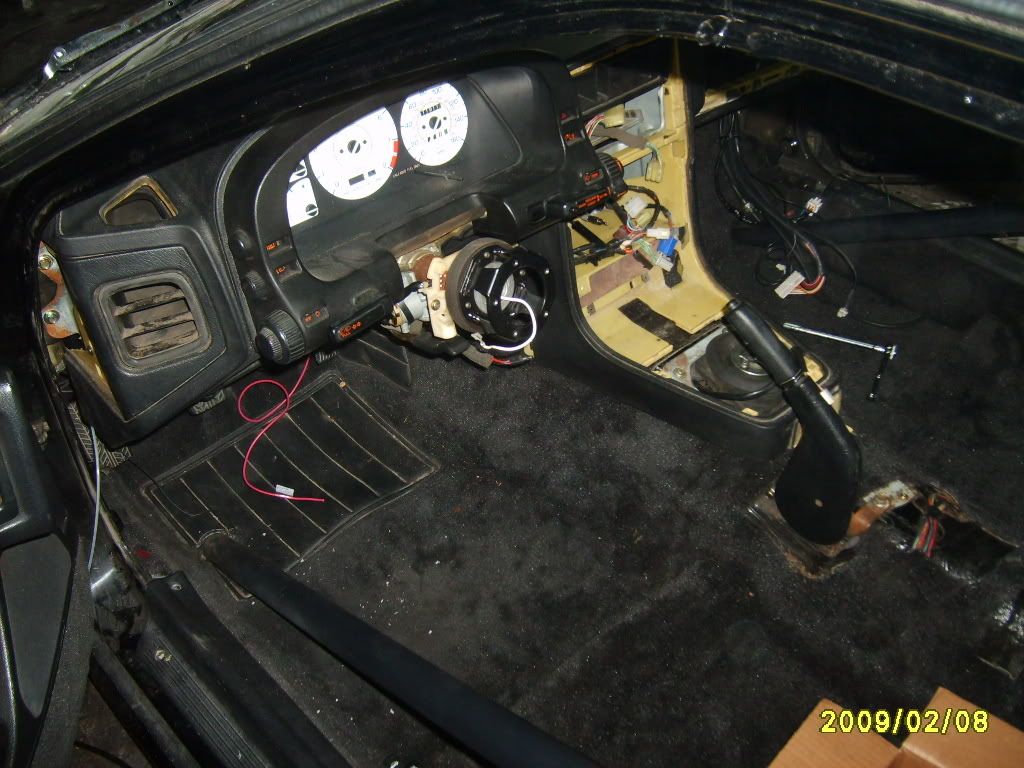 [/IMG]
[IMG]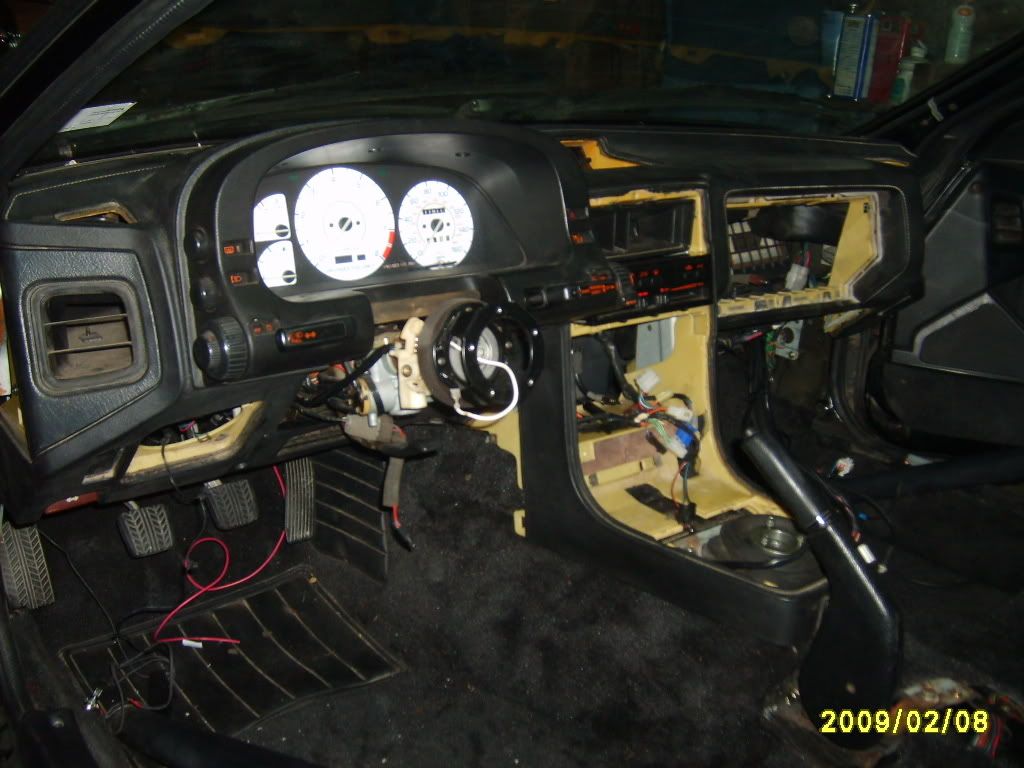 [/IMG]
[IMG]
[/IMG][IMG]
[/IMG][IMG]
[/IMG][IMG]
[/IMG][IMG]
[/IMG][IMG]
[/IMG]
Trending Topics
02-09-09, 02:45 PM
#8
mmm doritos
Thread Starter
iTrader: (4)
Join Date: Apr 2006
Location: lancaster PA
Posts: 2,107
Likes: 0
Received 0 Likes
on
0 Posts
lol.. no this is kind of just one of my project cars. i also have a 70 monte carlo i restored, a 88 rx7 vert and i also have a rx8. it took me 6 years and about 20k to get it to where it is now. everything on it is mint except for the paint job which is coming after the interior..

Thread
Thread Starter
Forum
Replies
Last Post
mulcryant
2nd Generation Specific (1986-1992)
10
09-09-15 05:24 PM
acha3
2nd Generation Specific (1986-1992)
7
09-06-15 08:14 AM
Nosferatu
2nd Generation Specific (1986-1992)
7
09-05-15 02:13 PM