Schmitty's "Like it or Don't" Drift Build
 10-04-12, 09:56 PM
#1
Schmitty's "Like it or Don't" Drift Build
So I spend a lot of time lurking in this section but never really post anything... so Here's a photo recap of my first full year of this thing you guys are calling drifting... cross posted from my local drift forum.
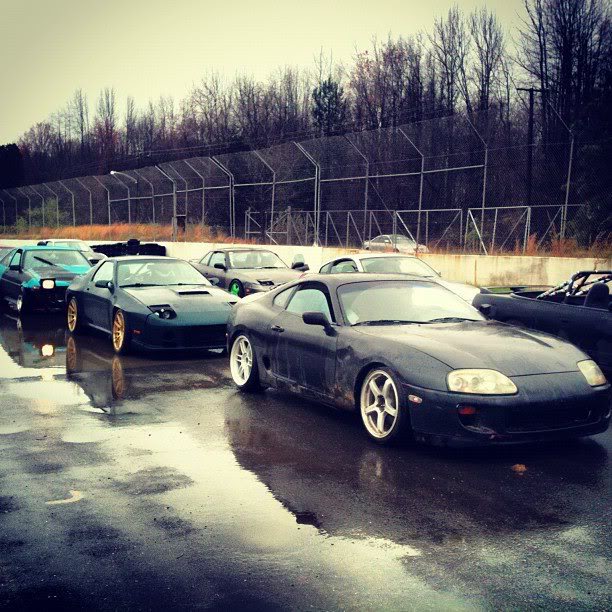
At the end of 2011 I was gearing up to convert my S5 NA into a drift car... but as soon as I had put together a budget for the build and was ready to start ordering parts a semi-local car popped up on ebay...
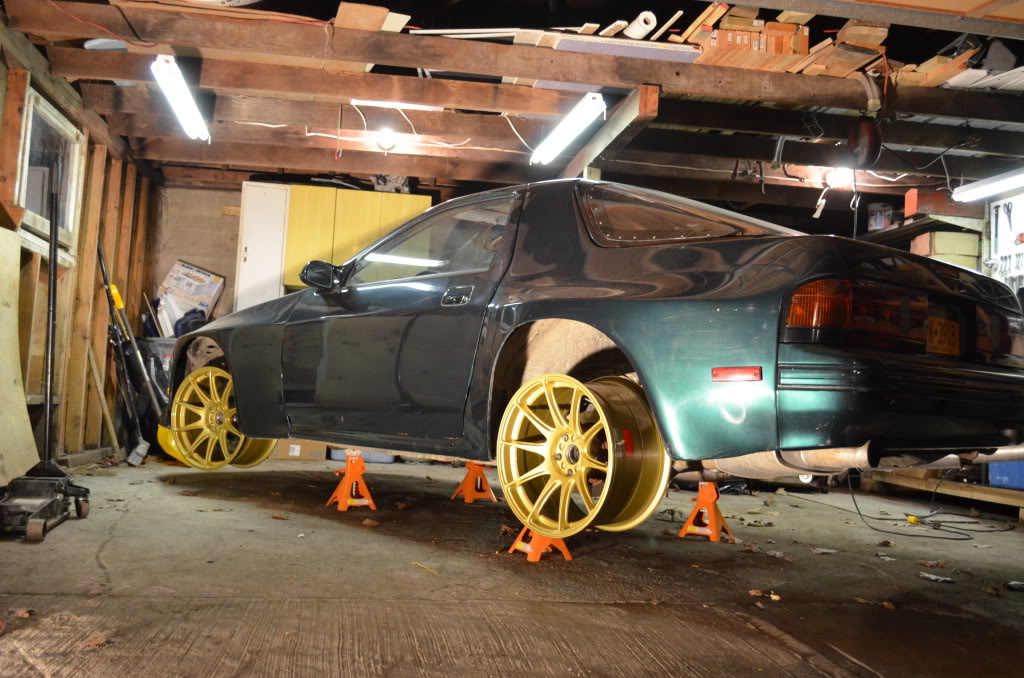
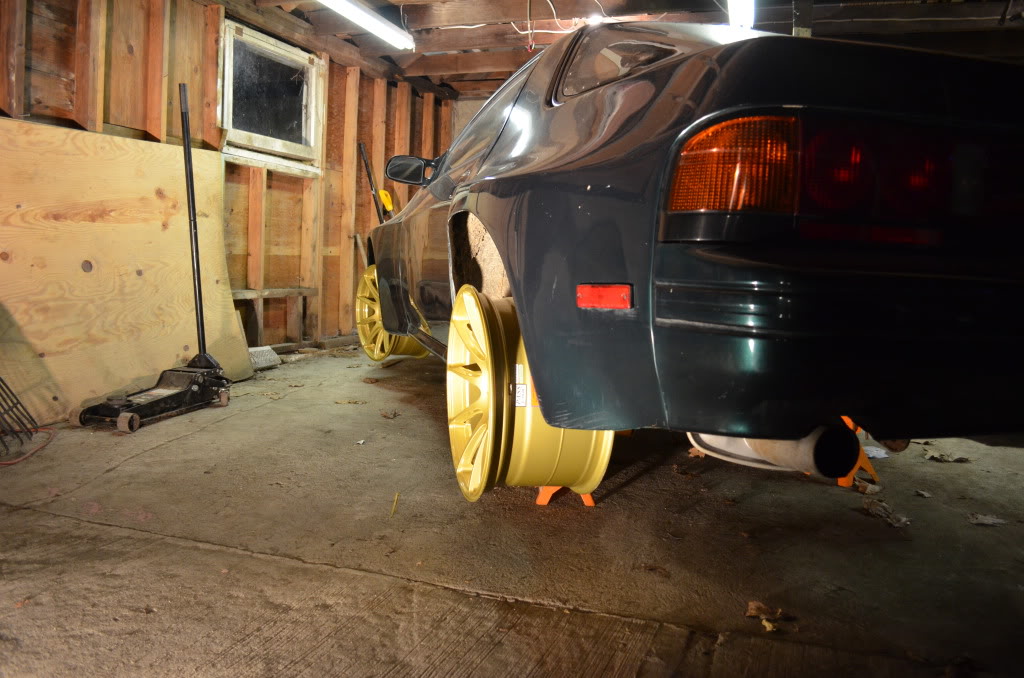
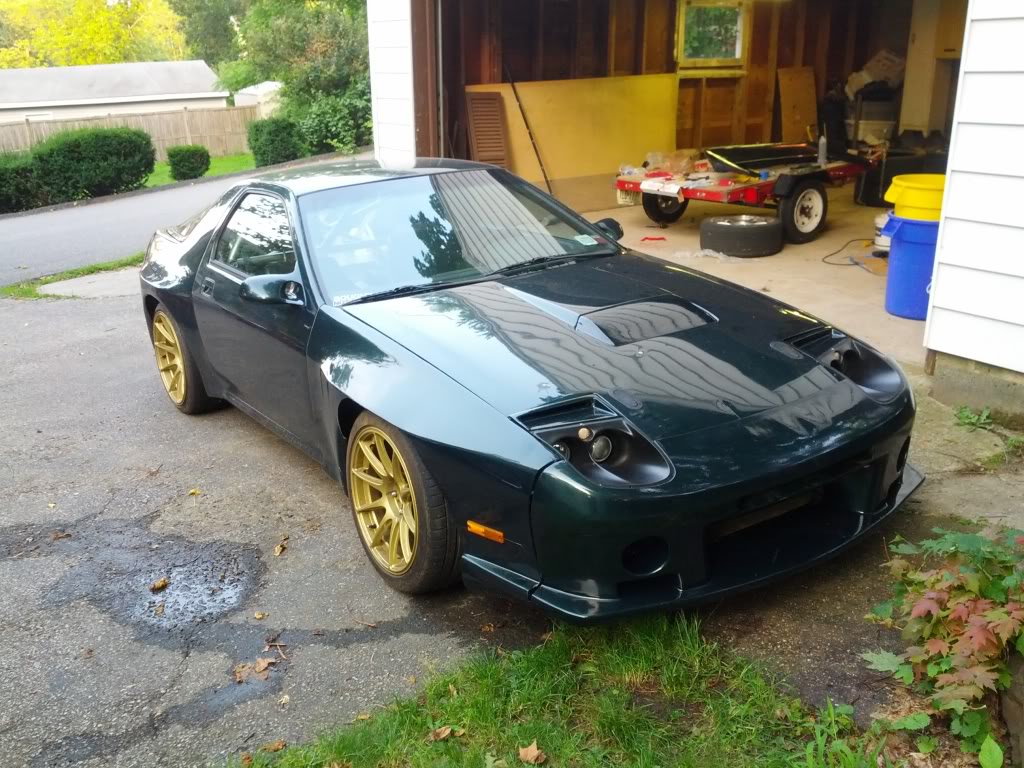
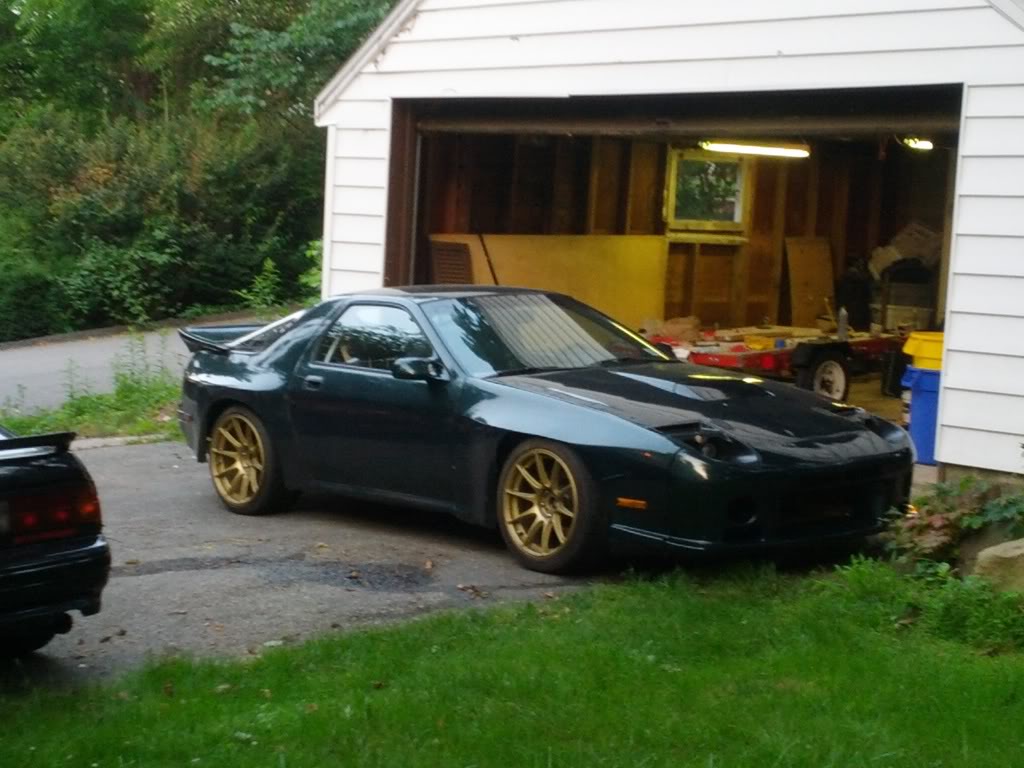
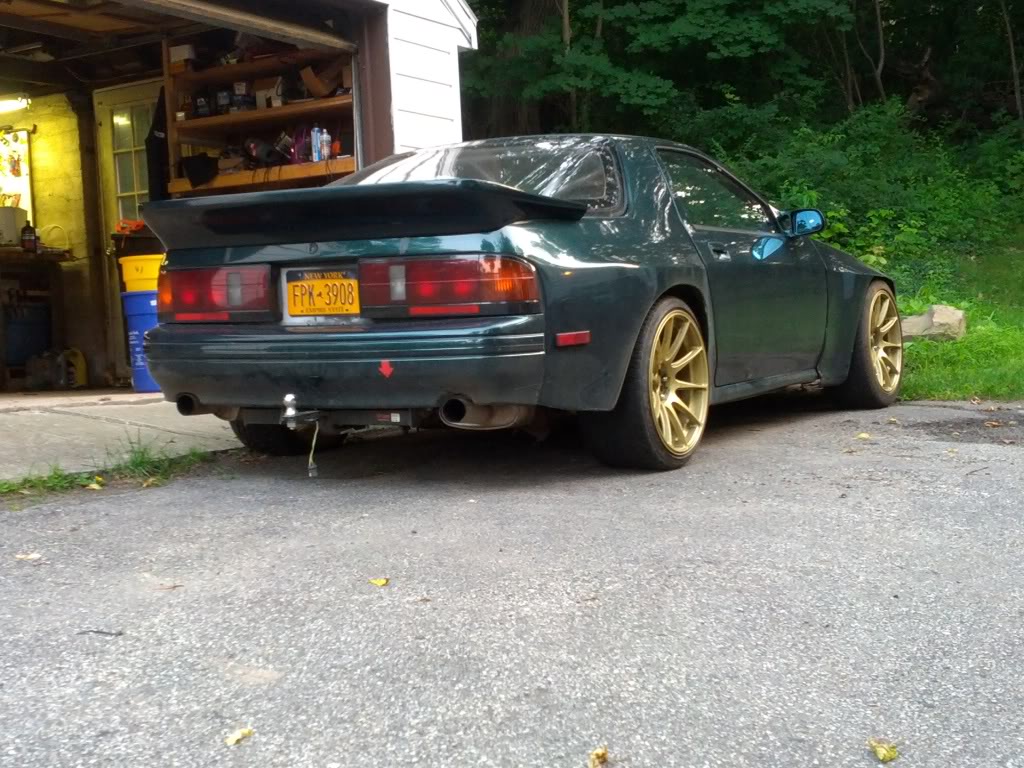
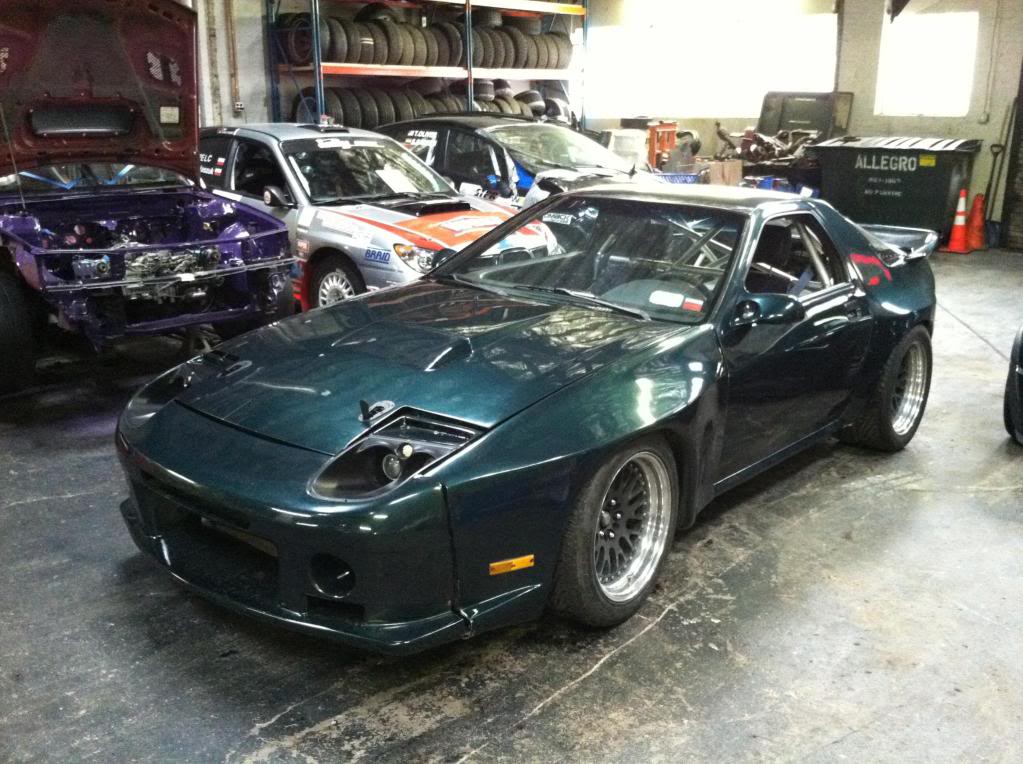
Like every car guy, I've been given 2 pieces of advice... "Never buy another Man's project, it will never run right' and "Never build your own track car... buy a complete one, for cheap, after it has bankrupted the builder/ previous owner." I usually stick to the first piece of advice... but late last year I dove head first into the 2nd piece of advice and bought this:
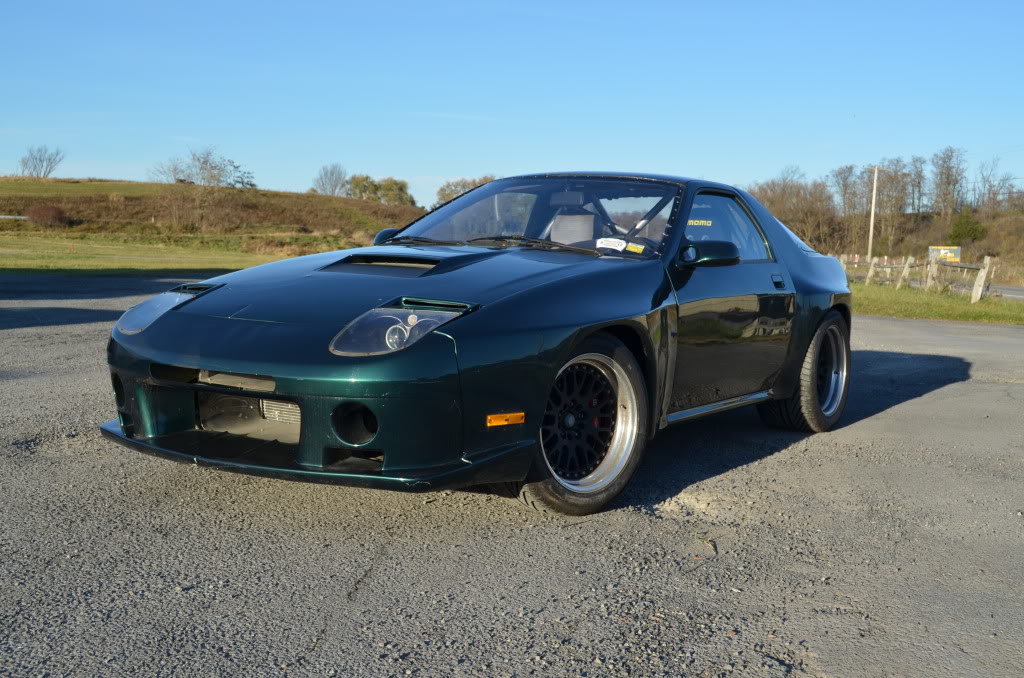
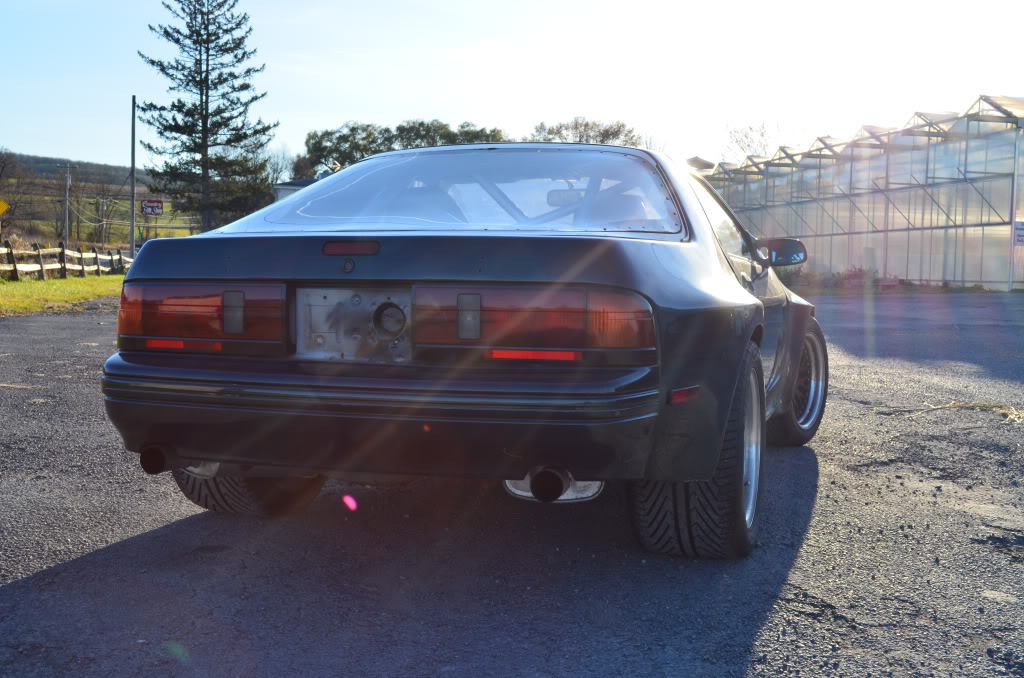
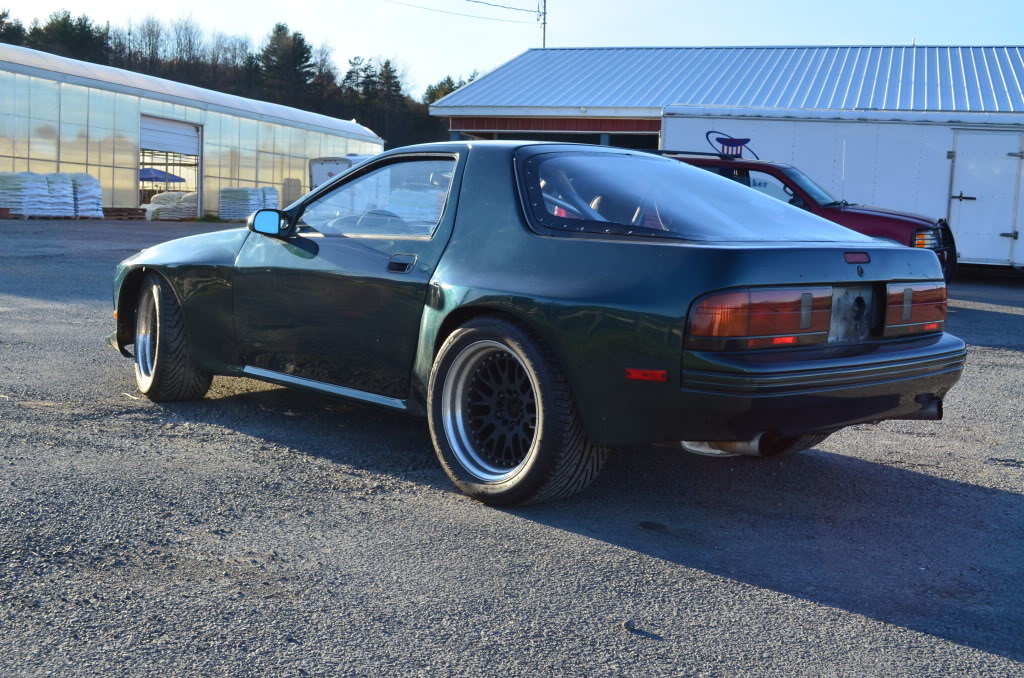
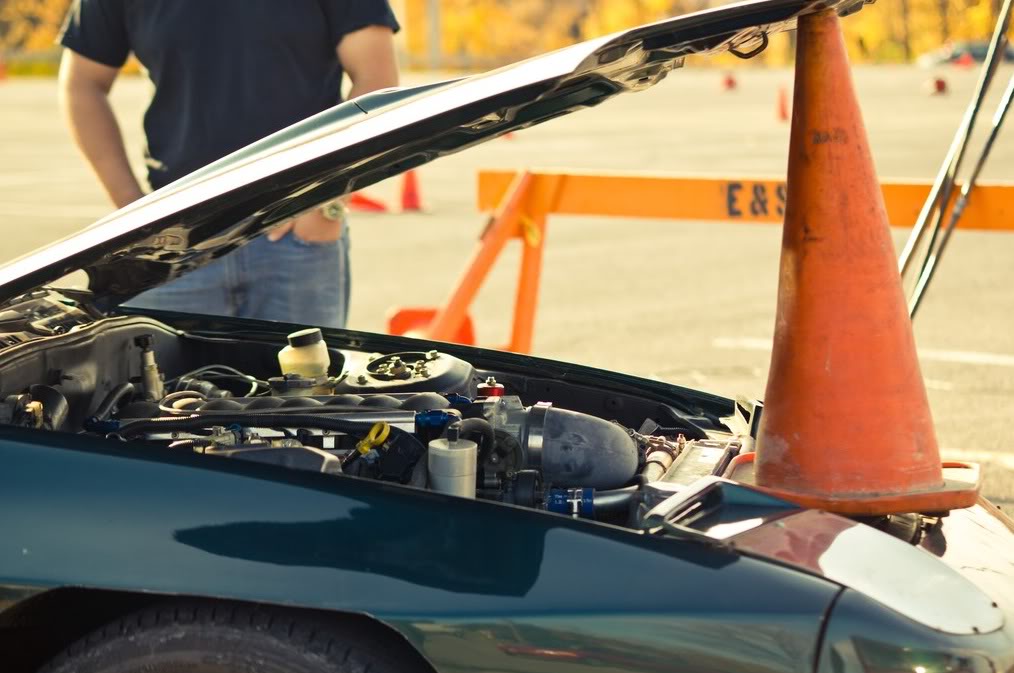
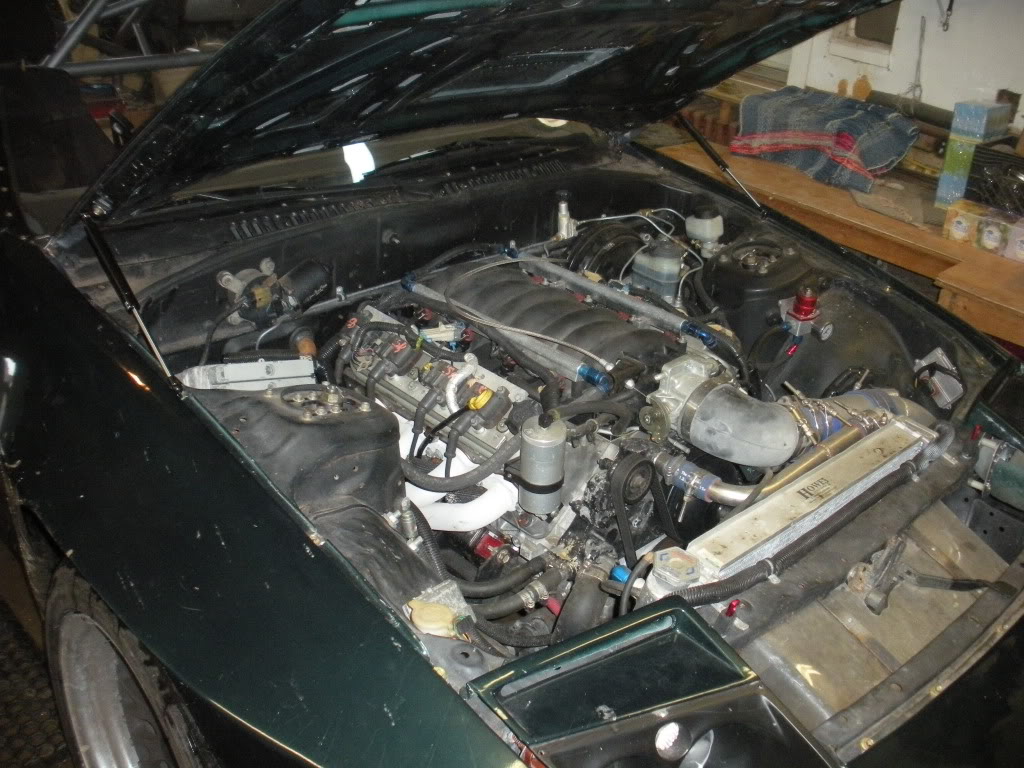
So long, Rotary... Hello Torque 8)
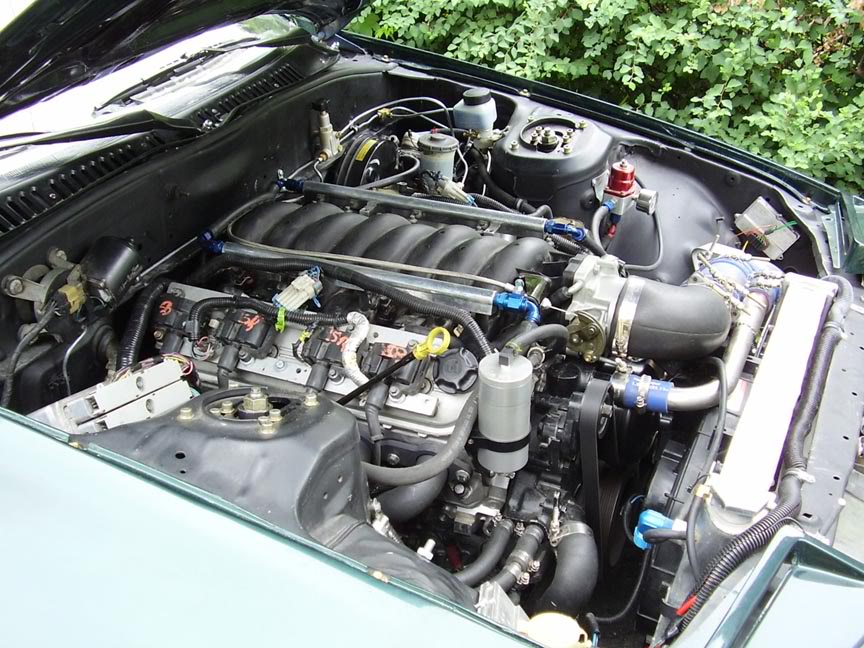
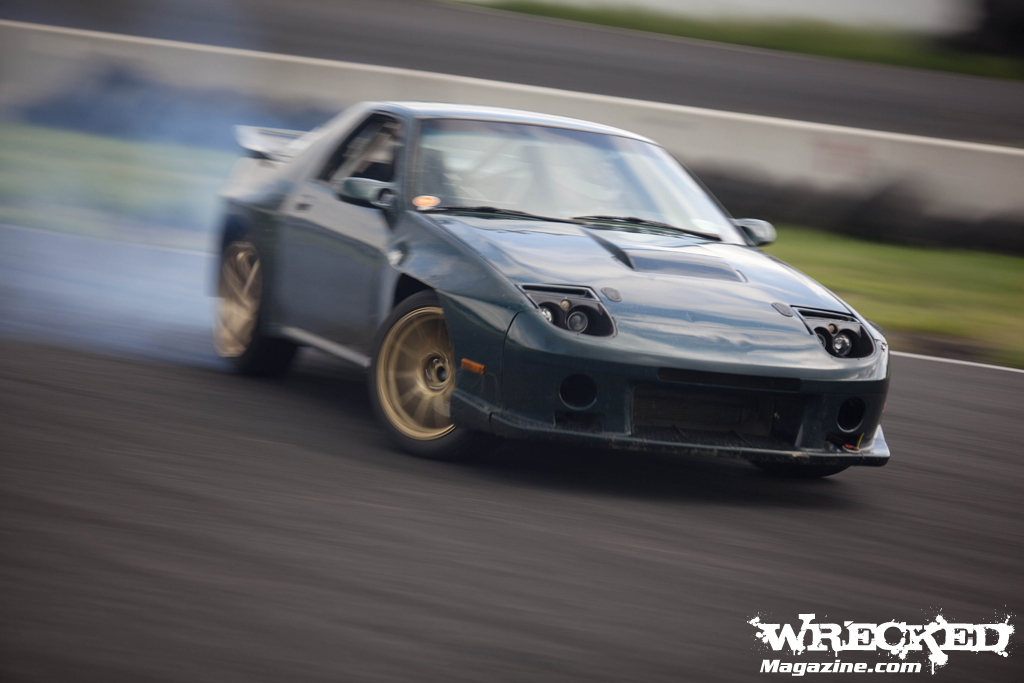
This car is super quick... it fights for traction on the 335 wide tires. The previous owner claims it has just over 400whp on his tune... and after driving it, I believe him. I'm going to spend the winter cleaning up the many loose ends in the car and tweaking it for my needs to have it ready to rock next spring.
Parts list from the previous owner:
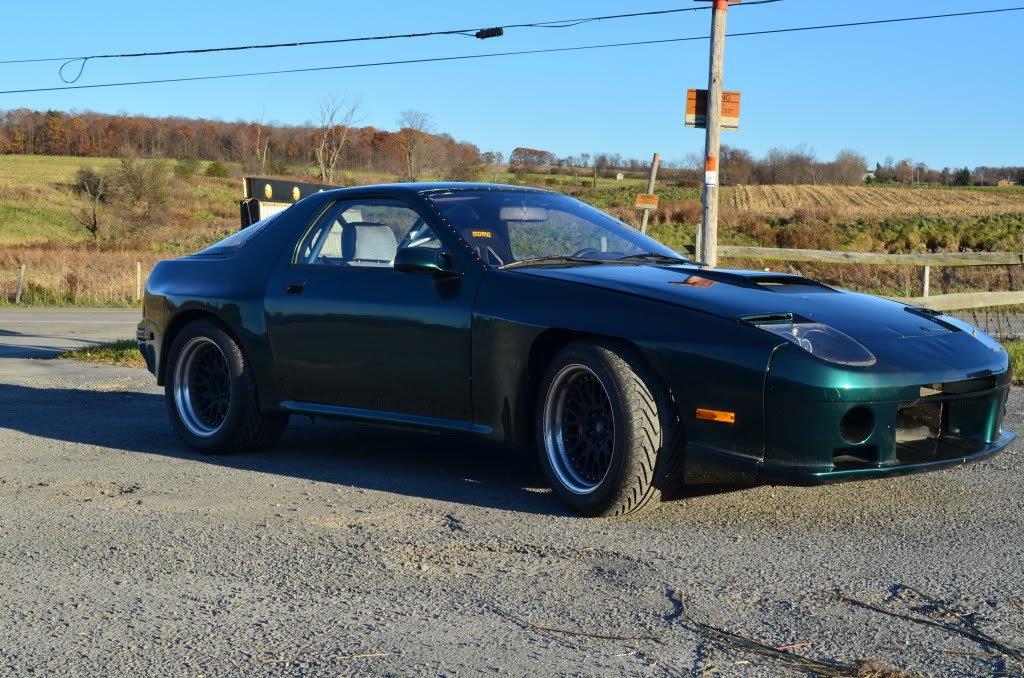
- tri-point wide body (85mm Wider Front 80mm Rear)
- CCW 17x10" wheels up front, 17x11" in rear. 285/335 width Michelin Pilot Sports
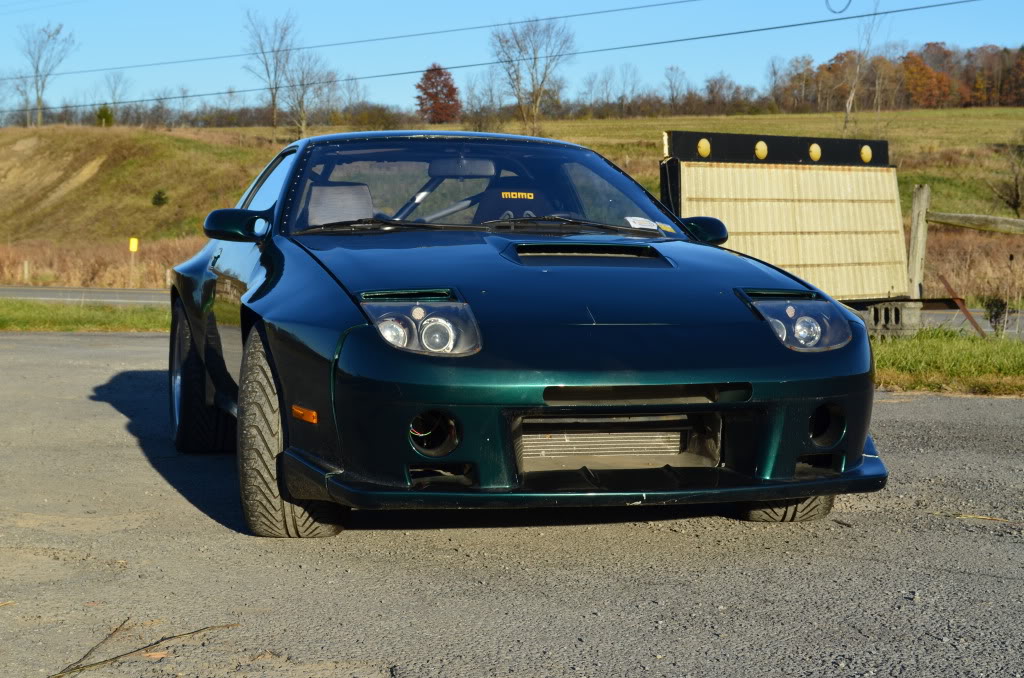
- RE Anemiya Style front bumper w/fixed headlights w/bi-xenon HID's
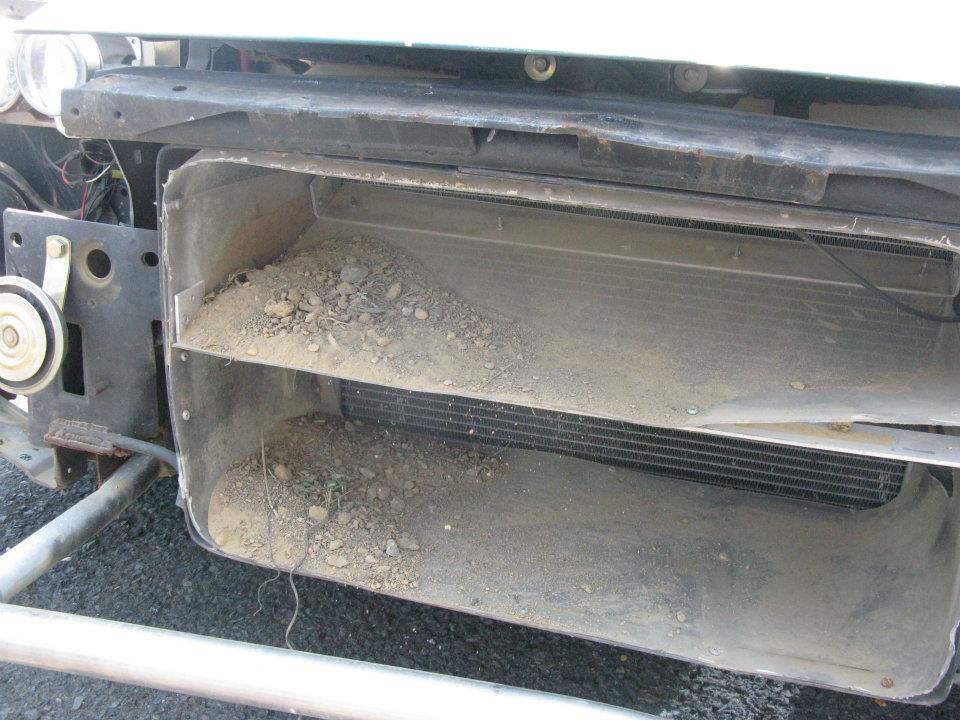
- huge aluminum radiator w/built in oil cooler (not connected)
- Futral FM13 cam
- trunion bearing upgrade
- LS6 intake/valley cover and ported TB
- Comp-r lifters
- chromoly pushrods (properly sized for pre-load)
- swain coated long tubes from JTR
- fly-cut pistons
- FFHP ported 853 heads (~10.9:1 compression)
- ARP head bolts
- ARP rod bolts
- 2000 LS-1 block - has been rebuilt w/new bearings, oil pumps, all TTY fasteners replaced during rebuild w/new ones (700 miles on rebuild)
- ported LS-6 oil pump
- Hinson swap parts
- aluminum flywheel, custom clutch from carolina clutch (as $1000 for both, feels great, holds great and at ~29lbs, spins up great)
- aluminum driveshaft
- recently rebuild T56 (shifts perfectly, carbon synchros, billet pads)
- Custom Stop-Tech front calipers (ST40s) and discs, custom spindle mounts, all properly sized to work w/stock rear brakes, manual rear prop valve, 1" MC (vacuum assist intact), stainless lines
- RacePak digital street dash (has dimmed, still works)
- PLX wideband
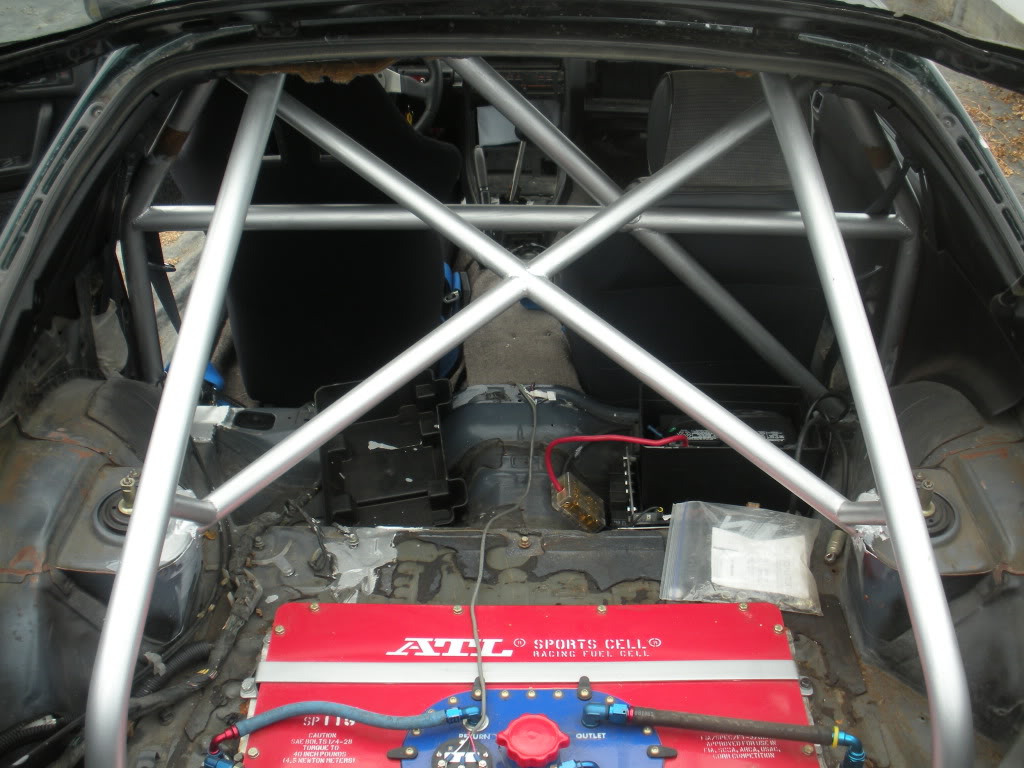
- 4 point chromoly roll bar
- 15 gal fuel cell, high flow racing fuel pump (300gph), custom fuel lines; 36lb injectors, return-style fueling setup
- custom koni/ground control spring/shock setup (spec'd by Lee Grimes)
- delrin suspension bushings
- new wheel bearings
- AWR rear rods (forgot exact name, need to machine the rear arms to get these in)
- solid diff mount, reinforced diff subframe mount (add'l material welded in)
- Momo racing seat, steering wheel, G Force 5 point (cert date has passed)
- custom 3" to 2.5" exhaust
- poly engine and tranny mounts
- no radio
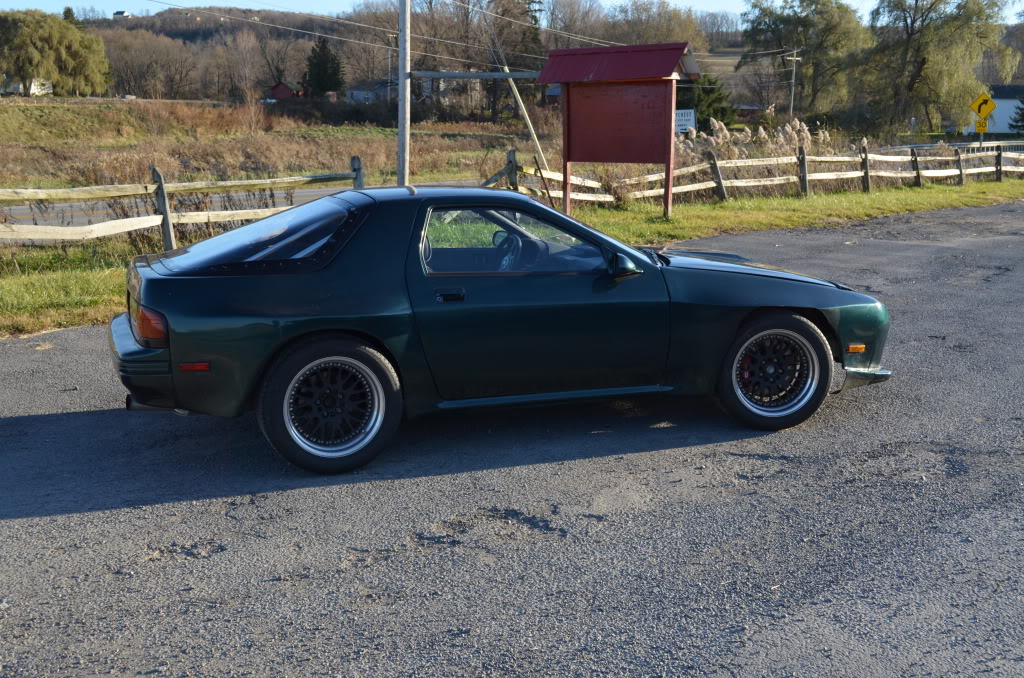
- roof (that had sunroof) cut and replaced w/roof from an RX7 GTU
- shaved side moldings
- British Racing Green paint
- percy's speedglass in front and rear
- custom fuse box setup (to handle all the additional electronics and bypass the old wiring)
- manual steering rack
- no A/C
- custom cold air intake
- battery relocated to behind pass. seat, in cubby (in battery box)
- fully rebuilt T2 diff, slightly thicker clutch packs for better lock-up, all new bearings, cryo'd.
- roll bar has been painted silver
- I may have forgotten some additional items, but if it could be done, I probably did it.
- weighs 2650 w/quarter tank of gas
-car was built for One Lap of America race but never entered.
I still haven't decided if this is the best thing I've ever bought... or the dumbest Only time will tell.
At the end of 2011 I was gearing up to convert my S5 NA into a drift car... but as soon as I had put together a budget for the build and was ready to start ordering parts a semi-local car popped up on ebay...
Like every car guy, I've been given 2 pieces of advice... "Never buy another Man's project, it will never run right' and "Never build your own track car... buy a complete one, for cheap, after it has bankrupted the builder/ previous owner." I usually stick to the first piece of advice... but late last year I dove head first into the 2nd piece of advice and bought this:
So long, Rotary... Hello Torque 8)
This car is super quick... it fights for traction on the 335 wide tires. The previous owner claims it has just over 400whp on his tune... and after driving it, I believe him. I'm going to spend the winter cleaning up the many loose ends in the car and tweaking it for my needs to have it ready to rock next spring.
Parts list from the previous owner:
- tri-point wide body (85mm Wider Front 80mm Rear)
- CCW 17x10" wheels up front, 17x11" in rear. 285/335 width Michelin Pilot Sports
- RE Anemiya Style front bumper w/fixed headlights w/bi-xenon HID's
- huge aluminum radiator w/built in oil cooler (not connected)
- Futral FM13 cam
- trunion bearing upgrade
- LS6 intake/valley cover and ported TB
- Comp-r lifters
- chromoly pushrods (properly sized for pre-load)
- swain coated long tubes from JTR
- fly-cut pistons
- FFHP ported 853 heads (~10.9:1 compression)
- ARP head bolts
- ARP rod bolts
- 2000 LS-1 block - has been rebuilt w/new bearings, oil pumps, all TTY fasteners replaced during rebuild w/new ones (700 miles on rebuild)
- ported LS-6 oil pump
- Hinson swap parts
- aluminum flywheel, custom clutch from carolina clutch (as $1000 for both, feels great, holds great and at ~29lbs, spins up great)
- aluminum driveshaft
- recently rebuild T56 (shifts perfectly, carbon synchros, billet pads)
- Custom Stop-Tech front calipers (ST40s) and discs, custom spindle mounts, all properly sized to work w/stock rear brakes, manual rear prop valve, 1" MC (vacuum assist intact), stainless lines
- RacePak digital street dash (has dimmed, still works)
- PLX wideband
- 4 point chromoly roll bar
- 15 gal fuel cell, high flow racing fuel pump (300gph), custom fuel lines; 36lb injectors, return-style fueling setup
- custom koni/ground control spring/shock setup (spec'd by Lee Grimes)
- delrin suspension bushings
- new wheel bearings
- AWR rear rods (forgot exact name, need to machine the rear arms to get these in)
- solid diff mount, reinforced diff subframe mount (add'l material welded in)
- Momo racing seat, steering wheel, G Force 5 point (cert date has passed)
- custom 3" to 2.5" exhaust
- poly engine and tranny mounts
- no radio
- roof (that had sunroof) cut and replaced w/roof from an RX7 GTU
- shaved side moldings
- British Racing Green paint
- percy's speedglass in front and rear
- custom fuse box setup (to handle all the additional electronics and bypass the old wiring)
- manual steering rack
- no A/C
- custom cold air intake
- battery relocated to behind pass. seat, in cubby (in battery box)
- fully rebuilt T2 diff, slightly thicker clutch packs for better lock-up, all new bearings, cryo'd.
- roll bar has been painted silver
- I may have forgotten some additional items, but if it could be done, I probably did it.
- weighs 2650 w/quarter tank of gas
-car was built for One Lap of America race but never entered.
I still haven't decided if this is the best thing I've ever bought... or the dumbest
Only time will tell.
 10-04-12, 09:57 PM
#2
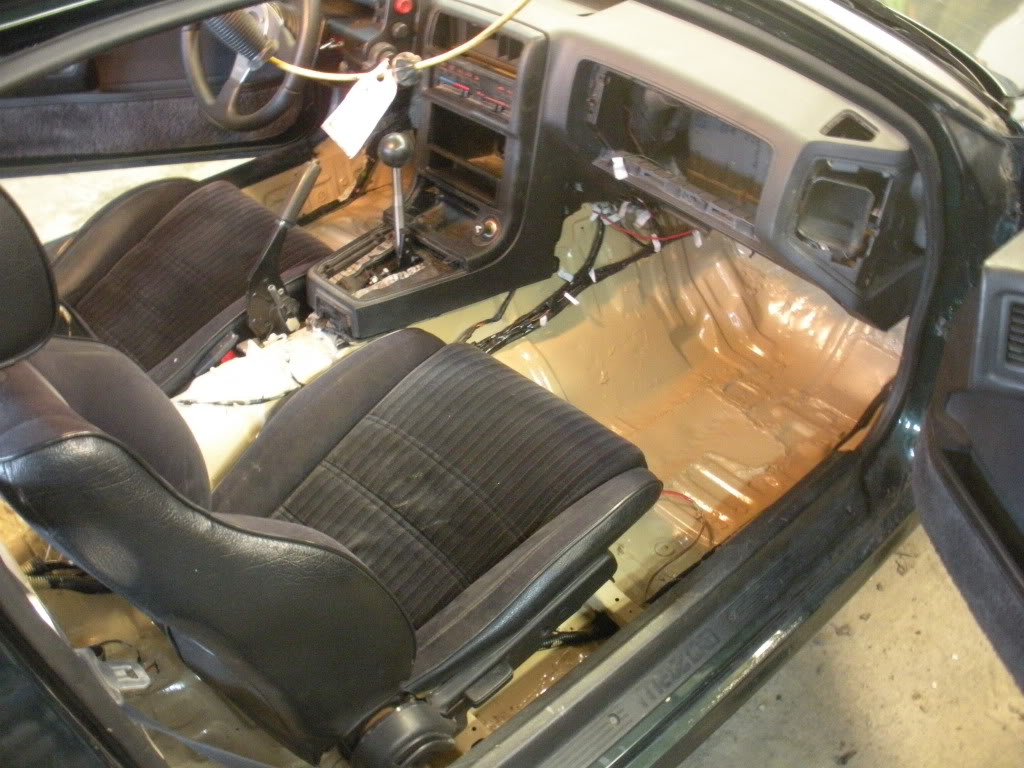
The Next weekend after I bought it, I dragged it out to the last AutoX of last year at my college. I did a little work on it before loading it on the trailer.
From this:
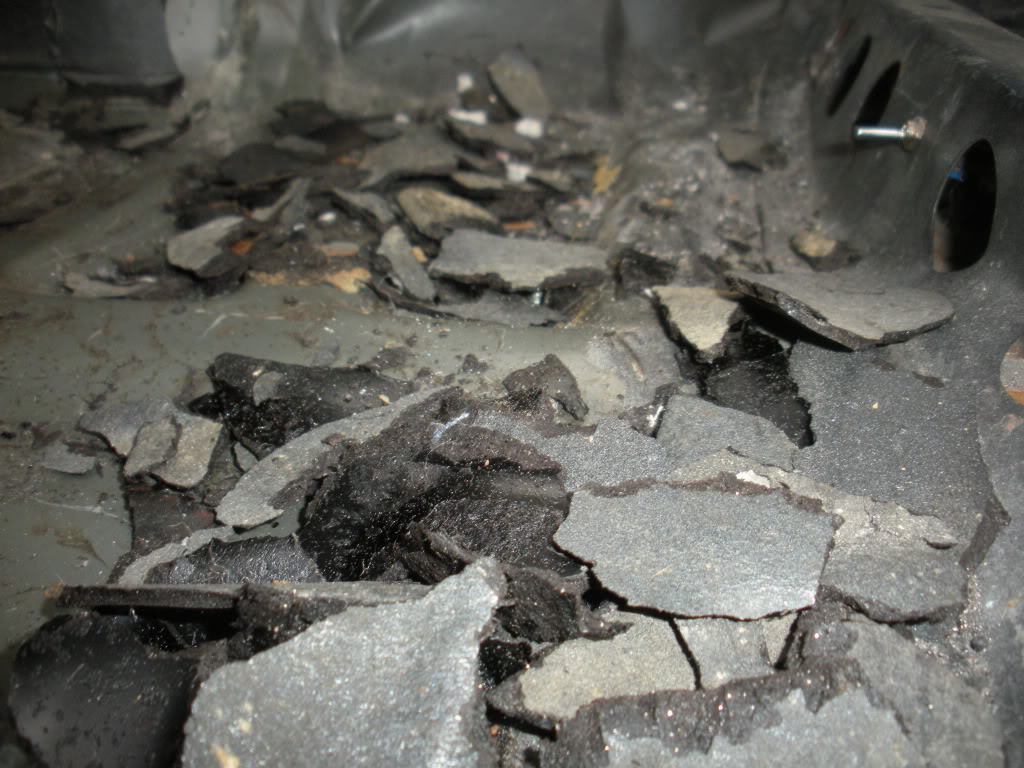
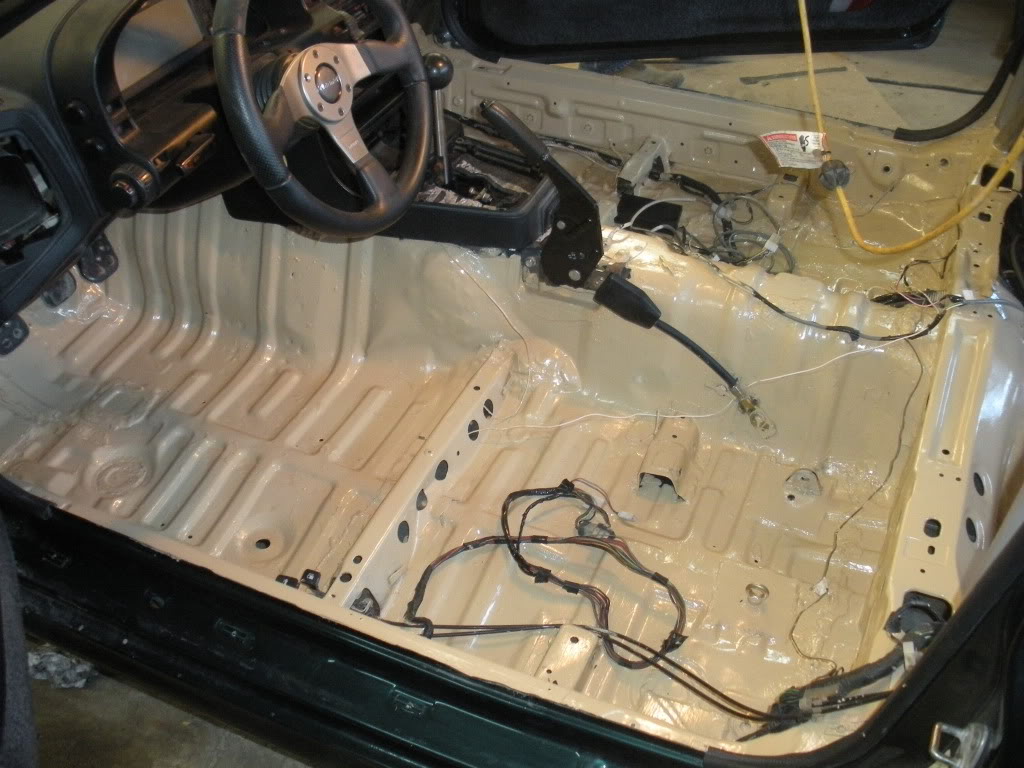
Scraping the sound deadening tar off the floor:
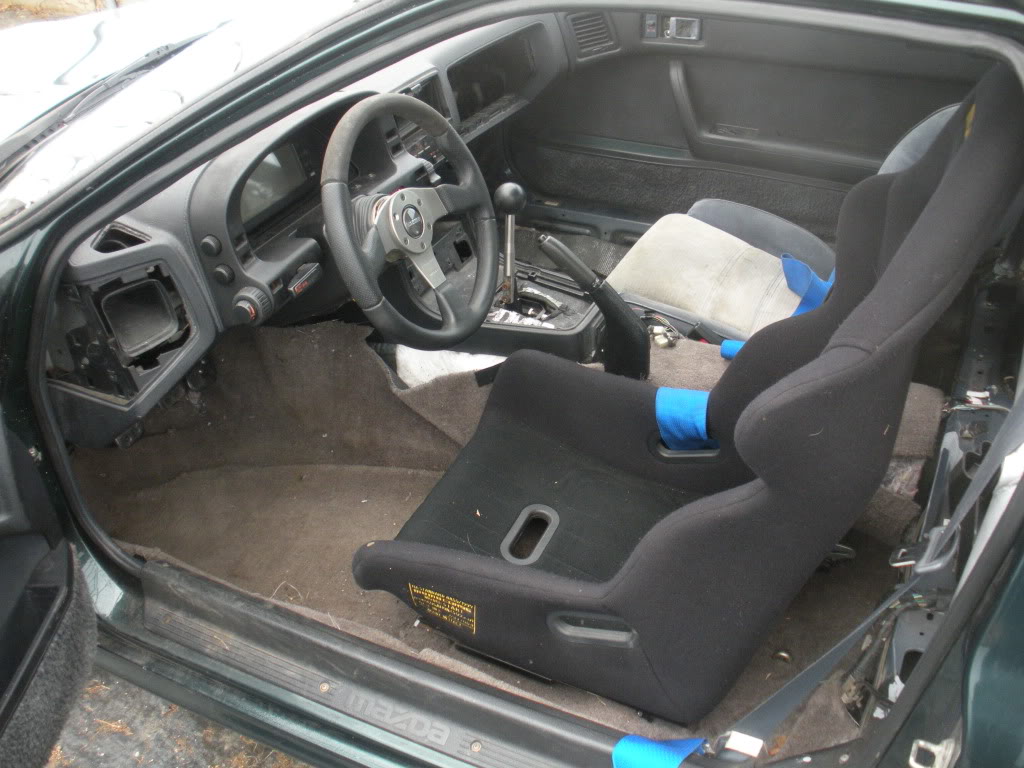
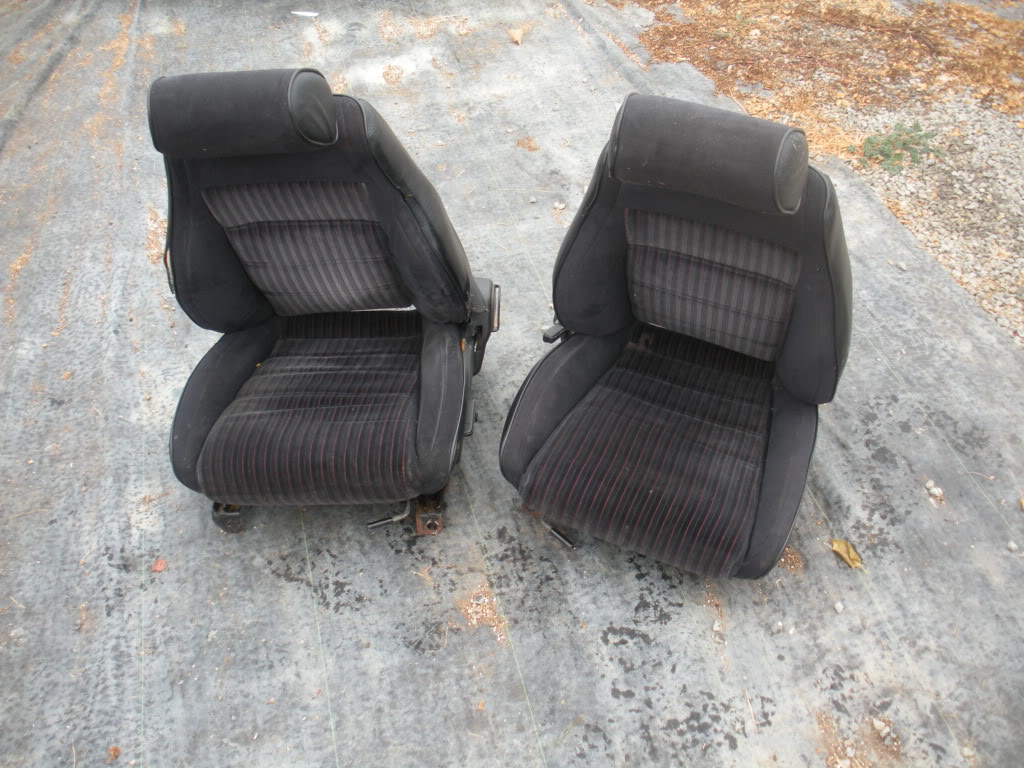
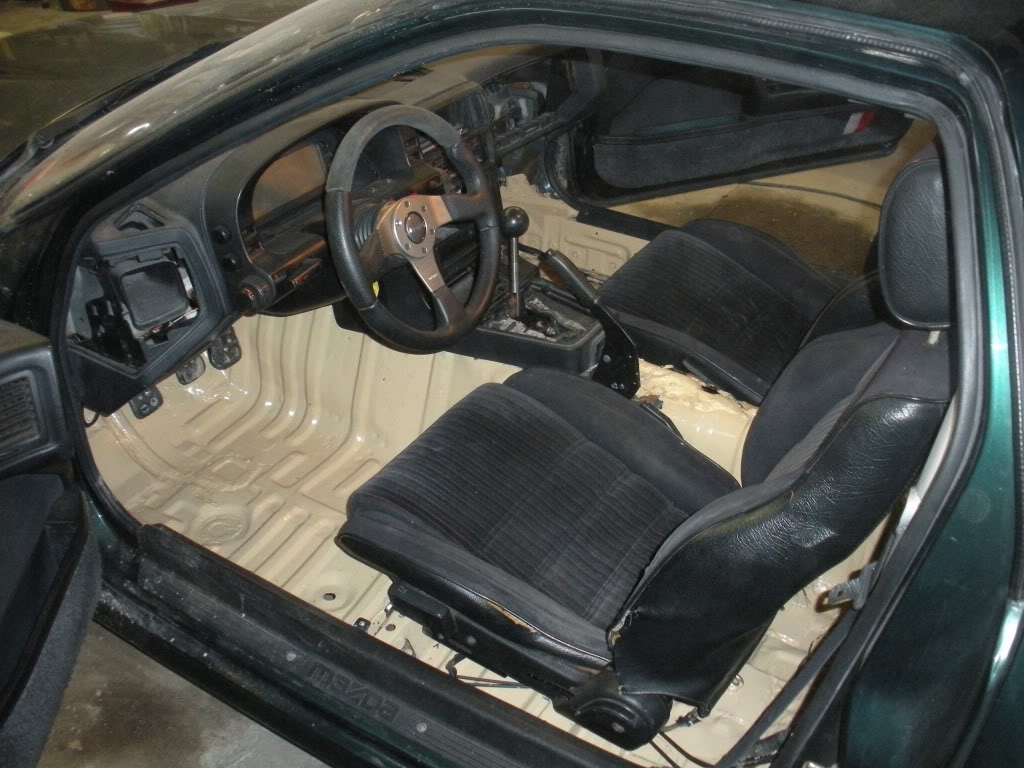
Stock seats to go back (Don't worry... the race bucket will be back in once I get side mounts for it):
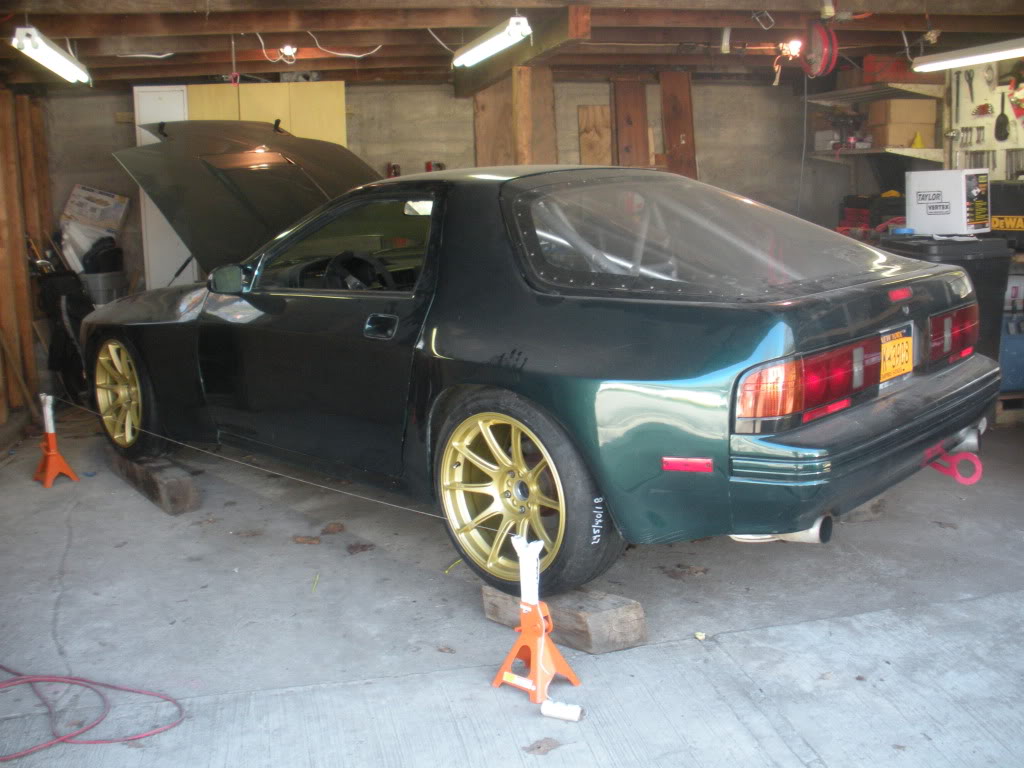
Back together and race ready:
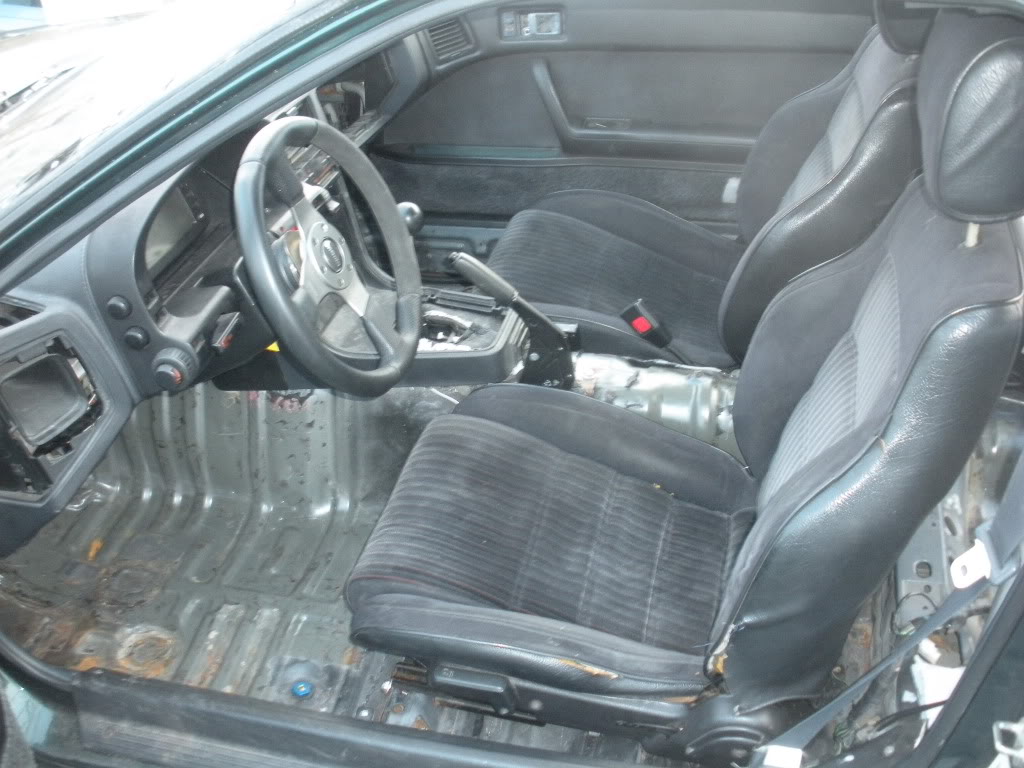
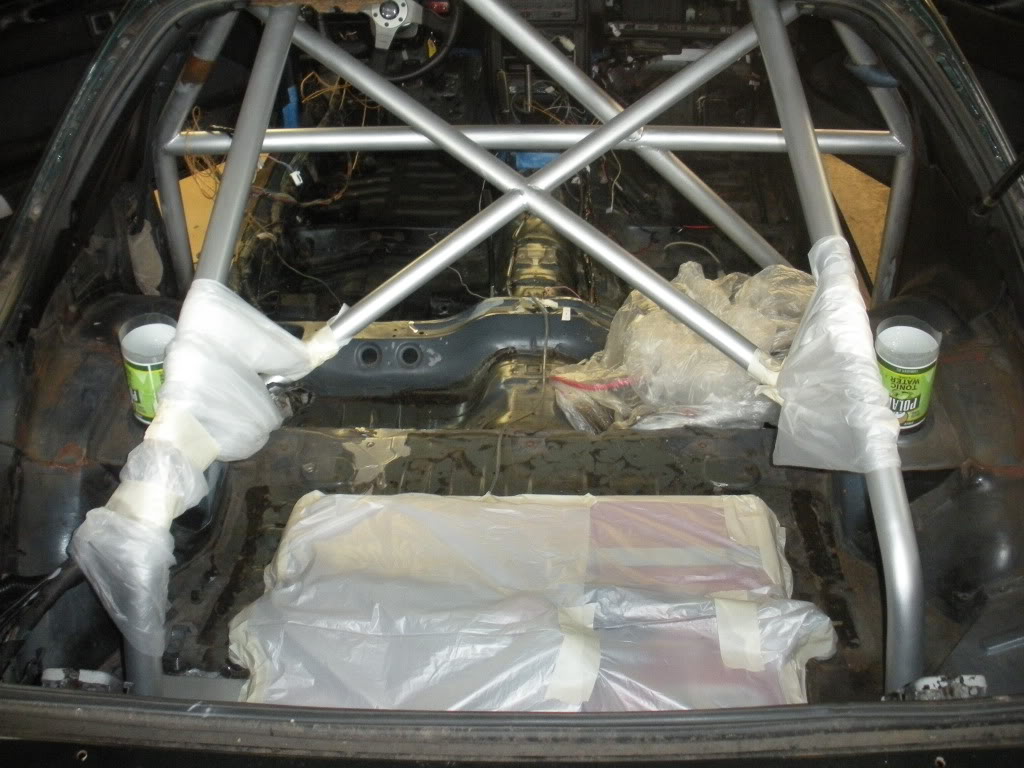
My plan from here is to clean up the previous owners wiring job, paint the floors and exposed metal in the interior one color (black or tan) since the original light blue and the green do not go together so well, re-install the racing bucket seat, and then piece the dash/interior back together. I also need to piece together the plumbing from the fuel cell to the filler neck located behind the rear license plate.
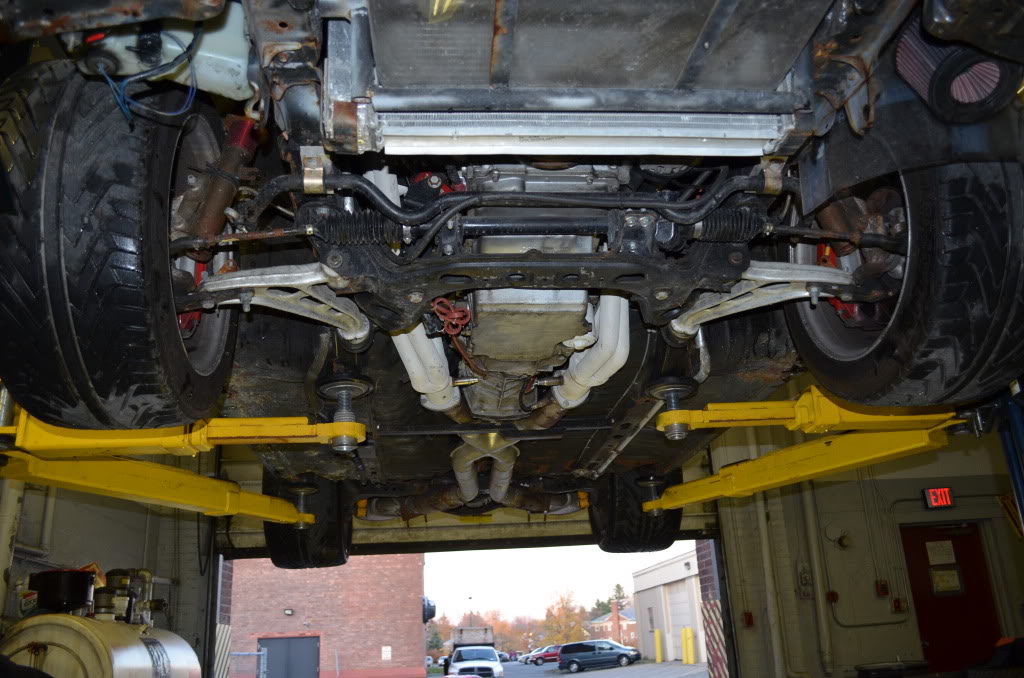
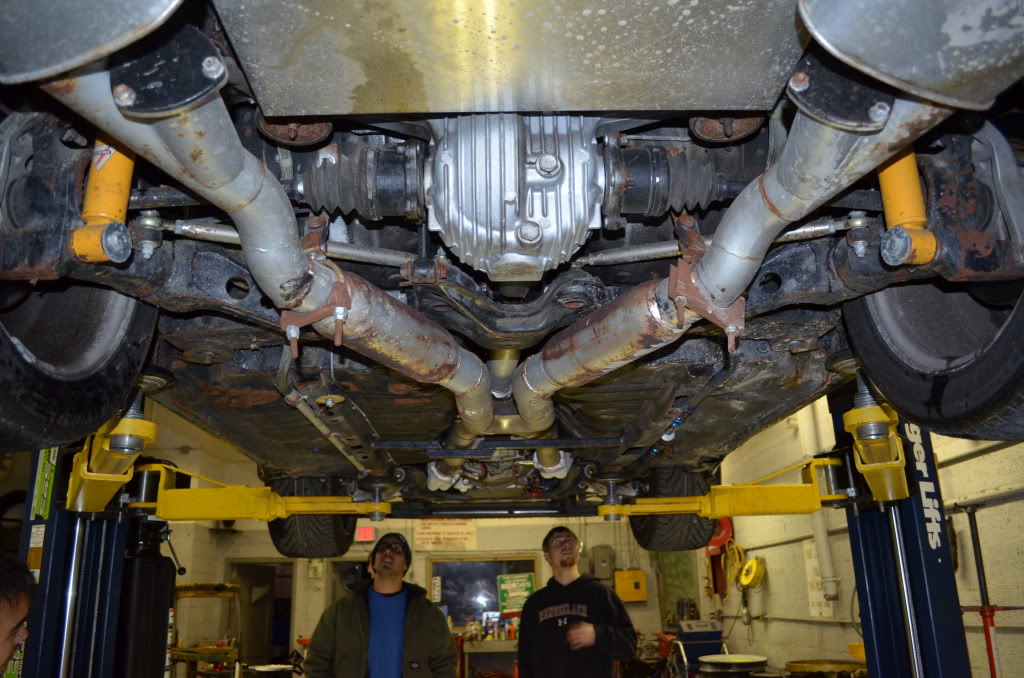
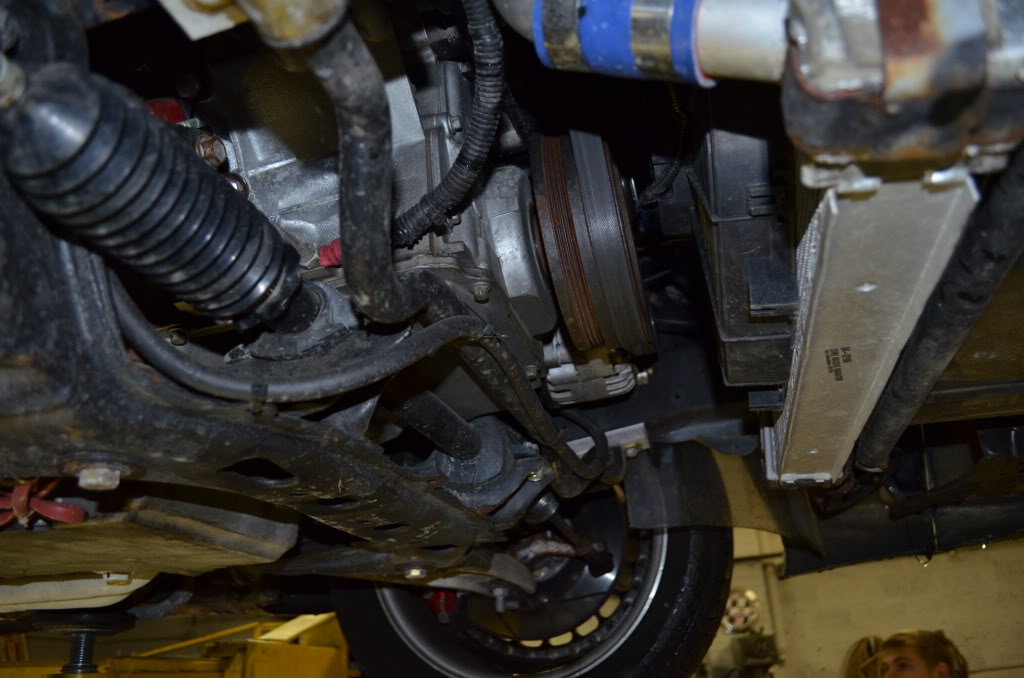
I got it on the lift after the race and took a few pics of the rusty POS:
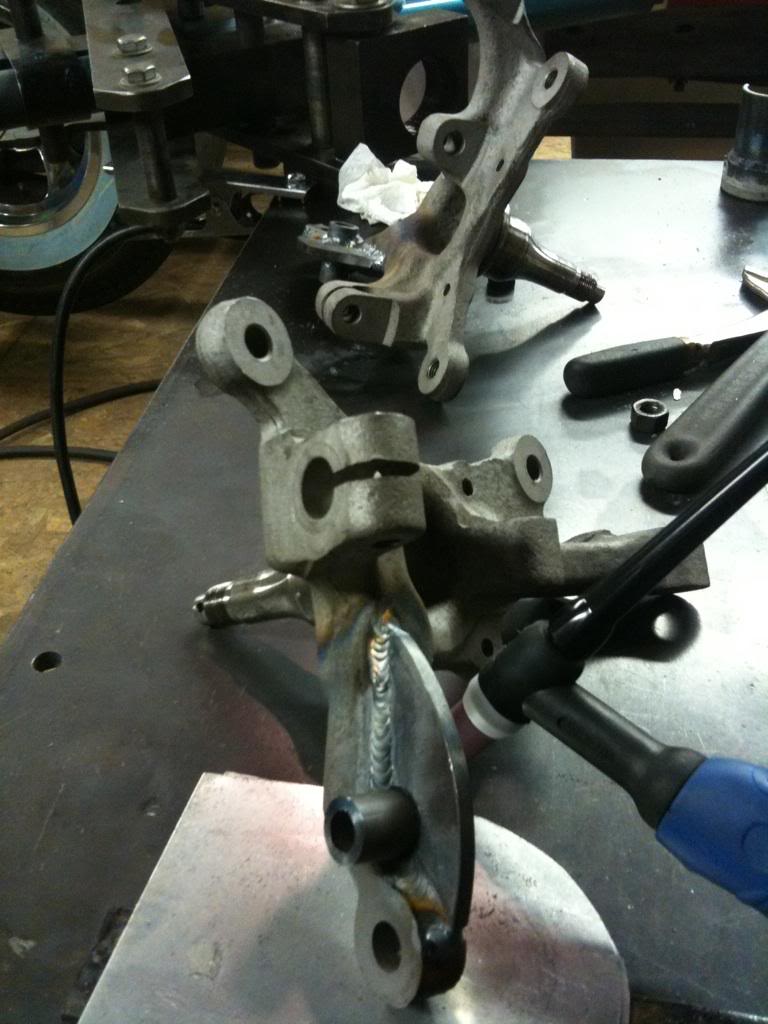
And Jeremy at 1945 Speed and Custom built me some knuckles:
From this:
Scraping the sound deadening tar off the floor:
Stock seats to go back (Don't worry... the race bucket will be back in once I get side mounts for it):
Back together and race ready:
My plan from here is to clean up the previous owners wiring job, paint the floors and exposed metal in the interior one color (black or tan) since the original light blue and the green do not go together so well, re-install the racing bucket seat, and then piece the dash/interior back together. I also need to piece together the plumbing from the fuel cell to the filler neck located behind the rear license plate.
I got it on the lift after the race and took a few pics of the rusty POS:
And Jeremy at 1945 Speed and Custom built me some knuckles:
10-04-12, 09:58 PM
#3
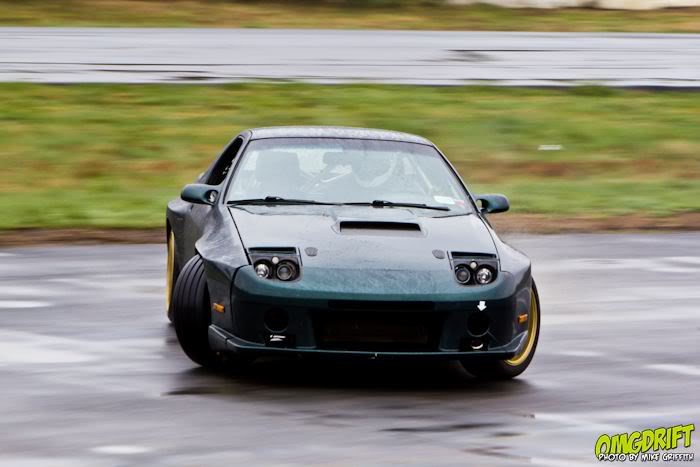
Behold, Autocross Shenanigans...

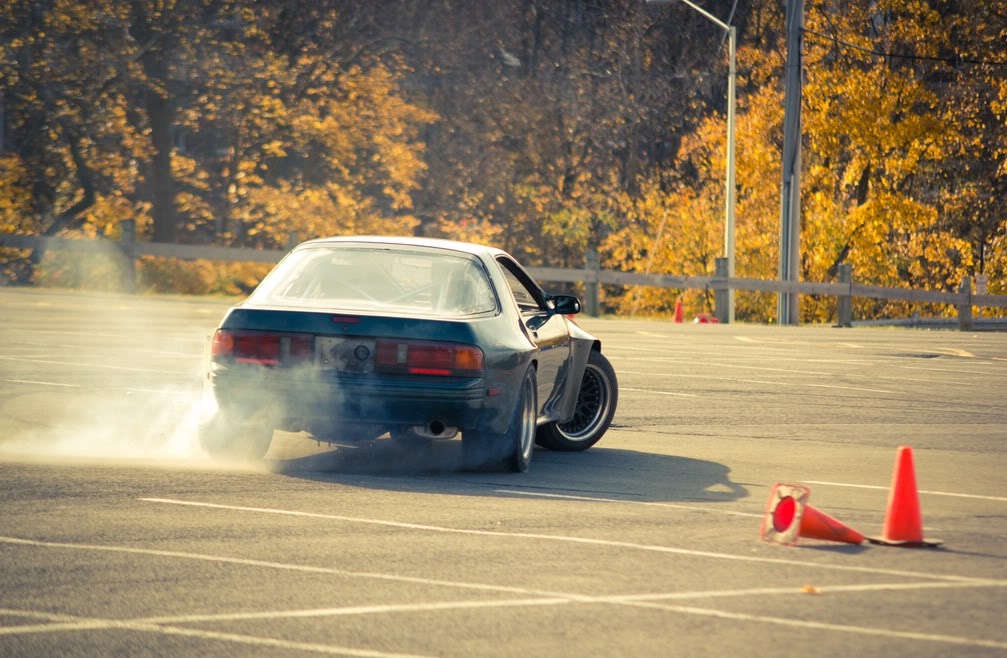
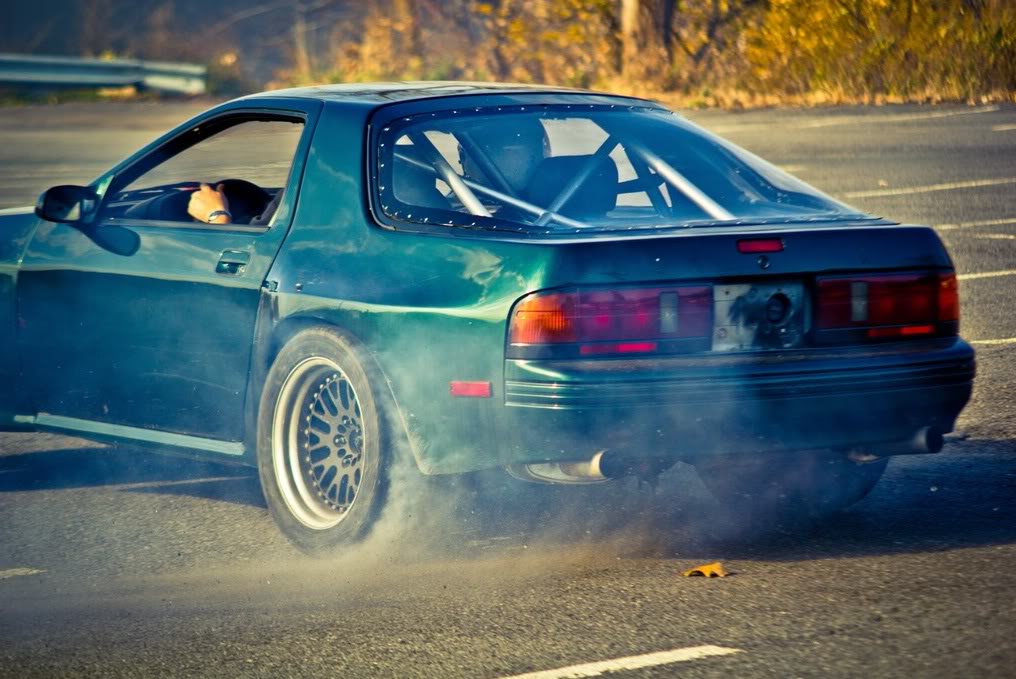
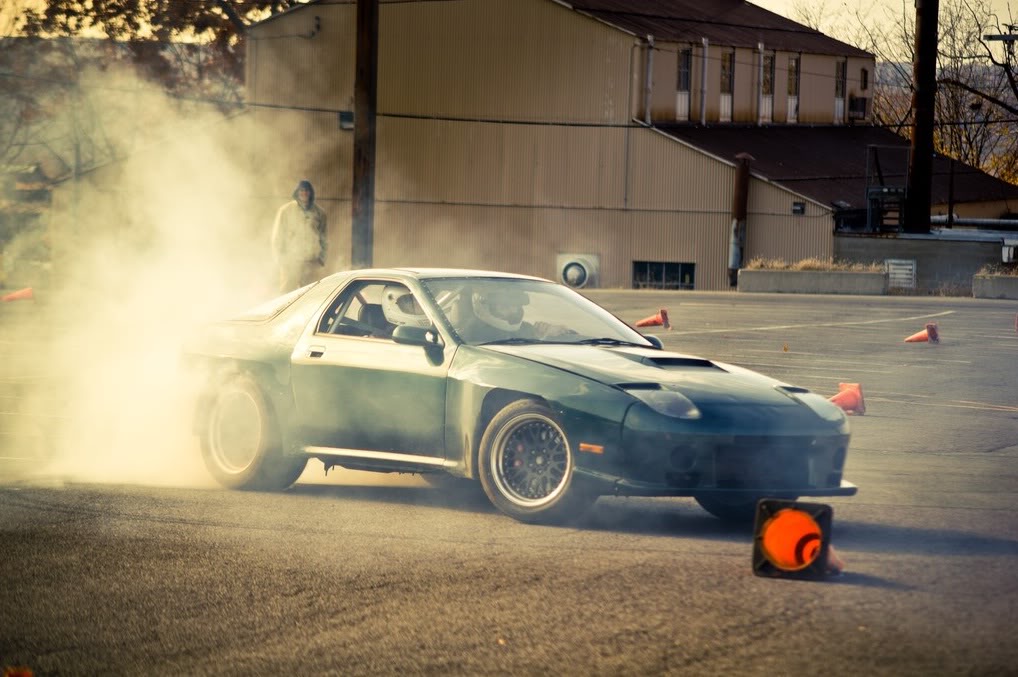
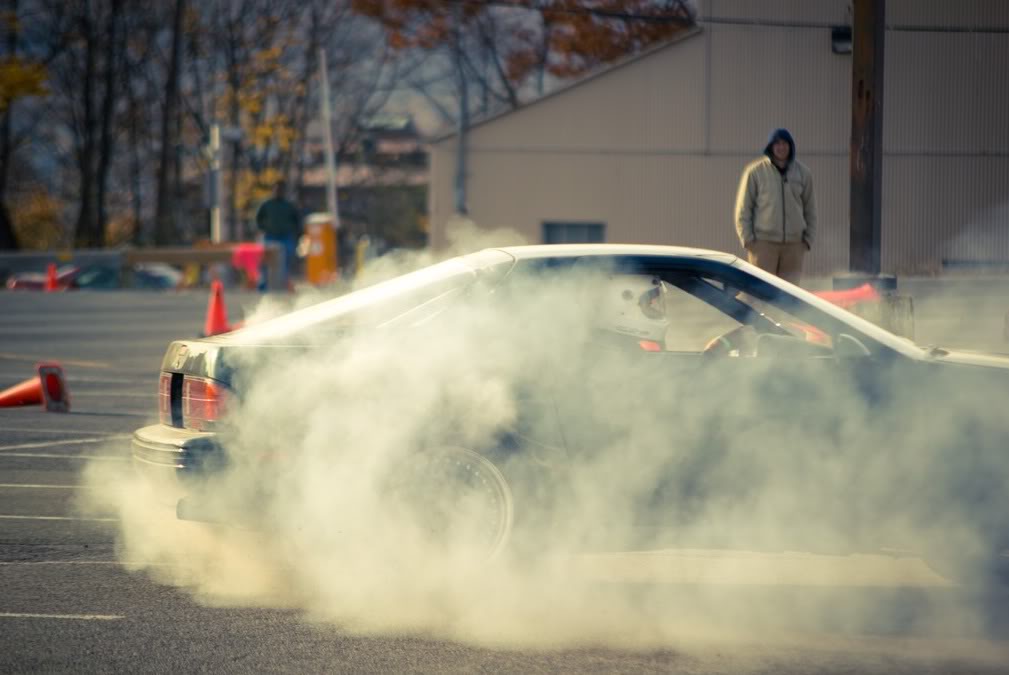
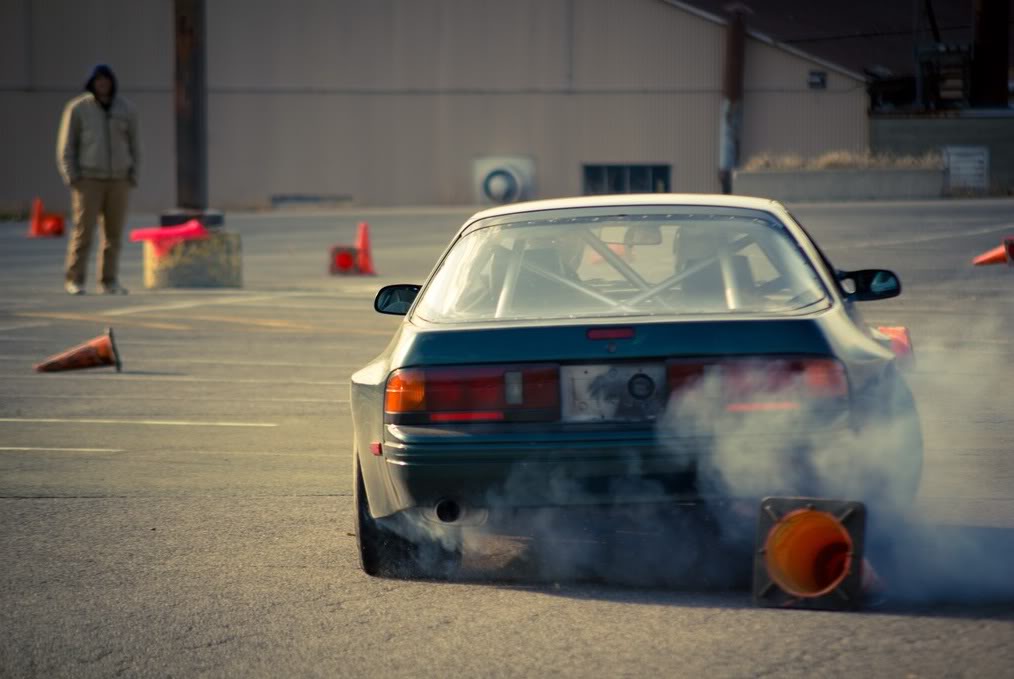
I have about 150 miles of driving on the street with the car so far. It has pretty good manners but the delrin rear end mounts transmit (and amplify) all the rear end gear noise into the cabin... fine when you have a helmet on... but not so good cruising along at 55mph on the street.
February 2012 -
I had a 3 day weekend to head up to NY and work on the RX-7. I took over my parents garage for the weekend and knocked out some little projects...
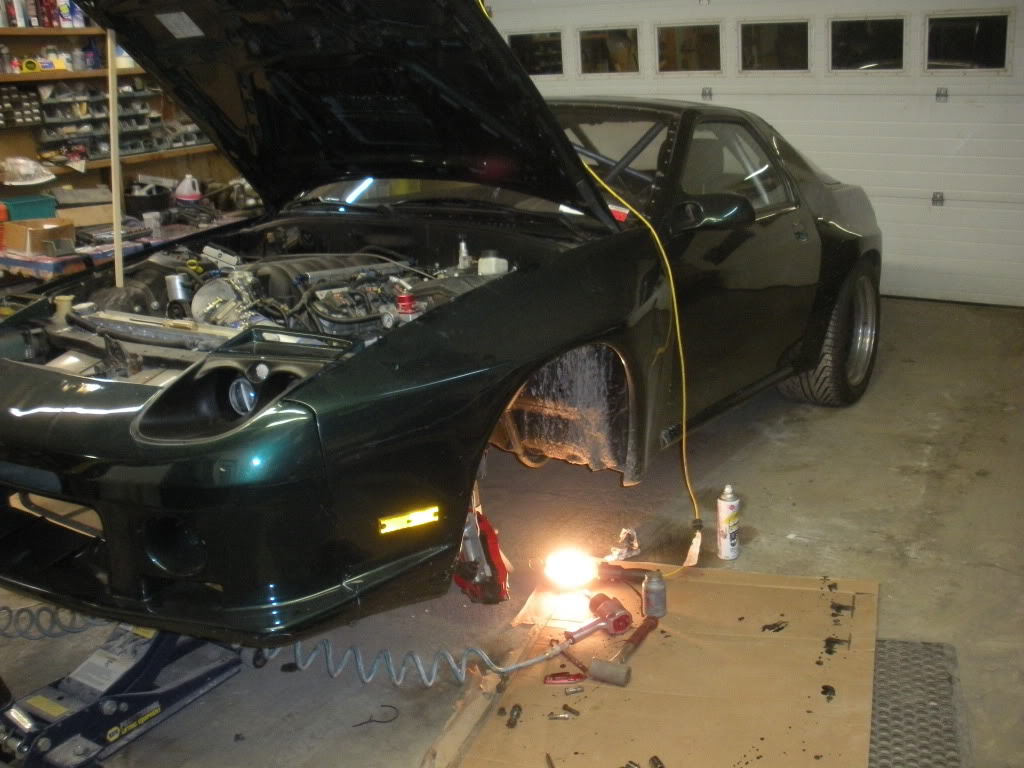
Project 1: I installed my modified front knuckles.... 2012 is going to be a riot on the drift course (if I can afford tires all summer)
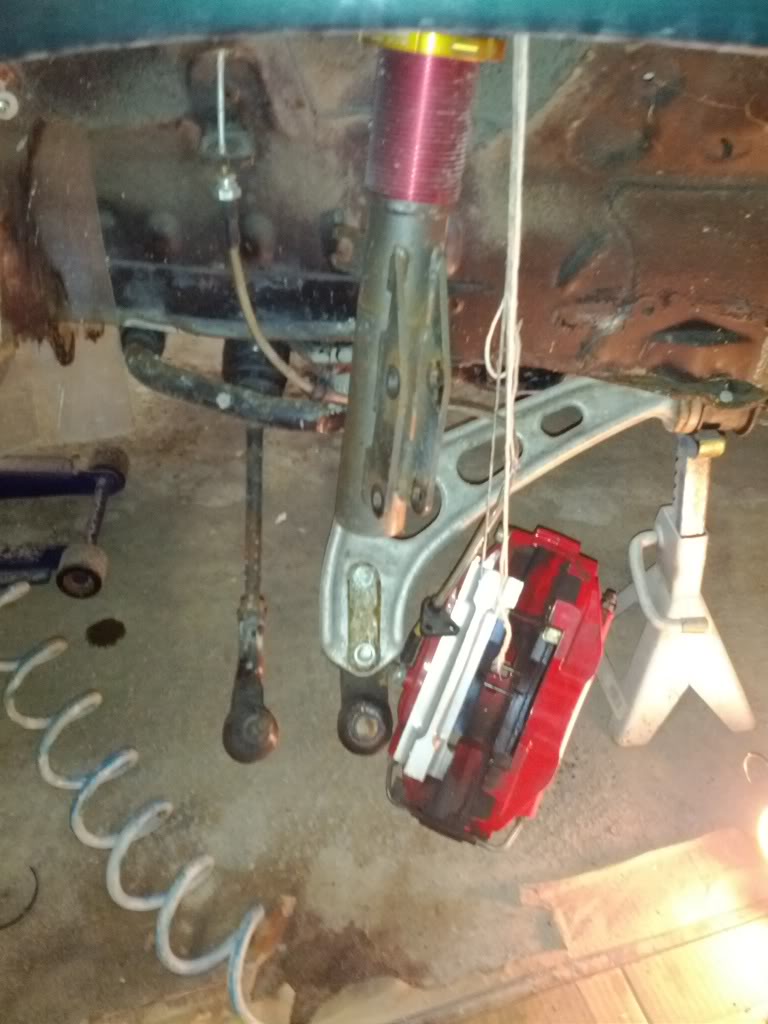
Hub installed on the new knucks -
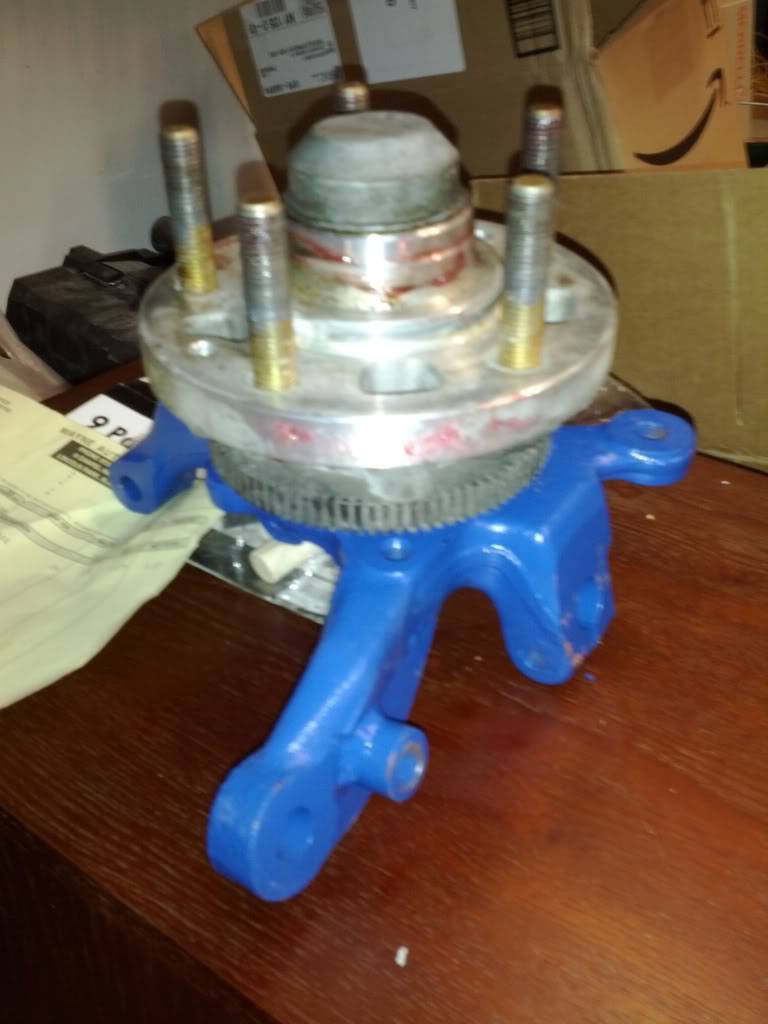
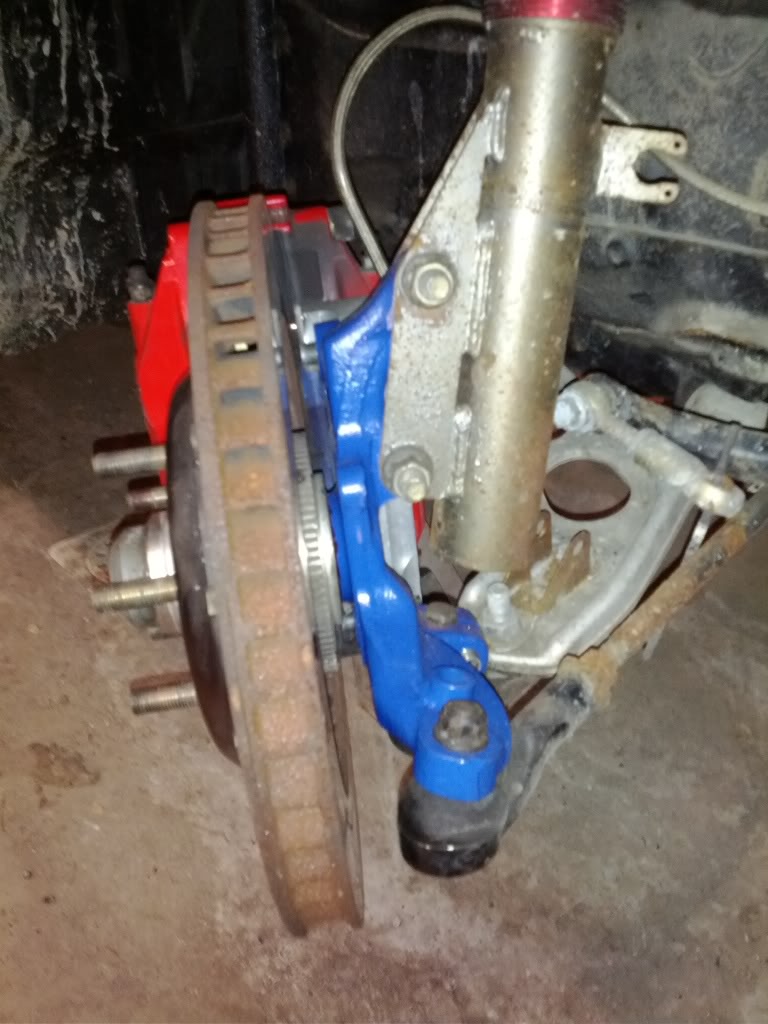
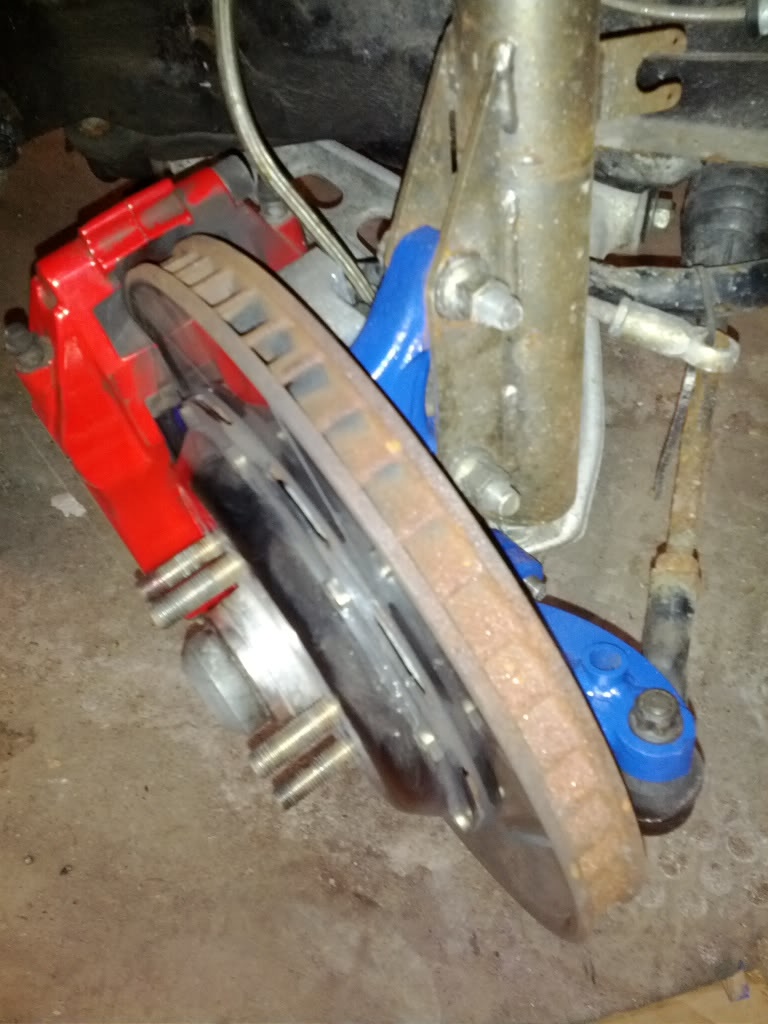
All buttoned up, but still using the stock pick-up point for the moment since I don't want to dick around with an alignment this weekend... the empty pickup point behind the stock tie-rod end is where all the drifty goodness is hidden. The CCWs rub at the inner frame rails with stock steering angle... trying to add more angle at this point is pointless.
I have about 150 miles of driving on the street with the car so far. It has pretty good manners but the delrin rear end mounts transmit (and amplify) all the rear end gear noise into the cabin... fine when you have a helmet on... but not so good cruising along at 55mph on the street.
February 2012 -
I had a 3 day weekend to head up to NY and work on the RX-7. I took over my parents garage for the weekend and knocked out some little projects...
Project 1: I installed my modified front knuckles.... 2012 is going to be a riot on the drift course (if I can afford tires all summer)
Hub installed on the new knucks -
All buttoned up, but still using the stock pick-up point for the moment since I don't want to dick around with an alignment this weekend... the empty pickup point behind the stock tie-rod end is where all the drifty goodness is hidden. The CCWs rub at the inner frame rails with stock steering angle... trying to add more angle at this point is pointless.
10-04-12, 09:59 PM
#4
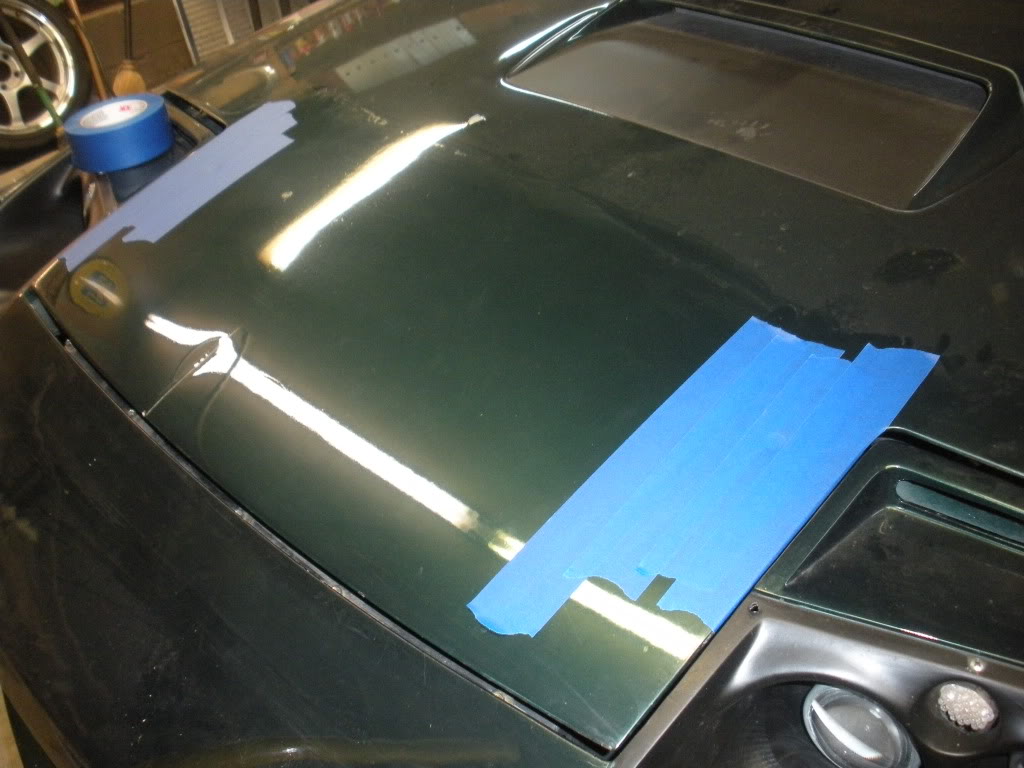
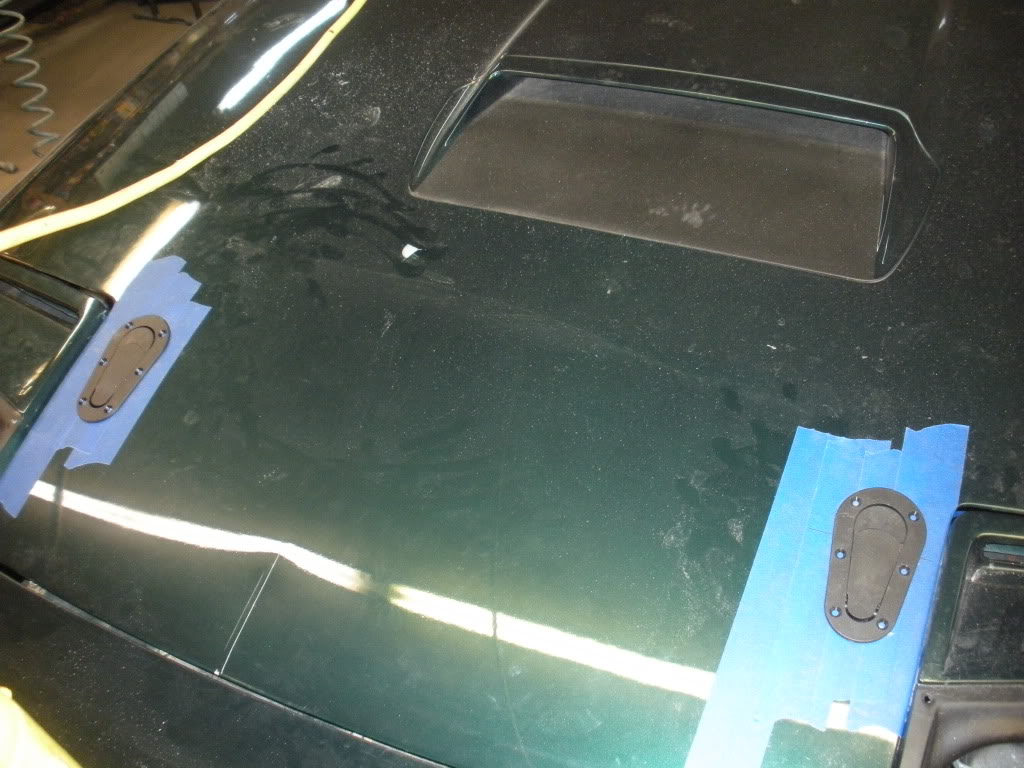
Project 2: Aerocatch hood pin install.
This hood used to have hood pins... so I'll enlarge the holes and pop the aerocatches in....
Tape:
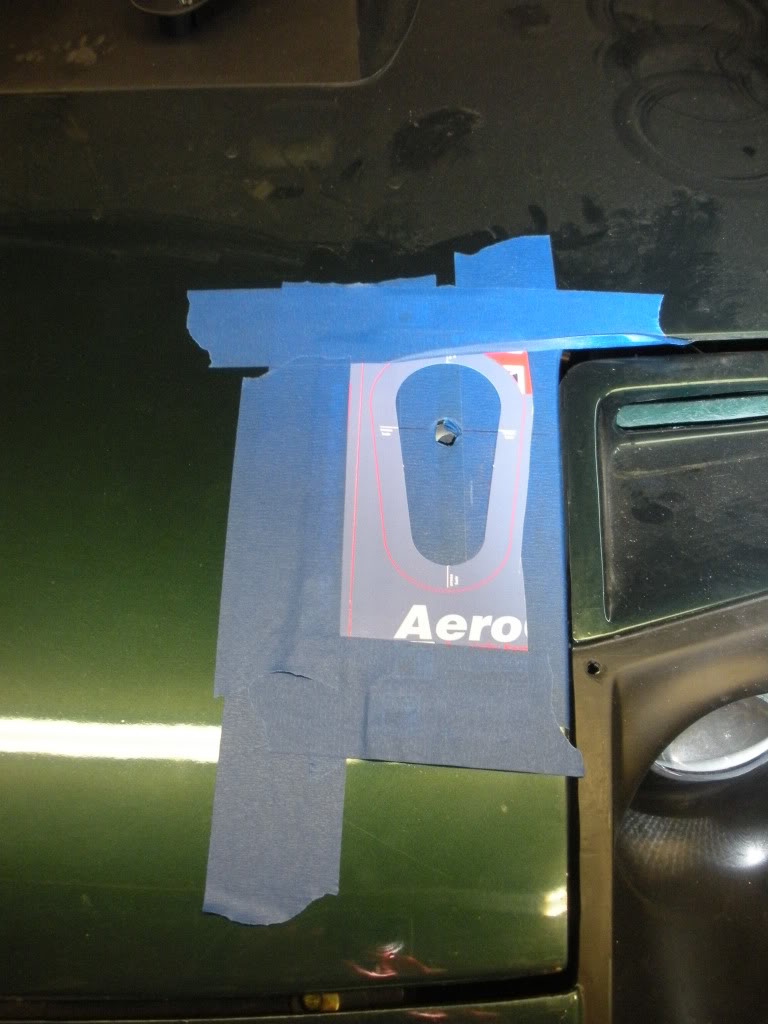
Align Template:
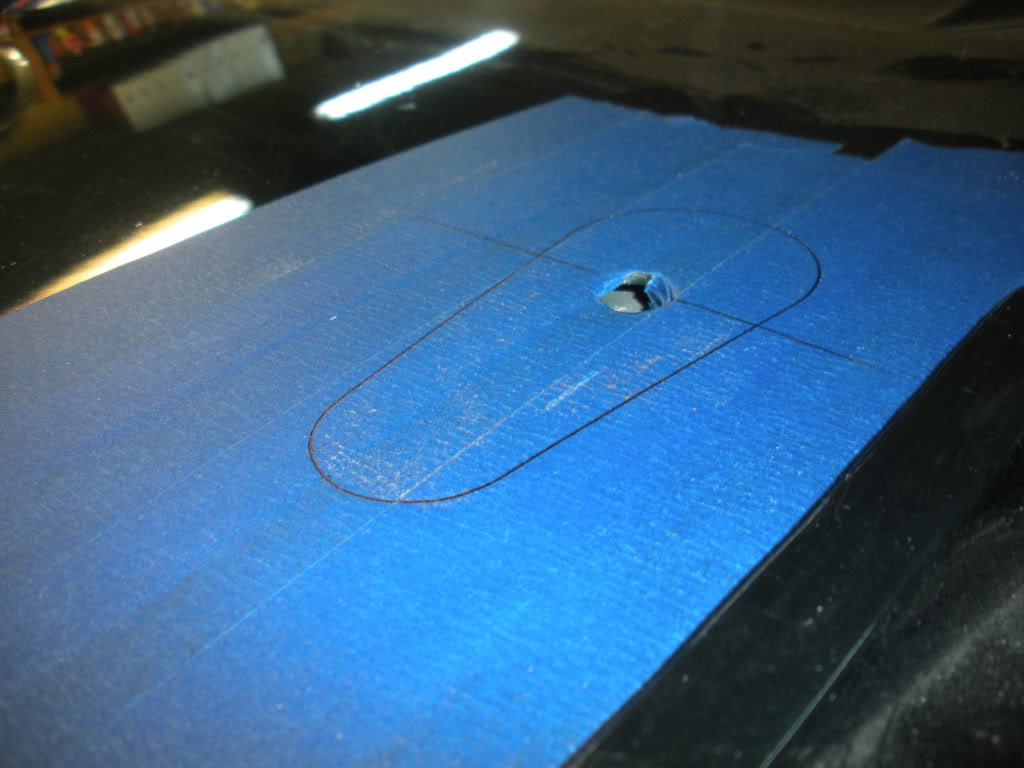
Trace Template:
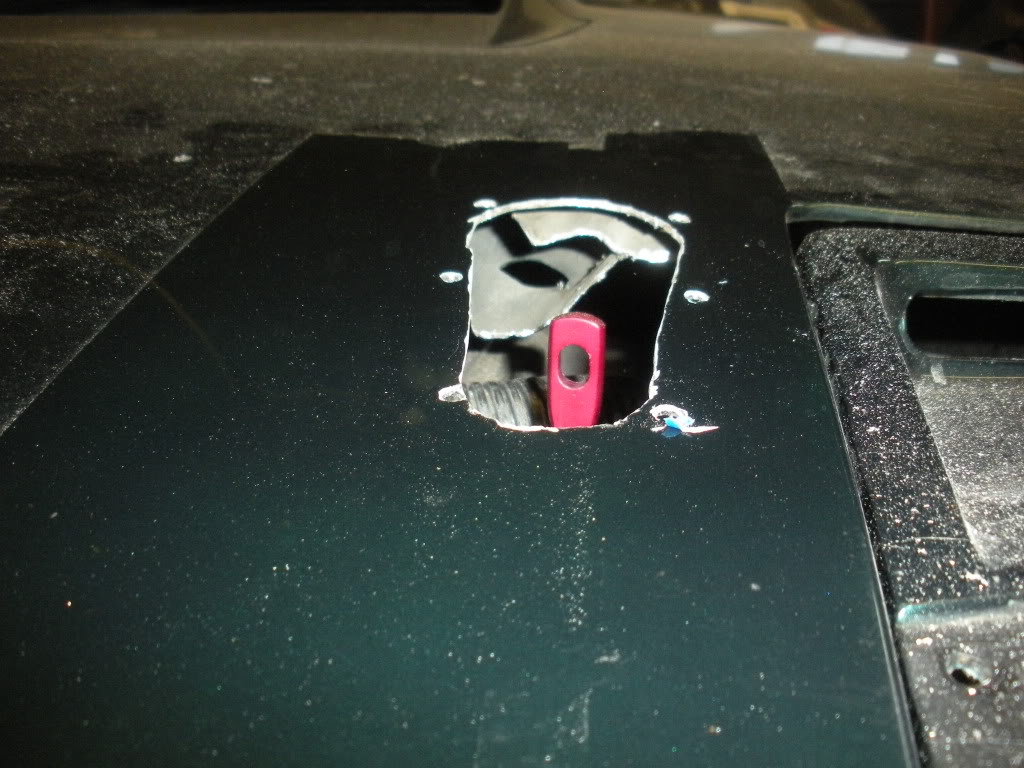
Cut Gnarly Hole:
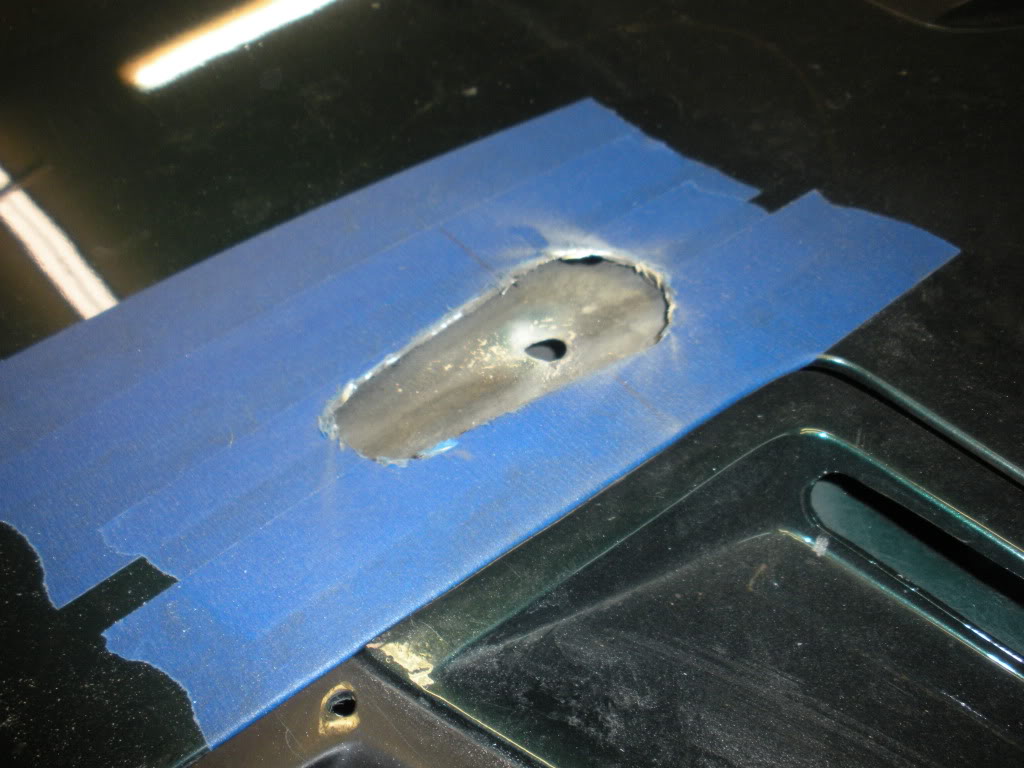
Cut Gnarly hole all the way through all the layers of hood and drop Aerocatch in and mark where to drill:
Drill holes and thank god that the flange on the top will cover up all this nastiness (a 4.5" angle grinder with a cutoff wheel is not exactly the correct tool for this job :|):
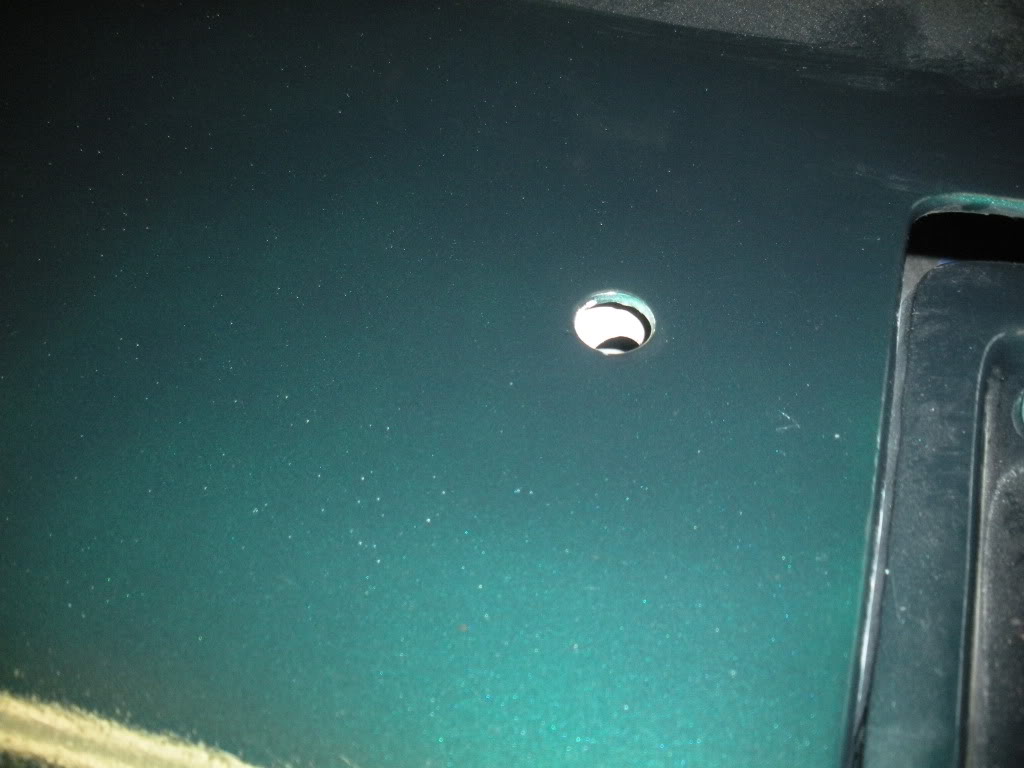
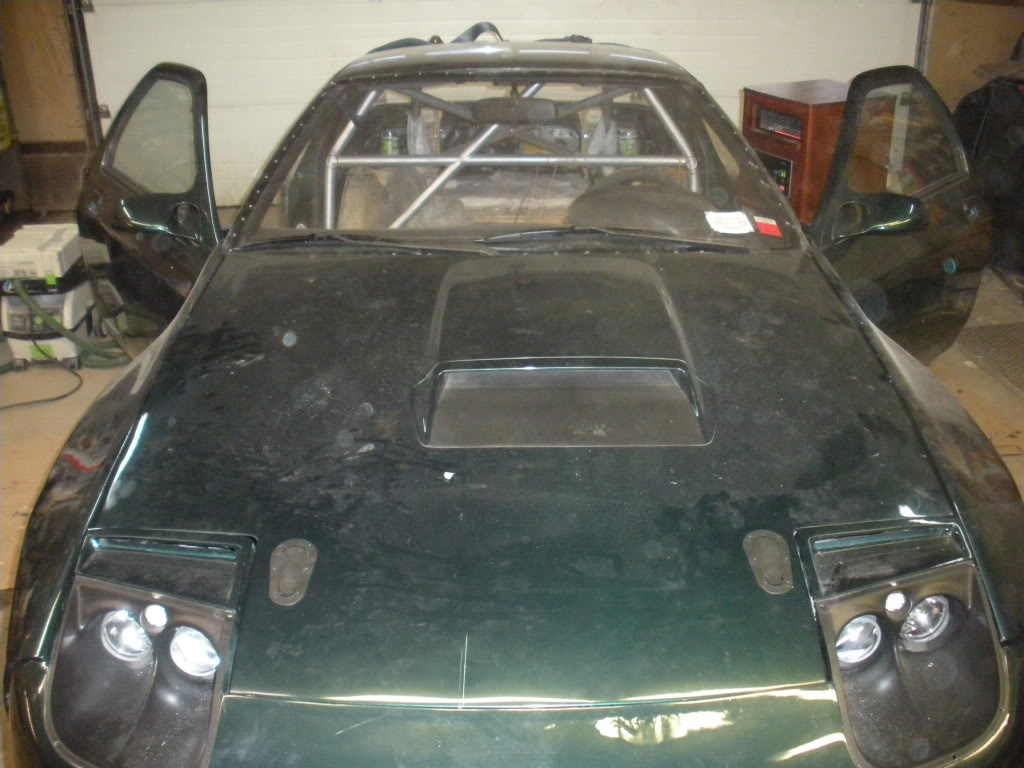
Install the hood pins and admire your handy work... (the dents, dings, and chipped paint on the hood are not my handy work)

This hood used to have hood pins... so I'll enlarge the holes and pop the aerocatches in....
Tape:
Align Template:
Trace Template:
Cut Gnarly Hole:
Cut Gnarly hole all the way through all the layers of hood and drop Aerocatch in and mark where to drill:
Drill holes and thank god that the flange on the top will cover up all this nastiness (a 4.5" angle grinder with a cutoff wheel is not exactly the correct tool for this job :|):
Install the hood pins and admire your handy work... (the dents, dings, and chipped paint on the hood are not my handy work
)
10-04-12, 09:59 PM
#5
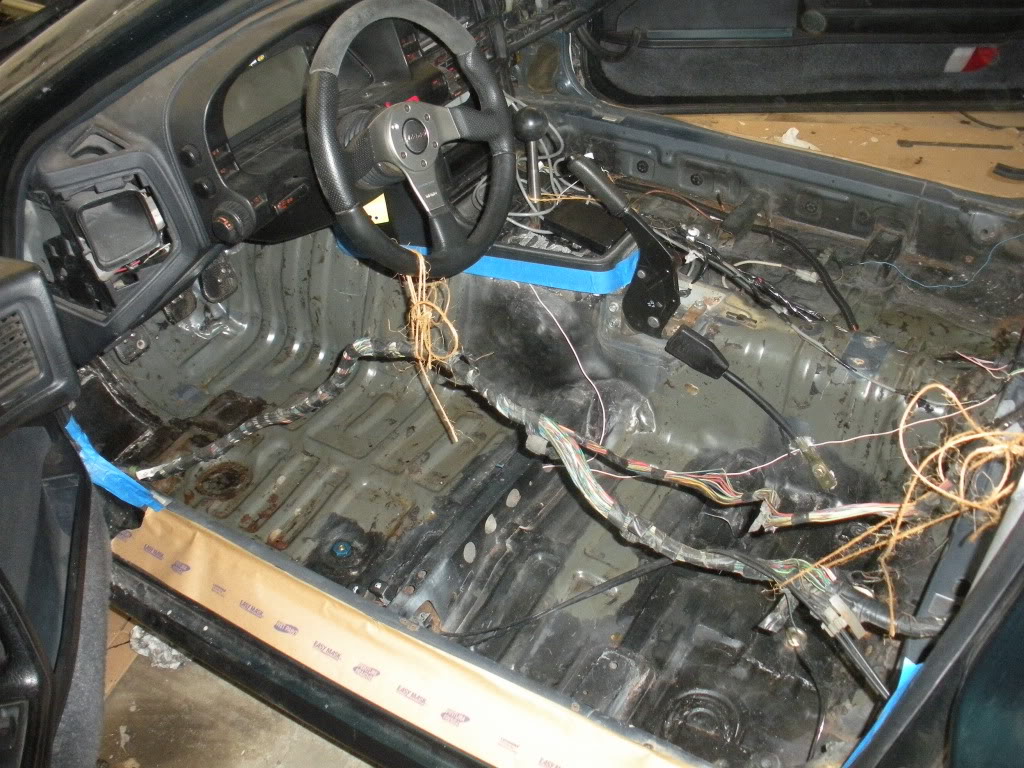
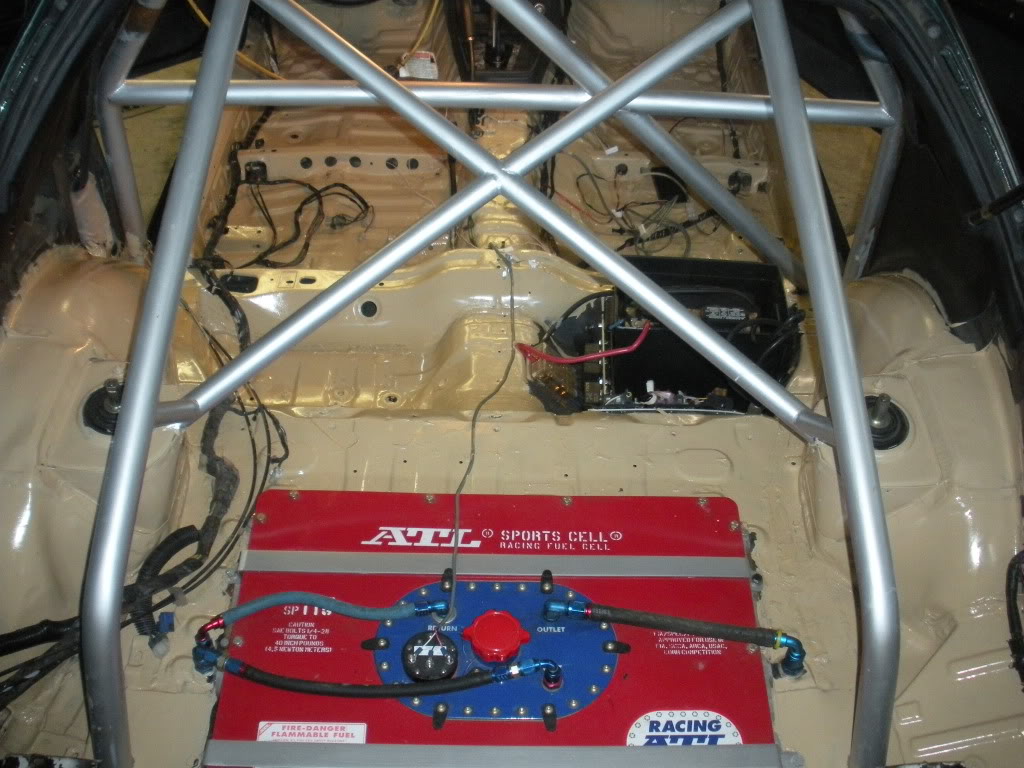
Project 3: Paint the floor one color.
I decided that since I'm not going to be running carpet (or much of the stock interior at all) that the floor should not look like a bag of dicks. Right now it's 4 colors... the stock factory light blue, the stock green primer that was under the sound-deadening tar, flat black over the welded in patch panels, and rust. I'm right in the middle of painting it one color.
Prep for brush painting:
2 coats of rustoleum later and the floor is painted! British Racing Green and Tan... always a classic, and a little different than the white or black that most do. :mrgreen:

Seats are back in and it's ready to rock!
And that's how she sits today. Since the car is stored in at my Grandparent's for the winter this thread will probably move pretty slow until I have to rush to get it done right before events start. Please let me know if you see anything that absolutely won't pass tech at LVD or Clubloose events so I don't miss fixing that stuff.
March 2012 -
Boom! Progress...
No more broom sticks or traffic cones required to hold the hood up. I went ahead and ordered some sookitech hood dampers overnight from Japan... well from Taiwan really, and it wasn't over night... but, close enough .
I decided that since I'm not going to be running carpet (or much of the stock interior at all) that the floor should not look like a bag of dicks. Right now it's 4 colors... the stock factory light blue, the stock green primer that was under the sound-deadening tar, flat black over the welded in patch panels, and rust. I'm right in the middle of painting it one color.
Prep for brush painting:
2 coats of rustoleum later and the floor is painted! British Racing Green and Tan... always a classic, and a little different than the white or black that most do. :mrgreen:
Seats are back in and it's ready to rock!
And that's how she sits today. Since the car is stored in at my Grandparent's for the winter this thread will probably move pretty slow until I have to rush to get it done right before events start. Please let me know if you see anything that absolutely won't pass tech at LVD or Clubloose events so I don't miss fixing that stuff.
March 2012 -
Boom! Progress...
No more broom sticks or traffic cones required to hold the hood up. I went ahead and ordered some sookitech hood dampers overnight from Japan... well from Taiwan really, and it wasn't over night... but, close enough .
10-04-12, 10:00 PM
#6
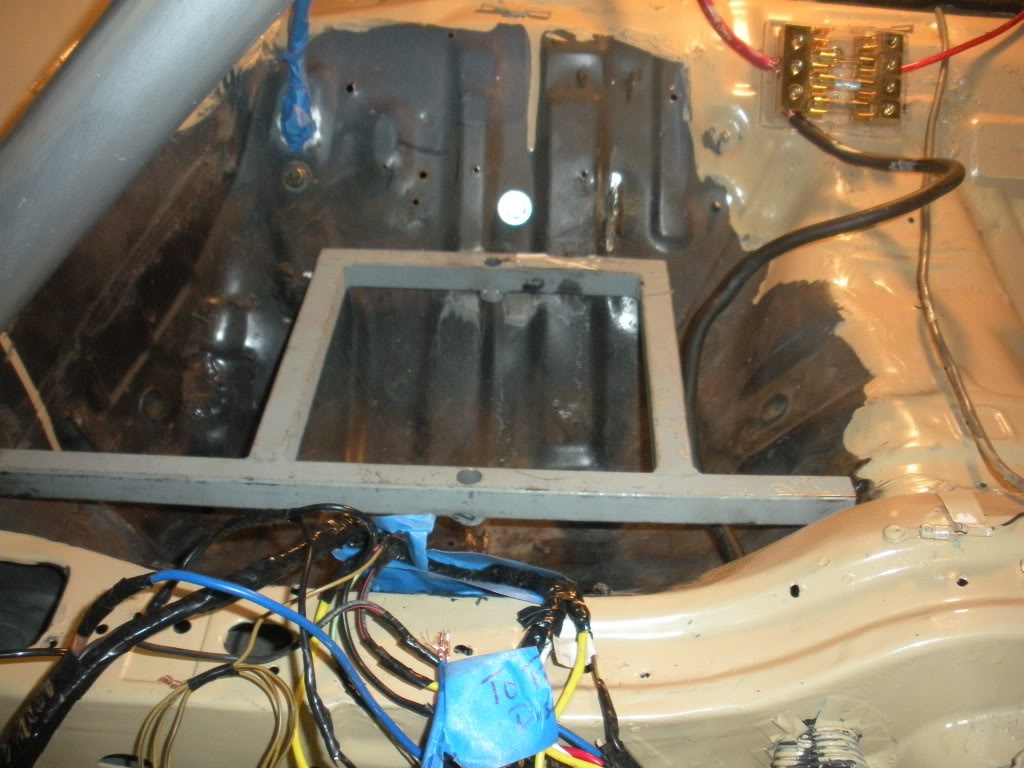
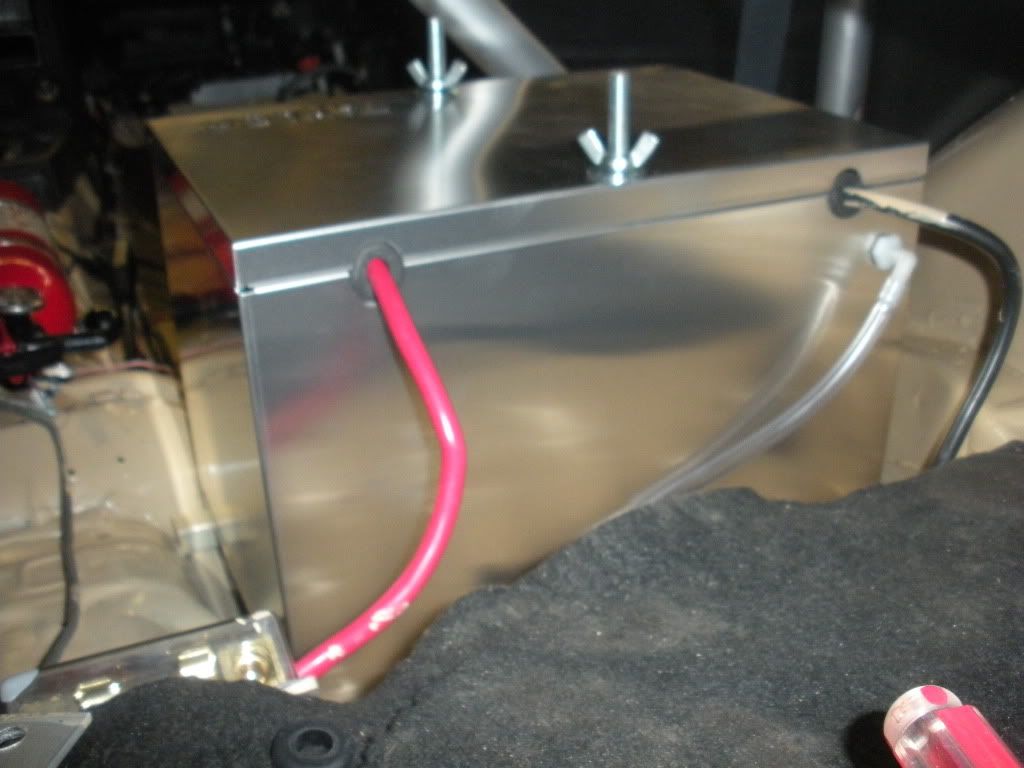
Then I started to install my sealed and vented battery box (NHRA Rule 8.1 Complaint). The big secret about this thing is that it is not really sealed at all, it comes in 3 pieces with no gaskets or o-rings and nowhere in the instructions does it indicate that RTV or similar is to be used to seal it up... but whatever it meets the rules and is shiny.
Here's the mess of wiring I was met with when I removed the marine battery box (that wasn't even mounted to anything... not good)
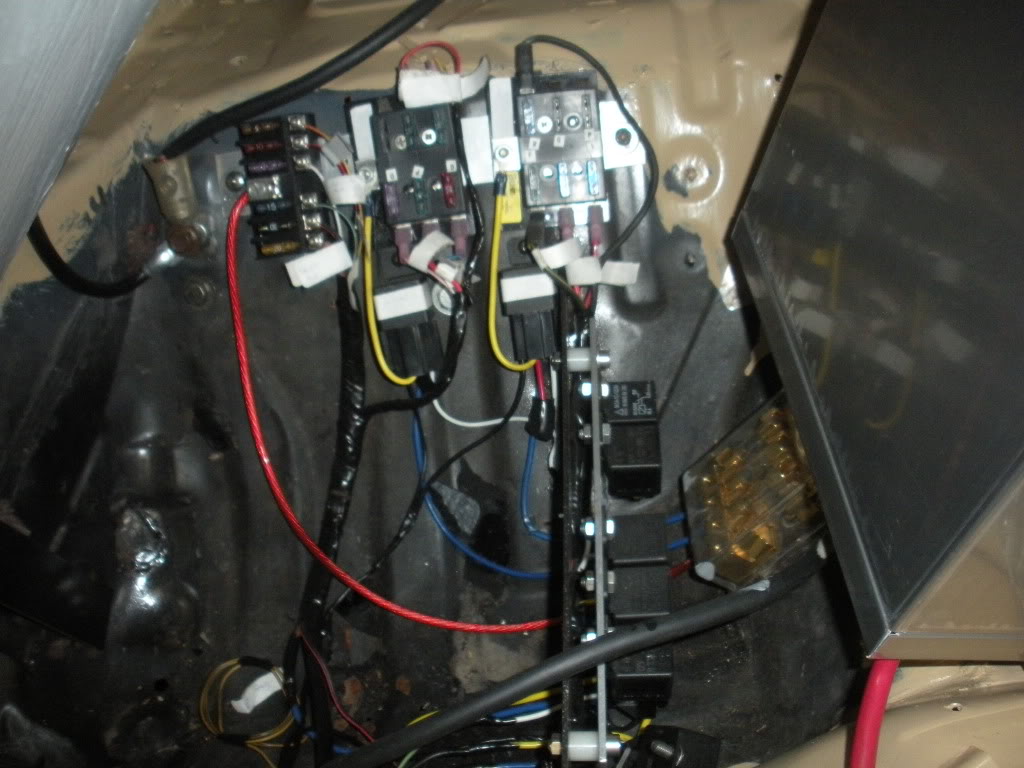
Since the only wiring diagram for that mess exists in the previous owner's head I'm going to have to leave it as is until I can totally redo it... but since the new battery box is like 1.5x the size of the old one its all got to get moved out of the way for now.
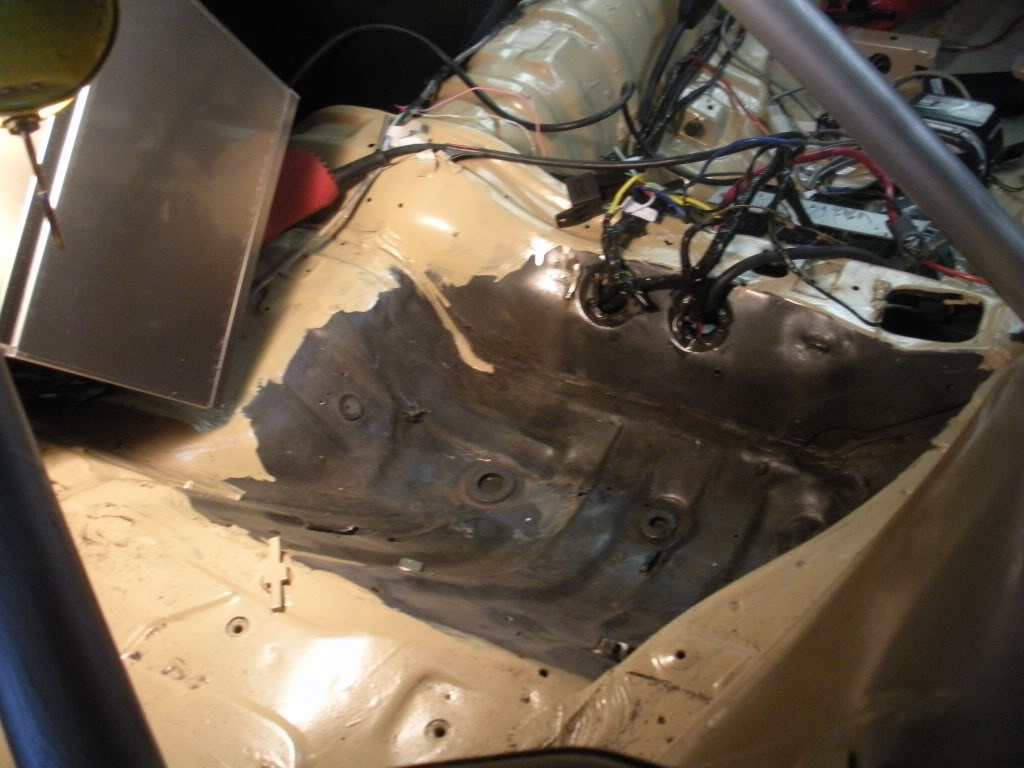
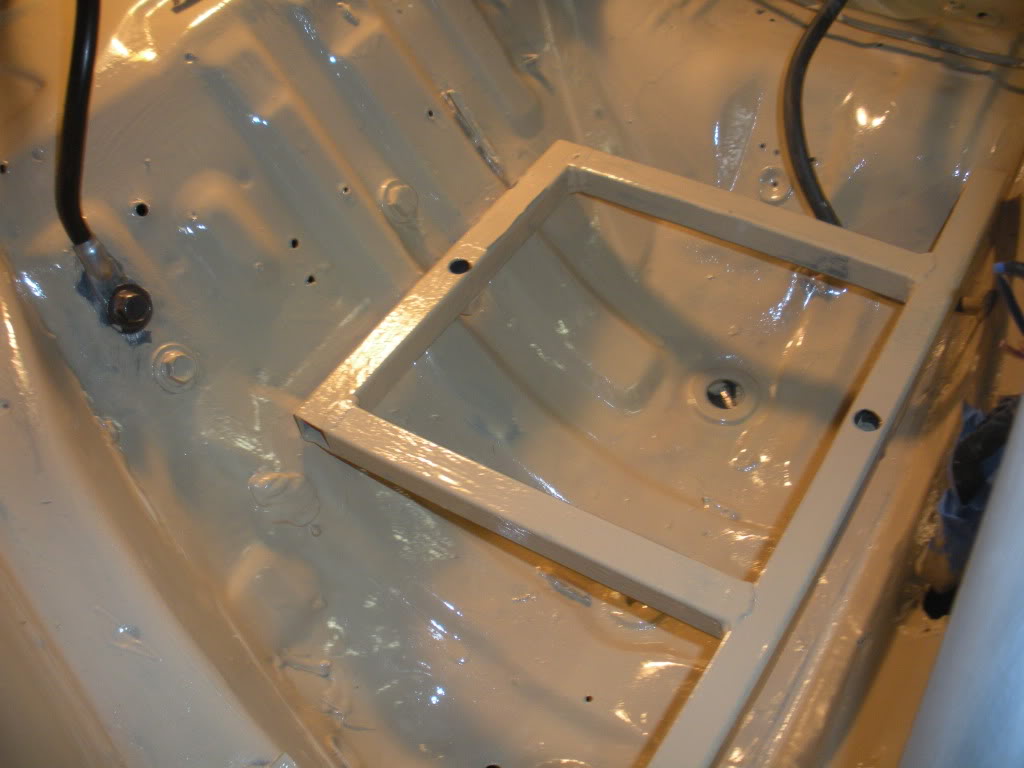
Weld up a frame for the new box to sit on... weld to chassis... paint.
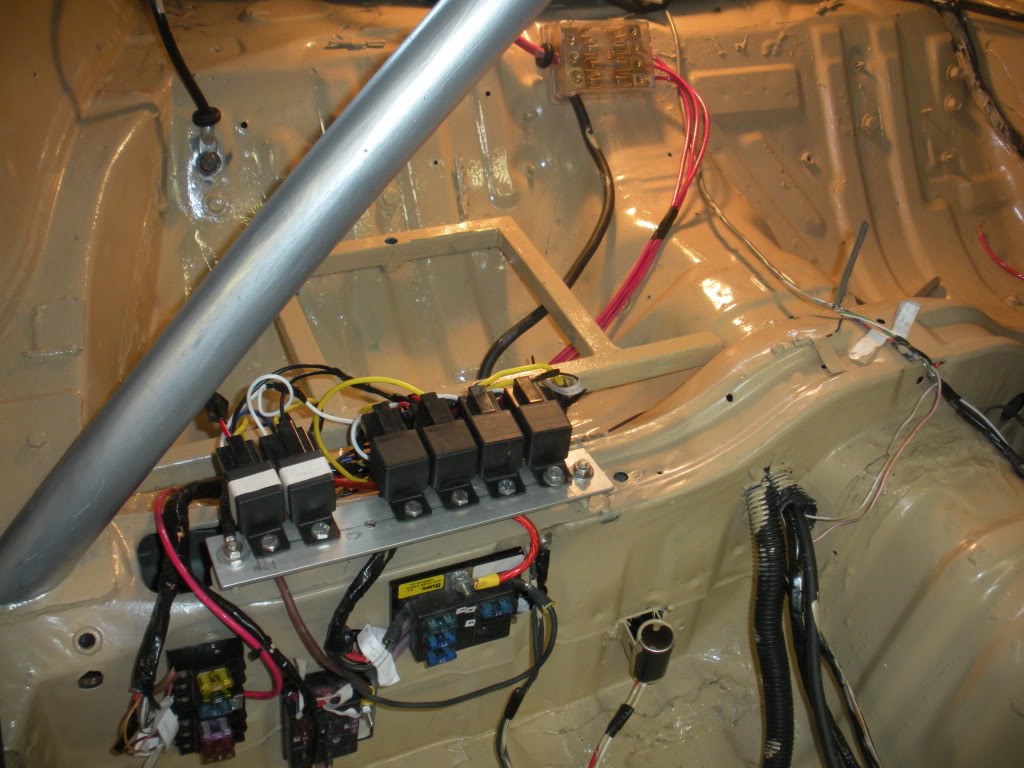
Now before I clutter this area up with a huge battery box I've got to find a place for all the relays and fuses to go... and the previous owner routed the harness through the chassis so there's no slack to move the harness anywhere. The only option short of cutting and extending all the wire individually was mount every thing right behind the passenger's seat.
Now with the wires out of the way of the battery box (but in the way of everything else now) it's time to assemble the box.
Bottom cover and battery -

Box sides -
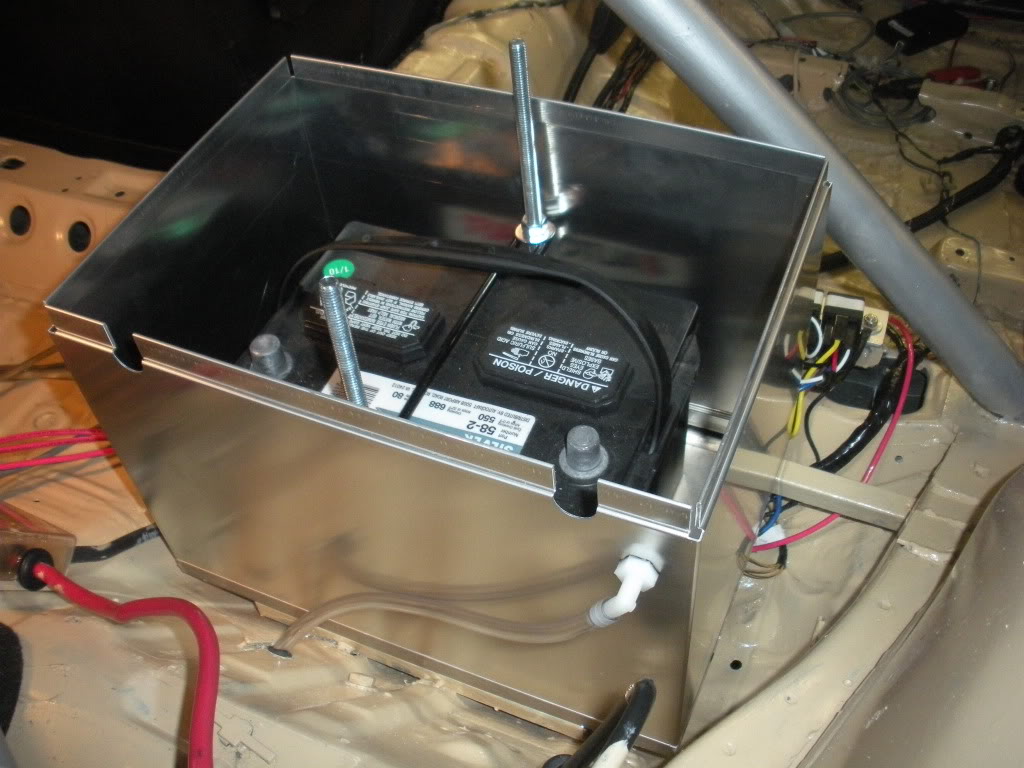
All "sealed" up-
Here's the mess of wiring I was met with when I removed the marine battery box (that wasn't even mounted to anything... not good)
Since the only wiring diagram for that mess exists in the previous owner's head I'm going to have to leave it as is until I can totally redo it... but since the new battery box is like 1.5x the size of the old one its all got to get moved out of the way for now.
Weld up a frame for the new box to sit on... weld to chassis... paint.
Now before I clutter this area up with a huge battery box I've got to find a place for all the relays and fuses to go... and the previous owner routed the harness through the chassis so there's no slack to move the harness anywhere. The only option short of cutting and extending all the wire individually was mount every thing right behind the passenger's seat.
Now with the wires out of the way of the battery box (but in the way of everything else now) it's time to assemble the box.
Bottom cover and battery -
Box sides -
All "sealed" up-
10-04-12, 10:01 PM
#7
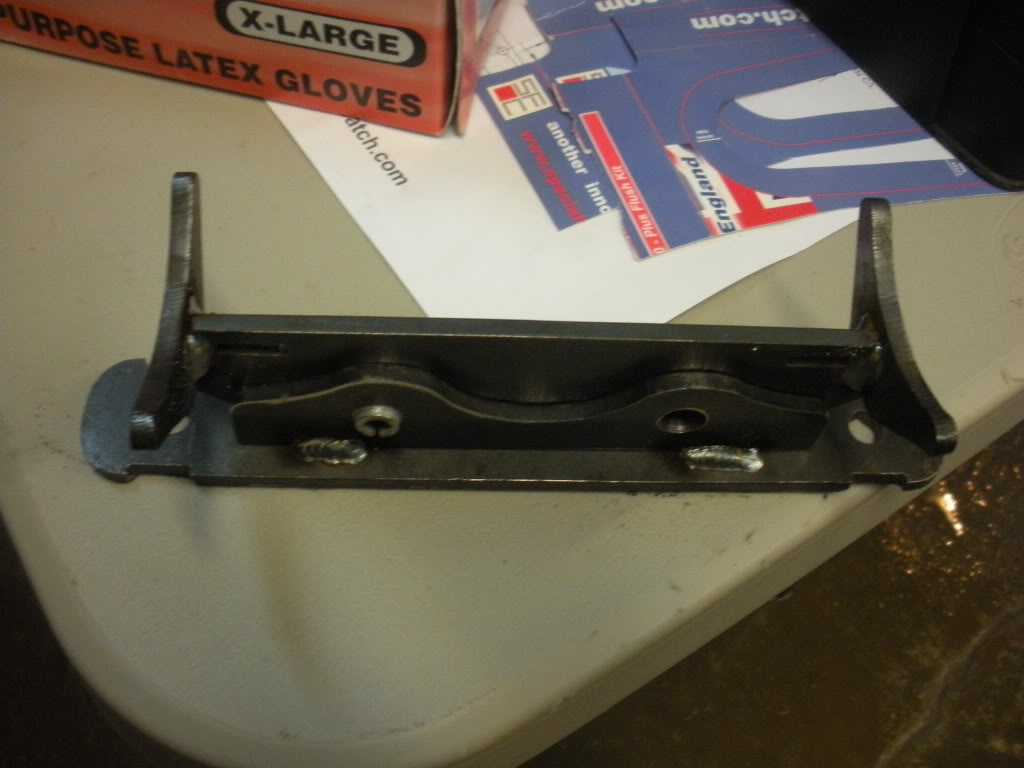
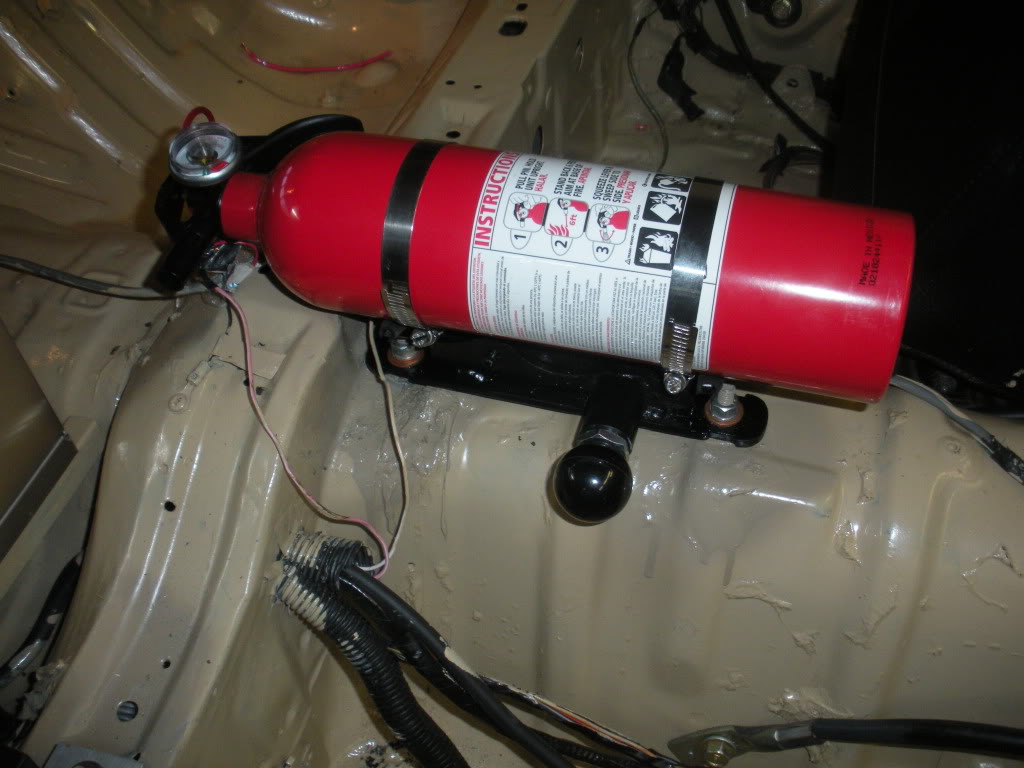
Up next was the fire extinguisher mount. I found this quick release mount on ebay and thought it looked neat... some assembly required.

All welded up (I plug welded the slots on the other side... those tacks on the top side of the mount are just for good measure)
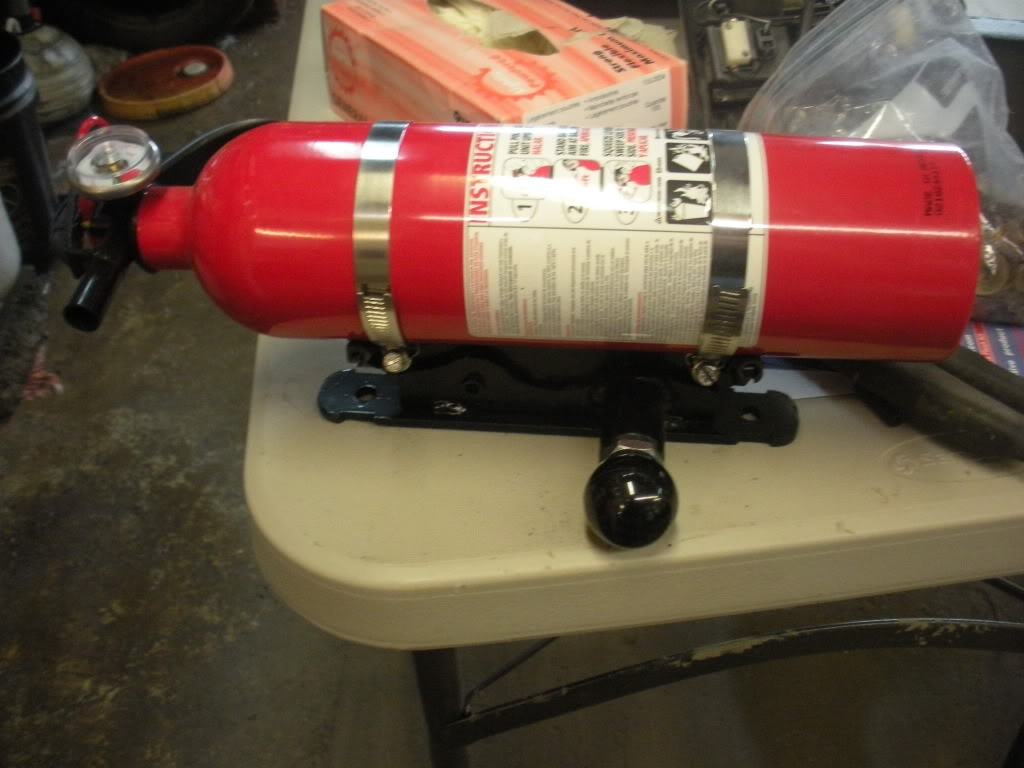
Painted and installed on the extinguisher -

Bottom mount installed in car -
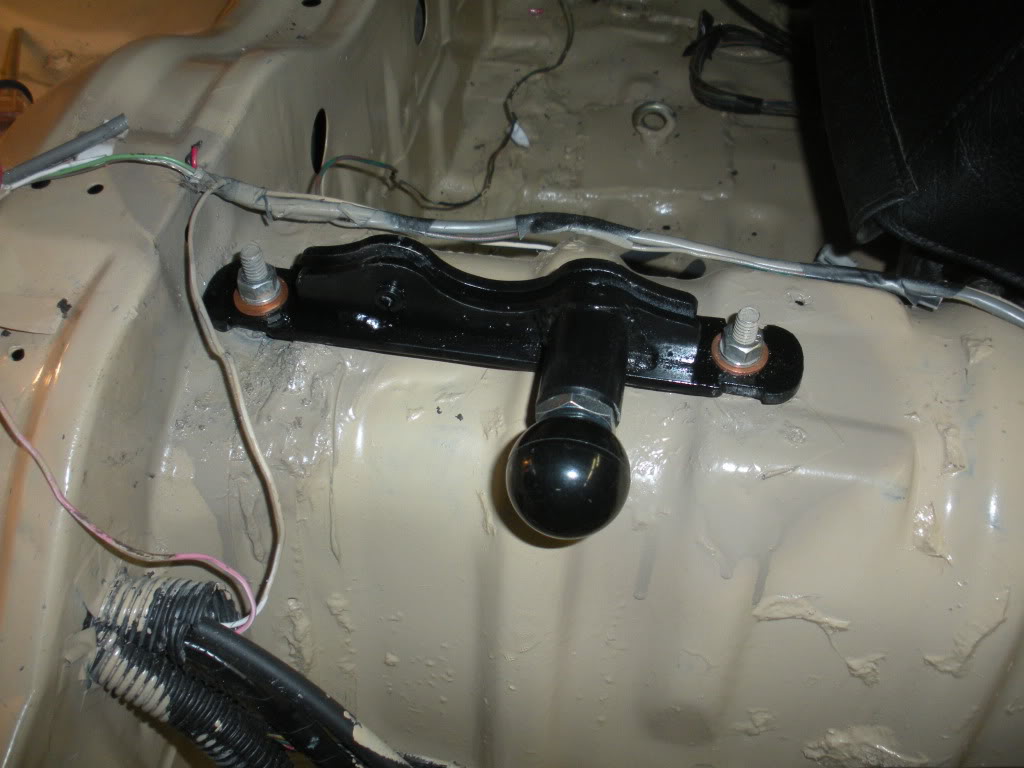
Fire extinguisher arm rest! (this will be great until the first time I power shift my elbow right into the bottom of it)
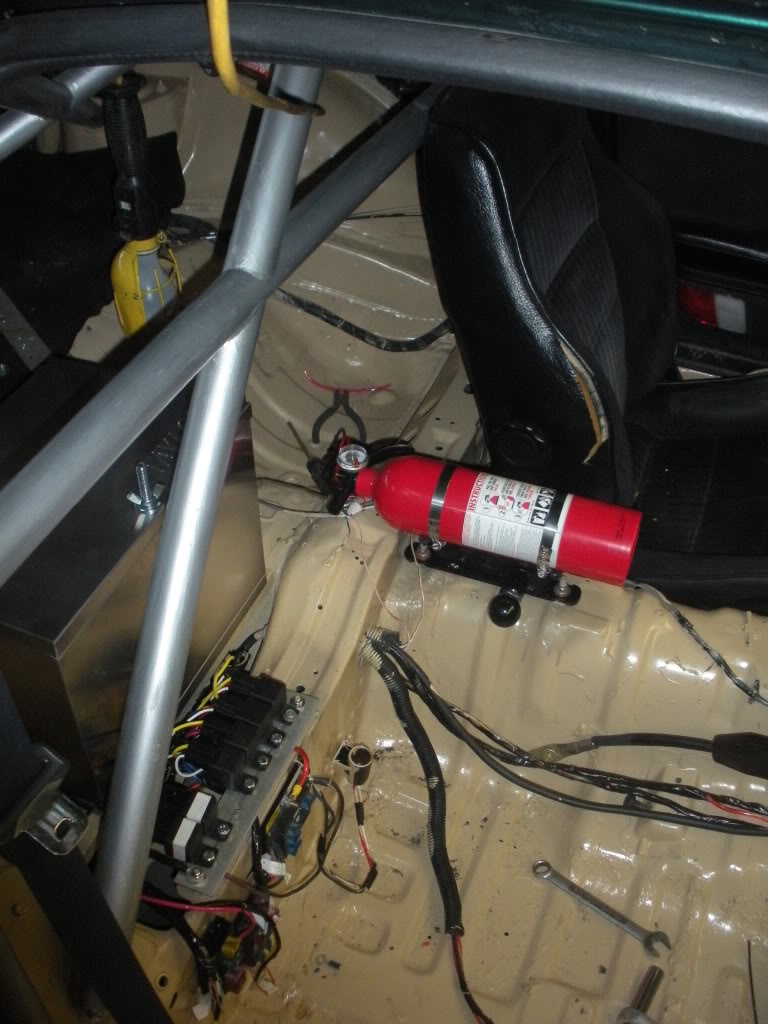
Before putting the passenger's seat back in I covered up the exposed wiring harness up with some wire loom.
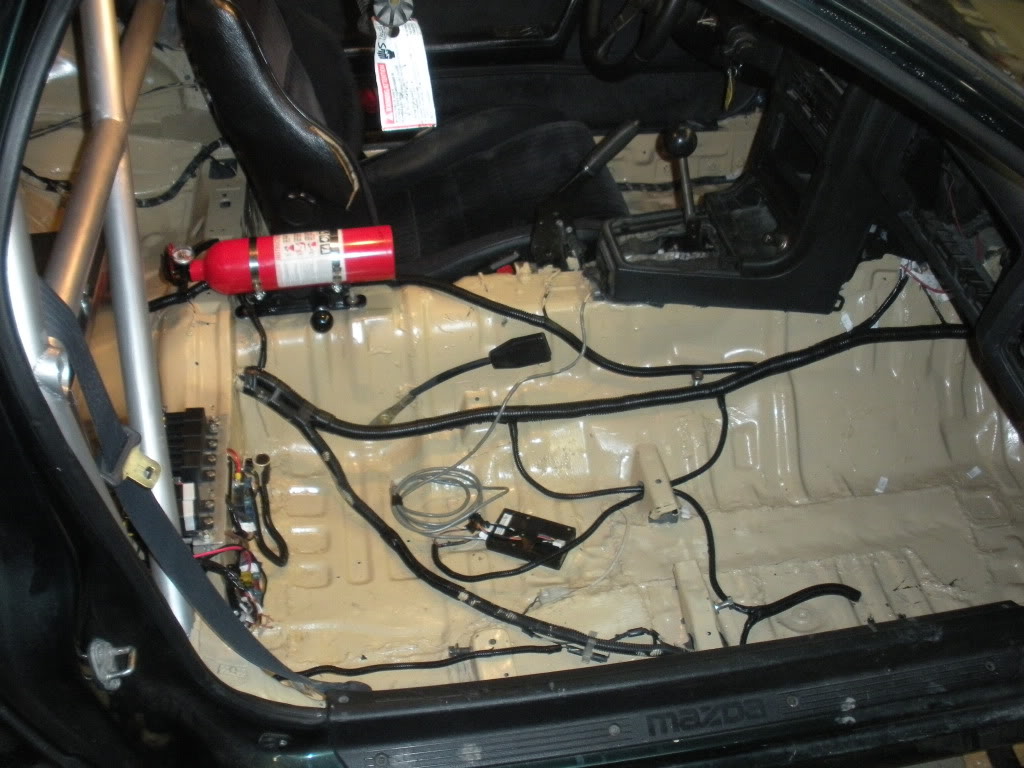
I also swapped out the door locks since the last dude to own it changed just the door locks out and then lost the key... So now I've got a key for an ignition and a key for the exterior locks... shitty... but at least I can lock the car now. This was a much bigger process than I anticipated. I had to strip each door down and remove the side window glass to get the handles out to replace the locks. Nothing really to see there... just a lot of labor for locks that are just clipped in place.
The last thing I did before heading back to NJ was pulling the lexan windshield out... once all the screws were pulled out it pretty much popped out by itself. I didn't take any pictures of this... but just image the car missing the windshield and you will get the idea. The new glass will be installed at the end of the week and that only leaves a few things to be done before I'm Club loose legal.
All welded up (I plug welded the slots on the other side... those tacks on the top side of the mount are just for good measure)
Painted and installed on the extinguisher -
Bottom mount installed in car -
Fire extinguisher arm rest! (this will be great until the first time I power shift my elbow right into the bottom of it)
Before putting the passenger's seat back in I covered up the exposed wiring harness up with some wire loom.
I also swapped out the door locks since the last dude to own it changed just the door locks out and then lost the key... So now I've got a key for an ignition and a key for the exterior locks... shitty... but at least I can lock the car now. This was a much bigger process than I anticipated. I had to strip each door down and remove the side window glass to get the handles out to replace the locks. Nothing really to see there... just a lot of labor for locks that are just clipped in place.
The last thing I did before heading back to NJ was pulling the lexan windshield out... once all the screws were pulled out it pretty much popped out by itself. I didn't take any pictures of this... but just image the car missing the windshield and you will get the idea. The new glass will be installed at the end of the week and that only leaves a few things to be done before I'm Club loose legal.
Trending Topics
10-04-12, 10:01 PM
#8
more parts at my door today... mostly courtesy of Ebay motors... so I can be helladope on the track.
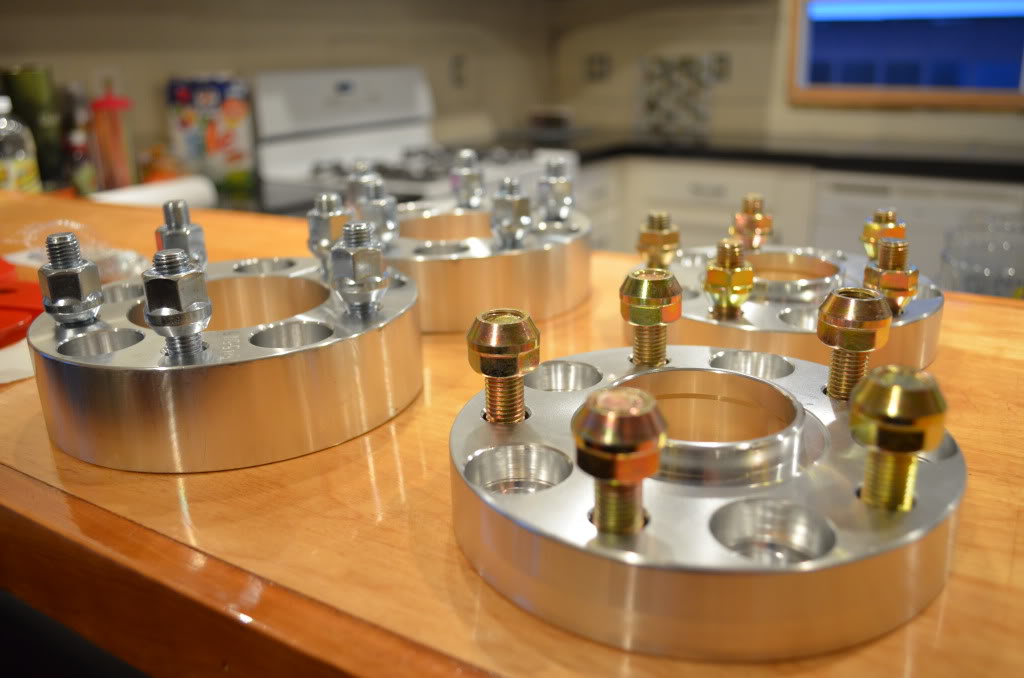
Spacers for flushness (since an 18x10 wheel can't do it on its own) 1.5" spacer in the front and 1" hub centric spacer in the rear. I'm taking a chance on the no name spacers here... but 6061 is 6061 and CNC machined is CNC machined right? You don't need a big brand name to make flat aluminum rings with studs pressed in... I hope.
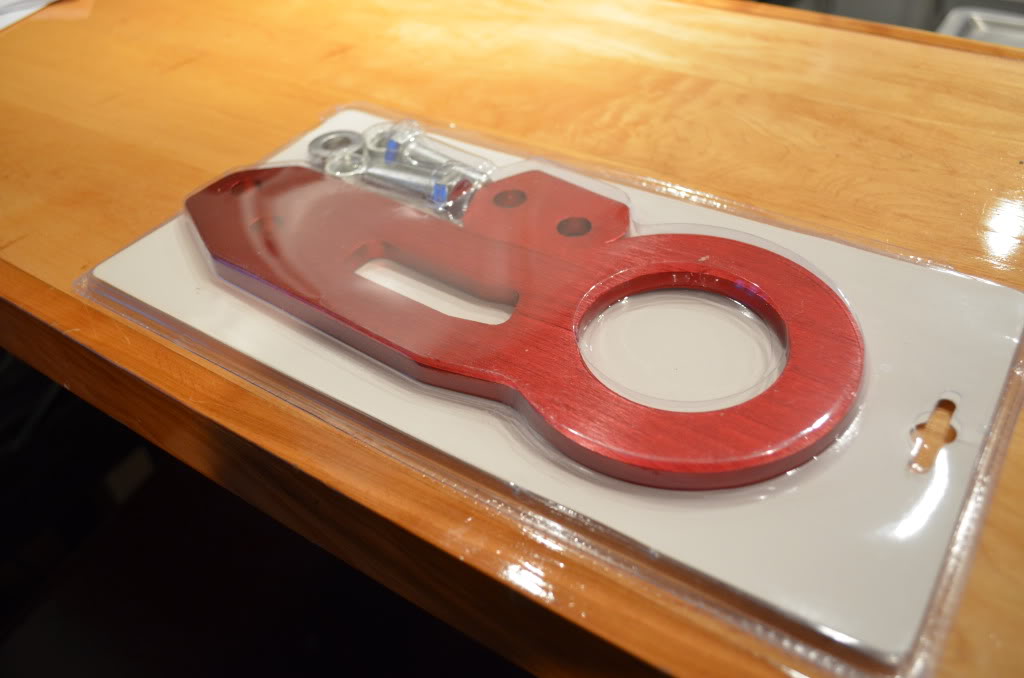
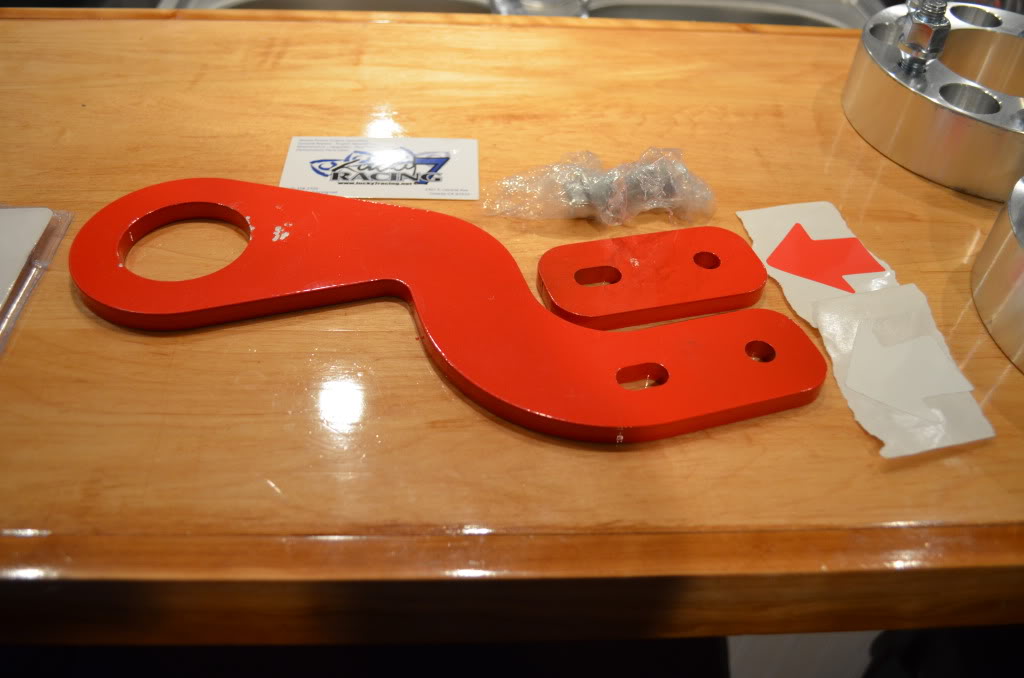
EBAY No name "JDM" Rear tow hook. My inner ricer is satisfied... too bad this thing is going to see track duty instead of an easy life hard parking... we'll see if this hold up towing the car out of the mud on any off track excursions... or if I would have had more luck zip-tying my $20 bill to the factory tow hook and trying to use that as a tow strap.
Ronin Speed Works Front tow hook. This one attaches to the frame rail in the front and snakes out through the lower grille. This is purpose built and track tested so it will probably hold up! This is probably the only thing that I haven't bought off ebay in the last 2 weeks.
So I lied about the 18x10s. They are 18x9.75 and 18x8.75. More chinese parts!
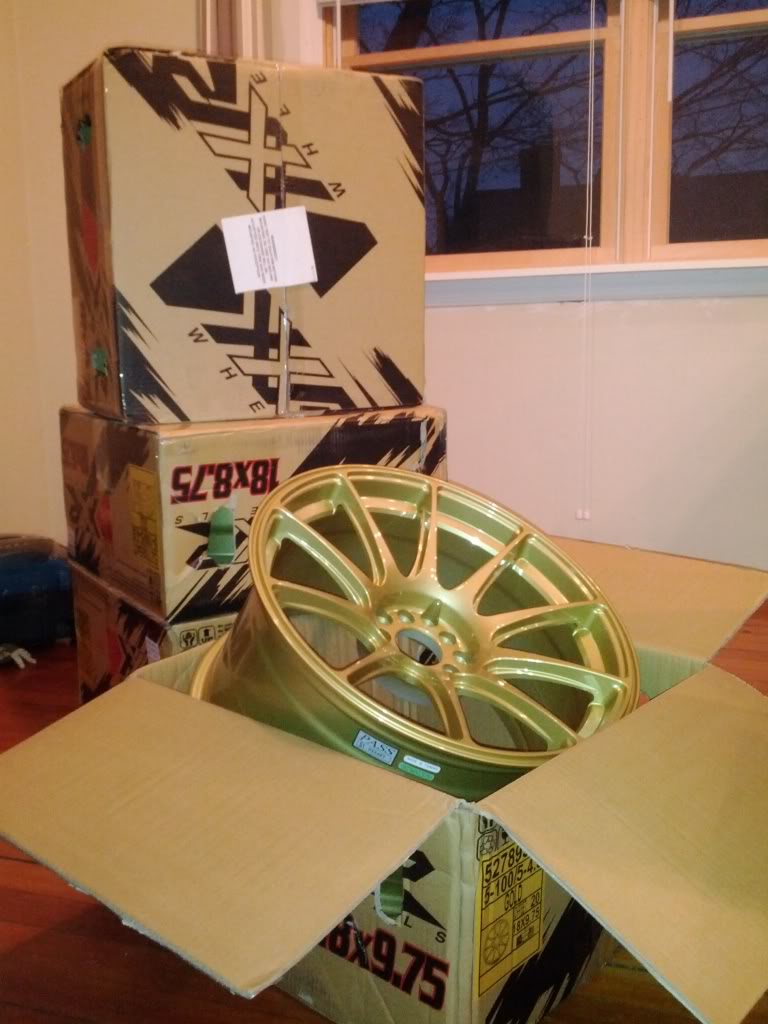
Wheel Test Fit:
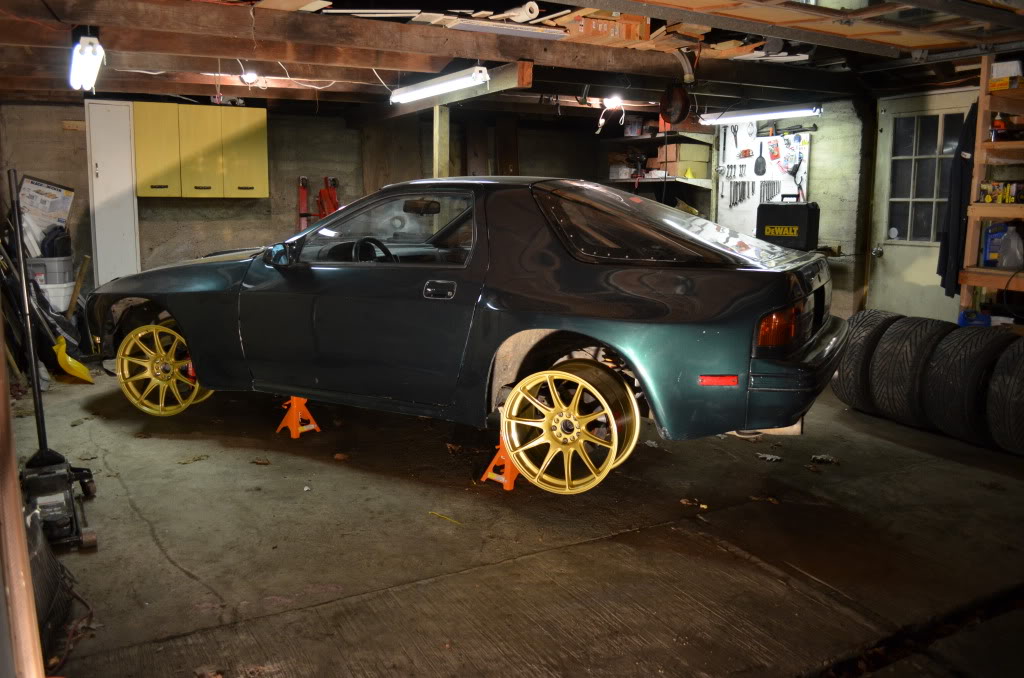
(those are the daily rollers in the corner)
The wheels should look pretty good with some tires on them and the ride height lowered from trophy-truck status.
In case any one is keeping track, the specs on the wheels are:
XXR 527 - 18x8.75 +20 (with a 38mm thick spacer) Front and 18x9.75 + 20 (with a 25mm spacer) Rear.
They will fall short of filling out the wide fenders hellaflush-style by a little... I really could use a 35mm to 38mm in the rear and some where in the 45 to 50mm range in the front... but that's just silly :rolleyes
Spacers for flushness (since an 18x10 wheel can't do it on its own) 1.5" spacer in the front and 1" hub centric spacer in the rear. I'm taking a chance on the no name spacers here... but 6061 is 6061 and CNC machined is CNC machined right? You don't need a big brand name to make flat aluminum rings with studs pressed in... I hope.
EBAY No name "JDM" Rear tow hook. My inner ricer is satisfied... too bad this thing is going to see track duty instead of an easy life hard parking... we'll see if this hold up towing the car out of the mud on any off track excursions... or if I would have had more luck zip-tying my $20 bill to the factory tow hook and trying to use that as a tow strap.
Ronin Speed Works Front tow hook. This one attaches to the frame rail in the front and snakes out through the lower grille. This is purpose built and track tested so it will probably hold up! This is probably the only thing that I haven't bought off ebay in the last 2 weeks.
So I lied about the 18x10s. They are 18x9.75 and 18x8.75. More chinese parts!
Wheel Test Fit:
(those are the daily rollers in the corner)
The wheels should look pretty good with some tires on them and the ride height lowered from trophy-truck status.
In case any one is keeping track, the specs on the wheels are:
XXR 527 - 18x8.75 +20 (with a 38mm thick spacer) Front and 18x9.75 + 20 (with a 25mm spacer) Rear.
They will fall short of filling out the wide fenders hellaflush-style by a little... I really could use a 35mm to 38mm in the rear and some where in the 45 to 50mm range in the front... but that's just silly :rolleyes
10-04-12, 10:02 PM
#9
April 2012 -
Home brew front toe alignment.
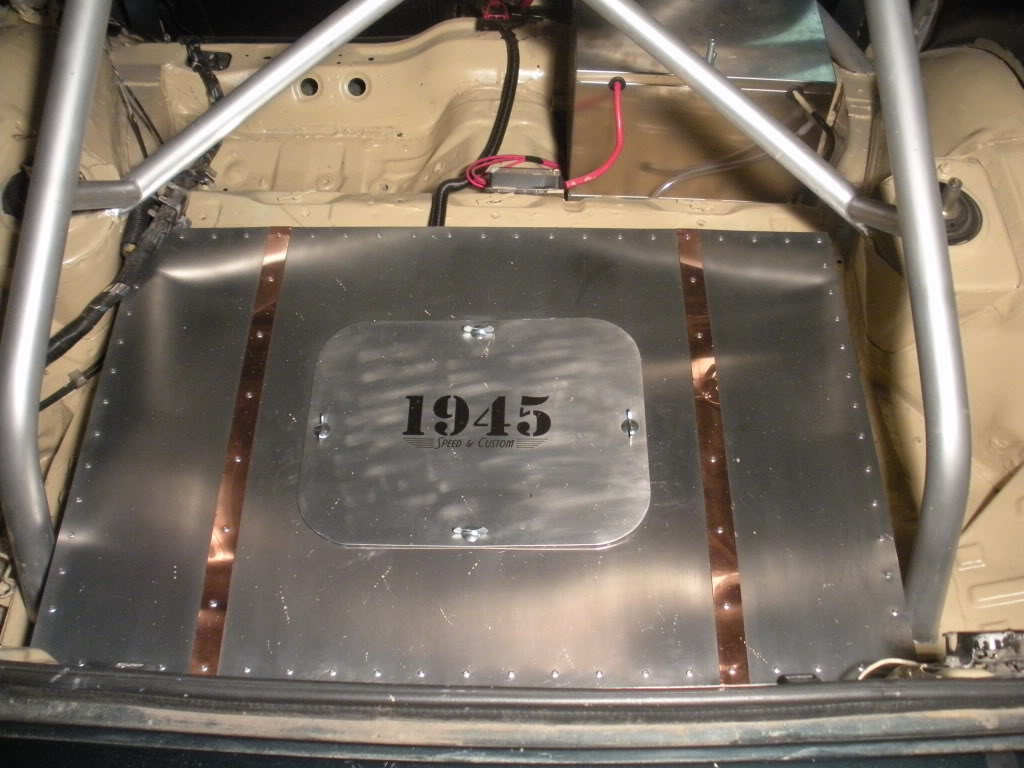
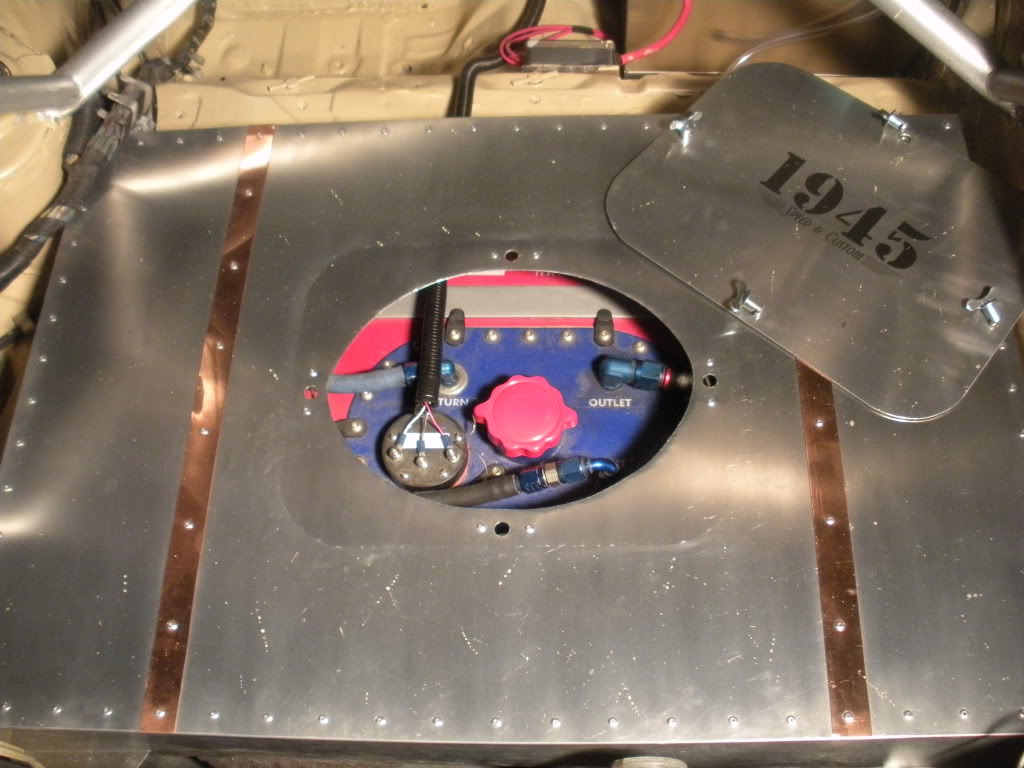
Sweet fuel cell cover/firewall Jeremy Baye at "1945 Speed & Custom" fabbed up for me.
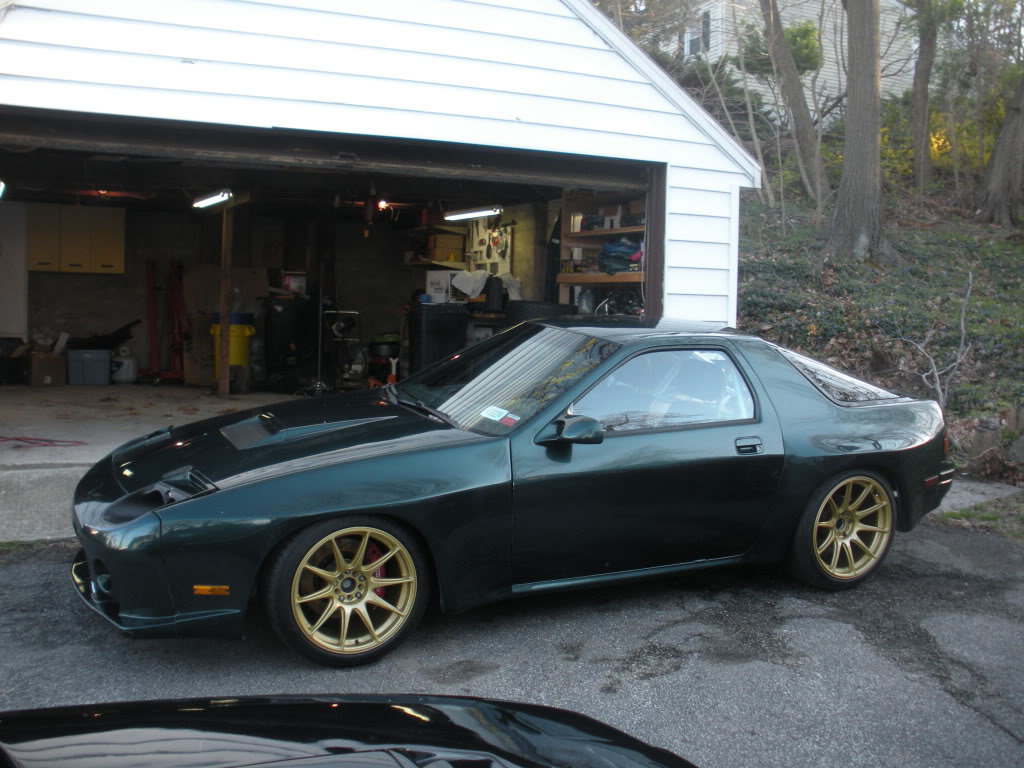
Out of the garage and ready to rock before opening moves.
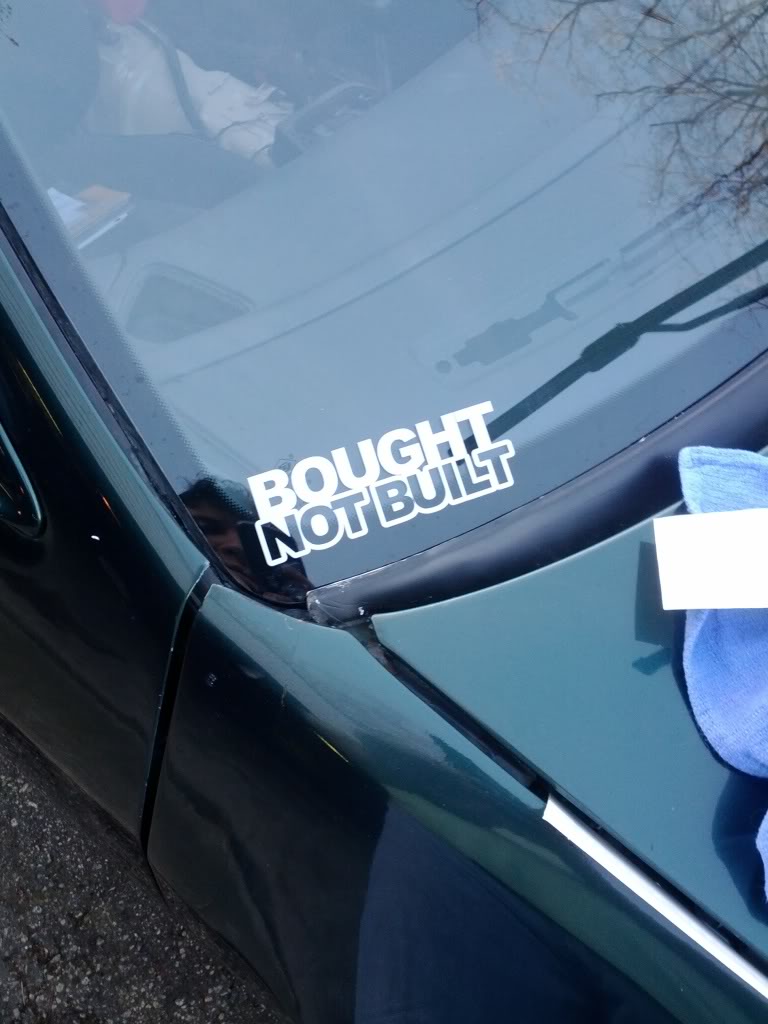
Stickers added... because it seems that stickers + car = drift car

Pits at Englishtown... and a mountain of tires we didn't need
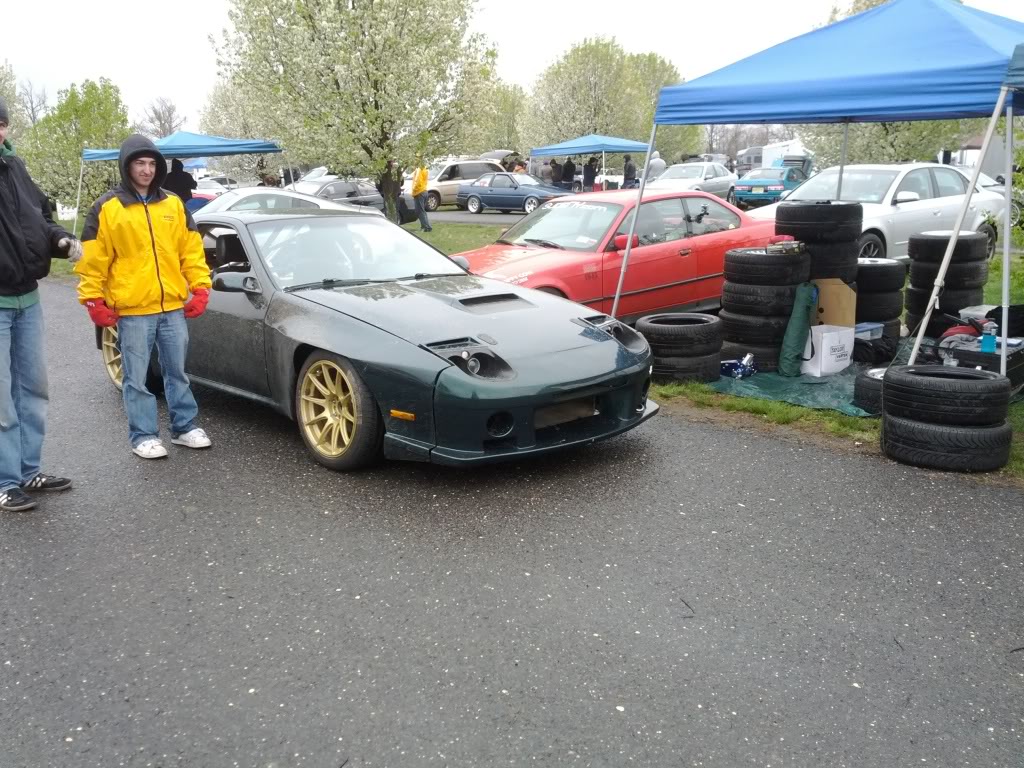
The only shots of the car I've seen so far from the event :pinch: I guess I'll have to run the front course next time if I want to get some action shots
Home brew front toe alignment.
Sweet fuel cell cover/firewall Jeremy Baye at "1945 Speed & Custom" fabbed up for me.
Out of the garage and ready to rock before opening moves.
Stickers added... because it seems that stickers + car = drift car
Pits at Englishtown... and a mountain of tires we didn't need
The only shots of the car I've seen so far from the event :pinch: I guess I'll have to run the front course next time if I want to get some action shots
10-04-12, 10:02 PM
#10
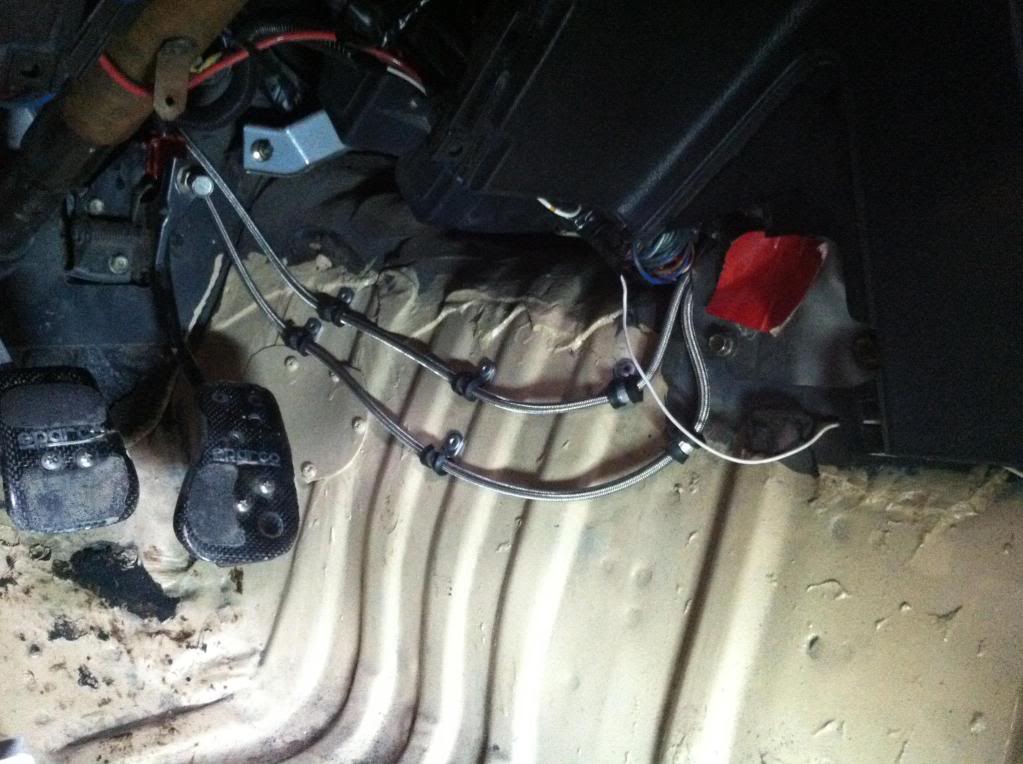
Not enough cool stuff has been happening to this car lately. I redid the fuel lines, New push-lok line from the fuel cell forward.
Pulled the passenger's seat and loaded it up with 17's to drift at night moves this Wednesday night. There's 2 more in the back jammed between the cage in a couple spots.
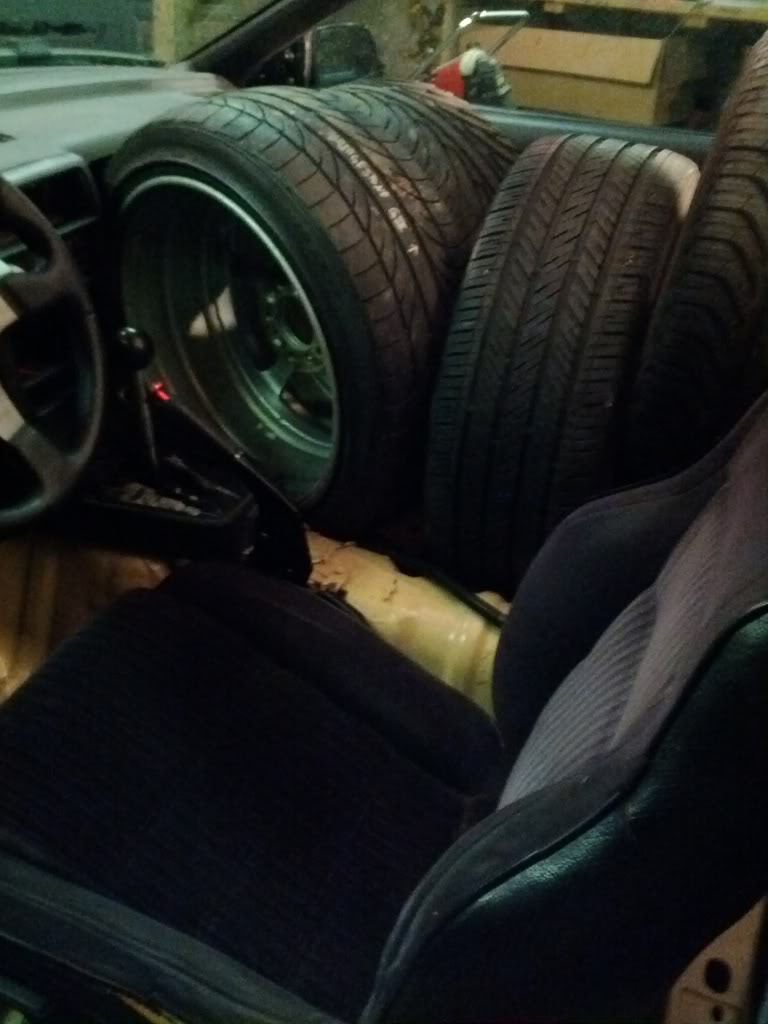
I really need a tire trailer!
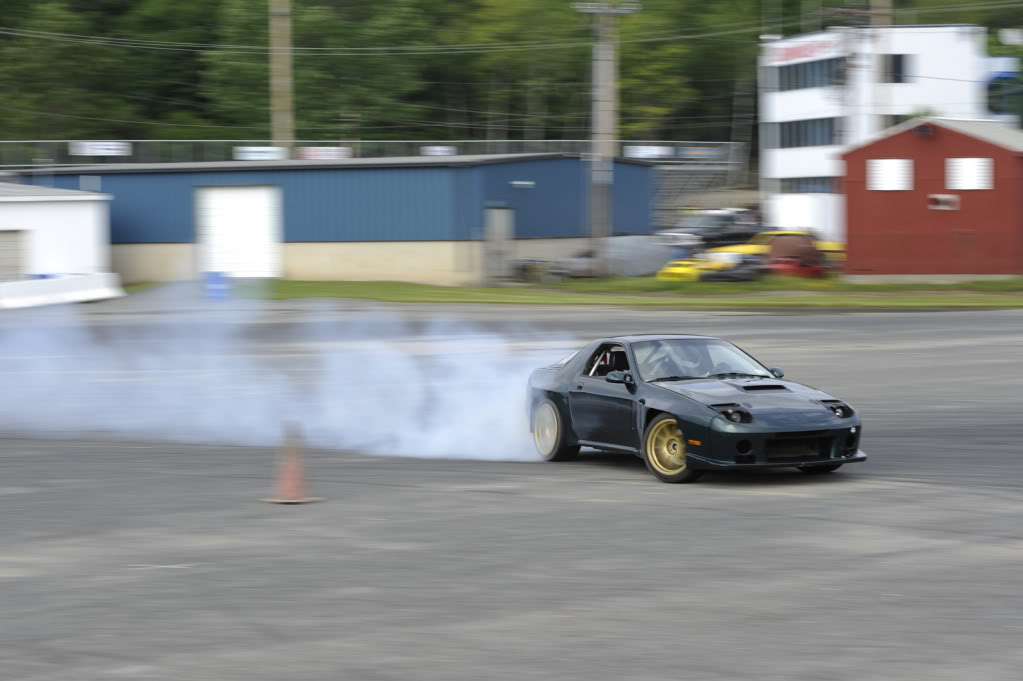
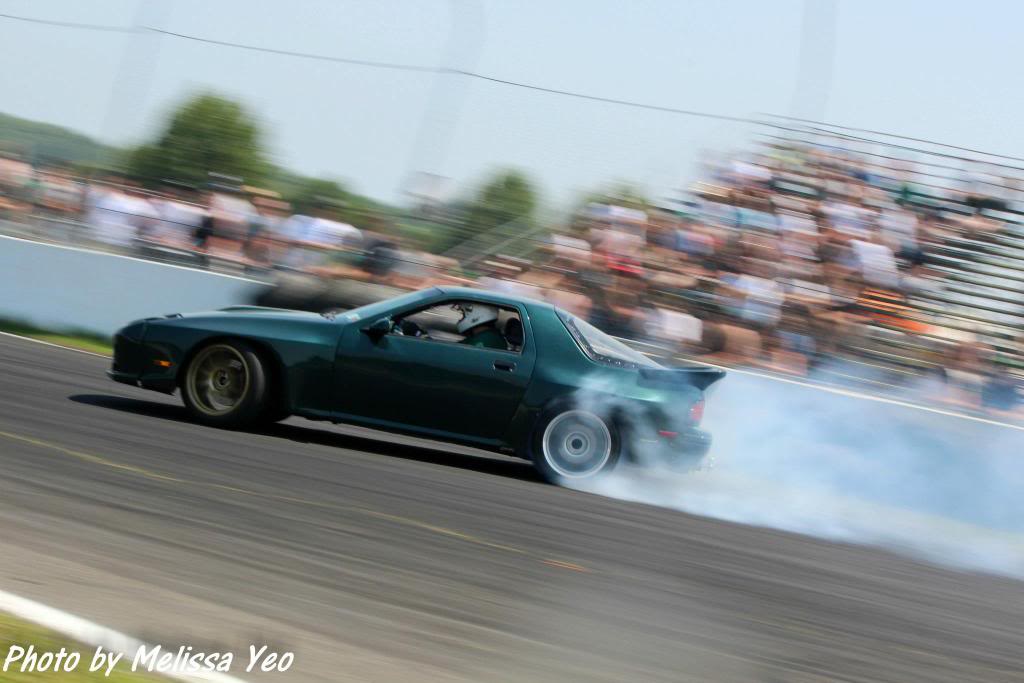
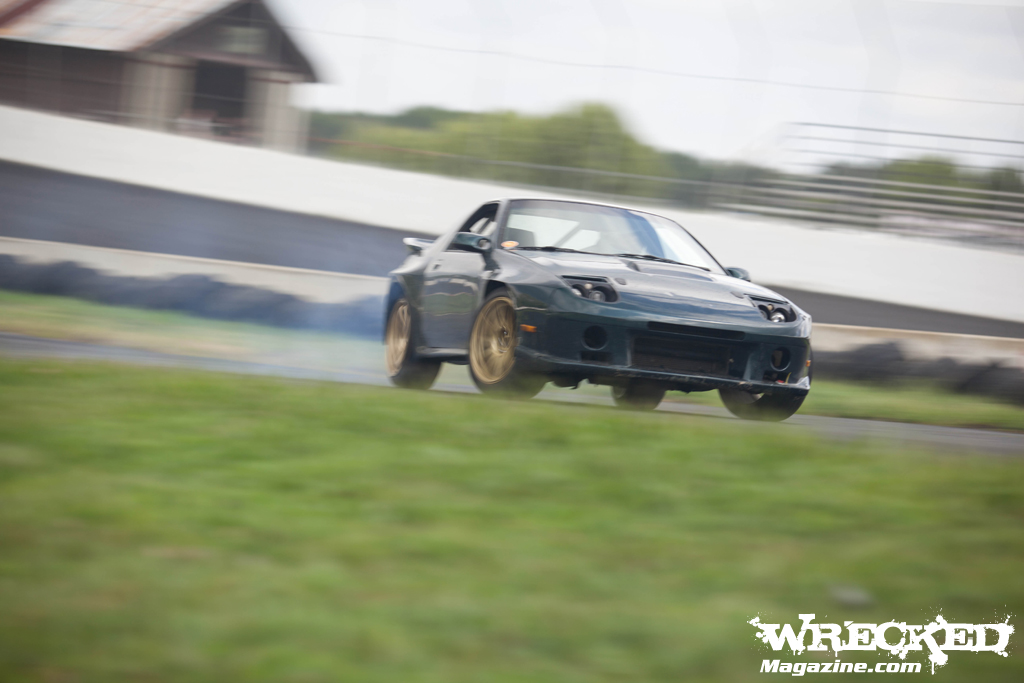
Early Summer LVD tire boiling

Late April 2012
Not much build happening to this car lately, mostly just driving. A few weekends ago I took it to RPI and ripped up north lot with an overall DNF due to all the drifting and then took it to Mohud the next day and finished like last after PAX had its way with my time.
Autox again... probably the last one for this car

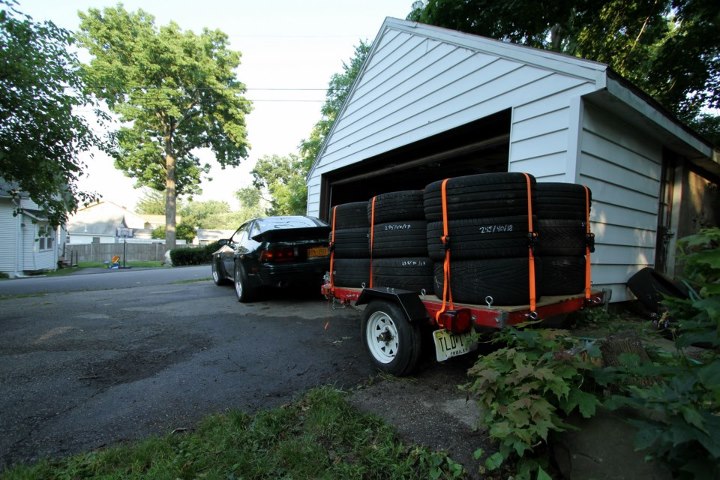
After that I built a tire trailer and attached a hitch to allow me to drag tons of drift spares to the track or parking lot.
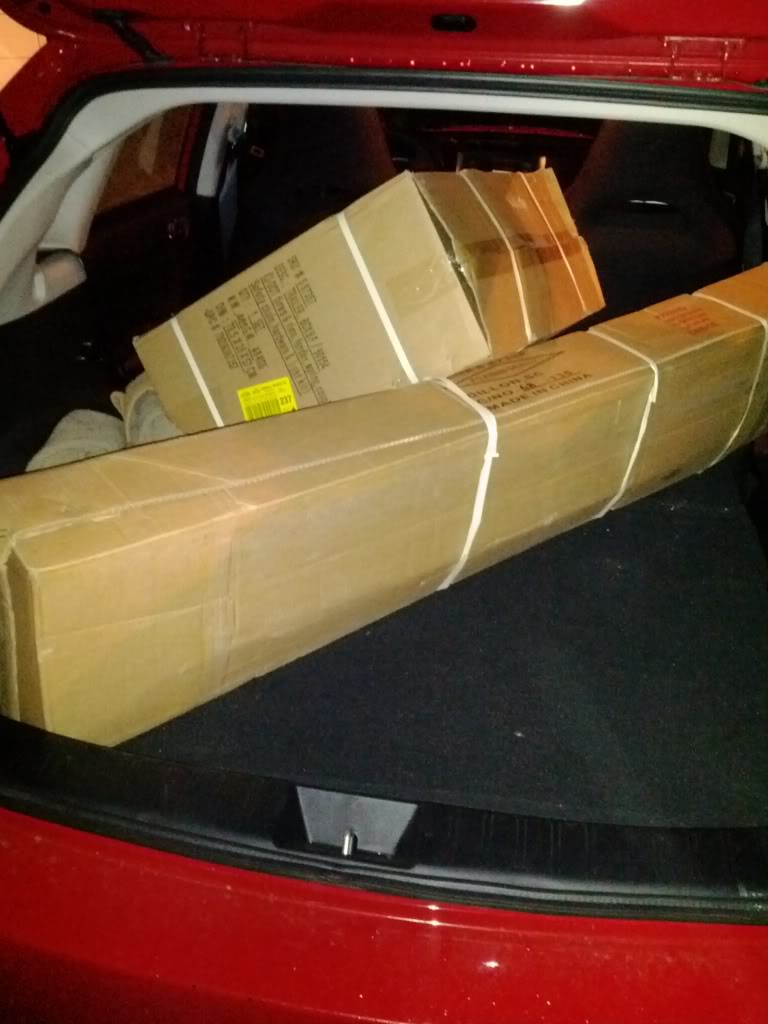
Hitch arrived - shipping box is cat approved
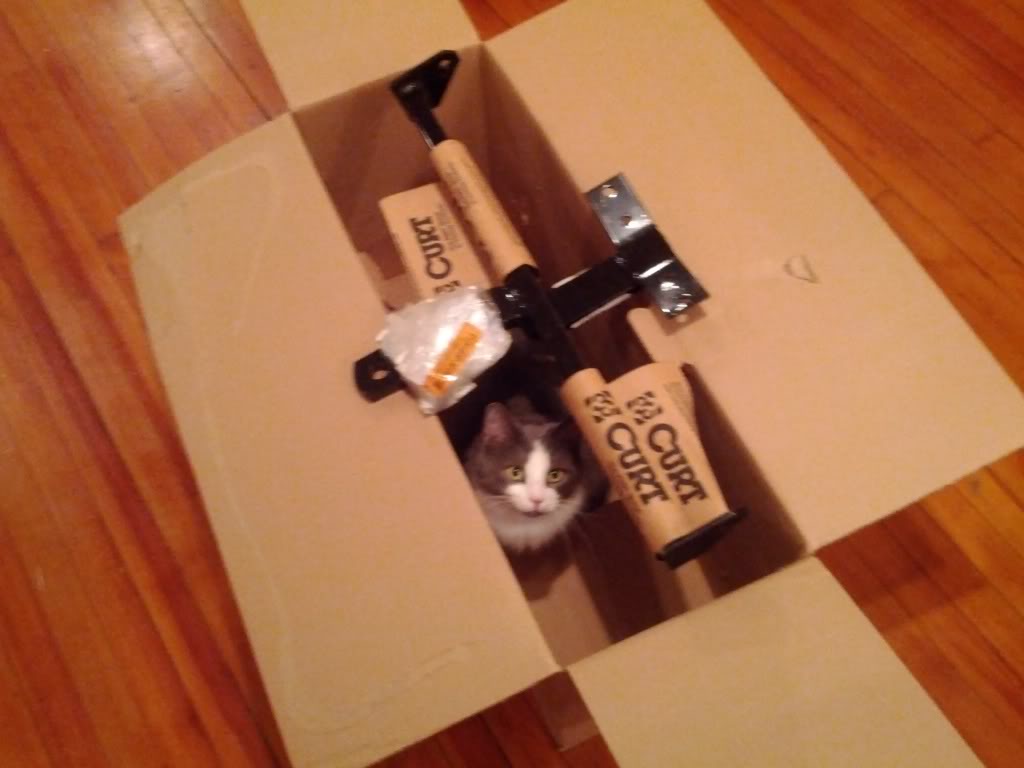
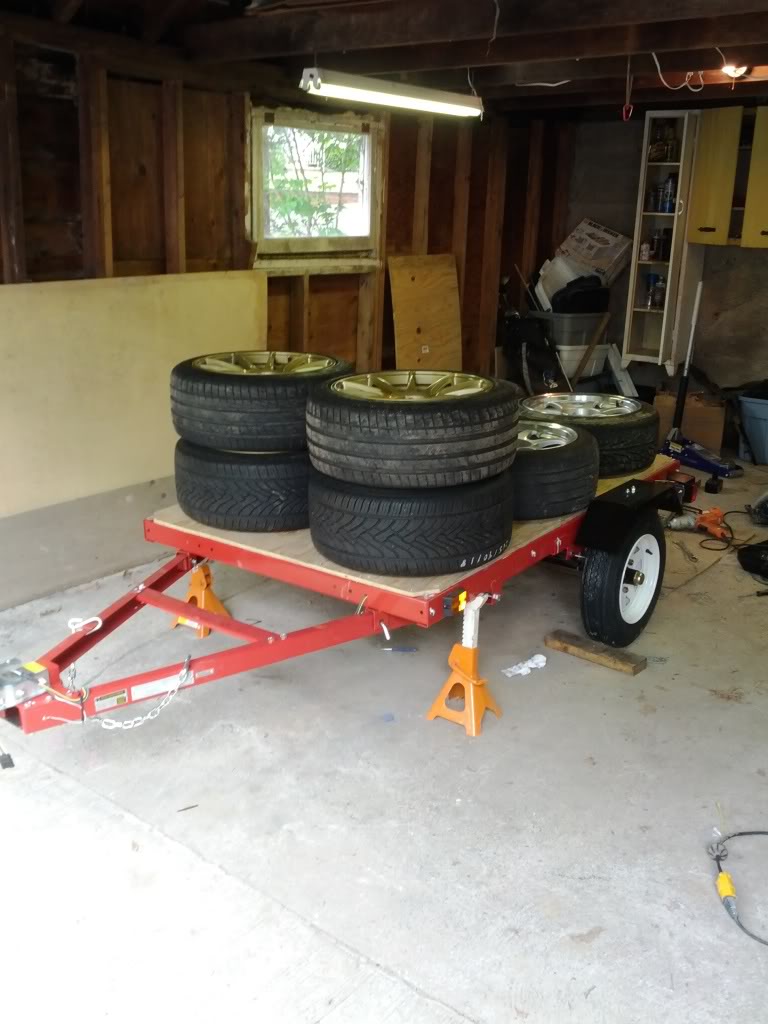
4'x8' folding utility trailer from Harbor Freight - All assembly required
Assembled - I ended up cutting 2 feet of the back to make it a 4'x6' trailer. Looks like it has plenty of room for wheels and tires.
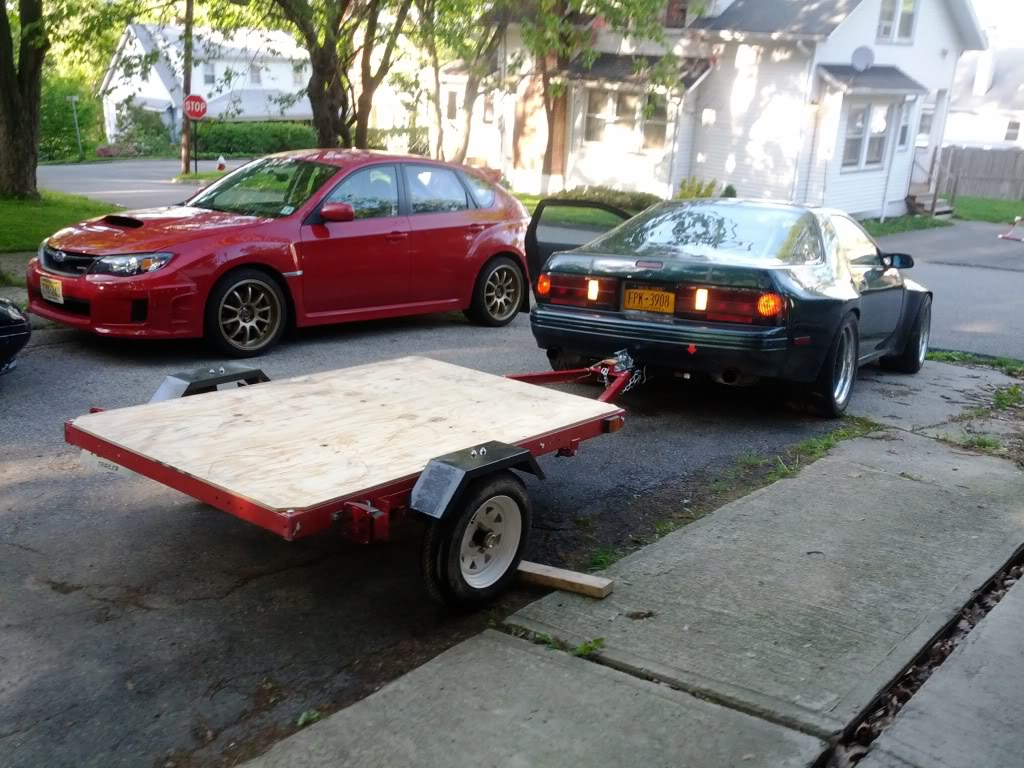
Hitched up for its maiden voyage around the block
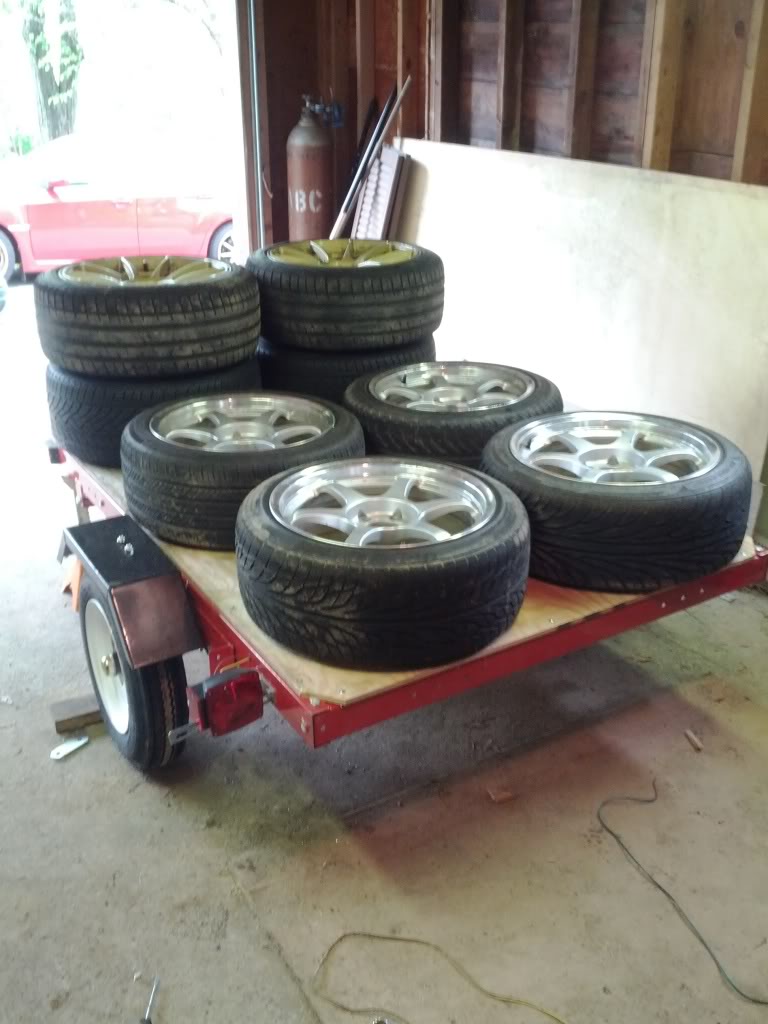
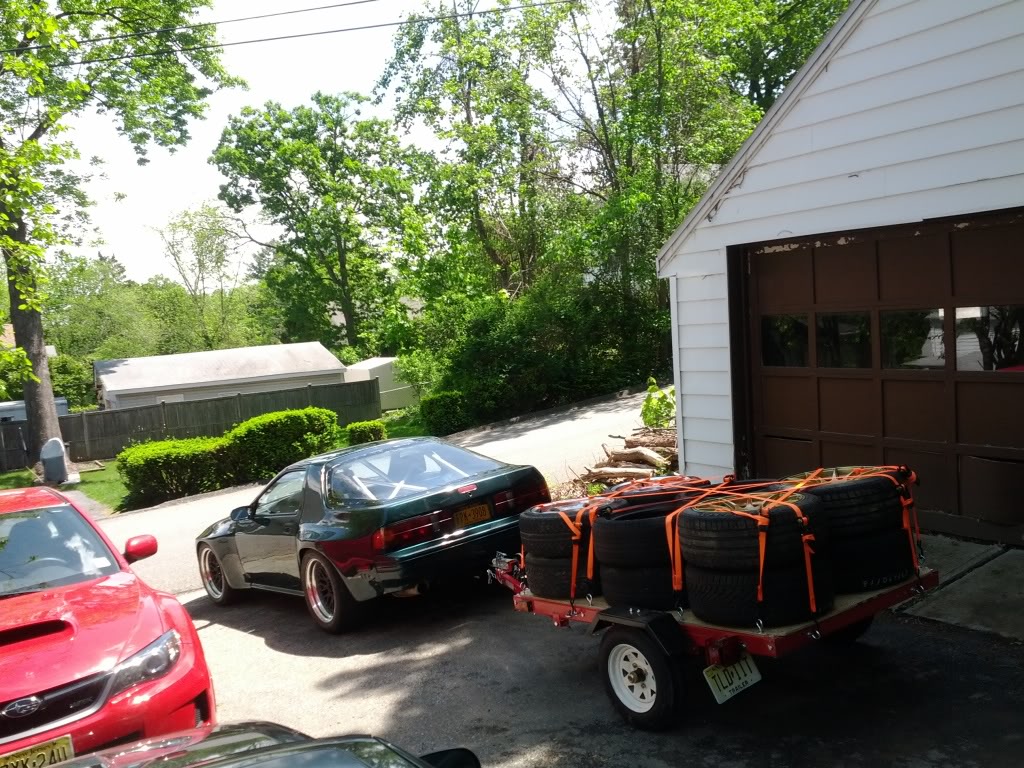
All packed up and ready to roll to Lebanon Valley. 8 wheels, 4 unmounted tires - and ratchet strap overkill
Pulled the passenger's seat and loaded it up with 17's to drift at night moves this Wednesday night. There's 2 more in the back jammed between the cage in a couple spots.
I really need a tire trailer!
Early Summer LVD tire boiling
Late April 2012
Not much build happening to this car lately, mostly just driving. A few weekends ago I took it to RPI and ripped up north lot with an overall DNF due to all the drifting and then took it to Mohud the next day and finished like last after PAX had its way with my time.
Autox again... probably the last one for this car
After that I built a tire trailer and attached a hitch to allow me to drag tons of drift spares to the track or parking lot.
Hitch arrived - shipping box is cat approved
4'x8' folding utility trailer from Harbor Freight - All assembly required
Assembled - I ended up cutting 2 feet of the back to make it a 4'x6' trailer. Looks like it has plenty of room for wheels and tires.
Hitched up for its maiden voyage around the block
All packed up and ready to roll to Lebanon Valley. 8 wheels, 4 unmounted tires - and ratchet strap overkill
10-04-12, 10:03 PM
#11
Killing tread.
Fuel Economy Numbers -
29.5 mpg on the highway with no trailer
20.5 mpg on the highway with trailer and 12 tires
15 mpg on the highway with trailer and 14 tires (tire stack higher than roof of car)
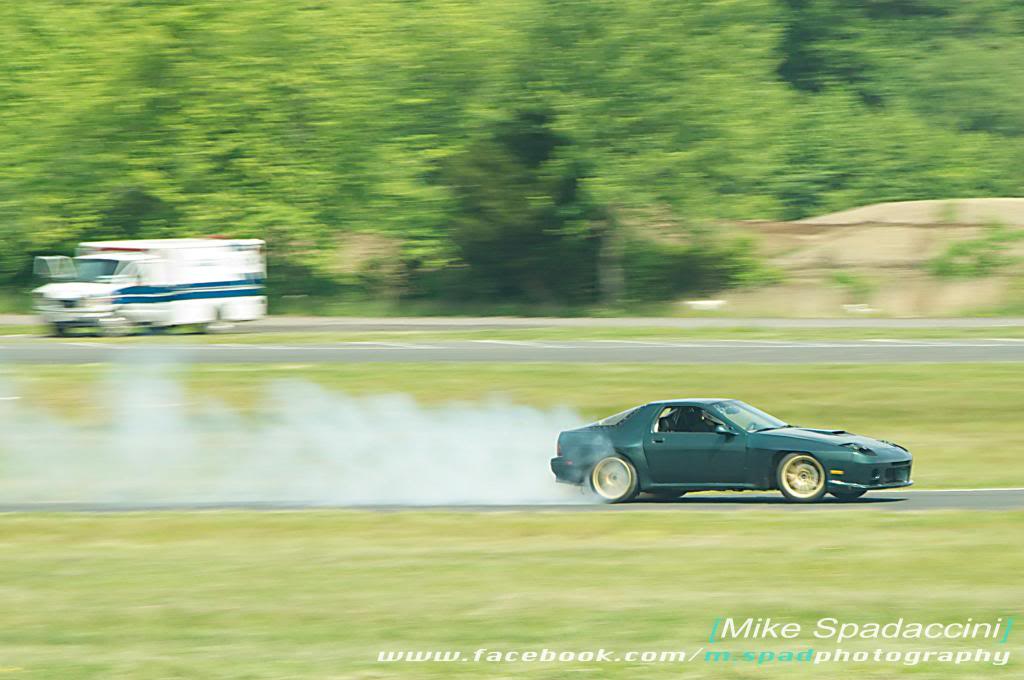
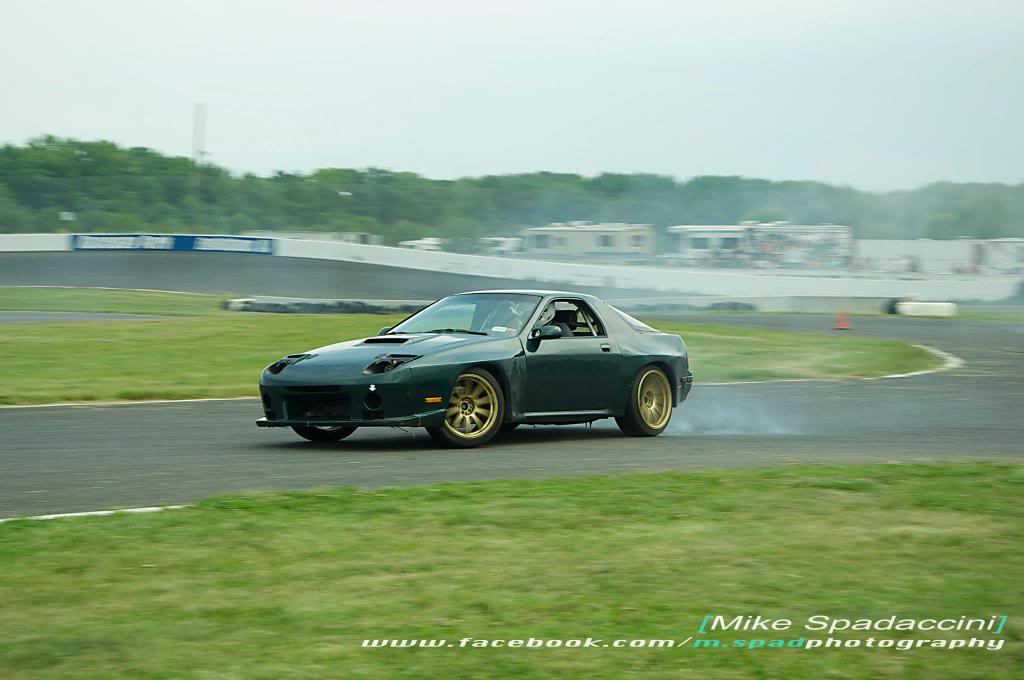
May 2012
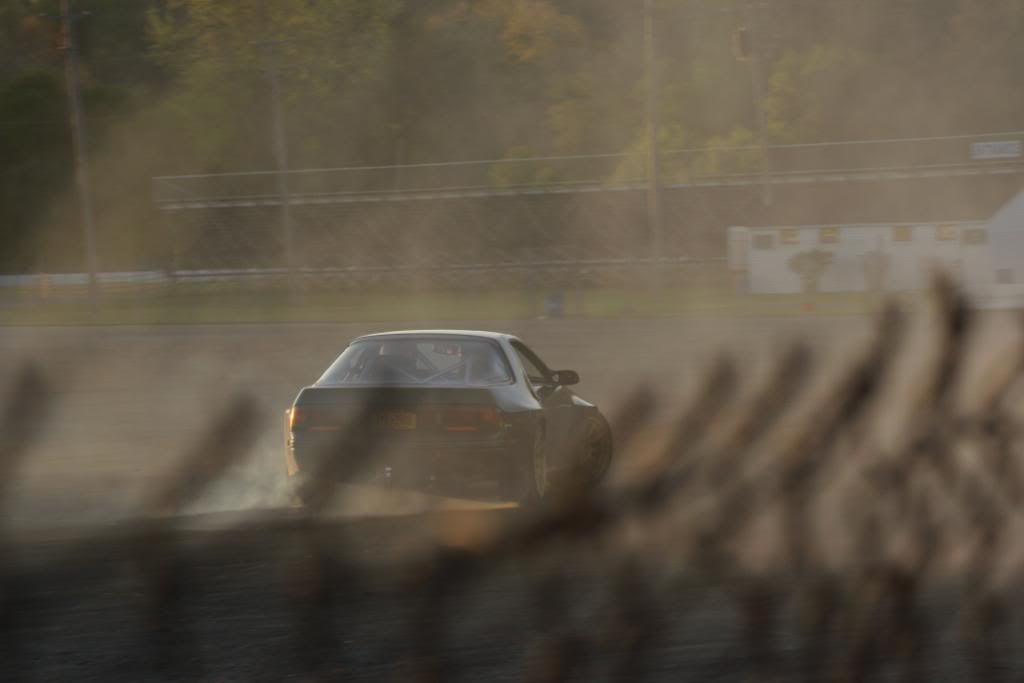
More stolen shots of the RX-5.7...
17.
http://www.flickr.com/photos/killerblackbird/7200192220/http://www.flickr.com/photos/killerblackbird/7200192220/# by http://www.flickr.com/people/killerblackbird/, on Flickr
18.
http://www.flickr.com/photos/killerblackbird/7200191388/http://www.flickr.com/photos/killerblackbird/7200191388/# by http://www.flickr.com/people/killerblackbird/, on Flickr
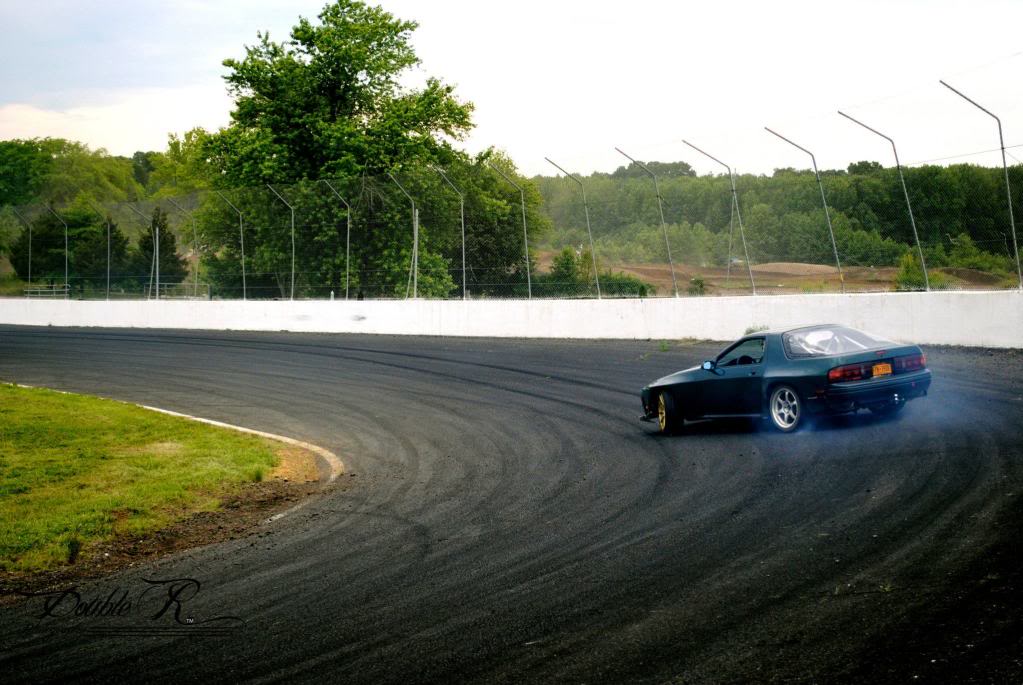
June 2012
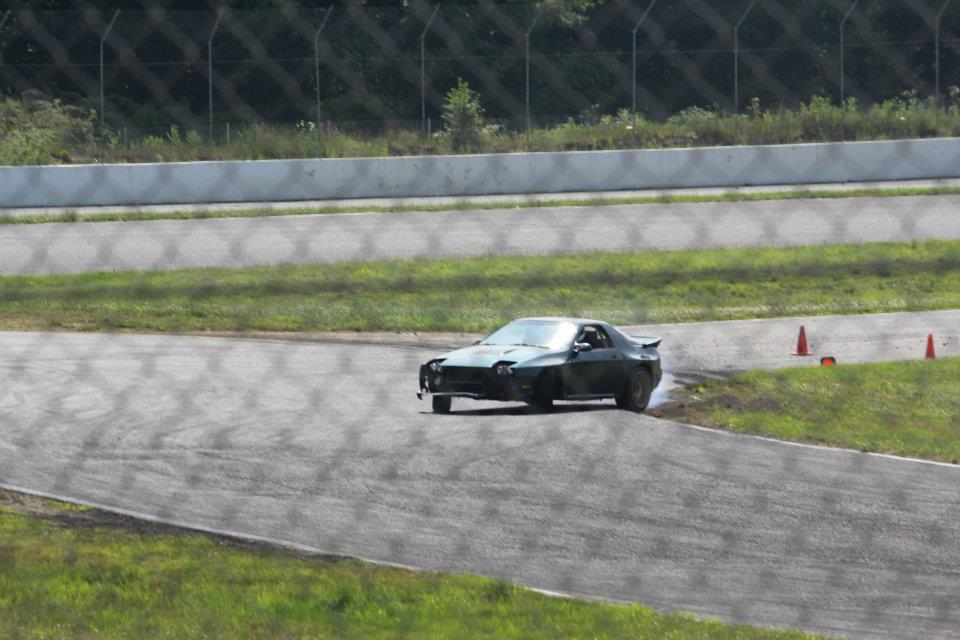
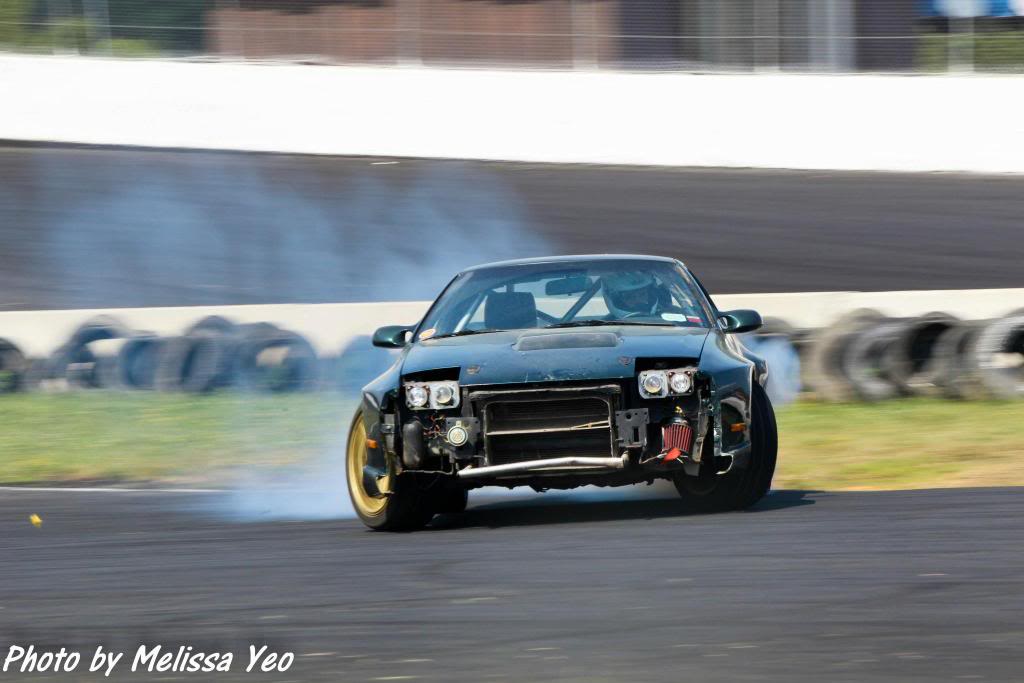
Survived another weekend of drifting
Friday at LVD -
Saturday at Englishtown -


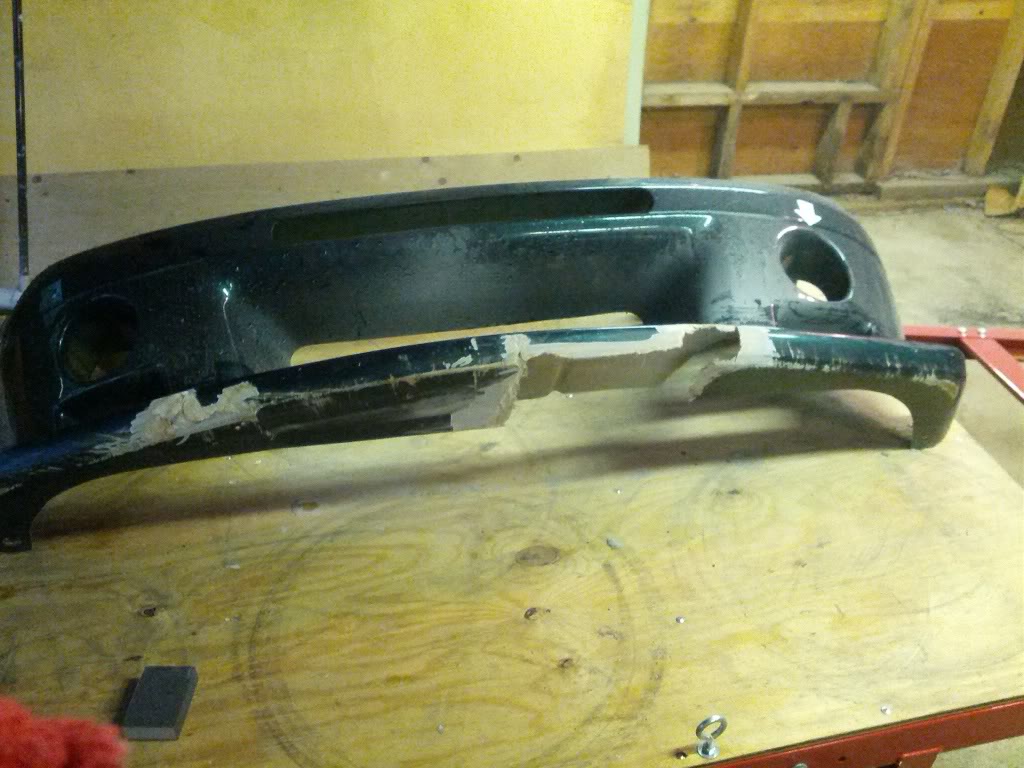
Front bumper did not survive Saturday -
Fuel Economy Numbers -
29.5 mpg on the highway with no trailer
20.5 mpg on the highway with trailer and 12 tires
15 mpg on the highway with trailer and 14 tires (tire stack higher than roof of car)
May 2012
More stolen shots of the RX-5.7...
17.
http://www.flickr.com/photos/killerblackbird/7200192220/http://www.flickr.com/photos/killerblackbird/7200192220/# by http://www.flickr.com/people/killerblackbird/, on Flickr
18.
http://www.flickr.com/photos/killerblackbird/7200191388/http://www.flickr.com/photos/killerblackbird/7200191388/# by http://www.flickr.com/people/killerblackbird/, on Flickr
June 2012
Survived another weekend of drifting
Friday at LVD -
Saturday at Englishtown -
Front bumper did not survive Saturday -
10-04-12, 10:04 PM
#12
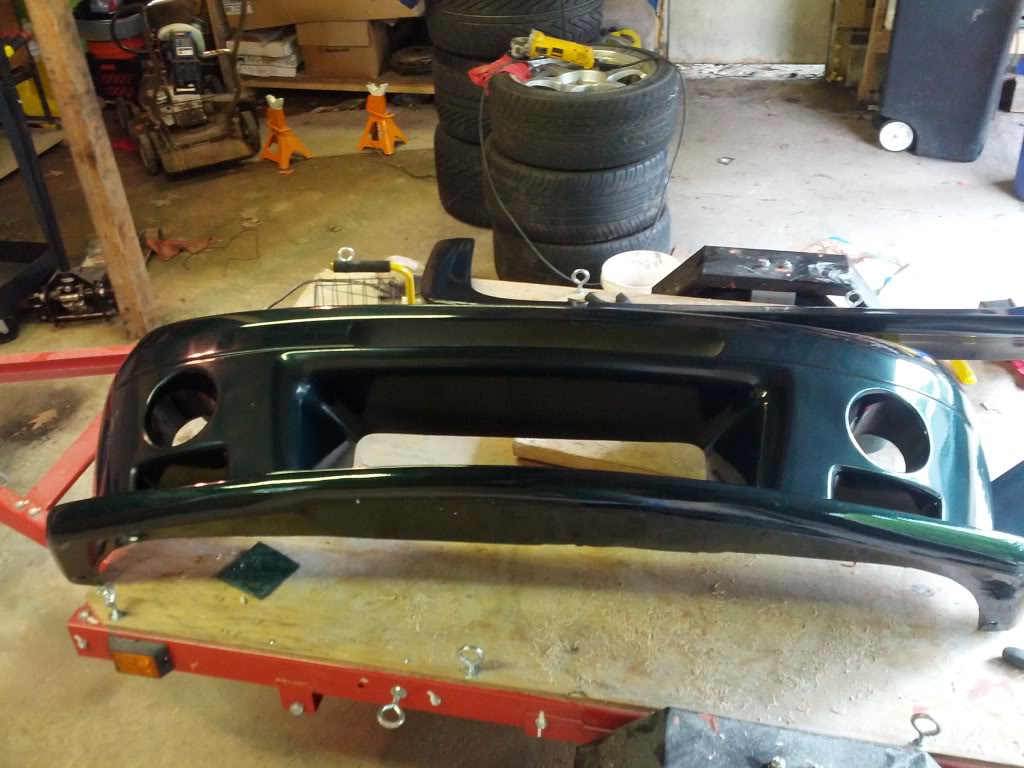
Bumper is fixed, wing, and scoop delete painted too (it was a DIY job for $83 in materials):
New fiberglass to replace the missing sections
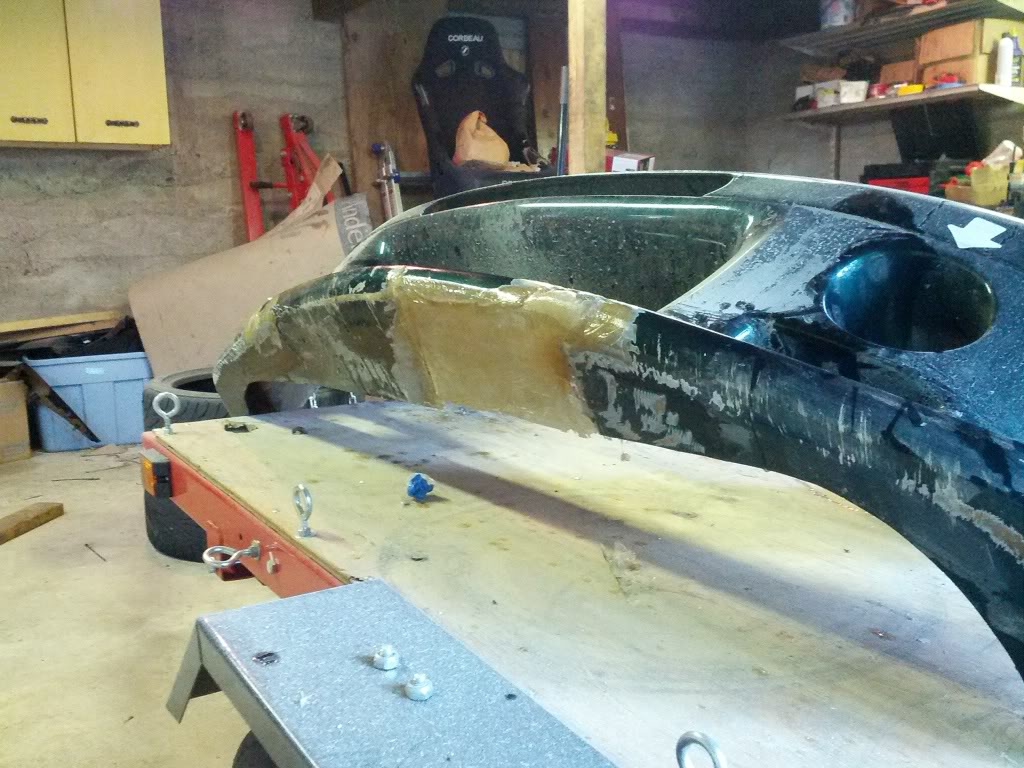
Painted it last weekend at my parent's house with PPG single stage urethane (rest of the car is base coat / clear coat so the finish/ color match is off but its not a huge deal)
Wangan wing and scoop delete panel...
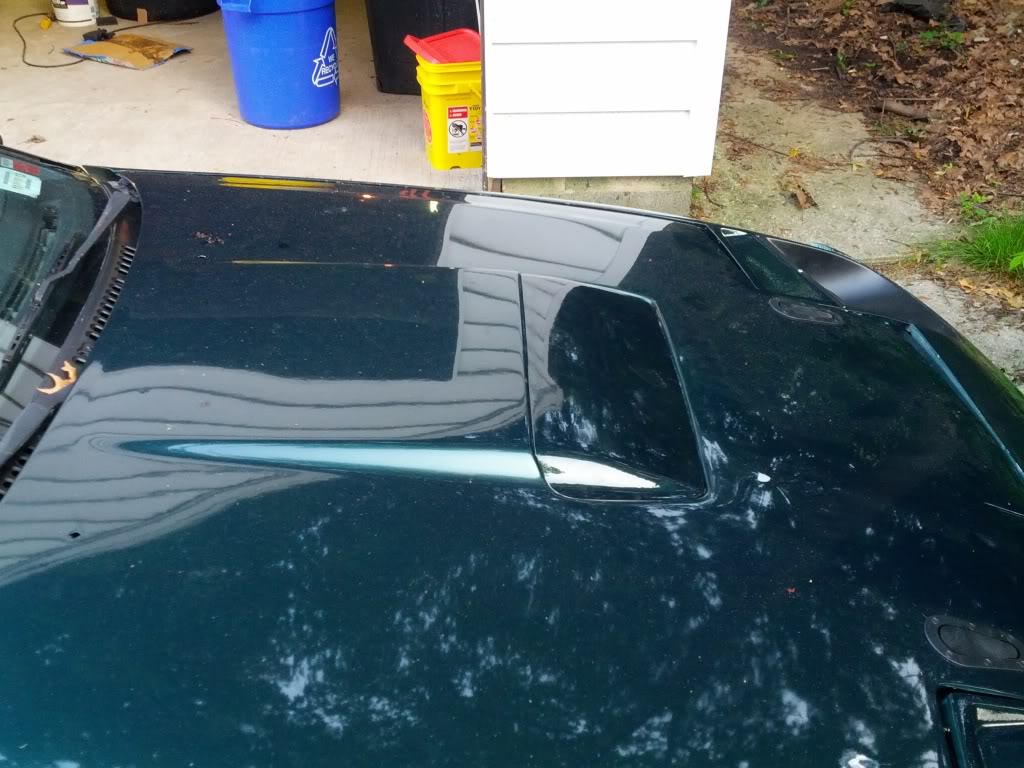
Wing resting on car, still unsure if I'm going to take the plunge and drill the chassis to install it.
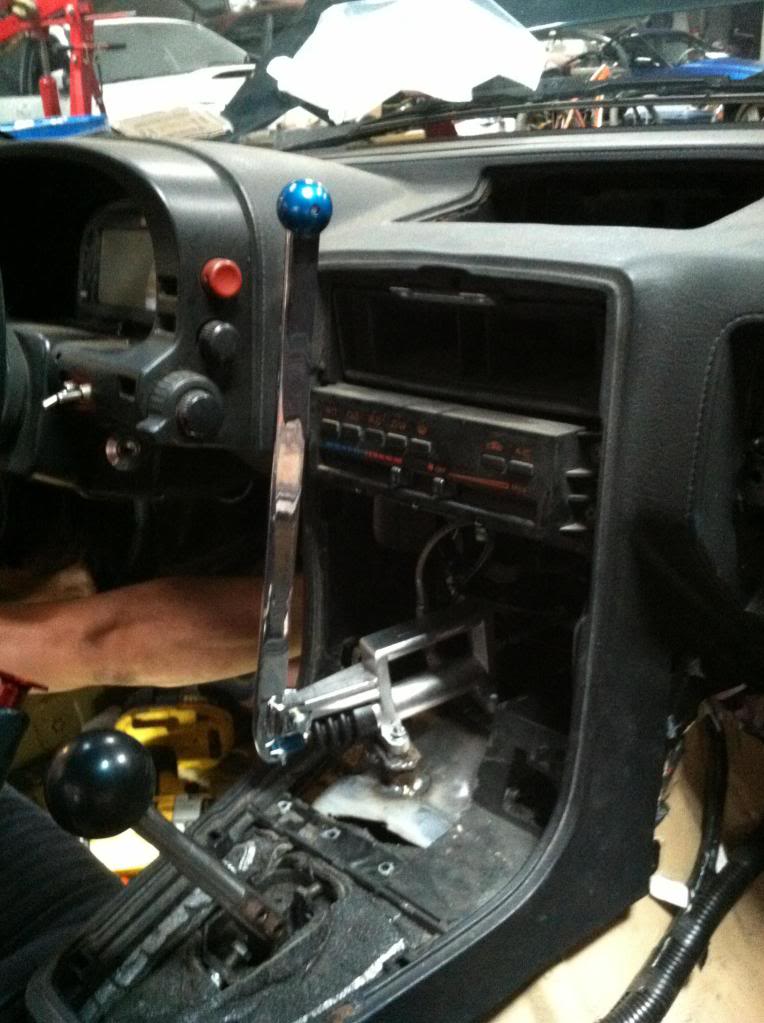
Powered by max hydro ebrake that I ordered last month is still on back-order with delivery date in July. I would like to have a hydro ebrake installed for East Coast Bash on the 30th.. So, I cancelled the nice PBM hydro and ordered this

It's a staging brake for drag racing but before companies started making/marketing hydro ebrakes for drifting dudes were using these things with great success. I'll give it a shot and if it totally sucks I'll sell it and get the PBM unit.
Late June 2012
Small updates -
Got car aligned at AZP Installs in Kenilworth, NJ. I should be able to make it down to the Tail of the Dragon next week without ruining my tires now
Got a pair of used grids in:
Sent my car Broken Motorsports in Union, NJ to get the hydro installed since I ran out of time to do it myself before East Coast Bash:
RX-7 + Rally Cars
Hydo in
Really can't wait until this weekend... East Coast Bash (2 day drift party at Englishtown) and then immediately heading down to TOTD area for the next week.

New fiberglass to replace the missing sections
Painted it last weekend at my parent's house with PPG single stage urethane (rest of the car is base coat / clear coat so the finish/ color match is off but its not a huge deal)
Wangan wing and scoop delete panel...
Wing resting on car, still unsure if I'm going to take the plunge and drill the chassis to install it.
Powered by max hydro ebrake that I ordered last month is still on back-order with delivery date in July. I would like to have a hydro ebrake installed for East Coast Bash on the 30th.. So, I cancelled the nice PBM hydro and ordered this
It's a staging brake for drag racing but before companies started making/marketing hydro ebrakes for drifting dudes were using these things with great success. I'll give it a shot and if it totally sucks I'll sell it and get the PBM unit.
Late June 2012
Small updates -
Got car aligned at AZP Installs in Kenilworth, NJ. I should be able to make it down to the Tail of the Dragon next week without ruining my tires now
Got a pair of used grids in:
Sent my car Broken Motorsports in Union, NJ to get the hydro installed since I ran out of time to do it myself before East Coast Bash:
RX-7 + Rally Cars
Hydo in
Really can't wait until this weekend... East Coast Bash (2 day drift party at Englishtown) and then immediately heading down to TOTD area for the next week.
10-04-12, 10:05 PM
#13
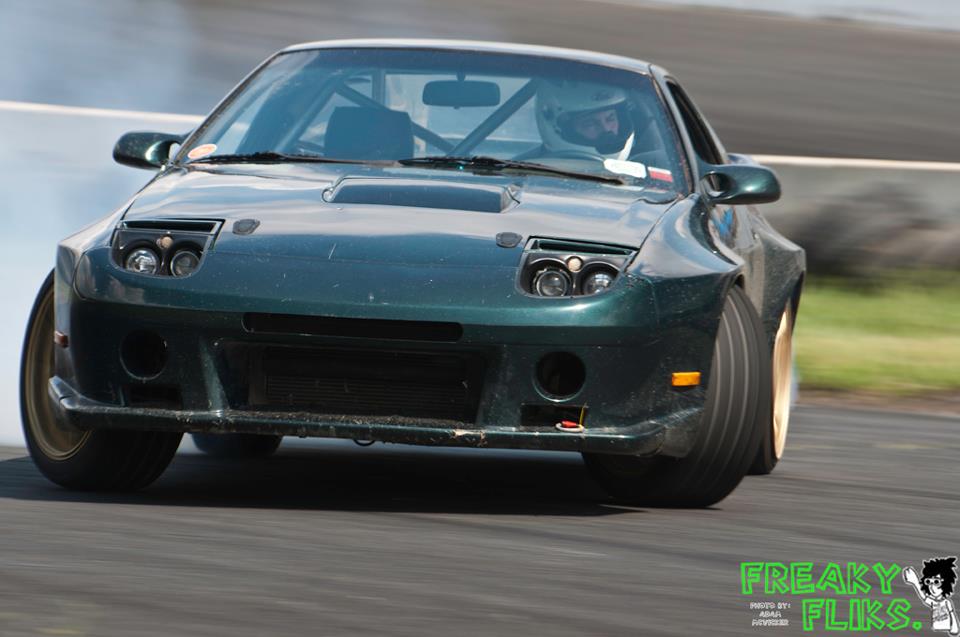
East Coast Bash 2012
Had a blast 2 weekends ago at East Coast Bash down at Englishtown. ECB is 2 day party with drifting on the side.
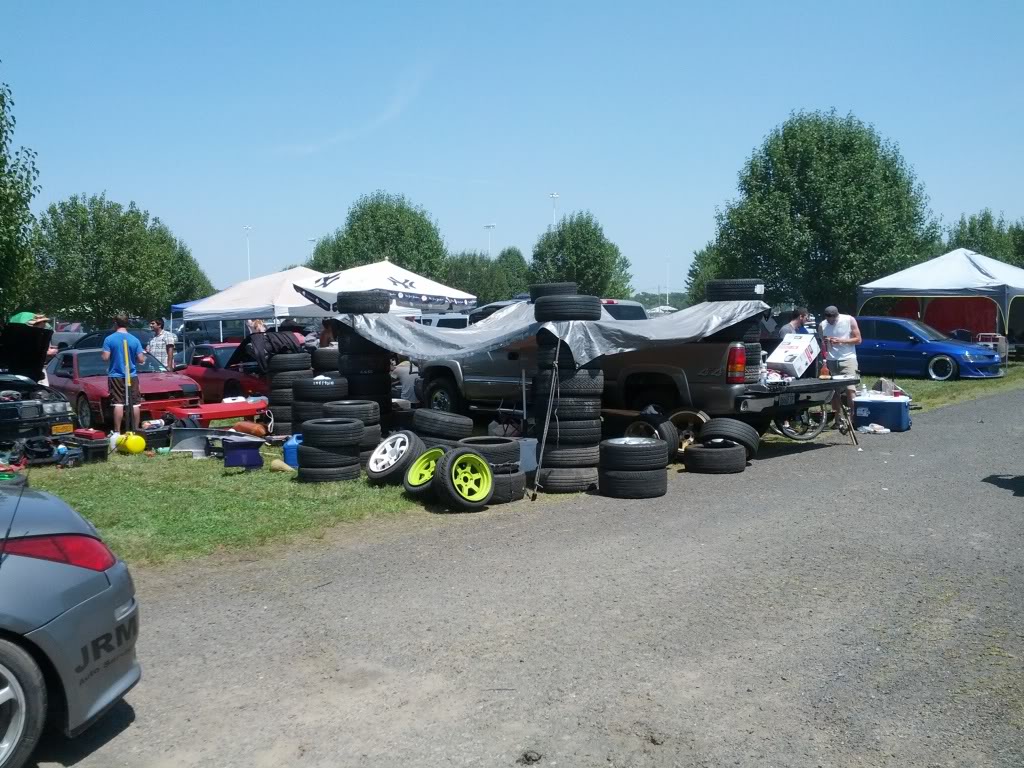
The weather was super hot all weekend and we forgot to bring an Easy-up... good thing we had tires and a tarp!
Shanty Town - RSAS-Alum Style
The car handled the heat pretty well. In preparation for the weekend (and the trip to the dragon, which didnt happen since I ended up taking the WRX ), I flushed the old coolant out, replaced the OEM thermostat, and refilled with water and waterwetter. Every car out there was running hot but I never overheated or sacrificed hot-lapping the back course due to the heat.
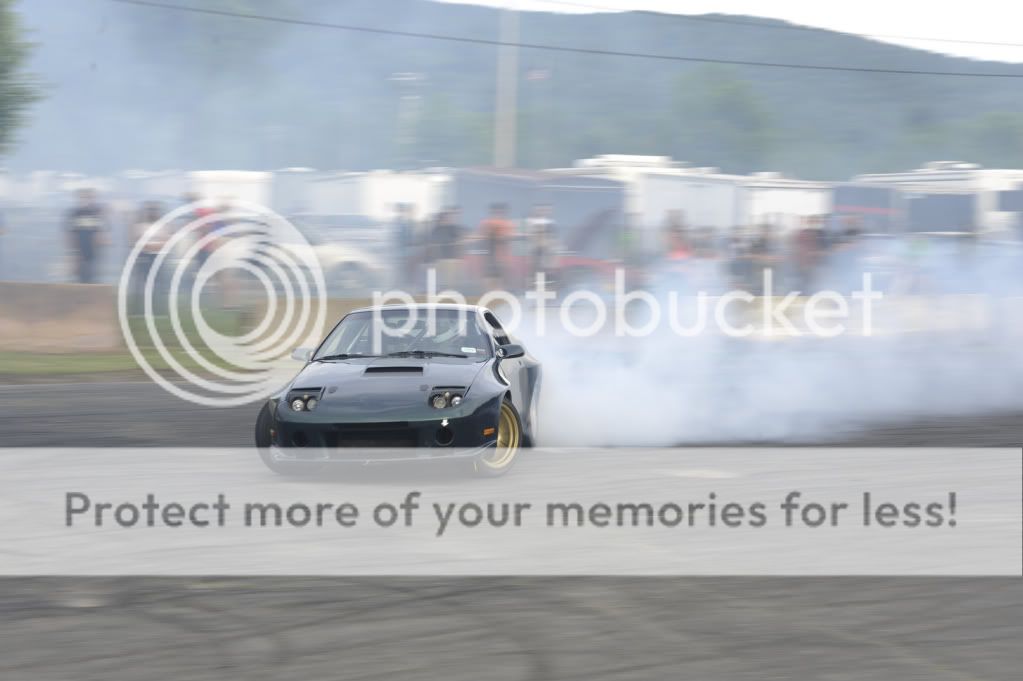
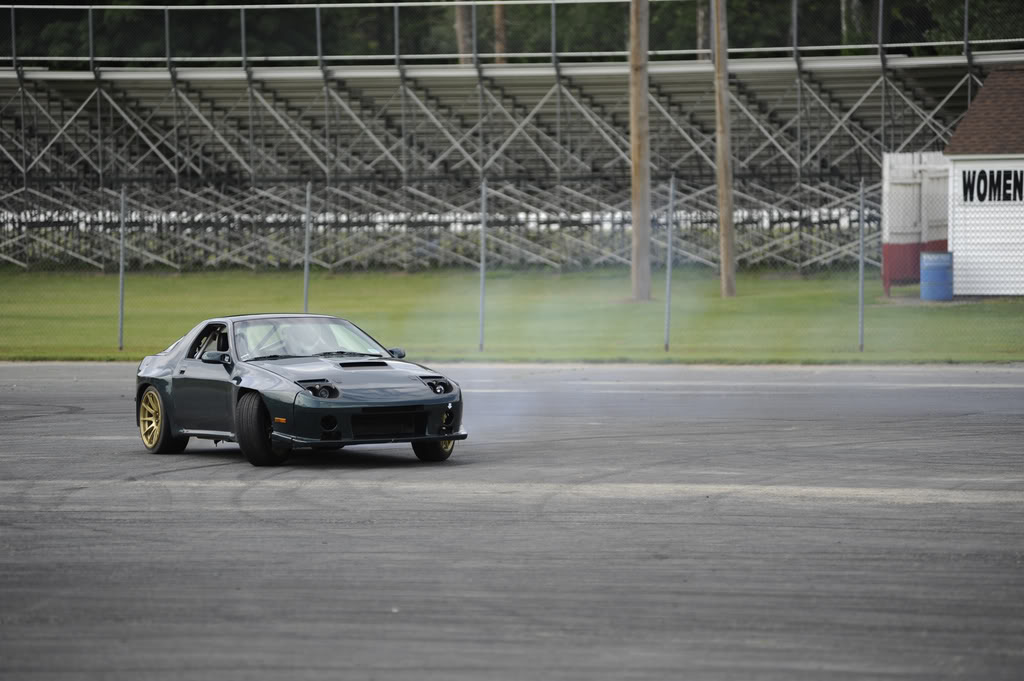
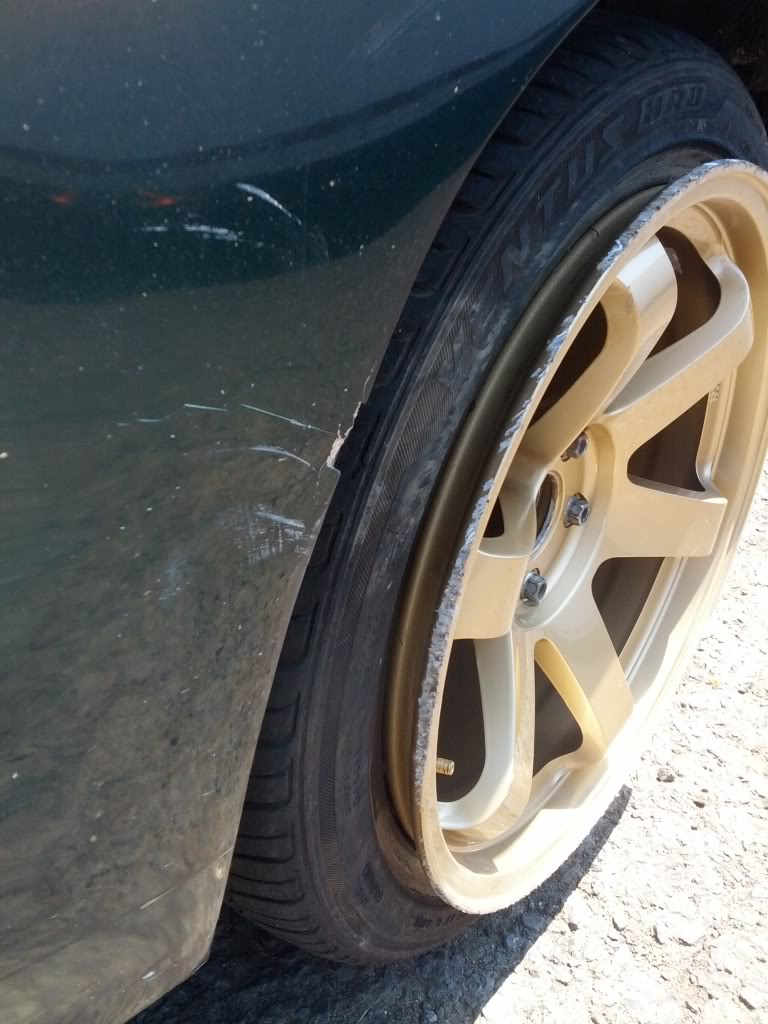
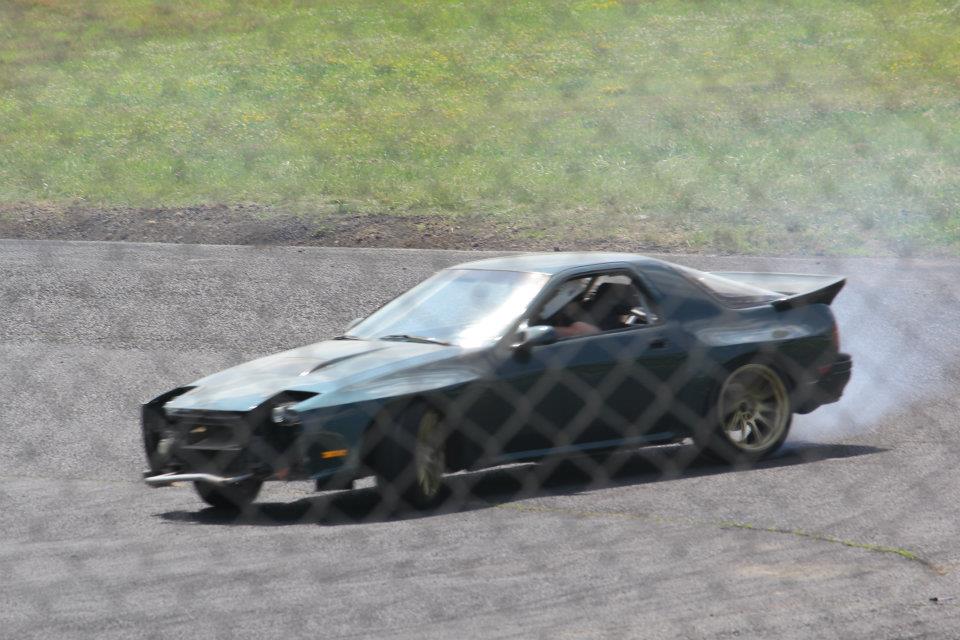
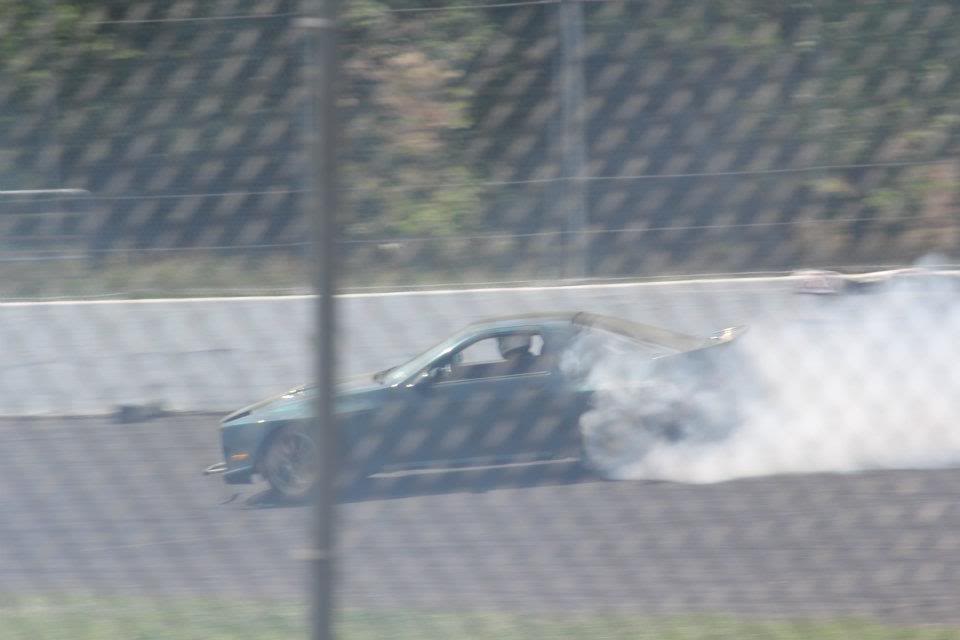
Shredding tires at the wall:
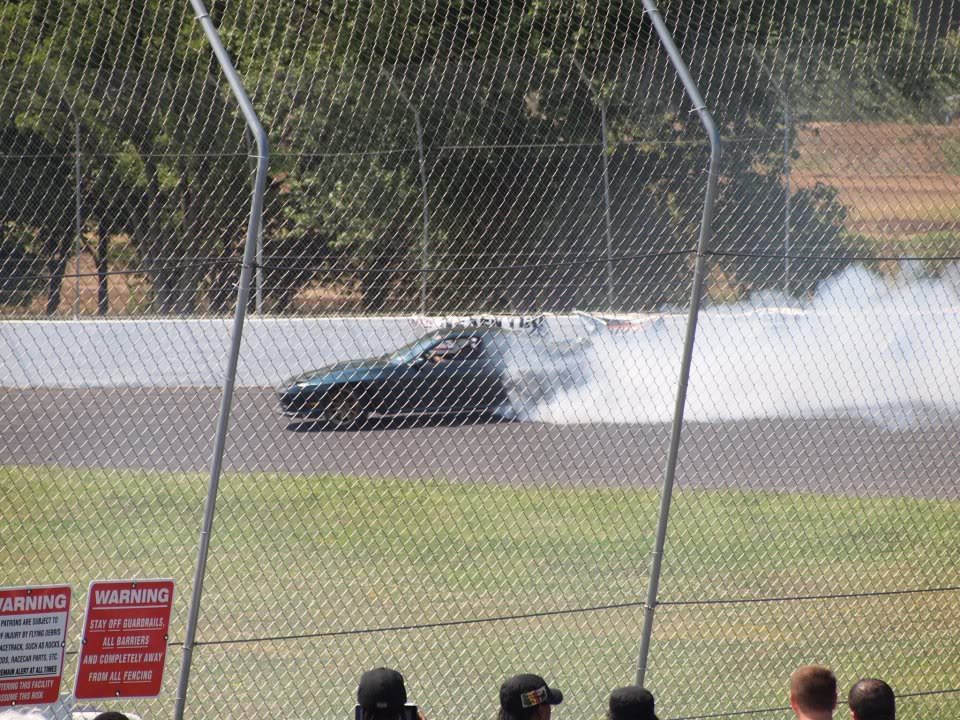
De-beaded a tire mid-drift and ground the rim on the pavement... patched tires FTL :x
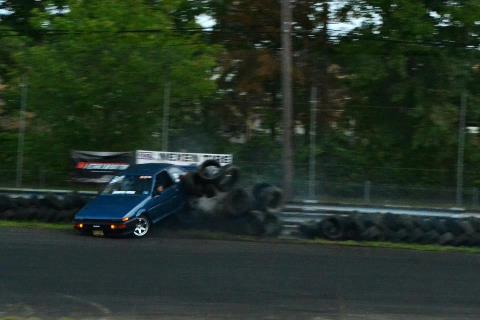
Went off track on Sunday with some serious speed Dukes-of-Hazzard style, re-broke my bumper and bent my bash bar.
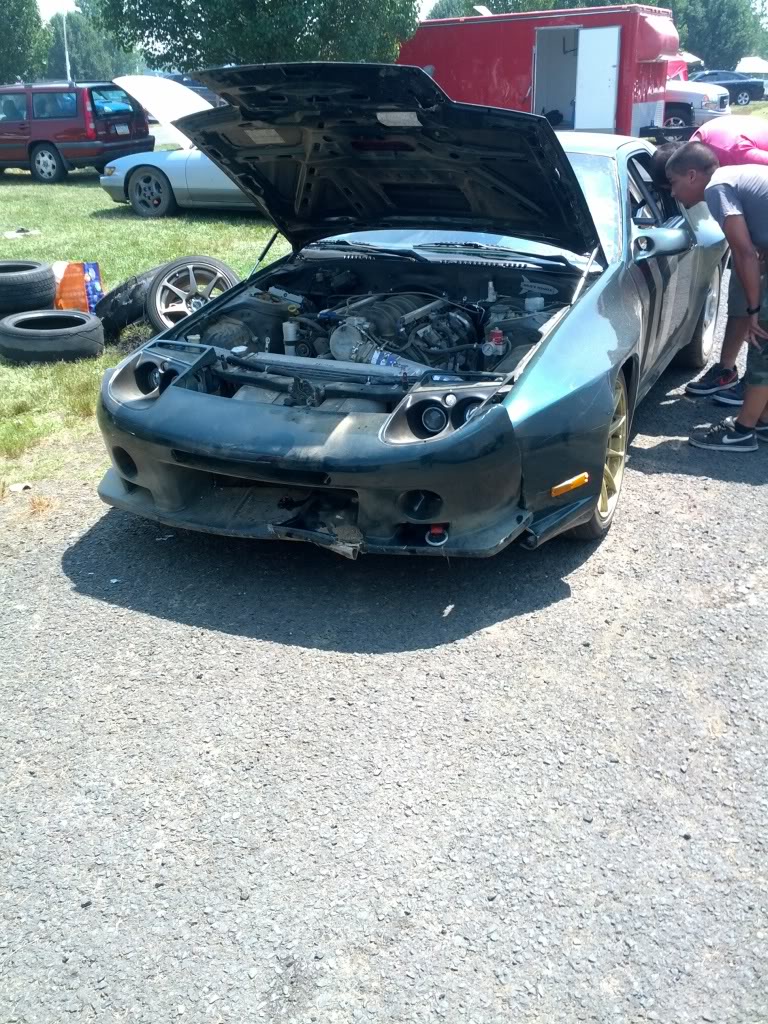
Remove bumper, keep drifting.
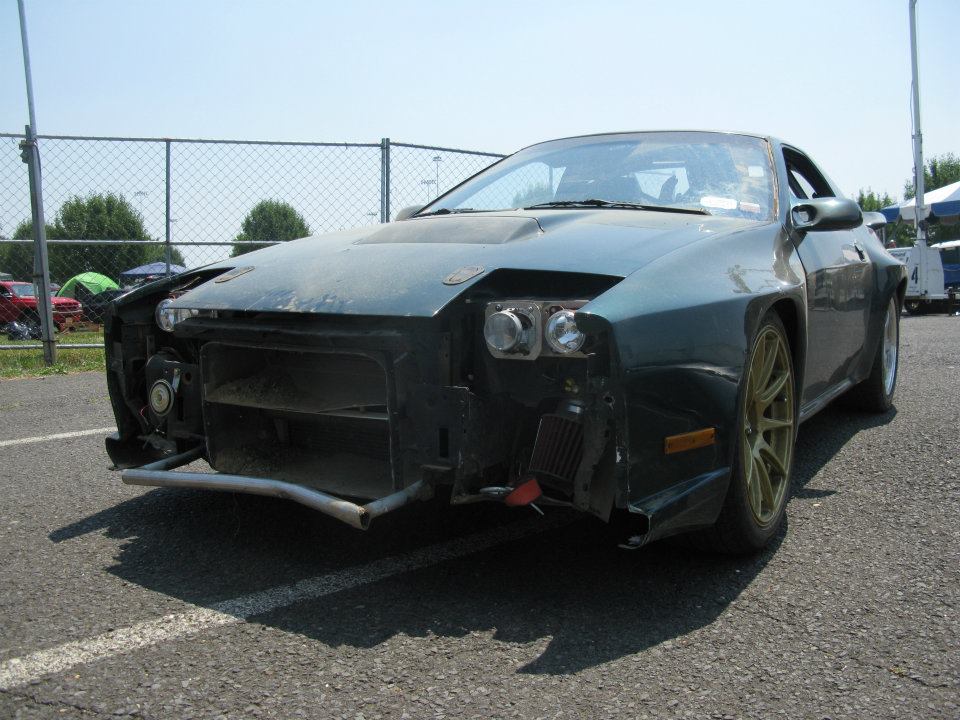
No bumper needed to ride the wall:
few more pics from ECB...
Had a blast 2 weekends ago at East Coast Bash down at Englishtown. ECB is 2 day party with drifting on the side.
The weather was super hot all weekend and we forgot to bring an Easy-up... good thing we had tires and a tarp!
Shanty Town - RSAS-Alum Style
The car handled the heat pretty well. In preparation for the weekend (and the trip to the dragon, which didnt happen since I ended up taking the WRX ), I flushed the old coolant out, replaced the OEM thermostat, and refilled with water and waterwetter. Every car out there was running hot but I never overheated or sacrificed hot-lapping the back course due to the heat.
Shredding tires at the wall:
De-beaded a tire mid-drift and ground the rim on the pavement... patched tires FTL :x
Went off track on Sunday with some serious speed Dukes-of-Hazzard style, re-broke my bumper and bent my bash bar.
Remove bumper, keep drifting.
No bumper needed to ride the wall:
few more pics from ECB...
10-04-12, 10:05 PM
#14
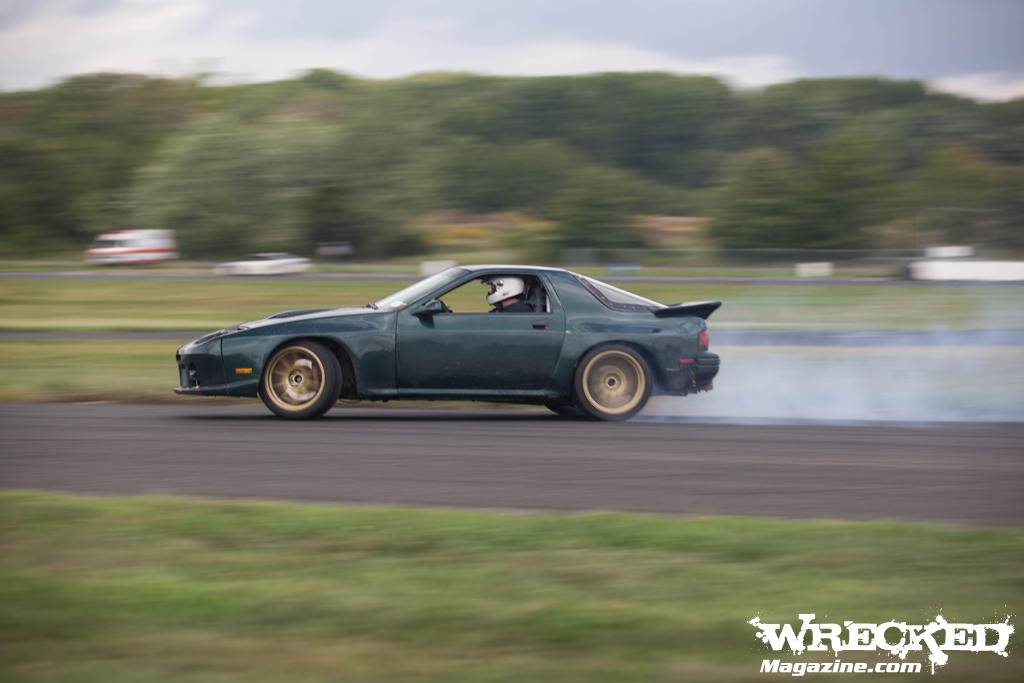
August/September 2012
Not too much to has changed on the car since the middle of the summer. The only real changes are that 2nd gear has pretty much decided that it will not be participating for the rest of the season and I finally mounted a corbeau seat to the floor so I have headroom!
I'm still doing a lot of this on the regular:
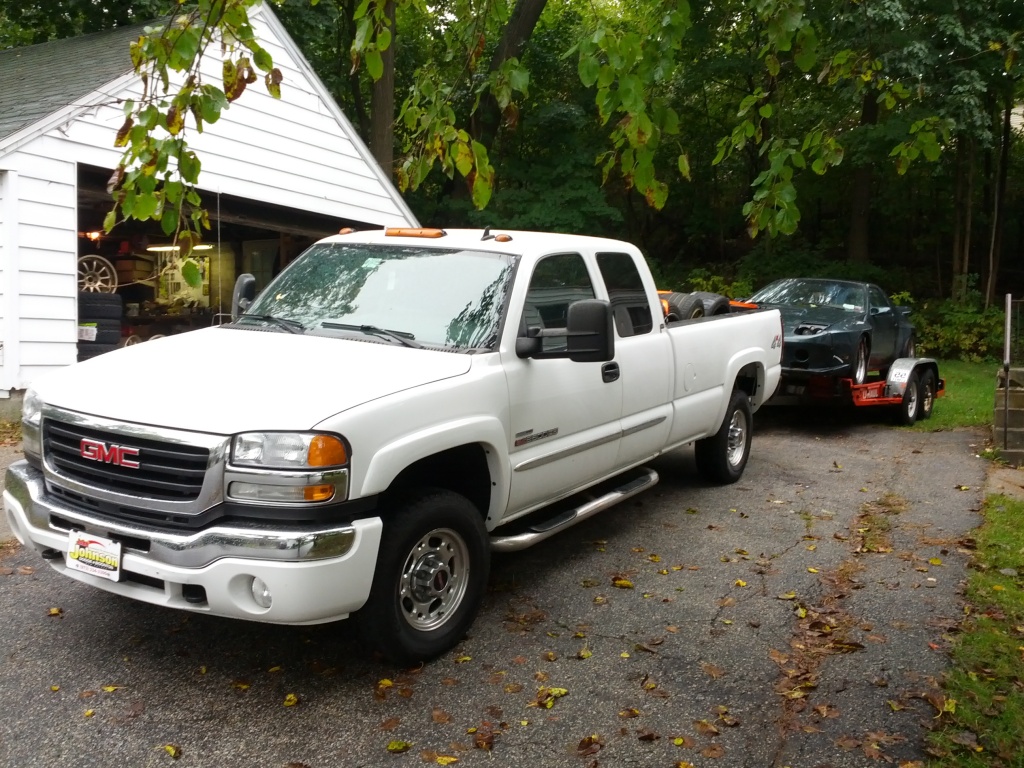
Semi-related - I picked this up
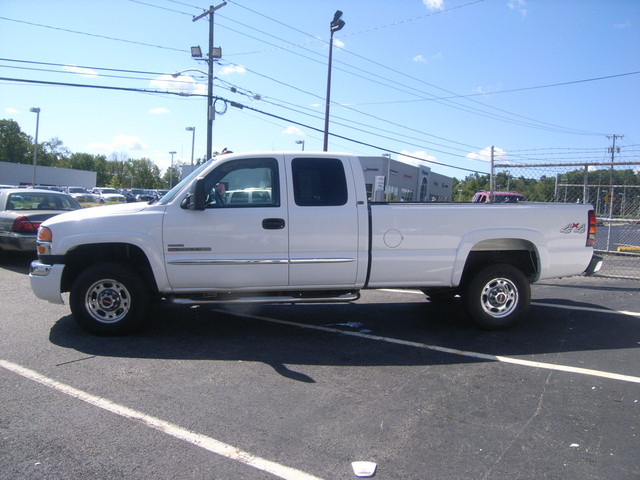
because I got sick of doing this
and worrying about having to drive home after something like this
So now I have plans to get the cage finished, get a harness mounted, and get ready to rub doors with with slideNY e36 crew for 2013.
Maiden-tow to LVD in the rain Sept.28
And that brings us to pretty much now... Still burns oil... still refuses to shift into 2nd gear... differential is having issues and the fiberglass widebody is more cracked than ever... but it never fails to put a smile on my face when I get behind the wheel. Good thing the snow will start flying soon so she only needs to make it through Finishing Moves at NJMP and then Lock City @ Lime Rock before she gets a well deserved rest and some much needed deferred maintenance!
Not too much to has changed on the car since the middle of the summer. The only real changes are that 2nd gear has pretty much decided that it will not be participating for the rest of the season and I finally mounted a corbeau seat to the floor so I have headroom!
I'm still doing a lot of this on the regular:
Semi-related - I picked this up
because I got sick of doing this
and worrying about having to drive home after something like this
So now I have plans to get the cage finished, get a harness mounted, and get ready to rub doors with with slideNY e36 crew for 2013.
Maiden-tow to LVD in the rain Sept.28
And that brings us to pretty much now... Still burns oil... still refuses to shift into 2nd gear... differential is having issues and the fiberglass widebody is more cracked than ever... but it never fails to put a smile on my face when I get behind the wheel. Good thing the snow will start flying soon so she only needs to make it through Finishing Moves at NJMP and then Lock City @ Lime Rock before she gets a well deserved rest and some much needed deferred maintenance!

 10-05-12, 09:37 AM
#18
Senior Member
Join Date: Nov 2011
Location: Oklahoma City, OK
Posts: 418
Likes: 0
Received 0 Likes
on
0 Posts
Hell yeah!!! I'm digging it so far. I might've missed it, but I failed to see what coilovers you're on? When you put on the XXR's it looked like a LOT of droop.
The only thing I DON'T like is the front bumper. Other than that, nice build. I dig it
The only thing I DON'T like is the front bumper. Other than that, nice build. I dig it
10-05-12, 10:10 AM
#19
But, Yeah there are a ton of things that I don't love about this car but it was too nicely done at the beginning of this year to take it all apart and start over again. I hate the shaved moldings and the front bumper took a while to grow on me... but it's certainly a different direction than the knock-off BN sports route
I'm going to continue driving it as hard and as fast as possible until it all breaks and then start all over with a little more of my style and a lot less of the previous owner's.
10-05-12, 12:12 PM
#21
Senior Member
Join Date: Nov 2011
Location: Oklahoma City, OK
Posts: 418
Likes: 0
Received 0 Likes
on
0 Posts
Coilovers are Ground Control sleeves and camber plates over Koni Yellow struts. They do droop a ton but ride super nice on the highway. I may swap them with the BCs on my s5 since they are too nice to beat up on the driftsloot. I'm worried about changing over though since I really, really like how the rear end grip feels now and I'm afraid that swapping over to the BCs will decrease the amount of rear grip.
But, Yeah there are a ton of things that I don't love about this car but it was too nicely done at the beginning of this year to take it all apart and start over again. I hate the shaved moldings and the front bumper took a while to grow on me... but it's certainly a different direction than the knock-off BN sports route
I'm going to continue driving it as hard and as fast as possible until it all breaks and then start all over with a little more of my style and a lot less of the previous owner's.
I dig what you're doing with it though! Great job!
10-07-12, 06:15 PM
#22
At the last 2 events I've having issues with the stock differential (which was rebuilt with the thicker mazda speed clutches) unlocking when the rear end slides left. At the last event it sounded awful... like the splines on the axle stub were stripping or something. I pulled both stubs and found no wear.
Drained the fluid and found this
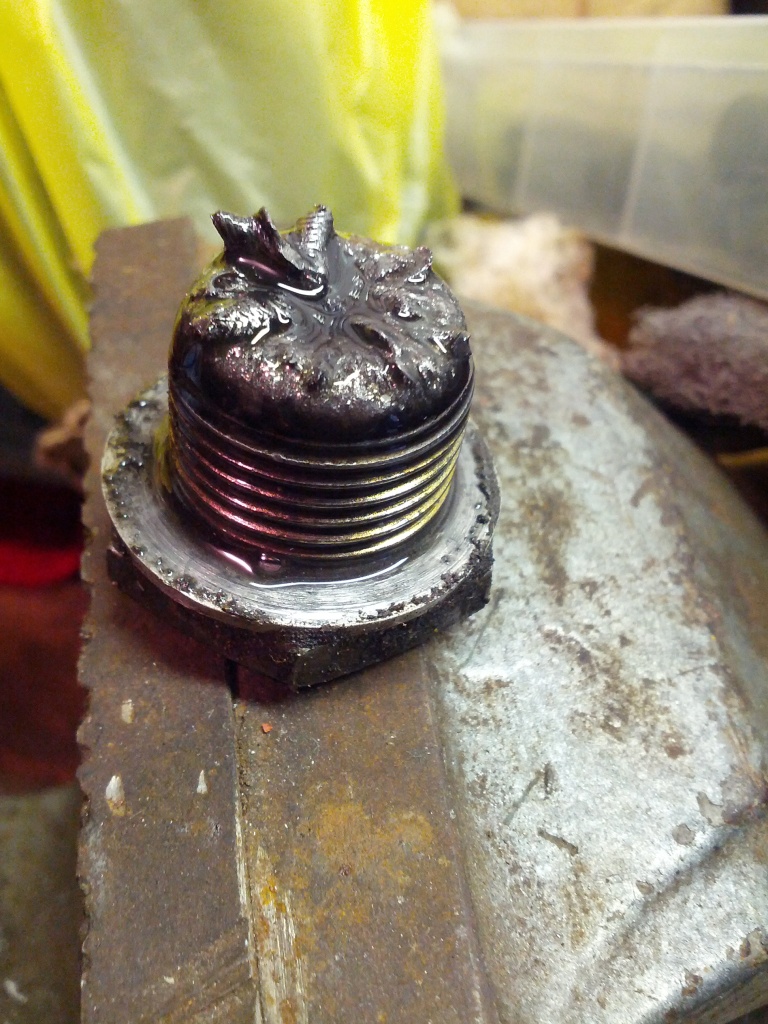
The bigger chunks are pieces of the spring that is inside the axle seals... and the other paste used to be mazdaspeed clutches. The fluid that came out was burnt smelling and full of metal particles. I figure the next step is to pull the diff, clean it, find the rest of that spring that's floating around in there getting torn up and jam some more shims in there before the next 2 events.
Drained the fluid and found this
The bigger chunks are pieces of the spring that is inside the axle seals... and the other paste used to be mazdaspeed clutches. The fluid that came out was burnt smelling and full of metal particles. I figure the next step is to pull the diff, clean it, find the rest of that spring that's floating around in there getting torn up and jam some more shims in there before the next 2 events.
10-07-12, 10:48 PM
#24


