A classy FC3S drift build
 05-13-16, 05:05 PM
#26
Full Member
Thread Starter

first test fit shifter placement. this is with the entire shifter assembly removed. I will be running the serial nine shift box when it is released 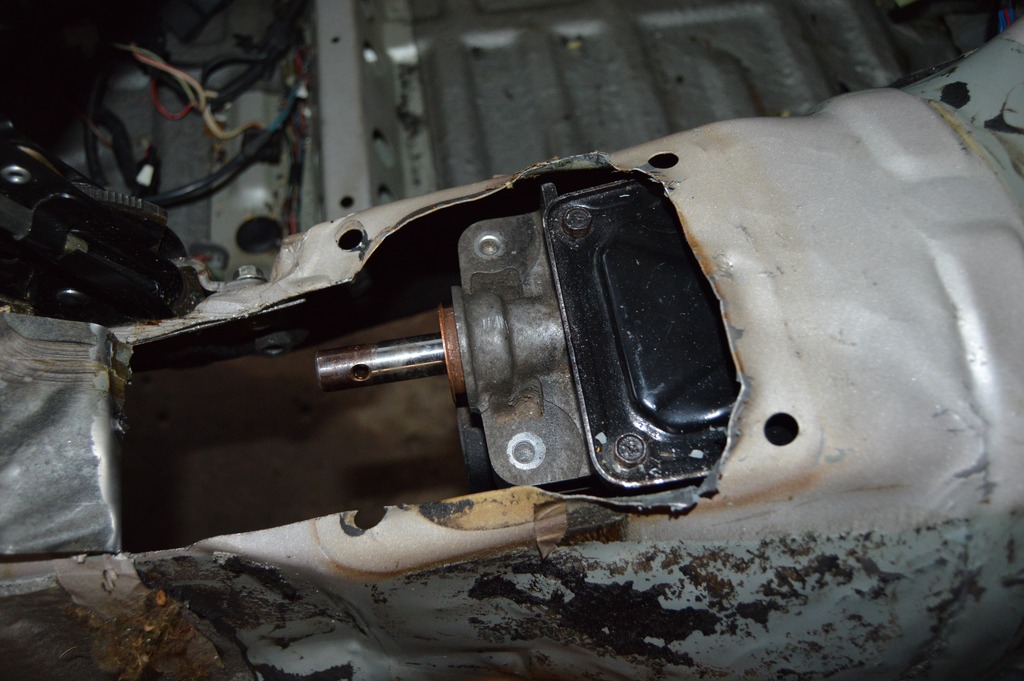
Dry ice worked wonders with stripping the sound deadening
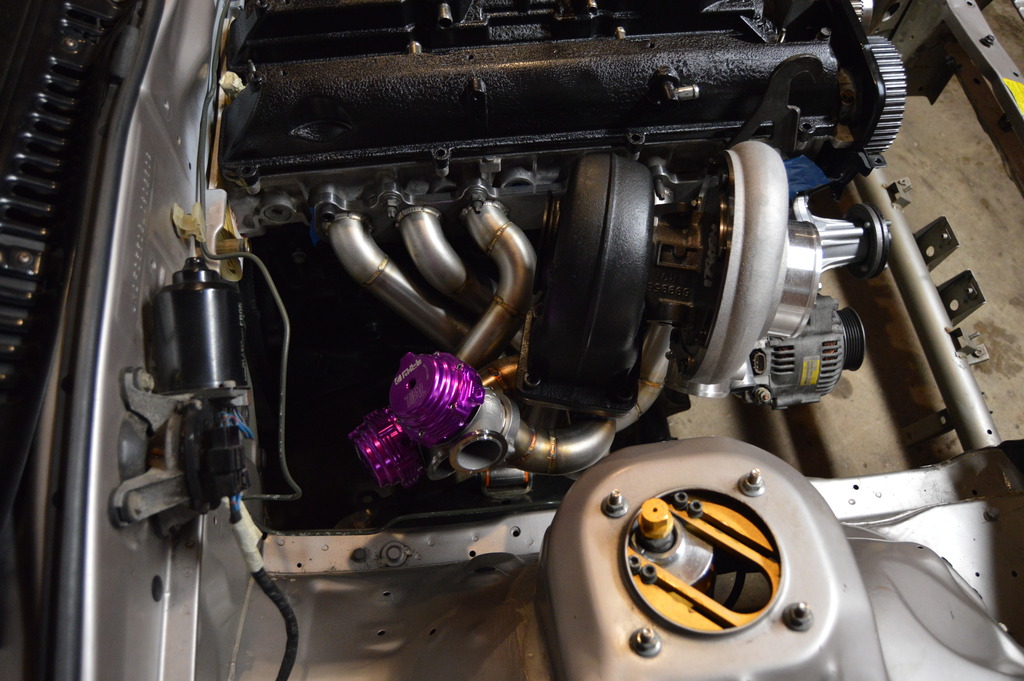
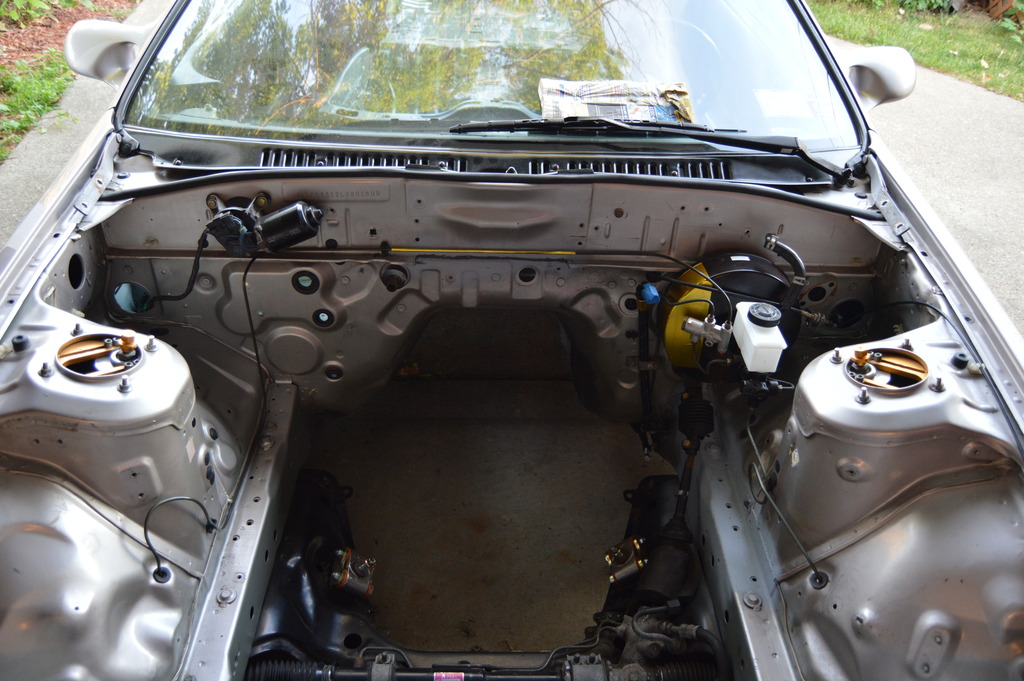
then the engine was pulled a few different times to massage the trans tunnel and notch the pinch weld. this all allowed the engine to sit all the way back and the furthest possible on the mounts
mocking up heater core lines
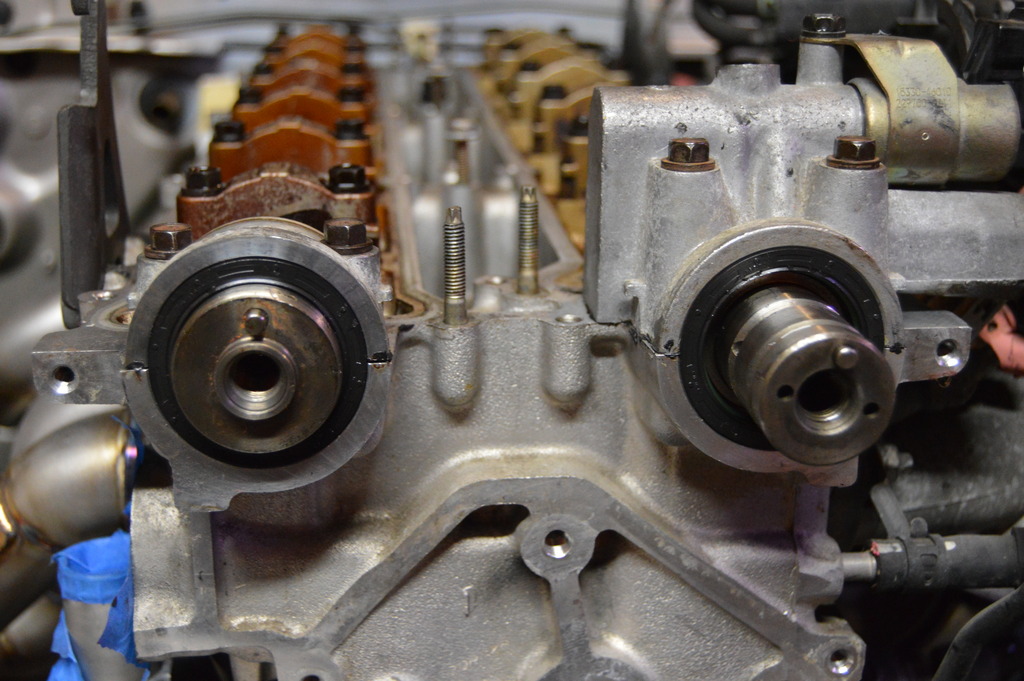
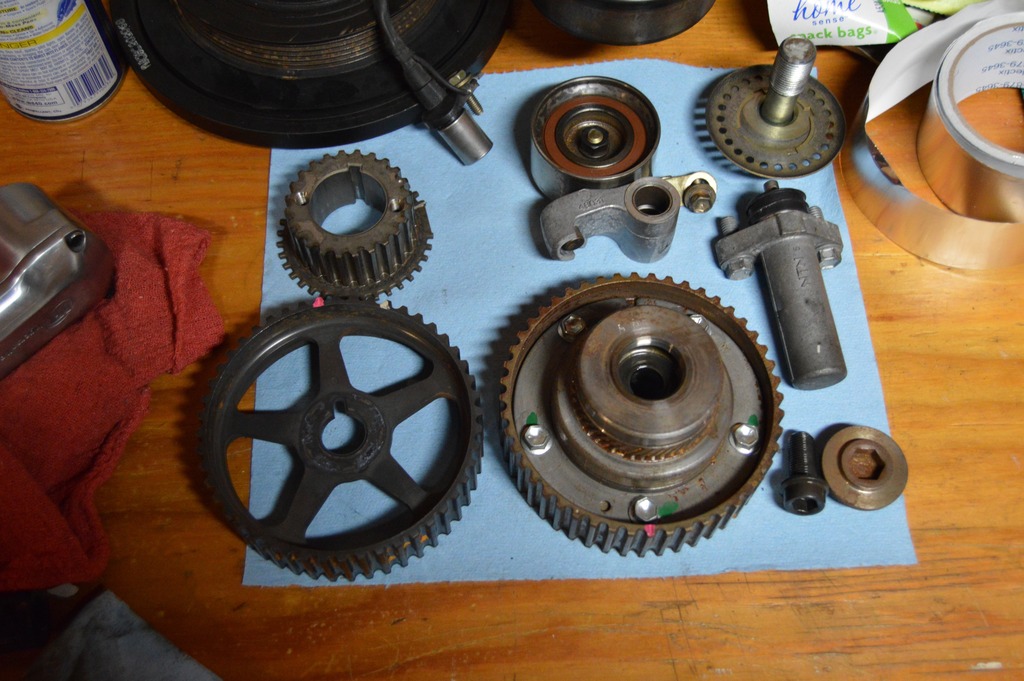
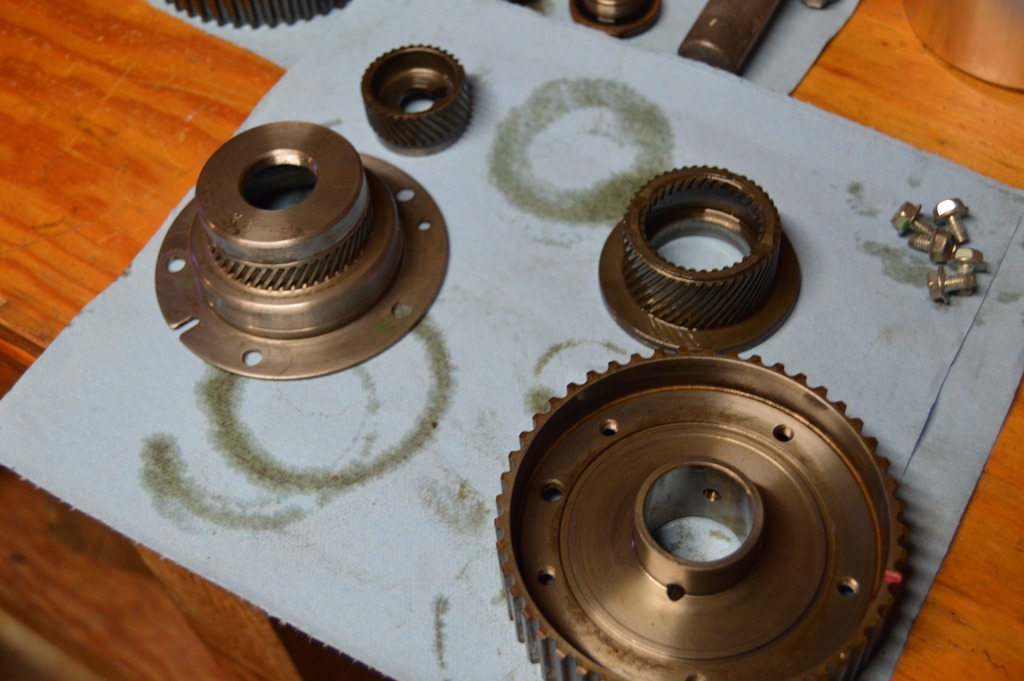
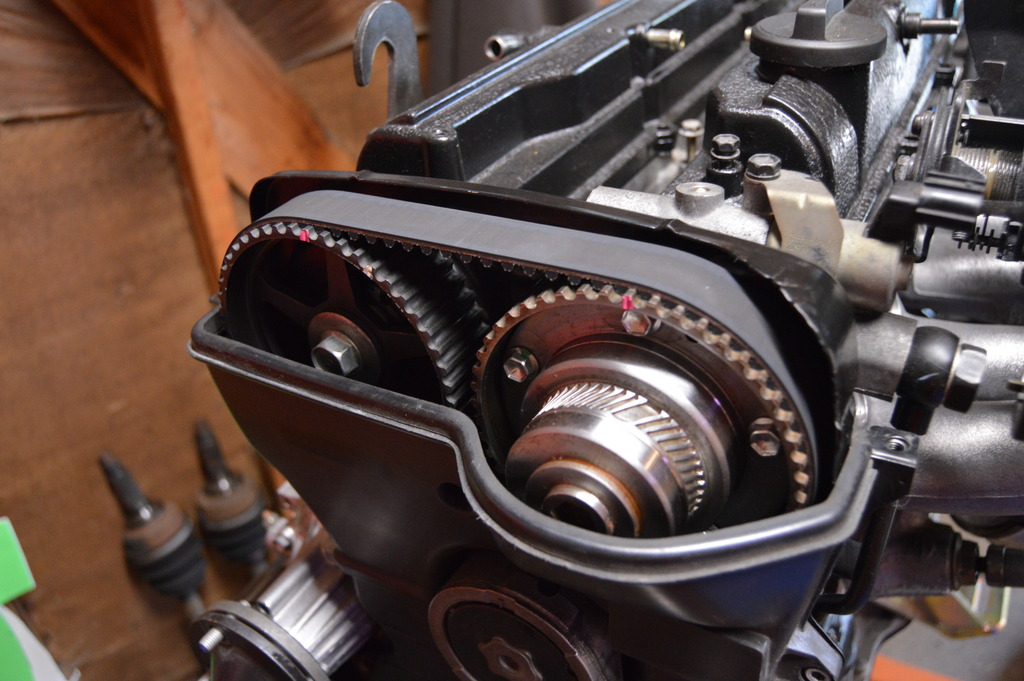
then the engine came out again for cam seals, front seal, timing belt, idler pulley, and VVTi gear rebuild.
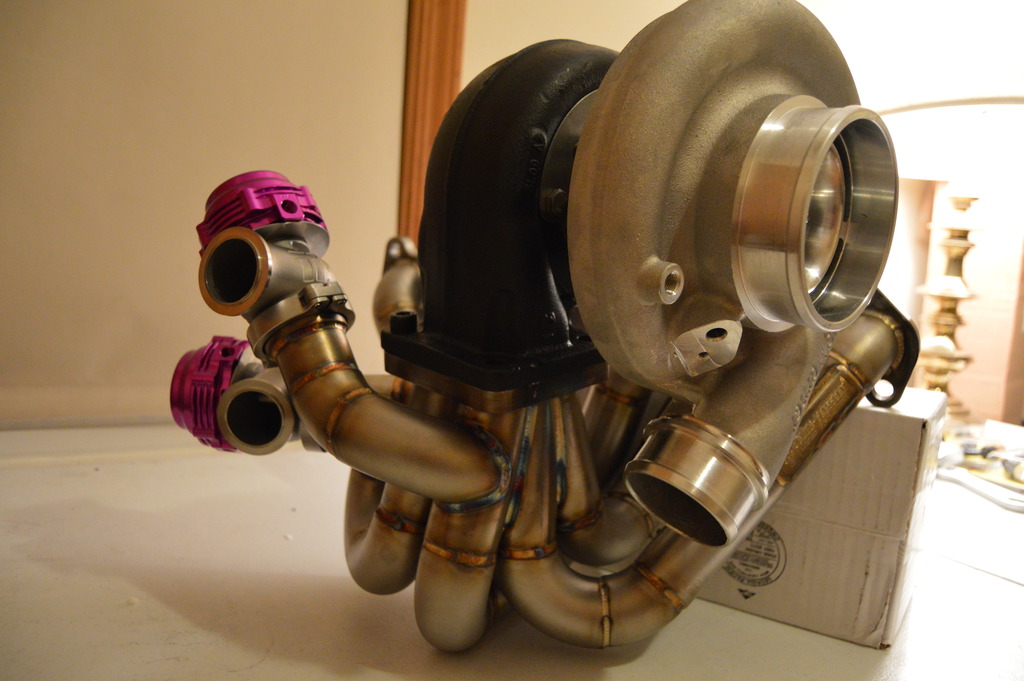
then my underpressure racing development manifold got finished up
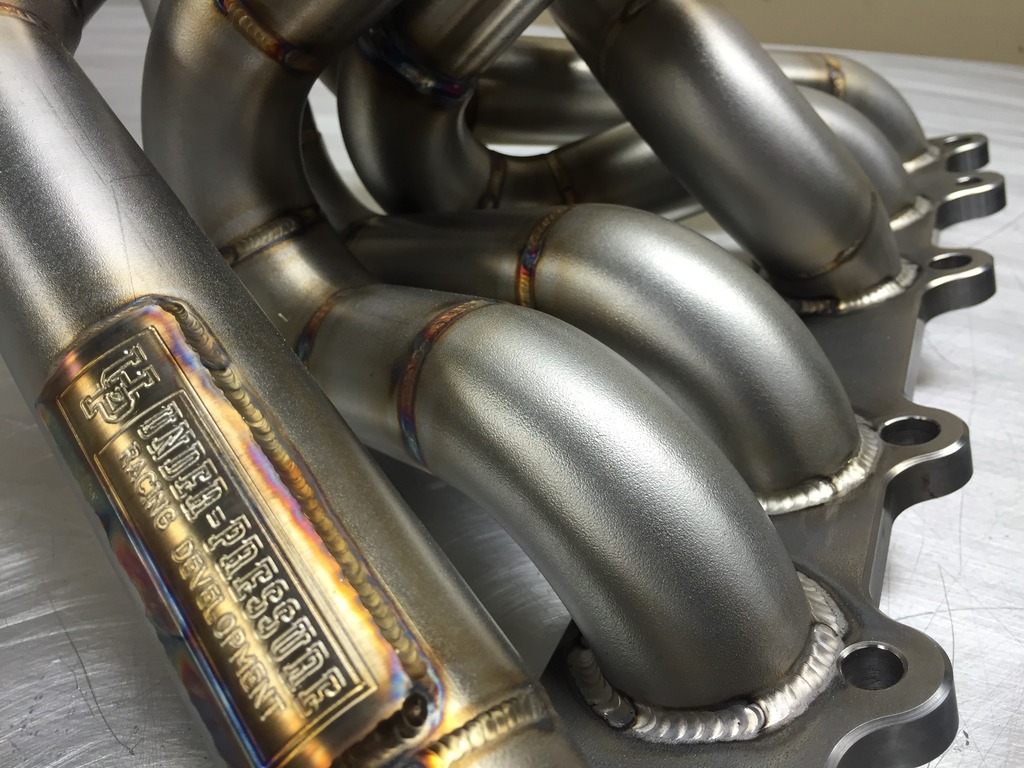
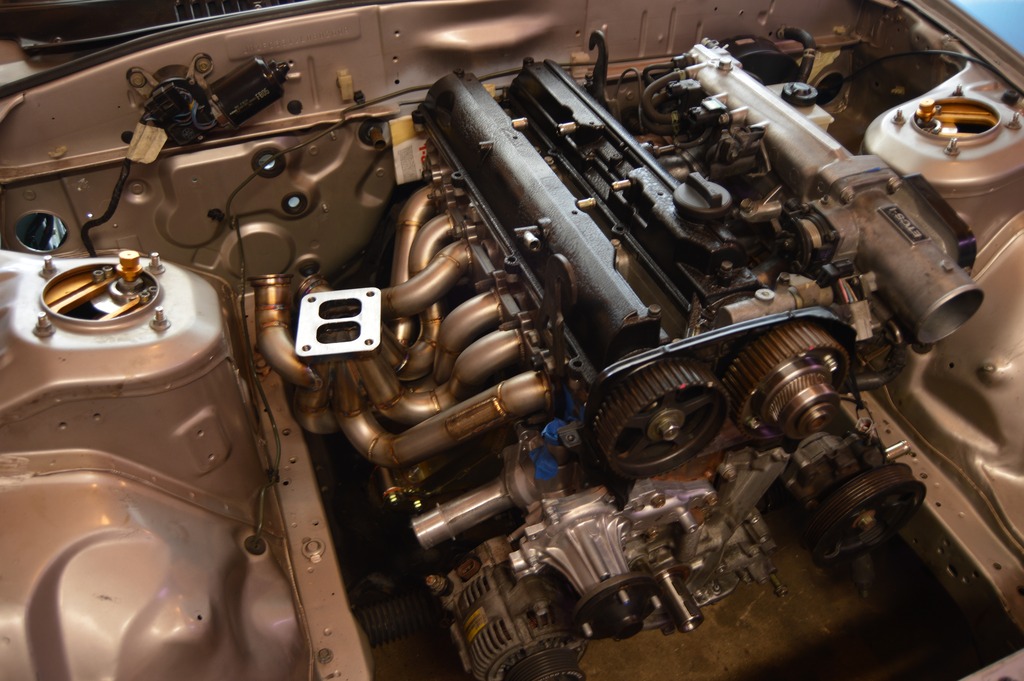
so pumped on this manifold it is an absolute piece of art

Dry ice worked wonders with stripping the sound deadening


then the engine was pulled a few different times to massage the trans tunnel and notch the pinch weld. this all allowed the engine to sit all the way back and the furthest possible on the mounts

mocking up heater core lines

then the engine came out again for cam seals, front seal, timing belt, idler pulley, and VVTi gear rebuild.


then my underpressure racing development manifold got finished up


so pumped on this manifold it is an absolute piece of art
 05-13-16, 05:44 PM
#27
Full Member
Thread Starter
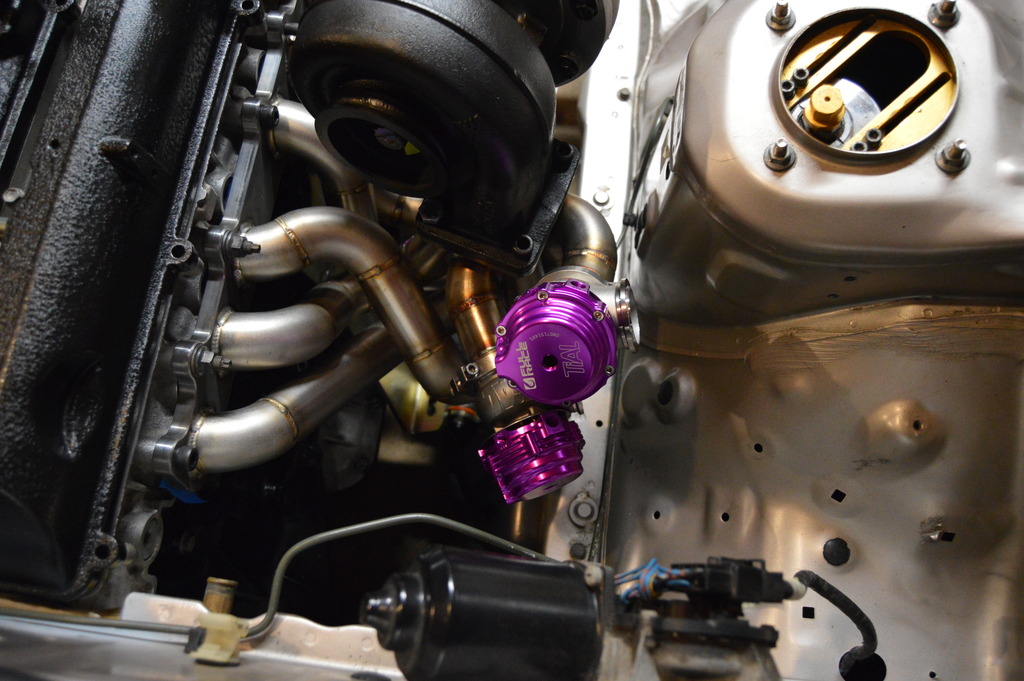
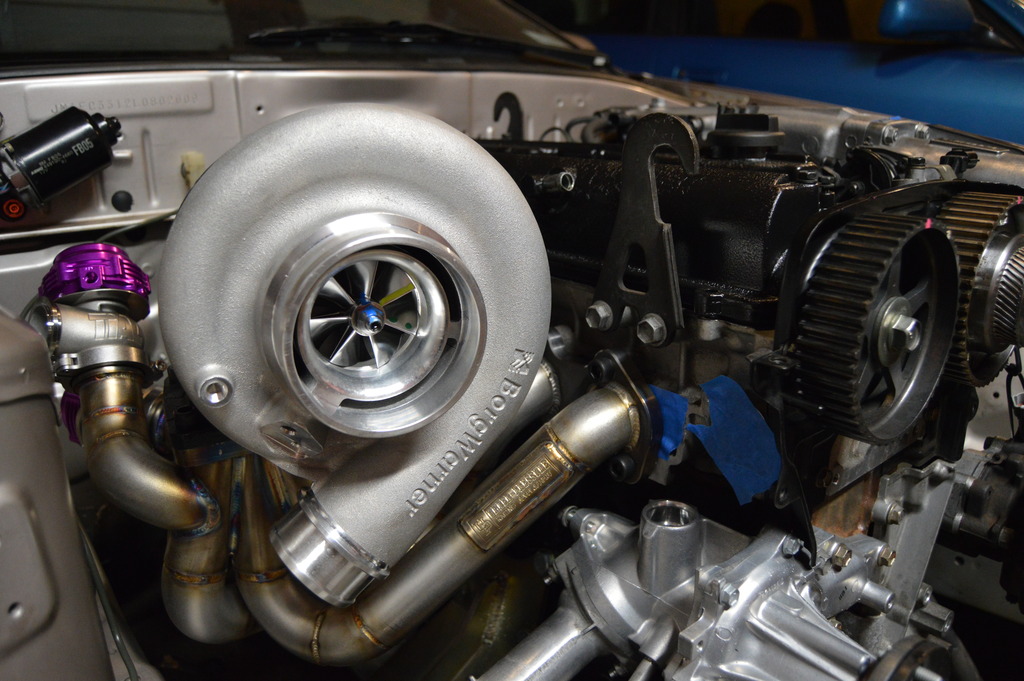
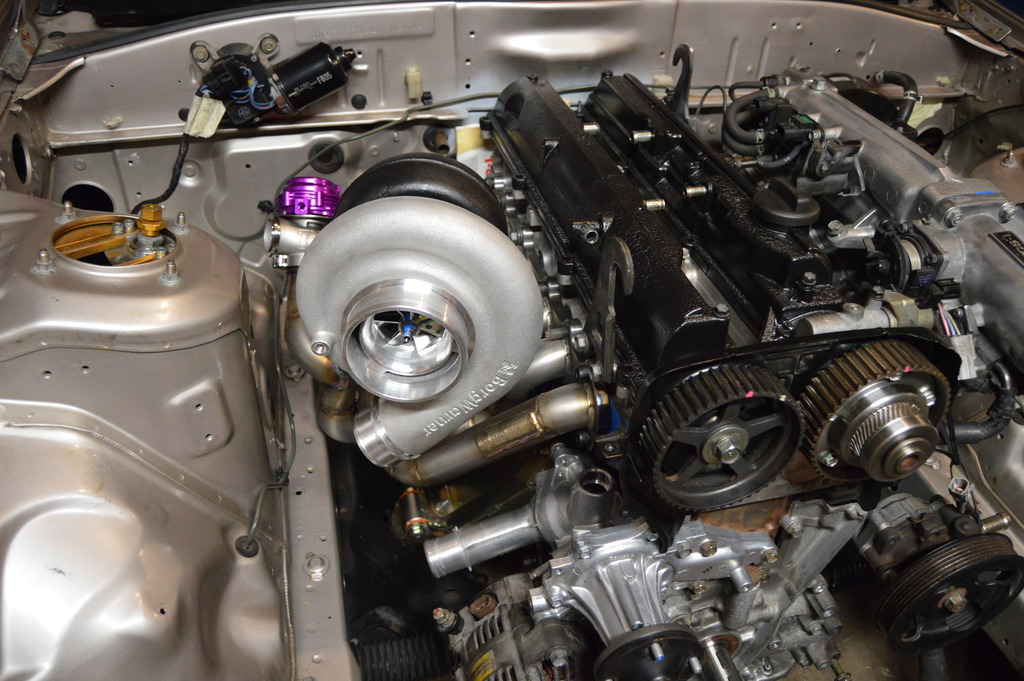
running an S362SXE with twin 38MM tials
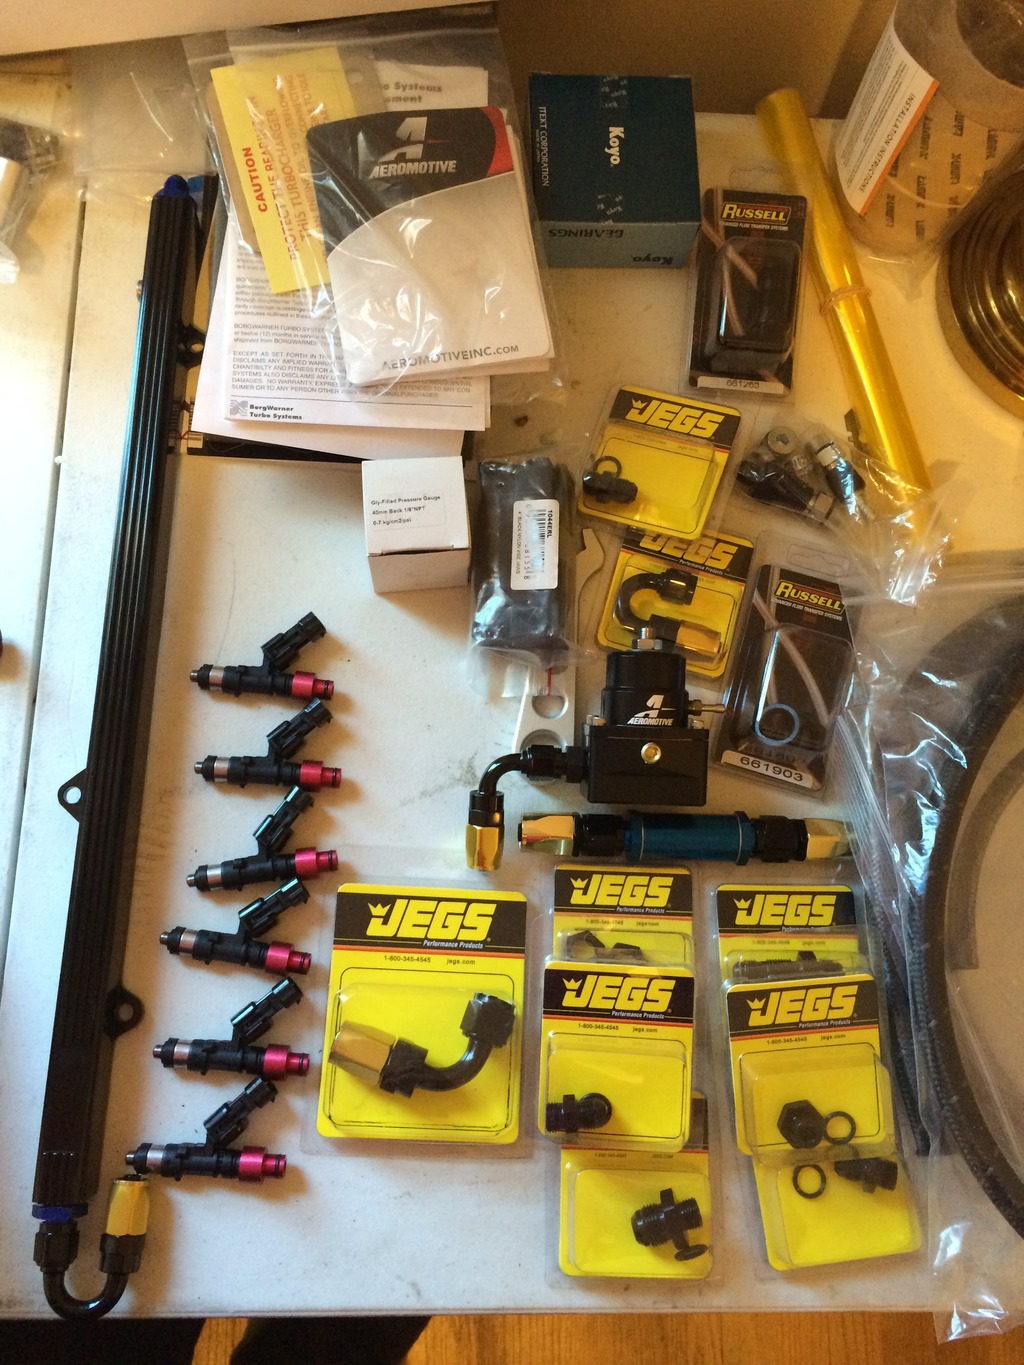
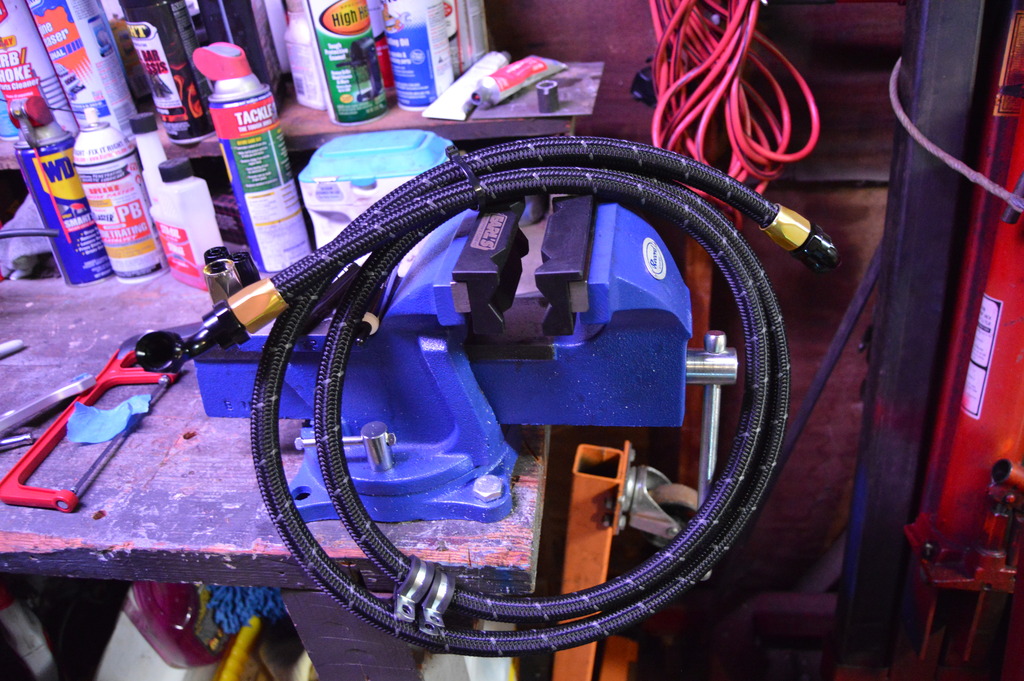
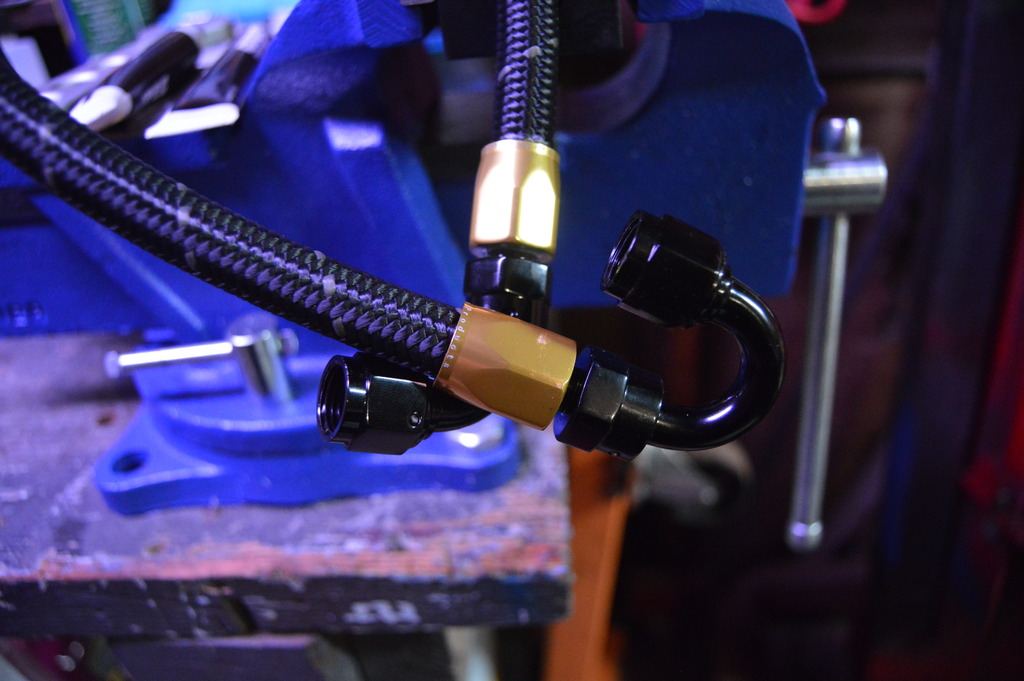
got in my fuel rail also and mocked it up. return will be -6 but this is some -8 shown
ID1000s and the rest of the my fuel system. still need to order a bosch 044
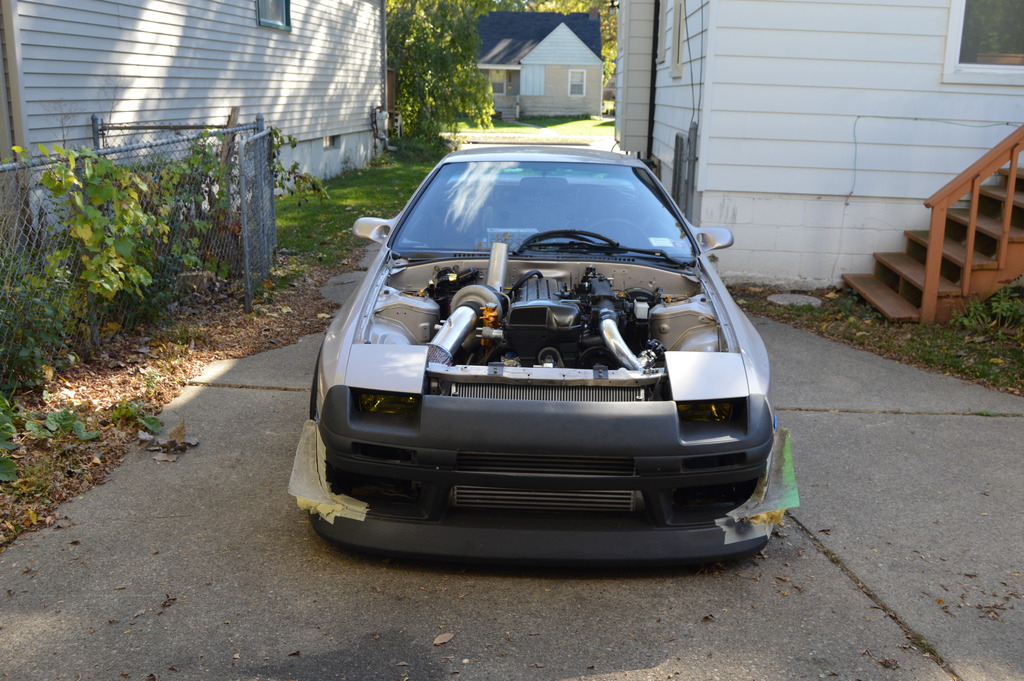
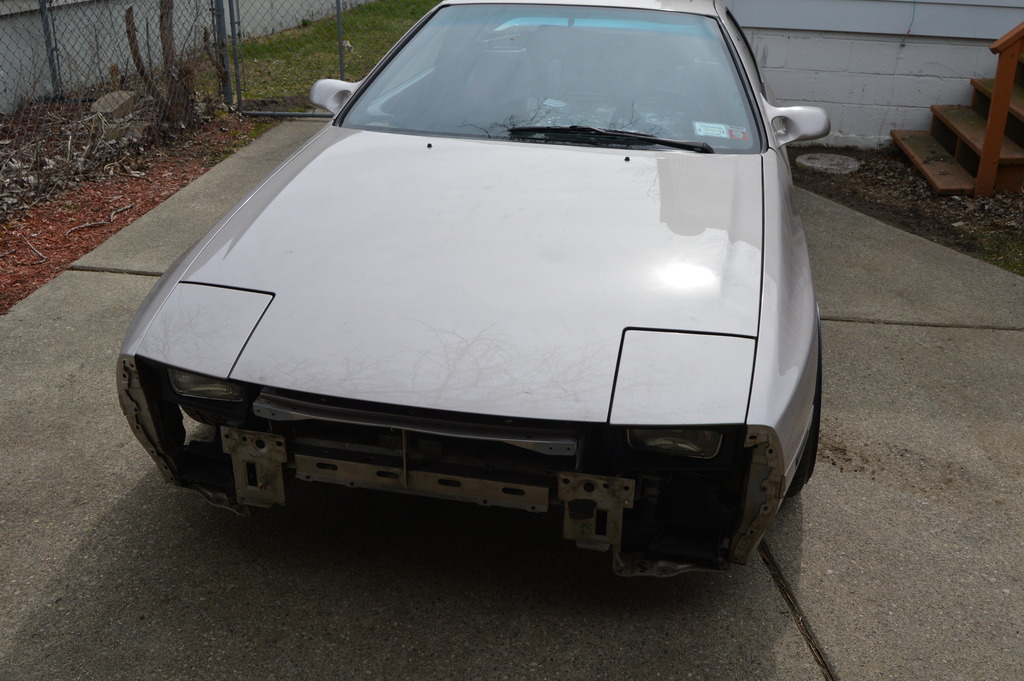
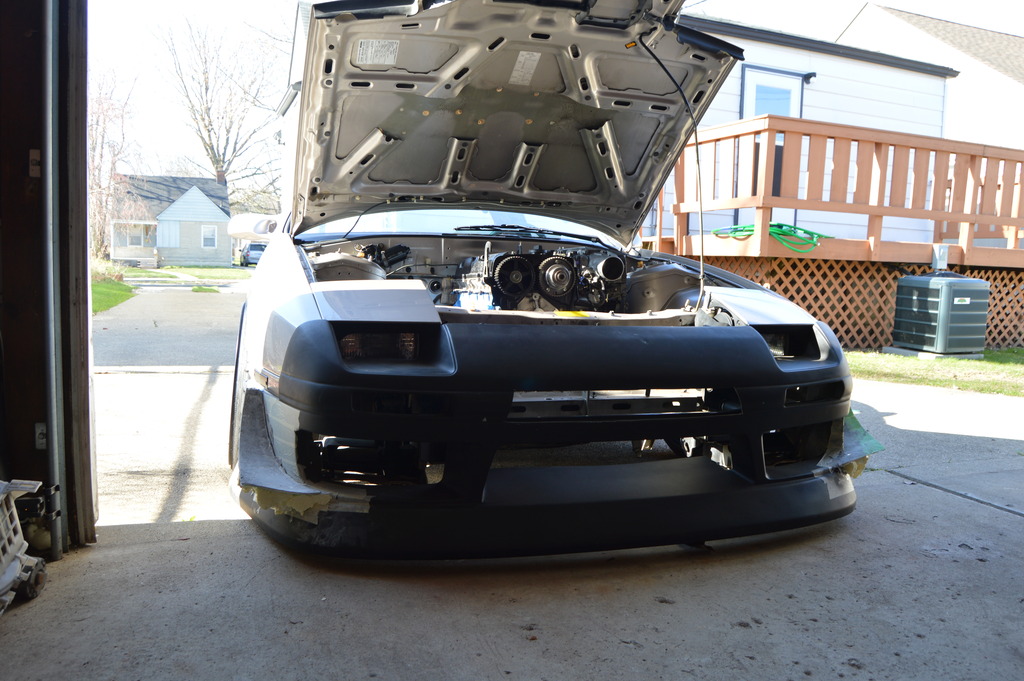
then got the hood to close. this is with the turbo, oil cap, and the throttle body removed and all inner webbing trimmed out. i will be running a DMAX style vent which should hide the throttle body


got in my fuel rail also and mocked it up. return will be -6 but this is some -8 shown

ID1000s and the rest of the my fuel system. still need to order a bosch 044

then got the hood to close. this is with the turbo, oil cap, and the throttle body removed and all inner webbing trimmed out. i will be running a DMAX style vent which should hide the throttle body


Last edited by dandoe; 05-13-16 at 11:56 PM.
05-13-16, 11:55 PM
#29
Full Member
Thread Starter
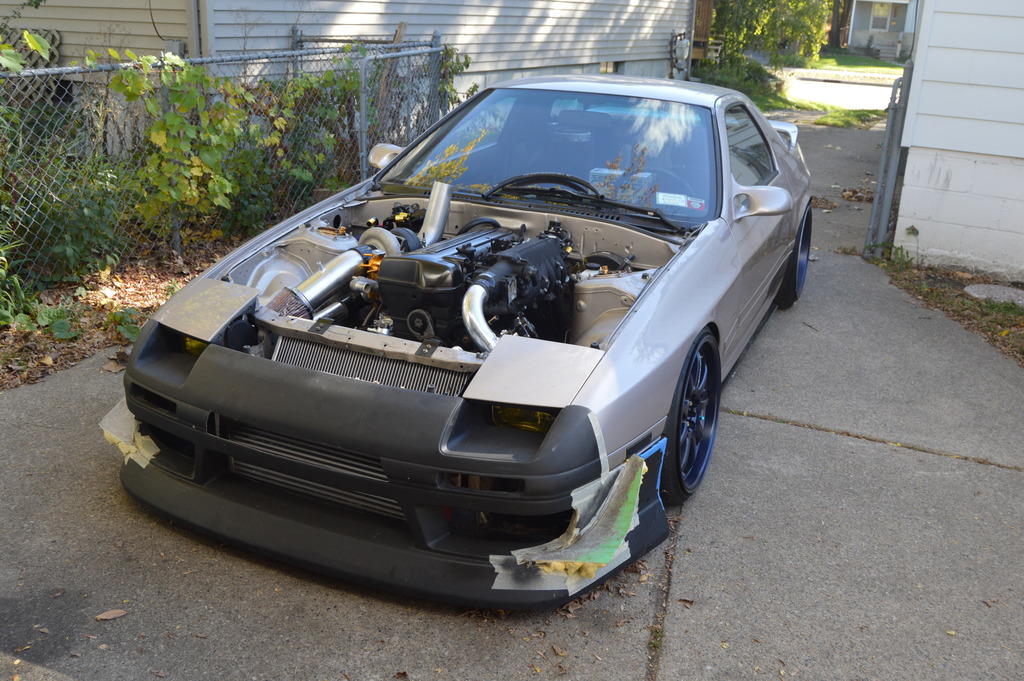
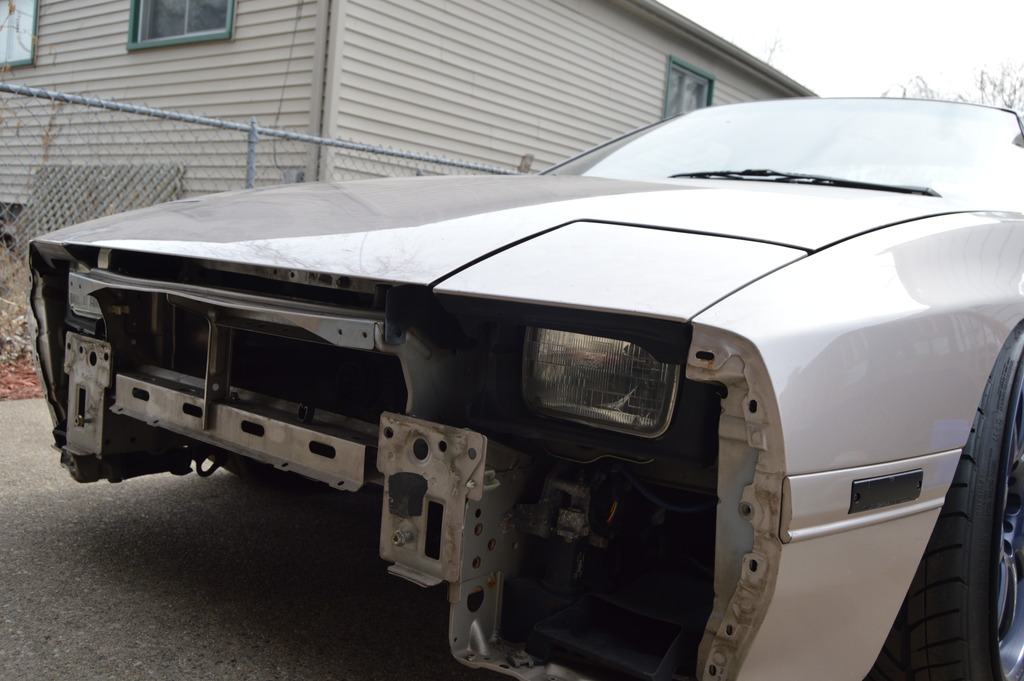
Got my street faction engineering bash bar installed and tinted out the headlights


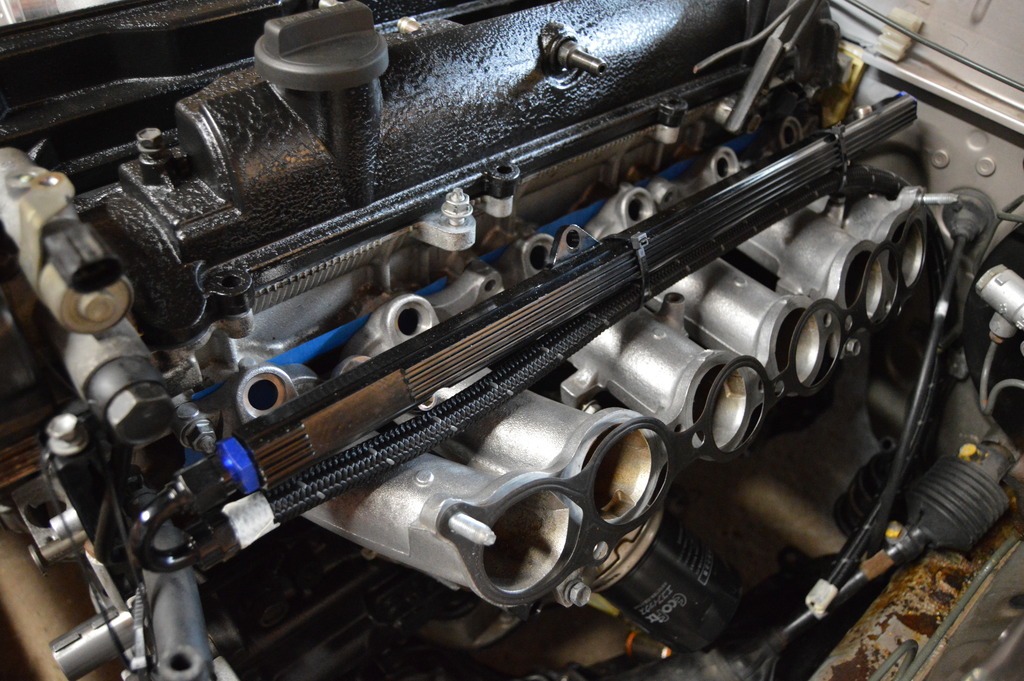
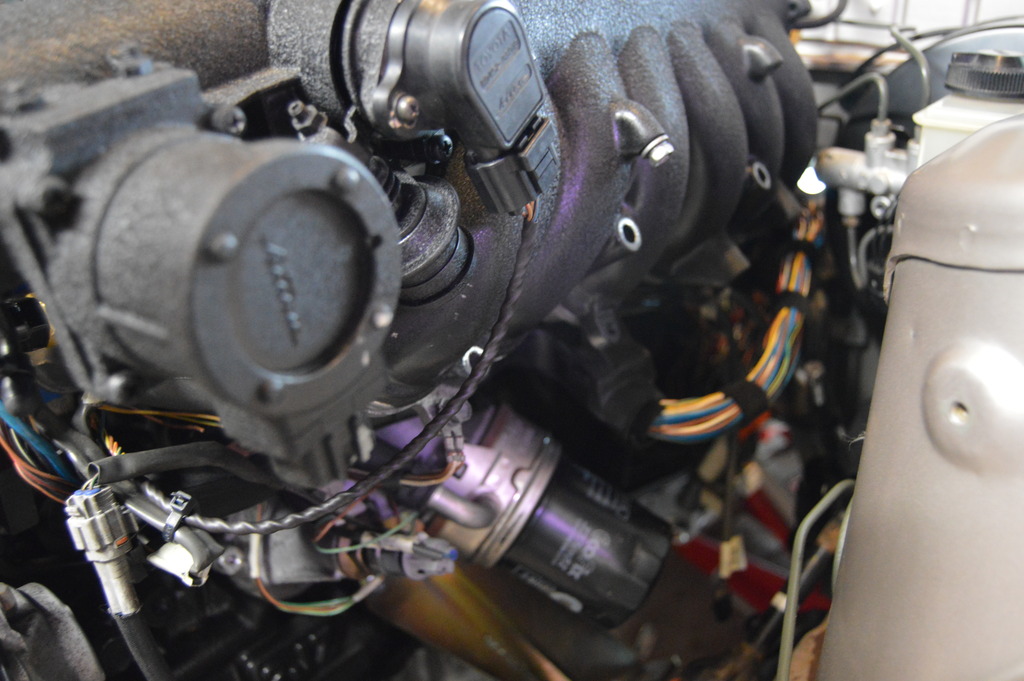
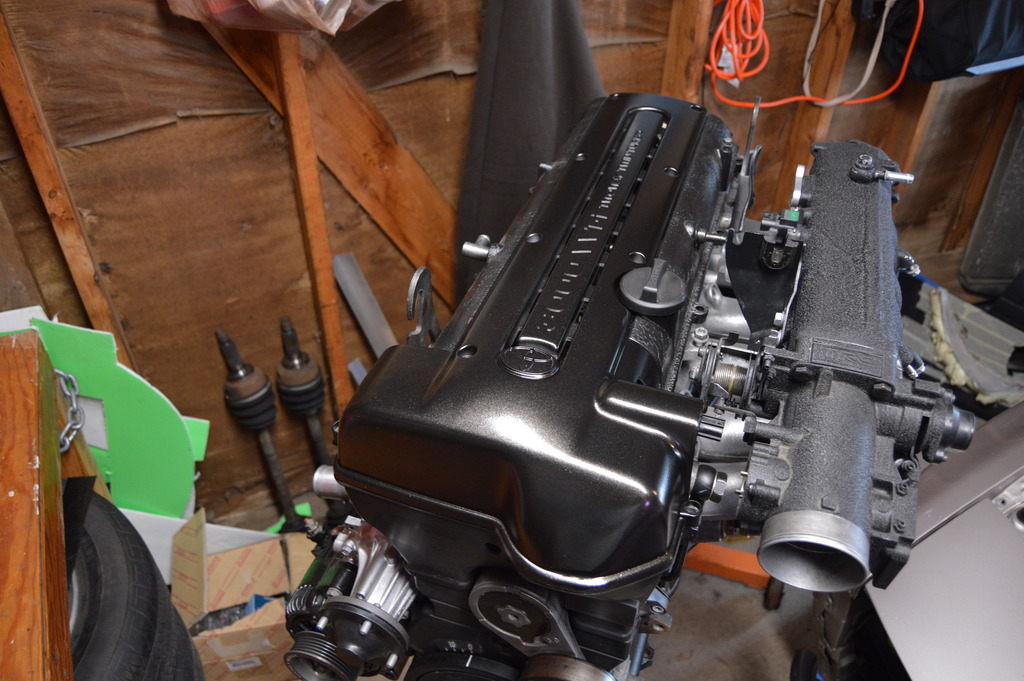
picked up a supra 2jz intake manifold and throttle body so i dont have to deal with the pesky DBW throttle body. feeling all the wrinkle black here, valve cover will get the gloss black treatment soon

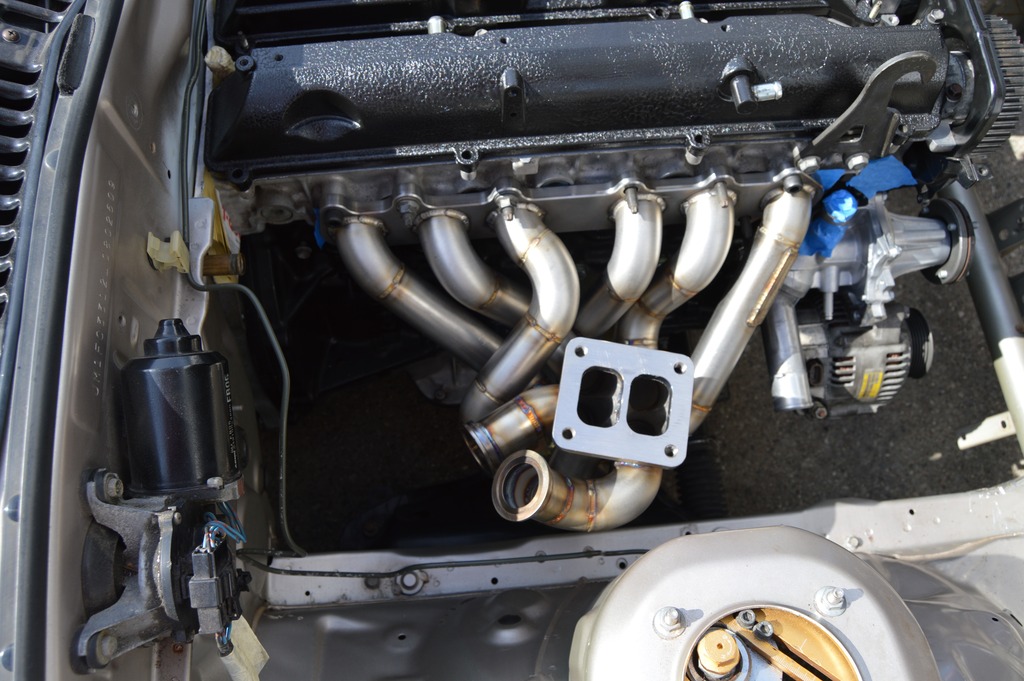
as seen before got my dump tubes and down (up?) pipe tacked together where i wanted them. the dump tubes will get extended and then all three will be cut flush to the hood.


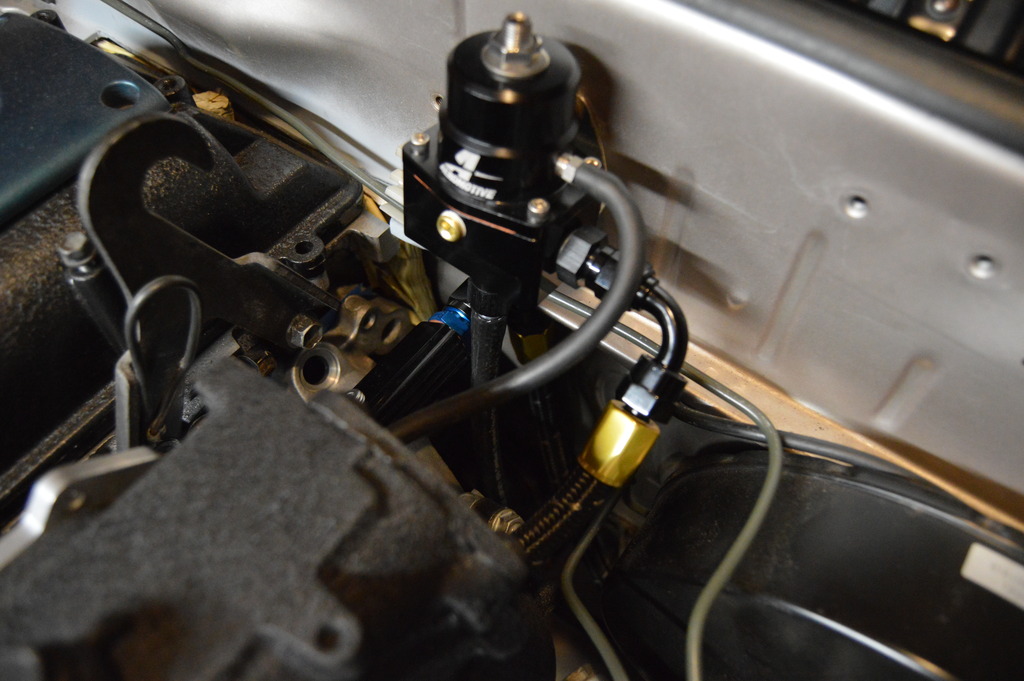
mocked up the location of the FPR also


Last edited by dandoe; 05-14-16 at 06:34 AM.
 05-30-16, 06:12 PM
#32
Full Member
Thread Starter
little update!
got the engine harness stripped down and routed. gotta order up a milspec connector next and some looming to finish it up.connector will run to the old speedo cable hole.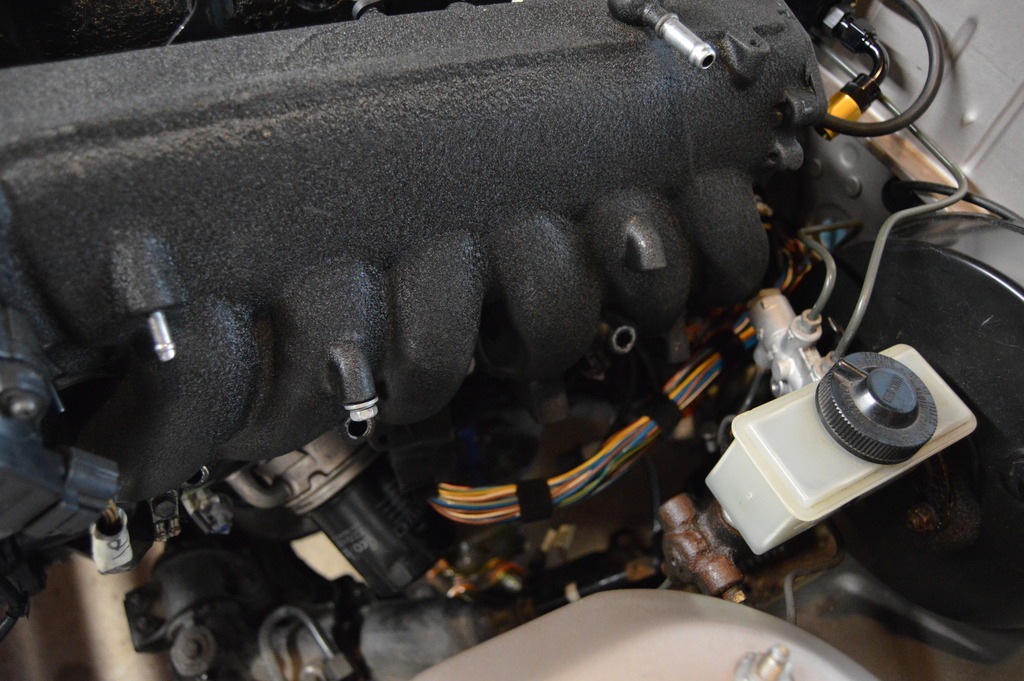
this is fully wired up minus the wideband and a few temp sensors.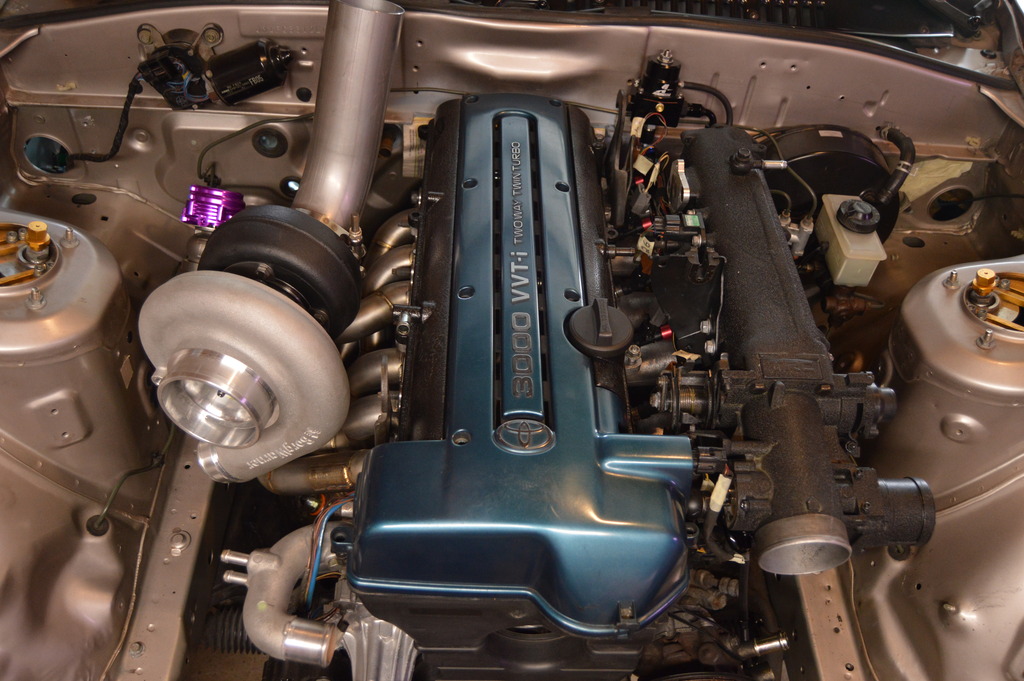
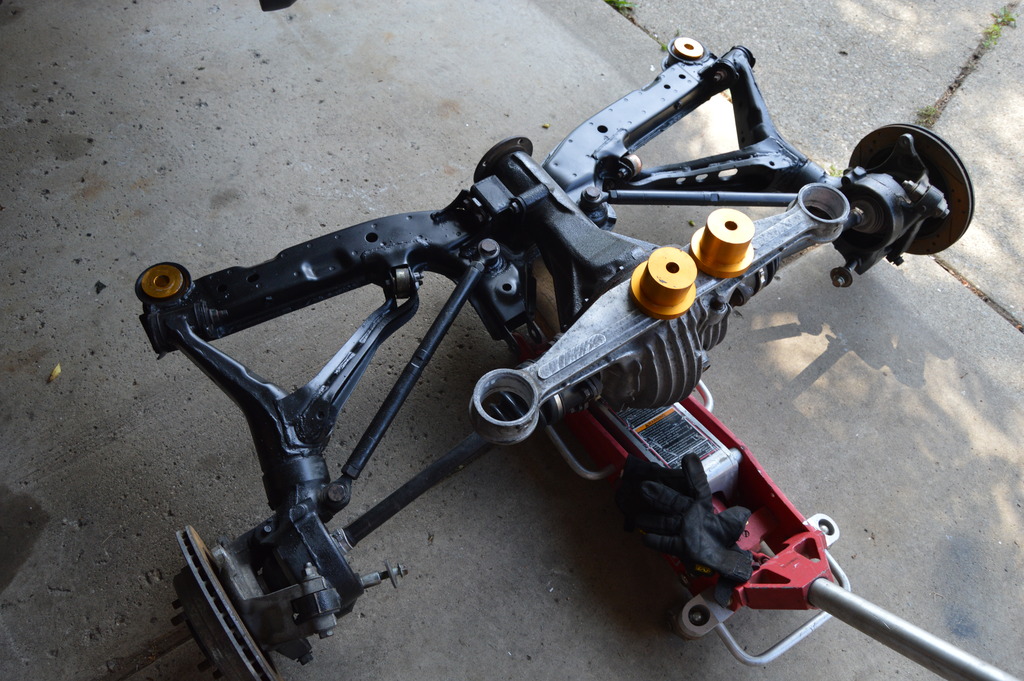
dropped my subframe to do a refresh on all my suspension and then rebuilt the TII axles. Diff is a Kaaz 1.5 way
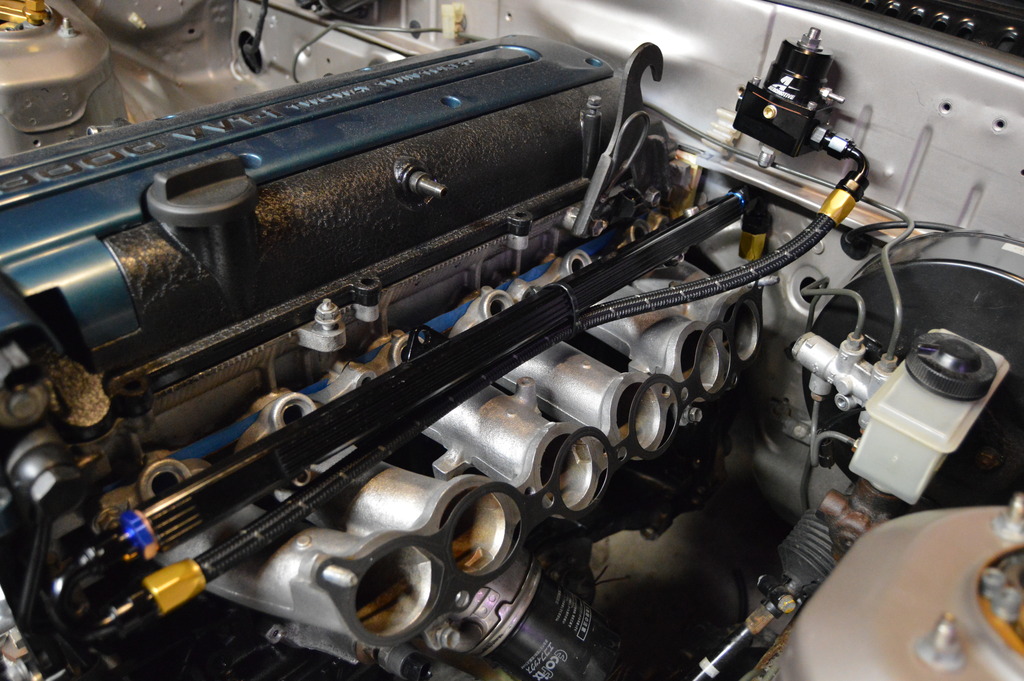
While my subframe was down i got my fuel system plumbed up.
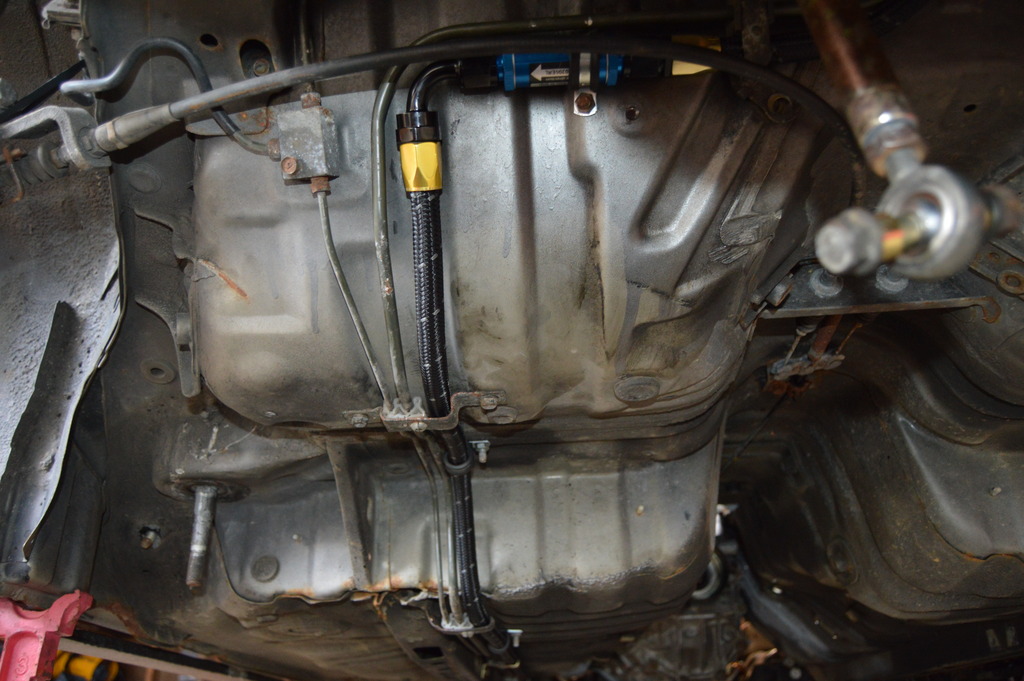
trimmed the stock fuel line brackets for the -8

feed line routed
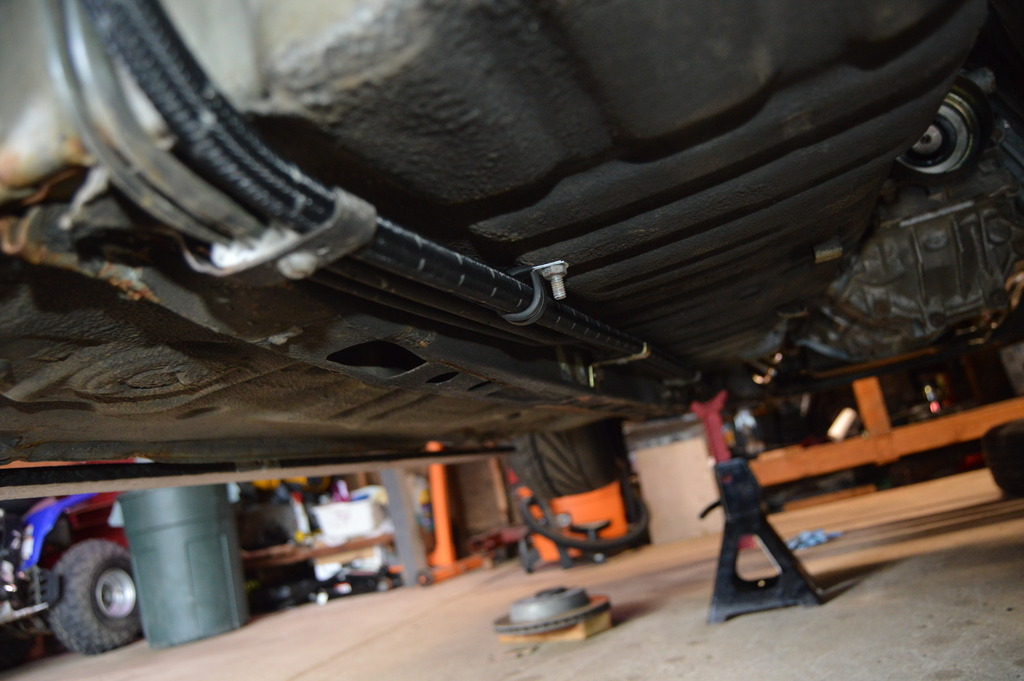
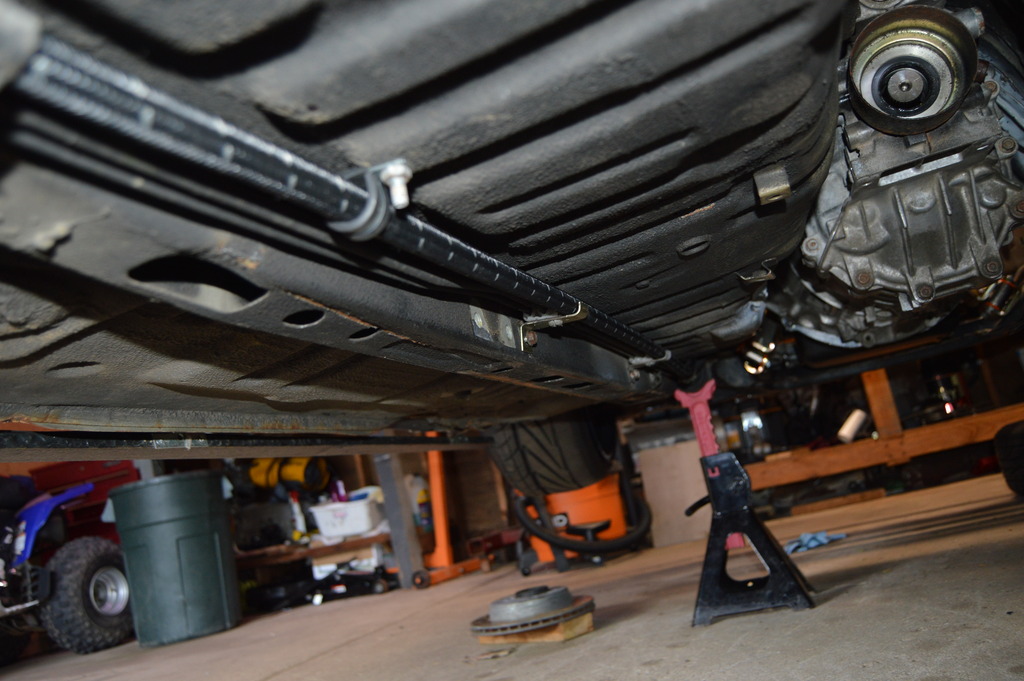
all tucked up
waiting on some -6 to finish the return from the rail to the FPR and then throw the bulkhead fitting on the fuel pump cover and that should do it for the fuel system. Engine it gonna come back out to run a new passenger brake line and swap the master cylinder. Also will clean up the rust on the frame rail and reroute the body harness.
got the engine harness stripped down and routed. gotta order up a milspec connector next and some looming to finish it up.connector will run to the old speedo cable hole.


this is fully wired up minus the wideband and a few temp sensors.

dropped my subframe to do a refresh on all my suspension and then rebuilt the TII axles. Diff is a Kaaz 1.5 way

While my subframe was down i got my fuel system plumbed up.


trimmed the stock fuel line brackets for the -8

feed line routed


all tucked up

waiting on some -6 to finish the return from the rail to the FPR and then throw the bulkhead fitting on the fuel pump cover and that should do it for the fuel system. Engine it gonna come back out to run a new passenger brake line and swap the master cylinder. Also will clean up the rust on the frame rail and reroute the body harness.
06-01-16, 08:58 PM
#33
Full Member
Thread Starter
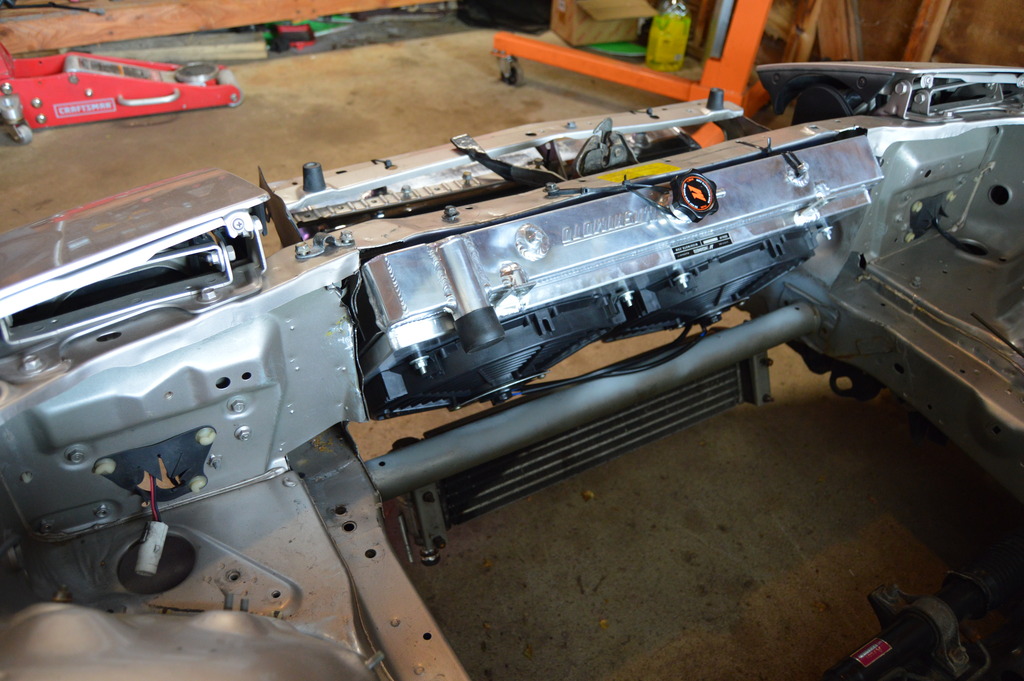
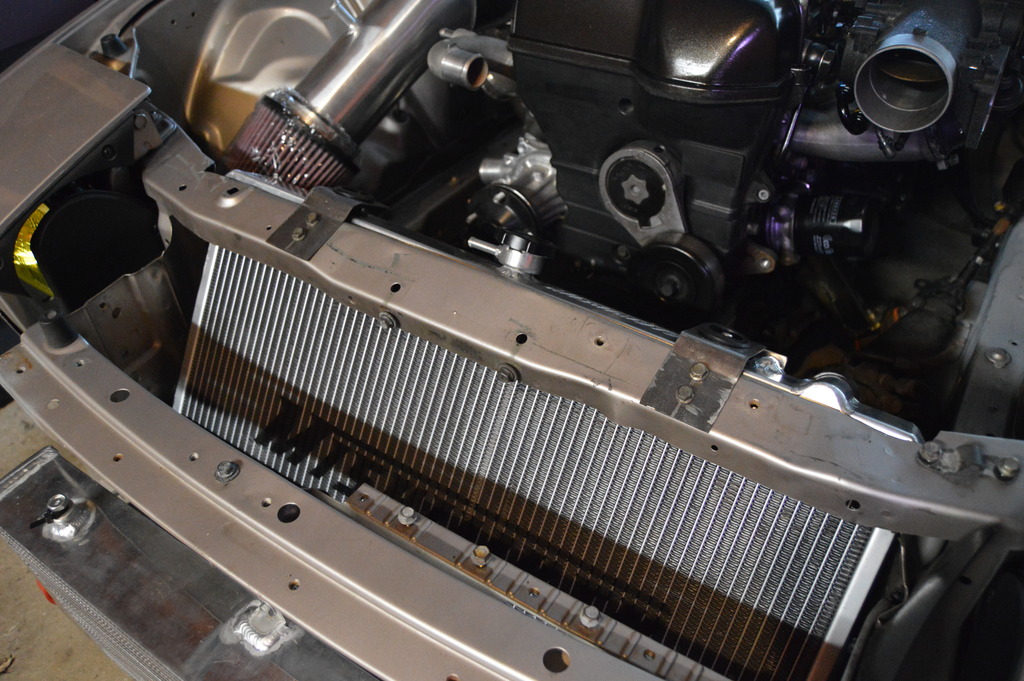
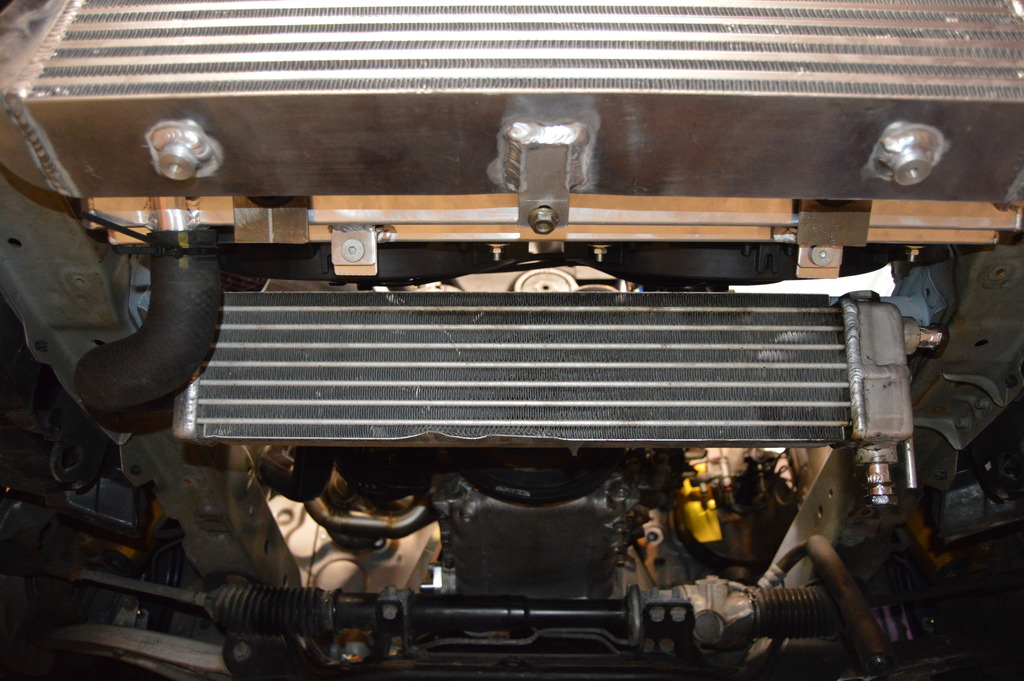
ordered this mishimoto SR20 240SX radiator and got it mocked up tonight. might rotate the oil cooler down alittle more so i can squeeze in the fans. Still a rough position as i need to figure out the best intercooler core size too.
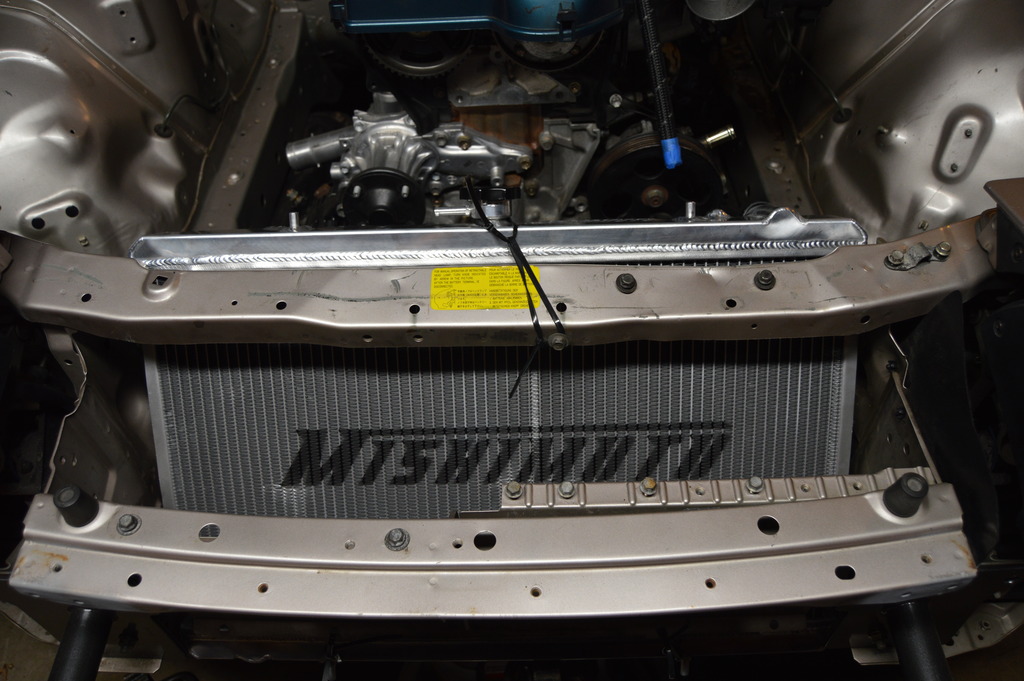
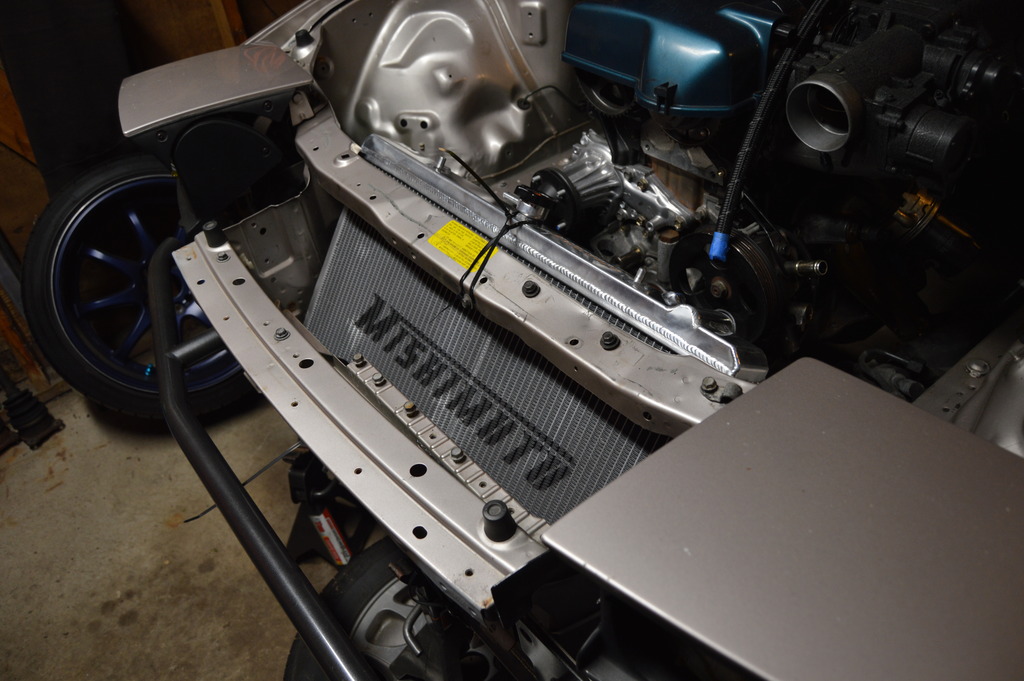
should get the return line and FPR plumbed up this weekend and hopefully get the radiator mounted permanently so i can plumb that up too along with the heater core.


should get the return line and FPR plumbed up this weekend and hopefully get the radiator mounted permanently so i can plumb that up too along with the heater core.
 07-23-16, 08:25 AM
#35
Full Member
Thread Starter
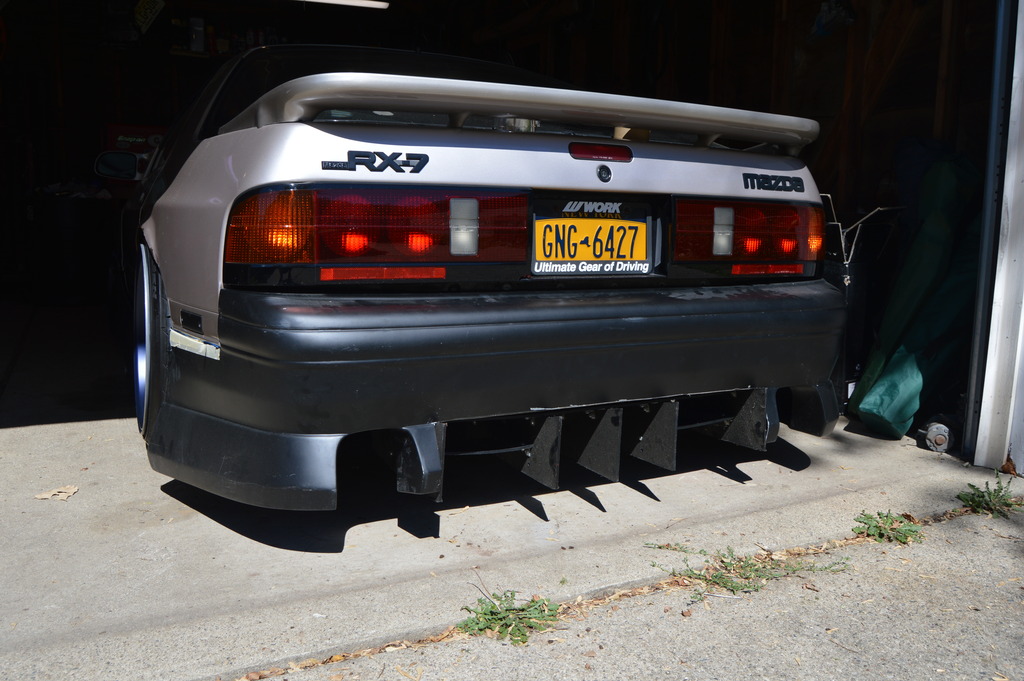
no, only thing i have trimmed is the bumper itself
Going to join premiumrices quest to revive the drift section here with a little update. I have been chipping away at this thing but as with any project mostly been ordering parts lol.
feed line plumbed up
return line
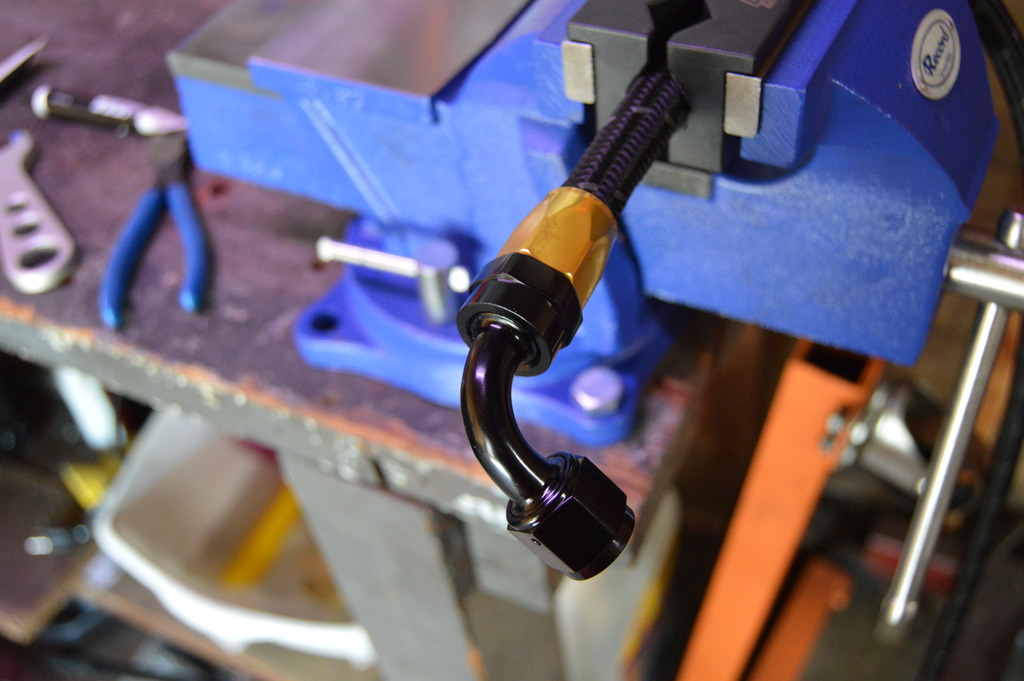
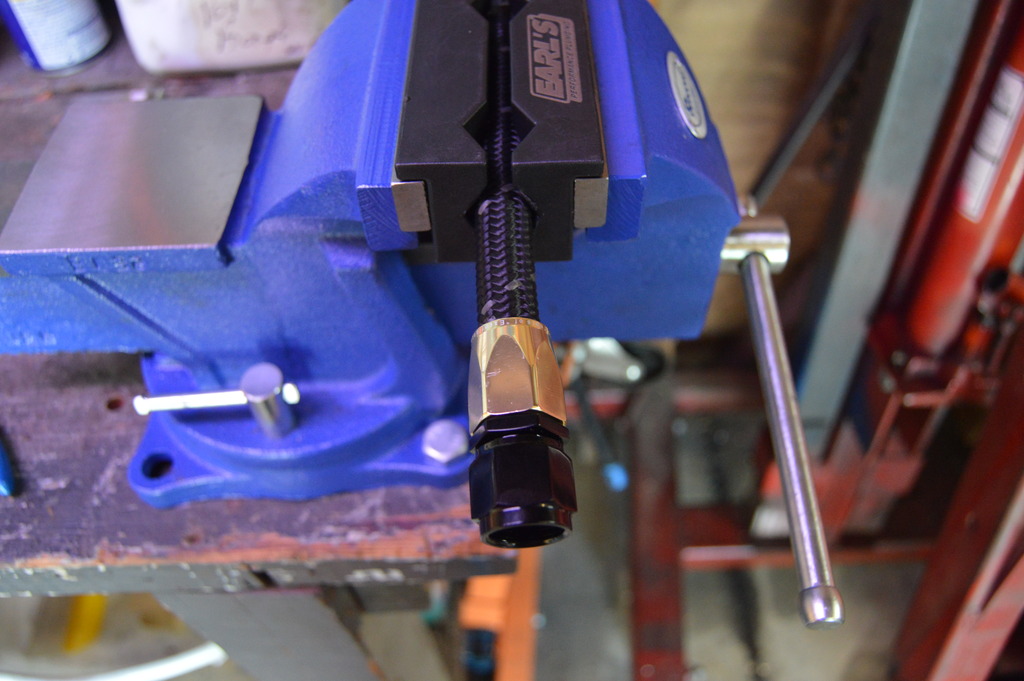
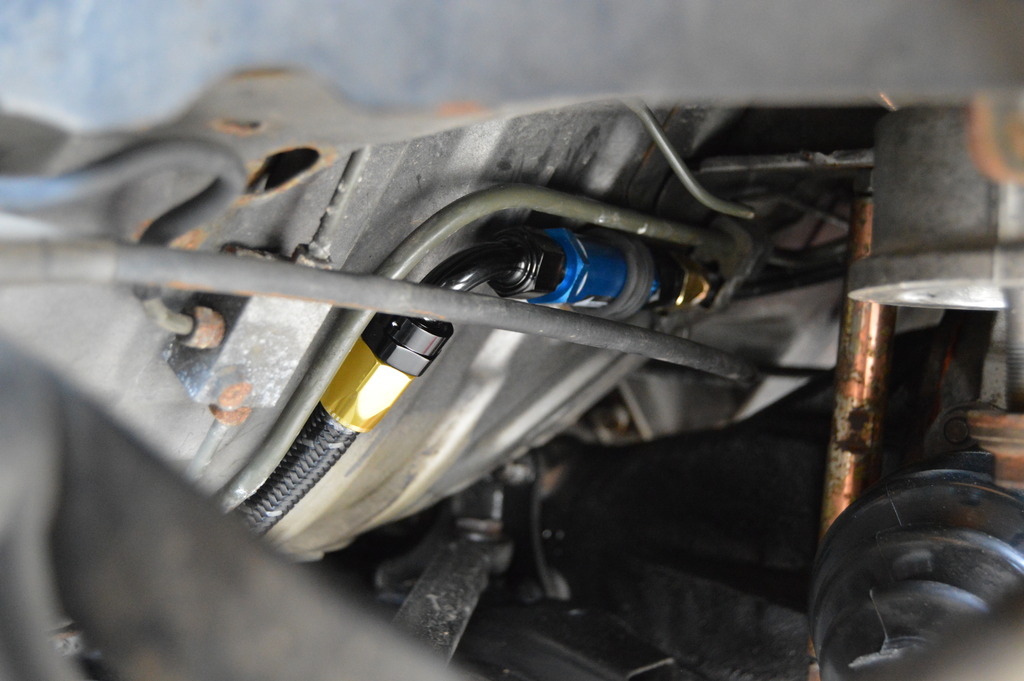
had to do alittle massaging to fit this big *** 90* -8. Still need to do more work to get this away from the firewall.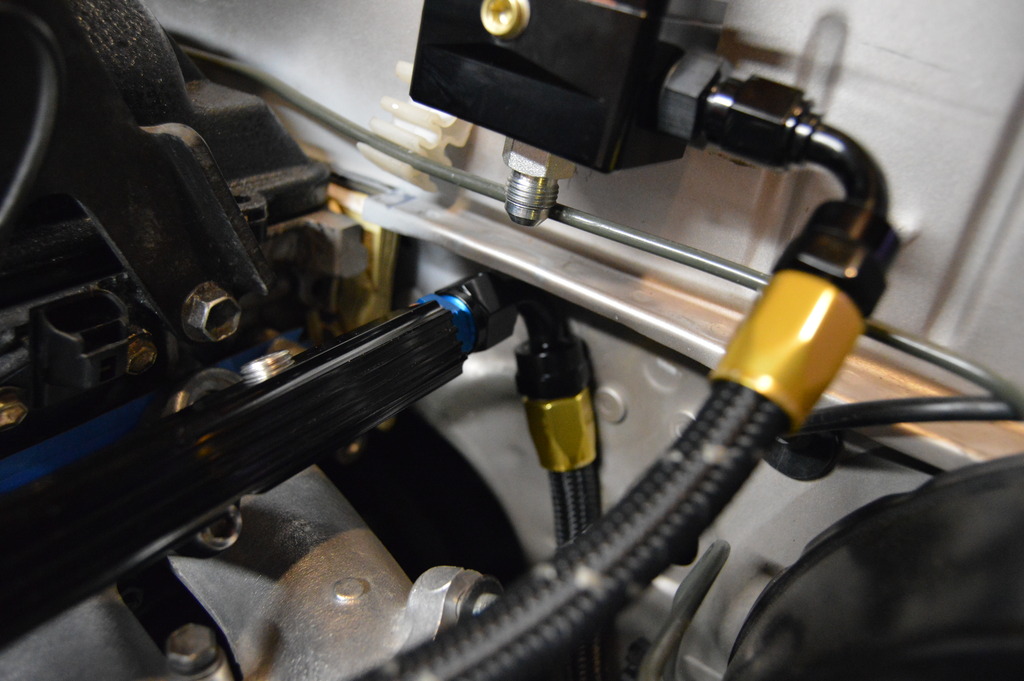
and all set. the return from the FPR is ran to the stock feed hardline back to the tank.
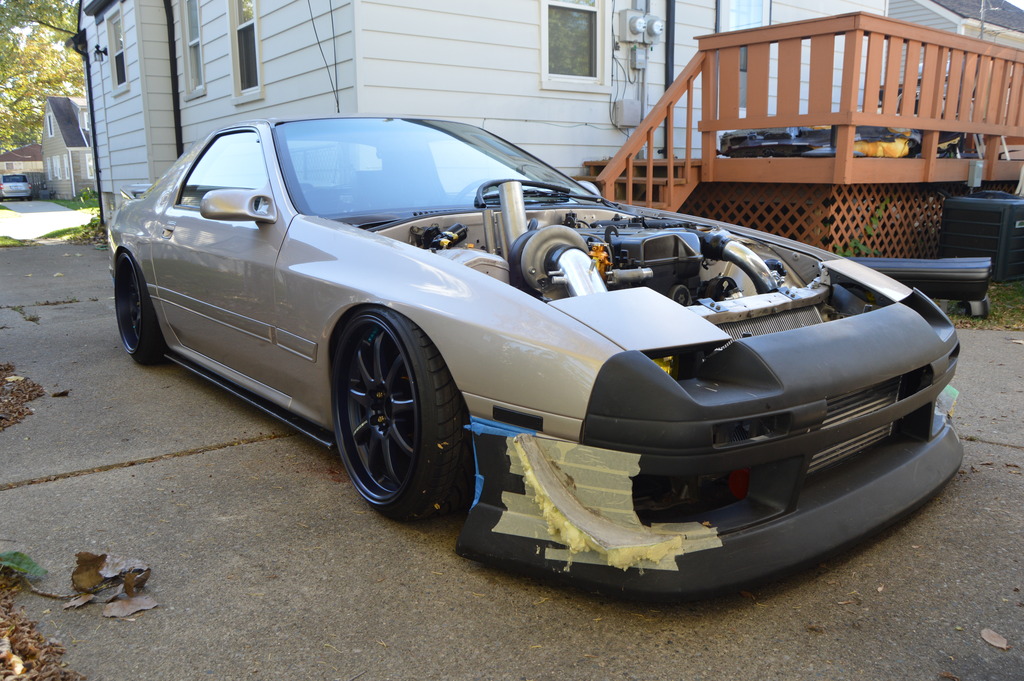
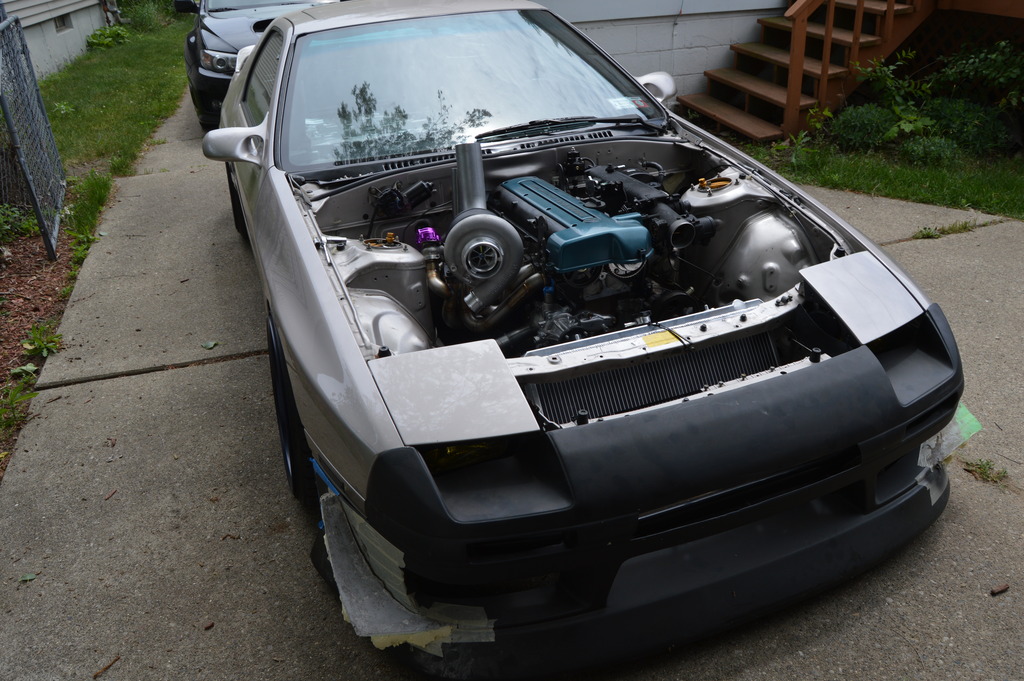
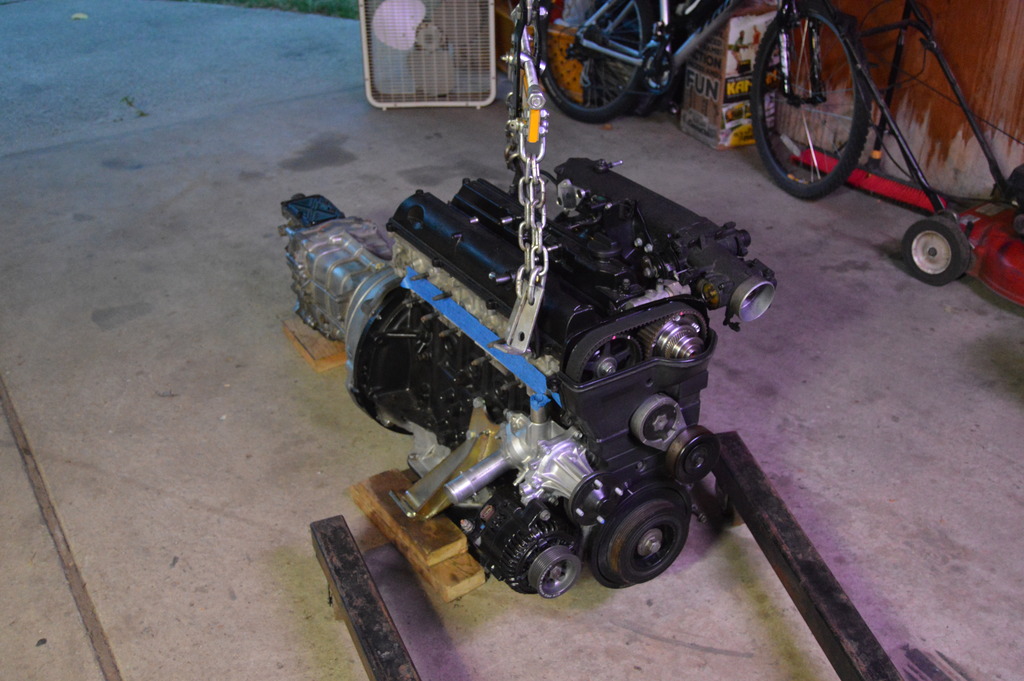
then subframe went back in and i threw everything on for a couple progress pics
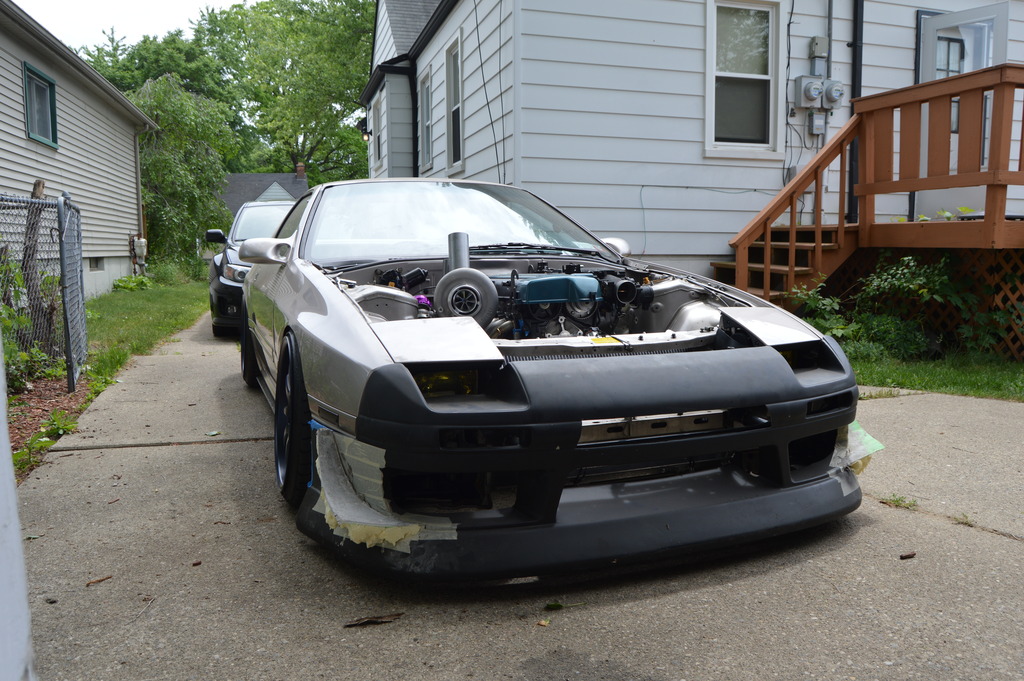
Going to join premiumrices quest to revive the drift section here with a little update. I have been chipping away at this thing but as with any project mostly been ordering parts lol.
feed line plumbed up

return line


had to do alittle massaging to fit this big *** 90* -8. Still need to do more work to get this away from the firewall.

and all set. the return from the FPR is ran to the stock feed hardline back to the tank.

then subframe went back in and i threw everything on for a couple progress pics


 07-23-16, 08:29 AM
#36
Full Member
Thread Starter
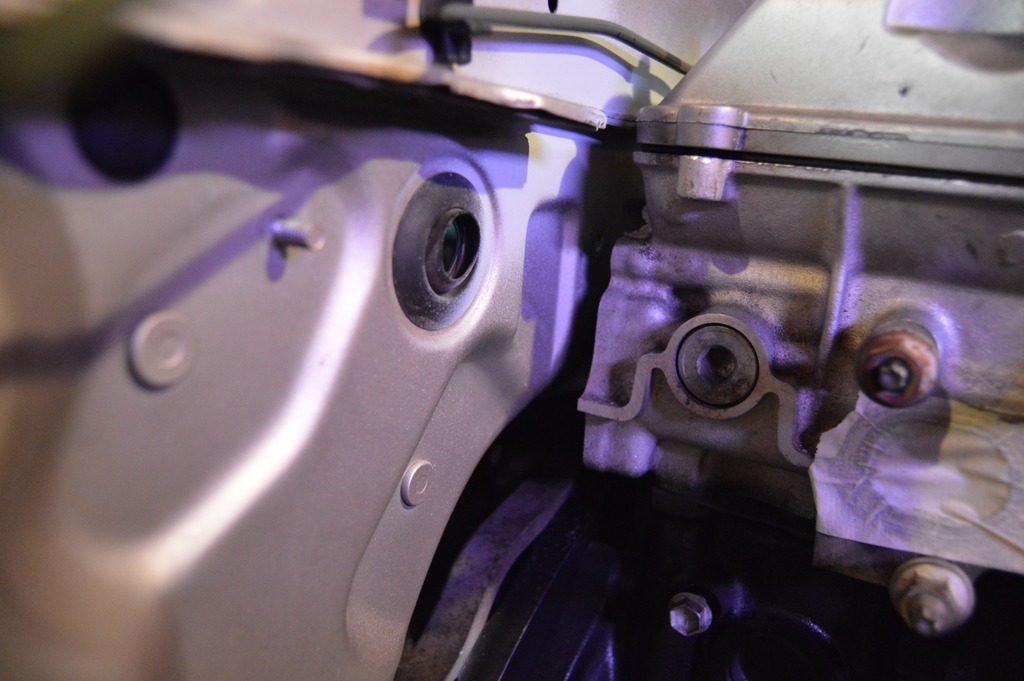
engine came out again and new front main seal went in.
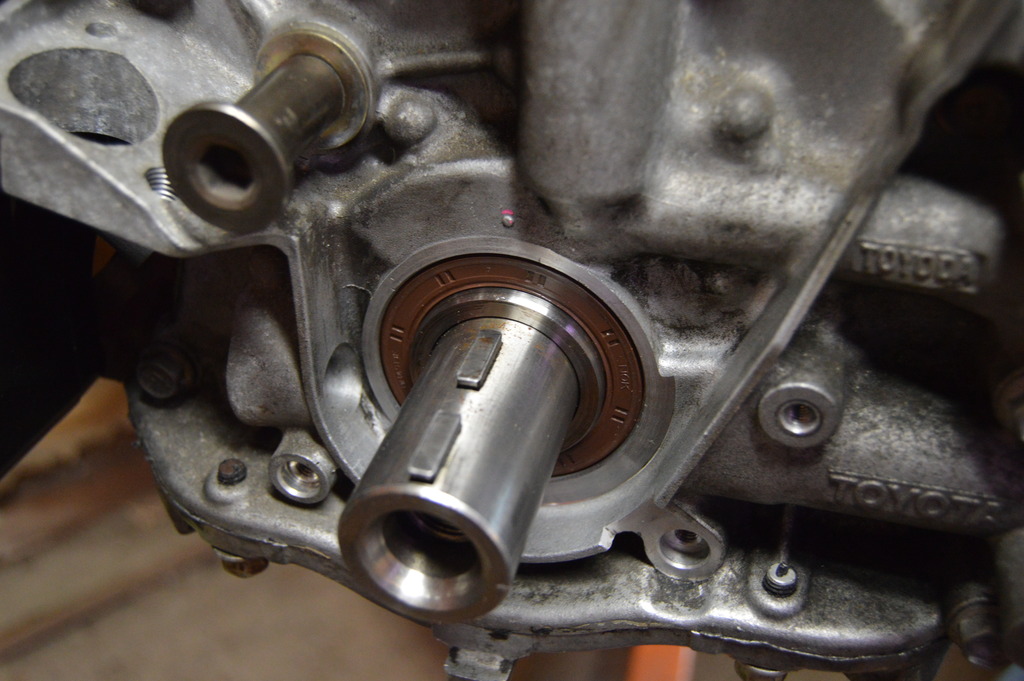
new timing belt and idler
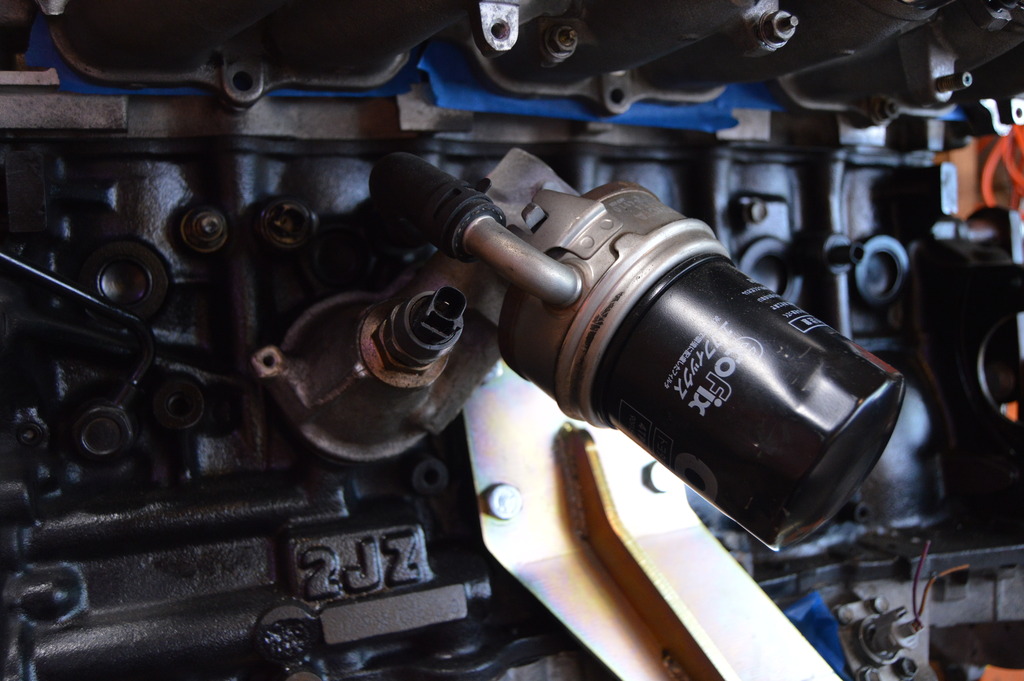
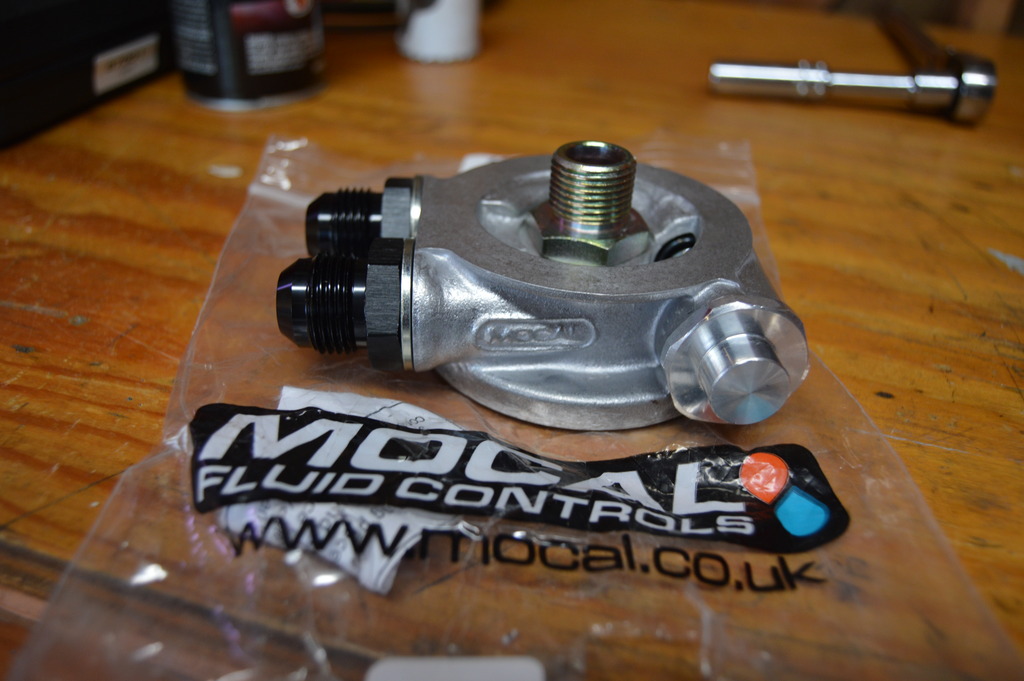
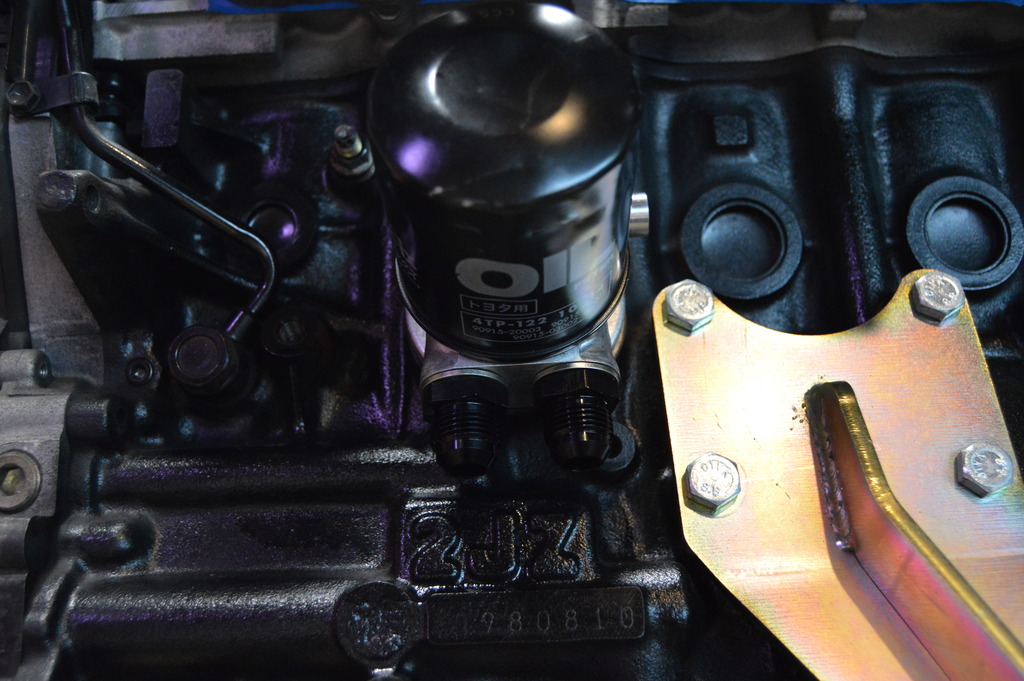
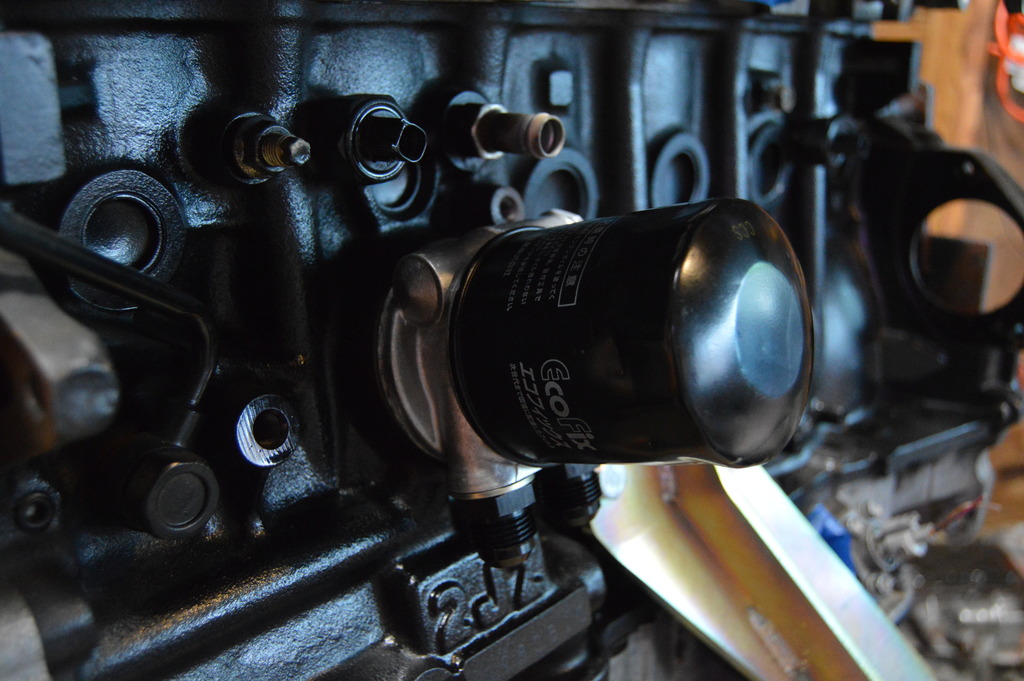
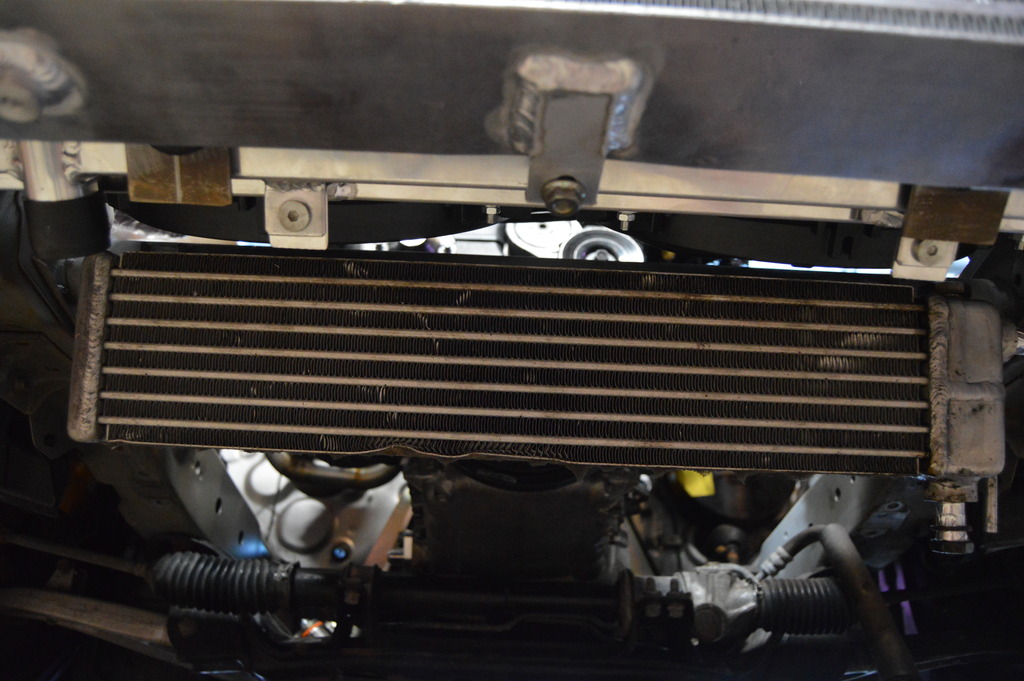
got rid of the stock oil cooler. -10 lines will be ran to the stock rx7 oil cooler.
cleaned up the surface rust from the old leaking master cylinder
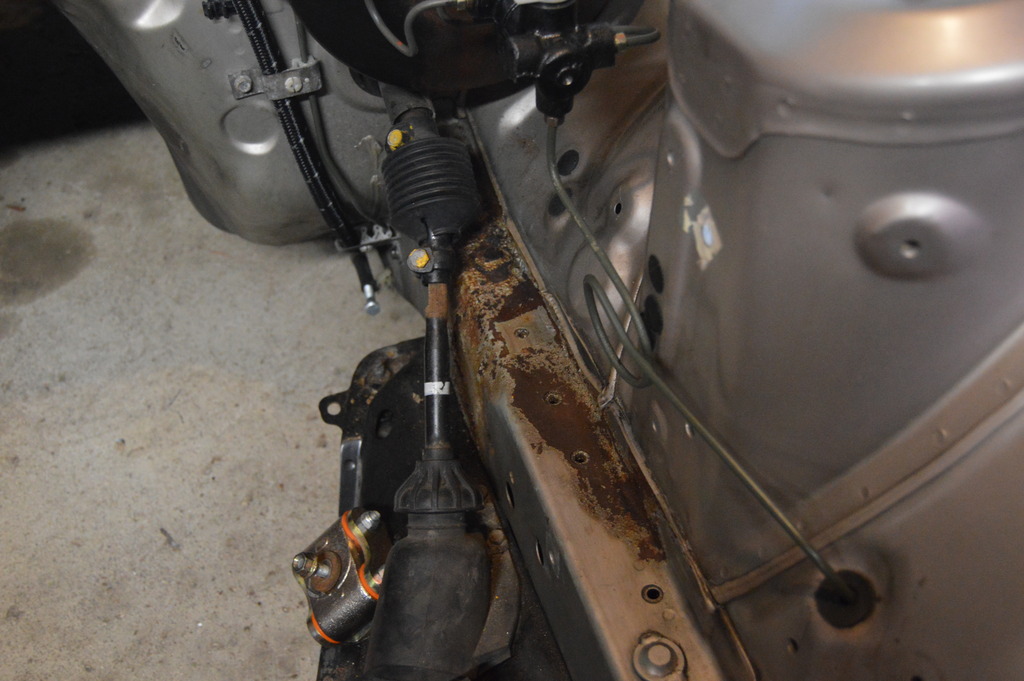
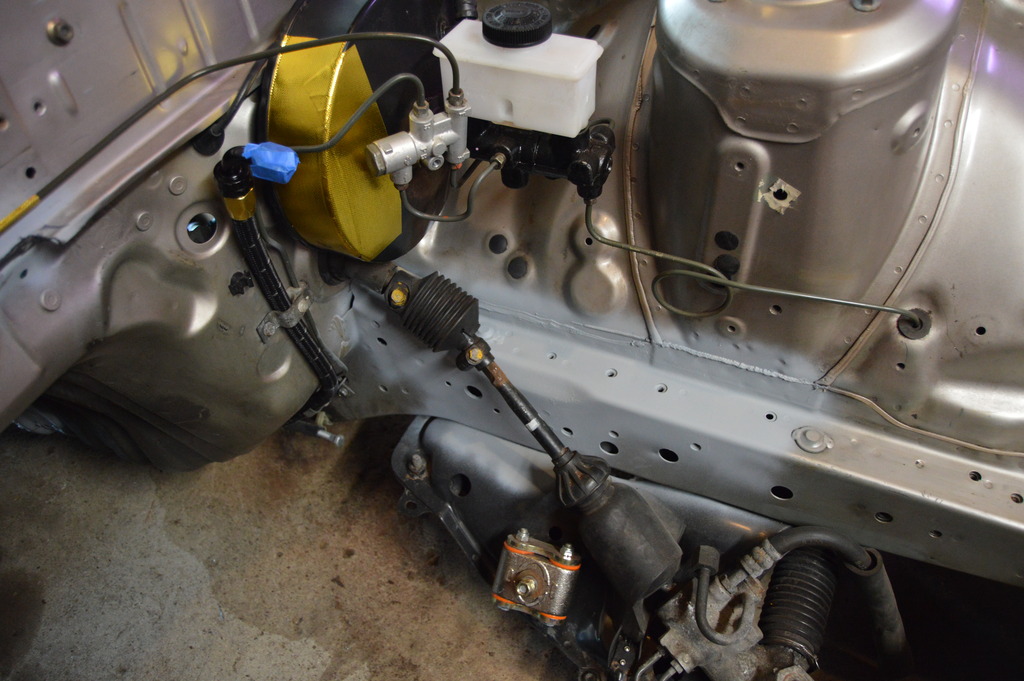
now i realize why everyone goes crazy with the reflective gold tape. all cleaned up and primed. new passenger brake line is in and much cleaner also
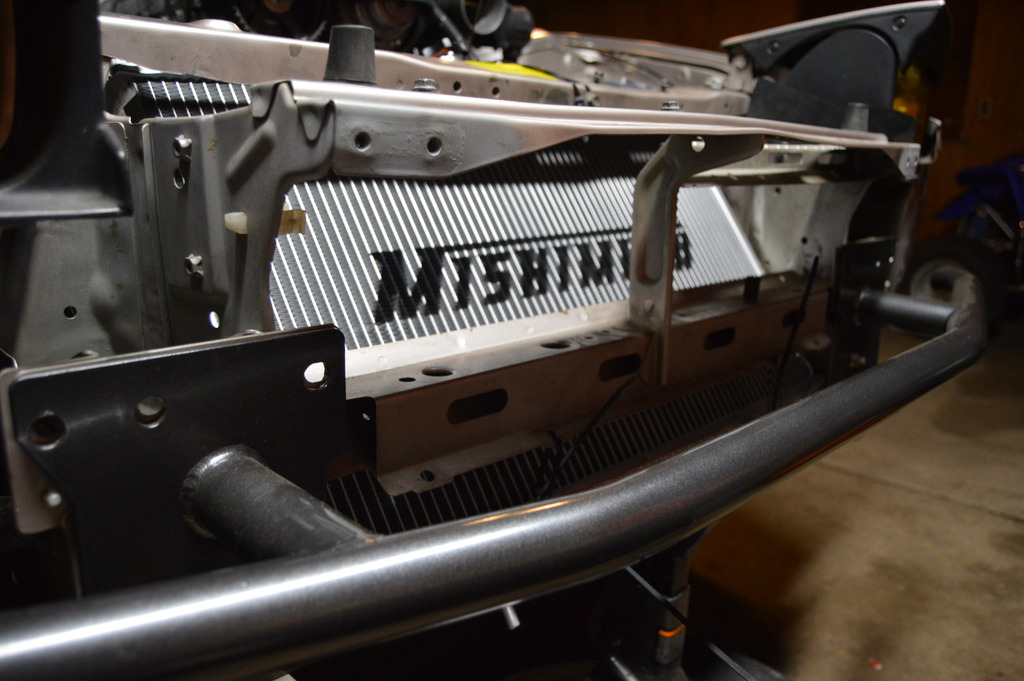
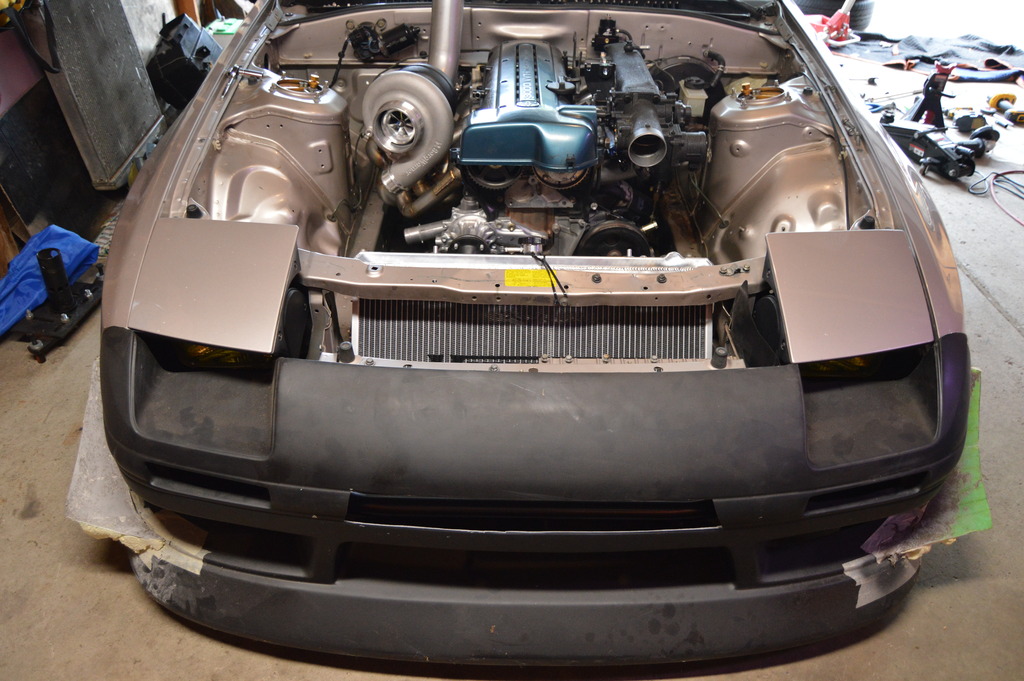
finalized radiator position with the fans. need to fabricate a cross bar to support the bottom of the radiator and the FMIC.

new timing belt and idler

got rid of the stock oil cooler. -10 lines will be ran to the stock rx7 oil cooler.


cleaned up the surface rust from the old leaking master cylinder


now i realize why everyone goes crazy with the reflective gold tape. all cleaned up and primed. new passenger brake line is in and much cleaner also

finalized radiator position with the fans. need to fabricate a cross bar to support the bottom of the radiator and the FMIC.

 07-23-16, 08:33 AM
#37
Full Member
Thread Starter
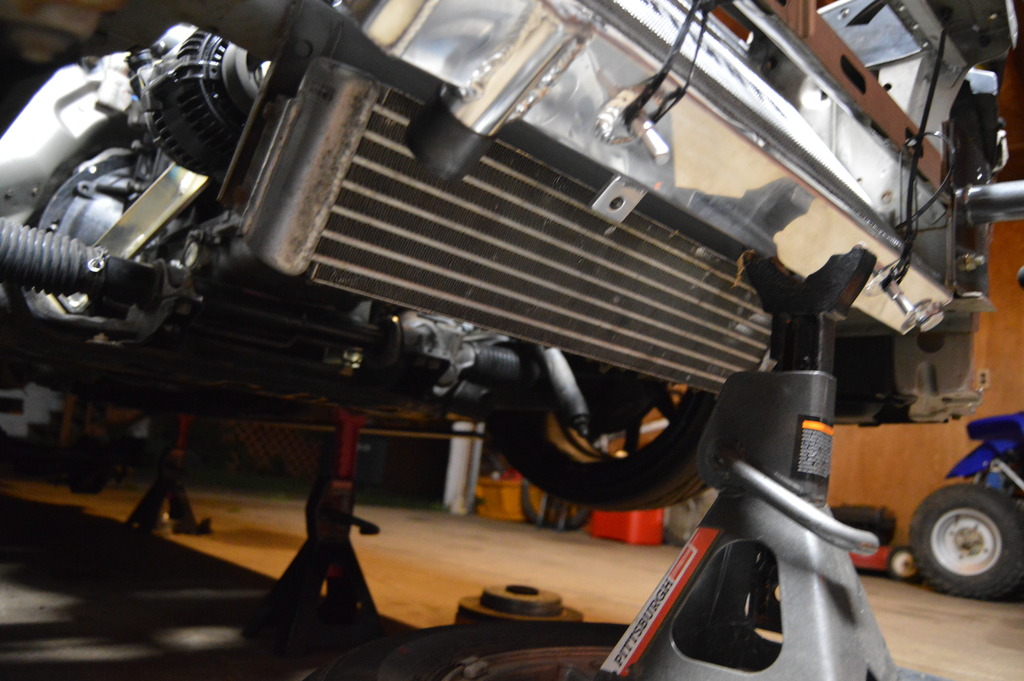
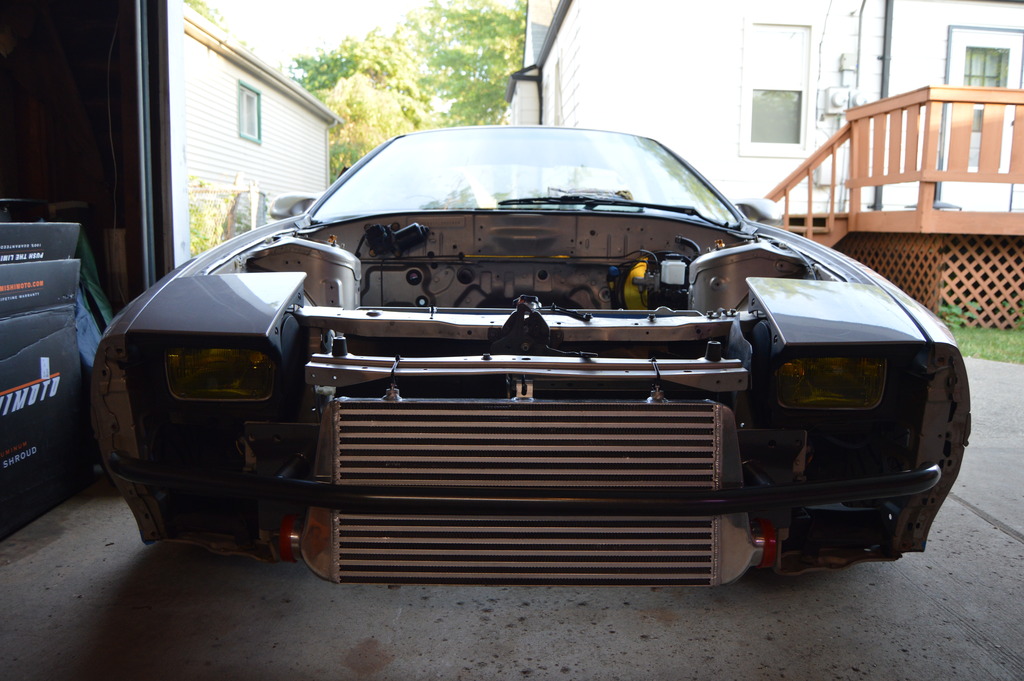
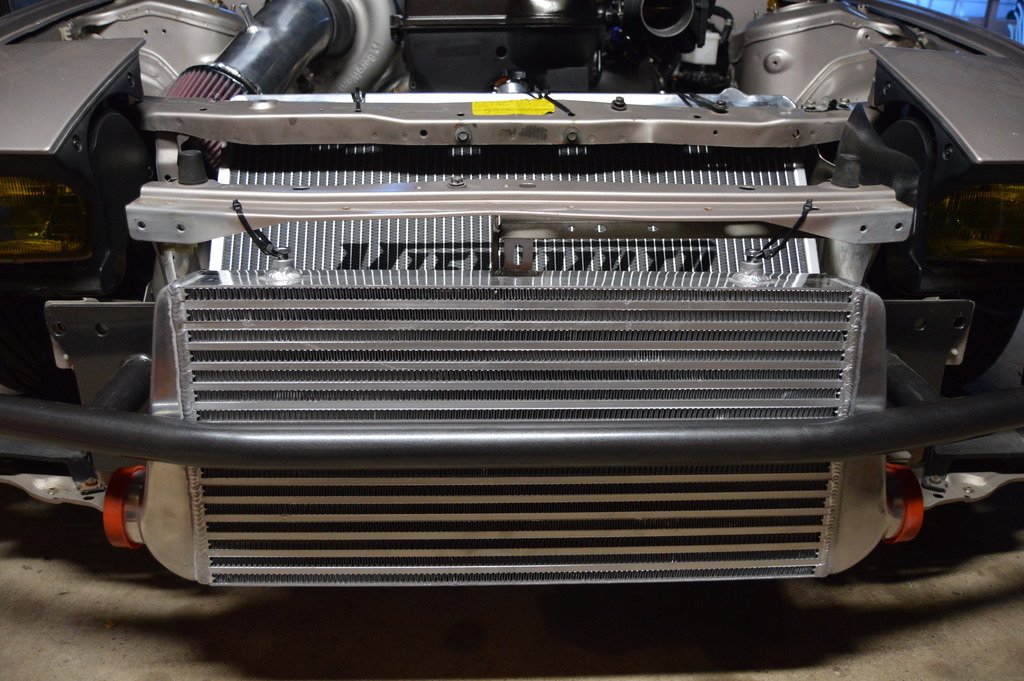
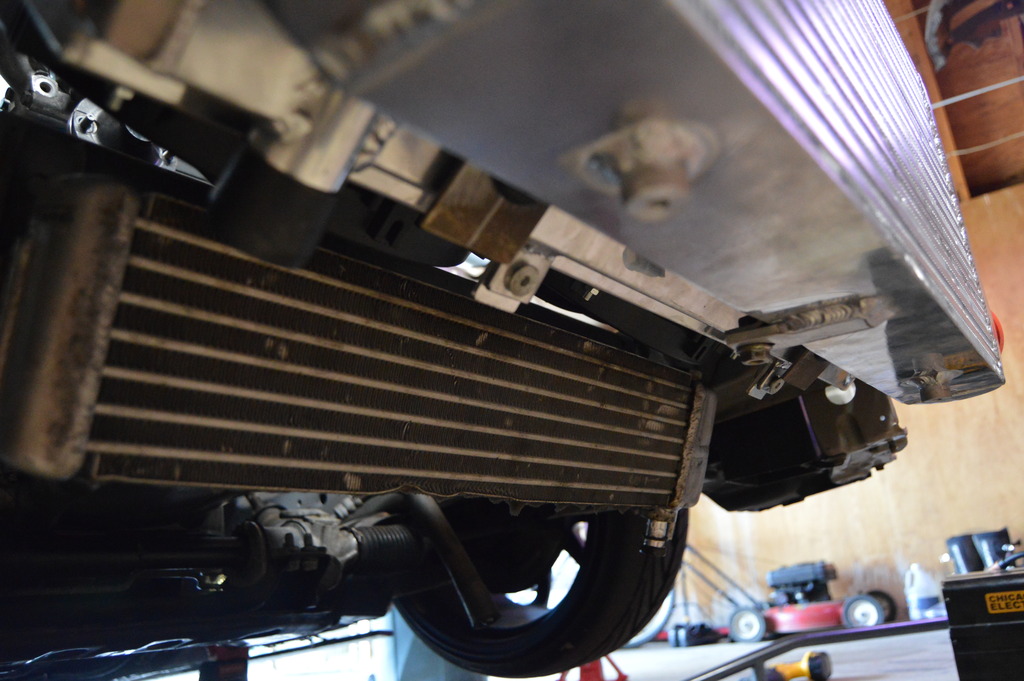
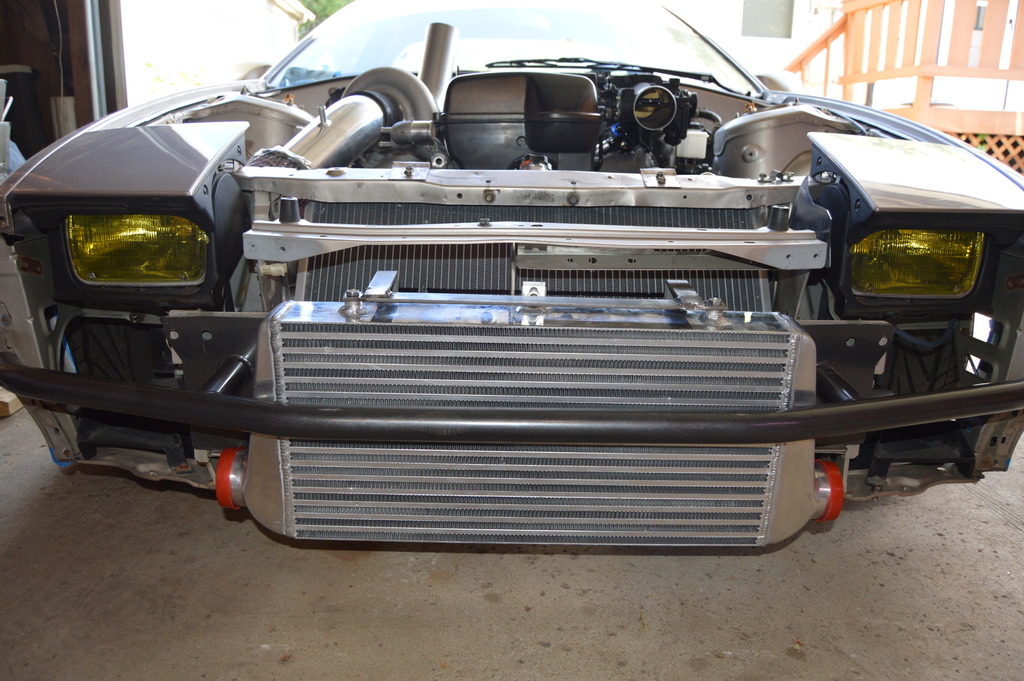
intercooler mocked up in position. this is a CX racing unit. there will be ducting above and below the IC to feed fresh air to the radiator.
painted and shaved the bracket on the spark plug cover
ready to go in for final mockup, plumbing, and final wiring
set
engine in and intake setup mocked up.
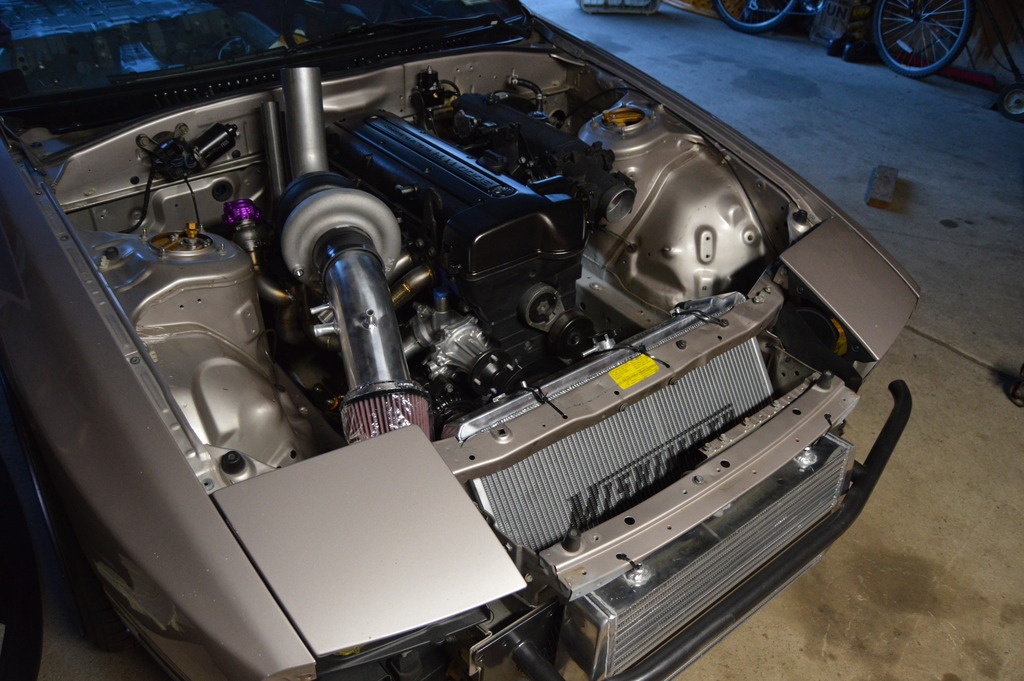
another one of the IC mocked up
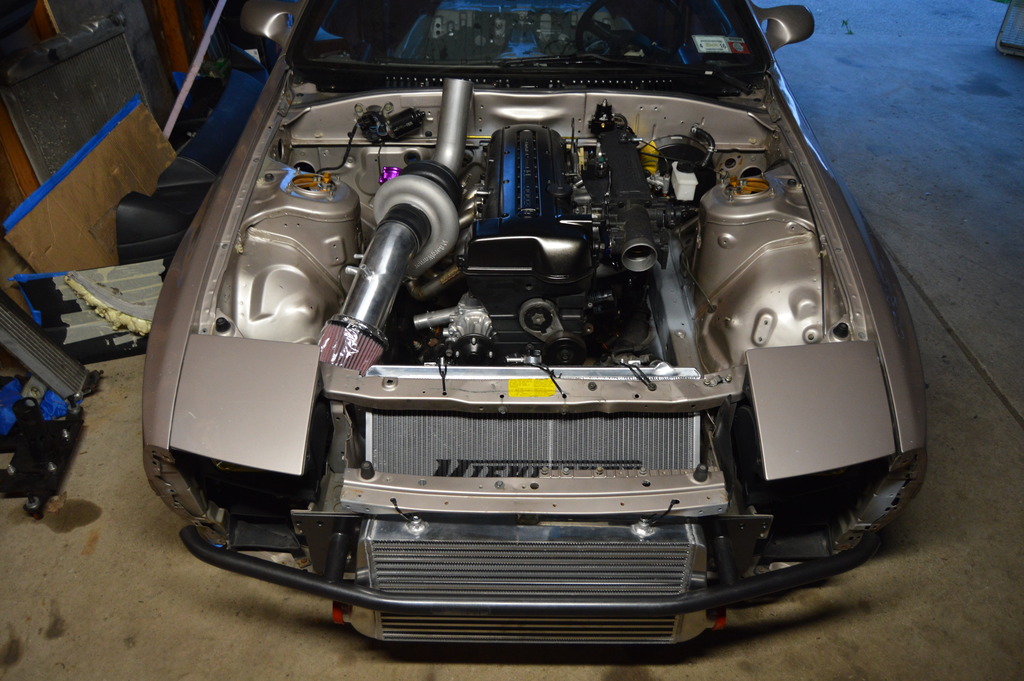
next up is plumbing for the oil cooler, catch can setup, IC, turbo, and cooling system. I just ordered my serialnine shifter relocation and i have to figure out engine management since the adaptronic modular is still 2-3 months out. I also need to order the milspec connectors for my engine harness then strip down the body harness and reloom it. Once everything it mocked up i need to find someone that can help me make my transmission mount as i am not equipped in my garage to do so. After that i can measure up a driveshaft and have driveshaft shop make one.

painted and shaved the bracket on the spark plug cover

ready to go in for final mockup, plumbing, and final wiring

set

engine in and intake setup mocked up.

another one of the IC mocked up


next up is plumbing for the oil cooler, catch can setup, IC, turbo, and cooling system. I just ordered my serialnine shifter relocation and i have to figure out engine management since the adaptronic modular is still 2-3 months out. I also need to order the milspec connectors for my engine harness then strip down the body harness and reloom it. Once everything it mocked up i need to find someone that can help me make my transmission mount as i am not equipped in my garage to do so. After that i can measure up a driveshaft and have driveshaft shop make one.
08-08-16, 08:52 PM
#38
Full Member
Thread Starter
Update!
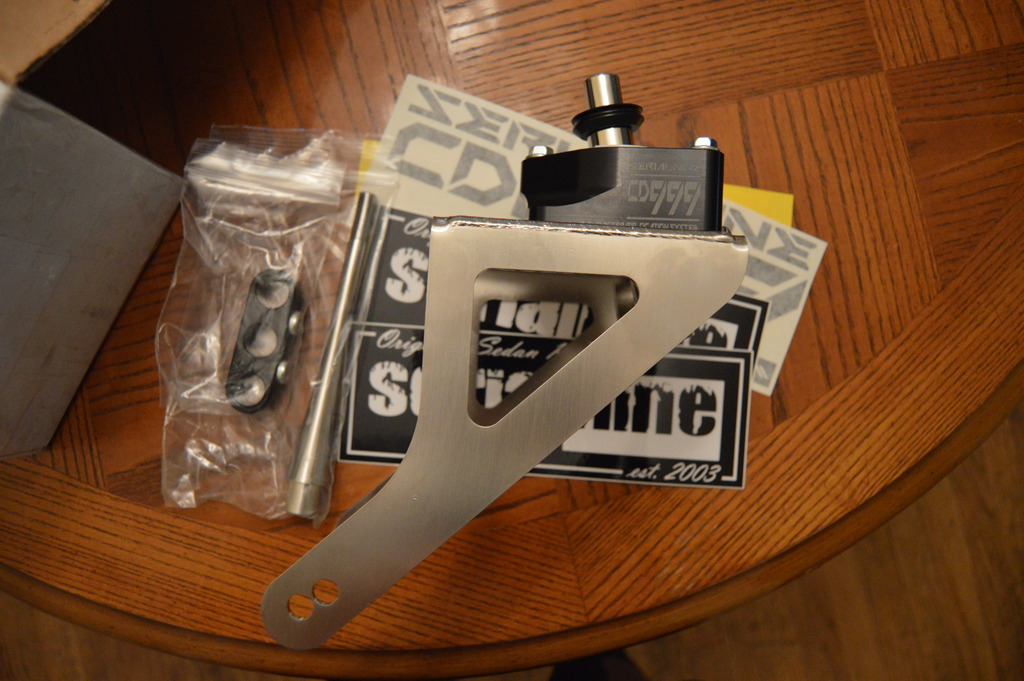
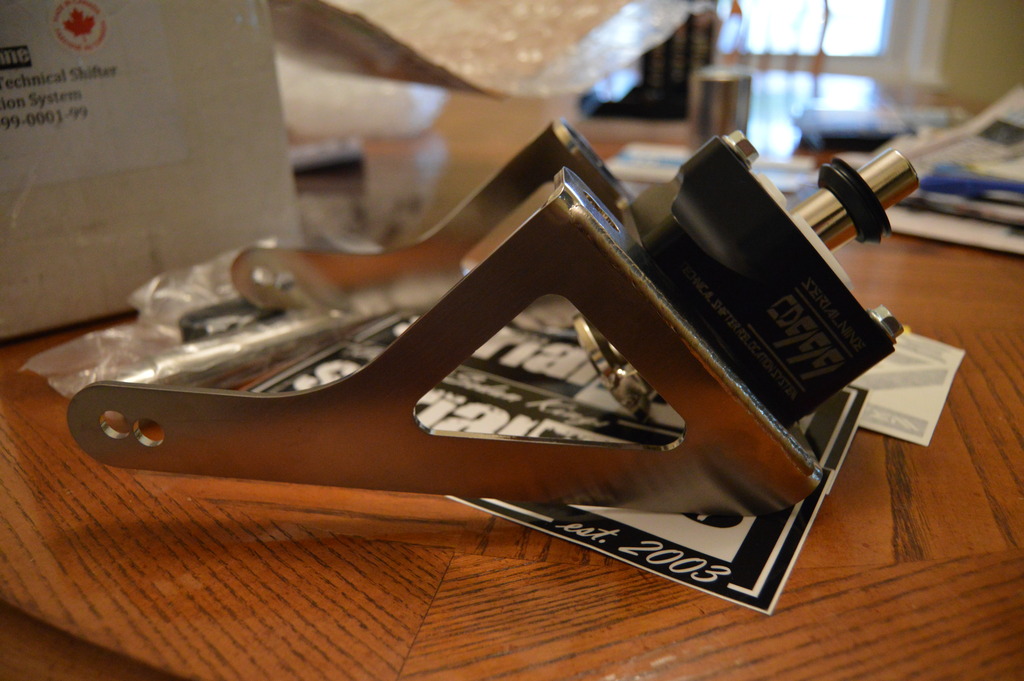
CD999 shifter relocation finally came in. thanks to TF works for the hook up. top quality on this thing!!!
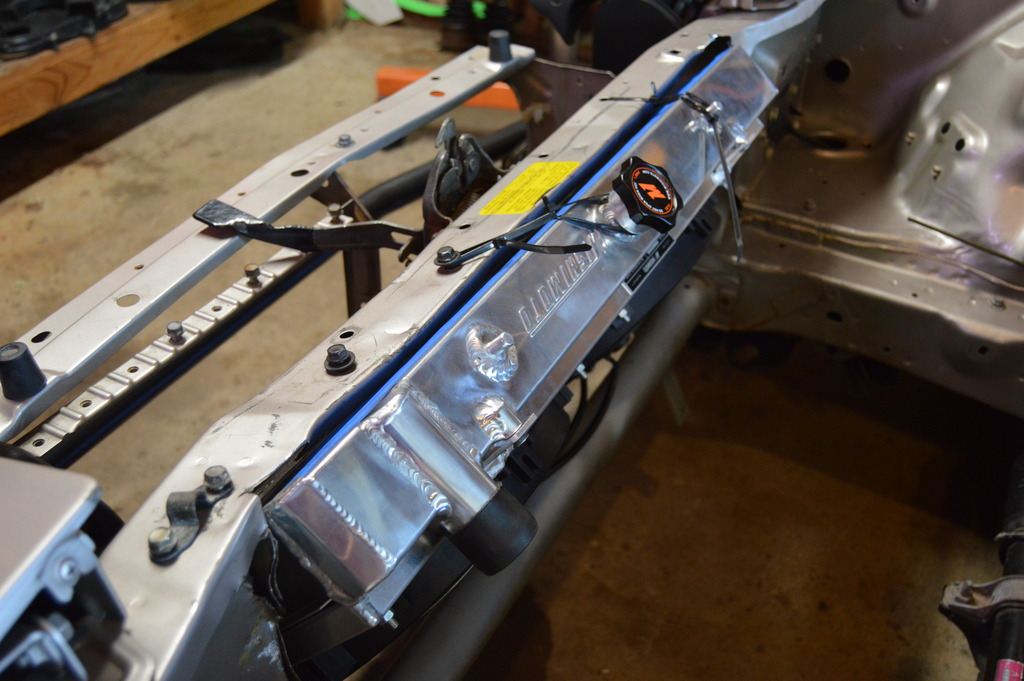
Borrowed my friends harbor freight flux welder and tacked up my radiator/intercooler support.
Used these radiator isolators that i got on amazon
IC bracket

Ducting is next
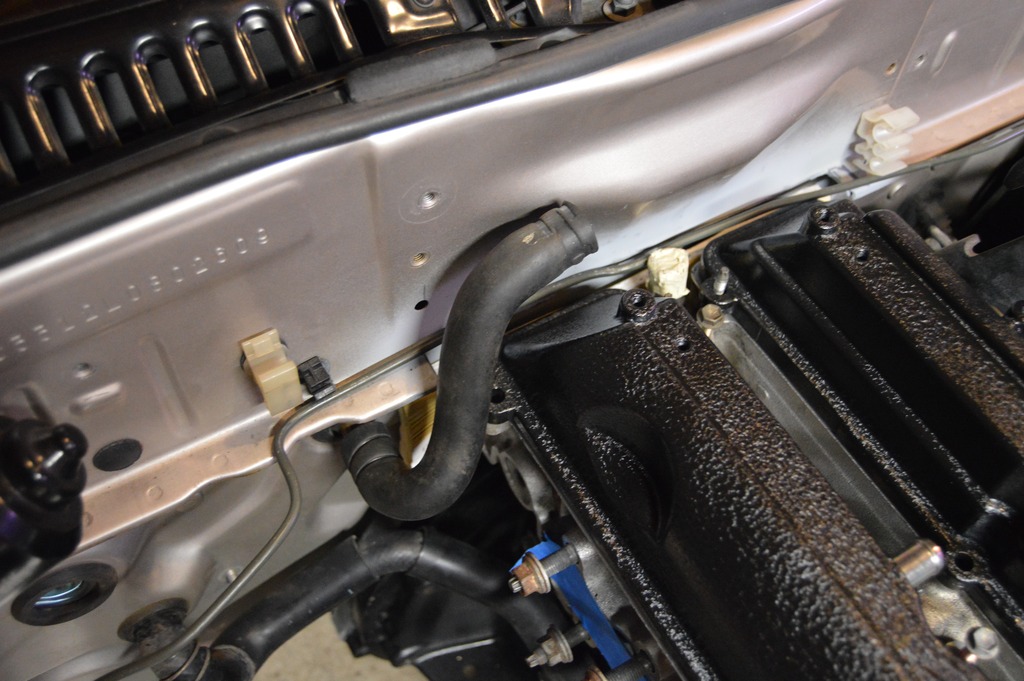
this stock VVTI rad hose fits perfectly around the oil cooler.
CD999 shifter relocation finally came in. thanks to TF works for the hook up. top quality on this thing!!!


Borrowed my friends harbor freight flux welder and tacked up my radiator/intercooler support.


Used these radiator isolators that i got on amazon


IC bracket


Ducting is next

this stock VVTI rad hose fits perfectly around the oil cooler.


 08-11-16, 08:57 PM
#43
Full Member
Thread Starter

and after it shattered


yes, but same **** when it comes to mounting and making it work in the chassis
 02-03-17, 10:05 PM
#45
Sideways is the only way
iTrader: (2)
Join Date: Nov 2007
Location: Vermont
Posts: 958
Likes: 0
Received 0 Likes
on
0 Posts
thats the drive by wire throttle body (etcs-i) right? whats your plan for running? I know they make delete kits since it does have a normal cable that actuates it, but thats for cars running stock ecu. if you run a standalone im not sure you even need to worry about it and just run a cable to it. curious as i may end up with a drive by wire 1jz, im getting a r154 trans mated with it and more concerned about finding one with oem tripod extended shifter and no hydro fan pump.
02-04-17, 08:39 PM
#46
Full Member
Thread Starter
thats the drive by wire throttle body (etcs-i) right? whats your plan for running? I know they make delete kits since it does have a normal cable that actuates it, but thats for cars running stock ecu. if you run a standalone im not sure you even need to worry about it and just run a cable to it. curious as i may end up with a drive by wire 1jz, im getting a r154 trans mated with it and more concerned about finding one with oem tripod extended shifter and no hydro fan pump.
02-17-17, 05:57 PM
#47
Sideways is the only way
iTrader: (2)
Join Date: Nov 2007
Location: Vermont
Posts: 958
Likes: 0
Received 0 Likes
on
0 Posts
I'm just getting the non vvti block as they all seem to be reg cable throttle. It seems that the factory extended shifter r154 are mainly paired with the non vvti anyway so looks like ill be good. I dont have the budget for stand alone is the issue right now so im just using jz ecu and gonna try to us my fc radiator but re bracket it. I already have 2.5" exhaust all the way back w a rb presilencer so ill make my own dp to that for now. I need my fc as a daily now cuz my other cars are falling apart. I dont recall but are you utilizing the factory fc fuse box at all for anything?
Last edited by FC_fan; 02-17-17 at 06:05 PM.
02-17-17, 06:13 PM
#48
Sideways is the only way
iTrader: (2)
Join Date: Nov 2007
Location: Vermont
Posts: 958
Likes: 0
Received 0 Likes
on
0 Posts
nm on fuse box. scrolled up and dont even see it. ill reread thread lol. i was planning on trying to run coils/igniter through the fc ignition fuse and just rerouting the post fuse wire to the jz ecu or ignition switch, wherever it needs to go. havent looked at fc pinout yet, just the jz pinouts. was planning the same with injectors through the injector fc fuse. is that more or less complicated do you think?
03-27-17, 11:04 AM
#49
Certified RoTard
Dude this thing is full goals....
Just got my 2JZ-GTE block back from the machine shop.
Interested on your wiring because that's going to be my biggest challenge.
Looking awesome man, keep up the cool ****!
Gave you a follow on insta as well!
Just got my 2JZ-GTE block back from the machine shop.
Interested on your wiring because that's going to be my biggest challenge.
Looking awesome man, keep up the cool ****!
Gave you a follow on insta as well!
03-27-17, 09:43 PM
#50
Full Member
Thread Starter
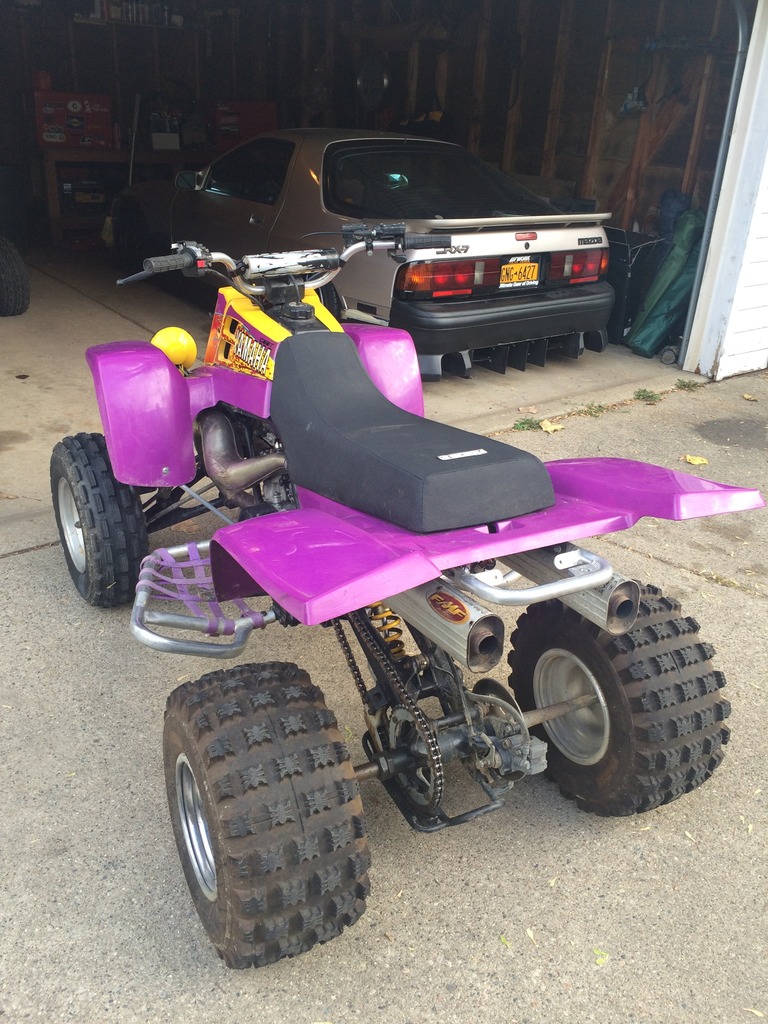
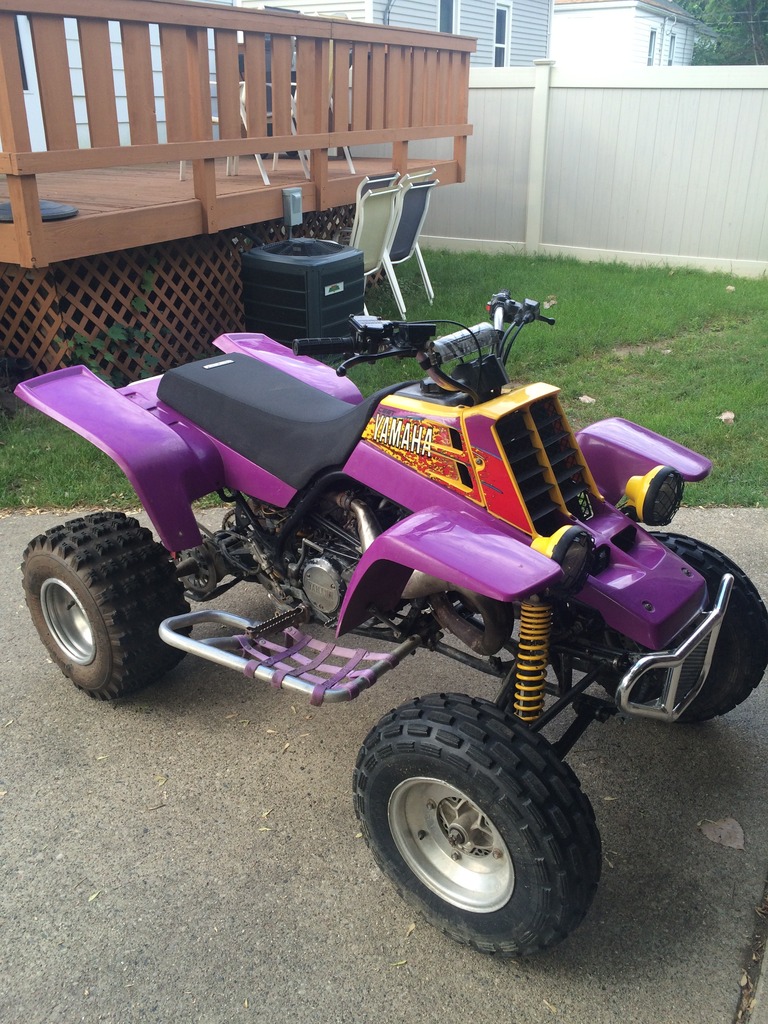
Time to catch this thread up. There has been hardly any progress made as i first bought a banshee and had been going riding almost every weekend before leaving michigan. I then moved down to dallas and the RX7 got stripped and ended up sitting at my new job for a month until i got settled in my new house.