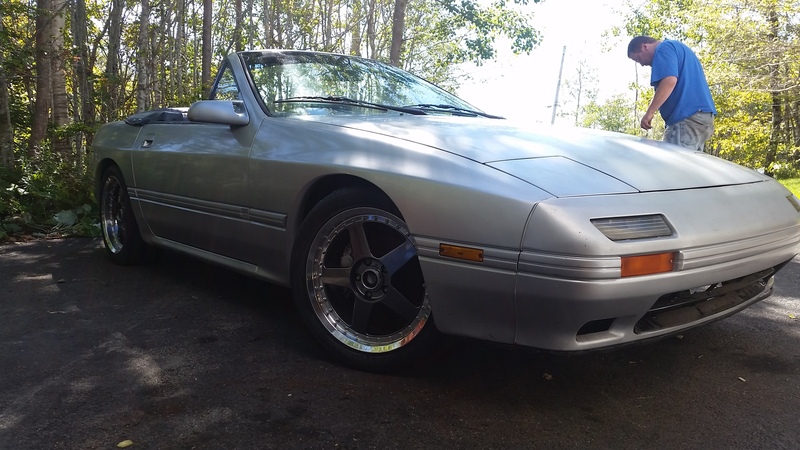
Project: Old School - '88 Convertible (with Turbo!)
 09-18-15, 07:21 PM
#26
What are you doing for a heat exchanger with the water air intercooler?
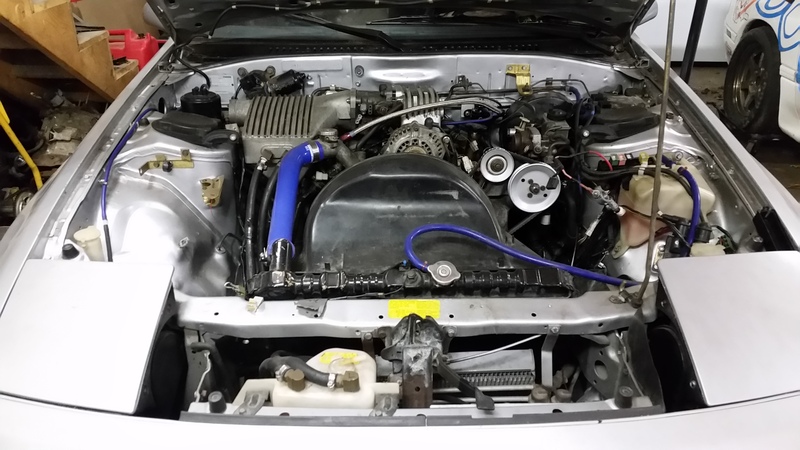
If you search ebay for used Mustang heat exchangers, there are a lot of options. I'm using a 26x6x1.25" heat exchanger from a Roush S/C kit, works pretty well. I also have an OEM GT500 IC overflow tank with a cap so I can actually fill and bleed the system, very important for it to work right.
I also have a 12x4.5x4.5" core ebay water air intercooler, mounted where the alternator usually sits. It stays pretty cool when moving, usually around 10F over ambient, but if I turn the car off for a few minutes (ie getting gas), the IATs are usually about 40+ over ambient. I would make sure you insulate the bottom of the cooler as well as possible to prevent it from getting heat soaked. Being mounted over the exhaust is definitely not ideal, but that is a really cool oldschool piece. Good luck!
 09-21-15, 10:47 AM
#27
Licensed Zip Tie Mechanic
Thread Starter
What are you doing for a heat exchanger with the water air intercooler?
If you search ebay for used Mustang heat exchangers, there are a lot of options. I'm using a 26x6x1.25" heat exchanger from a Roush S/C kit, works pretty well. I also have an OEM GT500 IC overflow tank with a cap so I can actually fill and bleed the system, very important for it to work right.
I also have a 12x4.5x4.5" core ebay water air intercooler, mounted where the alternator usually sits. It stays pretty cool when moving, usually around 10F over ambient, but if I turn the car off for a few minutes (ie getting gas), the IATs are usually about 40+ over ambient. I would make sure you insulate the bottom of the cooler as well as possible to prevent it from getting heat soaked. Being mounted over the exhaust is definitely not ideal, but that is a really cool oldschool piece. Good luck!
Here was my weekend:
And the car still doesn't start...

Here are the facts:
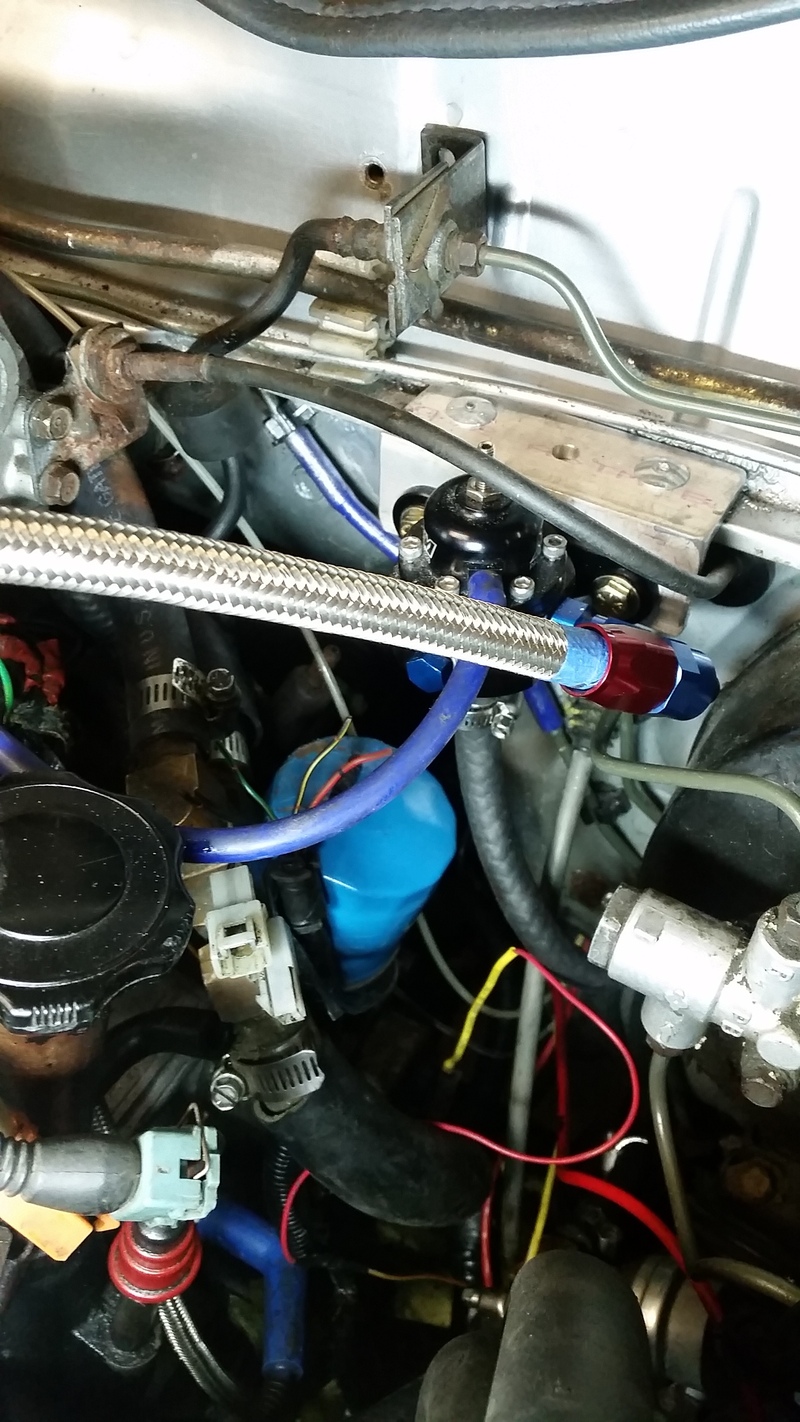
- It's getting fuel - lots of it. I checked the fuel pressure with my gauge and adjusted it to around 35-38 psi. When we take out the plugs to de-flood, they're wet, saturated actually. It's like it floods immediately after you turn it over a time or 2, and is dumping lots of fuel in there.
- We re-stabbed the Crank Angle Sensor to ensure the timing was correct, done according to factory spec.
- Checked for spark outside of the engine - there is lots. Arcs very well from the end of the plug to a ground source hooked to the body.
- All plug wires have been triple checked to make sure they're connected to the right plugs.
- All plugs are brand new.
When we de-flood it, and put some oil in the spark plug holes, then turn it over without the fuel on, then replace everything and try to start it, it kicks a couple times in the way that it would if you were bump starting it - you know when it feels like it's "catching", not the traditional sputter.
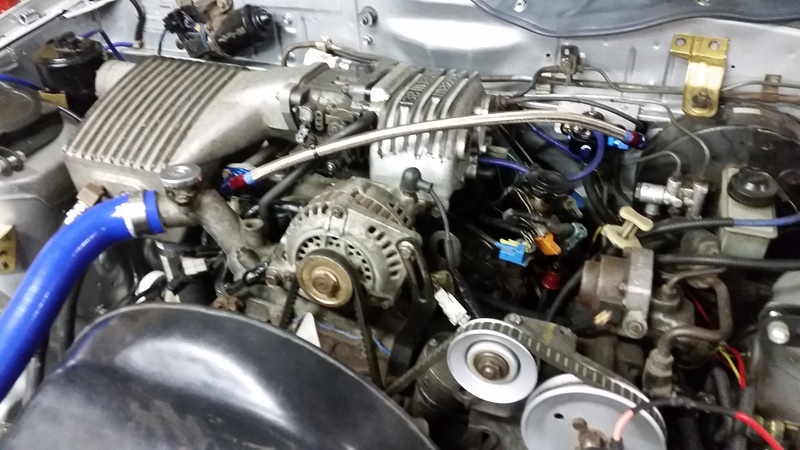
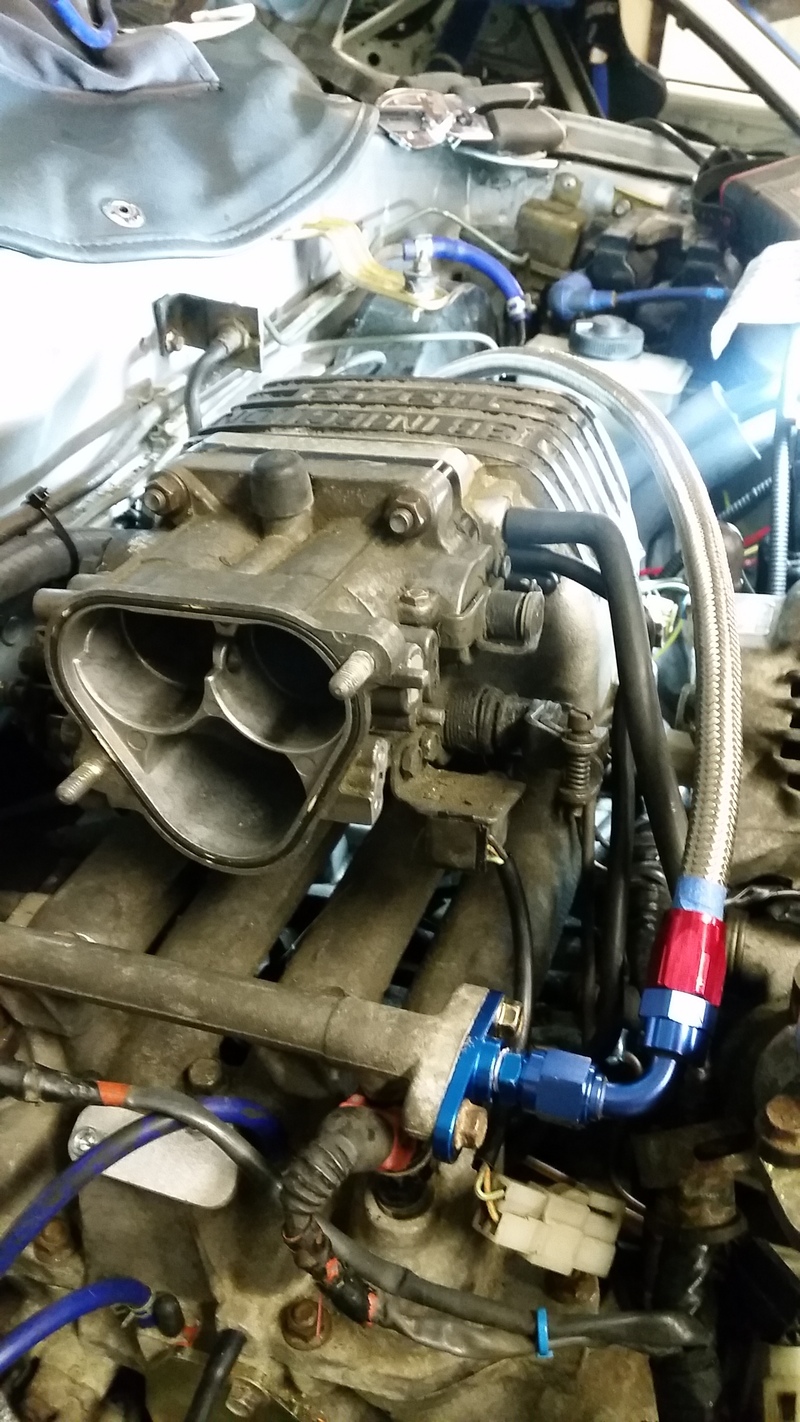
Here are the things that are done to the car so you can see the setup:
- 6-port S4 NA engine
- 88 Turbo injectors (550CC)
- Adaptronic Standalone ECU with Turbo 2 basemap
- Innovate LC-2 wideband (have calibrated it and connected to ECU)
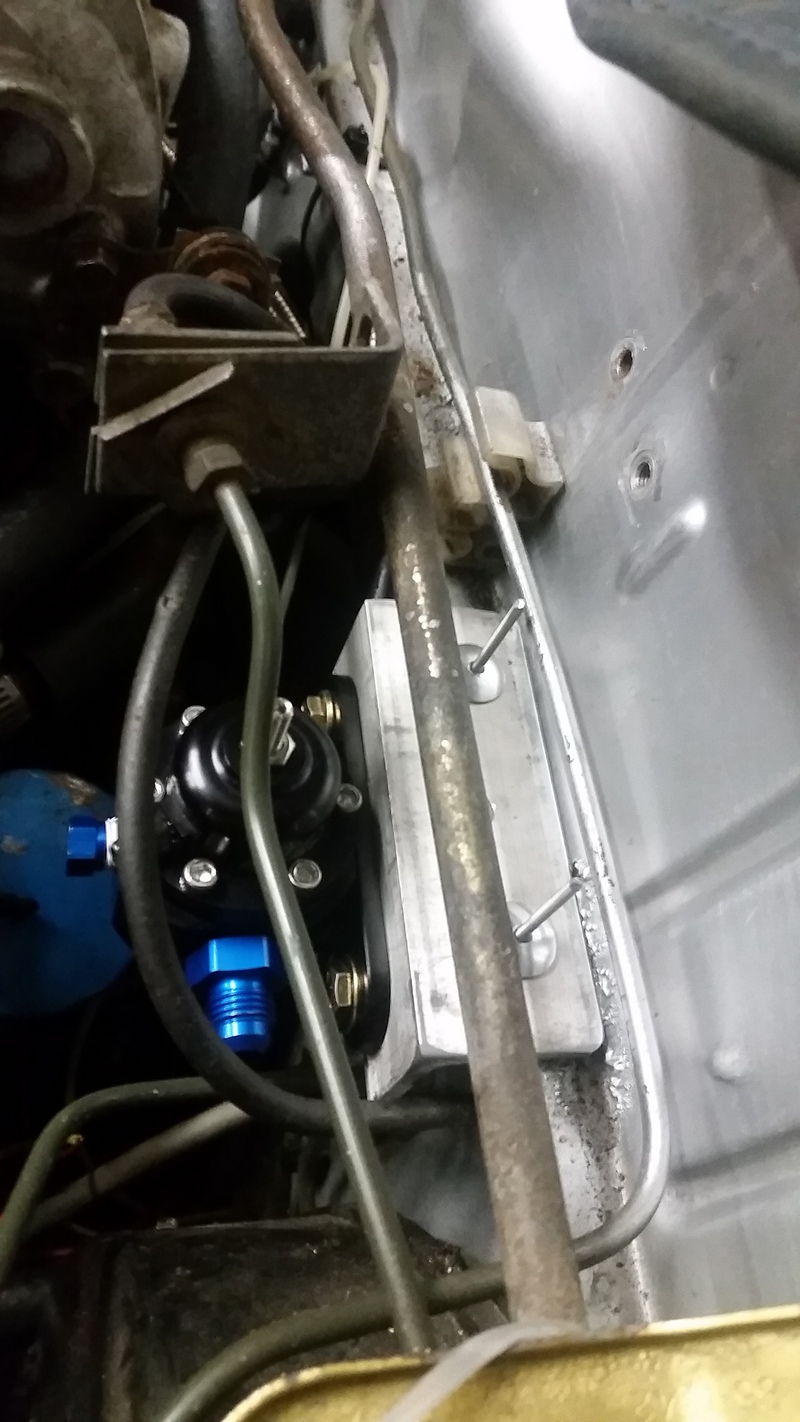
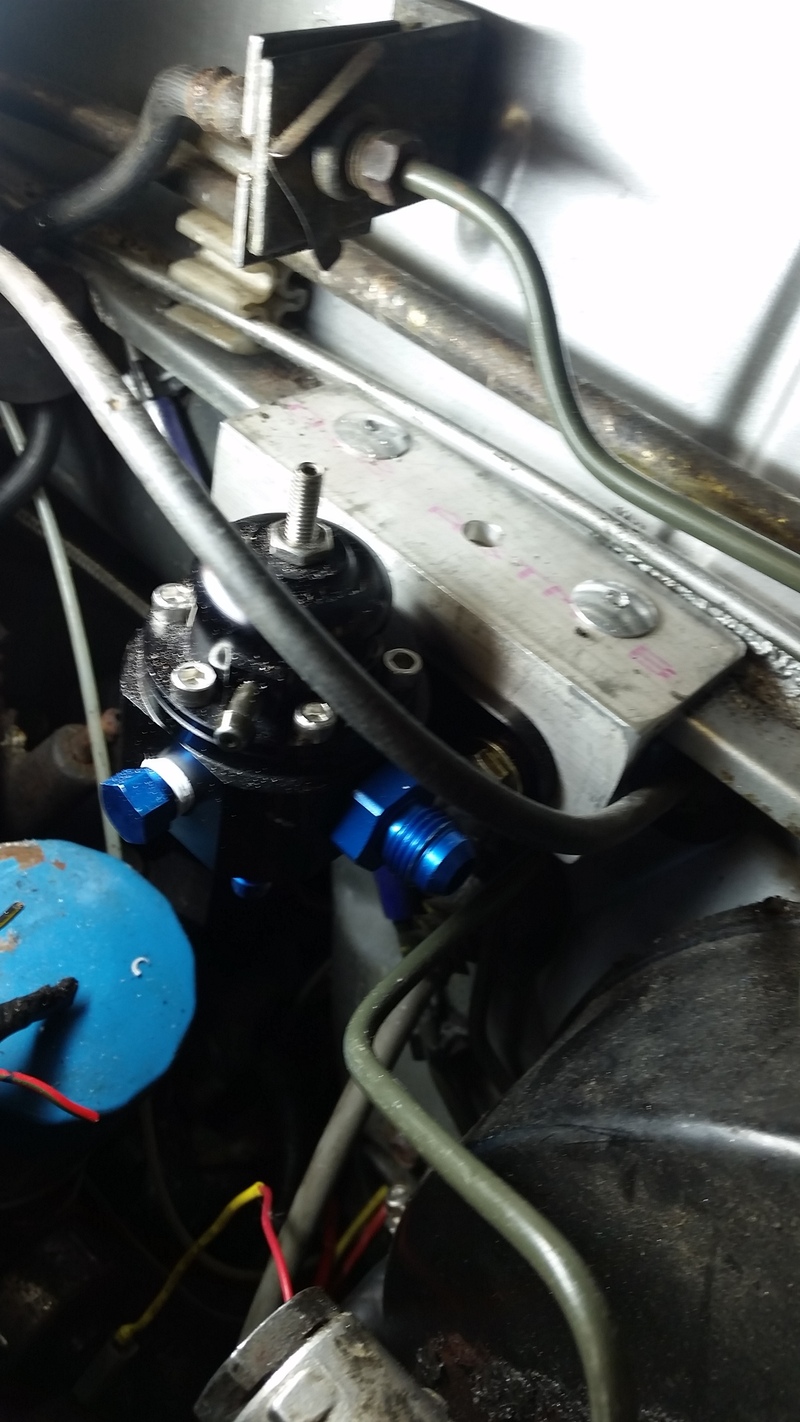
- AEM adjustable Fuel pressure regulator
- New Walbro 255 fuel pump
- Cartech turbo kit with intercooler
- Removed emissions including solenoids/vacuum rack, BAC valve, EGR valve, Air control valve, and air pump. Blocked off or removed all un-used vacuum lines
09-28-15, 08:44 AM
#29
Licensed Zip Tie Mechanic
Thread Starter
So it won't start, no way, no how. Compression is messed. Time to re-think the plan (compression saga is here: https://www.rx7club.com/2nd-generati.../#post11973356)
new plan:
6 port bridgeport (has turbo rotors in it - don't ask - I didn't build it) - was assembled with all new parts and we have had it running but of course didn't have high enough compression rotors to run as an NA and make any power, so time to slap a turbo on it. I have a set of S5 NA rotors kicking around in my other running engine as well...
My guess on what I need to do this:
- Full rebuild kit including apex seals
- Upgraded injectors - any suggestions on sizing?
- Some upgraded cooling
- T2 transmission/flywheel/clutch/starter
- Mazdatrix adapter driveshaft
Already have upgraded fuel system, adjustable FPR, adaptronic standalone, 6-port turbo kit, so I'm like...part of the way there. LOL
 11-04-15, 06:20 AM
#31
Licensed Zip Tie Mechanic
Thread Starter
Just an update on this:
I went on a massive 2500 mile road trip and collected up a bunch of goodies for the build.
I have:
- A bridgeport 6-port engine under my work bench - needs a refresh
- A t2 transmission with C's shortshifter
- A Mazdatrix adapter driveshaft
- Centerforce dual friction clutch
- JUN lightened flywheel and a counterweight
- T2 starter
- T2 clutch slave
- RE-Amemiya front bumper with the sleek headlights
- LRB Speed Aluminum Vent Set
Now I'm trying to decide on Apex Seals, which is a bit of a holy war. Leaning toward E&J seals.
I also need a soft seal kit from Atkins and a set of Injector Dynamics injectors - 725 / 1000.
Once I have all of that, it should come together fairly quickly.
Thank you to all of the forum users who met me along the way and sold me the pieces I need!
Last edited by PinkRacer; 11-04-15 at 08:15 AM.
01-28-16, 07:21 AM
#32
Licensed Zip Tie Mechanic
Thread Starter
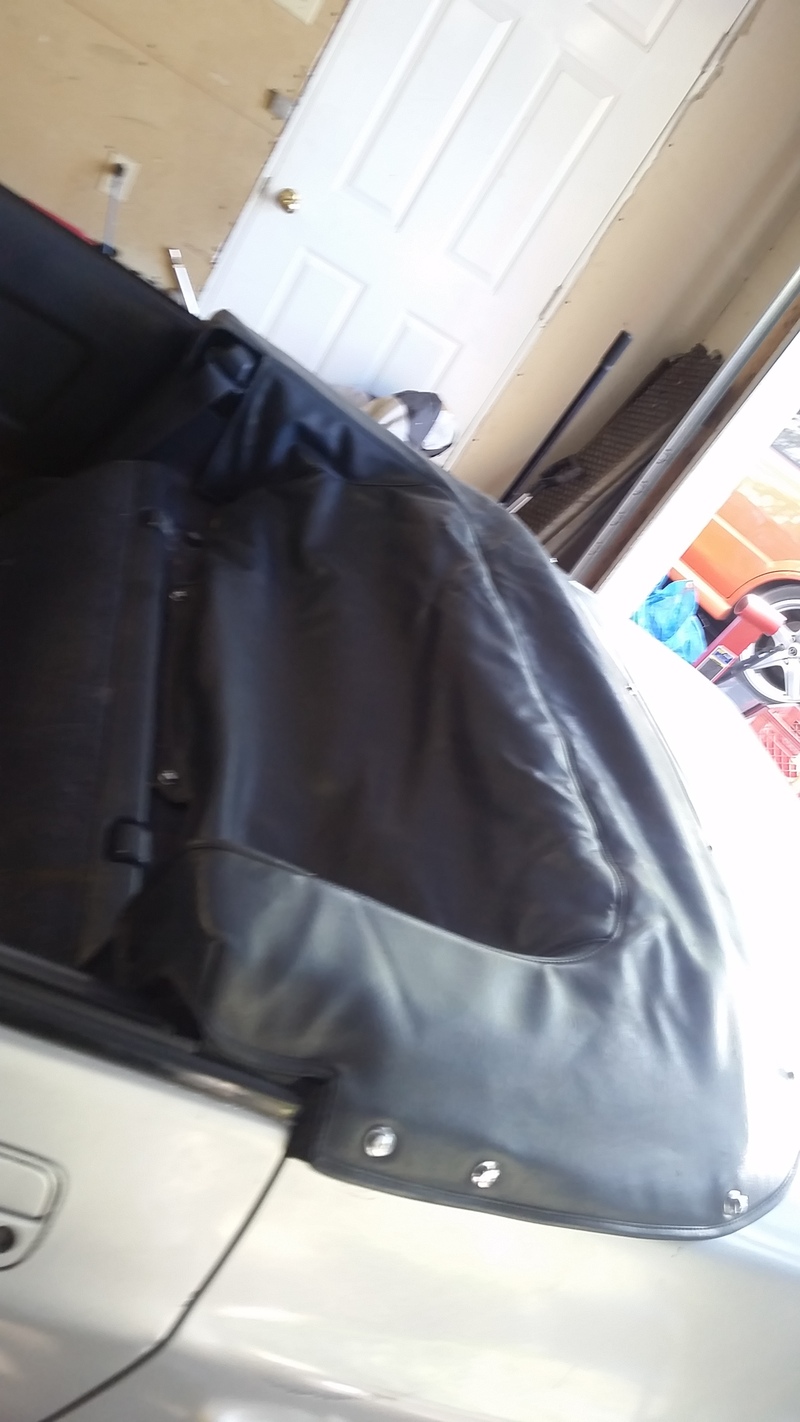
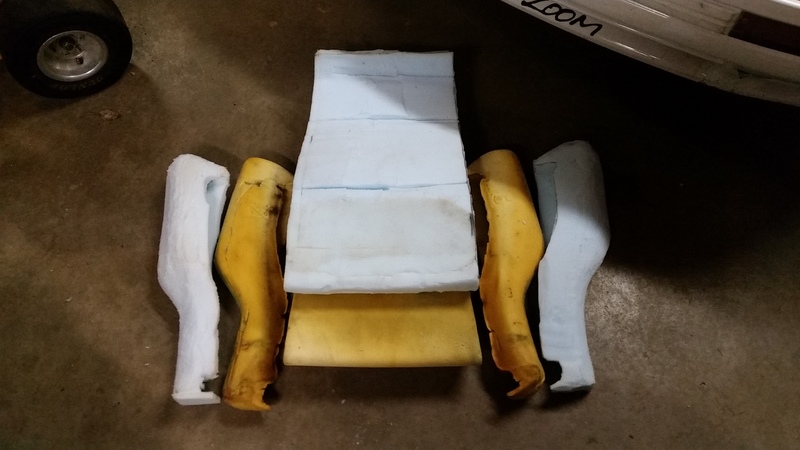
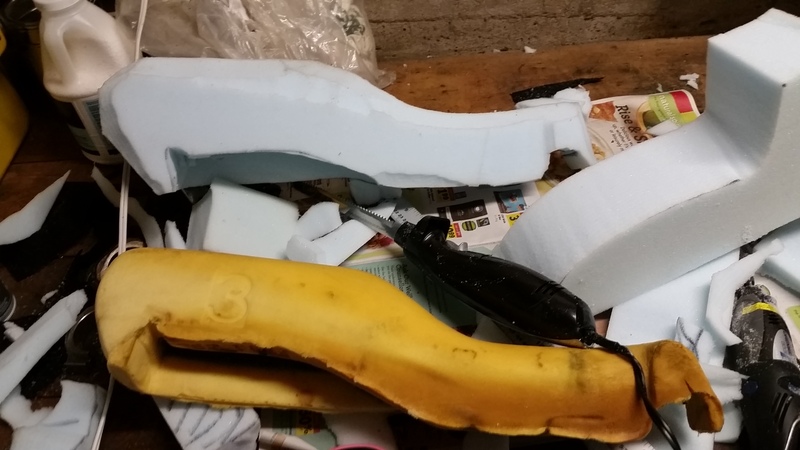
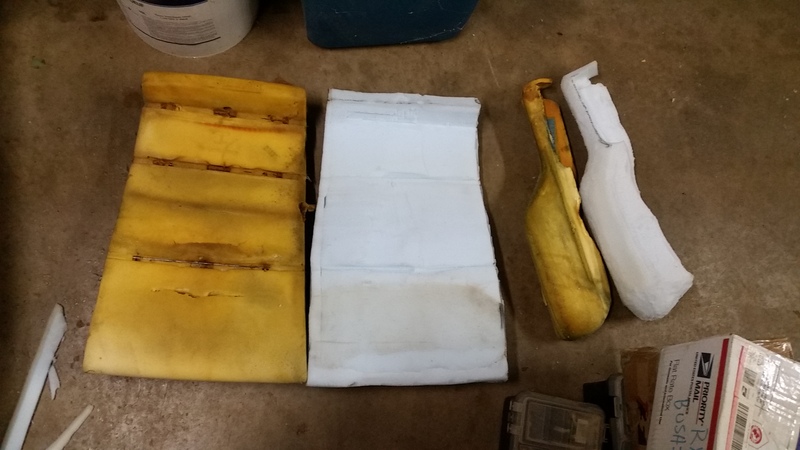
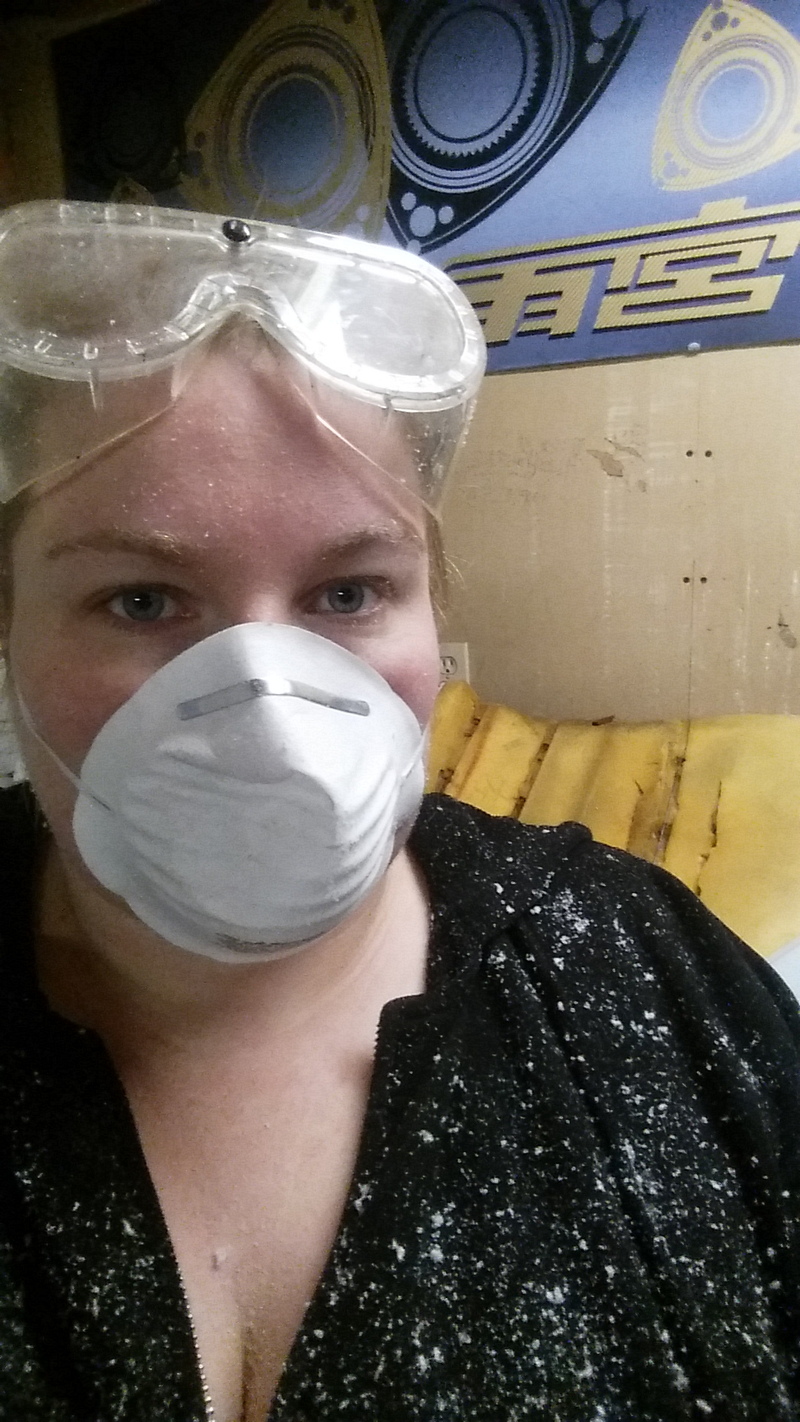
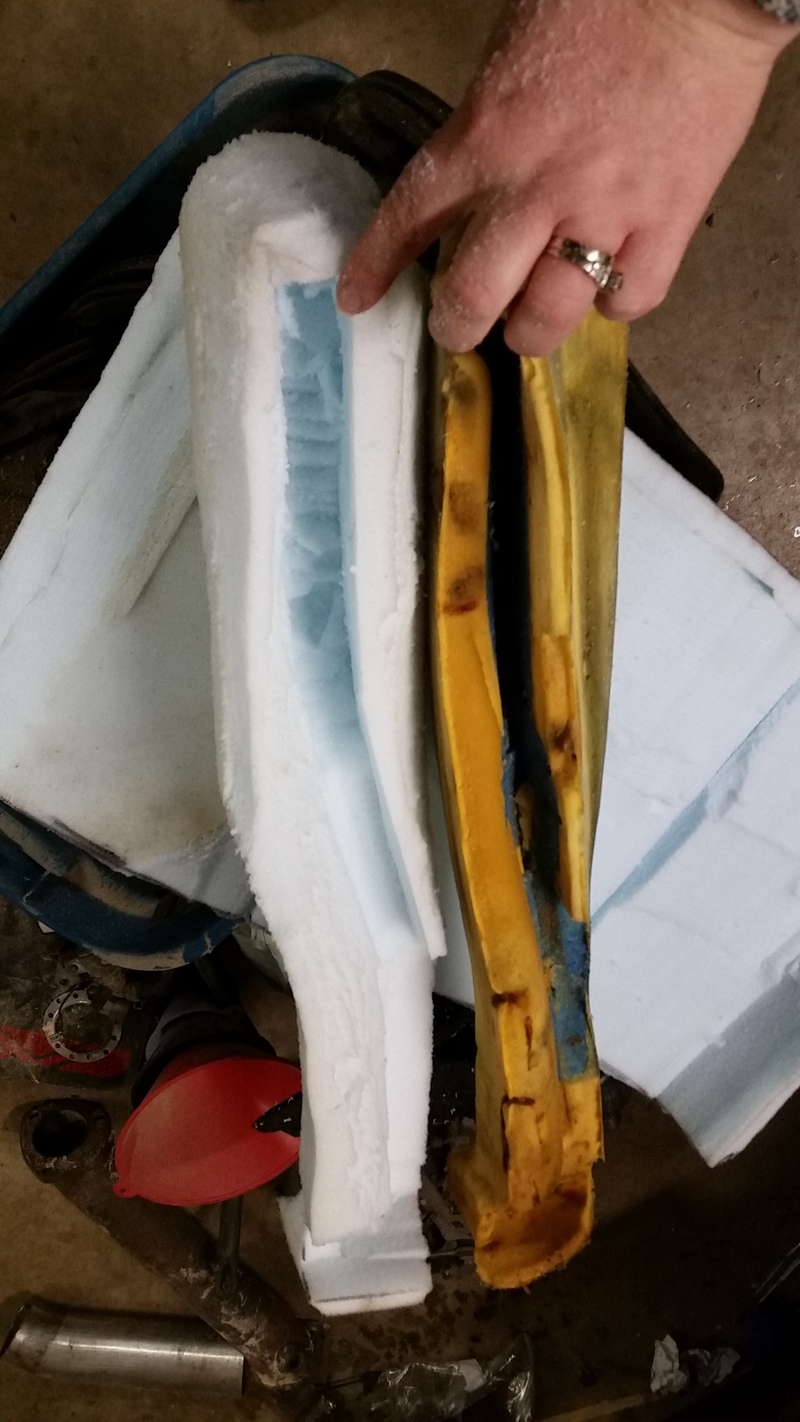
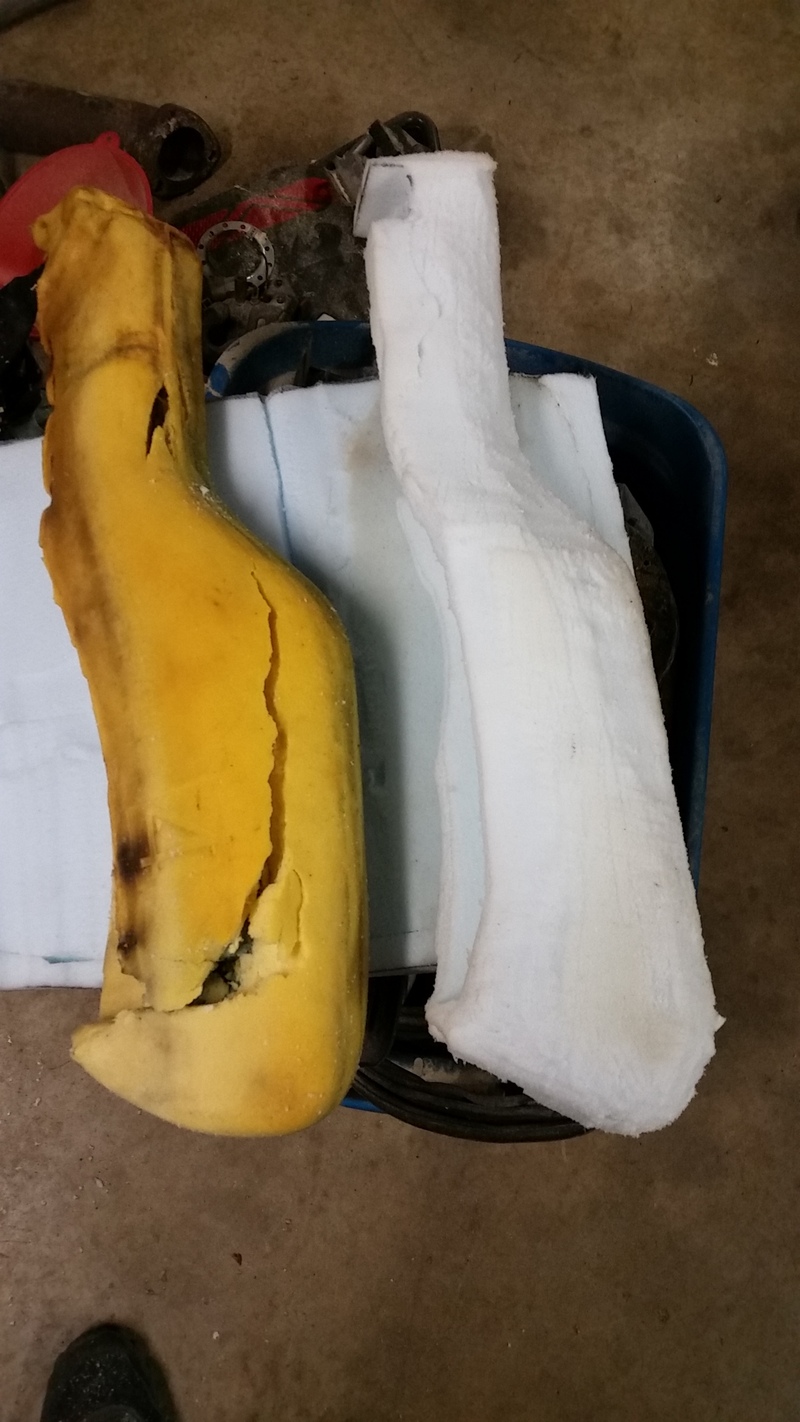
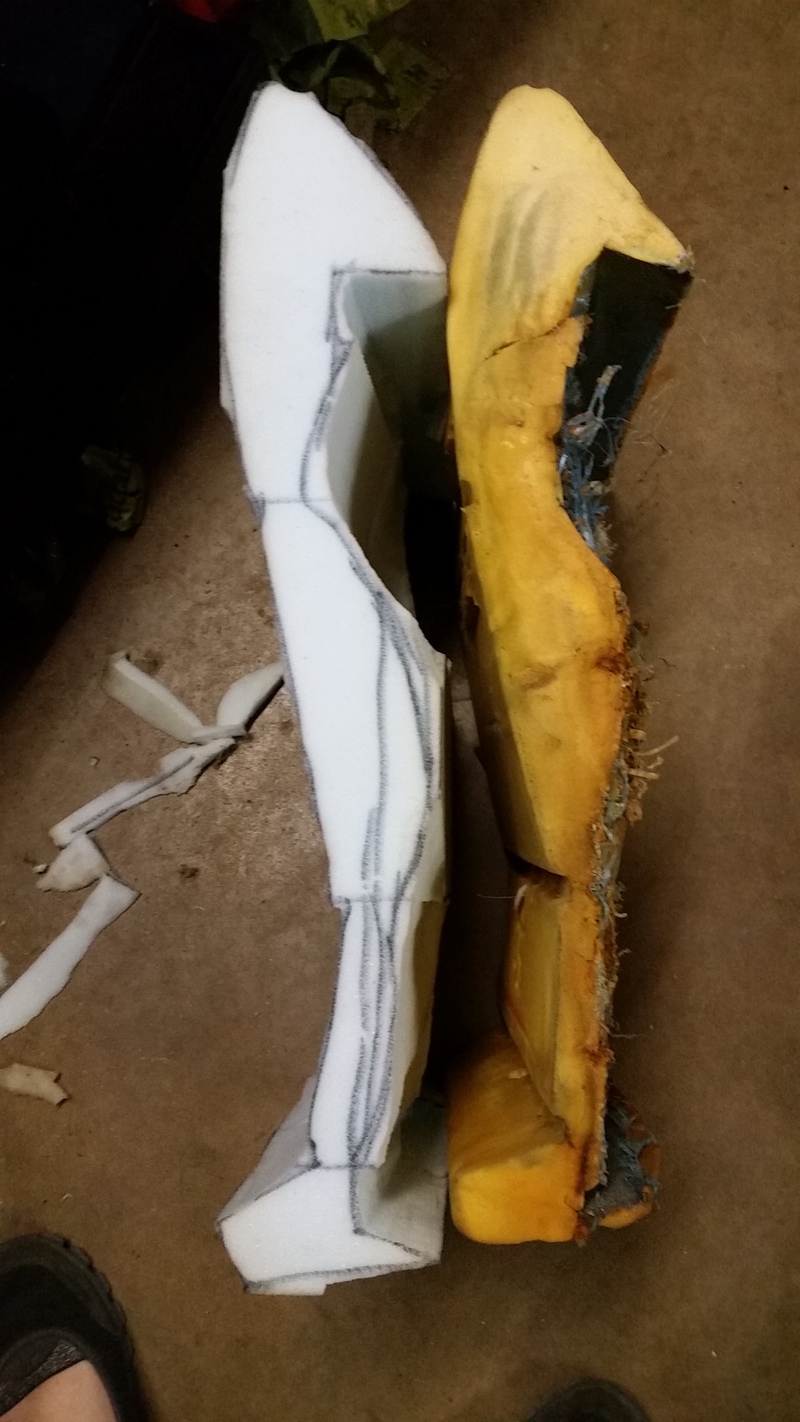
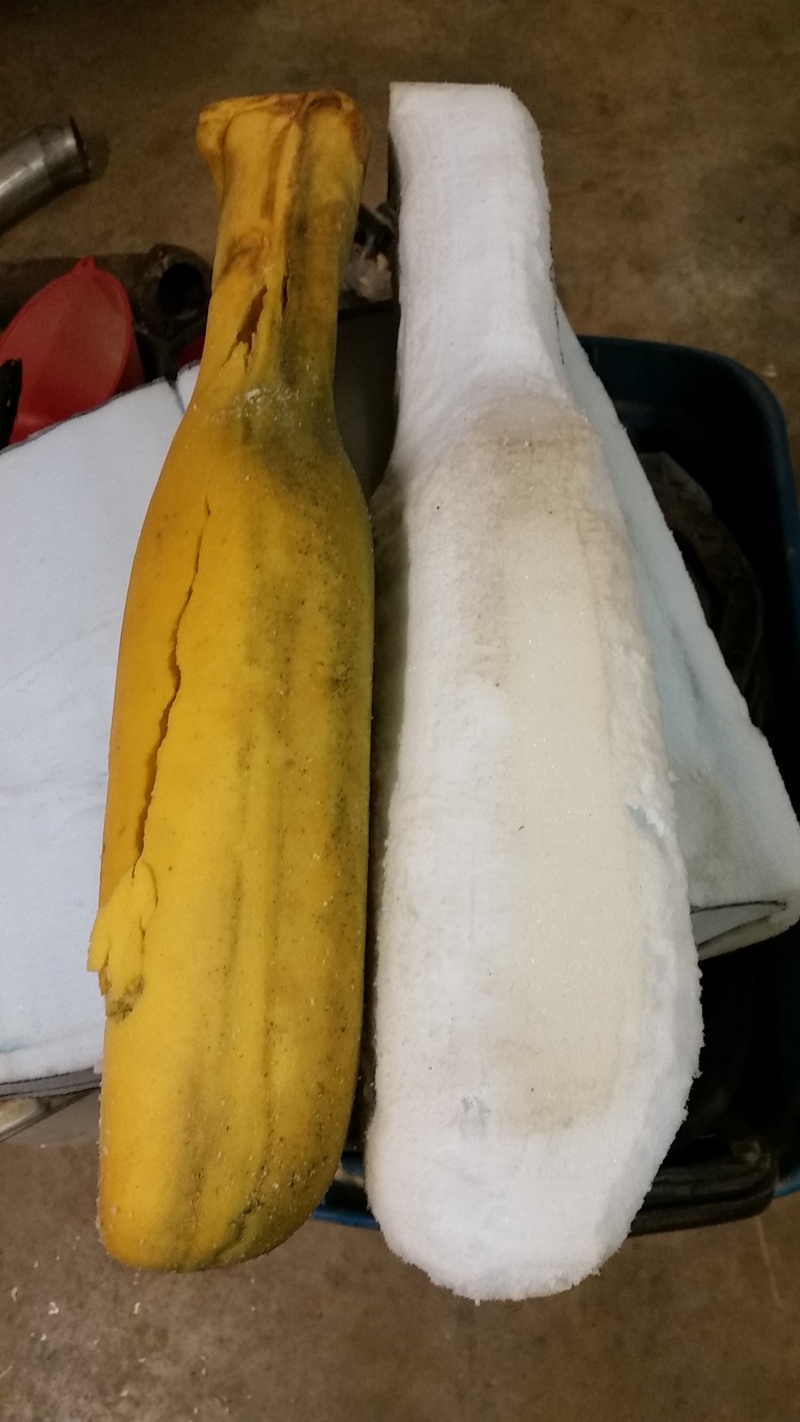
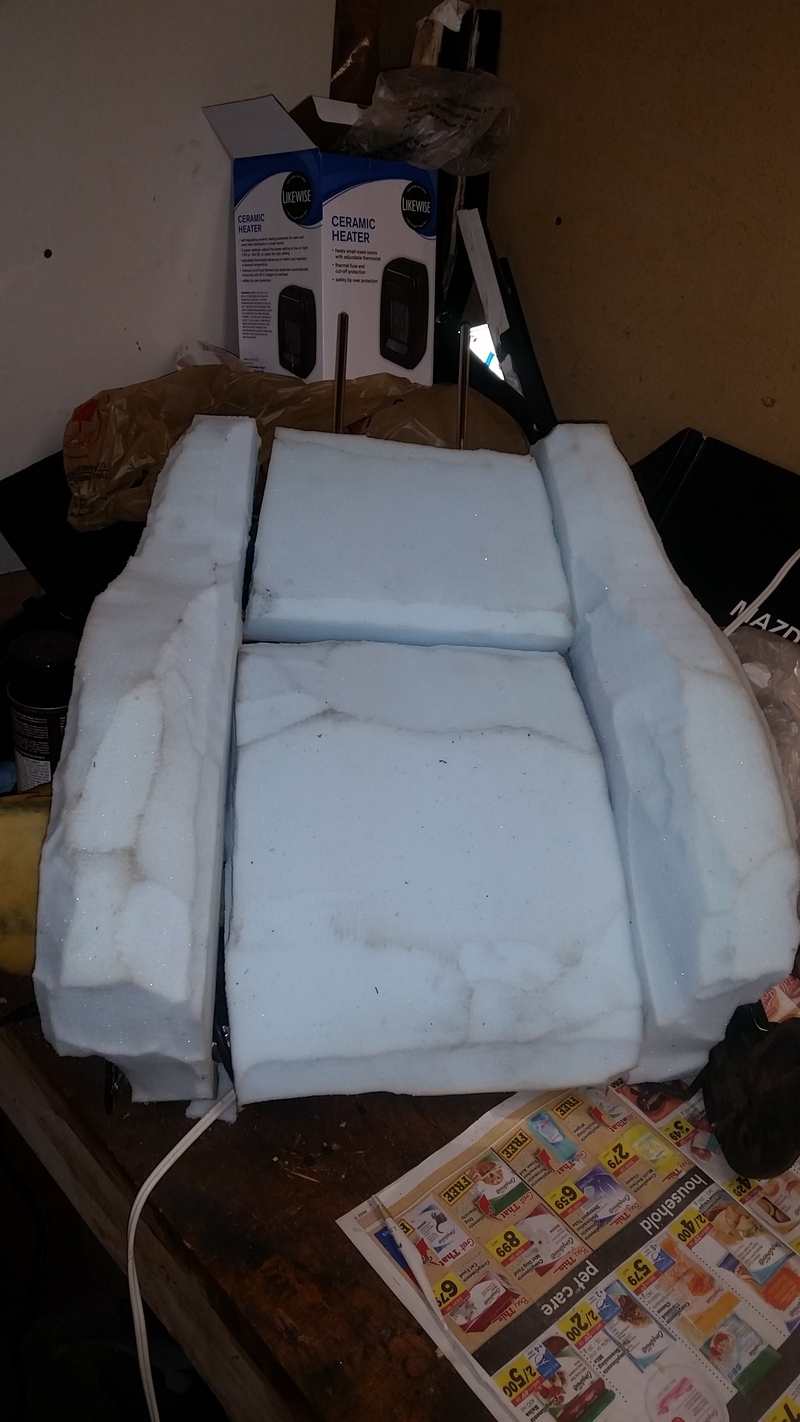
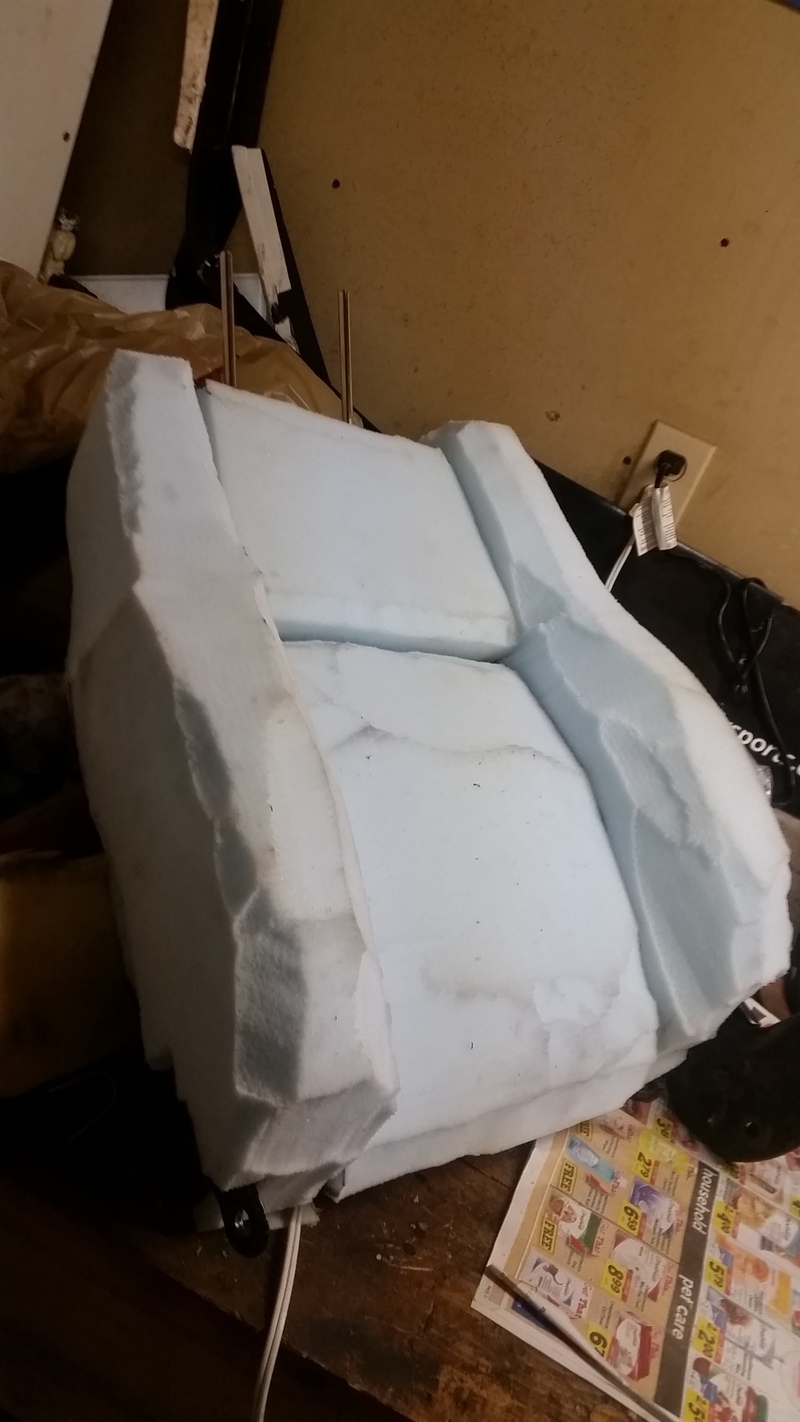
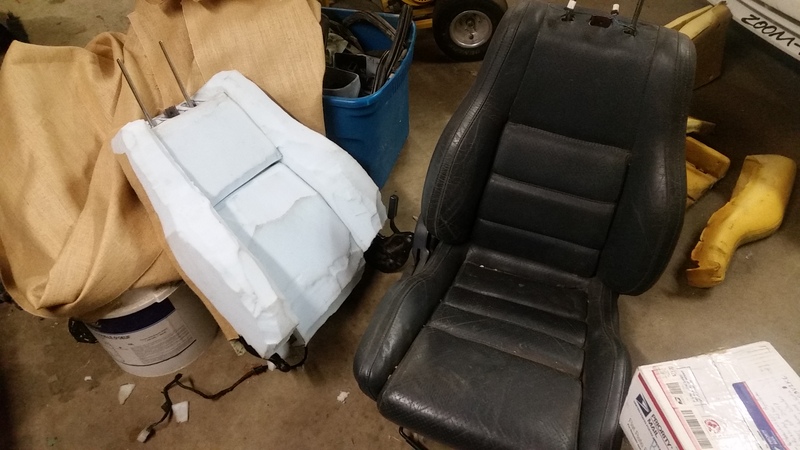
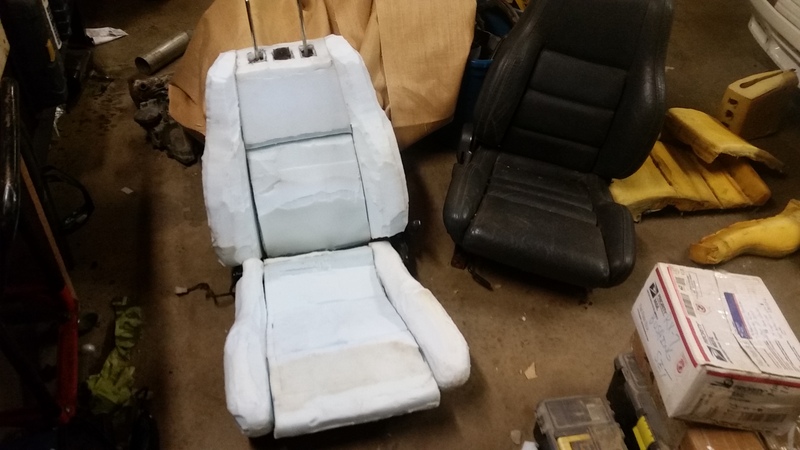
Bringing this back from the dead. Now that it's winter, I've resumed the project. Working on the seats now - replacing the 28 year old foam with fresh stuff. I'm currently carving all of the pieces from foam blocks, then I'll test fit them on the seat frame and with the new covers. Most pieces are at least cut for the first seat, if not almost finished. Using an electric carving knife from my kitchen and a dremel with a sanding drum. This is messy work....
02-01-16, 06:44 AM
#33
Licensed Zip Tie Mechanic
Thread Starter
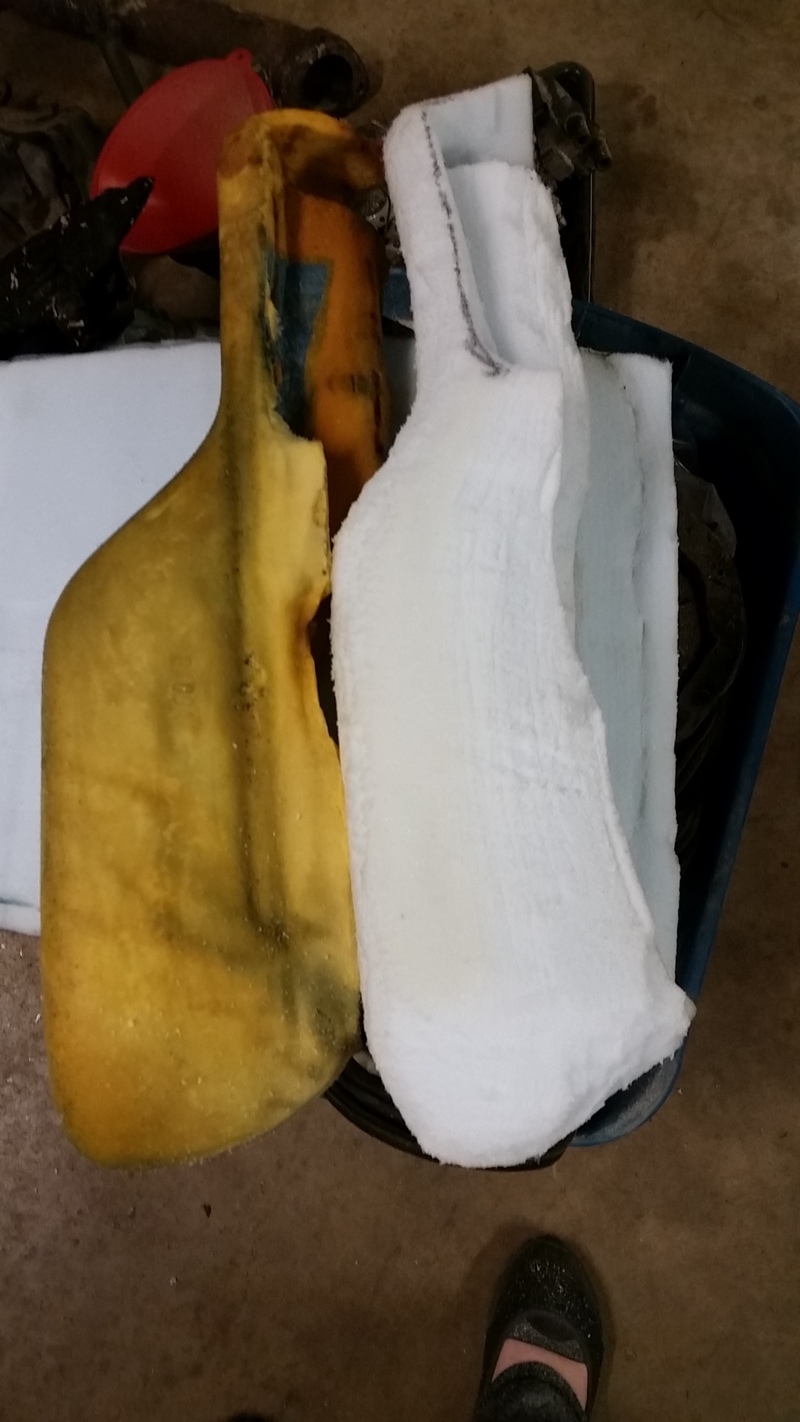
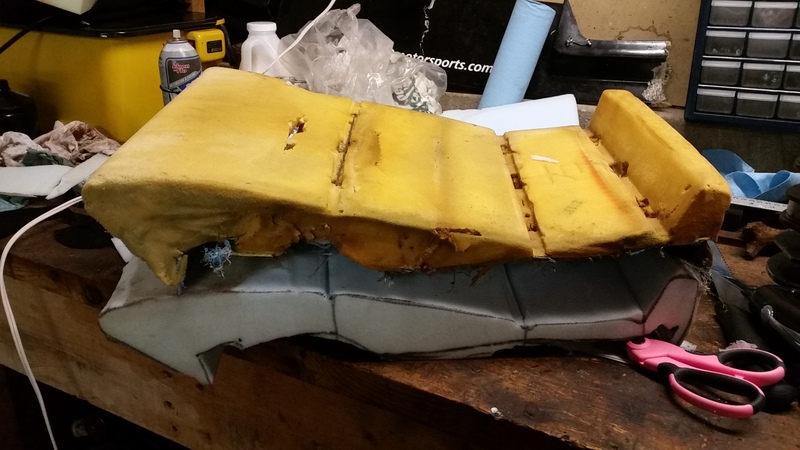
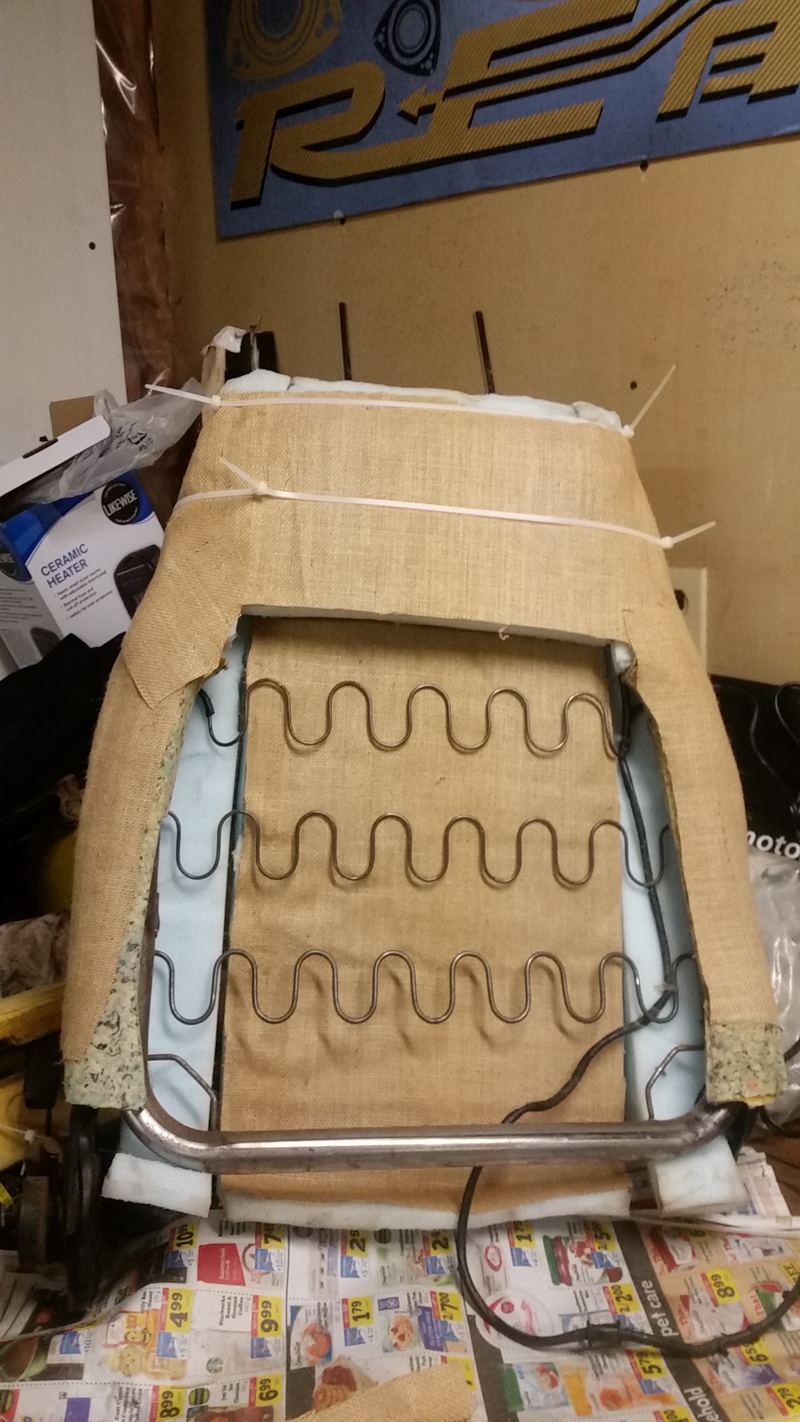
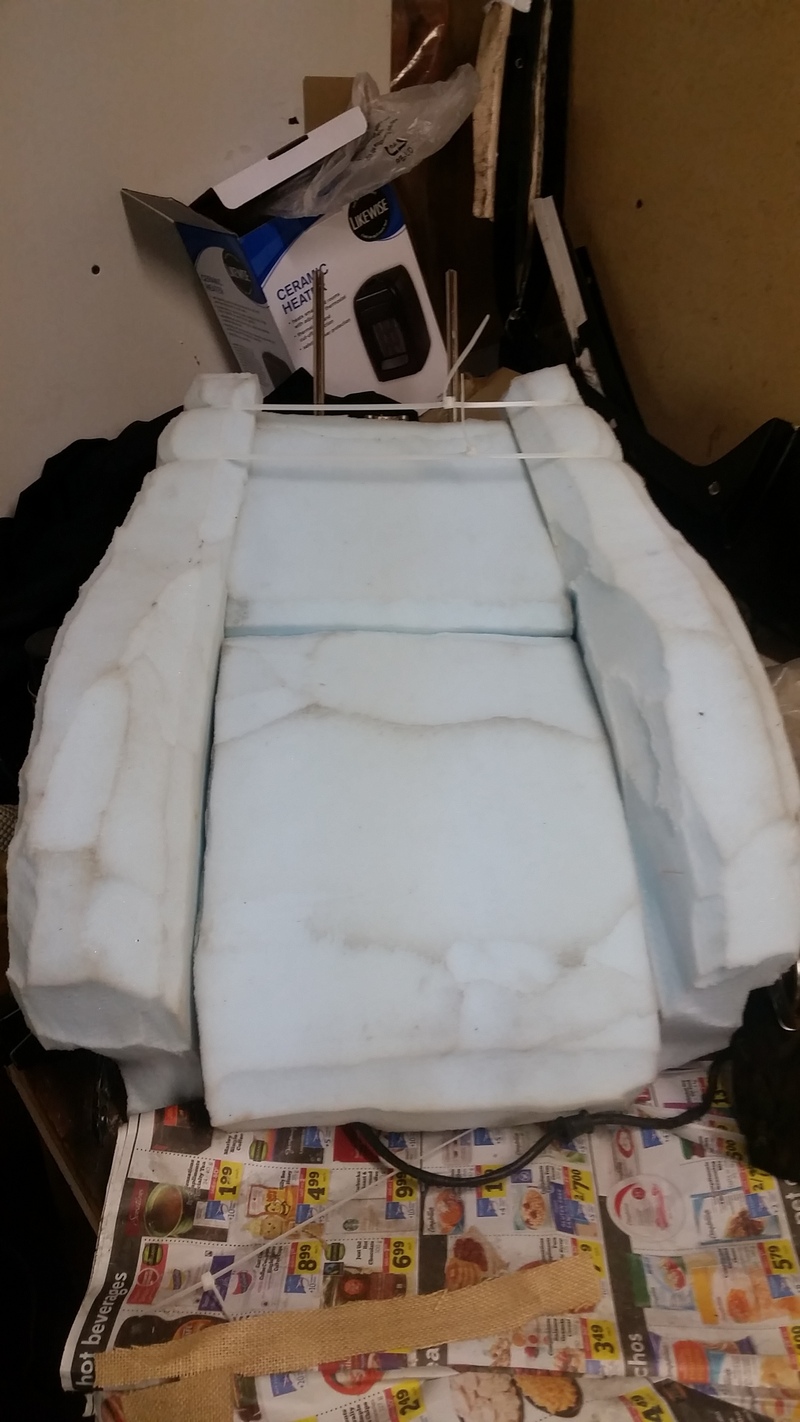
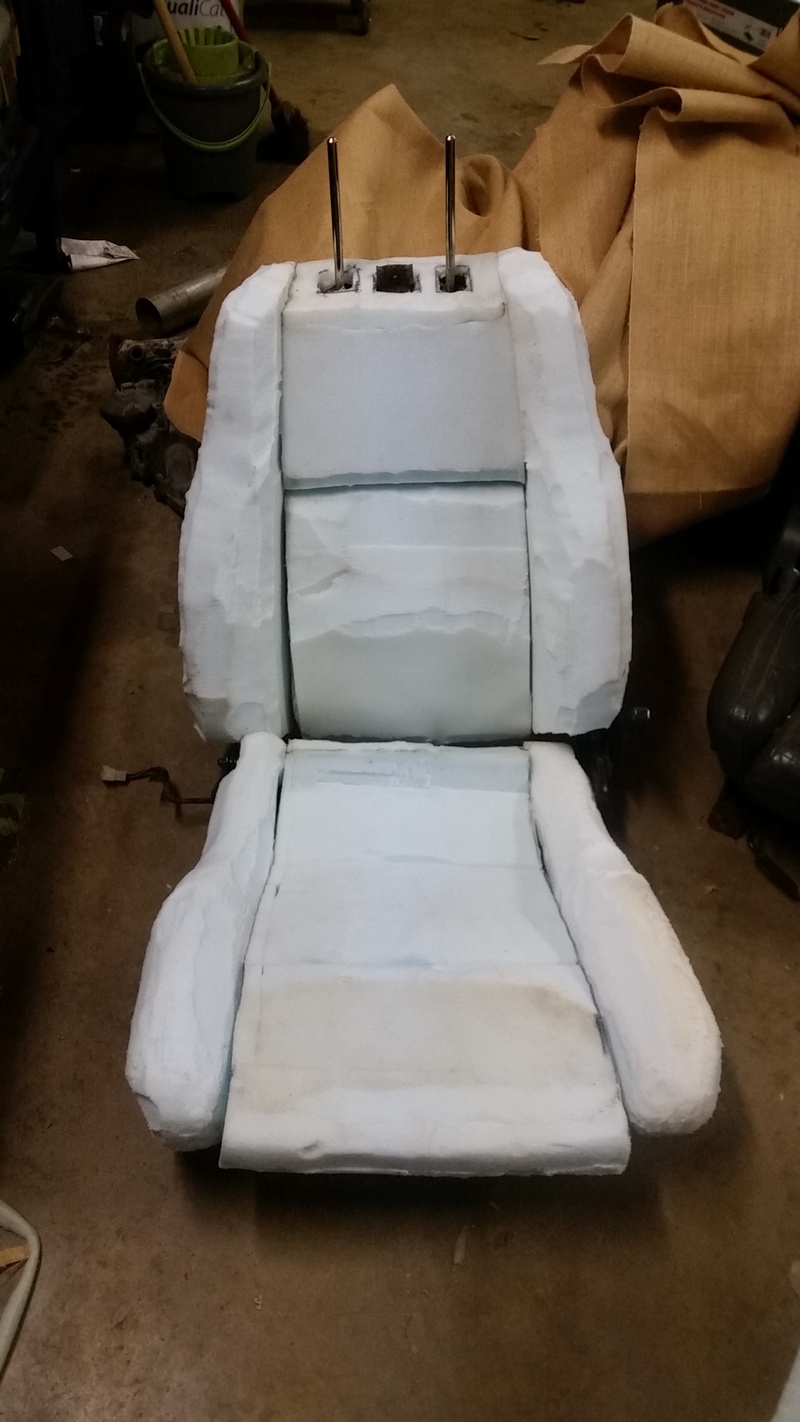
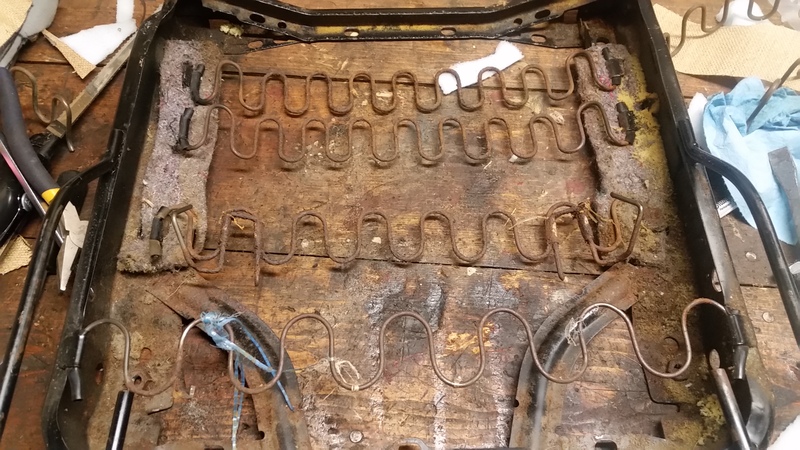
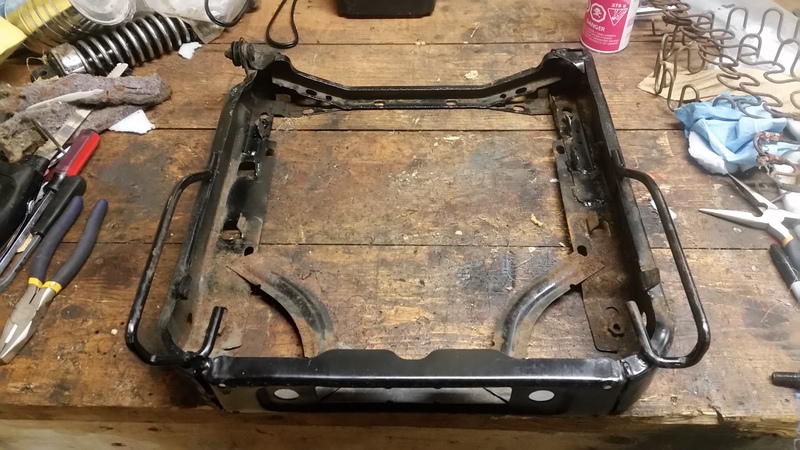
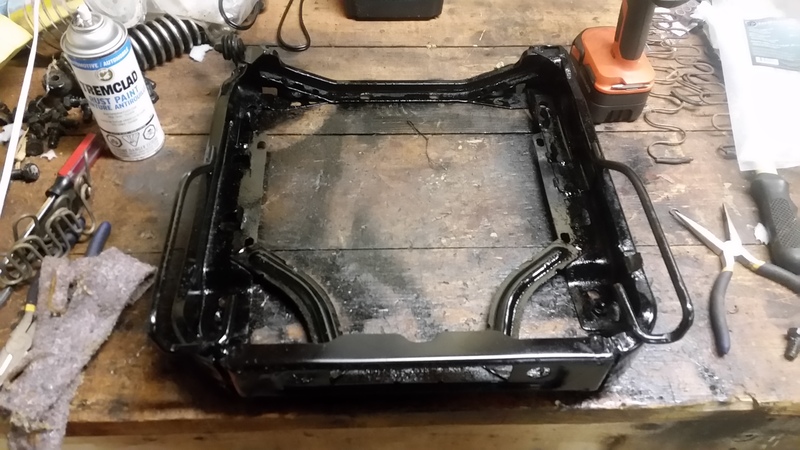
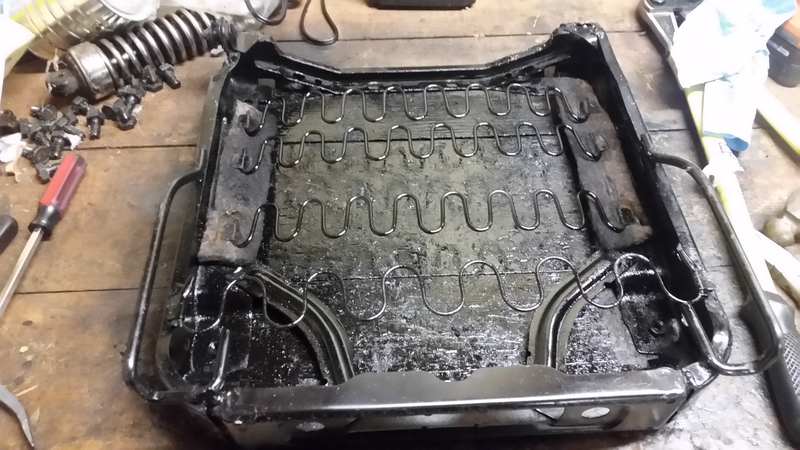
More seat progress - refurbishing the seat frame, putting in new springs, getting the foam shaped.
Tonight, going to try to fit the cover to it.
Tonight, going to try to fit the cover to it.


 02-03-16, 06:50 AM
#34
You're way more ambitious than I was. It looks to be pretty darn close. Once the seat cover is stretched over, it will probably look pretty good. I had a couple rough spots on mine where I glued in a piece or two of foam and I'm not even sure where they were anymore when I look at the seats.
02-05-16, 12:30 AM
#35
Rotary Enthusiast
iTrader: (6)
Join Date: Oct 2005
Location: Southern California
Posts: 1,275
Likes: 0
Received 0 Likes
on
0 Posts
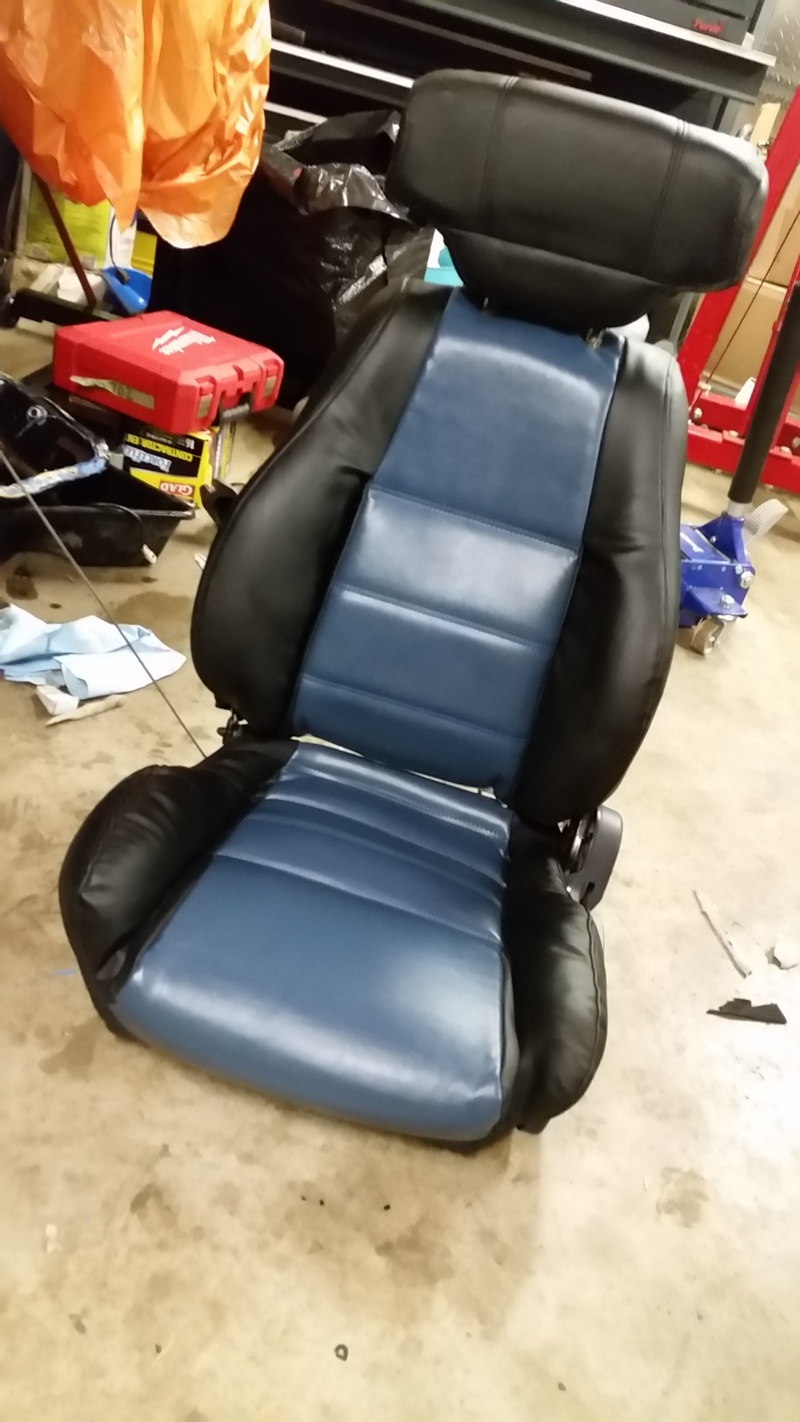
Awesome build, my friend! I'm thinking of ordering seat covers myself for my vert. What's the color options you went with? Looks like black vinyl with grey seat insert — is that right?
02-05-16, 08:43 AM
#36
Licensed Zip Tie Mechanic
Thread Starter
I ordered the covers from Racing Beat, and they sent me an envelope of fabric swatches after discussing the options. I then chose from a physical swatch, which was nice.

The only issues I had with them:
- They say they're a direct fit, but the stock seats have like little holes for the rings to go through to secure the seat. These ones have channels. If you're using the stock foam, the rods are built into the foam, so the channels won't work. You'll need to install grommets or make a cut in the foam and use a rod through the channel to secure it down
- Some of the channels don't seem to line up with the grooves in the foam
- Many of the holes for things like the head rest rods are not pre-cut. You'll need to cut them with an x-acto knife
I am going to revisit this project tonight/this weekend. Need to get the seat cover on one of them this weekend, that's the goal. I need to build up the bottom bolsters a bit in a few spots with some 1" high density foam and attach some edge wire in strategic places. Definitely getting there.
Tips I got this week:
- Use silicone spray to lubricate the cover/foam to help it slip on
- Cover rough sections with a layer of thin foam to make them smooth but retain the shape
Once the upholstery is done, I need to fit the side skits/front bumper and S5 moldings, remove the pop up headlights (going sleek), swap over the suspension from the race car, and build the bridgeport engine. LOL
Oh, and my husband bought me S5 vert tails for Christmas, so those are going in.
When it's all done, it'll get vinyl wrapped.
Last edited by PinkRacer; 02-05-16 at 08:52 AM.
02-10-16, 10:35 AM
#38
Licensed Zip Tie Mechanic
Thread Starter
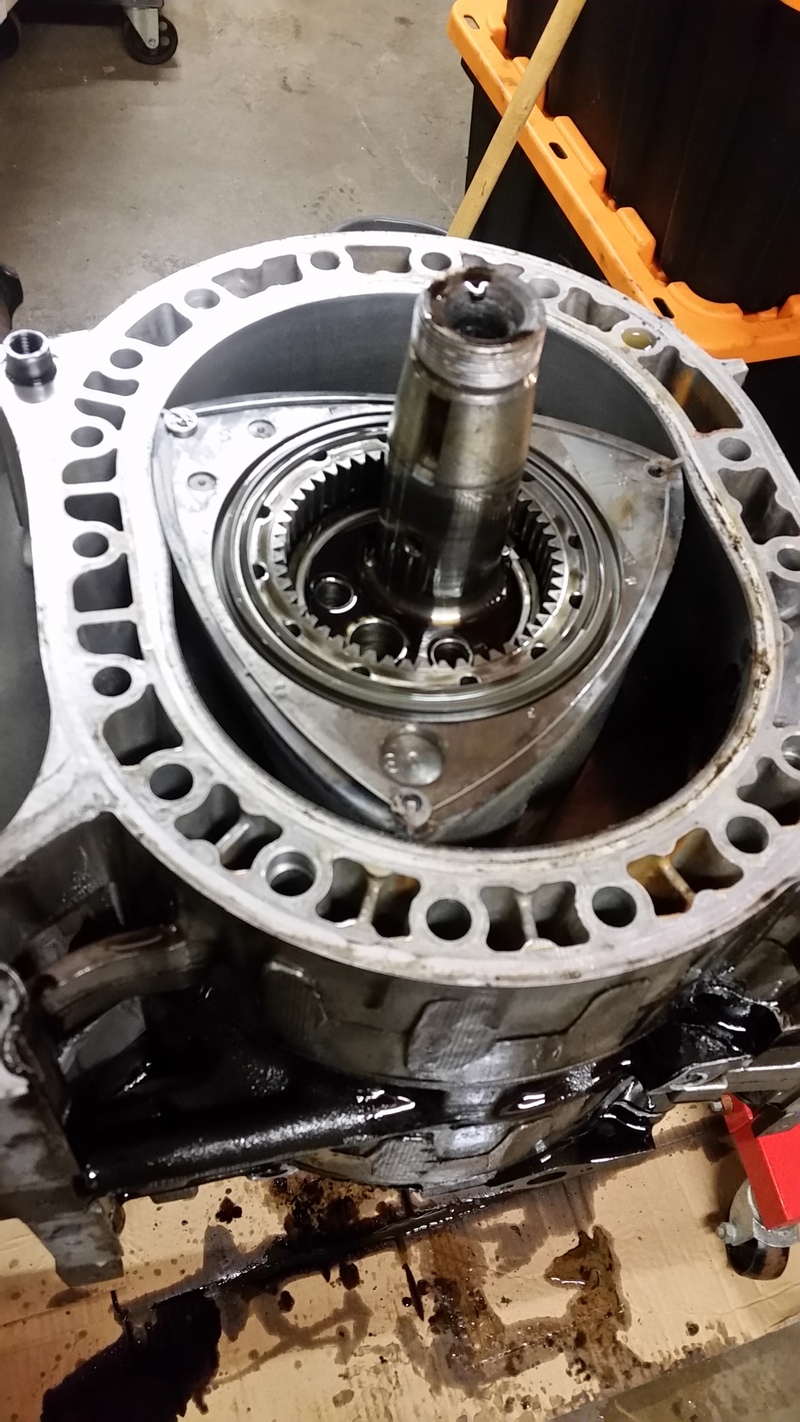
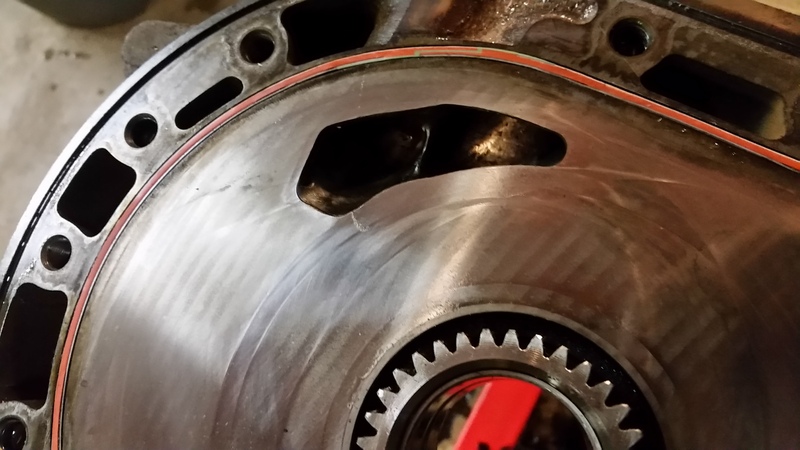
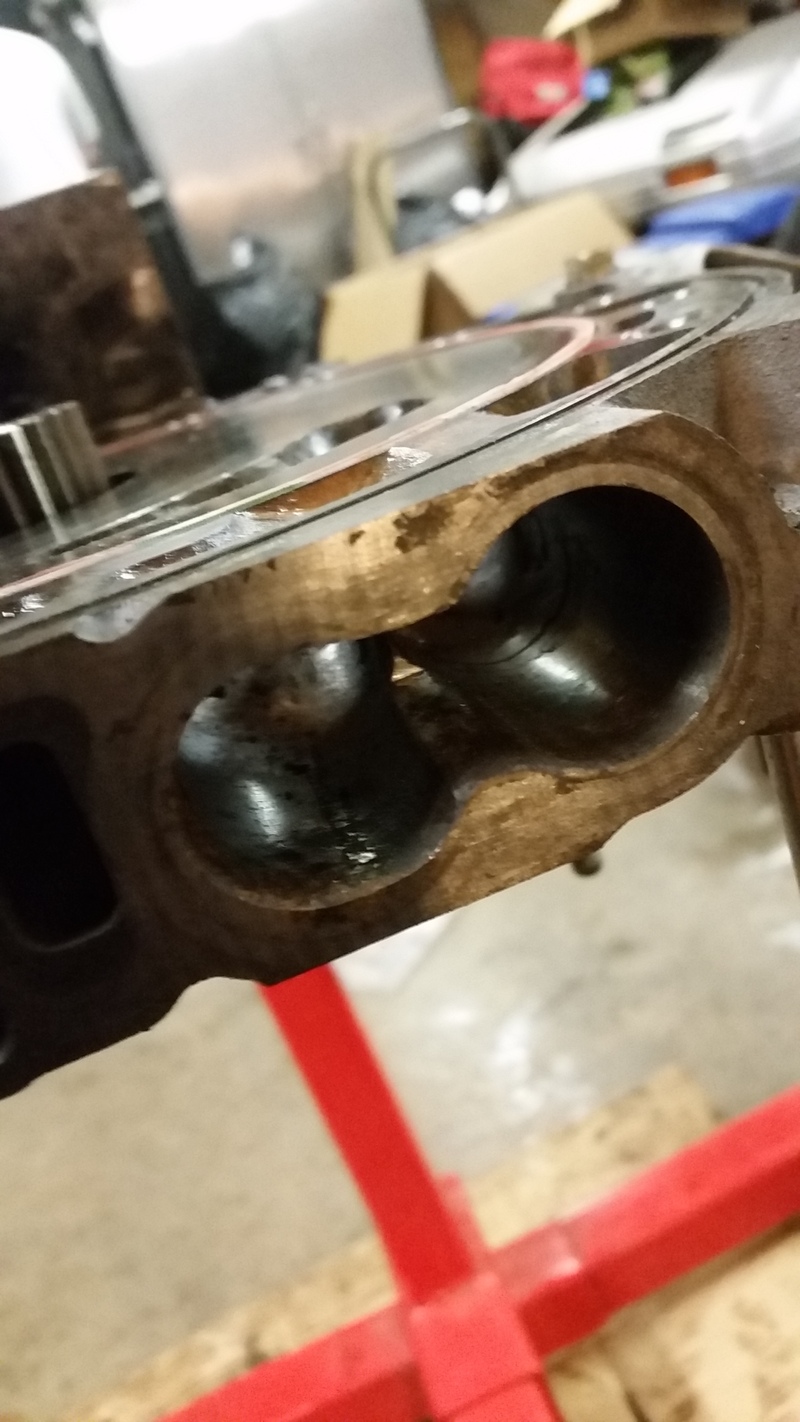
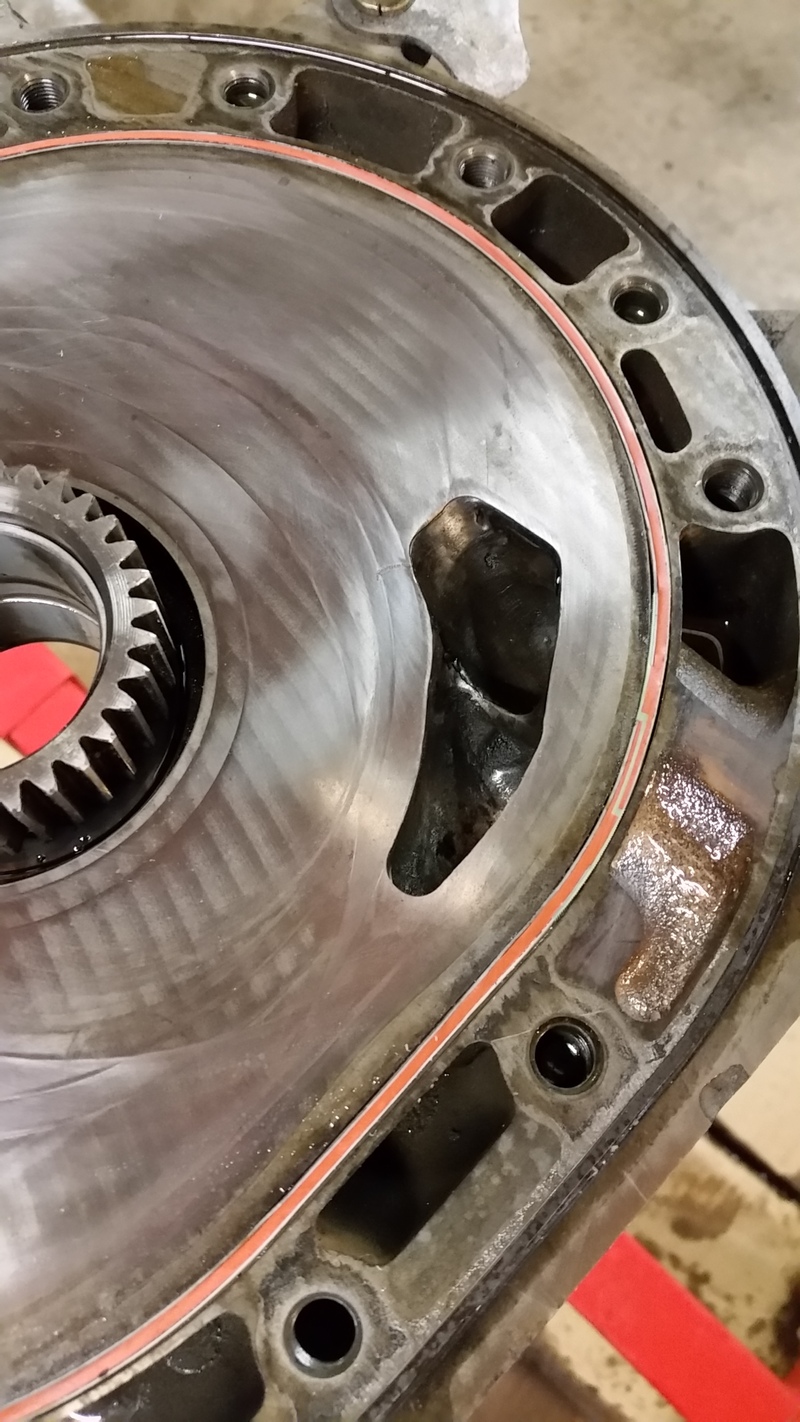
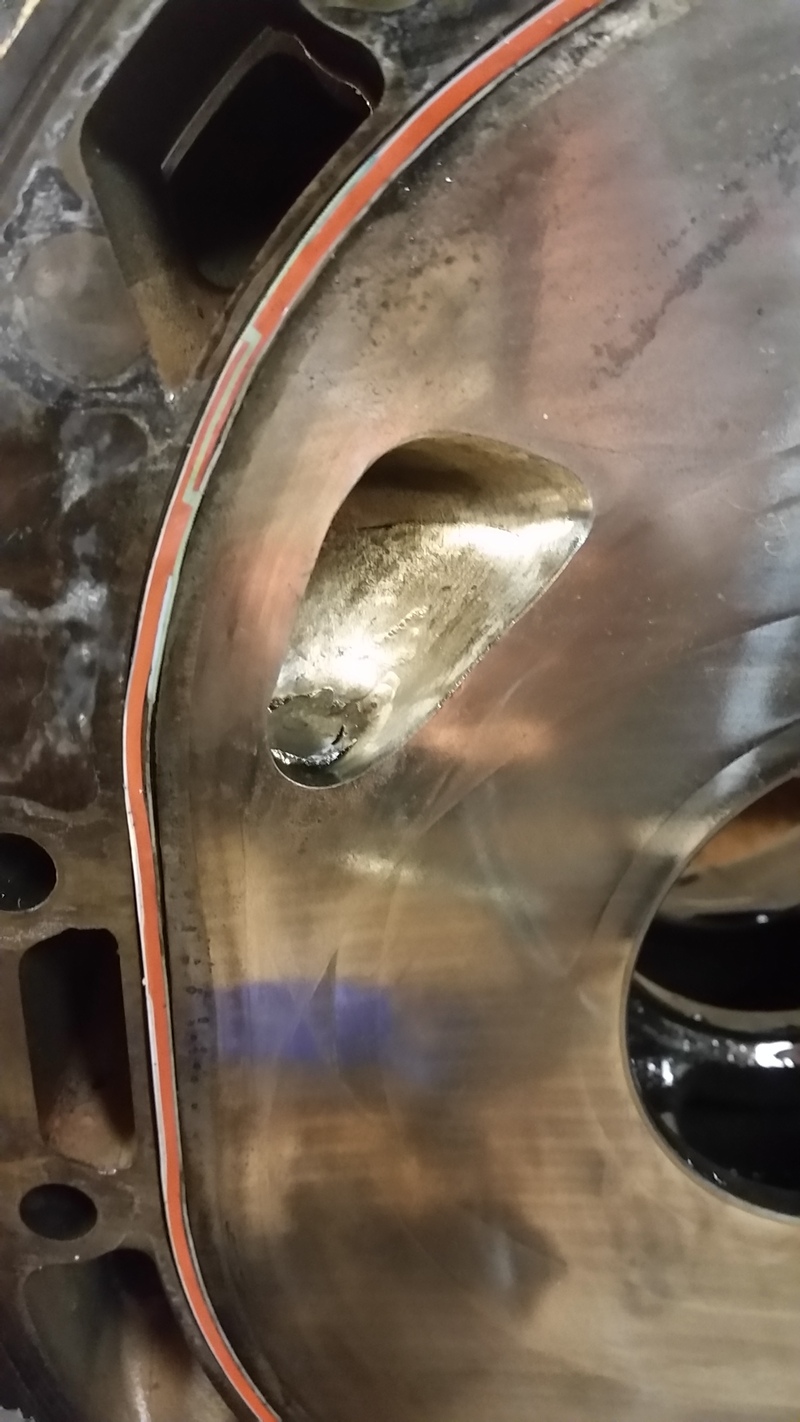
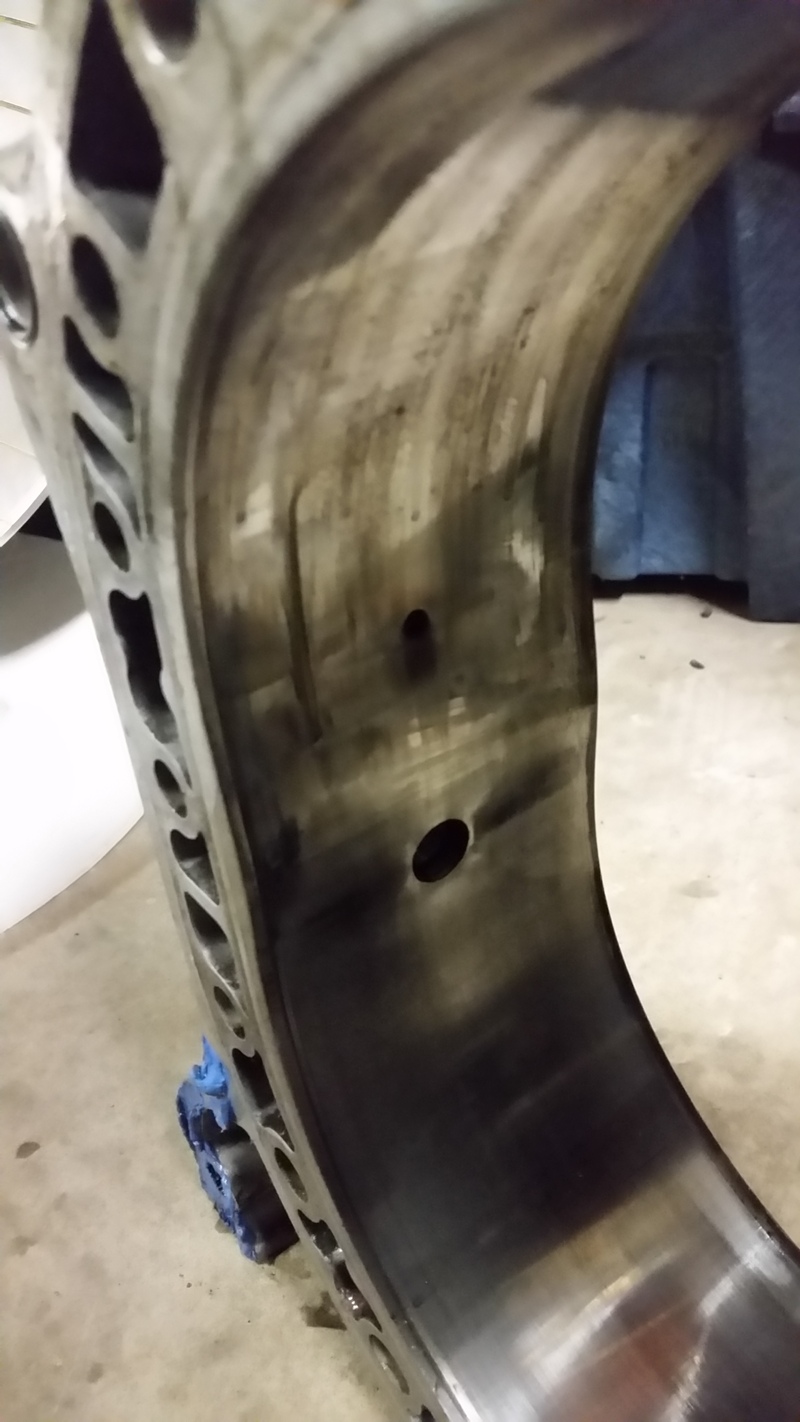
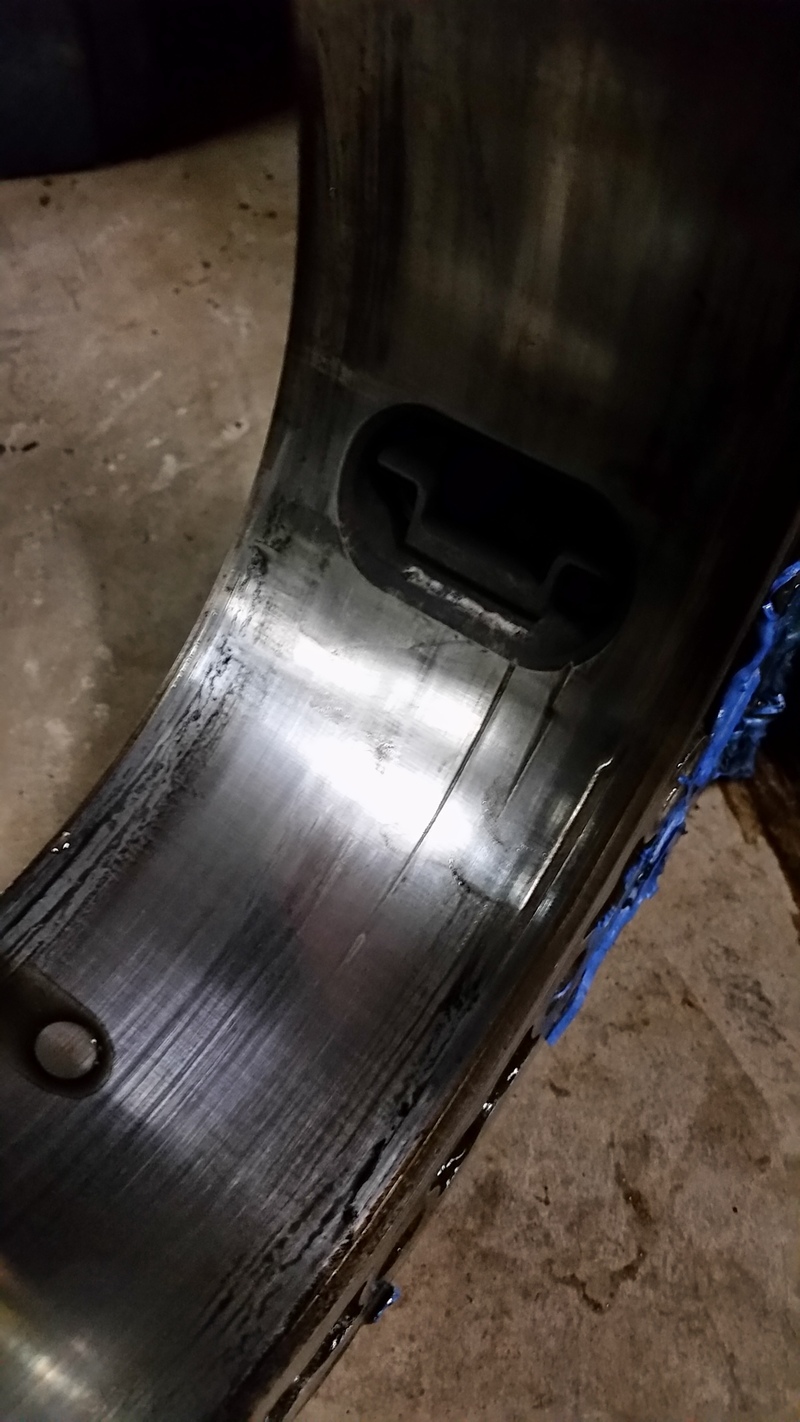
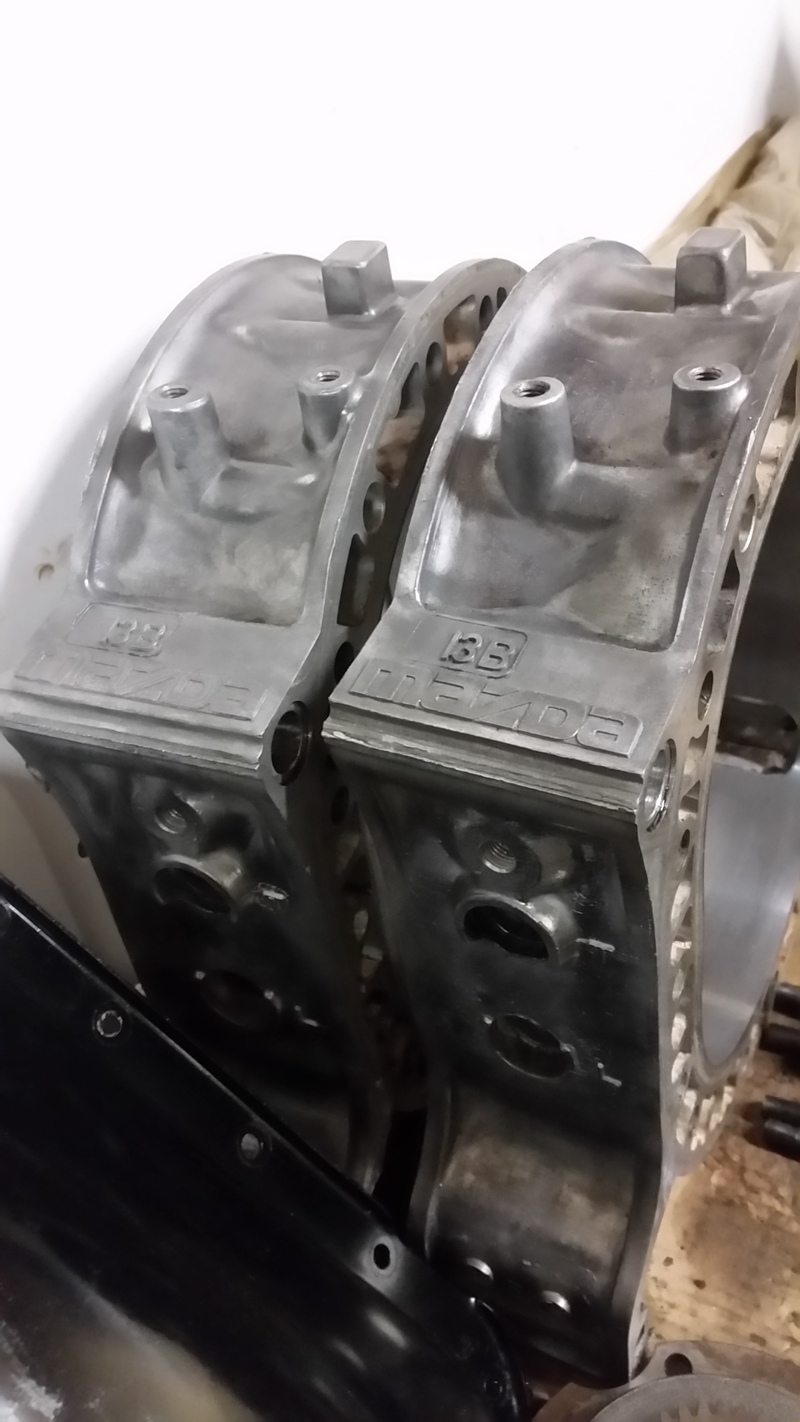
So, we took apart the old engine we had under the bench that we acquired many years ago with our race car. It was built by someone who didn't know about rotaries, and it was reported to be a bridgeport. As you can see, it's a 6 port that's been hacked, no bridge to be found. From my understanding, doing it this way is an easy way to kill low end and mid range power, especially with the sleeves removed completely. No wonder it was slooooooooooow. I suppose it would have been a rocket over 9k.
It also had at least 2 stuck side seals, and one rotor had the old wire style corner seal springs, while the other had the flat springs.
Also, it was reported to have had turbo rotors, when in fact it seems to have S5 N/A rotors. Normally that's a good thing, but I'm going to be boosting it, so they have to come out and be set aside for another project. I have a set of S4 N/A rotors available and a set of S4 Turbo rotors. Just deciding what I want to use.
Needless to say, I'm going to disassemble another engine and send the irons for porting next week (to be done RIGHT).
I have also ordered up all of the seals I need from Atkins, and purchased some fuel injectors.
Things that are usable from this engine:
- E-Shaft
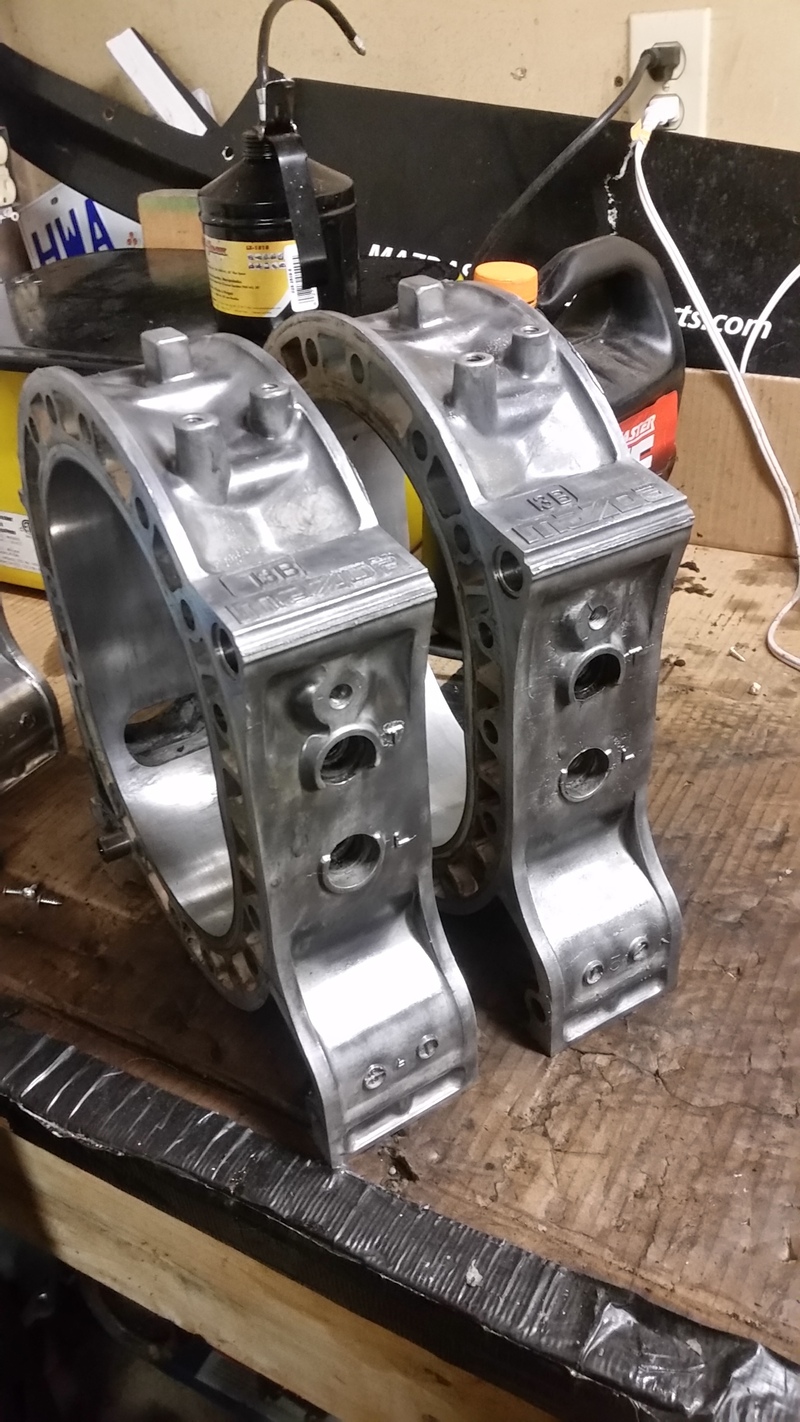
- Rotor housings - these are turbo housings, no deflectors in exhaust ports
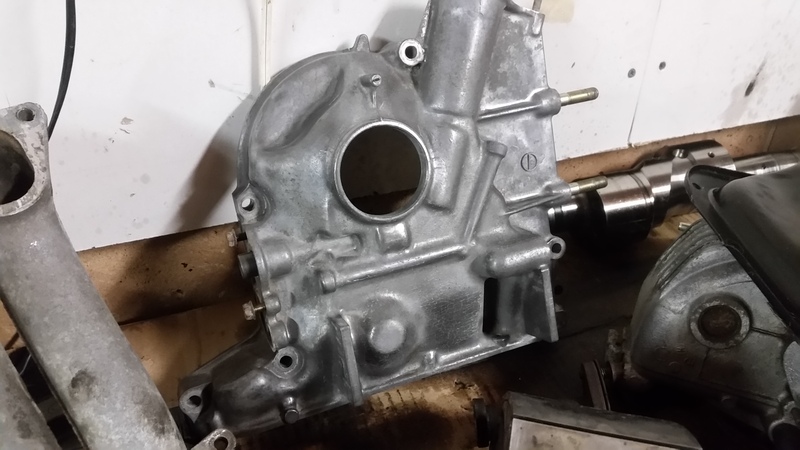
- Front stack stuff
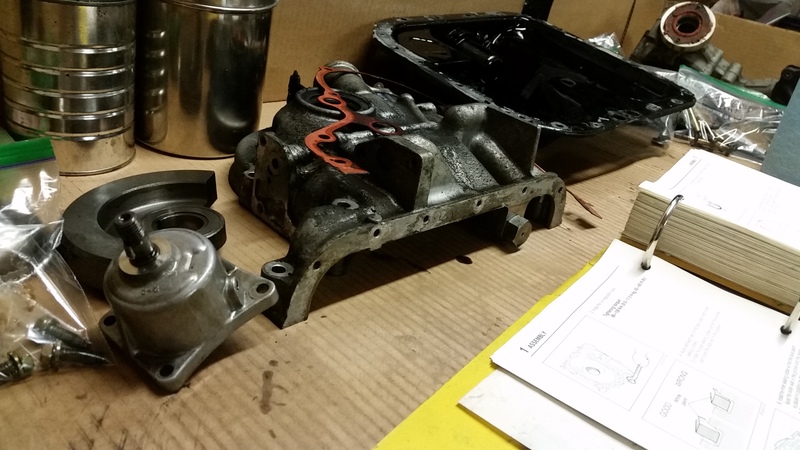
- Oil pump
- Front cover
- Stat gears
Rotors are in good shape, but not what I need for this project.
Things that will come out of the engine I'm going to pull this week from the convertible:
- Irons
- Possibly rotors (and bearings)
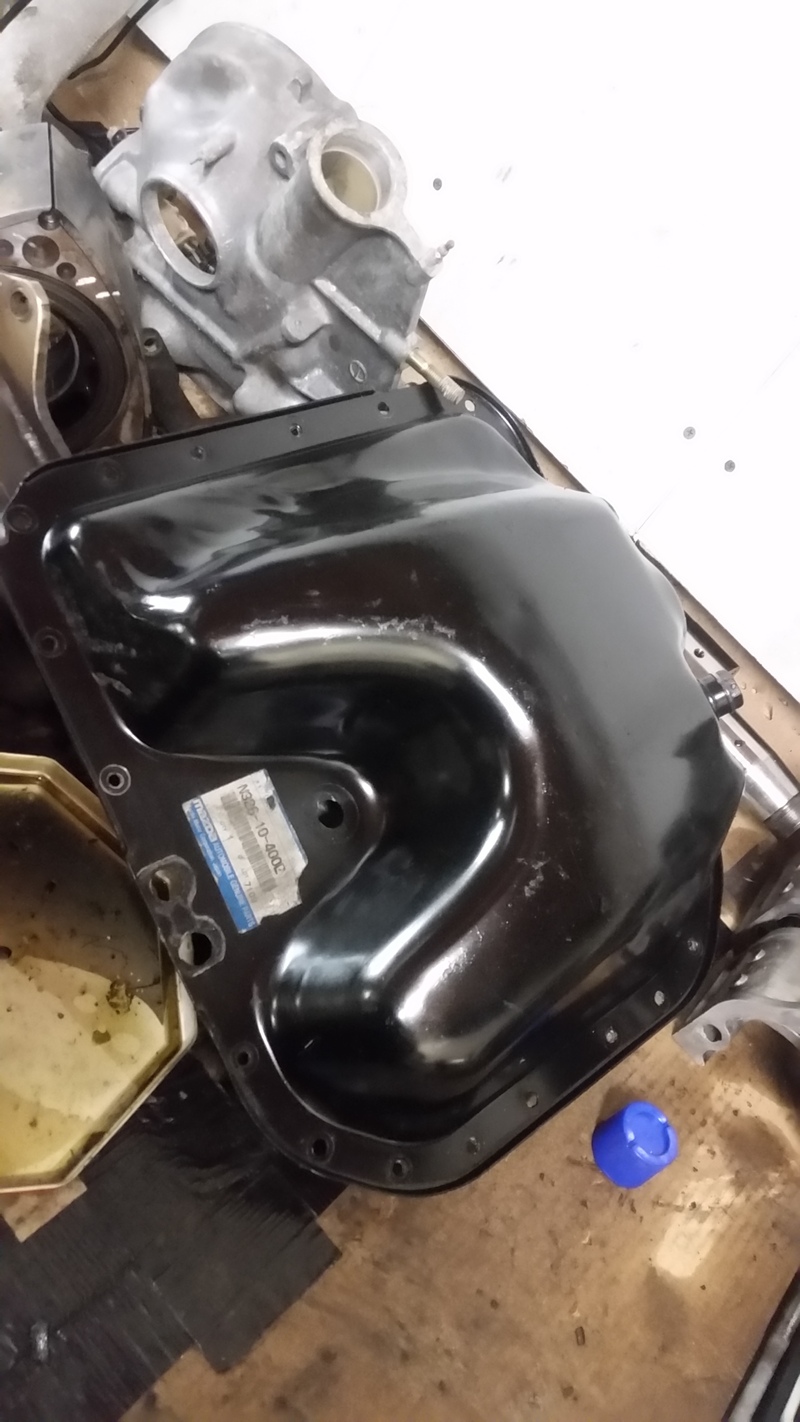
- Oil pan (tapped for oil return line from turbo)

It also had at least 2 stuck side seals, and one rotor had the old wire style corner seal springs, while the other had the flat springs.
Also, it was reported to have had turbo rotors, when in fact it seems to have S5 N/A rotors. Normally that's a good thing, but I'm going to be boosting it, so they have to come out and be set aside for another project. I have a set of S4 N/A rotors available and a set of S4 Turbo rotors. Just deciding what I want to use.
Needless to say, I'm going to disassemble another engine and send the irons for porting next week (to be done RIGHT).
I have also ordered up all of the seals I need from Atkins, and purchased some fuel injectors.
Things that are usable from this engine:
- E-Shaft
- Rotor housings - these are turbo housings, no deflectors in exhaust ports
- Front stack stuff
- Oil pump
- Front cover
- Stat gears
Rotors are in good shape, but not what I need for this project.
Things that will come out of the engine I'm going to pull this week from the convertible:
- Irons
- Possibly rotors (and bearings)
- Oil pan (tapped for oil return line from turbo)
Last edited by PinkRacer; 02-10-16 at 10:47 AM.
 02-13-16, 06:20 PM
#41
Licensed Zip Tie Mechanic
Thread Starter
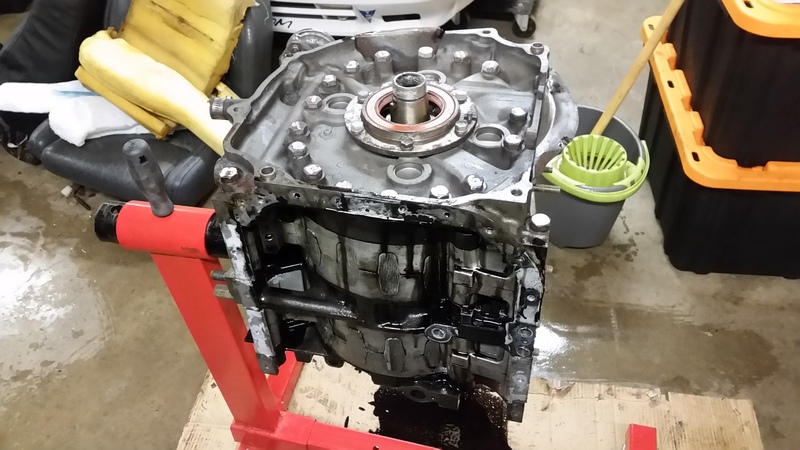
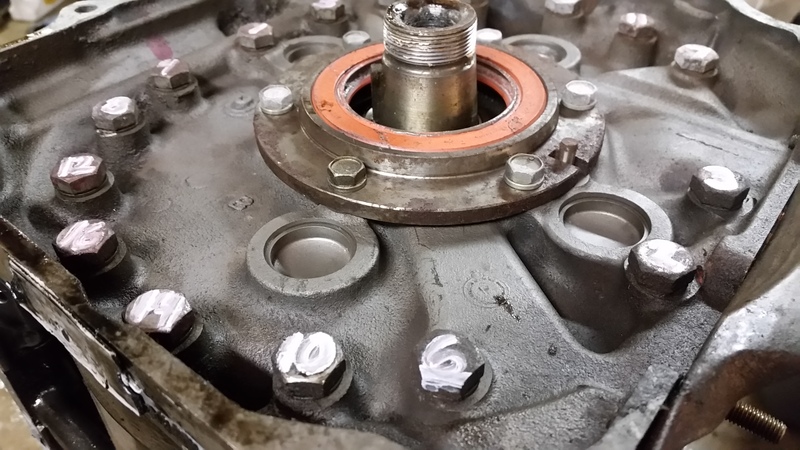
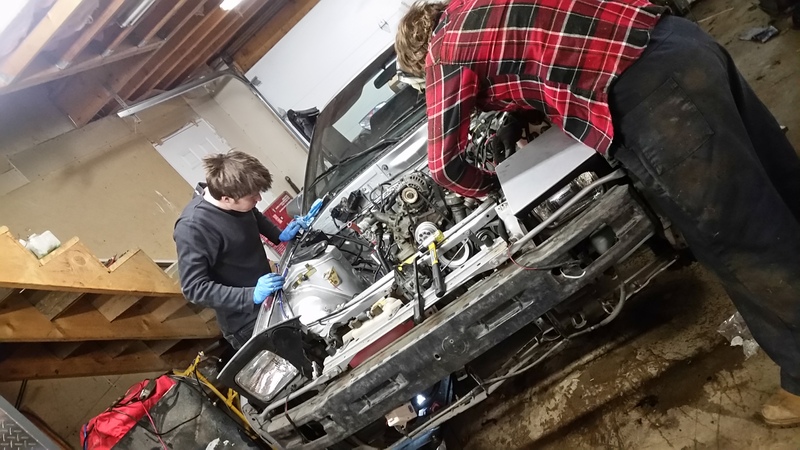
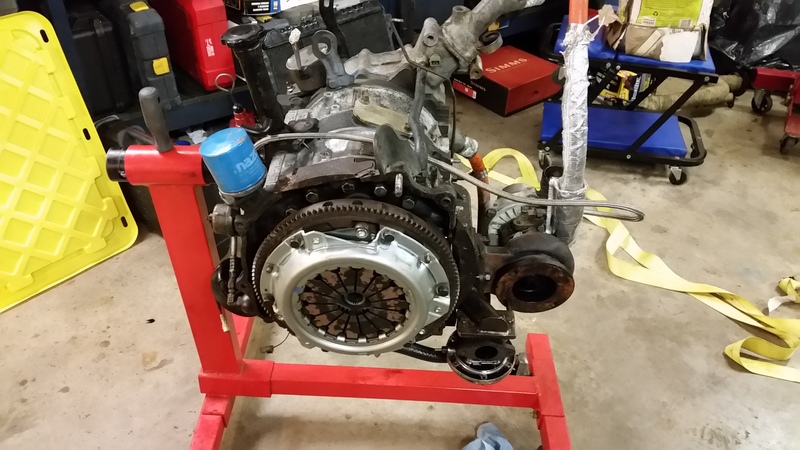
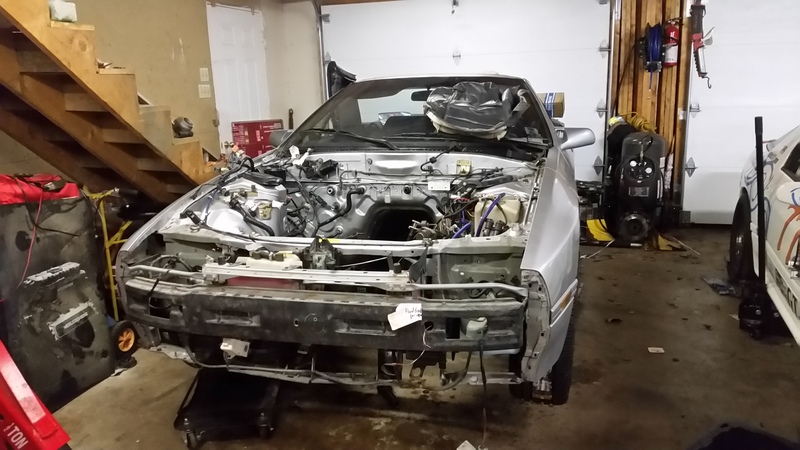
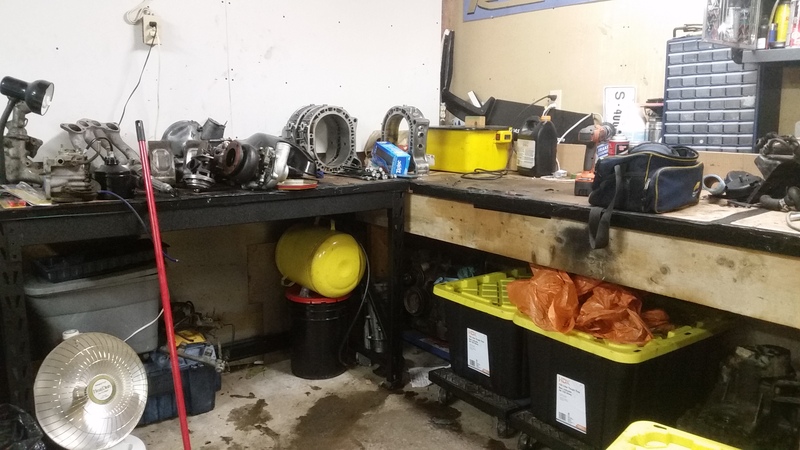
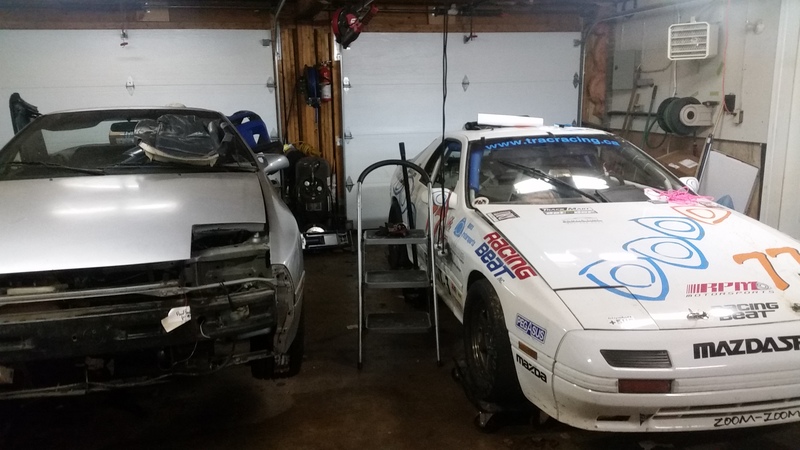
Here's today's update - engine is pulled from the convertible...and torn down.
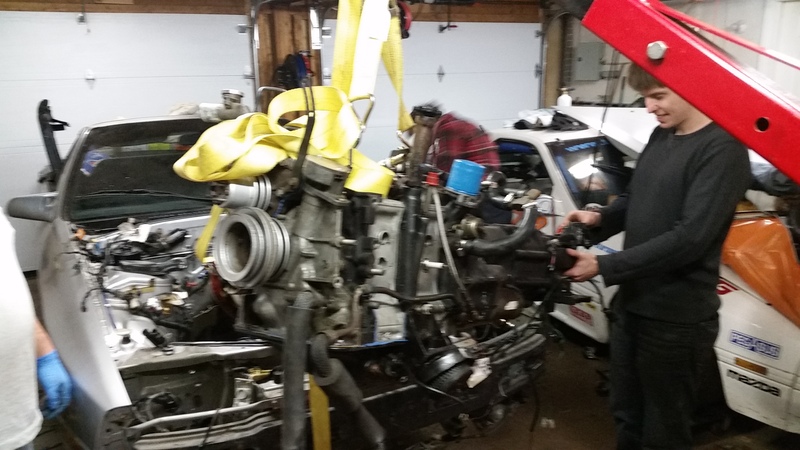

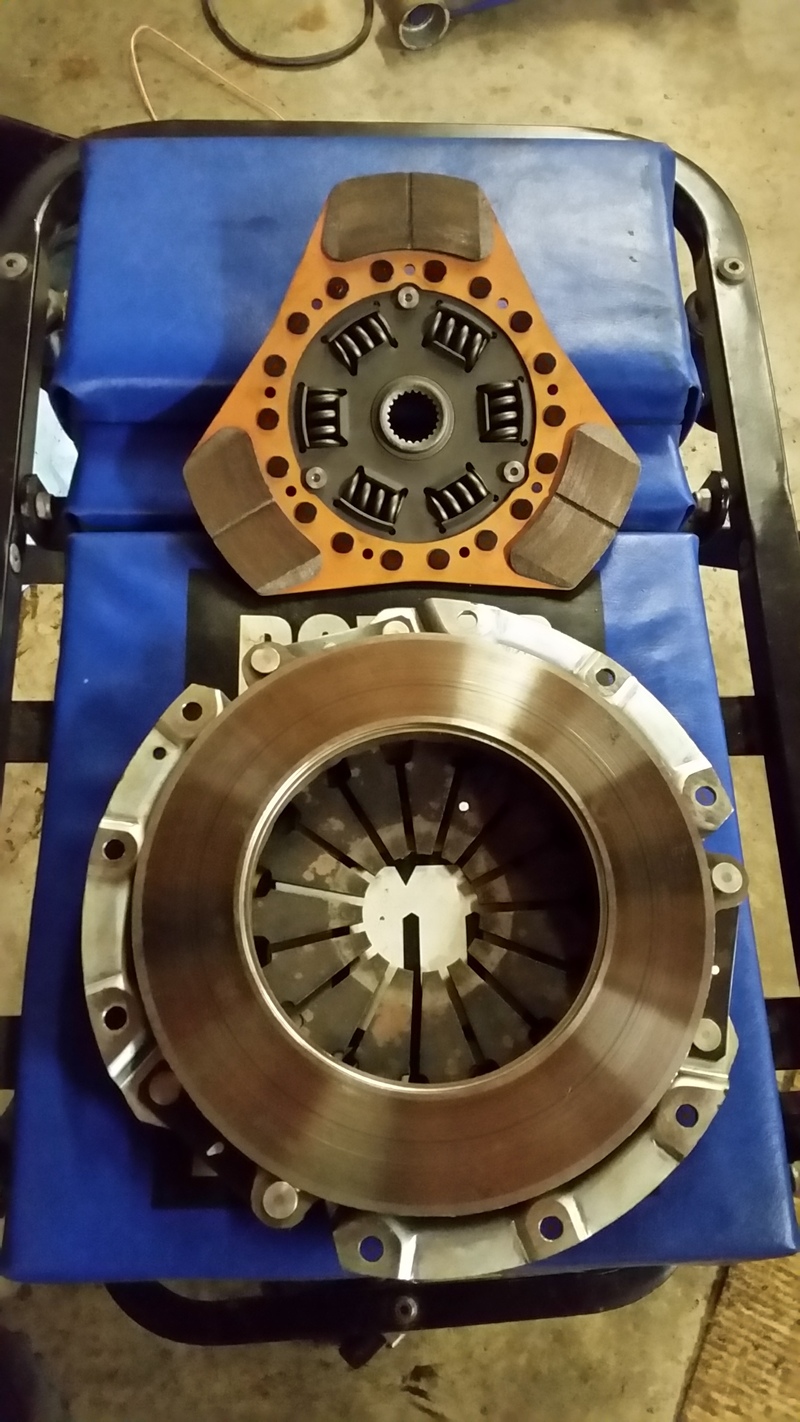
Found a new clutch in there...going to sell that now.
 g[/IMG]
Found a new clutch in there...going to sell that now.
g[/IMG]
02-13-16, 06:21 PM
#42
Licensed Zip Tie Mechanic
Thread Starter
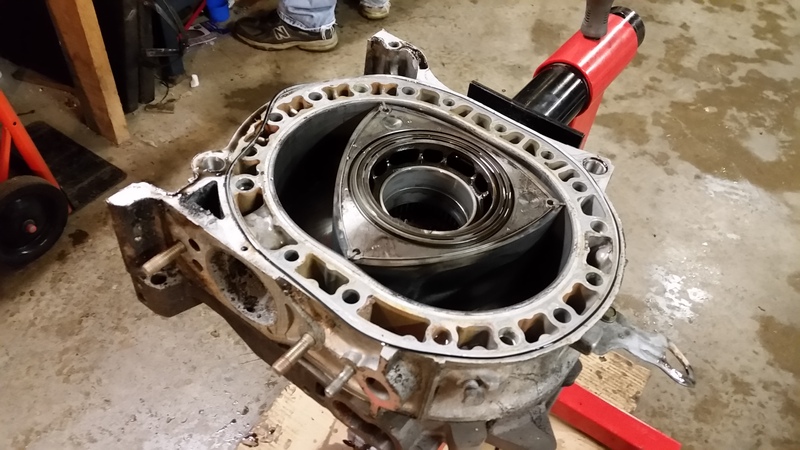
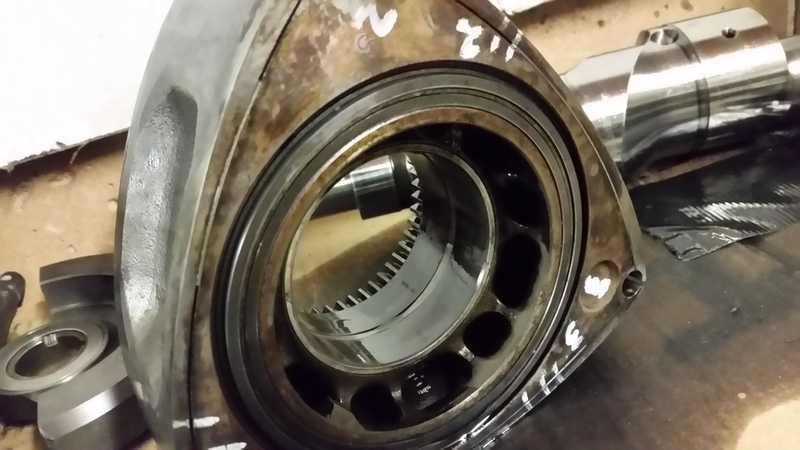
Also found 3 stuck side seals, a shredded torrington bearing in the front stack, and irons and housings that had no business being reused.
(Any idea how to get BADLY stuck side seals out?)

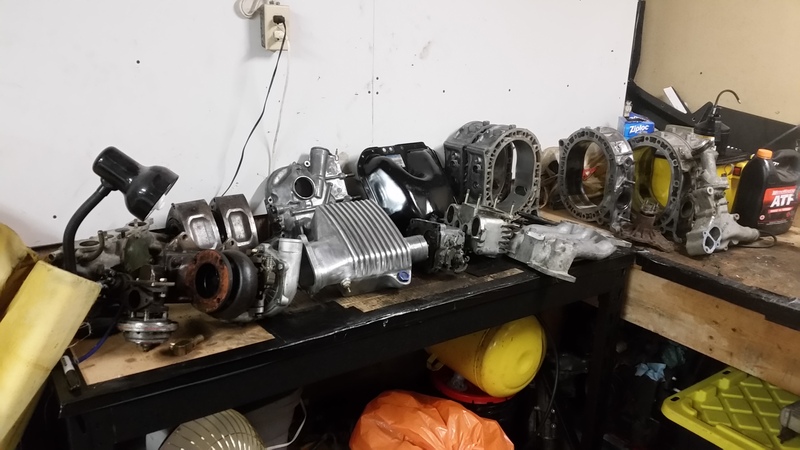
Running out of space....

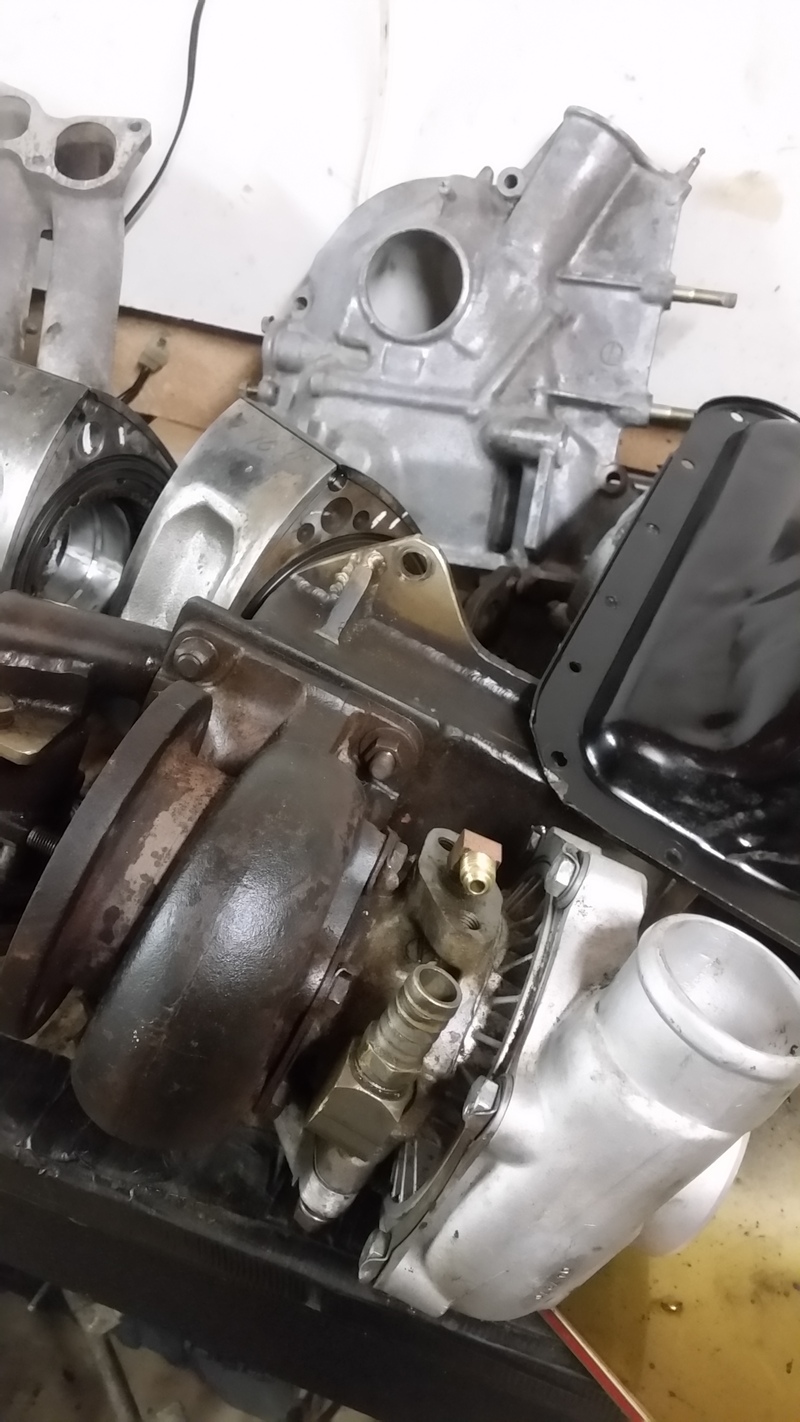
Measured the compressor wheel on the turbo - 55mm on the small part, 70mm on the large one.
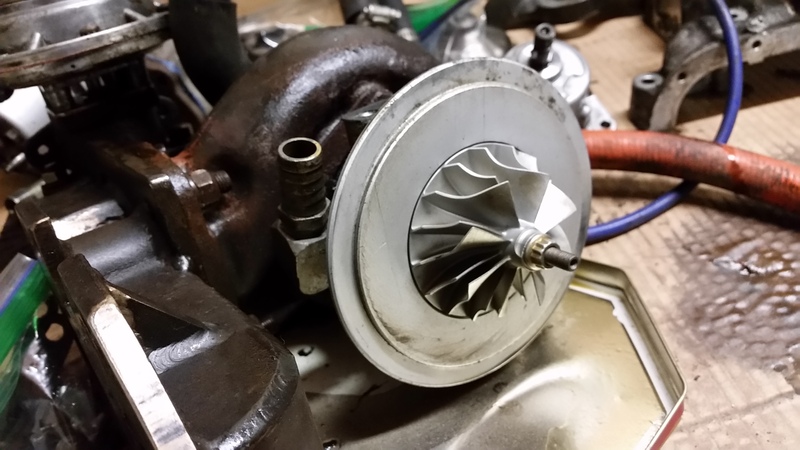
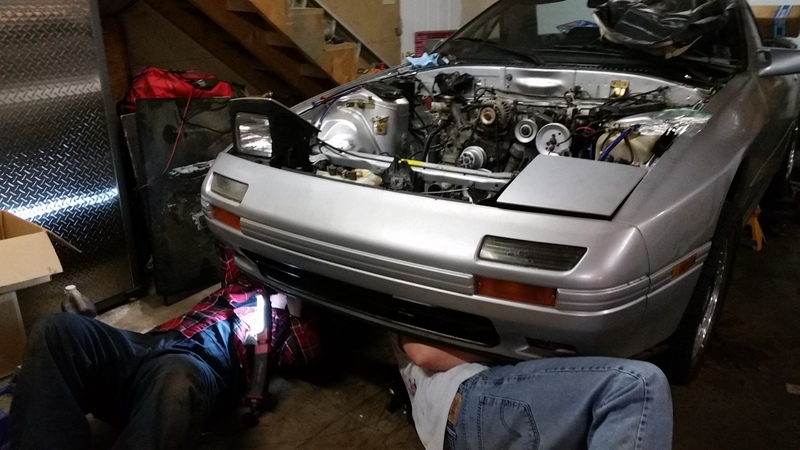
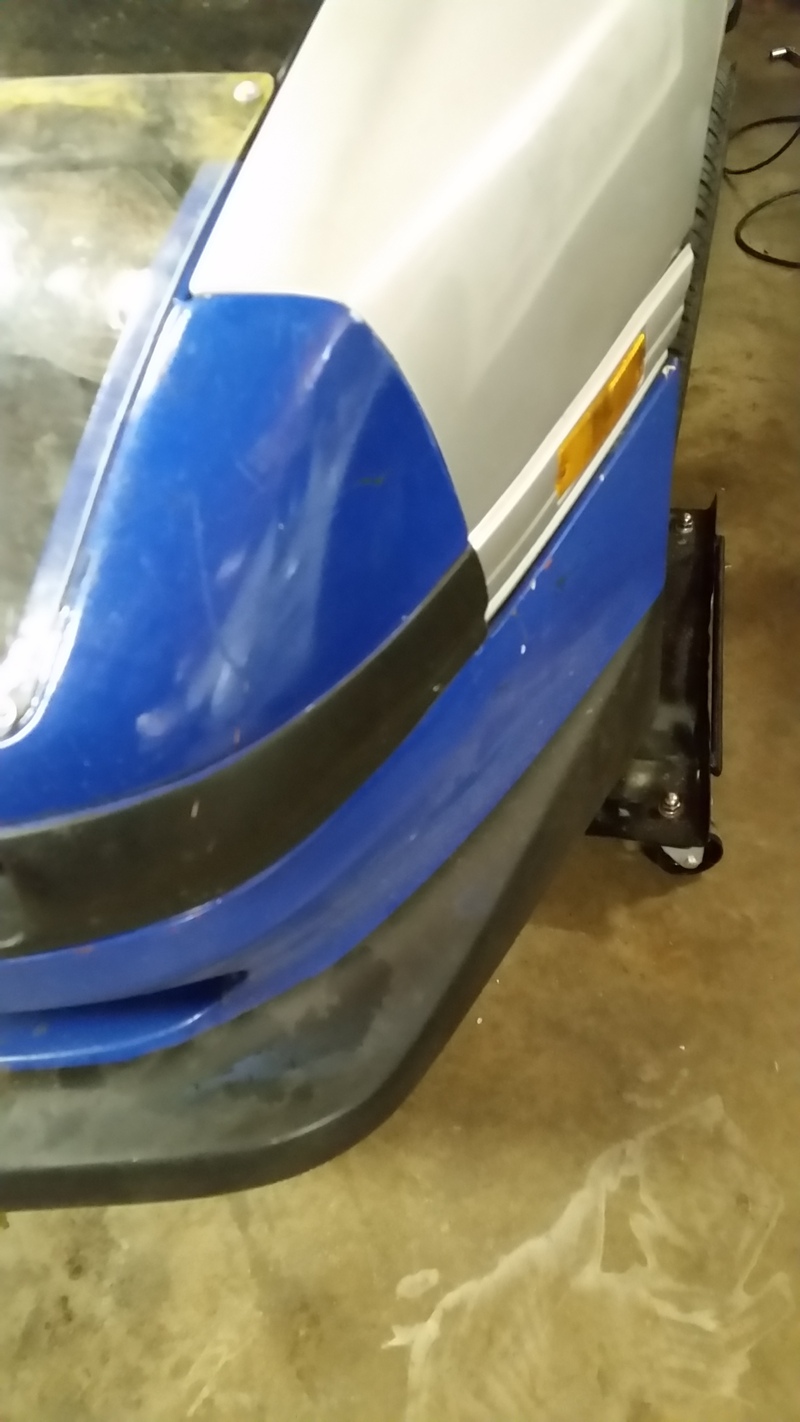
Took off the front bumper and the headlights too, making way for the RE-Amemiya bumper and sleek lights...
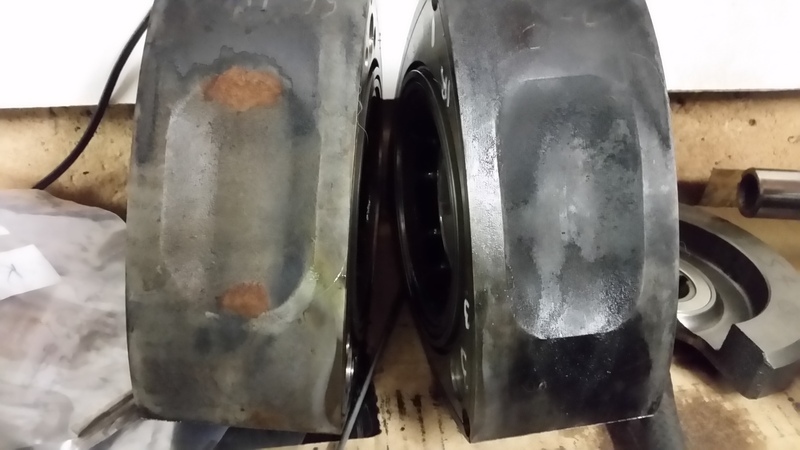
For fun - these two rotors were found in the same engine, the one we tore down last weekend. One is S4 NA, one is S5 NA....not sure how this ran...they are different weights and different compression....it would unbalance the whole assembly.
(Any idea how to get BADLY stuck side seals out?)
Running out of space....
Measured the compressor wheel on the turbo - 55mm on the small part, 70mm on the large one.
Took off the front bumper and the headlights too, making way for the RE-Amemiya bumper and sleek lights...
For fun - these two rotors were found in the same engine, the one we tore down last weekend. One is S4 NA, one is S5 NA....not sure how this ran...they are different weights and different compression....it would unbalance the whole assembly.
02-14-16, 08:06 PM
#43
Licensed Zip Tie Mechanic
Thread Starter
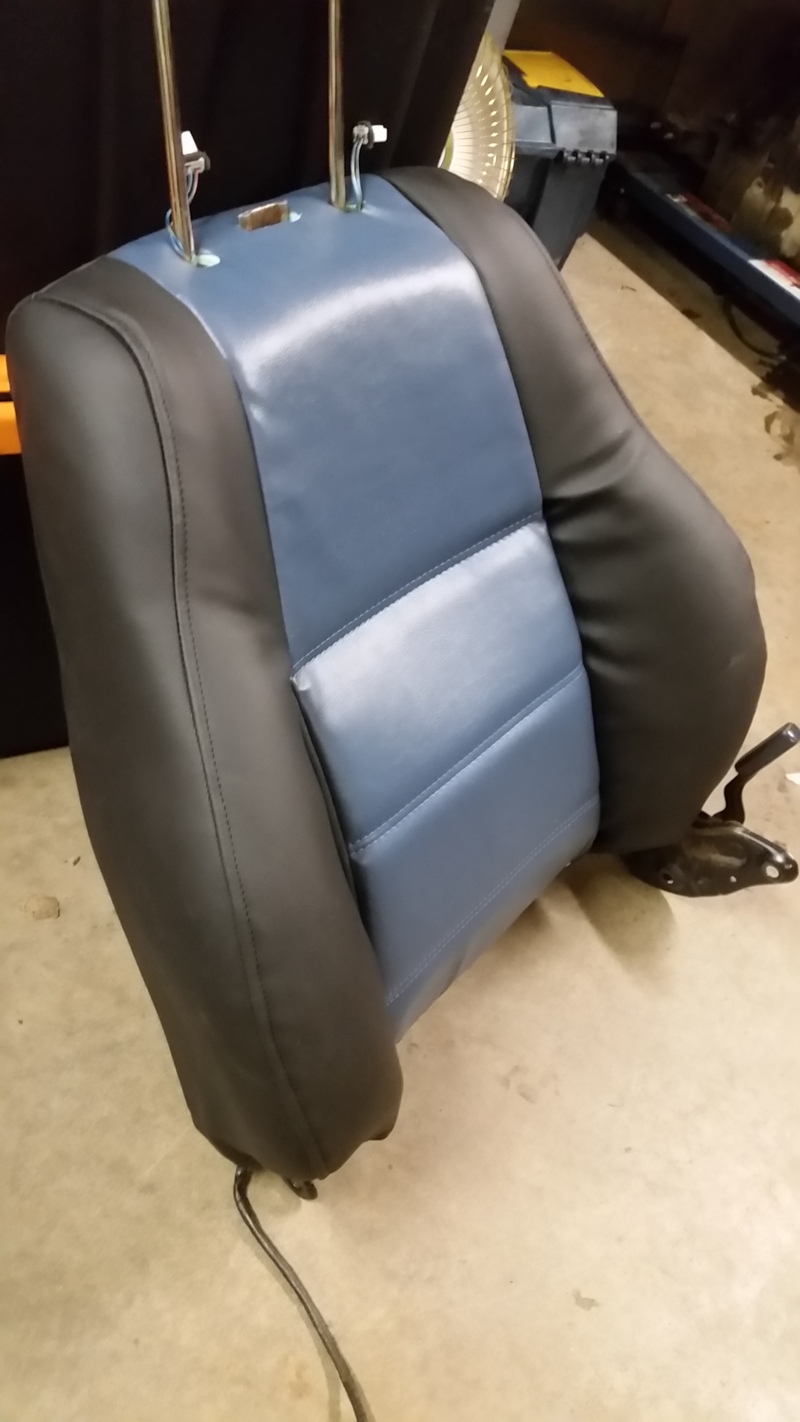
Drivers seat is just about done, a couple minor adjustments to the headrest and need to get some hardware.
Then...on to passengers seat.
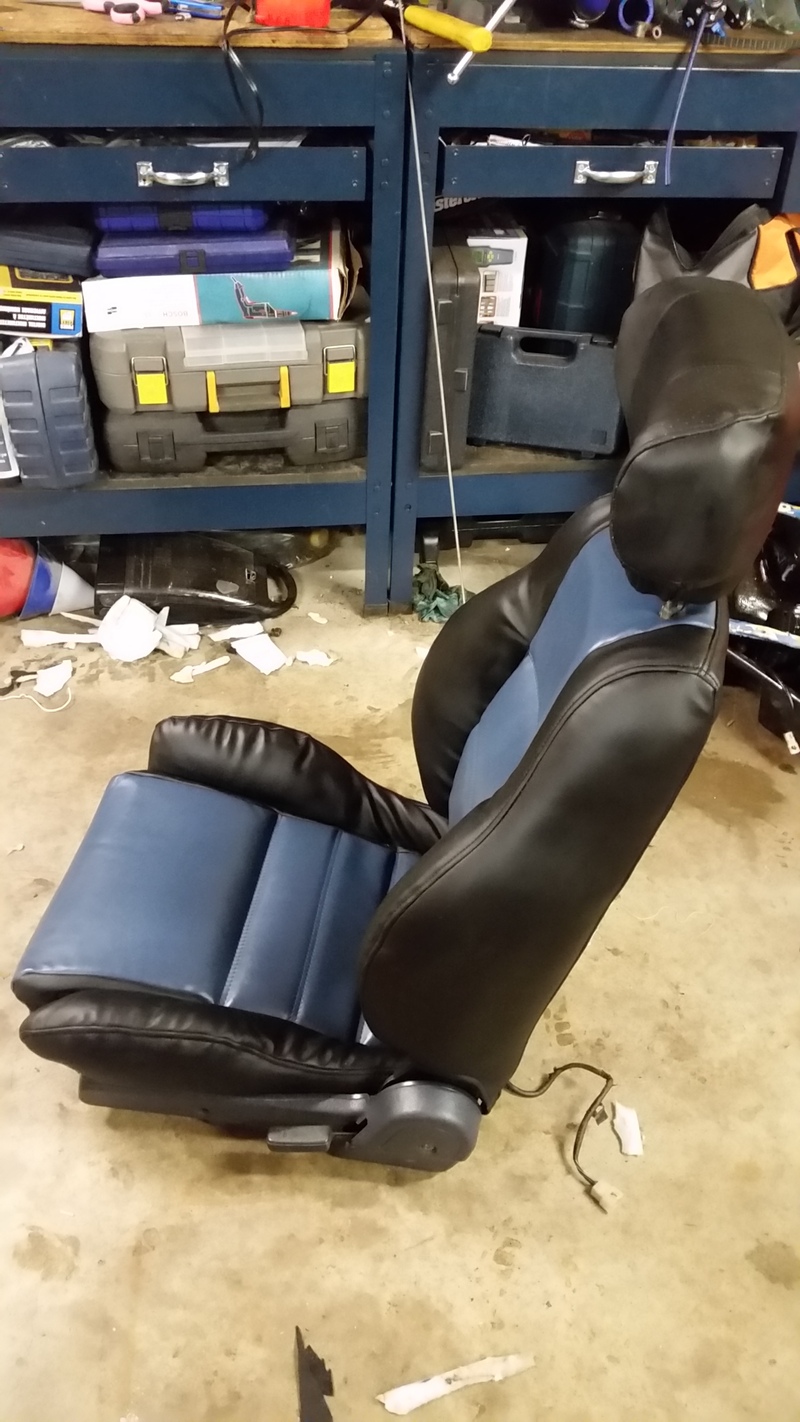

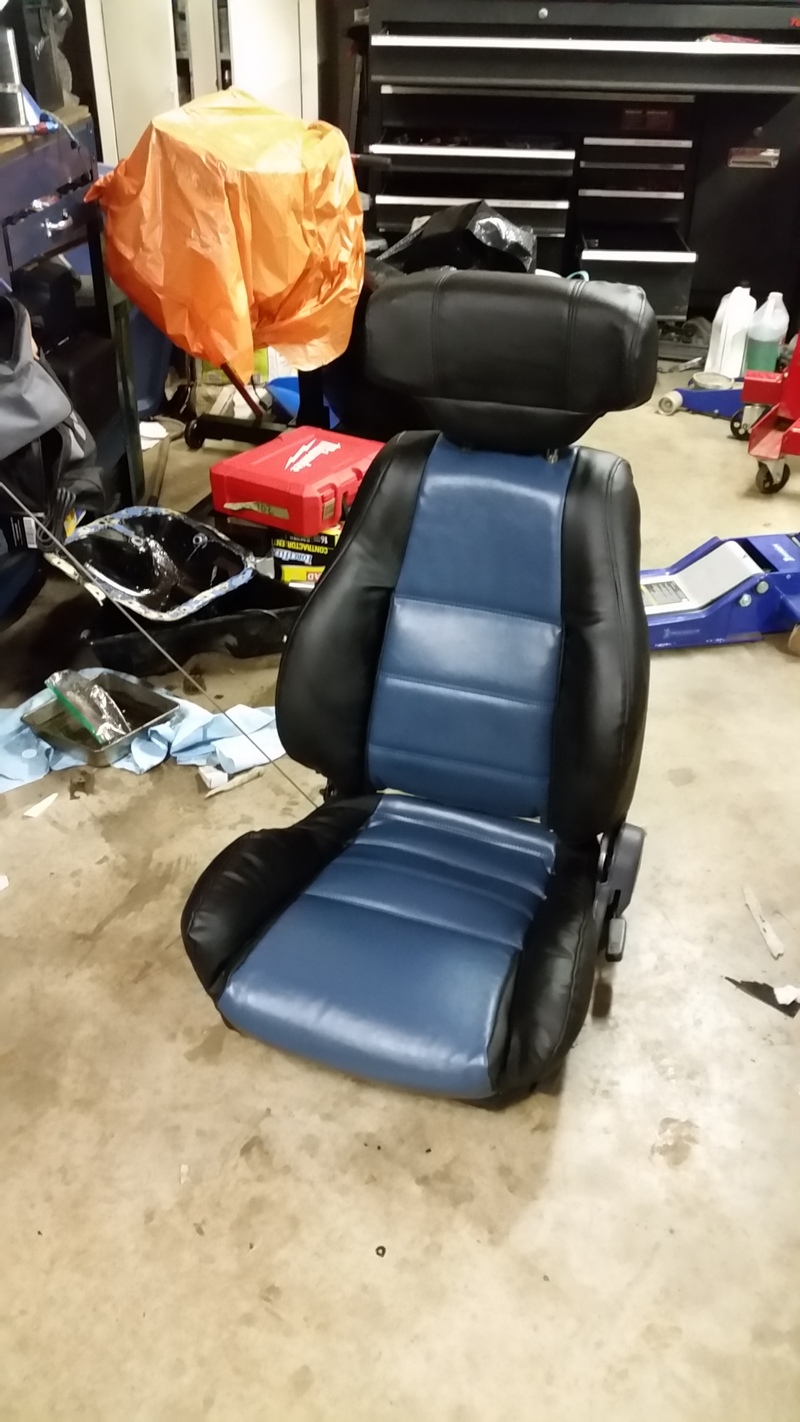
Then...on to passengers seat.
02-17-16, 10:39 AM
#44
Licensed Zip Tie Mechanic
Thread Starter
Figured I'd do an updated to-do list - I just finished ordering a bunch of hose and fittings to re-plumb some things:
February:
- Rebuild passengers seat (3 days) ONLY HAVE THE BOTTOM OF ONE SEAT LEFT NOW!
- Install seats (1 hour)
- Swap over adjustable suspension from race car (KYB AGX, Ground Control Sleeves, Camber Plates) (1 day)
- Install new brake flex line on Driver's front (when suspension is done)
- Get engine porting done (this is in progress) - going half bridge
- Put exhaust sleeves back on the housings I'm using - the guy before me removed them, good thing I have a spare set (a few hours tops)
- Get stuck side seals out of my rotors (working on this) DONE
- Clean all engine pieces (a few hours)
- Install boost control solenoid (1 hour)
- Create custom gasket for turbo-to-downpipe flange - since my turbo doesn't have a standard flange on it (30 min)
- Install e-fan and have it trigger off the ECU (1 hour)
- Install RE-Amemiya front bumper and wire up headlights (a few hours)
- Make new lexan headlight covers (2 hours)
- Install sideskirts (a few hours)
- Install S5 tails (30 min)
- Sand the car and fix any spots that need fixing (1 day)
- Order the rear diffuser (Shine)
March:
- Install S5 rear bumper and moldings (a couple hours)
- Assemble engine with Atkins seal kit (a few hours)
- Install rebuilt engine with turbo transmission, Centerforce clutch, turbo clutch slave, turbo starter, Mazdatrix adapter driveshaft (a few hours)
- Install new fuel injectors (10 minutes)
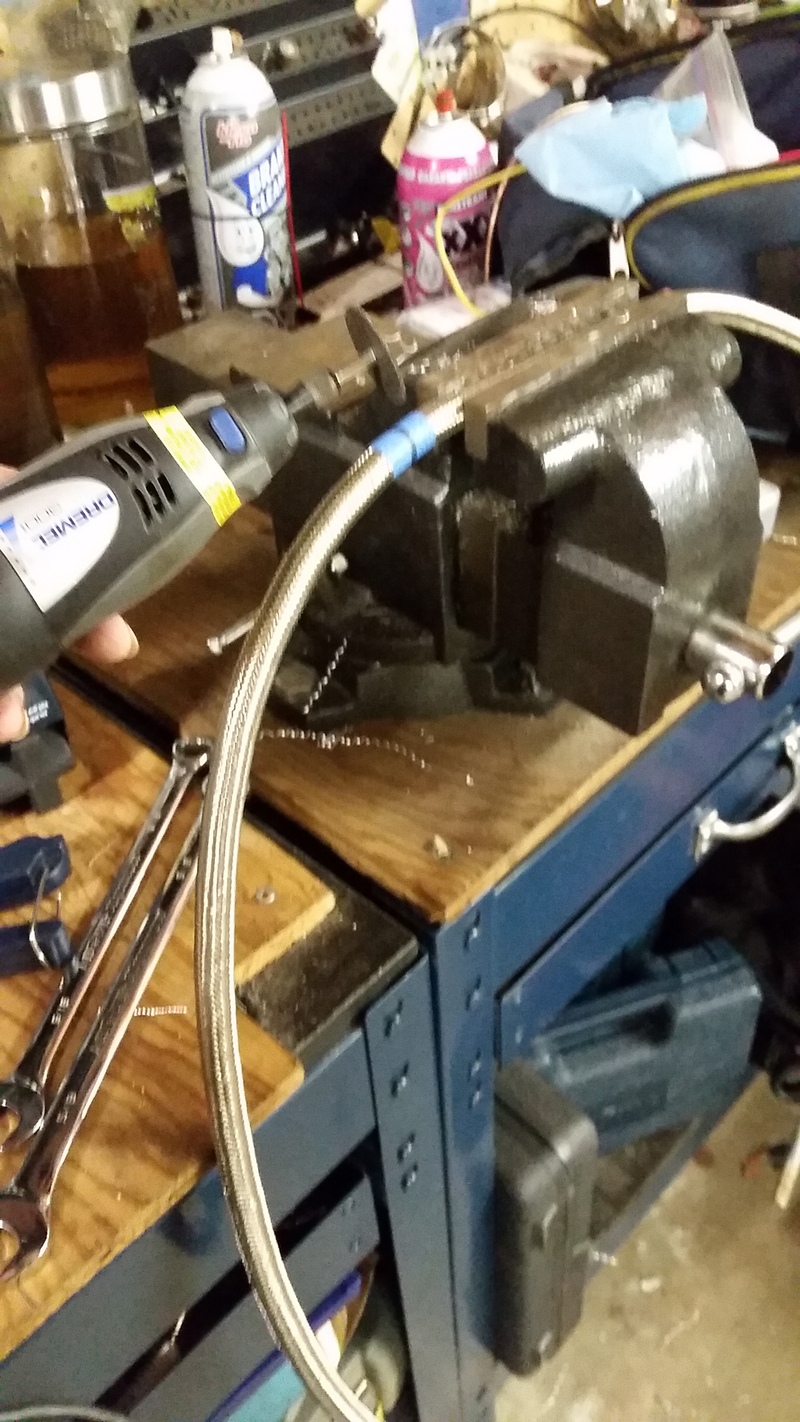
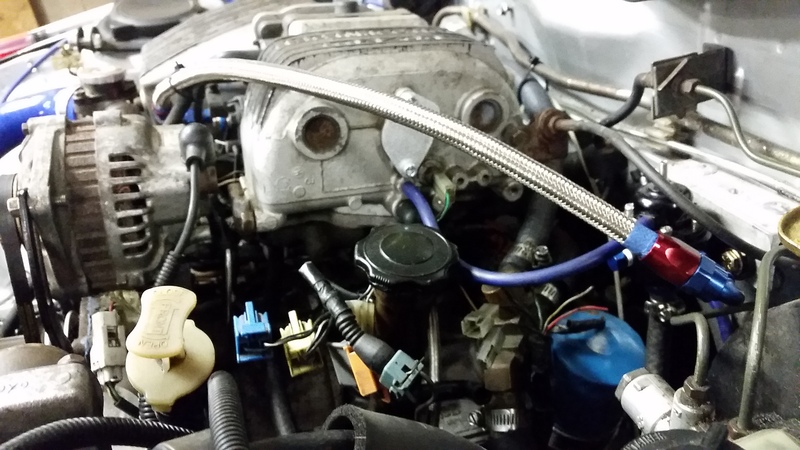
- Fabricate AN oil lines to replace factory (all the fittings are coming for that) (1 hour)
- Replace turbo coolant line with better quality line (5 minutes)
- Have it vinyl wrapped (3 - 4 days)
- Reinstall rear window in the top (1 hour)
April:
- Install rear diffuser (2 hours)
February:
- Rebuild passengers seat (3 days) ONLY HAVE THE BOTTOM OF ONE SEAT LEFT NOW!
- Install seats (1 hour)
- Swap over adjustable suspension from race car (KYB AGX, Ground Control Sleeves, Camber Plates) (1 day)
- Install new brake flex line on Driver's front (when suspension is done)
- Get engine porting done (this is in progress) - going half bridge
- Put exhaust sleeves back on the housings I'm using - the guy before me removed them, good thing I have a spare set (a few hours tops)
- Get stuck side seals out of my rotors (working on this) DONE
- Clean all engine pieces (a few hours)
- Install boost control solenoid (1 hour)
- Create custom gasket for turbo-to-downpipe flange - since my turbo doesn't have a standard flange on it (30 min)
- Install e-fan and have it trigger off the ECU (1 hour)
- Install RE-Amemiya front bumper and wire up headlights (a few hours)
- Make new lexan headlight covers (2 hours)
- Install sideskirts (a few hours)
- Install S5 tails (30 min)
- Sand the car and fix any spots that need fixing (1 day)
- Order the rear diffuser (Shine)
March:
- Install S5 rear bumper and moldings (a couple hours)
- Assemble engine with Atkins seal kit (a few hours)
- Install rebuilt engine with turbo transmission, Centerforce clutch, turbo clutch slave, turbo starter, Mazdatrix adapter driveshaft (a few hours)
- Install new fuel injectors (10 minutes)
- Fabricate AN oil lines to replace factory (all the fittings are coming for that) (1 hour)
- Replace turbo coolant line with better quality line (5 minutes)
- Have it vinyl wrapped (3 - 4 days)
- Reinstall rear window in the top (1 hour)
April:
- Install rear diffuser (2 hours)
Last edited by PinkRacer; 02-18-16 at 06:50 AM.
 02-17-16, 01:09 PM
#46
Licensed Zip Tie Mechanic
Thread Starter
I honestly think there should be a rotary abuser registry. That companies should refuse sale of rebuild parts to certain people, because it's just not going to turn out.
That builder should be on that list. Seriously...the rotors don't even look the same.
At least the housings and e-shaft are salvageable. And the rotors salvageable from the other engine, once I get the stuck side seals out.
02-22-16, 08:53 AM
#48
Licensed Zip Tie Mechanic
Thread Starter
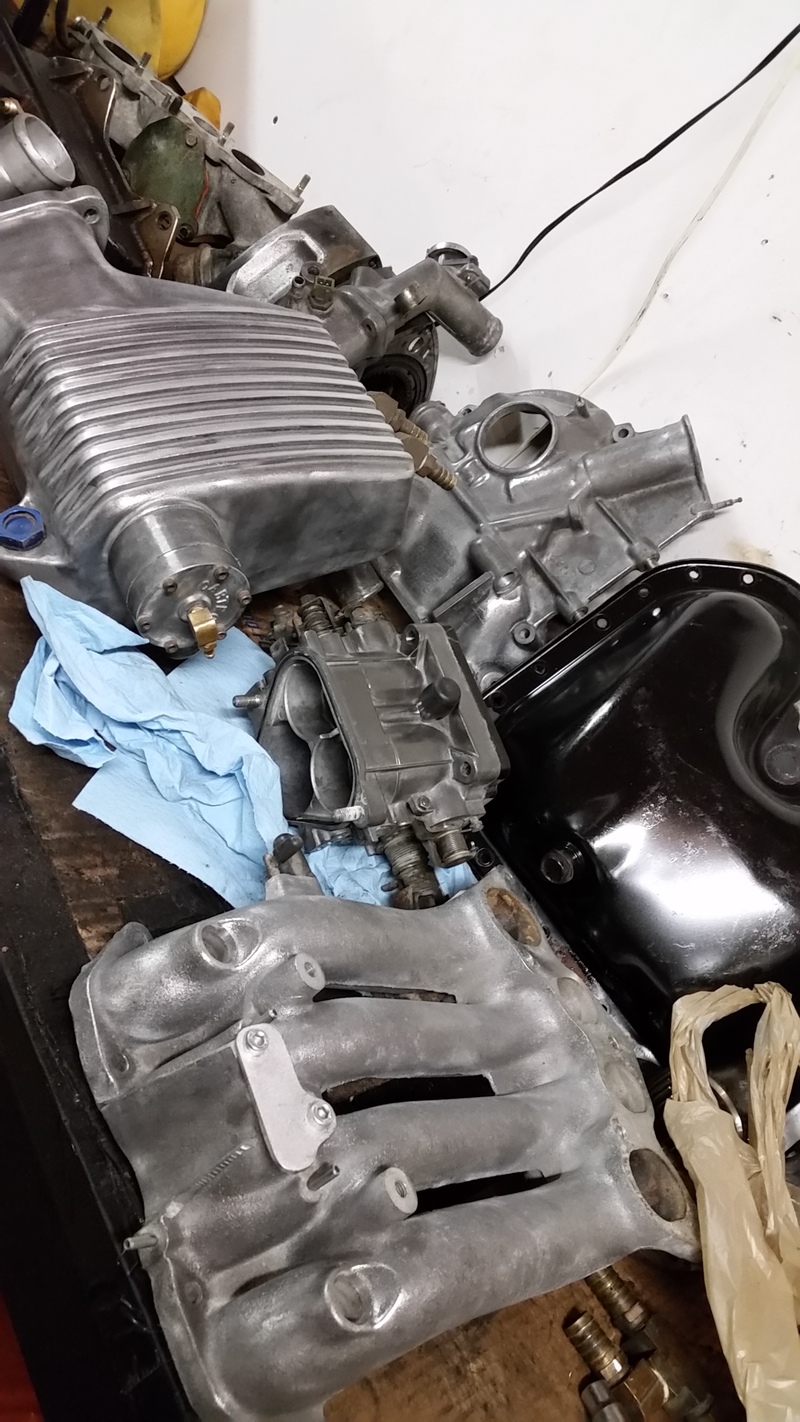
Did a lot of work on the weekend.
- Full suspension swap to KYB AGX's with Ground Control Sleeves and camber plates.
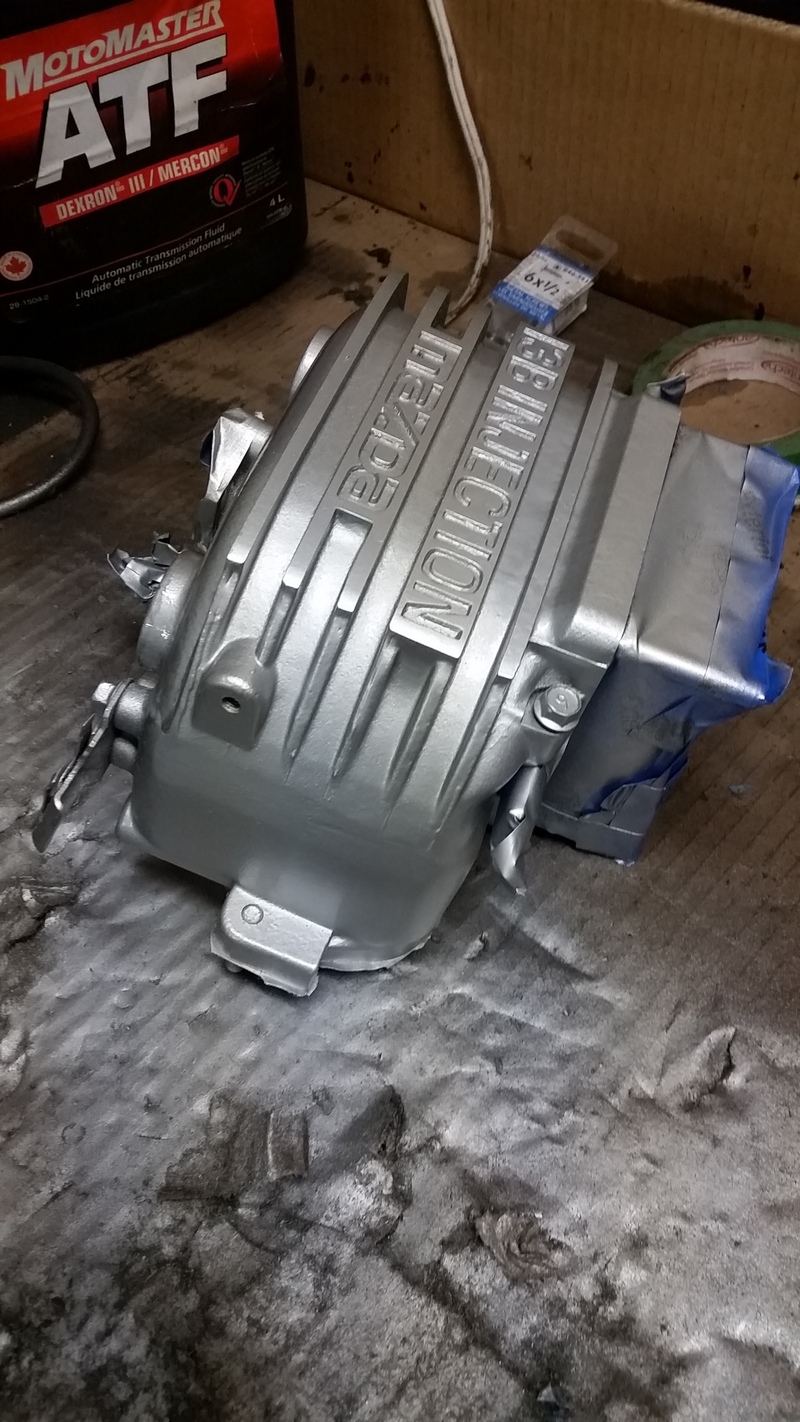
- Cleaned up most of the engine parts in prep for painting or polishing.
- Found a set of irons that will work and cleaned them, packed them up for shipping to get ported.
- Installed the new brake flex line.
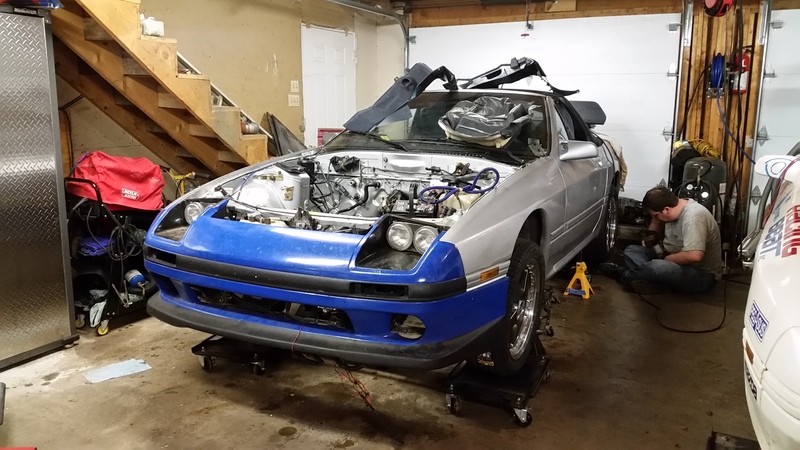
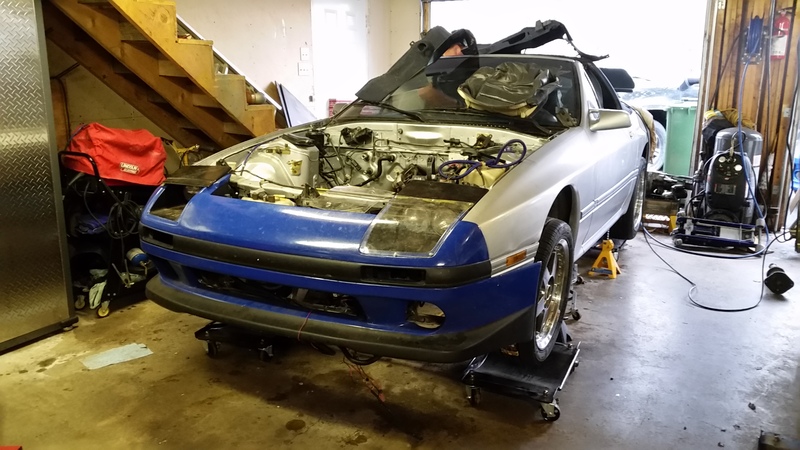
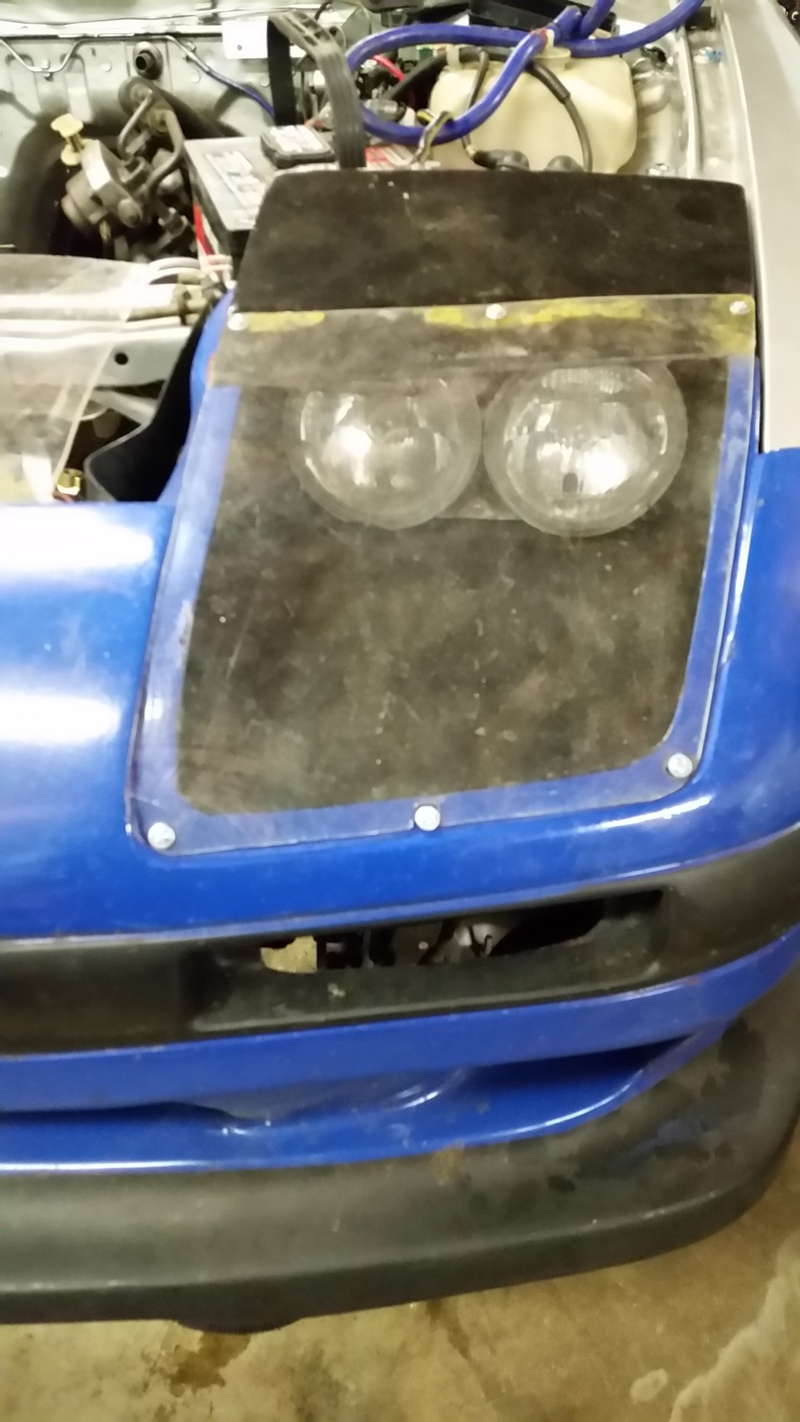
- Test fit the bumper and one of the headlight covers - I need to fab new covers out of the sheet of lexan I just bought and do a little fiberglass repair to the bumper around the fog lights, then sand it and prime it all one color. Wiring looks fairly straightforward, so I'll get that wired up shortly.
Waiting for all of my fittings and hose to arrive so I can fabricate all the fuel and oil lines. Also need to get the T2 front cover tapped for an AN fitting in the oil return line hole.
I found 2 trashed housings from friends of mine this weekend as well that I can steal FD exhaust port sleeves from - waiting for my super duper drill bits to get here to drill out the roll pins - had no success with a couple other DIY methods for getting those out. I'm going to tap the holes and use a set screw instead when it goes back together - countersunk so it lays just below the mating surface of the housing where it seals against the iron.
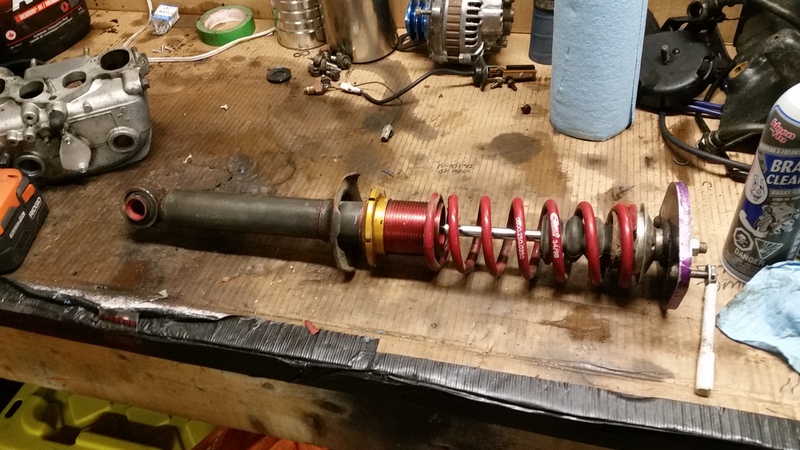
- Full suspension swap to KYB AGX's with Ground Control Sleeves and camber plates.
- Cleaned up most of the engine parts in prep for painting or polishing.
- Found a set of irons that will work and cleaned them, packed them up for shipping to get ported.
- Installed the new brake flex line.
- Test fit the bumper and one of the headlight covers - I need to fab new covers out of the sheet of lexan I just bought and do a little fiberglass repair to the bumper around the fog lights, then sand it and prime it all one color. Wiring looks fairly straightforward, so I'll get that wired up shortly.
Waiting for all of my fittings and hose to arrive so I can fabricate all the fuel and oil lines. Also need to get the T2 front cover tapped for an AN fitting in the oil return line hole.
I found 2 trashed housings from friends of mine this weekend as well that I can steal FD exhaust port sleeves from - waiting for my super duper drill bits to get here to drill out the roll pins - had no success with a couple other DIY methods for getting those out. I'm going to tap the holes and use a set screw instead when it goes back together - countersunk so it lays just below the mating surface of the housing where it seals against the iron.
 02-22-16, 08:57 AM
#50
Licensed Zip Tie Mechanic
Thread Starter
Updated to-do list:
February:
- Rebuild passengers seat (6 hours) (Just half of one seat to go now!! I was able to reuse some foam that was in good shape!)
- Install seats (1 hour)
- Get engine porting done (this is in progress) - going half bridge
- Put exhaust sleeves back on the housings I'm using - the guy before me removed them, good thing I have a spare set (a few hours tops) (waiting for drill bits)
- Create custom gasket for turbo-to-downpipe flange - since my turbo doesn't have a standard flange on it (30 min)
- Install e-fan and have it trigger off the ECU (1 hour)
- Install RE-Amemiya front bumper and wire up headlights (a few hours) (IN PROGRESS)
- Make new lexan headlight covers (2 hours) (IN PROGRESS)
- Install sideskirts (a few hours)
- Install S5 tails (30 min)
- Sand the car and fix any spots that need fixing (1 day)
- Order the rear diffuser (Shine)
March:
- Install boost control solenoid (1 hour)
- Install S5 rear bumper and moldings (a couple hours)
- Assemble engine with Atkins seal kit (a few hours)
- Install rebuilt engine with turbo transmission, Centerforce clutch, turbo clutch slave, turbo starter, Mazdatrix adapter driveshaft(a few hours)
- Install new fuel injectors (10 minutes)
- Fabricate AN oil lines and fuel lines to replace factory (all the fittings are coming for that) (1 hour)
- Replace turbo coolant line with better quality line (5 minutes)
- Have it vinyl wrapped (3 - 4 days)
- Reinstall rear window in the top (1 hour)
April:
- Install rear diffuser (2 hours)

