Jared's RB-7
 02-07-16, 11:34 PM
#1
Junior Member
Thread Starter

Join Date: Jan 2012
Location: Santa Clarita, Ca
Posts: 35
Likes: 0
Received 0 Likes
on
0 Posts
Jared's RB-7
Hello,
I suppose since this is official "day one" of me actually making an attempt to do this swap I should probably start documenting my progress.
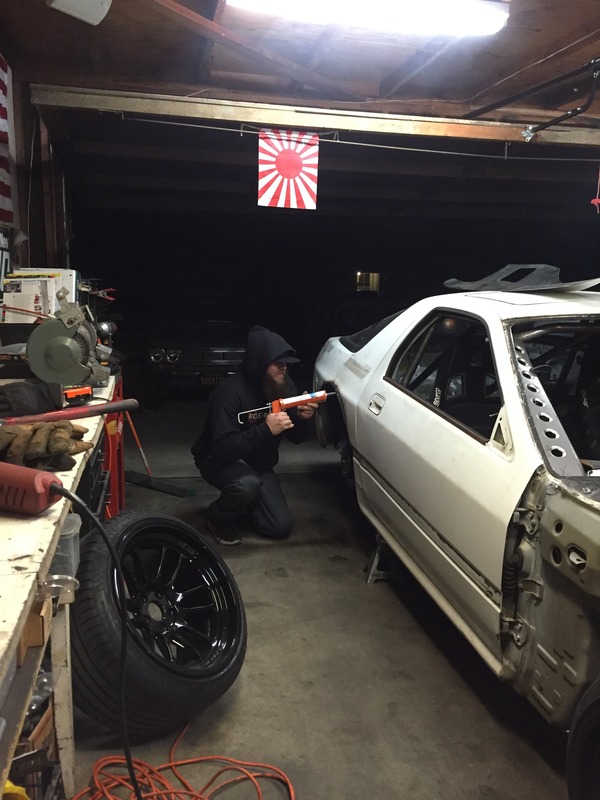
I had recently come to a stopping point with my '69 510 that I had been working on for the last year and apparently the word had gotten out that I was bored and needed a new project. I received a random text that there was an FC chassis a friend of a friend was trying to get rid of and was free for the taking. Myself being a Subaru and Datsun guy (weird mix I know) I was skeptical about the idea of a Mazda yet very excited about the idea of another obscure project. I decided to go take a look at it and upon arrival I realized that it was overall pretty clean. Additionally, the interior and engine were removed to include all four rotten tires, which wasn't really an issue. We bomb back over to my house and grab my spares and swap out the wheels. Shortly after, a phone call was made to the local towing company and the RX-7 was picked up and on its way to its new home.
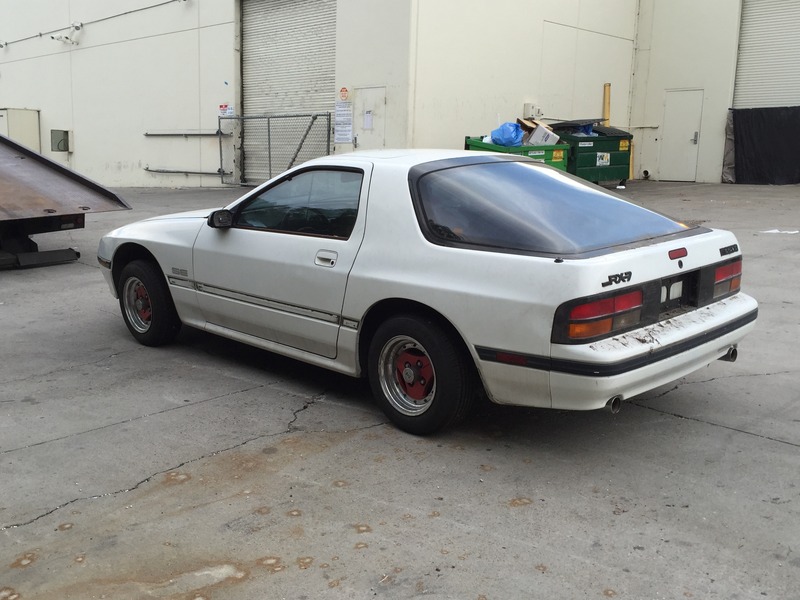
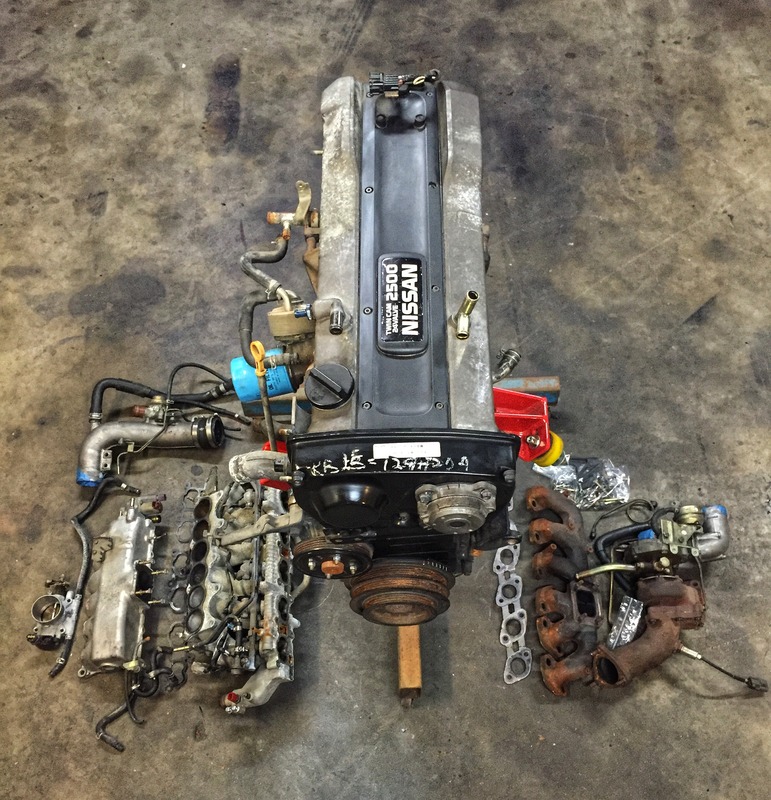
A couple days went by and I was contemplating on what engine to put in this beauty. I tossed around the idea of a LS, which bored me and I mildly entertained the JZ craze, but again didn't excite me by the unavailability of a decent transmission and commonality of the engines these days. I then decided that it needed something a bit more interesting and felt the desire to dive into some uncharted territory. I knew of an RB25DET swap in a S30 that was potentially for sale, so I called the friend and made an offer on the swap. To my surprise, the offer was accepted and another phone call I had a truck lined up to seal the deal. After I got the engine home and got it set up appropriately on a stand, I stripped all the stuff I assumed I wouldn't be needing and made an overall assessment of the purchase.
I suppose since this is official "day one" of me actually making an attempt to do this swap I should probably start documenting my progress.
I had recently come to a stopping point with my '69 510 that I had been working on for the last year and apparently the word had gotten out that I was bored and needed a new project. I received a random text that there was an FC chassis a friend of a friend was trying to get rid of and was free for the taking. Myself being a Subaru and Datsun guy (weird mix I know) I was skeptical about the idea of a Mazda yet very excited about the idea of another obscure project. I decided to go take a look at it and upon arrival I realized that it was overall pretty clean. Additionally, the interior and engine were removed to include all four rotten tires, which wasn't really an issue. We bomb back over to my house and grab my spares and swap out the wheels. Shortly after, a phone call was made to the local towing company and the RX-7 was picked up and on its way to its new home.
A couple days went by and I was contemplating on what engine to put in this beauty. I tossed around the idea of a LS, which bored me and I mildly entertained the JZ craze, but again didn't excite me by the unavailability of a decent transmission and commonality of the engines these days. I then decided that it needed something a bit more interesting and felt the desire to dive into some uncharted territory. I knew of an RB25DET swap in a S30 that was potentially for sale, so I called the friend and made an offer on the swap. To my surprise, the offer was accepted and another phone call I had a truck lined up to seal the deal. After I got the engine home and got it set up appropriately on a stand, I stripped all the stuff I assumed I wouldn't be needing and made an overall assessment of the purchase.
 02-07-16, 11:35 PM
#2
Junior Member
Thread Starter
Join Date: Jan 2012
Location: Santa Clarita, Ca
Posts: 35
Likes: 0
Received 0 Likes
on
0 Posts
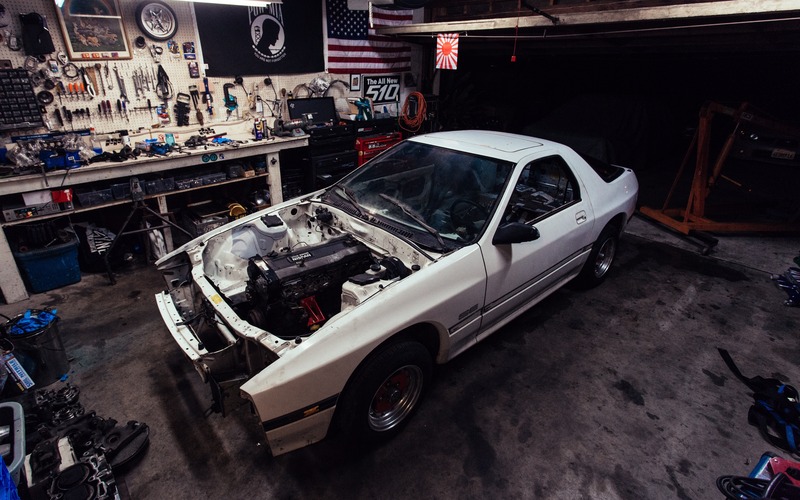
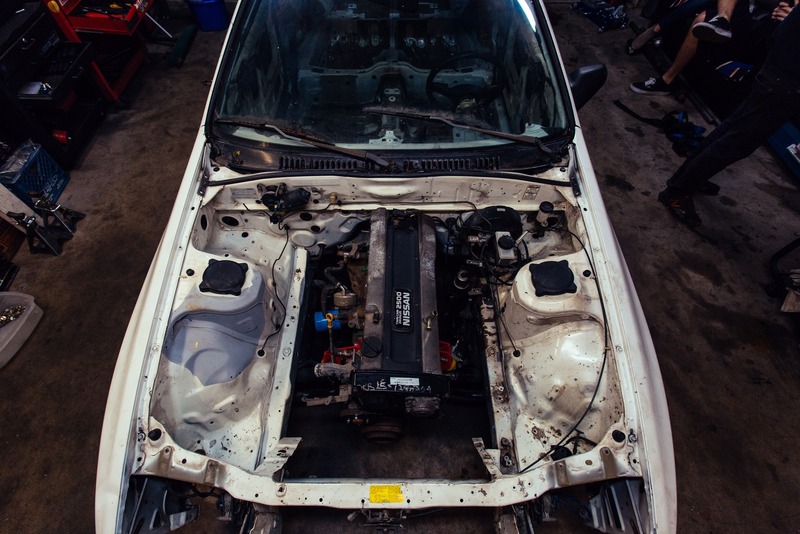
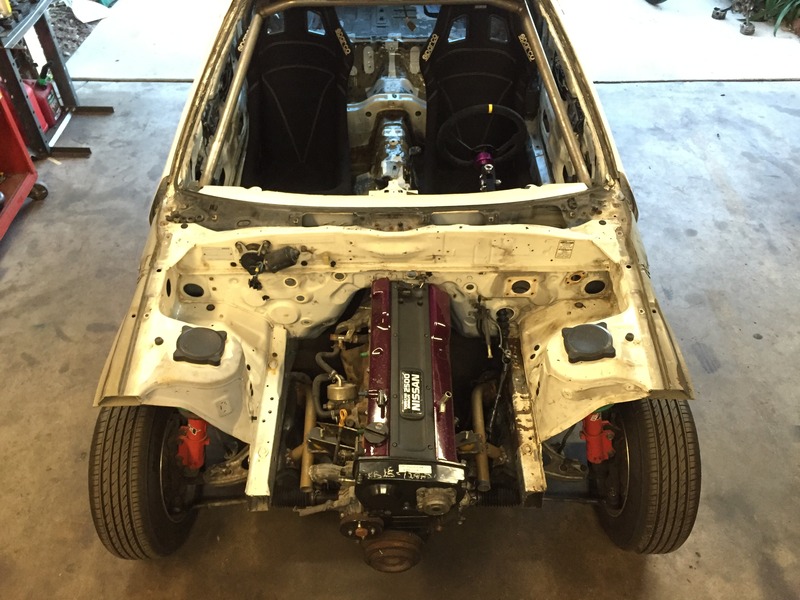
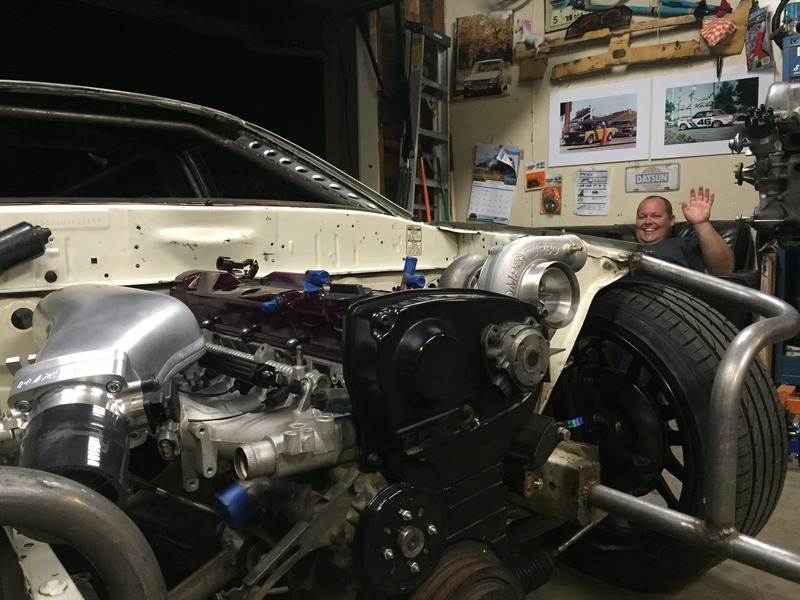
I was able to fit the engine in after work on Friday. I was able to use the Engine Hoist and a Transmission Jack to wiggle and shimmy the engine and transmission into the appropriate location. Surprisingly, the engine fit a lot better than I anticipated. I carefully rested the engine on the powerstering rack and crossmember just to get an idea of what I needed to move around. The mounts that came with the swap were installed to get an idea of what I was working with.
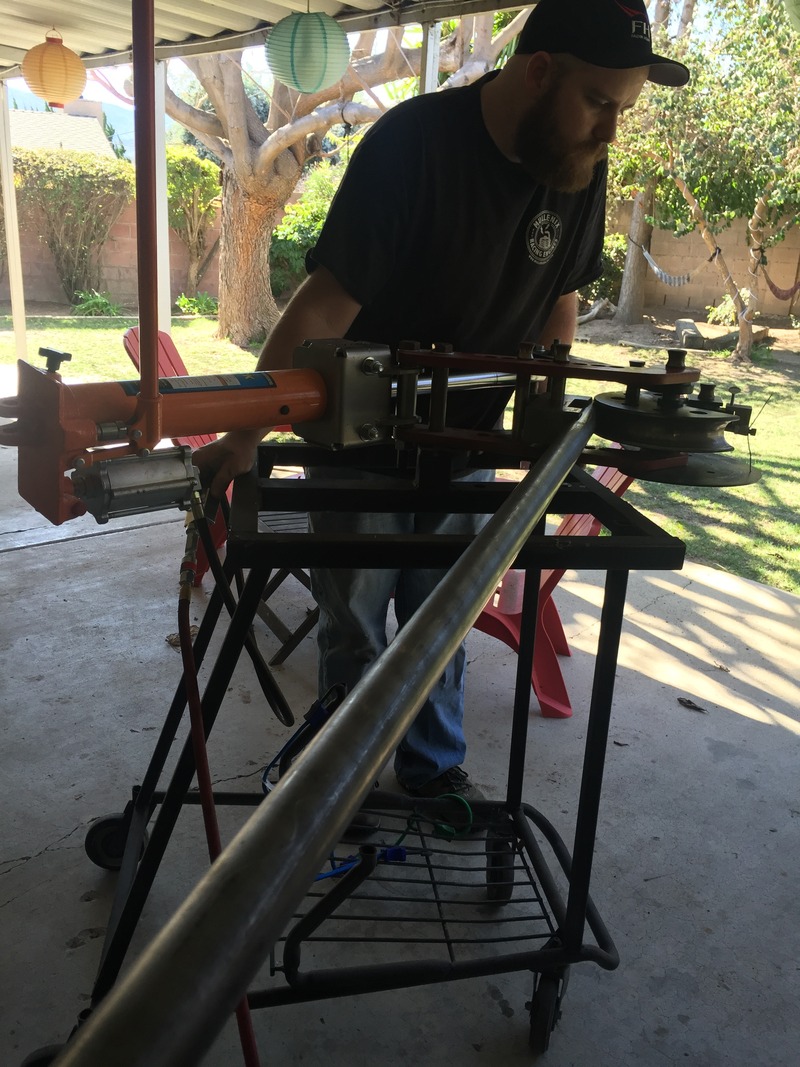
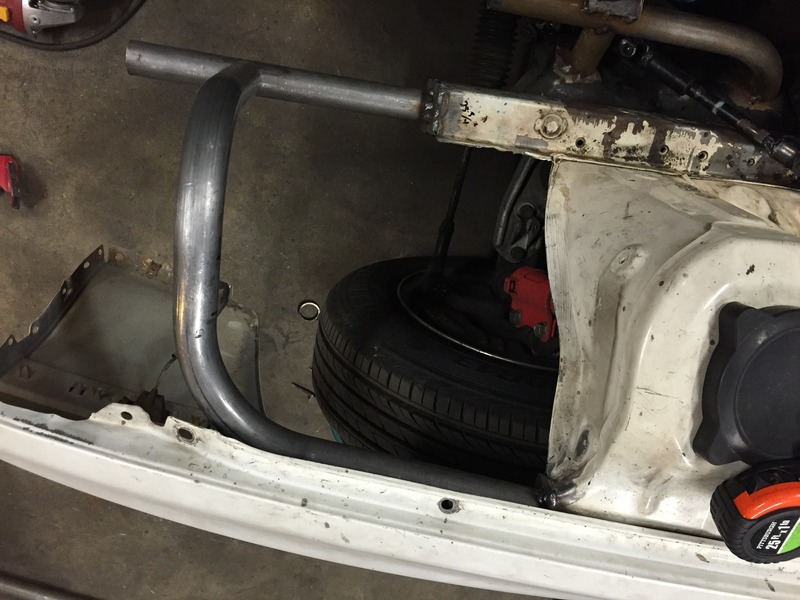
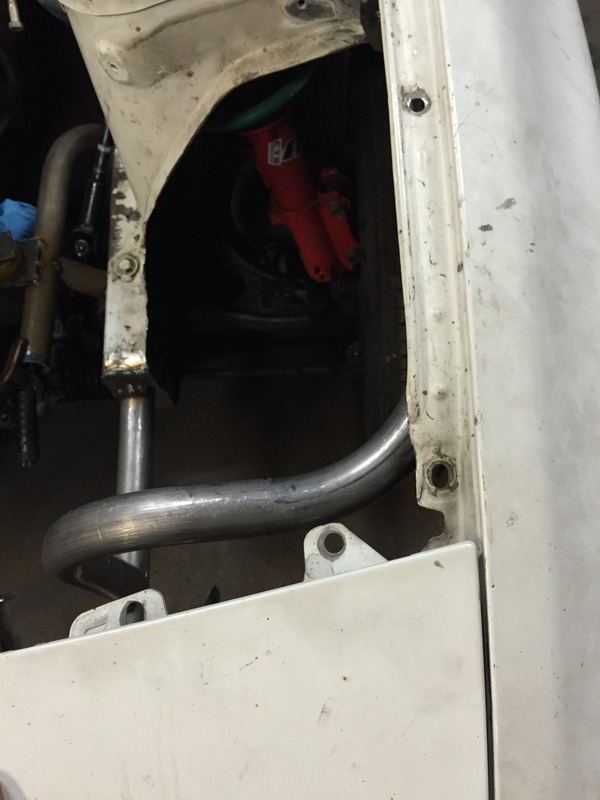
The following day, with the help of my good friend Clint, the car was raised up and measurements were taken to find the center of the engine and then held in place. A couple sections of DOM Tubing was bent in 90* towards the end and a couple other pieces notched. His Shopping Cart Tube Bender and Notcher suit the job very well.
3/16” Mild Steel was then cut and bent in various shapes to make the engine mount pedestals. The provided Engine mounts already had the bolt pattern, so of course those were also utilized. I didn't have a plasma cutter, so I had to revert to the basics and use a DA Grinder to cut the plate steel and a Jig saw, yes a Jig saw for the engine mount to crossmember sections. Keep in mid that this is all just tacked in and there is quite a bit of cleaning up to do to include the welding.
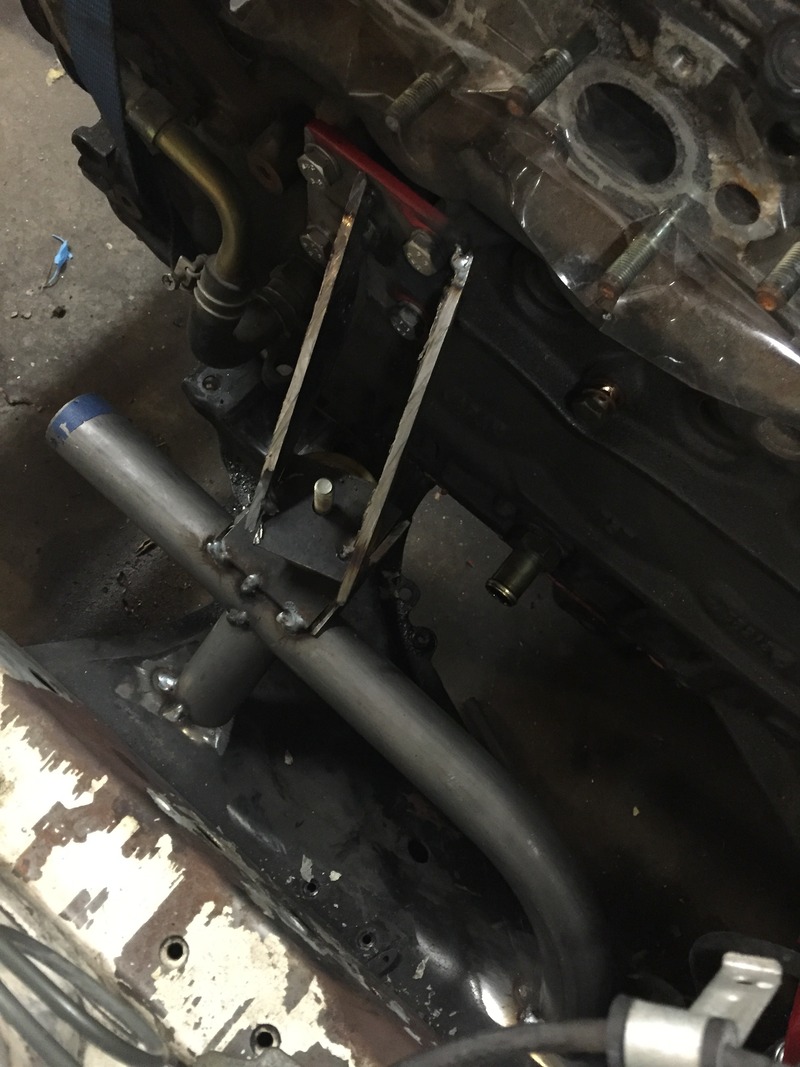
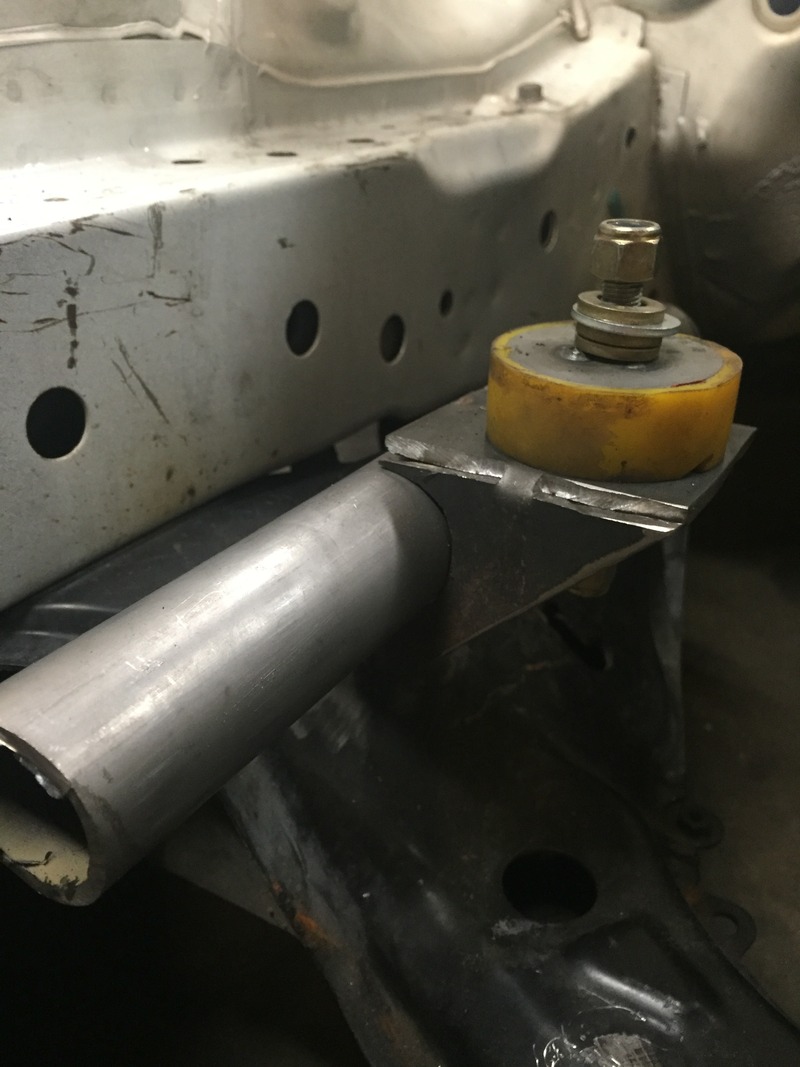
In the end, this is the addition to the crossmember that was created and I think it will do just fine. I was able to install the steering rack prior to removing the engine all of the way. I will need to lower the rack about 1” and it looks like the steering rod assembly should have no problem clearing the mounting assembly that was made.

The following day, with the help of my good friend Clint, the car was raised up and measurements were taken to find the center of the engine and then held in place. A couple sections of DOM Tubing was bent in 90* towards the end and a couple other pieces notched. His Shopping Cart Tube Bender and Notcher suit the job very well.
3/16” Mild Steel was then cut and bent in various shapes to make the engine mount pedestals. The provided Engine mounts already had the bolt pattern, so of course those were also utilized. I didn't have a plasma cutter, so I had to revert to the basics and use a DA Grinder to cut the plate steel and a Jig saw, yes a Jig saw for the engine mount to crossmember sections. Keep in mid that this is all just tacked in and there is quite a bit of cleaning up to do to include the welding.
In the end, this is the addition to the crossmember that was created and I think it will do just fine. I was able to install the steering rack prior to removing the engine all of the way. I will need to lower the rack about 1” and it looks like the steering rod assembly should have no problem clearing the mounting assembly that was made.
 02-27-16, 10:07 AM
#4
Junior Member
Thread Starter
Join Date: Jan 2012
Location: Santa Clarita, Ca
Posts: 35
Likes: 0
Received 0 Likes
on
0 Posts
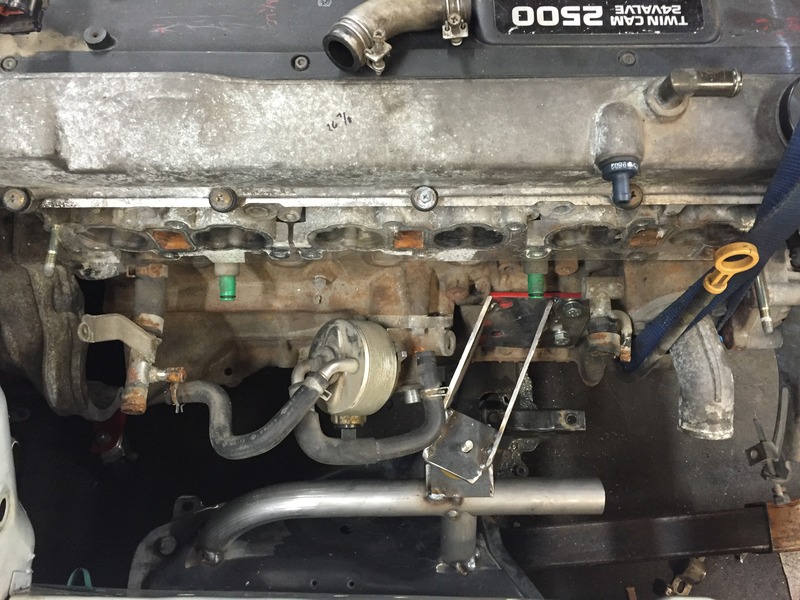
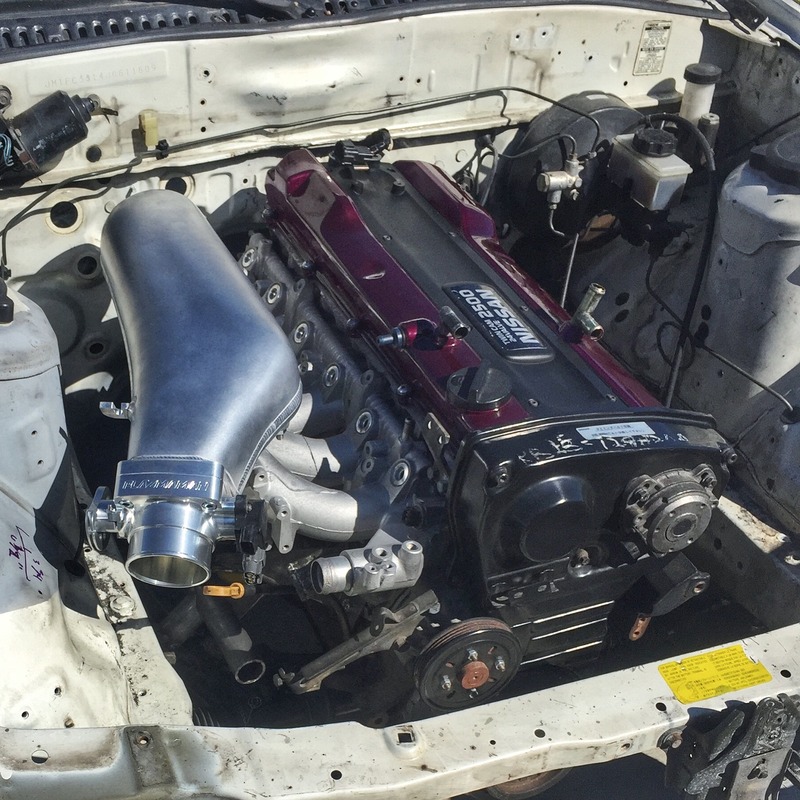
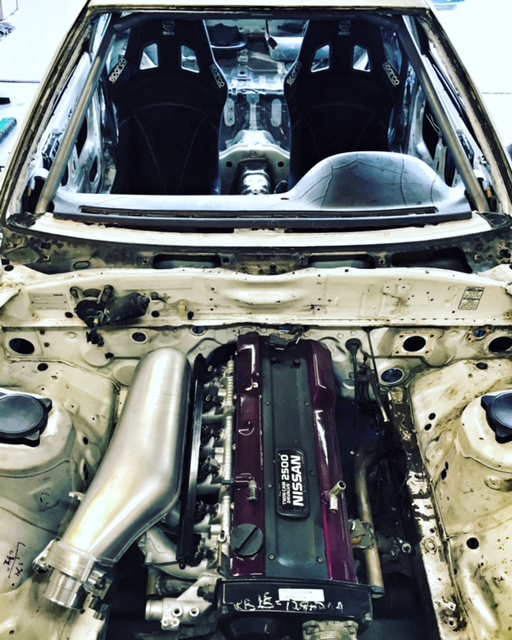
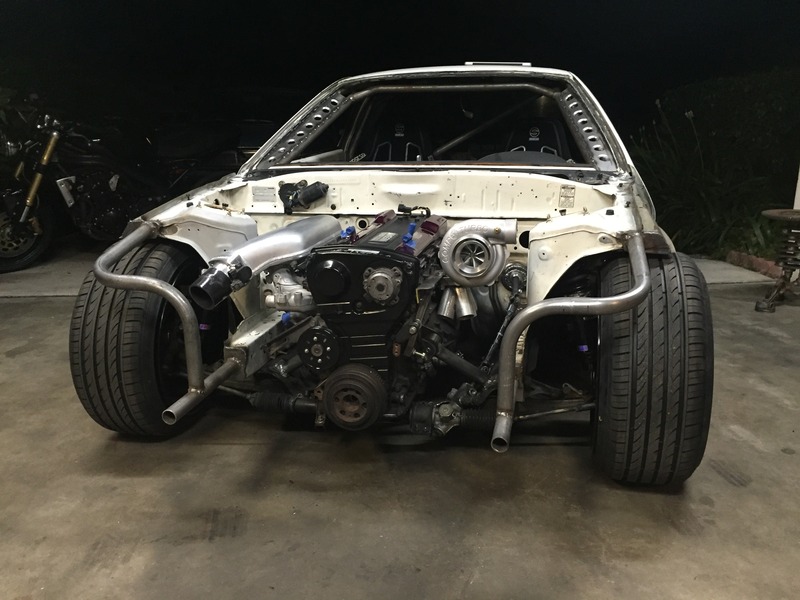
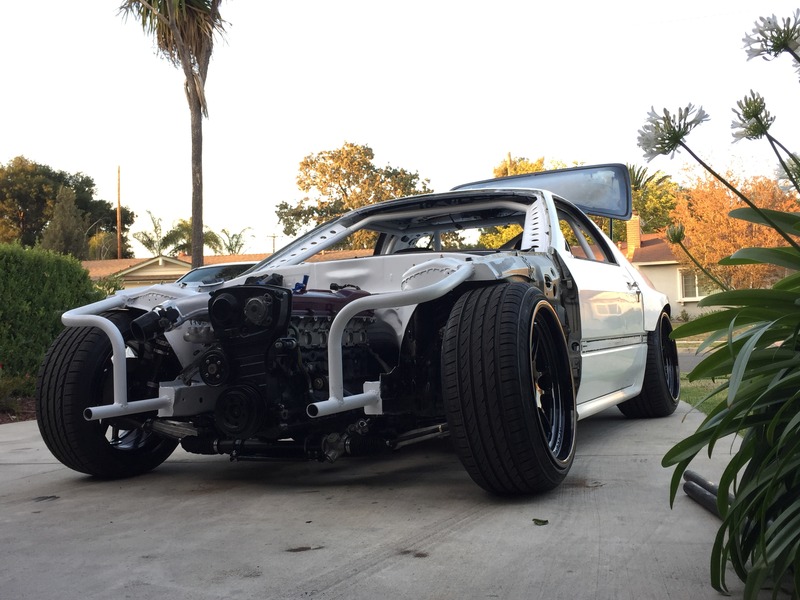
So far the Engine has been fitted with the correct aesthetically desirable 13* angle. An added benefit is that the Transmission sits properly upright in the tunnel with the engine slanted as normal.
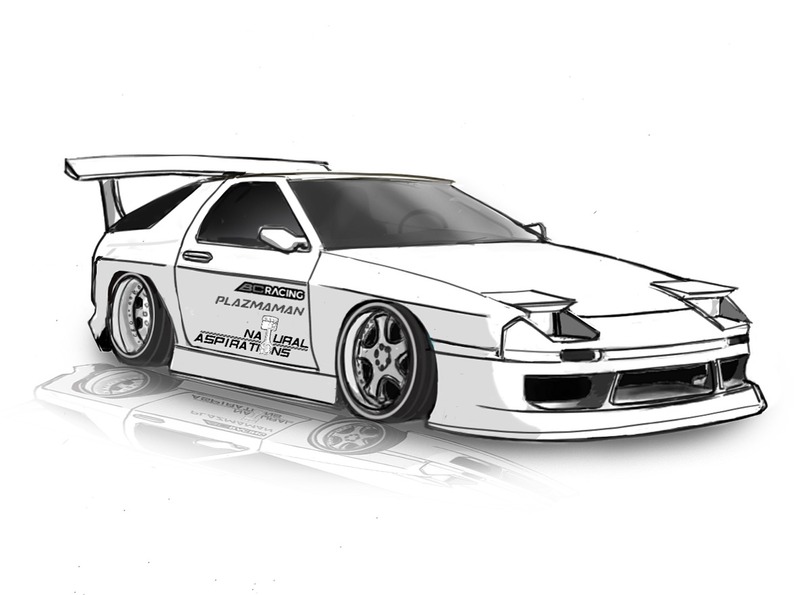
Also, a rendering of the RB-7 has been mocked up. Ideally, this is the direction that I intend to take the vehicle.
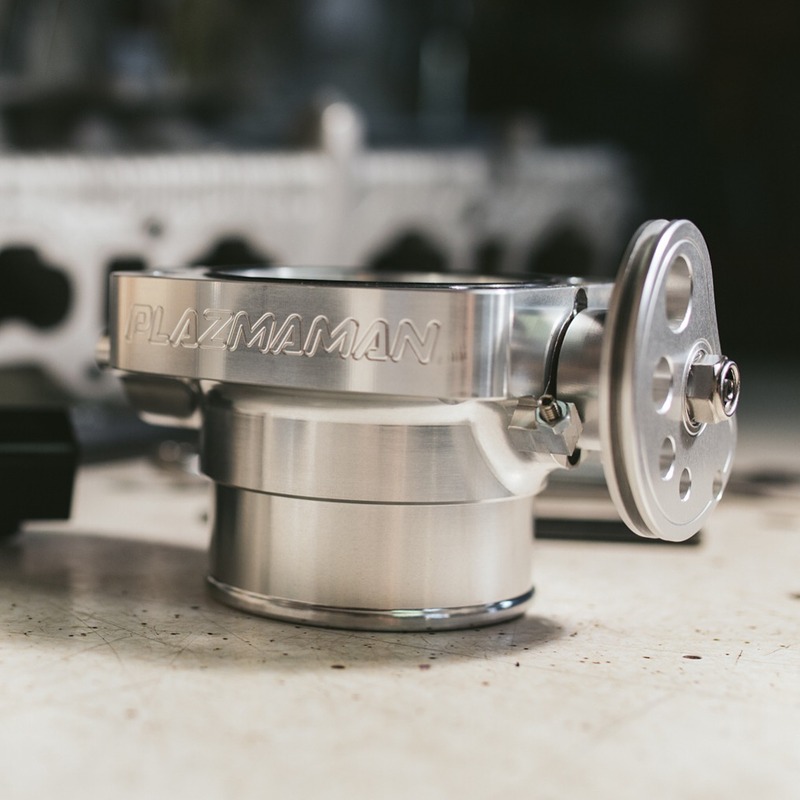
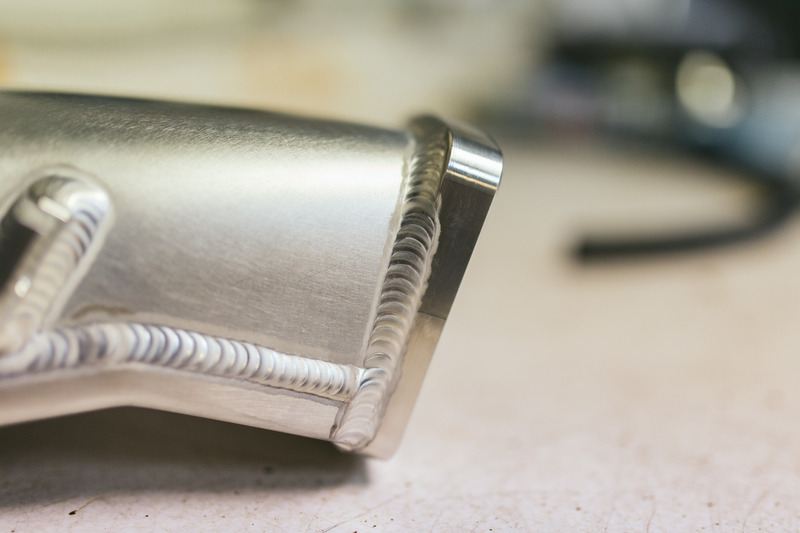
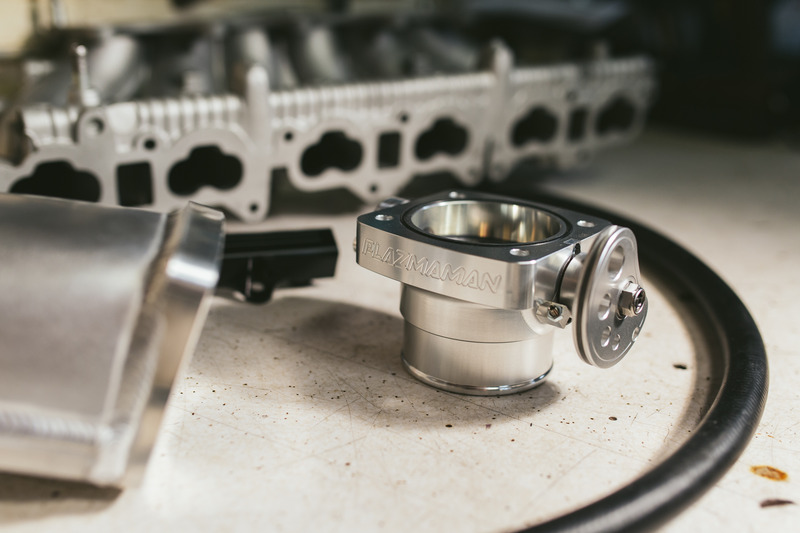
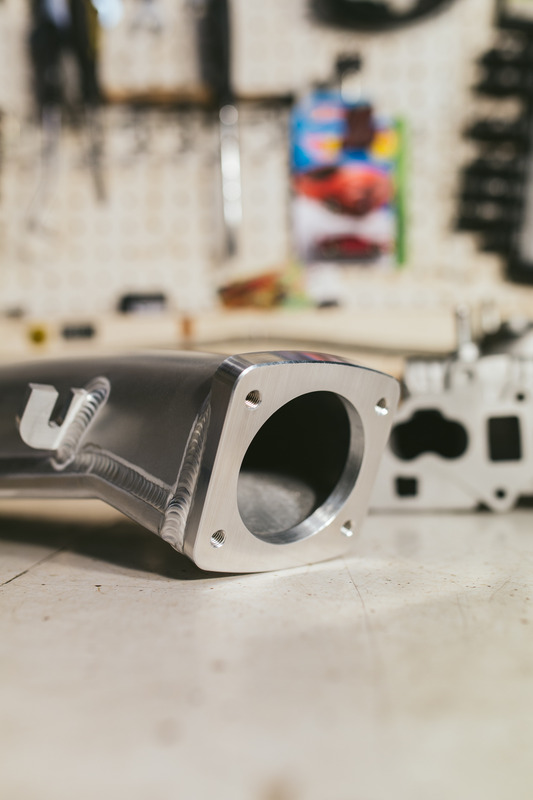
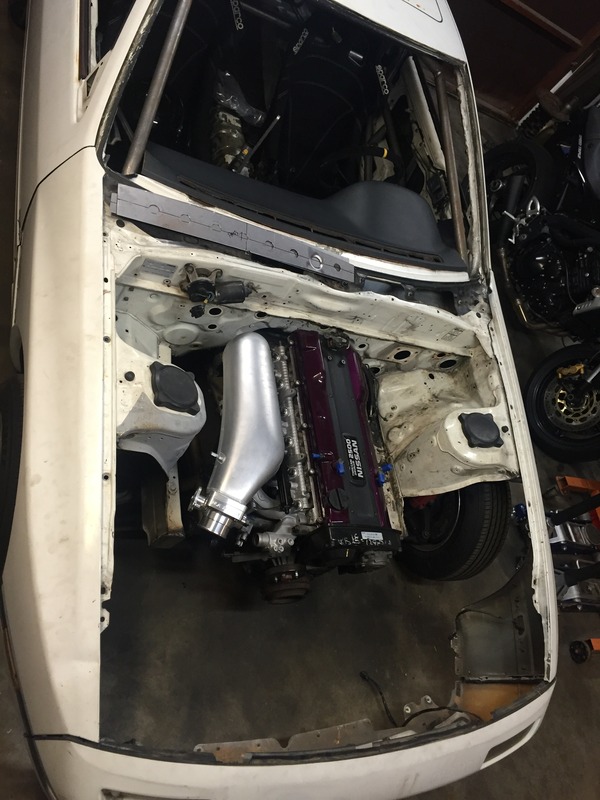
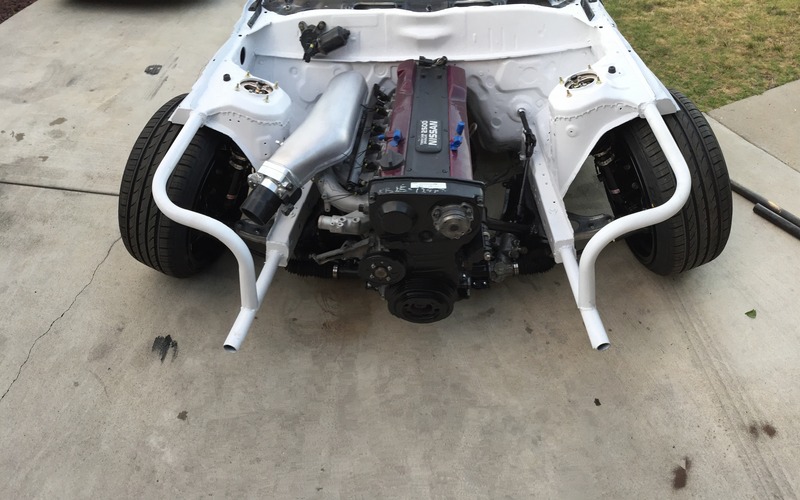
I have been working with a couple people so far in terms of getting support with the build. I have received an intake plenum, throttle body and fuel rail from Plazmaman. The quality of work with these parts is literally insane. I did a little test fitting with the manifold on the engine while mounted and there is plenty of clearance between the plenum and the shock tower.
Also, a rendering of the RB-7 has been mocked up. Ideally, this is the direction that I intend to take the vehicle.
I have been working with a couple people so far in terms of getting support with the build. I have received an intake plenum, throttle body and fuel rail from Plazmaman. The quality of work with these parts is literally insane. I did a little test fitting with the manifold on the engine while mounted and there is plenty of clearance between the plenum and the shock tower.
02-28-16, 10:43 AM
#6
Junior Member
Thread Starter
Join Date: Jan 2012
Location: Santa Clarita, Ca
Posts: 35
Likes: 0
Received 0 Likes
on
0 Posts
More pics of the manifold and fuel rail I failed to post yesterday:
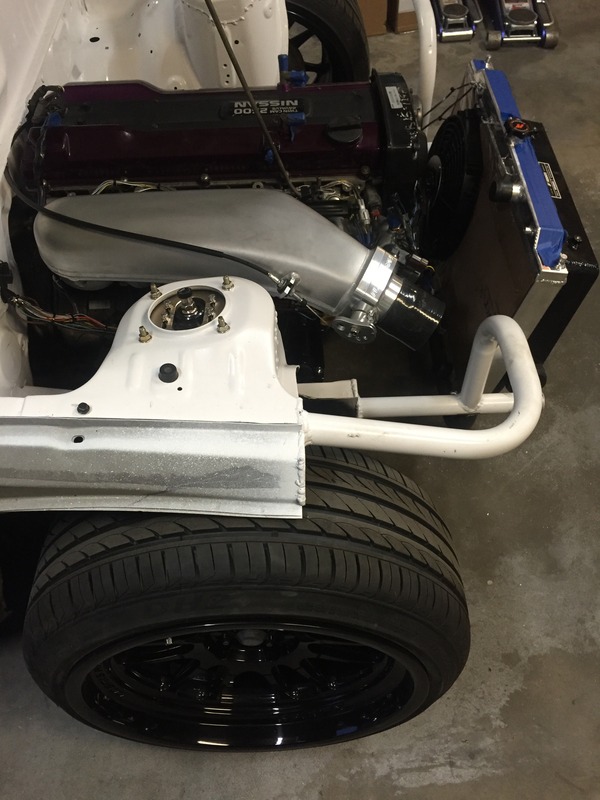
I also did a little test fitting to see how much clearance I have when the engine is sitting in the RB-7 with the Plazmaman Manifold. It looks like I still will be able to tub the wheel wells.
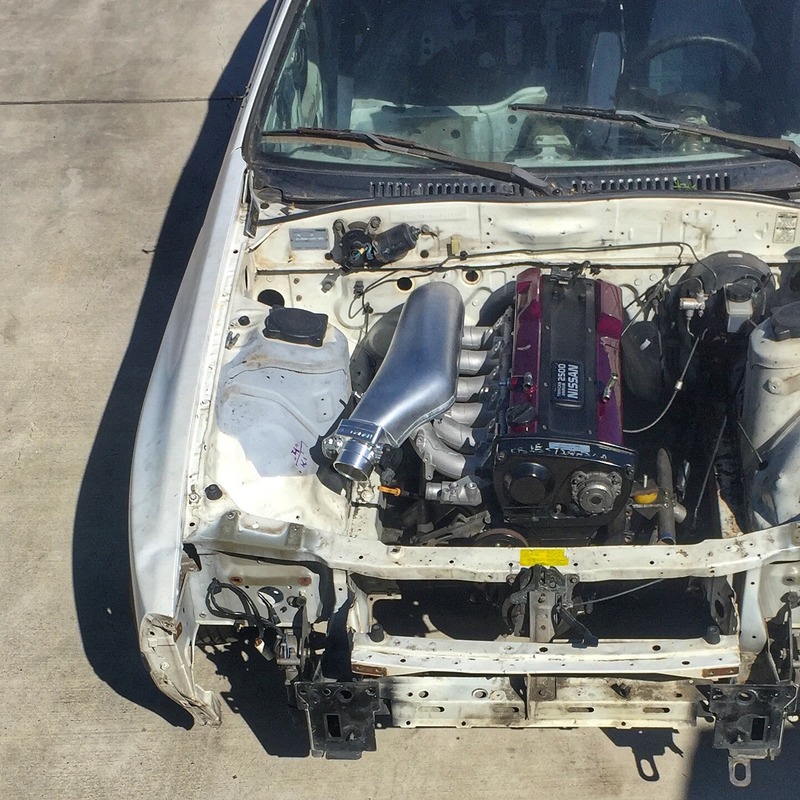
I also did a little test fitting to see how much clearance I have when the engine is sitting in the RB-7 with the Plazmaman Manifold. It looks like I still will be able to tub the wheel wells.
03-03-16, 10:55 PM
#7
Junior Member
Thread Starter
Join Date: Jan 2012
Location: Santa Clarita, Ca
Posts: 35
Likes: 0
Received 0 Likes
on
0 Posts
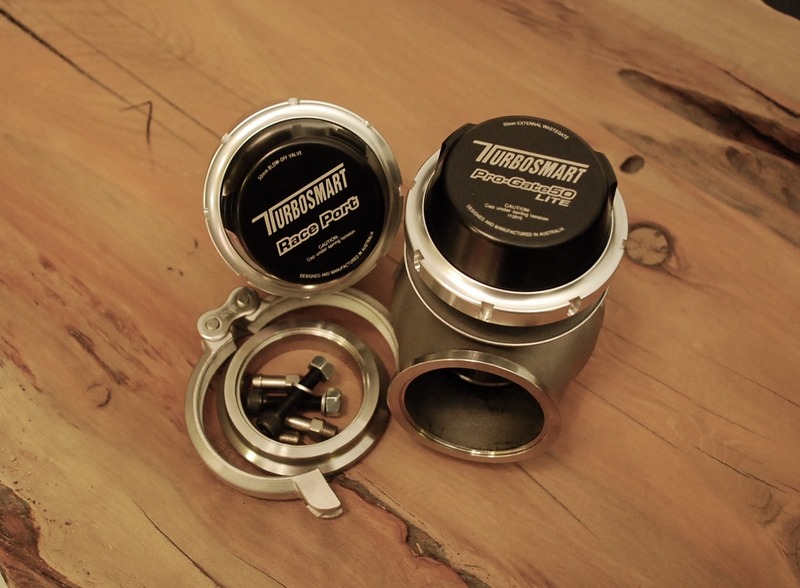
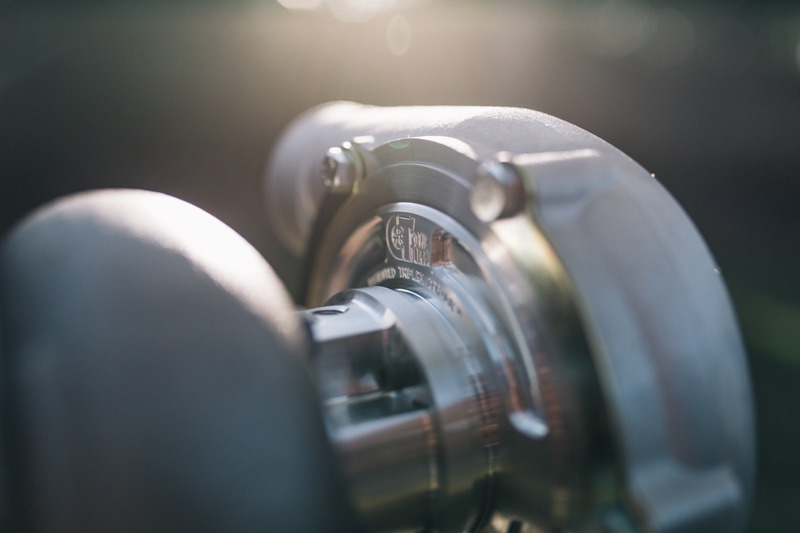
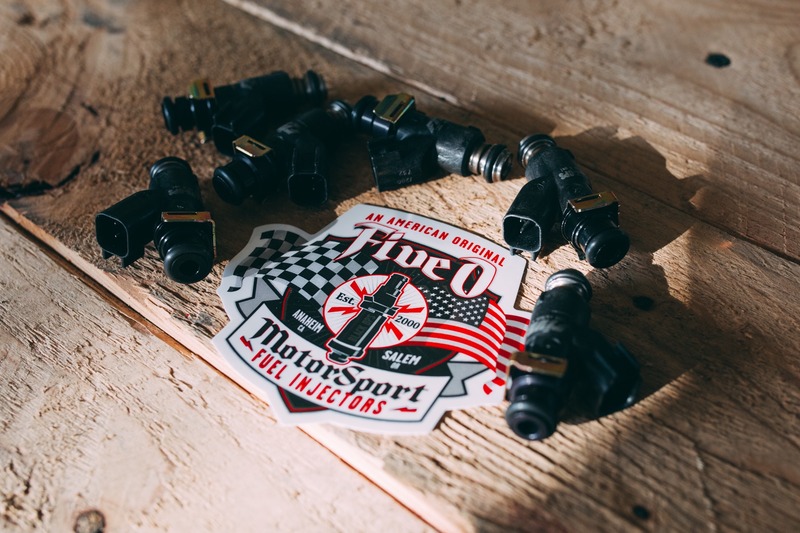
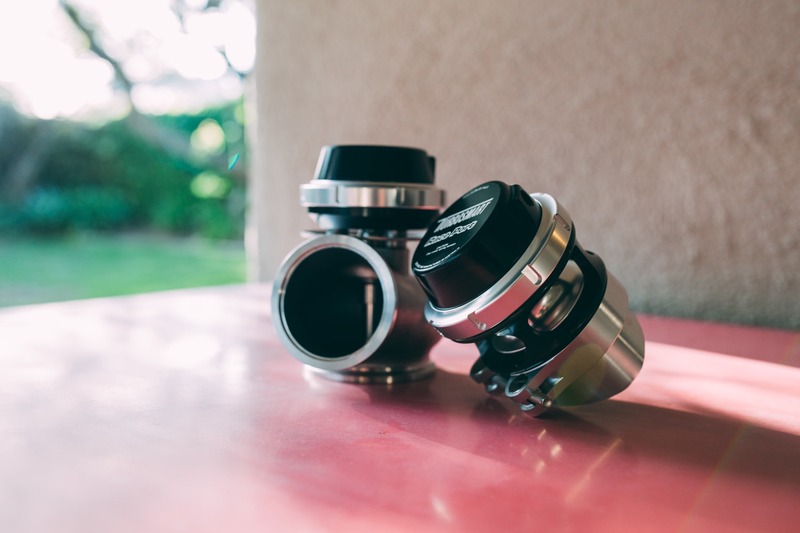
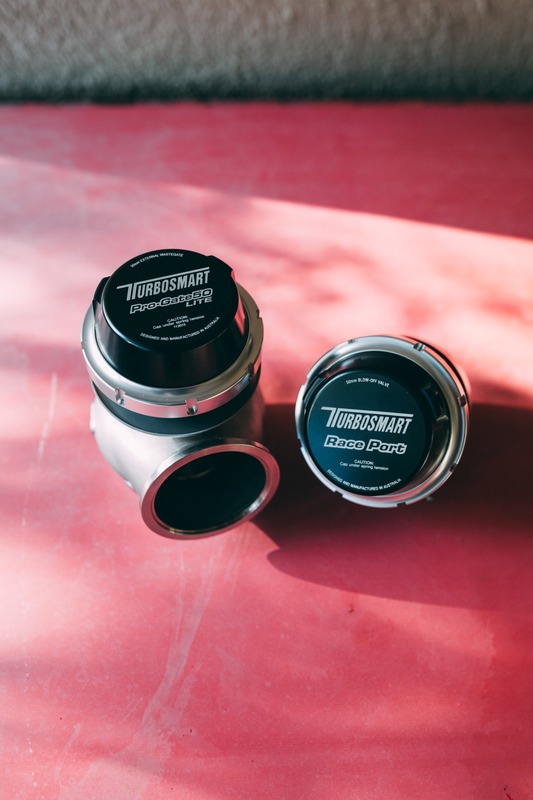
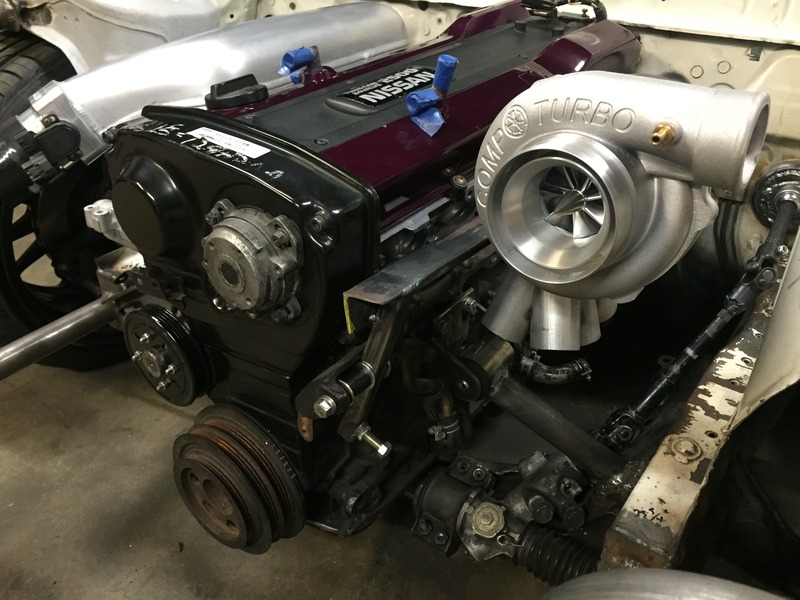
I would like to give a big shout out to Chris over at Natural Aspirations. He has been a crazy amount of help with this build so far. In the past he has offered guidance for the CA18DET powered 510 I built in addition to tuning the vehicle with Nistune. So far, Chris has facilitated the purchase of a 6262 Comp Turbo that is to come with a Billet wheel, Billet center section and triple ceramic ball bearings. Additionally, Five o 1200 cc injectors will fuel the fire. The supporting Waste Gate and BOV are by Turbonetics. Here is a pic of the Wastegate and BOV. Photos of the injectors and Turbo to come…
Trending Topics
03-07-16, 08:32 PM
#8
Junior Member
Thread Starter
Join Date: Jan 2012
Location: Santa Clarita, Ca
Posts: 35
Likes: 0
Received 0 Likes
on
0 Posts
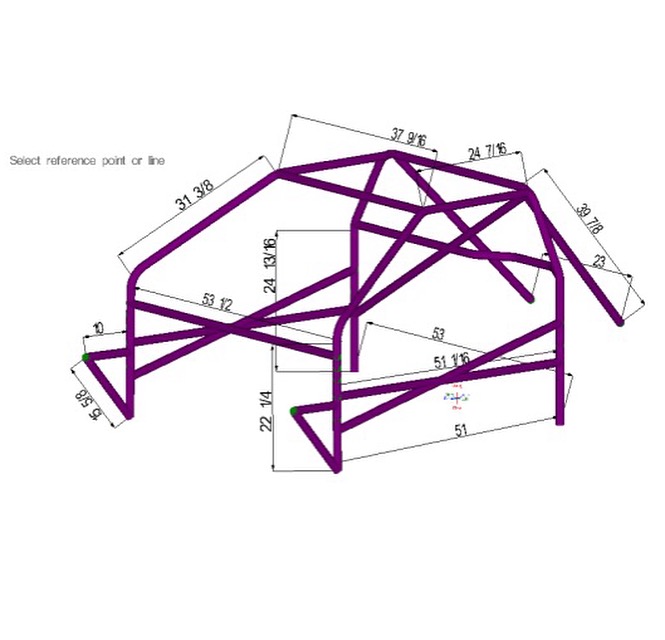
I was messing around with bend tech software this weekend and was able to come up with a roll cage design that should do the trick to facilitate amateur hour on the slide track. The software is pretty neat; the ability to print off a master materials list, cut and angle steps to include templates are all available in .pdf format after the export is complete. The dimensions are close, but not final. I will do another verification prior to actually cutting and bending. If all goes well I should be able to start in the next week or so. The tubing will be .090 1.5” 1025 Mild Steel.
 04-04-16, 11:07 PM
#12
Junior Member
Thread Starter
Join Date: Jan 2012
Location: Santa Clarita, Ca
Posts: 35
Likes: 0
Received 0 Likes
on
0 Posts
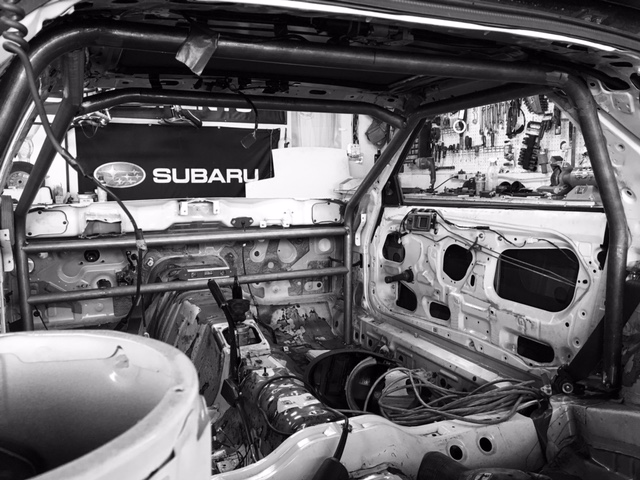
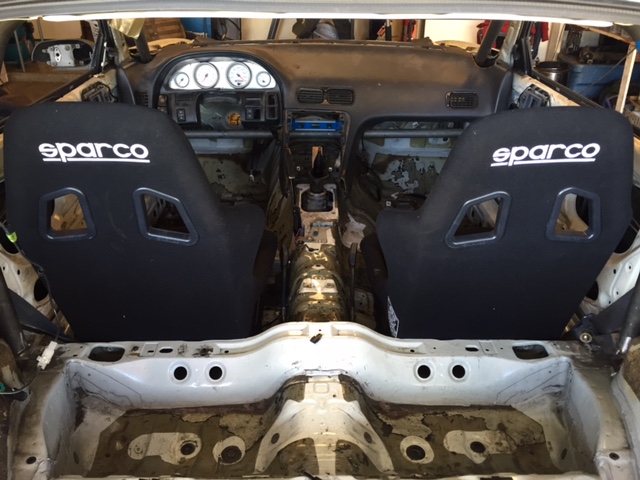
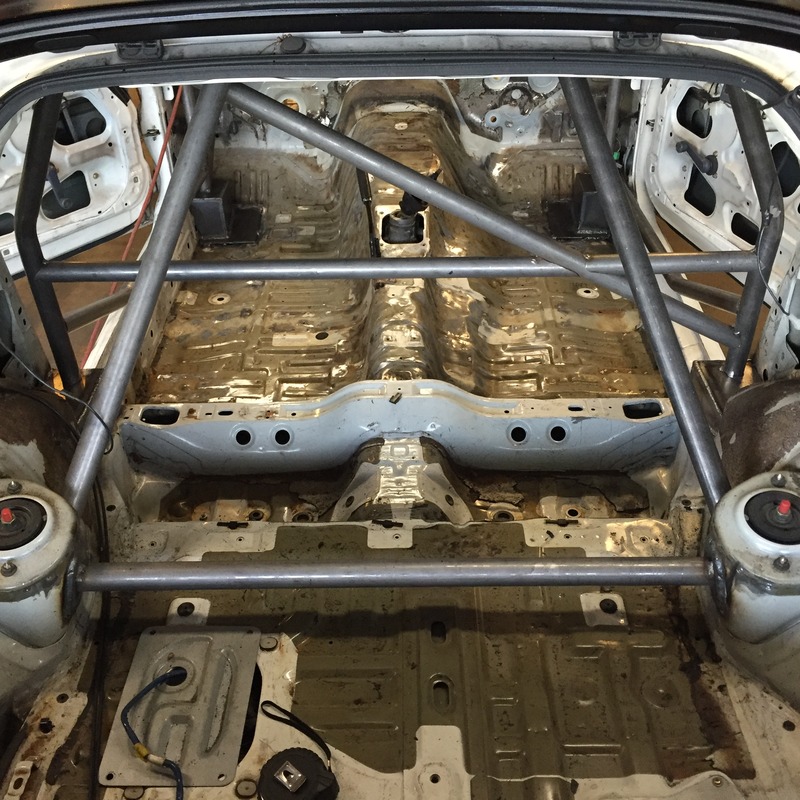
I recently started working on the roll cage over the weekend. I used .095 DOM to fill the cabin to include mocking up the sparco seats an S13 dash. The lower bar naturally wont be there, but it is keeping the upright portion vertical while the floor plates and boxes are being installed. “A” and “B” pillar dimple die gussets, door bars and rear bracing is coming up next and then it’s onto the tubed front end.
 05-11-16, 12:19 AM
#15
Junior Member
Thread Starter
Join Date: Jan 2012
Location: Santa Clarita, Ca
Posts: 35
Likes: 0
Received 0 Likes
on
0 Posts
I have been away for a bit due to work, but I had a couple days over the last couple weekends to catch back up.
I was able to get 90% of the roll cage finished up. It is all tacked in place except for the halo to front drop down bars, which are fully welded. The four corners are boxed in with 1/8” plate steel. It took a couple bars to get the symmetrical offset from A pillar to rear halo while keeping close to the roof line. I still need to install the upper door bars with vertical mounts, gussets along the A pillar, door bars and rear halo.
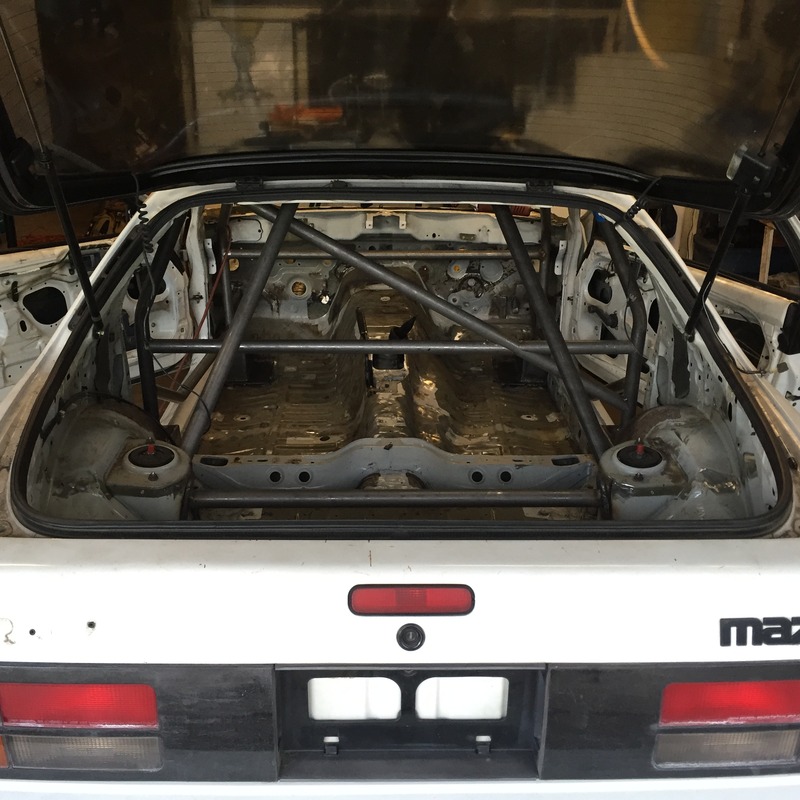
I also thought it would be a good idea to cut off the front endo for a tube front end. I was pretty surprised as to how much the removed sections weighed.
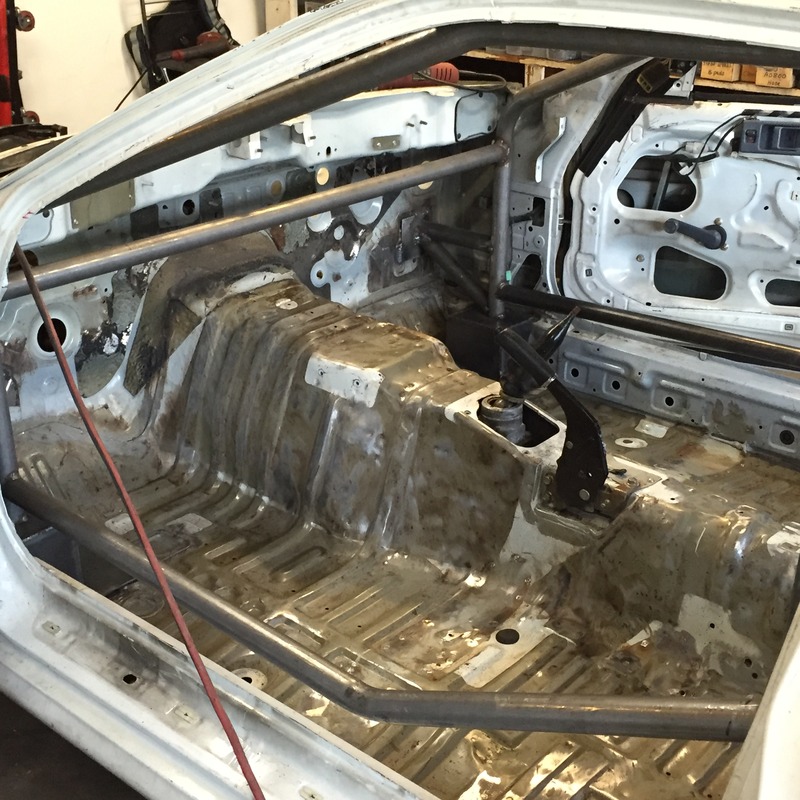
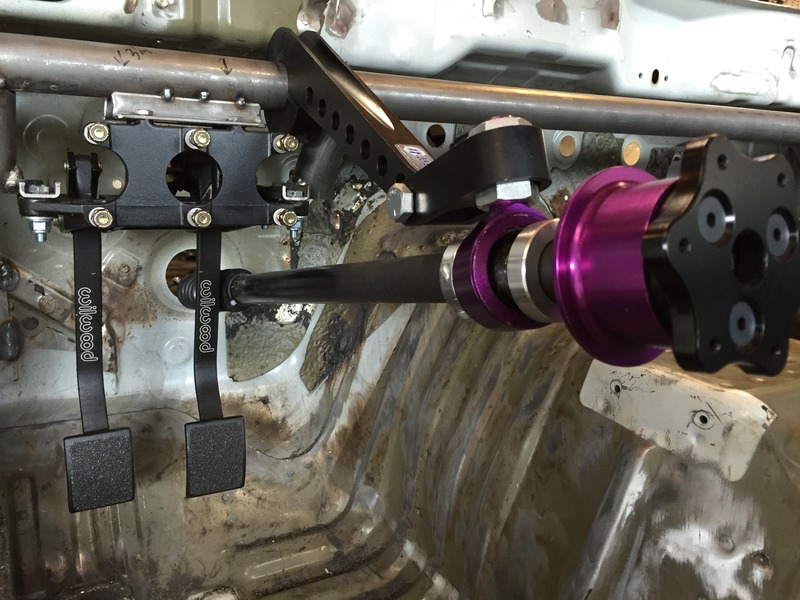
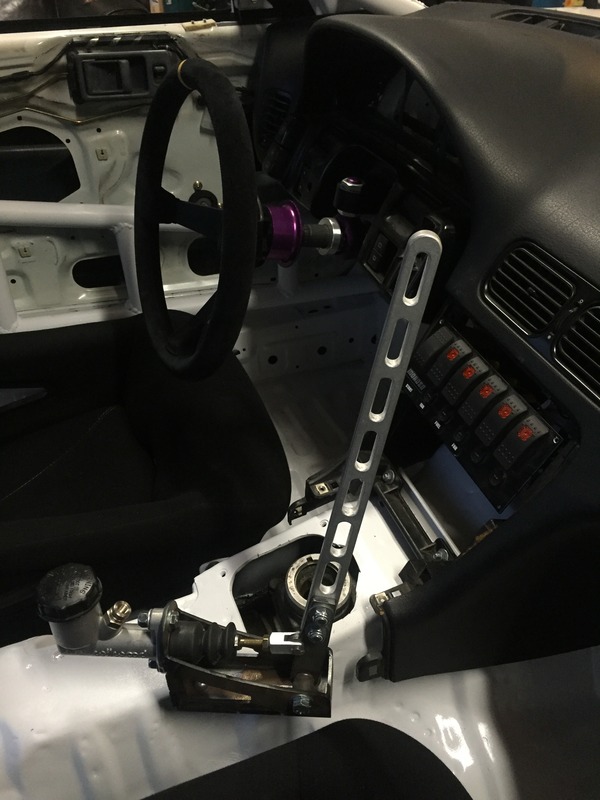
The floor pans were cleaned up in the cabin and in addition to mounting a wilwood reverse swing pedal mount. A speedway steering column was also mounted into the cabin via the roll cage horizontal bash bar.
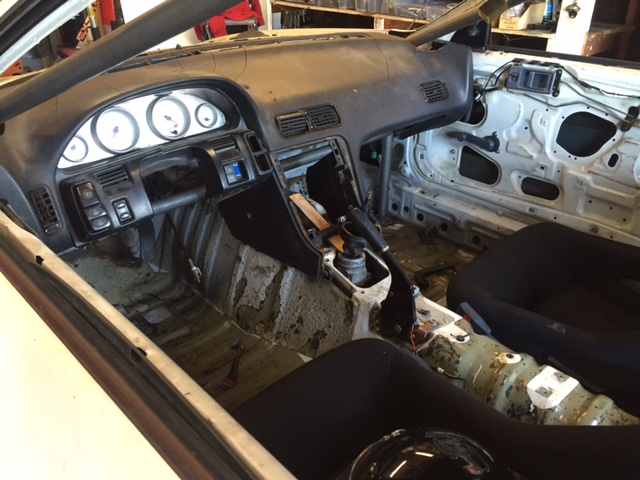
I then was able to make some tabs along the lower windshield area and installed some nutserts to properly mount the dash. I had to trim a little out for the drop down bars on the cage. Overall I feel the dash fits pretty good to include the steering column and wheel placement.

I was able to get 90% of the roll cage finished up. It is all tacked in place except for the halo to front drop down bars, which are fully welded. The four corners are boxed in with 1/8” plate steel. It took a couple bars to get the symmetrical offset from A pillar to rear halo while keeping close to the roof line. I still need to install the upper door bars with vertical mounts, gussets along the A pillar, door bars and rear halo.
I also thought it would be a good idea to cut off the front endo for a tube front end. I was pretty surprised as to how much the removed sections weighed.
The floor pans were cleaned up in the cabin and in addition to mounting a wilwood reverse swing pedal mount. A speedway steering column was also mounted into the cabin via the roll cage horizontal bash bar.
I then was able to make some tabs along the lower windshield area and installed some nutserts to properly mount the dash. I had to trim a little out for the drop down bars on the cage. Overall I feel the dash fits pretty good to include the steering column and wheel placement.
05-29-16, 10:34 AM
#16
Junior Member
Thread Starter
Join Date: Jan 2012
Location: Santa Clarita, Ca
Posts: 35
Likes: 0
Received 0 Likes
on
0 Posts
I stuck the front fenders back on along with the stock bumper to see what kind of clearance I have. Look like there is enough for a intercooler and radiator.
I had some scrap DOM tubing laying around, so I used an existing 90*, measured and added a 15* offset to account for the front fender line that comes forward off of the shock tower.
Passenger side
I need to run the stock headlights, so I extended it far enough so that I can still use the classy pop up lights.
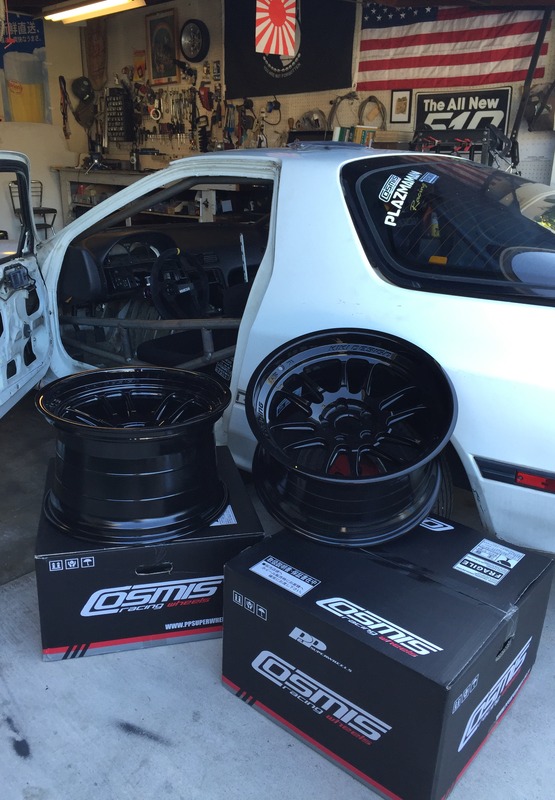
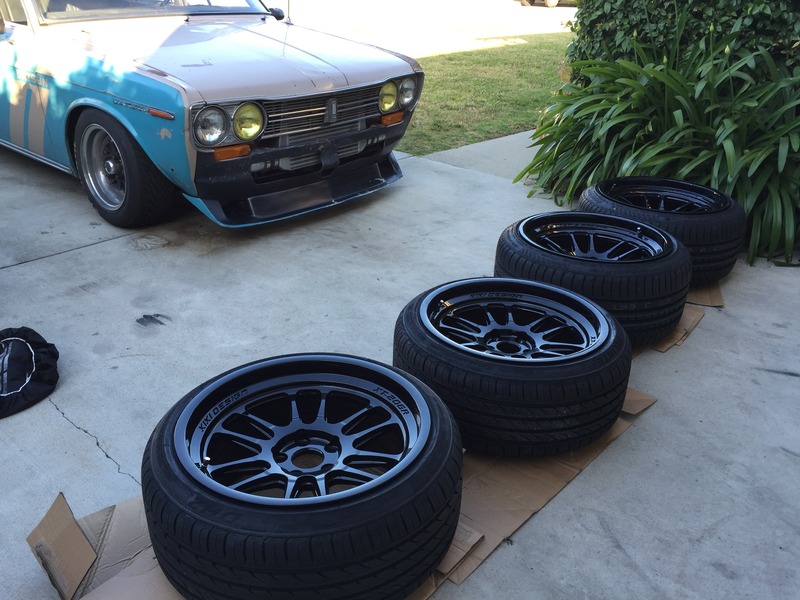
The wheels also arrived this weekend. Sponsorship support by Cosmis provided wheels in 18x11 +8 and 18x9.5 +10
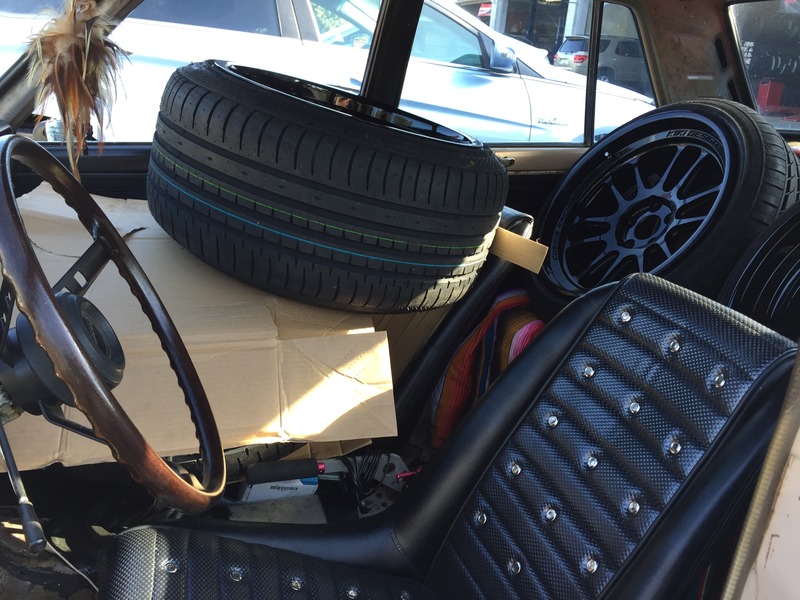
Fitting four wheels with tires in a Datsun 510 is pretty interesting.
Mounted and ready for installation
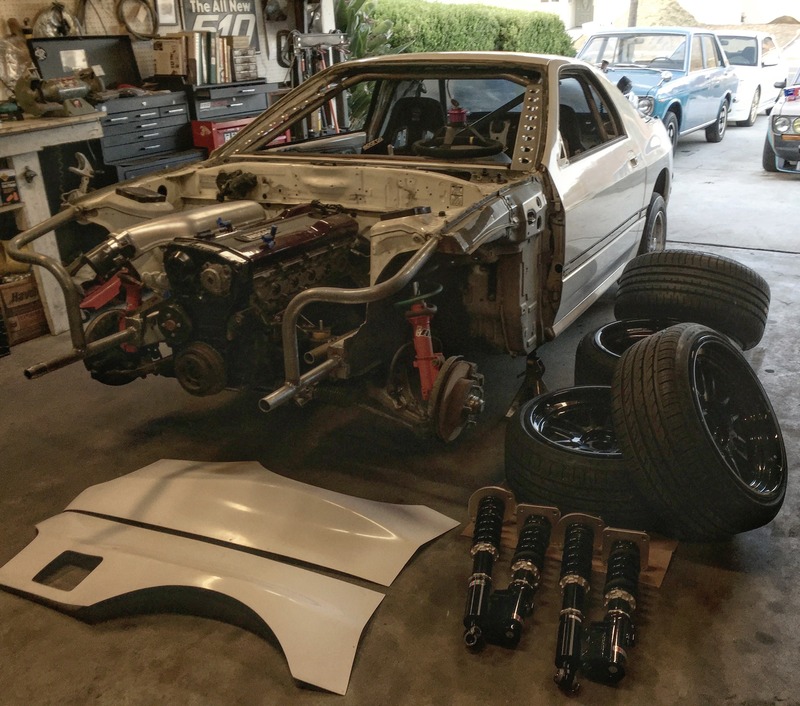
Goals this weekend included over fenders, brakes, axles, wheels.
BC Coilovers showed their support by building a full custom set of custom valved coilovers for the RB-7
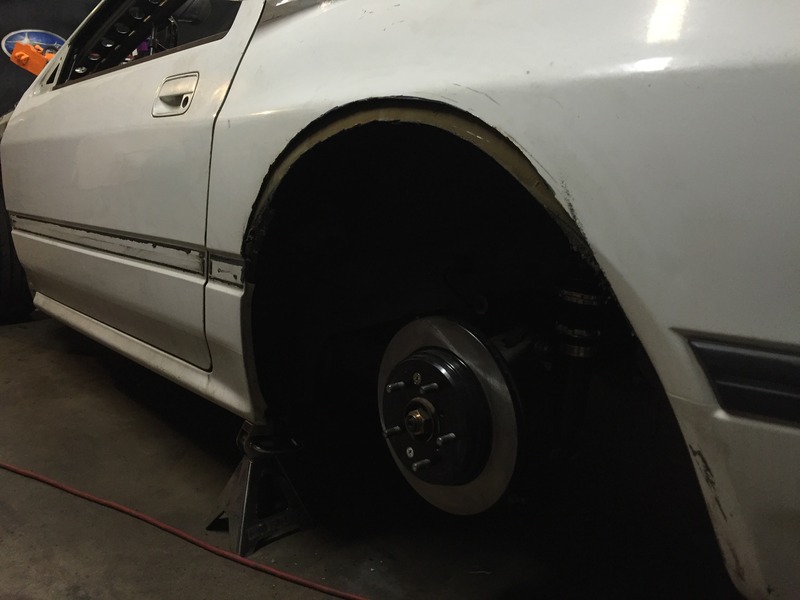
Cutting out the rear with a angle grinder, which was followed by a lot of hammering the under metal up, welding and seam sealing before the over fenders were installed.
Back to the Future
Here is ol @vaderwerks on IG exercising his talent with black caulk
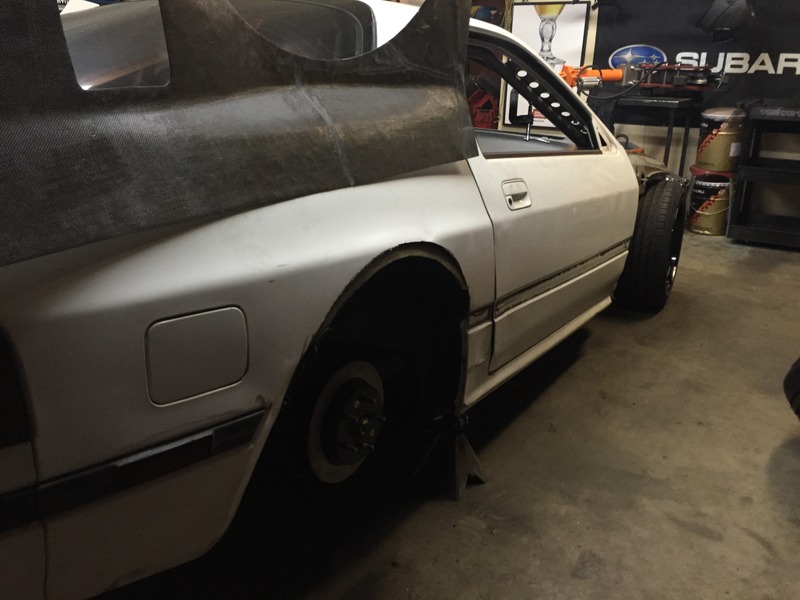
Pre riveting of the over fenders
I had some scrap DOM tubing laying around, so I used an existing 90*, measured and added a 15* offset to account for the front fender line that comes forward off of the shock tower.
Passenger side
I need to run the stock headlights, so I extended it far enough so that I can still use the classy pop up lights.
The wheels also arrived this weekend. Sponsorship support by Cosmis provided wheels in 18x11 +8 and 18x9.5 +10
Fitting four wheels with tires in a Datsun 510 is pretty interesting.
Mounted and ready for installation
Goals this weekend included over fenders, brakes, axles, wheels.
BC Coilovers showed their support by building a full custom set of custom valved coilovers for the RB-7
Cutting out the rear with a angle grinder, which was followed by a lot of hammering the under metal up, welding and seam sealing before the over fenders were installed.
Back to the Future
Here is ol @vaderwerks on IG exercising his talent with black caulk
Pre riveting of the over fenders
05-30-16, 10:15 PM
#17
Junior Member
Thread Starter
Join Date: Jan 2012
Location: Santa Clarita, Ca
Posts: 35
Likes: 0
Received 0 Likes
on
0 Posts
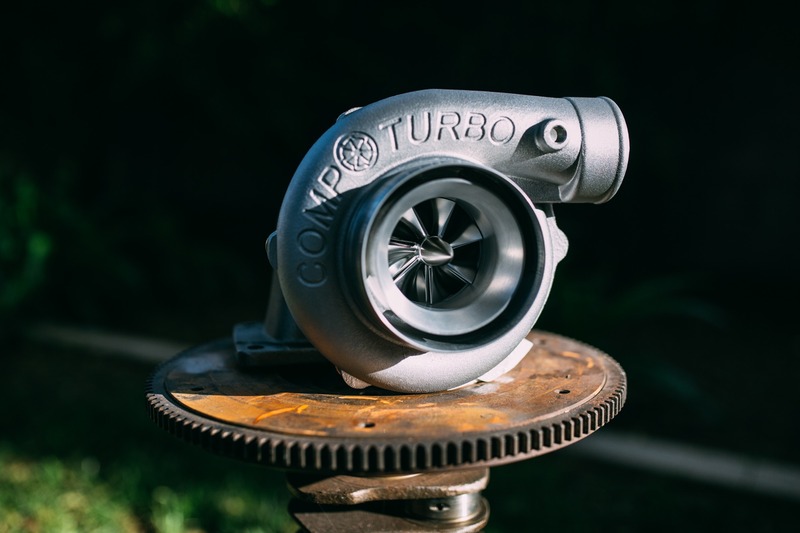
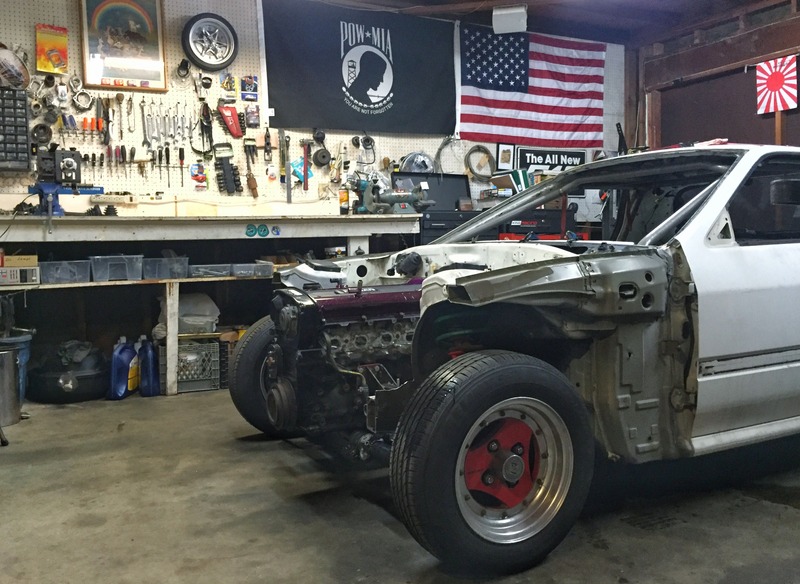
I hung the comp 6262 turbo yesterday. I might actually stick it behind the strut tower for a more equal length.
The turbo is as big as Devins head.


The turbo is as big as Devins head.
 05-30-16, 10:41 PM
#18
Junior Member
Thread Starter
Join Date: Jan 2012
Location: Santa Clarita, Ca
Posts: 35
Likes: 0
Received 0 Likes
on
0 Posts
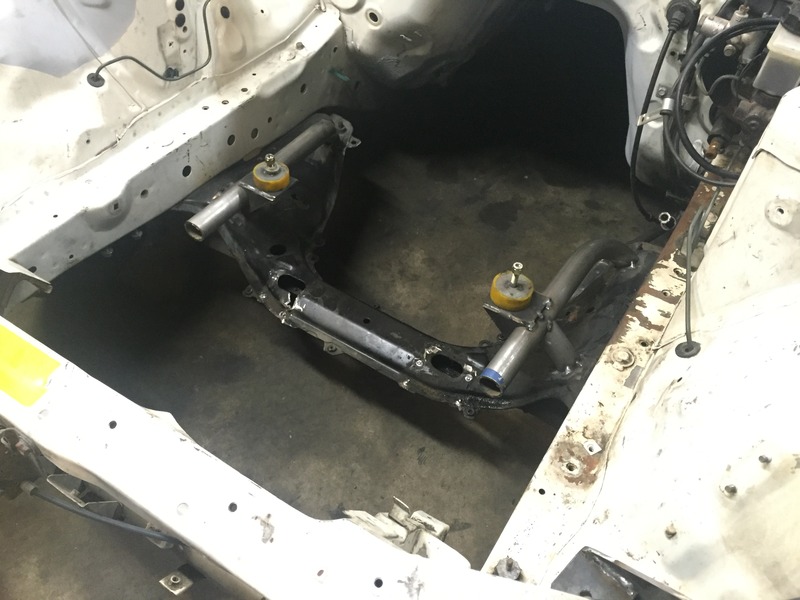
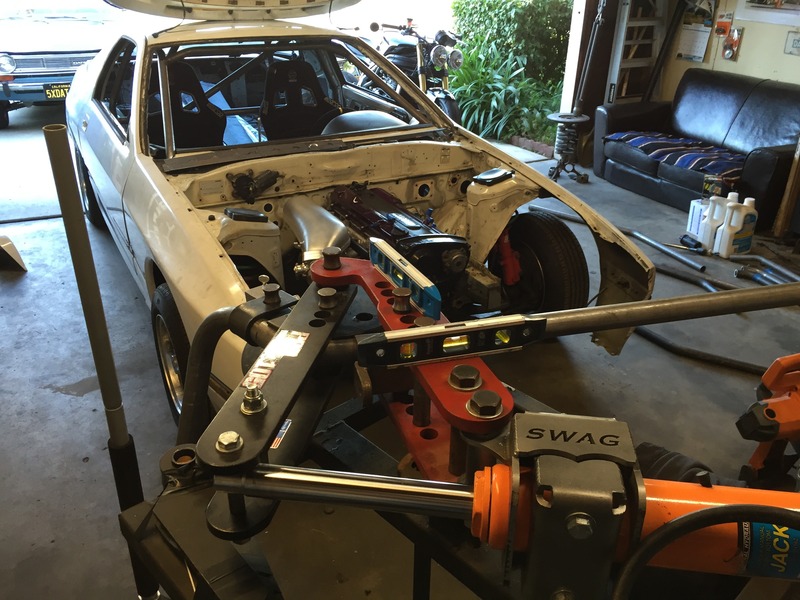
Today I worked on the engine mounts and converted them to an enclosed type. A new transmission mount was made and a spherical steering shaft mount was welded to the firewall. Its nice to have full steering now. Easy on the welding judgment… Ha Ha I am workin with what I have.
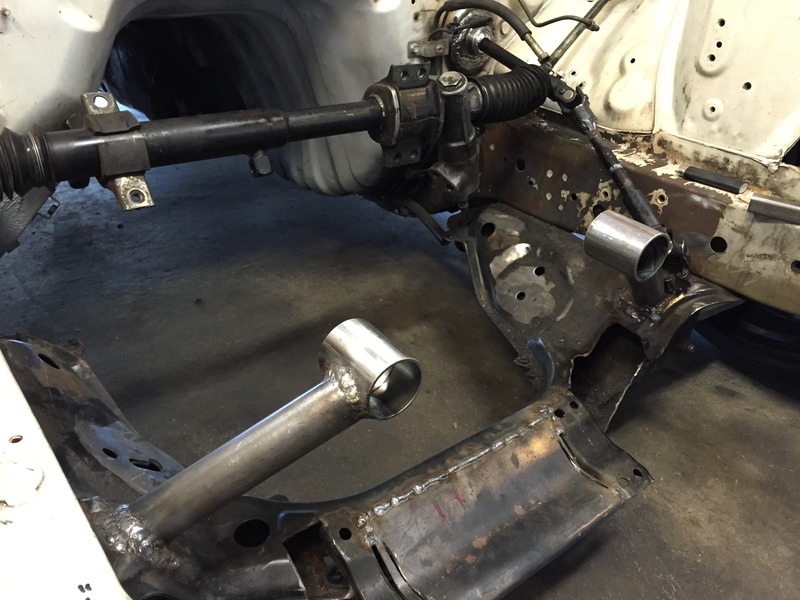
I also started filing in the cross member and getting the steering rack mounted properly. The intent is to seal up the firewall and finish welding in the cage tomorrow.
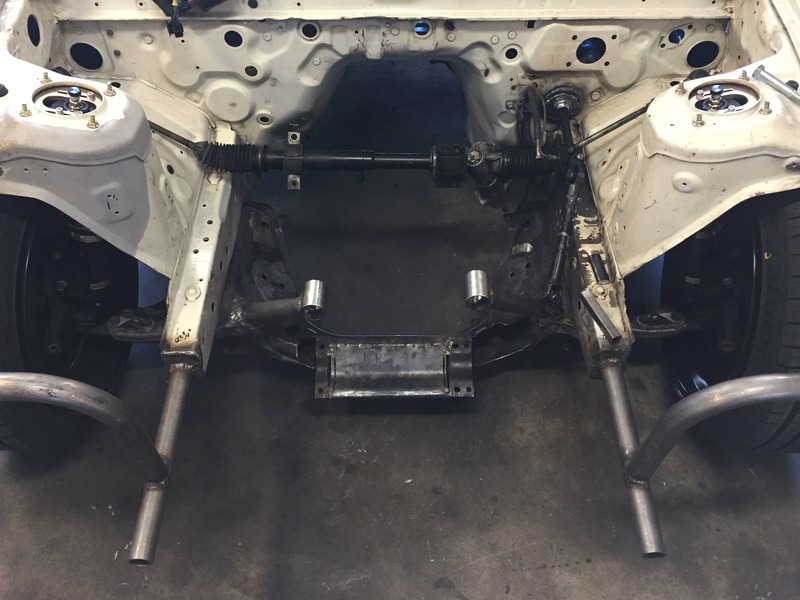
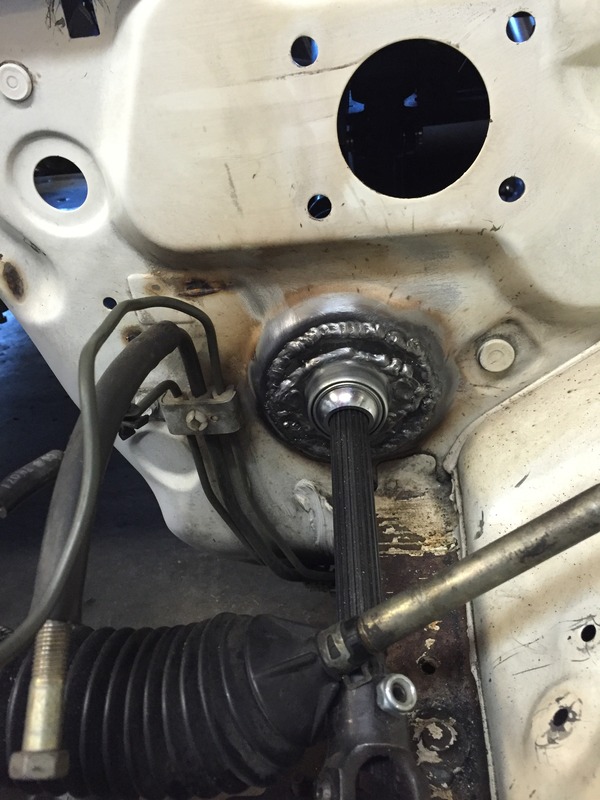
I also started filing in the cross member and getting the steering rack mounted properly. The intent is to seal up the firewall and finish welding in the cage tomorrow.
06-12-16, 12:00 PM
#20
Junior Member
Thread Starter
Join Date: Jan 2012
Location: Santa Clarita, Ca
Posts: 35
Likes: 0
Received 0 Likes
on
0 Posts
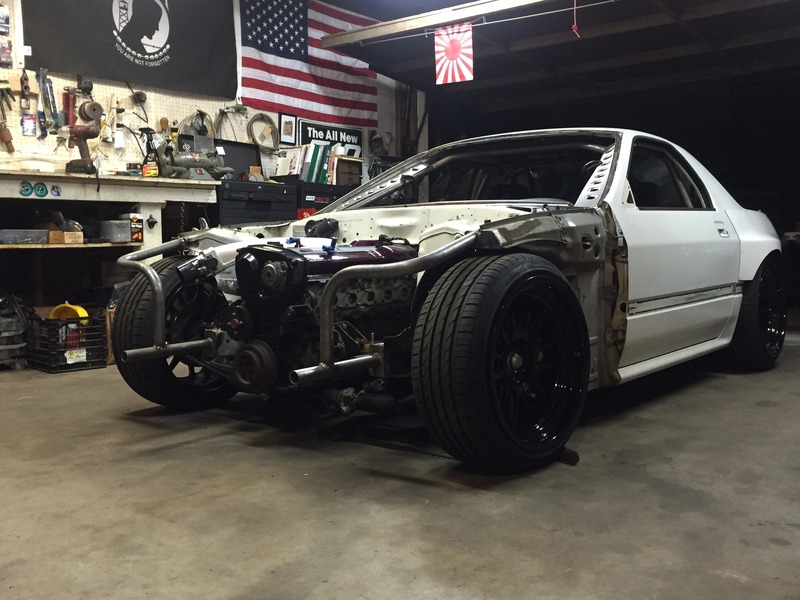
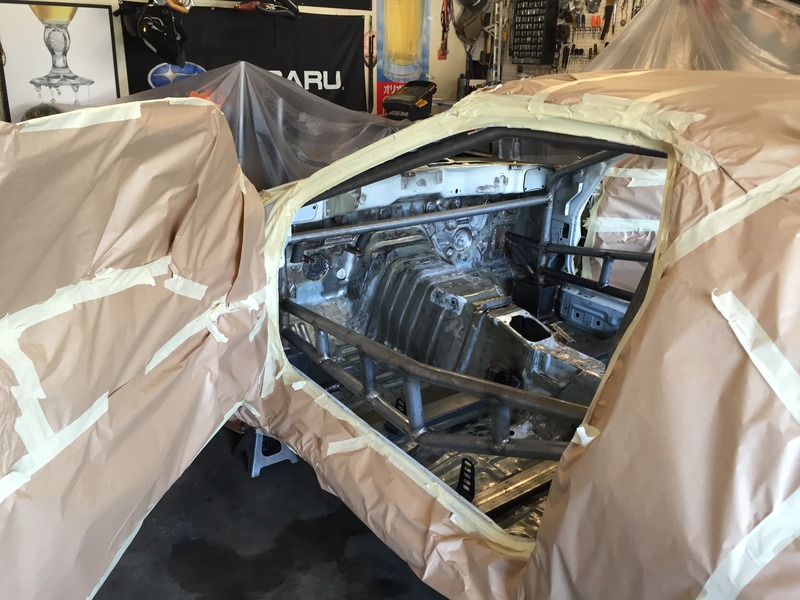
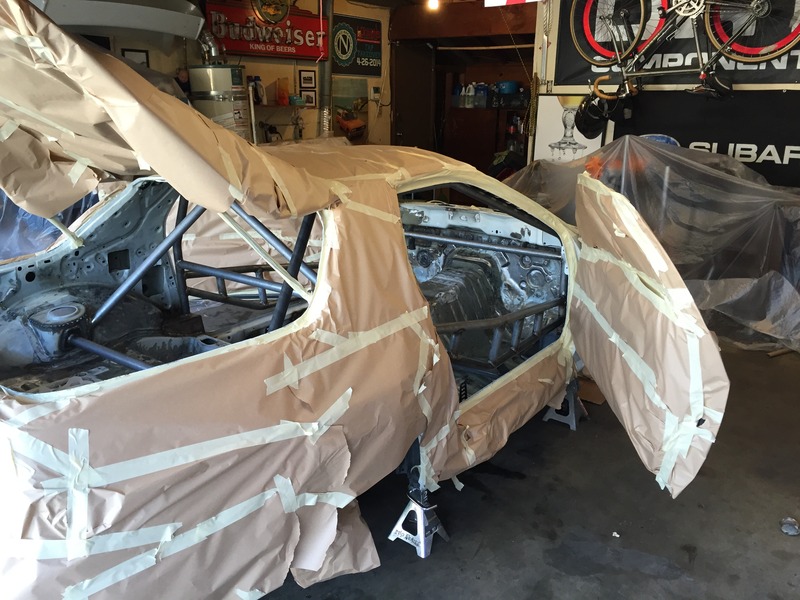
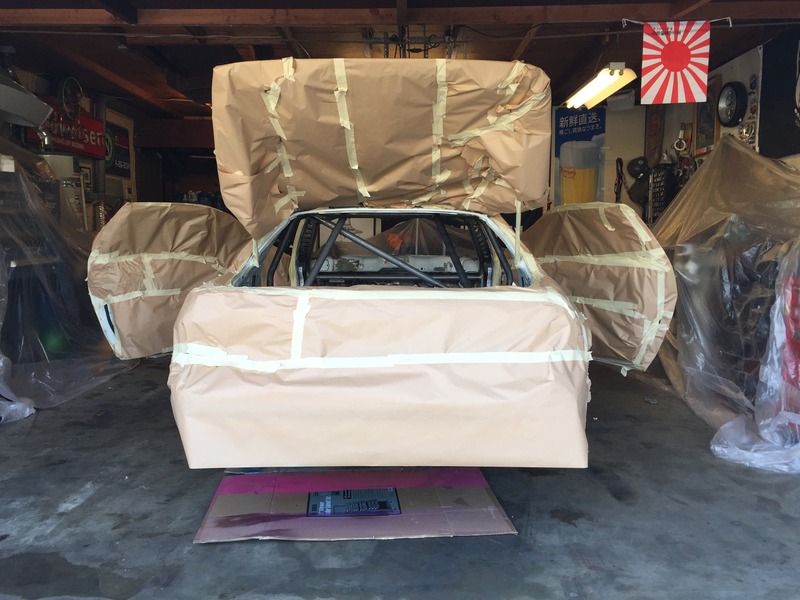
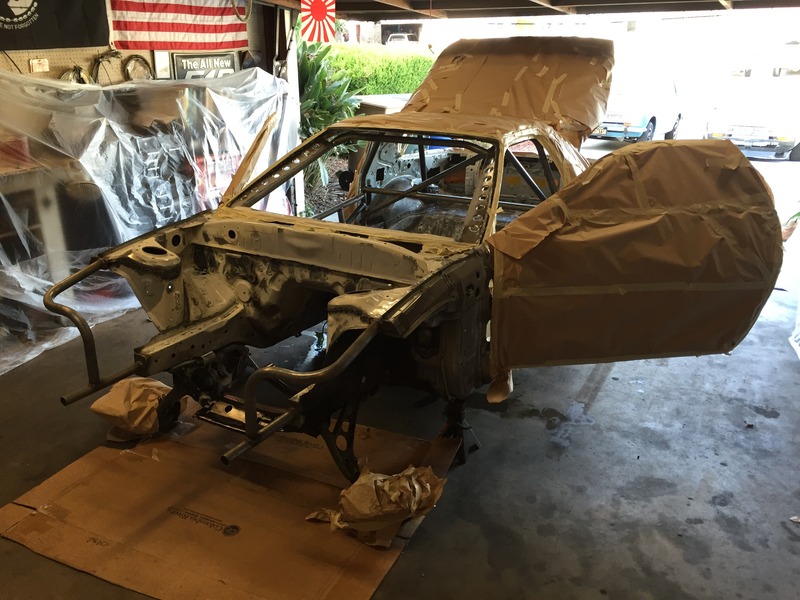
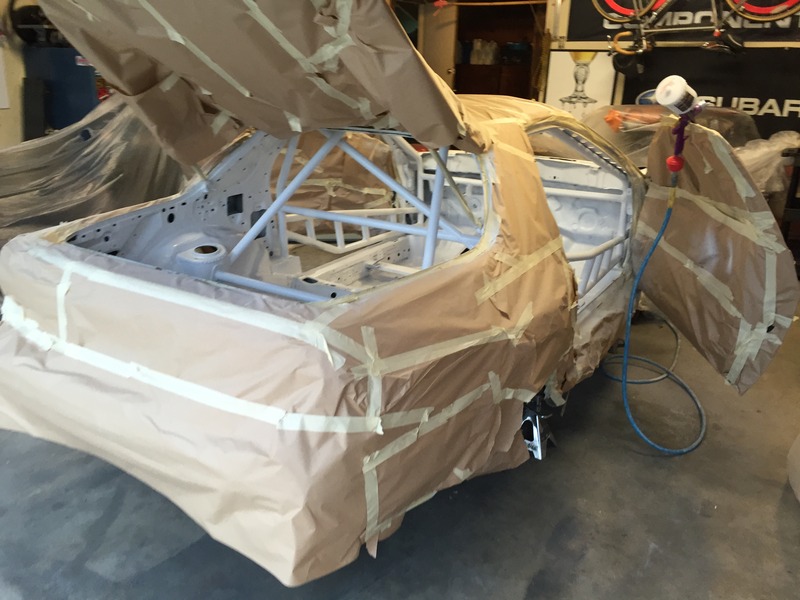
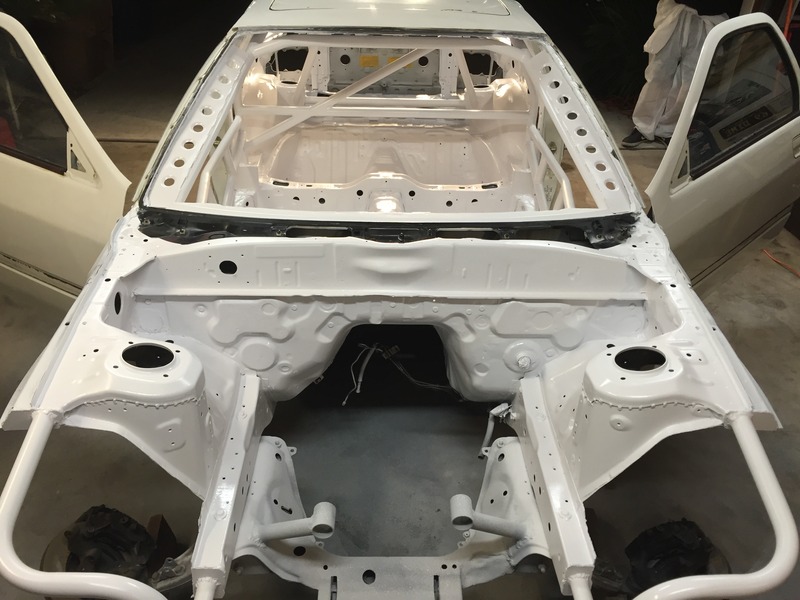
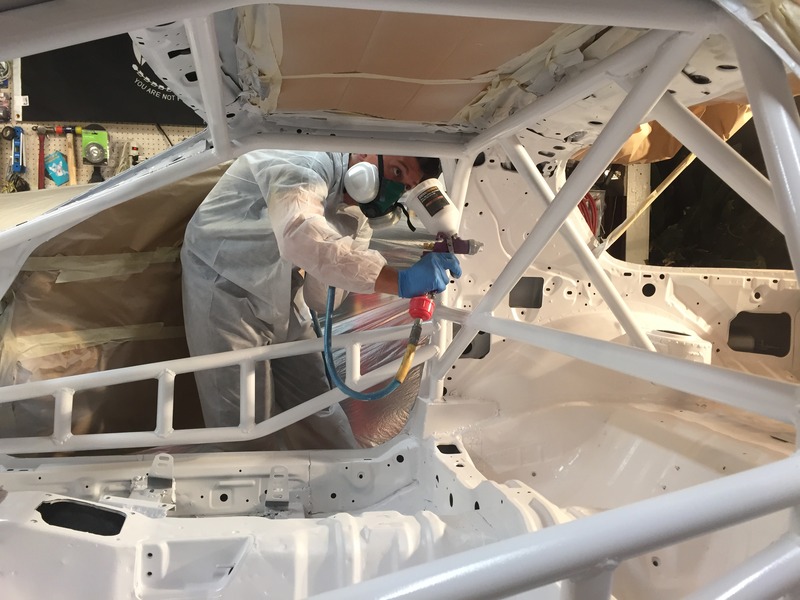
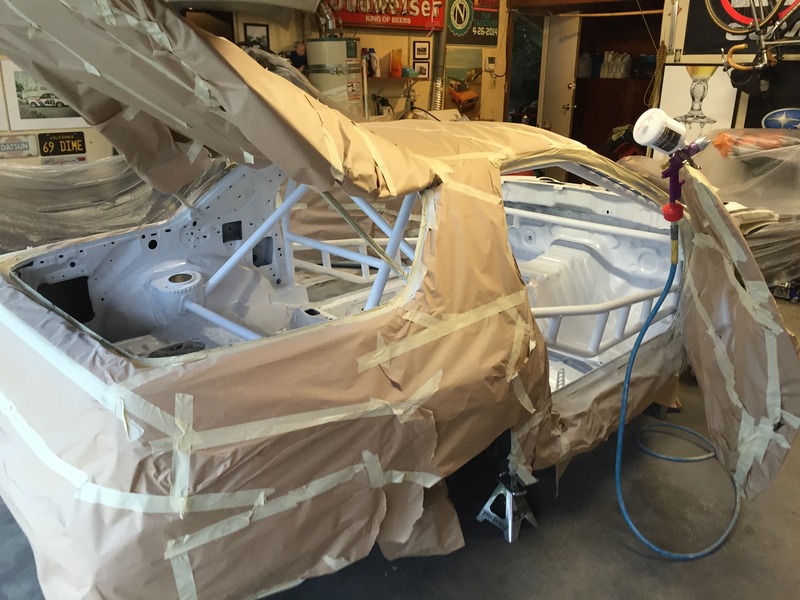
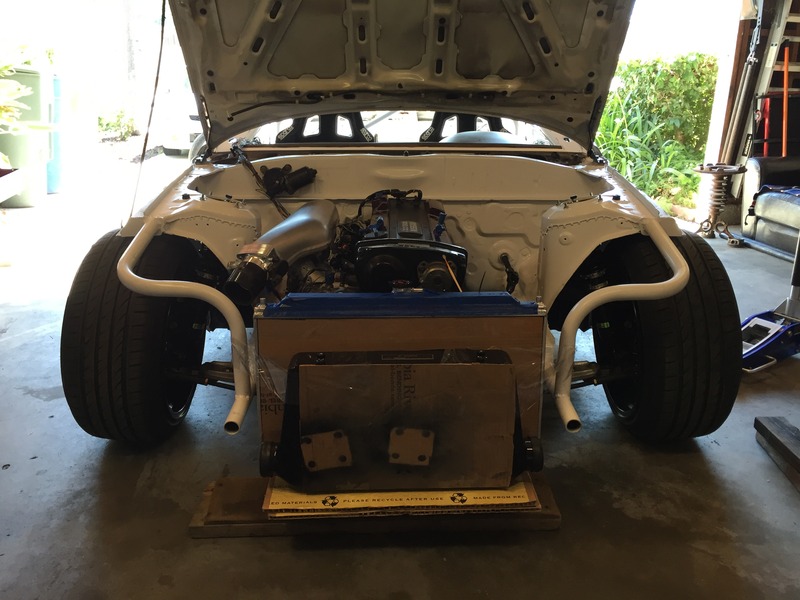
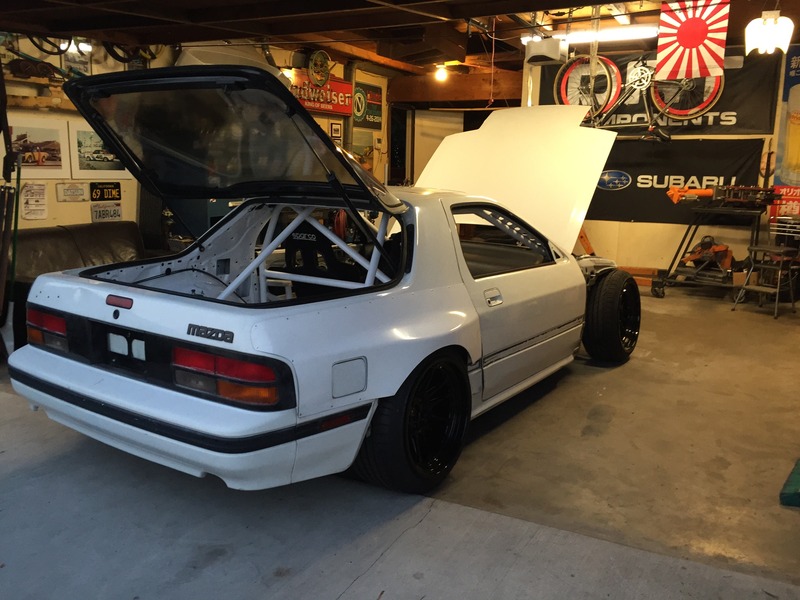
I decided to paint the car this weekend so I can get the windshield on and start the wiring and plumbing portion. I still have a ton of stuff to do like mount the radiator and intercooler along with figuring out what to do about the manifold situation.
Here are a couple photos of the prep and paint portion. Five cans of primer and three quarts of the finest of rustolium gloss white were applied with a Harbor Freight HLPV spray gun.
In the end, its at 20' or 20 mph the "race cars" all look good, right?
Here are a couple photos of the prep and paint portion. Five cans of primer and three quarts of the finest of rustolium gloss white were applied with a Harbor Freight HLPV spray gun.
In the end, its at 20' or 20 mph the "race cars" all look good, right?
 06-21-16, 12:14 AM
#22
Junior Member
Thread Starter
Join Date: Jan 2012
Location: Santa Clarita, Ca
Posts: 35
Likes: 0
Received 0 Likes
on
0 Posts
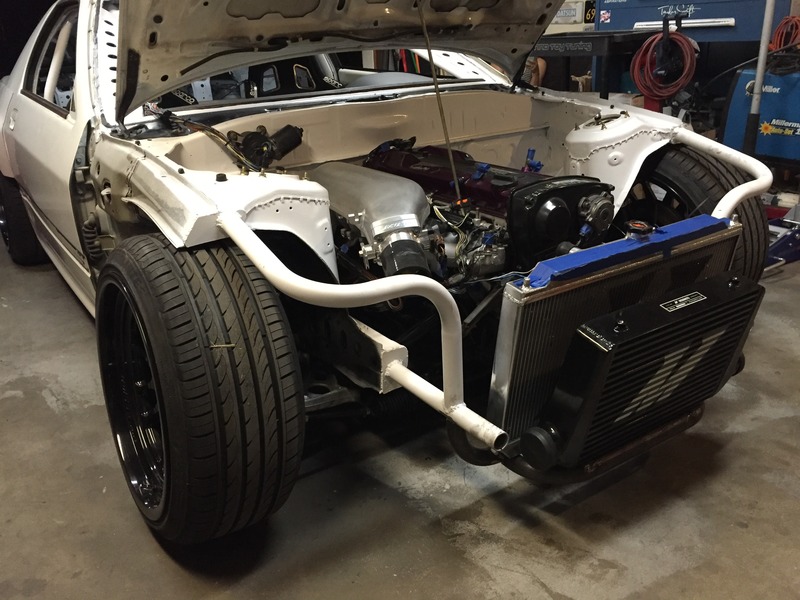
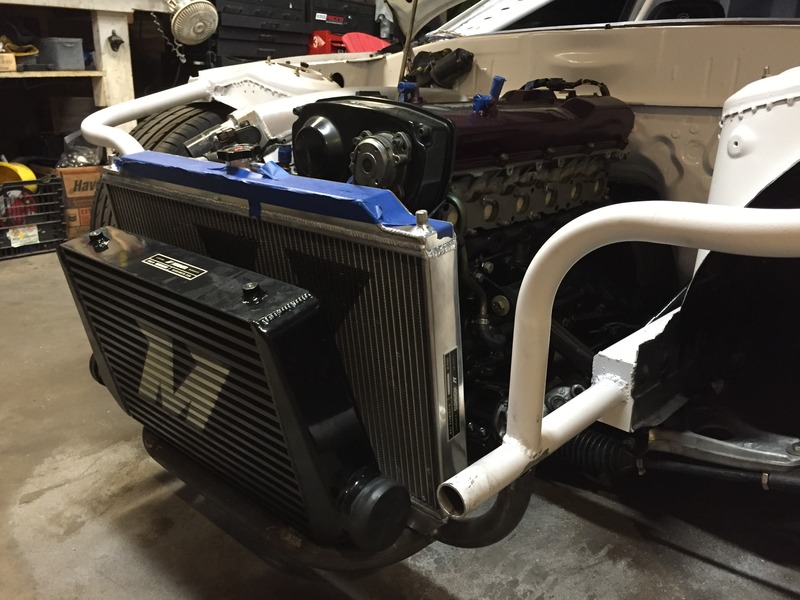
This weekend I mocked up the Radiator and the Intercooler. Both parts were provided by Mishimoto, which I am blessed to have been provided a sponsorship. The radiator is a dual row and the Intercooler apparently flows 1250 CFM, so we will see how they do in the near future.

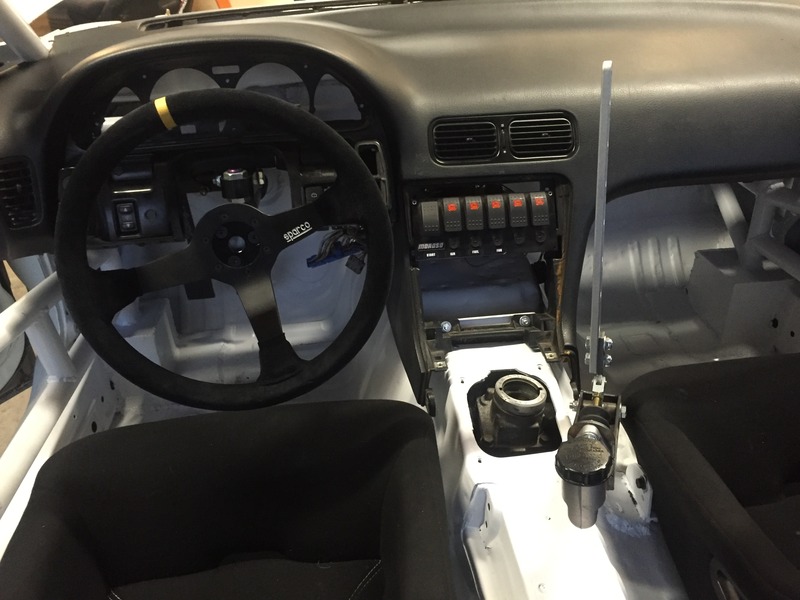
Dash, handbrake and tentative switch panel was installed along with brakes and rotors.
I also installed BC Racings custom built coilovers on the RB-7. I am really stoked on the sponsorship deal they were able to work out.
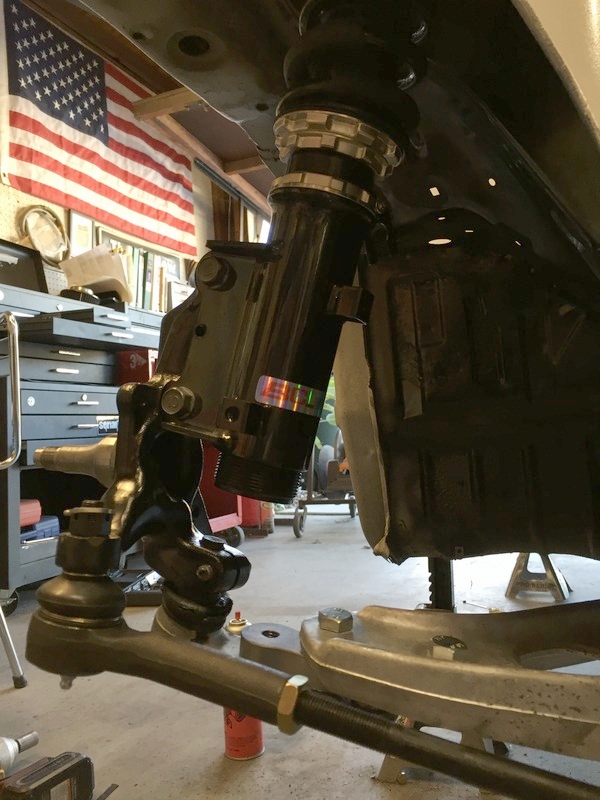
A villans angle kit and coils make the car sit really nice now.
Dash, handbrake and tentative switch panel was installed along with brakes and rotors.
I also installed BC Racings custom built coilovers on the RB-7. I am really stoked on the sponsorship deal they were able to work out.
A villans angle kit and coils make the car sit really nice now.
06-21-16, 10:58 AM
#24
dont kill the cones
Awesomeness!!!!!! although it has no spinny triangles a good build is a good build, Nice work! I live a town over from those Villans dudes and had the chance to meet Nate and Jason last year. Solid dudes, and their company seems to be making nice stuff.
06-21-16, 07:42 PM
#25
Junior Member
Thread Starter
Join Date: Jan 2012
Location: Santa Clarita, Ca
Posts: 35
Likes: 0
Received 0 Likes
on
0 Posts
Hotline 50mm rear over fenders.
Thanks!
Yea, Nate and the villains crew make some rad stuff and the customer service is on point too. The knuckles I got for instance were modified very nicely and the paint they used was of good quality. The machined LCA extensions were of great construction and accuracy to include the hardware.
Yea, Nate and the villains crew make some rad stuff and the customer service is on point too. The knuckles I got for instance were modified very nicely and the paint they used was of good quality. The machined LCA extensions were of great construction and accuracy to include the hardware.