Ed's Barn Find! 88 Vert Rebuild
 07-16-12, 07:59 AM
#1
Senior Member
Thread Starter

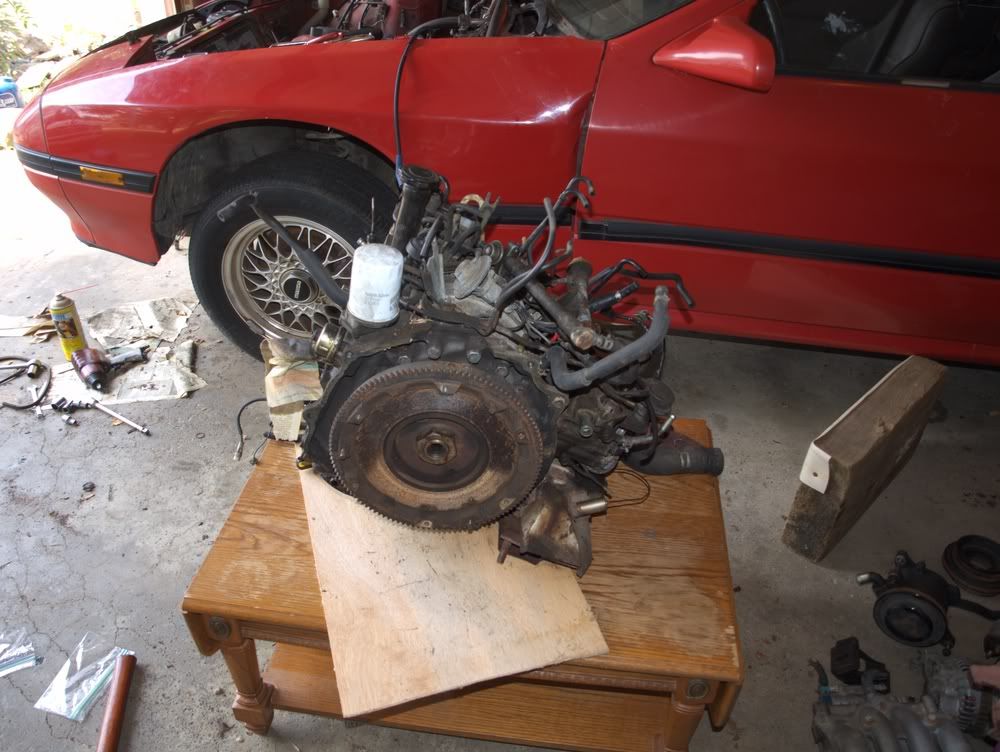
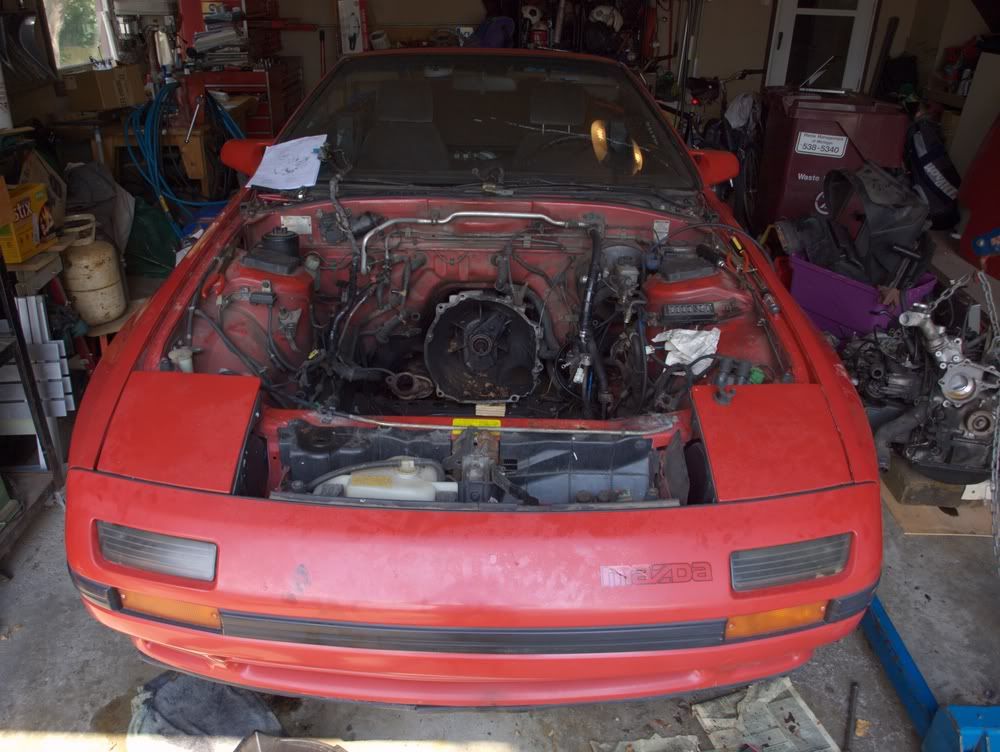
Hey everybody. I found this beast in a barn a few weeks ago. Apparently its been setting there for ten years or so.
LOTS of mice nests. I think I can make a bid for the dirtiest engine ever.
Anyways the plan for this car is to clean it up.
-Rebuild 13b with a streetport.
-New headers and exhaust. I think I'll use an RB header and custom the rest.
-Getting rid of all the vacuum line bullshit.
-Stage 1 Clutch from Mazdatrix
-Fix everything else I find.
now for the pics!
Last edited by Customisbetter; 07-16-12 at 08:03 AM.
 07-16-12, 01:23 PM
#2
Senior Member
Thread Starter
Sorry to bump my thread so soon but I'm about to purchase my rebuild bits. I destroyed my oil rings and all seals were toast so the rotors are getting everything new....
Does the MAzdatrix Engine Gasket set come with Oil control ring seals? The photo shows what look s to be those in the bottom right...

Here is what I'm getting:
--------------------------
Mazdatrix
-----------------------
Gasket Set $240
Front + Rear seal, rear gear o ring $22
-----------------------
Atkins
---------------------
Apex seals + springs $220
Oil control rings $320 >>>> WHY ARE THESE SO EXPENSIVE?
oil ring inserts $40
Oil ring springs $41
side seals $205
springs $24
Corner seals 1 piece $72
corner seal springs $30
------------------------------------
That's a total of $1214!!!
Is that a correct estimate?
Thanks for any input!
Does the MAzdatrix Engine Gasket set come with Oil control ring seals? The photo shows what look s to be those in the bottom right...
Here is what I'm getting:
--------------------------
Mazdatrix
-----------------------
Gasket Set $240
Front + Rear seal, rear gear o ring $22
-----------------------
Atkins
---------------------
Apex seals + springs $220
Oil control rings $320 >>>> WHY ARE THESE SO EXPENSIVE?
oil ring inserts $40
Oil ring springs $41
side seals $205
springs $24
Corner seals 1 piece $72
corner seal springs $30
------------------------------------
That's a total of $1214!!!
Is that a correct estimate?
Thanks for any input!
07-17-12, 08:20 AM
#6
Senior Member
Thread Starter
Thanks Beefhole! I just ordered :
Rotary Aviation RA Seals $235
Atkins Side seals, springs, corner plugs and springs $320
Mazdatrix Gasket and O ring kit, Eccentric seals and rear rear O ring, 6 port template ~$ 400
$950 is a little easier to swallow than 1200.
Rotary Aviation RA Seals $235
Atkins Side seals, springs, corner plugs and springs $320
Mazdatrix Gasket and O ring kit, Eccentric seals and rear rear O ring, 6 port template ~$ 400
$950 is a little easier to swallow than 1200.

Trending Topics
07-18-12, 07:42 PM
#8
Senior Member
Thread Starter
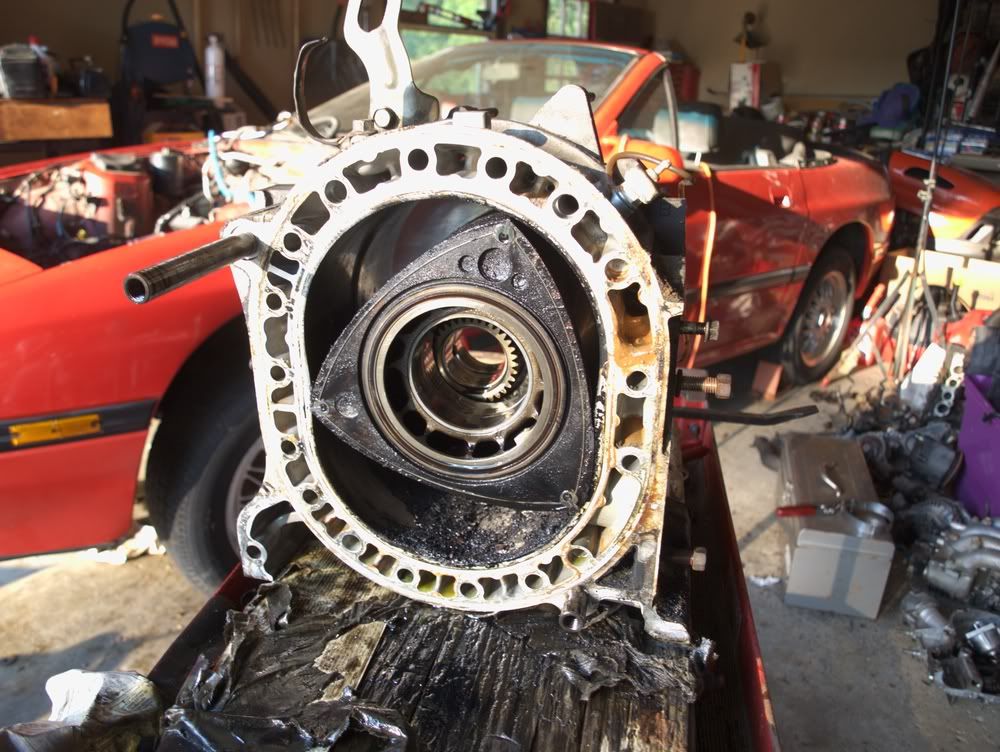
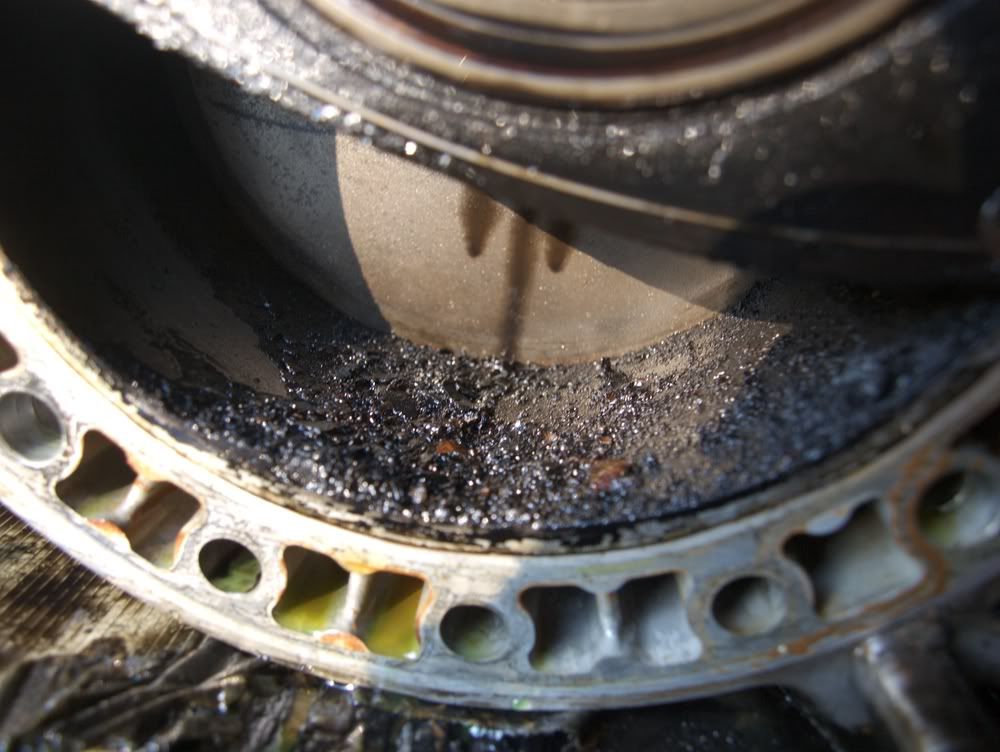
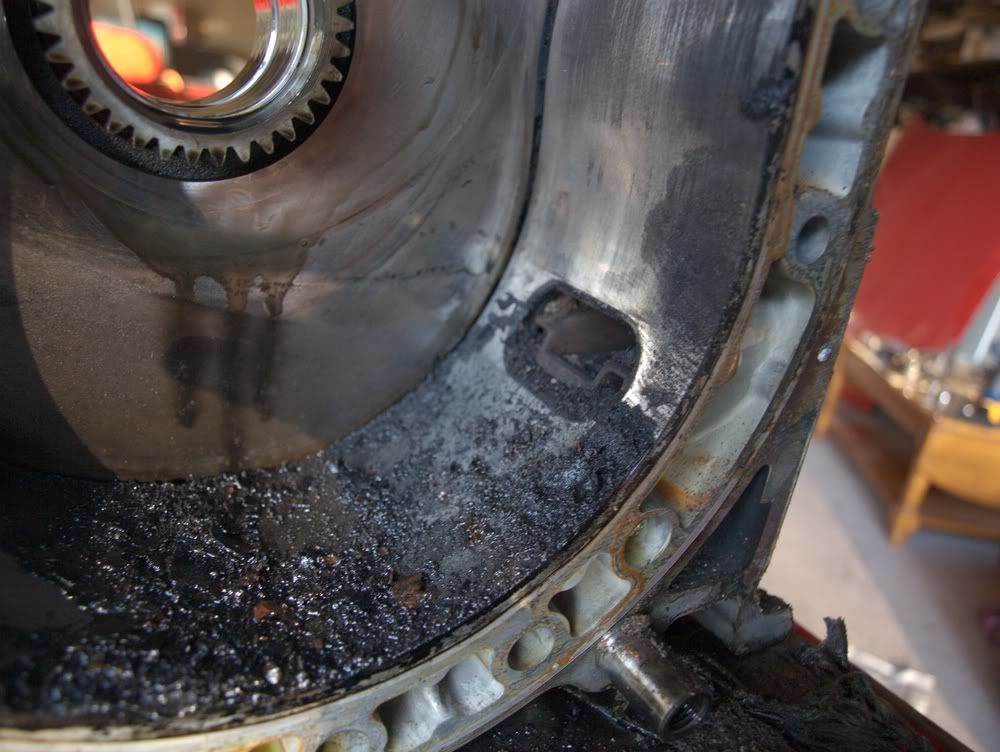
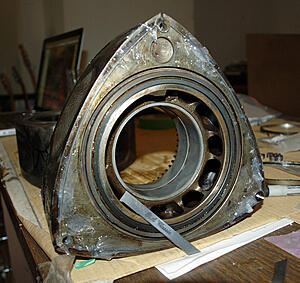
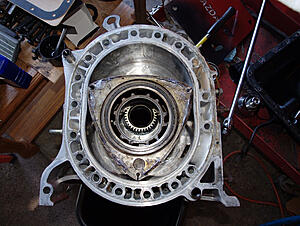
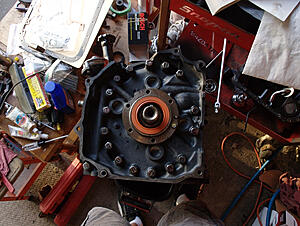
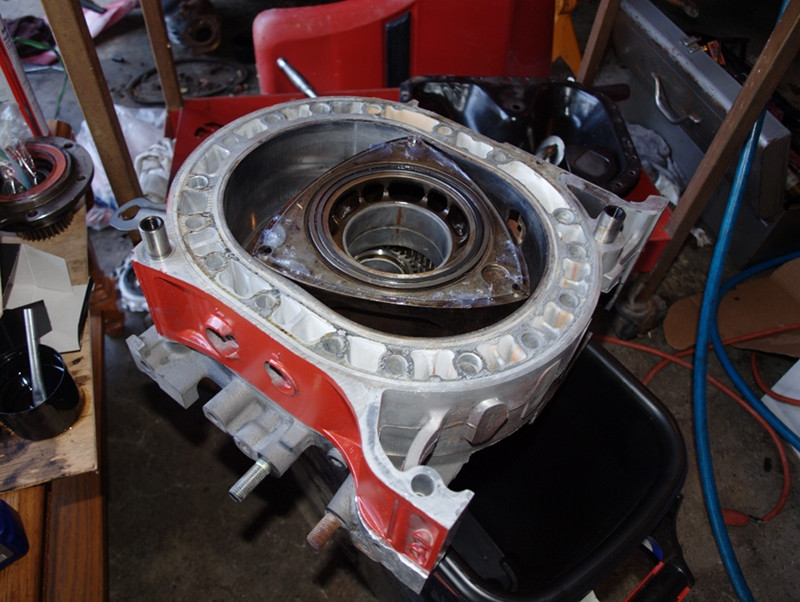
The rotors and aux ports are finally disassembled. I had to heat the rear iron with a torch for a few minutes to get the second sleeve out but all is well. Now the waiting begins for all of the parts.
08-02-12, 09:47 AM
#9
Senior Member
Thread Starter
Ok SO I bought more stuff from Rock auto:
belts
Fuel filter
Clutch kit
thermostat
waterpump
Next buy will be a fuel dampener and injector connections for rebuilding the engine harness.
belts
Fuel filter
Clutch kit
thermostat
waterpump
Next buy will be a fuel dampener and injector connections for rebuilding the engine harness.
08-03-12, 12:05 PM
#10
Senior Member
Thread Starter
I haven't gotten a reply back on my original Newbie section thread so I'll post this question here...
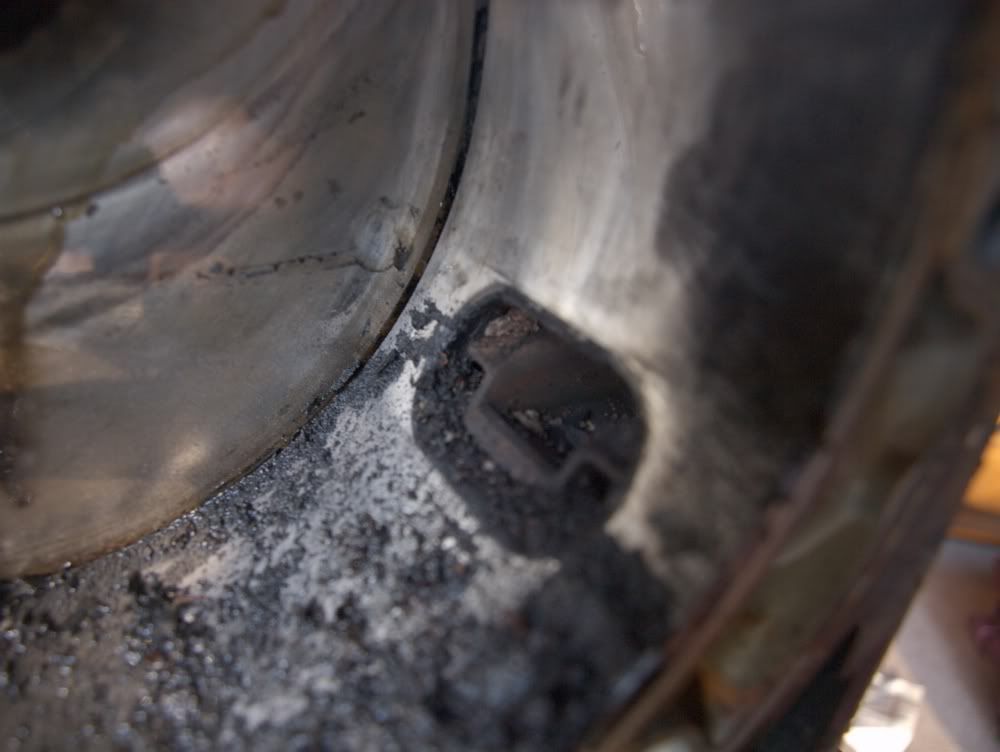
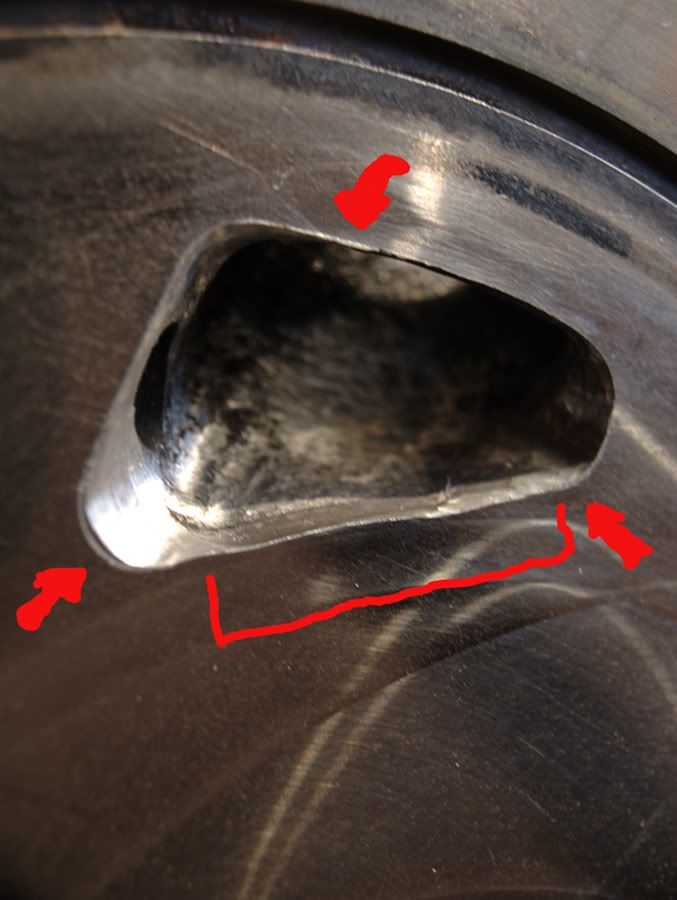
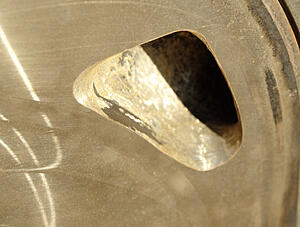
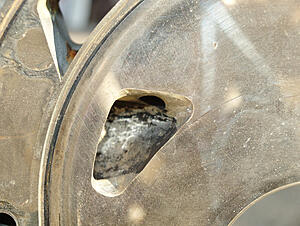
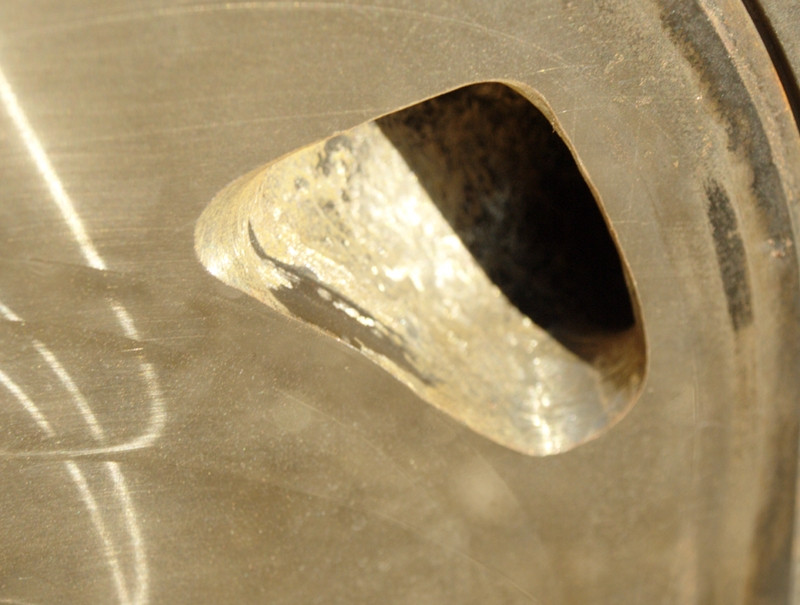
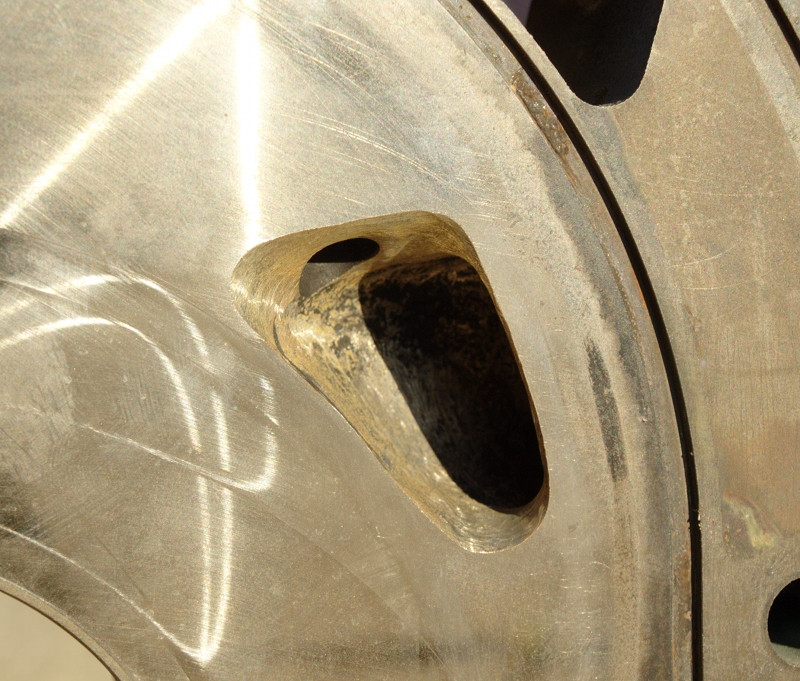
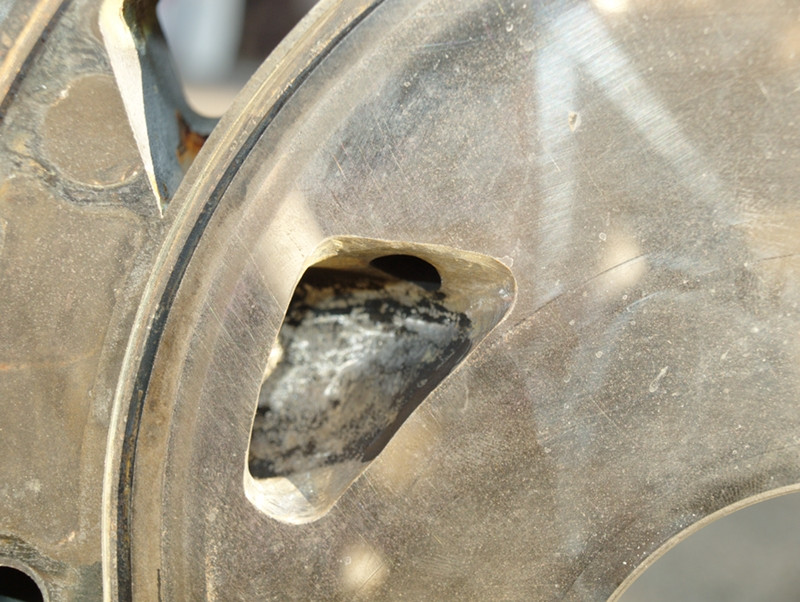
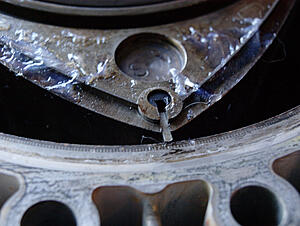
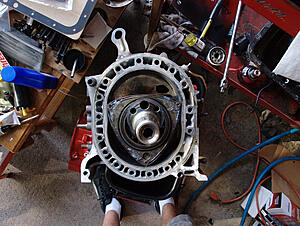
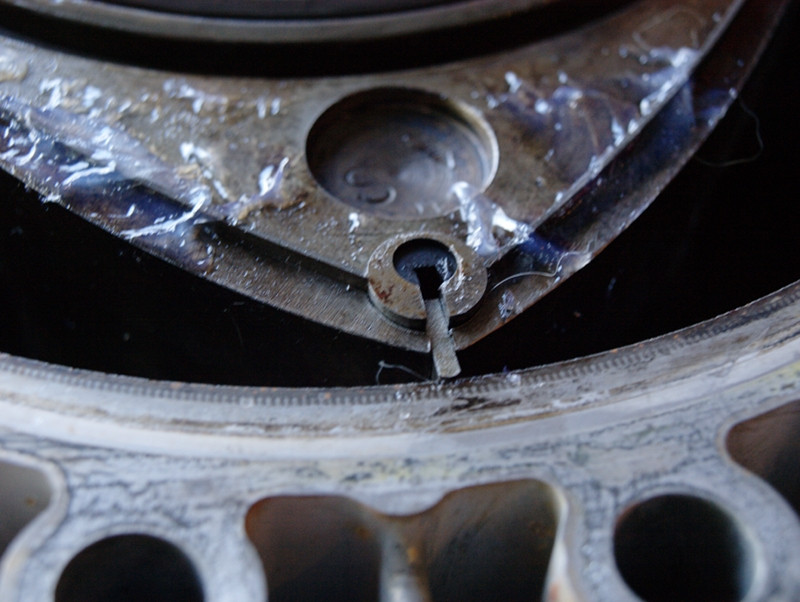
Im doing a Street port on my 6 port NA irons. This is the first center iron. Im using the Mazdatrix 6 port template.
Im worried about the inside curve being kind jacked. The stock curve went further in than the template which was odd.
Am I fubar-ing this or should I clean up that curve? *represented by the Bracket*
Also the corners aren't finished yet *arrows*
08-07-12, 07:00 PM
#11
Senior Member
Thread Starter
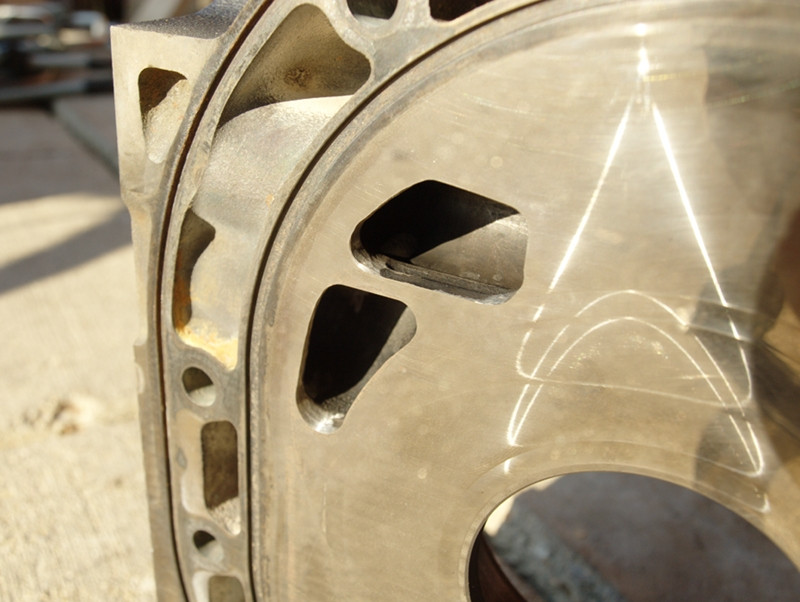
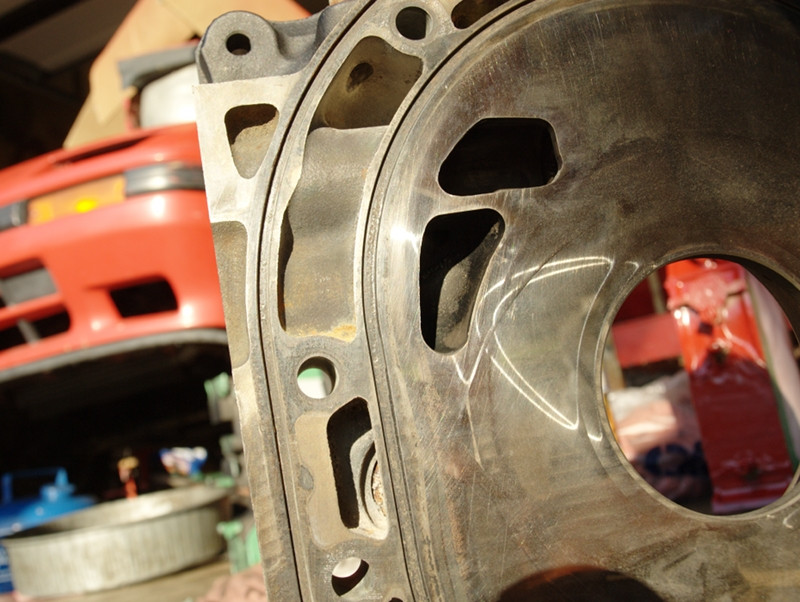
Porting is finished and housings are cleaned and beginning the painting process!
The rotor housings are red (very close to the body color red) and the irons are flat black.
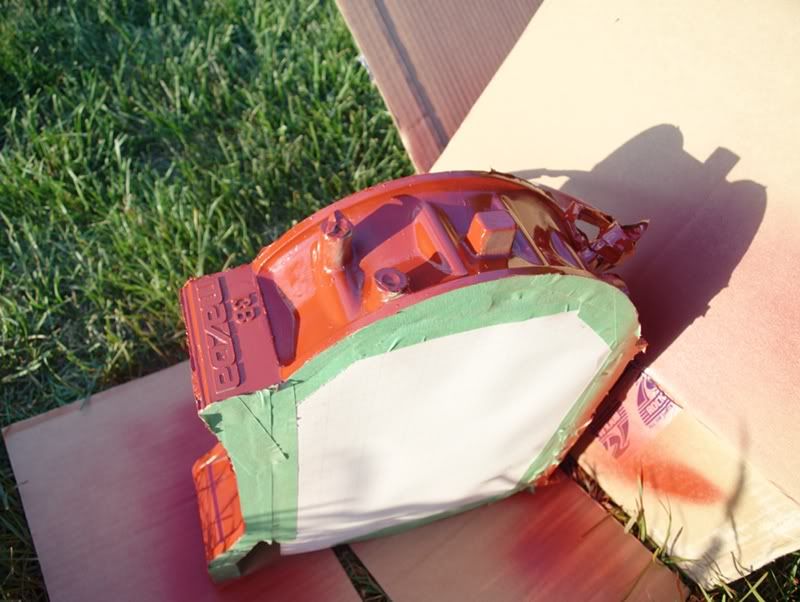

The rotor housings are red (very close to the body color red) and the irons are flat black.
08-07-12, 08:01 PM
#13
Senior Member
Thread Starter
^Its good! I ended up matching the template pretty well and smoothed out the transitions alright. I haven't polished them yet so I haven't taken any pics. I've found with porting there are a couple incredibly important things:
1) WATCH THE OIL CONTROL LINES
You can't touch those with the dremel or else you are screwed and the iron is junk.
2) The template is kinda wrong
At least mine wasn't perfect. I used the dimensions for timing and general corner shape however there was a lot of blending involved to fit with the original port.

 08-08-12, 04:43 PM
#16
Senior Member
Thread Starter
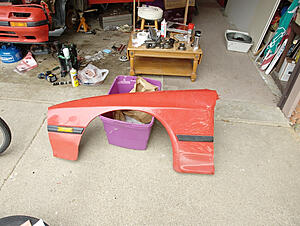
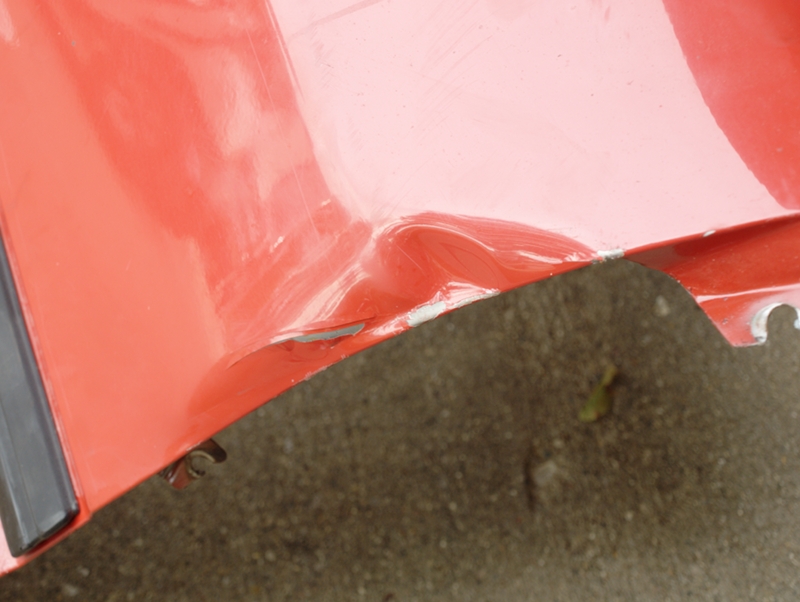
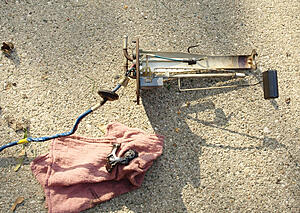
Did the two hardest things so far on this project. Removed the busted fender and then removed the gas tank as the fuel pump cover screws are rusty lumps and the pump doesn't work.


 08-15-12, 05:49 PM
#17
Senior Member
Thread Starter
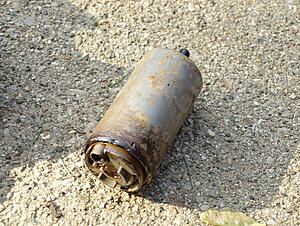
Fuel pump is OUT!
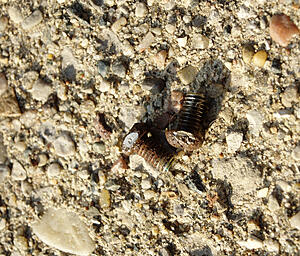
Fun tip: Dremel the sides of the top screw heads flat, then latch onto them with vicegrips and they'll come out.
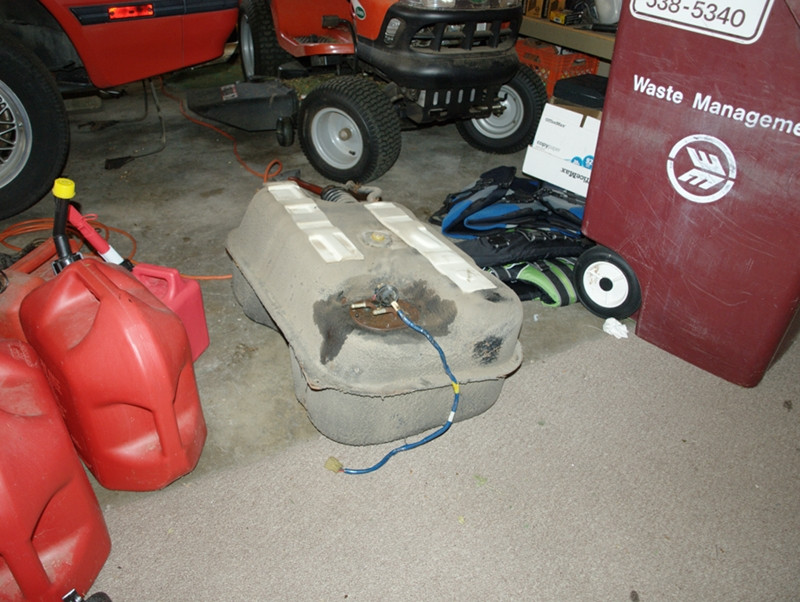
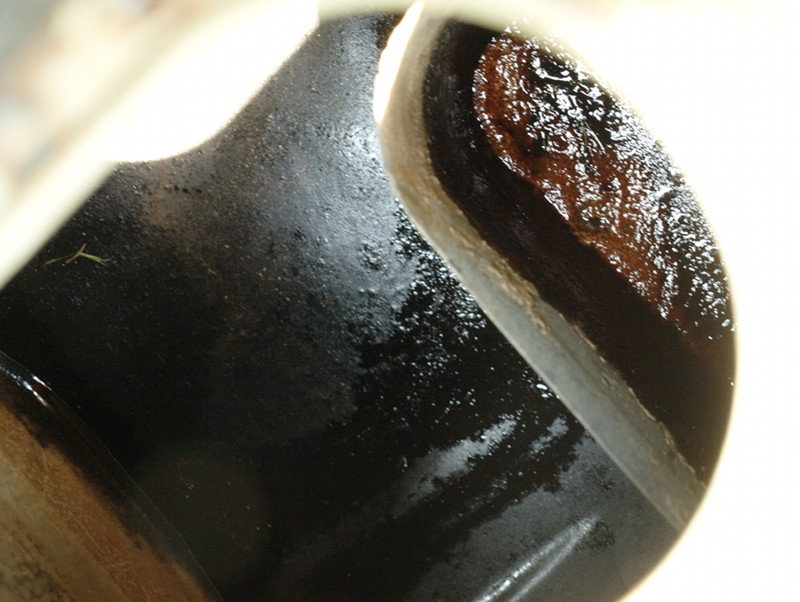
15 year old gasoline is disgusting. My fuel pump assembly was covered in gross yellow goo and the gas was dark brown. My fuel pump sock was FILLED with black sludge and the black rubber spacer beneath the pump was melted goop. I didn't take any pics because i was working fast, but here are some of the cleaned up stuff...
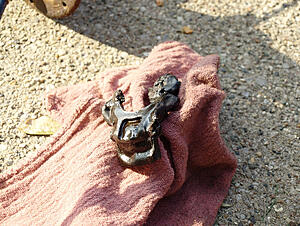
To clean the tank i washed with water, sloshed and dumped. It was dark brown every with a few gallons of clean water. Dumped in a gallon of mineral spirits and a stainless steel chain and sloshed and rotated for a few minutes making sure everything inside was touched. poured that out and it was still pretty brown, like apple cider. I washed out with water a few times after that and let air dry. This is a pic after that....
I'm waiting on ONE FREAKING OIL CONTROL RING and then I can finally reassemble the motor!
Fun tip: Dremel the sides of the top screw heads flat, then latch onto them with vicegrips and they'll come out.
15 year old gasoline is disgusting. My fuel pump assembly was covered in gross yellow goo and the gas was dark brown. My fuel pump sock was FILLED with black sludge and the black rubber spacer beneath the pump was melted goop. I didn't take any pics because i was working fast, but here are some of the cleaned up stuff...

To clean the tank i washed with water, sloshed and dumped. It was dark brown every with a few gallons of clean water. Dumped in a gallon of mineral spirits and a stainless steel chain and sloshed and rotated for a few minutes making sure everything inside was touched. poured that out and it was still pretty brown, like apple cider. I washed out with water a few times after that and let air dry. This is a pic after that....
I'm waiting on ONE FREAKING OIL CONTROL RING and then I can finally reassemble the motor!
08-15-12, 06:19 PM
#18
Senior Member
Thread Starter
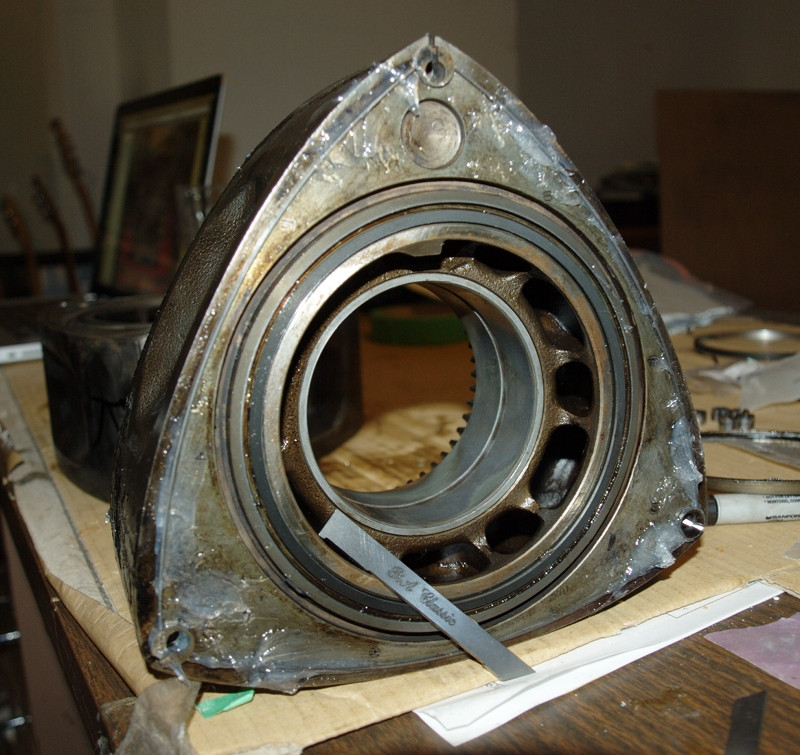
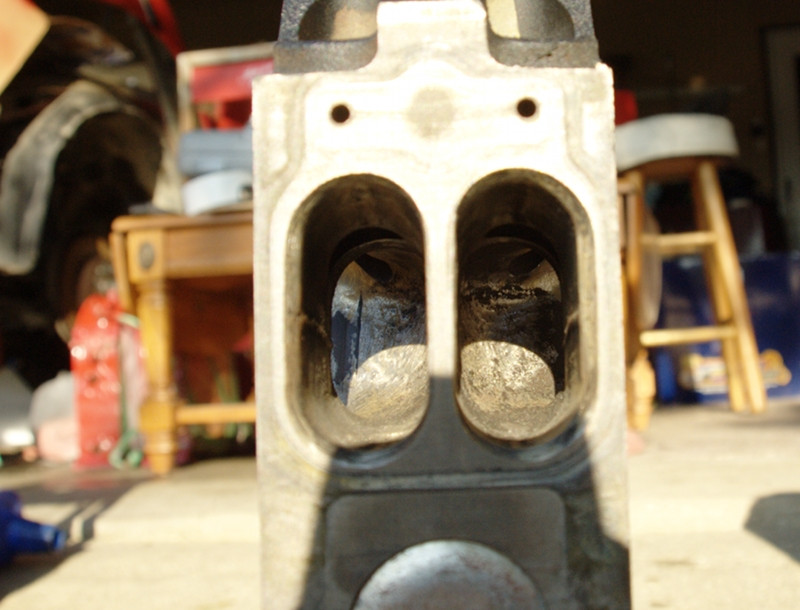
Here is one rotor all greased up and ready for some dirty hot action...
As requested here are some port pics!


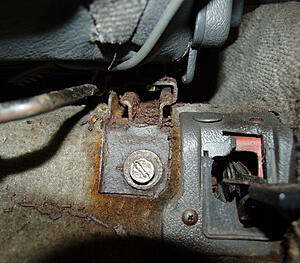
And this is my next huge annoyance. The driver's seat is rusted as hell! I can't move it forward or back. the controls are so rusted the arms bend. I've been trying to the get the front bolt out for a few days and it refuses to budge. I've tried a foot long half inch drive ratchet, impact driver, and impact drive with slot screwdriver socket and I haven't gotten it. The head is perfectly round now and my slot i made broke the screw driver I used.
Any suggestions?
As requested here are some port pics!
And this is my next huge annoyance. The driver's seat is rusted as hell! I can't move it forward or back. the controls are so rusted the arms bend. I've been trying to the get the front bolt out for a few days and it refuses to budge. I've tried a foot long half inch drive ratchet, impact driver, and impact drive with slot screwdriver socket and I haven't gotten it. The head is perfectly round now and my slot i made broke the screw driver I used.
Any suggestions?
 08-16-12, 07:01 PM
#21
Moderator
iTrader: (3)
Join Date: Mar 2001
Location: https://www2.mazda.com/en/100th/
Posts: 30,780
Received 2,565 Likes
on
1,824 Posts
use a chisel to unscrew it, or maybe drill it out?
 08-18-12, 07:50 PM
#24
Senior Member
Thread Starter
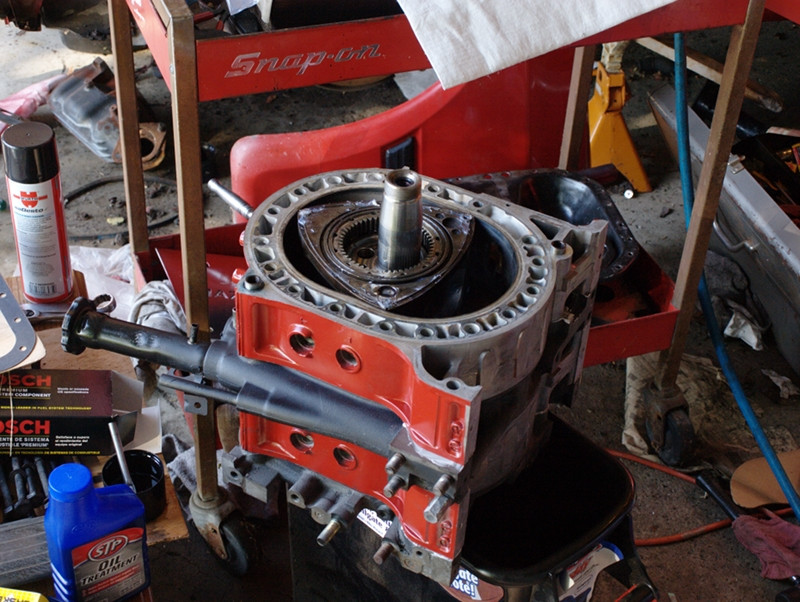
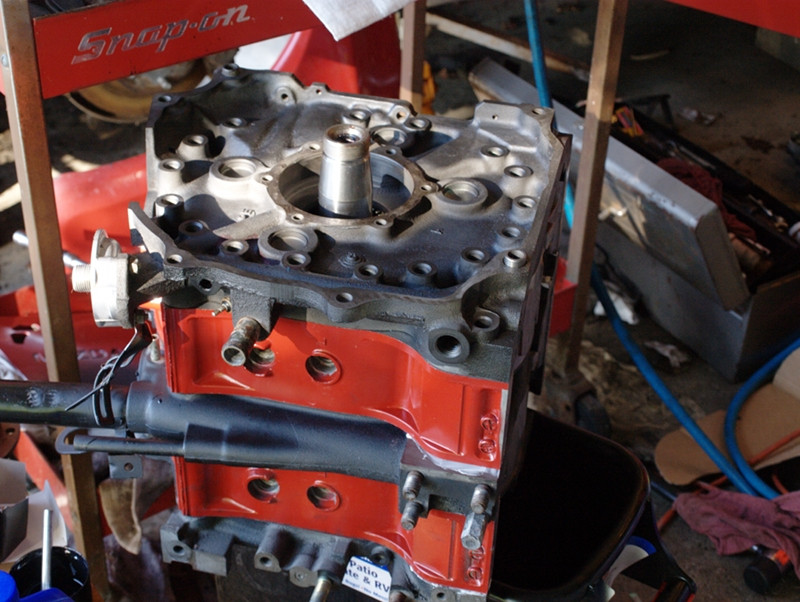
I'm putting the seat problem on the back burner for now because the engine is almost complete! All torqued, just need to set the end-play and install the front cover.
Also I had the gas tank professionally cleaned. He broiled hte tank then drilled holes on either side and sand blasted the interior. Then coated the inside with witchcraft. It cost a lot but I think it was totally worth it.
The engine was built on top of a charcoal storage bucket but I have since moved it to a more stable paint bucket. I can still lift the engine myself which I find hilarious.
For Assembly lube I used STP oil treatment stuff. Its tacky and heavy wich was great because I didn't spill any when hte cup fell off the workbench!


Also I had the gas tank professionally cleaned. He broiled hte tank then drilled holes on either side and sand blasted the interior. Then coated the inside with witchcraft. It cost a lot but I think it was totally worth it.

The engine was built on top of a charcoal storage bucket but I have since moved it to a more stable paint bucket. I can still lift the engine myself which I find hilarious.
For Assembly lube I used STP oil treatment stuff. Its tacky and heavy wich was great because I didn't spill any when hte cup fell off the workbench!


 08-18-12, 10:54 PM
#25
with your seat rail bolts....I had the same problem with mine except that the rust was much worse...not sure if you wanted to keep your seats, but I ended up unhooking the cloth that covered the seat and removed the padding and then took the seats off of the rails by removing the bolts....that way I could get a vise grip on the bolt and get it off