(Australia) Cams series 5 build
 11-19-13, 01:53 PM
#76
Full Member
Thread Starter
iTrader: (1)

Join Date: Jul 2011
Location: Sydney, Australia
Posts: 138
Likes: 0
Received 0 Likes
on
0 Posts
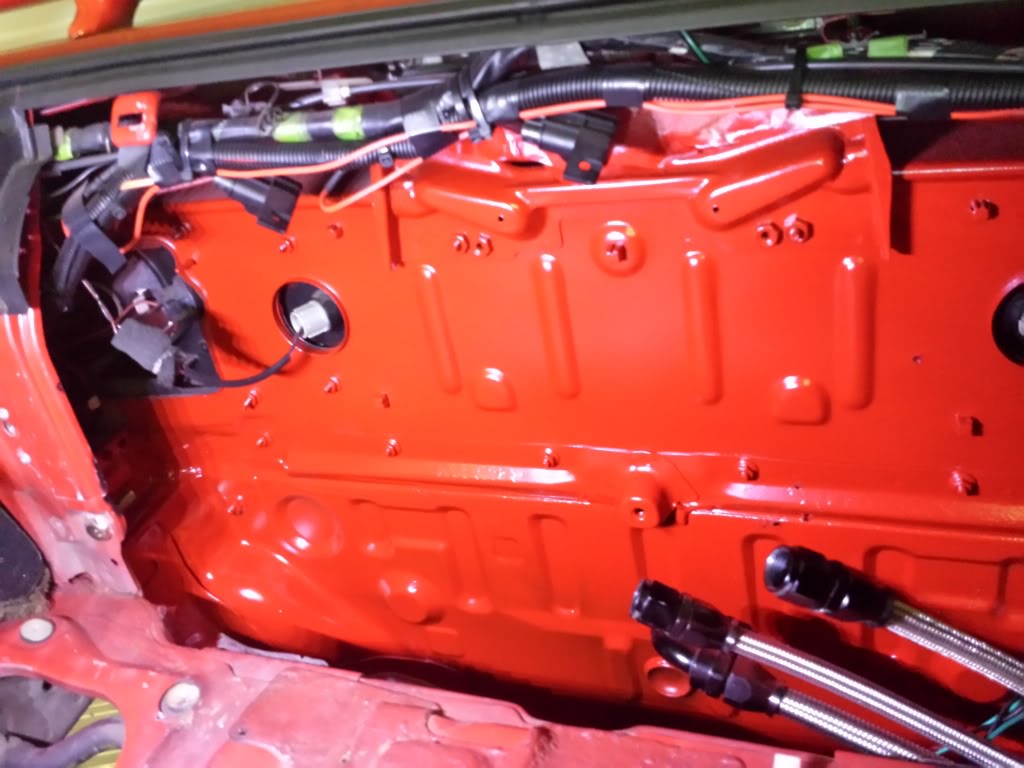
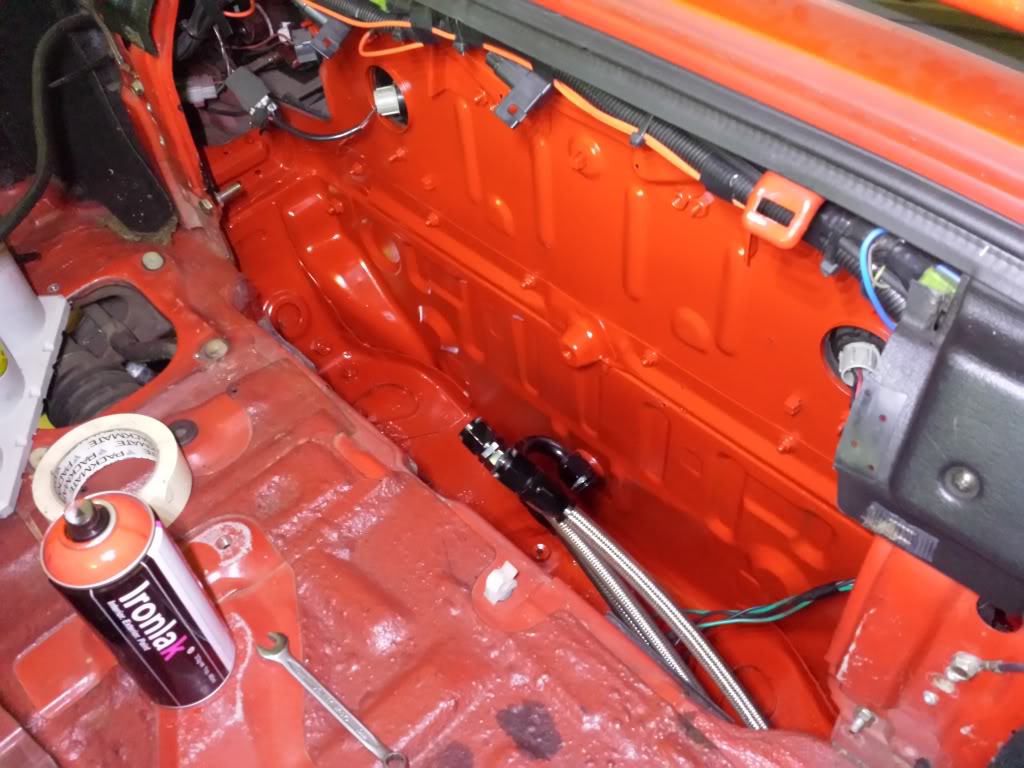
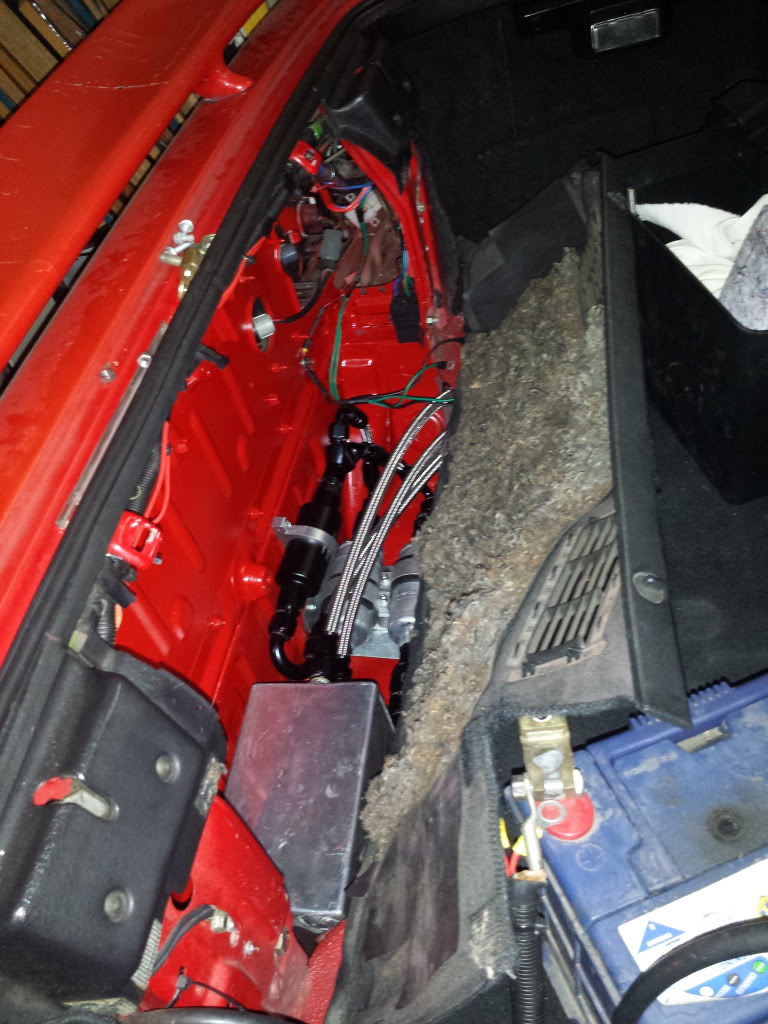
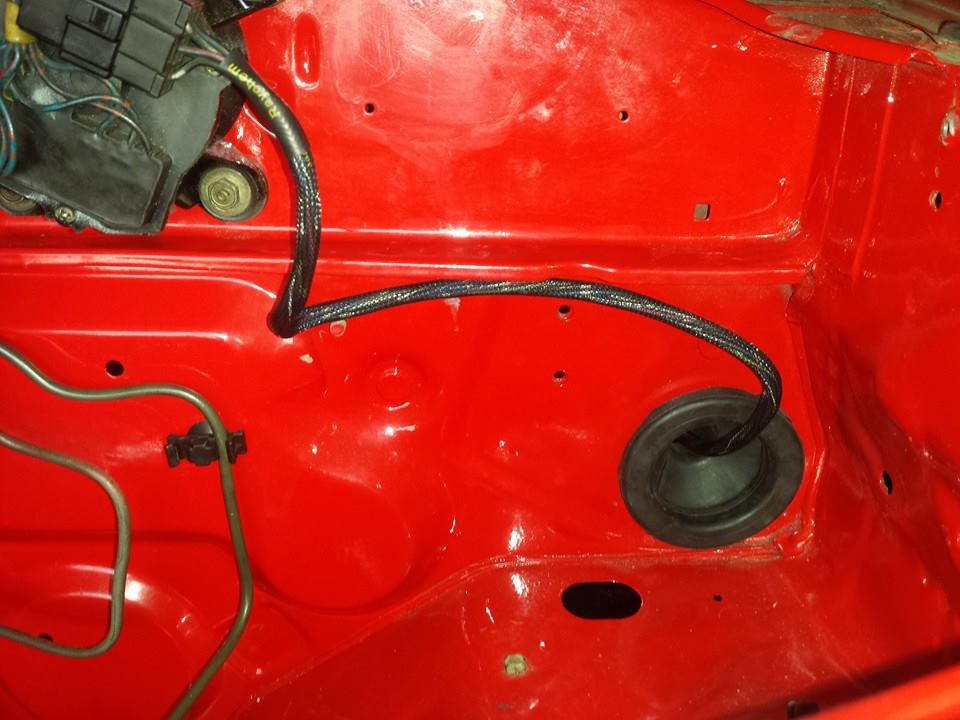
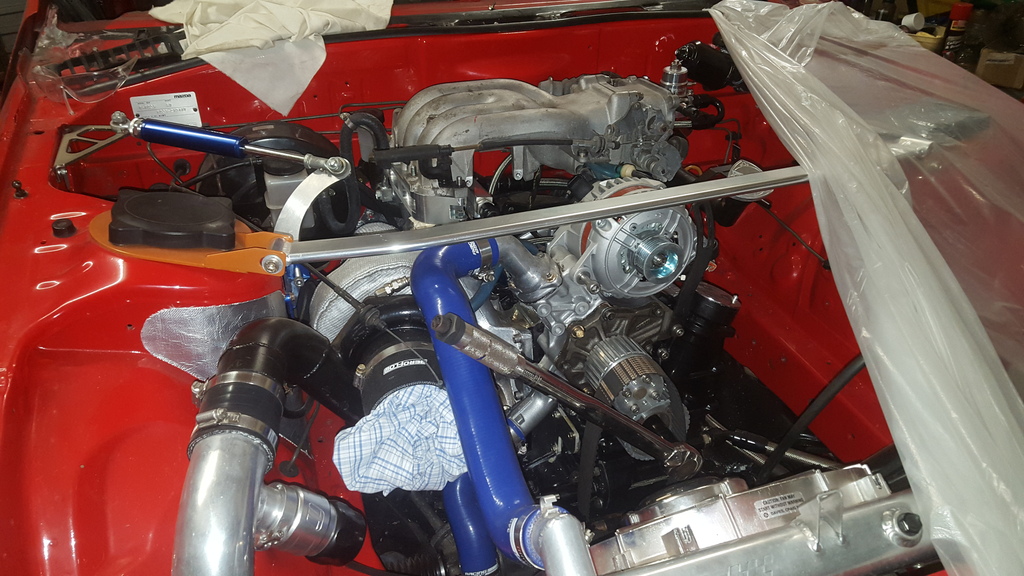
Gave them all a final blow out and started sealing them today.
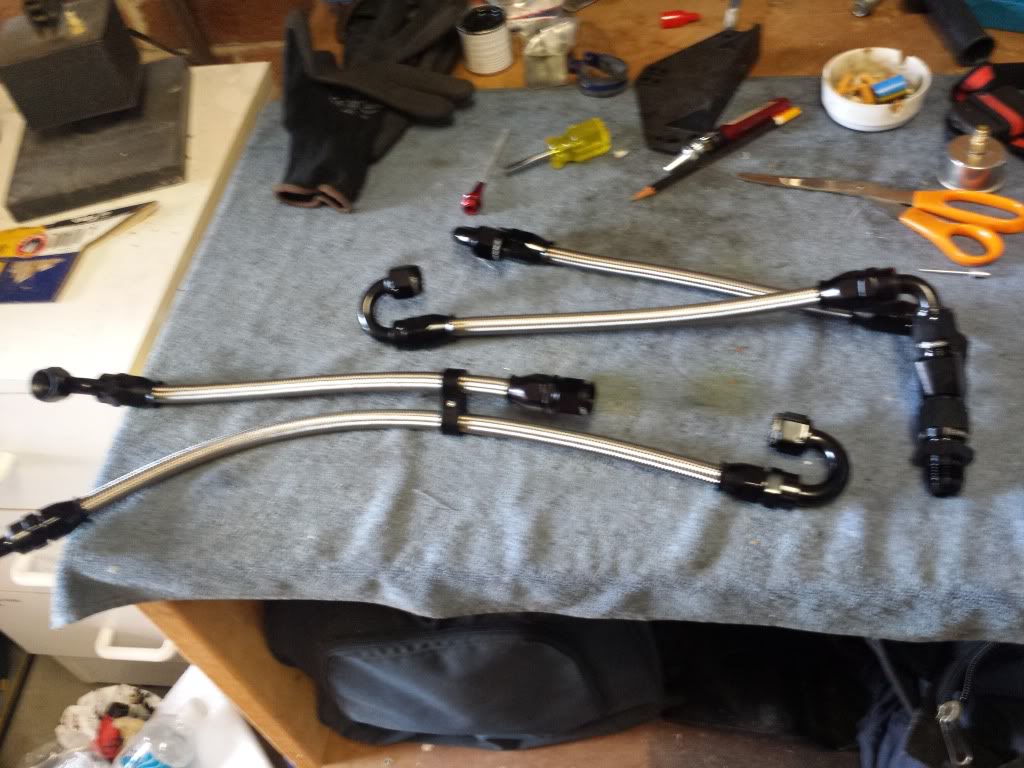
Then I decided the black looked ****, so I quickly scuffed it all and painted the boot red lol will look heaps better once its all back in.
Then I decided the black looked ****, so I quickly scuffed it all and painted the boot red lol will look heaps better once its all back in.
 11-19-13, 01:54 PM
#77
Full Member
Thread Starter
iTrader: (1)
Join Date: Jul 2011
Location: Sydney, Australia
Posts: 138
Likes: 0
Received 0 Likes
on
0 Posts
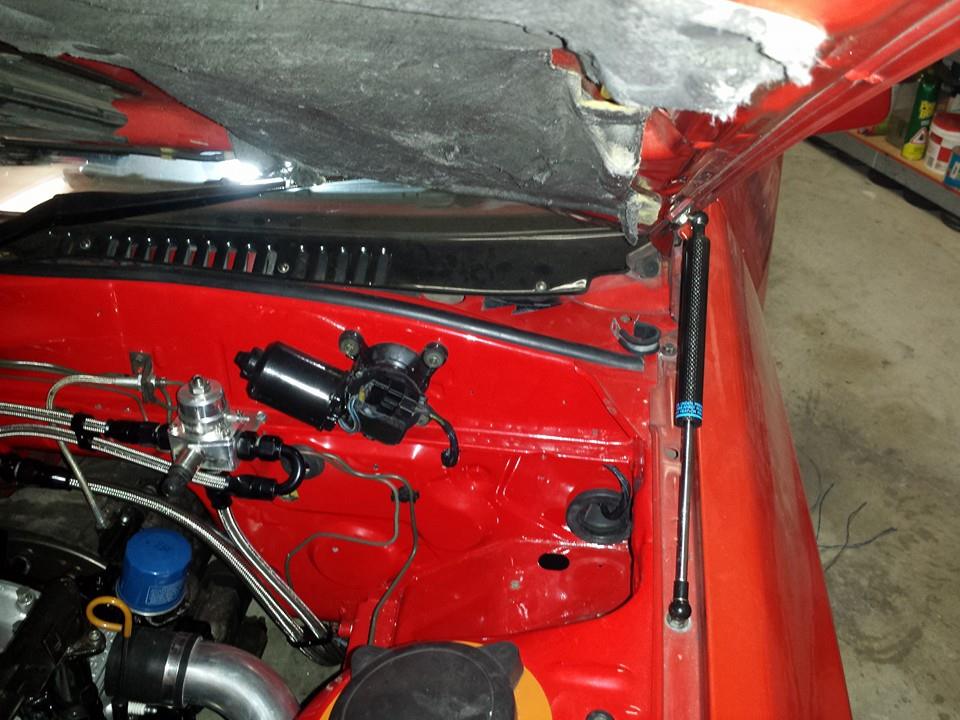
It should be tuned in the next week or 2 hopefully. Just have to put my steering rack back in.
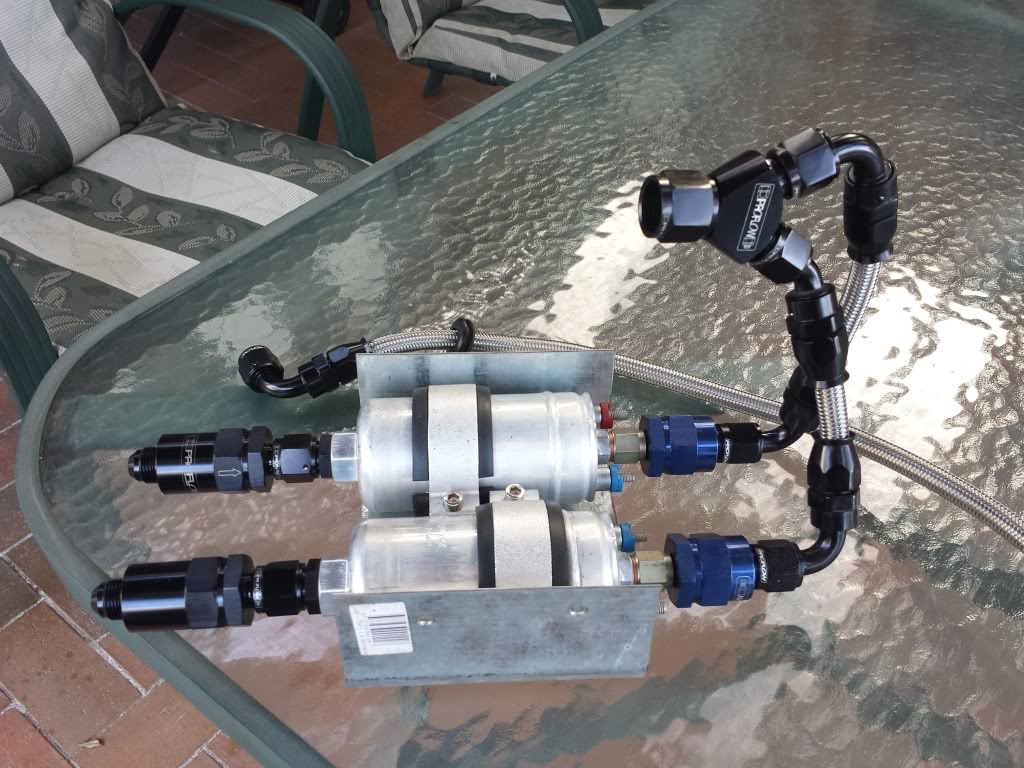
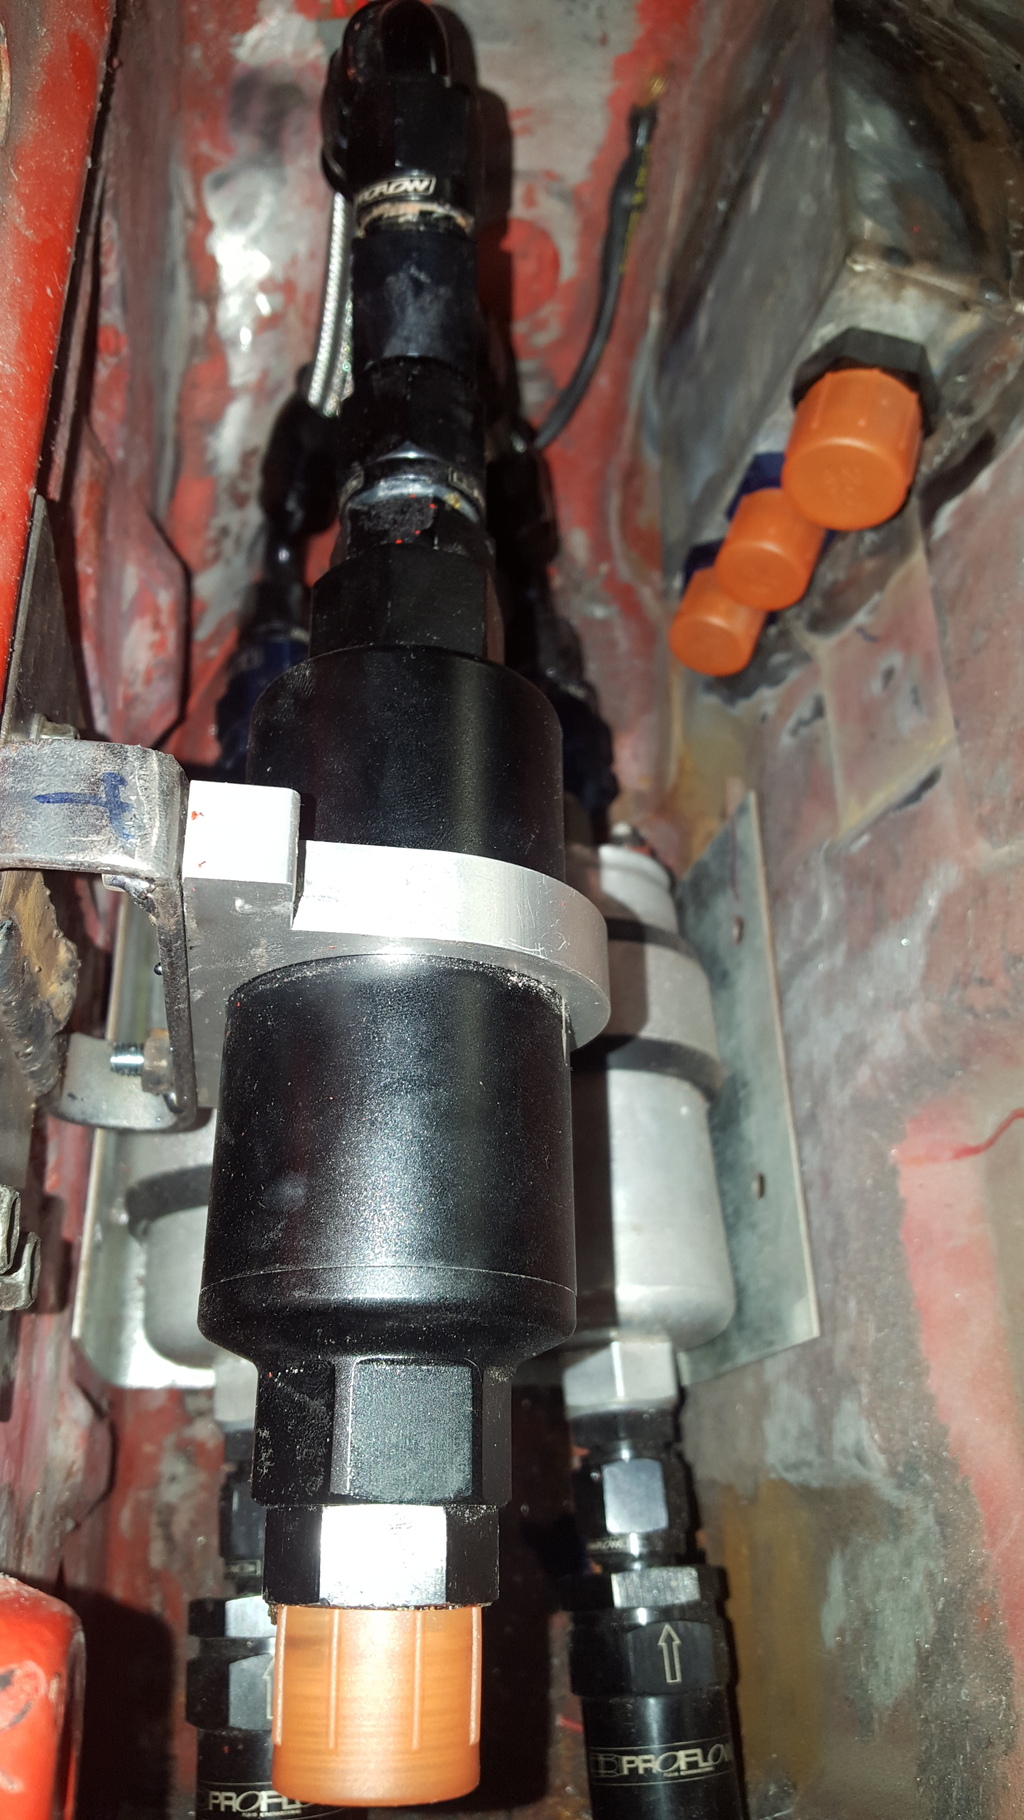
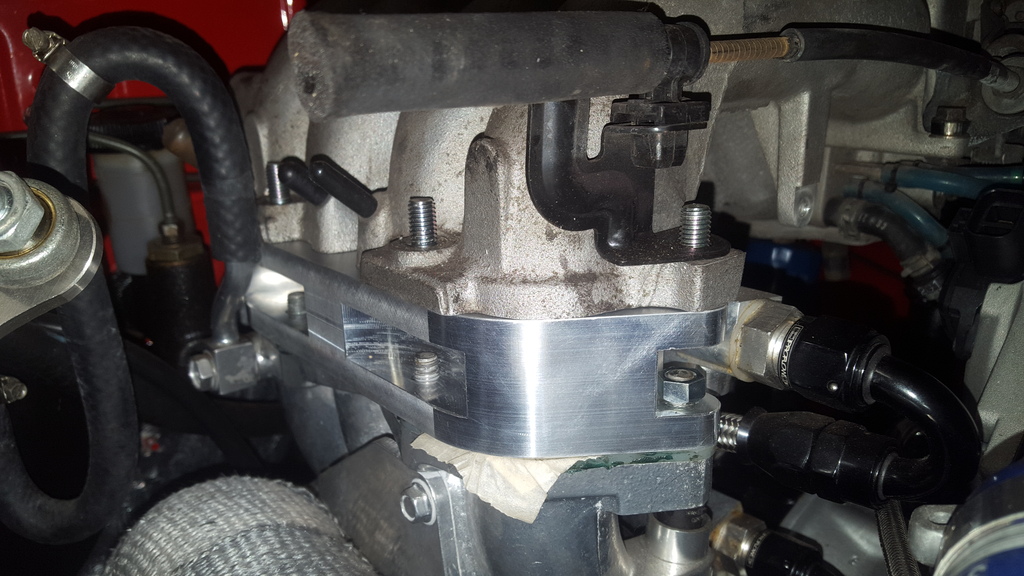
all sealed and mounted for good.. Just need to fix my filter mount.
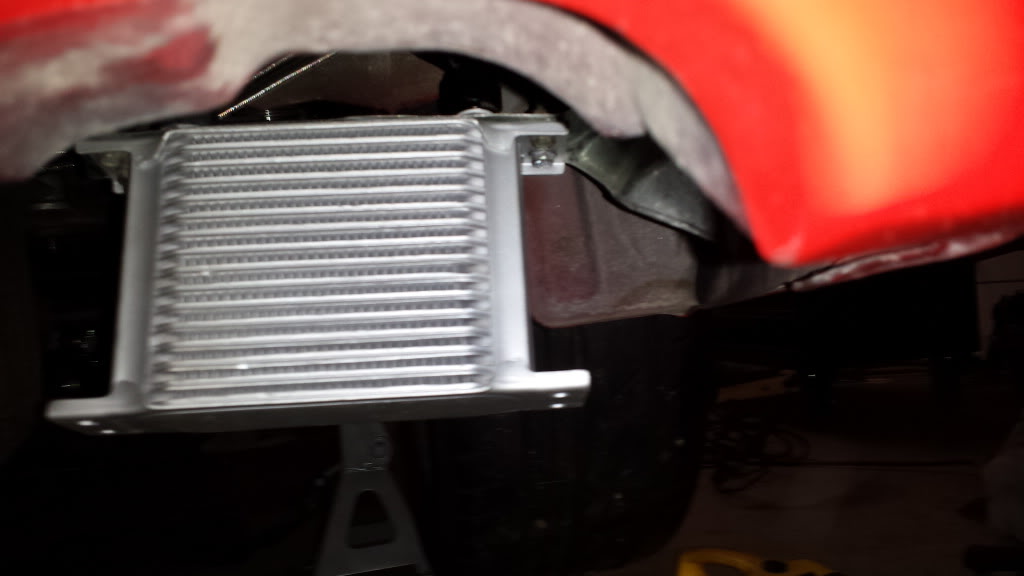
all sealed and mounted for good.. Just need to fix my filter mount.
05-22-14, 11:38 PM
#78
Full Member
Thread Starter
iTrader: (1)
Join Date: Jul 2011
Location: Sydney, Australia
Posts: 138
Likes: 0
Received 0 Likes
on
0 Posts
Havent updated this in a while. Ive been doing quite a bit of work on the car. I just got lazy with the updates.
Its so much easier to update a build thread on facebook so i have moved everything over to their.
https://www.facebook.com/camsrx7build
search for "cams rx7 build" if you cant find it.
Its so much easier to update a build thread on facebook so i have moved everything over to their.
https://www.facebook.com/camsrx7build
search for "cams rx7 build" if you cant find it.
06-22-14, 09:50 PM
#79
Full Member
Thread Starter
iTrader: (1)
Join Date: Jul 2011
Location: Sydney, Australia
Posts: 138
Likes: 0
Received 0 Likes
on
0 Posts
Havent been doing much lately apart from spending money lol.
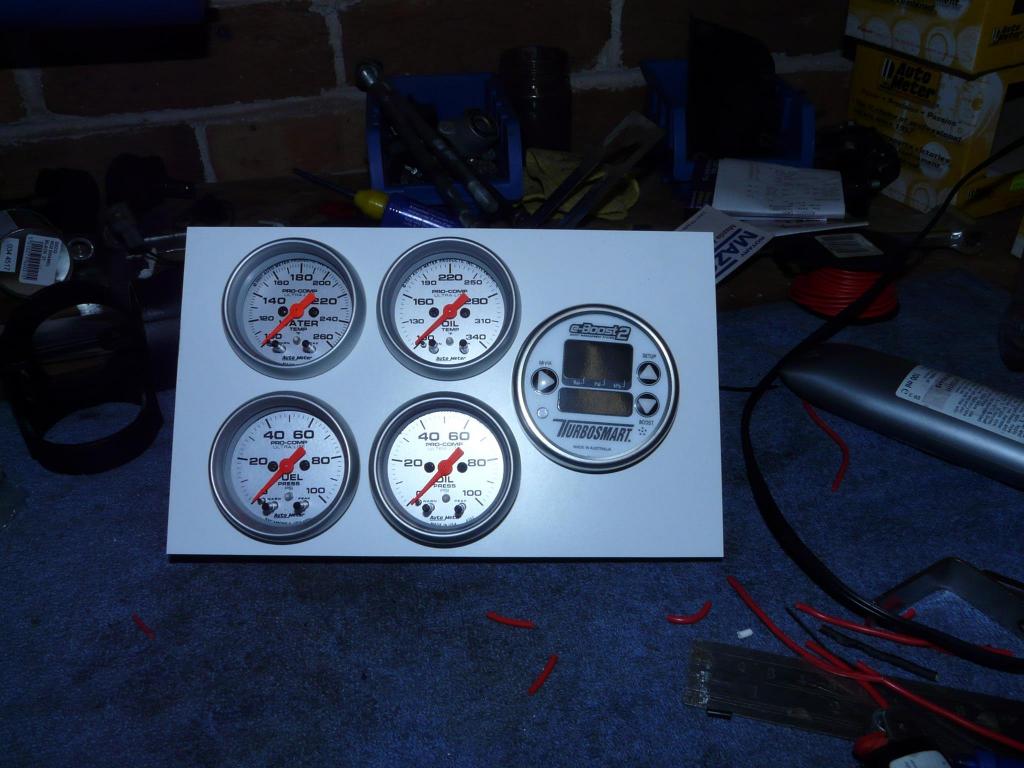
Wired in some gauges last week, oil pressure, oil temp, fuel pressure and water temp.
Finally got a decent electronic boost controller. Didnt get the one I wanted but this was only because im not tuning it. So I went with troys advice and got an eboost2.
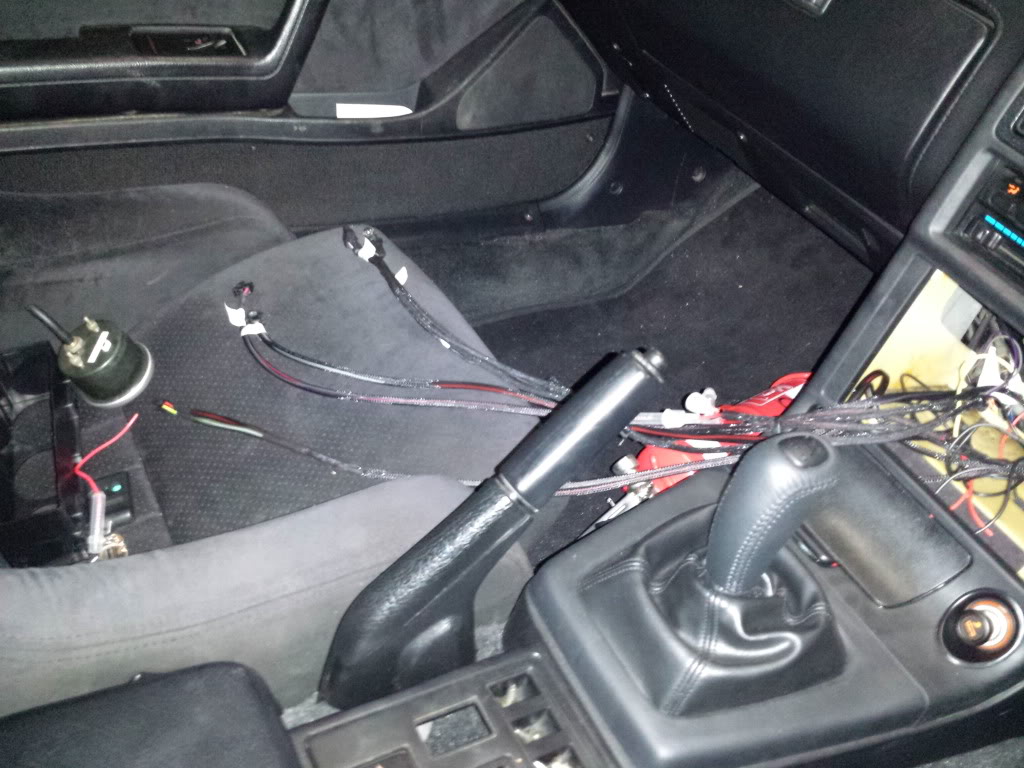
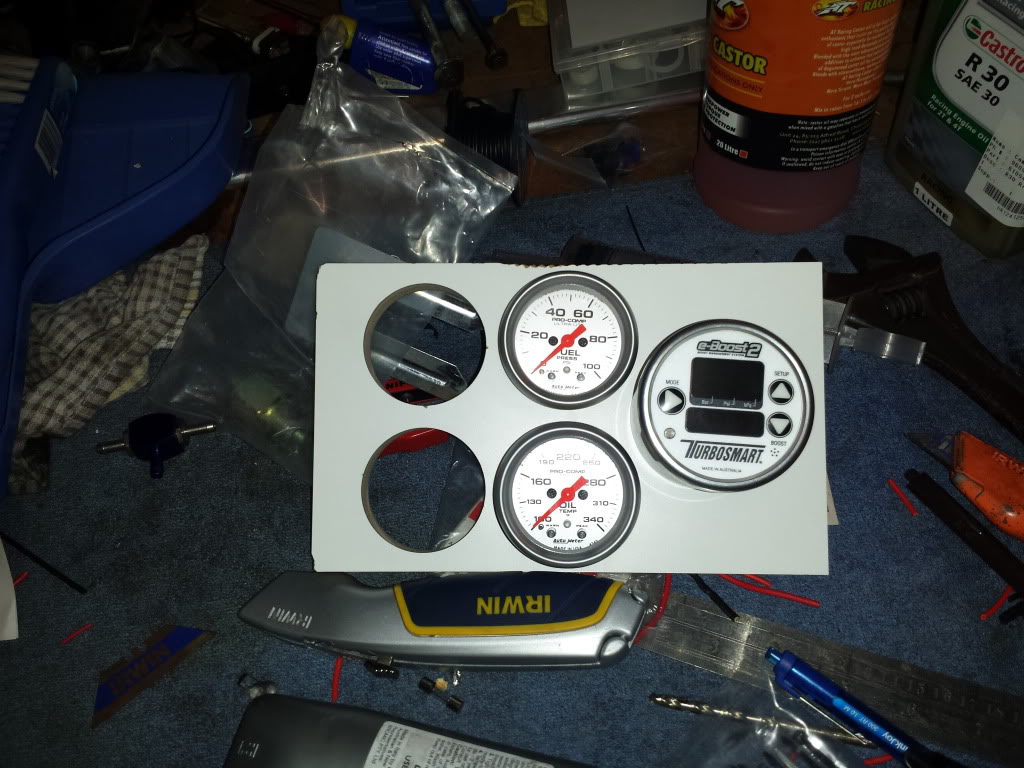
Wired in some gauges last week, oil pressure, oil temp, fuel pressure and water temp.
Finally got a decent electronic boost controller. Didnt get the one I wanted but this was only because im not tuning it. So I went with troys advice and got an eboost2.
06-22-14, 09:51 PM
#80
Full Member
Thread Starter
iTrader: (1)
Join Date: Jul 2011
Location: Sydney, Australia
Posts: 138
Likes: 0
Received 0 Likes
on
0 Posts
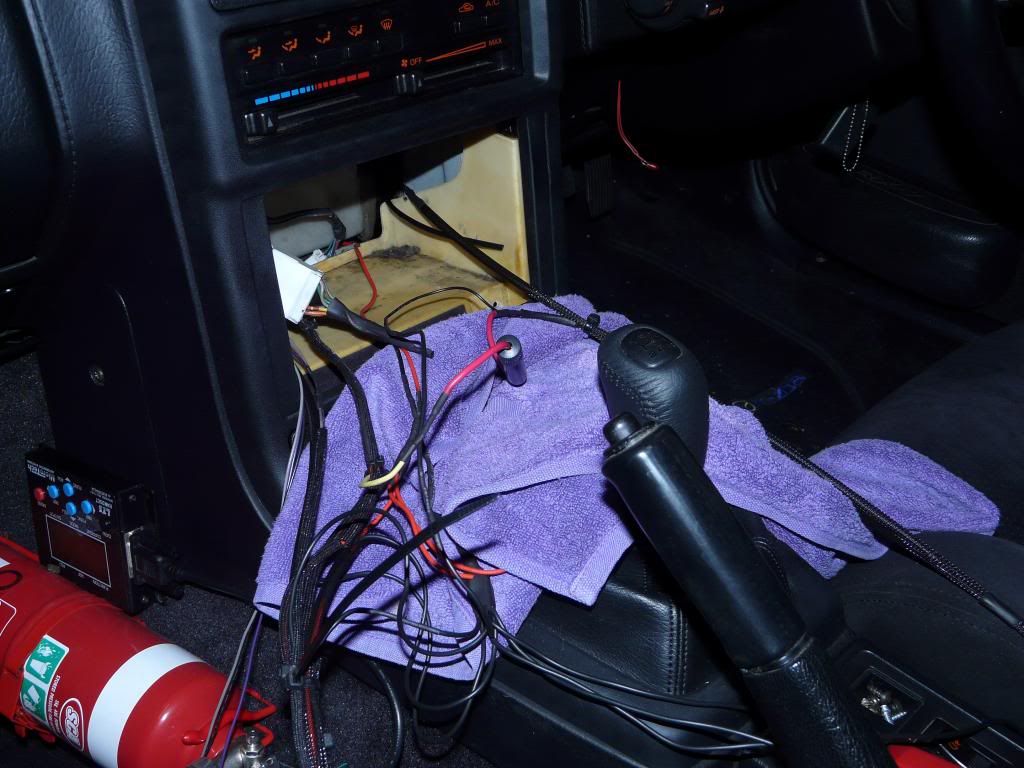
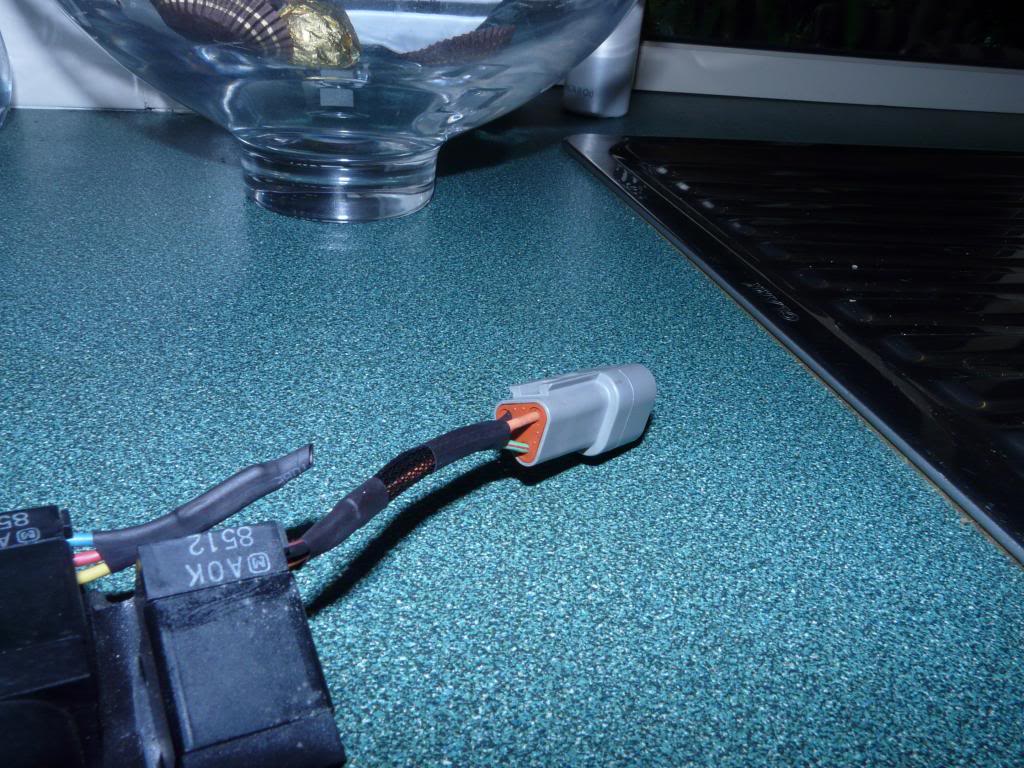
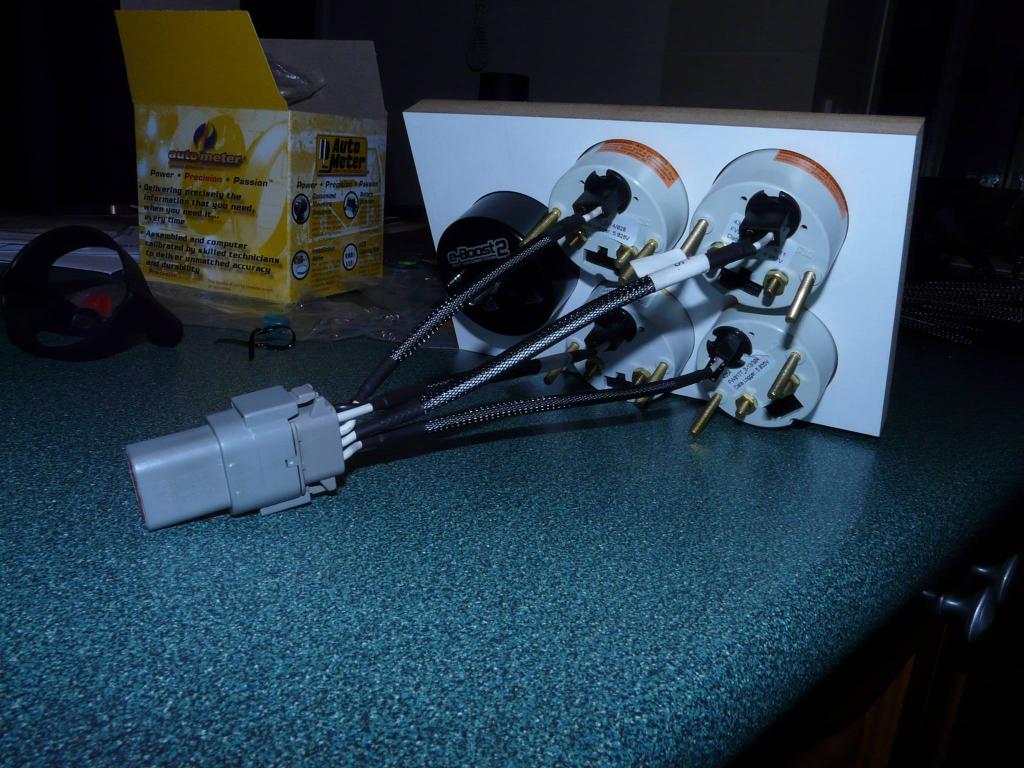
Canned my first attempt at wiring the guages in. Now re-doing it with deutsch plugs and one single harness. Dont know why i jumped the gun and started wiring them up indiviually. Just waiting on some tools and plugs to finish it off. Also started thinking about doing a mil spec plug for my engine wiring. Would like to also incorporate the guage sensors, but im having trouble finding a plug that accepts multi AWG wiring sizes. All the ones i have found are either 32 pins all @ 20 AWG or all 22 AWG. I need say 10 x 20AWG pins, 5 x 16AWG and so on.

 [/URL]
06-22-14, 09:52 PM
[/URL]
06-22-14, 09:52 PM
#82
Full Member
Thread Starter
iTrader: (1)
Join Date: Jul 2011
Location: Sydney, Australia
Posts: 138
Likes: 0
Received 0 Likes
on
0 Posts
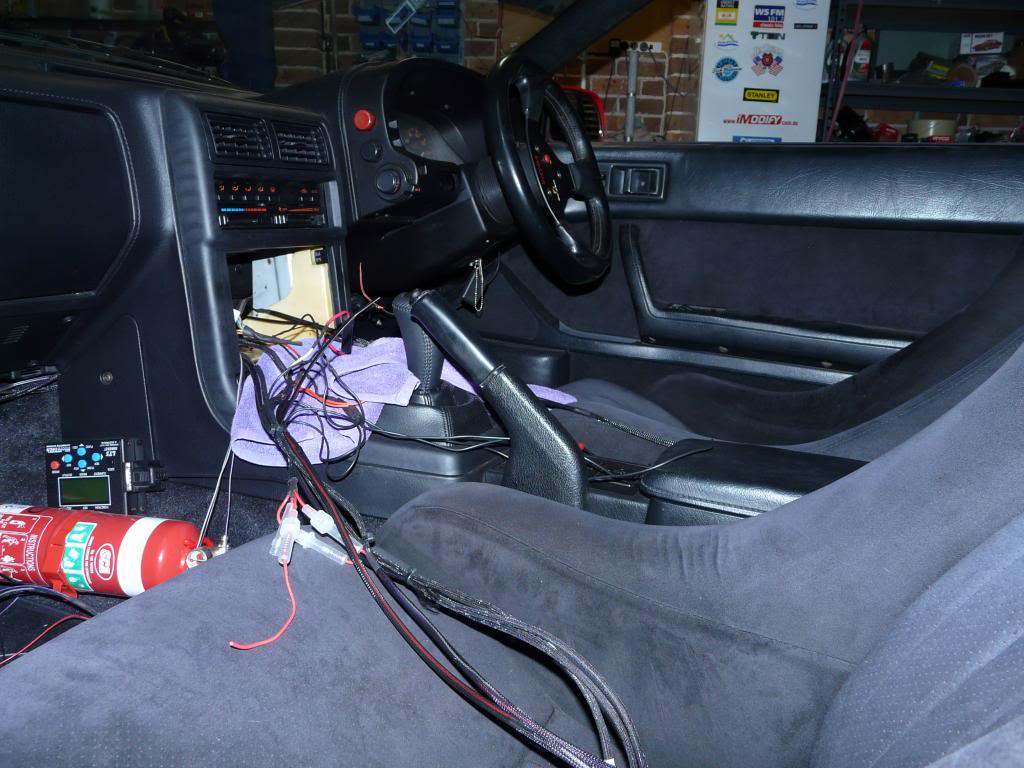
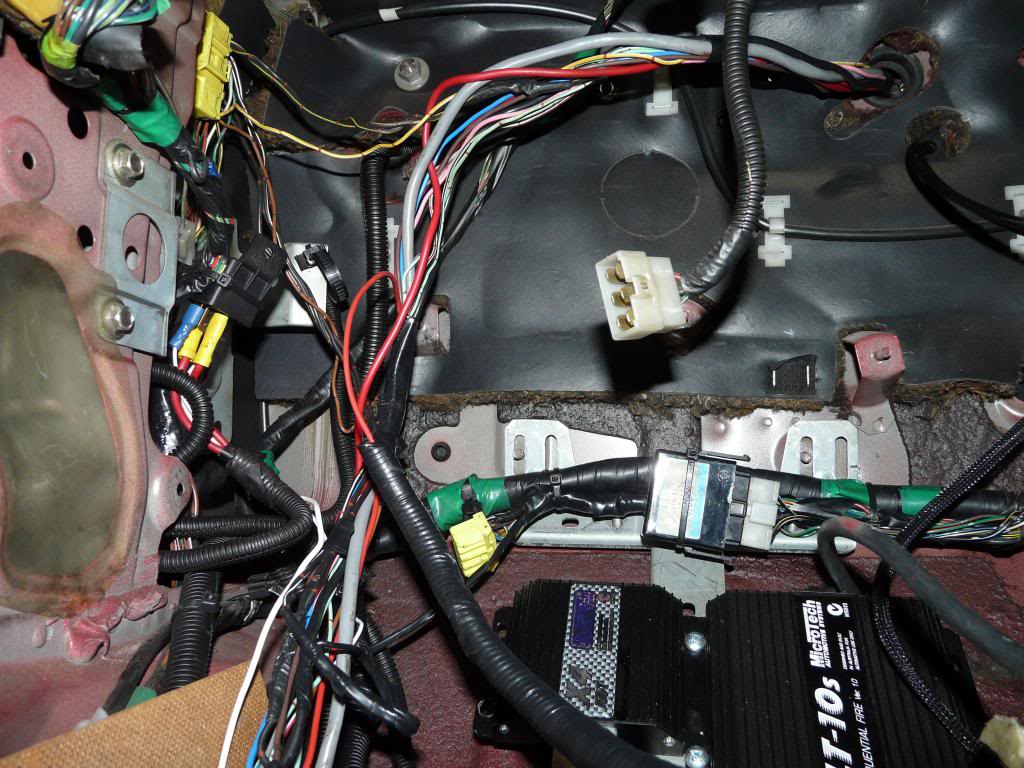
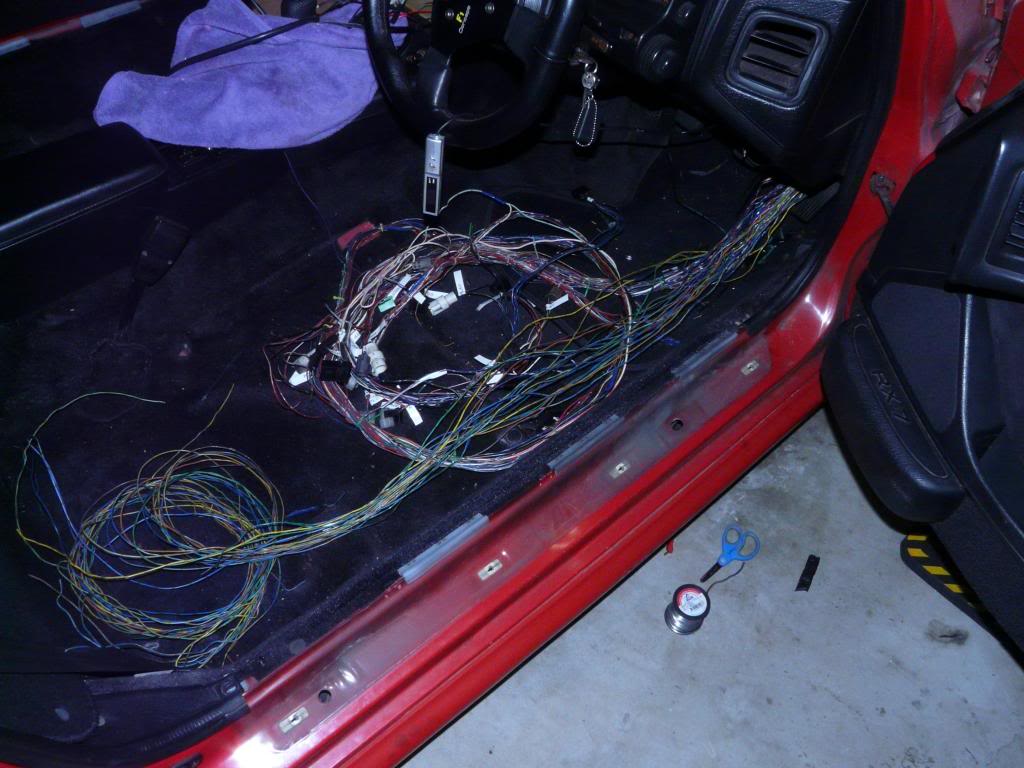
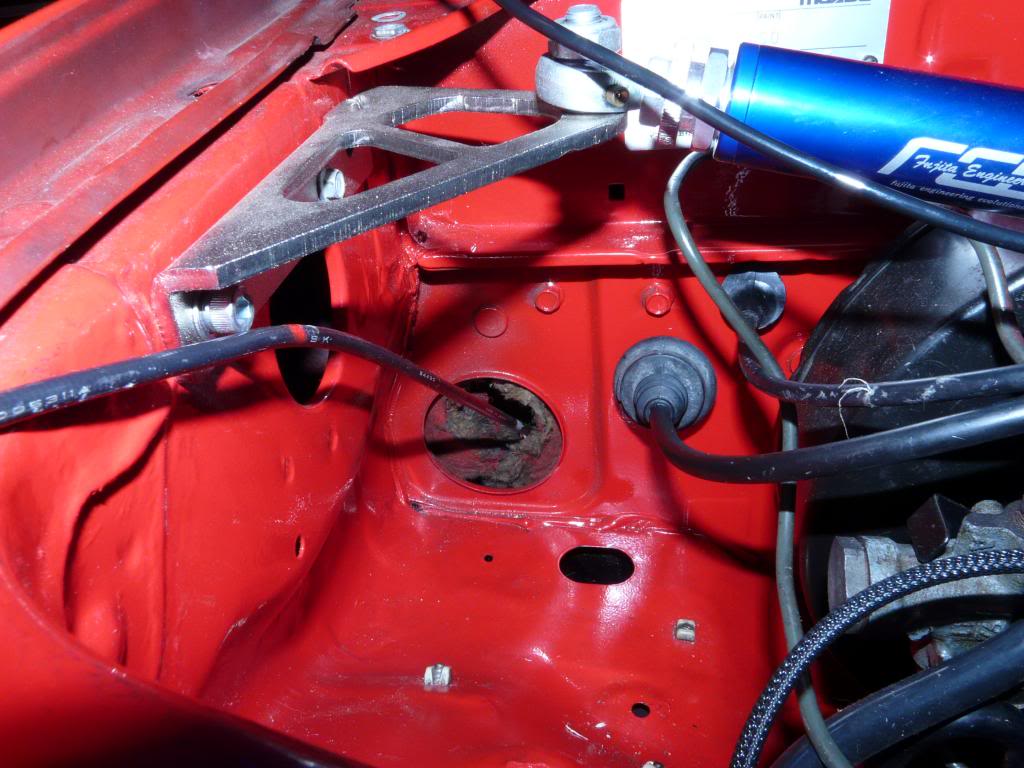
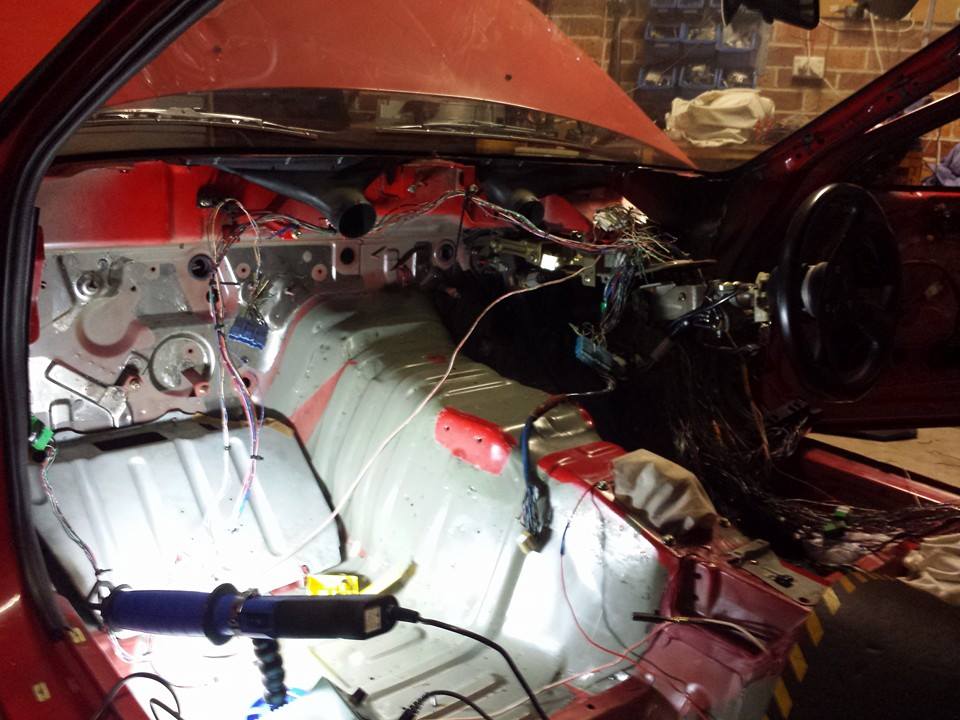
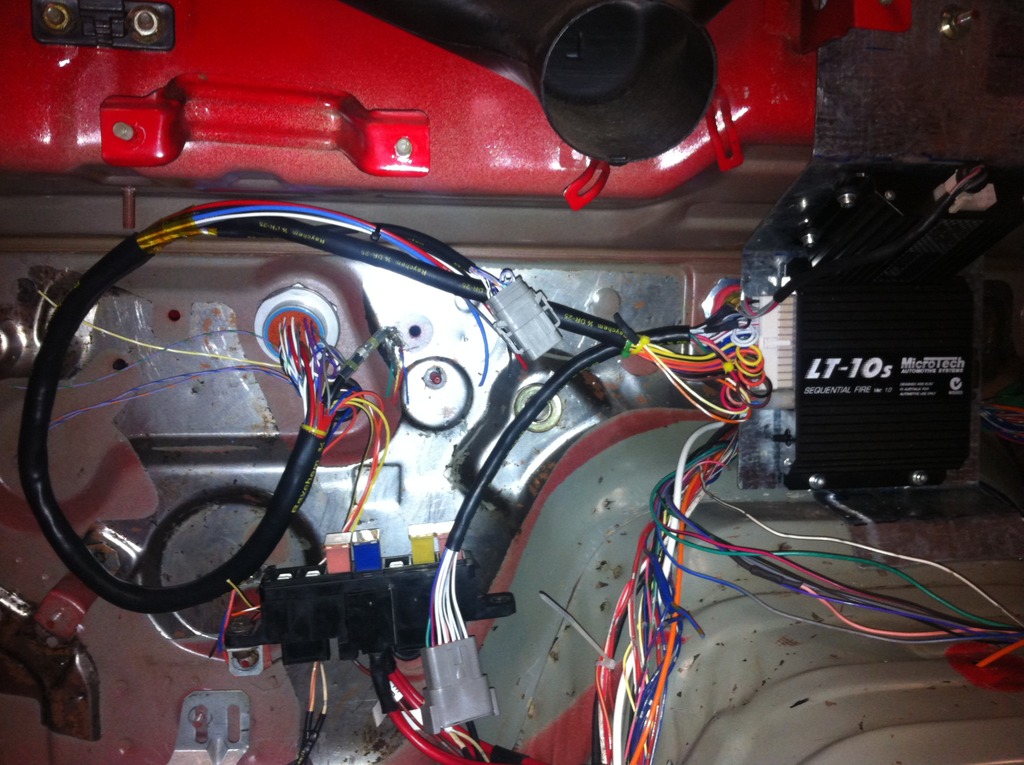
Well, I finally started doing something i never thought i would understand. Rewiring the entire engine bay loom. Body looms are now getting sorted aswell. Originally i was just planning on doing the engine loom, but i have now decided to do the job right the first time. I havent even made it past the relays in front of the radiator yet and ive already removed about 15 wires. The most time consuming part is labelling everything correctly so that i can trace the circuit back and hopefully shorten alot of the loom.
Some of the soldering in their at the moment. Glad i decided to take all the tape off finally

Under the dash
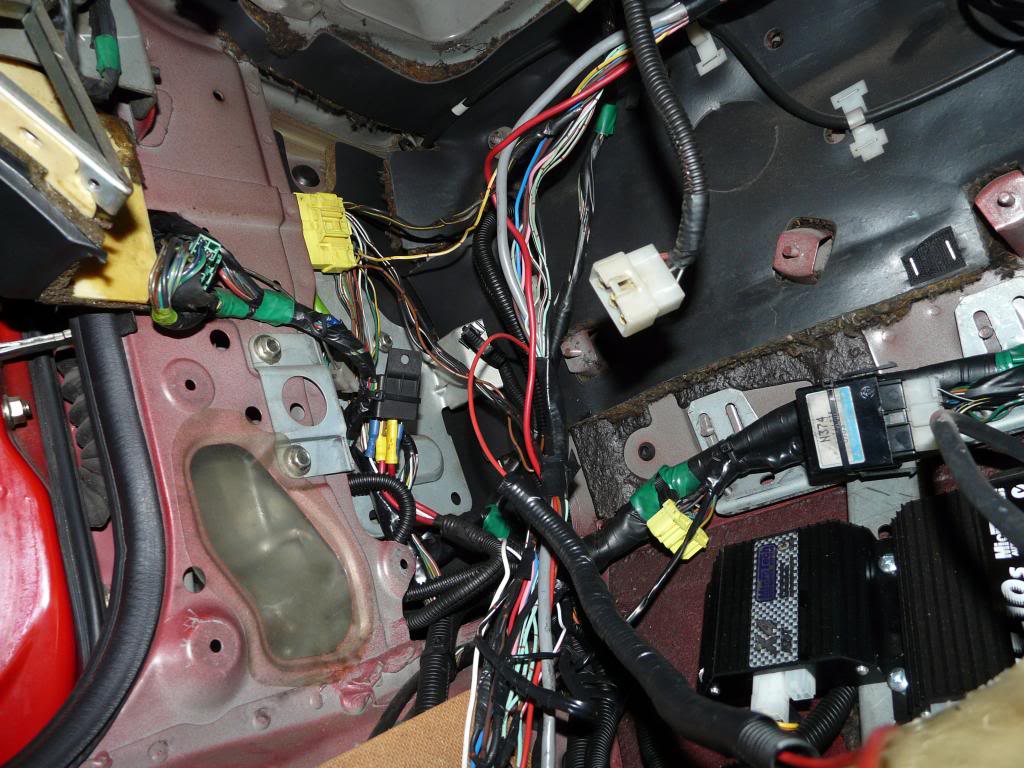

Started to finally tear the loom down.
Relays are all getting mounted in cabin so this will remain all nice and clean
And this is where i thought i would finish but then i couldnt sleep and went out for a smoke and then some how i stripped the remainder out under the turbo
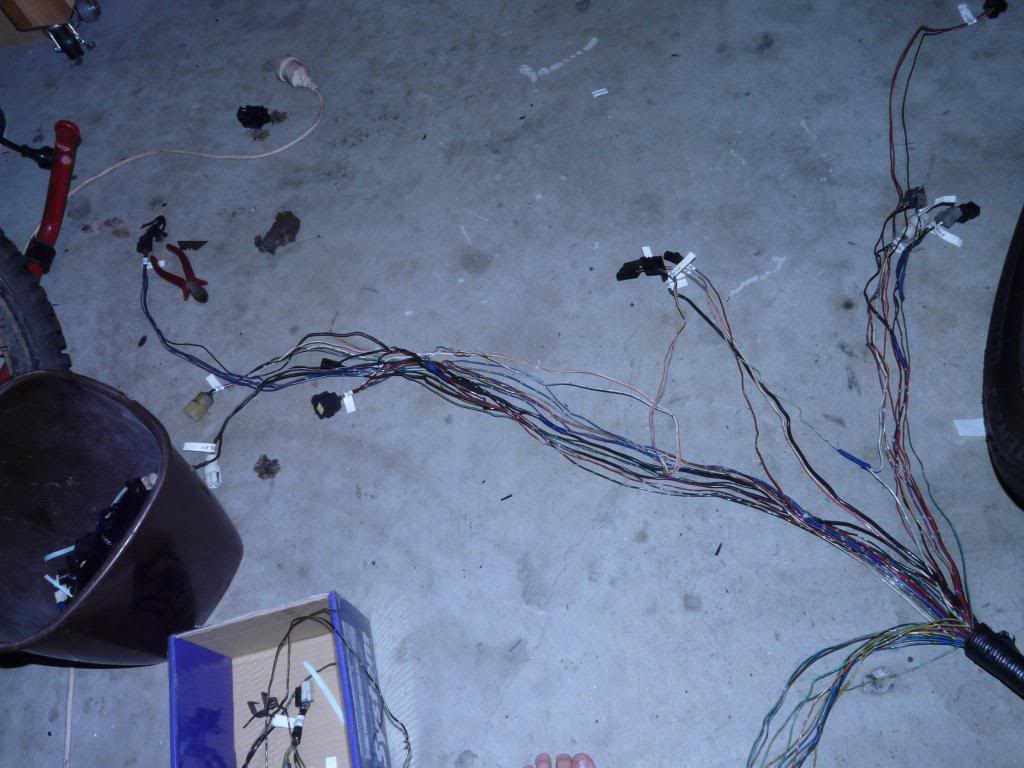
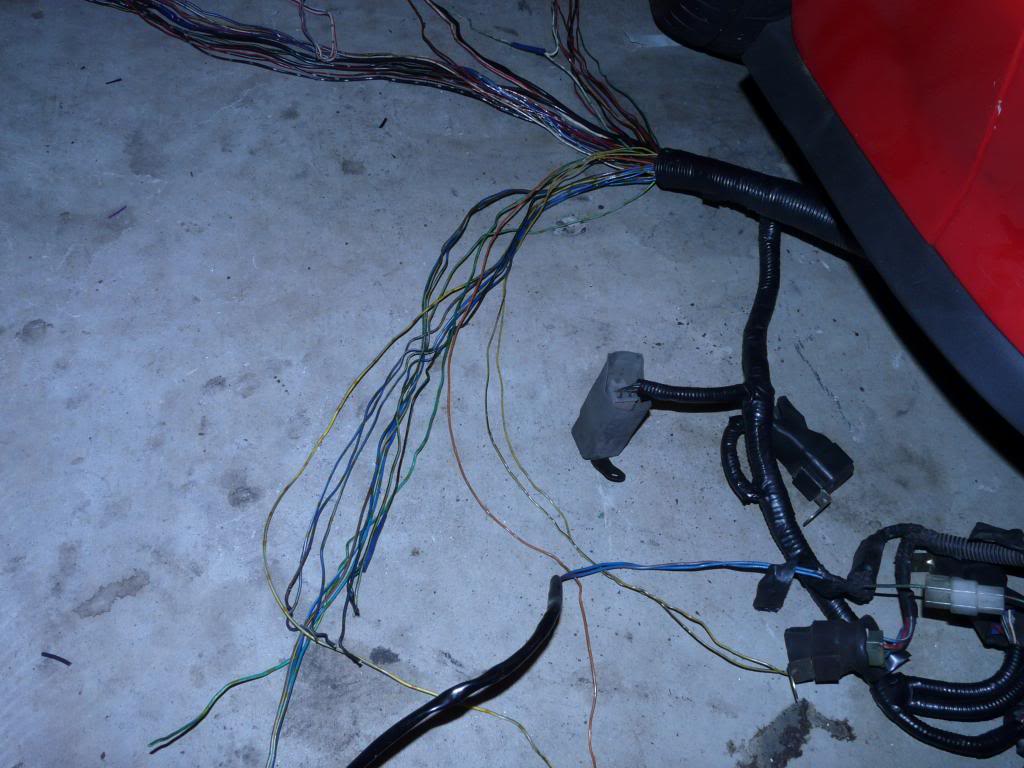
And then this is where i finished off.
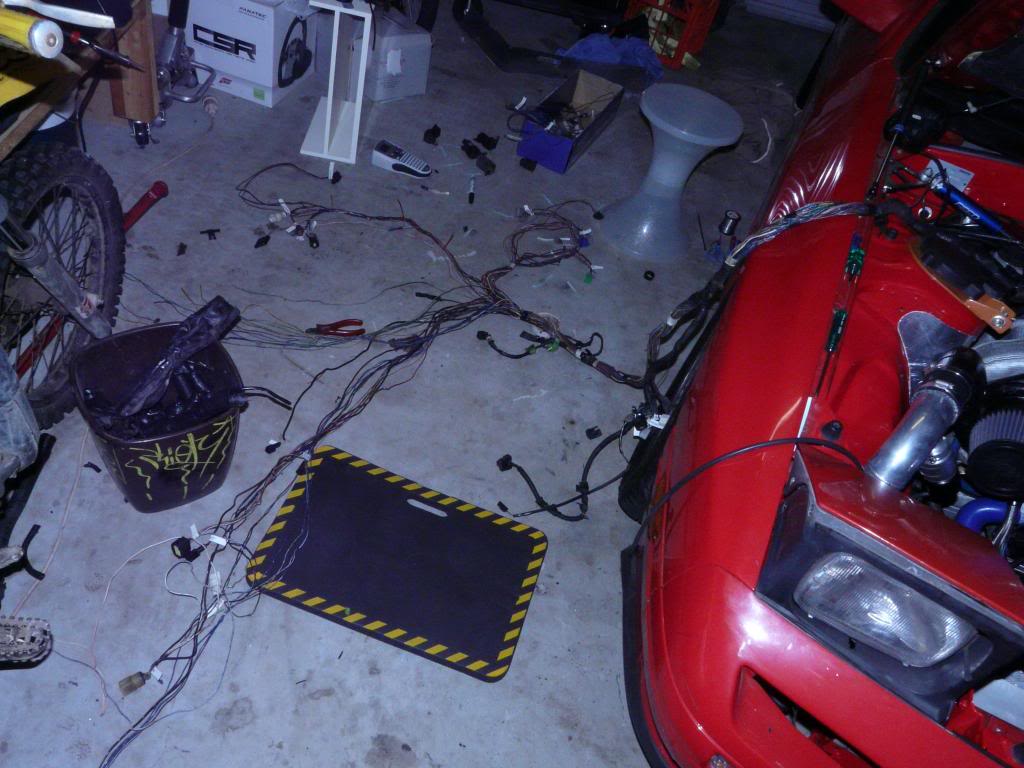
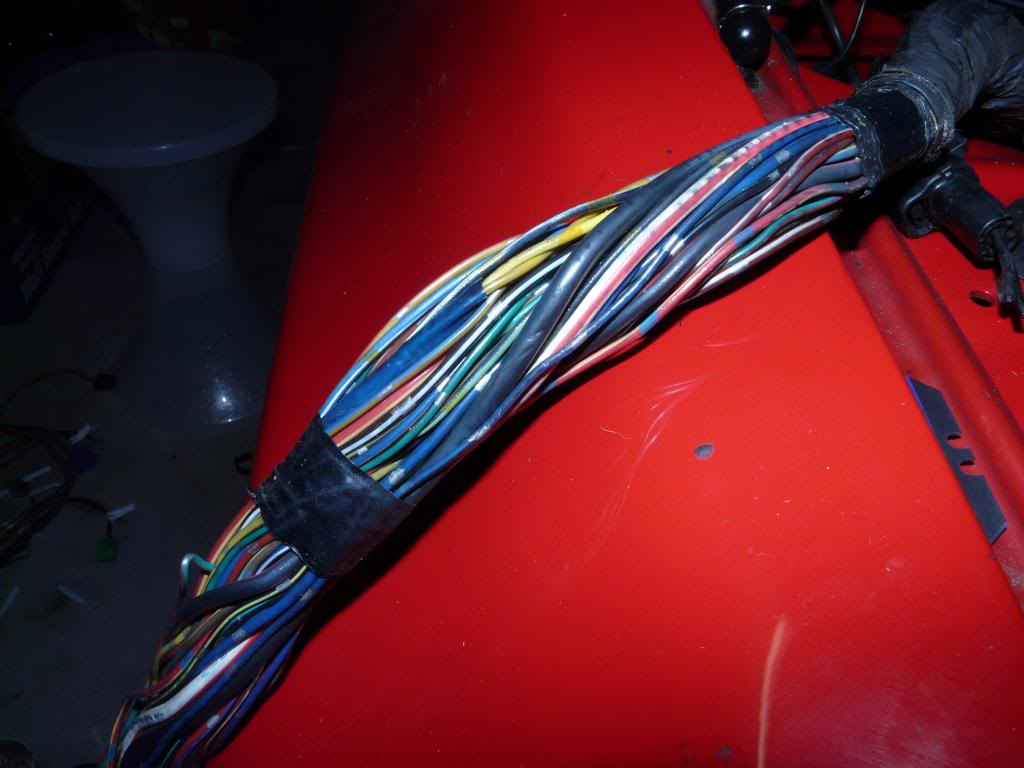
This is going to be the entire passenger side guard routed harness.
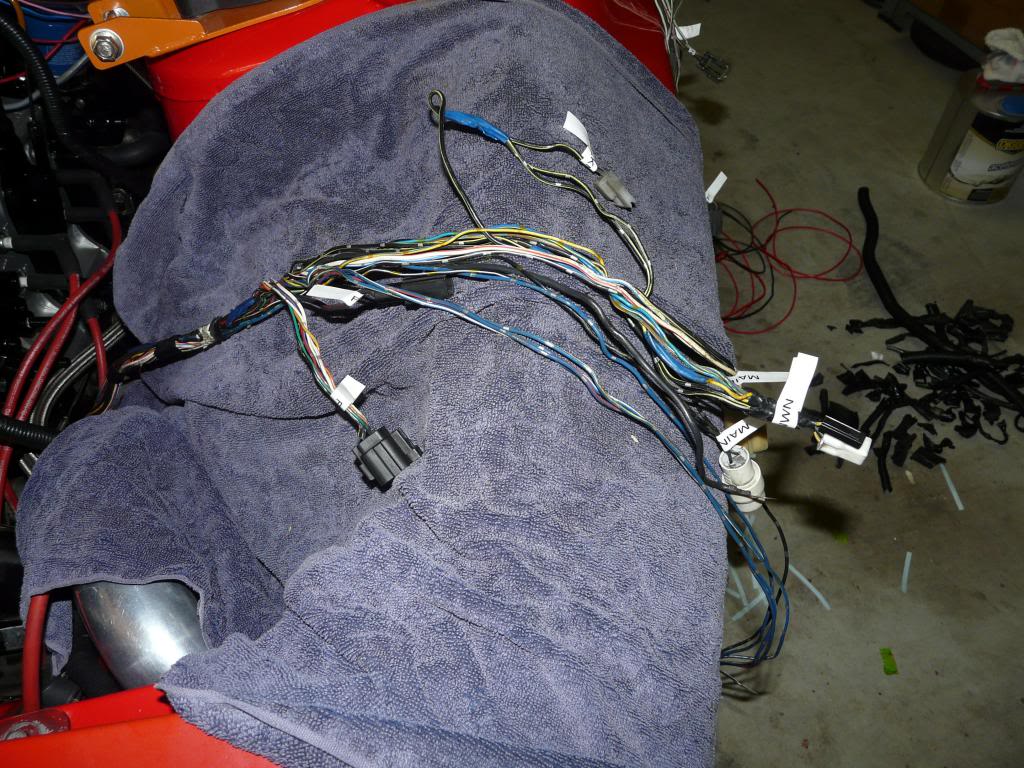
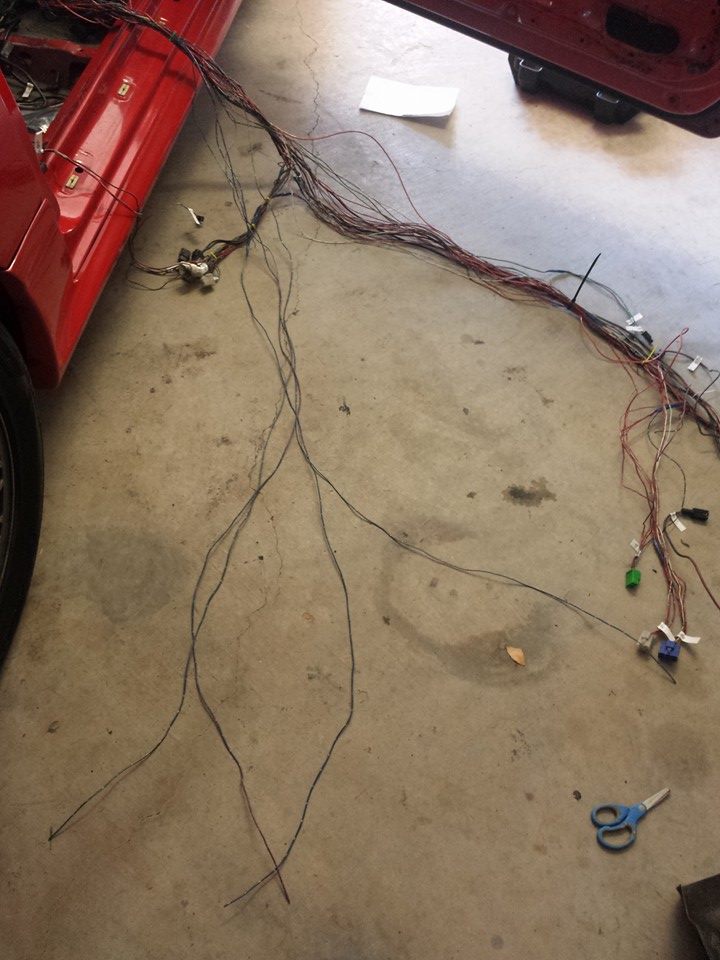
This is the collection of deleted wires so far.
Some of the soldering in their at the moment. Glad i decided to take all the tape off finally
Under the dash
Started to finally tear the loom down.
Relays are all getting mounted in cabin so this will remain all nice and clean
And this is where i thought i would finish but then i couldnt sleep and went out for a smoke and then some how i stripped the remainder out under the turbo
And then this is where i finished off.
This is going to be the entire passenger side guard routed harness.
This is the collection of deleted wires so far.
 06-23-14, 09:52 PM
#85
Full Member
Thread Starter
iTrader: (1)
Join Date: Jul 2011
Location: Sydney, Australia
Posts: 138
Likes: 0
Received 0 Likes
on
0 Posts
Started re-wiring the guages with some deutsch plugs.
Threw my first plug layout, out the window.
Changed to a much easier set up of only 2 plugs
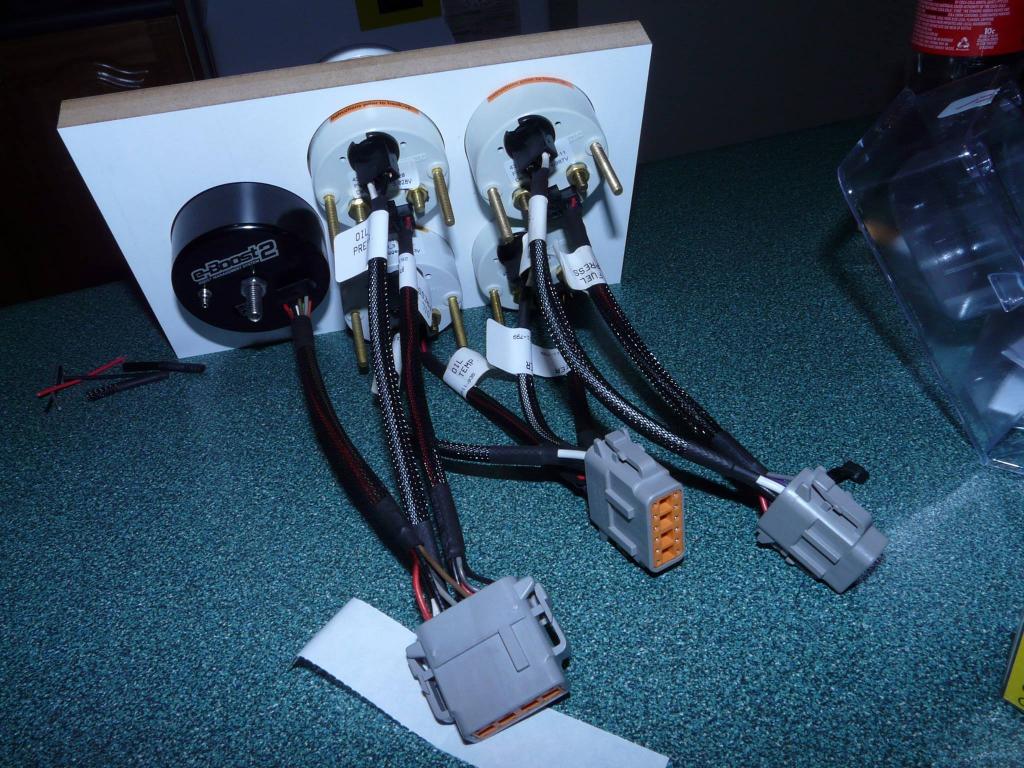
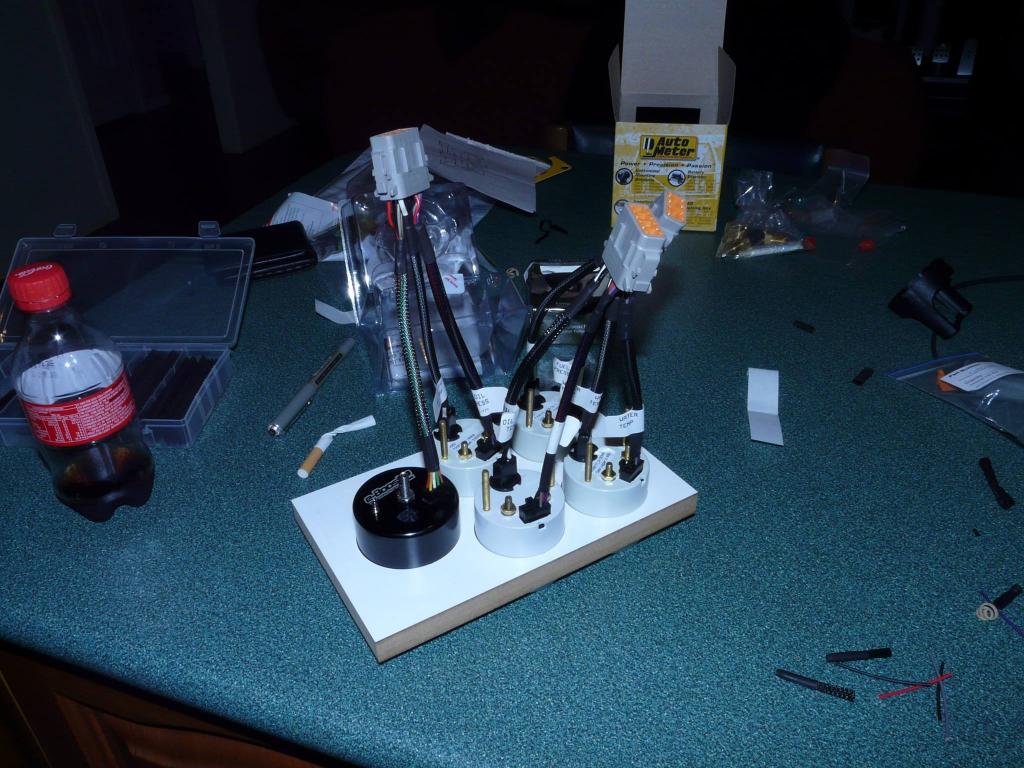


Threw my first plug layout, out the window.
Changed to a much easier set up of only 2 plugs


 06-23-14, 09:54 PM
#88
Full Member
Thread Starter
iTrader: (1)
Join Date: Jul 2011
Location: Sydney, Australia
Posts: 138
Likes: 0
Received 0 Likes
on
0 Posts

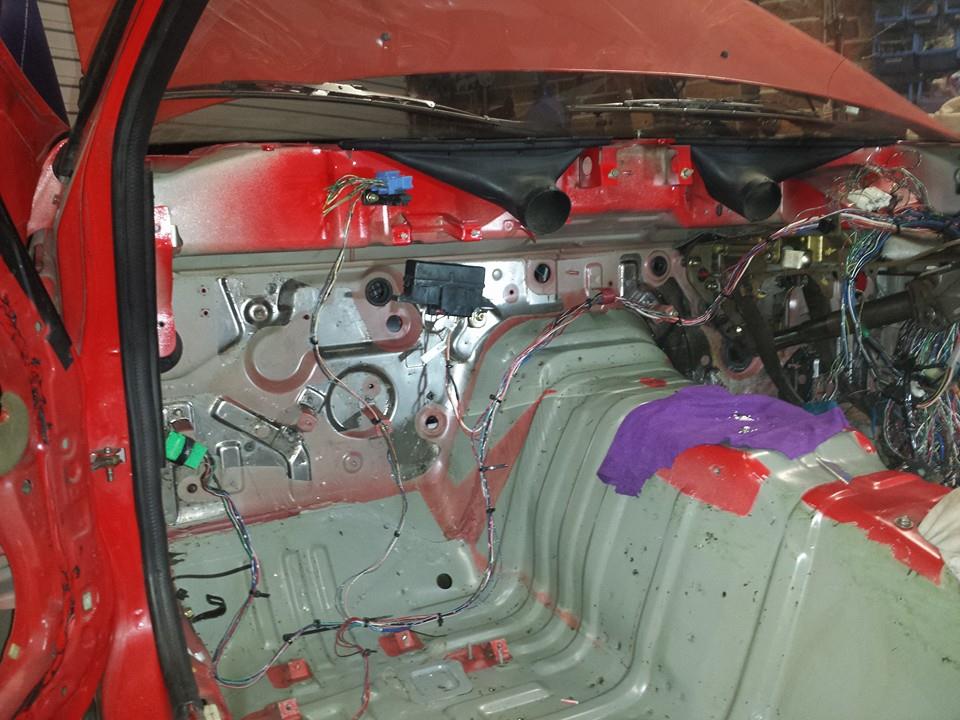
Striped the rest of the interior

Then i pulled the carpet out

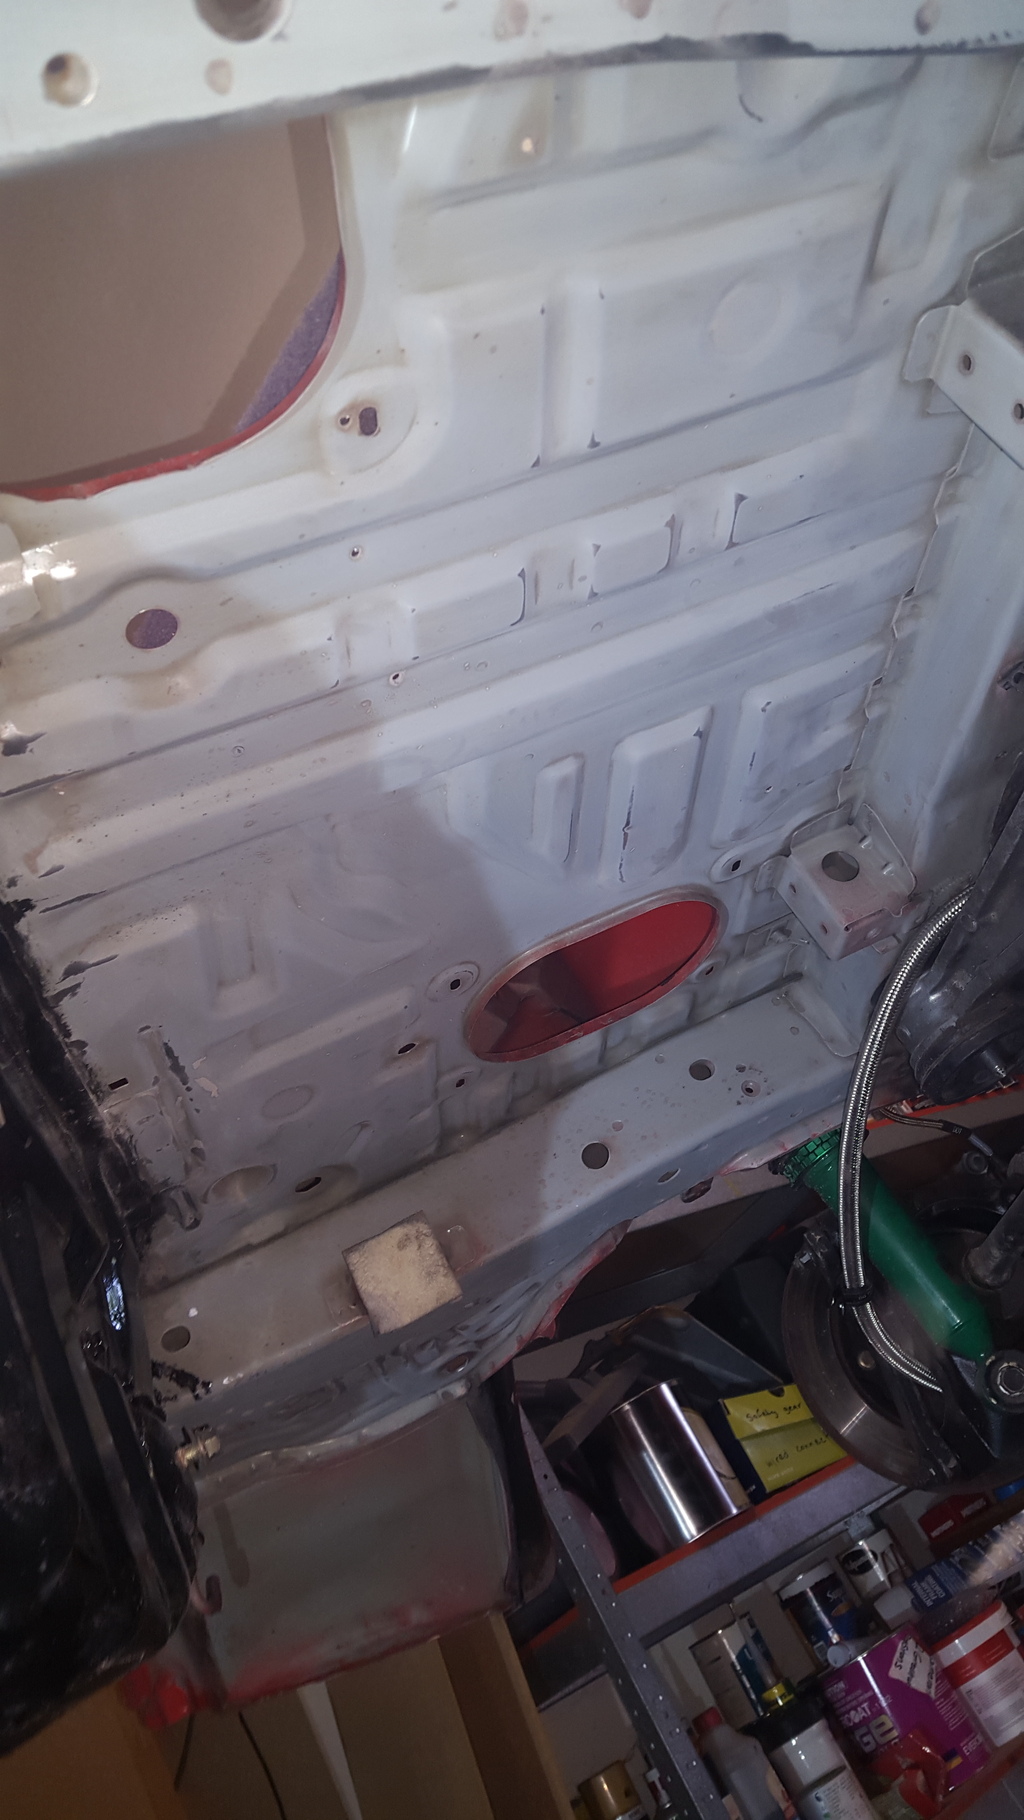
Found some oily residue under the carpet. Clutch fluid had leaked inside the firewall aswell and started pooling up and ended up making a hole in the floor just down by the fuel door flapper.


 06-23-14, 09:56 PM
#90
Full Member
Thread Starter
iTrader: (1)
Join Date: Jul 2011
Location: Sydney, Australia
Posts: 138
Likes: 0
Received 0 Likes
on
0 Posts
And the rust :shoot: :shoot: :shoot:
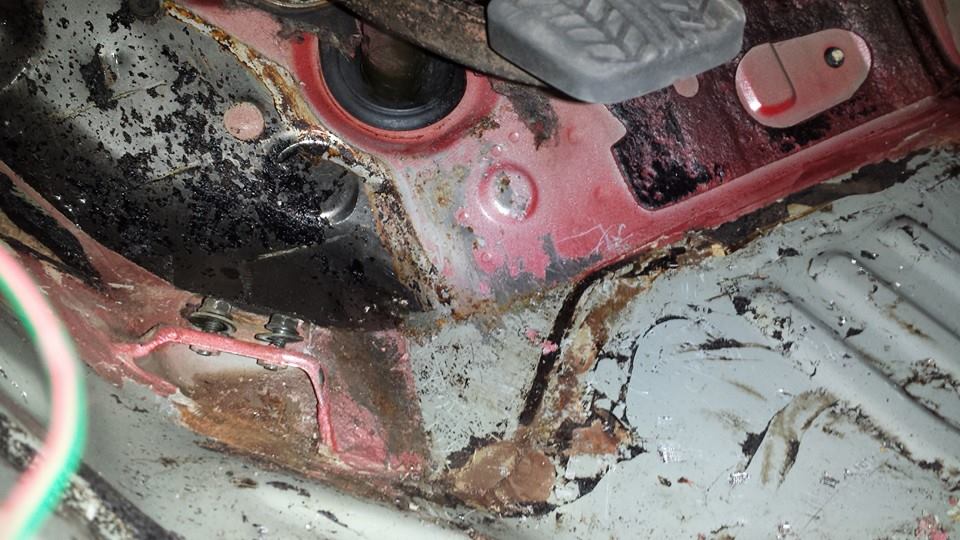
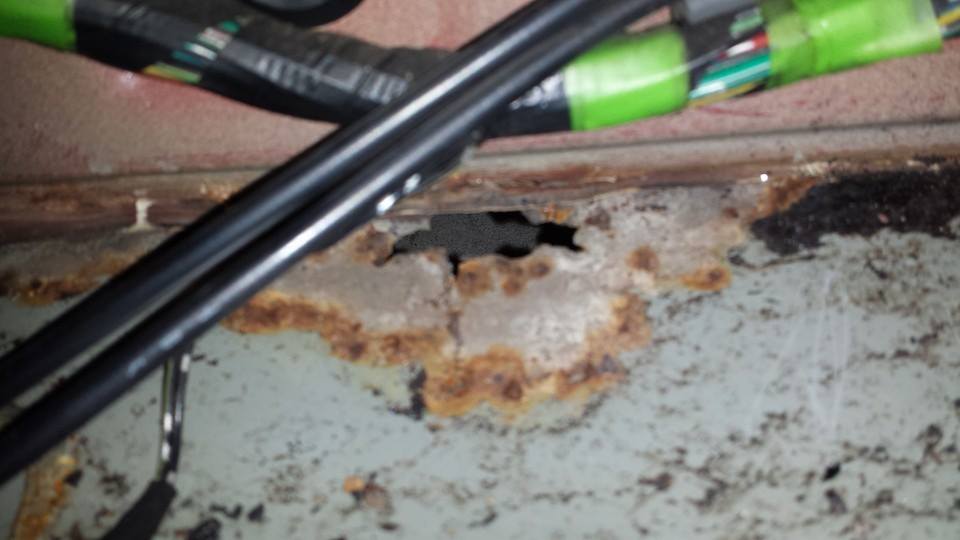
[url=http://s1188.photobucket.com/user/cambo_88/media/37_zpsb3ee661c.jpg.html][img]https://i1188.photobucket.com/albu


[url=http://s1188.photobucket.com/user/cambo_88/media/37_zpsb3ee661c.jpg.html][img]https://i1188.photobucket.com/albu


 06-29-14, 10:06 PM
#96
Full Member
Thread Starter
iTrader: (1)
Join Date: Jul 2011
Location: Sydney, Australia
Posts: 138
Likes: 0
Received 0 Likes
on
0 Posts
Thanks Mate! Much appreciated.
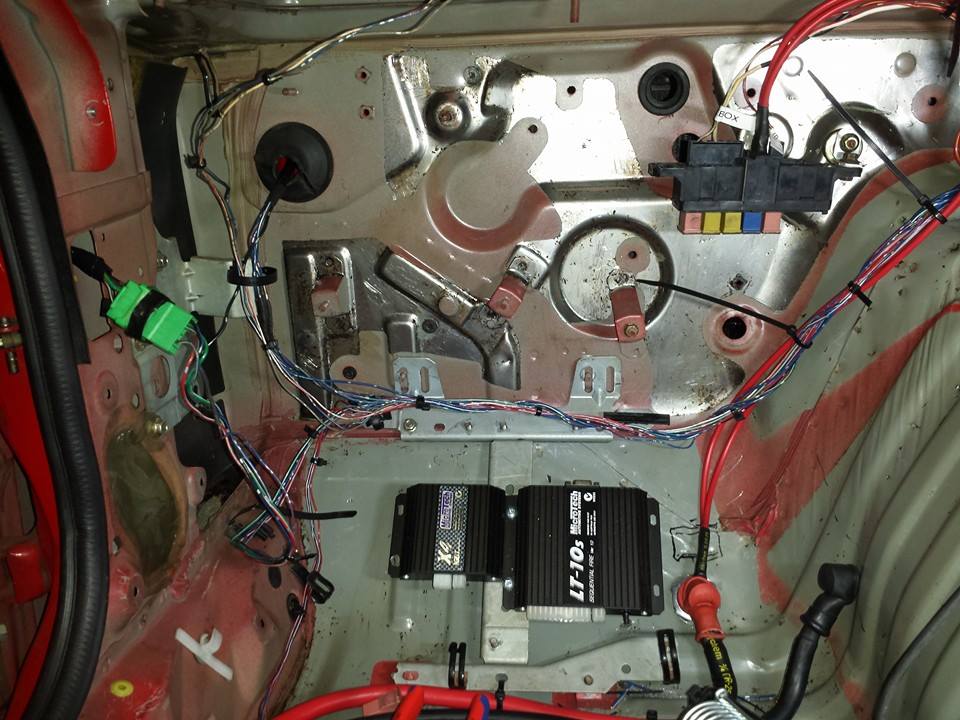
Moved the fuse box last night. It now sits behind the dash.
Just have to sort out my main power and altenator wiring running to the fuse box.
Moved the fuse box last night. It now sits behind the dash.
Just have to sort out my main power and altenator wiring running to the fuse box.

 04-07-16, 09:47 PM
#97
Full Member
Thread Starter
iTrader: (1)
Join Date: Jul 2011
Location: Sydney, Australia
Posts: 138
Likes: 0
Received 0 Likes
on
0 Posts
Havent updated this page for a while as i had started doing this on facebook but then i deleted my facebook account and lost the group i had created too.
anyway the first part of the update was about 2 years ago now (aug 14), but this is were the thread got left.
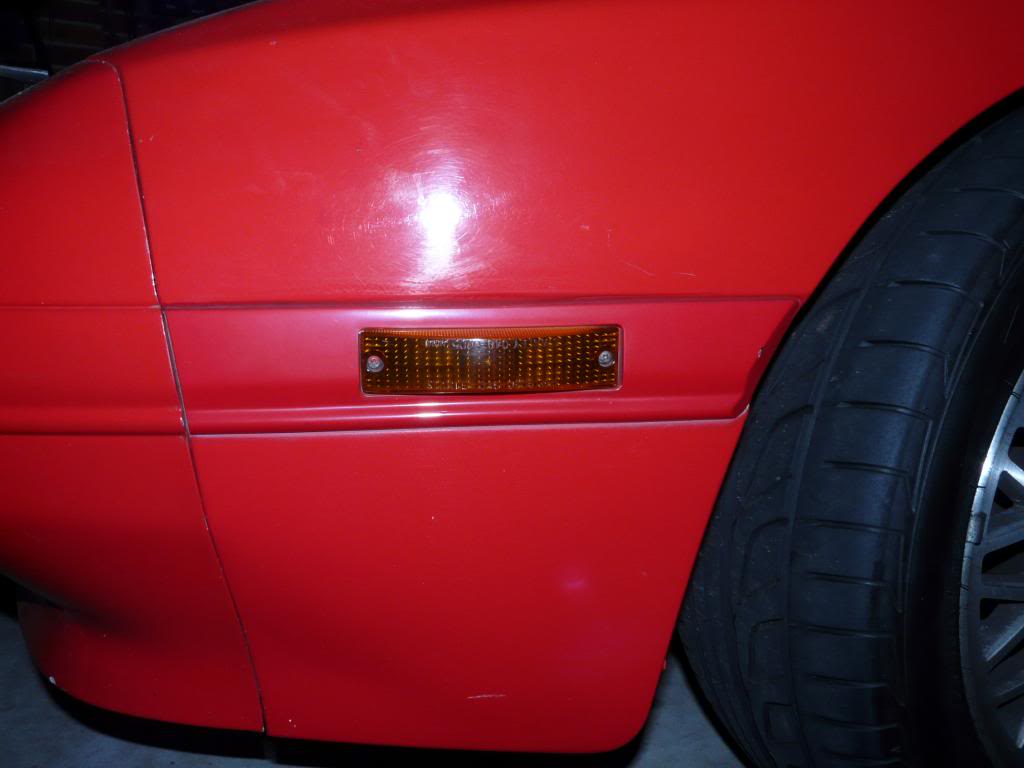
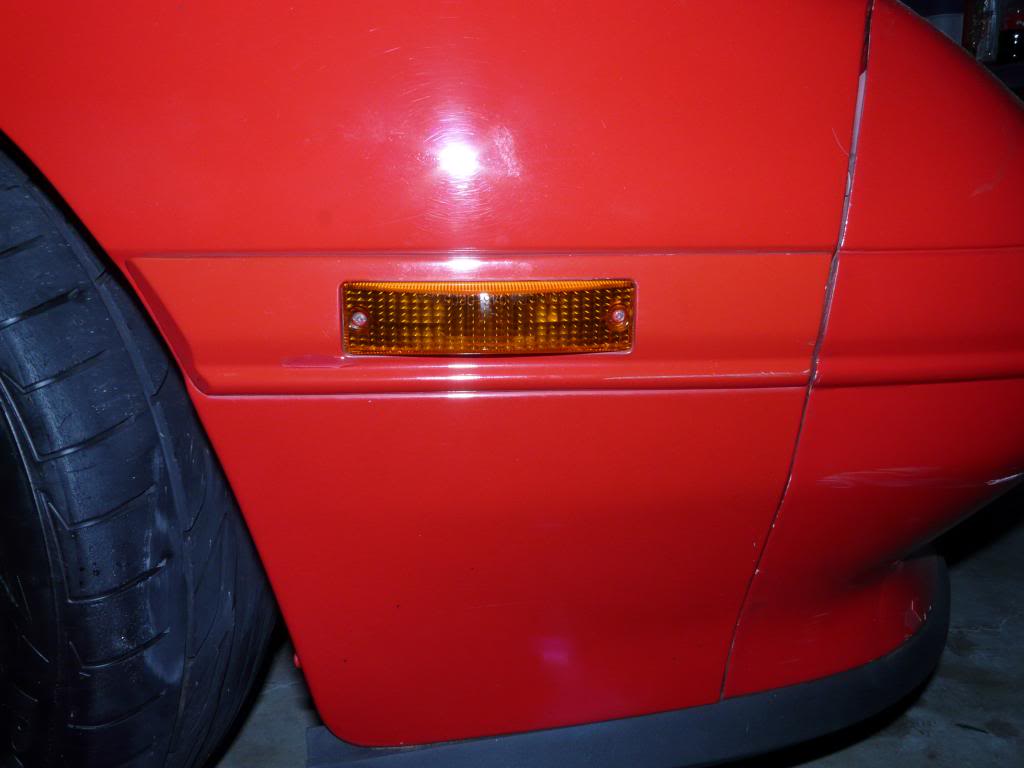
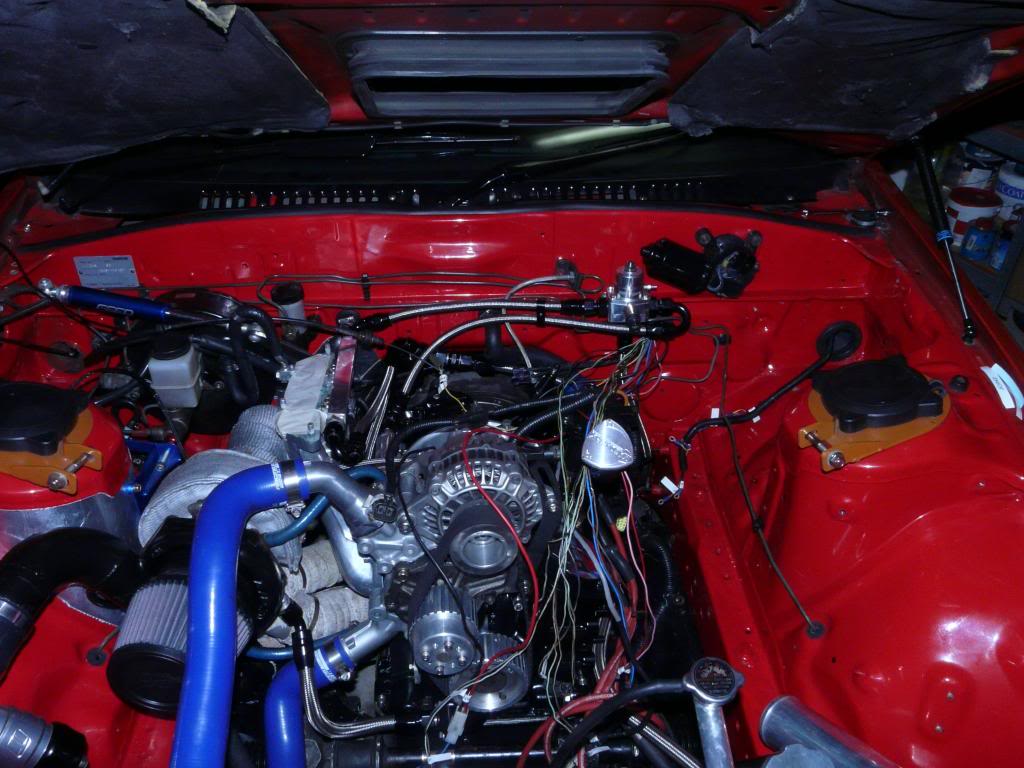
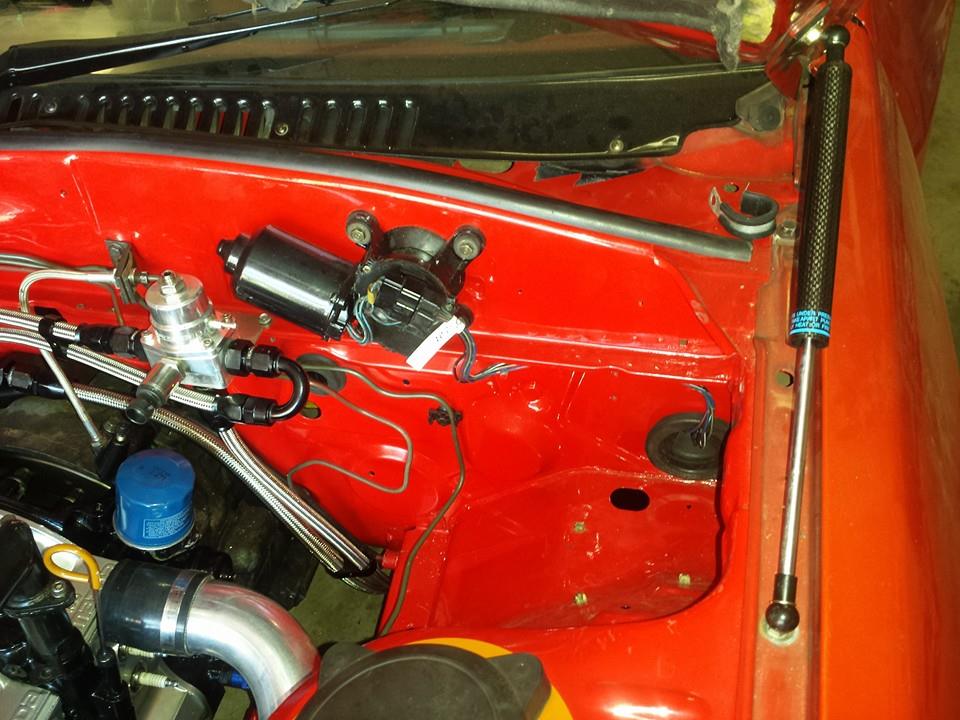
Moved the wiper motor wiring last weekend. Battery is all wired, isolator is all wired. Fuse box is 95%. Just waiting on my firewall plug and then i can wire up the engine loom and then i just have to modify a little bit of headlight/indicator wiring and im done.
anyway the first part of the update was about 2 years ago now (aug 14), but this is were the thread got left.
Moved the wiper motor wiring last weekend. Battery is all wired, isolator is all wired. Fuse box is 95%. Just waiting on my firewall plug and then i can wire up the engine loom and then i just have to modify a little bit of headlight/indicator wiring and im done.
04-07-16, 09:48 PM
#98
Full Member
Thread Starter
iTrader: (1)
Join Date: Jul 2011
Location: Sydney, Australia
Posts: 138
Likes: 0
Received 0 Likes
on
0 Posts
Car is full steam ahead whilst motivation levels are still high.
Hopefully I don't get fed up with again and put it on the back burner again
Will do a proper update when I get my camera with all my photos
Hopefully I don't get fed up with again and put it on the back burner again
Will do a proper update when I get my camera with all my photos
04-07-16, 09:49 PM
#99
Full Member
Thread Starter
iTrader: (1)
Join Date: Jul 2011
Location: Sydney, Australia
Posts: 138
Likes: 0
Received 0 Likes
on
0 Posts
Well I haven�t completely stopped working on it, just stopped posting updates as frequent. Up to the tedious �boring as all ****� (painting prep) stage now so it�s not too extravagant.
Have done quite a bit of work on it since I last posted so I will at least give you all a quick run down on whats been happening.
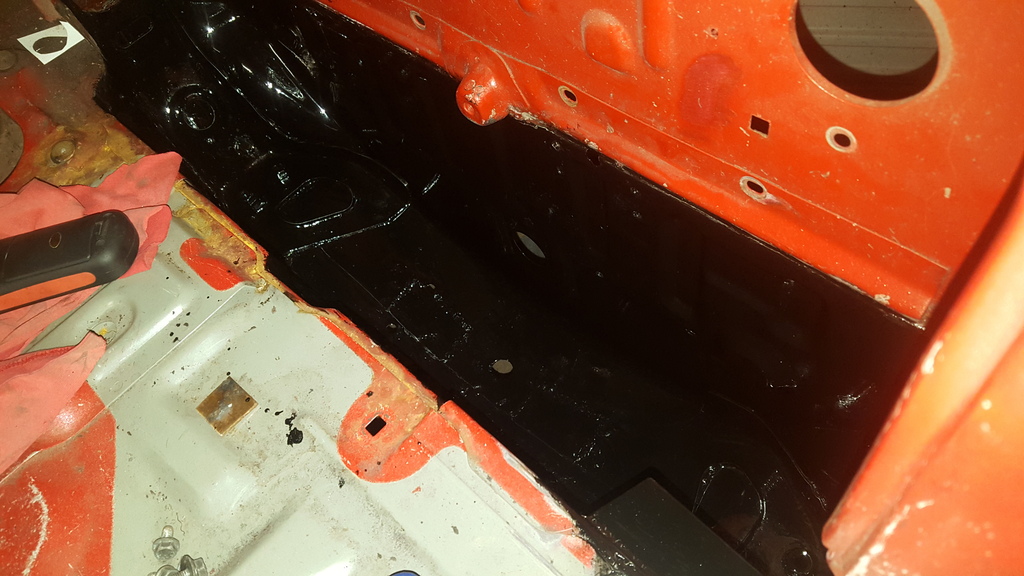
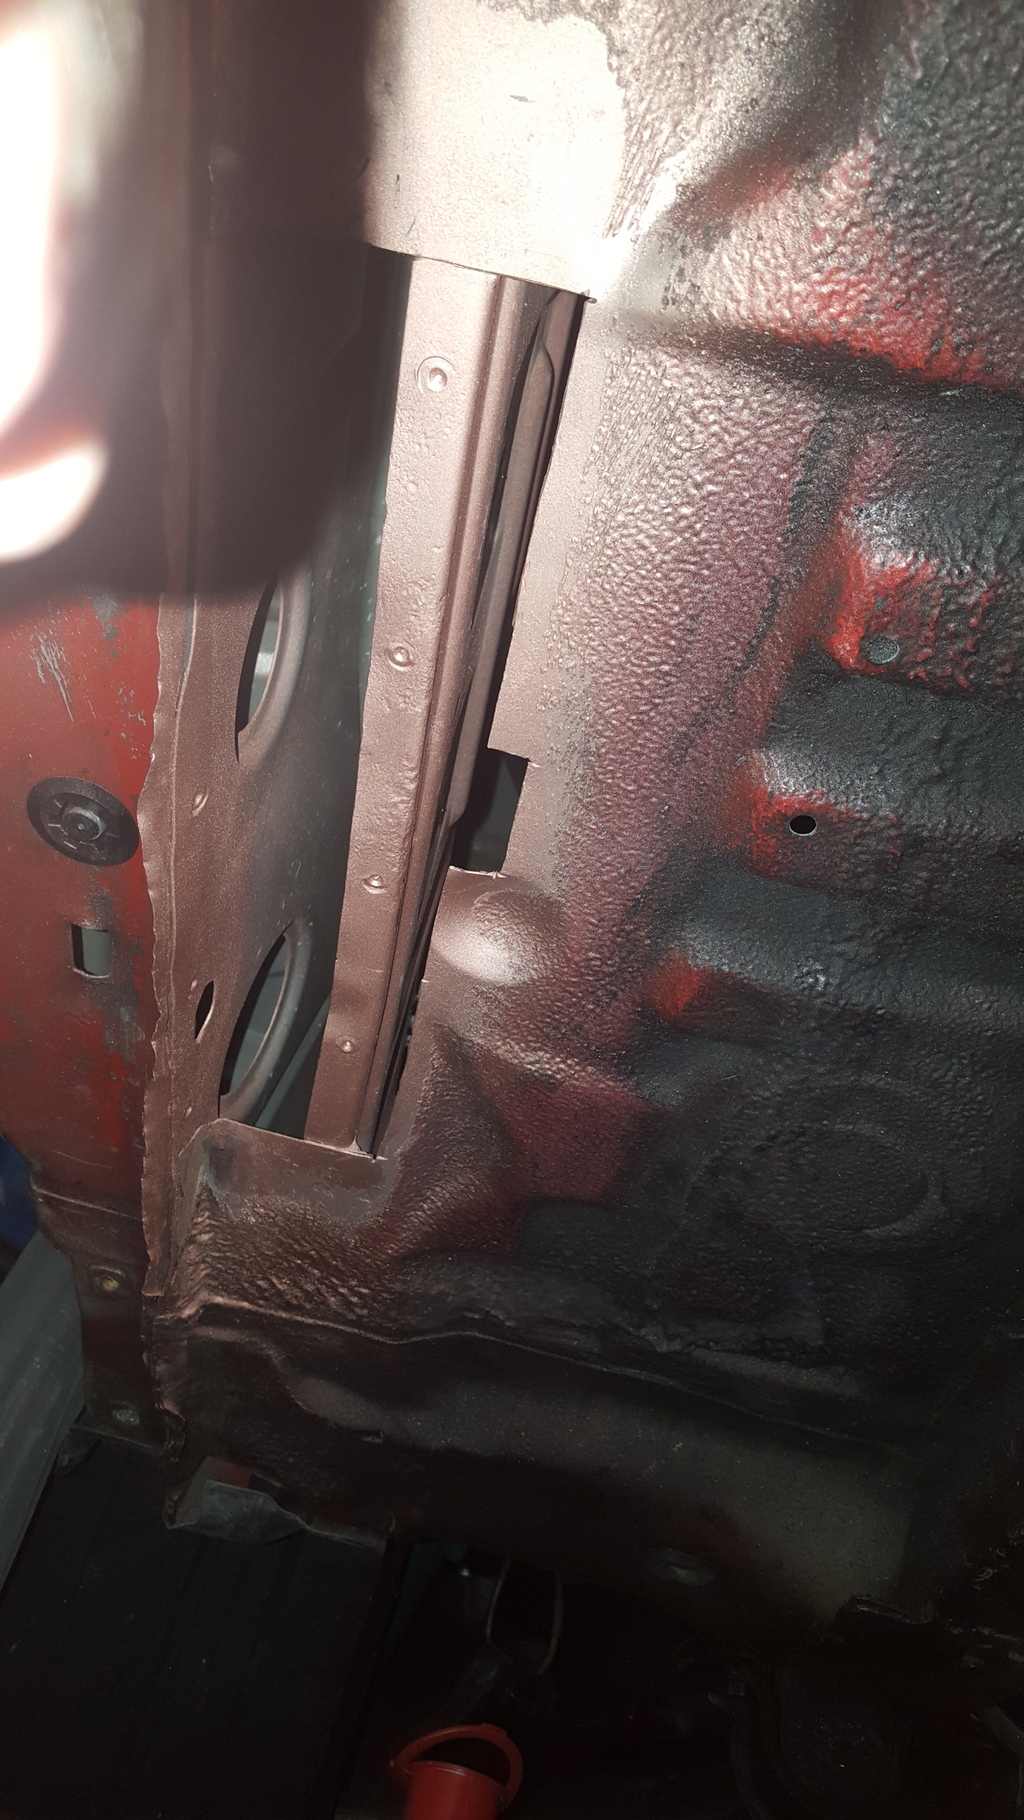
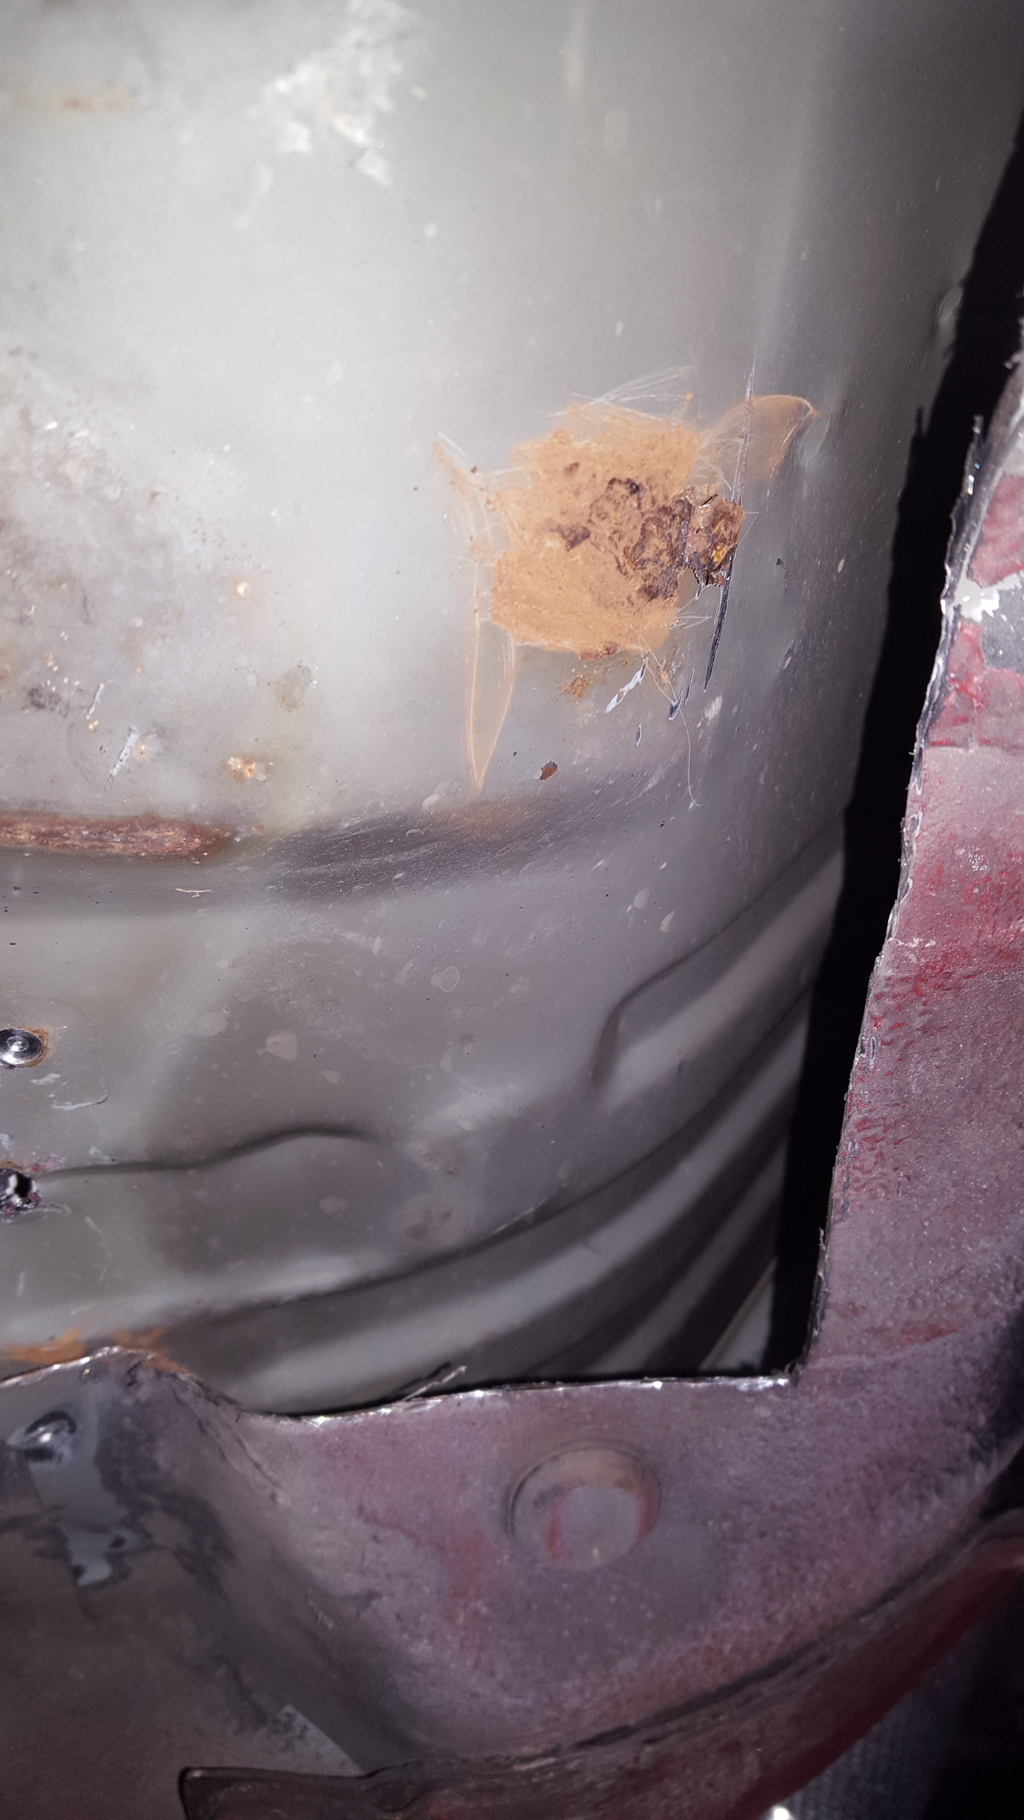
All rust is repaired and painted in POR 15 (inside and outside of door sill cavities). U-Pol weld through primer for any panel joins that required welding
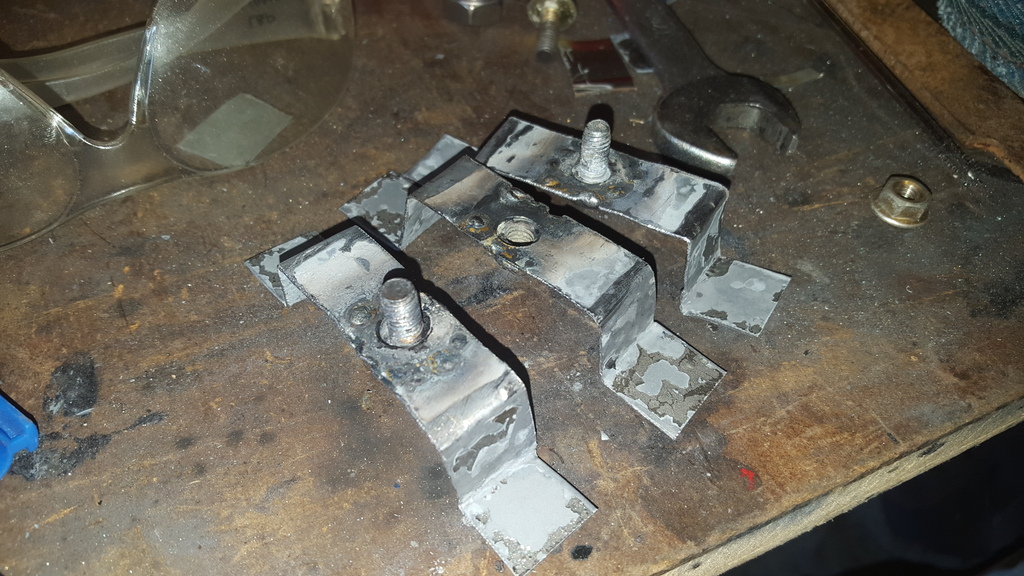
All fabrication of brackets and mounting tabs is done and majority are painted. I just have to weld on my fuel line mounting tabs and then I can paint the last of the underside and move back onto painting the body.
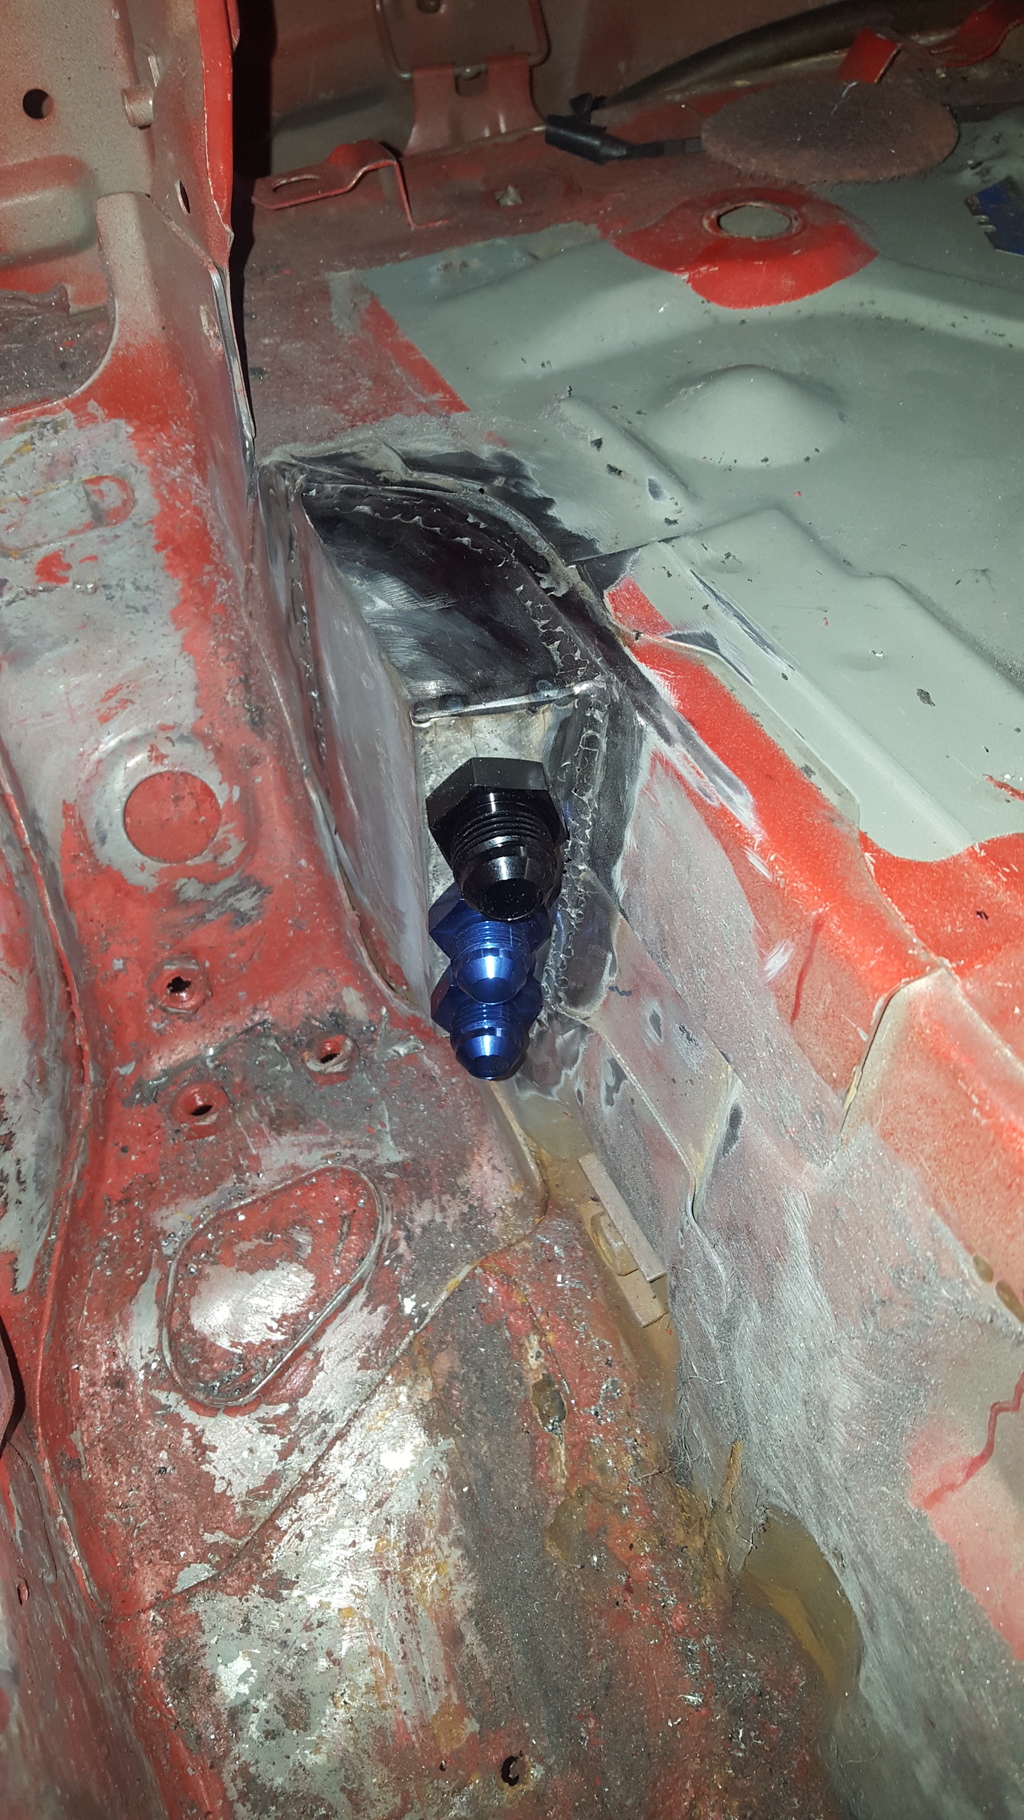
First bit of fab was just a sheet metal box to mount bulkhead fittings to so I can remove the dodgy rubber grommets with hose running through them. Then welded it to the car. Still learning to weld via trial and error and youtube. I know its not the best looking but its got good penetration and im not burning through on my 0.6mm sheet so im happy with it. A a bit high and lumpy but im fine with running a flap disk over it when done.
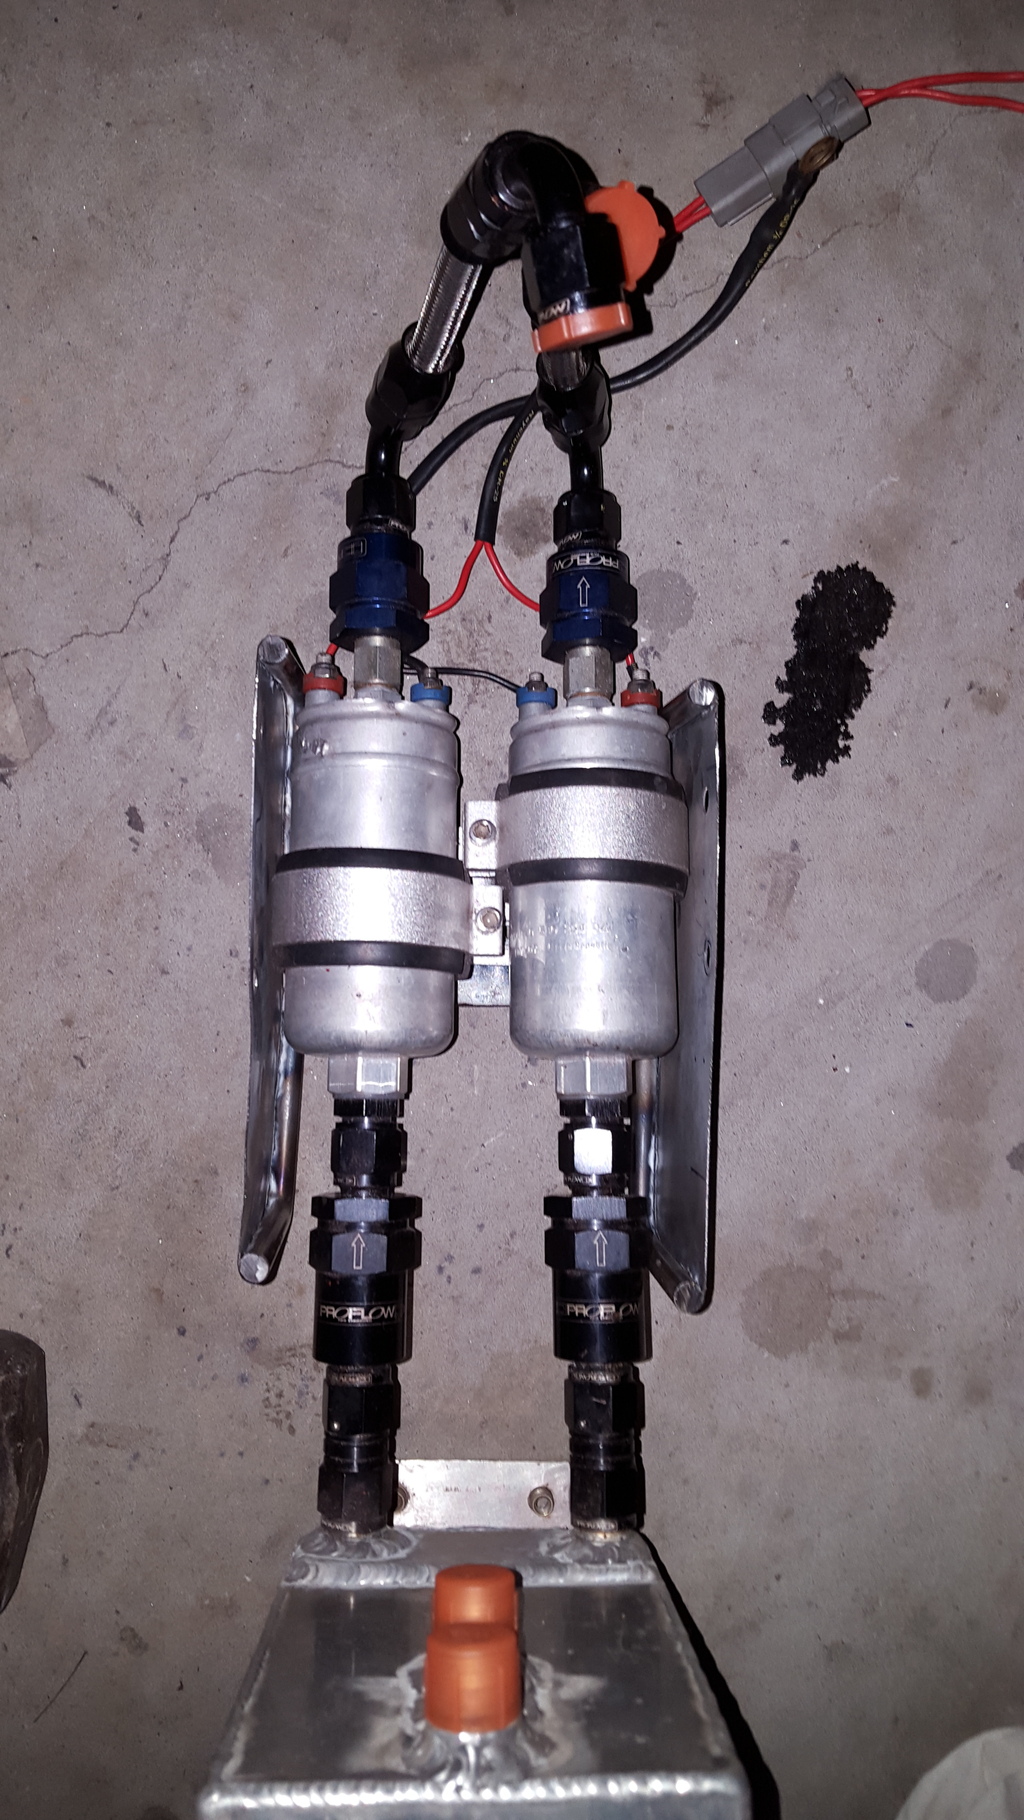
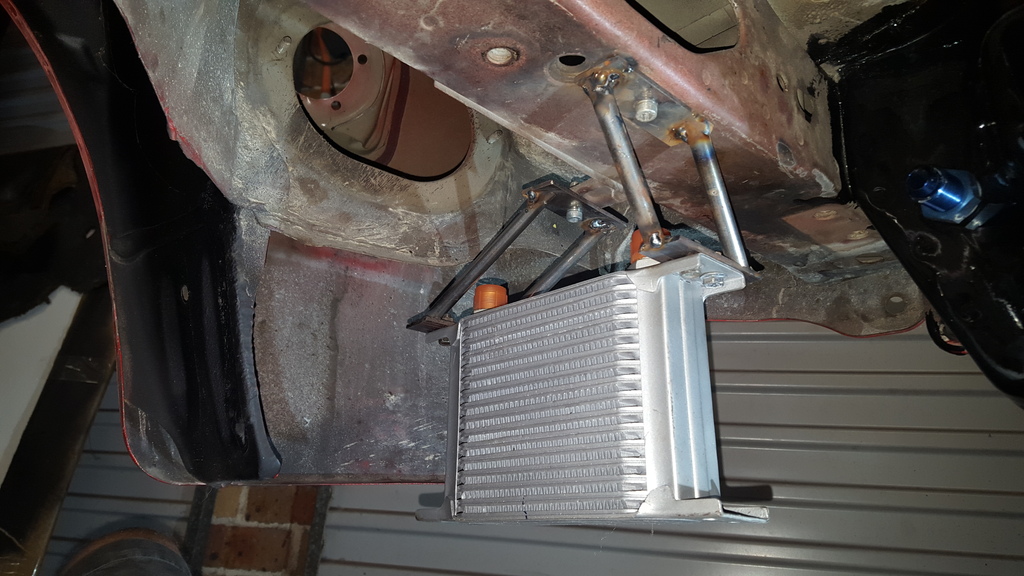
I have also made a bracket to mount the fuel filter, another fuel pump cradle that isn�t just a piece of sheet metal bent to suite lol. I also made brackets to mount the fuel cooler. Then I started to weld the floor back together as I sort of had my head around my welding. 0.6mm sheet metal was a hole new learning curve lol soooo many burnt holes at first lol
I have designed the remaining looms I am going to make in milspec. Making them is only about 25 hours work so I could finish them asap but I didn�t want to have a thousand jobs going at the same time as I would stuff something up so im taking my time with them and will get back to them when the body is painted. And all tefzel wire finally showed up after the 8 month back order, so that�s why they initially got put aside.
Managed to score some awesome parts too.
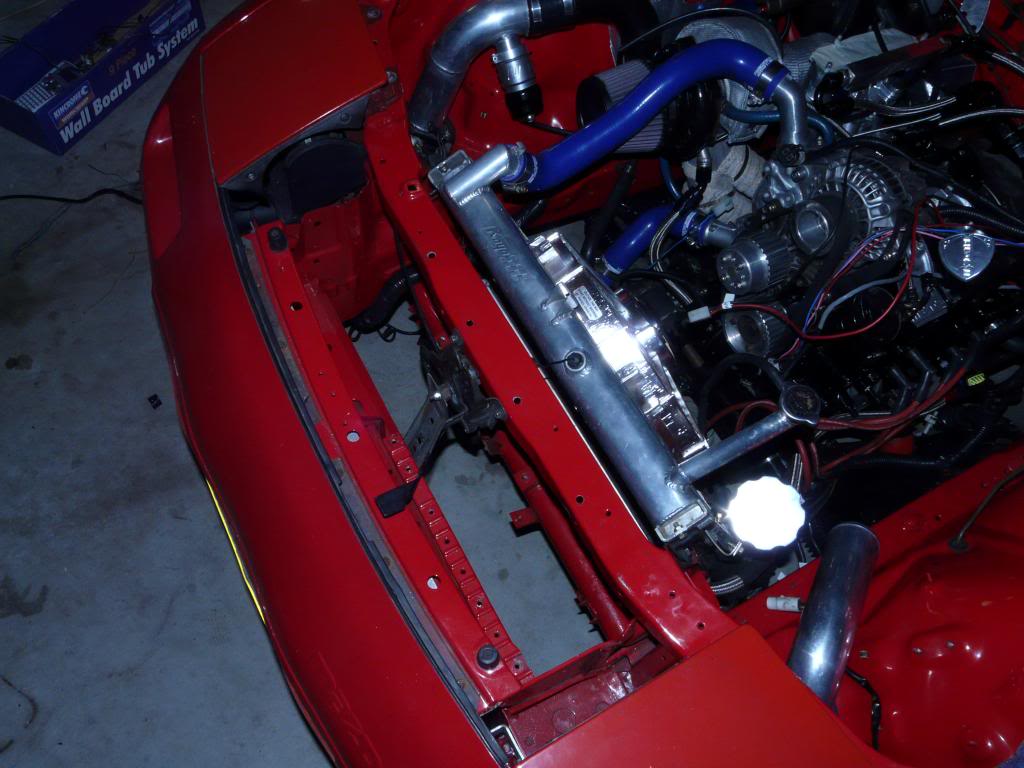
Bought a re-action racing fd to fc manifold adapter from a fellow member but it sat a little bit too high in the bay for my liking so I looked for other options and have decided on eventually using a excessive lower with a lower adapter to mate to the s5 block I have. Then the upper will sit nicely and I can also run more injectors.
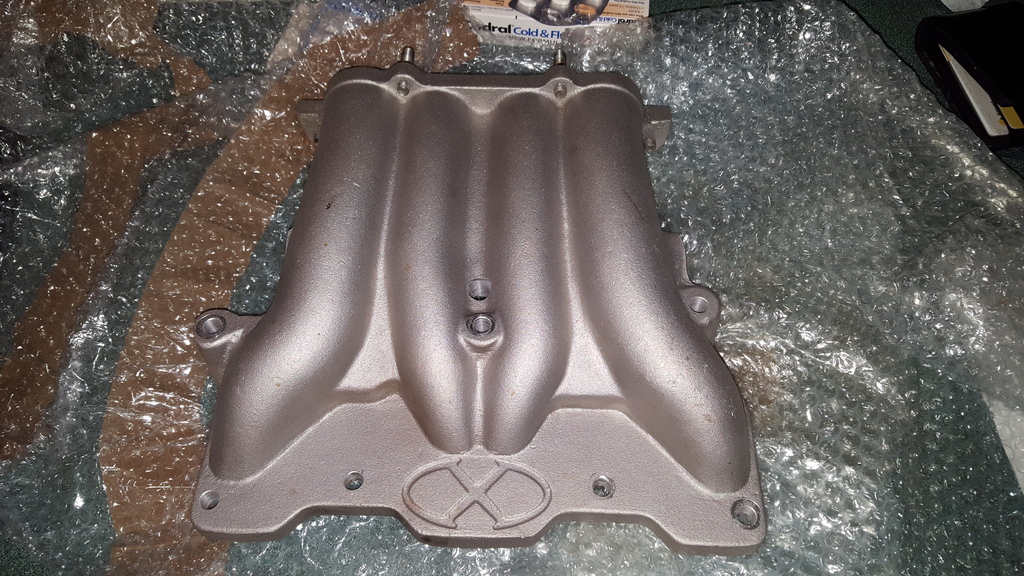
also bought an fd upper inlet manifold.
Managed to buy an Excessive lower inlet manifold about 10minutes from my house. I have thouroghly check it for casting defauts and cracks as I have read they had some issues in the past.
Also bought some painting supplies, durablocks, soft sanders, a few rolls of PSA sandpaper, another spraygun for high fill.
And probably a lot more but I cant remember lol.
First bit of fab work for me. Made a recessed box for the bulkhead fittings.

Fuel filter Bracket
Fuel pump Cradle
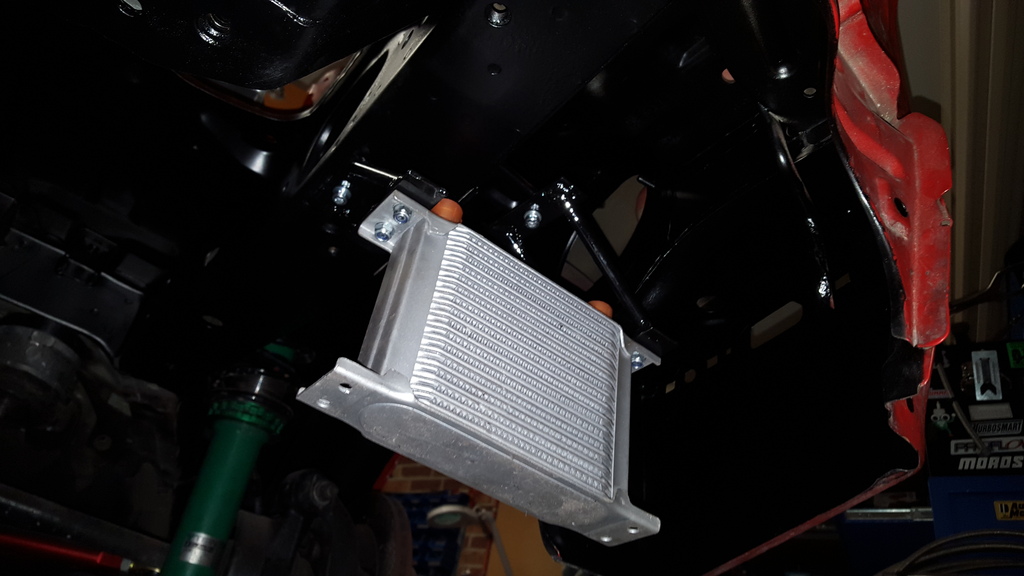
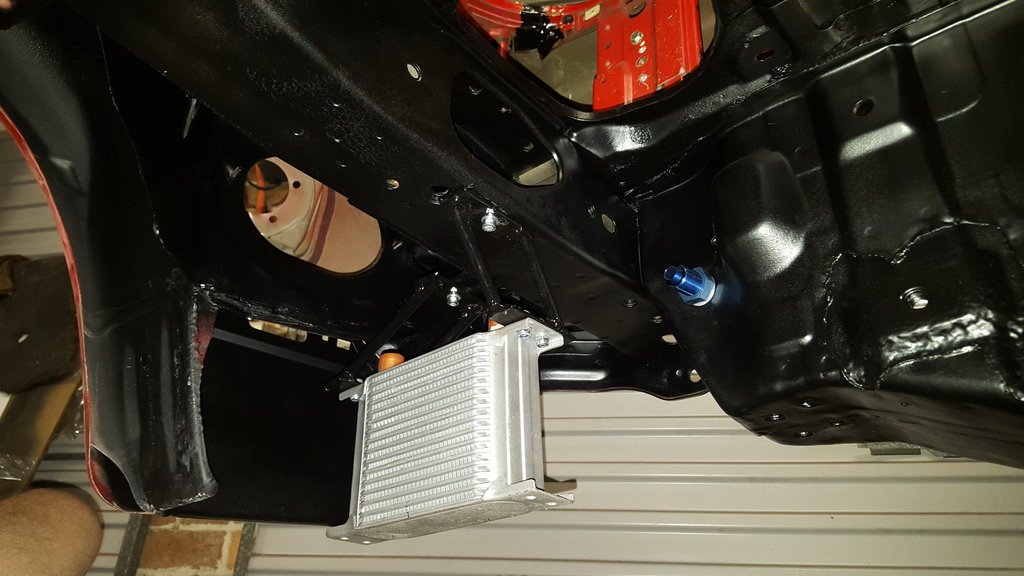
Fuel Cooler Brackets
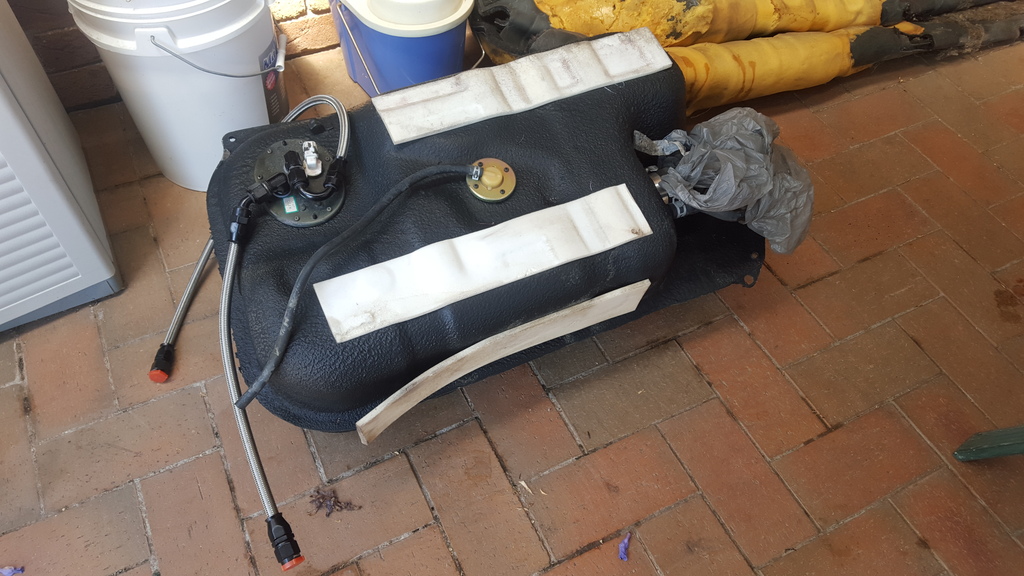
Cleaned up the fuel tank while it was out.
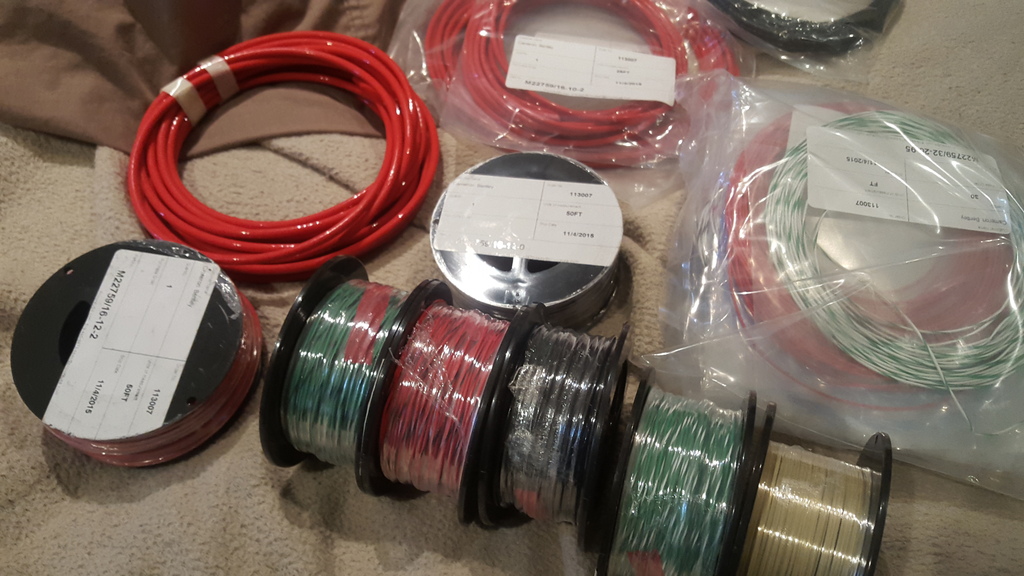
Some of the tefzel i was waiting on for half a year.
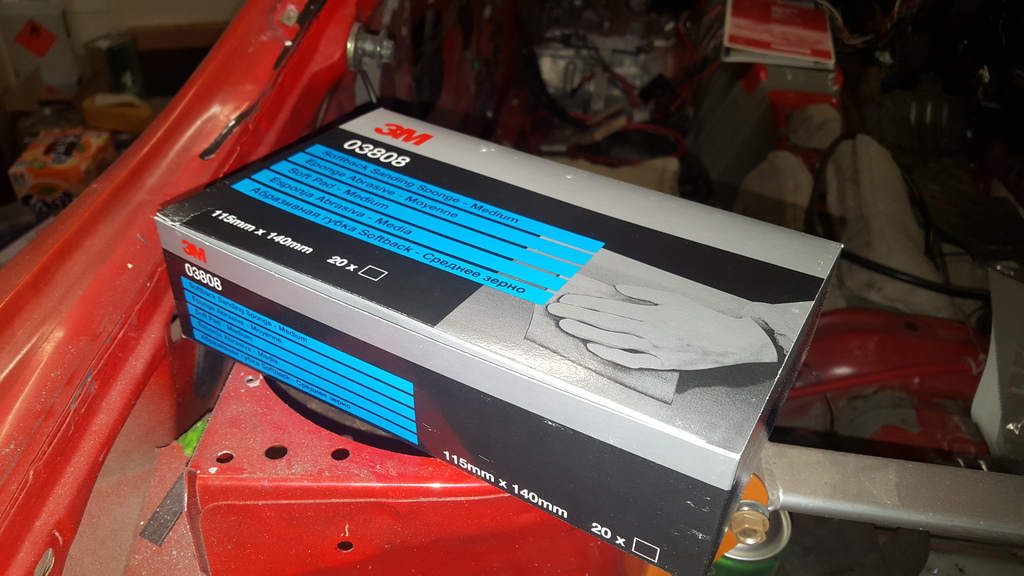
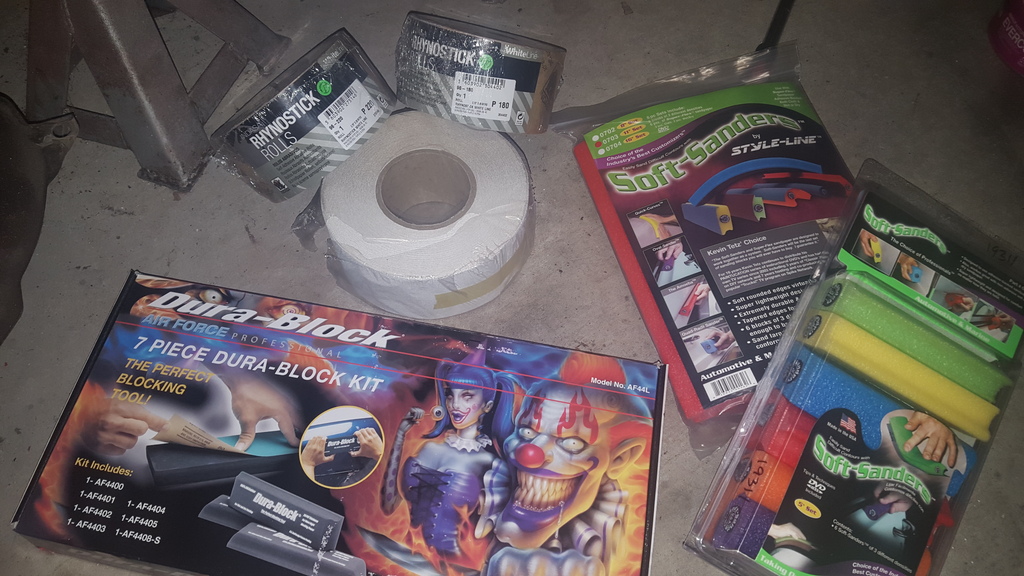
Some Painting supplies
My Fd Upper and manifold adapter
Have done quite a bit of work on it since I last posted so I will at least give you all a quick run down on whats been happening.
All rust is repaired and painted in POR 15 (inside and outside of door sill cavities). U-Pol weld through primer for any panel joins that required welding
All fabrication of brackets and mounting tabs is done and majority are painted. I just have to weld on my fuel line mounting tabs and then I can paint the last of the underside and move back onto painting the body.
First bit of fab was just a sheet metal box to mount bulkhead fittings to so I can remove the dodgy rubber grommets with hose running through them. Then welded it to the car. Still learning to weld via trial and error and youtube. I know its not the best looking but its got good penetration and im not burning through on my 0.6mm sheet so im happy with it. A a bit high and lumpy but im fine with running a flap disk over it when done.
I have also made a bracket to mount the fuel filter, another fuel pump cradle that isn�t just a piece of sheet metal bent to suite lol. I also made brackets to mount the fuel cooler. Then I started to weld the floor back together as I sort of had my head around my welding. 0.6mm sheet metal was a hole new learning curve lol soooo many burnt holes at first lol
I have designed the remaining looms I am going to make in milspec. Making them is only about 25 hours work so I could finish them asap but I didn�t want to have a thousand jobs going at the same time as I would stuff something up so im taking my time with them and will get back to them when the body is painted. And all tefzel wire finally showed up after the 8 month back order, so that�s why they initially got put aside.
Managed to score some awesome parts too.
Bought a re-action racing fd to fc manifold adapter from a fellow member but it sat a little bit too high in the bay for my liking so I looked for other options and have decided on eventually using a excessive lower with a lower adapter to mate to the s5 block I have. Then the upper will sit nicely and I can also run more injectors.
also bought an fd upper inlet manifold.
Managed to buy an Excessive lower inlet manifold about 10minutes from my house. I have thouroghly check it for casting defauts and cracks as I have read they had some issues in the past.
Also bought some painting supplies, durablocks, soft sanders, a few rolls of PSA sandpaper, another spraygun for high fill.
And probably a lot more but I cant remember lol.
First bit of fab work for me. Made a recessed box for the bulkhead fittings.
Fuel filter Bracket
Fuel pump Cradle
Fuel Cooler Brackets
Cleaned up the fuel tank while it was out.
Some of the tefzel i was waiting on for half a year.
Some Painting supplies
My Fd Upper and manifold adapter
04-07-16, 09:50 PM
#100
Full Member
Thread Starter
iTrader: (1)
Join Date: Jul 2011
Location: Sydney, Australia
Posts: 138
Likes: 0
Received 0 Likes
on
0 Posts
My New lower inlet manifold for when i get the lower manifold adapter and a new turbo manifold
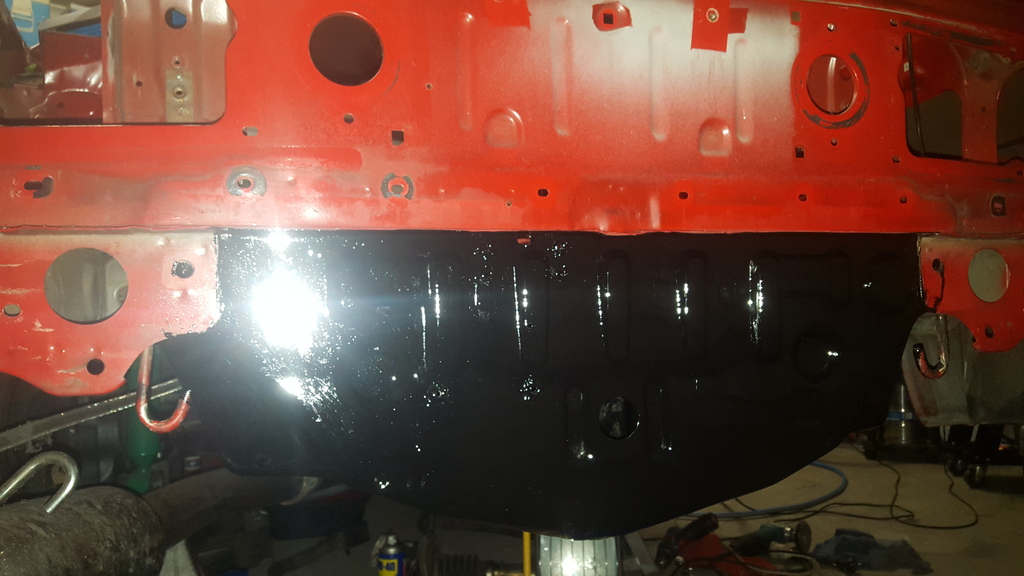
Fuel tank area all sanded prior to painting with por 15 underbody paint
Fuel cooler Brackets all painted and mounted. Can also see how far the underbody painting goes in the rear

The entire spare wheel arch was stripped bare metal and painted in POR 15 rust paint and then top coated with por 15 underbody paint.
Some mounting tabs i made for my fuel lines to be suspended from. Still need to fit these and then i can paint
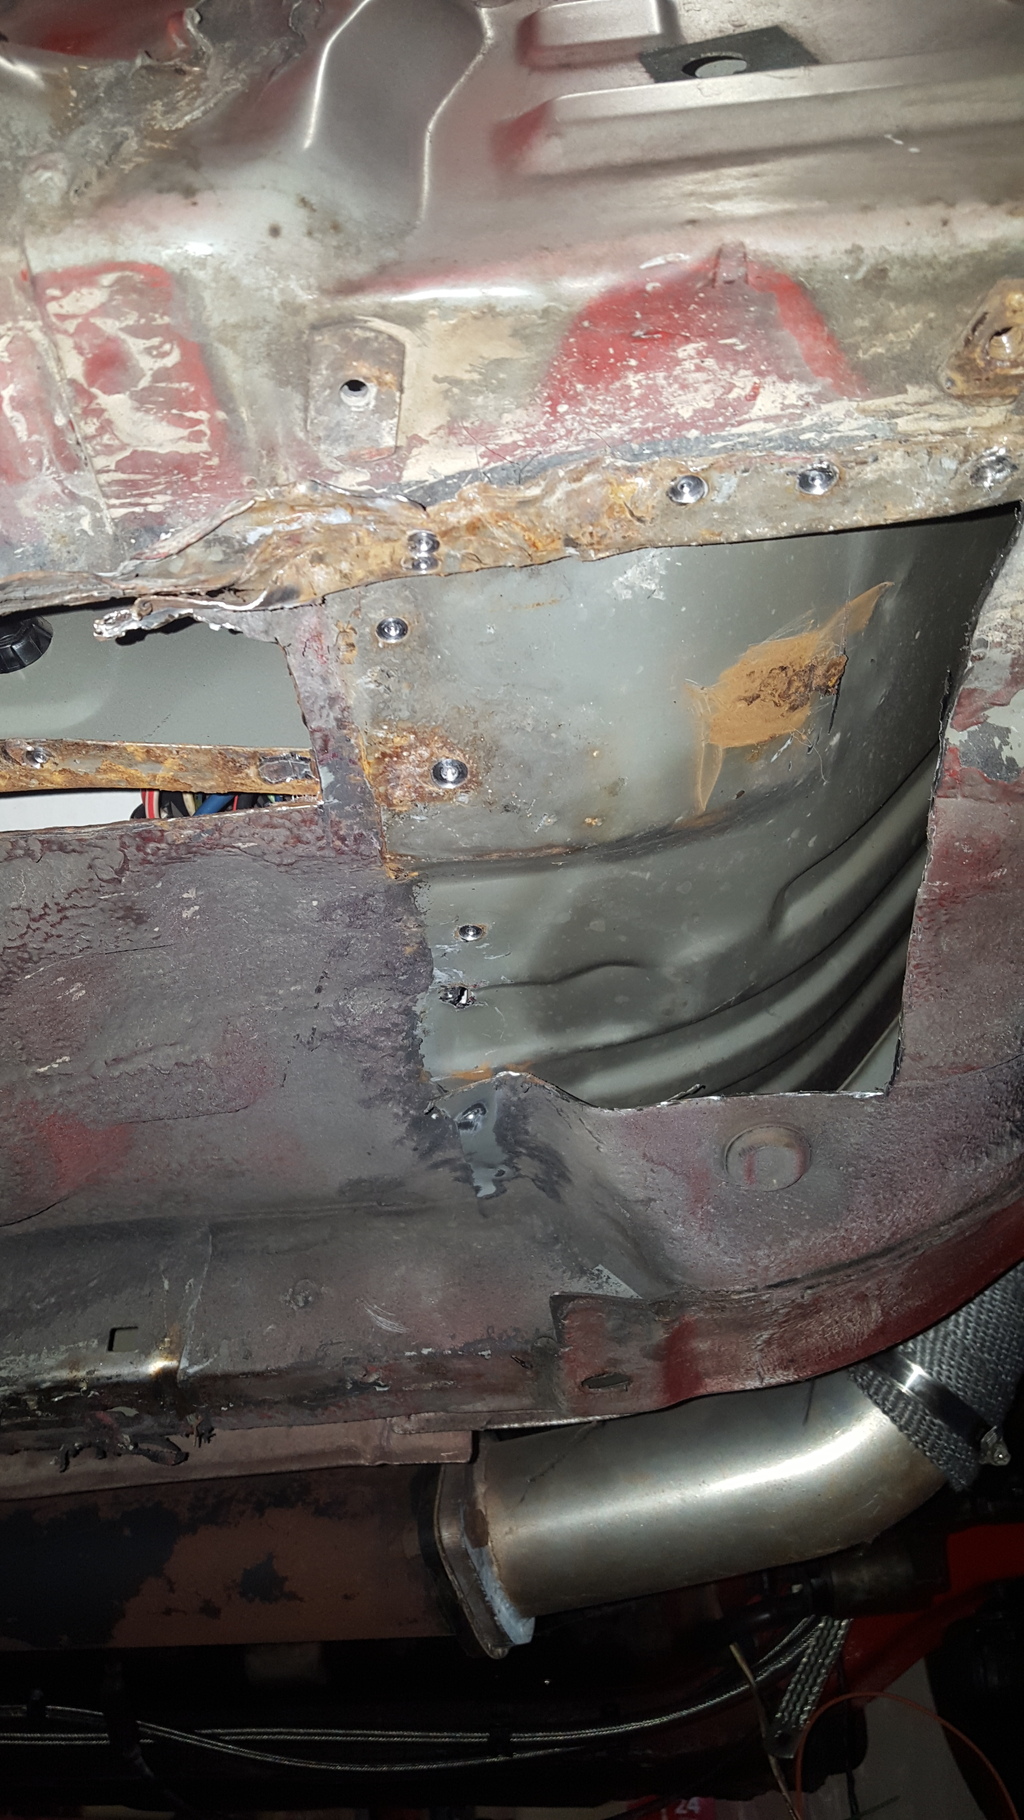
Passenger side rust cut out
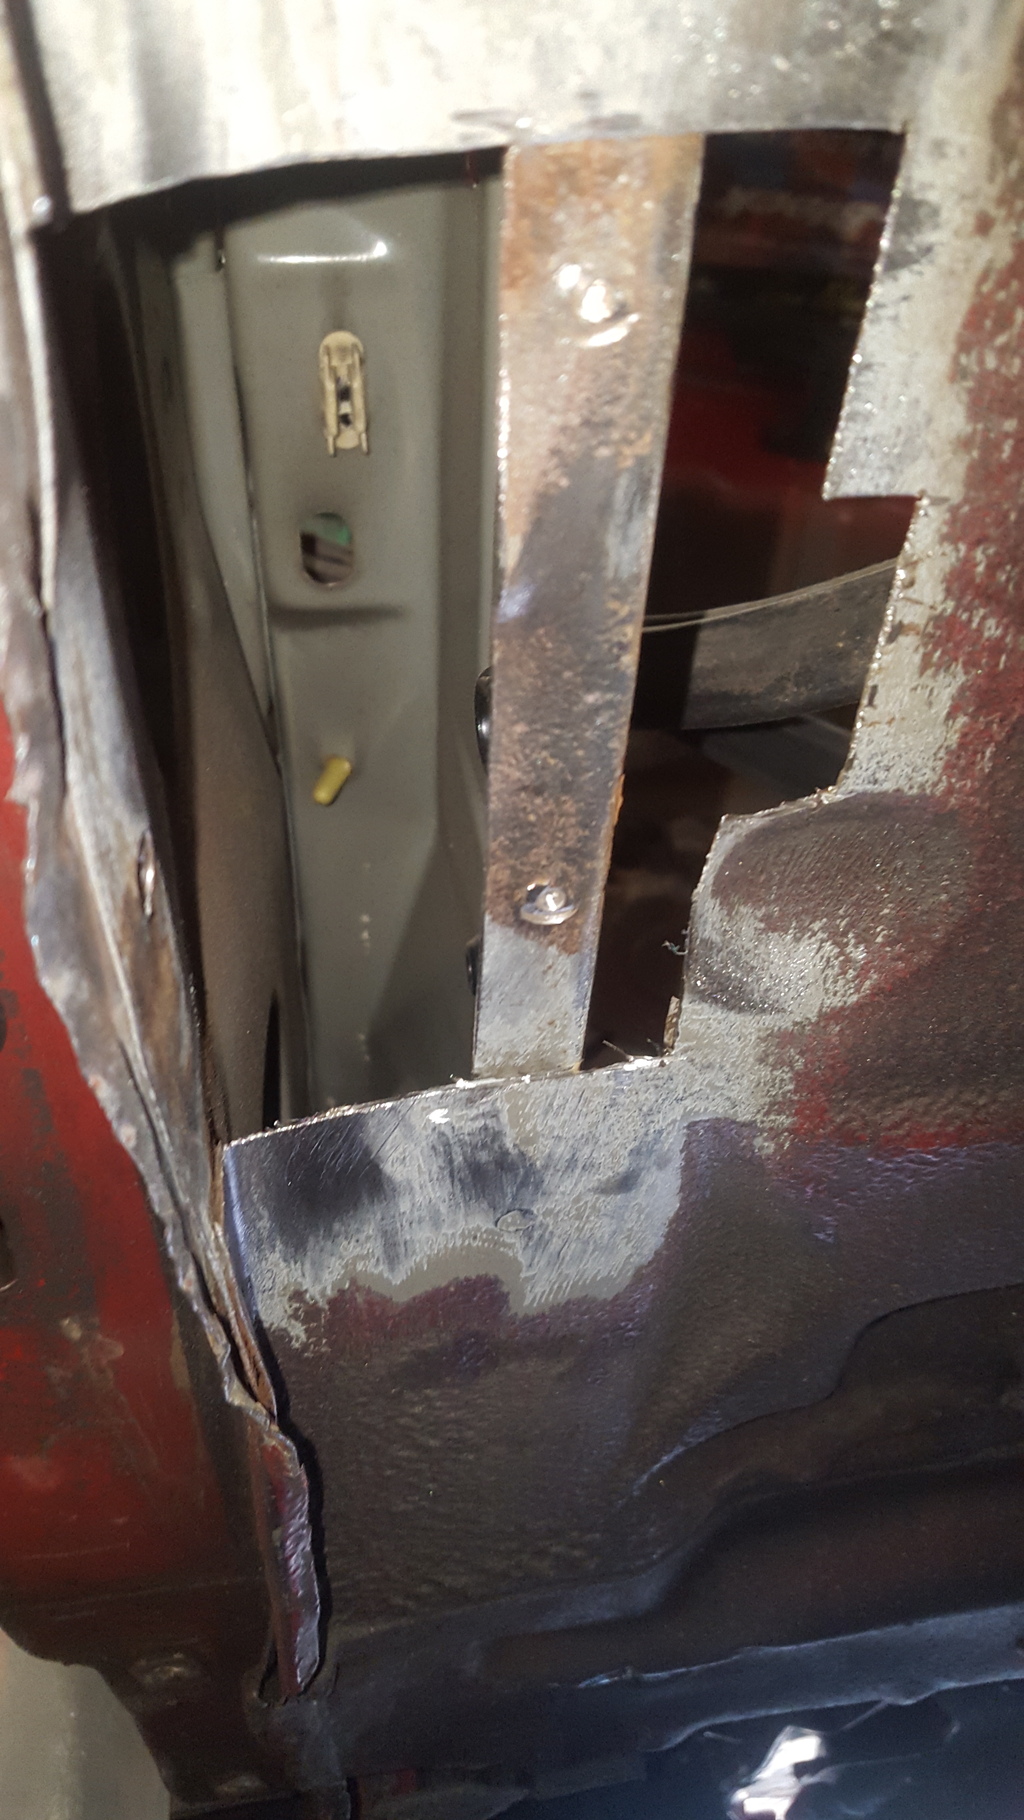
Drivers Side Rust was quite bad. Cut the first piece out and then there was more and more and so on lol
Fuel tank area all sanded prior to painting with por 15 underbody paint
Fuel cooler Brackets all painted and mounted. Can also see how far the underbody painting goes in the rear
The entire spare wheel arch was stripped bare metal and painted in POR 15 rust paint and then top coated with por 15 underbody paint.
Some mounting tabs i made for my fuel lines to be suspended from. Still need to fit these and then i can paint
Passenger side rust cut out
Drivers Side Rust was quite bad. Cut the first piece out and then there was more and more and so on lol