Addicted to boost. Turbo FC build.
 04-23-14, 11:12 PM
#26
@sudowoodo you'll love boost in a rotary man. Totally different feeling from na and even other turbo platforms. Top end is just awesome, loud, full of amazing sounds and flames. 
I'm trying the get this thread updated but I have about a years worth of pics/info before the thread catches up to how the car sits today. It'll take a while haha
I'm trying the get this thread updated but I have about a years worth of pics/info before the thread catches up to how the car sits today. It'll take a while haha
 04-24-14, 10:25 AM
#27
Haha yeah. I miss the boost in my STi but the motor is toast. I'm taking the brakes off it and putting them on my rx7 so I can have good brakes to go with more power. I also have more pics to post in my build thread but haven't gotten around to it.
 04-02-15, 01:09 PM
#30
So I ended up running the rebuilt 60-1 for about 400 miles. The 46mm precision wastegate was 100x better at controlling the boost. Still can't get over that open dump sound.. And I also installed a rotary works gilmer drive belt. It sounded soooo good, but guess what happens when you over-tighten a gilmer belt? Guess!! Pics coming soon..
 04-18-15, 10:28 AM
#32
One of my favorite pictures ever. Love the hard body lines on the FC. The GP sports kit really enhances them. Really digging the dusty hood. I guess I don't go fast enough.
[IMG]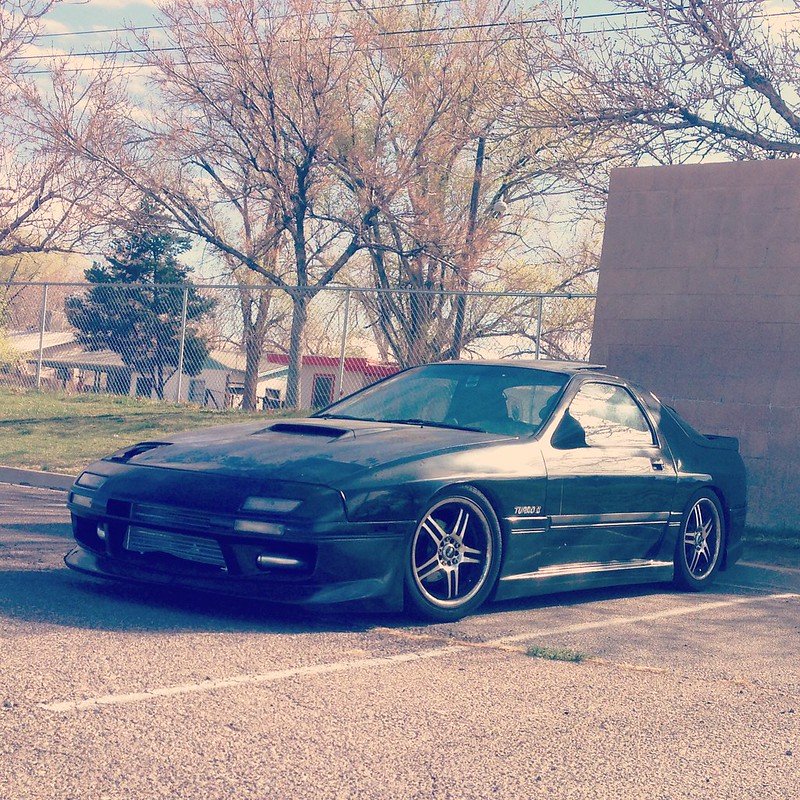 IMG_2643 by brian_reynolds123, on Flickr[/IMG]
[IMG] IMG_2639 by brian_reynolds123, on Flickr[/IMG]
At 300whp the car was plenty fast. I'd pull pretty much everything I'd race with the exception of a few high hp (500+) mustangs. Once it came onto boost you better hold on. The sound of the open dump was there to let you know that **** was getting real.. Fast! I had even scared myself a few times doing exit ramp pulls to get on the highway. I remember thinking, "This is more power than I'd ever need!"
[IMG]
IMG_2643 by brian_reynolds123, on Flickr[/IMG][IMG]
IMG_2639 by brian_reynolds123, on Flickr[/IMG]At 300whp the car was plenty fast. I'd pull pretty much everything I'd race with the exception of a few high hp (500+) mustangs. Once it came onto boost you better hold on. The sound of the open dump was there to let you know that **** was getting real.. Fast! I had even scared myself a few times doing exit ramp pulls to get on the highway. I remember thinking, "This is more power than I'd ever need!"
Last edited by brian_skotch; 04-18-15 at 10:46 AM.
04-18-15, 11:17 AM
#33
Being in my fathers FD I got really jealous of the cargo cover he had in the rear. I liked the privacy that it provided so I began the hunt for an FC one. aaaand got it.
[IMG]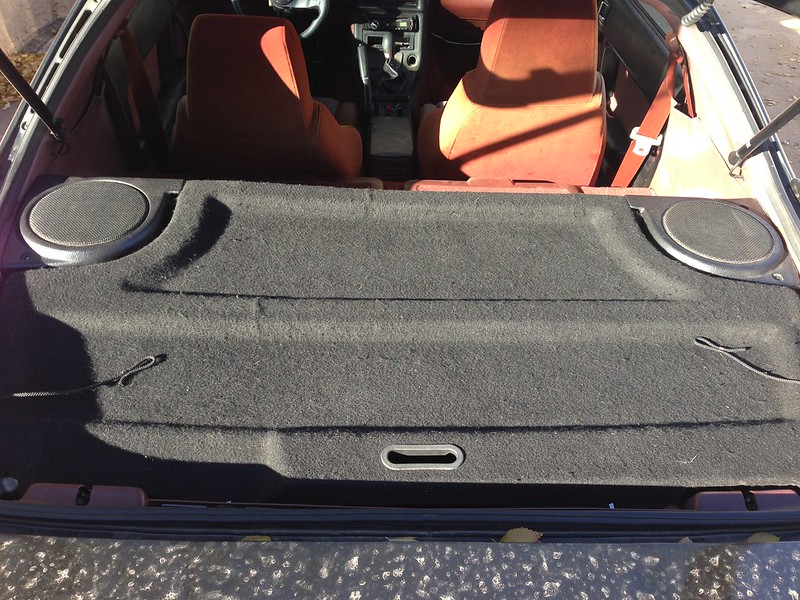 IMG_0634 by brian_reynolds123, on Flickr[/IMG]
[IMG] IMG_0673 by brian_reynolds123, on Flickr[/IMG]
I also got this rare cargo cover in black which meant that it was time to swap over from the ron jeremy pornstar maroon to black front and rear carpet with black leather seats. The seats were reupholstered by me and my father. They came out pretty sweet for our first time doing something like this. The leather looks loose in the pics but it tightened up as they were exposed to heat cycles and daily driving. This was only half of the red to black interior swap. The dash painting(dyeing), plastics, and rear side carpets would be addressed later. So long nasty maroon!
[IMG] IMG_0773 by brian_reynolds123, on Flickr[/IMG]
[IMG]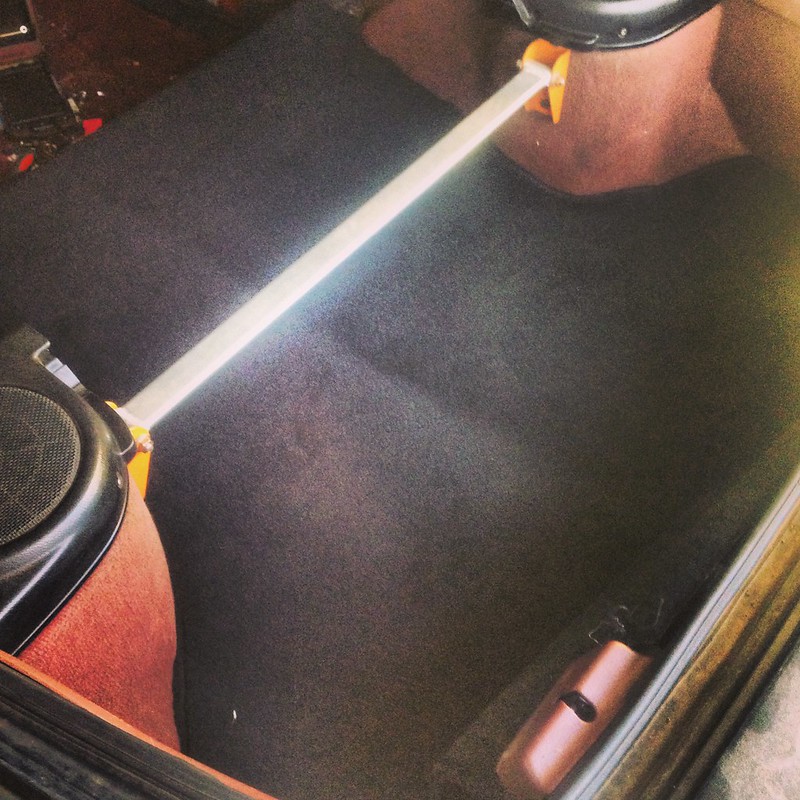 IMG_0845 by brian_reynolds123, on Flickr[/IMG]
[IMG] IMG_2527 by brian_reynolds123, on Flickr[/IMG]
[IMG]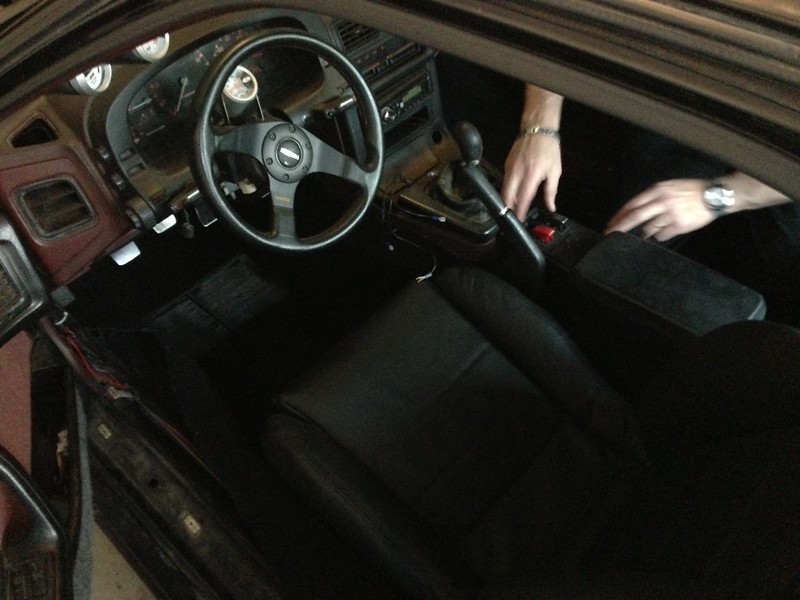 IMG_0870 by brian_reynolds123, on Flickr[/IMG]
[IMG]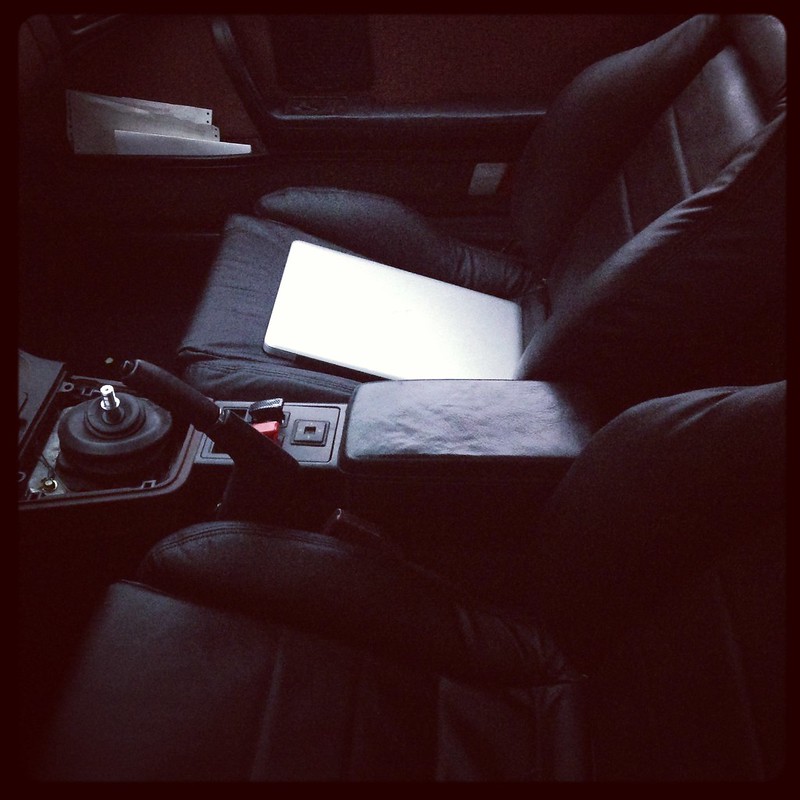 IMG_0898 by brian_reynolds123, on Flickr[/IMG]
Much better! That's all for now folks. More engine stuff coming soon! stay tuned. I'm going to catch this build thread up!
[IMG]
IMG_0634 by brian_reynolds123, on Flickr[/IMG][IMG]
IMG_0673 by brian_reynolds123, on Flickr[/IMG]I also got this rare cargo cover in black which meant that it was time to swap over from the ron jeremy pornstar maroon to black front and rear carpet with black leather seats. The seats were reupholstered by me and my father. They came out pretty sweet for our first time doing something like this. The leather looks loose in the pics but it tightened up as they were exposed to heat cycles and daily driving. This was only half of the red to black interior swap. The dash painting(dyeing), plastics, and rear side carpets would be addressed later. So long nasty maroon!
[IMG]
IMG_0773 by brian_reynolds123, on Flickr[/IMG][IMG]
IMG_0845 by brian_reynolds123, on Flickr[/IMG][IMG]
IMG_2527 by brian_reynolds123, on Flickr[/IMG][IMG]
IMG_0870 by brian_reynolds123, on Flickr[/IMG][IMG]
IMG_0898 by brian_reynolds123, on Flickr[/IMG]Much better! That's all for now folks. More engine stuff coming soon! stay tuned. I'm going to catch this build thread up!
05-01-15, 08:04 PM
#34
So here's some pics of the Rotary Works gilmer belt. Has a sweet sound and more than likely it won't ever slip. And it looks pretty badass too. Oh and a stockpile of parts!
[IMG]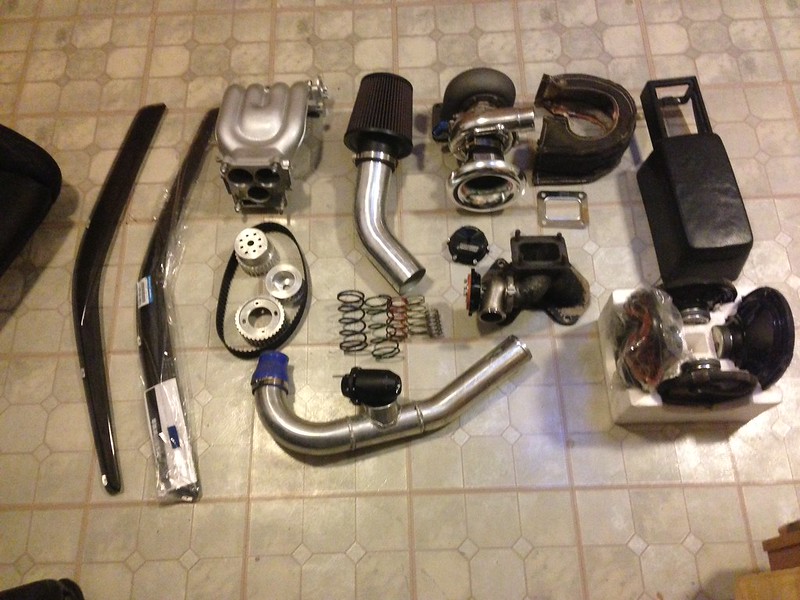 IMG_2531 by brian_reynolds123, on Flickr[/IMG]
[IMG]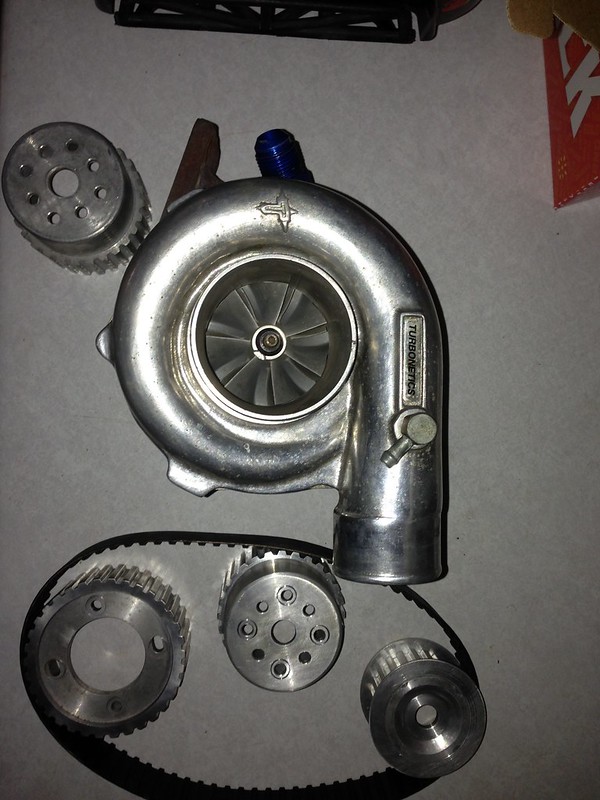 IMG_0769 by brian_reynolds123, on Flickr[/IMG]
[IMG]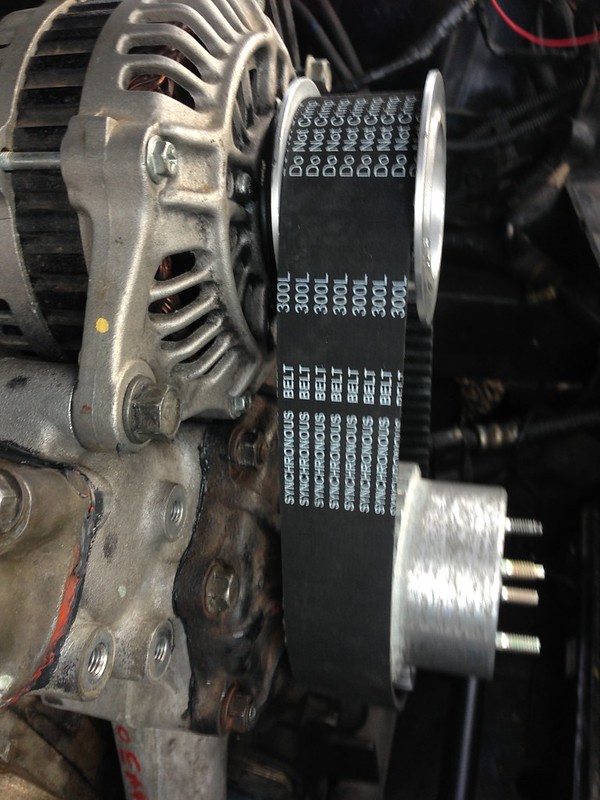 IMG_0915 by brian_reynolds123, on Flickr[/IMG]
[IMG] IMG_0930 by brian_reynolds123, on Flickr[/IMG]
WARNING!WARNING!WARNING!!
Do NOT overtighten a gilmer belt, as amazing as that whine sound may be... Should you be so stupid, this will happen...
*Dun Du DUUUUUUN*
[IMG]
IMG_2531 by brian_reynolds123, on Flickr[/IMG][IMG]
IMG_0769 by brian_reynolds123, on Flickr[/IMG][IMG]
IMG_0915 by brian_reynolds123, on Flickr[/IMG][IMG]
IMG_0930 by brian_reynolds123, on Flickr[/IMG]WARNING!WARNING!WARNING!!
Do NOT overtighten a gilmer belt, as amazing as that whine sound may be... Should you be so stupid, this will happen...
*Dun Du DUUUUUUN*
05-01-15, 08:29 PM
#35
[IMG]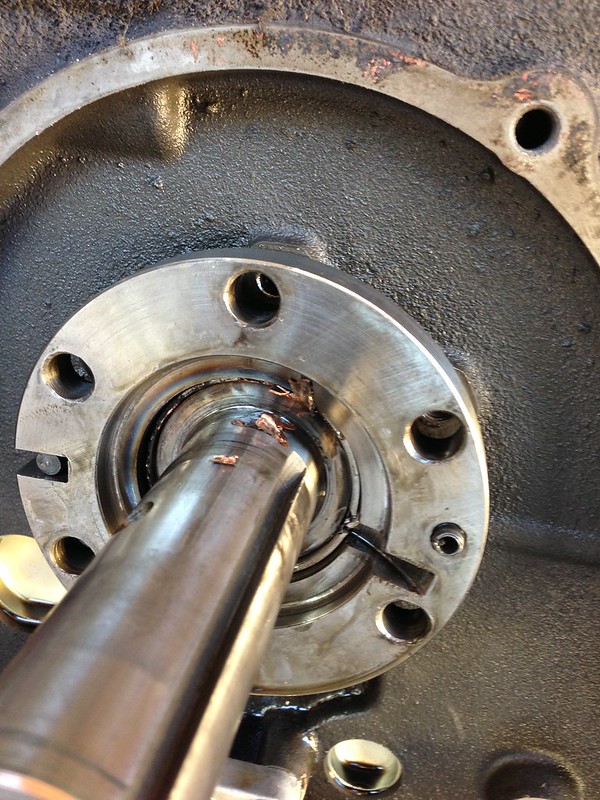 IMG_1157 by brian_reynolds123, on Flickr[/IMG]
Yup.. I spun a bearing. After spending days trying to diagnose the problem, a compression test yielded the results that no car owner ever wants to hear. "Your motor is blown!"
Come to think of it, I remember hearing the notorious "whirring" sound that happens when a bearing spins. It was on a hard downshift from third to second gear. Rev match and everything. It sucks because I remember telling my father when we were installing the gilmer drive, "It doesn't need to be that tight!" but then he went hulk on it.. Oh well that's the way it goes I guess. **** happens.
Ready to come out!!
[IMG]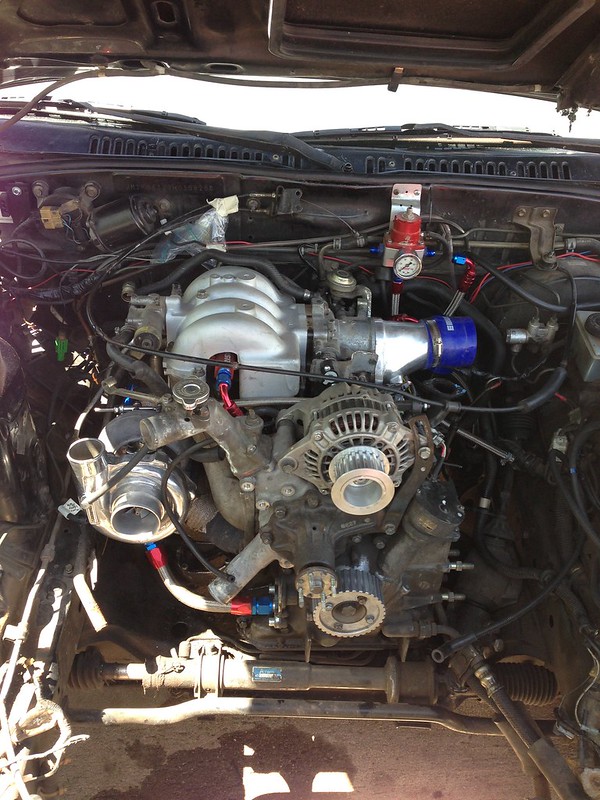 IMG_1146 by brian_reynolds123, on Flickr[/IMG]
And not too happy about it.
[IMG] IMG_1148 by brian_reynolds123, on Flickr[/IMG]
Here you can see copper flakes and shavings in the oil pan. Followed by copper stuck in the oil pickup.
[IMG]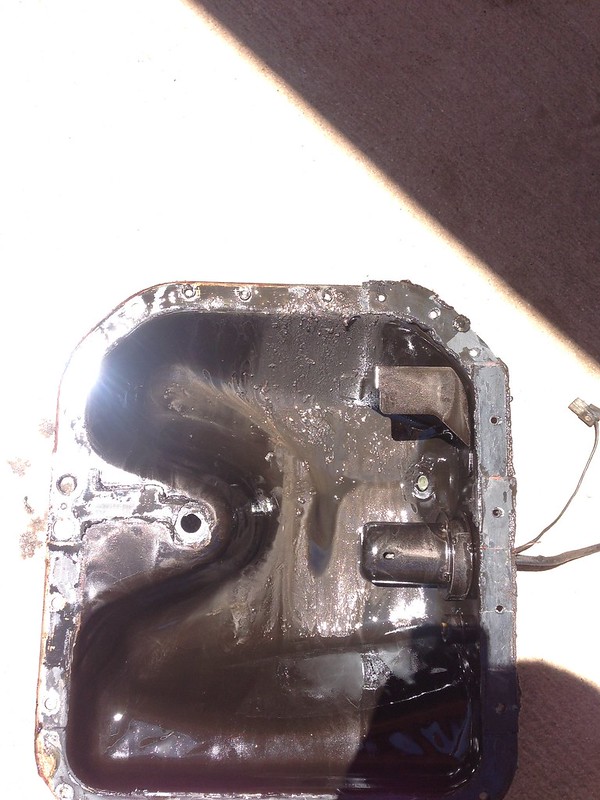 IMG_1156 by brian_reynolds123, on Flickr[/IMG]
[IMG] IMG_1155 by brian_reynolds123, on Flickr[/IMG]
IMG_1157 by brian_reynolds123, on Flickr[/IMG]Yup.. I spun a bearing. After spending days trying to diagnose the problem, a compression test yielded the results that no car owner ever wants to hear. "Your motor is blown!"
Come to think of it, I remember hearing the notorious "whirring" sound that happens when a bearing spins. It was on a hard downshift from third to second gear. Rev match and everything. It sucks because I remember telling my father when we were installing the gilmer drive, "It doesn't need to be that tight!" but then he went hulk on it.. Oh well that's the way it goes I guess. **** happens.
Ready to come out!!
[IMG]
IMG_1146 by brian_reynolds123, on Flickr[/IMG]And not too happy about it.
[IMG]
IMG_1148 by brian_reynolds123, on Flickr[/IMG]Here you can see copper flakes and shavings in the oil pan. Followed by copper stuck in the oil pickup.
[IMG]
IMG_1156 by brian_reynolds123, on Flickr[/IMG][IMG]
IMG_1155 by brian_reynolds123, on Flickr[/IMG]
05-03-15, 12:05 AM
#37
More copper!
[IMG]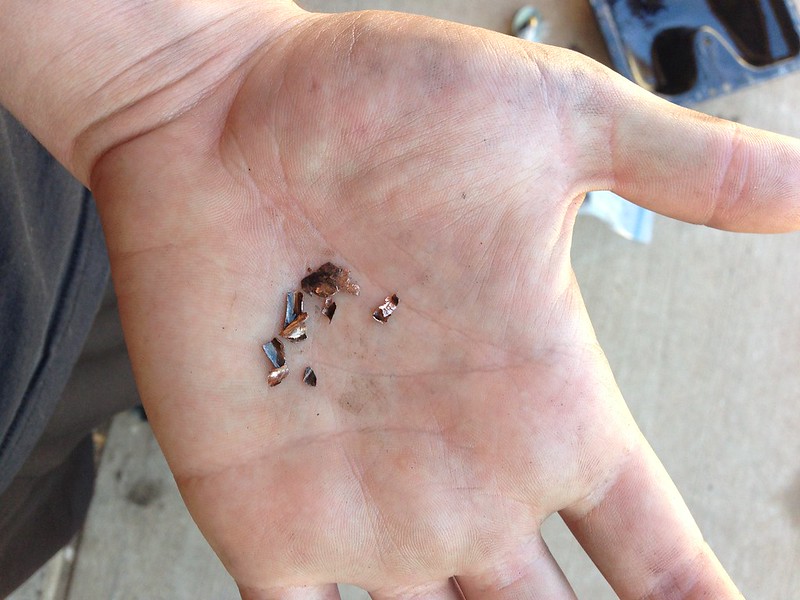 IMG_1158 by brian_reynolds123, on Flickr[/IMG]
And here she sits awaiting the rebuild.
[IMG] IMG_1119 by brian_reynolds123, on Flickr[/IMG]
[IMG]
IMG_1158 by brian_reynolds123, on Flickr[/IMG]And here she sits awaiting the rebuild.
[IMG]
IMG_1119 by brian_reynolds123, on Flickr[/IMG]
05-03-15, 12:27 AM
#38
So here are some teardown pics. As far as damage goes, I spun the front rotor bearing due to the gilmer belt being so tight and the tension from the alternator was actually pulling up on the main pulley enough to allow the front rotor to spin just a little off axis. In turn some side seals on the front rotor were smashed in. and the front rotor housing has a mark on it. With some wiggling the pieces of stuck side seals were removed and everything was spec'd. The mark on the front rotor housing was just cosmetic luckily. Here are some random pics from the rebuild process.
[IMG] IMG_1160 by brian_reynolds123, on Flickr[/IMG]
[IMG] IMG_1161 by brian_reynolds123, on Flickr[/IMG]
[IMG] IMG_1169 by brian_reynolds123, on Flickr[/IMG]
[IMG] IMG_1189 by brian_reynolds123, on Flickr[/IMG]
[IMG]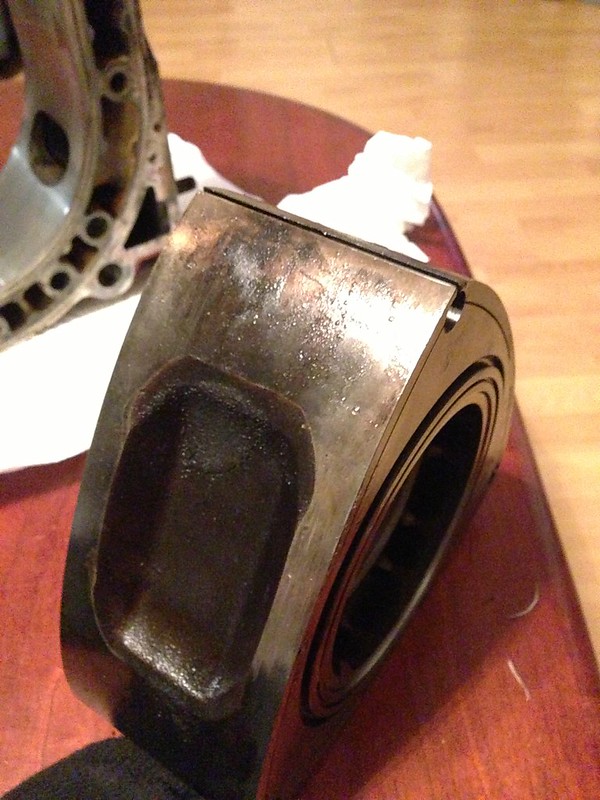 IMG_1172 by brian_reynolds123, on Flickr[/IMG]
Alright time for bed. Tomorrow I'll post pics of the whole putting it back together process.
[IMG]
IMG_1160 by brian_reynolds123, on Flickr[/IMG][IMG]
IMG_1161 by brian_reynolds123, on Flickr[/IMG][IMG]
IMG_1169 by brian_reynolds123, on Flickr[/IMG][IMG]
IMG_1189 by brian_reynolds123, on Flickr[/IMG][IMG]
IMG_1172 by brian_reynolds123, on Flickr[/IMG]Alright time for bed. Tomorrow I'll post pics of the whole putting it back together process.
05-12-15, 11:21 PM
#41
Cleaning up the front cover before paint. Decided to go with a red and silver scheme with black accents.
[IMG]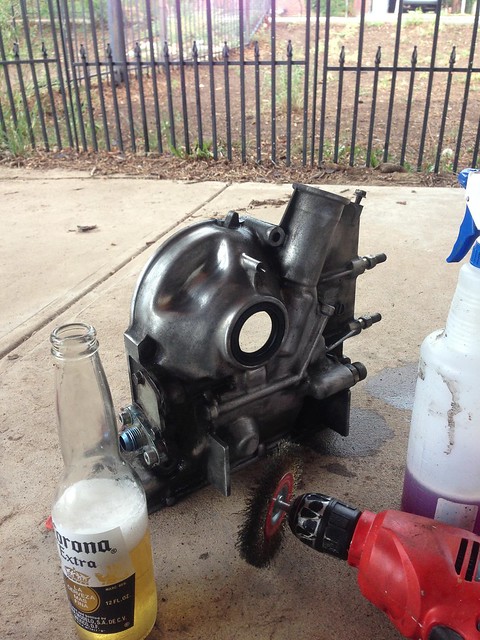 IMG_1239 by Brian Skotchdopole, on Flickr[/IMG]
[IMG]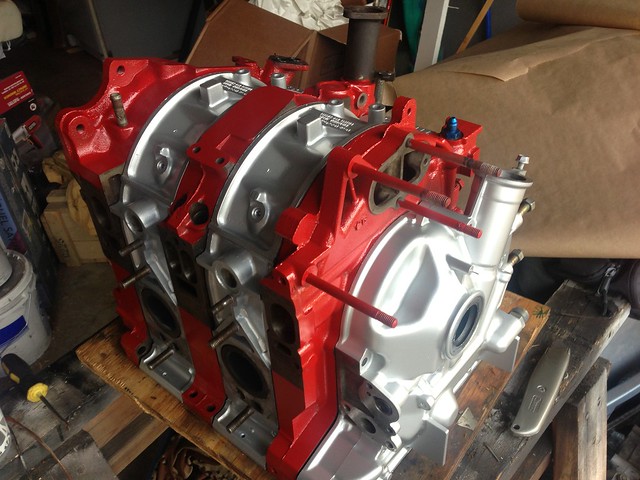 IMG_1271 by Brian Skotchdopole, on Flickr[/IMG]
[IMG]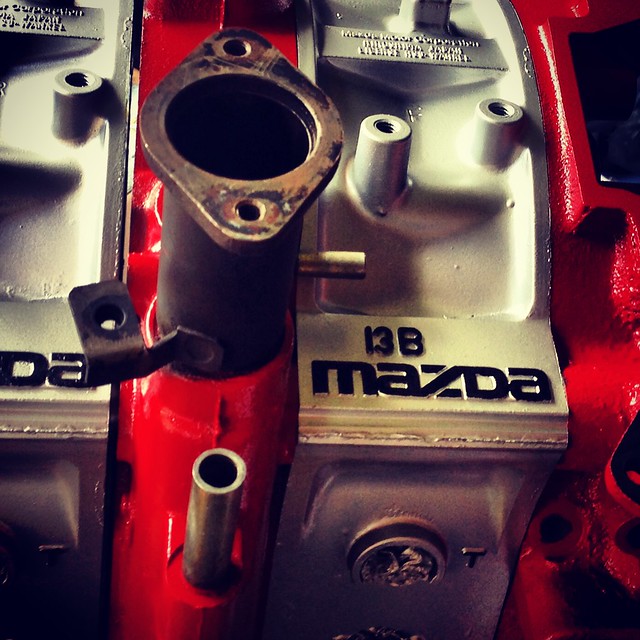 IMG_1297 by Brian Skotchdopole, on Flickr[/IMG]
Attention to detail!
[IMG]
IMG_1239 by Brian Skotchdopole, on Flickr[/IMG][IMG]
IMG_1271 by Brian Skotchdopole, on Flickr[/IMG][IMG]
IMG_1297 by Brian Skotchdopole, on Flickr[/IMG]Attention to detail!
05-13-15, 12:14 PM
#42
Alright so here are some pics of the actual motor stacked. Sorry I didn't get any pics in between irons/housings. I was too busy with the hylomar and engine lube.  Oh and check out that super awesome engine stand!
[IMG]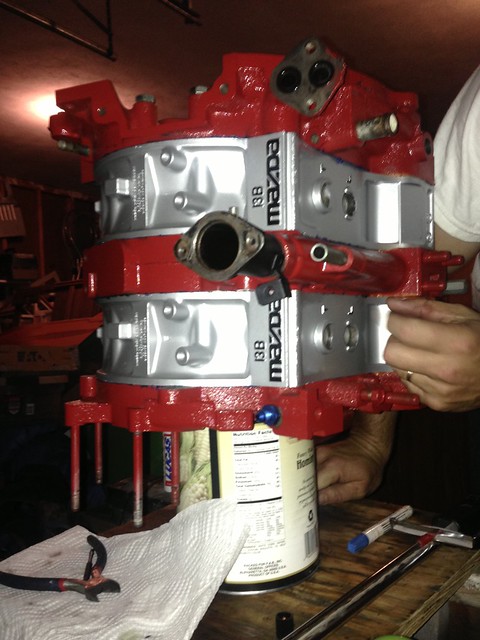 IMG_1302 by Brian Skotchdopole, on Flickr[/IMG]
[IMG]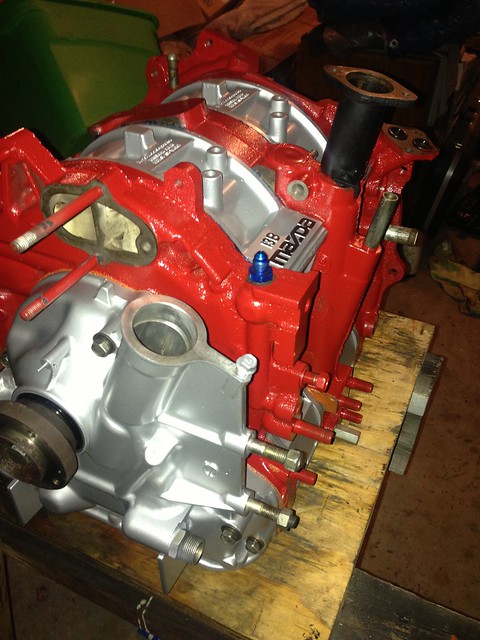 IMG_1306 by Brian Skotchdopole, on Flickr[/IMG]
[IMG]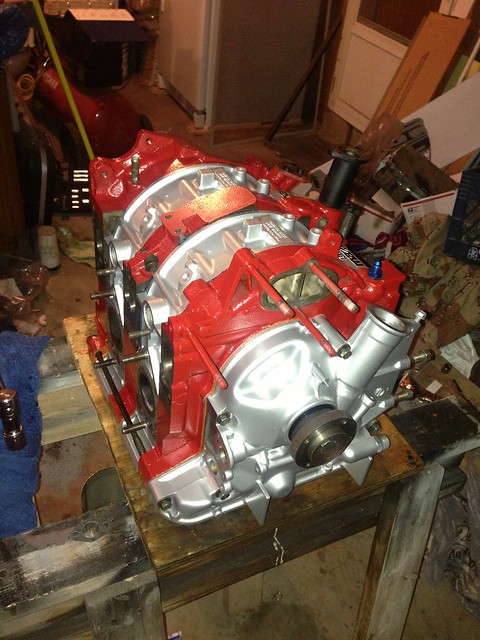 IMG_1305 by Brian Skotchdopole, on Flickr[/IMG]
I also ported or "gasket matched" the lower intake manifold and irons so there would be a really smooth flow through there. Still left the surface rough for proper air/fuel atomization. Then I hit the lim with high temp paint and cured it in the oven. It matched the upper intake manifold, but I went an extra step and put heat reflective tape all over the lim to keep it as cool as possible sitting right next to the turbocharger. I think it was called "cool tape" by DEI.
[IMG]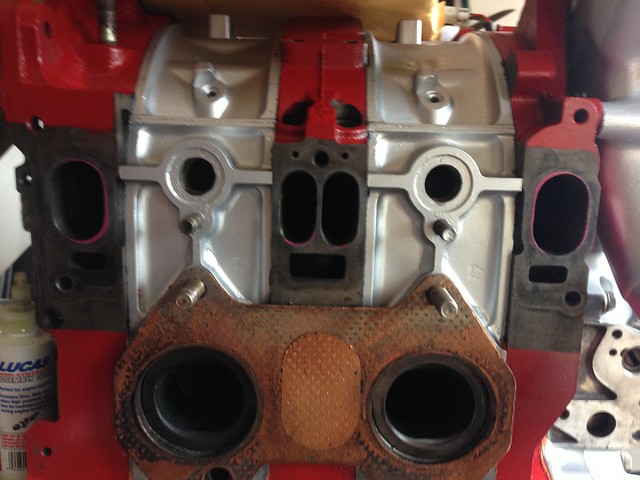 IMG_3431 by Brian Skotchdopole, on Flickr[/IMG]
[IMG] IMG_3430 by Brian Skotchdopole, on Flickr[/IMG]
[IMG]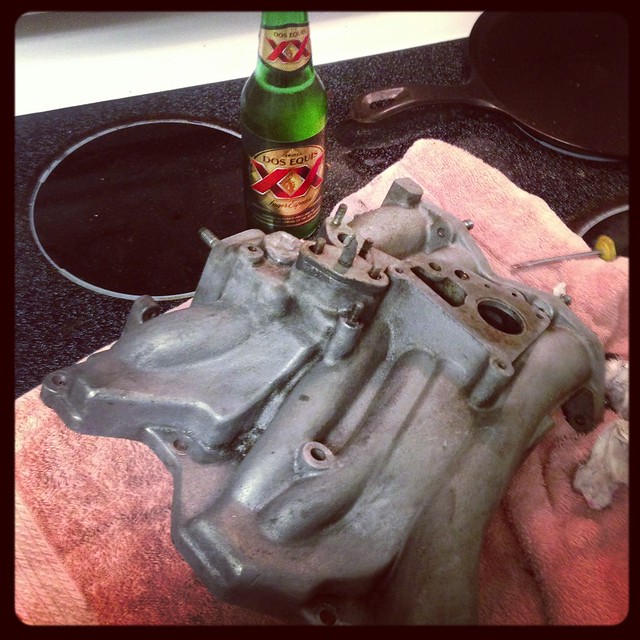 IMG_1393 by Brian Skotchdopole, on Flickr[/IMG]
[IMG]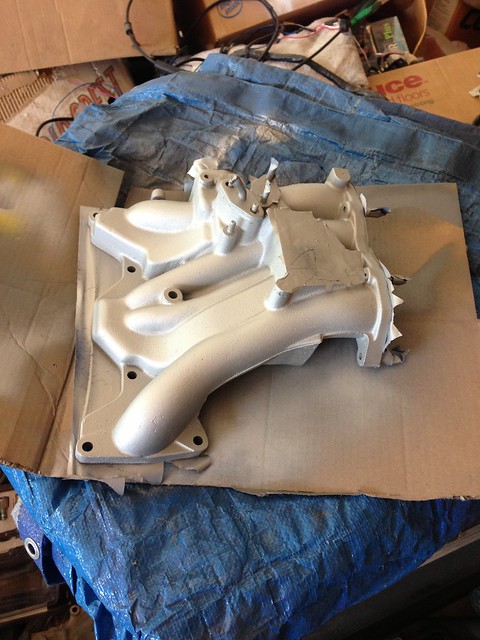 IMG_1394 by Brian Skotchdopole, on Flickr[/IMG]
[IMG]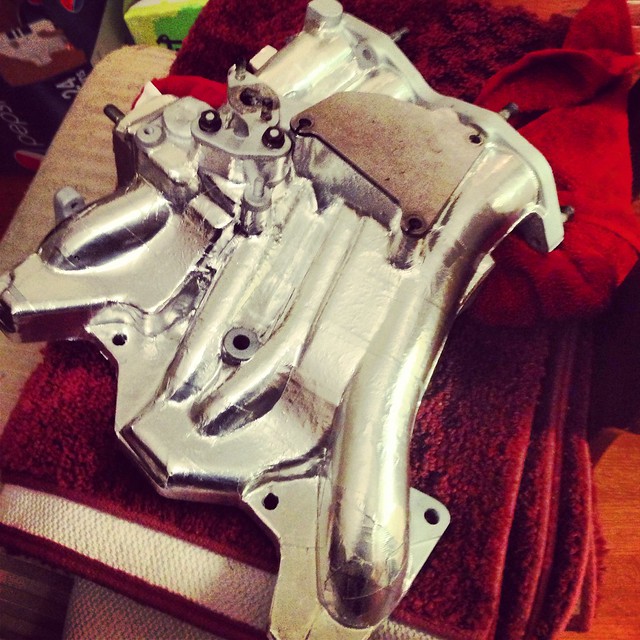 IMG_1429 by Brian Skotchdopole, on Flickr[/IMG]
Oh and check out that super awesome engine stand![IMG]
IMG_1302 by Brian Skotchdopole, on Flickr[/IMG][IMG]
IMG_1306 by Brian Skotchdopole, on Flickr[/IMG][IMG]
IMG_1305 by Brian Skotchdopole, on Flickr[/IMG]I also ported or "gasket matched" the lower intake manifold and irons so there would be a really smooth flow through there. Still left the surface rough for proper air/fuel atomization. Then I hit the lim with high temp paint and cured it in the oven. It matched the upper intake manifold, but I went an extra step and put heat reflective tape all over the lim to keep it as cool as possible sitting right next to the turbocharger. I think it was called "cool tape" by DEI.
[IMG]
IMG_3431 by Brian Skotchdopole, on Flickr[/IMG][IMG]
IMG_3430 by Brian Skotchdopole, on Flickr[/IMG][IMG]
IMG_1393 by Brian Skotchdopole, on Flickr[/IMG][IMG]
IMG_1394 by Brian Skotchdopole, on Flickr[/IMG][IMG]
IMG_1429 by Brian Skotchdopole, on Flickr[/IMG]
05-13-15, 12:23 PM
#43
So you can be sure I wasn't going to put the pretty engine in a dirty engine bay! Here's how it was looking before we got to cleaning it up and painting. Nasty right!!! So in all honesty, even though I was bummed that the motor spun a bearing, I was more than happy to leave the nasty bay in the past. Don't think it had been cleaned since 1987.
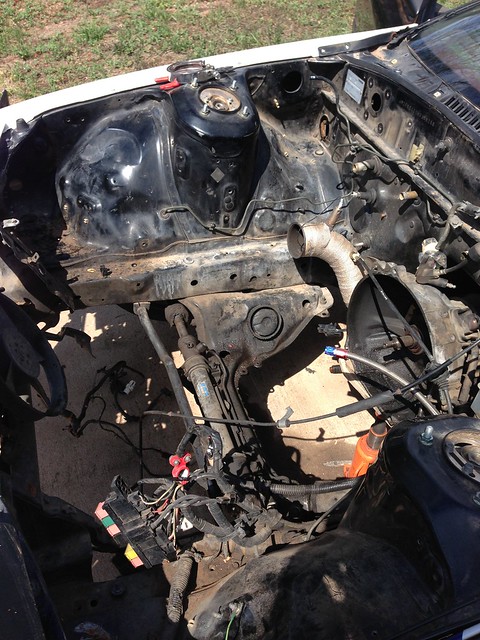 IMG_1343 by Brian Skotchdopole, on Flickr
[IMG]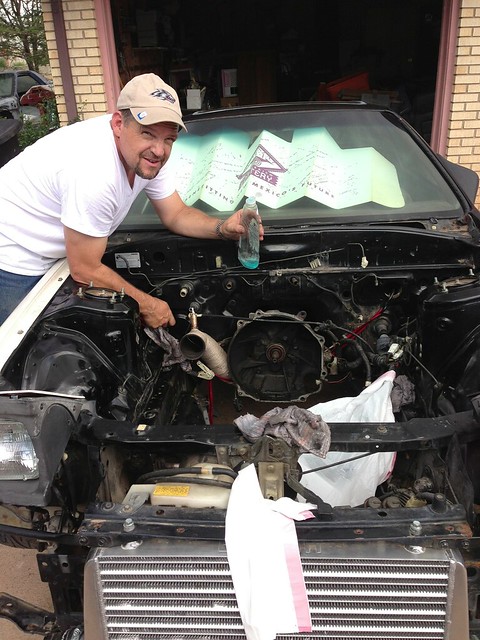 IMG_1351 by Brian Skotchdopole, on Flickr[/IMG]
^It's amazing how much shine came back and how well it cleaned up just scrubbing with DAWN dish soap. If there weren't so many scratches and some original paint messed up from a leaking brake master cylinder, I would have called it done after the dish soap cleaning. Below is a pic of the primer over the rough spots and then the repaint. Areas that weren't primer'd were hit with a green scotch brite pad. This would ensure that the new paint would adhere to the old since it was roughed up.
[IMG]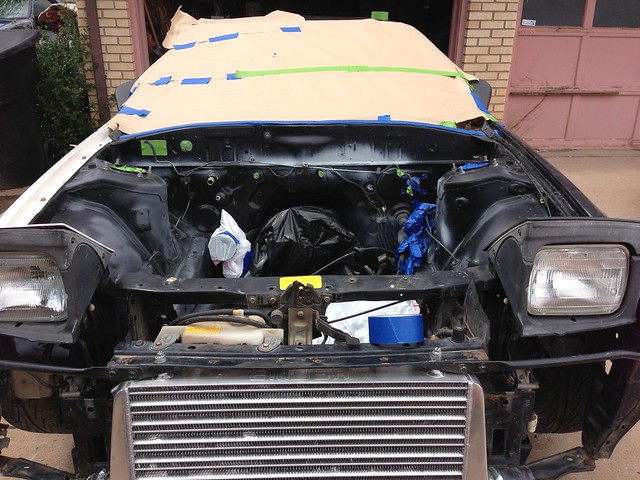 IMG_1353 by Brian Skotchdopole, on Flickr[/IMG]
[IMG] IMG_1358 by Brian Skotchdopole, on Flickr[/IMG]
And there she is! Not too shabby.
IMG_1343 by Brian Skotchdopole, on Flickr[IMG]
IMG_1351 by Brian Skotchdopole, on Flickr[/IMG]^It's amazing how much shine came back and how well it cleaned up just scrubbing with DAWN dish soap. If there weren't so many scratches and some original paint messed up from a leaking brake master cylinder, I would have called it done after the dish soap cleaning. Below is a pic of the primer over the rough spots and then the repaint. Areas that weren't primer'd were hit with a green scotch brite pad. This would ensure that the new paint would adhere to the old since it was roughed up.
[IMG]
IMG_1353 by Brian Skotchdopole, on Flickr[/IMG][IMG]
IMG_1358 by Brian Skotchdopole, on Flickr[/IMG]And there she is! Not too shabby.
05-13-15, 07:03 PM
#45
NA-BOOSTIN
 05-14-15, 11:15 AM
#46
Jeremy Griffith, that manifold was included when I bought the turbo setup from my buddy. It was custom and the welds werent all that great. Wastegate placement was horrible. I've since switched to a divided with dual runners for the wastegate.
Unek87, I'm gonna take some awesome pics for you when I get there. and I always like to have a beer when I'm cleaning parts haha.
Unek87, I'm gonna take some awesome pics for you when I get there.
and I always like to have a beer when I'm cleaning parts haha.
05-14-15, 12:26 PM
#47
NA-BOOSTIN
I wish there was more rotary peeps around Austin area . All the kook builds are outta state . Looking forward to the pics man . Check out my thread below . Just updated with some pics
05-14-15, 05:28 PM
#49
A shot of the sweet cas cover from pineapple racing. Installed the water pump and thermostat housing.
[IMG]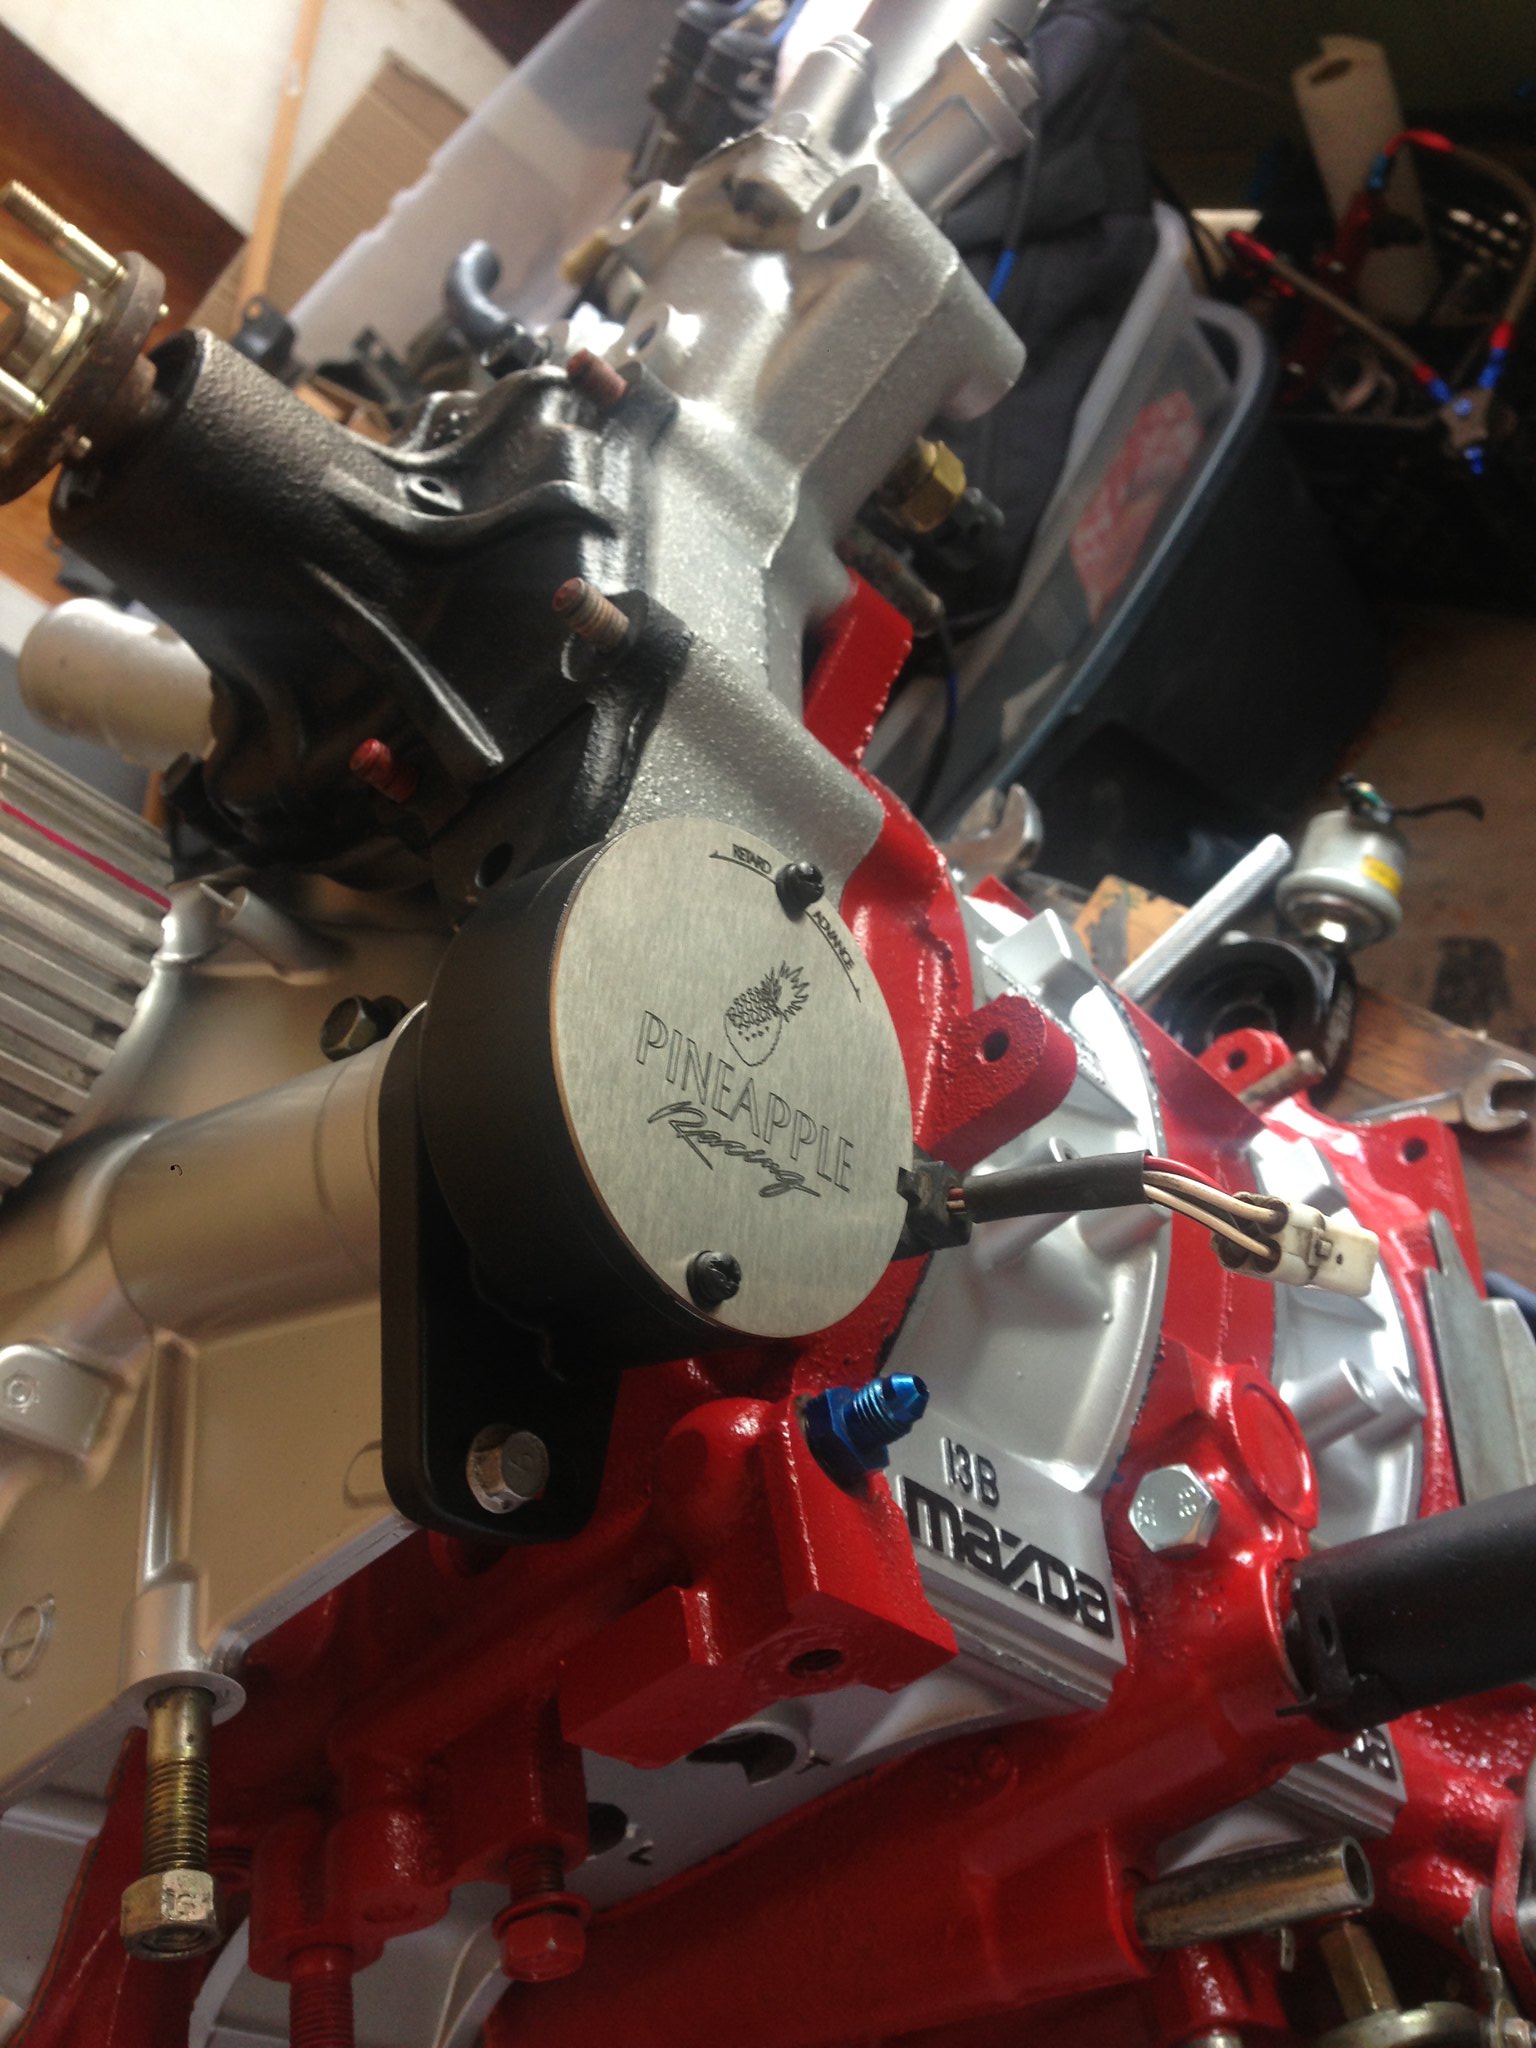 IMG_1454 by Brian Skotchdopole, on Flickr[/IMG]
And here's the freshly painted bay awaiting her new heart!
[IMG]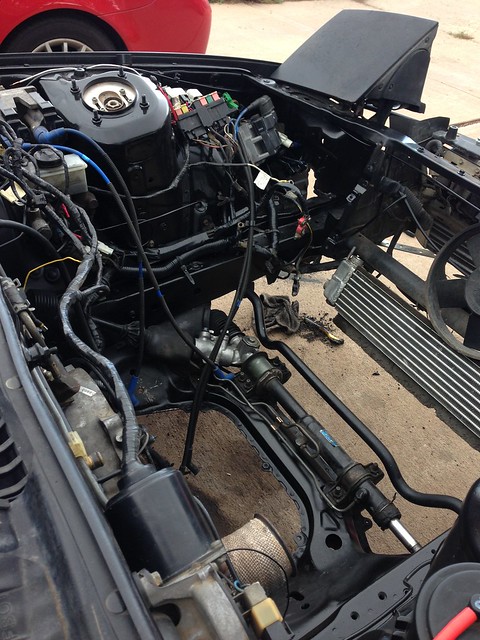 IMG_1459 by Brian Skotchdopole, on Flickr[/IMG]
[IMG]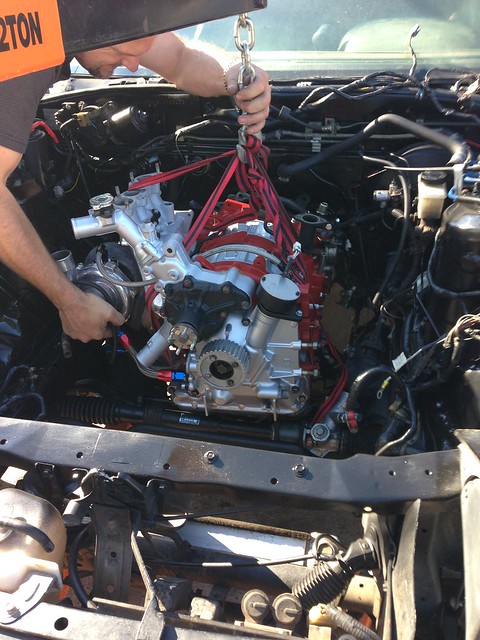 IMG_1466 by Brian Skotchdopole, on Flickr[/IMG]
AND IT'S IN!!! WHOOOOO!
[IMG]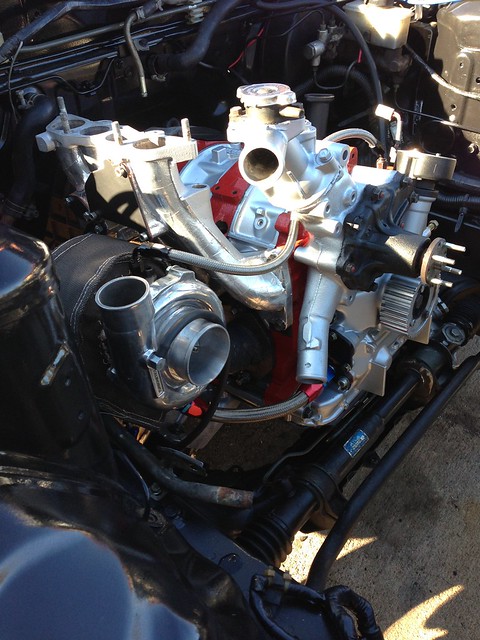 IMG_1467 by Brian Skotchdopole, on Flickr[/IMG]
[IMG]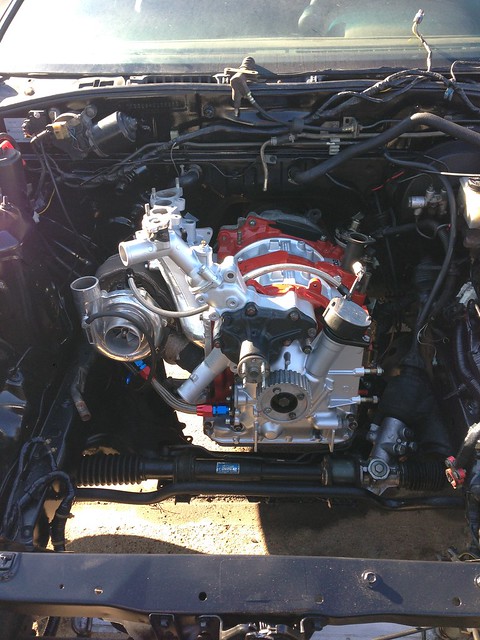 IMG_1468 by Brian Skotchdopole, on Flickr[/IMG]
[IMG]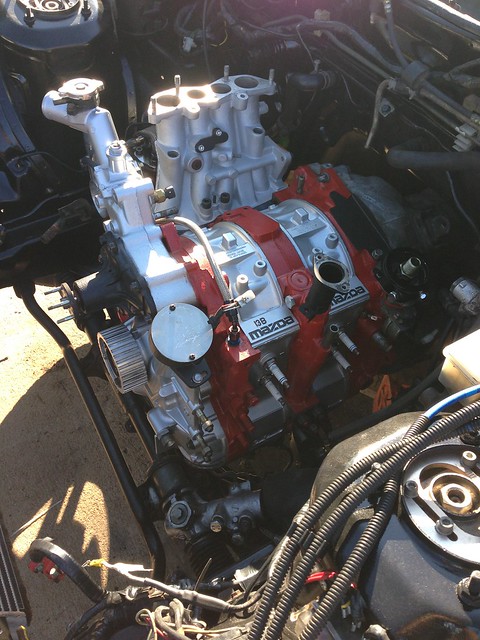 IMG_1469 by Brian Skotchdopole, on Flickr[/IMG]
[IMG]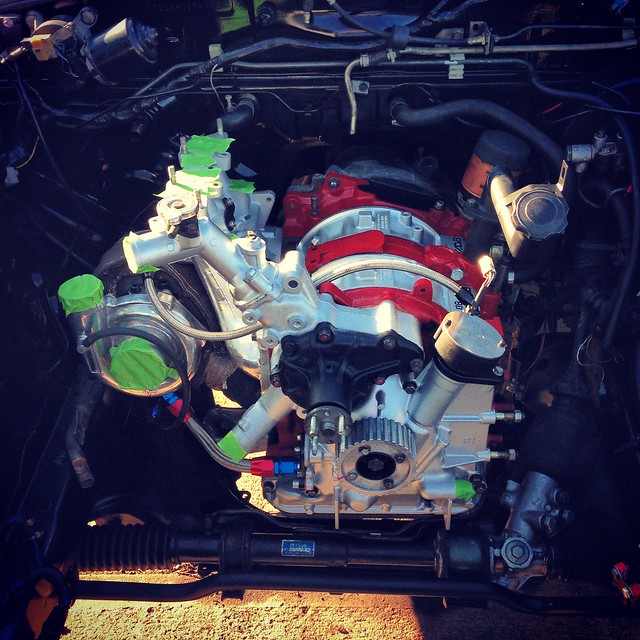 IMG_1475 by Brian Skotchdopole, on Flickr[/IMG]
At this point it was getting pretty late in the day, so I taped everything up so no critters would get in. It sat like this for a few days while all of my parts arrived. I'd be doing new radiator hoses, and red silicone vacuum lines. Because red is faster duh.
[IMG]
IMG_1454 by Brian Skotchdopole, on Flickr[/IMG]And here's the freshly painted bay awaiting her new heart!
[IMG]
IMG_1459 by Brian Skotchdopole, on Flickr[/IMG][IMG]
IMG_1466 by Brian Skotchdopole, on Flickr[/IMG]AND IT'S IN!!! WHOOOOO!
[IMG]
IMG_1467 by Brian Skotchdopole, on Flickr[/IMG][IMG]
IMG_1468 by Brian Skotchdopole, on Flickr[/IMG][IMG]
IMG_1469 by Brian Skotchdopole, on Flickr[/IMG][IMG]
IMG_1475 by Brian Skotchdopole, on Flickr[/IMG]At this point it was getting pretty late in the day, so I taped everything up so no critters would get in. It sat like this for a few days while all of my parts arrived. I'd be doing new radiator hoses, and red silicone vacuum lines. Because red is faster duh.
05-14-15, 05:59 PM
#50
Upgr8 radiator hoses. 4 ply nice quality silicone for an awesome price. Highly recommend them.
[IMG]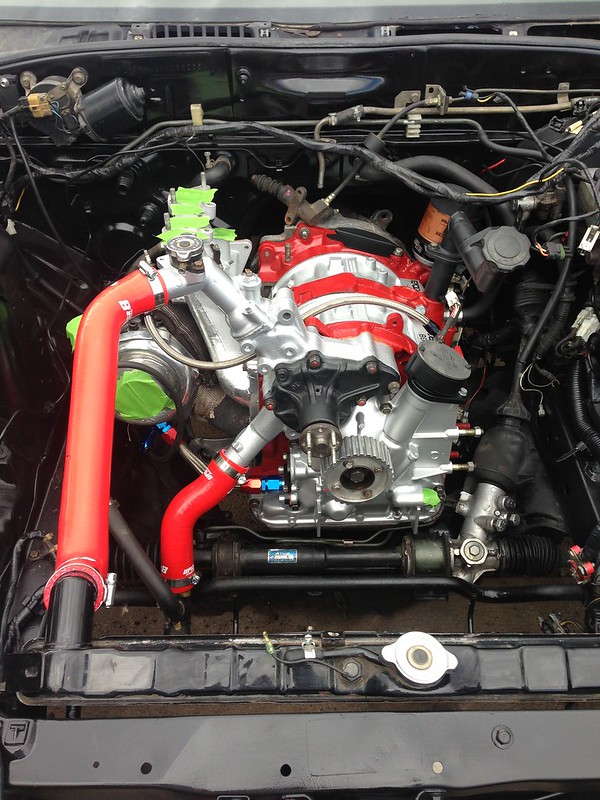 IMG_1491 by Brian Skotchdopole, on Flickr[/IMG]
[IMG]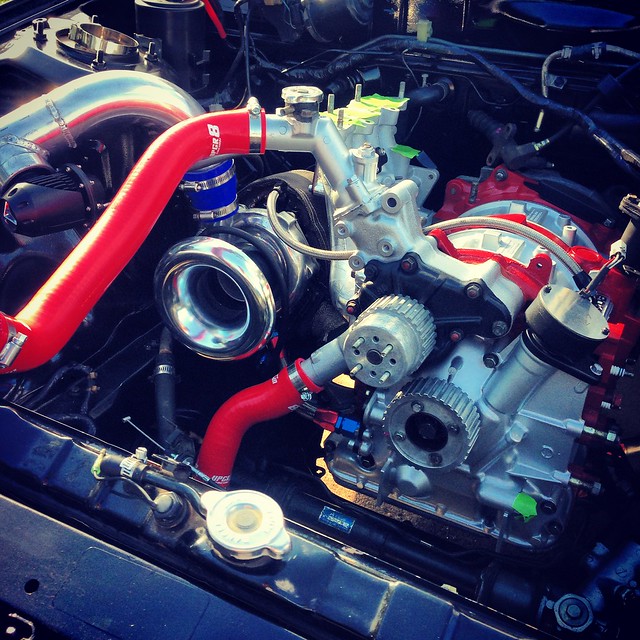 IMG_1495 by Brian Skotchdopole, on Flickr[/IMG]
I also took this opportunity to upgrade to corksport stainless oil cooler lines. Oh and picked up a new oil cooler since there was more than likely copper flakes in my old one due to spinning a bearing. I like the corksport lines a lot. Some people on this forum complained about fitment but mine were pretty easy to fit with just a little wiggling. Maybe I'm lucky? They don't leak or anything and they look a million times better. Comparison with the old.
[IMG]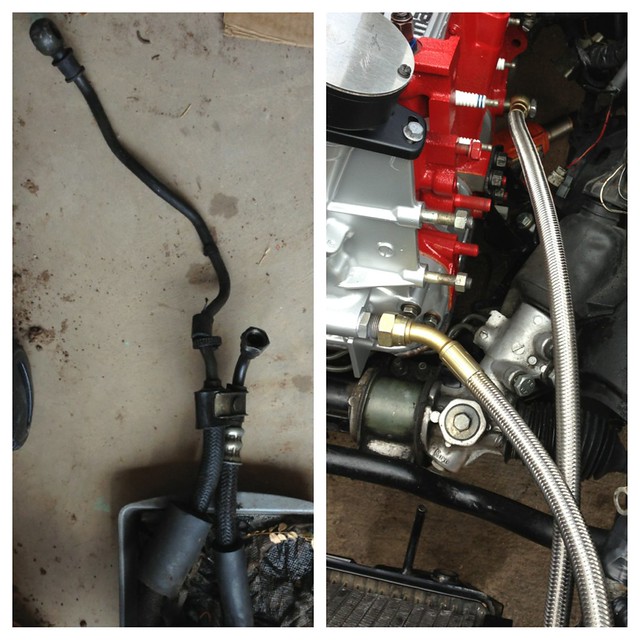 IMG_1506 by Brian Skotchdopole, on Flickr[/IMG]
[IMG] IMG_1501 by Brian Skotchdopole, on Flickr[/IMG]
And a nice little view from the underside. Wastegate just dumps down towards the ground. No dump tube yet. I'll eventually get to routing it out of the passenger sideskirt. I love the sound of open dump so routing it back into the downpipe is not an option.
[IMG]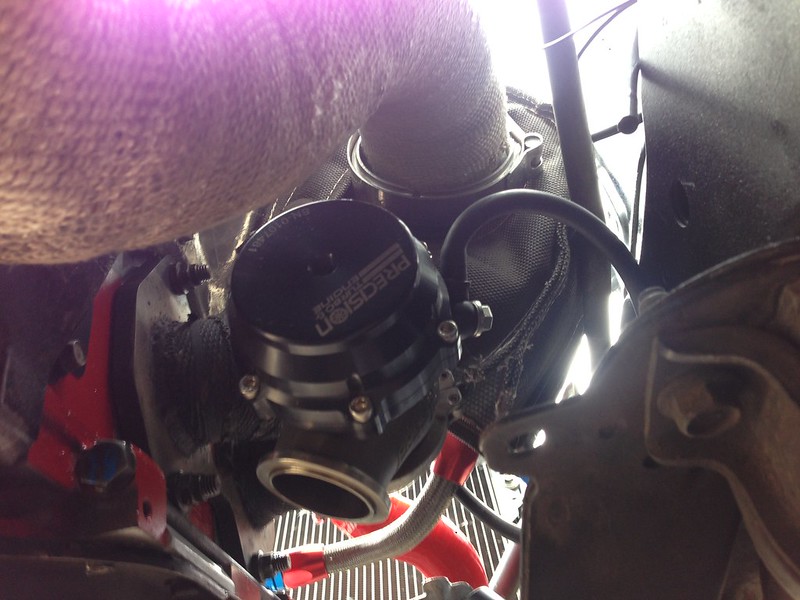 IMG_1509 by Brian Skotchdopole, on Flickr[/IMG]
Fuel system and some more red.
[IMG]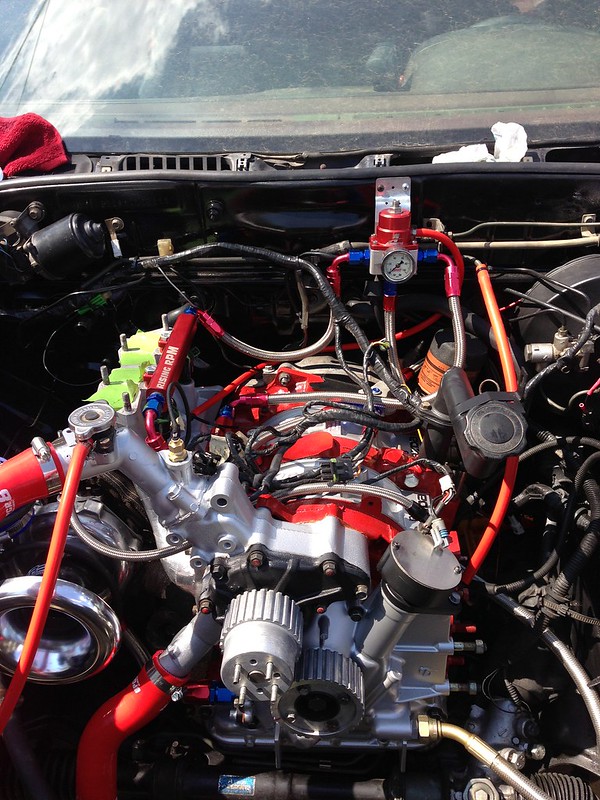 IMG_1544 by Brian Skotchdopole, on Flickr[/IMG]
And pretty much everything back together. I really need to get rid of the stock clutch fan and relocate the battery. But hey if it ain't broke (yet).... And then a pic of how she sits with her 3rd motor.
[IMG]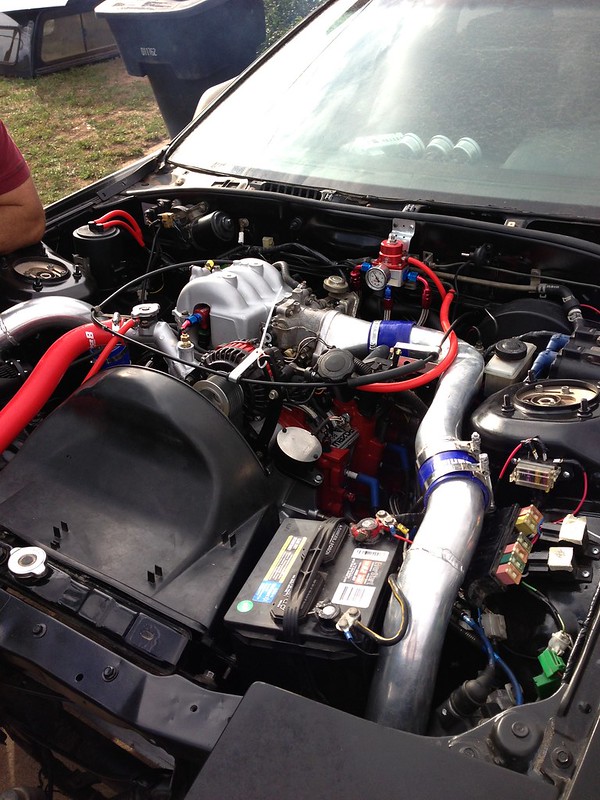 IMG_1555 by Brian Skotchdopole, on Flickr[/IMG]
[IMG] IMG_1560 by Brian Skotchdopole, on Flickr[/IMG]
[IMG]
IMG_1491 by Brian Skotchdopole, on Flickr[/IMG][IMG]
IMG_1495 by Brian Skotchdopole, on Flickr[/IMG]I also took this opportunity to upgrade to corksport stainless oil cooler lines. Oh and picked up a new oil cooler since there was more than likely copper flakes in my old one due to spinning a bearing. I like the corksport lines a lot. Some people on this forum complained about fitment but mine were pretty easy to fit with just a little wiggling. Maybe I'm lucky? They don't leak or anything and they look a million times better. Comparison with the old.
[IMG]
IMG_1506 by Brian Skotchdopole, on Flickr[/IMG][IMG]
IMG_1501 by Brian Skotchdopole, on Flickr[/IMG]And a nice little view from the underside. Wastegate just dumps down towards the ground. No dump tube yet. I'll eventually get to routing it out of the passenger sideskirt. I love the sound of open dump so routing it back into the downpipe is not an option.
[IMG]
IMG_1509 by Brian Skotchdopole, on Flickr[/IMG]Fuel system and some more red.
[IMG]
IMG_1544 by Brian Skotchdopole, on Flickr[/IMG]And pretty much everything back together. I really need to get rid of the stock clutch fan and relocate the battery. But hey if it ain't broke (yet).... And then a pic of how she sits with her 3rd motor.
[IMG]
IMG_1555 by Brian Skotchdopole, on Flickr[/IMG][IMG]
IMG_1560 by Brian Skotchdopole, on Flickr[/IMG]

