1986 Mazda RX-7 Sport

 09-20-16, 12:41 PM
#77
LegacyCore
Thread Starter
Figured it's been a couple of months since my last update, I can give something for you all. Still really just churning away on the body, with only being able to work on it on weekends these things are just going to take time. Currently in the blocking stage which we're almost finished with before we lay down the final primer before color and clear. So no use to post pictures of any of that, pretty boring stuff. But I do have a few fun things I've bought that I'd like to share.
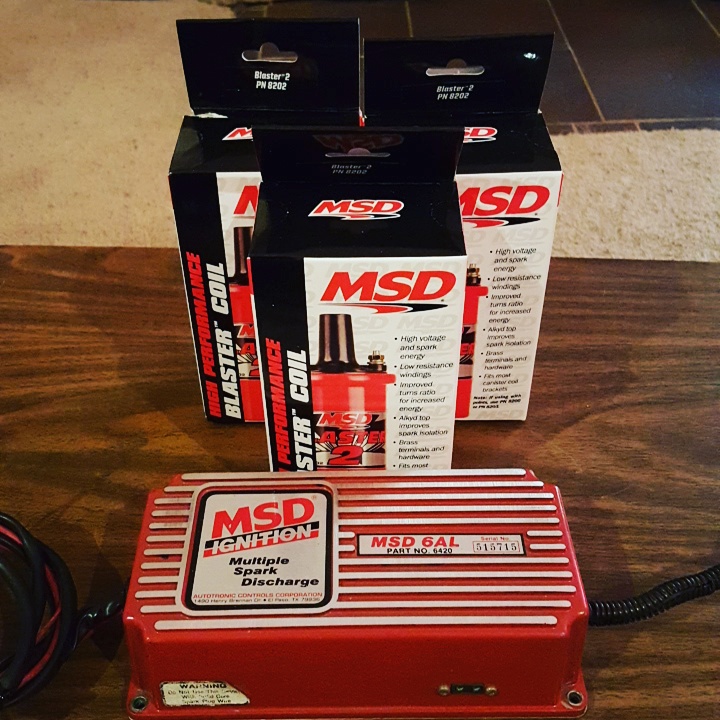
I've now figured out how I'm going to wire up the ignition system, using and MSD 6AL box and three MSD Blaster 2 coils. I'll wire up the green and purple wires from the MSD 6AL to the leading magnetic pickup of the distributor. That will allow the 6AL to get its signal from the leading side of the distributor. Then wire the orange and black wires from the 6AL to two of the Blaster 2 coils. These two Blaster 2 coils will be bridged and both use just one 6AL box. Then wire the 6AL up the rest of the way to your power, ground, and switch ignition power. This will then allow me to have a "wasted spark" direct fire to the leading spark plugs. You'll then use the third Blaster 2 coil to get power to the trailing side of the distributor. You can also use a factory FC coil here, but to keep things the same and pretty I'm gonna use MSD. And that should do what I need it to do for ignition purposes!
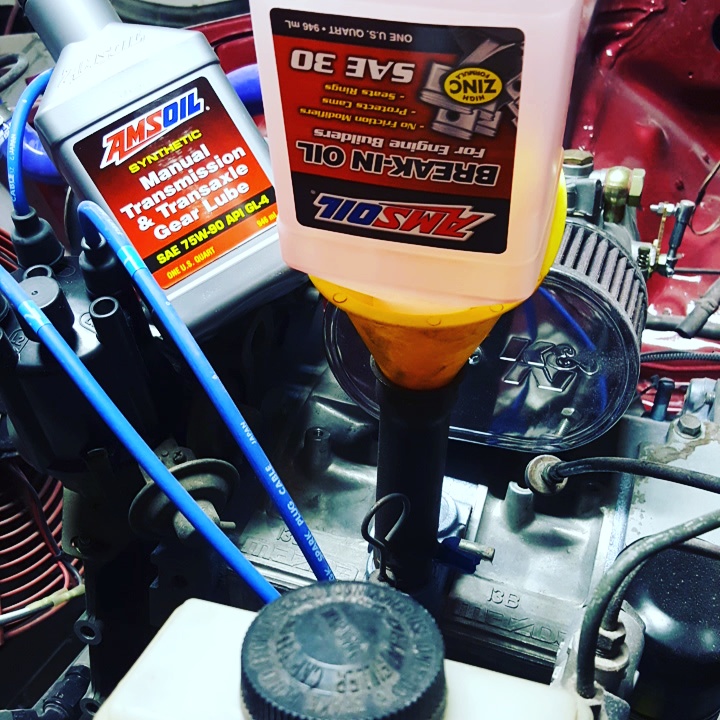
Also ordered all my fluids from AMSOIL, using a 30w AMSOIL break in oil for my first two oil changes, and AMSOIL manual trans oil as well. Did a little bit of product placement here lol
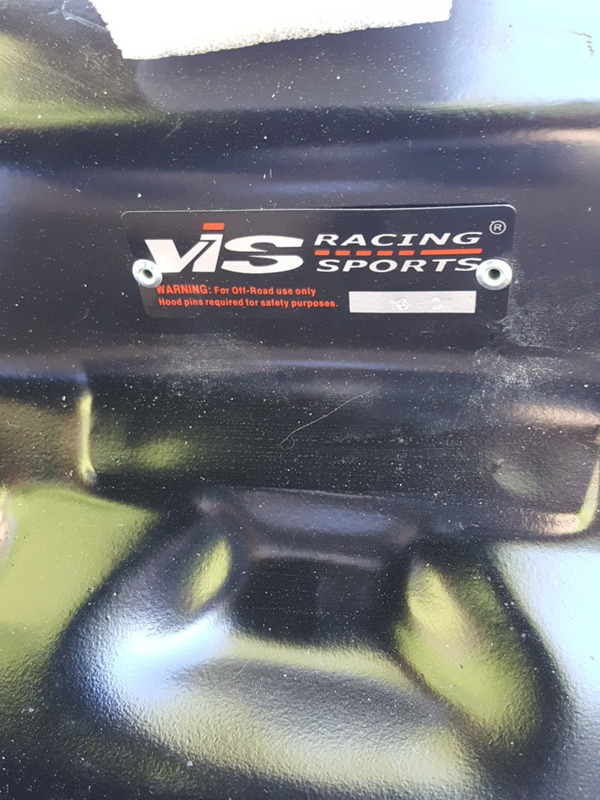
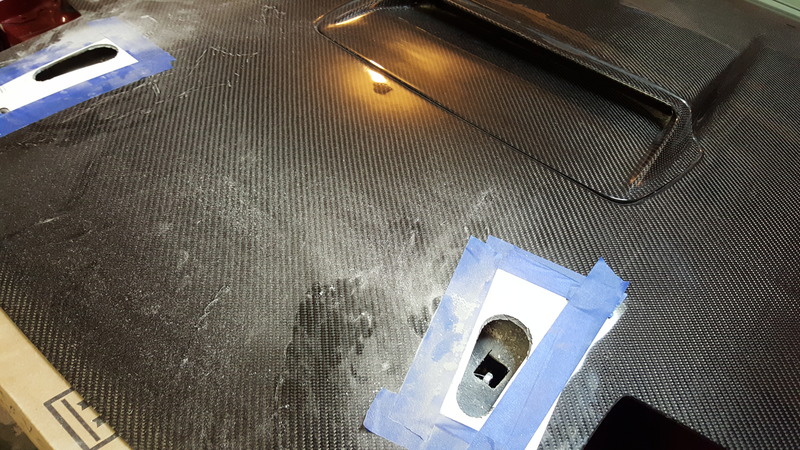
Also got this gem in this past Monday morning, my new VIS TII carbon fiber hood with Aerocatch hood pins. Took me about two hours to install the hood pins as I was trying to make them match each other in position on the hood the best I could.

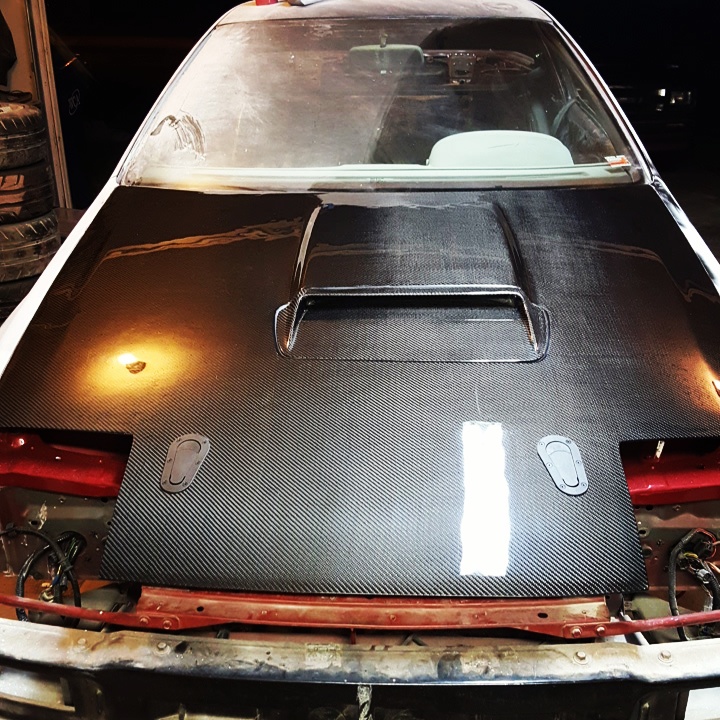
Here I've got it on the car and bolted down to make sure all the body lines and everything fit. And it's about perfect with minimal tweaking, it pays to buy name brand stuff guys and gals.
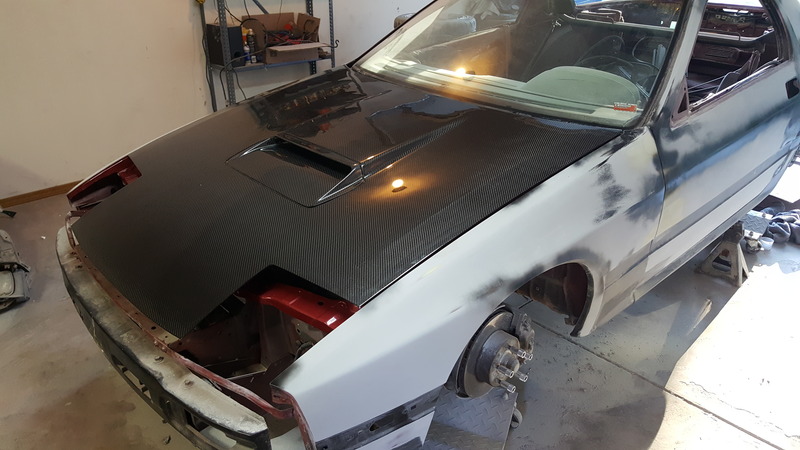
This just like anybody else made me nervous as all hell, but turned out great in the end!
Yes, before anybody says anything it does look like one of the hood pins is crooked and off. But I double checked after the picture was taken and it was just the angle of the pic. Looks so good!
So there you have it, a bit of an update. Things are still going rather slow at the moment especially since I won't be working on it for a few more weeks as I'll be out of town this weekend. But I still expect to have this in color by the end of October. So stay tuned everybody, and thanks for checking it out!
I've now figured out how I'm going to wire up the ignition system, using and MSD 6AL box and three MSD Blaster 2 coils. I'll wire up the green and purple wires from the MSD 6AL to the leading magnetic pickup of the distributor. That will allow the 6AL to get its signal from the leading side of the distributor. Then wire the orange and black wires from the 6AL to two of the Blaster 2 coils. These two Blaster 2 coils will be bridged and both use just one 6AL box. Then wire the 6AL up the rest of the way to your power, ground, and switch ignition power. This will then allow me to have a "wasted spark" direct fire to the leading spark plugs. You'll then use the third Blaster 2 coil to get power to the trailing side of the distributor. You can also use a factory FC coil here, but to keep things the same and pretty I'm gonna use MSD. And that should do what I need it to do for ignition purposes!

Also ordered all my fluids from AMSOIL, using a 30w AMSOIL break in oil for my first two oil changes, and AMSOIL manual trans oil as well. Did a little bit of product placement here lol

Also got this gem in this past Monday morning, my new VIS TII carbon fiber hood with Aerocatch hood pins. Took me about two hours to install the hood pins as I was trying to make them match each other in position on the hood the best I could.


Here I've got it on the car and bolted down to make sure all the body lines and everything fit. And it's about perfect with minimal tweaking, it pays to buy name brand stuff guys and gals.

This just like anybody else made me nervous as all hell, but turned out great in the end!

Yes, before anybody says anything it does look like one of the hood pins is crooked and off. But I double checked after the picture was taken and it was just the angle of the pic. Looks so good!

So there you have it, a bit of an update. Things are still going rather slow at the moment especially since I won't be working on it for a few more weeks as I'll be out of town this weekend. But I still expect to have this in color by the end of October. So stay tuned everybody, and thanks for checking it out!
10-06-16, 11:34 PM
#78
LegacyCore
Thread Starter
Instead of calling this an update, let's call it a sneak peek at what's to come. But before I show off the pics I need to give a bit of an explanation. So for those of you that are following along with my build process, you know that the plan was to have the car in the paint booth by the end of this month. Well.... That's not happening now, in fact there probably won't be any color on the car until spring 2017.... I know, I know... I keep putting it off, but I promise it's for a VERY VERY VERY good reason. The reason is, I'm broke... My car fund is depleted... But once again there is a VERY VERY VERY good reason for this. And here is that reason...
The reason for my funds to be out the window, and the paint to be pushed off for another 6-7 months. The *sneak peek*
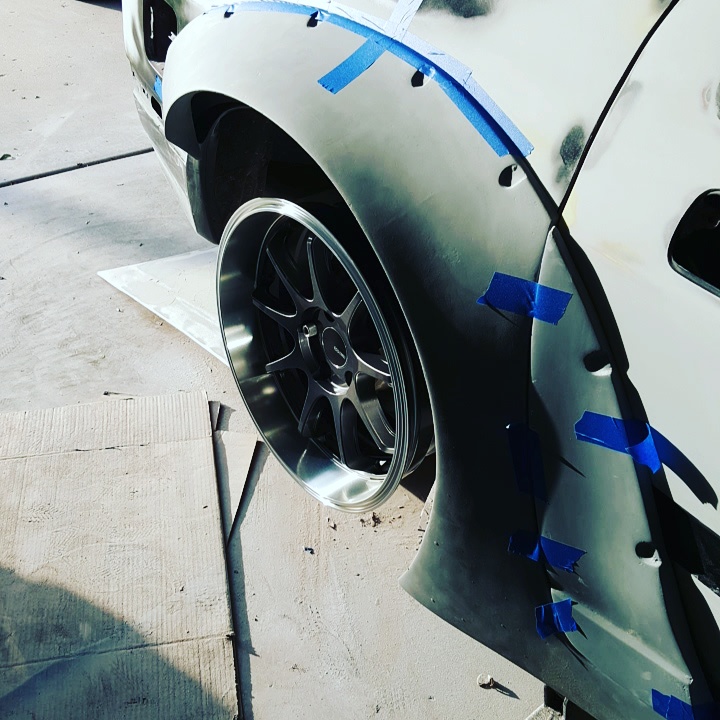
PLEASE IGNORE THE FITMENT IN THIS PIC, MY JACK STAND WAS GETTING IN THE WAY!!!

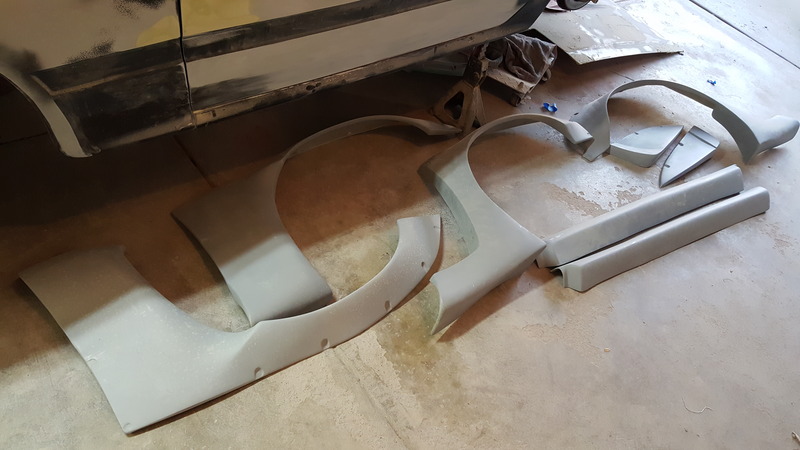
So... As you call can see the sneak peek is that I used my paint money to buy a fiberglass Rocket Bunny V2 replica body kit. I'm still waiting for the front bumper to show up, I ordered the kit from http:jpfiberglass.netindex.html - Online Store in the Dominican Republic. The owner of the company is a pretty good guy. Very responsive, and quick on answering any questions I have. The reason the front bumper has not shown up yet is because as some of you know that area of the world is getting hit by a hurricane. So things are a bit delayed atm. I should have it by the end of next week, then I can really start mocking up the kit and getting it to fit perfect.
The reason for my funds to be out the window, and the paint to be pushed off for another 6-7 months. The *sneak peek*


PLEASE IGNORE THE FITMENT IN THIS PIC, MY JACK STAND WAS GETTING IN THE WAY!!!


So... As you call can see the sneak peek is that I used my paint money to buy a fiberglass Rocket Bunny V2 replica body kit. I'm still waiting for the front bumper to show up, I ordered the kit from http:jpfiberglass.netindex.html - Online Store in the Dominican Republic. The owner of the company is a pretty good guy. Very responsive, and quick on answering any questions I have. The reason the front bumper has not shown up yet is because as some of you know that area of the world is getting hit by a hurricane. So things are a bit delayed atm. I should have it by the end of next week, then I can really start mocking up the kit and getting it to fit perfect.
10-06-16, 11:35 PM
#79
LegacyCore
Thread Starter
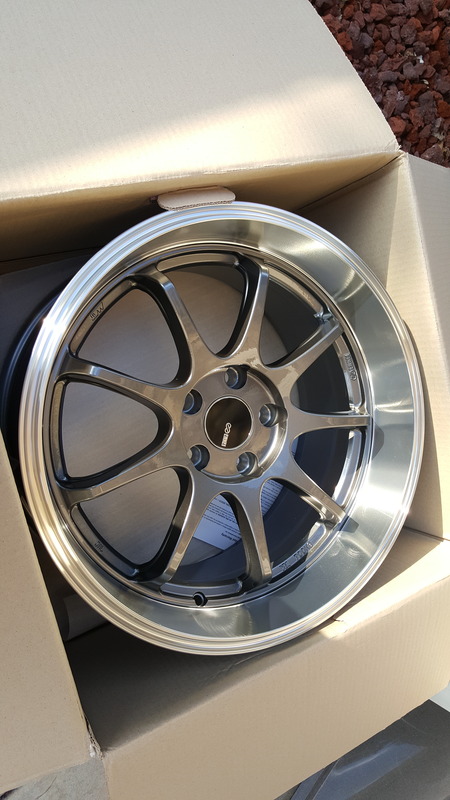
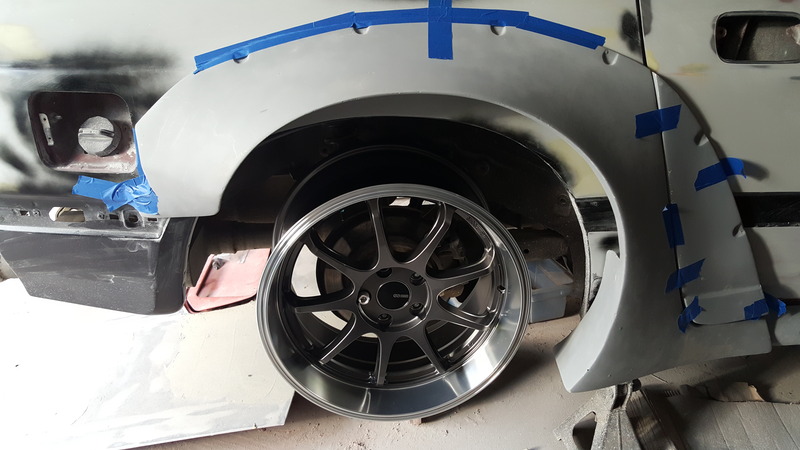
So... With such a big change to the appearance to the car also means one other pretty big thing will have to change. My wheel/tire setup... I'm gonna have to go a lot wider and totally different offset. The rear wheels I'd be looking at a 18x12 -12 or something along those lines. So I started my search, and to get anything I want in the size I'm needing in a quality name brand wheel is just way out of my budget right now. So I made a decision that is not a very popular one... I sold my front wheels/tires the Enkei Tinjen 17x8 +35 wrapped in 225/45R17 Nitto NT05's. Then moved my rear setup which are 17x9 +35 in a 255/40R17 NT05 to the front. I then purchased a pair of Enkei Tinjen 18x9.5 +30mm with a deep dish/wide lip and a pair of Nitto NT05 275/40R18's to go with them for the rear.
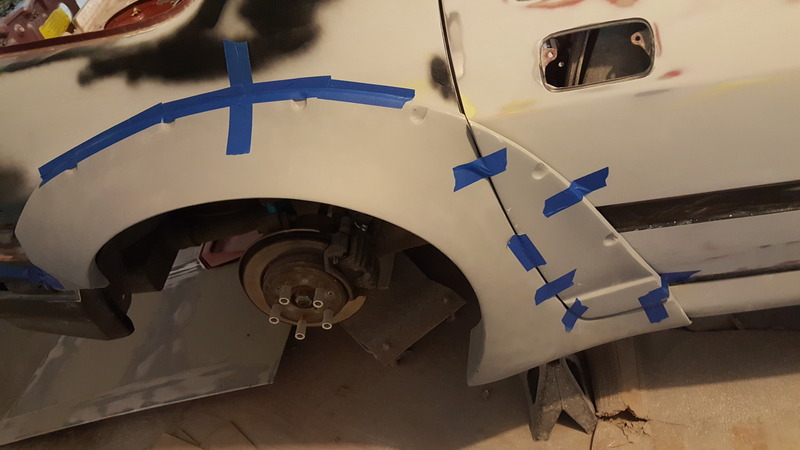
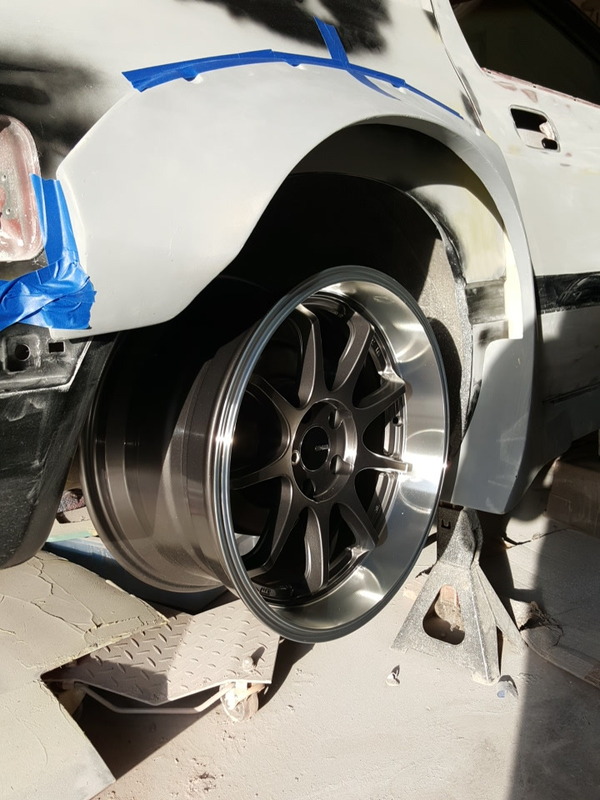
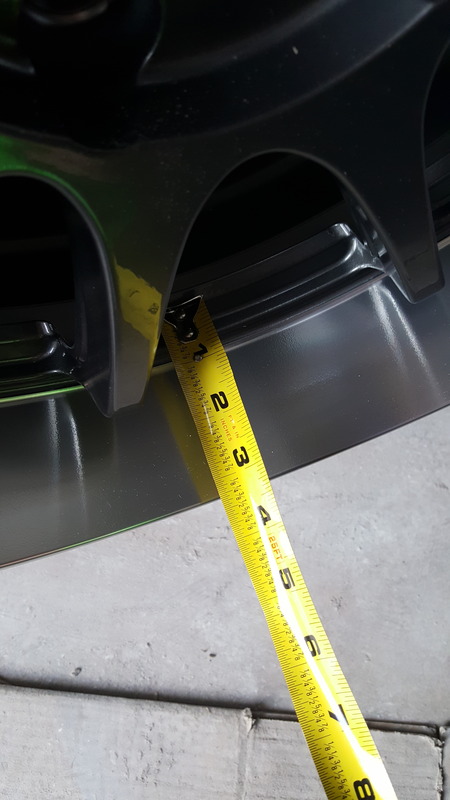
Now you all are saying this is still not enough to fill in those flares, and you are right. Here is the part that make most upset so far, after I get my tires mounted and balanced on the 18's I'm gonna mount on the car and measure the best I can to see how big of a spacer I'm going to have to run. Off the top of my head I'm thinking at least 1.5" spacers in the rear. Not sure on the front yet.... SO anywho this is way too much to read and most of you won't anyways. On to more pics!
And there you have it! This should keep some of you satisfied for a few minutes I hope. I wouldn't expect too many updates for a little while since all I'll really be doing is getting the body kit on. Which will take me all winter I'm sure, as I've never done this before so I'll have a good friend who's been doing the majority of the body work anyways working on it. Still will be a slow process as we can only work on it on weekends. And if I don't get a heater installed in my garage before it gets cold. There won't be much work going on at all anyways. So, until next time stay tuned!
Now you all are saying this is still not enough to fill in those flares, and you are right. Here is the part that make most upset so far, after I get my tires mounted and balanced on the 18's I'm gonna mount on the car and measure the best I can to see how big of a spacer I'm going to have to run. Off the top of my head I'm thinking at least 1.5" spacers in the rear. Not sure on the front yet.... SO anywho this is way too much to read and most of you won't anyways. On to more pics!


And there you have it! This should keep some of you satisfied for a few minutes I hope. I wouldn't expect too many updates for a little while since all I'll really be doing is getting the body kit on. Which will take me all winter I'm sure, as I've never done this before so I'll have a good friend who's been doing the majority of the body work anyways working on it. Still will be a slow process as we can only work on it on weekends. And if I don't get a heater installed in my garage before it gets cold. There won't be much work going on at all anyways. So, until next time stay tuned!
 10-07-16, 10:00 AM
#81
LegacyCore
Thread Starter
My first time doing a body kit on anything, I'm typically the guy that leaves the body somewhat stock and just does power mods. But I've always loved RB kits on just about every car, when I saw this guy was making them. I took the leap of faith and bought one, it's gonna take a while to get it on the car. But I'm gonna take my dear sweet time doing it to make sure it's perfect.
10-07-16, 02:51 PM
#83
LegacyCore
Thread Starter
Yeah it's pretty nice, has some flex in it so that tells me they used a poly resin which is a higher quality resin. But it's still pretty thick so not flimsy at all, we'll see how good it really is when my bumper cover shows up.
11-25-16, 10:54 PM
#84
LegacyCore
Thread Starter
Things have gotten slow for me in getting progress on the car. But I do have a few things I can post up to keep my thread fresh in everybody's minds. Hopefully I can have some relevant updates for you all in regards to the body kit installation, it seems to be one thing or another slowing this build down. On a already slow time table with being able to work on it only on the weekends... Anyways, updates...
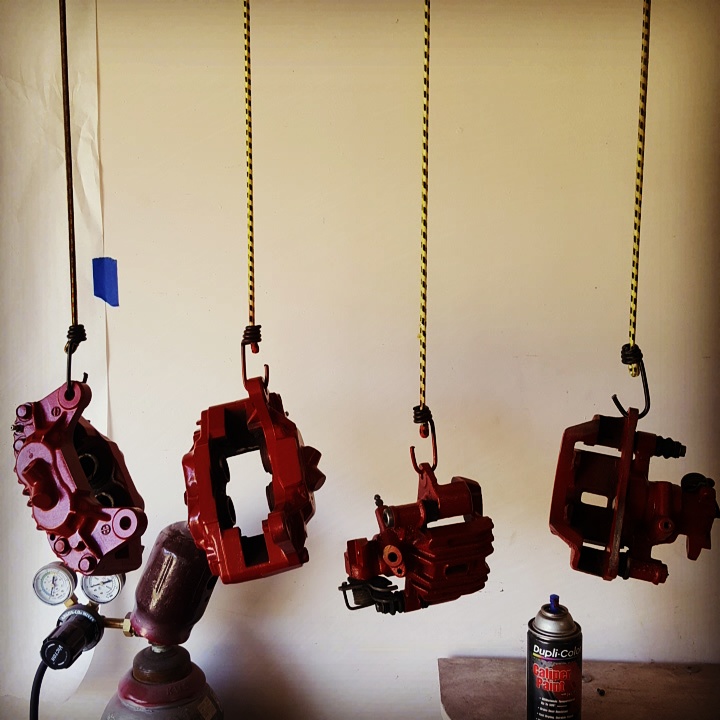
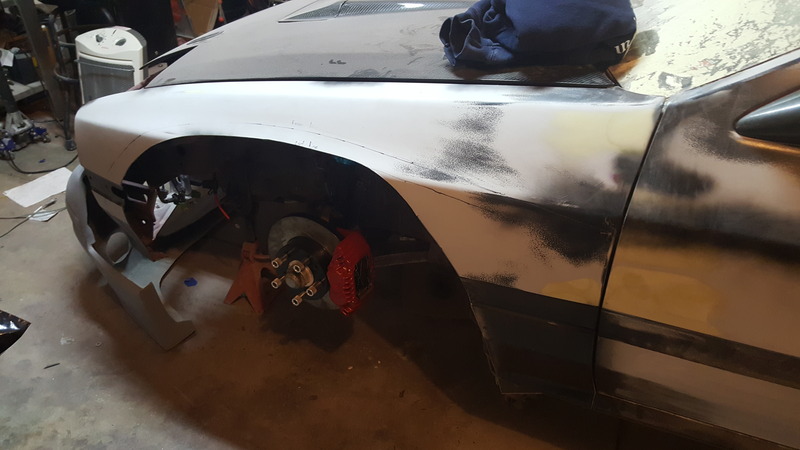
I decided it was time to get back to working on the brakes, stripping down the calipers, cleaning and painting while installing new hardware in the front 4 piston calipers. As well as installing new Hawk HP Plus pads and Stoptech slotted rotors.
Got the calipers are cleaned, hung up and painted here:
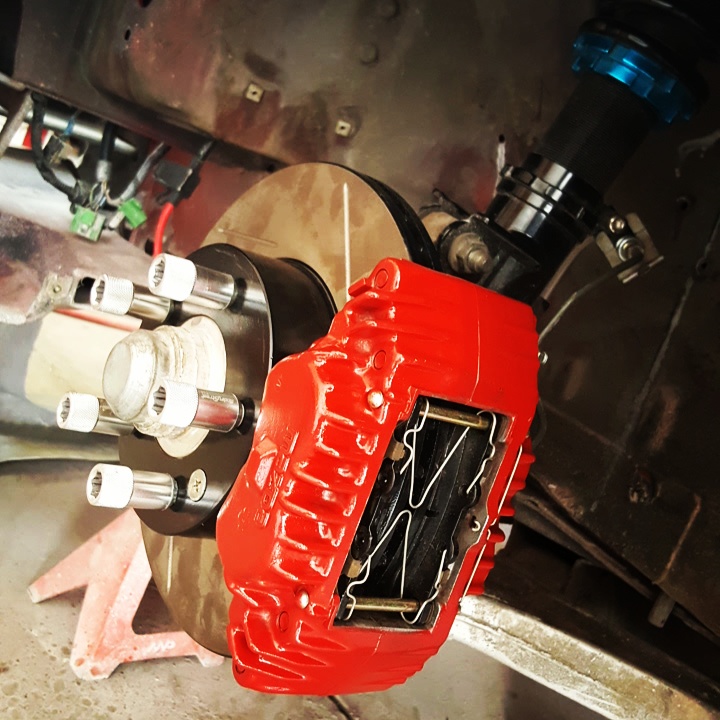
Front calipers and rotors all installed and ready to bleed:
I still need to get the rears installed back on the car, but need to rent the caliper tool to push the pistons back in. I'll get around to it here soon, maybe even tomorrow if weather permits. (Starting to get cold in MO)
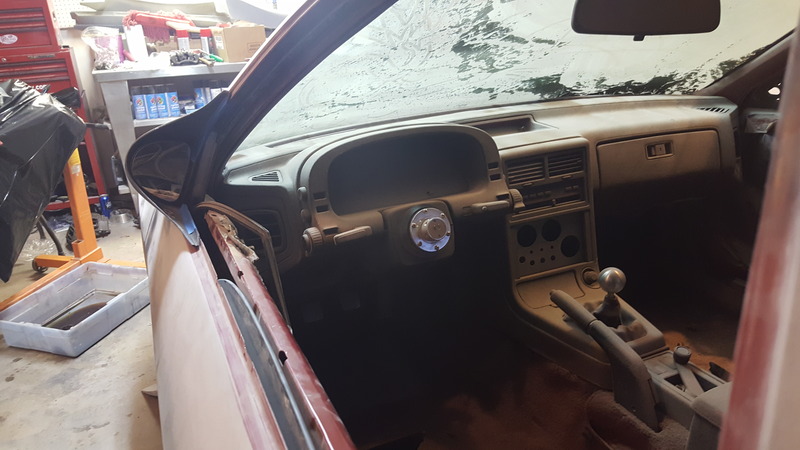
So a little while ago I was going through some of the parts we were storing in the car itself since my two car garage is limited on space with the FC being parked dead center on jack stands. And I found my passenger side mirror was broken, not sure how this happened but it did. And while looking online for a replacement I came across some RE Amemiya mirrors for what I felt was a pretty good price. And with the curves of the RB kit I figured these mirrors would look pretty good over the OEM ones.
OEM mirror for reference:
RE Amemiya mirrors:
So should be a pretty good addition to the body kit, I've read the stories of not being able to see out of these mirrors because they are first non adjustable, which is true. And they were meant for RHD cars, which is also true. But this is my show car that won't see a ton of real world driving.
And last on the list I do have a tiny update for the RB kit installation process, I've ordered all my stainless m10x1.5 allen button head bolts, with nylon washers, and rivnuts. Decided the best way is to mount the kit using bolts and rivnuts, and also decided to make the stainless allen bolts apart of the appeal of the body kit by getting the biggest I can fit.
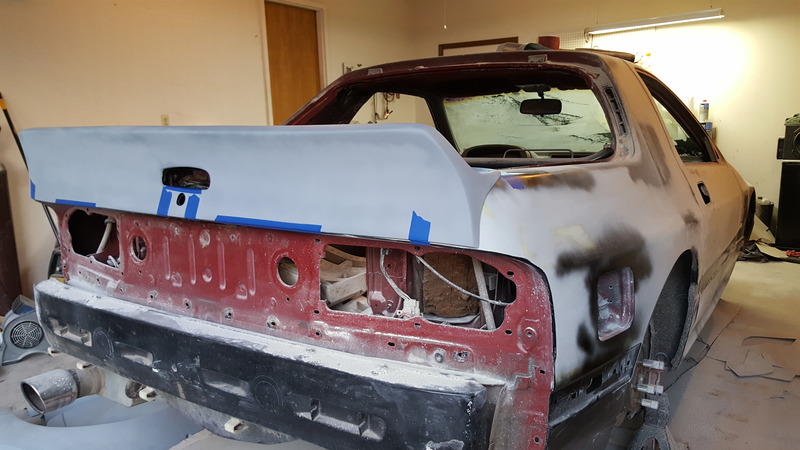
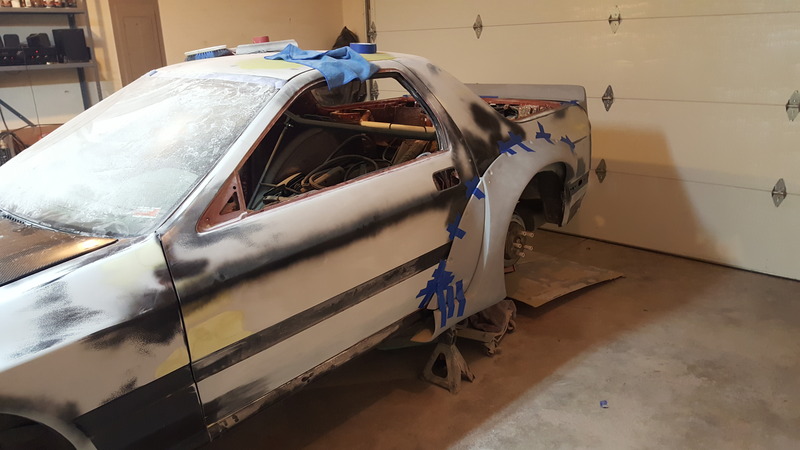
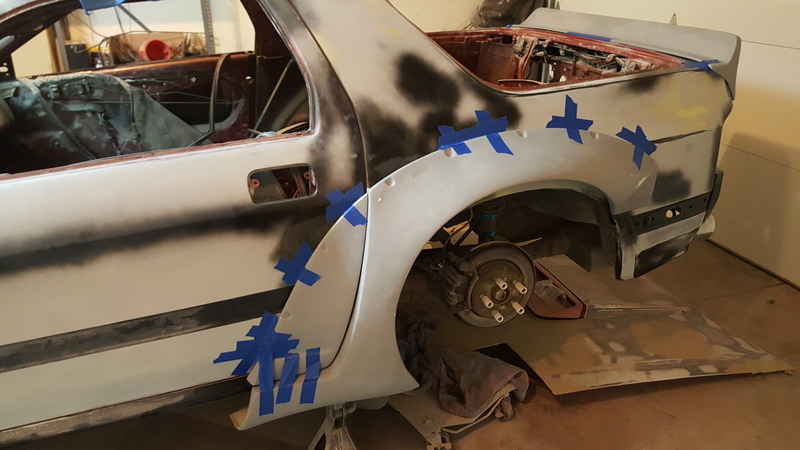
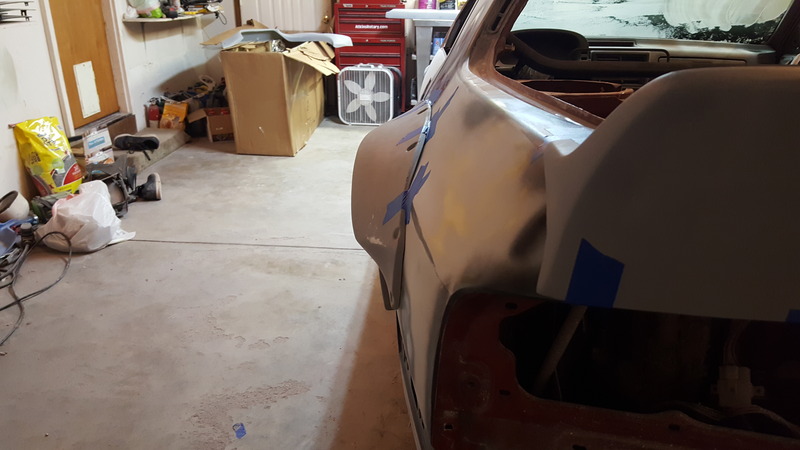
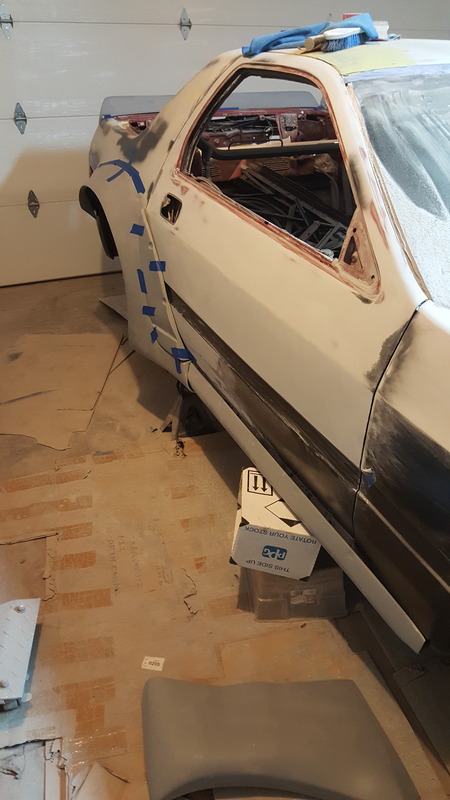
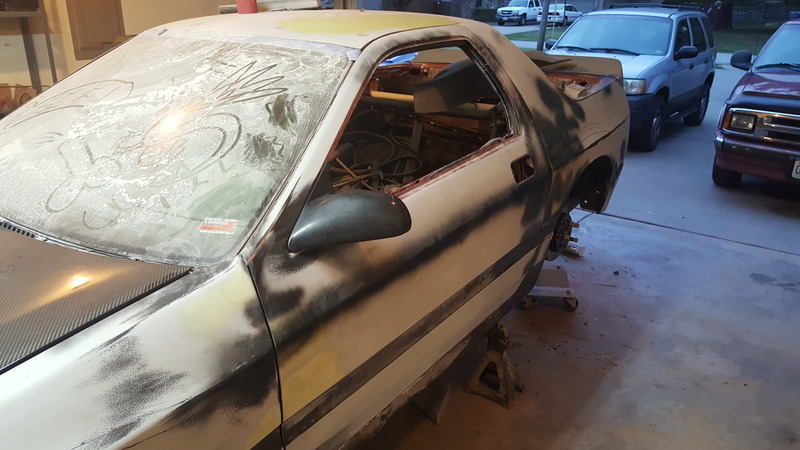
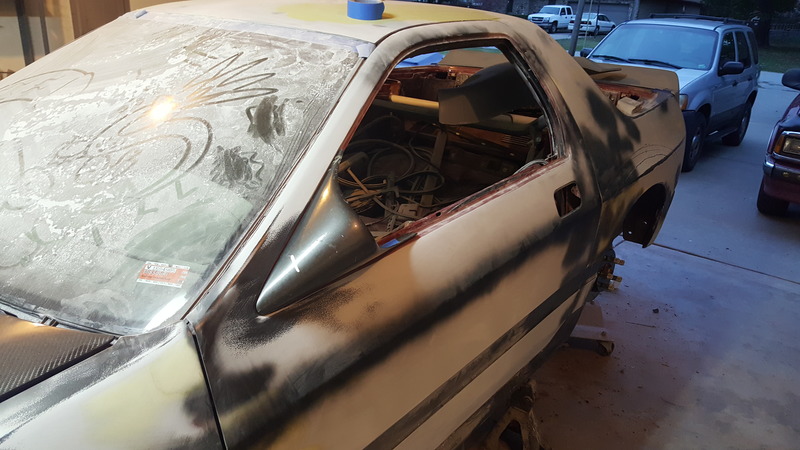
Also, was able to get the rear quarters and fenders all cut out so the flares will fit properly. I'm pretty much at the point of no return. If this kit does not get installed then the body is ruined, and I estimate there is over 200 hours already in body work with another 150+ to go by the time paint, clear, and all the wet sanding and buffing is done.
Front fender hacked up for the front flares:
Rear quarters all hacked up as well:
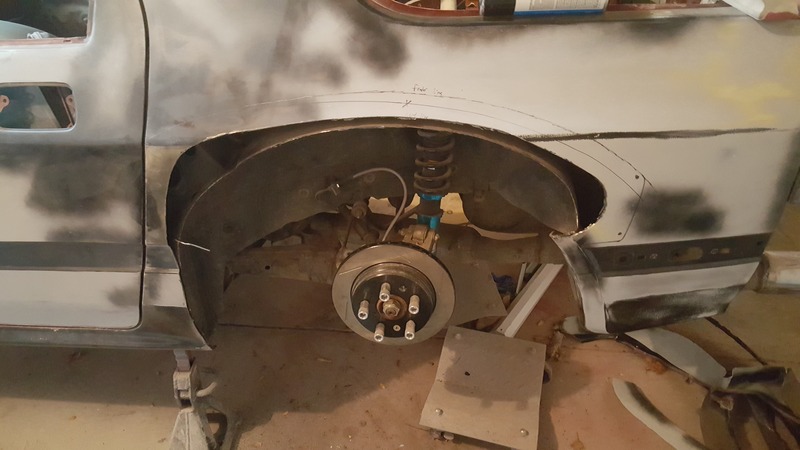
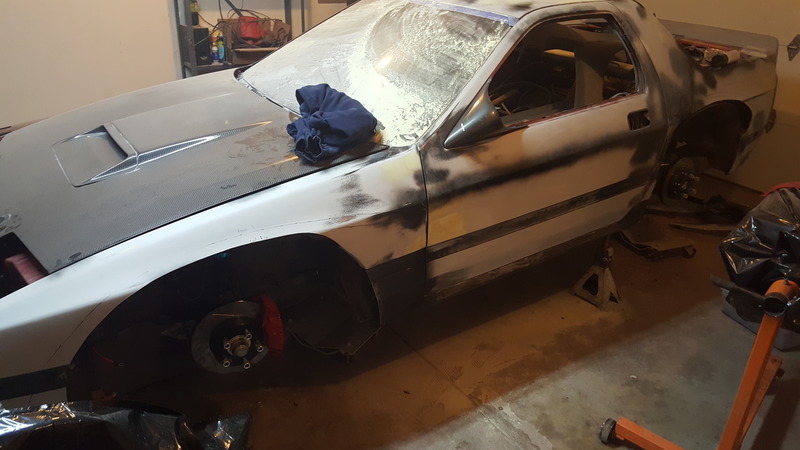
Overall view of the car with hacked body parts:
So that's all I have for the time being in updates. Like I said before I really hope to have more significant updates for you all in the weeks to come. There is still so much work left to do, but I officially have a due date of the first of June. As some of you know, if not most June 10th 2017 will be the first Import Alliance in Kansas City which is a 3 hour drive for me. The RBFC will be there come Hell or high water, so please comment, ask questions, and stay tuned for more updates!
I decided it was time to get back to working on the brakes, stripping down the calipers, cleaning and painting while installing new hardware in the front 4 piston calipers. As well as installing new Hawk HP Plus pads and Stoptech slotted rotors.
Got the calipers are cleaned, hung up and painted here:

Front calipers and rotors all installed and ready to bleed:

I still need to get the rears installed back on the car, but need to rent the caliper tool to push the pistons back in. I'll get around to it here soon, maybe even tomorrow if weather permits. (Starting to get cold in MO)
So a little while ago I was going through some of the parts we were storing in the car itself since my two car garage is limited on space with the FC being parked dead center on jack stands. And I found my passenger side mirror was broken, not sure how this happened but it did. And while looking online for a replacement I came across some RE Amemiya mirrors for what I felt was a pretty good price. And with the curves of the RB kit I figured these mirrors would look pretty good over the OEM ones.
OEM mirror for reference:

RE Amemiya mirrors:


So should be a pretty good addition to the body kit, I've read the stories of not being able to see out of these mirrors because they are first non adjustable, which is true. And they were meant for RHD cars, which is also true. But this is my show car that won't see a ton of real world driving.
And last on the list I do have a tiny update for the RB kit installation process, I've ordered all my stainless m10x1.5 allen button head bolts, with nylon washers, and rivnuts. Decided the best way is to mount the kit using bolts and rivnuts, and also decided to make the stainless allen bolts apart of the appeal of the body kit by getting the biggest I can fit.
Also, was able to get the rear quarters and fenders all cut out so the flares will fit properly. I'm pretty much at the point of no return. If this kit does not get installed then the body is ruined, and I estimate there is over 200 hours already in body work with another 150+ to go by the time paint, clear, and all the wet sanding and buffing is done.
Front fender hacked up for the front flares:

Rear quarters all hacked up as well:

Overall view of the car with hacked body parts:

So that's all I have for the time being in updates. Like I said before I really hope to have more significant updates for you all in the weeks to come. There is still so much work left to do, but I officially have a due date of the first of June. As some of you know, if not most June 10th 2017 will be the first Import Alliance in Kansas City which is a 3 hour drive for me. The RBFC will be there come Hell or high water, so please comment, ask questions, and stay tuned for more updates!
11-27-16, 10:15 PM
#85

Really interested in the fitment of the kit,
Some of his stuff looks legit and others look really dodgy like his pics of this kit on his site are of very different cars and some with obviously different kits too
Some of his stuff looks legit and others look really dodgy like his pics of this kit on his site are of very different cars and some with obviously different kits too
11-28-16, 09:09 AM
#87
LegacyCore
Thread Starter
Just like any other FG body kit it will need work to get to fit perfectly. So far mocking everything up and holding it up with painter's tape the kit looks like it will fit pretty well. It's a cheap kit I paid $1245 shipped for it from the Dominican Republic. The maker/seller of the kit is very responsive, and backs his parts up. Also a lot of the pics on his site are unfinished products, look for his finished cars which are pretty nice.
11-28-16, 09:13 AM
#88
LegacyCore
Thread Starter
Well, there is no legit name brand Rocket Bunny, there is a guy in the Dominican Republic who took the S13 RB kit and modified it to fit the FC. It's a cheap FG kit that will take a bit of work to make fit perfect, but better than nothing at all for those who want RB.
http:jpfiberglass.netindex.html - Online Store
http:jpfiberglass.netindex.html - Online Store
 12-01-16, 04:37 PM
#92
LegacyCore
Thread Starter
12-01-16, 05:18 PM
#93
The special tool to screw the rear pistons in (assuming you don't just use needlenose pliers) coats about $5 from any Autozone.
As you've already said that to a certain extent you value looks over function (regarding the new mirrors), aren't you concerned how the stock brakes will look kinda puny in your massive wheel setup?
12-01-16, 08:45 PM
#94
LegacyCore
Thread Starter
"Rent"?
The special tool to screw the rear pistons in (assuming you don't just use needlenose pliers) coats about $5 from any Autozone.
As you've already said that to a certain extent you value looks over function (regarding the new mirrors), aren't you concerned how the stock brakes will look kinda puny in your massive wheel setup?
Like we all say, our projects are never done.
12-01-16, 09:16 PM
#95
The tool for the rear calipers is $8.63 shipped on Amazon.
Lisle 28600 Disc Brake Piston Tool https://www.amazon.com/dp/B0002SQUFY..._PDoqybPZ0672Y
Lisle 28600 Disc Brake Piston Tool https://www.amazon.com/dp/B0002SQUFY..._PDoqybPZ0672Y
12-01-16, 11:02 PM
#96
LegacyCore
Thread Starter
The tool for the rear calipers is $8.63 shipped on Amazon.
Lisle 28600 Disc Brake Piston Tool https://www.amazon.com/dp/B0002SQUFY..._PDoqybPZ0672Y
Lisle 28600 Disc Brake Piston Tool https://www.amazon.com/dp/B0002SQUFY..._PDoqybPZ0672Y
12-02-16, 10:22 AM
#99
An actual disc brake Caliper tool kit works far more efficiently than the 'caliper cube' as I call it.
With the press kit, you're guaranteed smooth and even pressure whilst the piston is turned into the Caliper, and it can save some scraped knuckles.
The Caliper cube works, but is irritating, in my opinion.
With the press kit, you're guaranteed smooth and even pressure whilst the piston is turned into the Caliper, and it can save some scraped knuckles.
The Caliper cube works, but is irritating, in my opinion.
12-02-16, 10:59 AM
#100
LegacyCore
Thread Starter
An actual disc brake Caliper tool kit works far more efficiently than the 'caliper cube' as I call it.
With the press kit, you're guaranteed smooth and even pressure whilst the piston is turned into the Caliper, and it can save some scraped knuckles.
The Caliper cube works, but is irritating, in my opinion.
With the press kit, you're guaranteed smooth and even pressure whilst the piston is turned into the Caliper, and it can save some scraped knuckles.
The Caliper cube works, but is irritating, in my opinion.