The 10th Anniversary clone (TII) build
 01-08-15, 08:15 PM
#1


The 10th Anniversary clone (TII) build
Hello everyone and thanks for stopping by to check out my build. I have done a lot before this first post so the beginning will be an abridged version of what I've done so far.
First off a little bit of history of the car:
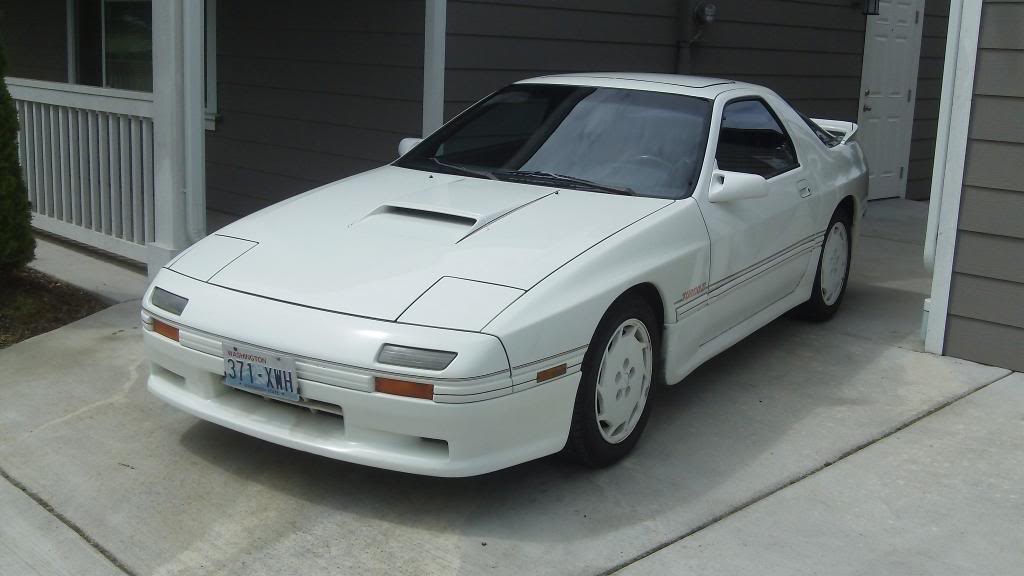
I purchased her in March? of 2014 for a reasonable price with 109k on the clock. I have yet to see such a clean and well maintained TII that was not completely modified. Having said that, I intend to tastefully modify the car for reliability and a slight power increase. I am aiming for anywhere over 250hp to the wheels and If I can get closer to the 300 mark, I will not complain one bit. The only problems I encountered in the few months of driving it were of course a malfunctioning clock, intermittent setting for wipers didn't work, a few small oil leaks, and a hole in the muffler.
I am the third owner of the car. It started life on the dry side of the Cascade mountains here in WA and spent all but the last 3 years there. The original owner thought it would be cool to make a 10th AE clone. They installed the current body kit, which I have yet to fully identify. They also painted the wheels white and did a very terrible job of spraying the body kit when it was mounted. (There is overspray in quite a few unwanted areas)
I have decided to just embrace the clone idea until I can find/afford the wheels I want to install.
The second owner had it briefly and changed the brake pads, rear struts, some coolant lines and a few vacuum lines, and as I found out later had the brains to modify the pulsation damper.
The car is in overall great condition with no reported or discovered accidents or damage. I have yet to find a single spot of rust on the main chassis, but only time will tell if that will change.
Plans:
As I stated earlier, I wish to keep it simple and try not to molest the car too much.
I intend to keep as many stock parts as I can in storage in case I wish to sell the car in the future.
I wish to run a reliable low boost level, add supporting mods to safely run higher boost, eliminate emissions (with the exception of the BAC) and modernize the suspension.
Purchased bolt on parts:
Racing beat rev TII full exhaust
Rtek 2.1 with palm
4x 720cc injectors
Parallel fuel feed setup with aeromotive regulator
Walbro 255lph pump
Innovate lc2 wideband
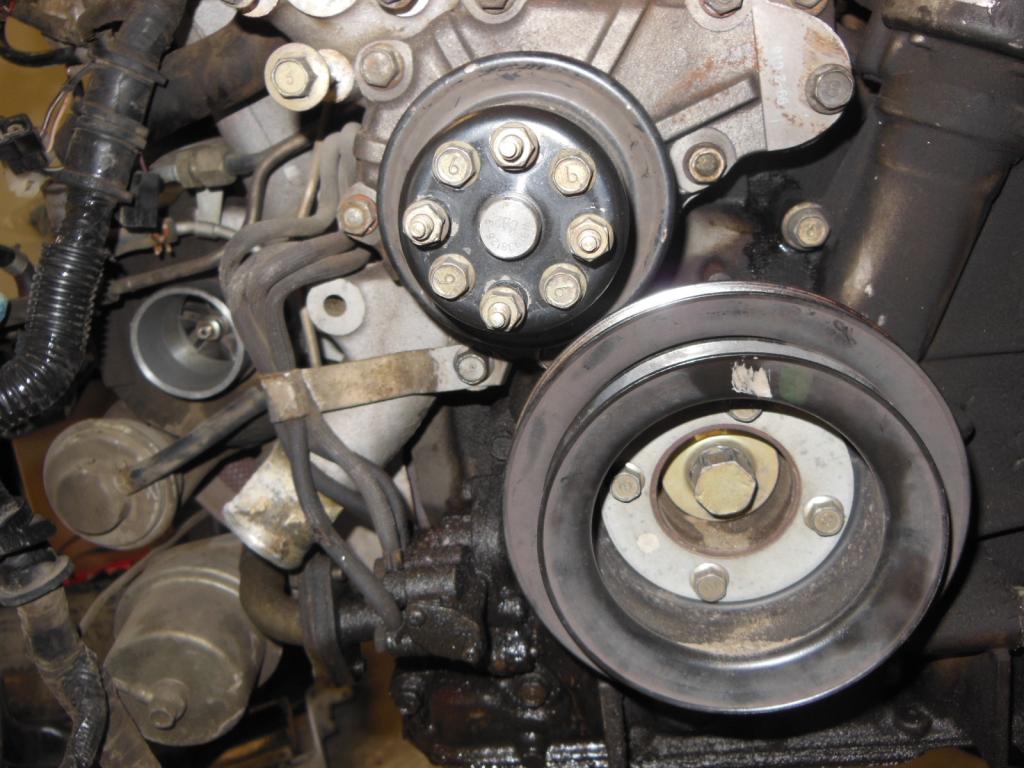
Dual belt alternator pulley
K&N air filter/AFM adapter
Koyo Radiator
--------------------------------------------------------------------------------------------------------
The build started around August of 2014. Although there were no problems with the engine, I decided to run through a multitude of compression checks giving me very disappointingly low results, about 70psi from both rotors. The motor was starting to feel really tired, but surprisingly did not give many of the typical low compression indicators aside from poor fuel consumption.
Instead of waiting for catastrophe and since this is not my daily driver, I decided to begin the process of my first rotary rebuild.
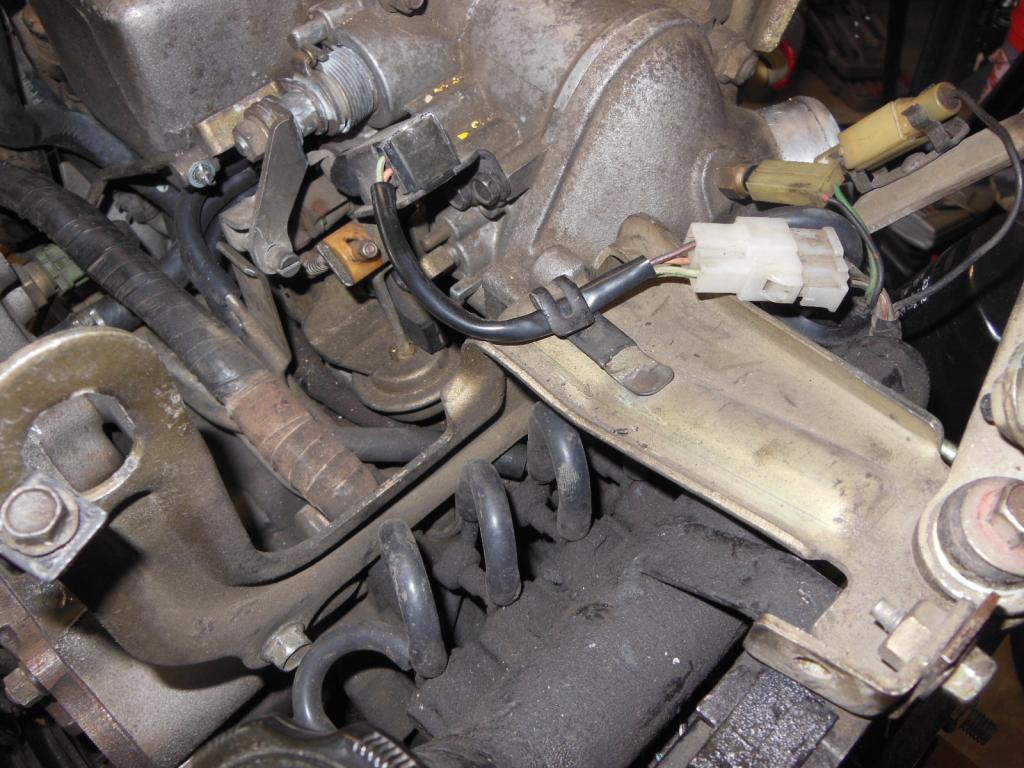
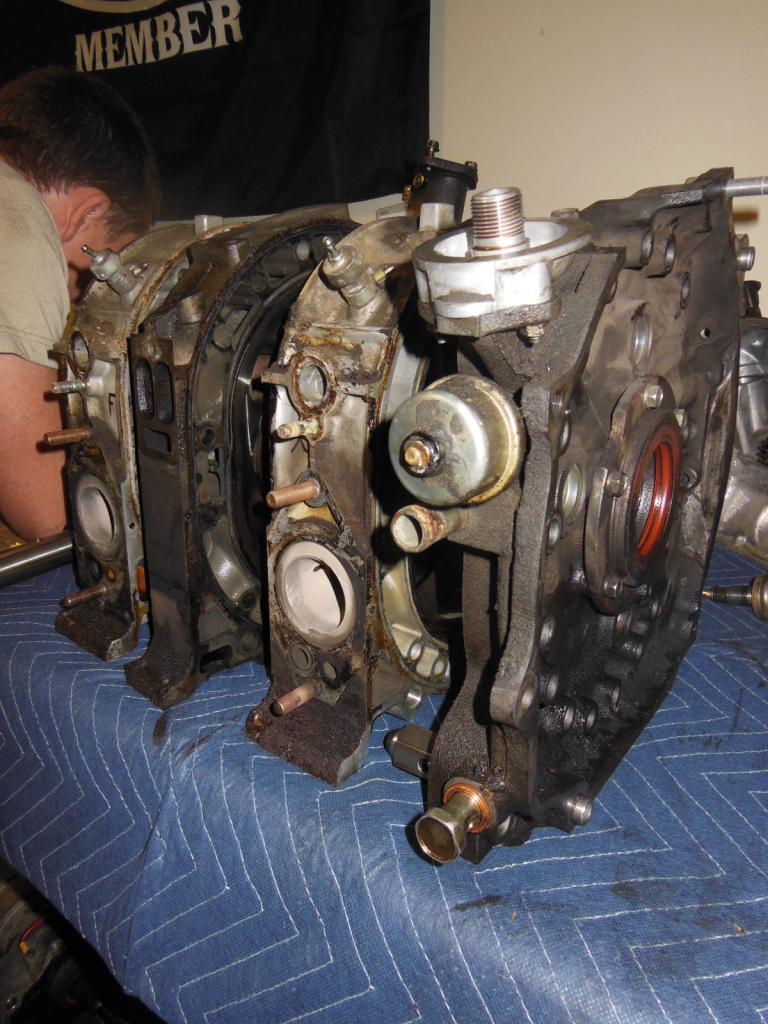
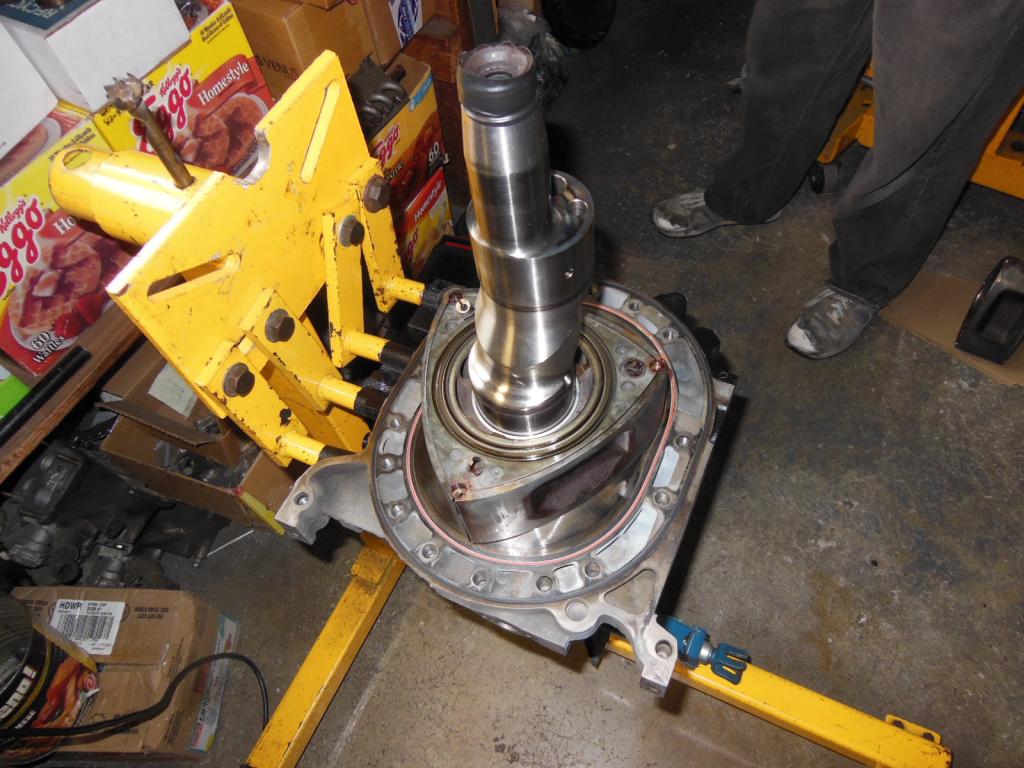
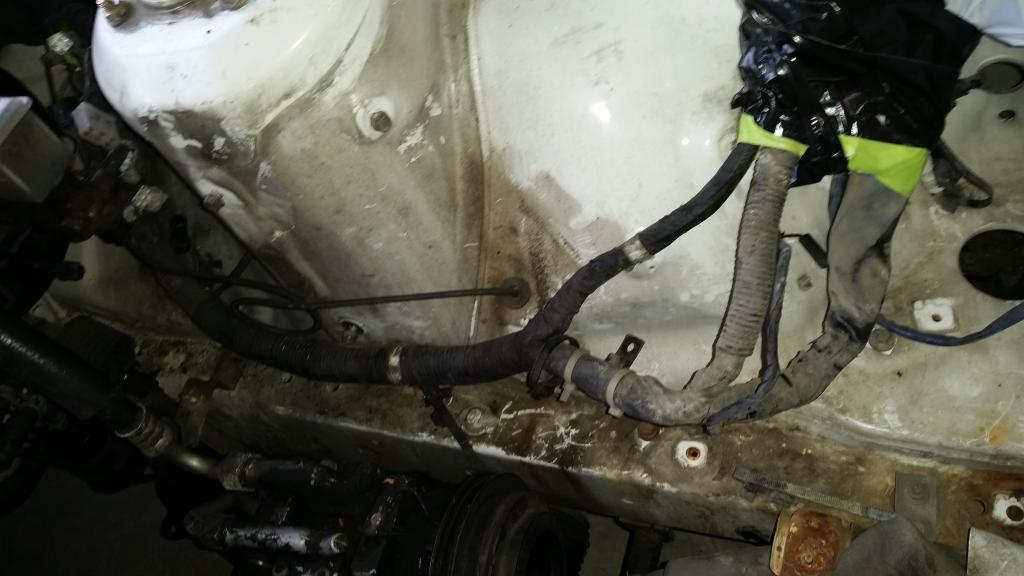
For starters the oil leaks had been going on for quite some time as there was a MASSIVE accumulation of oil and grime all over the engine, the bay, and the transmission tunnel.
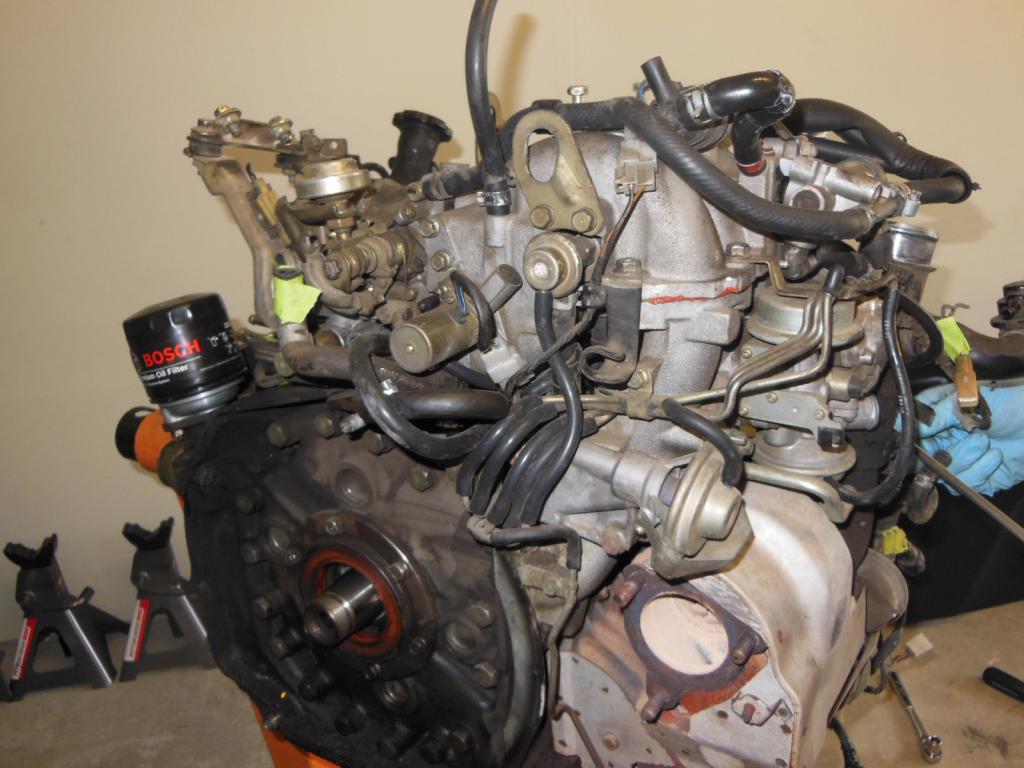
These photos are from just after the engine was removed. You can see that there was a leak from the rear main seal, and a leak around the OMP.
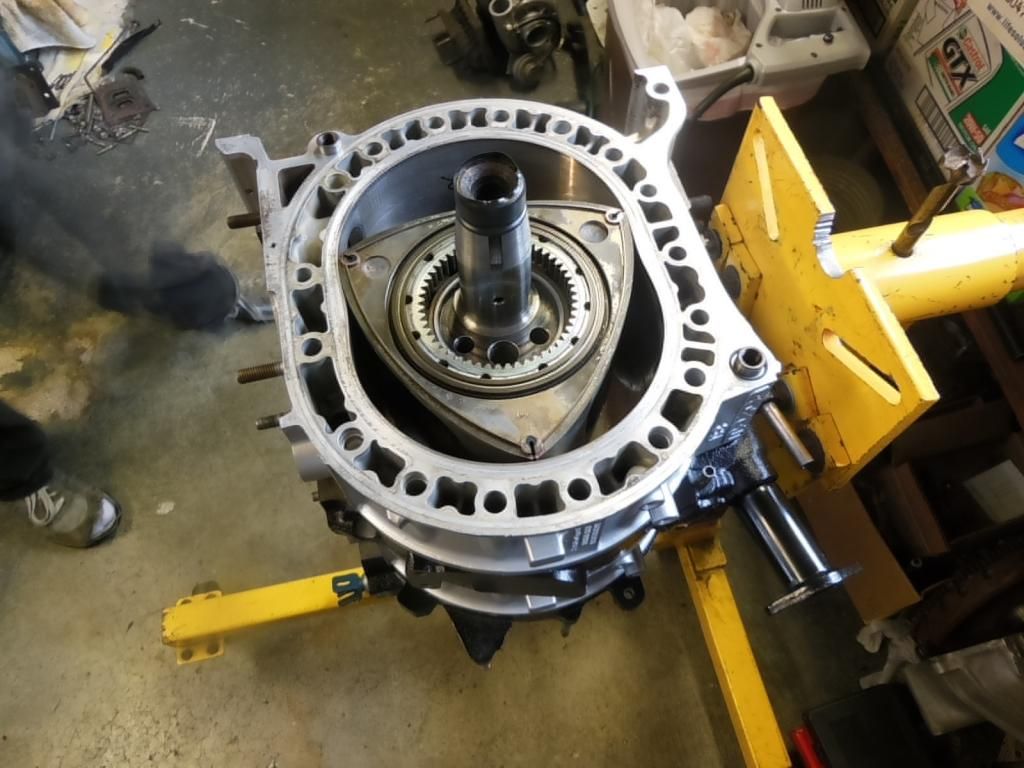
After stripping everything down the teardown of the engine began. Internals were in pretty good shape but man was everything dirty. I could tell that the coolant seals were smoked by the terrible burnt odor they emitted. The housings were smooth, with minor chrome flaking near the exhaust. Apex seals were worn down pretty bad, which I believe was giving me the compression loss. (Sadly I had no photos of the seals close up before I ditched them)
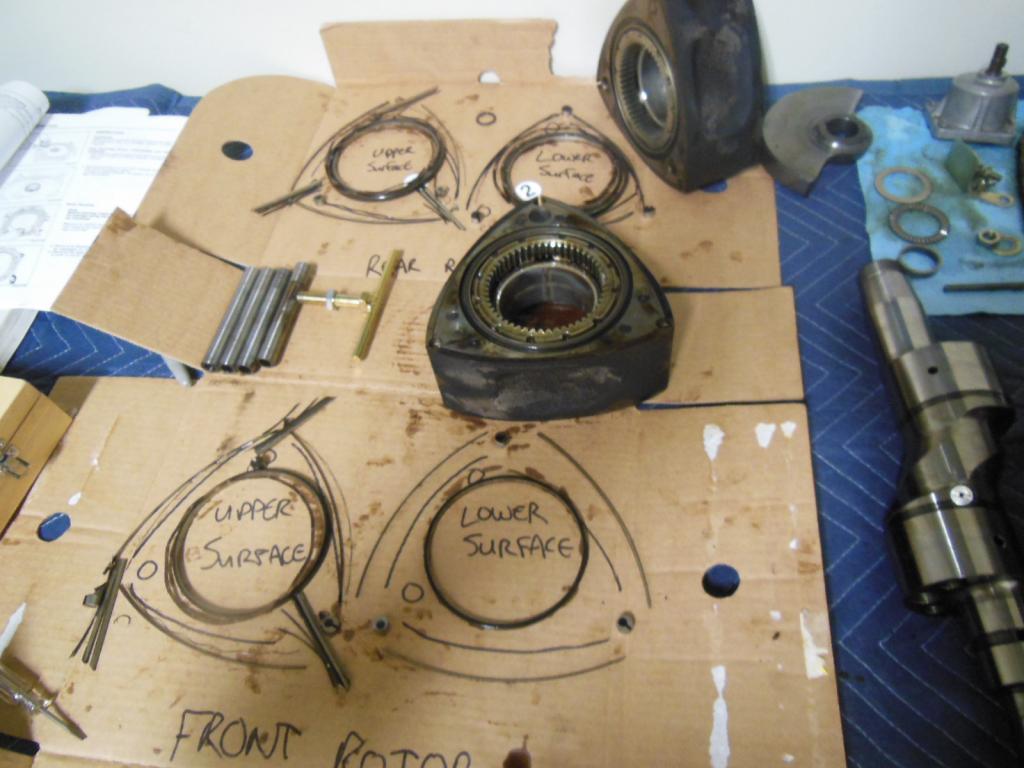
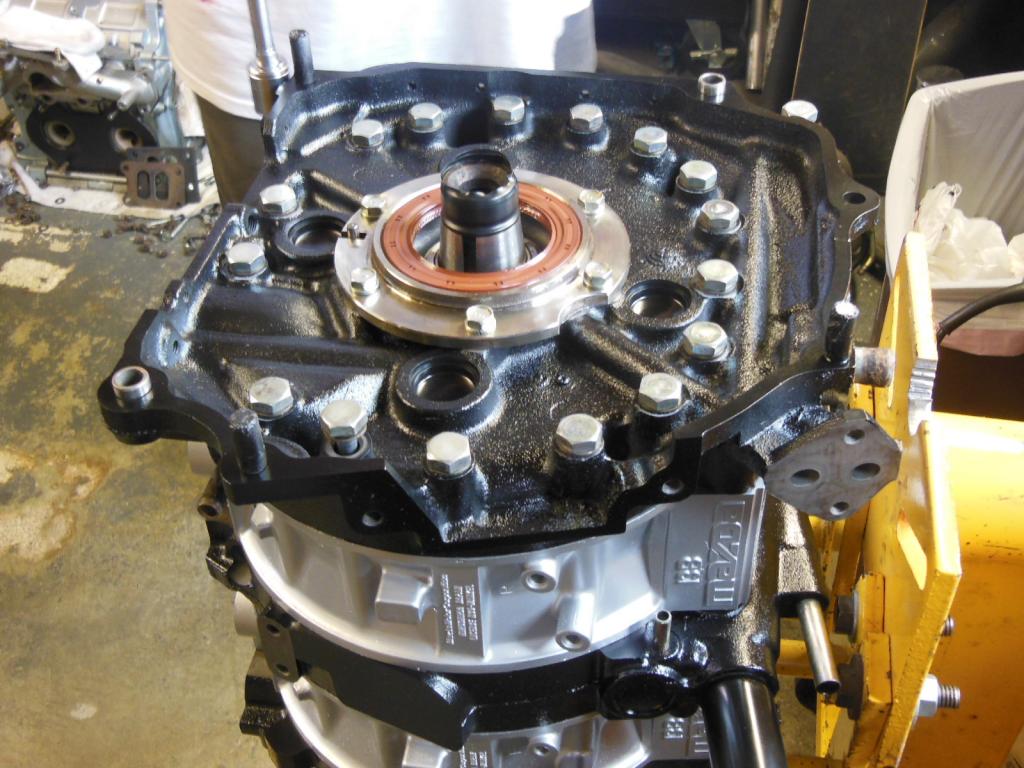
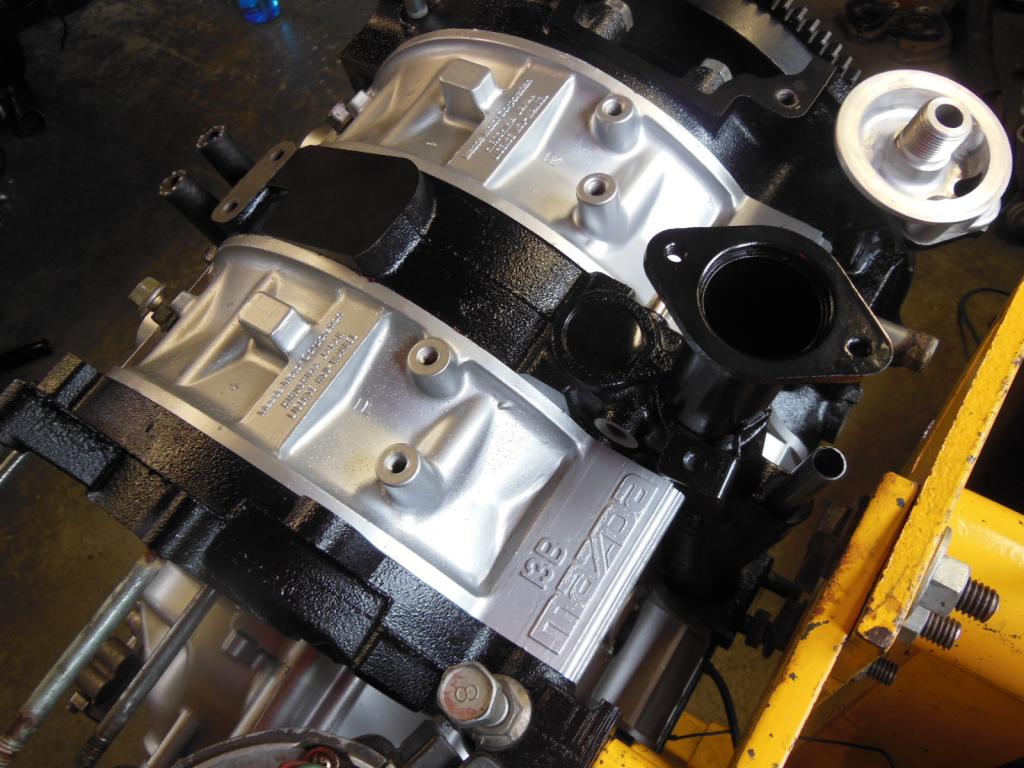
The rebuild began with some help from a local rotary wizard to help guide me through the process. We decided to leave the stock ports alone and only perform a minor cleanup and smoothed things out a bit. Rebuilt was performed at my friend's shop and the stacking was completed in amazing time! Somewhere around the 30min mark. (With seals pre - installed in rotors of course!)
We used Mazda OEM apex seals, and a rebuild kit from Atkins with FD corner seals, etc, etc.. with a fresh coat of paint.

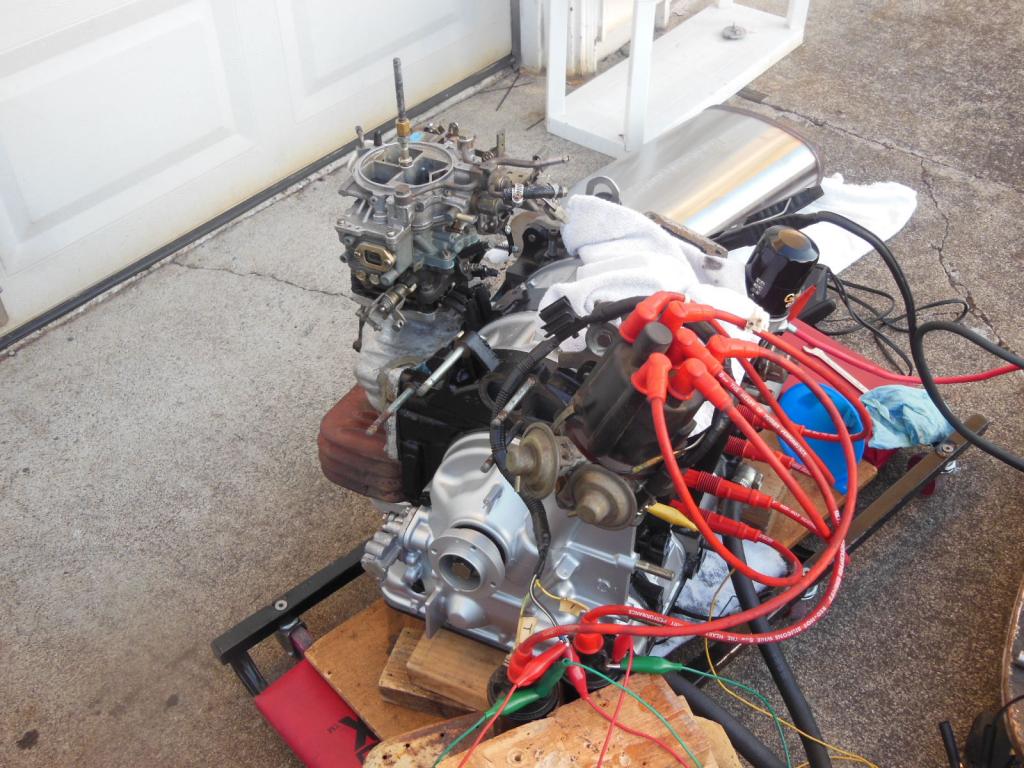
The next step was a driveway test fire! Pieced together a frankenstein with components from rotaries of all generations and a couple of batteries to crank and run for a few seconds. Plug your ears!!

First off a little bit of history of the car:
I purchased her in March? of 2014 for a reasonable price with 109k on the clock. I have yet to see such a clean and well maintained TII that was not completely modified. Having said that, I intend to tastefully modify the car for reliability and a slight power increase. I am aiming for anywhere over 250hp to the wheels and If I can get closer to the 300 mark, I will not complain one bit. The only problems I encountered in the few months of driving it were of course a malfunctioning clock, intermittent setting for wipers didn't work, a few small oil leaks, and a hole in the muffler.
I am the third owner of the car. It started life on the dry side of the Cascade mountains here in WA and spent all but the last 3 years there. The original owner thought it would be cool to make a 10th AE clone. They installed the current body kit, which I have yet to fully identify. They also painted the wheels white and did a very terrible job of spraying the body kit when it was mounted. (There is overspray in quite a few unwanted areas)
I have decided to just embrace the clone idea until I can find/afford the wheels I want to install.
The second owner had it briefly and changed the brake pads, rear struts, some coolant lines and a few vacuum lines, and as I found out later had the brains to modify the pulsation damper.
The car is in overall great condition with no reported or discovered accidents or damage. I have yet to find a single spot of rust on the main chassis, but only time will tell if that will change.
Plans:
As I stated earlier, I wish to keep it simple and try not to molest the car too much.
I intend to keep as many stock parts as I can in storage in case I wish to sell the car in the future.
I wish to run a reliable low boost level, add supporting mods to safely run higher boost, eliminate emissions (with the exception of the BAC) and modernize the suspension.
Purchased bolt on parts:
Racing beat rev TII full exhaust
Rtek 2.1 with palm
4x 720cc injectors
Parallel fuel feed setup with aeromotive regulator
Walbro 255lph pump
Innovate lc2 wideband
Dual belt alternator pulley
K&N air filter/AFM adapter
Koyo Radiator
--------------------------------------------------------------------------------------------------------
The build started around August of 2014. Although there were no problems with the engine, I decided to run through a multitude of compression checks giving me very disappointingly low results, about 70psi from both rotors. The motor was starting to feel really tired, but surprisingly did not give many of the typical low compression indicators aside from poor fuel consumption.
Instead of waiting for catastrophe and since this is not my daily driver, I decided to begin the process of my first rotary rebuild.
For starters the oil leaks had been going on for quite some time as there was a MASSIVE accumulation of oil and grime all over the engine, the bay, and the transmission tunnel.
These photos are from just after the engine was removed. You can see that there was a leak from the rear main seal, and a leak around the OMP.


After stripping everything down the teardown of the engine began. Internals were in pretty good shape but man was everything dirty. I could tell that the coolant seals were smoked by the terrible burnt odor they emitted. The housings were smooth, with minor chrome flaking near the exhaust. Apex seals were worn down pretty bad, which I believe was giving me the compression loss. (Sadly I had no photos of the seals close up before I ditched them)


The rebuild began with some help from a local rotary wizard to help guide me through the process. We decided to leave the stock ports alone and only perform a minor cleanup and smoothed things out a bit. Rebuilt was performed at my friend's shop and the stacking was completed in amazing time! Somewhere around the 30min mark. (With seals pre - installed in rotors of course!)
We used Mazda OEM apex seals, and a rebuild kit from Atkins with FD corner seals, etc, etc.. with a fresh coat of paint.


The next step was a driveway test fire! Pieced together a frankenstein with components from rotaries of all generations and a couple of batteries to crank and run for a few seconds. Plug your ears!!

 01-08-15, 08:33 PM
#2
Engine being prepped for storage while all other work is to be completed.
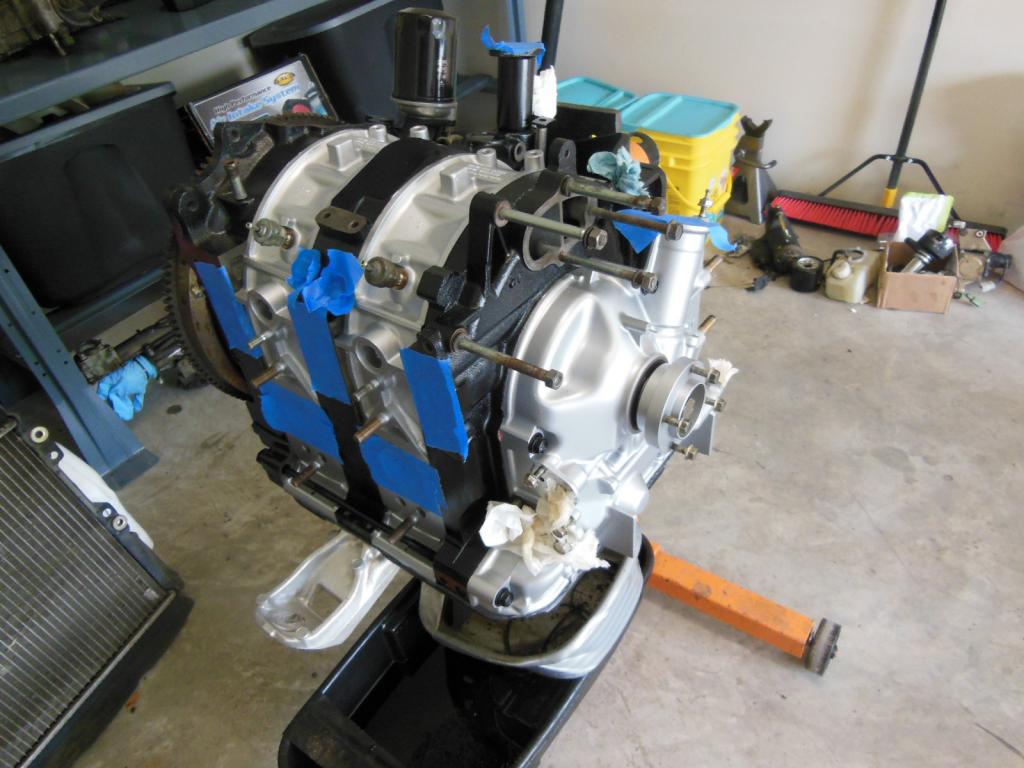
At this point it will be photos of small projects until everything is ready to come together. I have completed many small projects, but these are what I have taken photos of so far.
Inspection and re-wrapping of the wiring harness
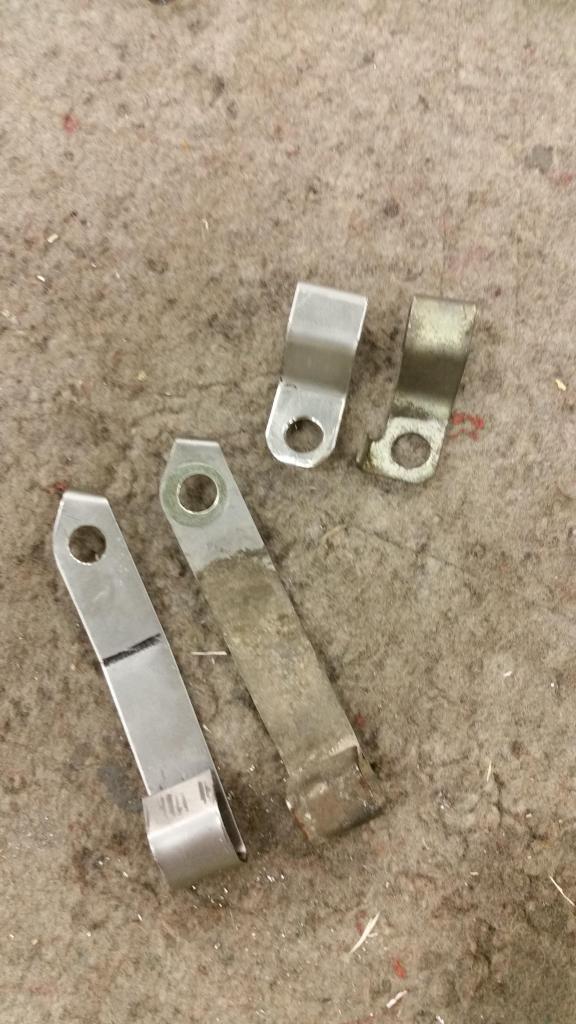
Rebuilt the cracked and brittle OMP lines and constructed some new retainers out of .040 CRES
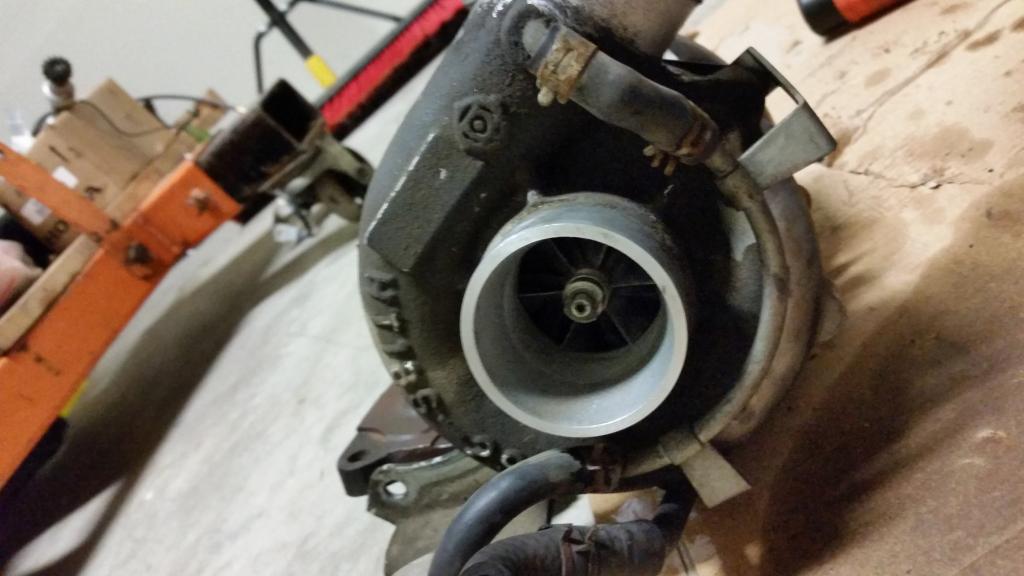
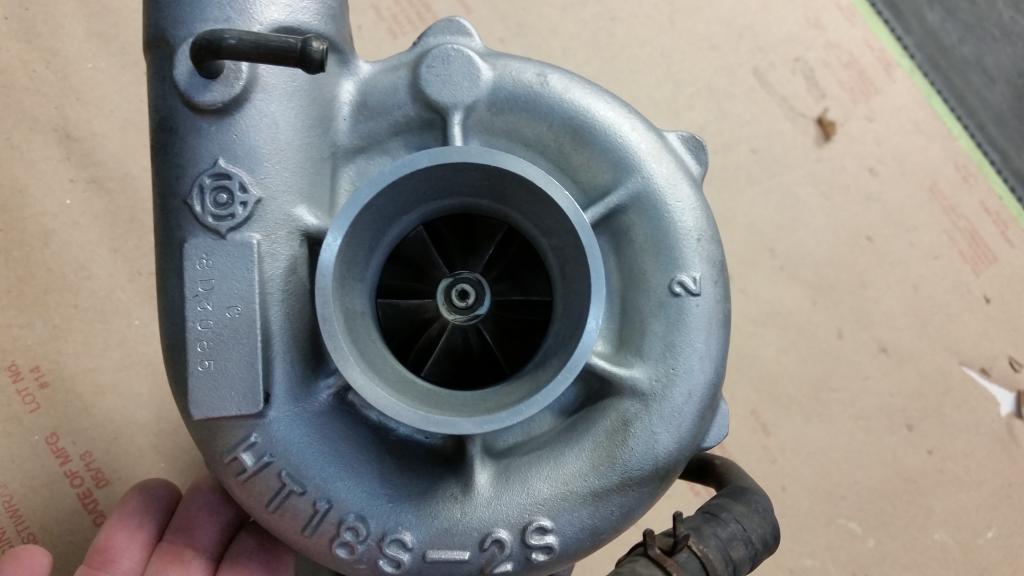
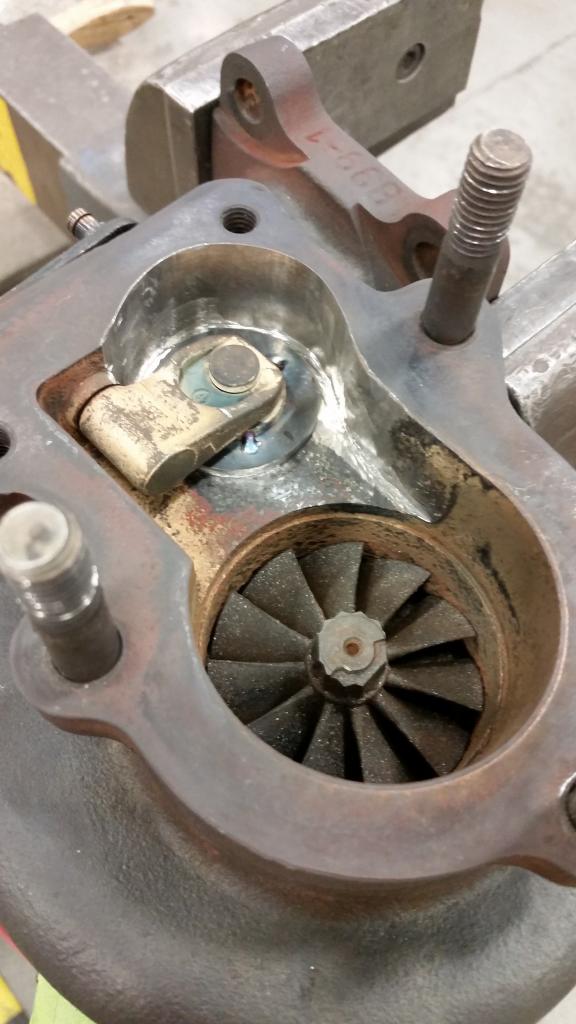
Cleaned up the turbo! The turbo is in amazing shape! Shaft play is very minimal. Time to port that wastegate....
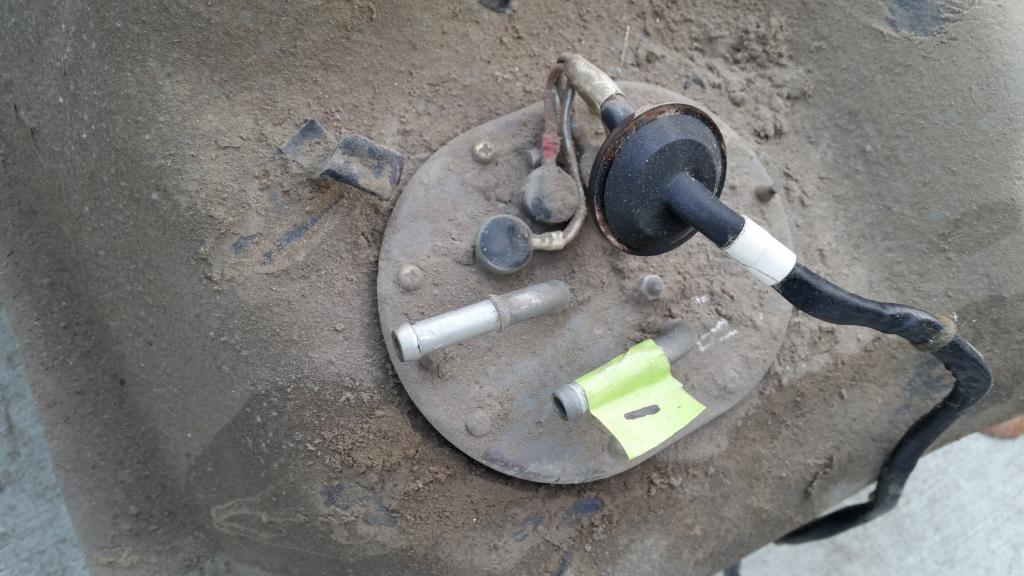
Next I decided to drop the fuel tank and assess it's condition. All I can say is that it was so filthy I feared the worst.
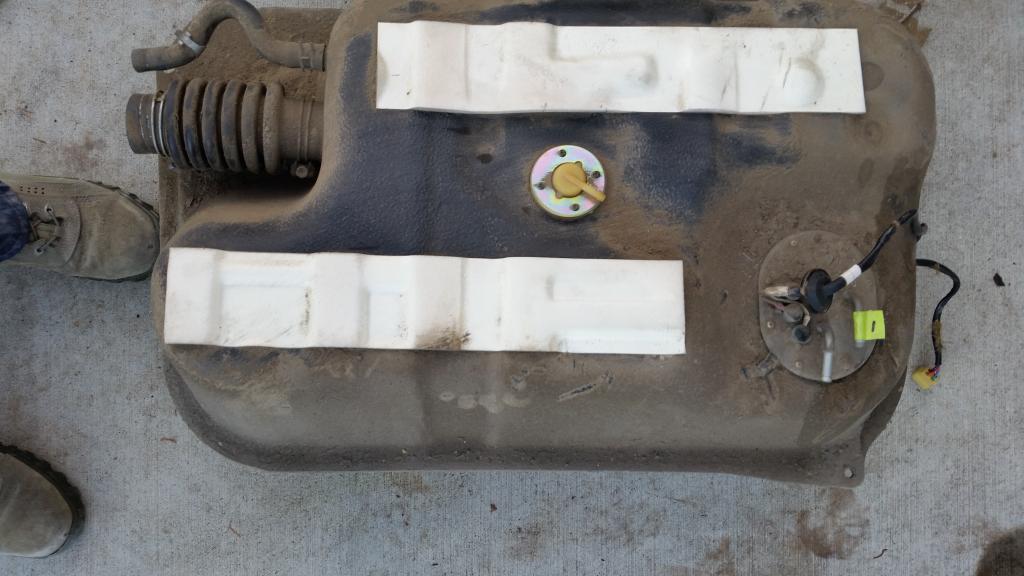
After some nice cleanup
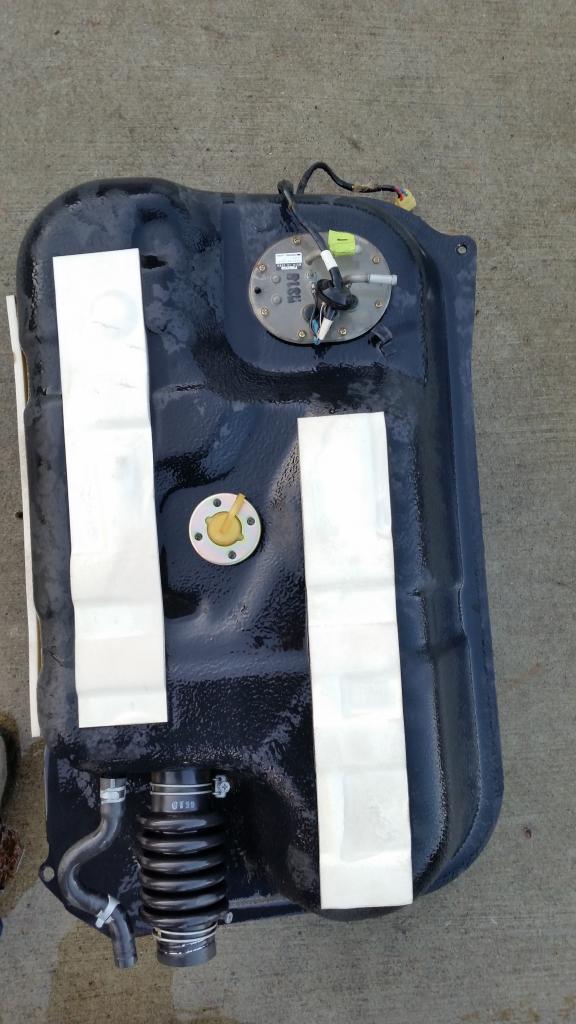
The screws holding the sending unit came off with ease which gave me some piece of mind and I was amazed to see that the inside of the tank was immaculate. There were some small particles inside which I cleaned out.
Next step was to install the fuel pump. Started to hook up the wiring and the stud where the pump power wire runs sheared right off with very minimal tightening!!!
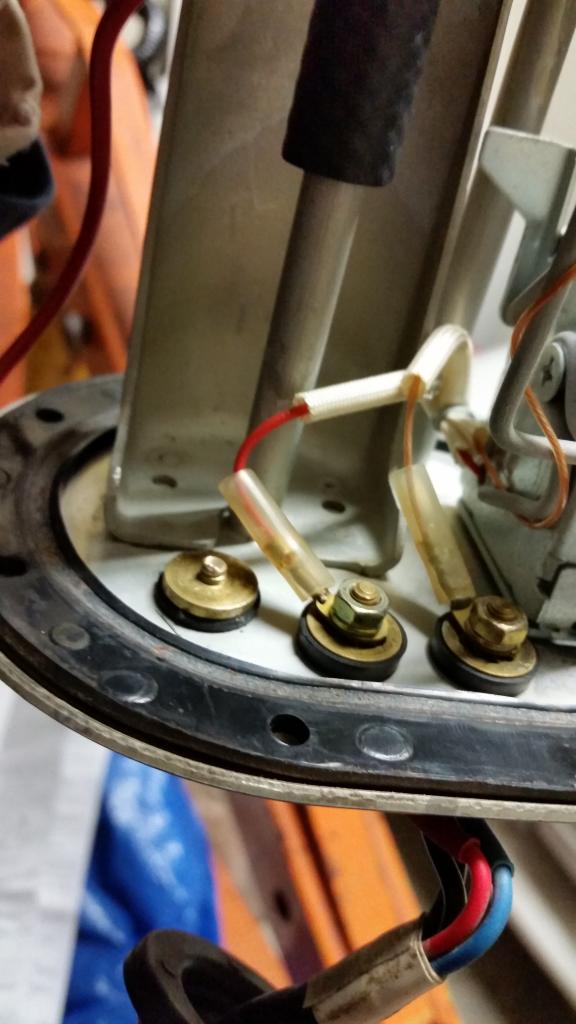
This one has me frustrated. What are your suggestions? I have a separate post on this, but any other ideas will help.

At this point it will be photos of small projects until everything is ready to come together. I have completed many small projects, but these are what I have taken photos of so far.
Inspection and re-wrapping of the wiring harness

Rebuilt the cracked and brittle OMP lines and constructed some new retainers out of .040 CRES


Cleaned up the turbo! The turbo is in amazing shape! Shaft play is very minimal. Time to port that wastegate....


Next I decided to drop the fuel tank and assess it's condition. All I can say is that it was so filthy I feared the worst.


After some nice cleanup

The screws holding the sending unit came off with ease which gave me some piece of mind and I was amazed to see that the inside of the tank was immaculate. There were some small particles inside which I cleaned out.
Next step was to install the fuel pump. Started to hook up the wiring and the stud where the pump power wire runs sheared right off with very minimal tightening!!!

This one has me frustrated. What are your suggestions? I have a separate post on this, but any other ideas will help.
01-08-15, 08:48 PM
#3
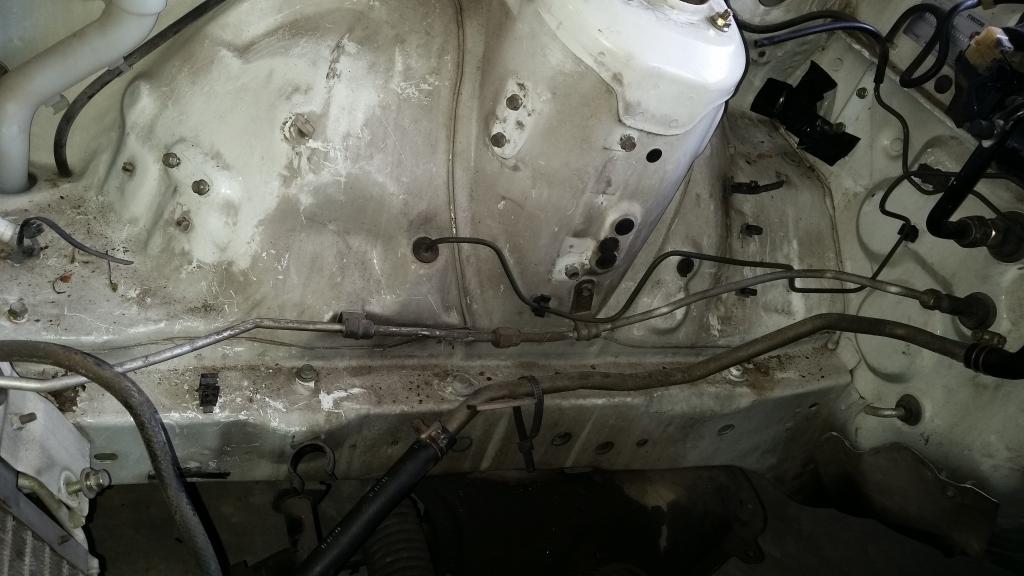
Now I am currently cleaning out this filthy filthy filthy engine bay. It's bad.... The front subframe is completely coated in grease and all of the white paint is covered in an aged grimy hard scale.
The old battery had caused a lot of corrosion on the tray mounts and the attaching bolts all sheared off in the nuts. The corrosion will have to be addressed after everything has been cleaned to a manageable level. Looks like I will also be relocating the battery.
Before shots:
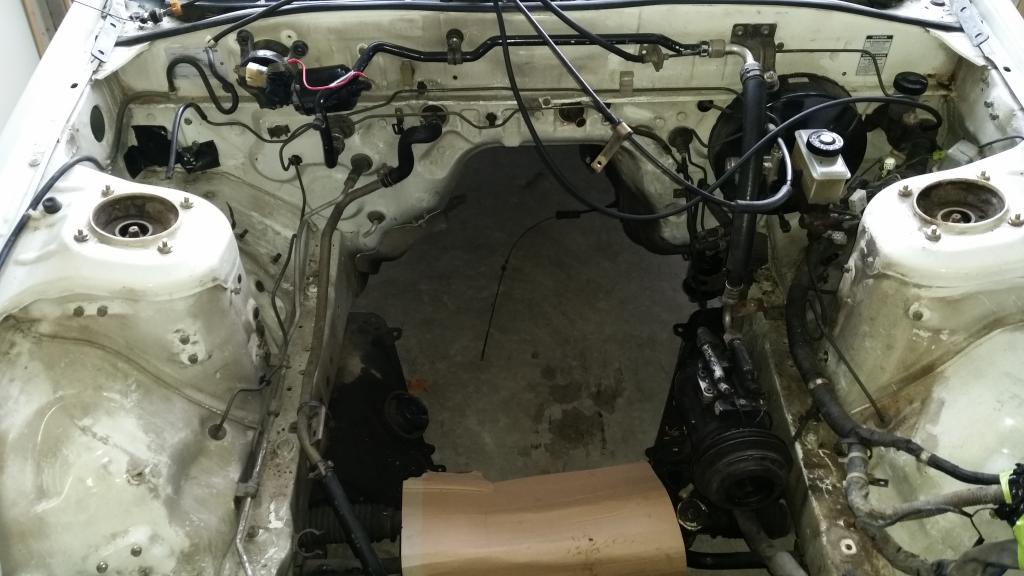
Passenger side before:
After: (Its amazing what you can do with some TLC)
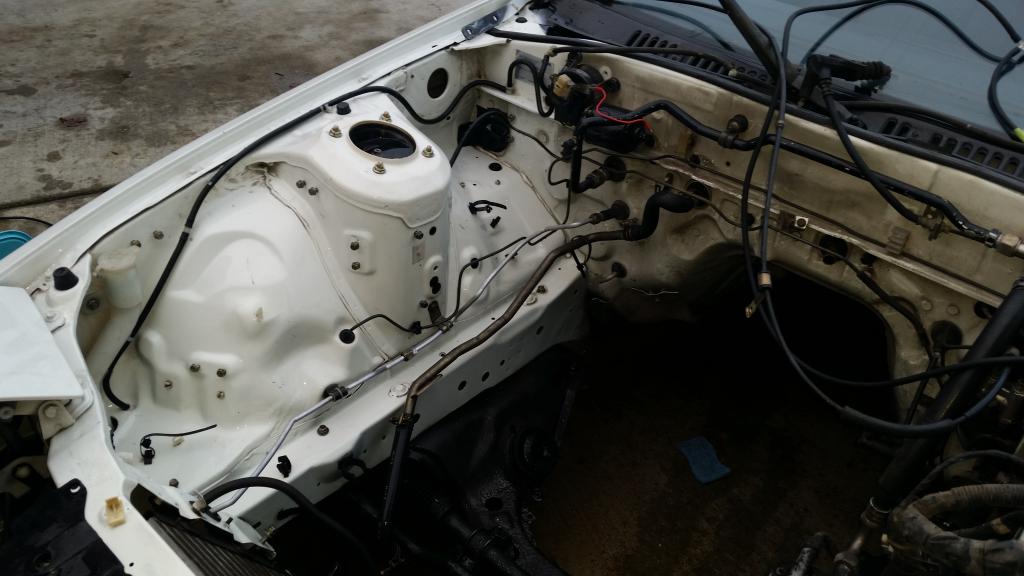
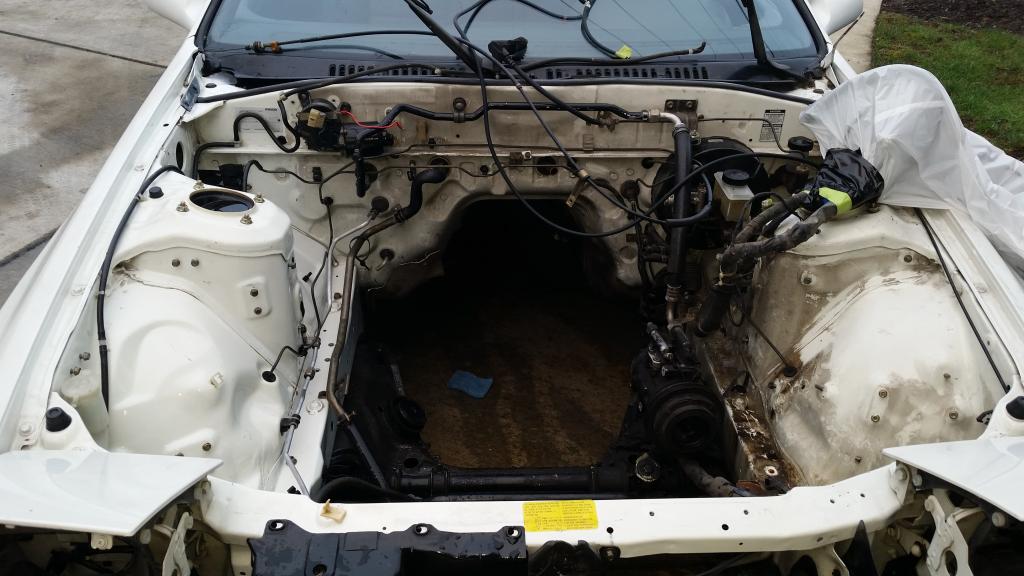
Got roughly halfway done before it started to get dark. Looks like I will have to wait and finish on another sunny or semi sunny day in the Pacific Northwest! Who knows when that will be........
In the meantime, I will be media blasting and painting many parts that were removed from the engine bay.
Before I end for the night, I want to say that I greatly appreciate any input on this build so if anyone has an idea or better way to do something that I have shown, please post your input. I want this to be a tasteful build and I'm not a corner cutter, so there will be much more work to do.
The old battery had caused a lot of corrosion on the tray mounts and the attaching bolts all sheared off in the nuts. The corrosion will have to be addressed after everything has been cleaned to a manageable level. Looks like I will also be relocating the battery.
Before shots:


Passenger side before:

After: (Its amazing what you can do with some TLC)


Got roughly halfway done before it started to get dark. Looks like I will have to wait and finish on another sunny or semi sunny day in the Pacific Northwest! Who knows when that will be........
In the meantime, I will be media blasting and painting many parts that were removed from the engine bay.
Before I end for the night, I want to say that I greatly appreciate any input on this build so if anyone has an idea or better way to do something that I have shown, please post your input. I want this to be a tasteful build and I'm not a corner cutter, so there will be much more work to do.
01-09-15, 09:15 AM
#4
I love the cleaned up bay look. All too often people are quick to re-paint the engine bay. Looks like you are well on the way to a clean car.
How long did it take to re-wrap the harness?
As for the pump situation, I have a spare pump cradle laying around I can send you. PM me and I'll send some pics.
How long did it take to re-wrap the harness?
As for the pump situation, I have a spare pump cradle laying around I can send you. PM me and I'll send some pics.
01-09-15, 09:48 PM
#5
I am surprised at how great of condition the paint in the bay is. It seems like the grime protected it. I found a small area that I will repaint once it's all cleaned out.
It took me a good afternoon to finish the harness. I found a high temp mica wrap that I used on the sections that run directly over the motor. I will have to post pictures of it soon.
It took me a good afternoon to finish the harness. I found a high temp mica wrap that I used on the sections that run directly over the motor. I will have to post pictures of it soon.

Trending Topics
 01-16-15, 10:24 PM
#13

I drilled out the sheared bolts and went up slightly in size to clean up the hole since the battery is no longer going to reside here.

After grinding out the corrosion and sanding everything smooth I applied some primer and topcoat. Here is the bay as clean as it's going to get:

Spent the rest of the afternoon installing some of the freshly painted brackets and other items that I pulled to clean the bay.

A side project has also been completed. Carbon fiber goodies!!

I made a total of 4 CAS covers out of 4 plies of plain weave pre-preg carbon fiber and 1 fiberglass barrier ply on the surface that comes in contact with the aluminum to prevent galvanic corrosion. (Carbon will eat up exposed aluminum if there is nothing between the two.) [Selling the other 3, pm for details if you want them]

Media blasted/painted pile of parts

New(ish) koyo ready for install!

Here is a quick shot of the parallel fuel setup with the fuel regulator.

That's it for this week stay tuned for more!
Question from the week:
What is a good way to clean between fins of the oil cooler/ac cooler? I have a bunch of crud that has accumulated in between the fins which I'm sure will impede airflow considerably. Let me know if you have a good method.
Next up on my agenda is to finish installing the body wiring harness. Next should be mounting the battery to the passenger side bin, followed by rewiring the fuel pump. I'll be looking to install the bare block/trans shortly after then I have to figure out the mess of deleting emissions/rats nest.
01-28-15, 12:12 PM
#15
Time for another update!
The past couple weeks have been slow, but I still knocked out some small projects.
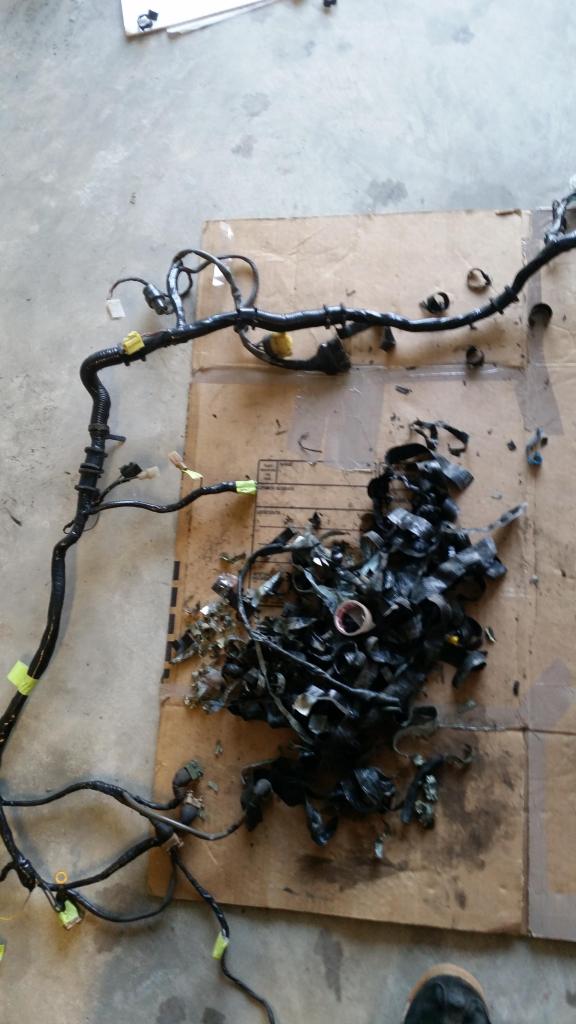
I first spent time cleaning/re wrapping/modifying the stock charging/ground harness
Just to give you an idea of how messy and neglected it was:
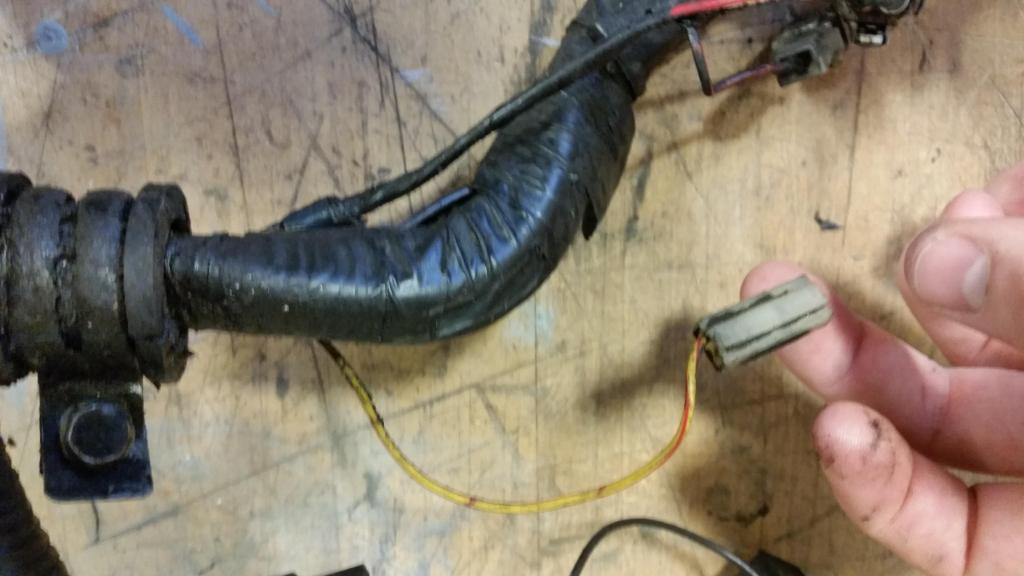
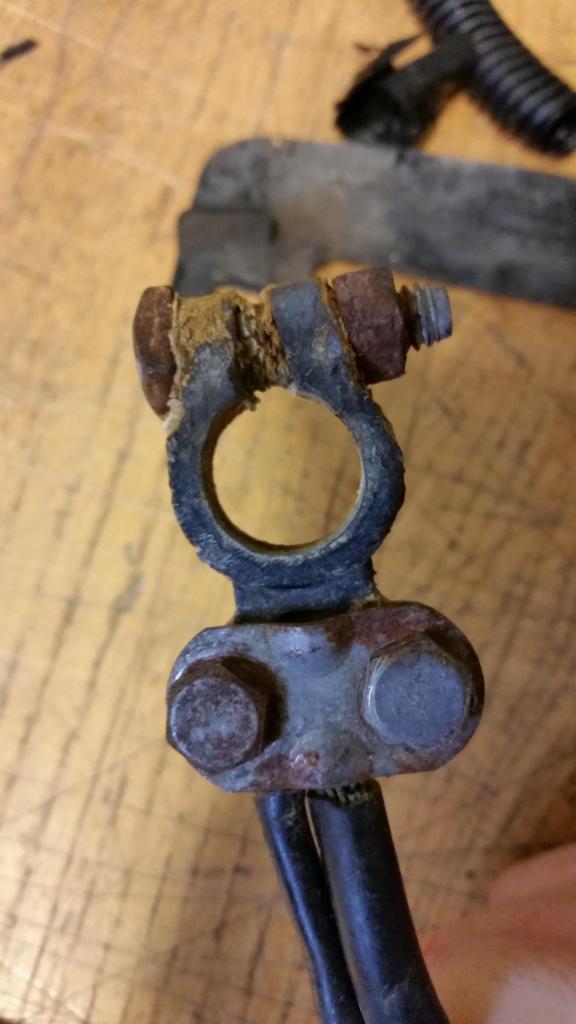
Since I am new to wiring and electrical work I spent a bit of time practicing my soldering techniques. The stock crimps are very strong, but I added some solder mainly for the practice.
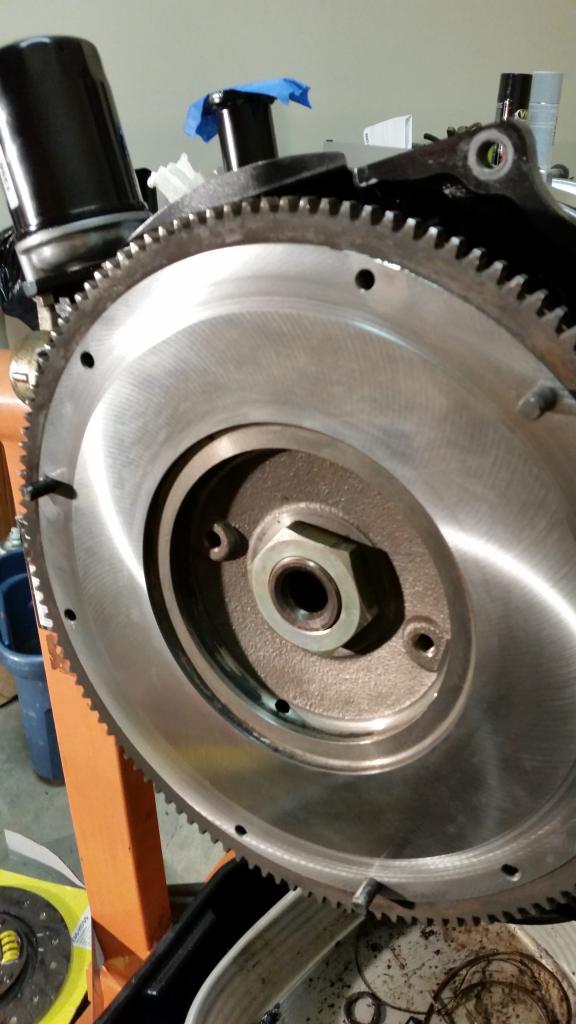
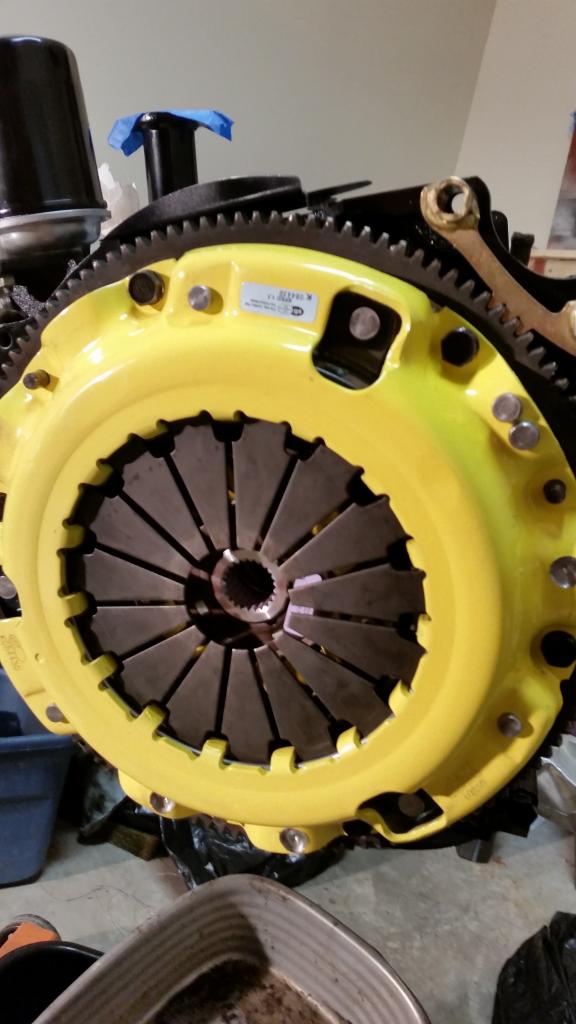
Next up was the installation of the ACT street disc and heavy duty pressure plate
Here is the nice and clean resurfaced flywheel
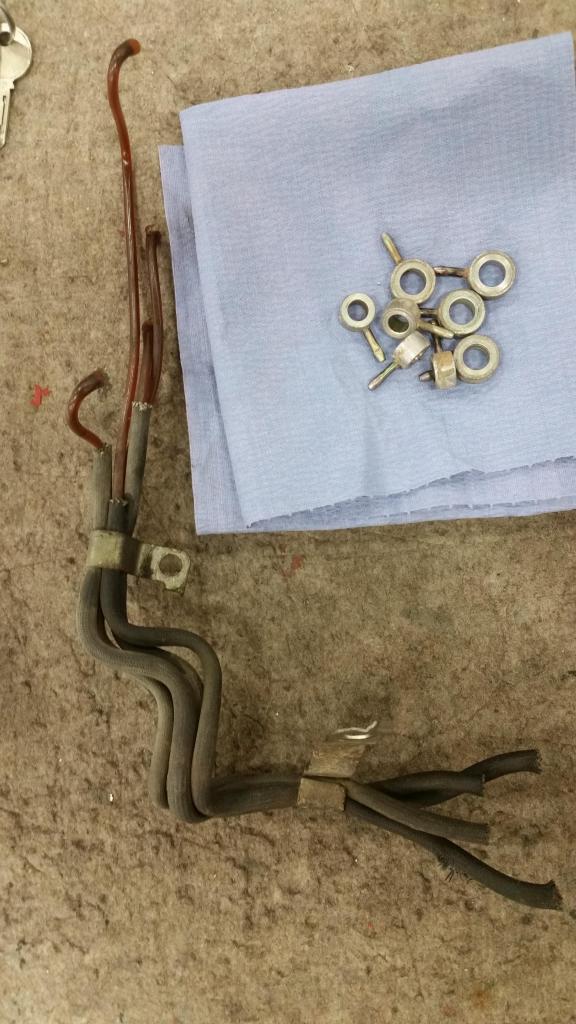
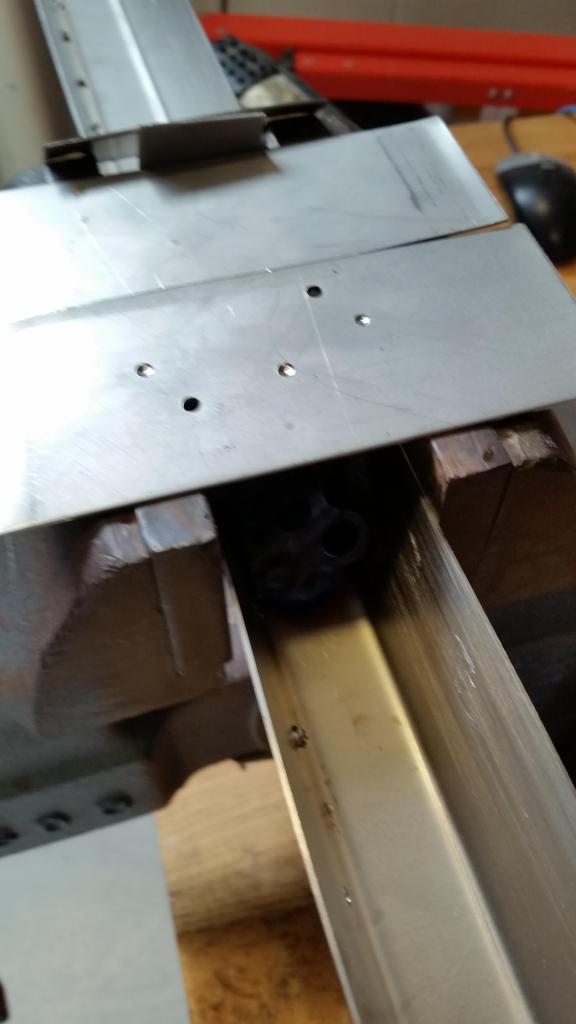
The next project was to anneal the copper o rings for the OMP system. I had to construct a makeshift furnace from scraps of stainless steel/titanium just to get the temperature high enough with the tiny butane torch I have.
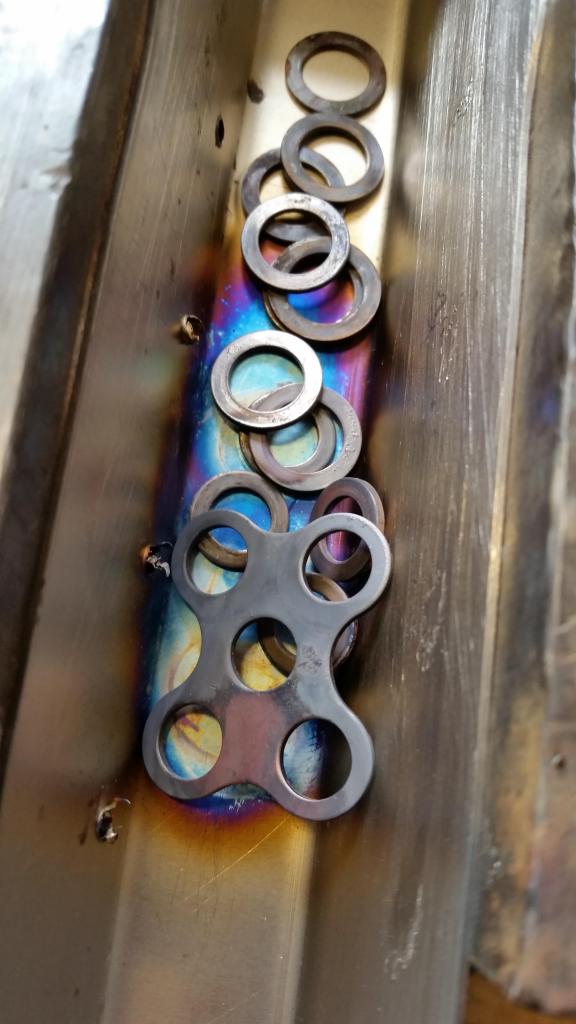
Here are the annealed o rings.. Gotta love the look of torched titanium
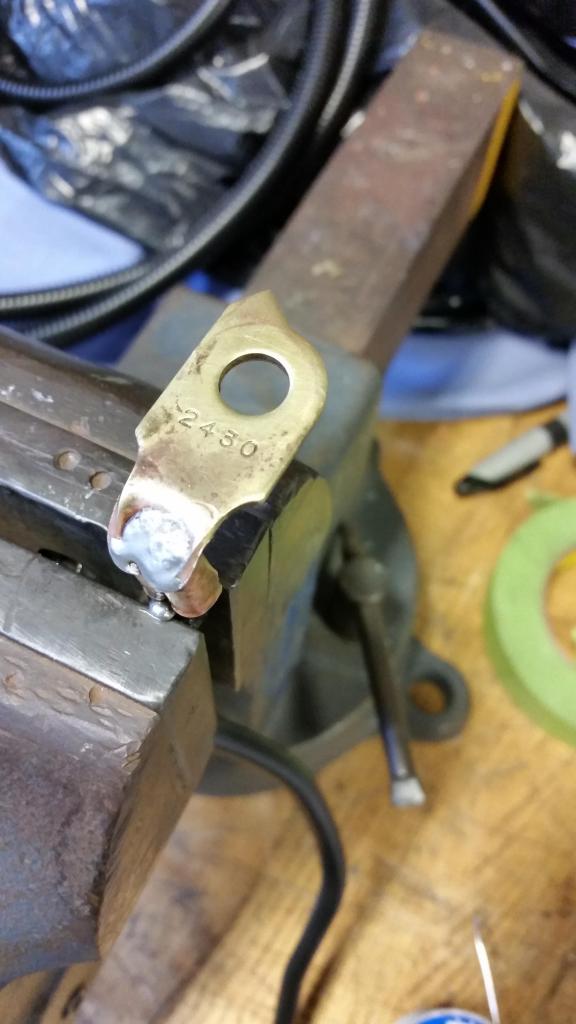
Next up was to finally port the wastegate on the stock s4 turbo. This turbo is in amazing shape so I will use it until I need another then I will consider upgrades. Any suggestions for a very responsive 300-350hp?
After a little grinding:

Yeah that wasn't enough... This is more like it:
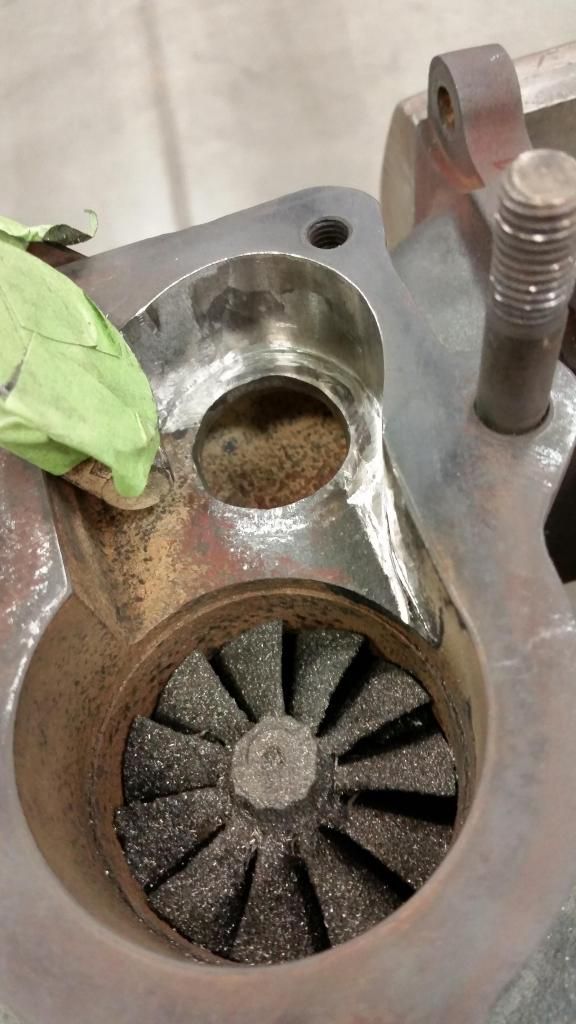
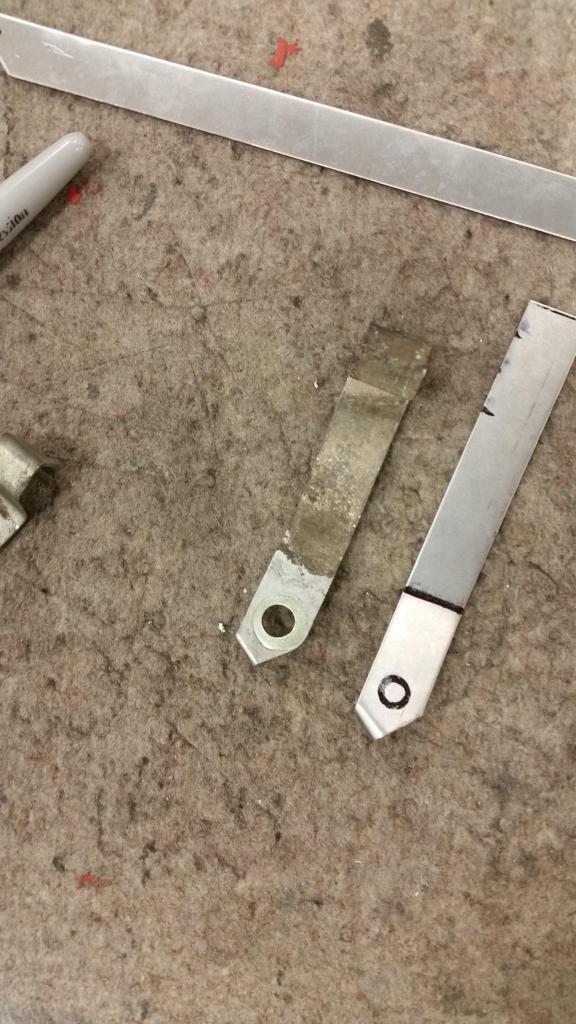
Spent a long time on this. Opening the hole and providing proper undercutting takes a lot longer that I expected. Here are the washers I was planning to use, but I'm not sure if this cheap mild steel will be able to take the heat. I am considering cutting a solid circle from stainless and getting that welded on. What are your thoughts on washer selection?
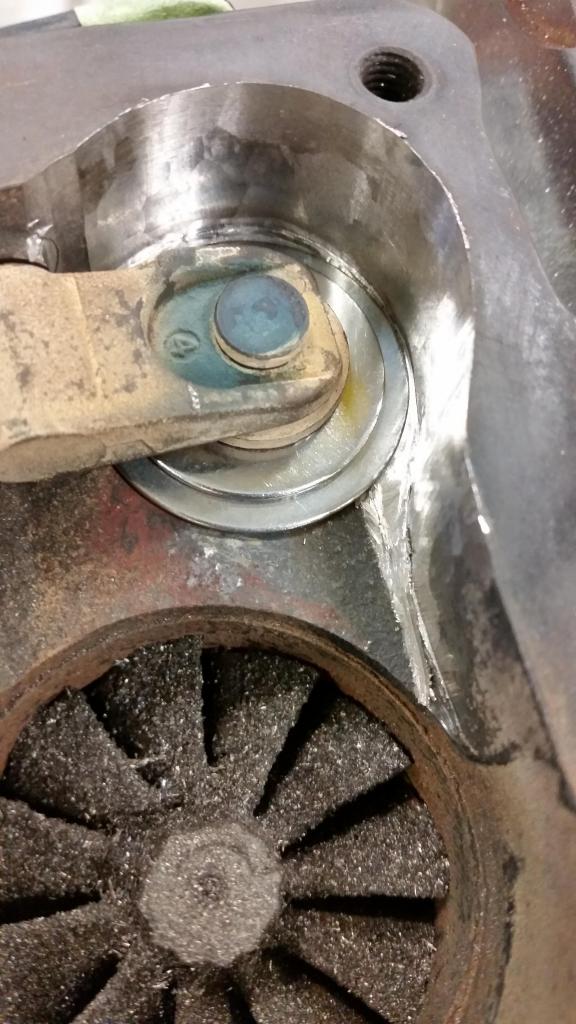
This is my first port job on the s4 turbo so let me know what you think.
When the weather gets nice again I will be able to start removing the interior and re-wiring the battery/fuel pump. After that, it's time to drop in the motor!
The past couple weeks have been slow, but I still knocked out some small projects.
I first spent time cleaning/re wrapping/modifying the stock charging/ground harness
Just to give you an idea of how messy and neglected it was:


Since I am new to wiring and electrical work I spent a bit of time practicing my soldering techniques. The stock crimps are very strong, but I added some solder mainly for the practice.

Next up was the installation of the ACT street disc and heavy duty pressure plate
Here is the nice and clean resurfaced flywheel


The next project was to anneal the copper o rings for the OMP system. I had to construct a makeshift furnace from scraps of stainless steel/titanium just to get the temperature high enough with the tiny butane torch I have.

Here are the annealed o rings.. Gotta love the look of torched titanium

Next up was to finally port the wastegate on the stock s4 turbo. This turbo is in amazing shape so I will use it until I need another then I will consider upgrades. Any suggestions for a very responsive 300-350hp?
After a little grinding:

Yeah that wasn't enough... This is more like it:

Spent a long time on this. Opening the hole and providing proper undercutting takes a lot longer that I expected. Here are the washers I was planning to use, but I'm not sure if this cheap mild steel will be able to take the heat. I am considering cutting a solid circle from stainless and getting that welded on. What are your thoughts on washer selection?

This is my first port job on the s4 turbo so let me know what you think.
When the weather gets nice again I will be able to start removing the interior and re-wiring the battery/fuel pump. After that, it's time to drop in the motor!
02-04-15, 11:12 PM
#16
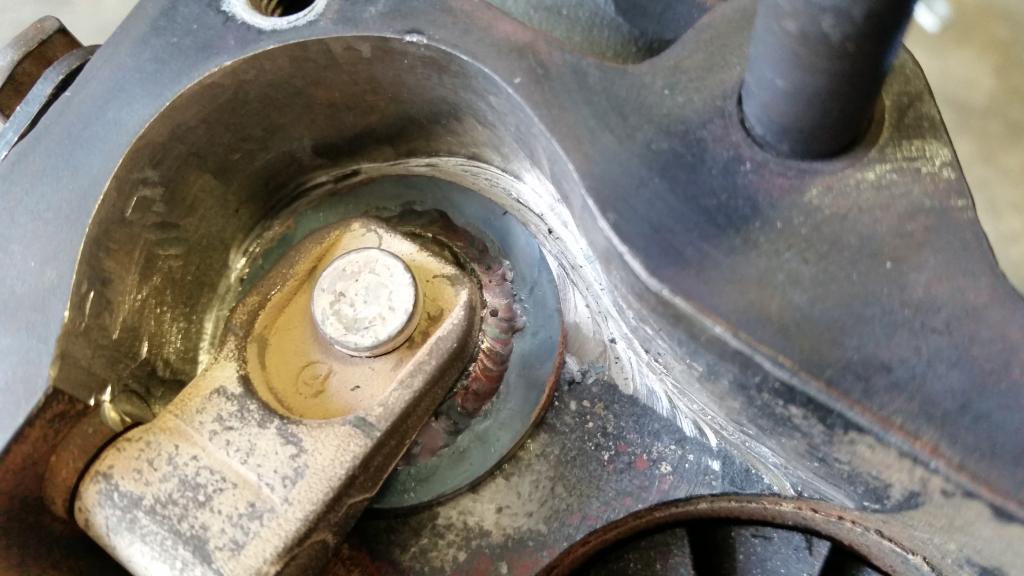
So I took some time and got a better piece of stainless steel to take the heat. Had my welder tack it on to make sure there are no clearance issues. Everything looks good. It will be finished soon. 
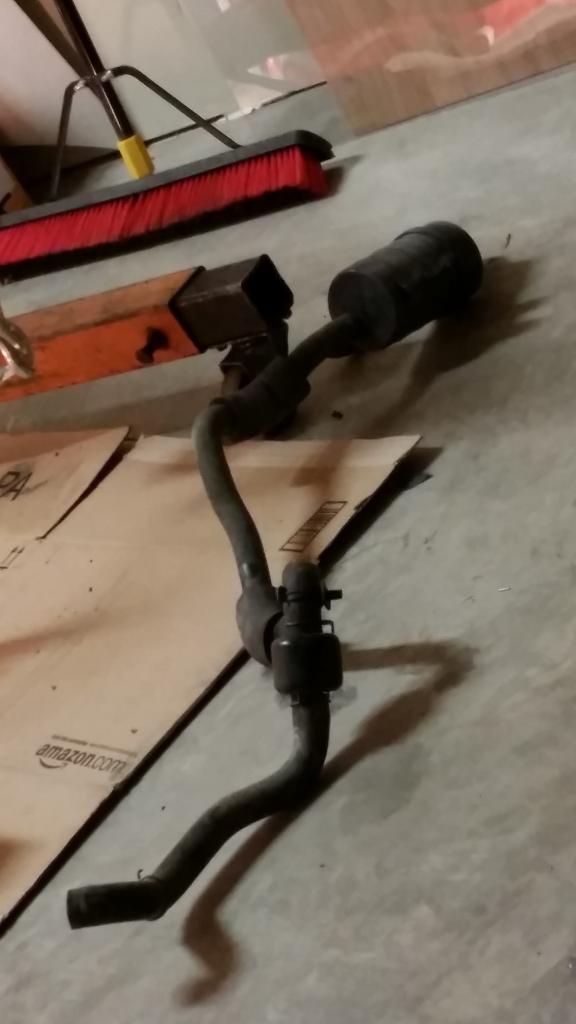
Started the week by taking out the silencer thing for the airpump since it is just taking up space. That thing is surprisingly heavy!
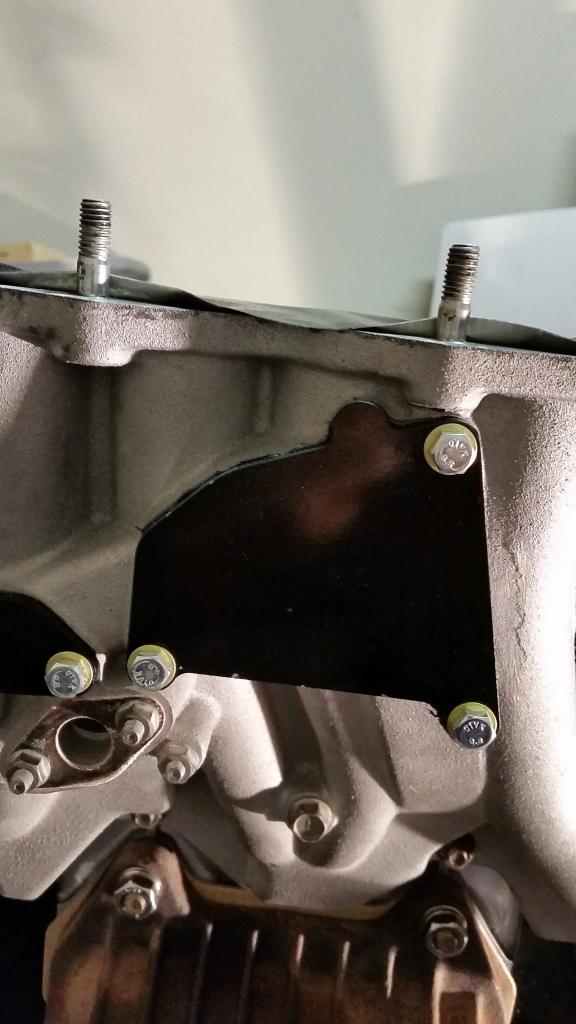
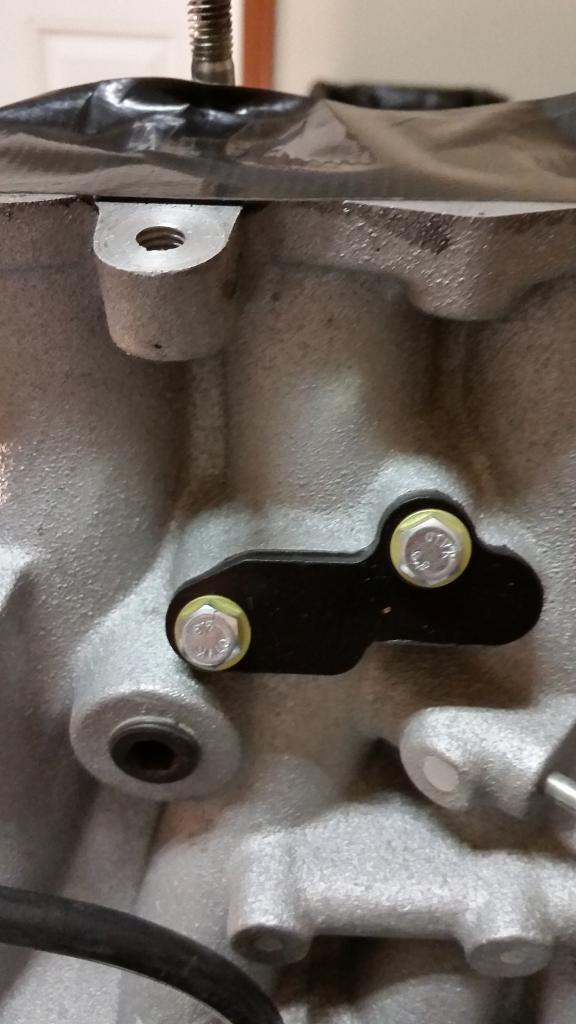
Some shots of the painted block off plates installed with some fresh hardware. I used the kit from Banzai racing. The fitment/quality is excellent.
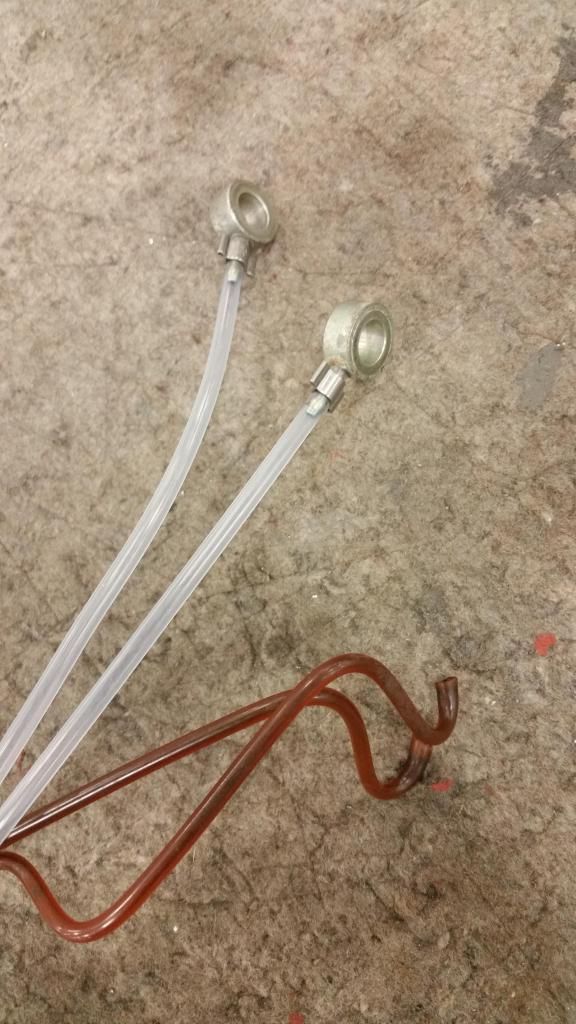
Next up was routing the new OMP lines. Took me a minute and some digging in the fsm to figure out which ones were for which specific nozzle. (Not really sure if it matters)
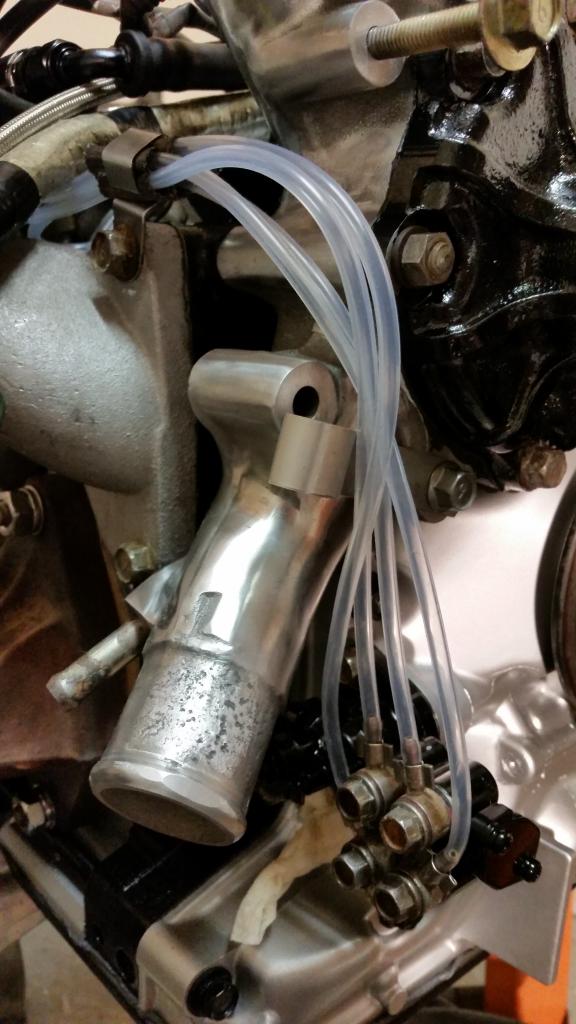
In order to make sure the lines didn't chafe their way to oblivion I sliced up the old sleeves and wrapped the lines where they came in contact with the brackets I made. In hindsight, I should have made my own design to these rather than copying the stock brackets.
Not the best looking, but it should keep them safe.
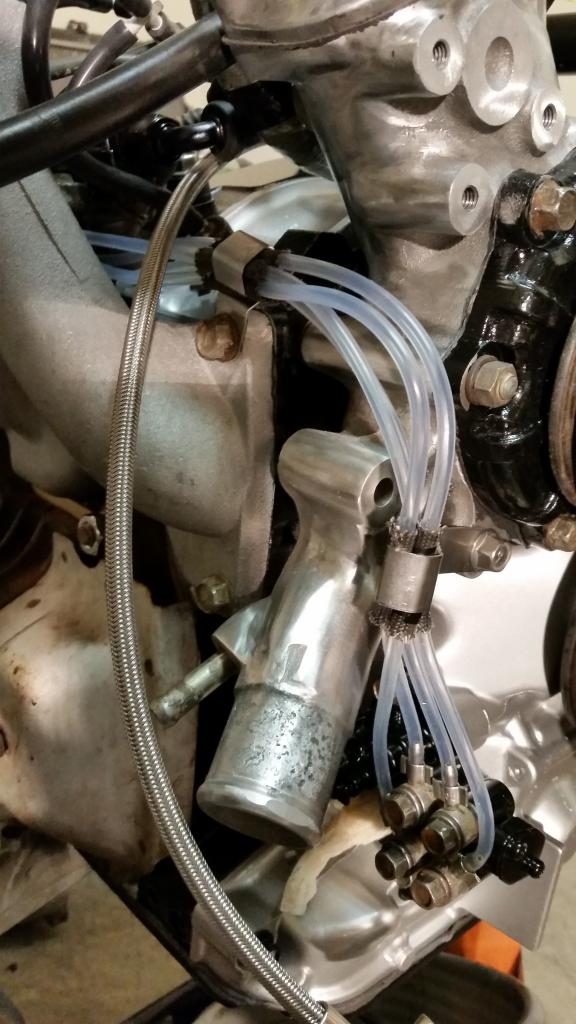
I got a lot accomplished during the next phase. I had the 4x 720cc injectors I bought off the forum tested just for some peace of mind. The injectors passed with flying colors. I have now partially installed the parallel fuel feed setup, the wiring harness on top of the block, a fresh braided oil line for the turbo and a couple of vacuum lines.
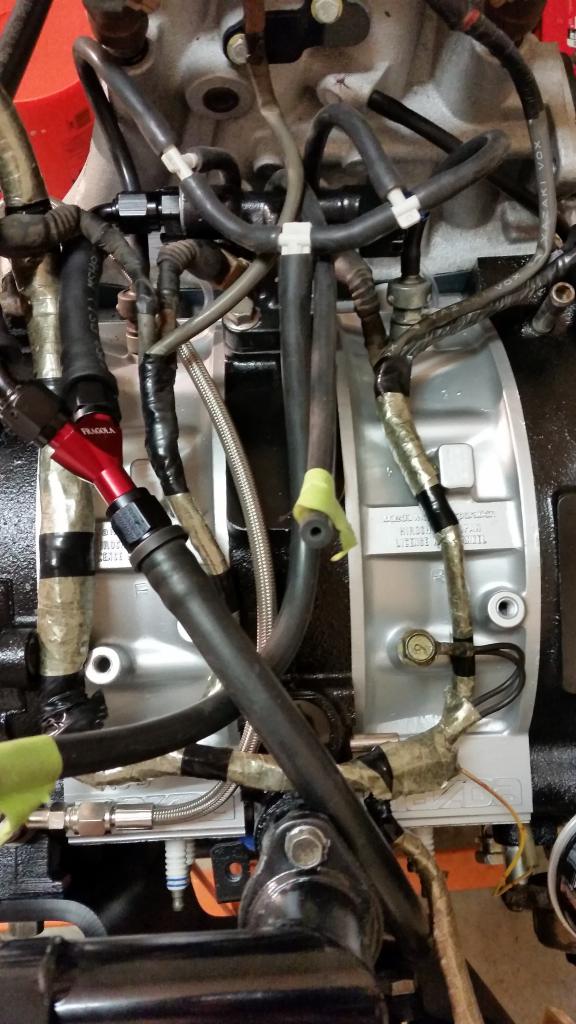
There is still some tidying up to do! Now I have to sort out the rest of the vacuum line routing.
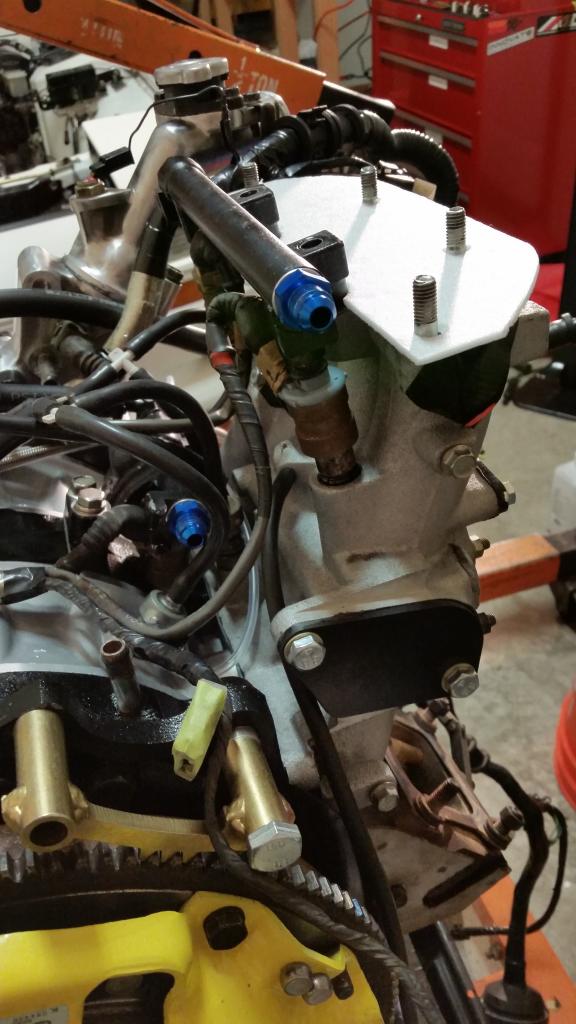
The next phase will be to install the turbo, then I will be installing the motor/tranny.

Started the week by taking out the silencer thing for the airpump since it is just taking up space. That thing is surprisingly heavy!

Some shots of the painted block off plates installed with some fresh hardware. I used the kit from Banzai racing. The fitment/quality is excellent.


Next up was routing the new OMP lines. Took me a minute and some digging in the fsm to figure out which ones were for which specific nozzle. (Not really sure if it matters)

In order to make sure the lines didn't chafe their way to oblivion I sliced up the old sleeves and wrapped the lines where they came in contact with the brackets I made. In hindsight, I should have made my own design to these rather than copying the stock brackets.
Not the best looking, but it should keep them safe.

I got a lot accomplished during the next phase. I had the 4x 720cc injectors I bought off the forum tested just for some peace of mind. The injectors passed with flying colors. I have now partially installed the parallel fuel feed setup, the wiring harness on top of the block, a fresh braided oil line for the turbo and a couple of vacuum lines.

There is still some tidying up to do! Now I have to sort out the rest of the vacuum line routing.

The next phase will be to install the turbo, then I will be installing the motor/tranny.

 03-06-15, 07:03 AM
#24
First of all I want to apologize for the lack of updates. I recently started working grave shifts and it has been rough. After working all night the last thing I have the energy for is working on the car. I'm trying to push hard to get the car drivable soon because we will be moving to a new place over the next couple of weeks. Progress should get faster as I don't want to have to tow the car if at all possible!
I have gotten a few things done over the last weeks.
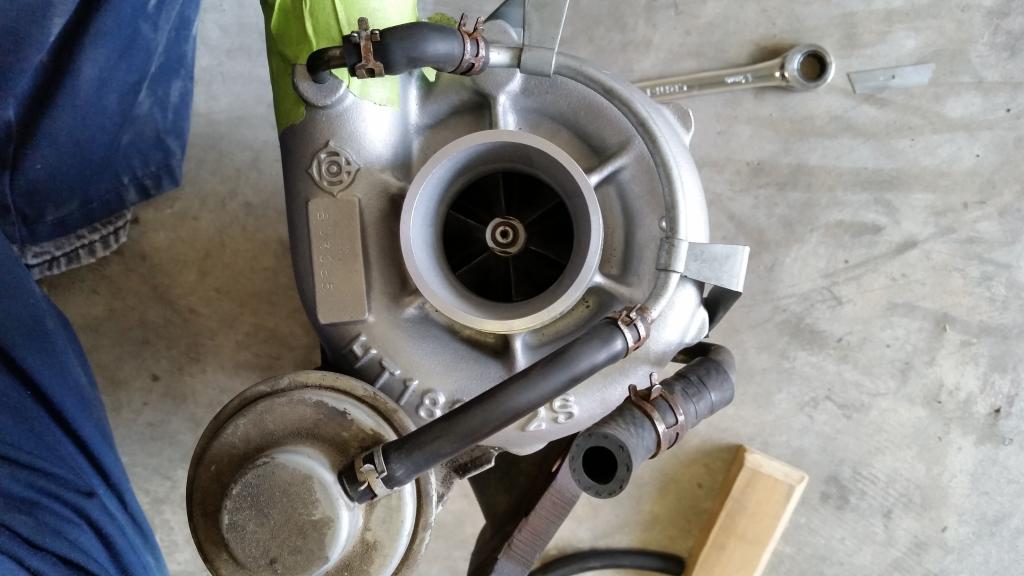
First off was to finish the wastegate. I feel like this came out very nice. I "shouldn't" have any boost creep issues, but I'll have to report back on that.
The weld came out very nice. No credit to myself here, I am unfortunately not a welder.
I proceeded to put the turbo back together.
Then I had a friend come over and help install the motor/transmission.
Here's an obligatory action shot!

Got her in!
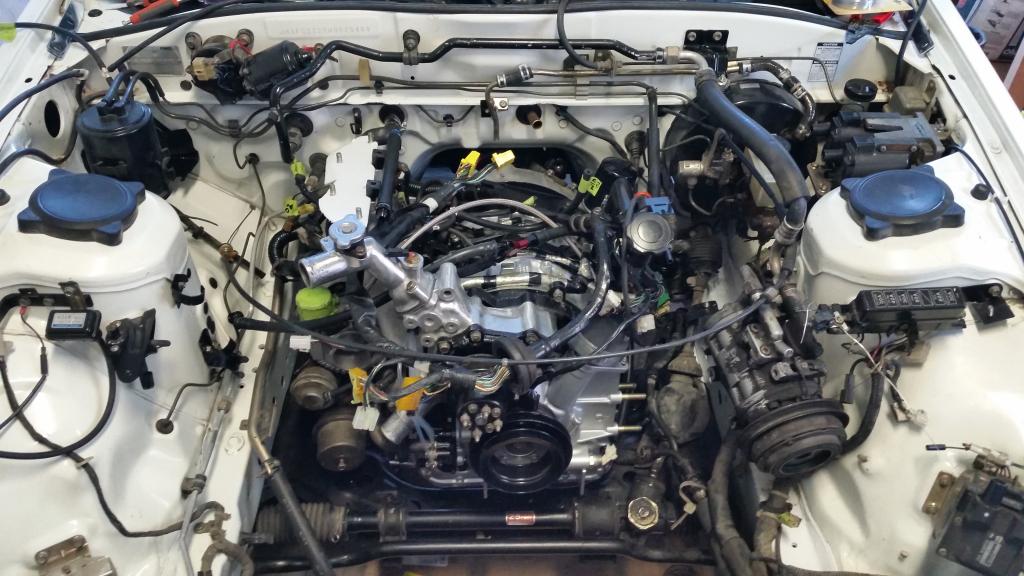
The first thought in my head was that the engine sits very crooked. I checked the mounts but they are very straightforward and it seems to only sit in one way. Maybe its just been that long since it's been out.
I have since installed the driveshaft, starter, engine charging harness, and the heat shields for exhaust. (I feel no photos are necessary for such mundane tasks)
So now the next major task.... Installing the godspeed fmic kit I picked up for a great price. (Pics of the setup soon) I may need some help with this one.
After that it's just a number of small things. I'm having a lot of trouble fishing the wiring harness through the passenger side hole in the firewall. My hands must have gotten larger because I don't remember it being so difficult to disconnect the plugs as it is to install them.
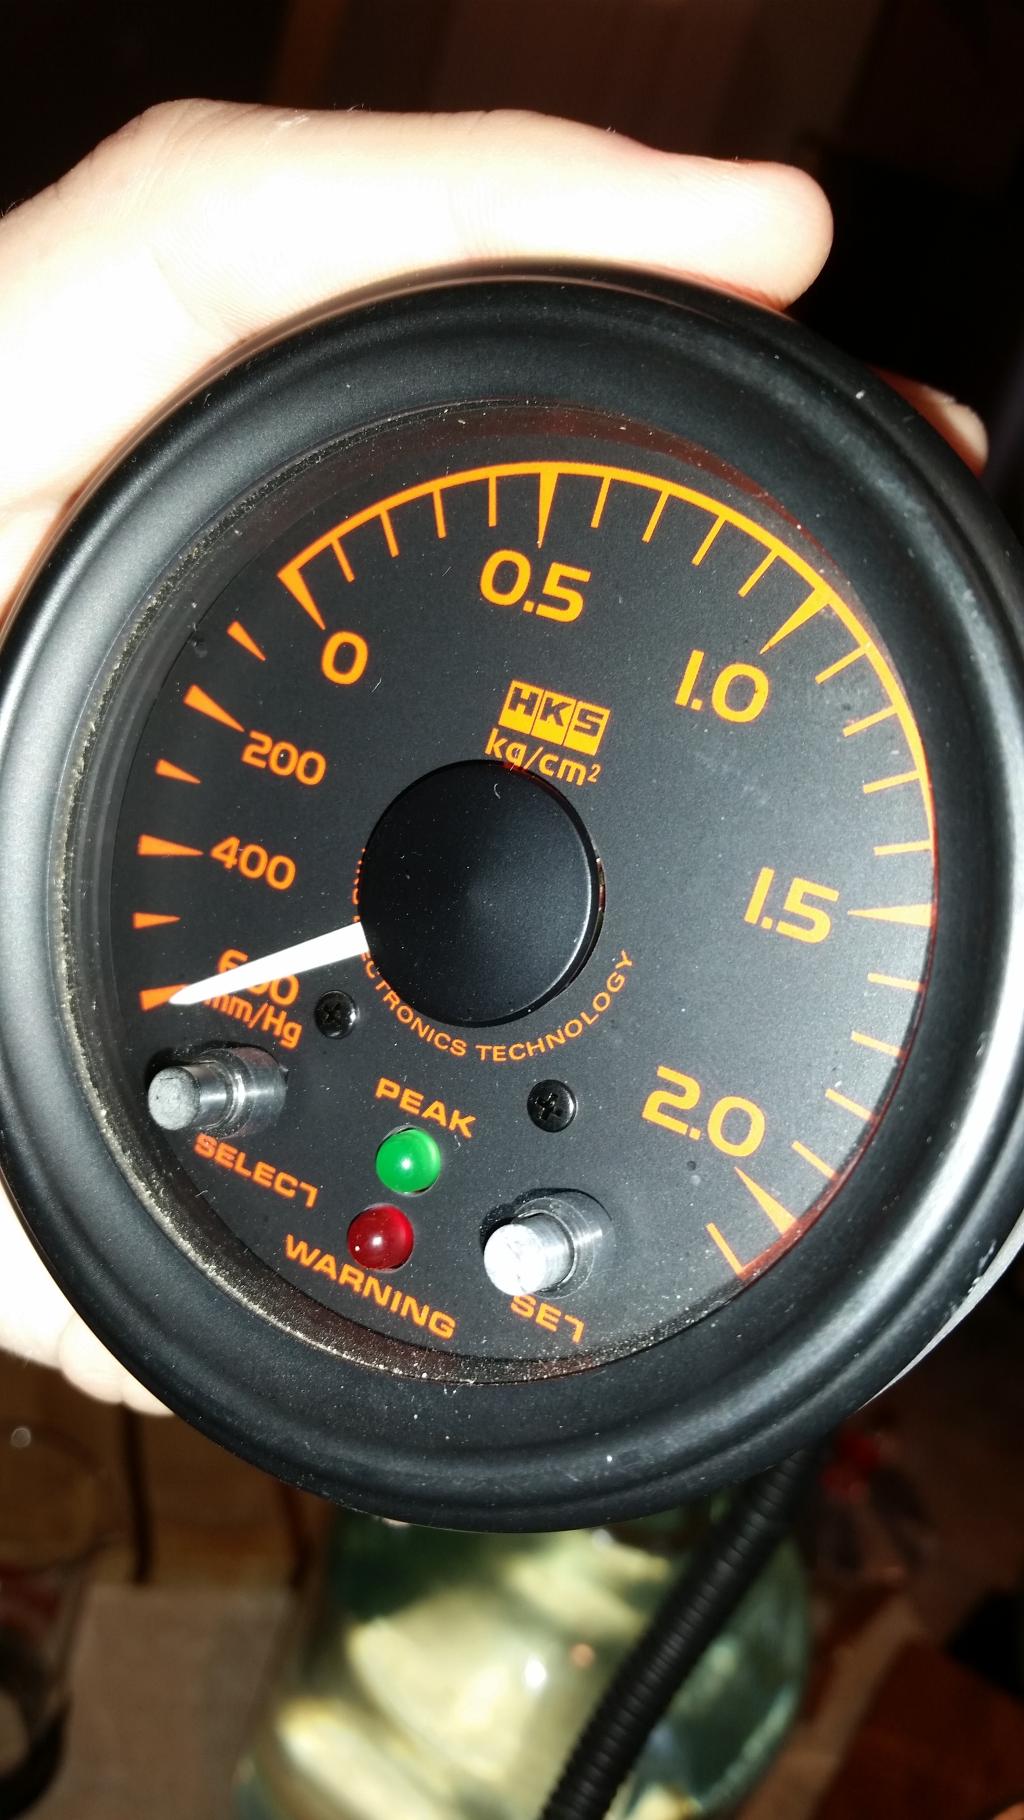
Also picked up this little beauty, but mistakenly got the electric gauge without a sending unit. If anyone can source the sending unit please let me know! I would love to use these gauges, they are such a great fit in the car.
I will get to do a lot more work this weekend, so expect another update soon.
I have gotten a few things done over the last weeks.
First off was to finish the wastegate. I feel like this came out very nice. I "shouldn't" have any boost creep issues, but I'll have to report back on that.
The weld came out very nice. No credit to myself here, I am unfortunately not a welder.

I proceeded to put the turbo back together.

Then I had a friend come over and help install the motor/transmission.
Here's an obligatory action shot!

Got her in!

The first thought in my head was that the engine sits very crooked. I checked the mounts but they are very straightforward and it seems to only sit in one way. Maybe its just been that long since it's been out.
I have since installed the driveshaft, starter, engine charging harness, and the heat shields for exhaust. (I feel no photos are necessary for such mundane tasks)
So now the next major task.... Installing the godspeed fmic kit I picked up for a great price. (Pics of the setup soon) I may need some help with this one.
After that it's just a number of small things. I'm having a lot of trouble fishing the wiring harness through the passenger side hole in the firewall. My hands must have gotten larger because I don't remember it being so difficult to disconnect the plugs as it is to install them.
Also picked up this little beauty, but mistakenly got the electric gauge without a sending unit. If anyone can source the sending unit please let me know! I would love to use these gauges, they are such a great fit in the car.

I will get to do a lot more work this weekend, so expect another update soon.
03-06-15, 07:05 AM
#25
I would love to restore a real 10th AE one day! I feel like this thing will get further from the "clone" look and more to what suits my style. The paint on the body kit and the wheels was done poorly and is already starting to fail in a few places. Maybe an entire respray is in the future.