Widebody Turbo Swap - My Dream FB Build is Finally Happening!
 03-09-15, 07:55 PM
#101
I got a lot done today!
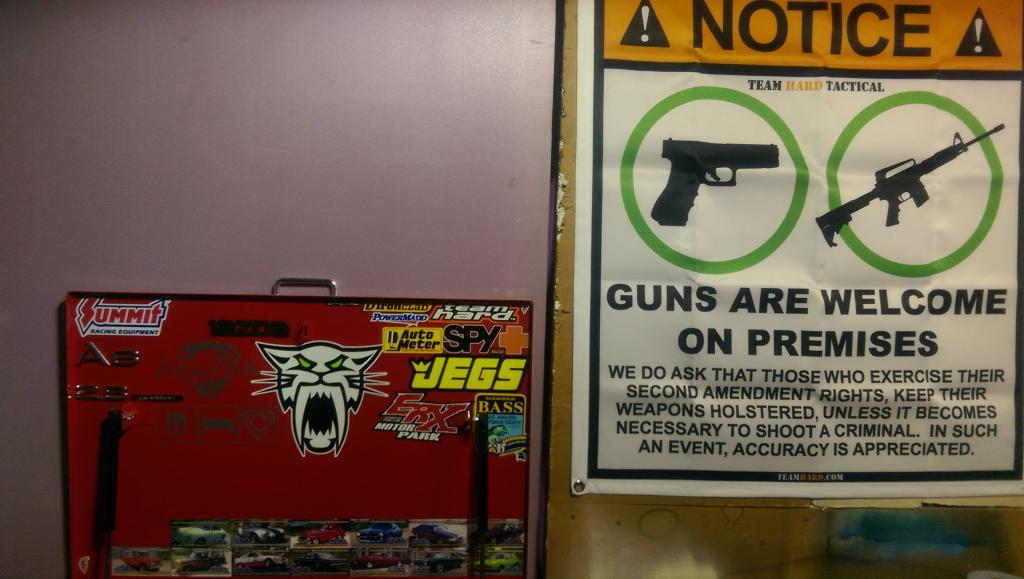
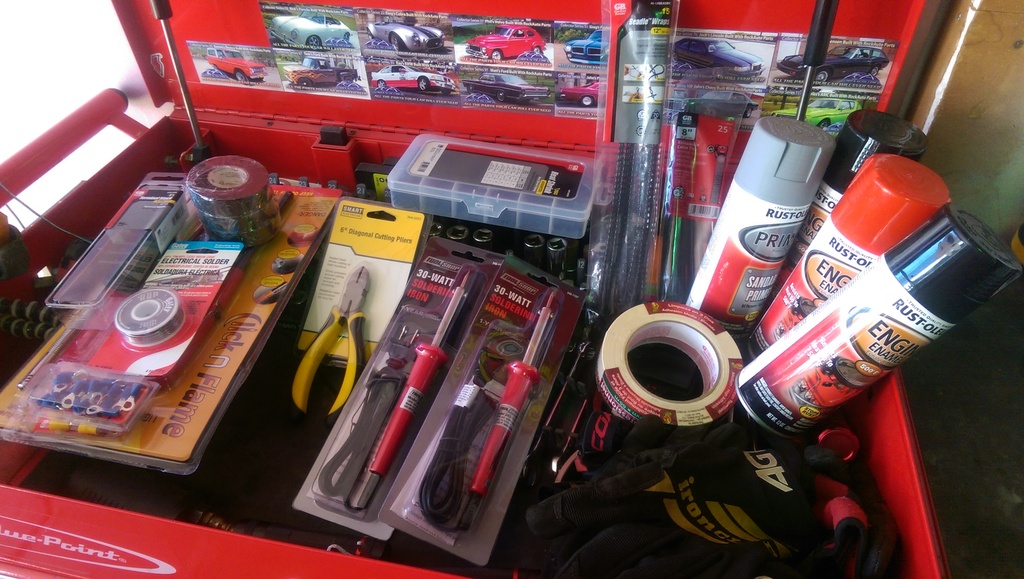
Some new decals for the tool box, just had these sitting around for a long time.
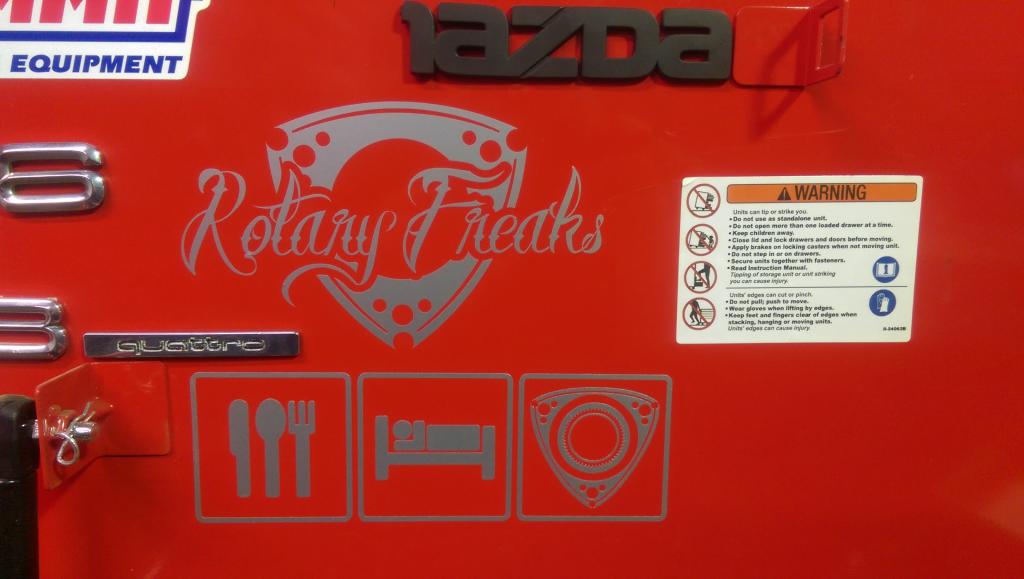
Oh, and the banner.
Pushed the widebody all the way out of the garage towards the end of the driveway.
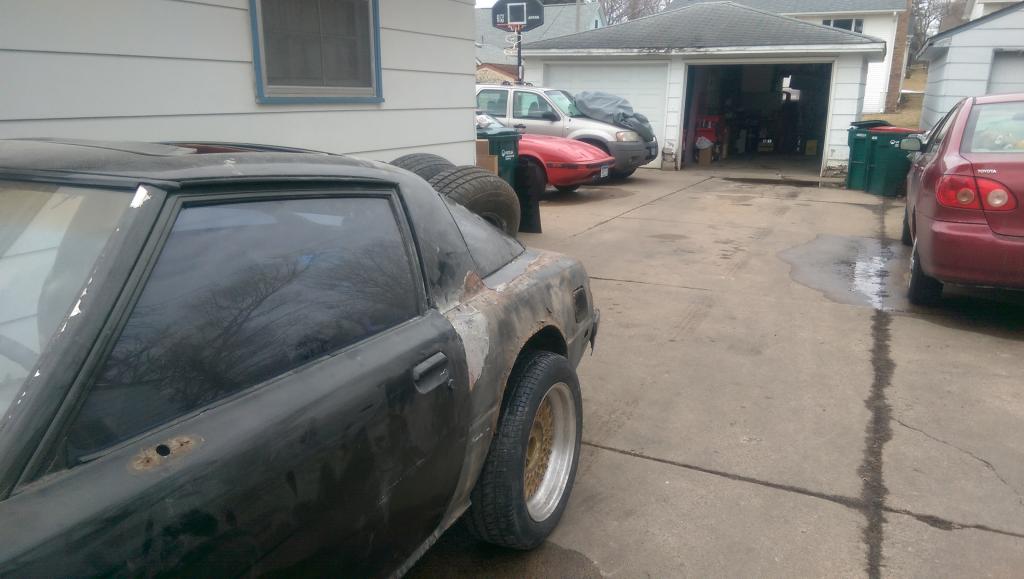
Red car got pushed up to meet the black car, in order to push the red car in the garage.
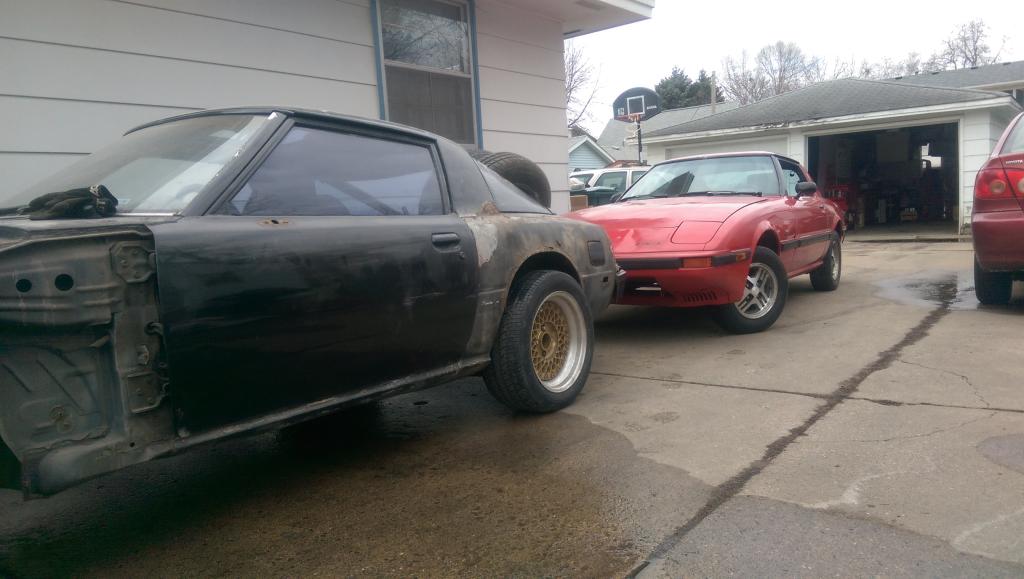

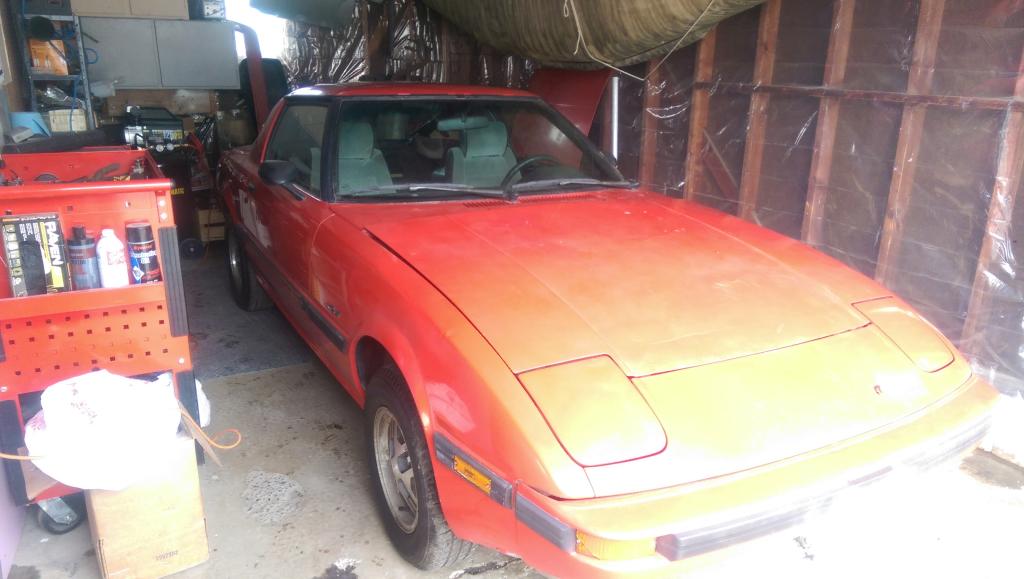
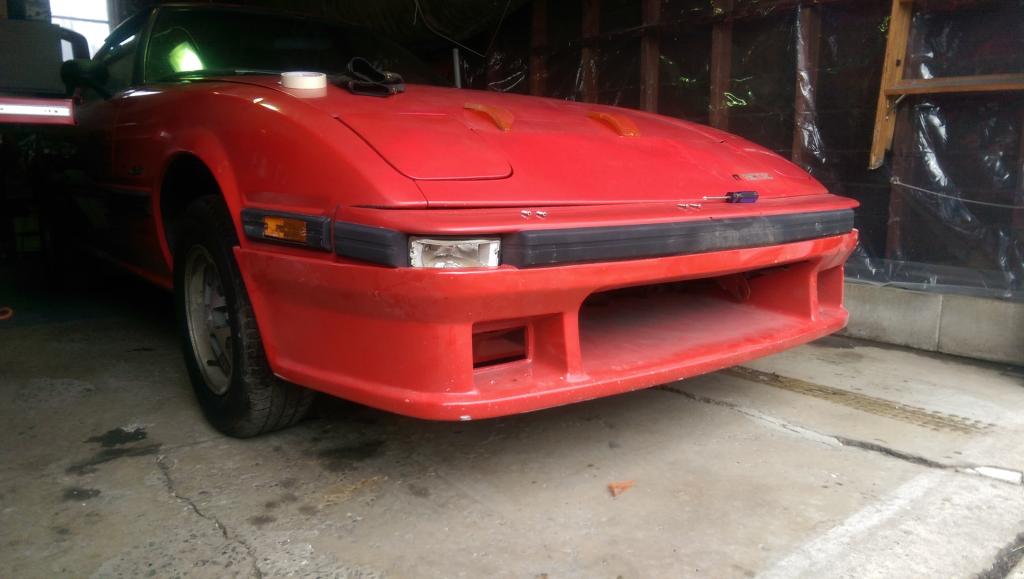
Red car finally made it back in to the garage!
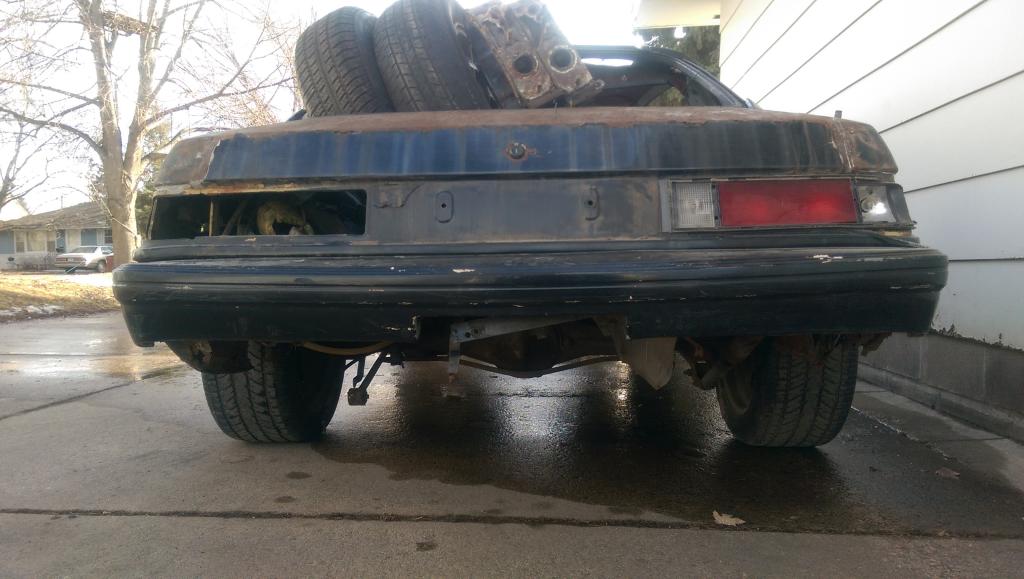
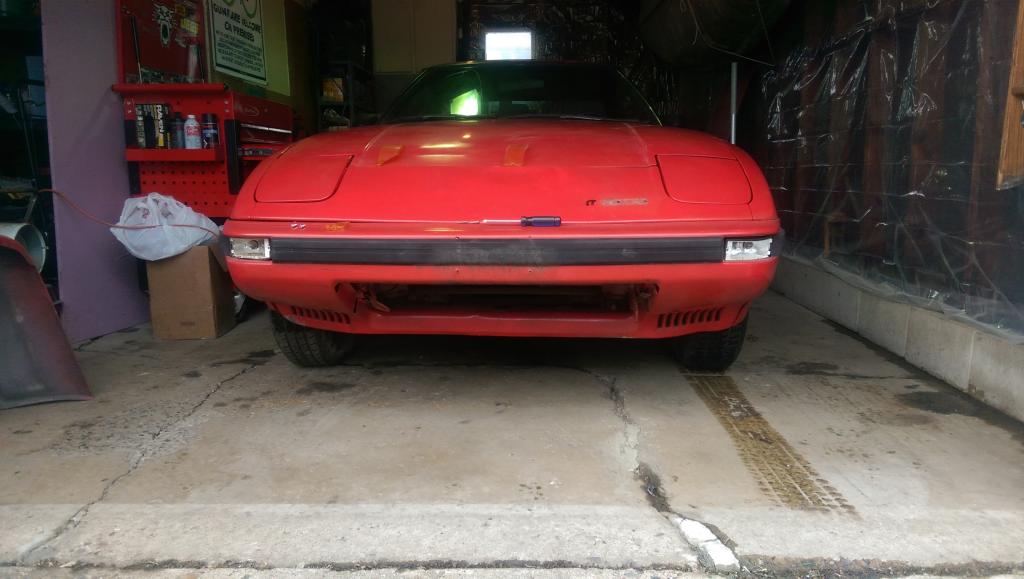
Before front air dam fitment...
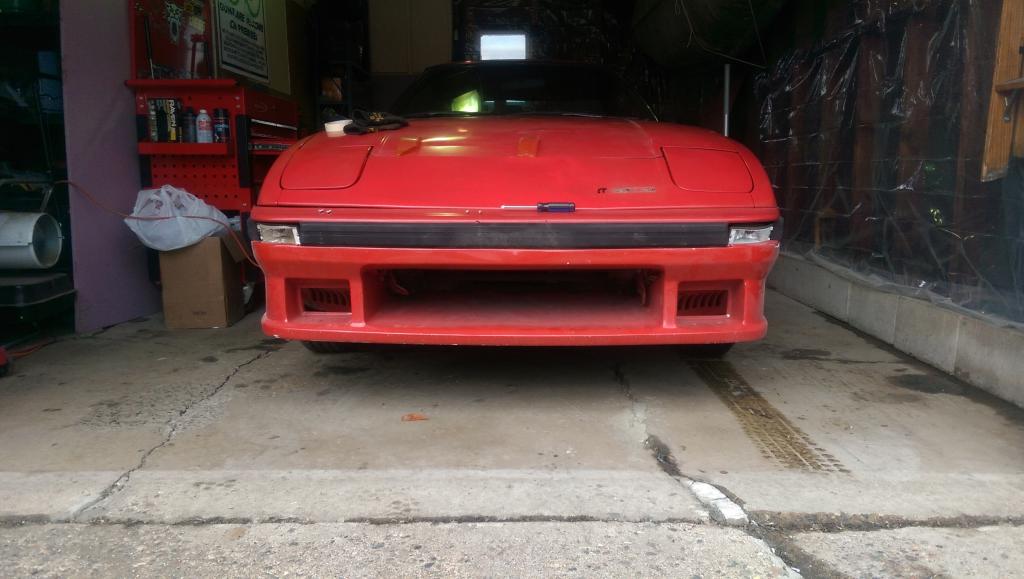
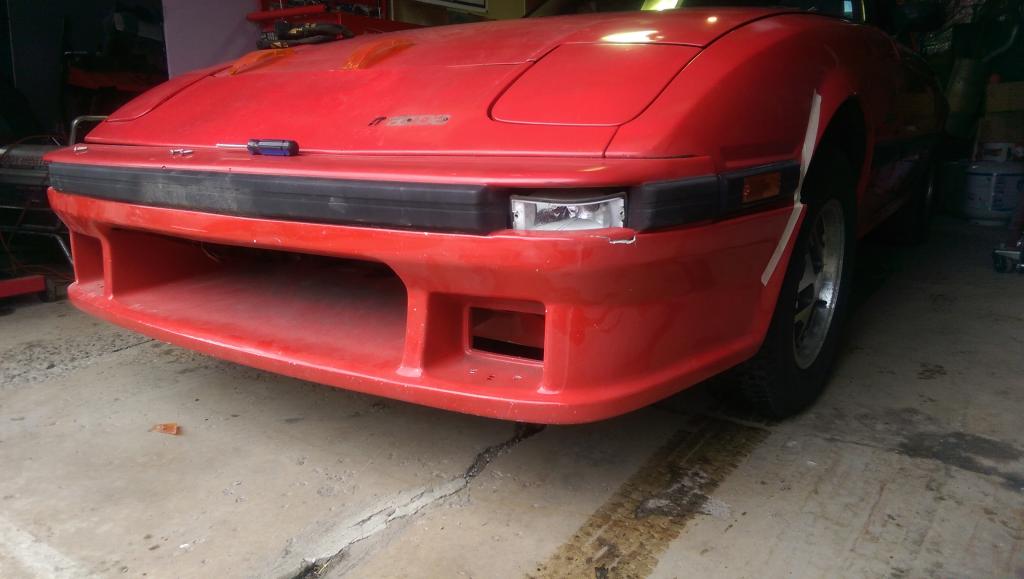
...front air dam installed!
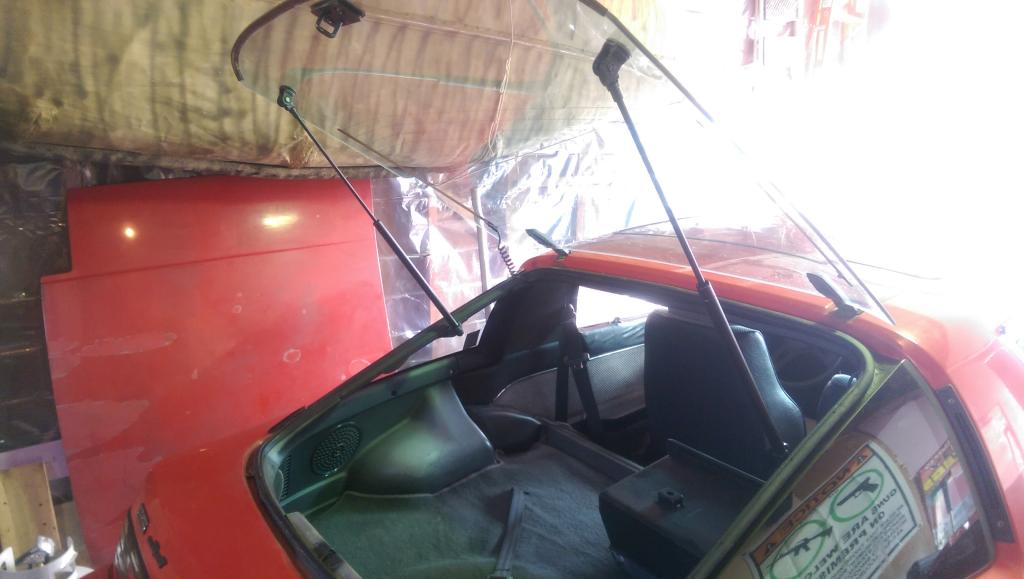
Look! It's like a parlor trick, no stick holding up the rear hatch! Gotta love new hatch struts.
Some new decals for the tool box, just had these sitting around for a long time.

Oh, and the banner.

Pushed the widebody all the way out of the garage towards the end of the driveway.


Red car got pushed up to meet the black car, in order to push the red car in the garage.


Red car finally made it back in to the garage!

Before front air dam fitment...

...front air dam installed!


Look! It's like a parlor trick, no stick holding up the rear hatch! Gotta love new hatch struts.

 03-10-15, 11:06 PM
#103
Thanks man, I'm glad too. Thanks again for the good deal on it, I'd have to be running stock if I didn't have it! This should help even out the big wheels I hope.
Update for the day:
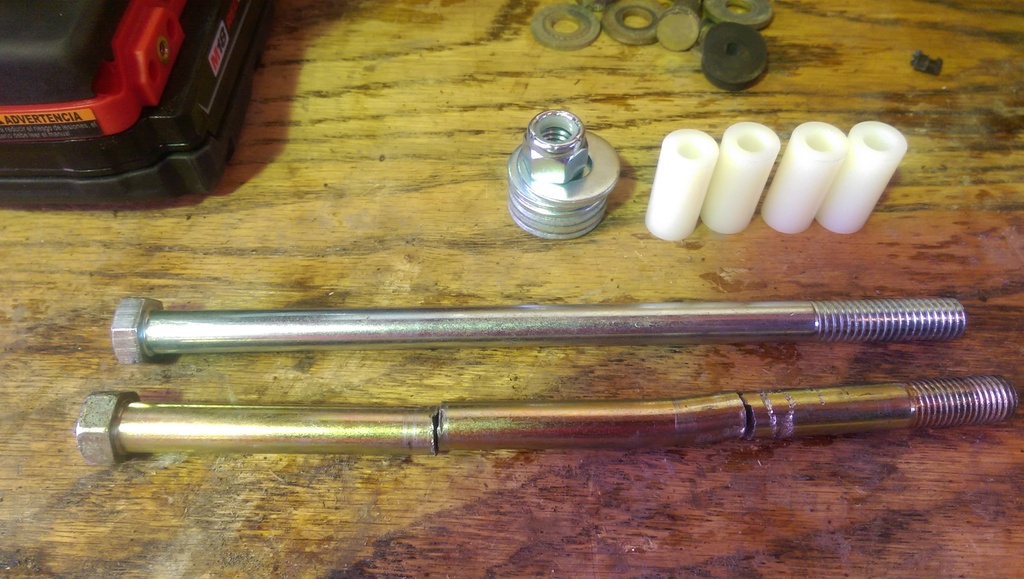
I got the manual clutch and brake pedals out of the widebody car. I had to pry the whole pedal box out which really pissed me off because of how they wedged everything in there. My goal is to replace the short bolt that they installed in the auto cars with a longer one to accommodate for the clutch pedal. There isn't any other difference that I can see and I hope that it is a relatively easy install and swap...here's to hoping...
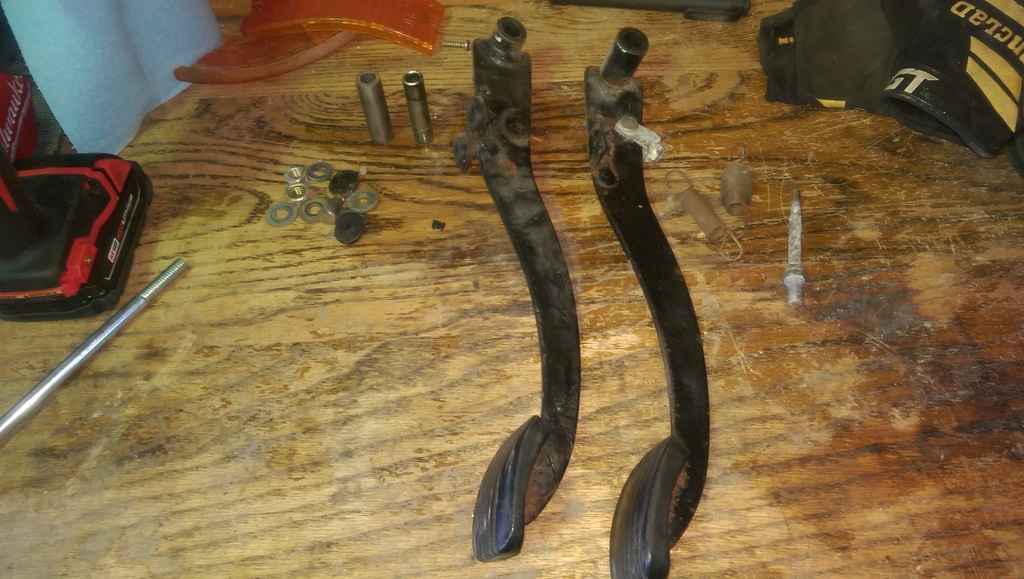
Had to get a 3/8" coarse threaded bolt that's 7" long to match the length of the original M10 bolt in there. I can't find a bolt that long anywhere in metric. The nylon sleeves wont work, I can't mill them small enough to be useful in the stock metal sleeves in the pedals, so that idea is being scrapped. Not sure if I'll try to throw something in there or not to help with pedal play, I'll have to think on it some more.
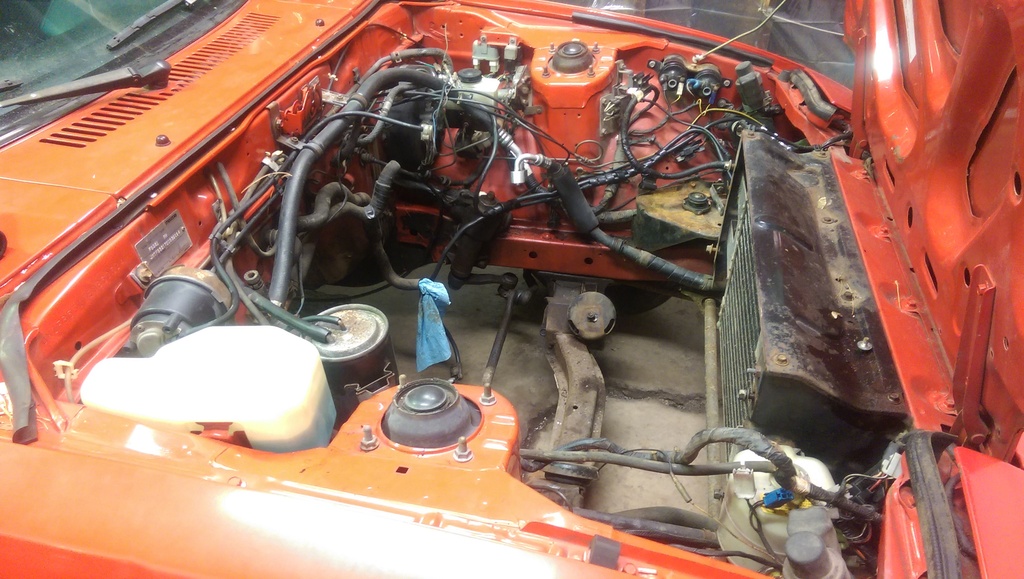
Engine bay before harness removal:
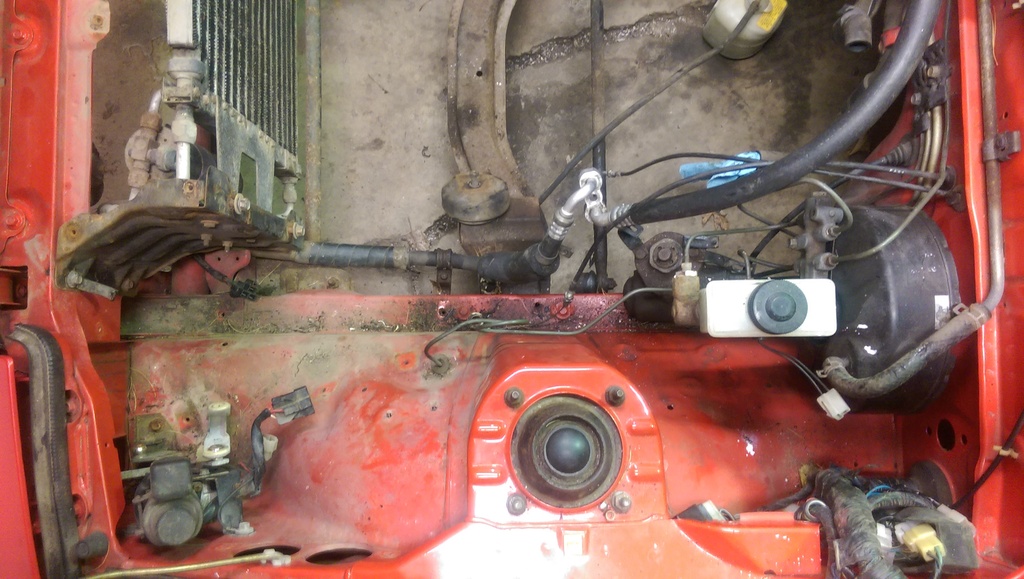
Engine bay after harness removal:
Big ol' wiring mess under the dash that I'm going to have to reroute, this should be entertaining to say the least...

That big cluster has to be gone through and decided on where to put everything.
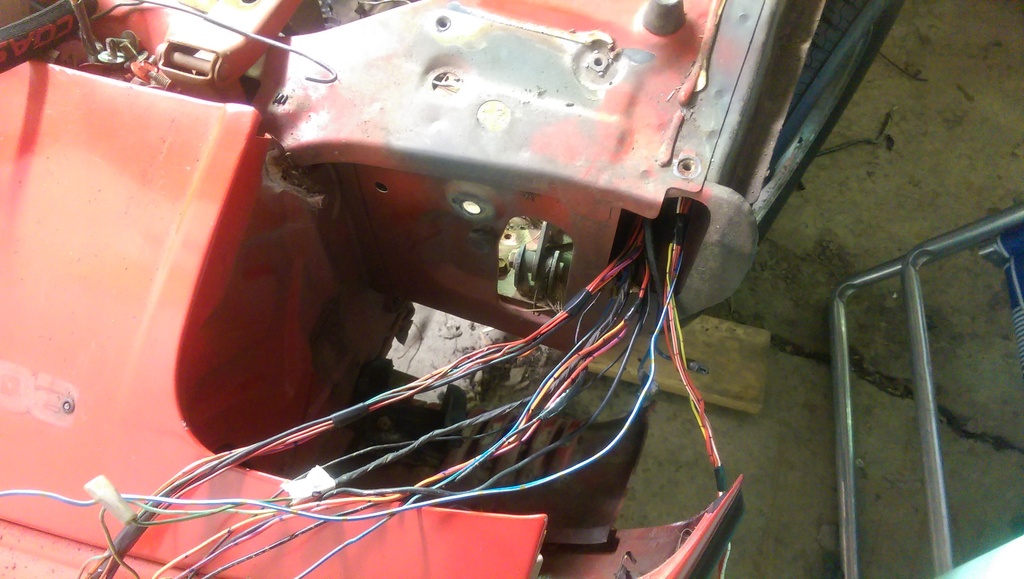
Here's the left side engine/chassis harness that I need to go through and pick out the useful bits, and snip off the rest. Should make for one whole interesting day sorting through wiring colors, that's for sure.
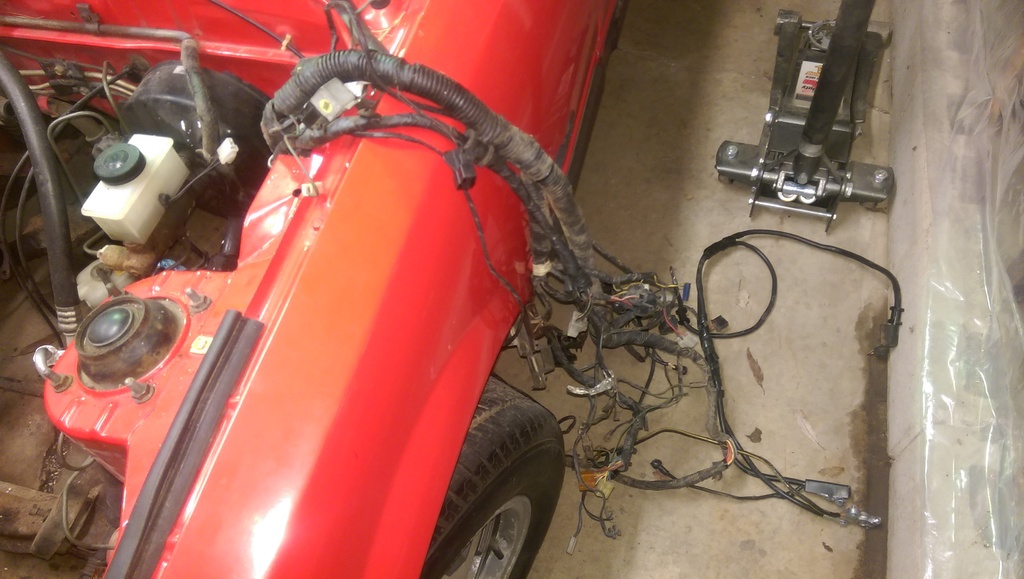
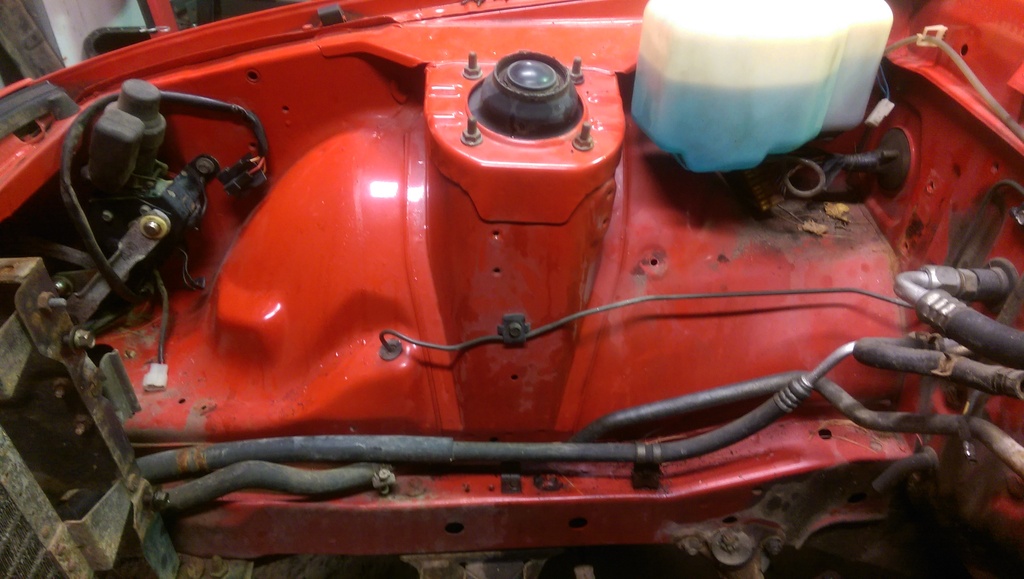
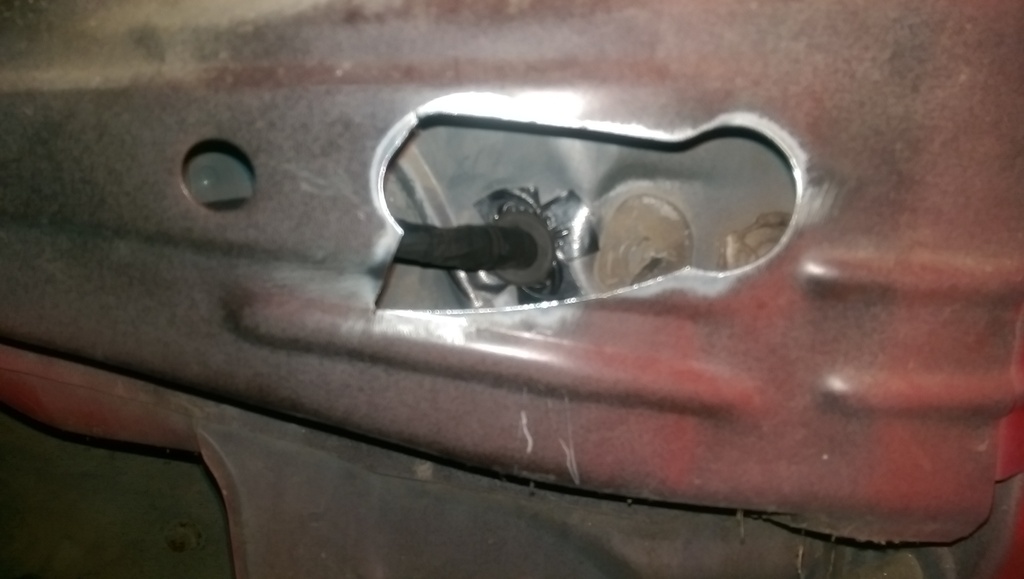
Got the fender off to decide where I'm going to route all of those wires, since I don't want them to be seen in the bay.
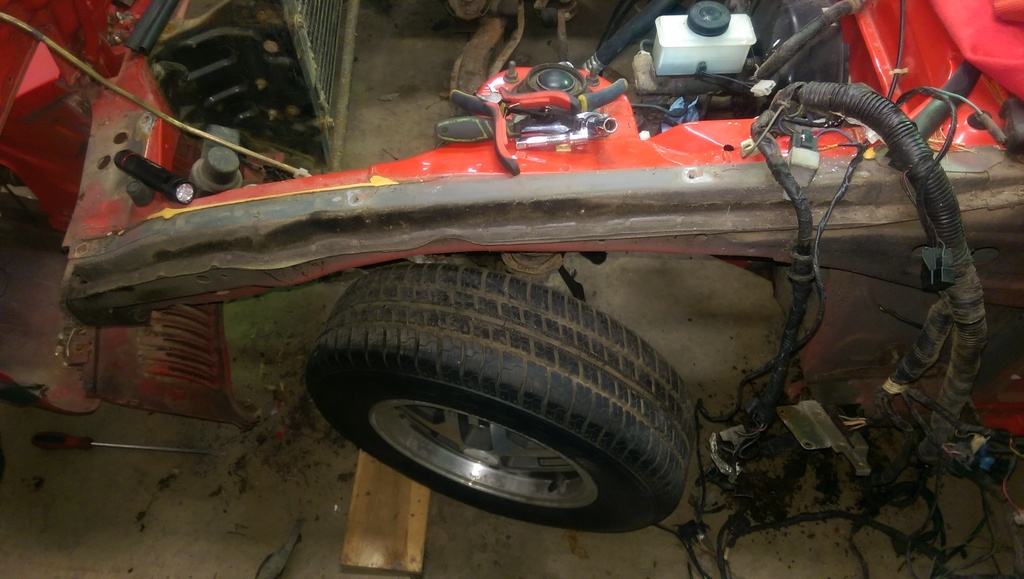
Those last two holes will have the metal between them cut out so it's one big ovular hole, and I'll extend it down maybe an inch for hand clearance. I know it's not going to help the structural rigidity of the car there, but sacrifices have to be made. I'll drill a hole into the chassis there since it's just 90 degrees off of the original hole anyways, at almost the exact same height. Should allow me to run the wires out through the fender and up to the lights, horn and A/C stuff that will be left on the harness. Luckily I have a whole spare harness from the widebody for that side so I can cut and extend pieces as I need to - the benefits of a parts car!
Update for the day:
I got the manual clutch and brake pedals out of the widebody car. I had to pry the whole pedal box out which really pissed me off because of how they wedged everything in there. My goal is to replace the short bolt that they installed in the auto cars with a longer one to accommodate for the clutch pedal. There isn't any other difference that I can see and I hope that it is a relatively easy install and swap...here's to hoping...

Had to get a 3/8" coarse threaded bolt that's 7" long to match the length of the original M10 bolt in there. I can't find a bolt that long anywhere in metric. The nylon sleeves wont work, I can't mill them small enough to be useful in the stock metal sleeves in the pedals, so that idea is being scrapped. Not sure if I'll try to throw something in there or not to help with pedal play, I'll have to think on it some more.

Engine bay before harness removal:

Engine bay after harness removal:


Big ol' wiring mess under the dash that I'm going to have to reroute, this should be entertaining to say the least...

That big cluster has to be gone through and decided on where to put everything.

Here's the left side engine/chassis harness that I need to go through and pick out the useful bits, and snip off the rest. Should make for one whole interesting day sorting through wiring colors, that's for sure.

Got the fender off to decide where I'm going to route all of those wires, since I don't want them to be seen in the bay.

Those last two holes will have the metal between them cut out so it's one big ovular hole, and I'll extend it down maybe an inch for hand clearance. I know it's not going to help the structural rigidity of the car there, but sacrifices have to be made. I'll drill a hole into the chassis there since it's just 90 degrees off of the original hole anyways, at almost the exact same height. Should allow me to run the wires out through the fender and up to the lights, horn and A/C stuff that will be left on the harness. Luckily I have a whole spare harness from the widebody for that side so I can cut and extend pieces as I need to - the benefits of a parts car!
 03-11-15, 11:31 AM
#106
He had to cut it due to being bent, just to get it out. I ran into the exact same problem on the GLC where I had to take a dremel and cut it while still in the car. That sucked. Metal dust everywhere (I hooked up a box fan pulling air through the passenger door opening which helped a lot). The old pedal was all bent up from the shop that swapped a rotary in and went from a cable clutch to hydraulic. The new bolt and pedal came from an 84-85 set. I had to bend the pedal to follow the inner wheel well contours so the bent bolt problem shouldn't happen again, I hope.
The main reason for swapping pedals was due to the shop's misaligned rod to the clutch master. It wore a crescent moon of pistom material away and would start to leak after maybe 1000 miles. I just swapped in a new master so I had to do something about the misalighment.
Lindahl, get ready to work! Your problem/solutions won't be exactly the same as mine, but it still is a bigger job than you're expecting it to be, as you're finding out now.
03-11-15, 11:52 AM
#107
...correct, with the reciprocating saw (I always call it a Sawz-All even though it's a Menard's brand saw).
He had to cut it due to being bent, just to get it out. I ran into the exact same problem on the GLC where I had to take a dremel and cut it while still in the car. That sucked. Metal dust everywhere (I hooked up a box fan pulling air through the passenger door opening which helped a lot). The old pedal was all bent up from the shop that swapped a rotary in and went from a cable clutch to hydraulic. The new bolt and pedal came from an 84-85 set. I had to bend the pedal to follow the inner wheel well contours so the bent bolt problem shouldn't happen again, I hope.
The main reason for swapping pedals was due to the shop's misaligned rod to the clutch master. It wore a crescent moon of pistom material away and would start to leak after maybe 1000 miles. I just swapped in a new master so I had to do something about the misalighment.
Lindahl, get ready to work! Your problem/solutions won't be exactly the same as mine, but it still is a bigger job than you're expecting it to be, as you're finding out now.
The main reason for swapping pedals was due to the shop's misaligned rod to the clutch master. It wore a crescent moon of pistom material away and would start to leak after maybe 1000 miles. I just swapped in a new master so I had to do something about the misalighment.
Lindahl, get ready to work! Your problem/solutions won't be exactly the same as mine, but it still is a bigger job than you're expecting it to be, as you're finding out now.
I'm not sure how well that's gonna work out because I can't tell if that bolt is going to hit something before coming all the way out, so I'll have to wait and see. It'll be a complicated process for sure though! I already found myself cursing the small Japanese engineer who decided to put that box in there the way he did, and I'm sure he'll receive more bad voodoo from me when I go to finish this project up.
On a related side note, do you fellas know if the auto gas pedal is different from the manual? The auto has a sensor for when you're at WOT, the manual does not. That's the only difference that I can see, just wondering if the travel length is different, so I know to swap in the manual setup instead.
03-11-15, 12:50 PM
#108
Moderator
iTrader: (3)
Join Date: Mar 2001
Location: https://www2.mazda.com/en/100th/
Posts: 30,778
Received 2,564 Likes
on
1,824 Posts
On a related side note, do you fellas know if the auto gas pedal is different from the manual? The auto has a sensor for when you're at WOT, the manual does not. That's the only difference that I can see, just wondering if the travel length is different, so I know to swap in the manual setup instead.
03-11-15, 12:56 PM
#109
Sweet, thanks! I'll just pull that sensor out of there and do away with it. Cable length is inherently the same as well since it's a Nikki carb cable initially, so I'll just leave it in there and make it work! I'll build a bracket on the UIM so that the FB cable works instead of trying to use a FC TII cable again, that thing was darn near 10' long with a lot of cable pull feel in the pedal. 82transam is the guy I can thank for that mod, so much easier than a TII cable. The last build had the long cable and I couldn't stand it and I believe this route should be much nicer.
03-11-15, 01:31 PM
#110
Wow, I hadn't thought of how crappy such a long cable would feel. Out of all the rotary projects and swaps I've done, I have never done the middle child; the T2. I'm realizing that such a long cable might actually be a deal breaker for me. I know, weird priorities, right?
When I did an FD setup for PercentSevenC, we figured out a way to use the stock FB cable with the cruise control "lever", which just needed a quick fabbed bracket. It worked out great. No way did we want to deal with swapping in a T2 cable and then modding it to fit the FD's stock throttle cable lever position, which was designed for a right hand drive like the T2 if I remember correctly.
When I did an FD setup for PercentSevenC, we figured out a way to use the stock FB cable with the cruise control "lever", which just needed a quick fabbed bracket. It worked out great. No way did we want to deal with swapping in a T2 cable and then modding it to fit the FD's stock throttle cable lever position, which was designed for a right hand drive like the T2 if I remember correctly.
03-11-15, 01:41 PM
#111
Moderator
iTrader: (3)
Join Date: Mar 2001
Location: https://www2.mazda.com/en/100th/
Posts: 30,778
Received 2,564 Likes
on
1,824 Posts
the long cables do ok when they are new, but when they get old and crusty they get stiff. the short cables seem to stay young forever. plus the 12A cable is there....
03-11-15, 01:55 PM
#112
Wow, I hadn't thought of how crappy such a long cable would feel. Out of all the rotary projects and swaps I've done, I have never done the middle child; the T2. I'm realizing that such a long cable might actually be a deal breaker for me. I know, weird priorities, right?
When I did an FD setup for PercentSevenC, we figured out a way to use the stock FB cable with the cruise control "lever", which just needed a quick fabbed bracket. It worked out great. No way did we want to deal with swapping in a T2 cable and then modding it to fit the FD's stock throttle cable lever position, which was designed for a right hand drive like the T2 if I remember correctly.
When I did an FD setup for PercentSevenC, we figured out a way to use the stock FB cable with the cruise control "lever", which just needed a quick fabbed bracket. It worked out great. No way did we want to deal with swapping in a T2 cable and then modding it to fit the FD's stock throttle cable lever position, which was designed for a right hand drive like the T2 if I remember correctly.
 ) and time deciding how you want to avoid it. I never thought of the location of the throttle linkage as being designed for RHD cars...it totally makes sense...
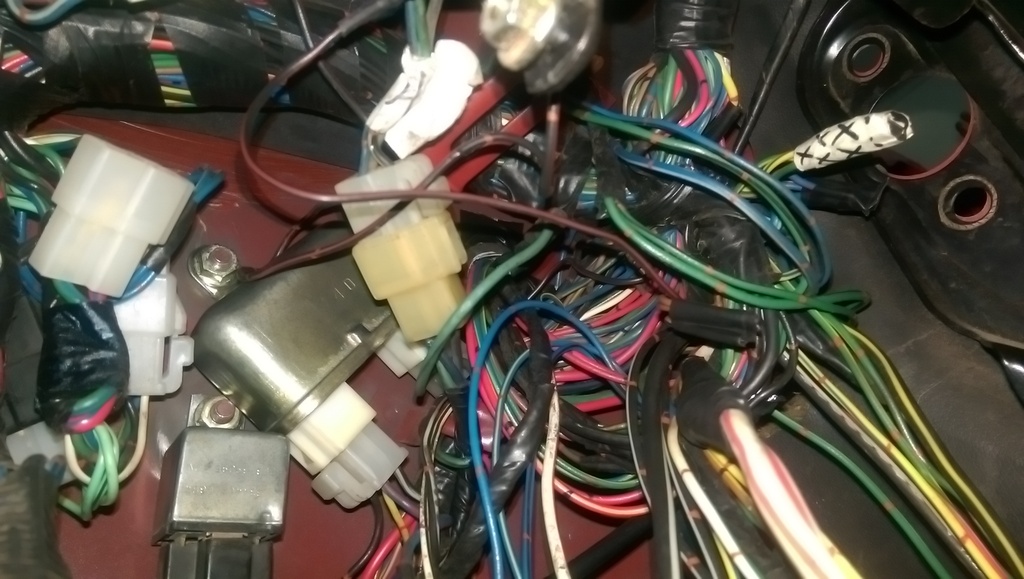
Mini update so far today, I got this beast in!

That is an uncut, ECU Plug #1 "left side" engine harness that runs under the dash and through the hole in the left side of the firewall by the brake booster. It also came with a bunch of relays and sensors for the swap so I should be completely set when I need to get the wiring rolling. All that's left is a good battery, grounding block, some heat shrink, soldering supplies that I have run out of, and picking up a set of TII coils locally. Oh, and time...a whole lot of it too... Maybe later tonight I'll stay in the house and depin that whole harness, we will have to wait and see
 03-12-15, 10:13 AM
#115
Moderator
iTrader: (3)
Join Date: Mar 2001
Location: https://www2.mazda.com/en/100th/
Posts: 30,778
Received 2,564 Likes
on
1,824 Posts
since i've exhumed this, i think i will leave it here The 2nd Generation Rx-7 Resource
B, if you need any connectors or anything, lemme know, i scored bunch of JDM harnii last year, and they look to be mostly complete
B, if you need any connectors or anything, lemme know, i scored bunch of JDM harnii last year, and they look to be mostly complete
03-12-15, 02:30 PM
#116
since i've exhumed this, i think i will leave it here The 2nd Generation Rx-7 Resource
B, if you need any connectors or anything, lemme know, i scored bunch of JDM harnii last year, and they look to be mostly complete
B, if you need any connectors or anything, lemme know, i scored bunch of JDM harnii last year, and they look to be mostly complete
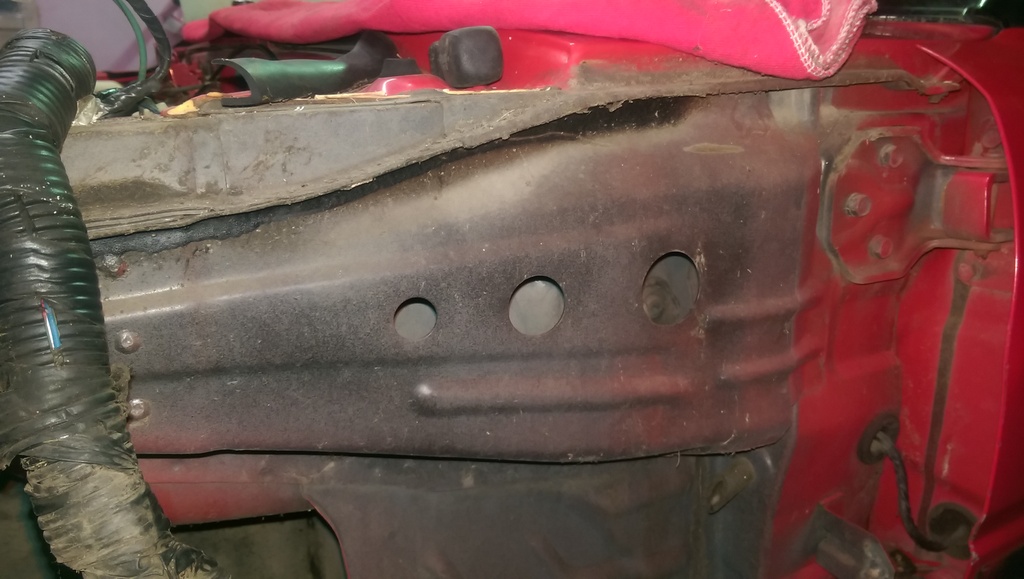
Initial reciprocating saw cut between the two holes in the stock fender/wiper cowl area.

I had to open the hole a bit more to be able to clear the drill head, which totally sucked. But there's not too much material missing so I'm not extremely worried about it. That hole is 5/16" I believe, made for the pilot bit in the 1" hole saw I'll be using.

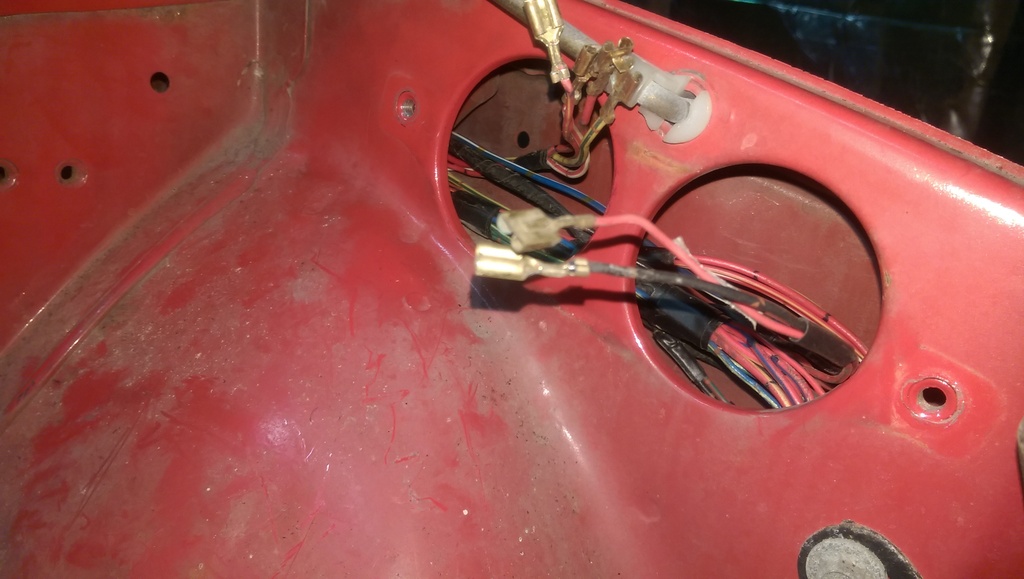
Blurry, but that's where the hole comes through on the inside of the car - perfect placement for what I'm doing.

Picture of the tool I used to make the new hole:

1" hole saw cut right through there, scary how thin that sheet metal is...

Well, that FC chassis wiring harness is already completely torn down - scary how quickly it goes once you've done it before.


That Wal-Mart bag was packed full of wiring protectant, probably a good 5 pounds worth I'd bet.

I'll post more pics as I make more progress, next step is figuring out where I want to mount all of the relays and sensors, then making the harness according to those preferences. It'll take me quite a while to figure out but hopefully the final product comes out like I expect it to...clean
03-12-15, 04:16 PM
#117
#garageguybuild
iTrader: (32)
Nice DIR, I wanted to do the wire tuck also but got lazy and just clean up the harness and placed it back in its stock position.
One day I'll I do it so take lots of pics
Keep up the good work... Two thumbs up!!
One day I'll I do it so take lots of pics
Keep up the good work... Two thumbs up!!
03-14-15, 01:13 PM
#118
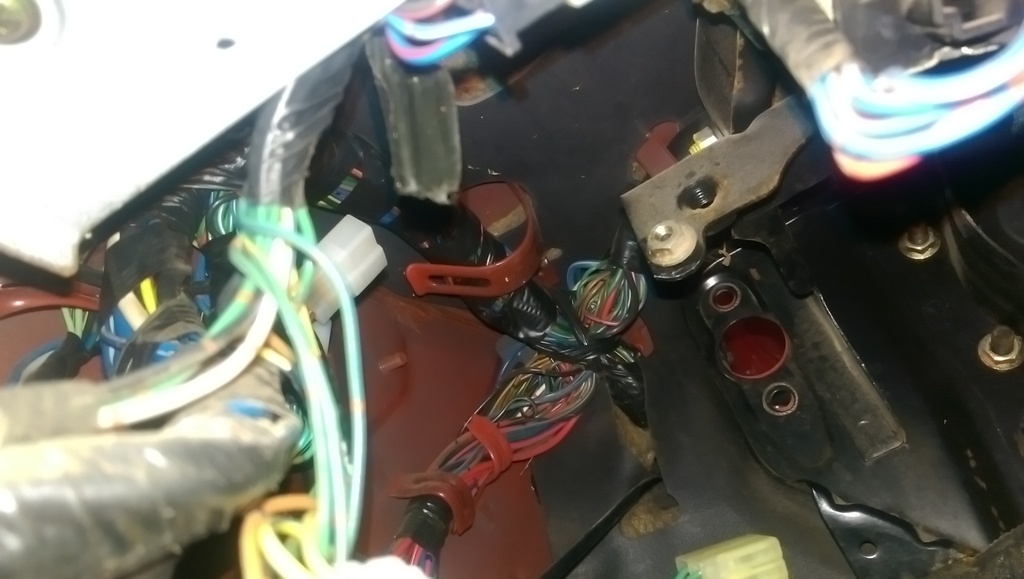
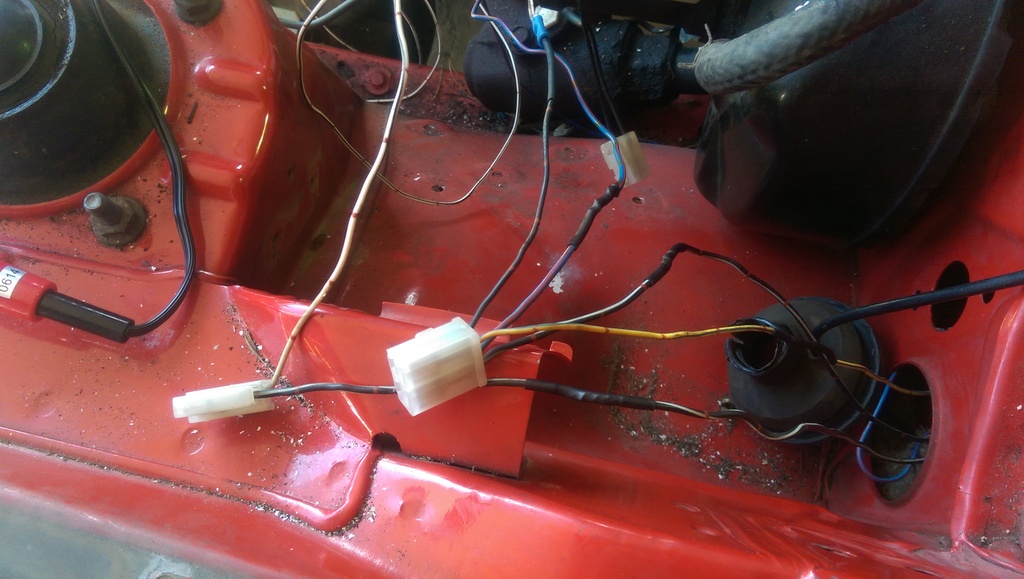
Yay, no more wires in the driver's side firewall! That took a long time, but I finally got it all figured out on how to get the ones I needed through the firewall and into the chassis.

Found this nasty leak, that totally sucks. Time to get a new brake master cylinder and brake booster. Dang, by the time this build is done nothing will be original...

Separating the wires inside the chassis, such a fun process.

What I'm working with inside the chassis.

Before, with the 12a ECU and automatic transmission control unit...

...after with the Rtek 2.1 N332 S4 TII ECU, atmospheric pressure sensor, boost pressure sensor and knock control unit all mounted on the stock ECU plate. I actually was able to mount the Main Relay for the TII where the APU is here and moved the APU up a bit. So this setup now has the KCU, APU, BPS, MR, and ECU all under that kick panel. The only FC components left are the Fuel Pump Relay/Resistor and Circuit Opening Relay. I'm thinking of mounting those in the rear bin with the battery since it'll be the shortest lead to the fuel pump but I'm not sure yet. If you're following along with the wiring, that only leaves the Choke/Check Relay in the FB chassis and A/C Relay.

Don't worry, the wiring will all be very well documented when I'm done with pictures and a YouTube video or two! I'm also going to be color-coding wiring diagrams with specific locations of how I run wires for the tuck. Should be pretty awesome when I'm done I hope.
03-15-15, 12:15 AM
#119
I got a whole lot more done on the car today, mainly just wiring stuff so far.
Had to go get a whole bunch of wiring supplies and paint from Menard's, the hardware store and the local paint shop. I grabbed some POR-15 as well so I can solve the rear bin rust issue - man that stuff is expensive!
Soldering the choke/check relay since I accidentally cut it out before really thinking about it.
Got the wires run for the tuck!
There's a little lip behind the strut tower and coil spot there - the worst part of the tuck.
How I got the wires to sit in there;
The wiring disaster in there right now, going to get cleaned up and sorted out next.
So next up on the list is running the wires I won't be using on the left side of the harness, over the transmission tunnel and to the right passenger side for the stock FB wiring. Then I'll have to start in on the FC wiring right away, not sure if I'll drop the engine in there first or not. I need to make a Mazdatrix order for the front cover o-ring and thermal pellet and install those before putting the engine in.
Had to go get a whole bunch of wiring supplies and paint from Menard's, the hardware store and the local paint shop. I grabbed some POR-15 as well so I can solve the rear bin rust issue - man that stuff is expensive!

Soldering the choke/check relay since I accidentally cut it out before really thinking about it.

Got the wires run for the tuck!

There's a little lip behind the strut tower and coil spot there - the worst part of the tuck.

How I got the wires to sit in there;

The wiring disaster in there right now, going to get cleaned up and sorted out next.

So next up on the list is running the wires I won't be using on the left side of the harness, over the transmission tunnel and to the right passenger side for the stock FB wiring. Then I'll have to start in on the FC wiring right away, not sure if I'll drop the engine in there first or not. I need to make a Mazdatrix order for the front cover o-ring and thermal pellet and install those before putting the engine in.
 .
03-15-15, 12:39 AM
.
03-15-15, 12:39 AM
#122
Now you see why it's taken me so long to text back, been hard at work in the wiring of this chassis.I'm averaging 10hrs/day on the FB for the last 4 days probably. I have spring break this week too so that'll really help!
I might have a few weeks off after this semester is done, before I start my summer job. But I may be going to get a part time job for after school and weekends to help recoup some build money - so that'll really cut down on progress on the car.
03-15-15, 10:59 AM
#123
FB TII Swap Mazda RX7: Episode 2 - Picking a Chassis
Episode two is now available
I guess YouTube can take a while when you upload a 1080p video to give you the full HD version. Both of those videos are in full 1080p but only viewable in 480p right now - sorry about that. Give it a day or two and they'll both hopefully be in full HD
Episode two is now available
I guess YouTube can take a while when you upload a 1080p video to give you the full HD version. Both of those videos are in full 1080p but only viewable in 480p right now - sorry about that. Give it a day or two and they'll both hopefully be in full HD