RXSE7EN – Building a Killer FB Mazda RX-7 REXOMOD
 01-02-17, 06:09 PM
#1
RXSE7EN – Building a Killer FB Mazda RX-7
Hey guys, I’m ‘Right Back at it Again’! (ADTR song reference, great band)
Since I have been away from the game for so long now I figured I’d take a different approach to a build thread. I’m going to focus on giving as much useful information as I can. This thread will have as many pictures as people can handle. This way if someone needs to reference how to do bearings, brakes, a wire tuck, anything that I’ll be doing – they can come back here and find useful information. It will almost be a ‘How To’ build thread of sorts. I did that with my first build when I did the TII swap in my first car ( Austin’s FB TII Swap – Details and Pics Aplenty ) and I think that turned out pretty well.
The first RX-7 I ever bought was purchased on 08/01/2011 and it’s all been a journey from there. Over the last 5 years I’ve learned more than I ever thought I would with these cars specifically and with automobiles in general. I’ve been collecting RX-7’s for the last 20 months now and not a single one of them has actually ran and drove. This red one was the 5th RX-7 that I had owned up to that point. Since I acquired this car I’ve had 6 more RX-7’s for a total of 11 RX-7’s so far. I also currently own a 2004 Winning Blue RX-8 with the 6 speed manual that I’m rebuilding as a daily driver right now
Here’s a quick timeline rundown (mainly for my own enjoyment):
For those who have paid attention, this is my old thread with this same car that I felt was getting way too cluttered up with my old aspirations and all the other cars I owned in the time period: Widebody Turbo Swap – My Dream FB Build is Finally Happening
So here I am now!
RXSE7EN came to me when thinking of vanity plates and I thought it would be a cool hashtag to use on social media that would be easy to find and remember. It is a compound of the RX from the car and SE7EN from the movie with Morgan Freeman, Brad Pitt and Kevin Spacey. So I’m going to go about this build thread using the following seven areas in order to keep it somewhat orderly and easy to follow.
SE7EN Categories:
1NE – Engine
2WO – Drivetrain
THR3E – Suspension
4OUR – Wheels
5IVE – Wiring
SI6 – Interior
SE7EN – Body
Hey guys, I’m ‘Right Back at it Again’! (ADTR song reference, great band)
Since I have been away from the game for so long now I figured I’d take a different approach to a build thread. I’m going to focus on giving as much useful information as I can. This thread will have as many pictures as people can handle. This way if someone needs to reference how to do bearings, brakes, a wire tuck, anything that I’ll be doing – they can come back here and find useful information. It will almost be a ‘How To’ build thread of sorts. I did that with my first build when I did the TII swap in my first car ( Austin’s FB TII Swap – Details and Pics Aplenty ) and I think that turned out pretty well.
The first RX-7 I ever bought was purchased on 08/01/2011 and it’s all been a journey from there. Over the last 5 years I’ve learned more than I ever thought I would with these cars specifically and with automobiles in general. I’ve been collecting RX-7’s for the last 20 months now and not a single one of them has actually ran and drove. This red one was the 5th RX-7 that I had owned up to that point. Since I acquired this car I’ve had 6 more RX-7’s for a total of 11 RX-7’s so far. I also currently own a 2004 Winning Blue RX-8 with the 6 speed manual that I’m rebuilding as a daily driver right now
Here’s a quick timeline rundown (mainly for my own enjoyment):
- 08/01/2011 #1 – Purchased my first 1984 FB GS Tornado Gray Metallic/Burgundy FB that was pristine. This was the one that I TII swapped and sold shortly thereafter.
- 11/07/2012 #2 – Purchased a 1983 FB GSL Blue/Black parts car that had very high mileage to try and part it out and make some money, which kind of worked.
- 02/01/2013 #2 – Scrapped the FB at a local yard in exchange for a rear seat out of an S2 FB but I wasn’t able to get the stupid rusted-in bolts to come loose.
- 02/11/2013 #3 – Purchased a 1987 FC TII Blue/Blue that was running and driving as a donor car that would have been a perfect drift car.
- 03/15/2013 #3 – Sold the TII shell to a local guy who was going to drift it but I think he eventually parted it out and got rid of the idea.
- 09/01/2013 #1 – Sold the TII swapped GS FB to a local guy who eventually resold it to a friend or family member. Someday I’ll get it back…
- 11/16/2013 #4 – Traded a high mileage 1992 Audi UrS4 (which I wish I would have kept) for a 1983 FB GS Silver/Black with some cash on his end.
- 12/29/2013 #4 – I traded the 1983 GS that was pretty sketchy for 3 snowmobiles and a trailer.
- Here I went 10 months without an RX-7…it was terrible!
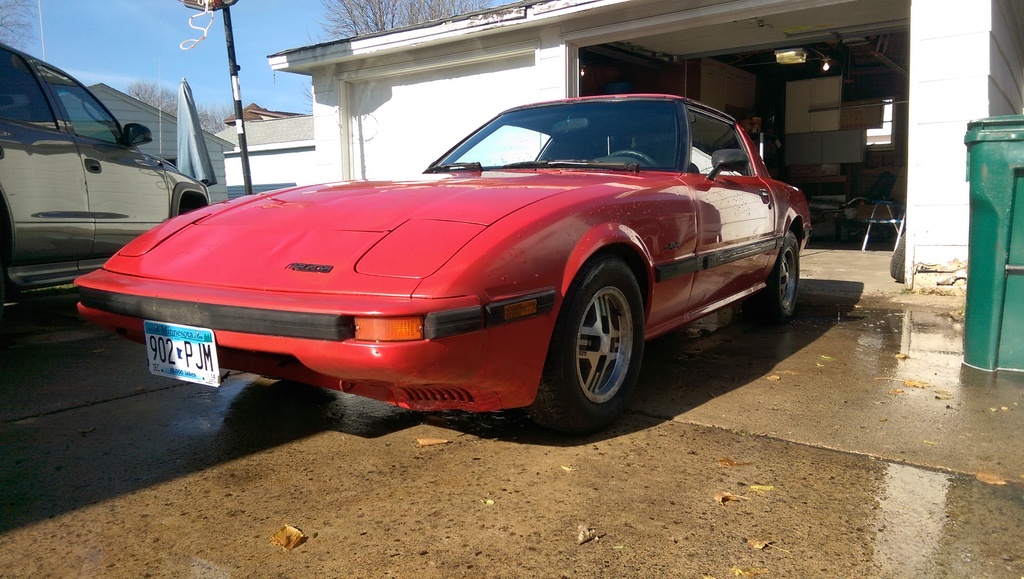
- 10/23/2014 #5 – I acquired this red 1984 FB GS Red/Gray that I’m using in this build in its stock form with an automatic transmission and a blown 12a motor.
- 01/25/2015 #6 – Purchased a 1983 GSL Black/Burgundy shell that was swapped with an entire 1984 GSL-SE interior and suspension, with a Pacifica widebody kit and my favorite Epsilon Centerlock wheels.
- 05/19/2015 #6 – Scrapped the pieced-together 83 GSL without suspension, body kit or wheels since I kept them all to myself.
- 07/26/2015 #7 – Picked up an early-build 1979 SA IMSA Mk1 widebody kit-equipped White/Black car for parts mainly since the floors and frame were completely rotten.
- 09/05/2015 #8 – Bought a 1984 FB GSL Black/Burgundy that was pretty much just a shell with the good big-bearing rear end for parts. Still need to scrap that car to this day.
- 10/18/2015 #9 – Bought a 1987 FC TII Blue/Blue with a presumably blown motor for a good deal from the same guy I bought the #7 IMSA SA car from.
- 02/05/2016 #10 – Bought a 1986 FC N/A shell with no front subframe with plans to drift it but I never got around to it and decided to get rid of it.
- 02/14/2016 #9 – Sold the TII FC to my brother so that he can have an RX-7 to cruise around with me once it’s all built up.
- 04/09/2016 #10 – Sold the N/A FC shell to a guy who planned on parting it completely out and scrapping the shell as far as I knew.
- 06/24/2016 – Traded an old Dodge Durango for a 2004 Mazda RX-8 which will be built up as a daily driver while I work on the RX-7.
- 11/22/2016 #7 – Scrapped the IMSA widebody SA car without the front fenders and without the rear wheels that were aftermarket.
- 11/22/2016 #11 – Was given a 1984 FB GSL-SE shell with no motor, suspension or interior to use for parts. Will take the gas tank out of it and scrap the rest.
For those who have paid attention, this is my old thread with this same car that I felt was getting way too cluttered up with my old aspirations and all the other cars I owned in the time period: Widebody Turbo Swap – My Dream FB Build is Finally Happening
So here I am now!
RXSE7EN came to me when thinking of vanity plates and I thought it would be a cool hashtag to use on social media that would be easy to find and remember. It is a compound of the RX from the car and SE7EN from the movie with Morgan Freeman, Brad Pitt and Kevin Spacey. So I’m going to go about this build thread using the following seven areas in order to keep it somewhat orderly and easy to follow.
SE7EN Categories:
1NE – Engine
2WO – Drivetrain
THR3E – Suspension
4OUR – Wheels
5IVE – Wiring
SI6 – Interior
SE7EN – Body
 01-02-17, 06:16 PM
#2
1NE – Engine
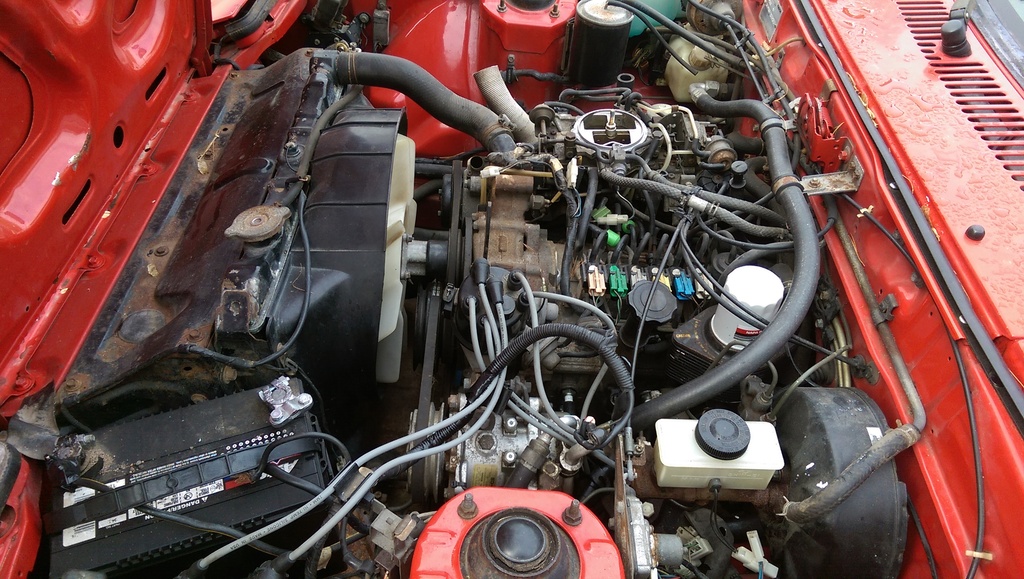
Originally this car had the old trusty 12a with a Nikki carburetor and had an automatic transmission behind it. This of course was blown because the apex seals were extremely stuck in the rotors. I tried getting this to start and run on its own power but it just refused to work. So I had grand plans to swap in a TII motor again but that didn’t pan out in the end.
Now it’s getting an S5 N/A 13b motor out of an FC that I’m going to use a DelLorto DHLA 48 for fuel delivery. Short, simple and sweet – the easiest and best way for an FB to be in my life at this moment.
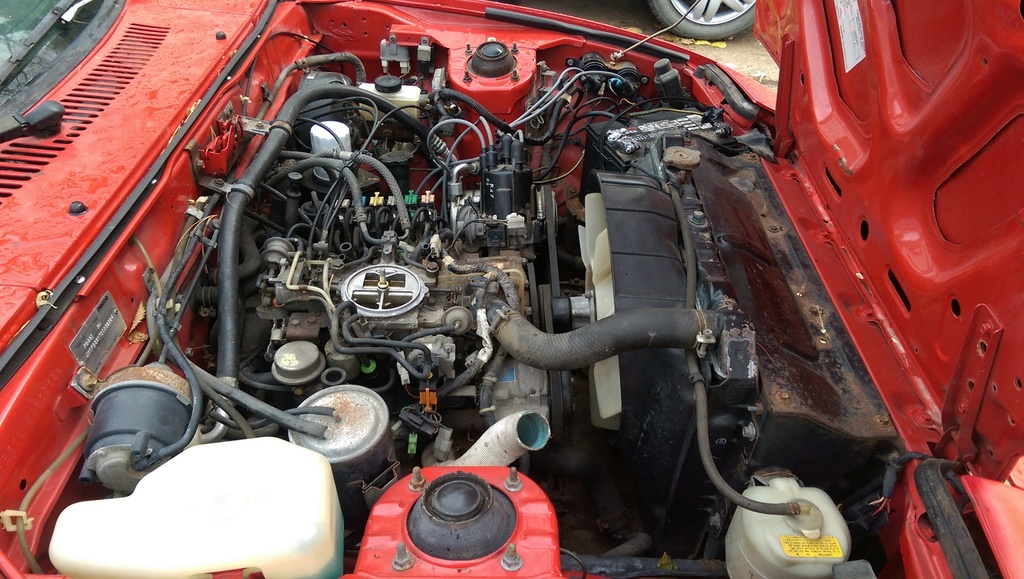
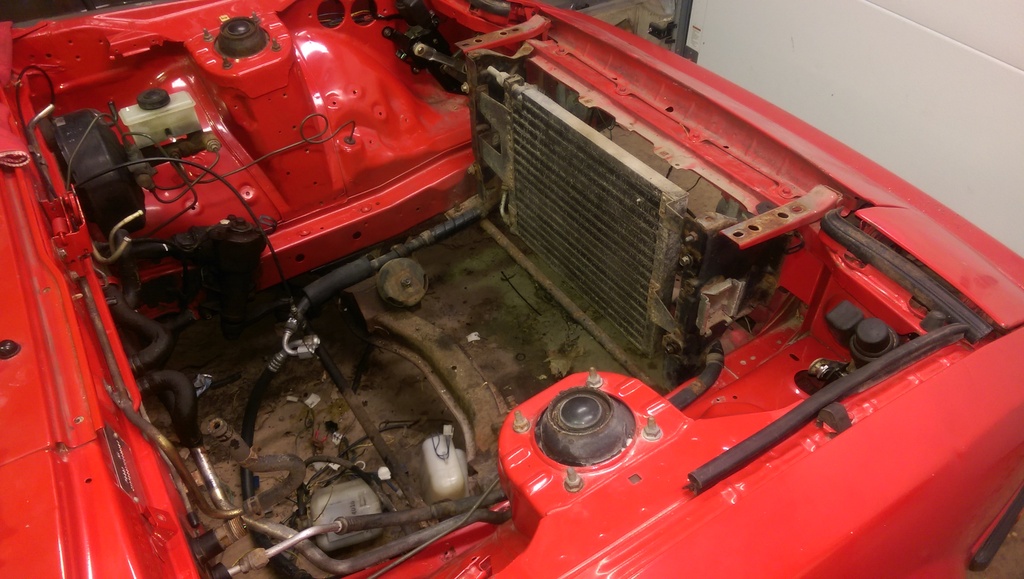
Original 12a in the car
Original 12a pulled out of the car
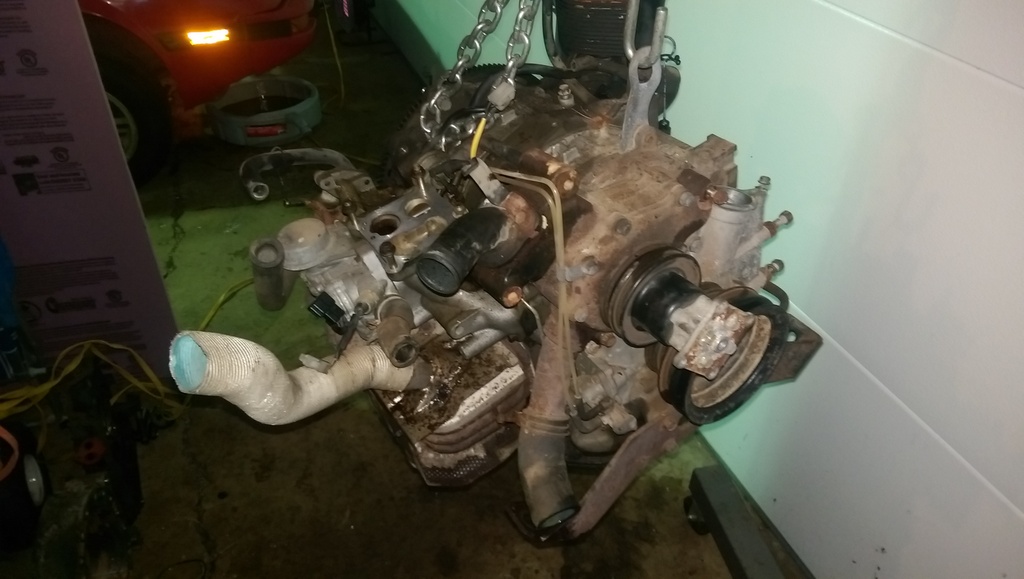
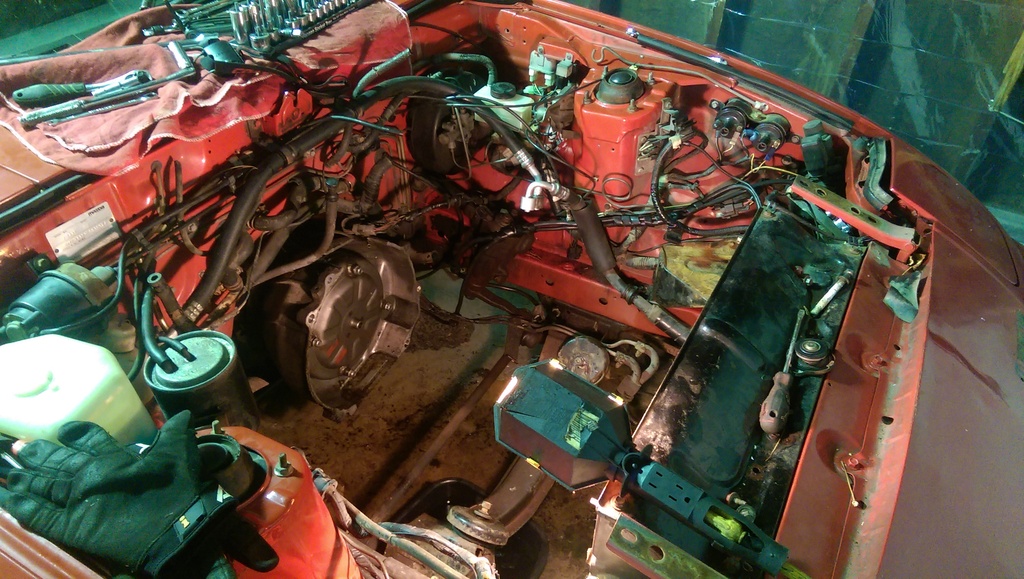
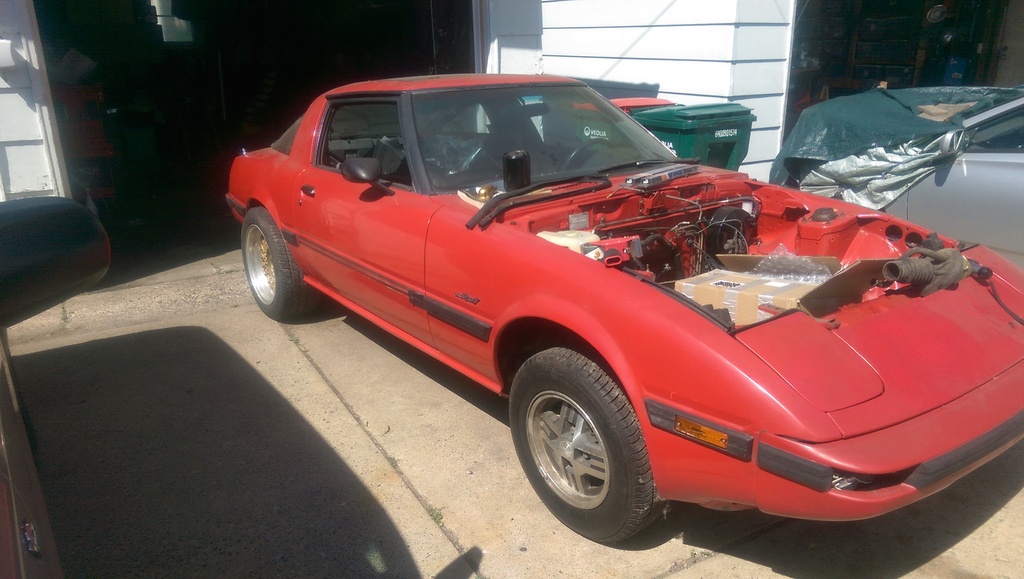
No more 12a, but cool shot with the auto transmission still in the car
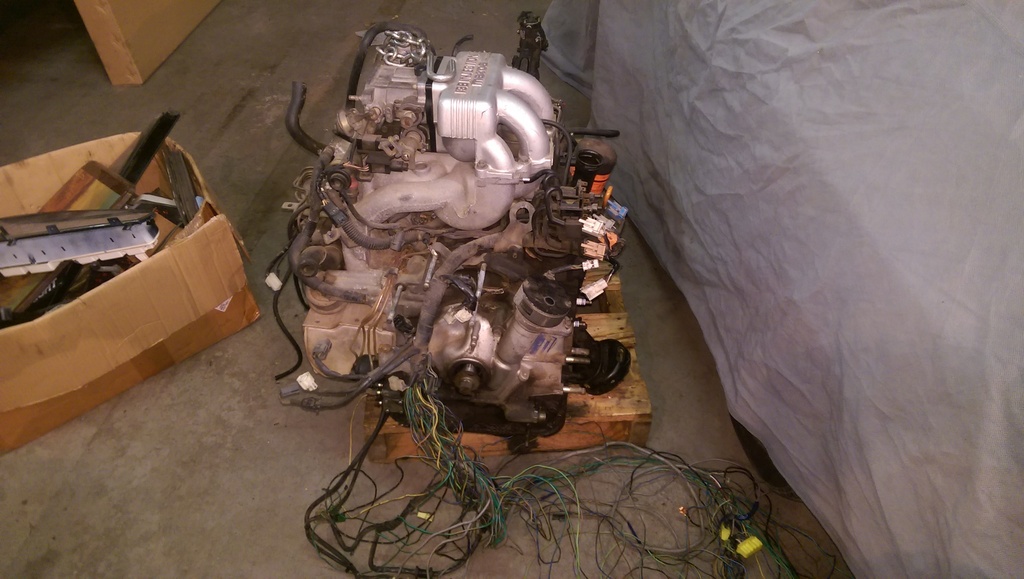
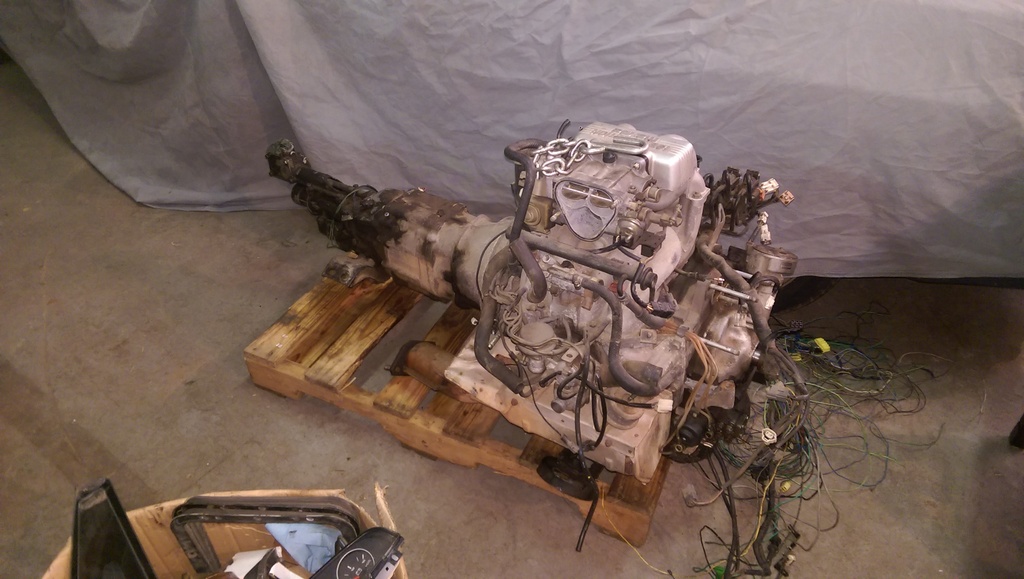
S5 N/A motor out of an FC supposedly that ran, we will see
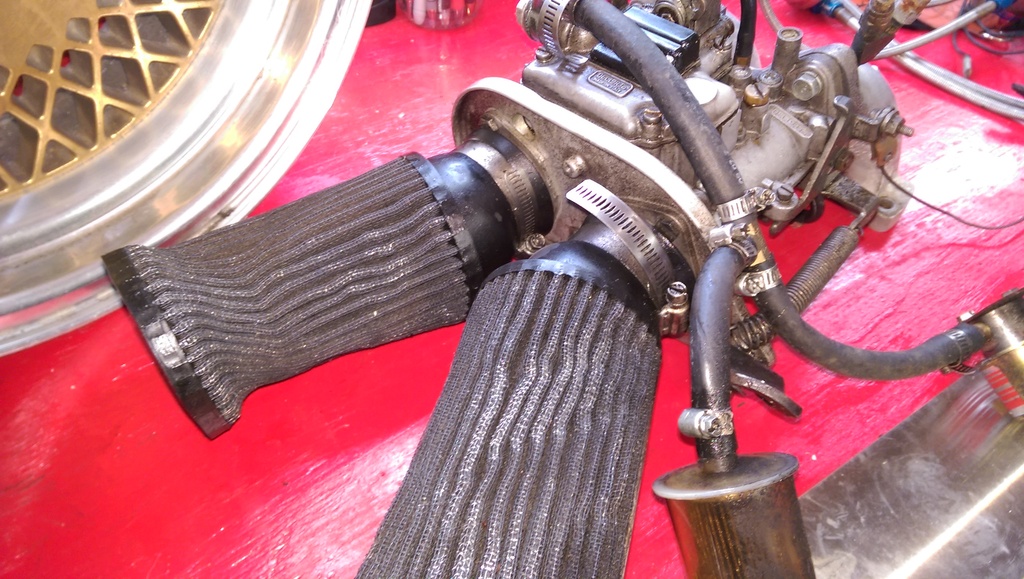
DelLorto DHLA 48 side draft carb and Racing Beat side draft intake manifold setup as I got it

Originally this car had the old trusty 12a with a Nikki carburetor and had an automatic transmission behind it. This of course was blown because the apex seals were extremely stuck in the rotors. I tried getting this to start and run on its own power but it just refused to work. So I had grand plans to swap in a TII motor again but that didn’t pan out in the end.
Now it’s getting an S5 N/A 13b motor out of an FC that I’m going to use a DelLorto DHLA 48 for fuel delivery. Short, simple and sweet – the easiest and best way for an FB to be in my life at this moment.
Original 12a in the car


Original 12a pulled out of the car

No more 12a, but cool shot with the auto transmission still in the car

S5 N/A motor out of an FC supposedly that ran, we will see


DelLorto DHLA 48 side draft carb and Racing Beat side draft intake manifold setup as I got it


Last edited by DreamInRotary; 01-02-17 at 08:00 PM.
01-02-17, 06:20 PM
#3
2WO – Drivetrain
This car was originally an automatic but will be ran with a S4 TII transmission setup instead.
This car originally had the automatic transmission in it so the transmission mounts are different than they would be in a manual car.
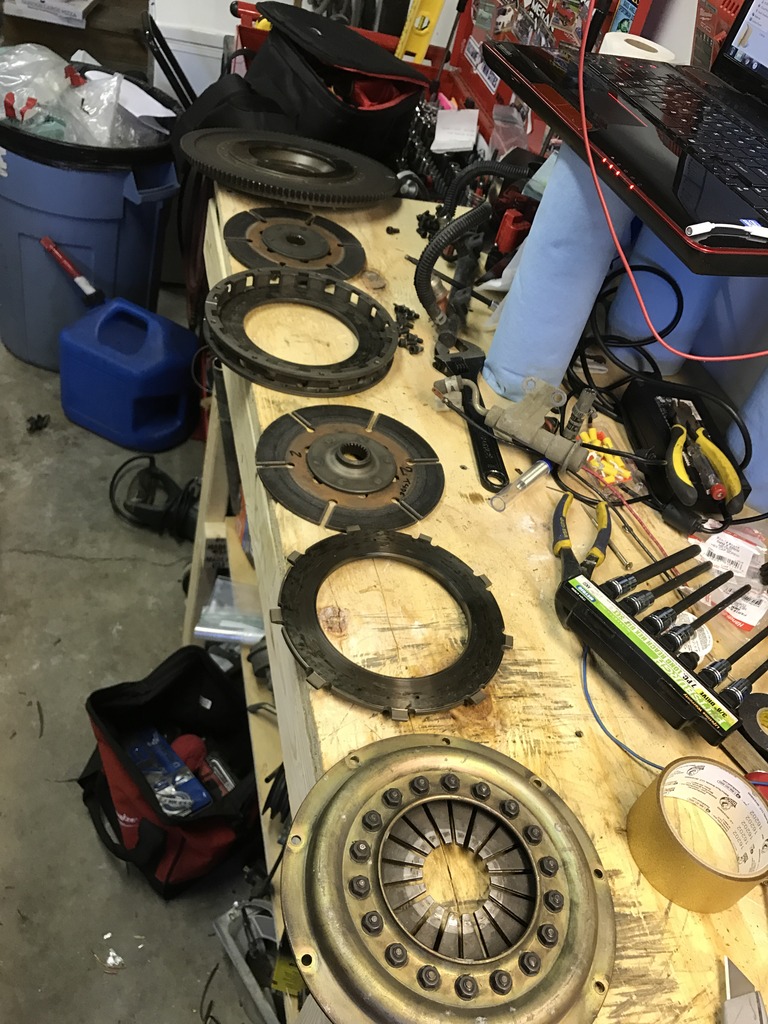
OS Giken twin disc clutch setup that I'm going to rock in this car
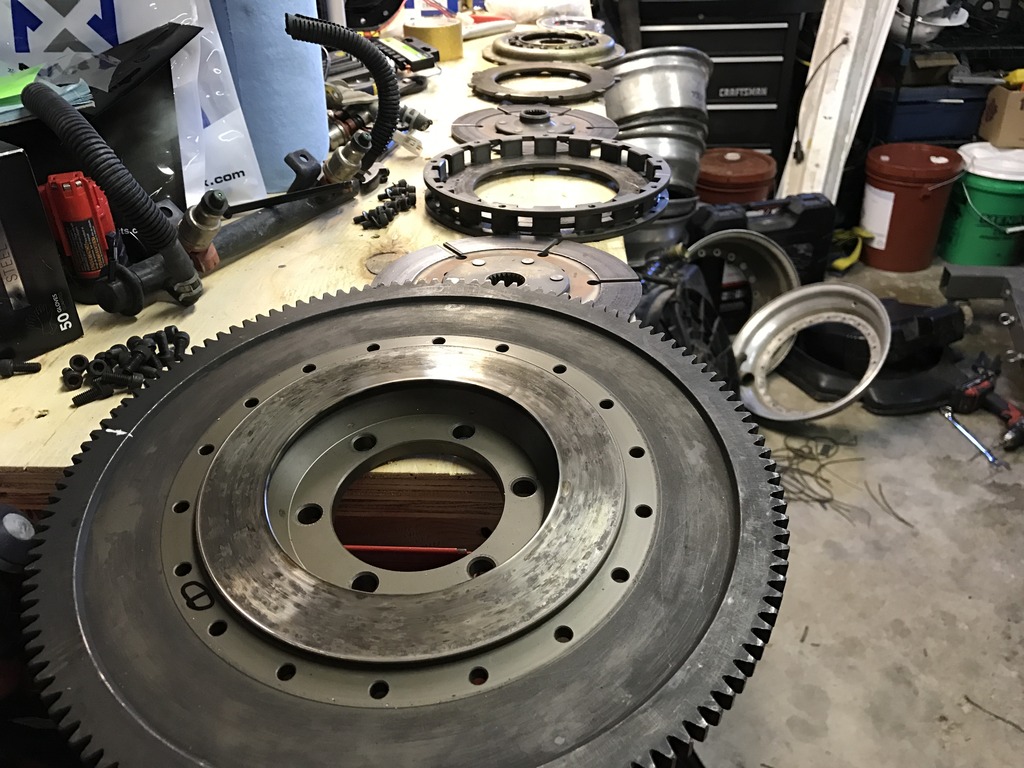
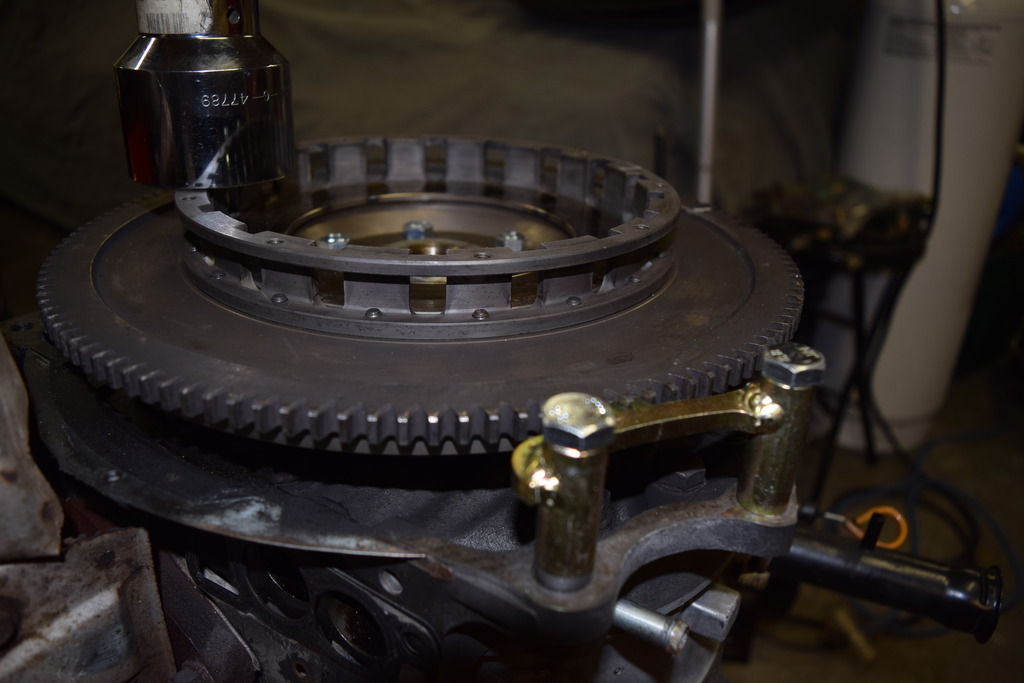
Using the Mazdatrix flywheel stopper to install the rear flywheel nut
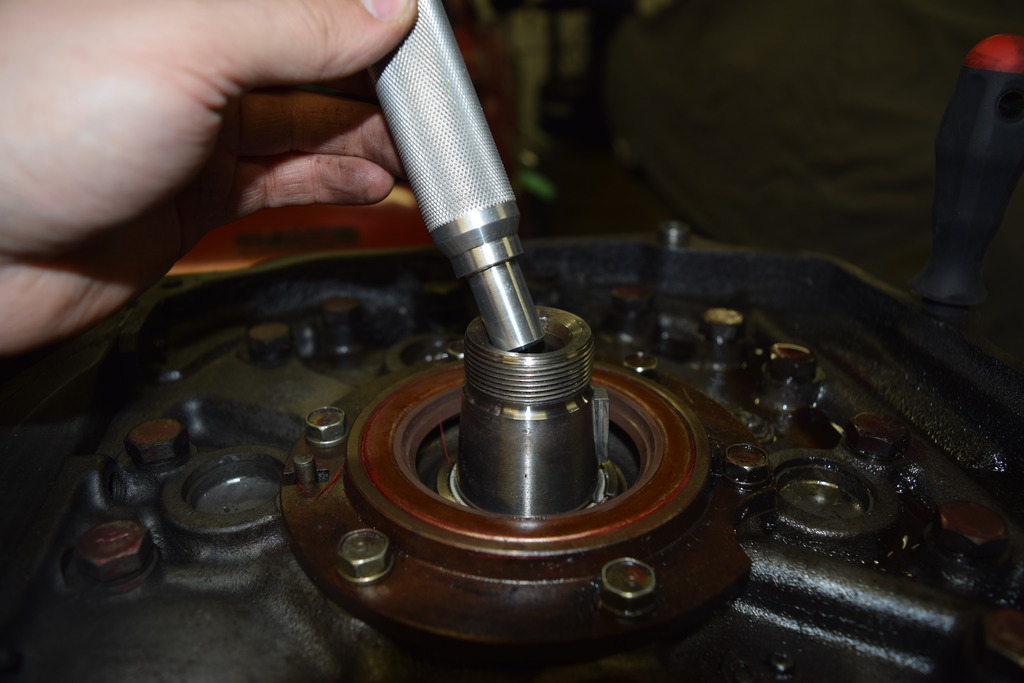
Installing the pilot bearing using the Mazdatrix pilot bearing install tool
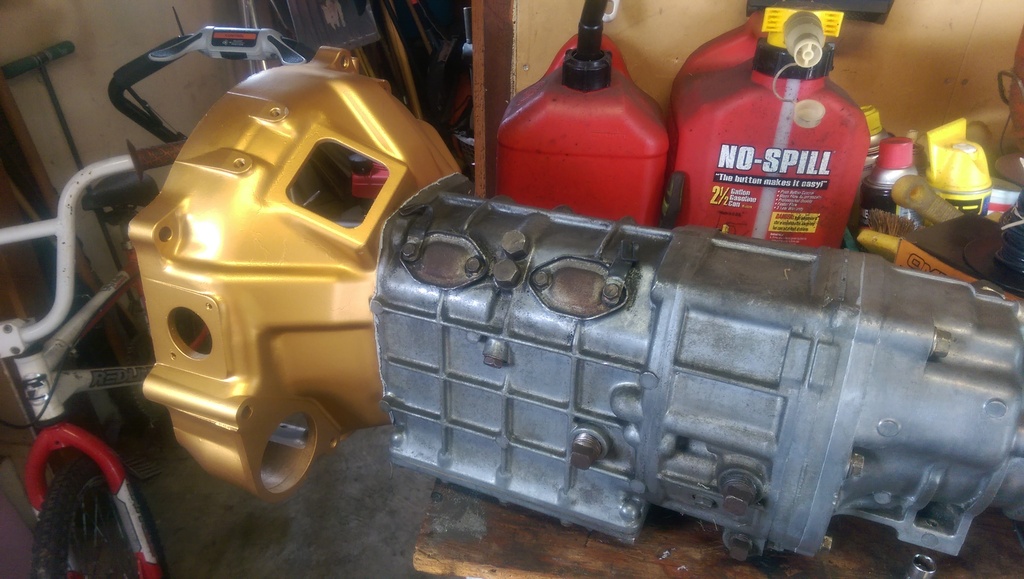
S4 TII Transmission redone with new seals, still should get a rebuild eventually though
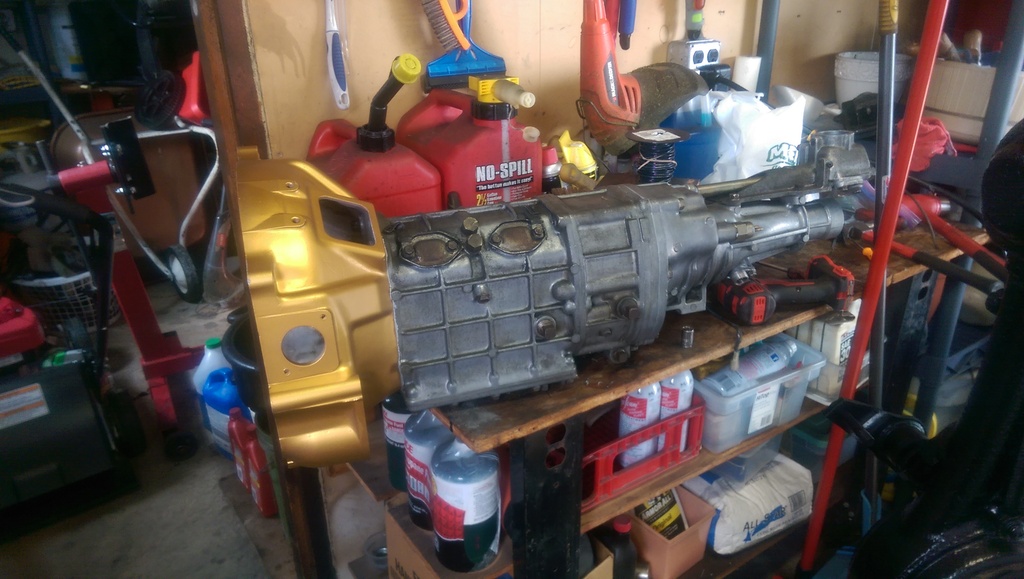
This car was originally an automatic but will be ran with a S4 TII transmission setup instead.
This car originally had the automatic transmission in it so the transmission mounts are different than they would be in a manual car.
OS Giken twin disc clutch setup that I'm going to rock in this car


Using the Mazdatrix flywheel stopper to install the rear flywheel nut

Installing the pilot bearing using the Mazdatrix pilot bearing install tool

S4 TII Transmission redone with new seals, still should get a rebuild eventually though


Last edited by DreamInRotary; 01-02-17 at 08:11 PM.
01-02-17, 06:21 PM
#4
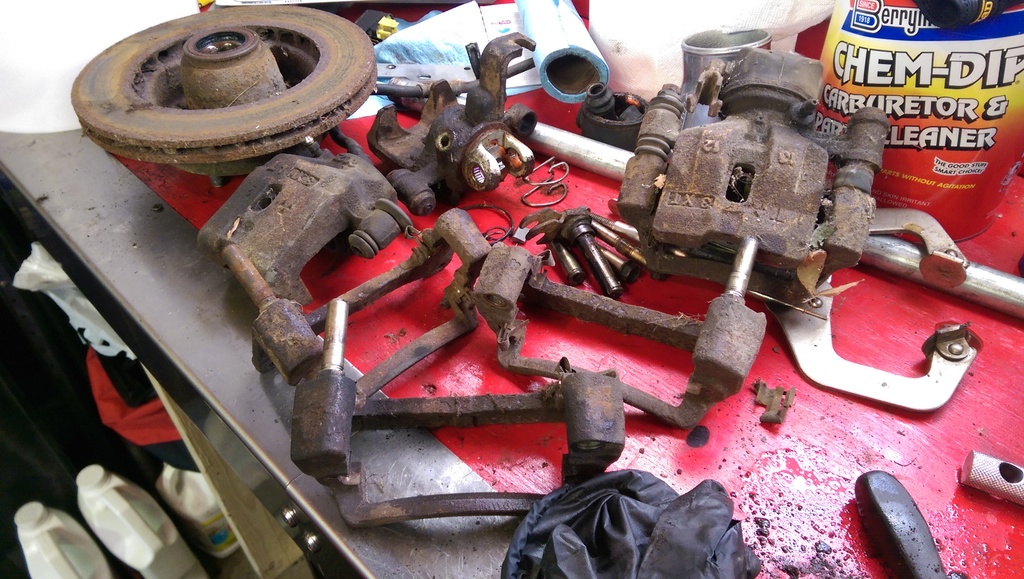
THR3E – Suspension
Since this car was originally on GS suspension I knew that this wouldn’t be good enough in the end. So it’s had the GSL-SE suspension swapped into the chassis so it’s now 4x114.3 bolt pattern with the best stock FB brake setup you can get.
Some nasty old brake components that sat for way too long!
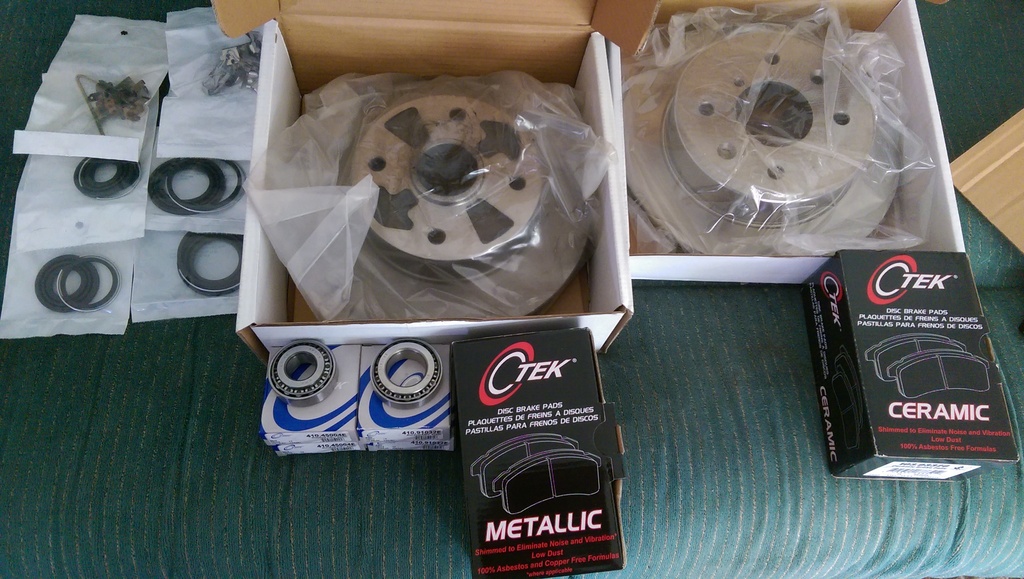
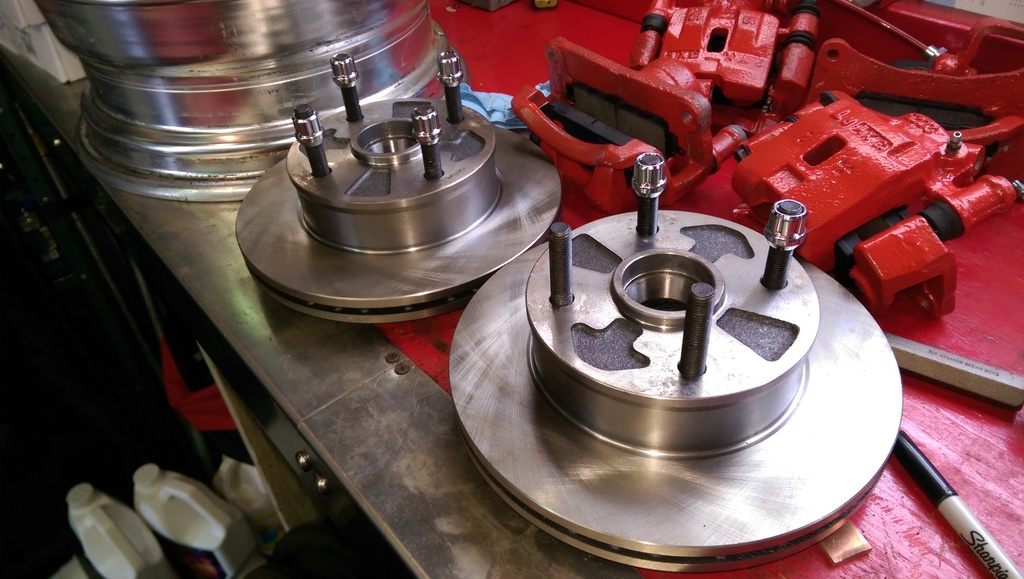
All new braking components except calipers
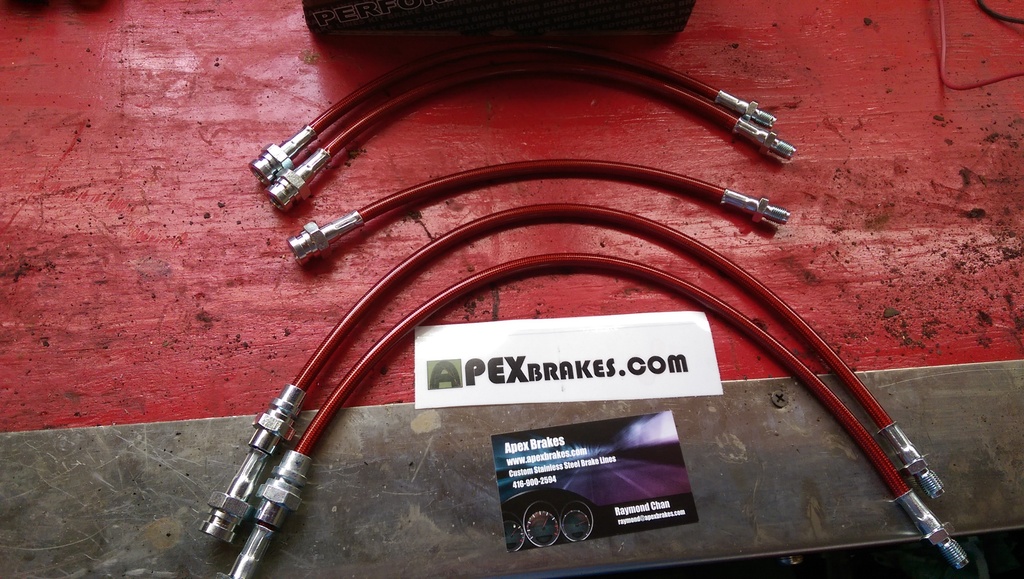
Stainless steel brake lines from Apex
Repainted calipers
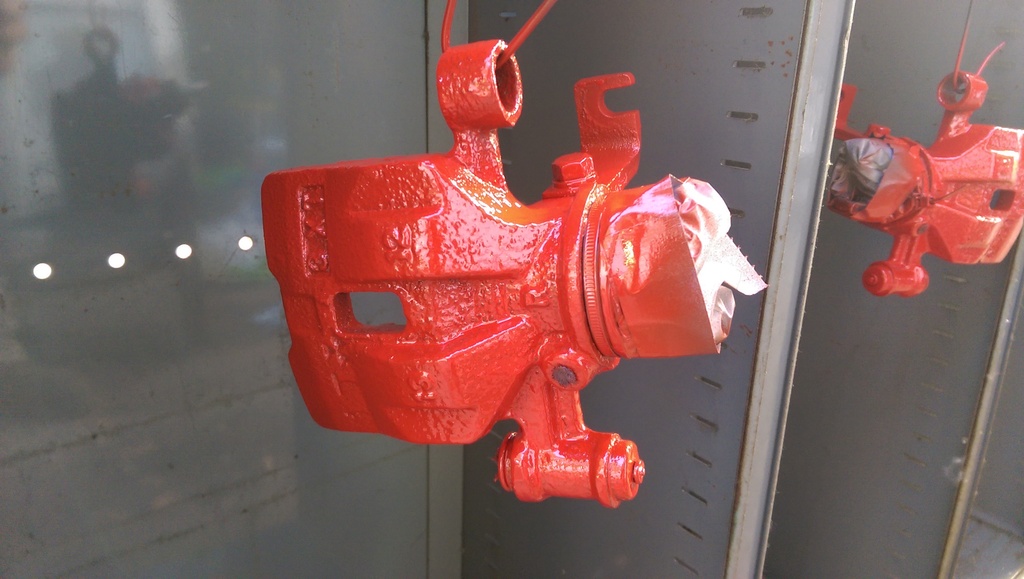
Redone brake calipers

New wheel bearings, retainers, repainted dust covers and axle shaft retainers
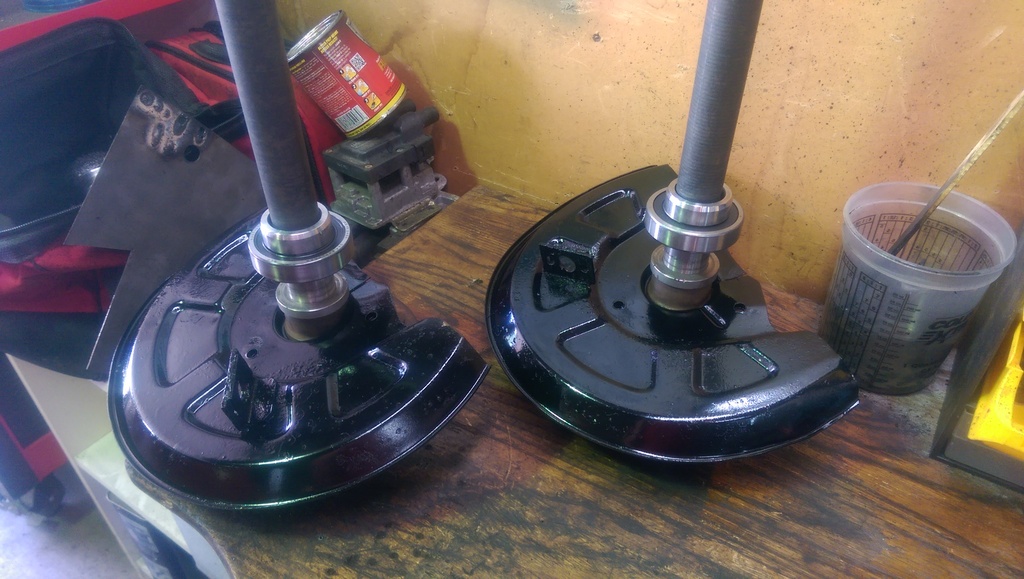
New studs pressed in and new bearings installed
GSL-SE rear axle installed and hung
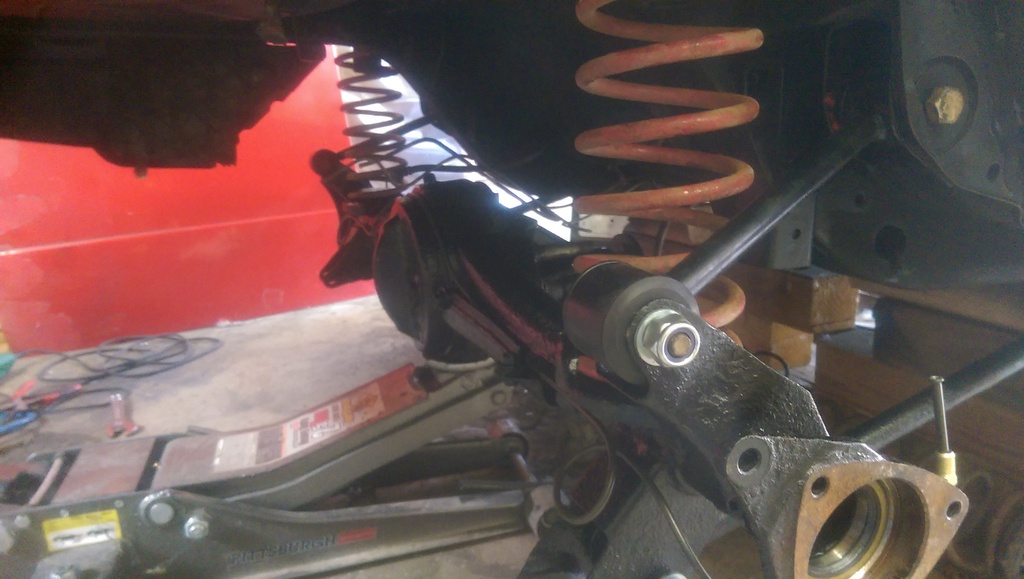
Axle shafts and third member installed

Since this car was originally on GS suspension I knew that this wouldn’t be good enough in the end. So it’s had the GSL-SE suspension swapped into the chassis so it’s now 4x114.3 bolt pattern with the best stock FB brake setup you can get.
Some nasty old brake components that sat for way too long!

All new braking components except calipers

Stainless steel brake lines from Apex

Repainted calipers

Redone brake calipers

New wheel bearings, retainers, repainted dust covers and axle shaft retainers

New studs pressed in and new bearings installed

GSL-SE rear axle installed and hung

Axle shafts and third member installed

Last edited by DreamInRotary; 01-02-17 at 08:18 PM.
01-02-17, 06:22 PM
#5
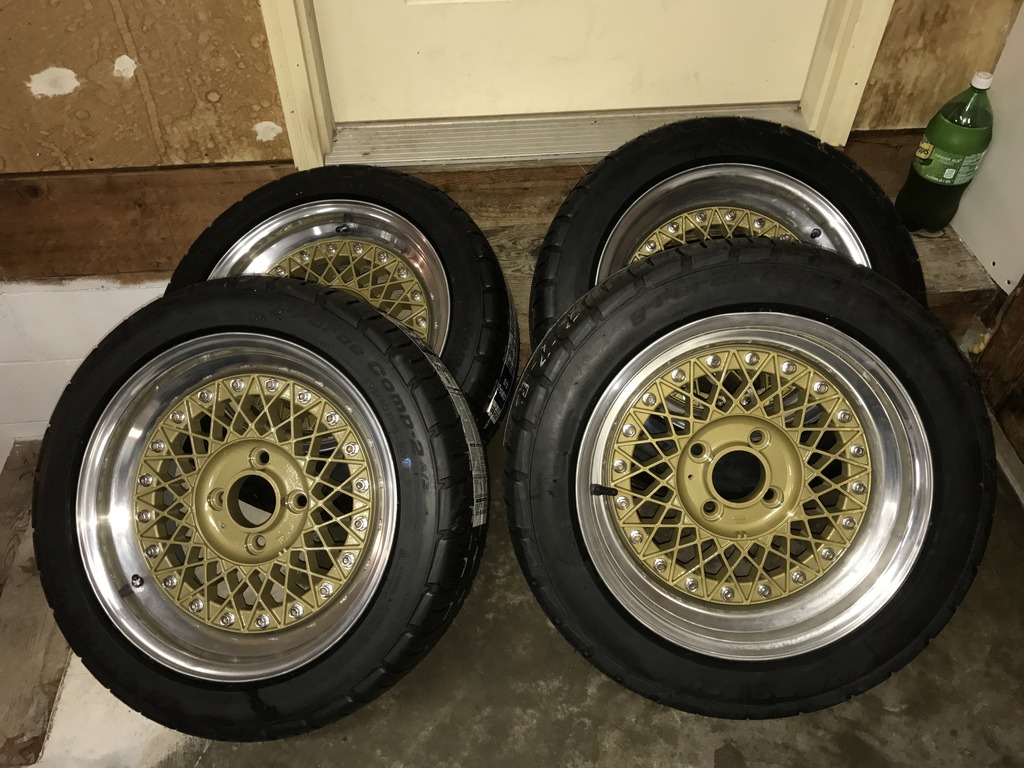
4OUR – Wheels
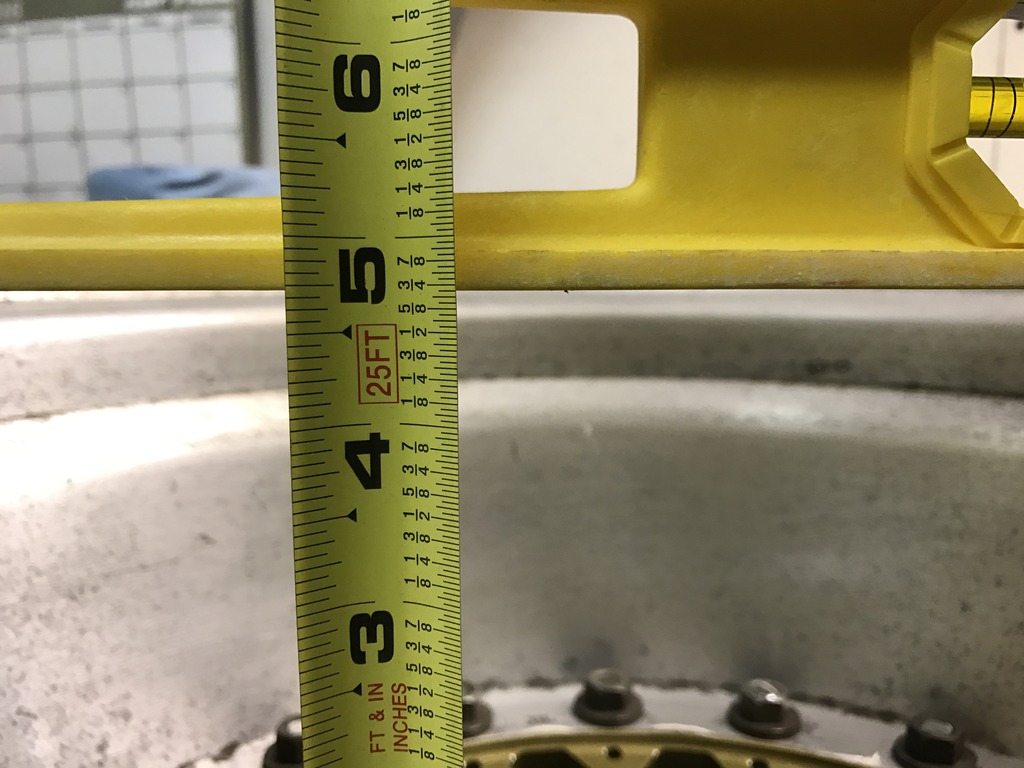
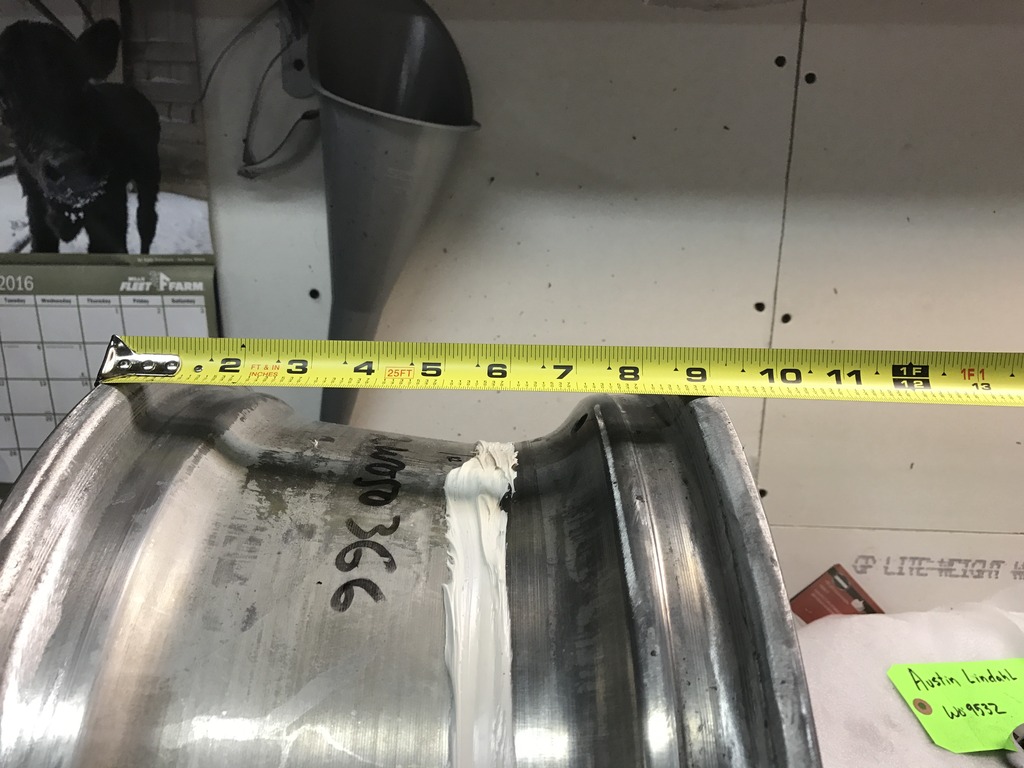
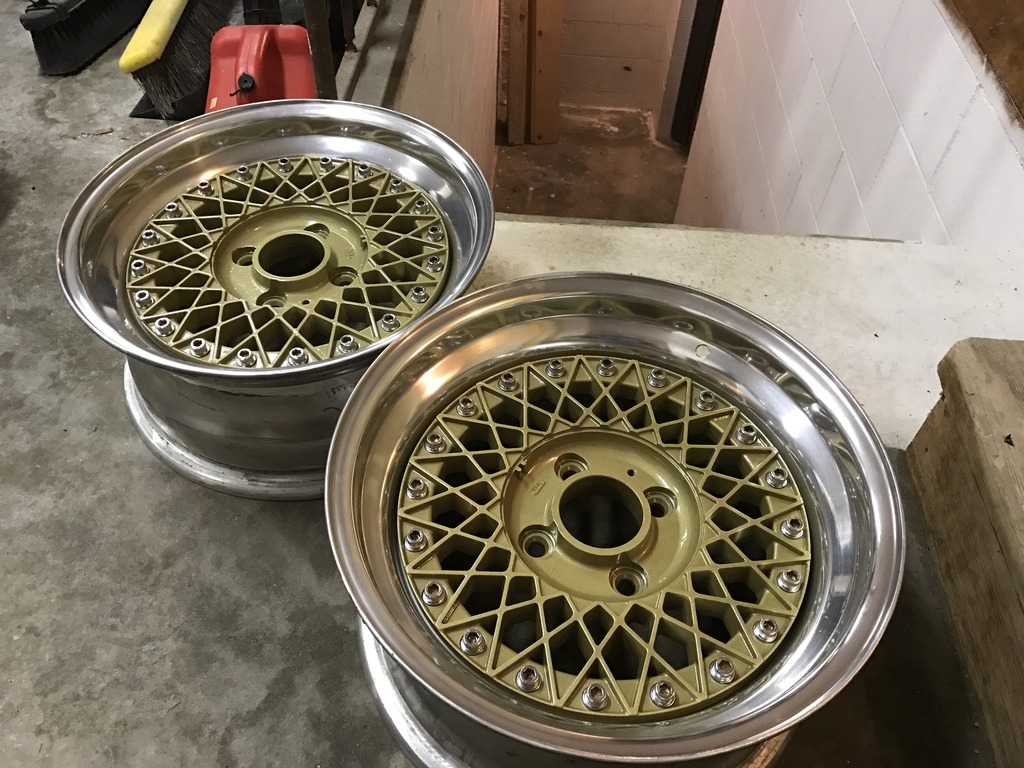
Of course I’m going to be running my Epsilon Centerlock 16” wheels 8” fronts and 9” rears as my main set, and I have a set of Enkei 16” wheels that will most likely turn into track wheels when I can finally justify it.
Front 16" x 8" 4x114.3mm 4 3/8" backspacing +10mm offset
Rear 16" x 9" 4x114.3mm 4 3/4" backspacing -6mm offset
Front wheel backspacing
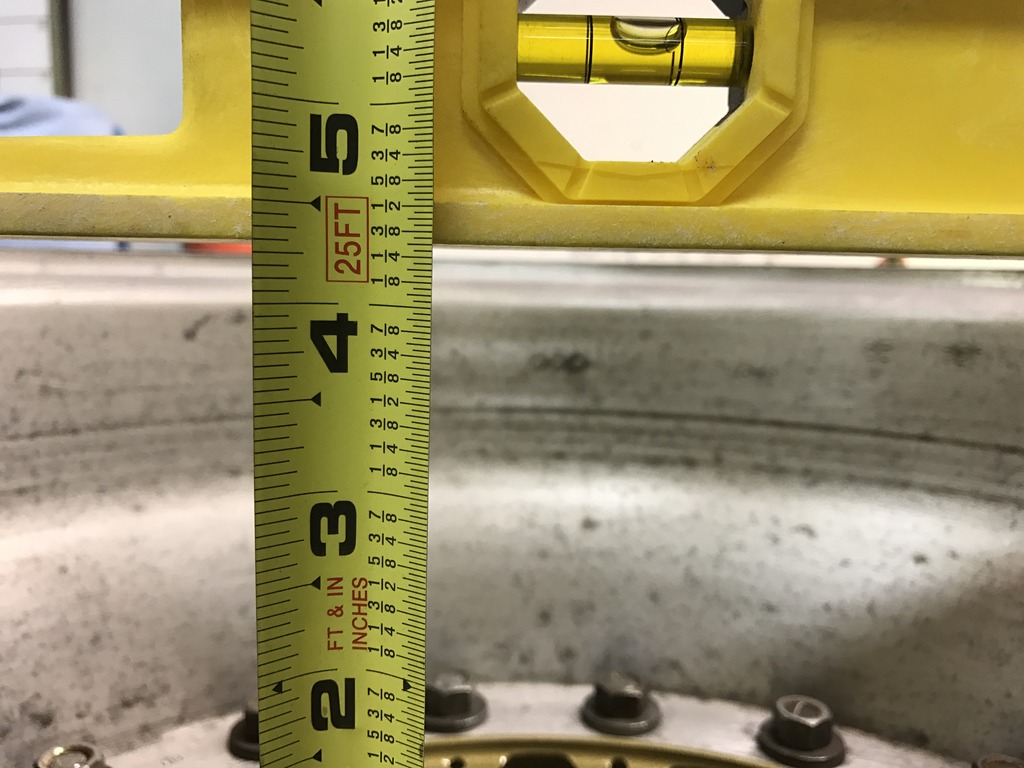
Front wheel width

Rear wheel backspacing
Rear wheel width
Wheels all done and ready for tire installation
All four tires installed on the wheels
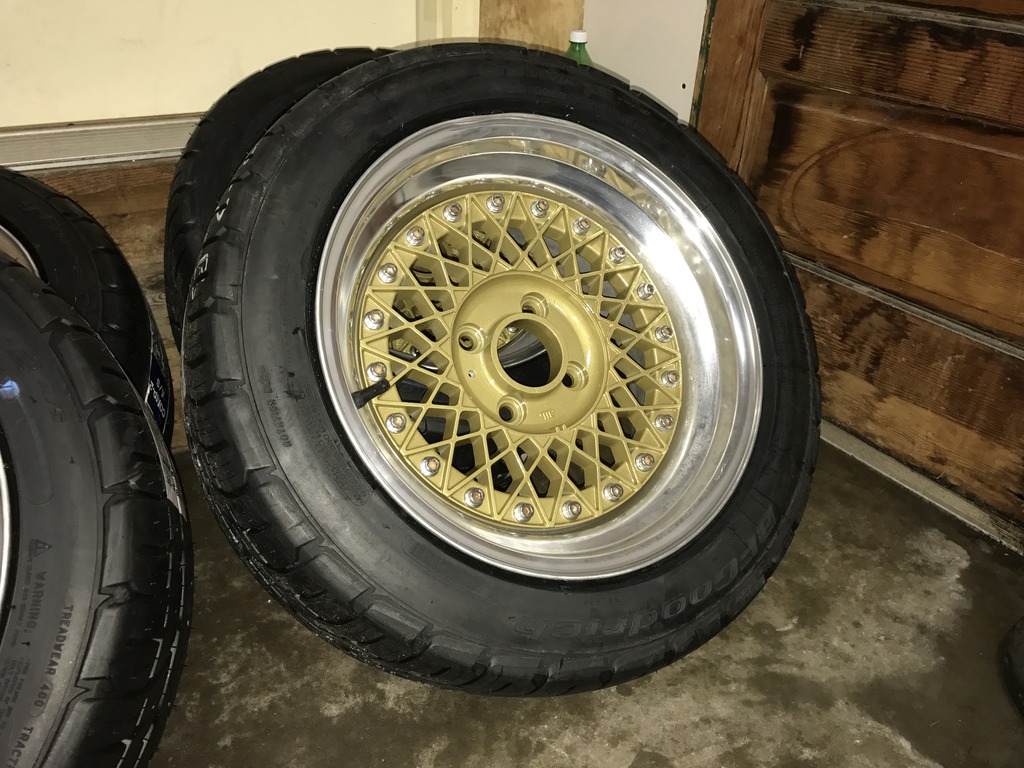
Rear wheel after tire installation
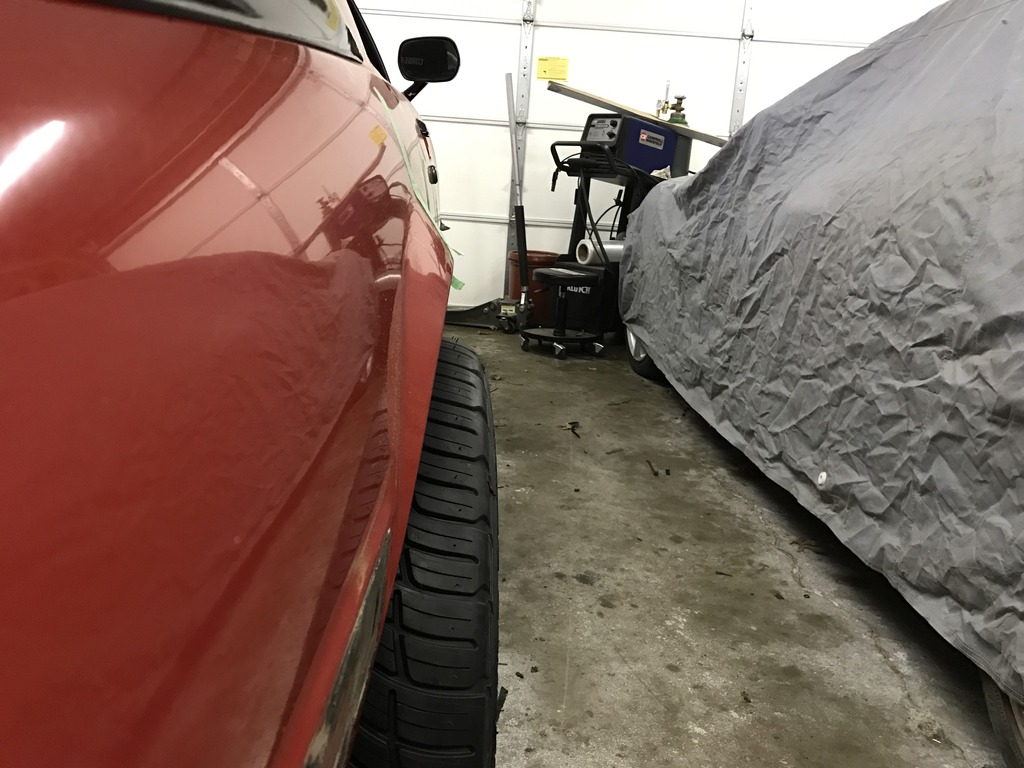
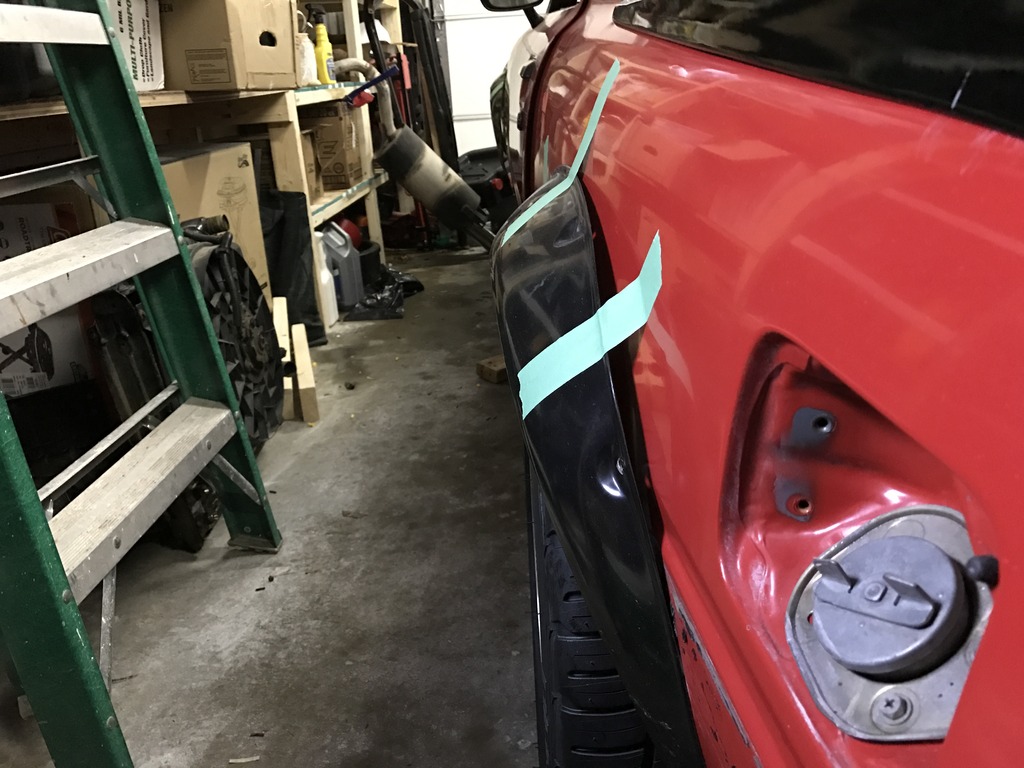
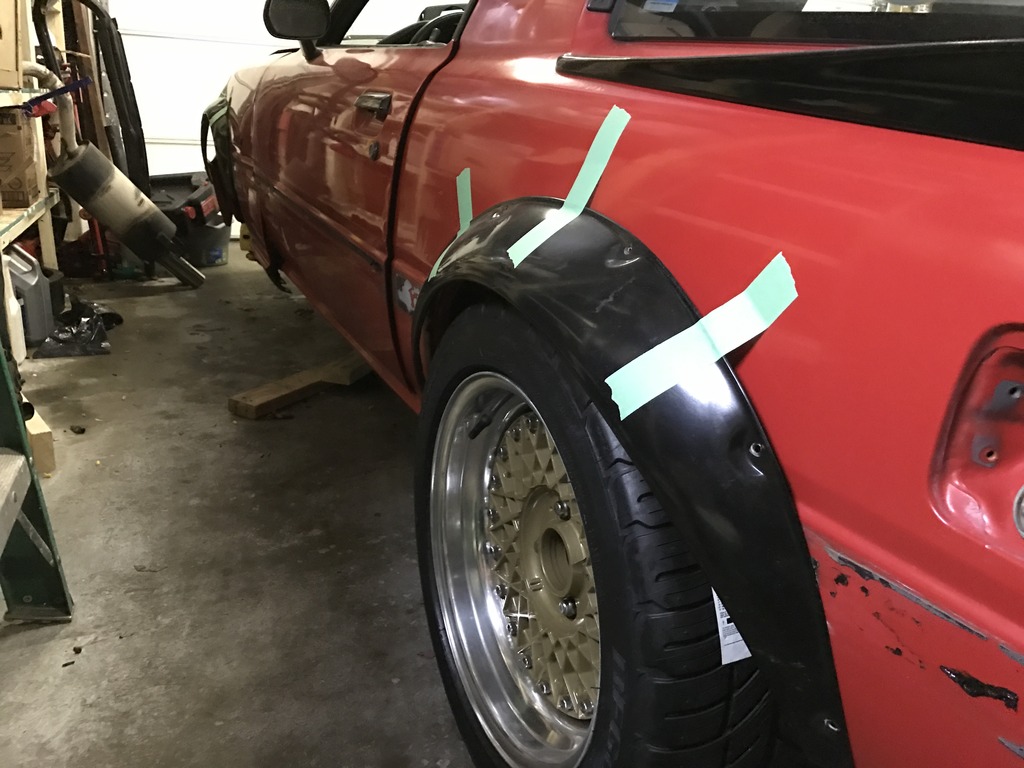
Rear fitment without flare
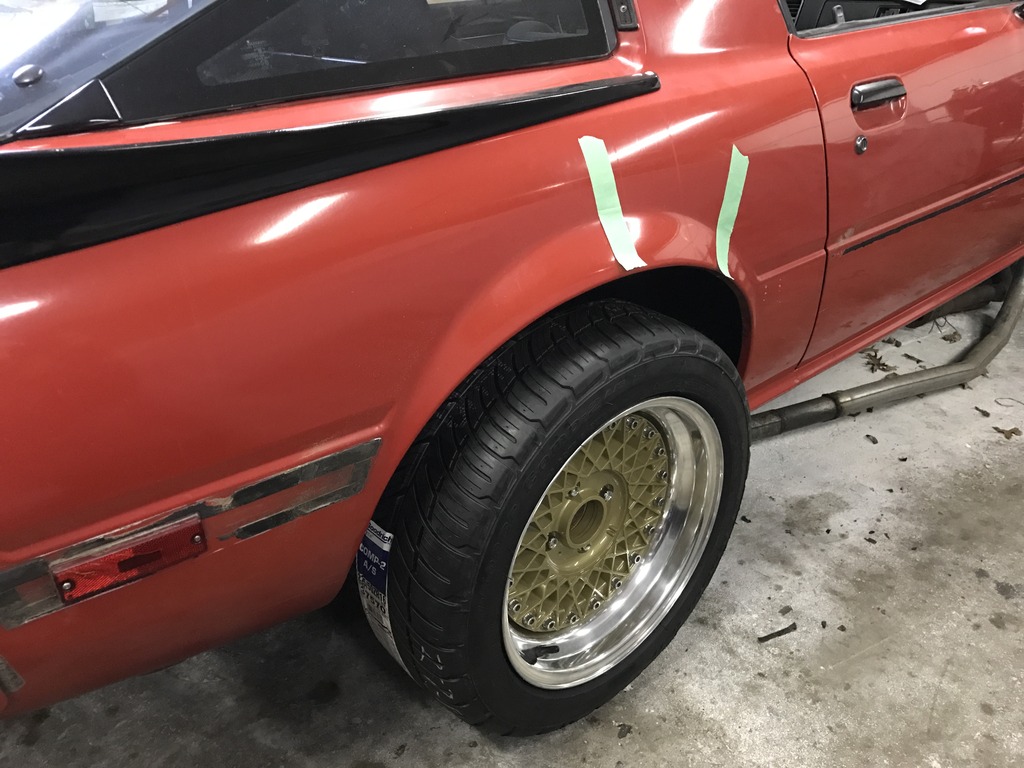
Rear fitment with flare mocked up
Of course I’m going to be running my Epsilon Centerlock 16” wheels 8” fronts and 9” rears as my main set, and I have a set of Enkei 16” wheels that will most likely turn into track wheels when I can finally justify it.
Front 16" x 8" 4x114.3mm 4 3/8" backspacing +10mm offset
Rear 16" x 9" 4x114.3mm 4 3/4" backspacing -6mm offset
Front wheel backspacing

Front wheel width

Rear wheel backspacing

Rear wheel width

Wheels all done and ready for tire installation

All four tires installed on the wheels

Rear wheel after tire installation

Rear fitment without flare


Rear fitment with flare mocked up


Last edited by DreamInRotary; 01-02-17 at 07:44 PM.
01-02-17, 06:22 PM
#6
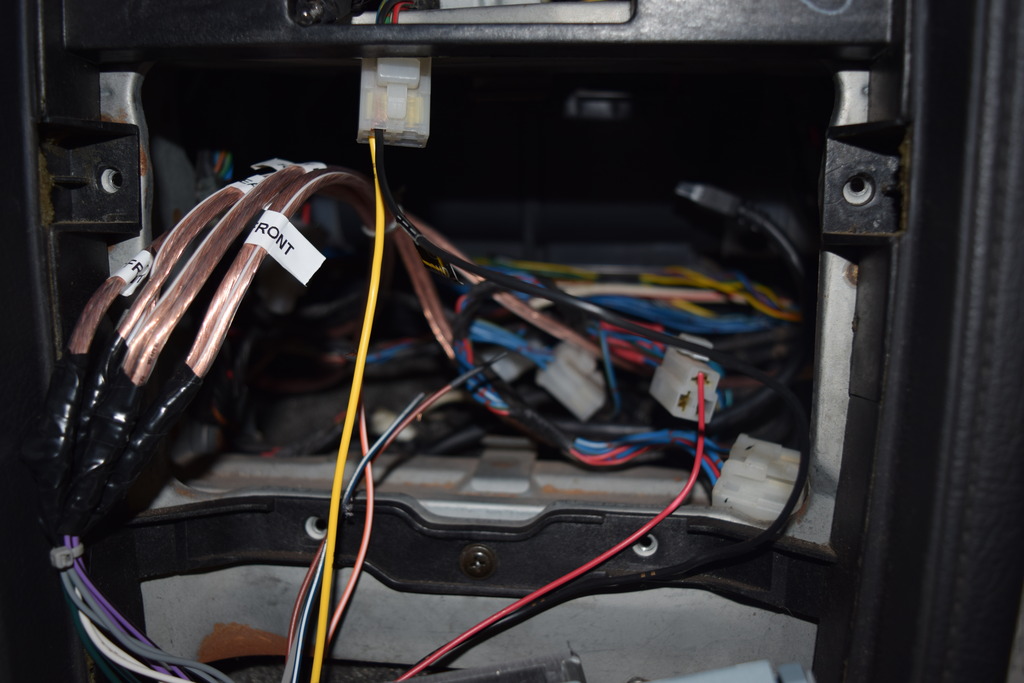
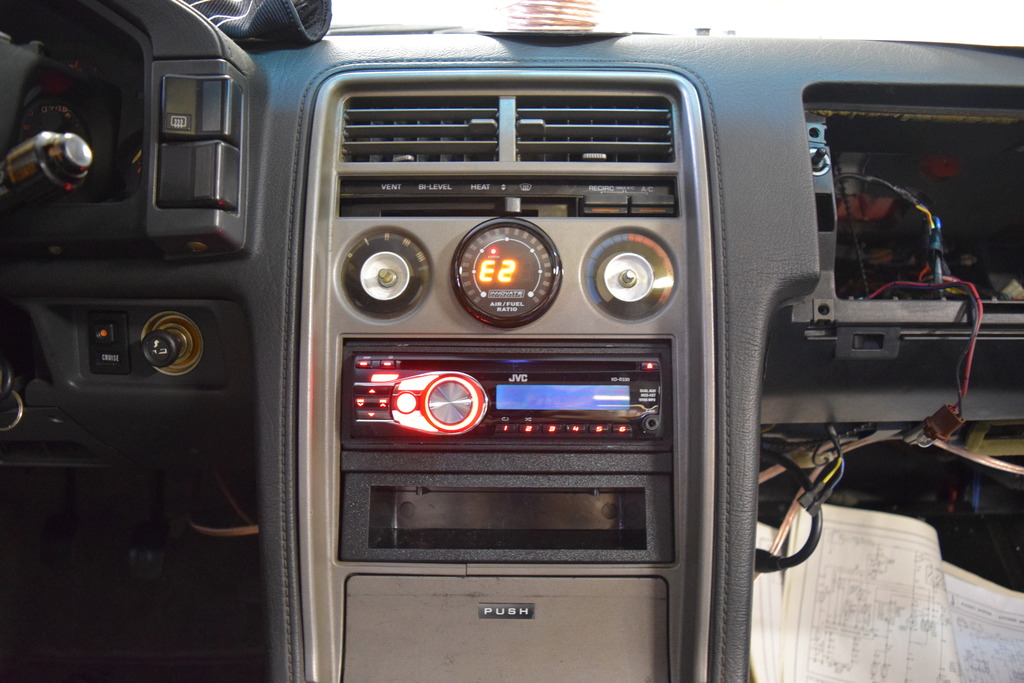
5IVE – Wiring
In the way that I can’t leave anything alone, I decided to do a wiring tuck and modify most of the harness to accomplish this.
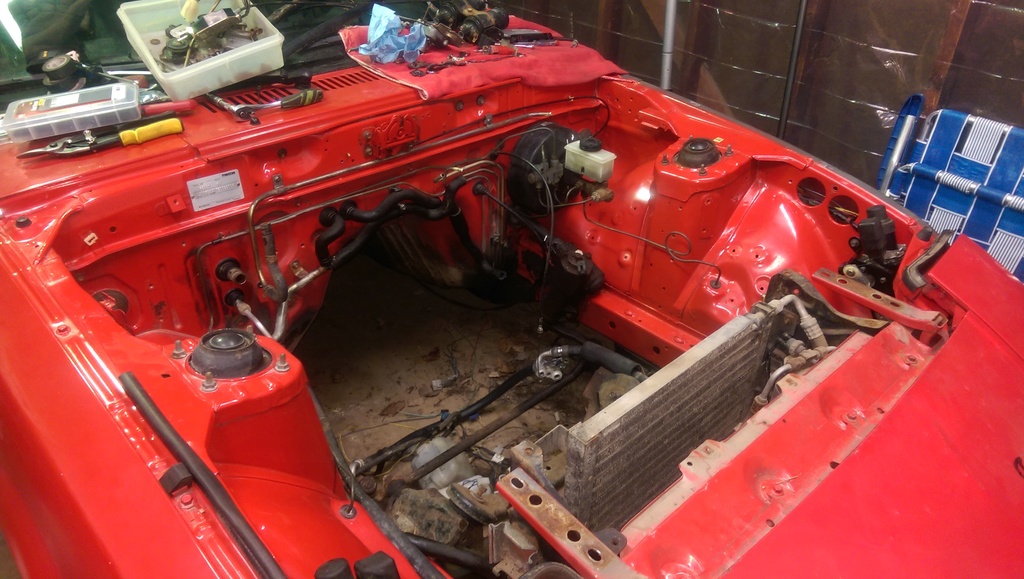
Engine bay before wiring tuck

Engine bay after wiring tuck
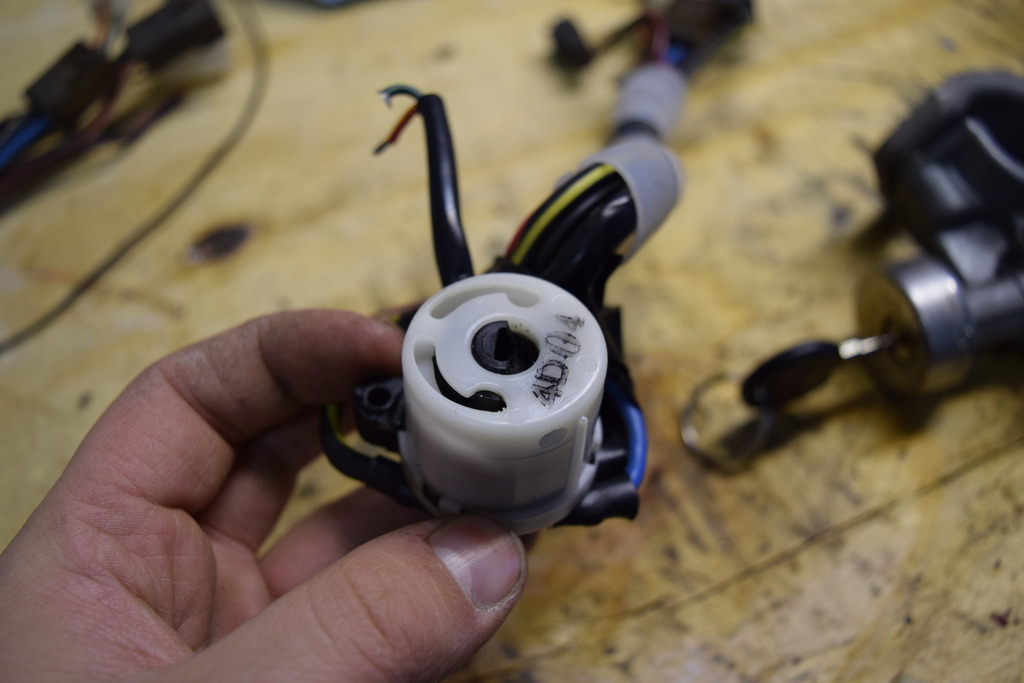
Ignition cylinder replacement

Broken ignition switch
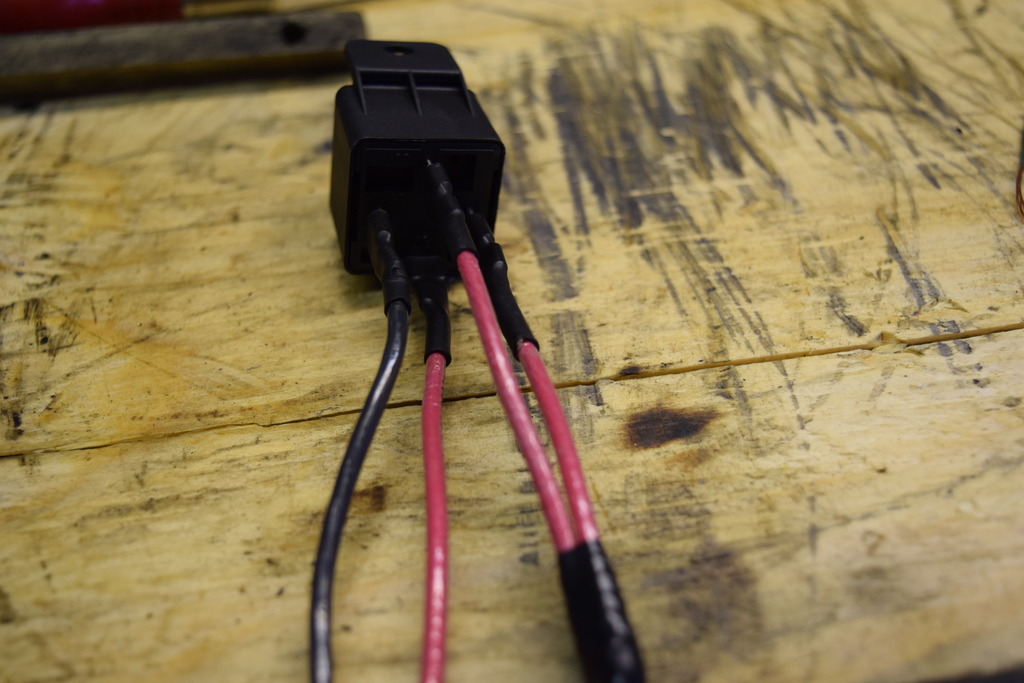
Relay wiring for fuel pump and cooling fan
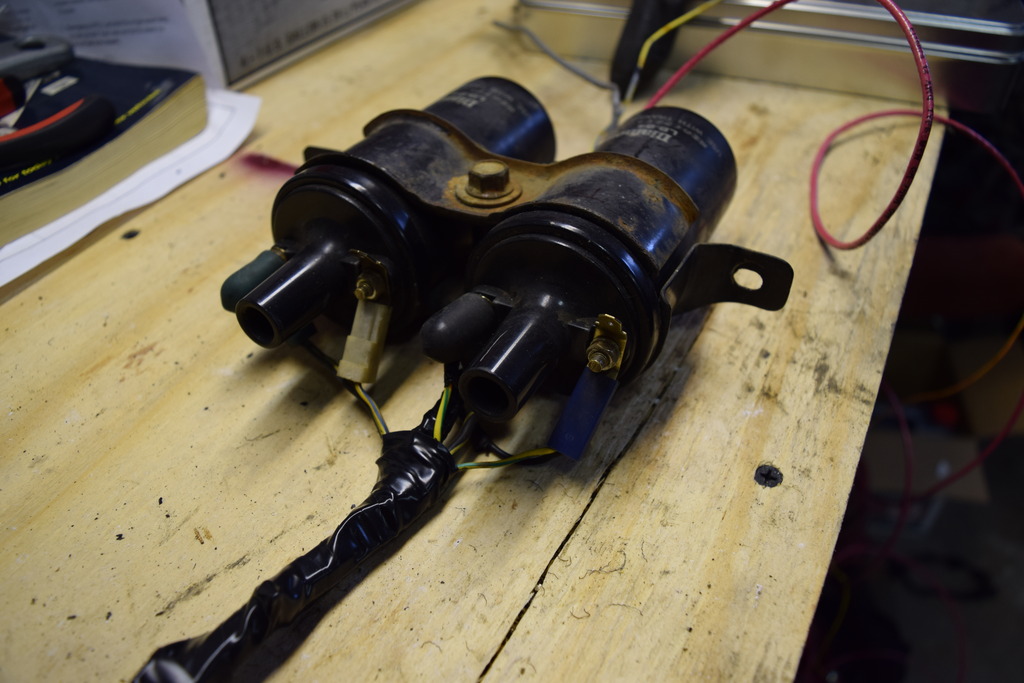
12a ignition wiring in the process of being redone
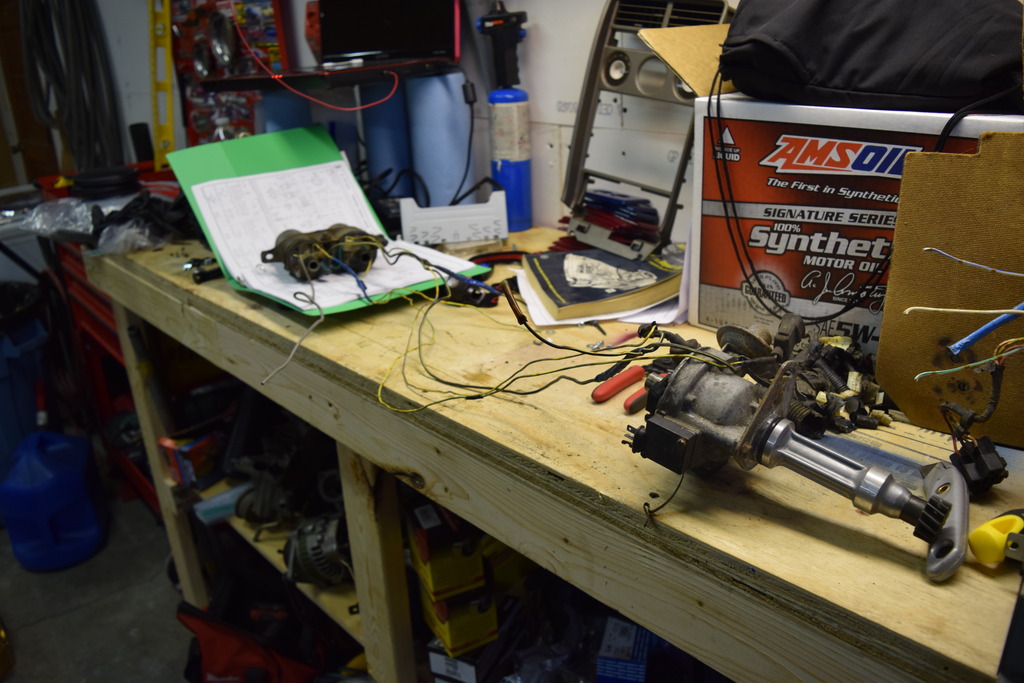
12a ignition wiring setup almost finalized
Sound system wiring installation
In the way that I can’t leave anything alone, I decided to do a wiring tuck and modify most of the harness to accomplish this.
Engine bay before wiring tuck
Engine bay after wiring tuck


Ignition cylinder replacement

Broken ignition switch

Relay wiring for fuel pump and cooling fan

12a ignition wiring in the process of being redone

12a ignition wiring setup almost finalized

Sound system wiring installation

Last edited by DreamInRotary; 01-02-17 at 08:26 PM.
01-02-17, 06:23 PM
#7
SI6 – Interior
I wouldn’t be continuing this build without modifying the interior along with the rest of the car.
Stock interior, as it came to me
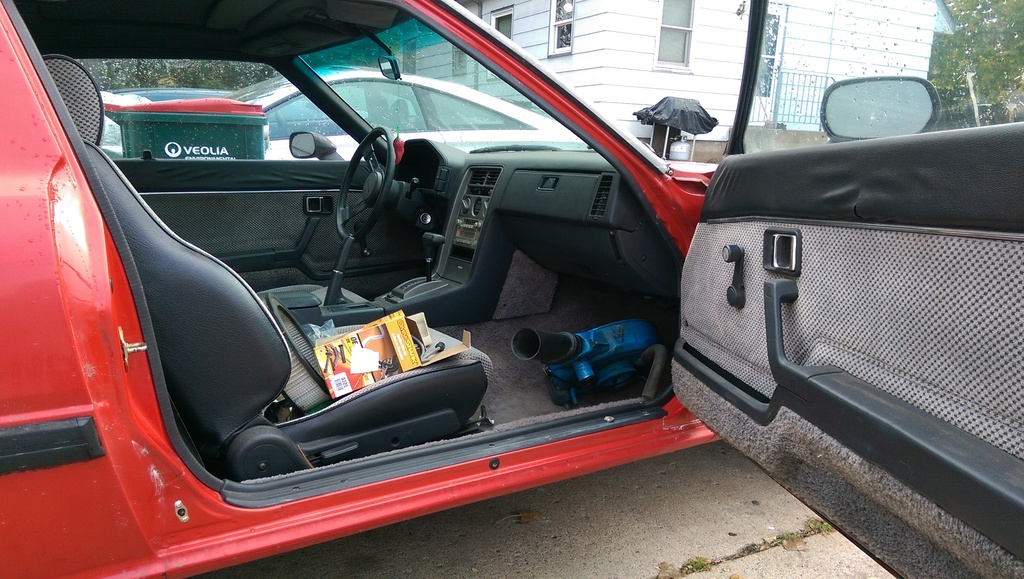
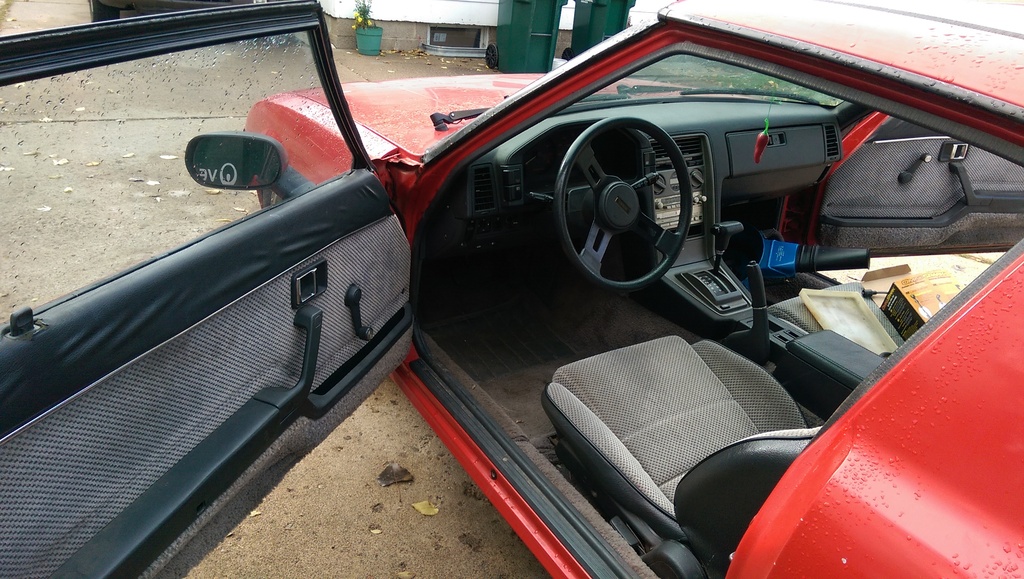
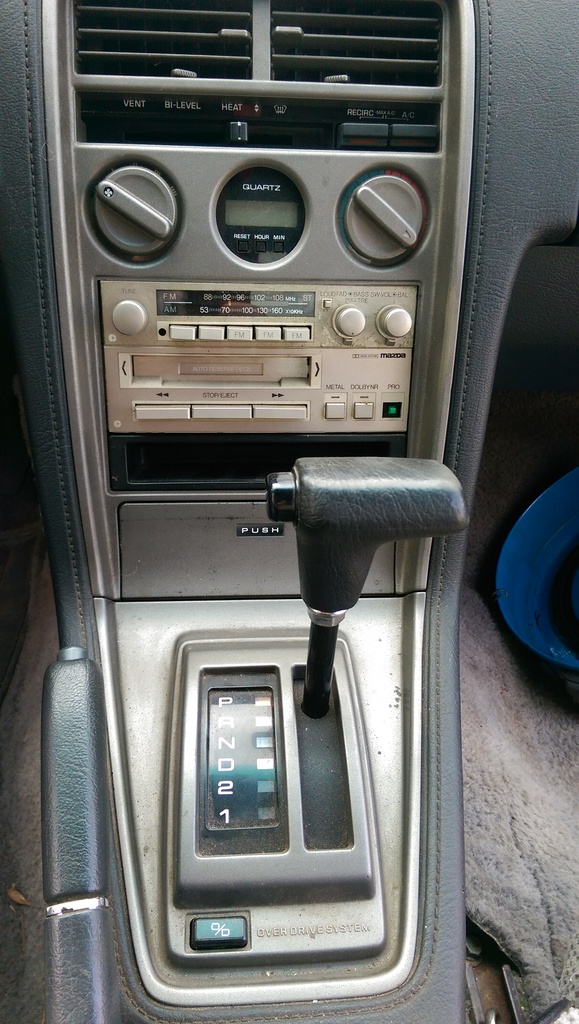
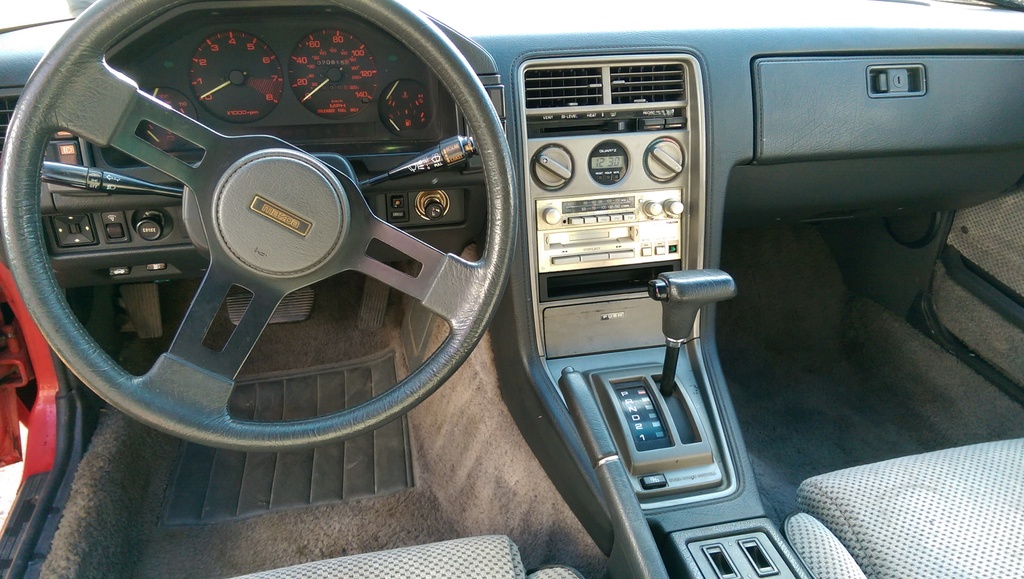
How it sat for a very long time
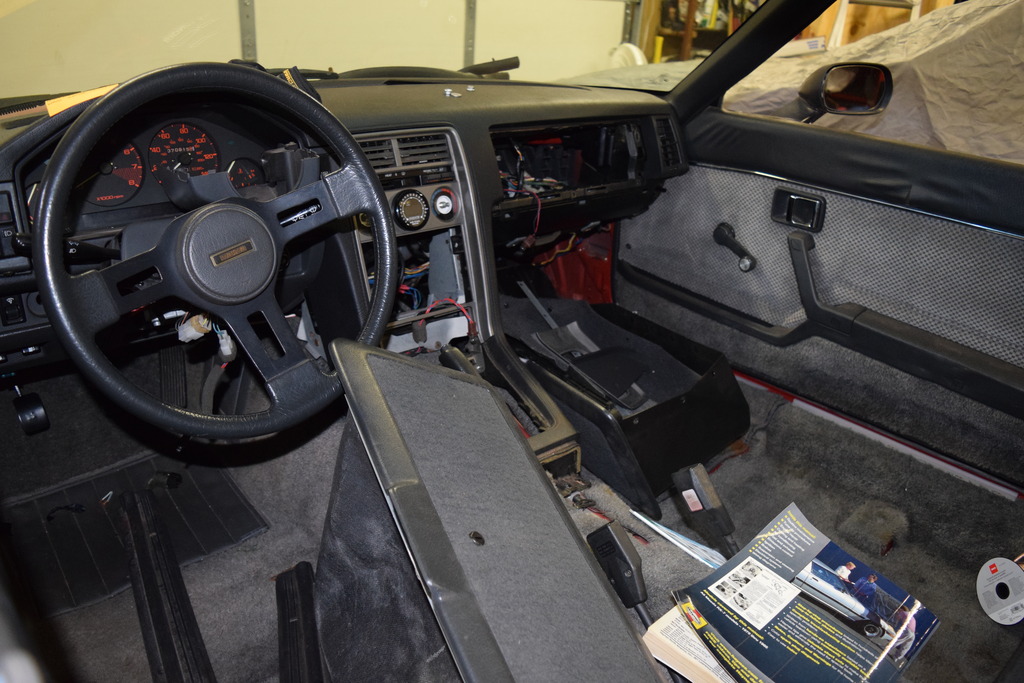
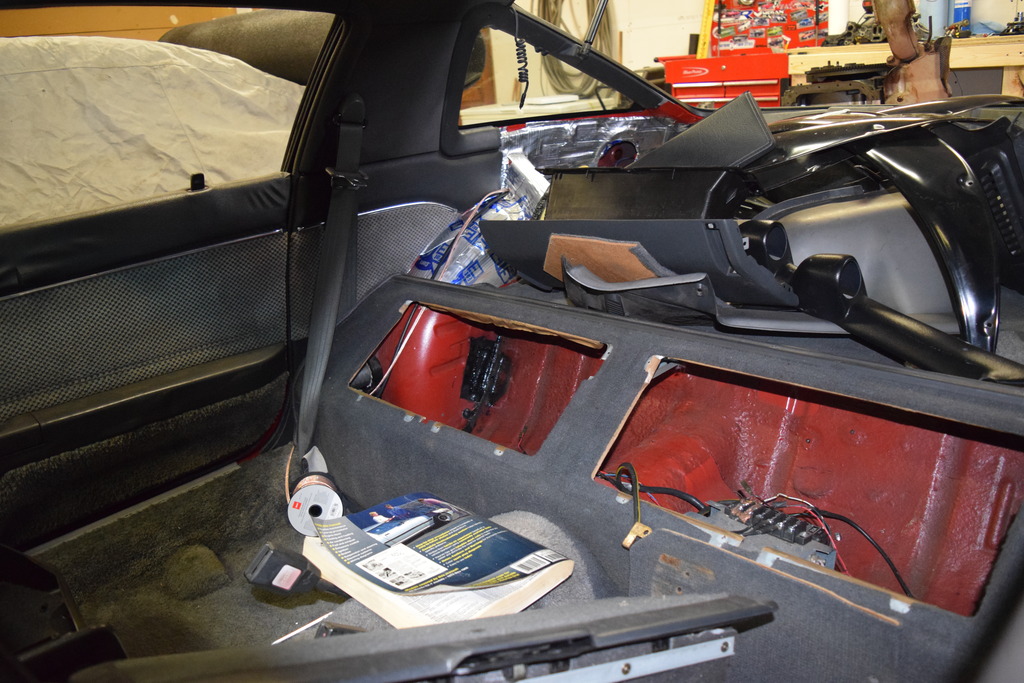
What it's starting to look like now, more pics later of course
I wouldn’t be continuing this build without modifying the interior along with the rest of the car.
Stock interior, as it came to me


How it sat for a very long time


What it's starting to look like now, more pics later of course

Last edited by DreamInRotary; 01-02-17 at 07:55 PM.
Trending Topics
01-02-17, 06:23 PM
#8
SE7EN – Body
The exterior of this car will remain mostly stock besides a few tasteful mods that make it look much better.
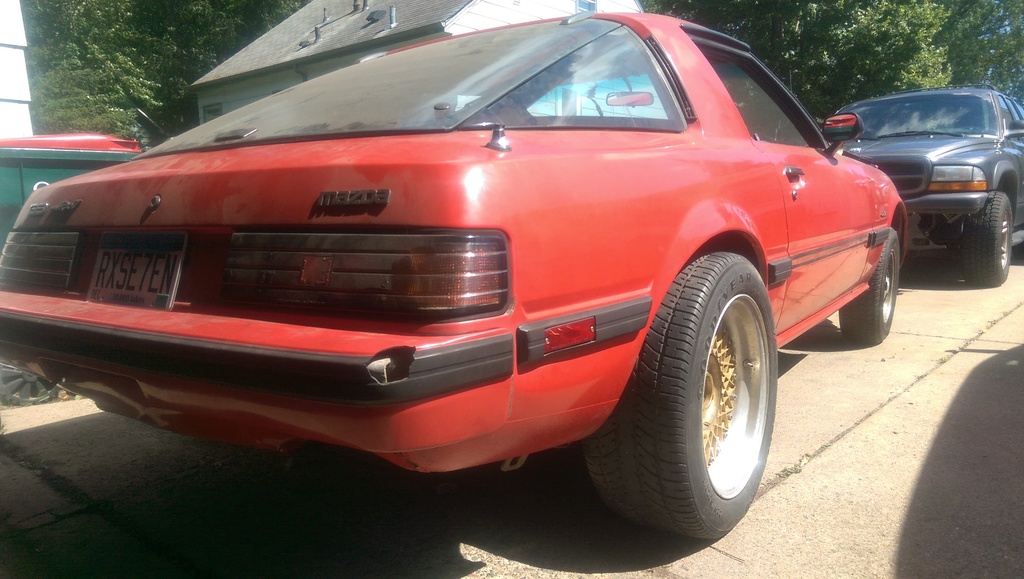
Stock body, as it came to me
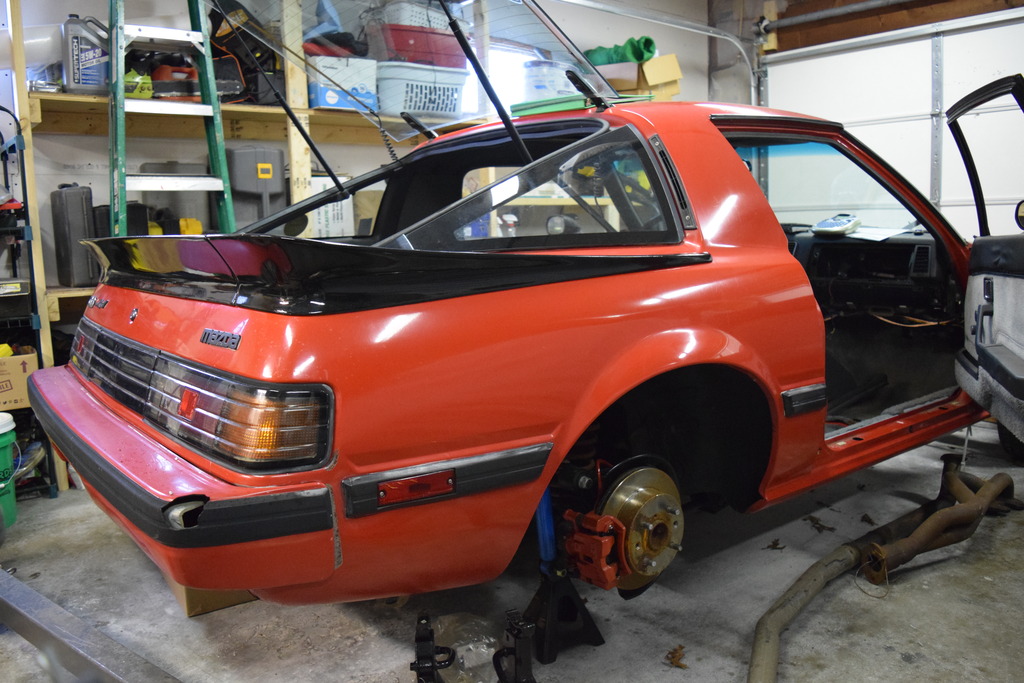
Finally had the rear axle installed in the car
In this pic you'll see the 04 Durango that I traded for the RX-8 hiding in the background
IMSA Wing mocked up on the car
IMSA Wing mocked up on the car with the ZG Flares
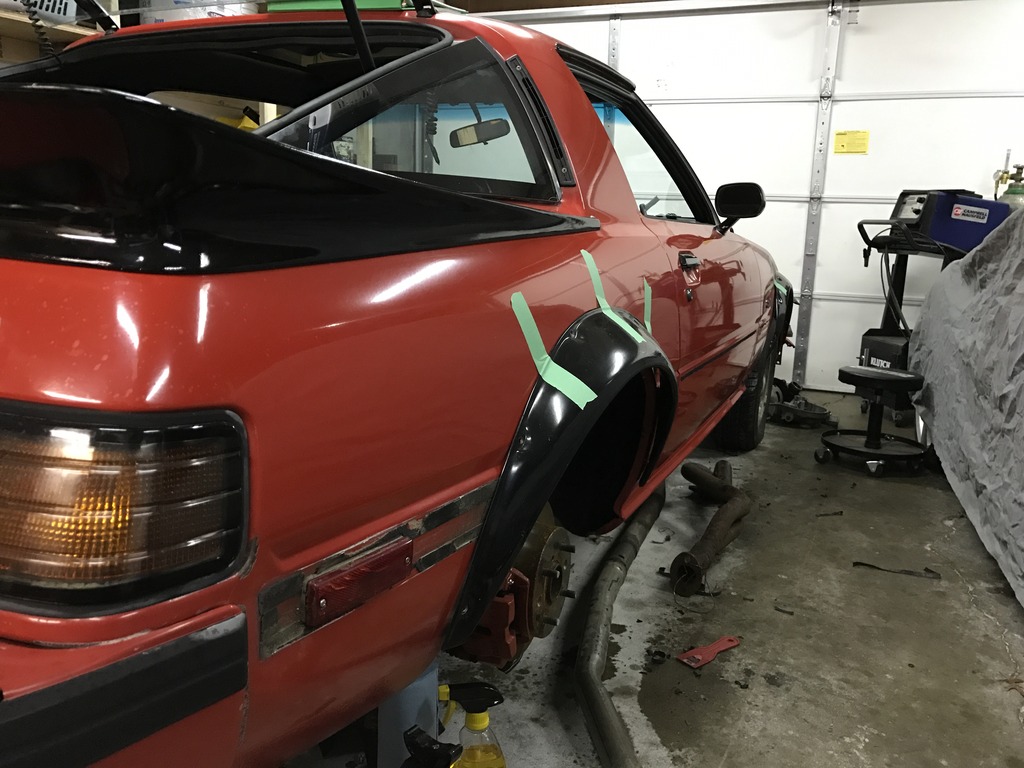
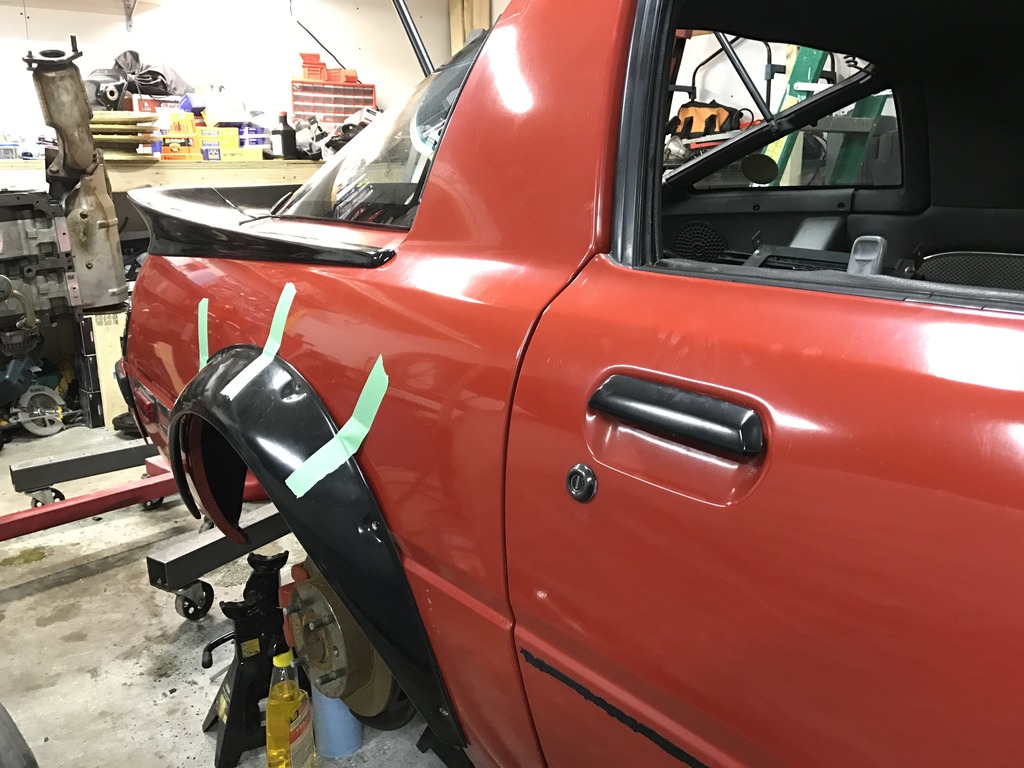
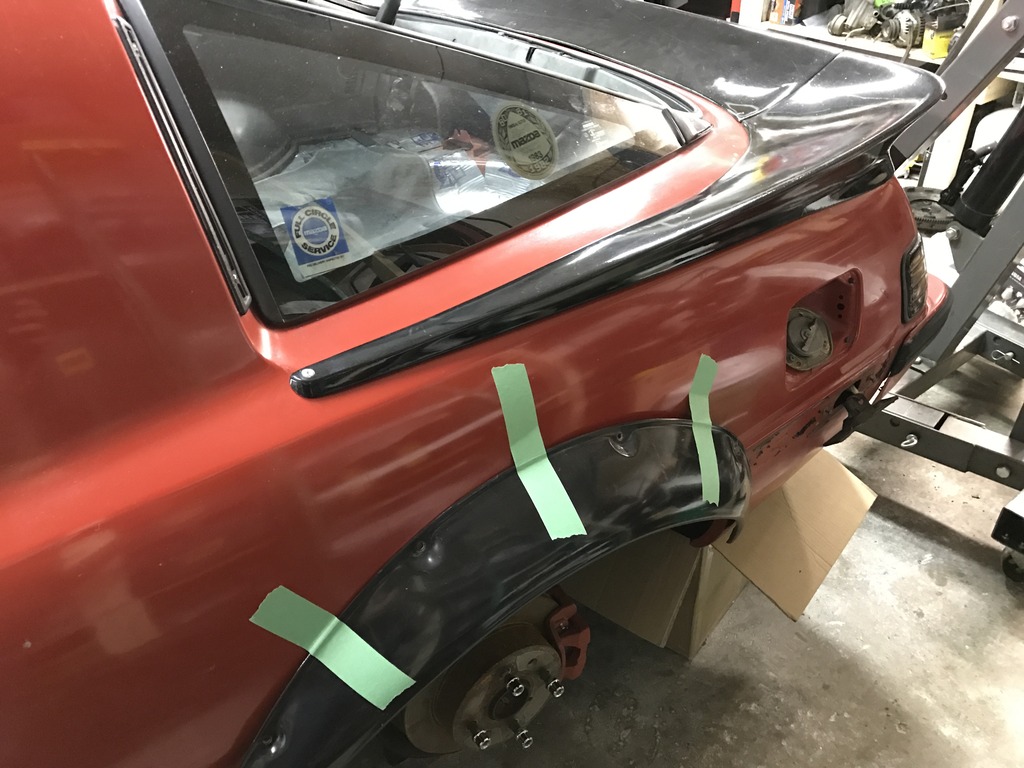
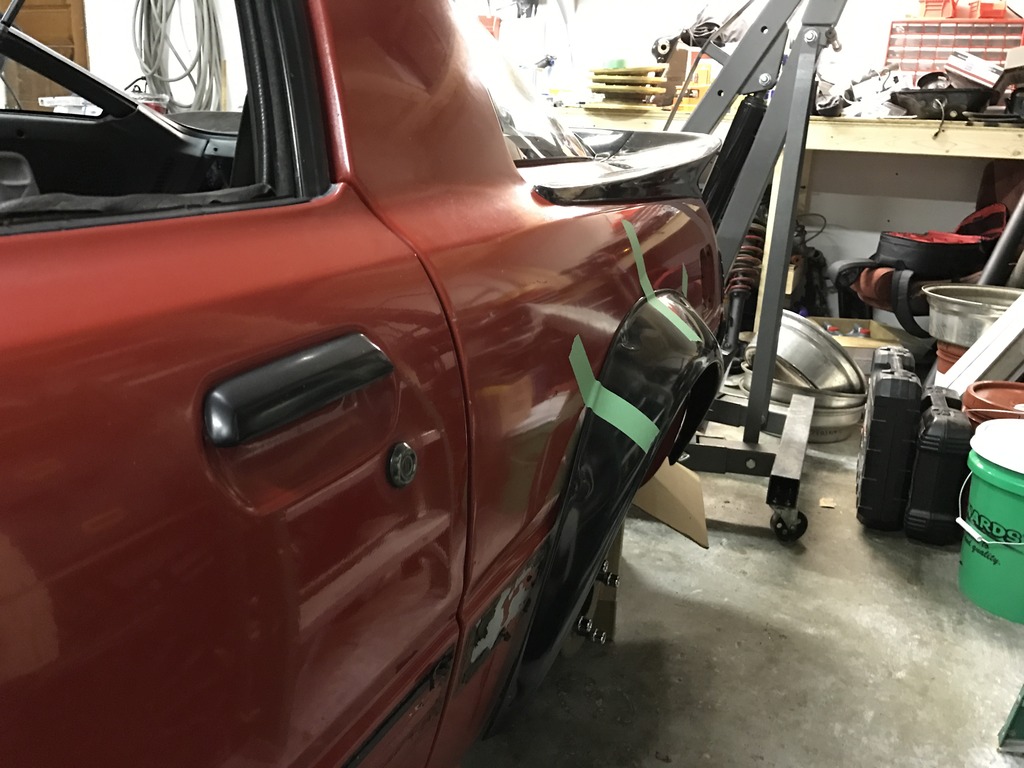
The exterior of this car will remain mostly stock besides a few tasteful mods that make it look much better.
Stock body, as it came to me

Finally had the rear axle installed in the car

In this pic you'll see the 04 Durango that I traded for the RX-8 hiding in the background

IMSA Wing mocked up on the car

IMSA Wing mocked up on the car with the ZG Flares


Last edited by DreamInRotary; 01-02-17 at 07:50 PM.
01-02-17, 06:52 PM
#9
1NE – Engine
Originally this car had the old trusty 12a with a Nikki carburetor and had an automatic transmission behind it. This of course was blown because the apex seals were extremely stuck in the rotors. I tried getting this to start and run on its own power but it just refused to work. So I had grand plans to swap in a TII motor again but that didn’t pan out in the end.

Now it’s getting an S5 N/A 13b motor out of an FC that I’m going to use a DelLorto DHLA 48 for fuel delivery. Short, simple and sweet – the easiest and best way for an FB to be in my life at this moment.
Originally this car had the old trusty 12a with a Nikki carburetor and had an automatic transmission behind it. This of course was blown because the apex seals were extremely stuck in the rotors. I tried getting this to start and run on its own power but it just refused to work. So I had grand plans to swap in a TII motor again but that didn’t pan out in the end.
Now it’s getting an S5 N/A 13b motor out of an FC that I’m going to use a DelLorto DHLA 48 for fuel delivery. Short, simple and sweet – the easiest and best way for an FB to be in my life at this moment.
Use the Nikki with an RB holley intake manifold. Or make an adapter plate to bolt the Nikki manifold to the 13B. That's what I'd do. But you said easy not cheap

DHLA's are cool but expensive.
gonna direct fire it?
01-02-17, 08:40 PM
#10
This will not be direct fired yet, unless I find a few good ignitors and change up some wiring on the ignition setup I already made up. I have the ignition set up as a stock 12a that should work out alright for now. Eventually I'd like to do an MSD and just run the leading plugs with two MSD coils. But that's a while down the road yet!
01-02-17, 09:50 PM
#11
[QUOTE=DreamInRotary;12137804] 4OUR – Wheels
Of course I’m going to be running my Epsilon Centerlock 16” wheels 8” fronts and 9” rears as my main set, and I have a set of Enkei 16” wheels that will most likely turn into track wheels when I can finally justify it.
Front 16" x 8" 4x114.3mm 4 3/8" backspacing +10mm offset
Rear 16" x 9" 4x114.3mm 4 3/4" backspacing -6mm offset
[\quote]
Just a quick correction for you. The wheels are 7 and 8 in width (front and rear respectively). Measurement is taken from inside the barrel.
 01-04-17, 02:18 AM
#14
Banned. I got OWNED!!!

Welcome back!

 04-08-17, 11:23 PM
#20
Thanks man, I appreciate it.
I sure hope so. Hasn't been much progress as of late because of all this RX-8 nonsense, but I will be doing better here shortly.
Thanks! Feels good to be back.
Thanks!
Thank you! I want to have it out of the garage and on the streets in the next 4 weeks or so, depending on funds and timing.
That's right!
I love them too, my favorite part on the car!
07-05-17, 09:07 PM
#22
I do have updates, but I guess that I will need to switch image hosting companies now since I'm not paying $399.99 PER YEAR to Photobucket to enable 3rd party hosting on any other site but their own. How STUPID! More like PhotoPhuckit at this point...
I'll update later this week hopefully once the picture issue is resolved, making some seriously great headway on this project lately and I aim to drive it within the next week or two here
I'll update later this week hopefully once the picture issue is resolved, making some seriously great headway on this project lately and I aim to drive it within the next week or two here
08-24-17, 01:41 PM
#23
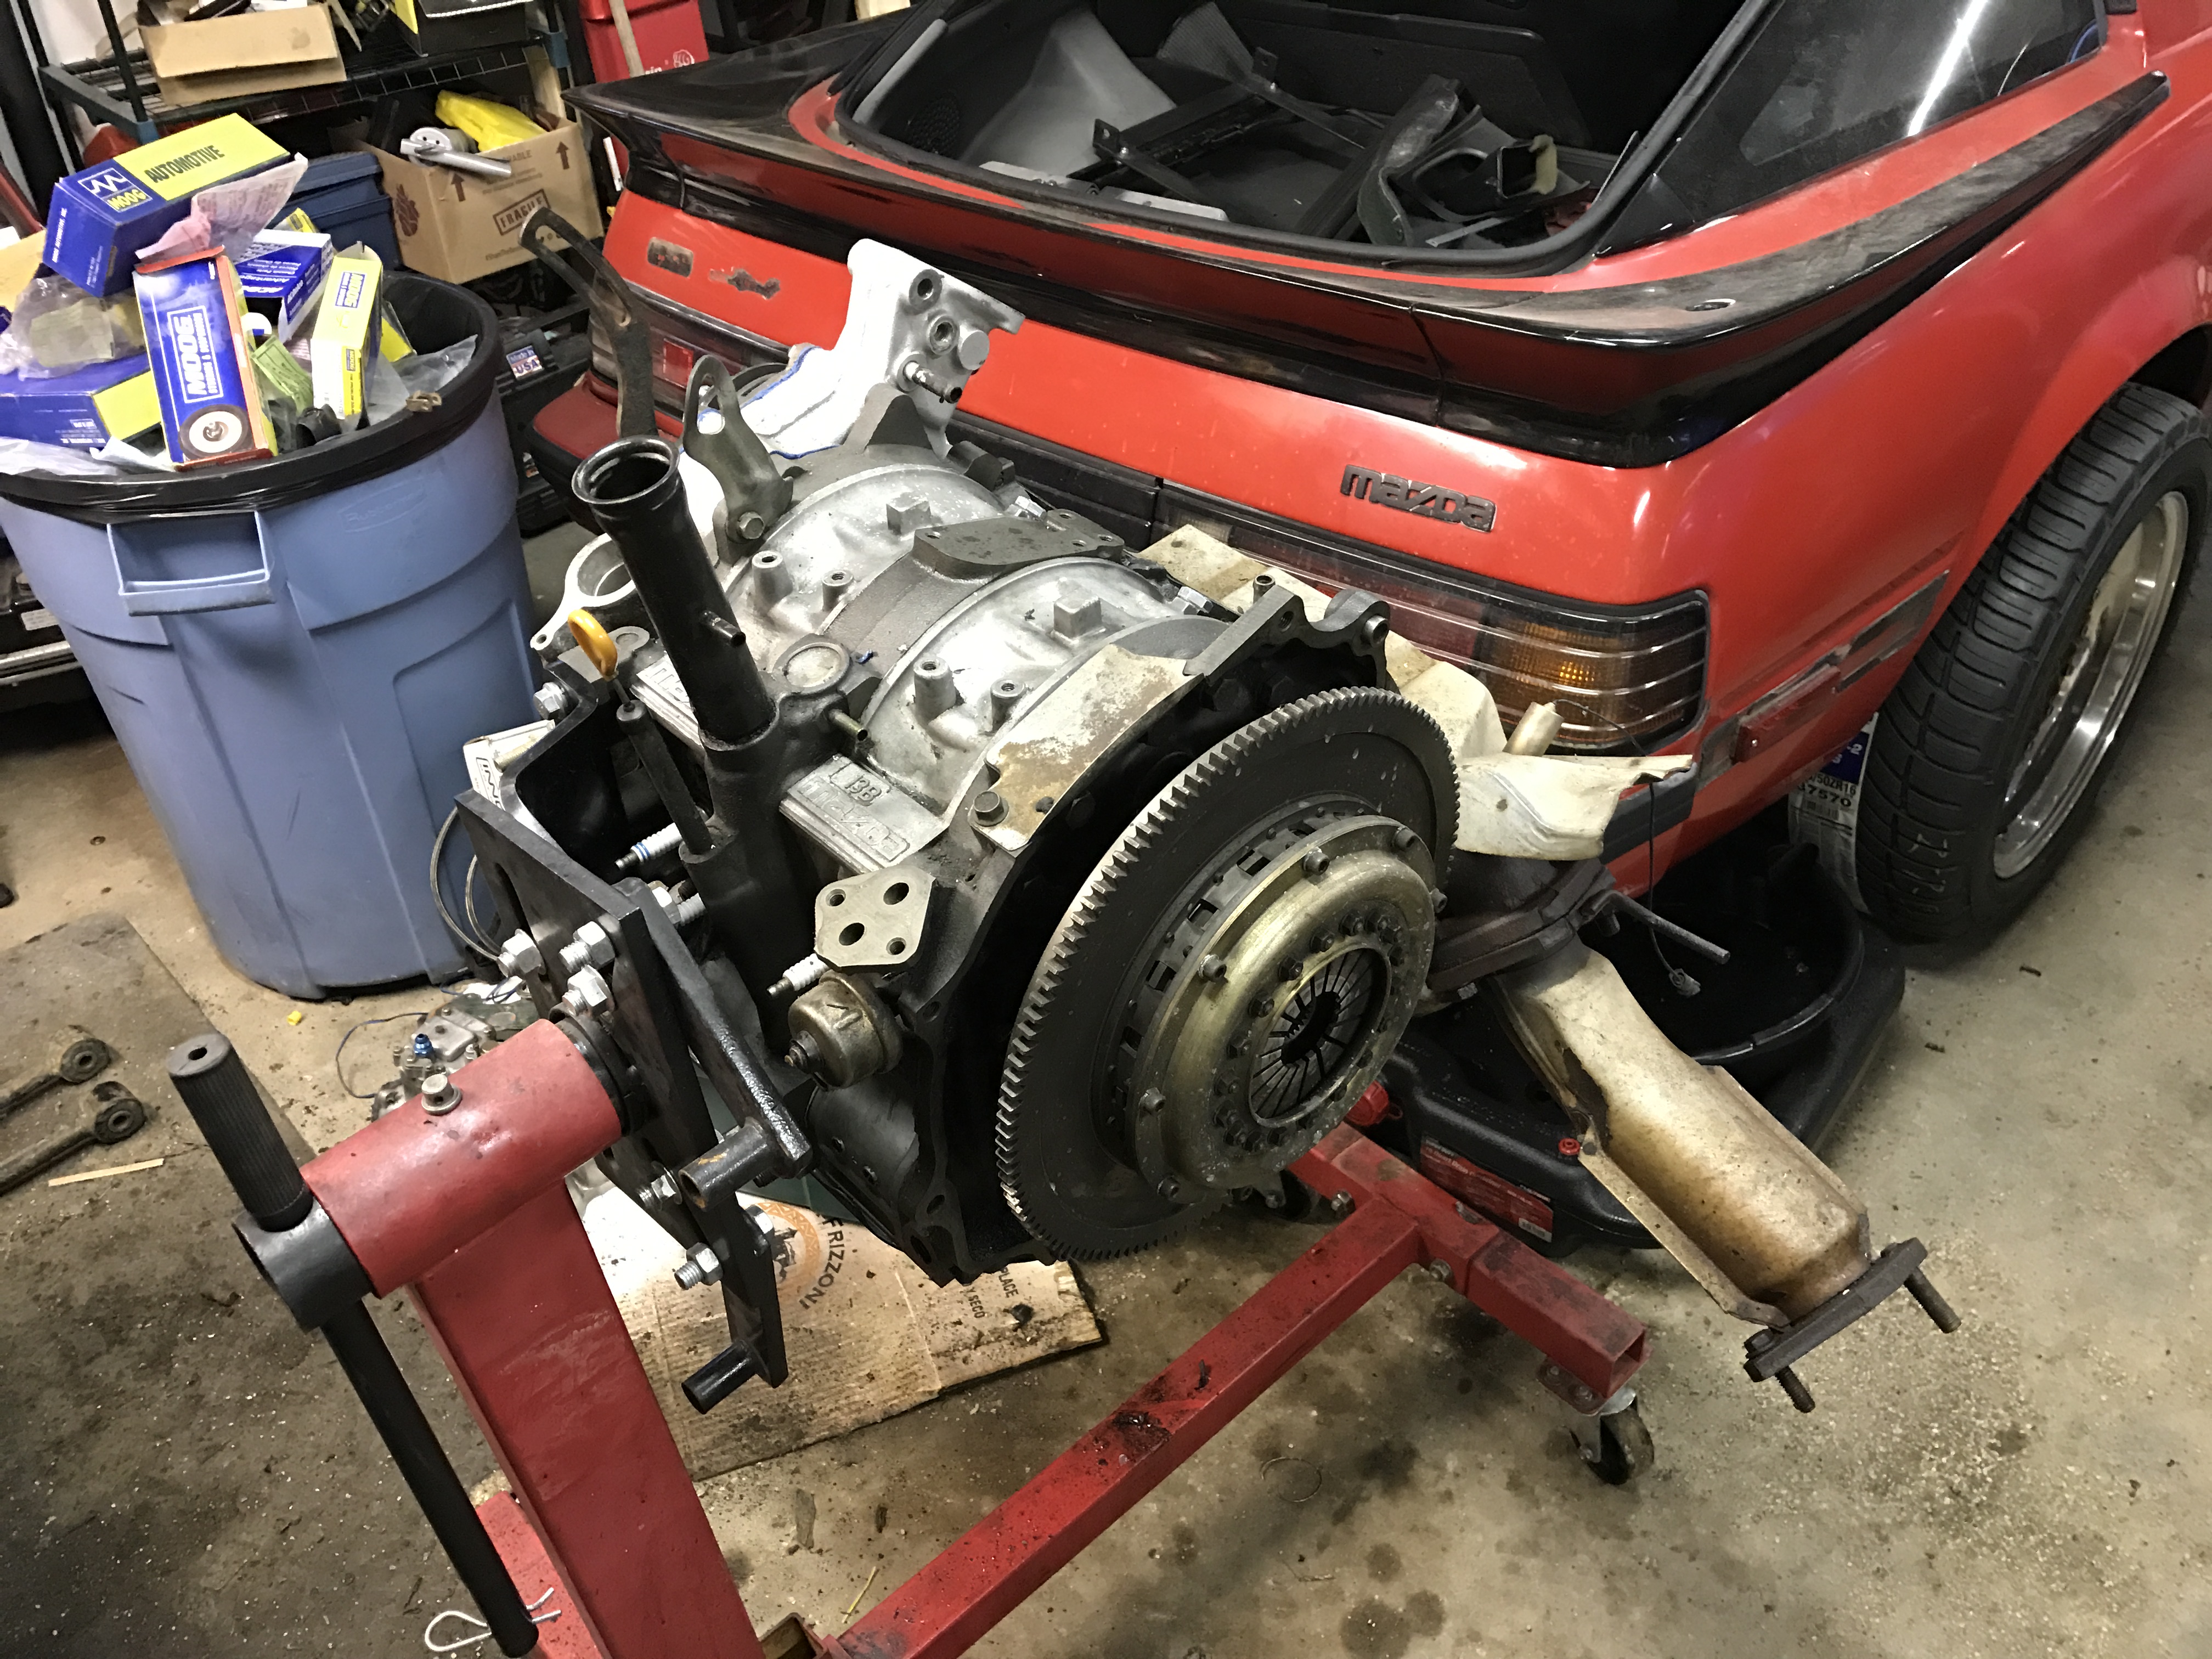
Let's do a huge update!
The engine got all put together for it's intended purpose on the stand:
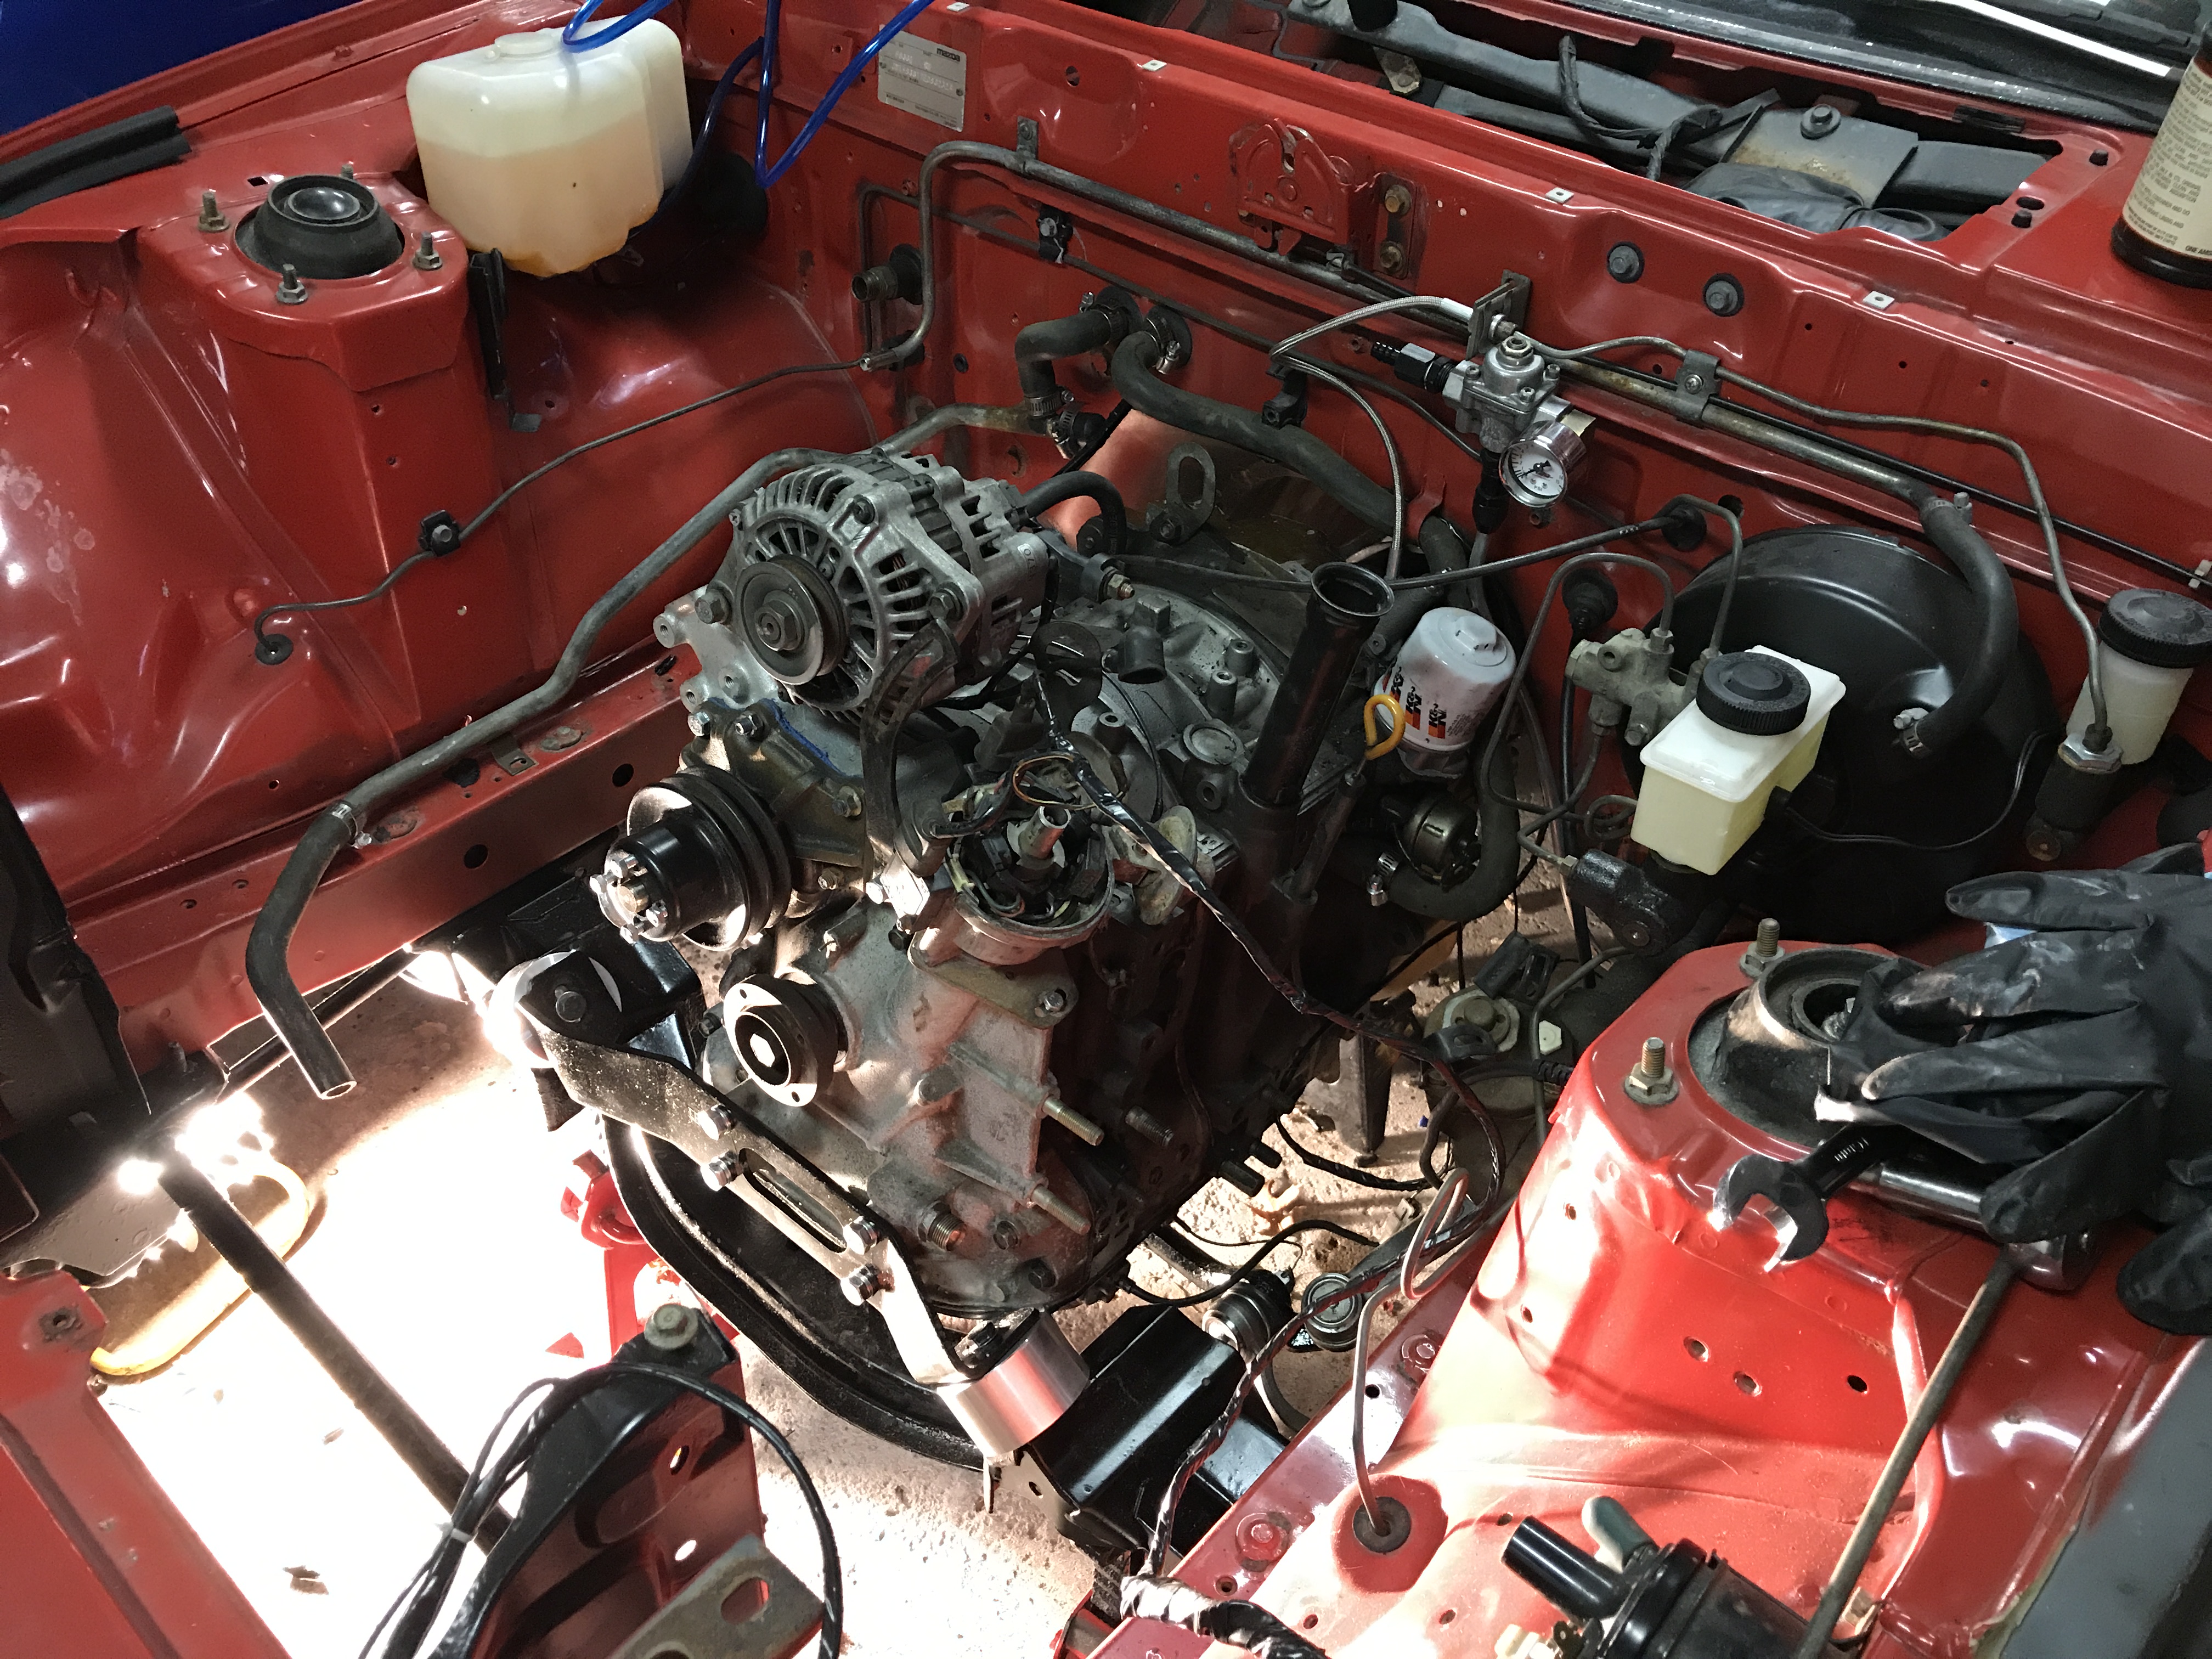
The engine was then put in the car!

I also ditched the DelLorto DHLA 48mm sidedraft setup and ended up getting a Mikuni PHH side draft carb. It measures out at 48mm for the body but they only say the PHH carbs go up to 44mm, so I call this thing a bastard carb - like Jon Snow!
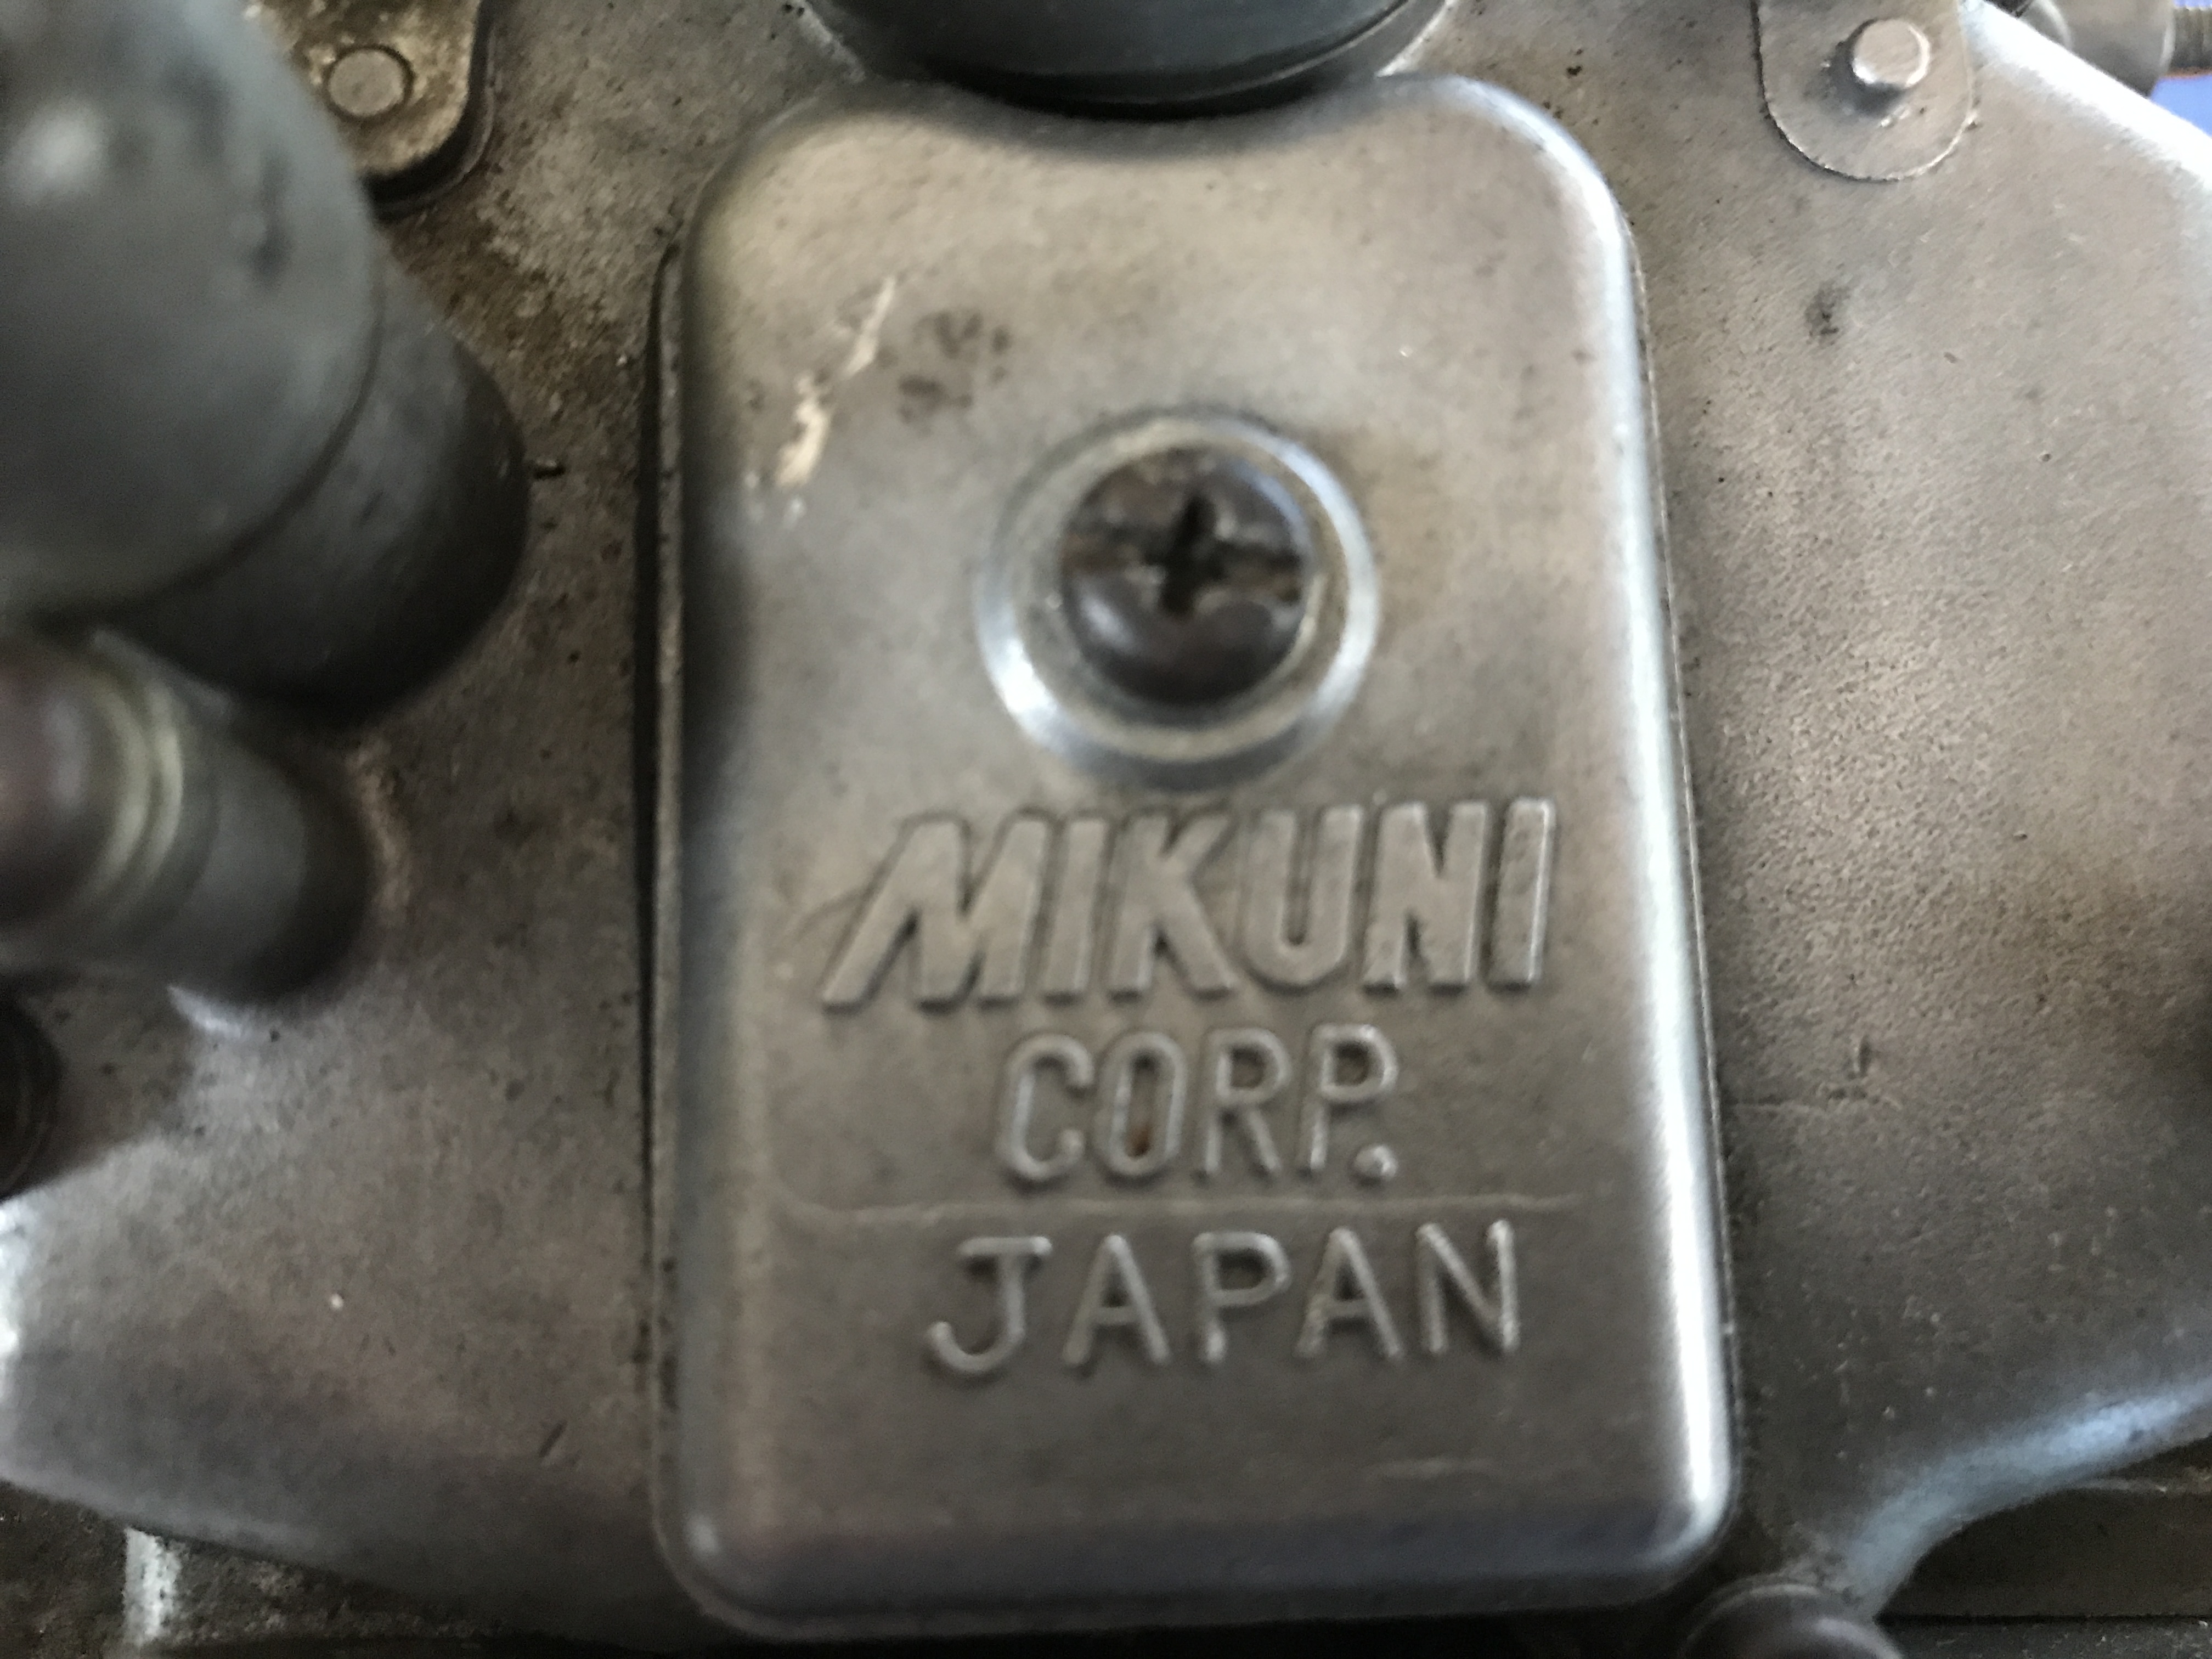

Here's the jetting size that I'm using for a Mikuni PHH 44mm (really a 48mm bore) side draft carb in my RX-7. Just for keywords I'll put that it's not a 12a, it's a stock port 13b S5 NA motor in here (not S4 REGI or GSL-SE SE motor, an S5). I looked around for this information for forever and never found anything so hopefully I can help someone out here.

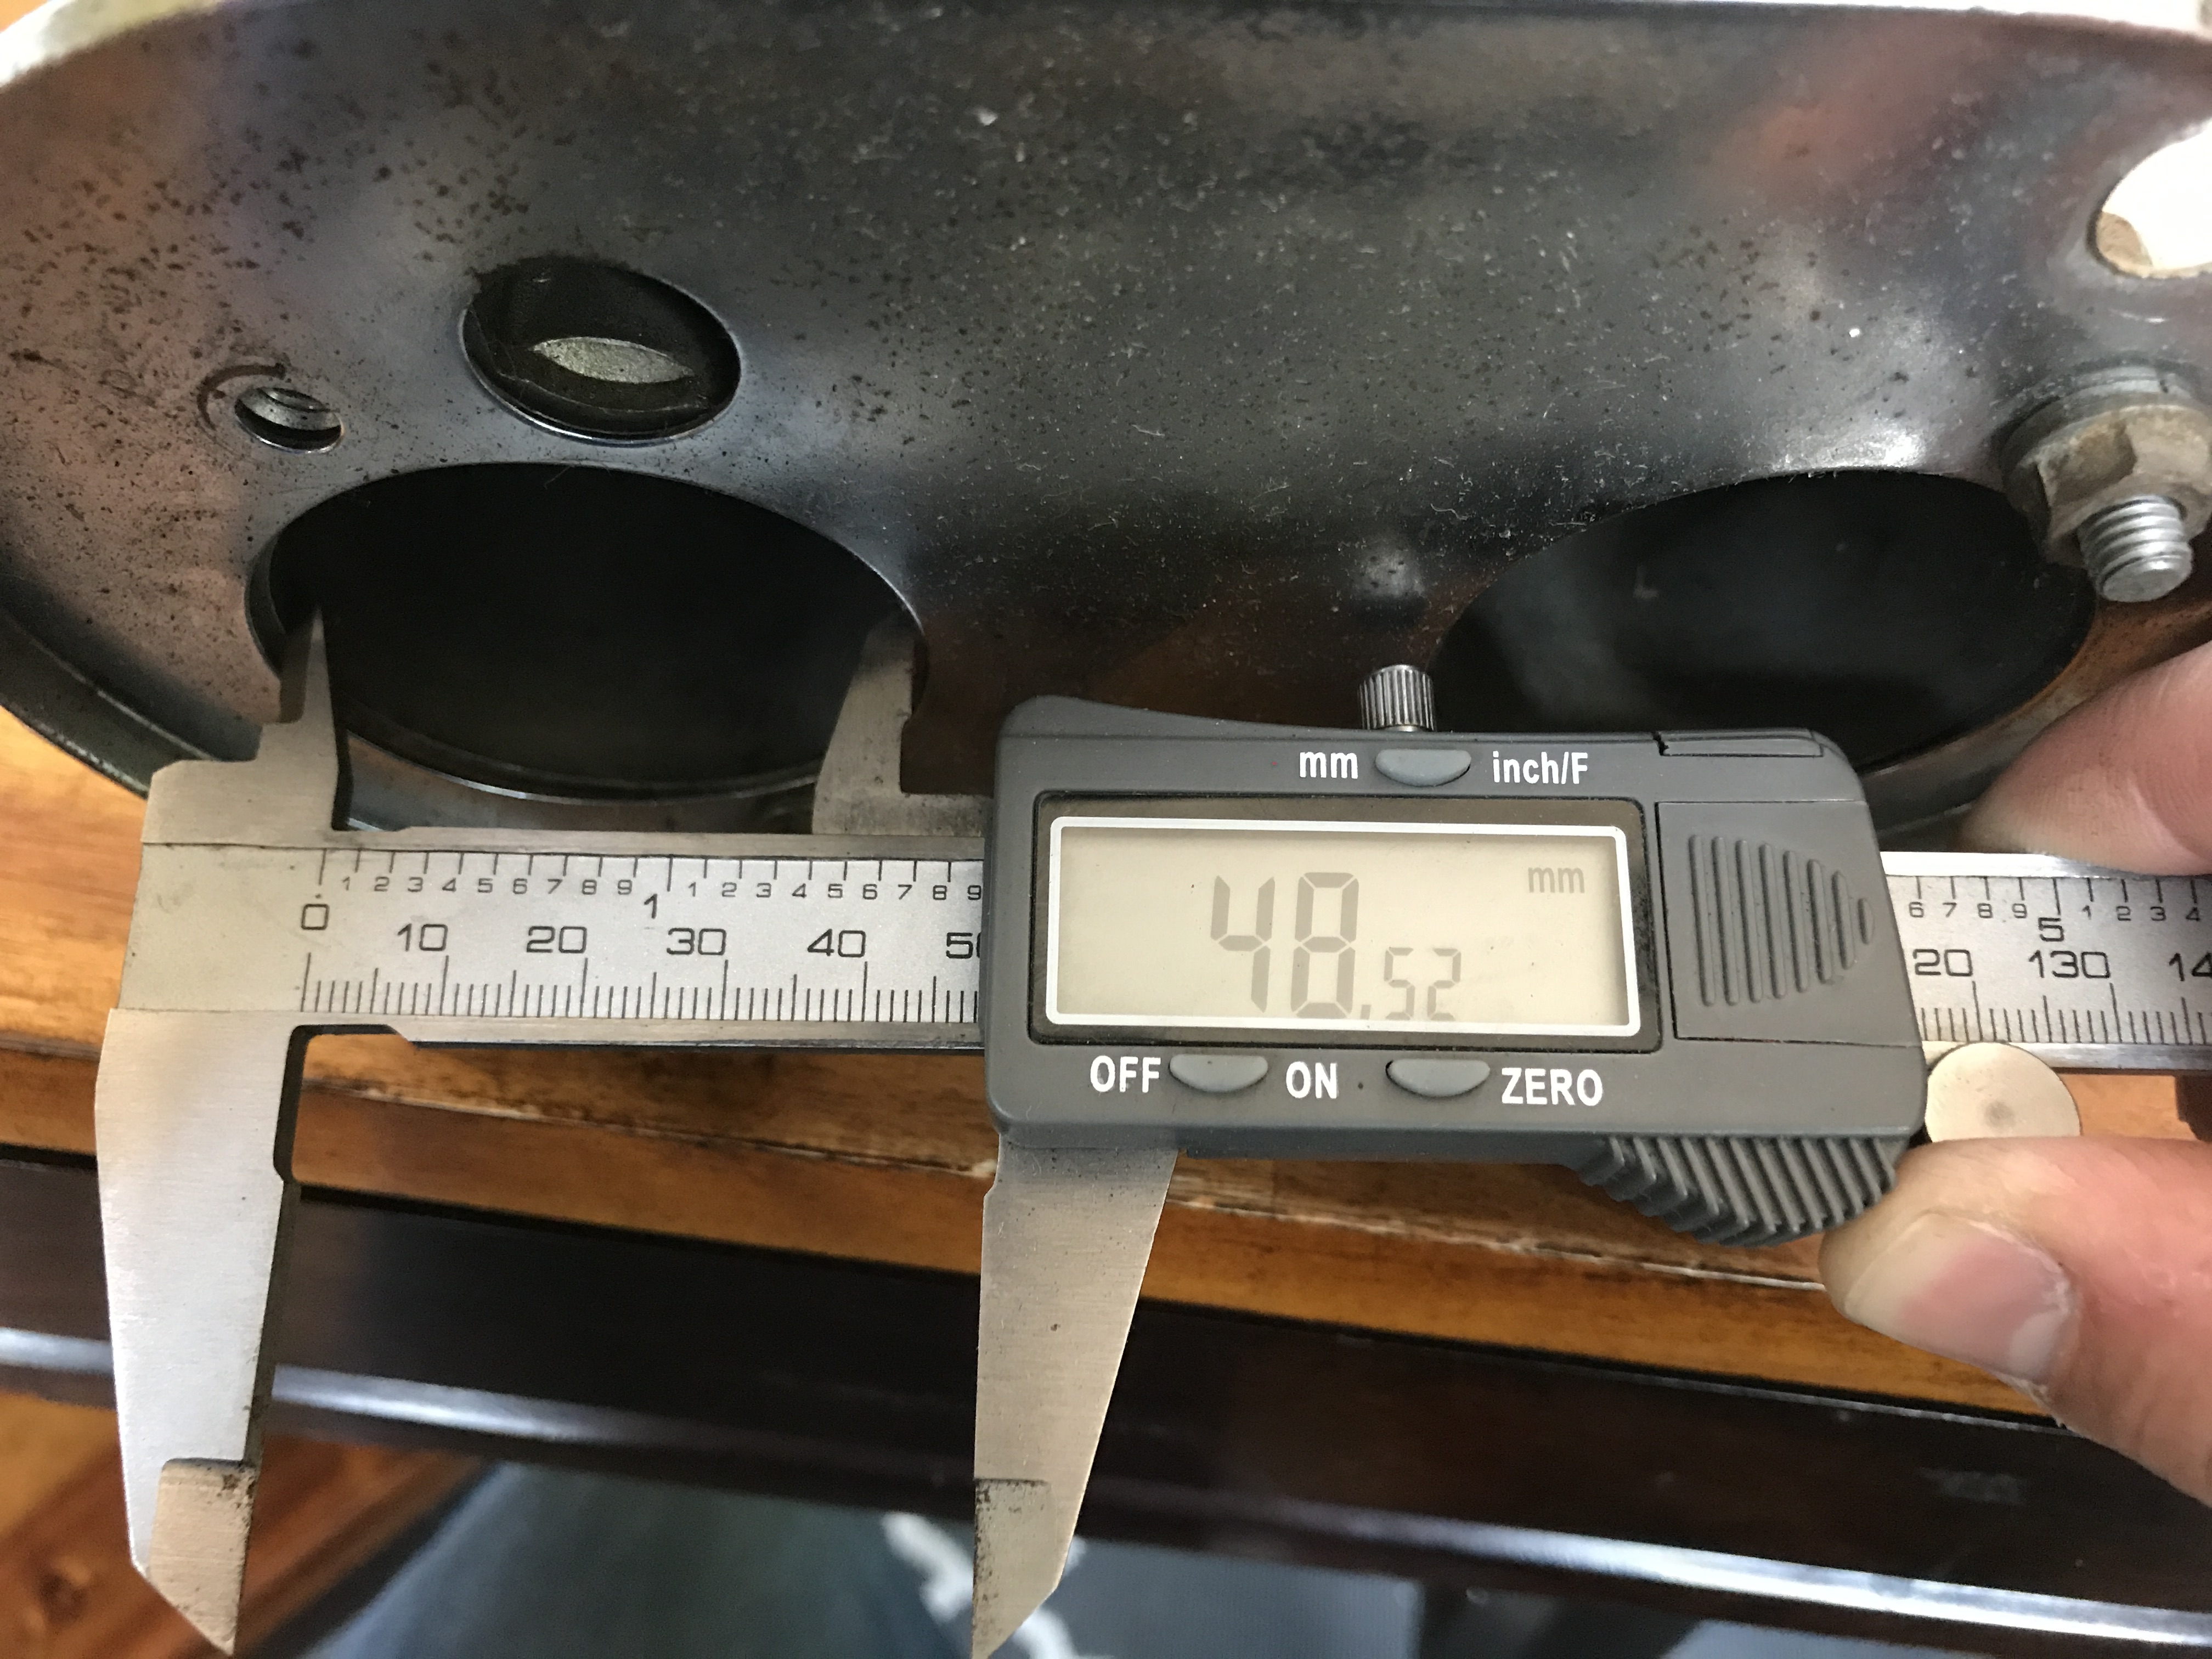
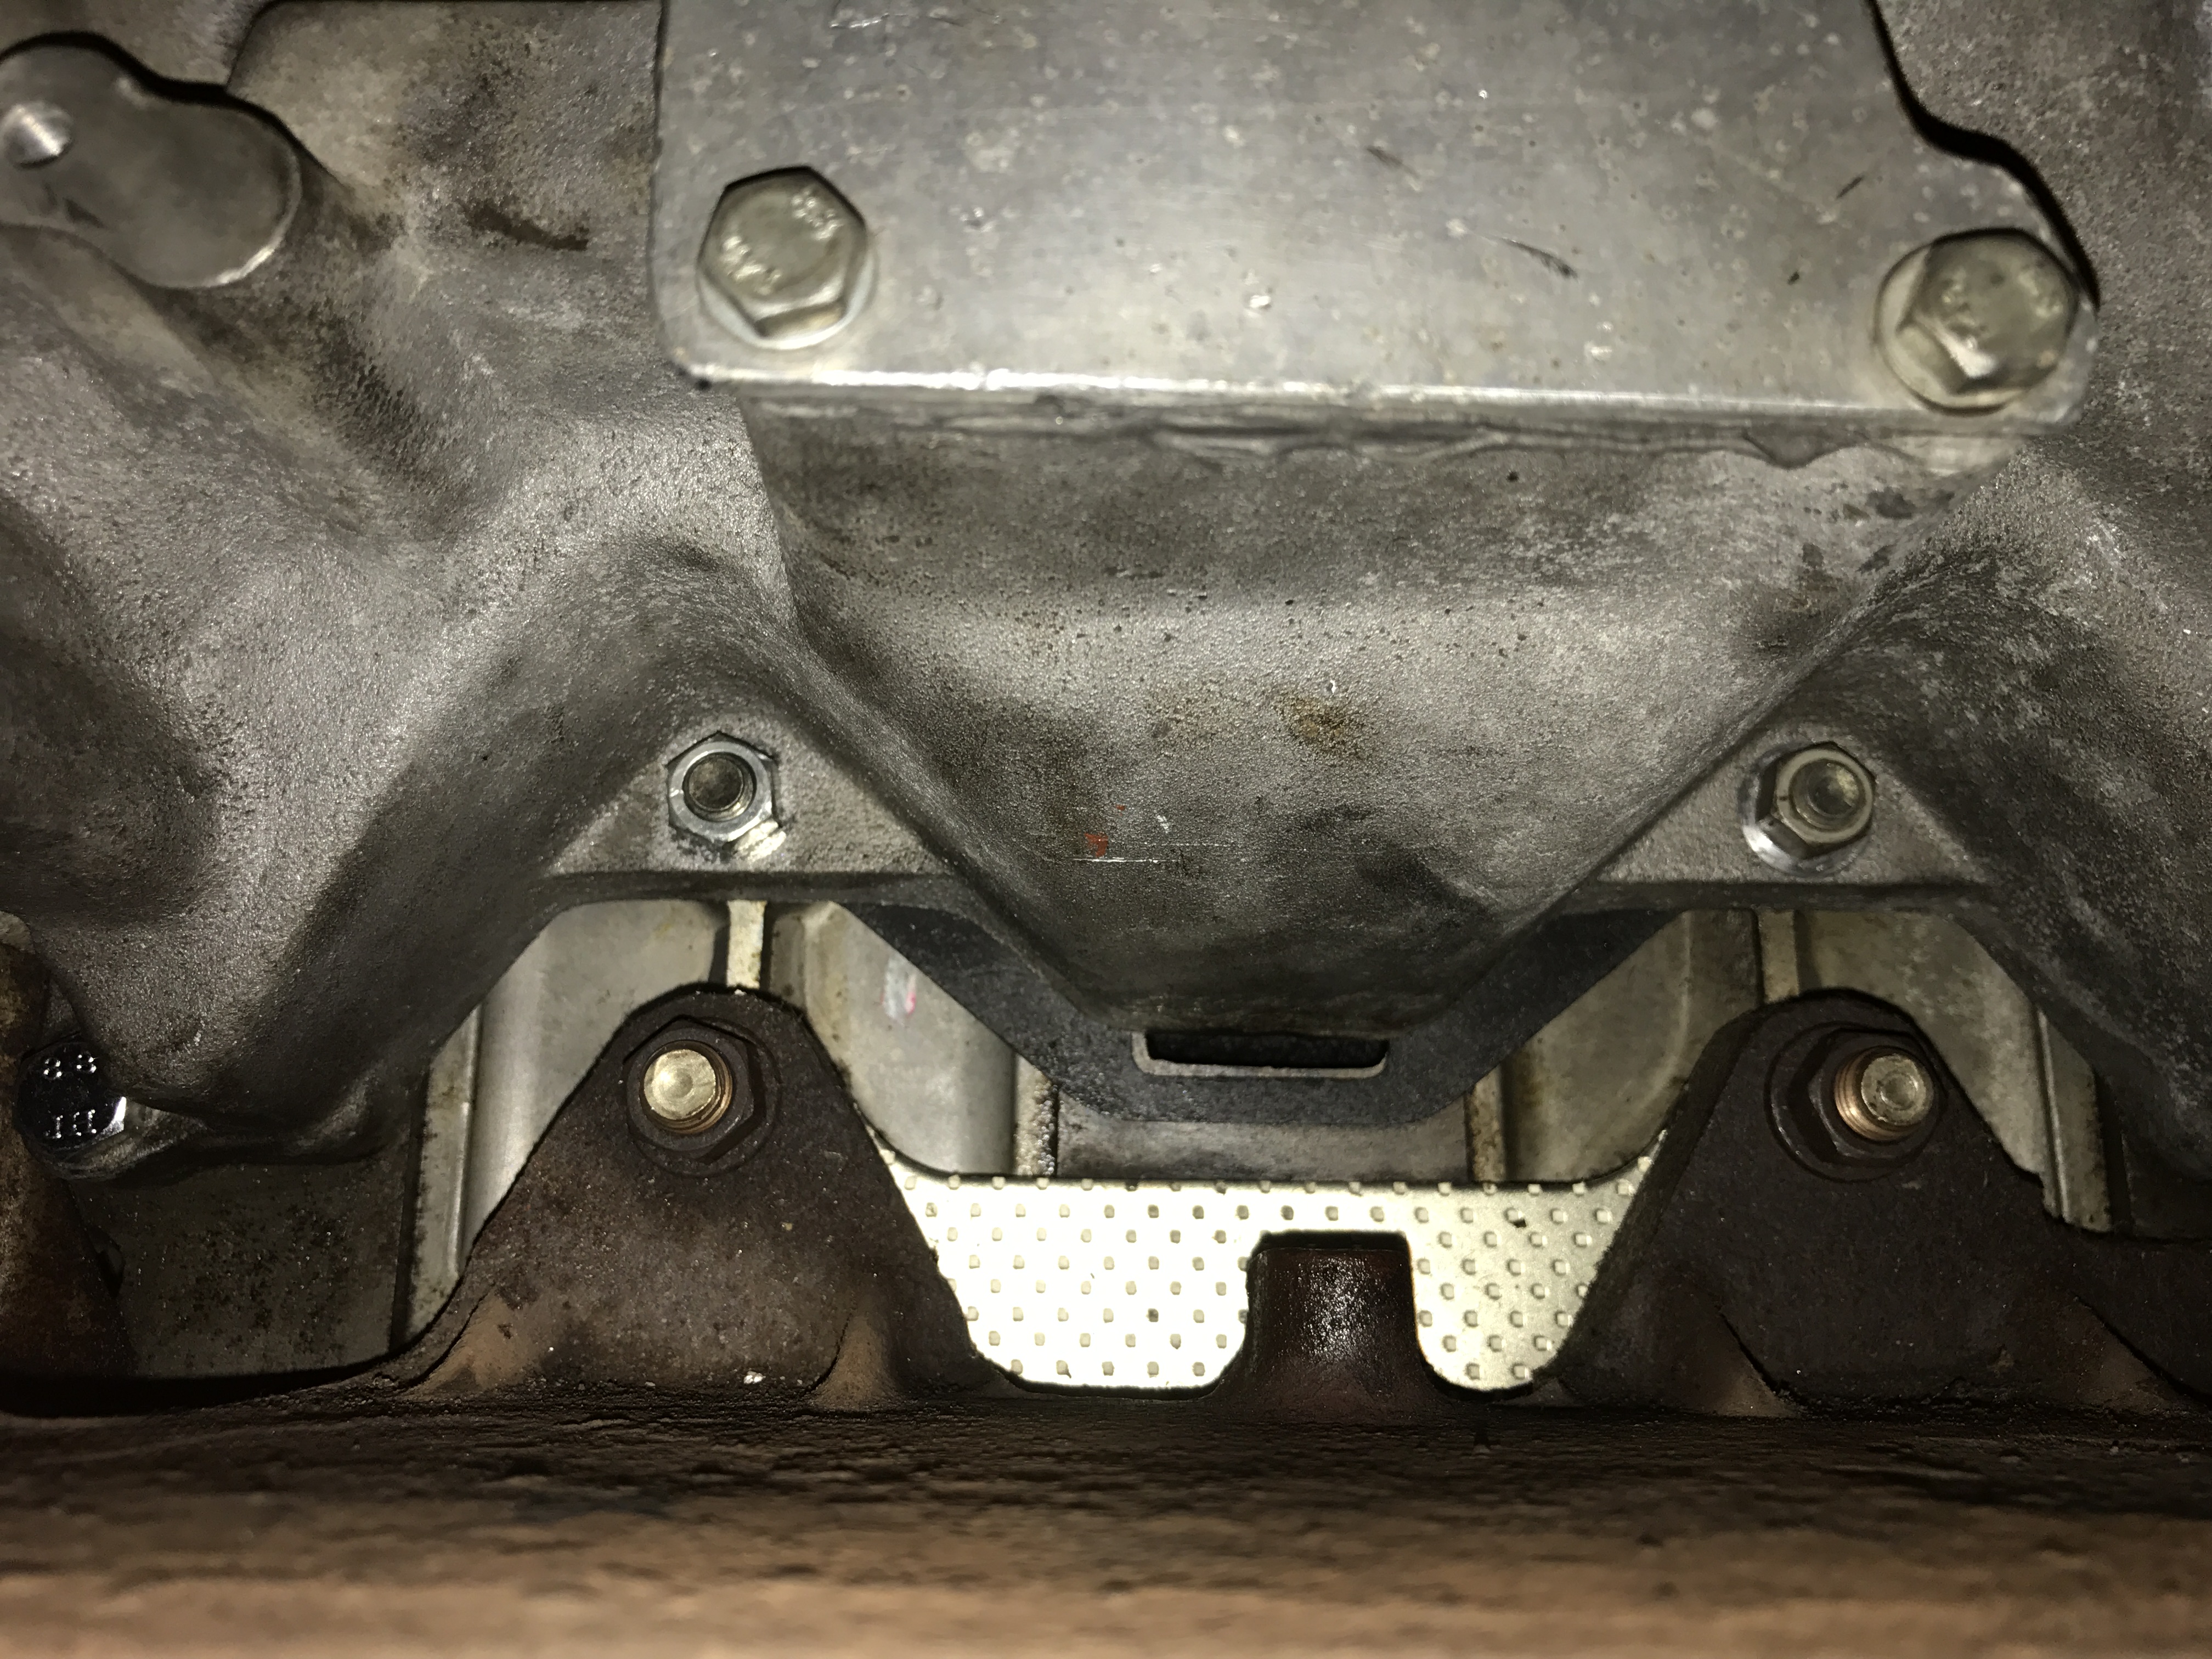
I also had to find out the hard way that an S4 or GSL-SE REGI NA lower intake manifold is indeed different than an S5 NA intake manifold (I cannot confirm which one I have, it's either an S4 or SE). The way that they take in exhaust gasses for all of the EGR crap is different. Turns out that the S5 has a much larger port in the iron designed for reusing those exhaust gasses. The other intake manifold that I used first left a gaping hole shooting exhaust out at the fender of the car. Pictures to follow of course:
Here's what the wrong lower intake manifold on an S5 NA motor looks like:
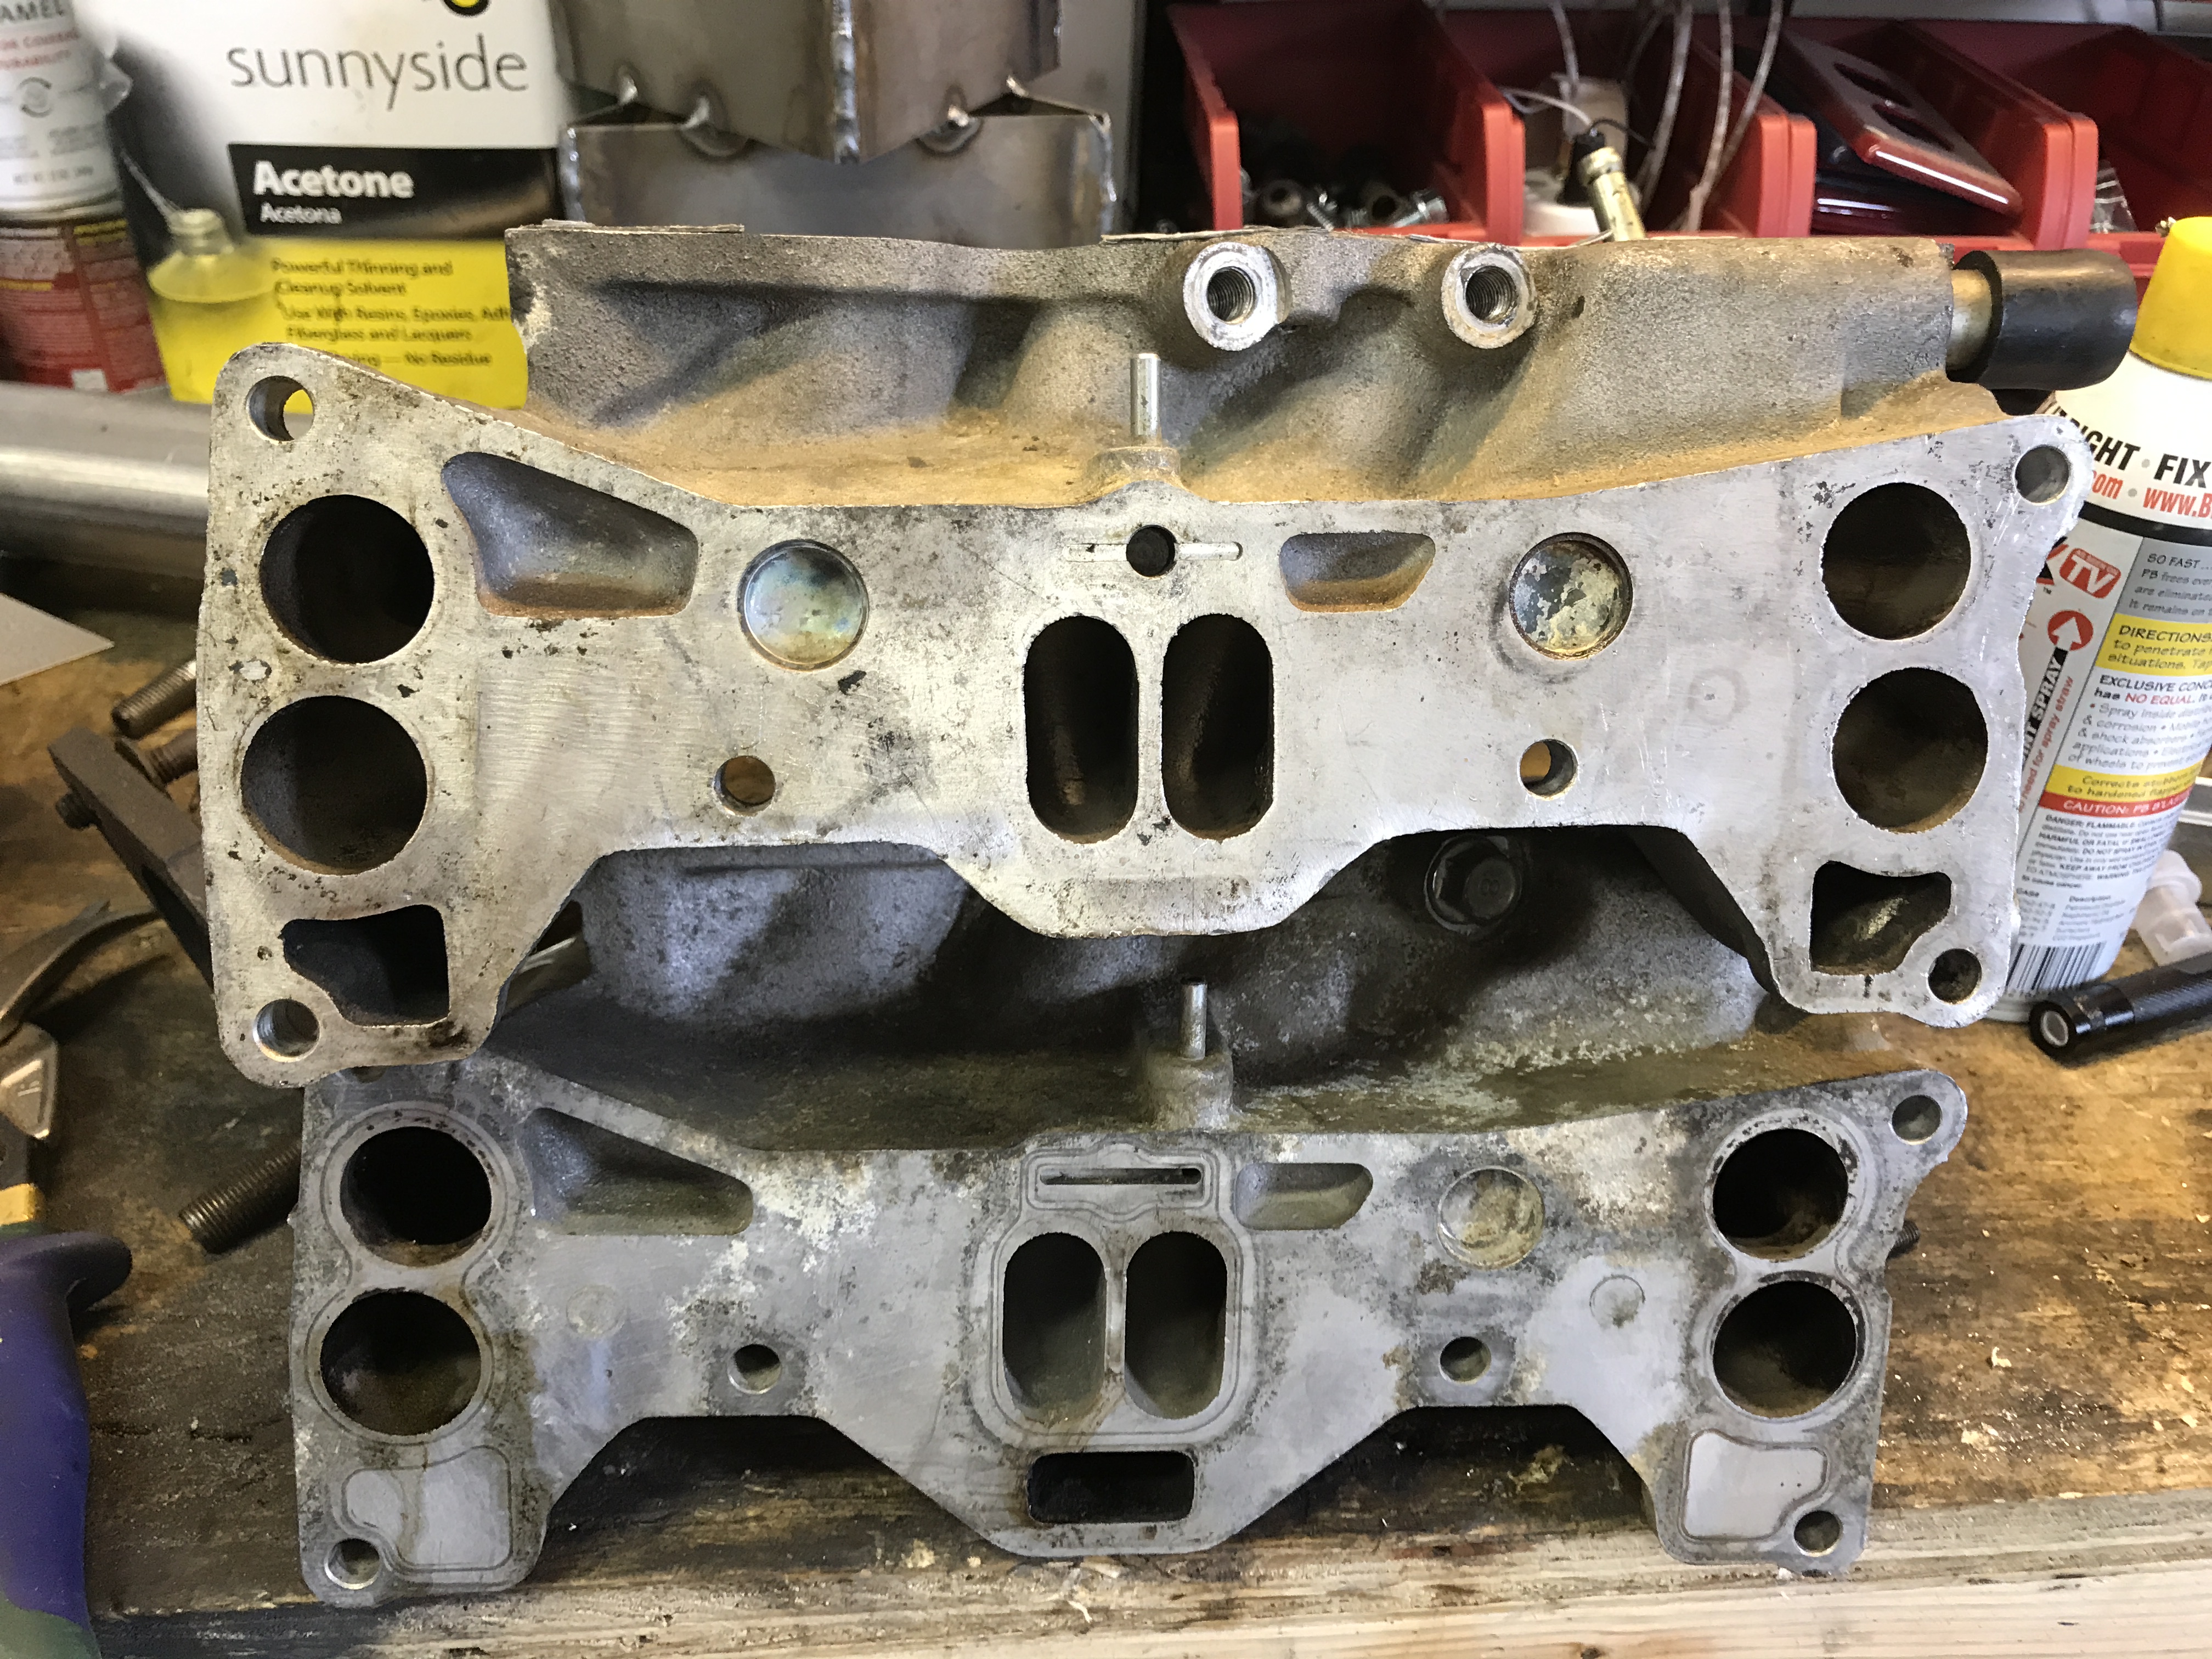
Here you can clearly see the differences in the S5 NA lower intake manifold and an S4 or GSL-SE REGI lower intake mani, very evident when side by side.
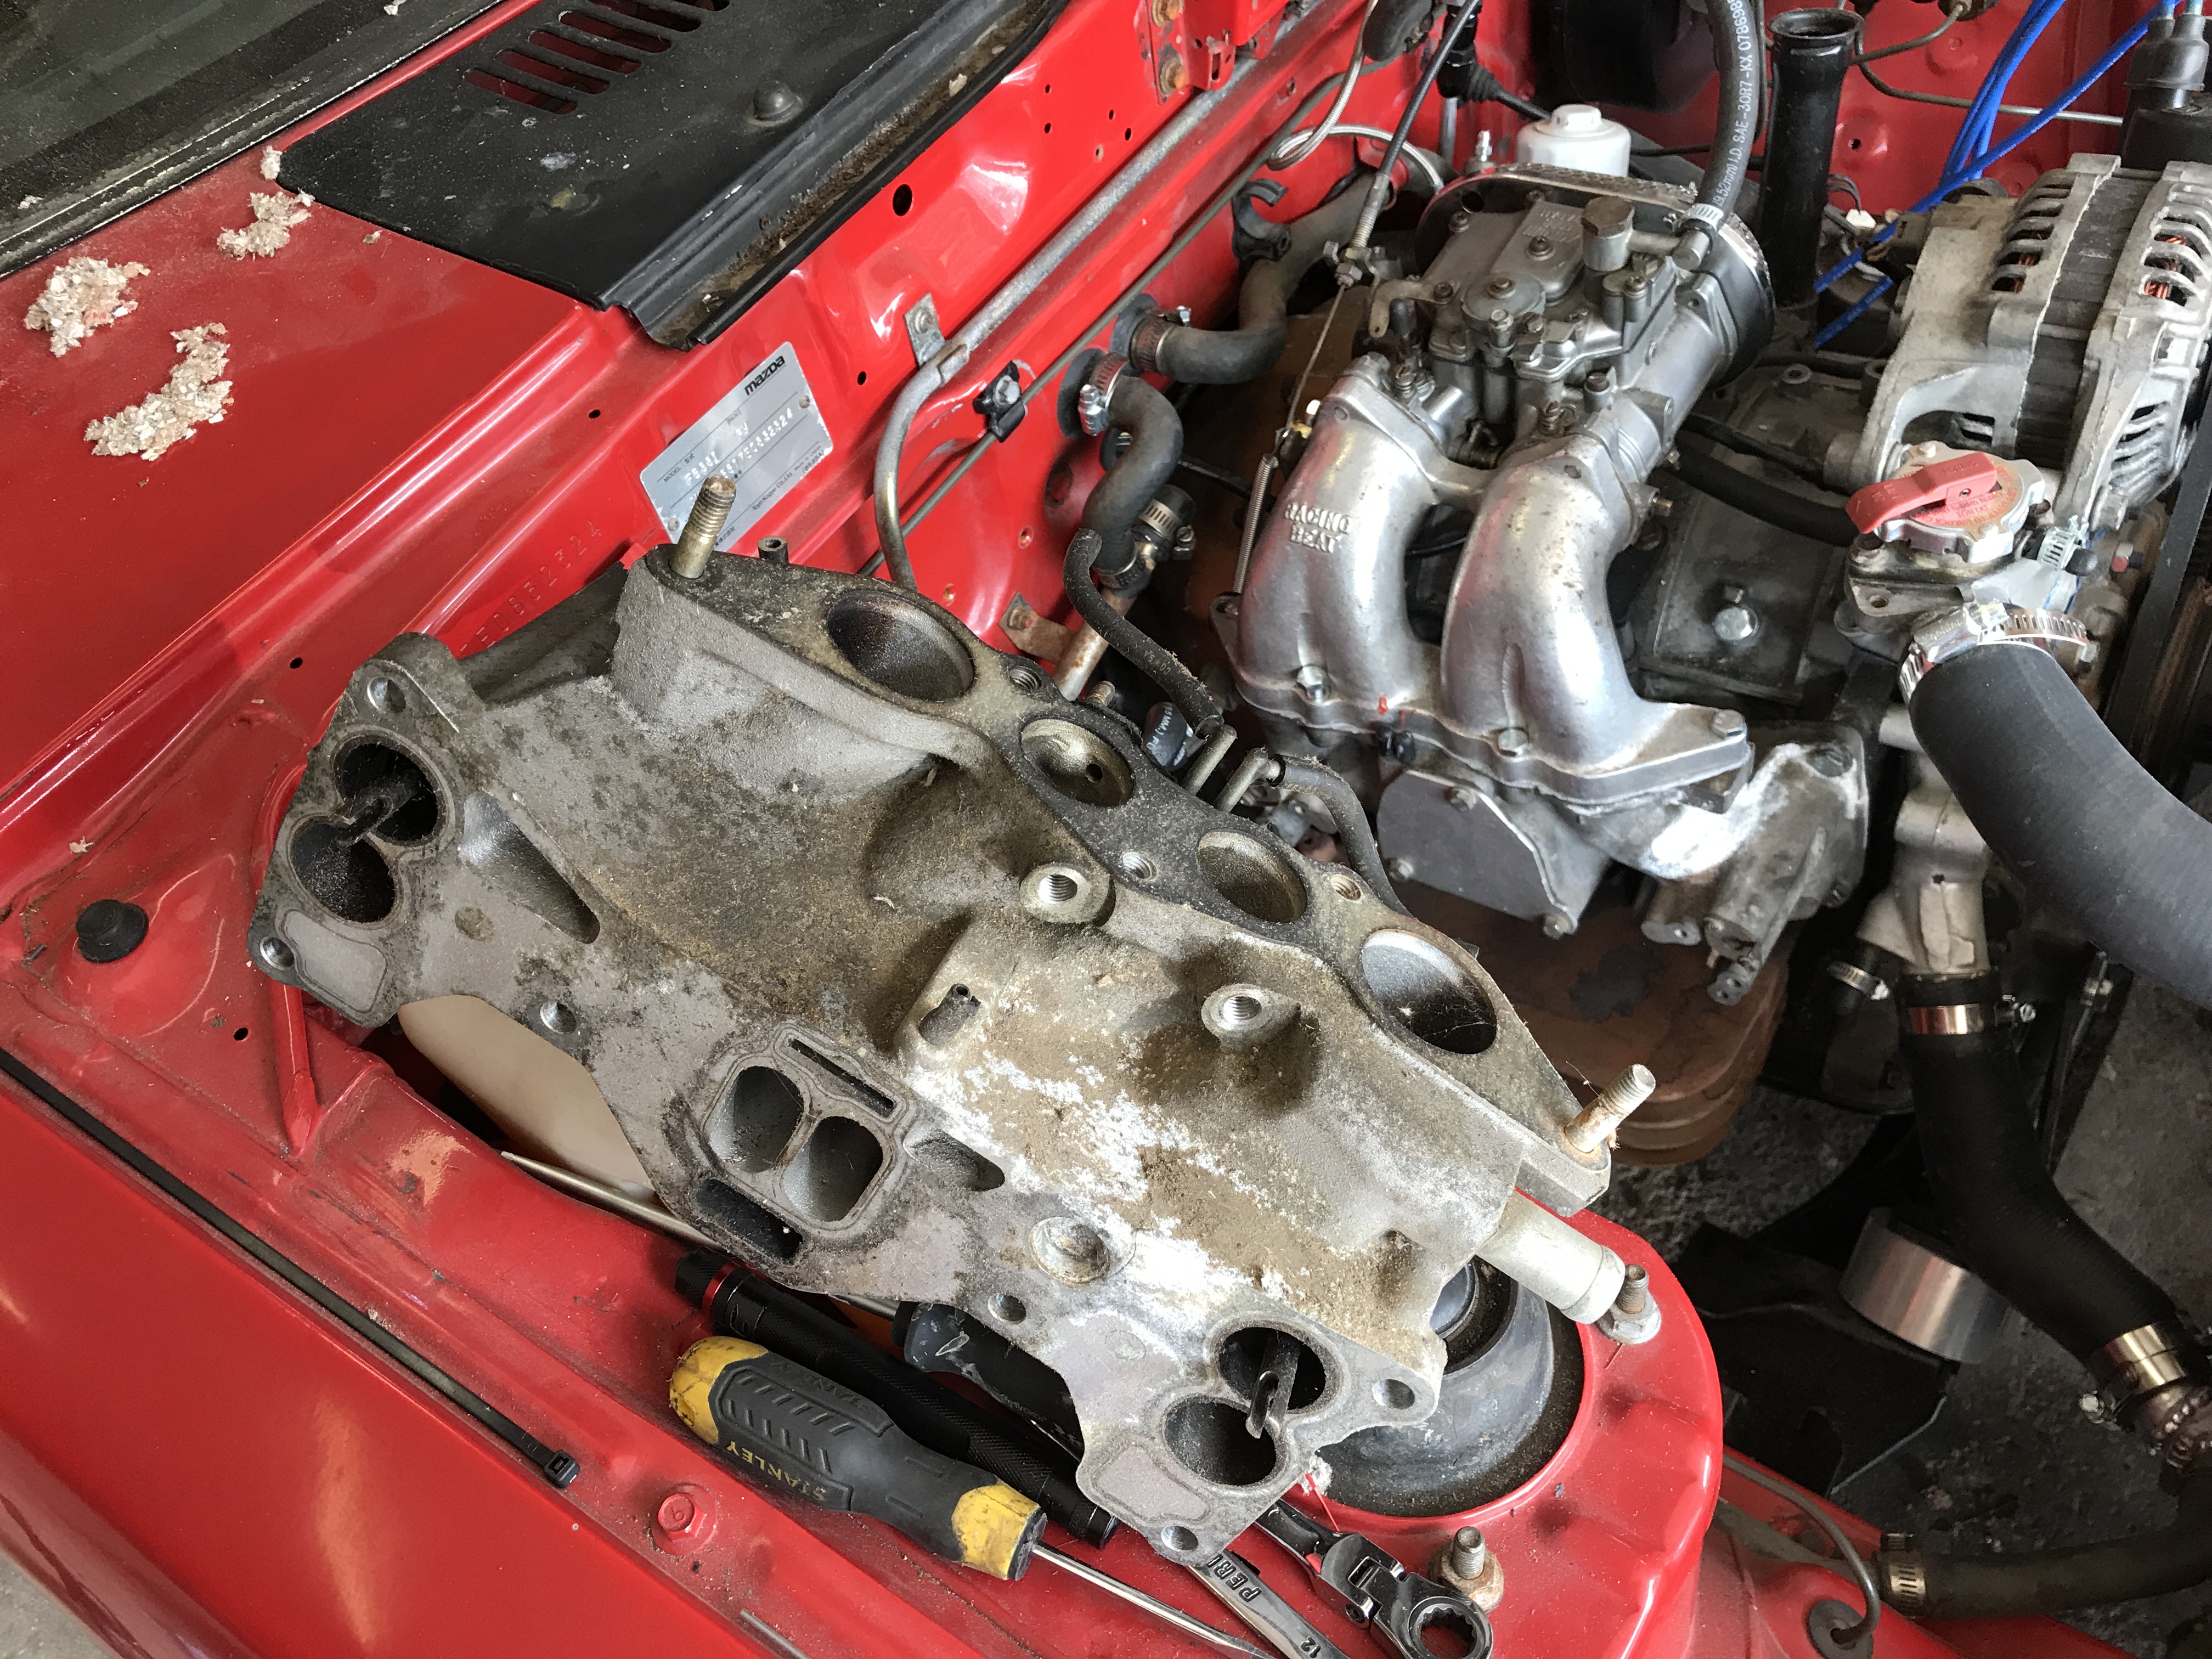
Making the swap in this picture:
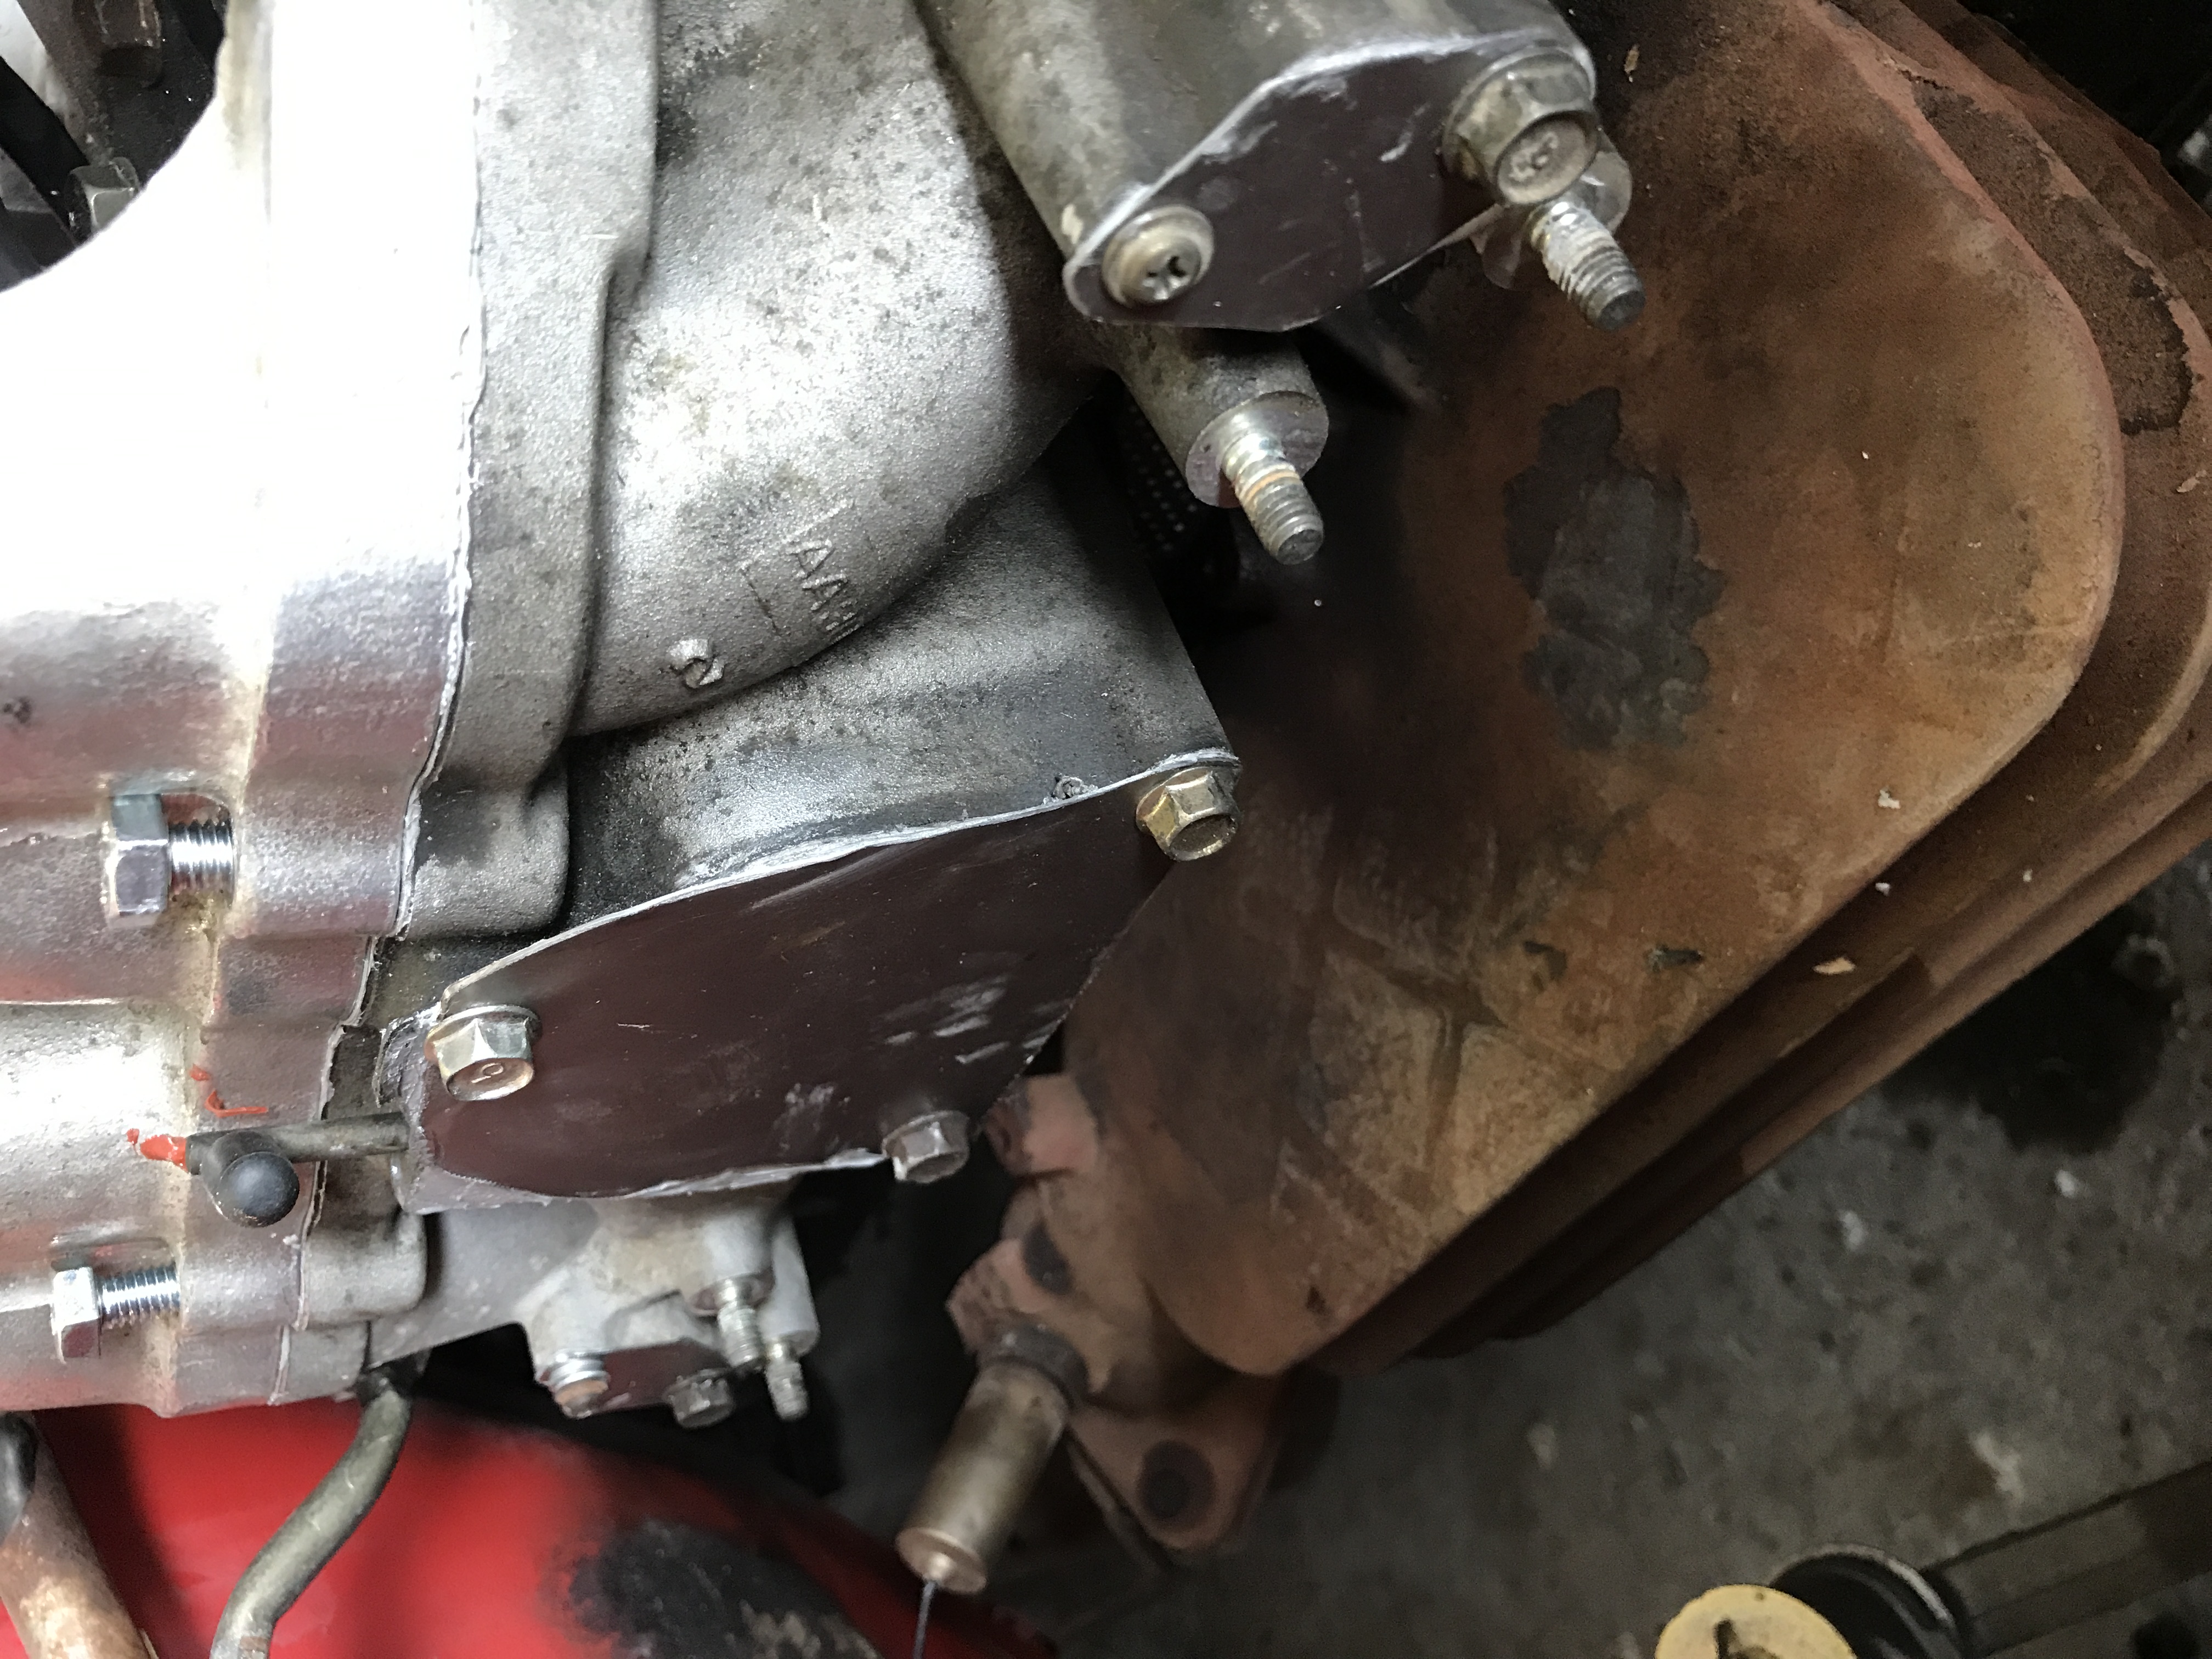
Ahhhh, that's better!

Emissions system all blocked off of course.
The engine got all put together for it's intended purpose on the stand:
The engine was then put in the car!
I also ditched the DelLorto DHLA 48mm sidedraft setup and ended up getting a Mikuni PHH side draft carb. It measures out at 48mm for the body but they only say the PHH carbs go up to 44mm, so I call this thing a bastard carb - like Jon Snow!
Here's the jetting size that I'm using for a Mikuni PHH 44mm (really a 48mm bore) side draft carb in my RX-7. Just for keywords I'll put that it's not a 12a, it's a stock port 13b S5 NA motor in here (not S4 REGI or GSL-SE SE motor, an S5). I looked around for this information for forever and never found anything so hopefully I can help someone out here.
I also had to find out the hard way that an S4 or GSL-SE REGI NA lower intake manifold is indeed different than an S5 NA intake manifold (I cannot confirm which one I have, it's either an S4 or SE). The way that they take in exhaust gasses for all of the EGR crap is different. Turns out that the S5 has a much larger port in the iron designed for reusing those exhaust gasses. The other intake manifold that I used first left a gaping hole shooting exhaust out at the fender of the car. Pictures to follow of course:
Here's what the wrong lower intake manifold on an S5 NA motor looks like:
Here you can clearly see the differences in the S5 NA lower intake manifold and an S4 or GSL-SE REGI lower intake mani, very evident when side by side.
Making the swap in this picture:
Ahhhh, that's better!
Emissions system all blocked off of course.
Last edited by DreamInRotary; 08-24-17 at 04:56 PM. Reason: PHOTOBUCKET SUCKS
08-24-17, 01:48 PM
#24
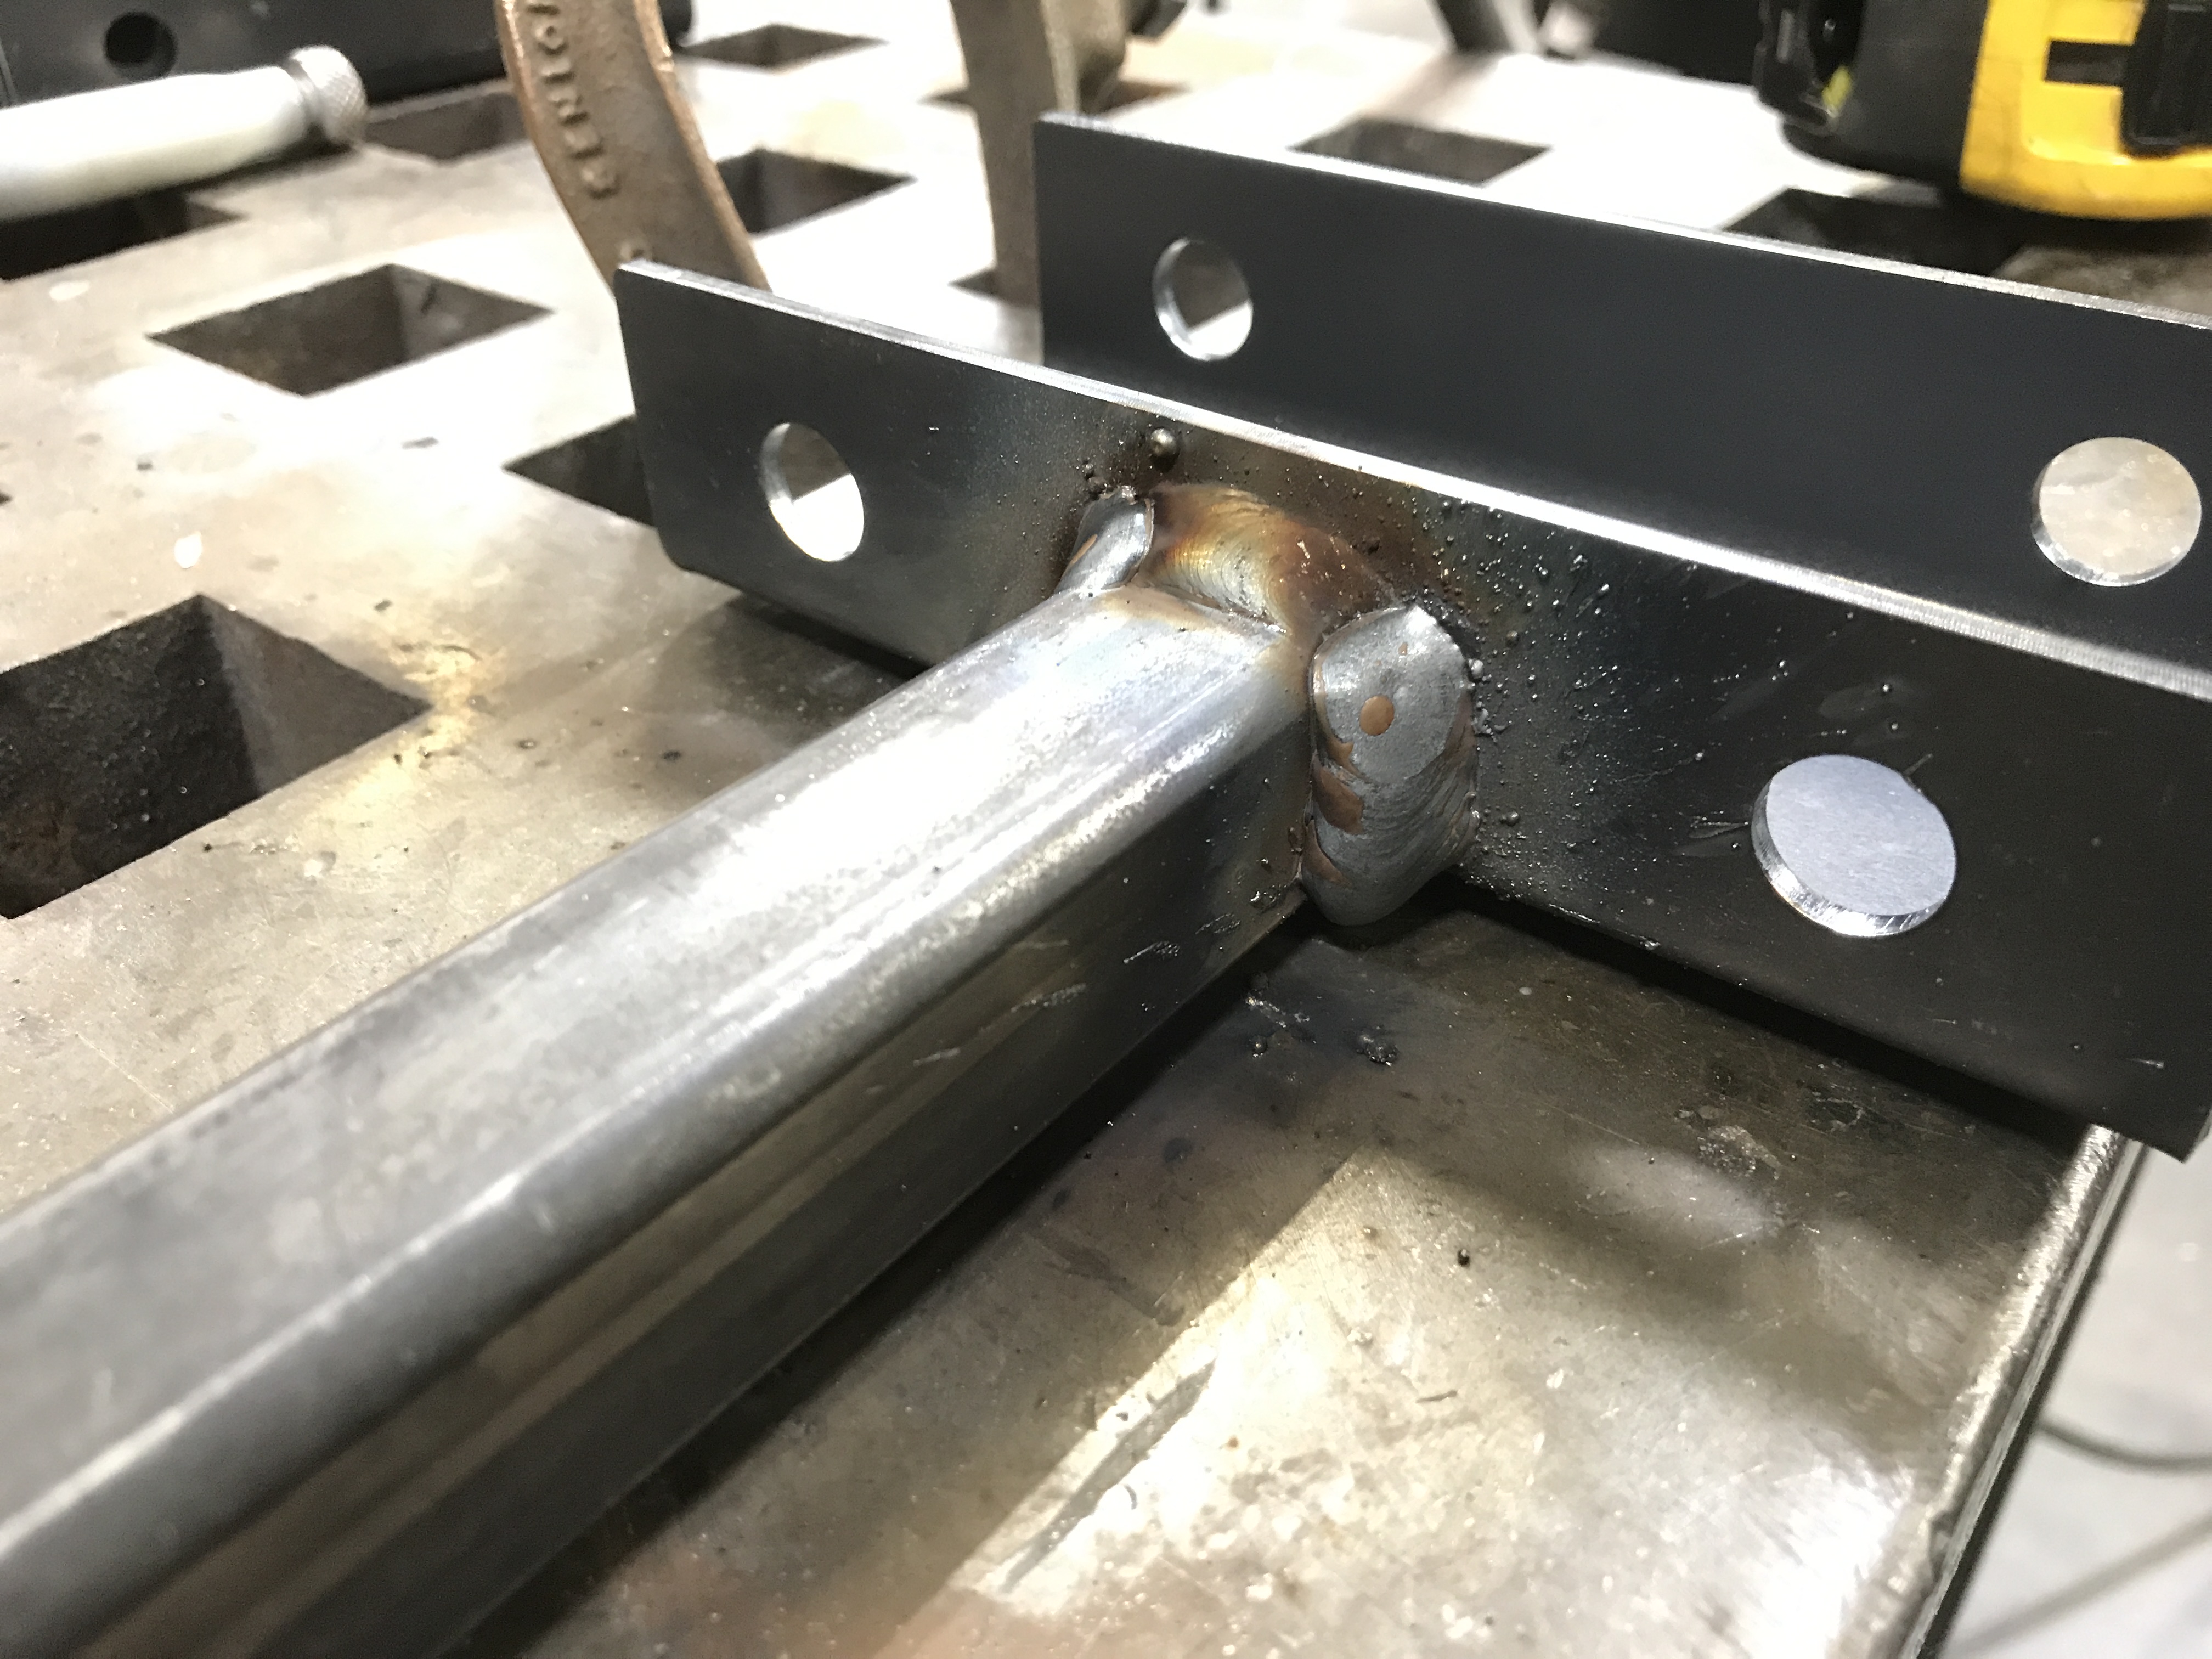
Let's make a super cool custom tranny mount that'll stiffen up the chassis!
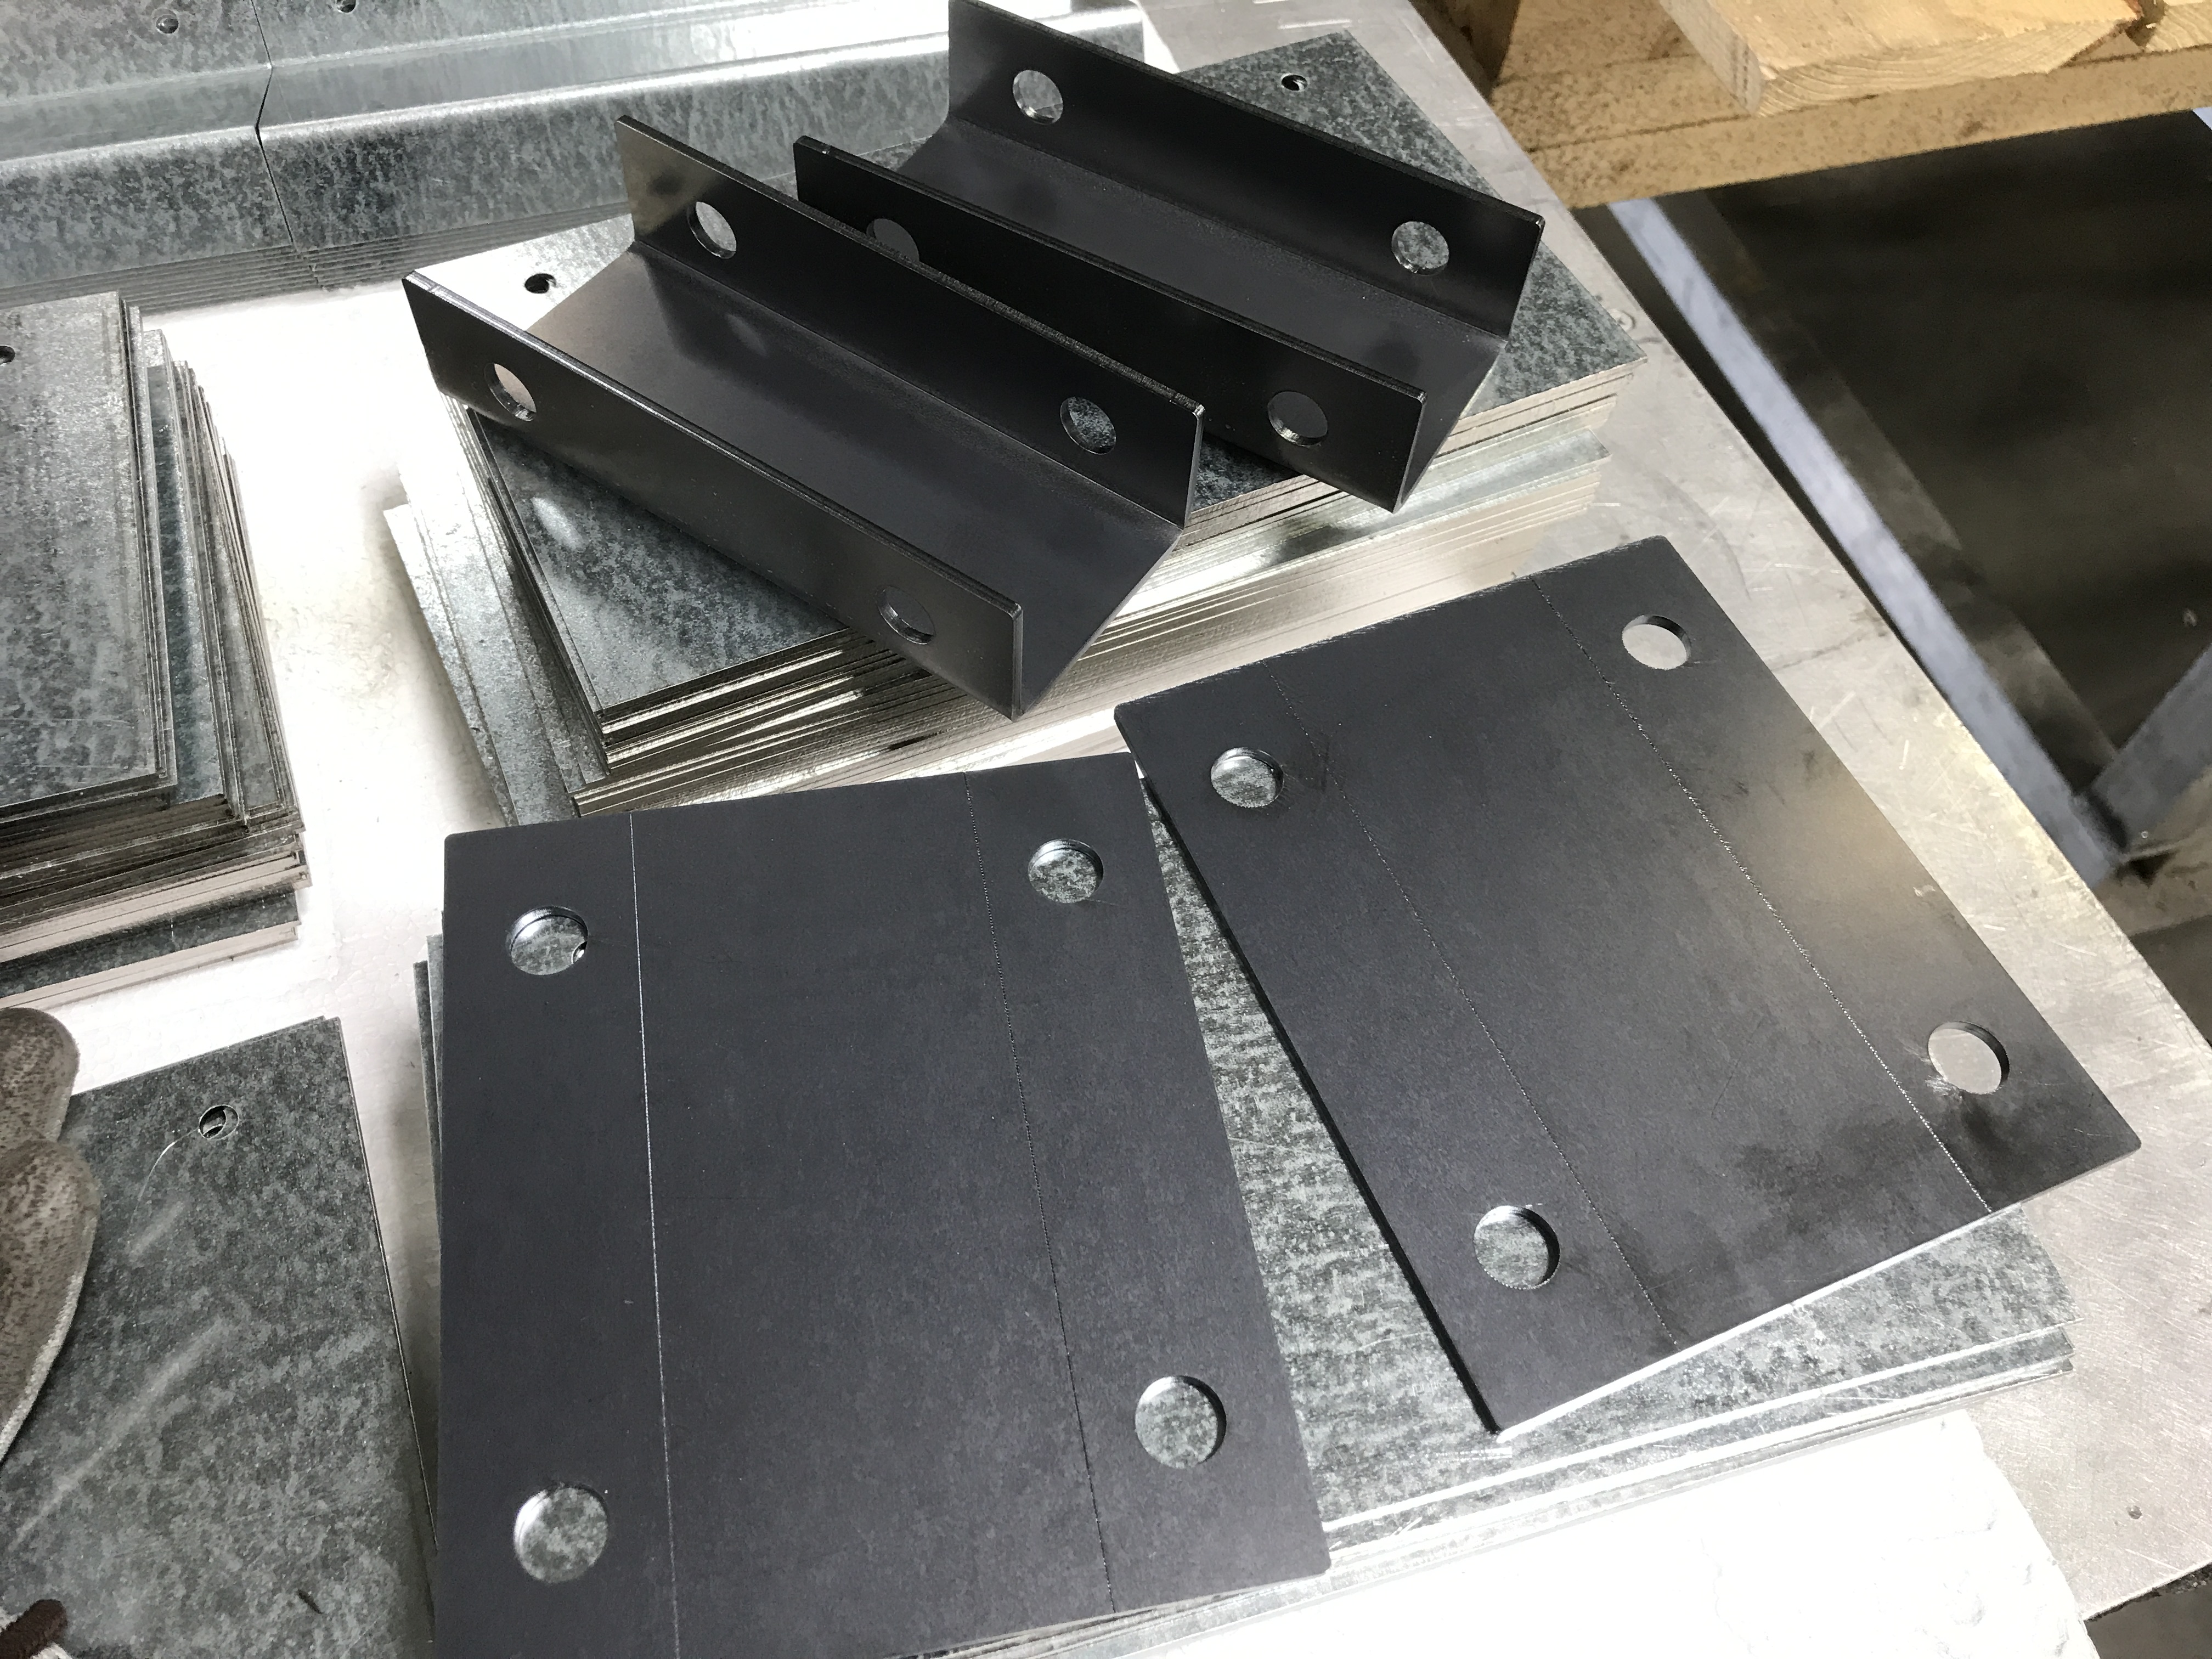
This whole thing was made out of 1/8" mild steel components. I drew the brackets myself, allowing for bend allowances (since I worked in sheet metal up until last week), and had them laser'ed out of a sheet of 1/8' mild steel I bought. The square tubing came from the same distributor and I just bought a 4' section of it from them. It's 1" OD tubing with 1/8" sidewalls, super stout stuff.
Brackets for the frame rails:
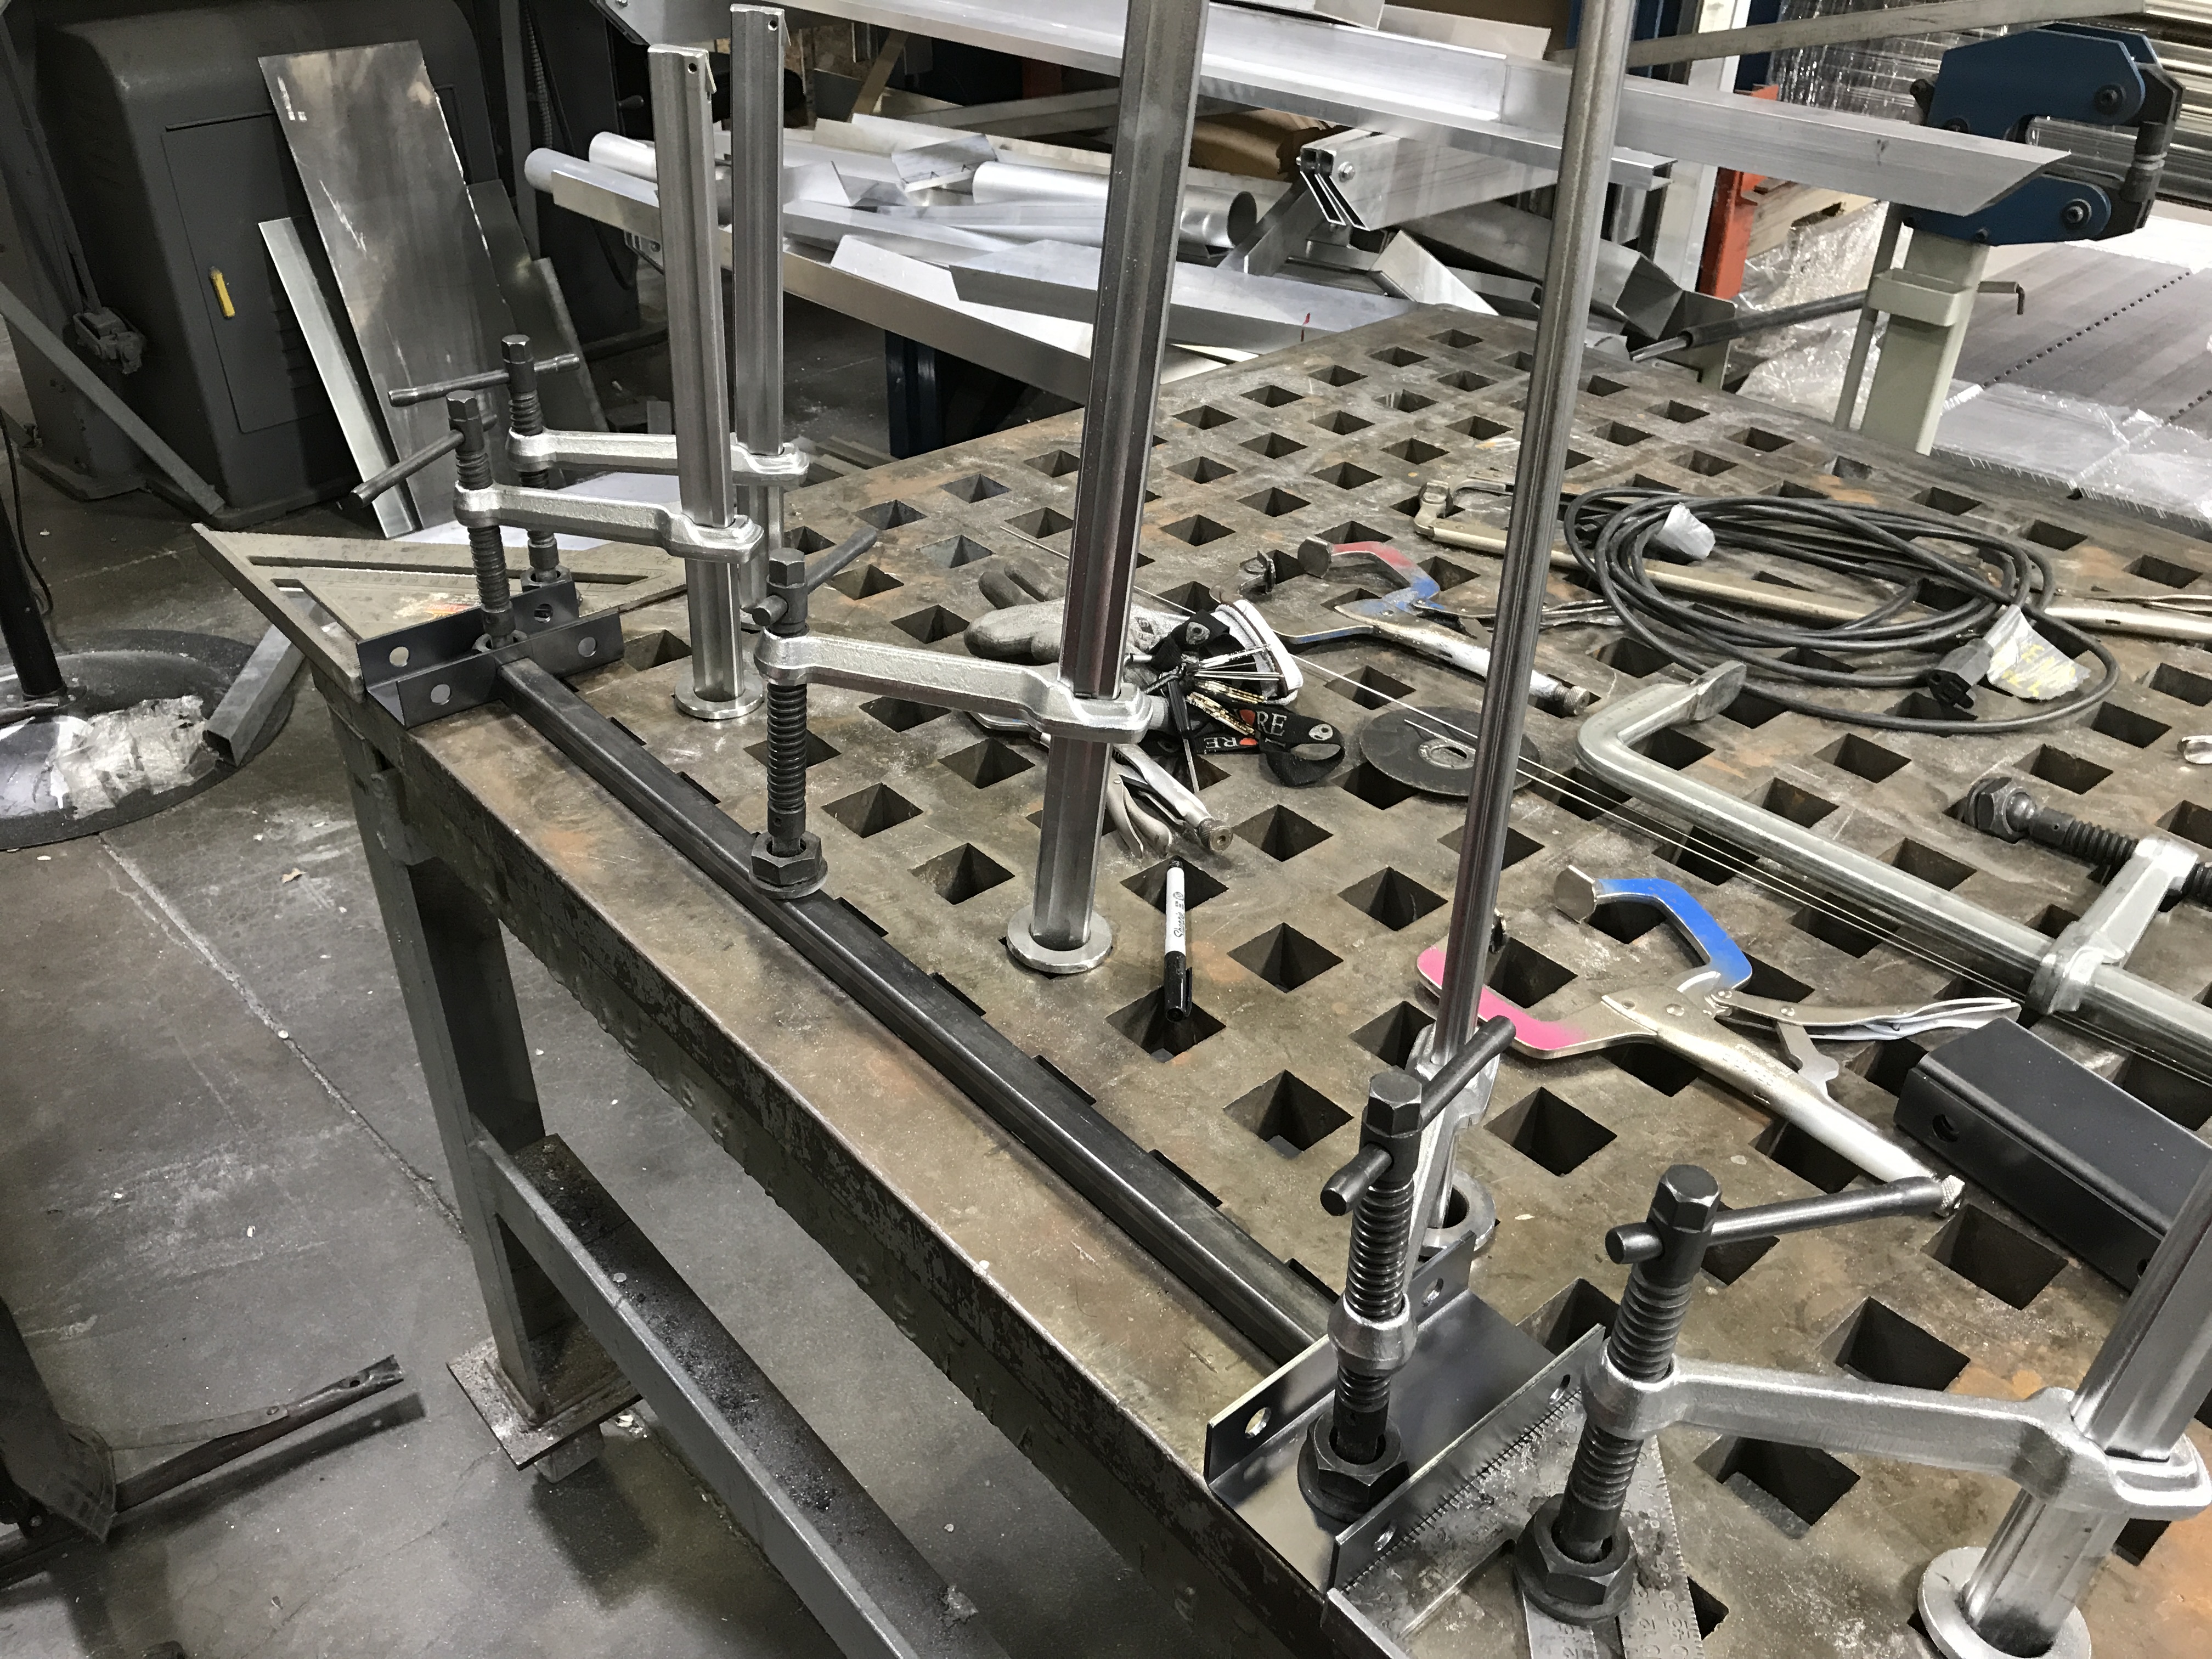
All jig'ed up and ready to weld:
Some welding done:
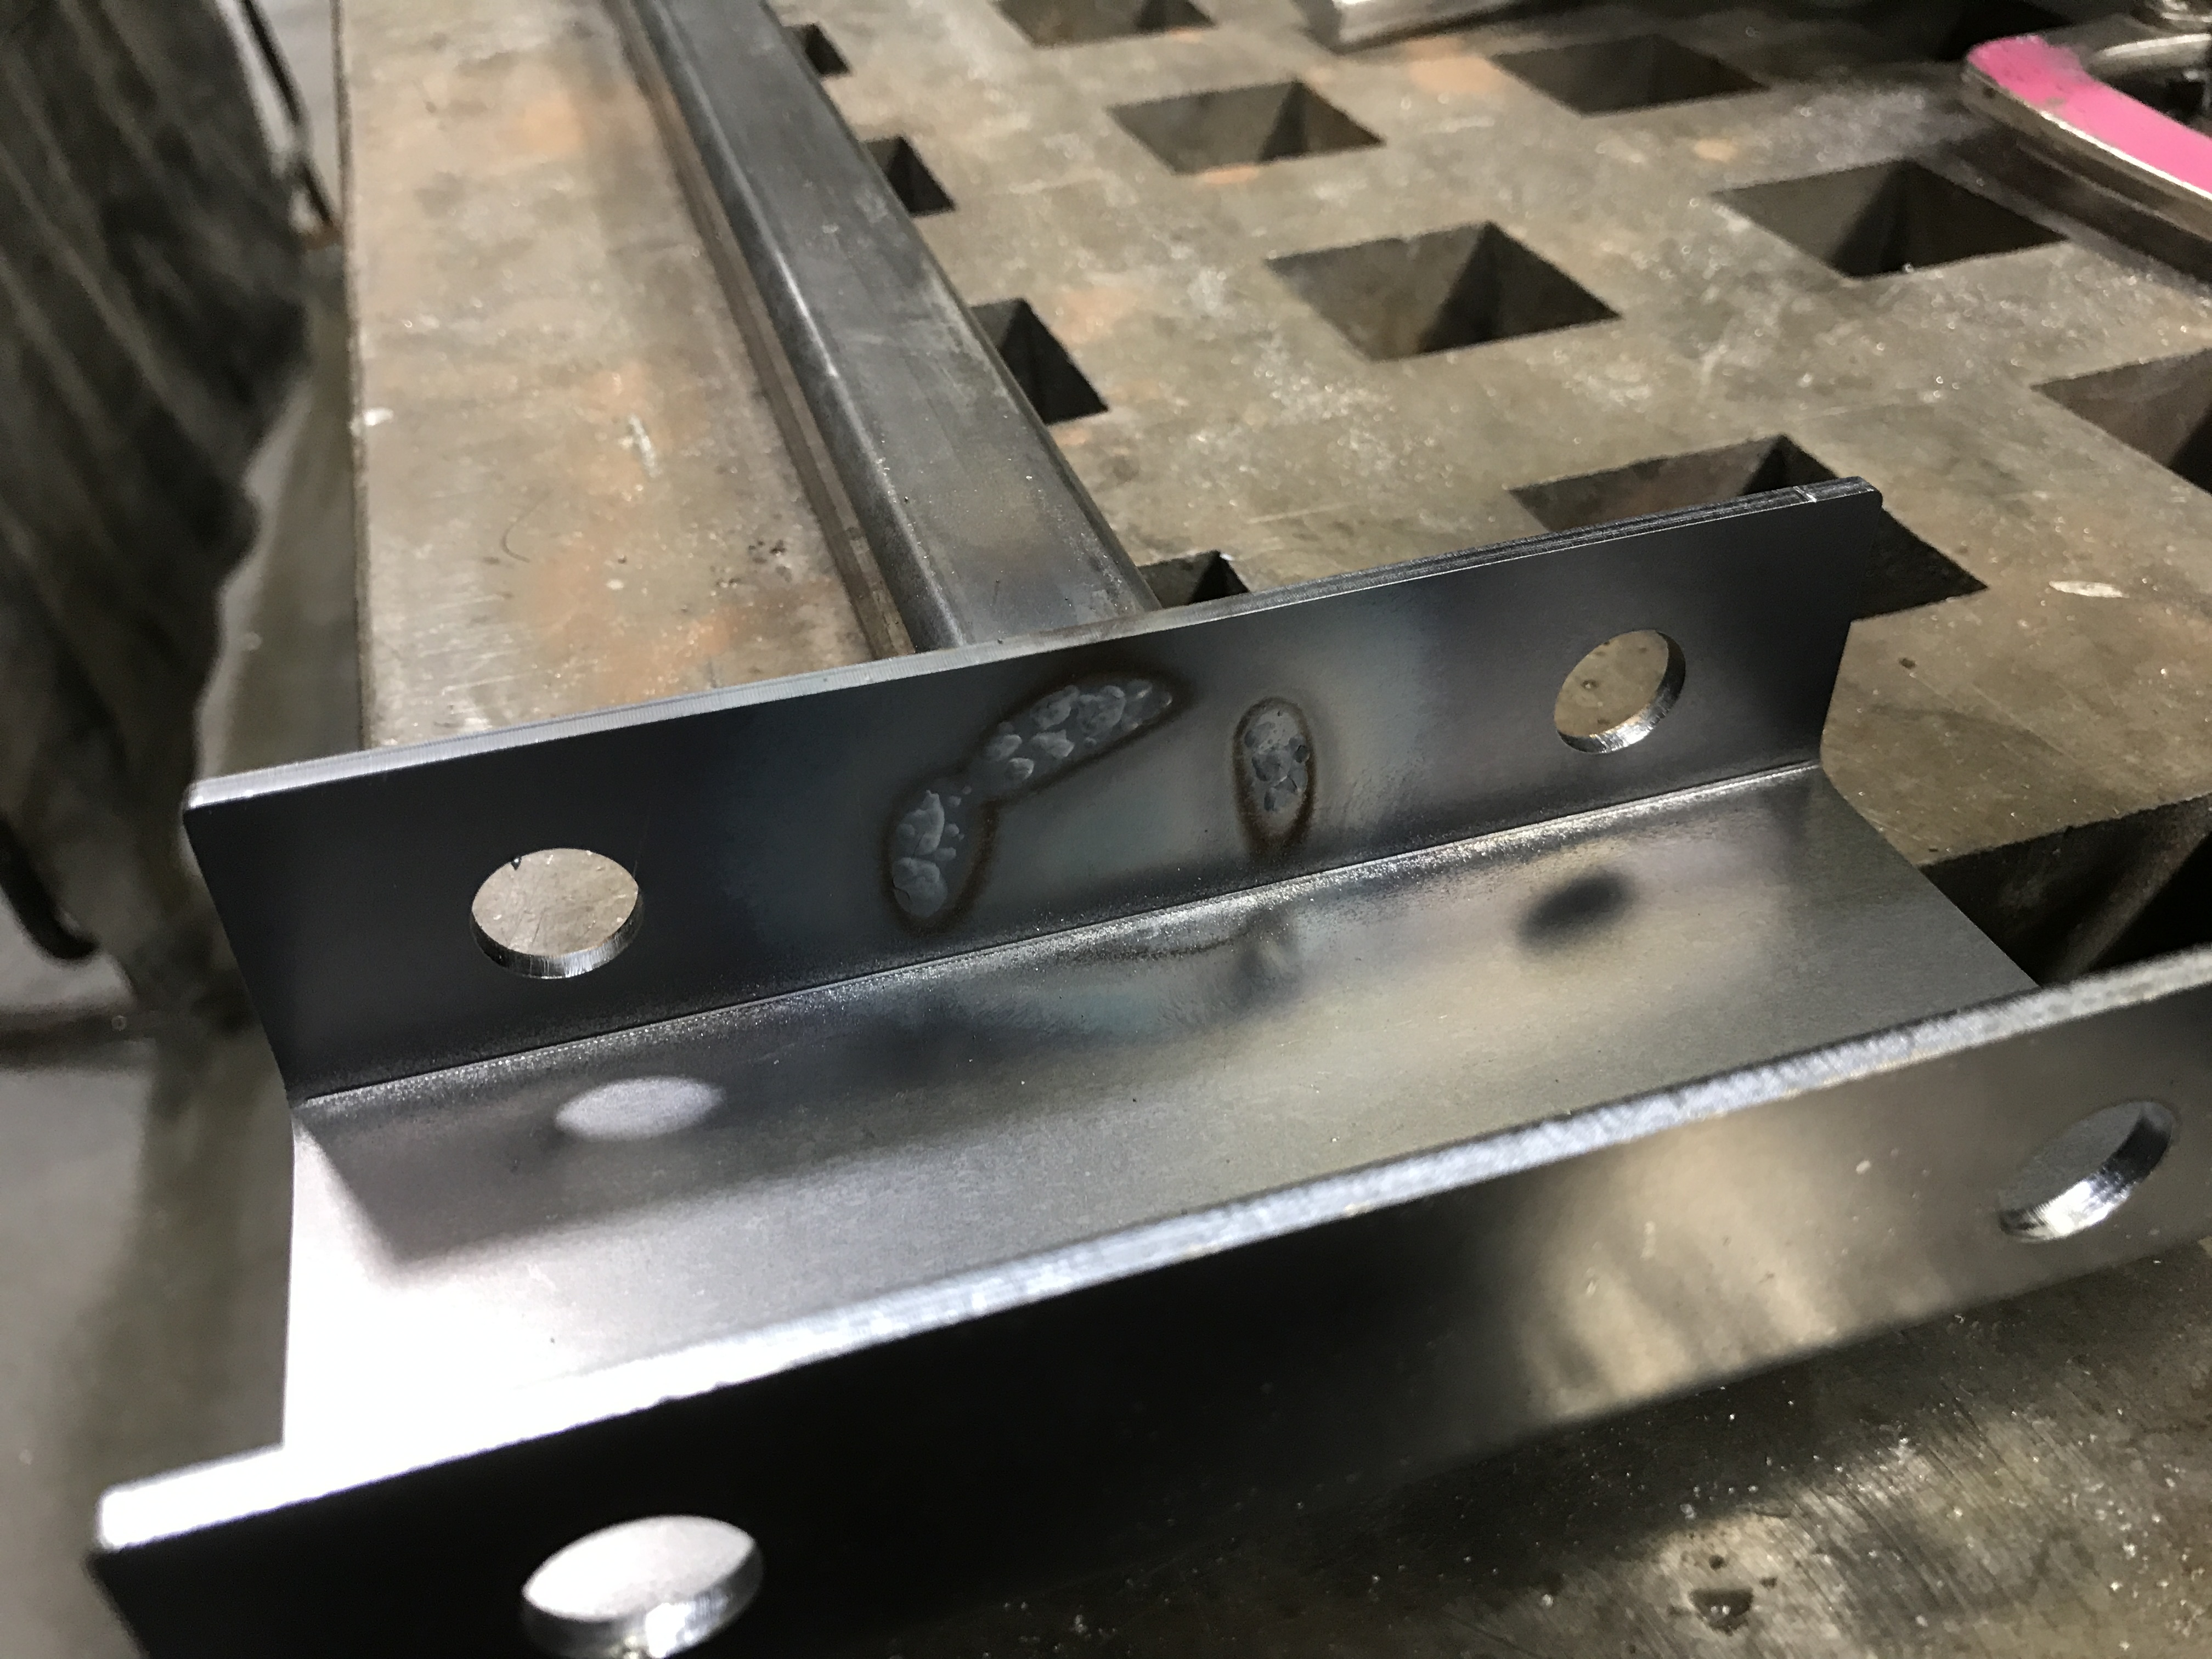
Welding completed:
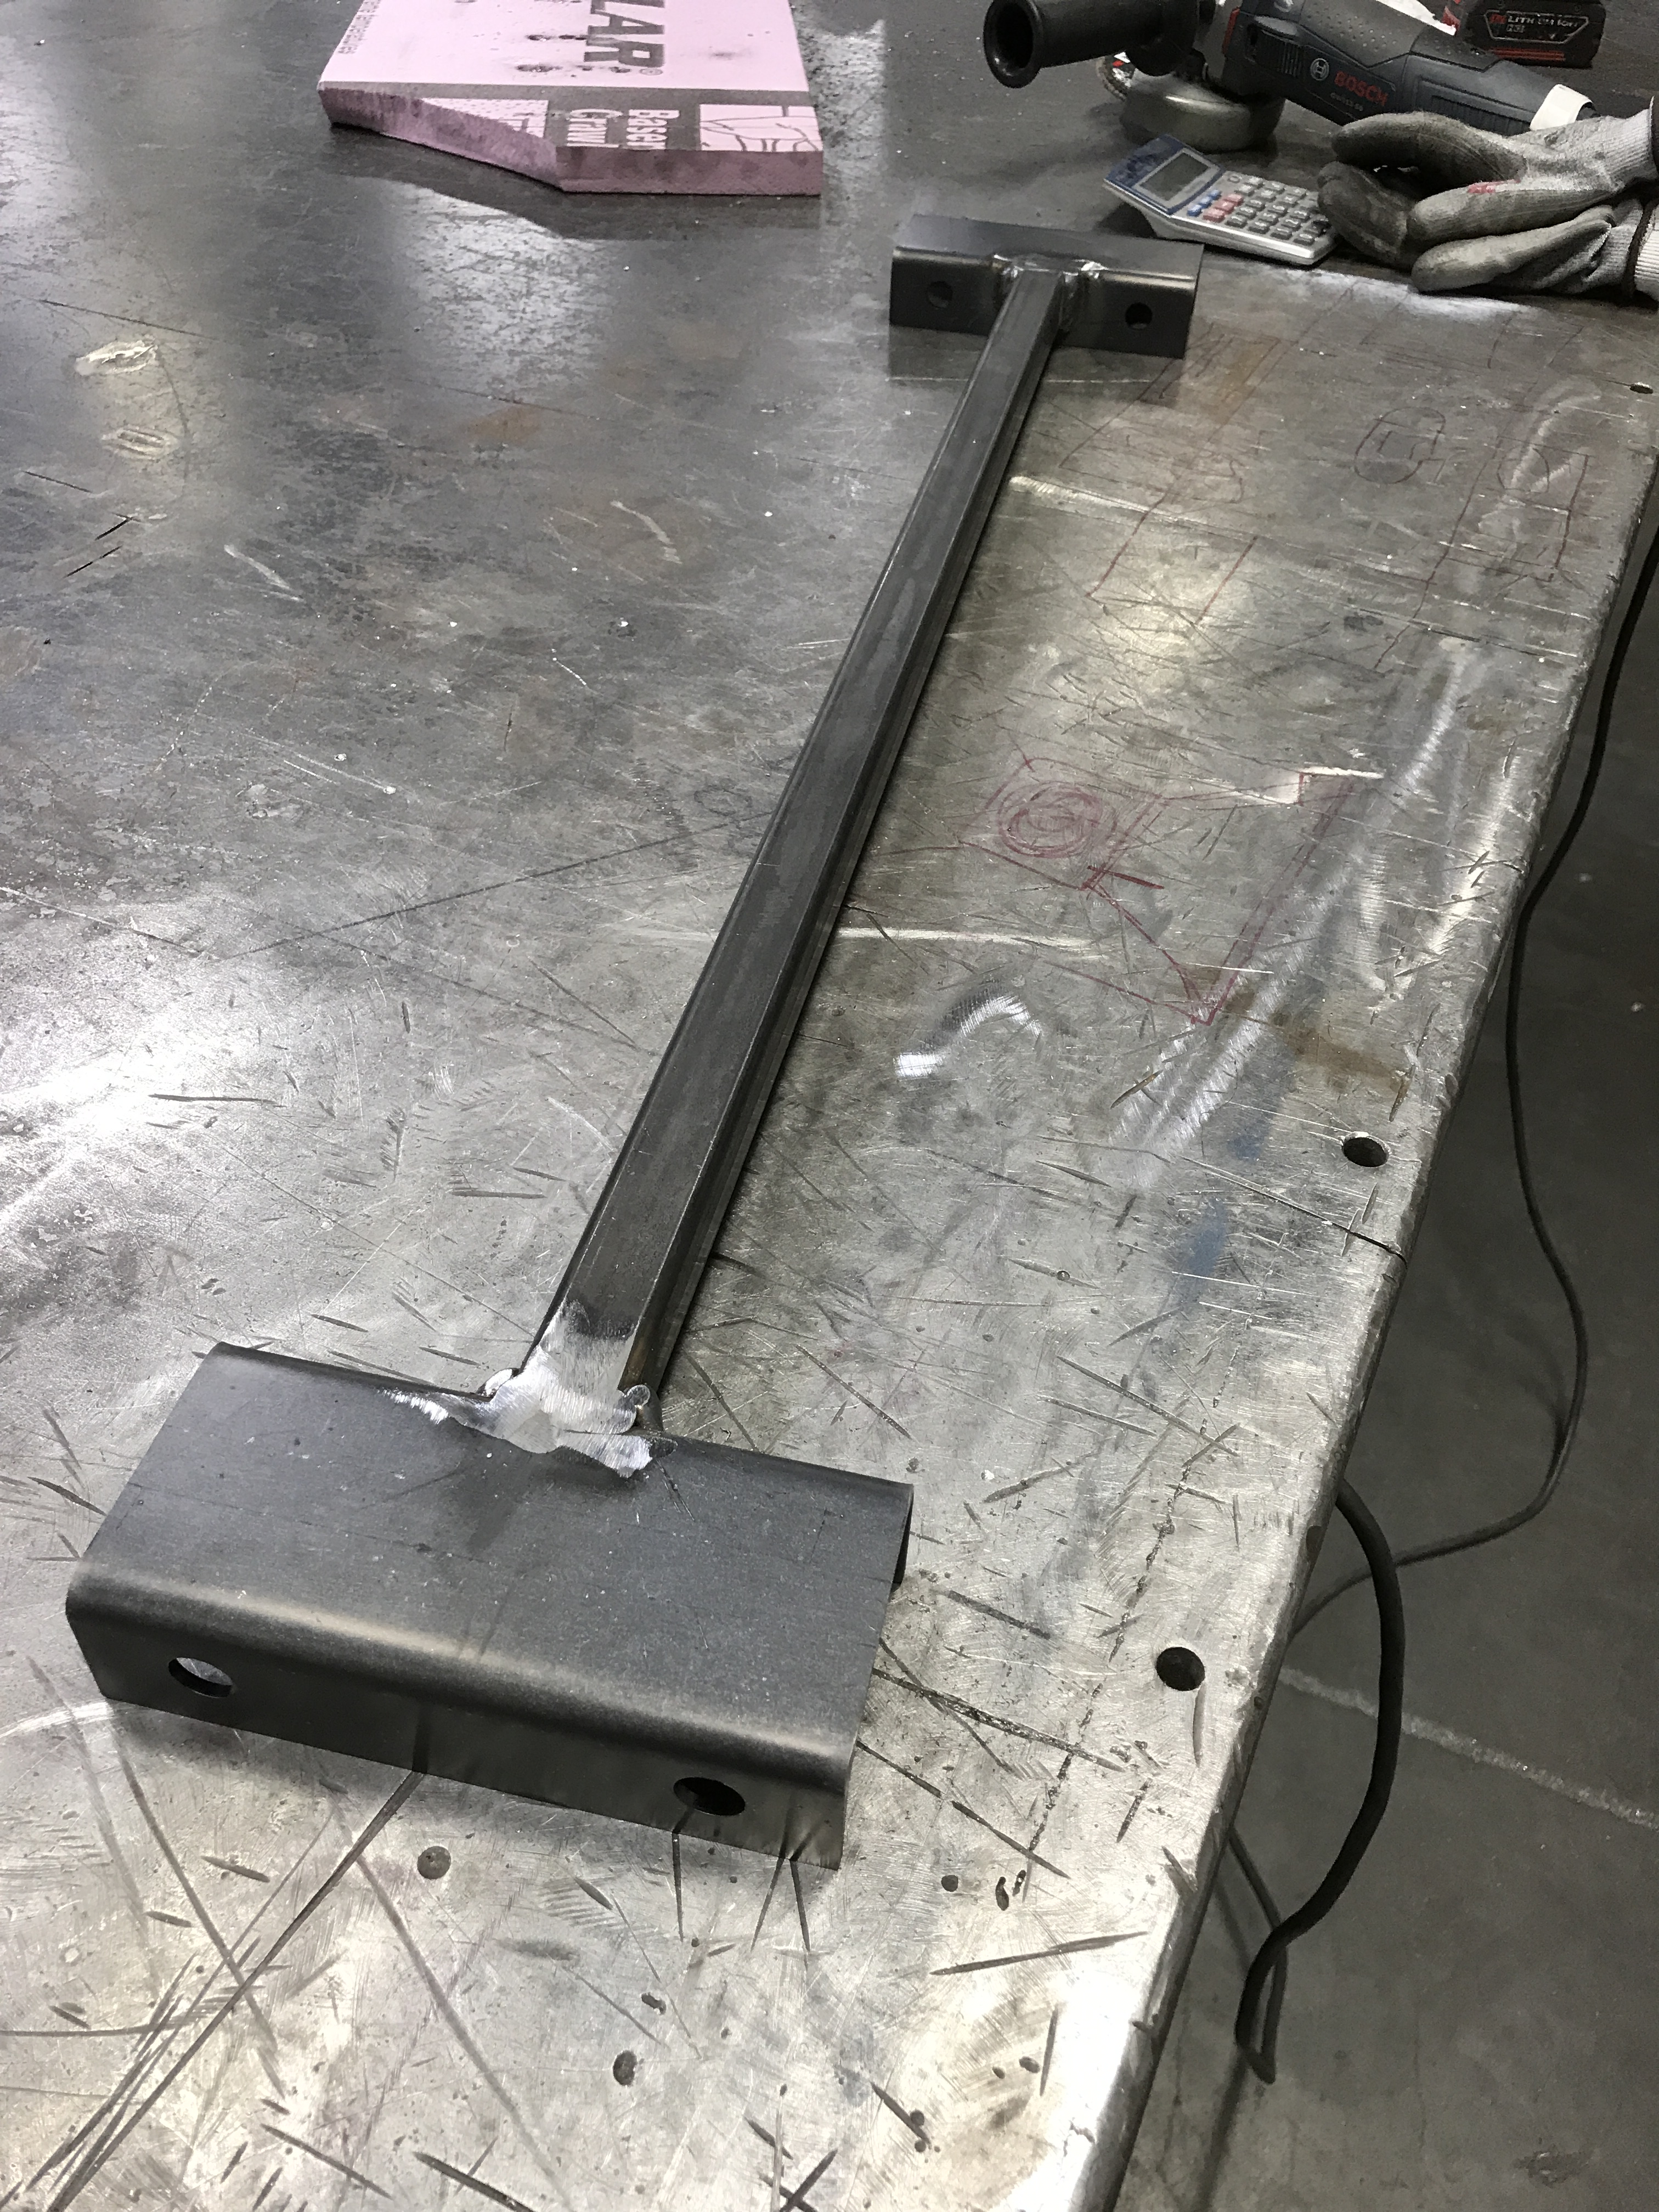
Pass welds added on top of the structural ones, wanted to make sure it wouldn't break free!
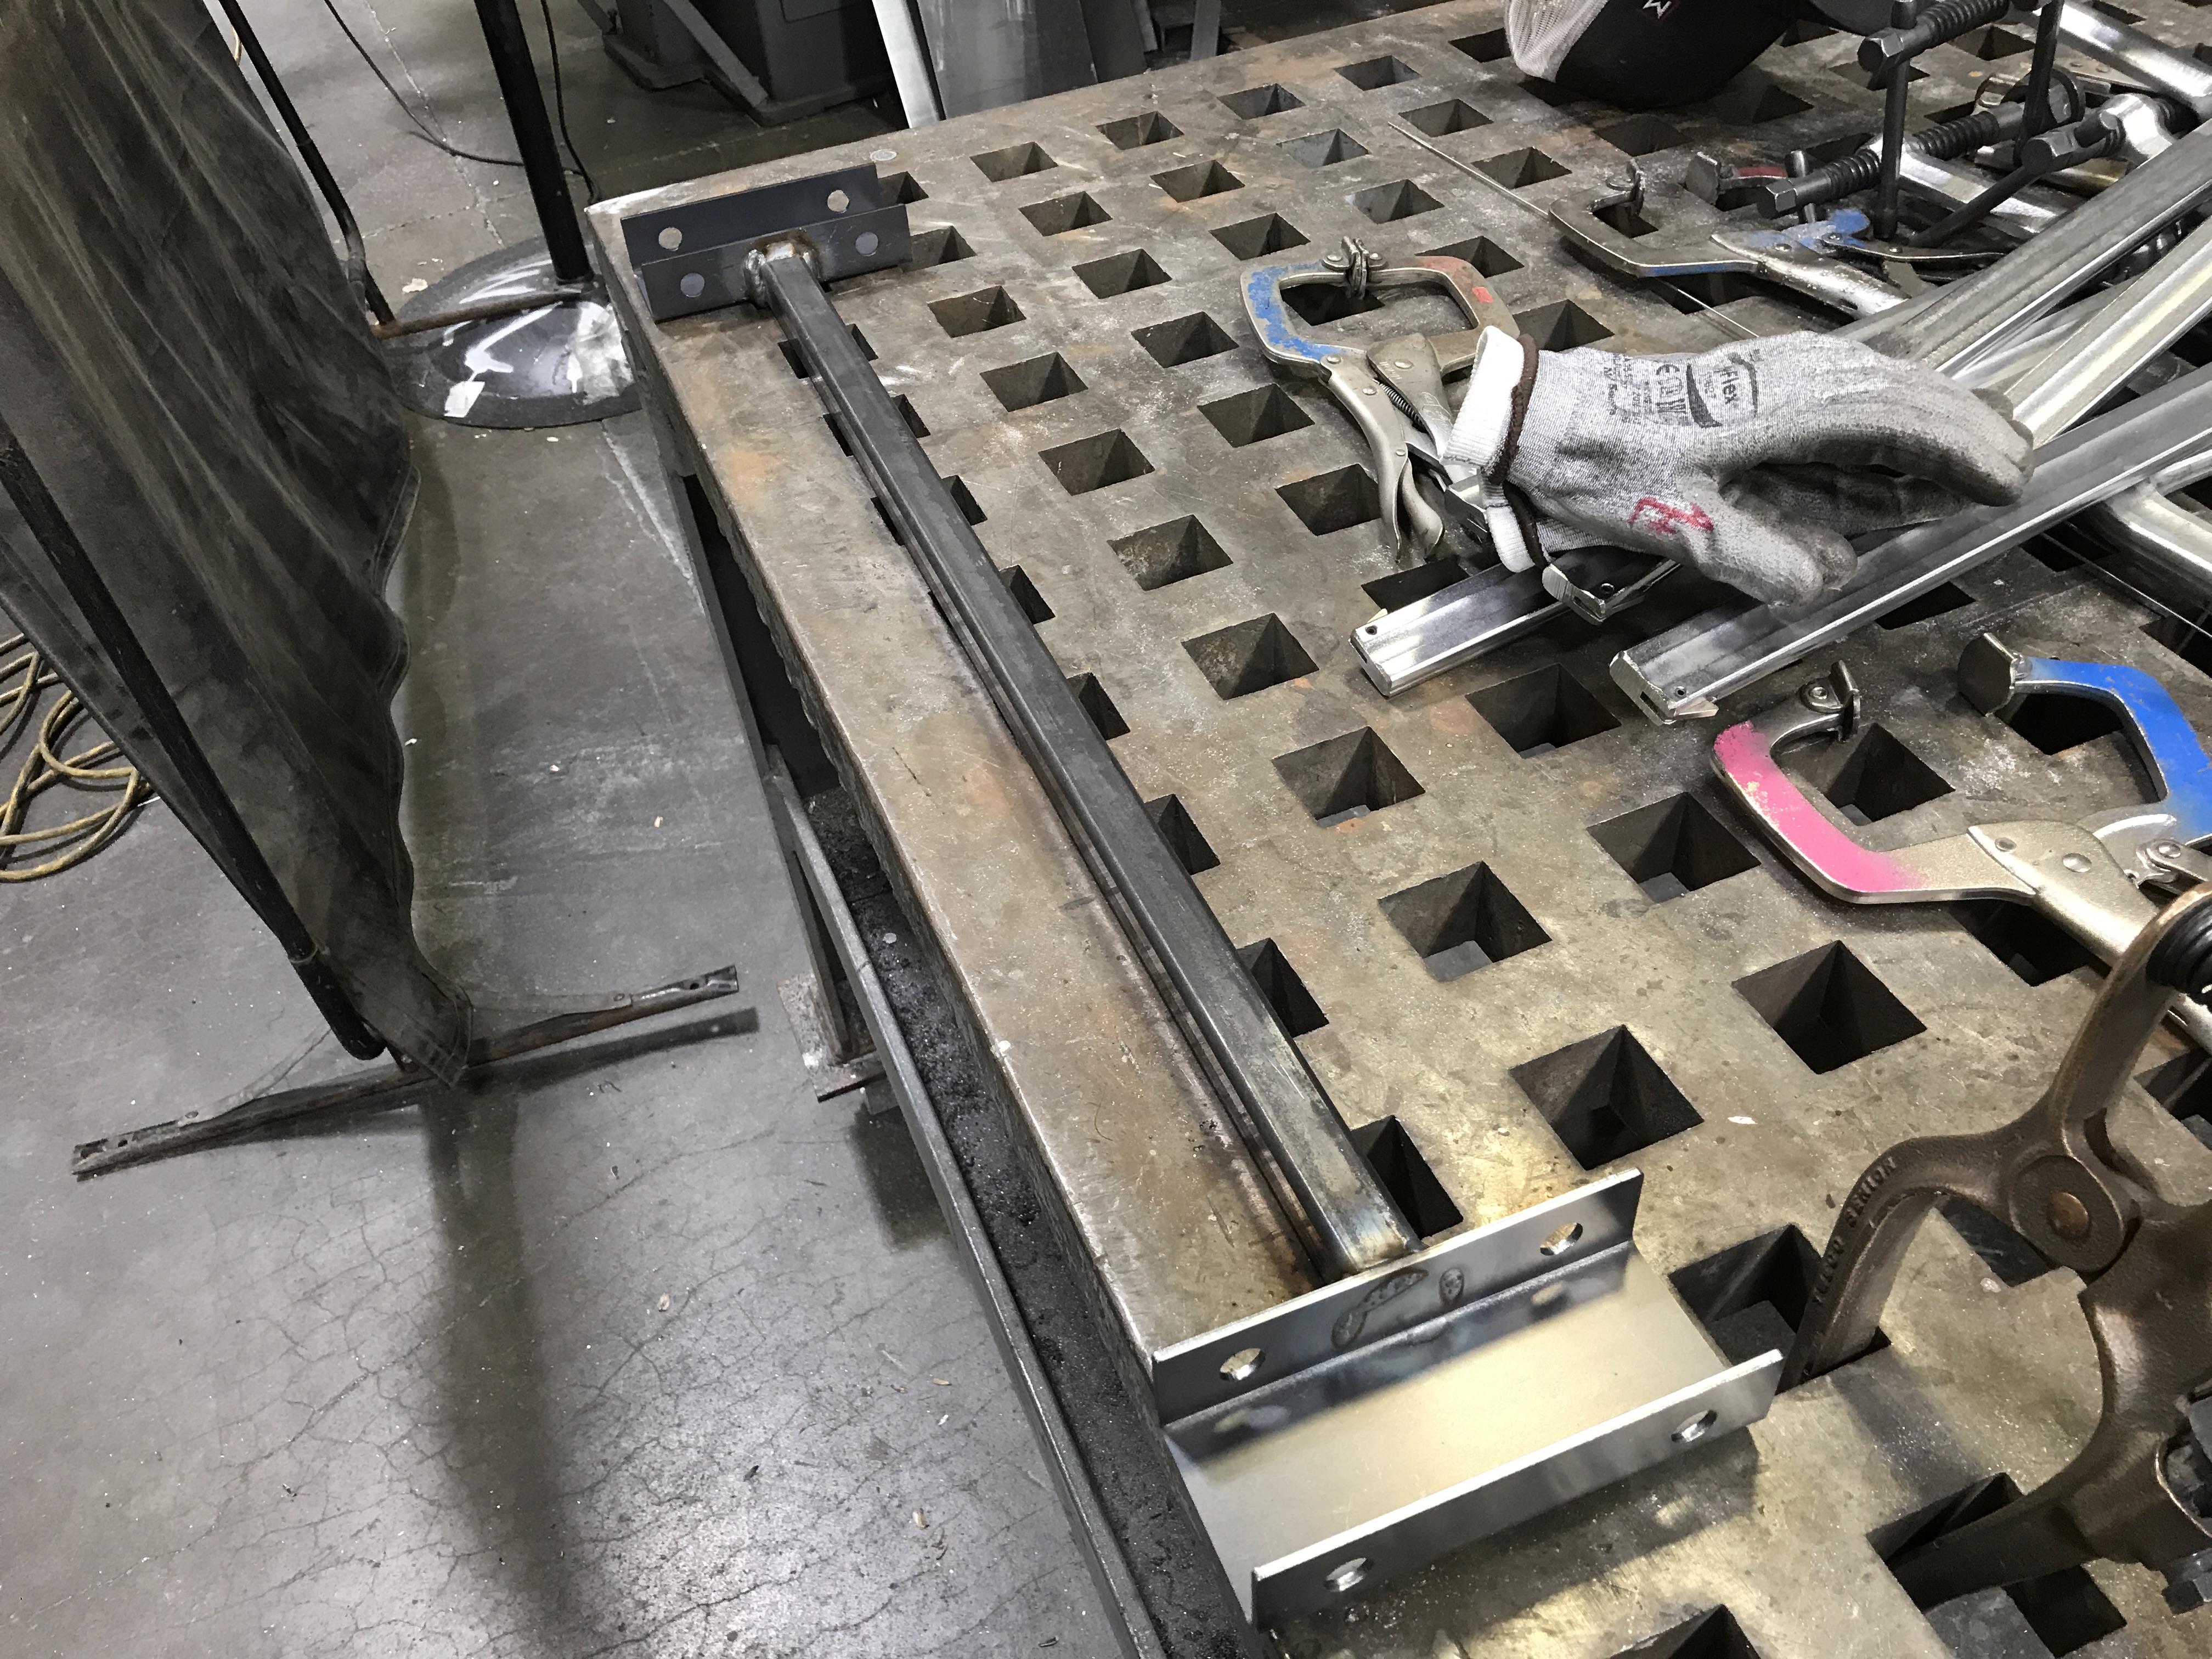
Ground the bottom flat, just in case I want to drag the frame in the near future (lower it to SLAMMED status...nah, I prefer function over form).
Concept of how to mount the tranny in the car with some polyurethane bushings from eBay:
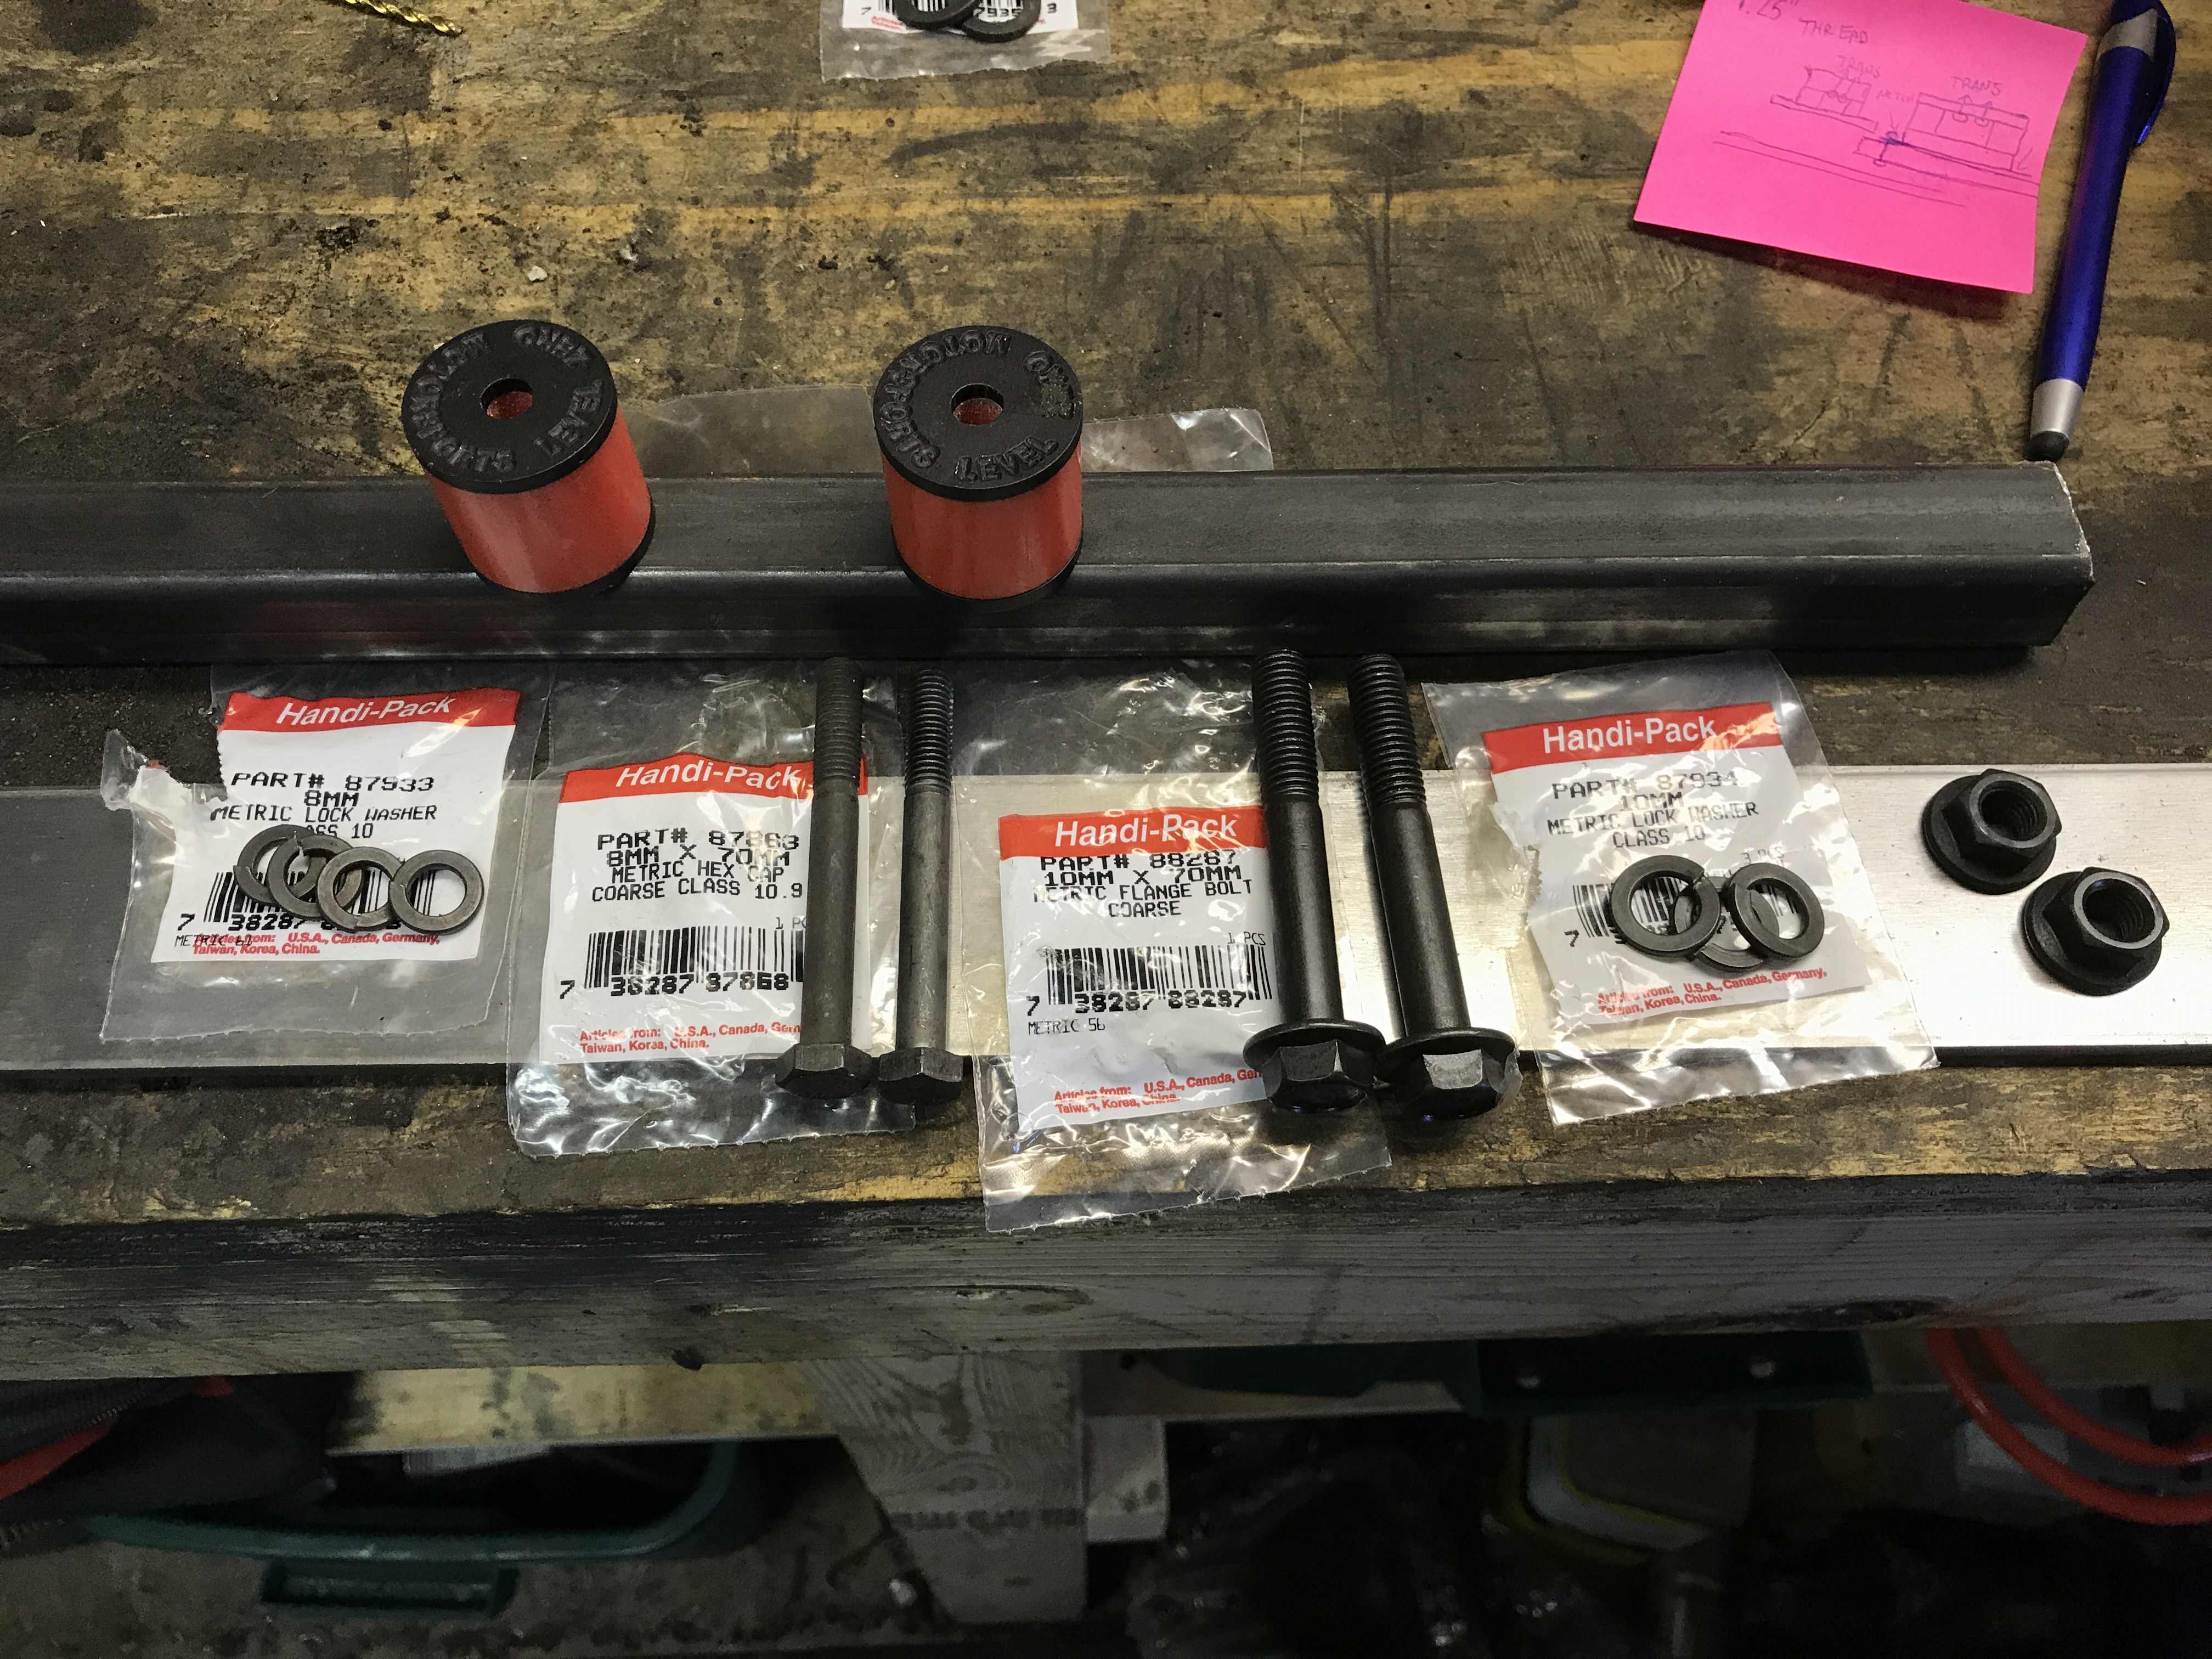
Some cutting and drilling...
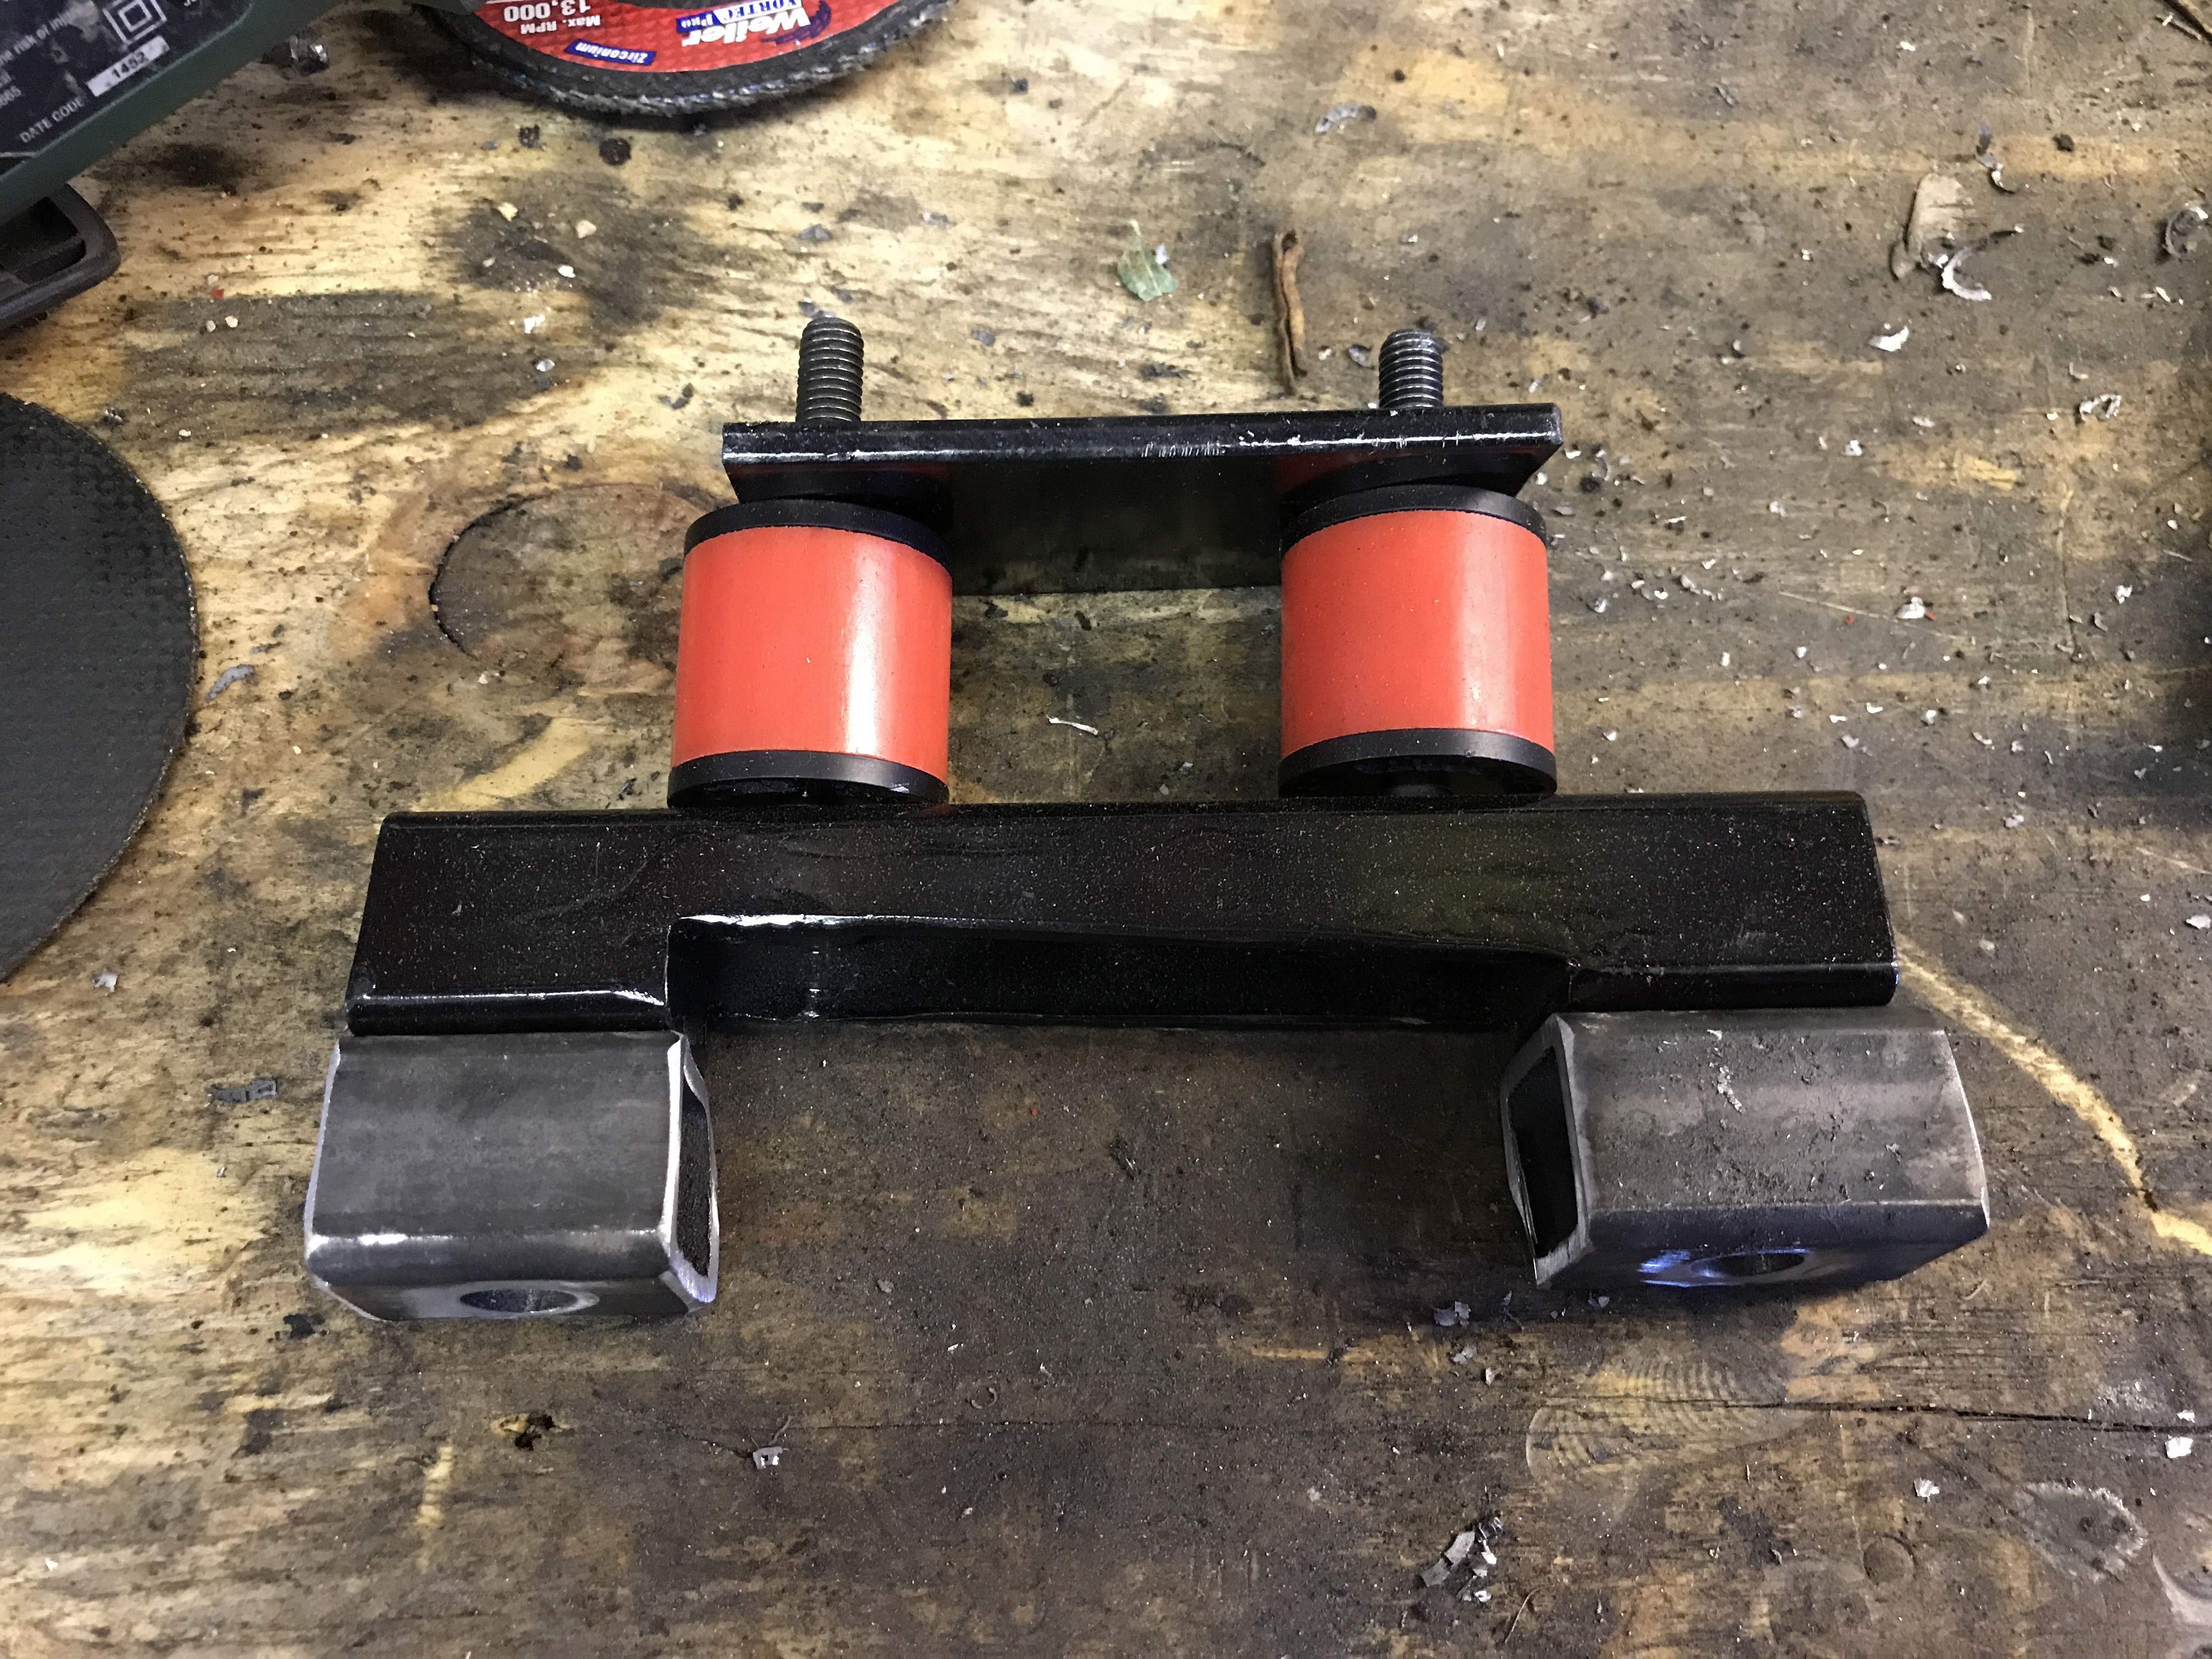
It's slowly coming together, after a lot of cutting and drilling...

Another angle of the whole setup:
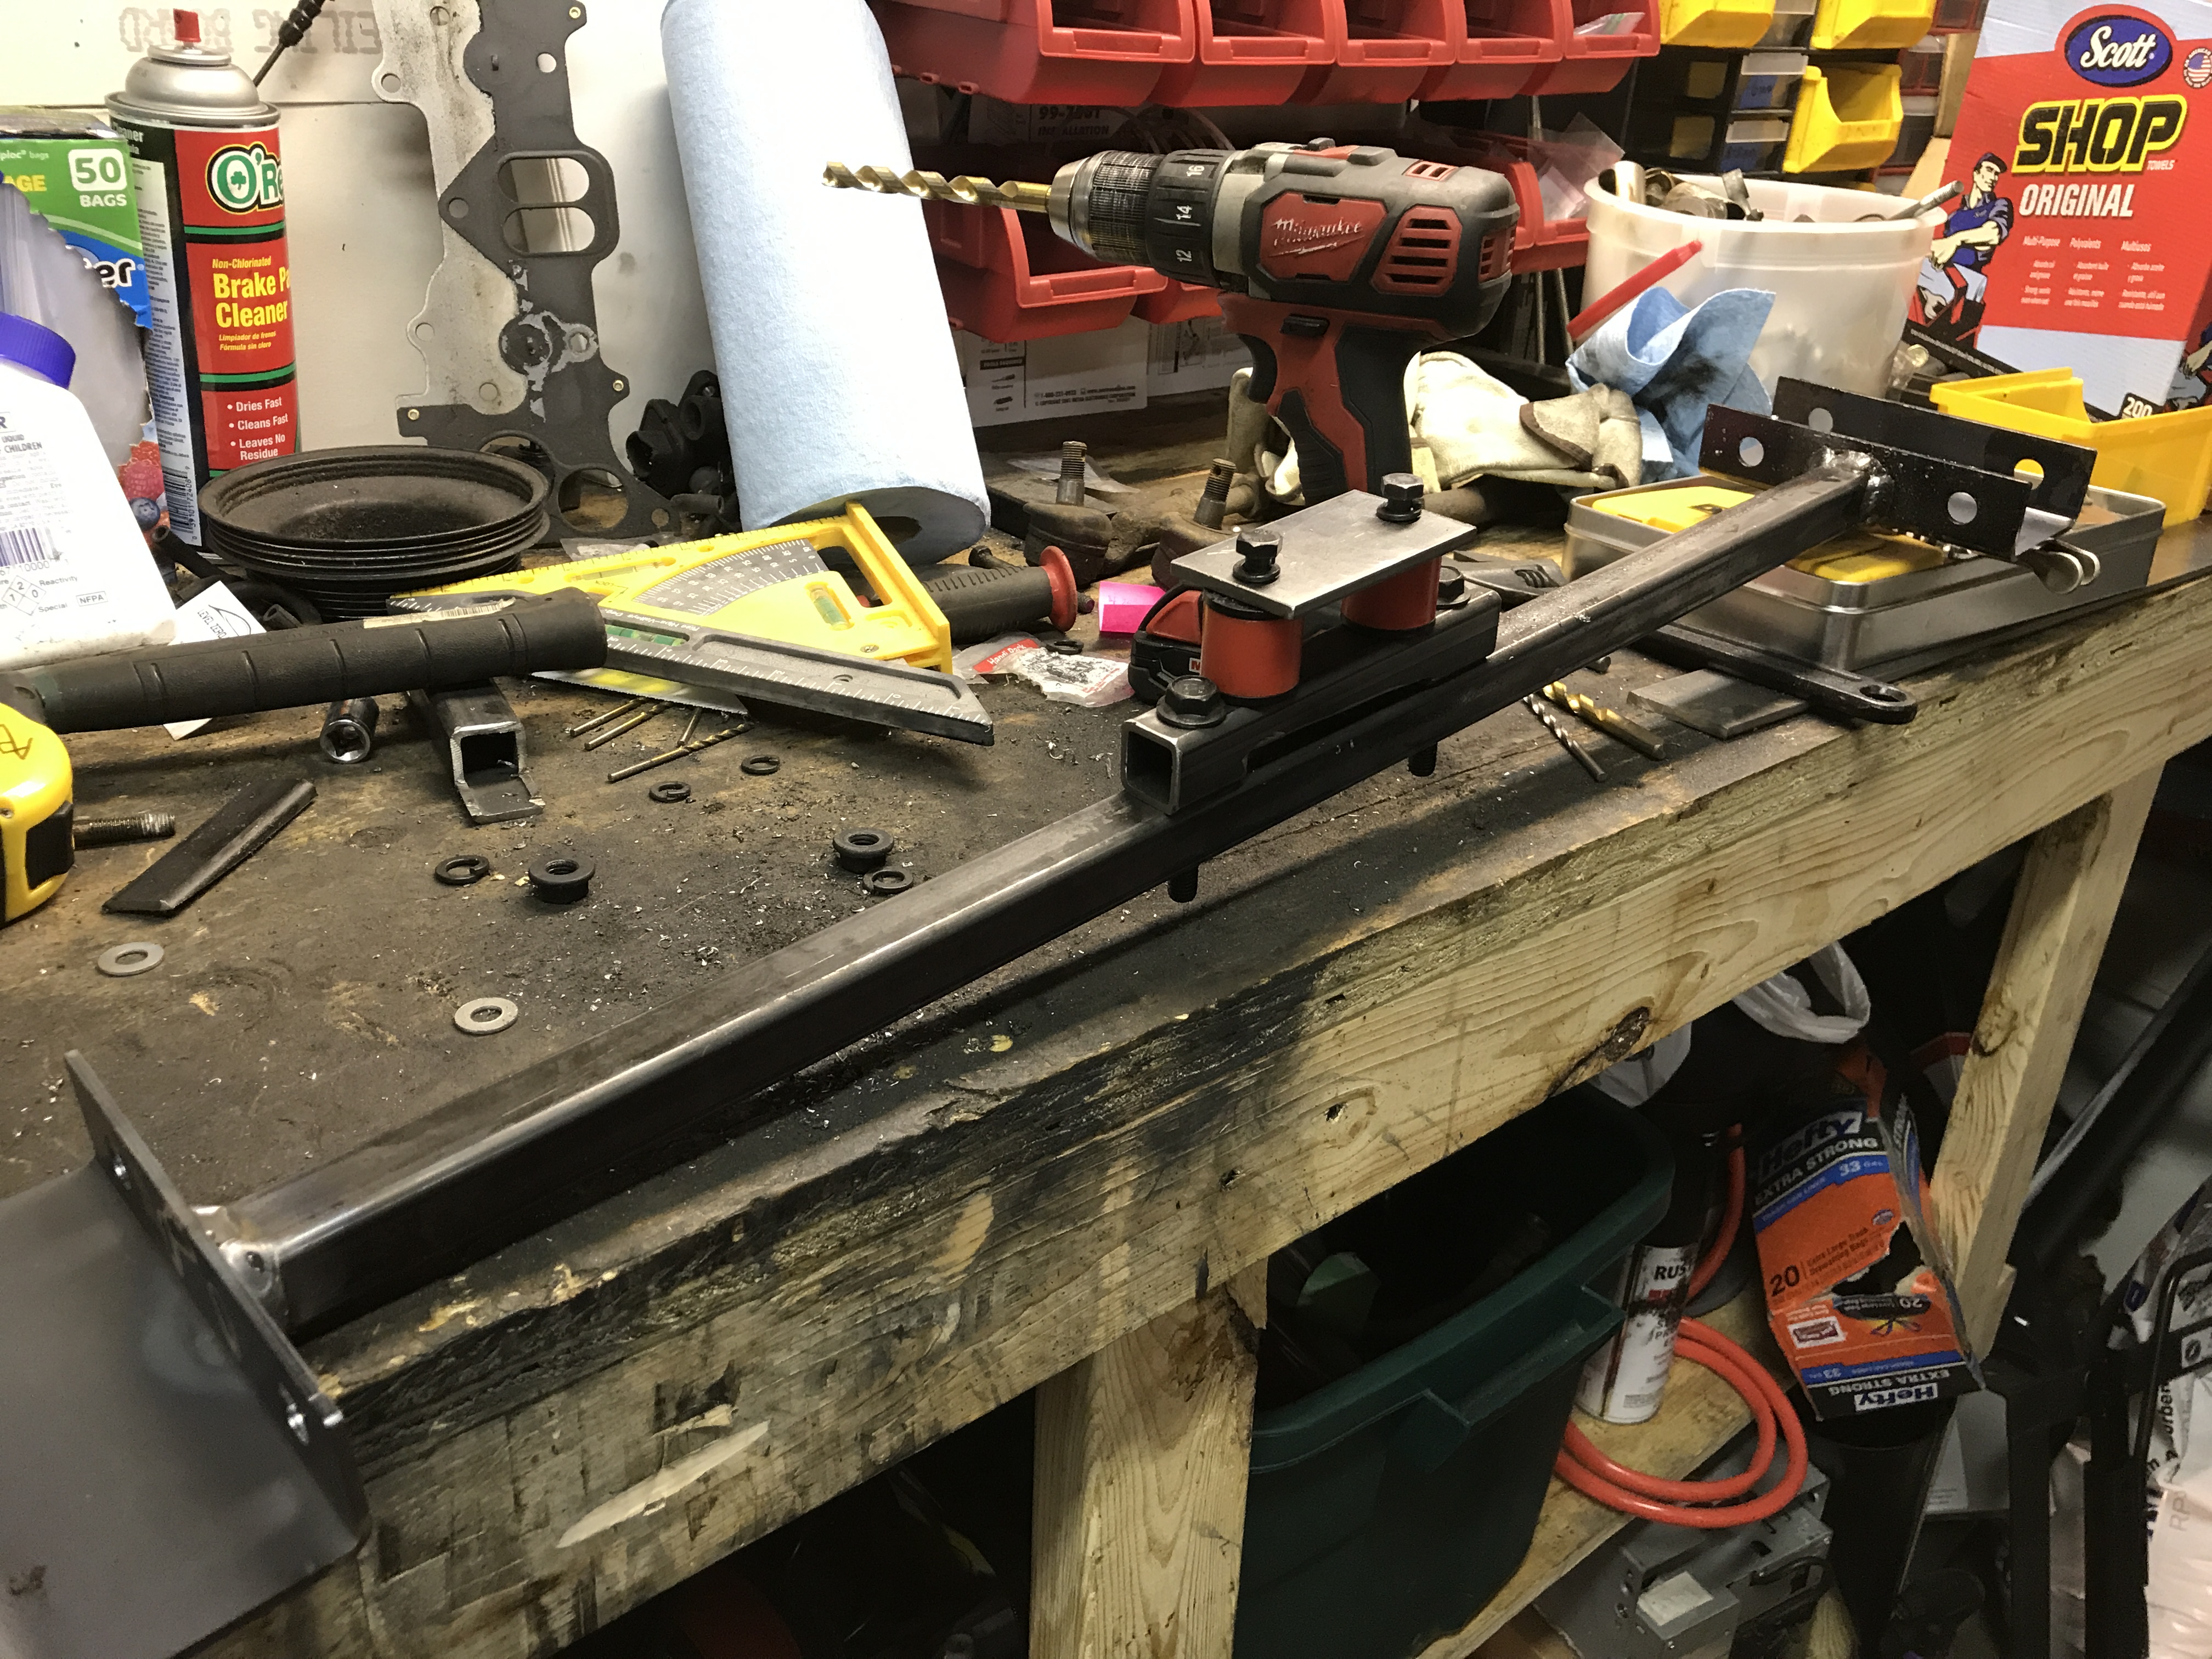
The final render of what I thought would work amazingly well:
This whole thing was made out of 1/8" mild steel components. I drew the brackets myself, allowing for bend allowances (since I worked in sheet metal up until last week), and had them laser'ed out of a sheet of 1/8' mild steel I bought. The square tubing came from the same distributor and I just bought a 4' section of it from them. It's 1" OD tubing with 1/8" sidewalls, super stout stuff.
Brackets for the frame rails:
All jig'ed up and ready to weld:
Some welding done:
Welding completed:
Pass welds added on top of the structural ones, wanted to make sure it wouldn't break free!
Ground the bottom flat, just in case I want to drag the frame in the near future (lower it to SLAMMED status...nah, I prefer function over form).
Concept of how to mount the tranny in the car with some polyurethane bushings from eBay:
Some cutting and drilling...
It's slowly coming together, after a lot of cutting and drilling...
Another angle of the whole setup:
The final render of what I thought would work amazingly well:
Last edited by DreamInRotary; 08-24-17 at 05:15 PM. Reason: PHOTOBUCKET SUCKS
08-24-17, 02:02 PM
#25
YouTube video associated with this part of the build:
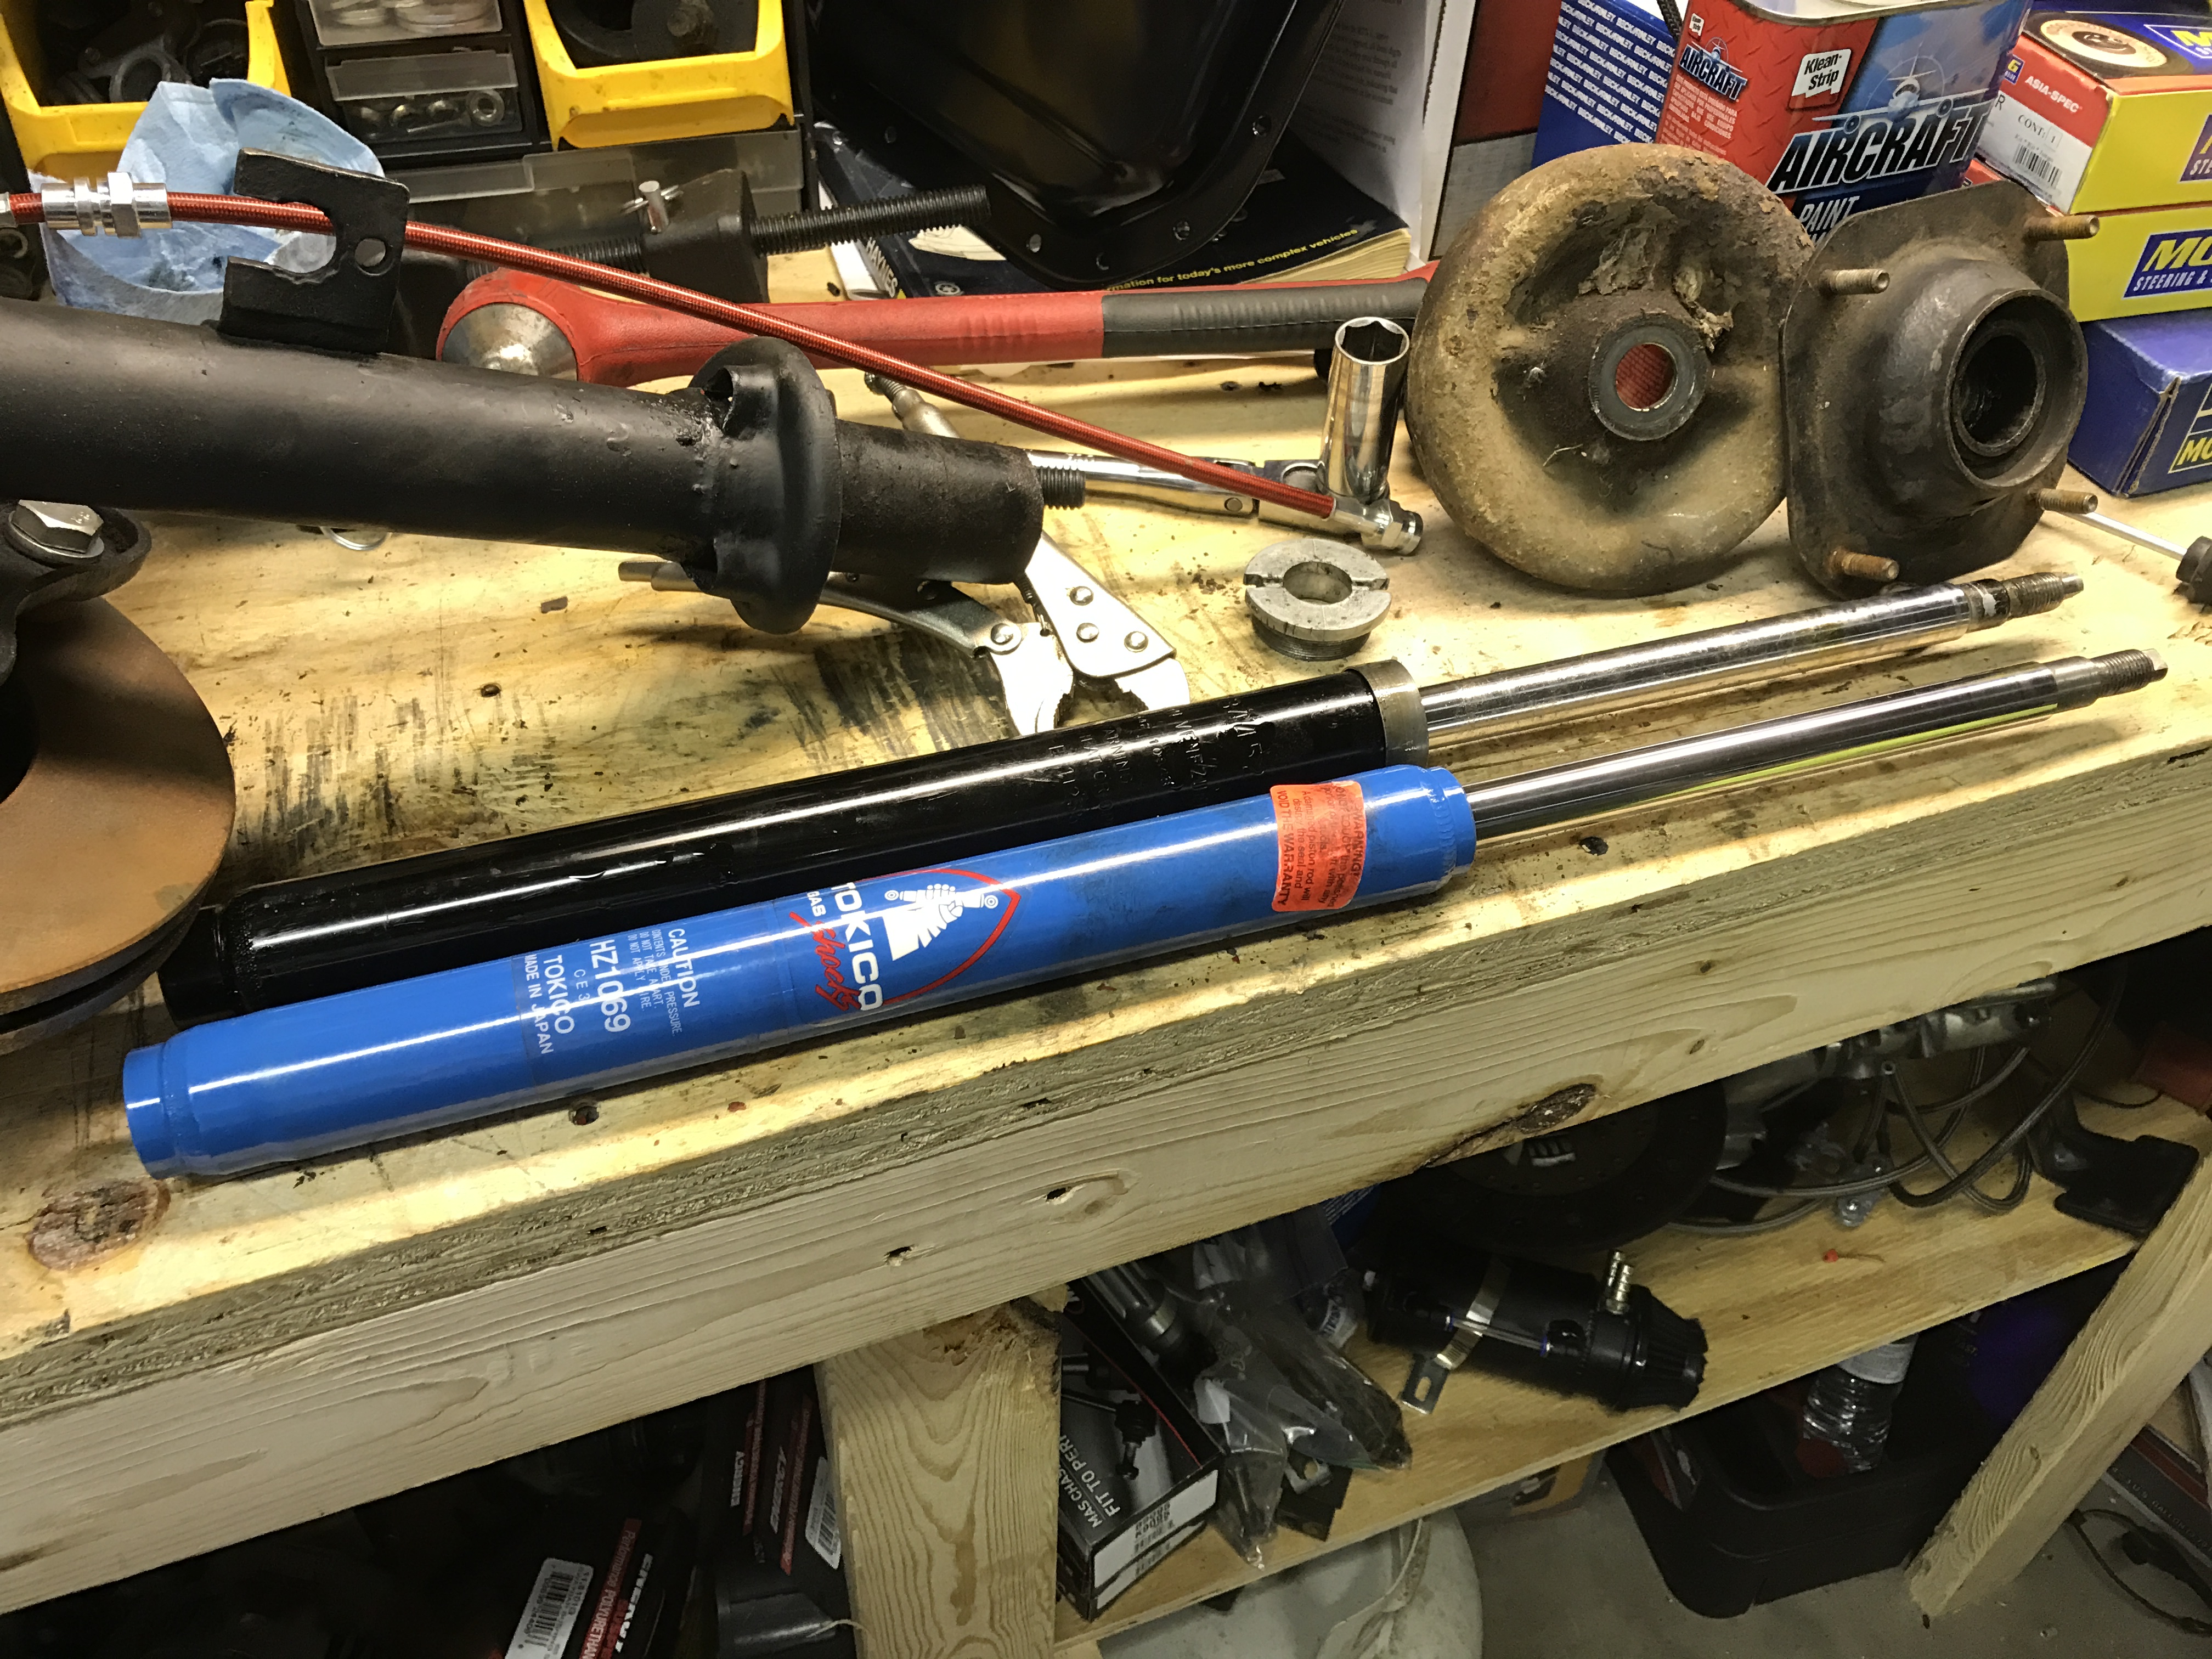
So I decided to replace the super old, saggy, nasty suspension components here.
A set of barely-used Tokico Blues replaced the blown old struts on all four corners.
Gross old front subframe, steering components and suspension came out in one piece...more or less.

This is a different front subframe from another FB that I had which I chose to refurbish. This car had no rust on the components whatsoever, whereas the one out of my car here was in terrible shape. I would still be fighting with the parts to this day trying to get them to come apart. The only difference I can conceive is that the parts car I had was sitting on concrete and this red car of mine was sitting on grass or dirt. Every part was so corroded together there was no way I was going to be able to get them to separate. Thank the Lord for parts cars!

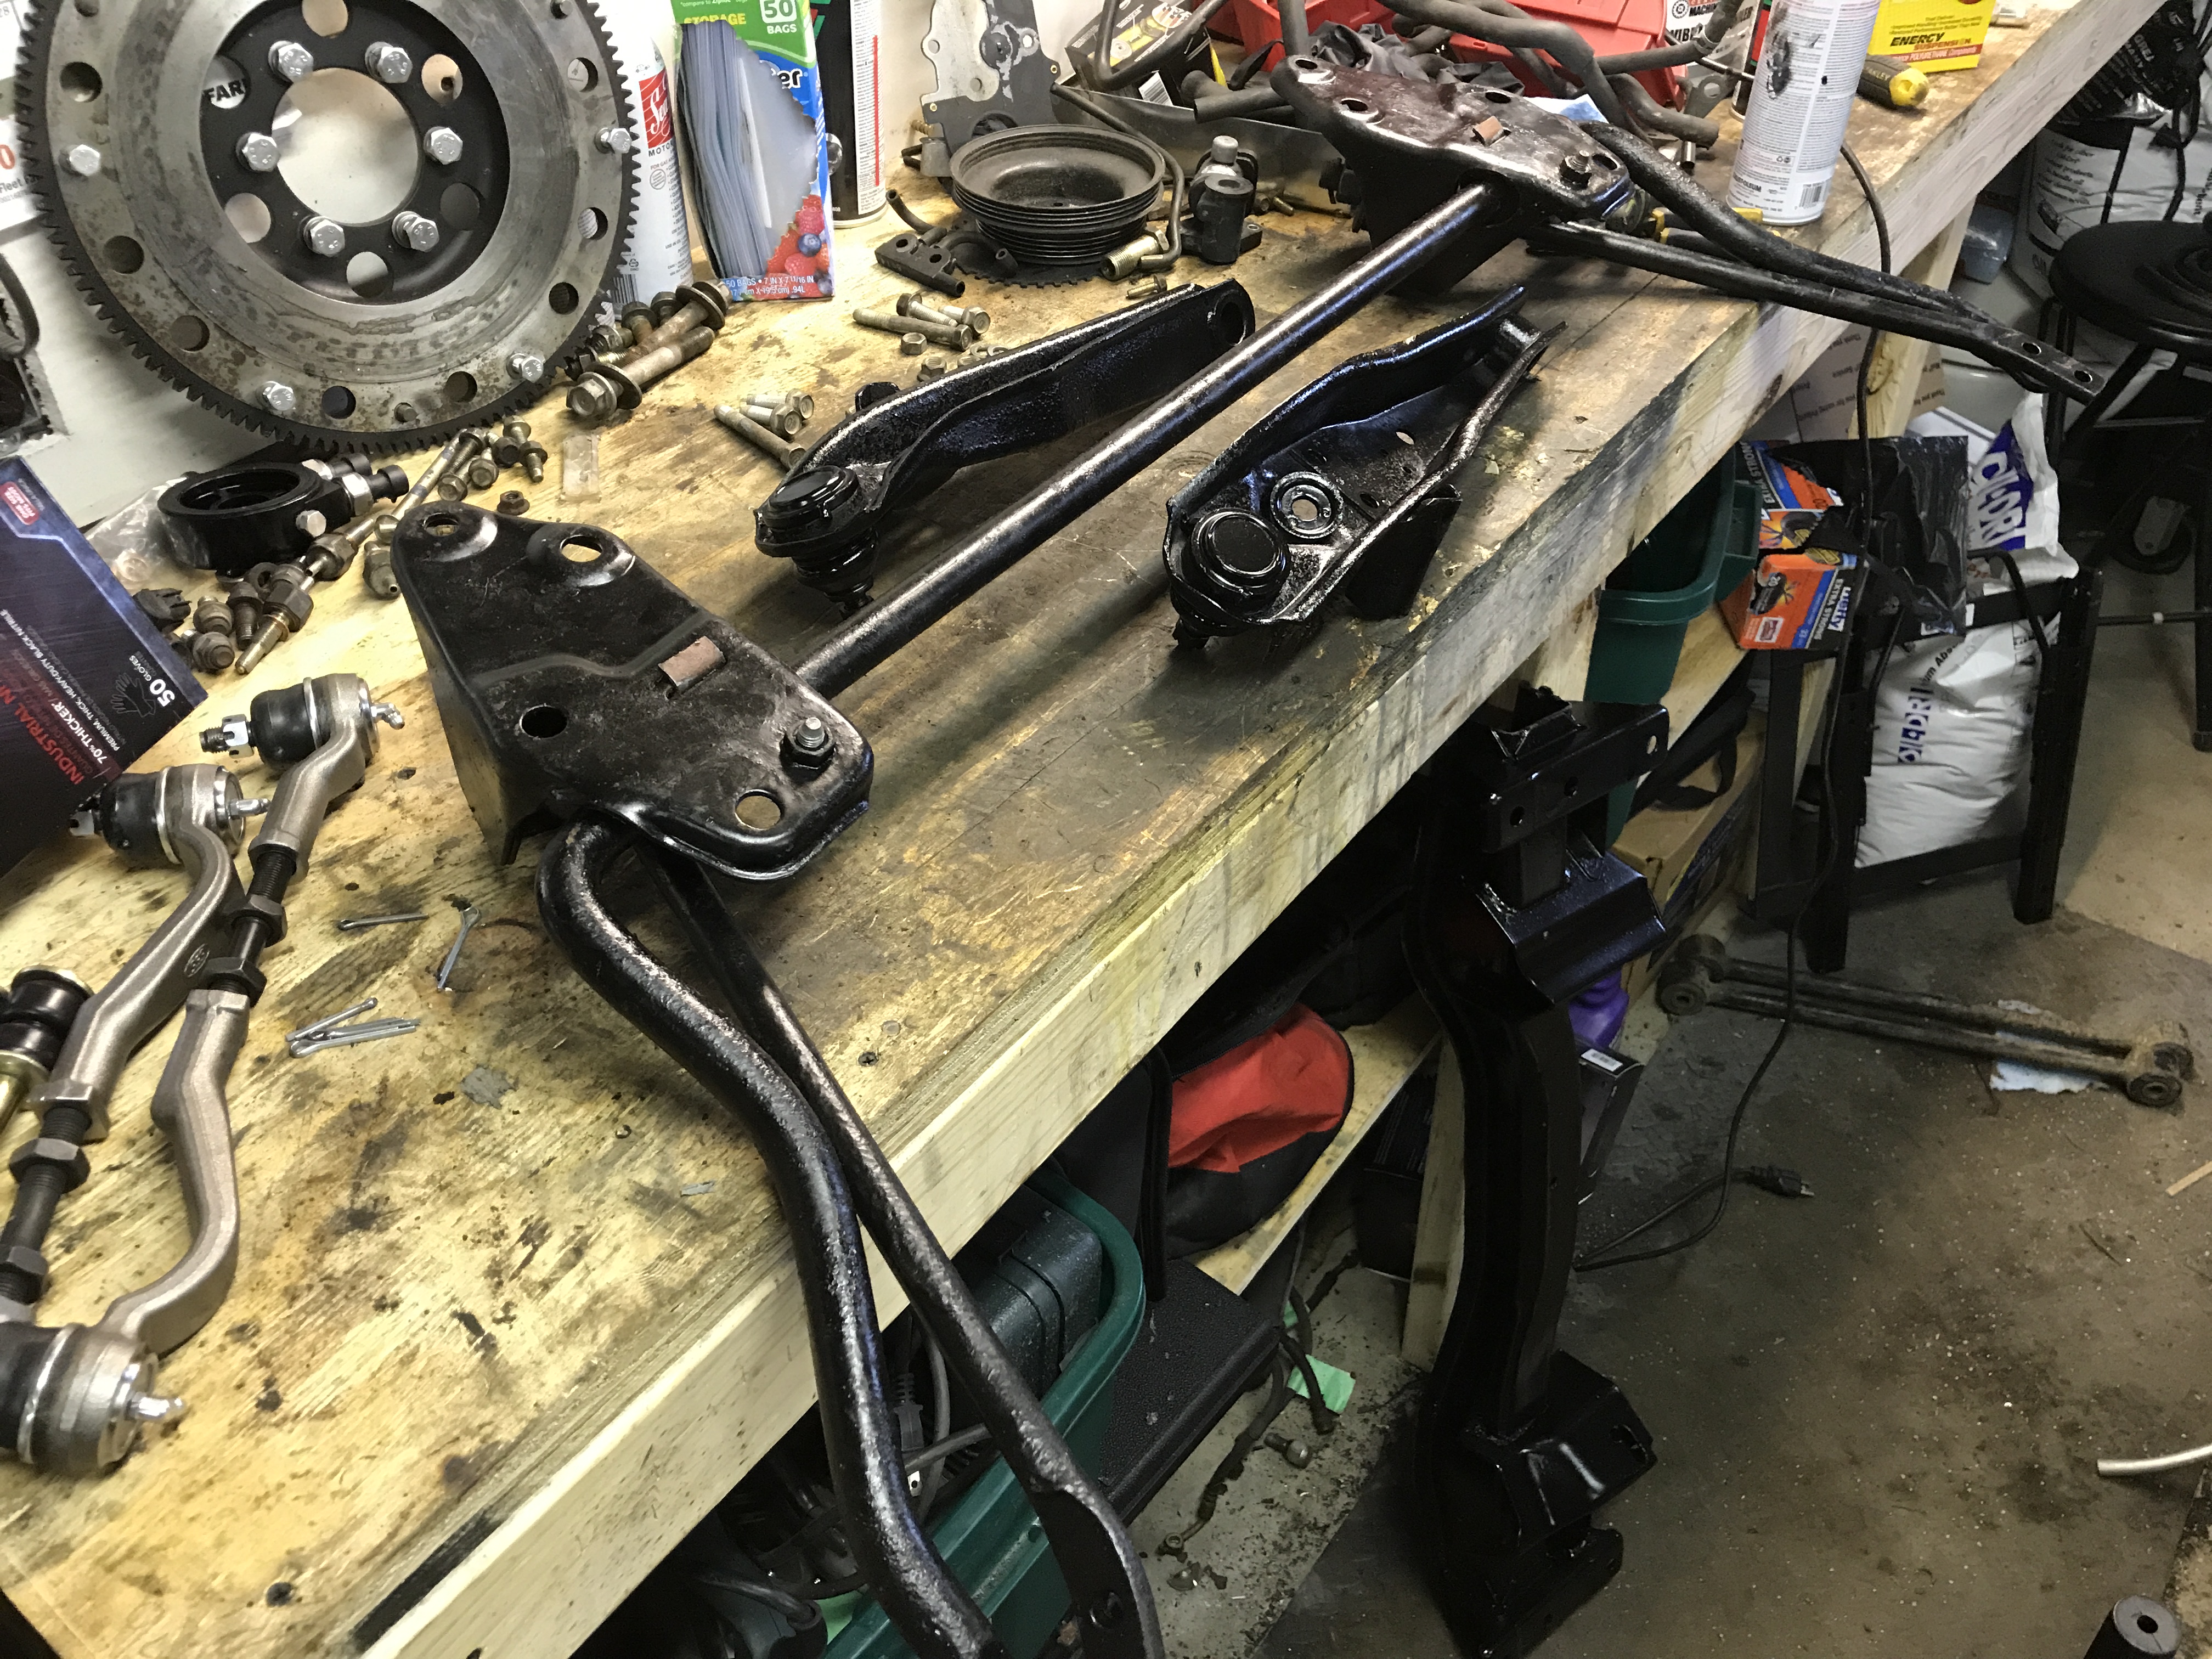
In case you wanted to see what a whole lot of money in suspension components looks like sitting on a bench top:
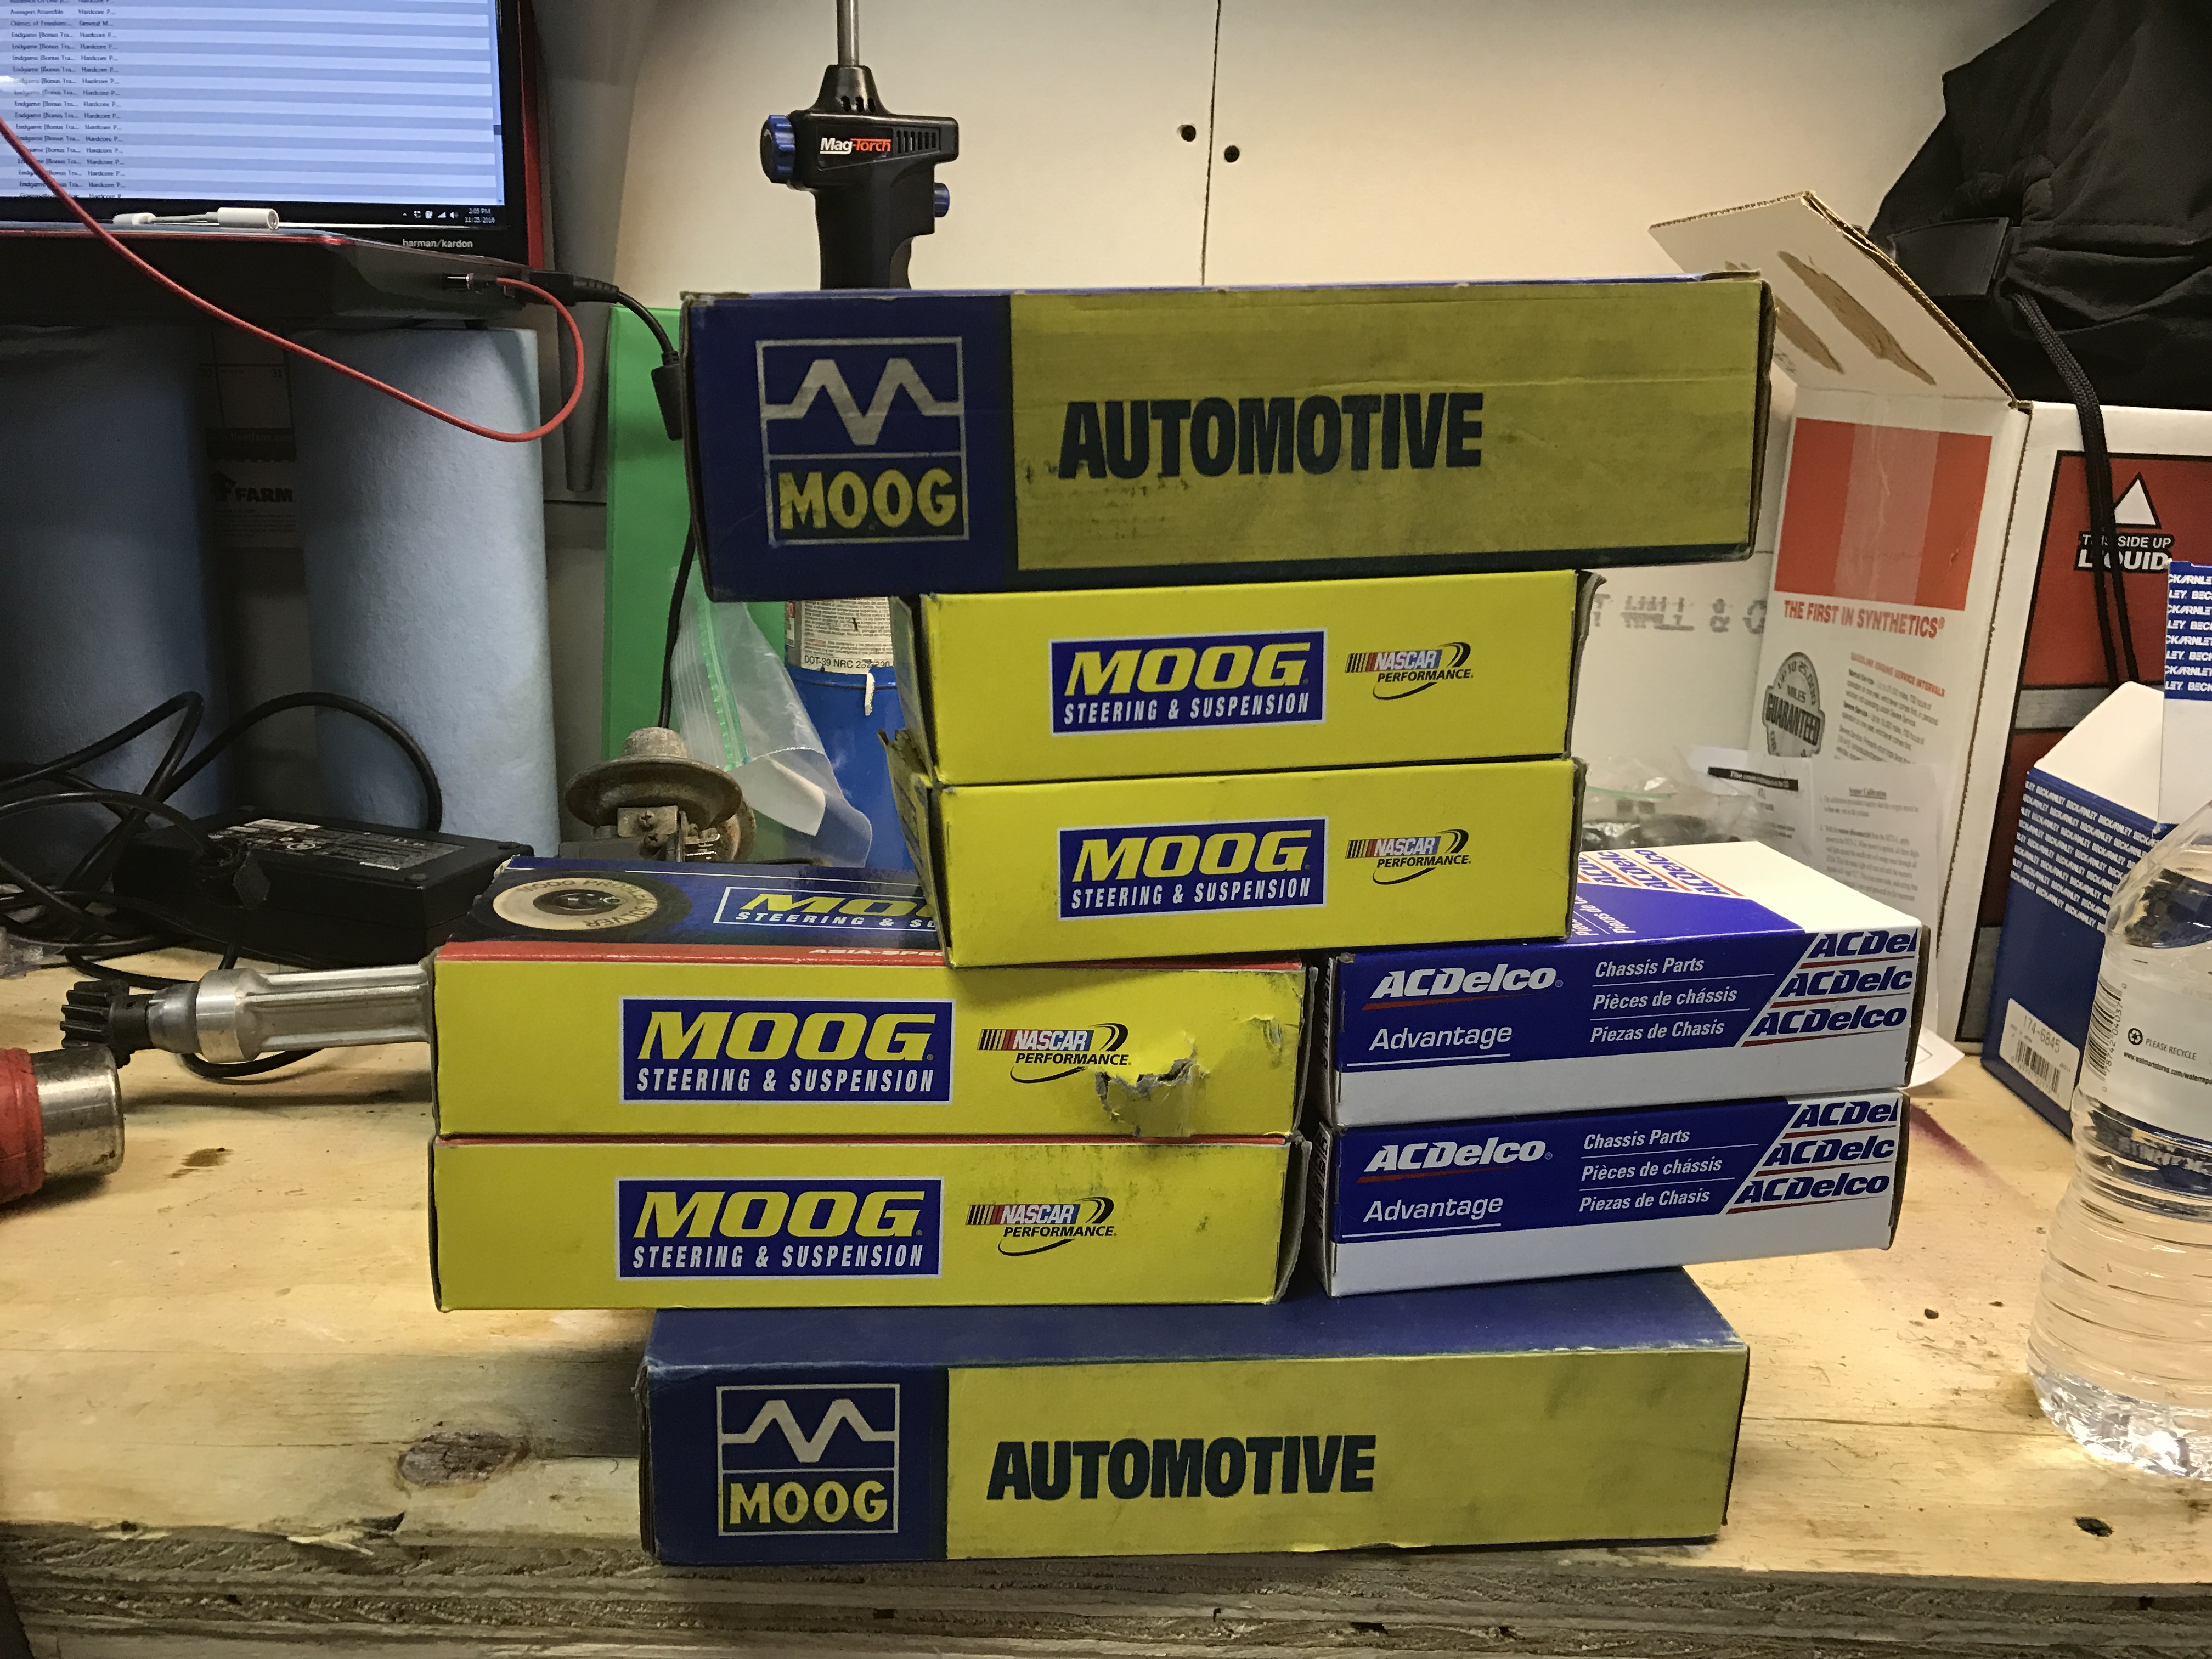
Here they're all unboxed:
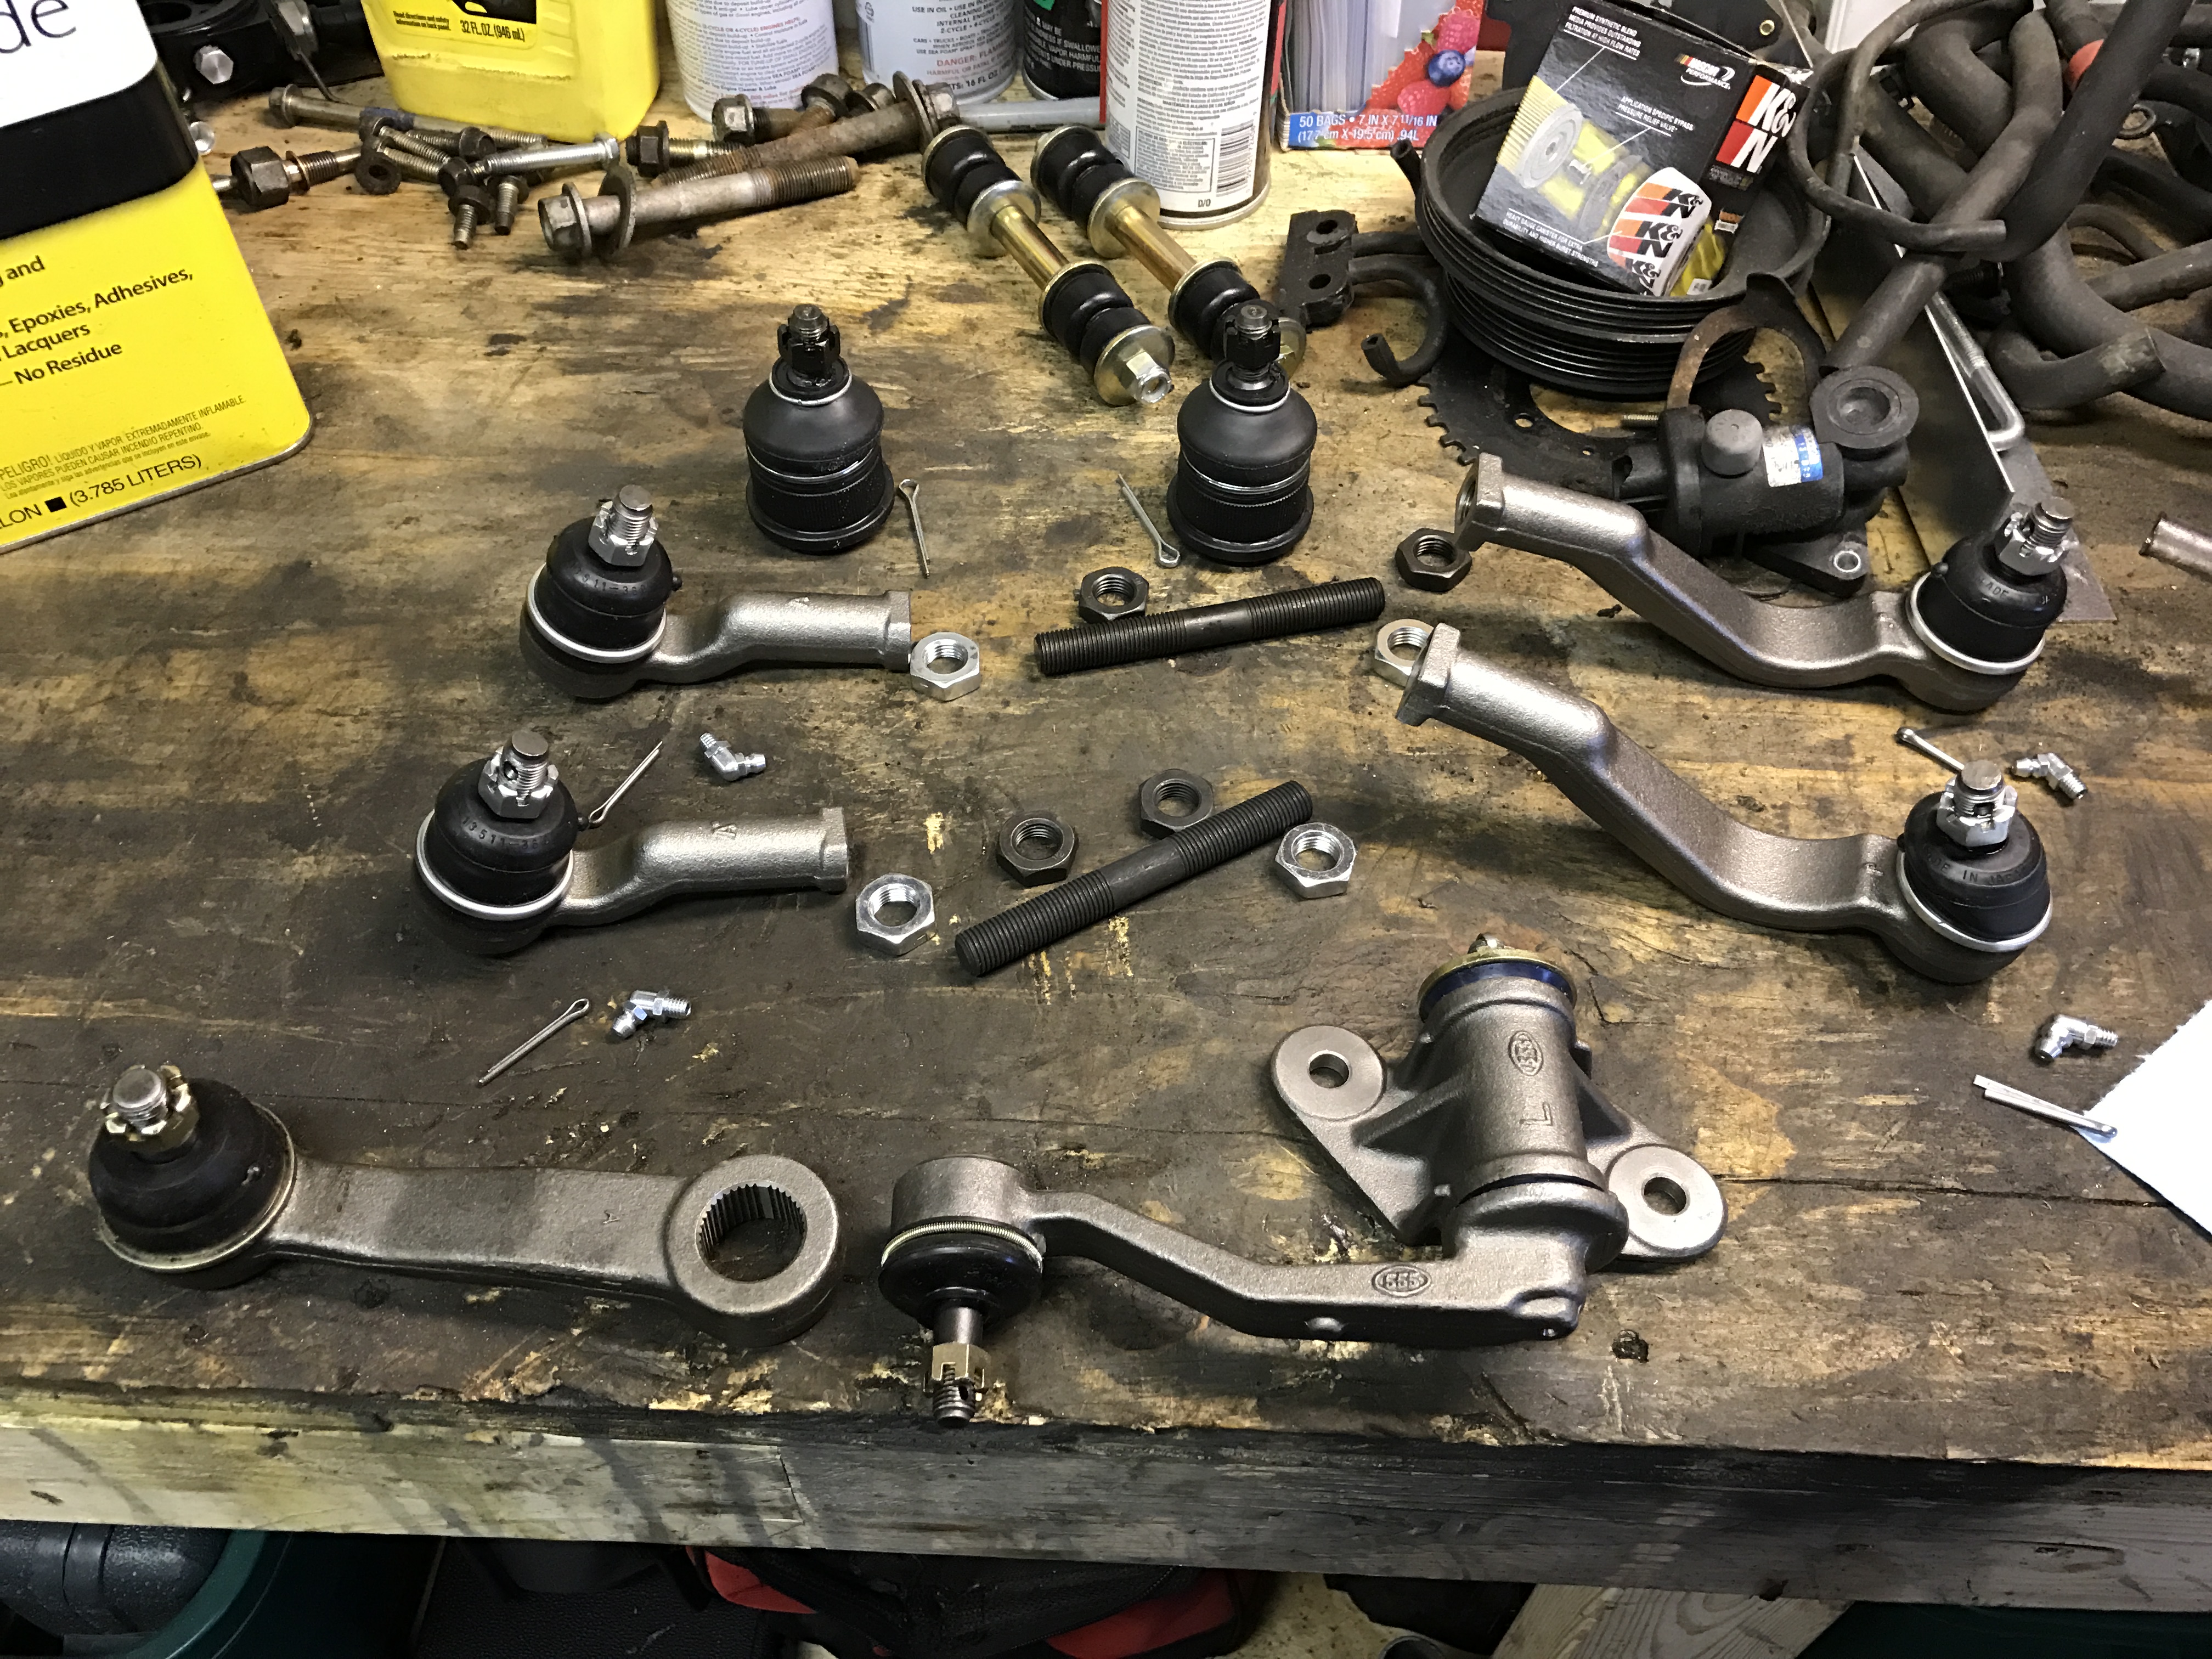
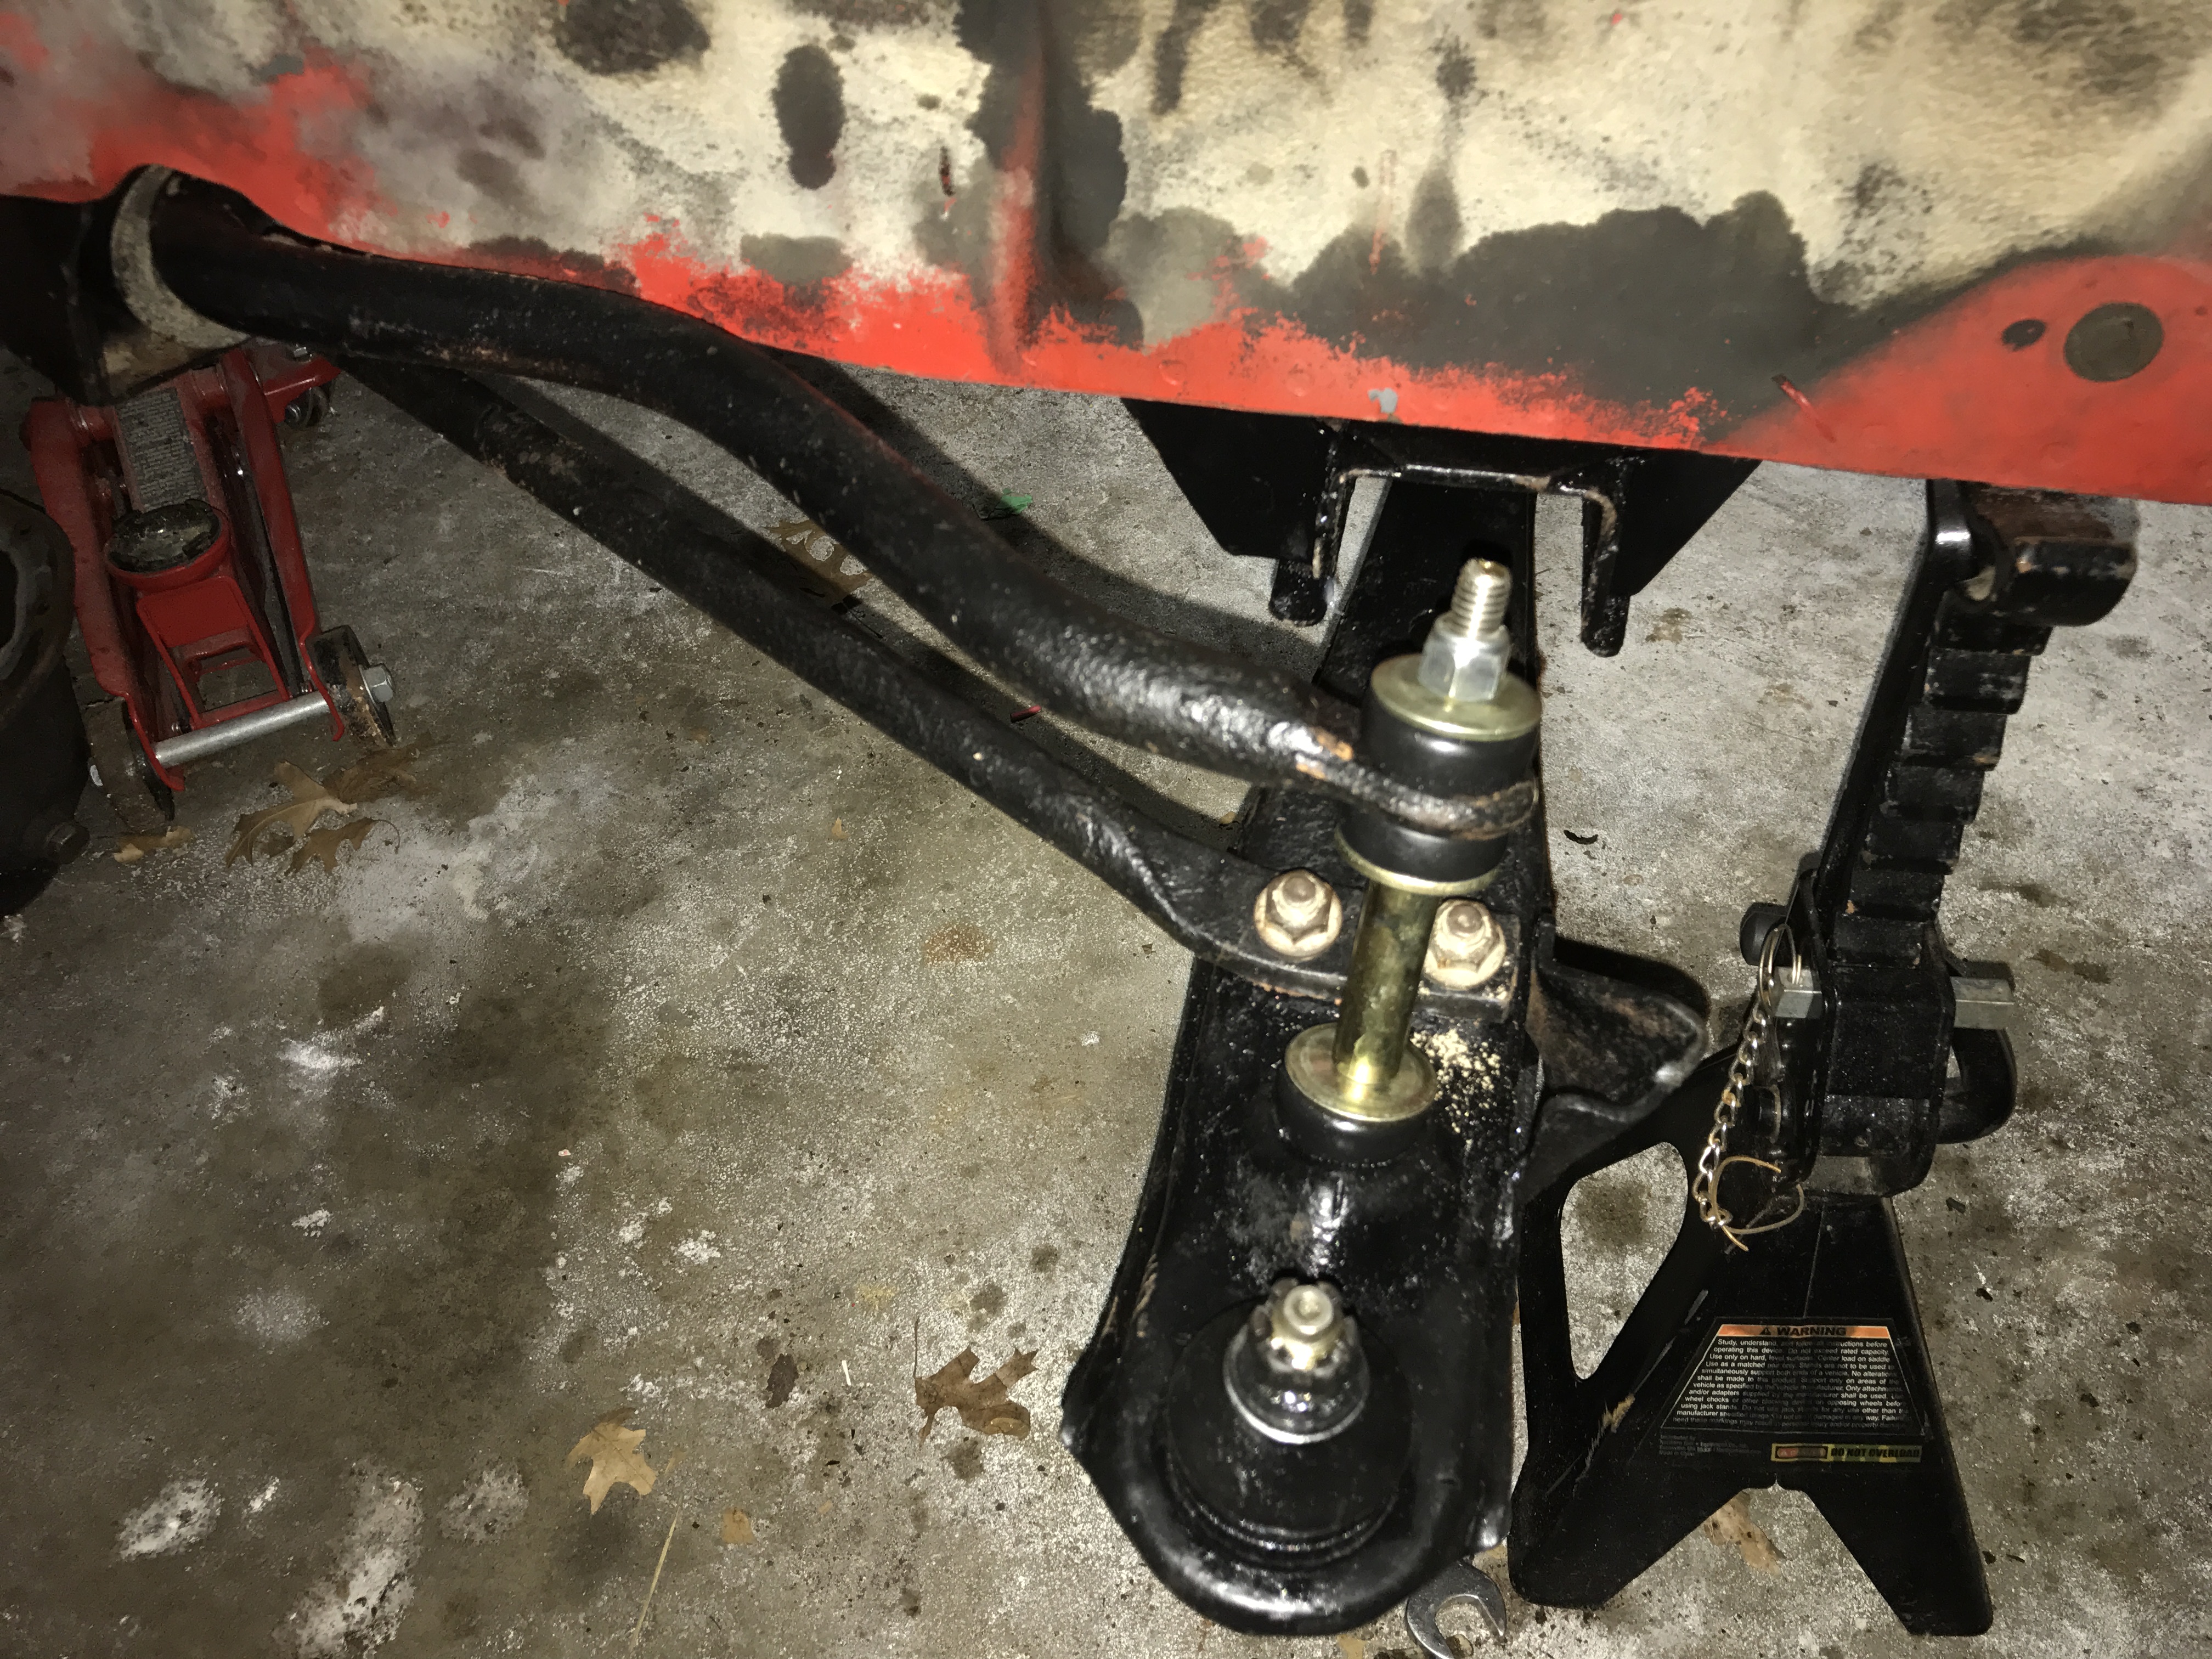
Trying to put the puzzle back together:
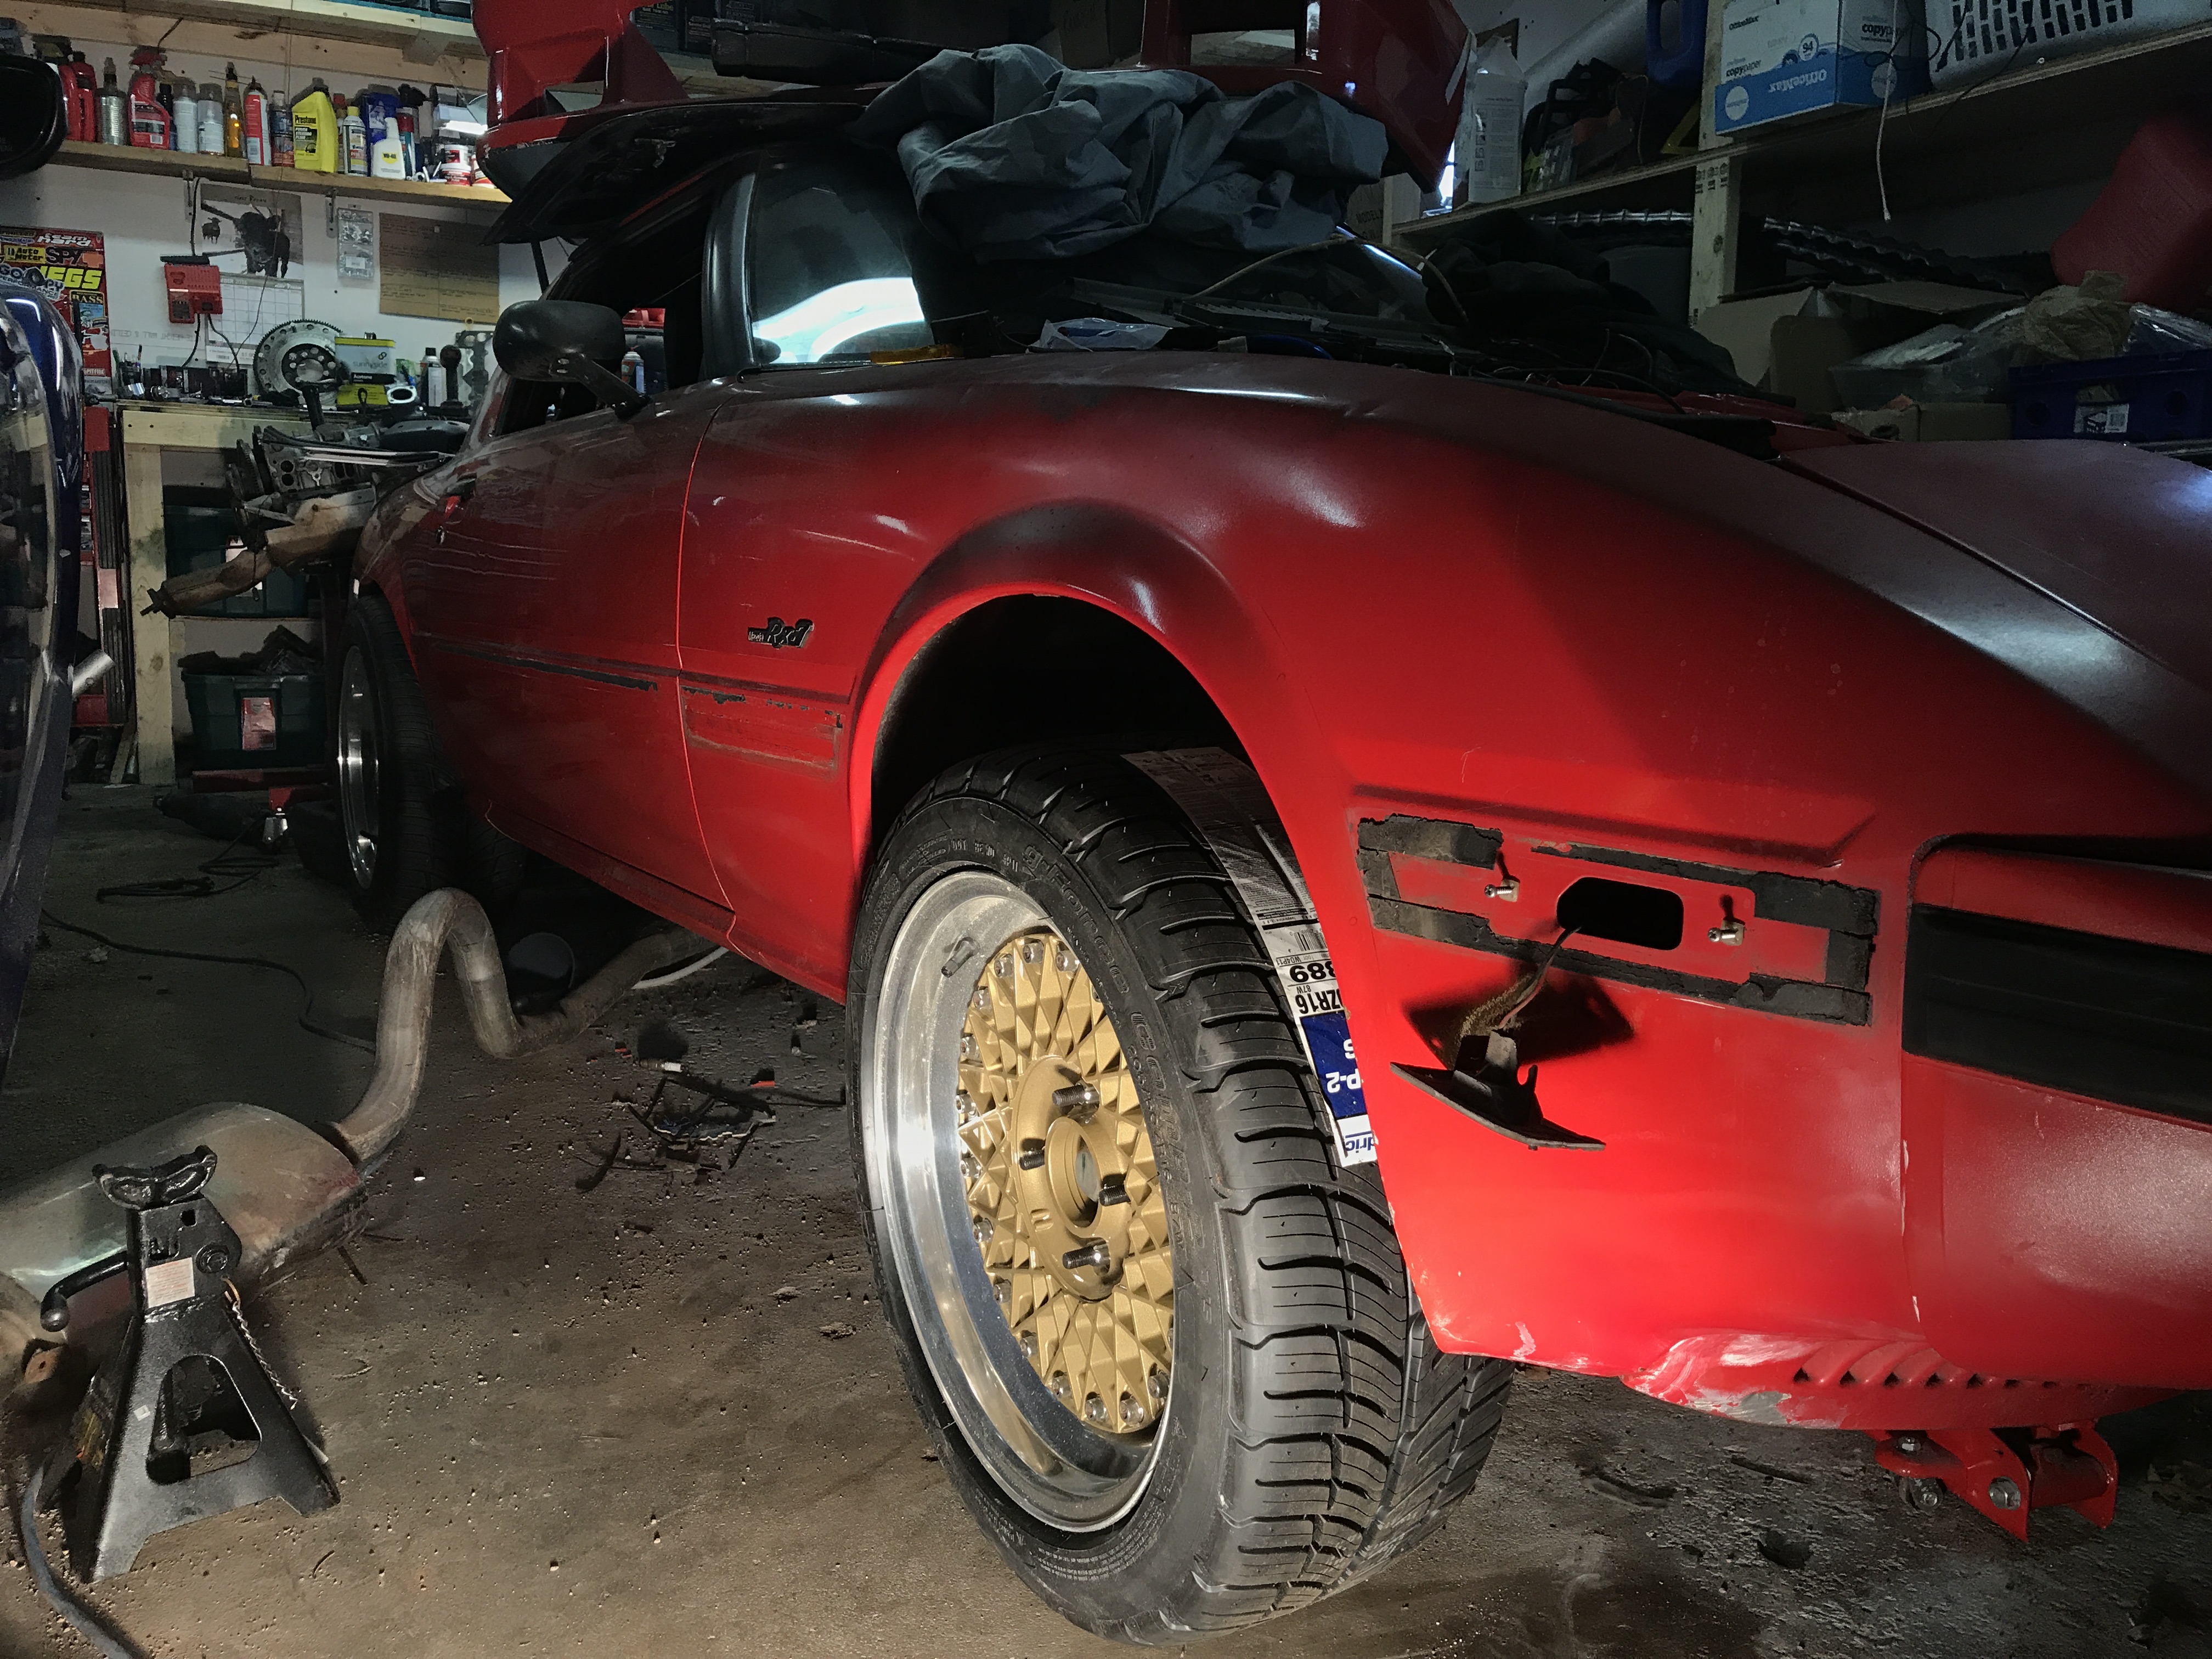
Here it is in the car finally!
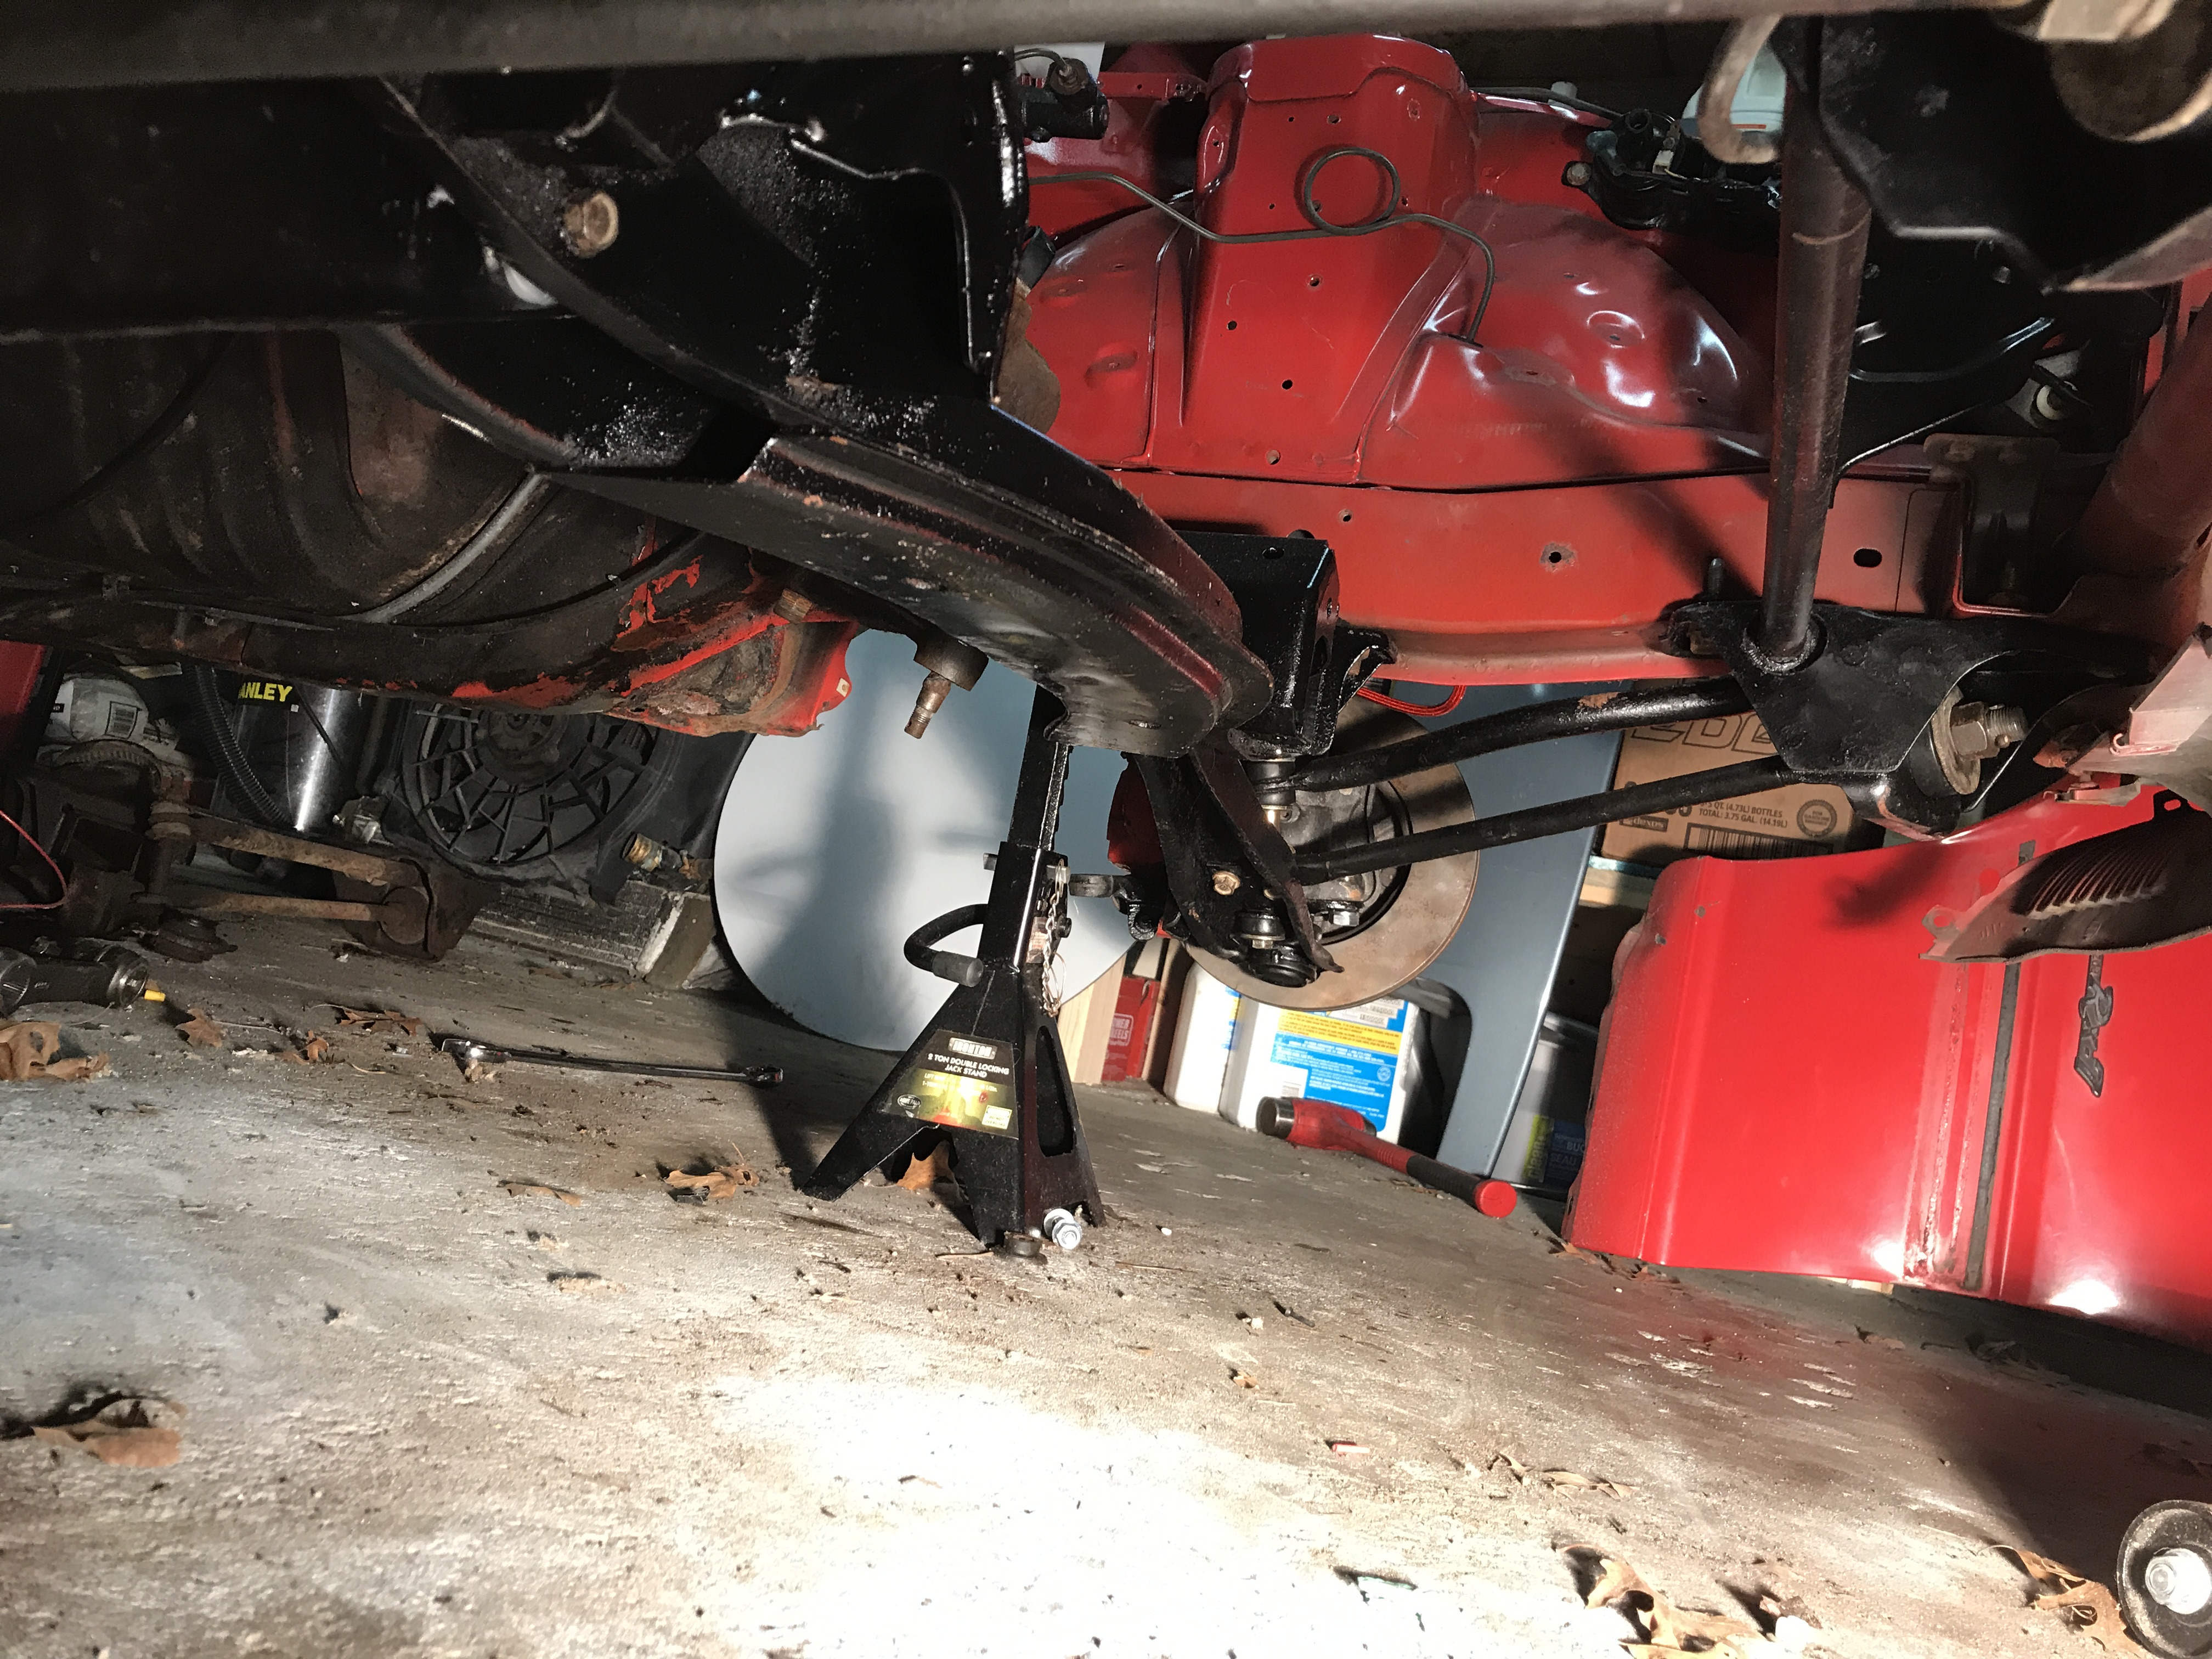
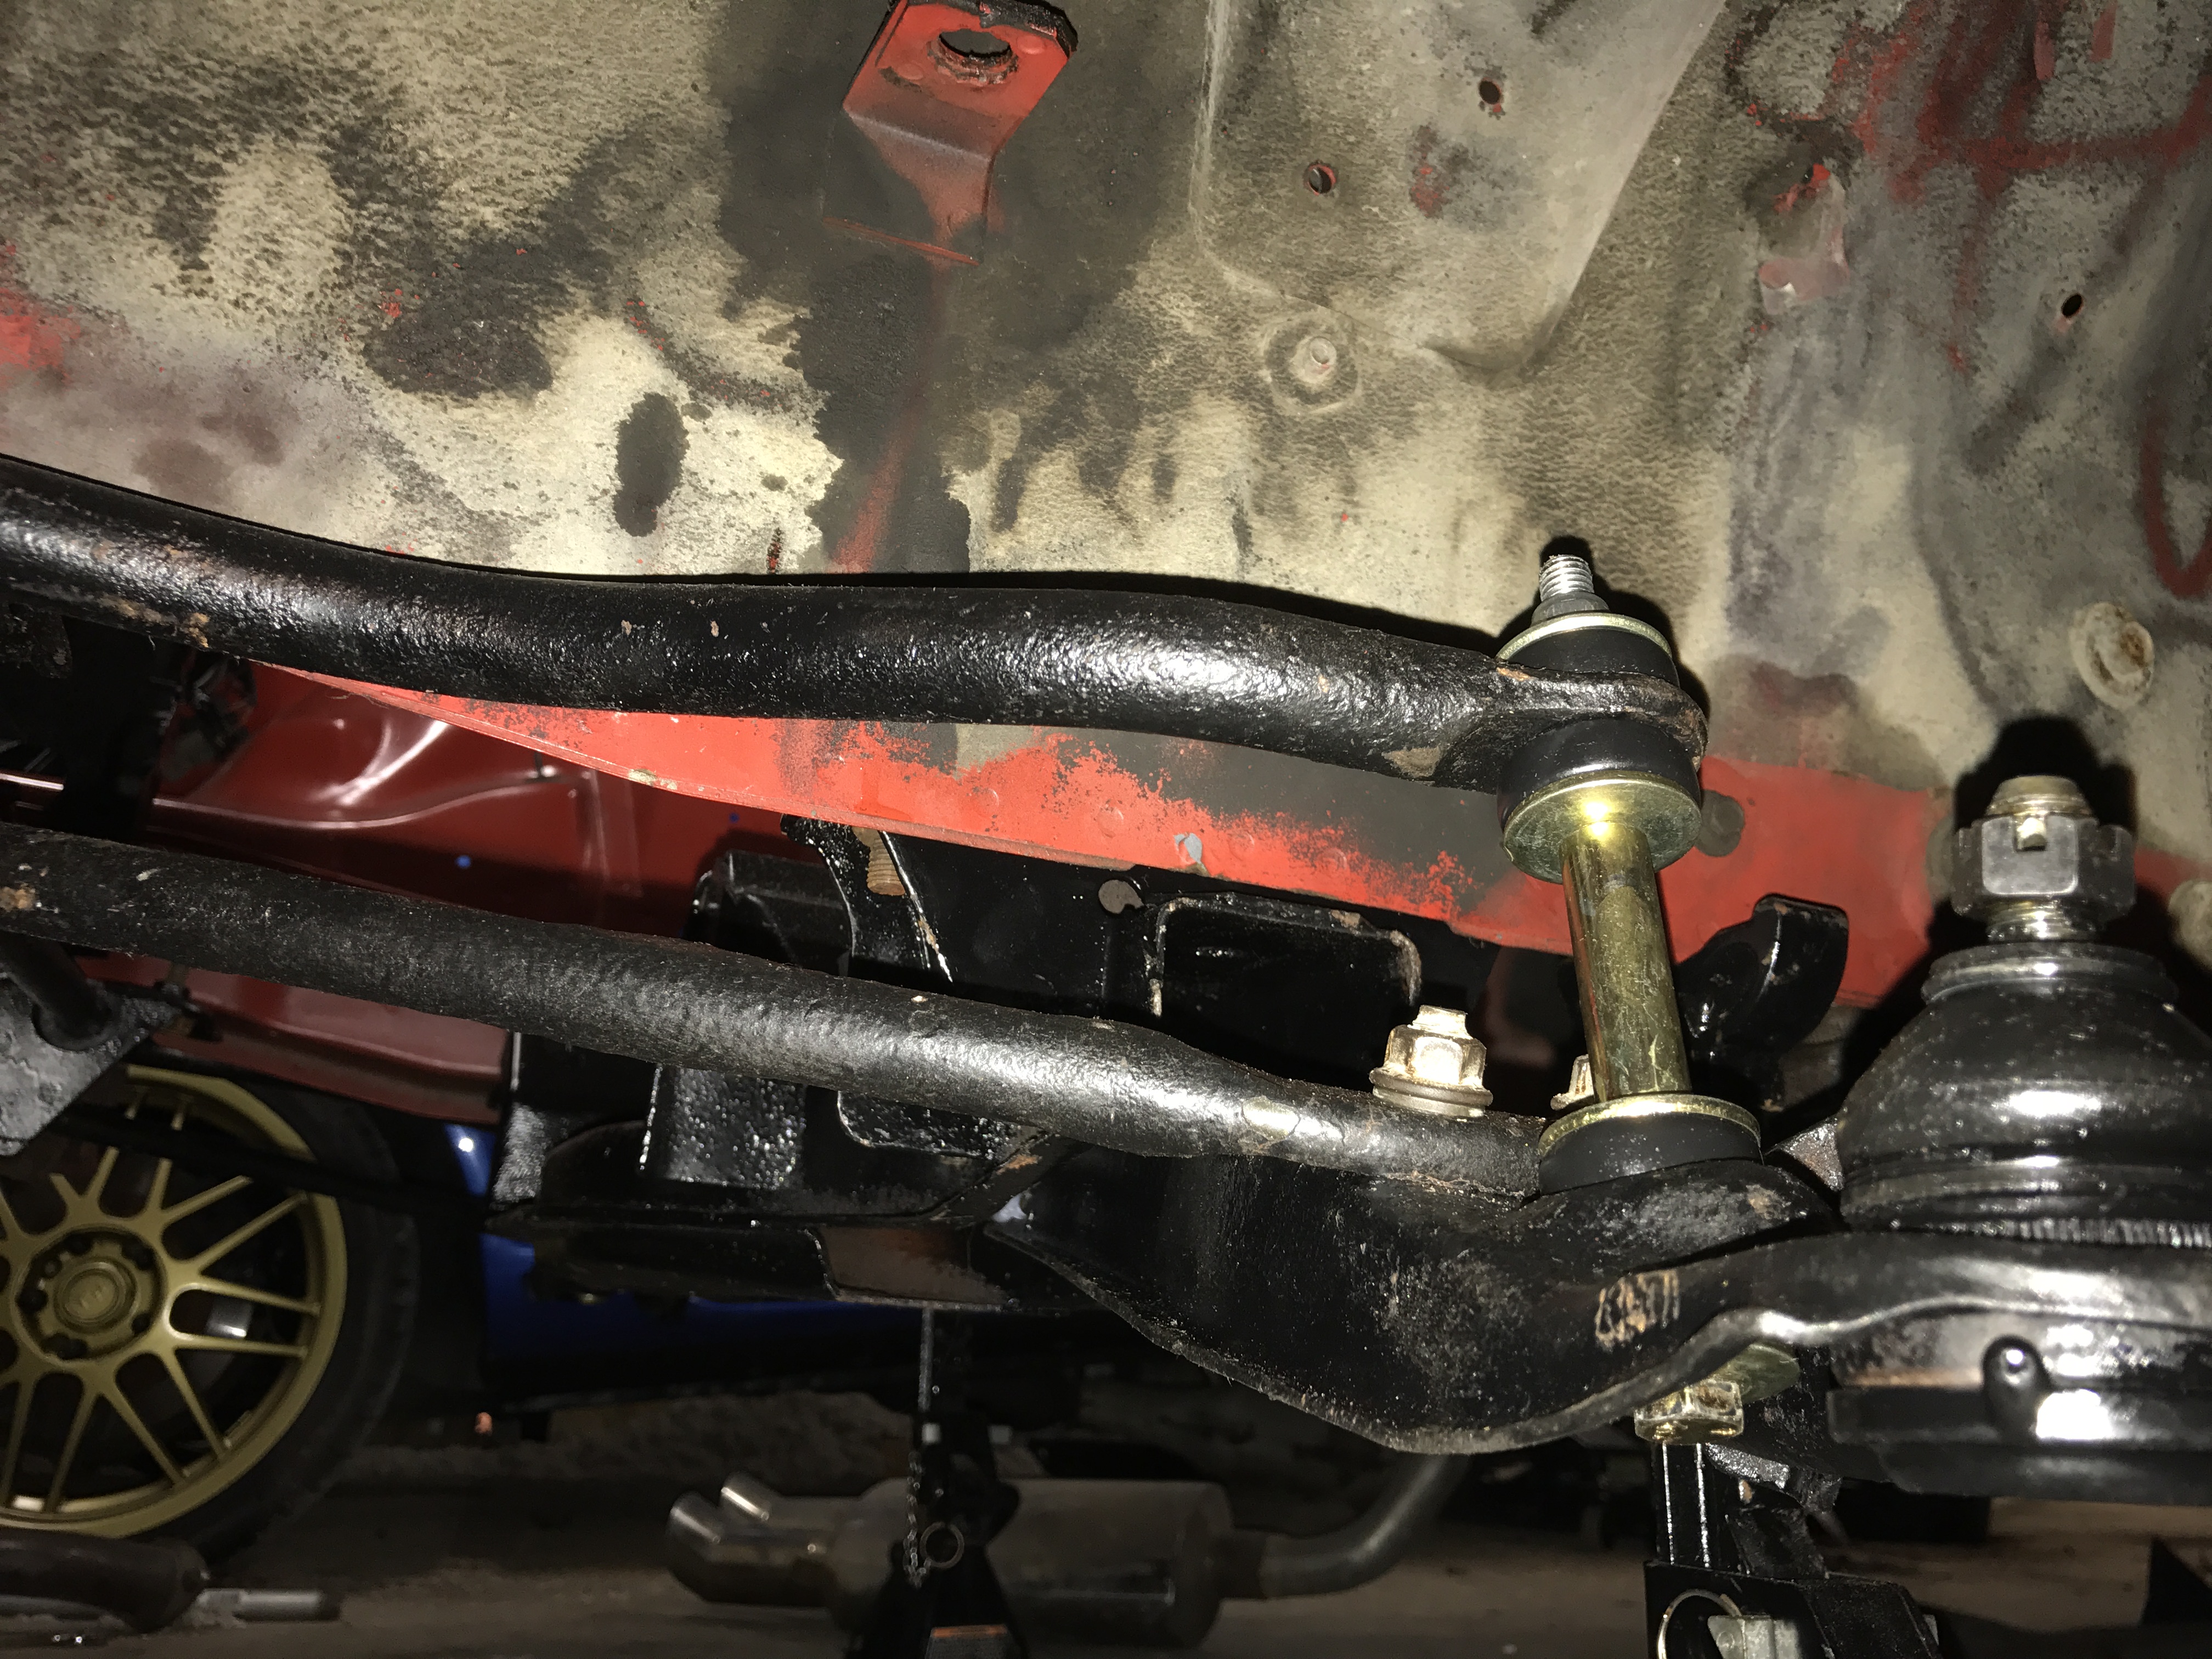
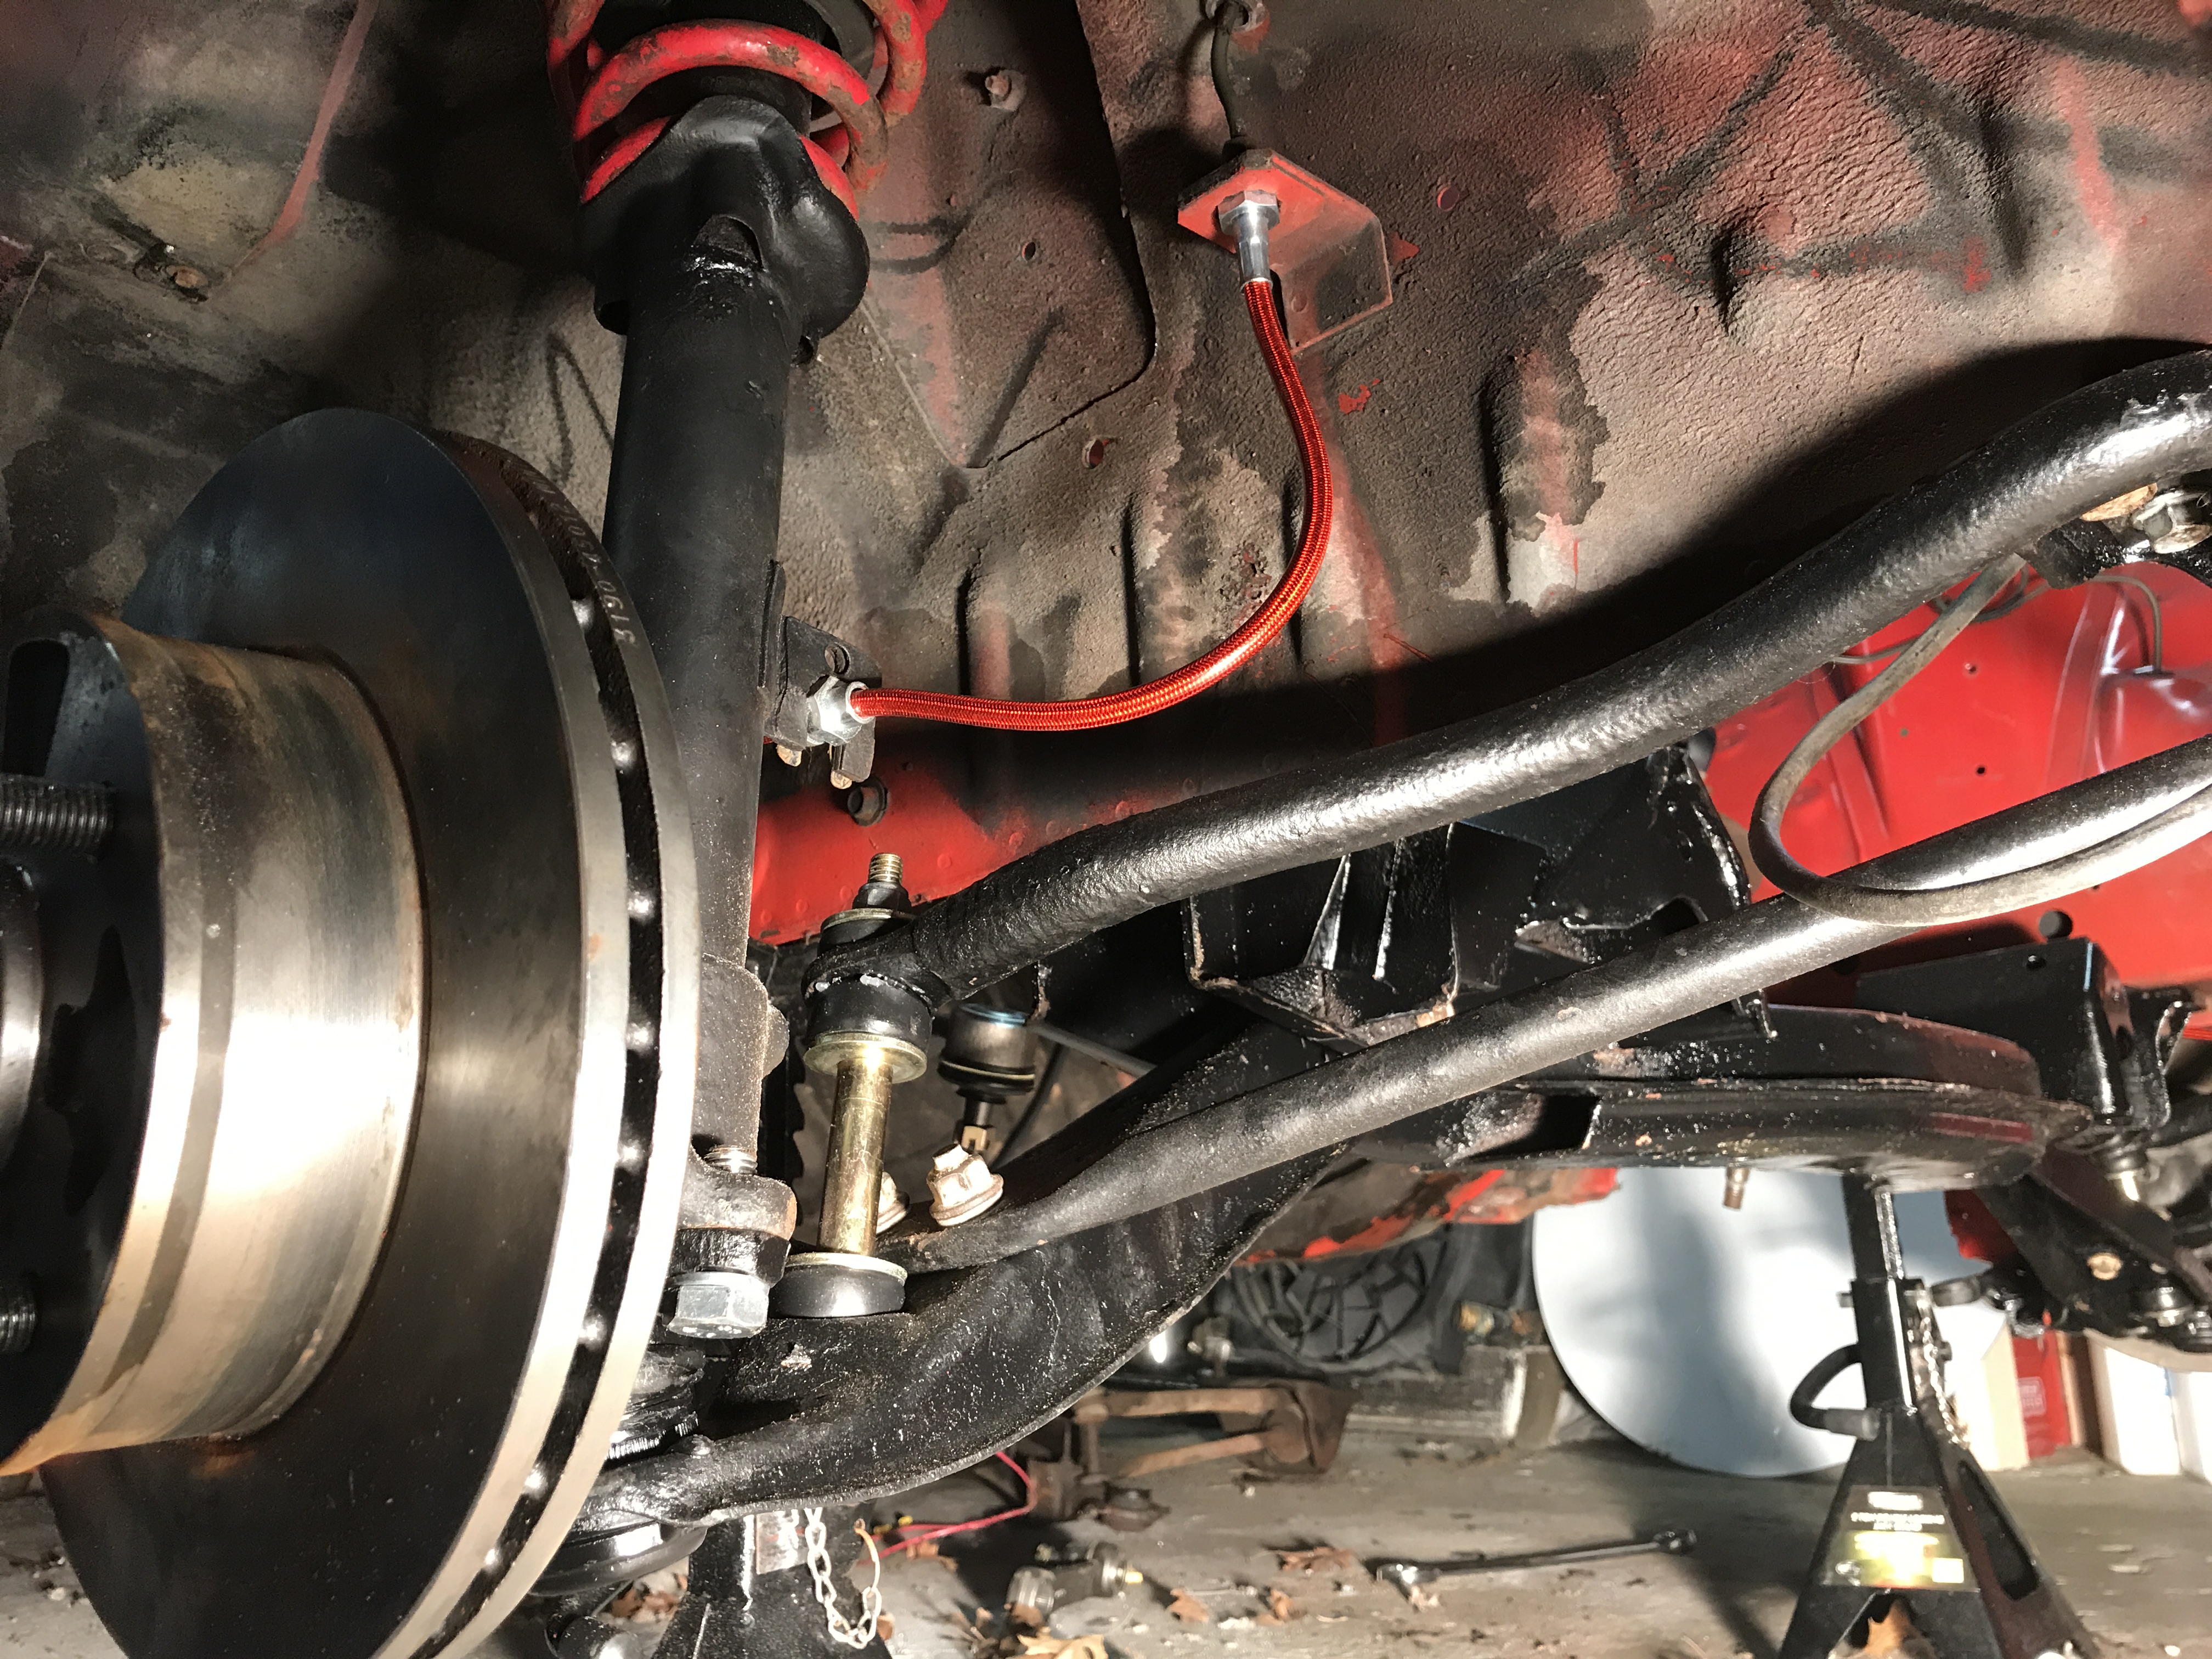
First time on its wheels, was a big day for me!

So I decided to replace the super old, saggy, nasty suspension components here.
A set of barely-used Tokico Blues replaced the blown old struts on all four corners.
Gross old front subframe, steering components and suspension came out in one piece...more or less.
This is a different front subframe from another FB that I had which I chose to refurbish. This car had no rust on the components whatsoever, whereas the one out of my car here was in terrible shape. I would still be fighting with the parts to this day trying to get them to come apart. The only difference I can conceive is that the parts car I had was sitting on concrete and this red car of mine was sitting on grass or dirt. Every part was so corroded together there was no way I was going to be able to get them to separate. Thank the Lord for parts cars!
In case you wanted to see what a whole lot of money in suspension components looks like sitting on a bench top:
Here they're all unboxed:
Trying to put the puzzle back together:
Here it is in the car finally!
First time on its wheels, was a big day for me!
Last edited by DreamInRotary; 08-24-17 at 05:24 PM.