84 12a bridgeport drift car
 08-12-13, 11:39 PM
#1
Full Member
Thread Starter

84 12a bridgeport drift car
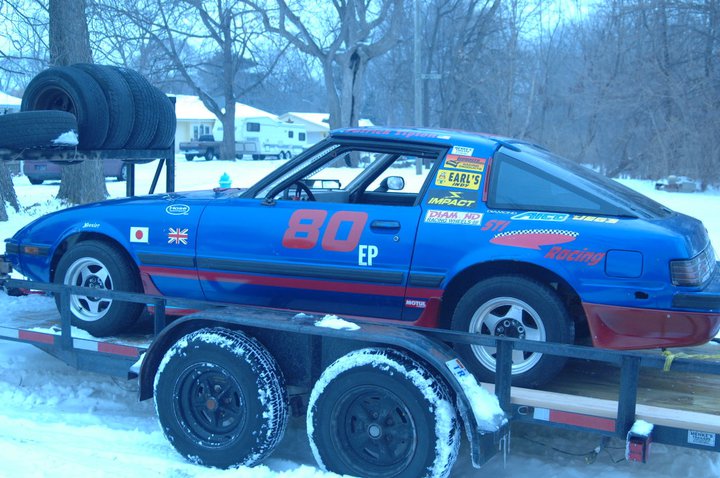
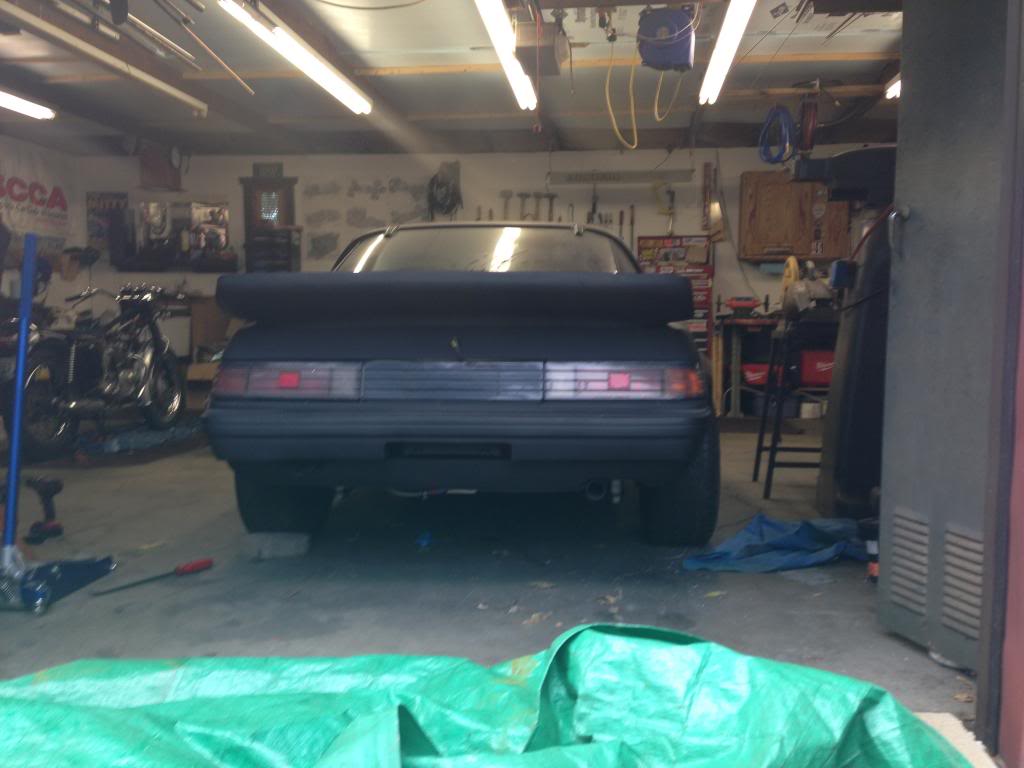
Bought an aborted ITS (i guess?) rx7 project a little over 2 years ago without any serious plans for it. This is the way the car looked when I picked it up


 08-12-13, 11:52 PM
#3
Full Member
Thread Starter
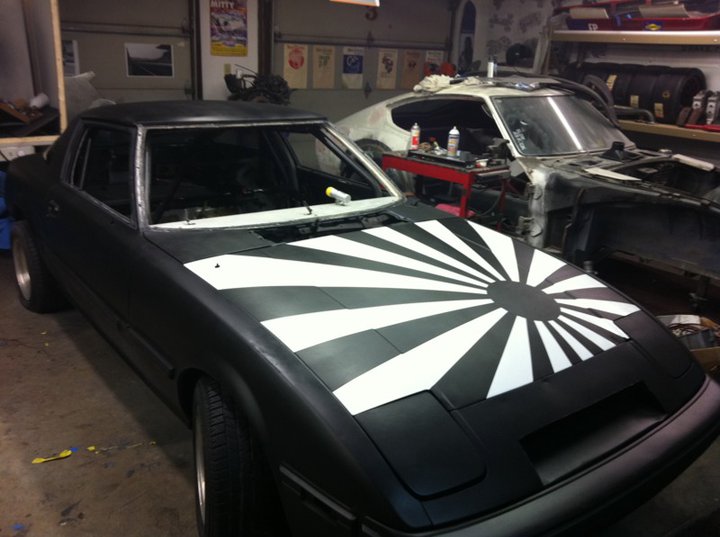
A few months later a put my datsun project on hold for a while and I got excited about the rx7 and ordered a bunch of parts to build a decent motor and rattle canned the thing black with a rising sun on the hood
Also found out that I had a set of bridgeported irons (came with the car, I didnt know anything about rotor engines when I got it), so I decided to do the bridgeport bit.
Ported my housings to go along with the bridgeport
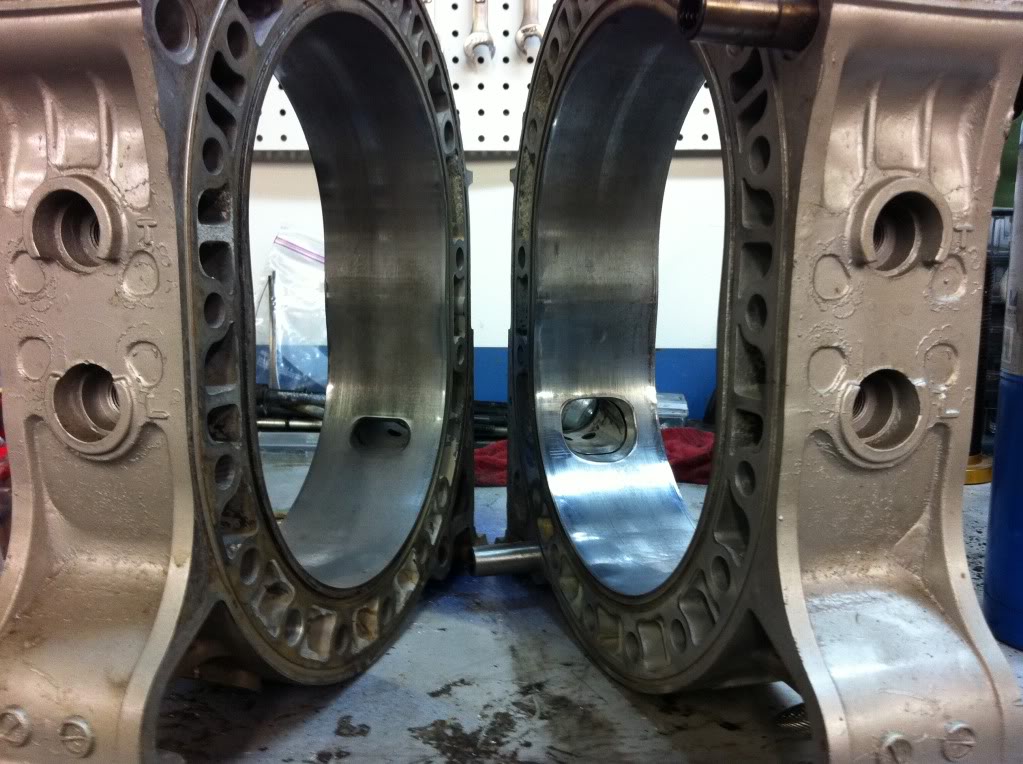


Also found out that I had a set of bridgeported irons (came with the car, I didnt know anything about rotor engines when I got it), so I decided to do the bridgeport bit.

Ported my housings to go along with the bridgeport
 08-12-13, 11:57 PM
#4
Full Member
Thread Starter
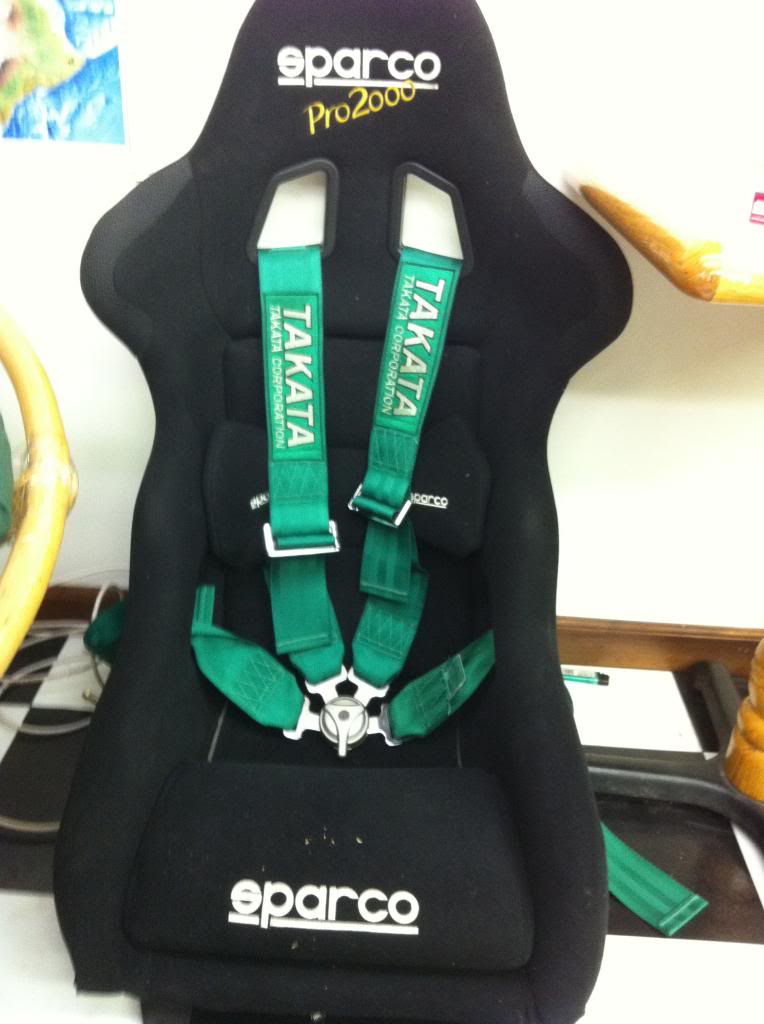
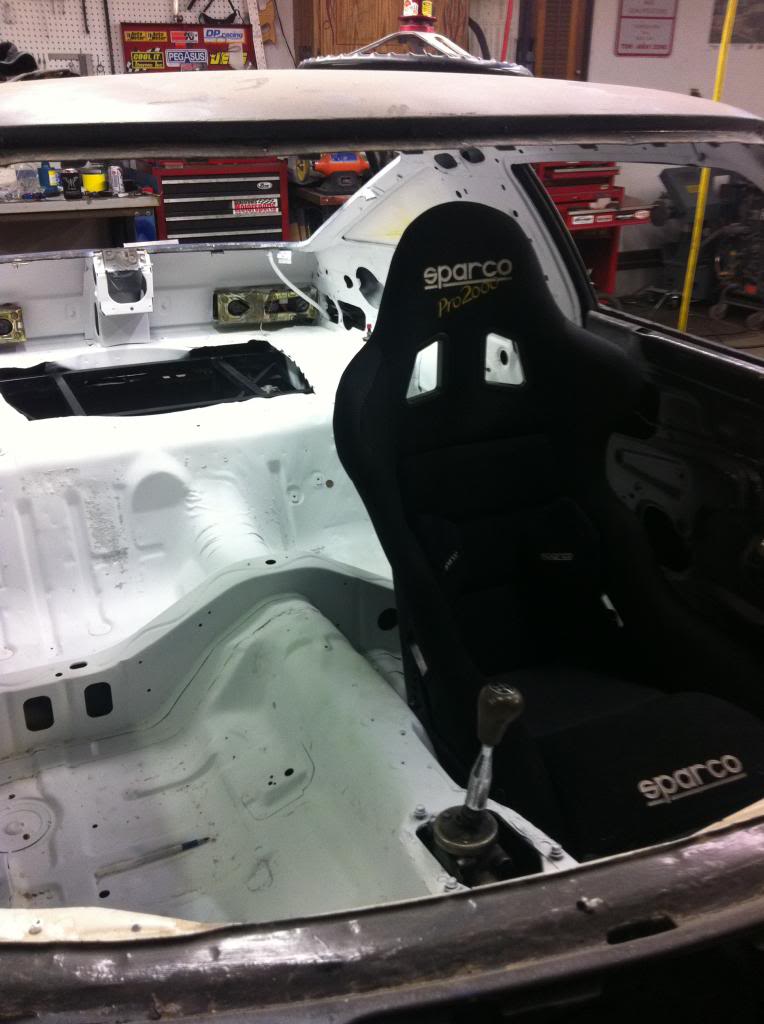
I also got a good deal on a used seat and harnesses and picked that up
Stripped the rest of the interior (dry ice - sound deadening and all that) and put the seat in
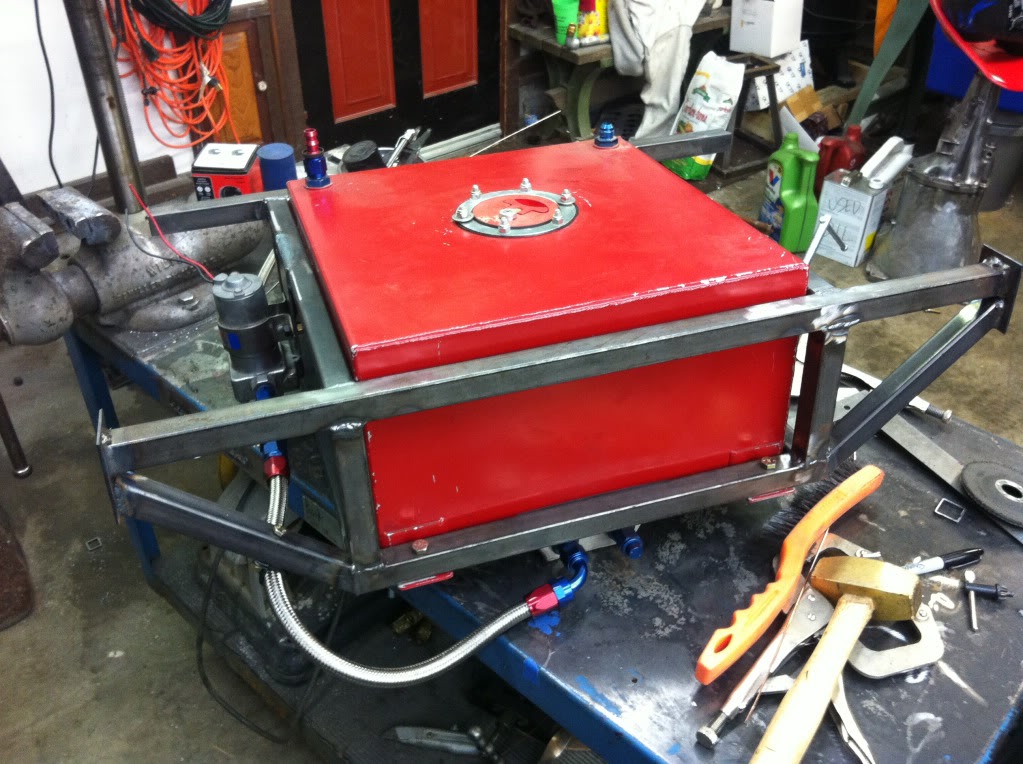
The previous owner had pulled off a real hack job of fabricating (i use that term loosely) a way to install a fuel cell.....
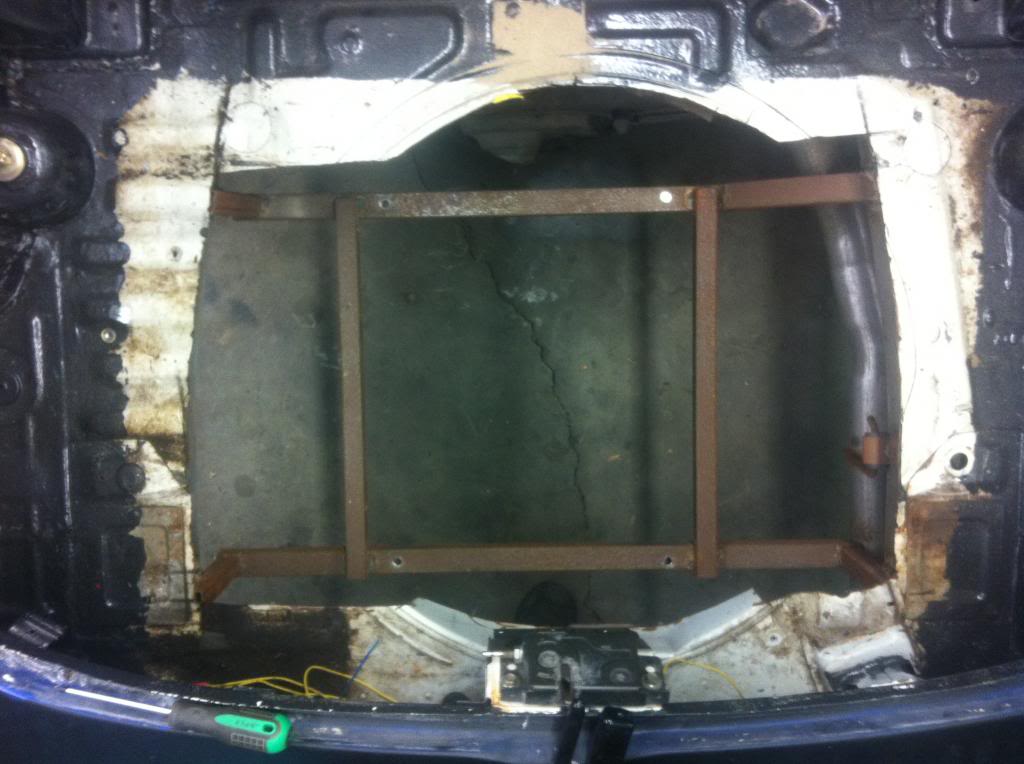
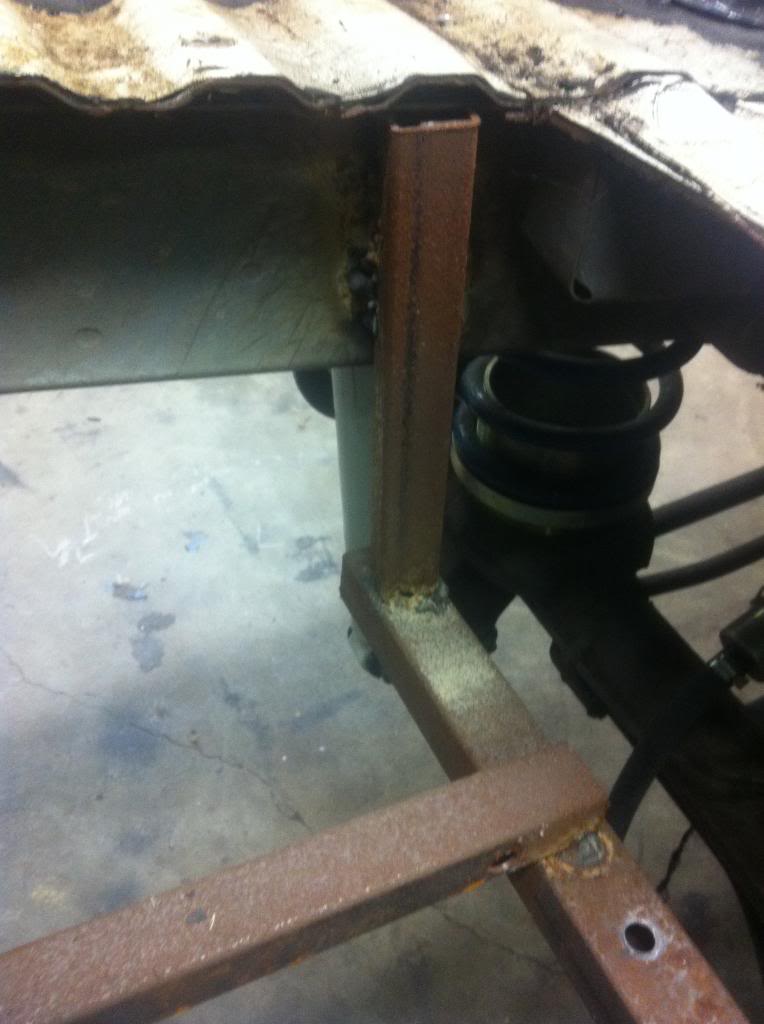
So I replaced that with this version that I made

Stripped the rest of the interior (dry ice - sound deadening and all that) and put the seat in

The previous owner had pulled off a real hack job of fabricating (i use that term loosely) a way to install a fuel cell.....


So I replaced that with this version that I made
 08-13-13, 12:09 AM
#5
Full Member
Thread Starter
Here's a pic of the fuel cell mounting frame welded into the car and painted
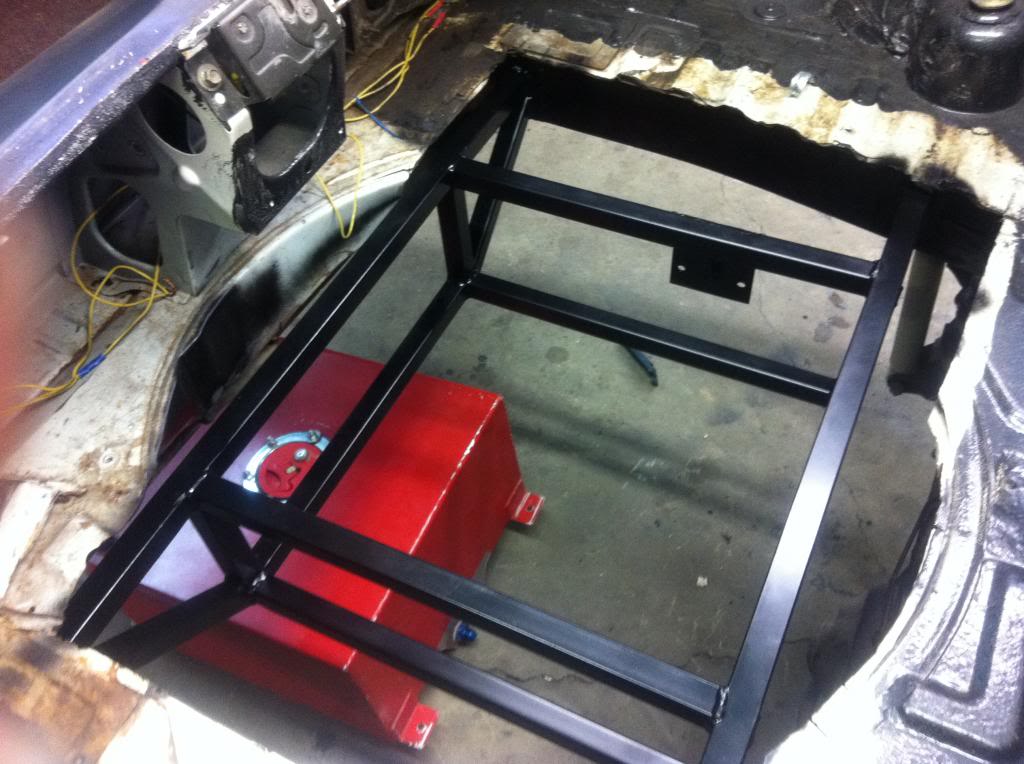
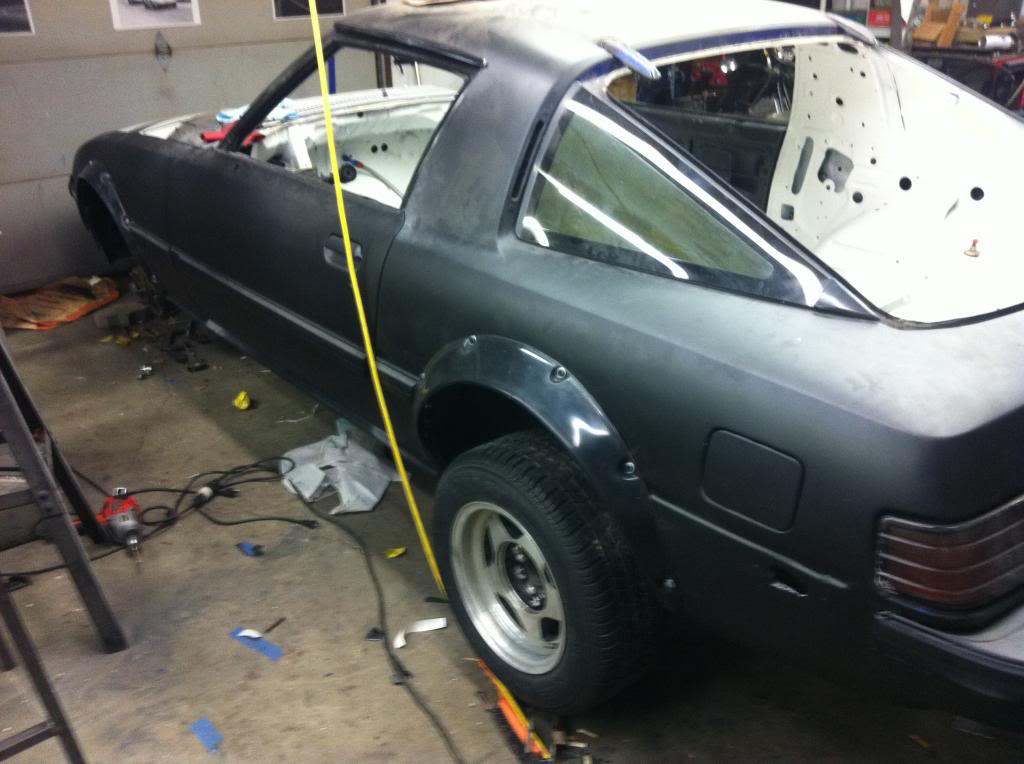
I picked up some ZG fender flares, chopped and seam welded the fenders and put those on next
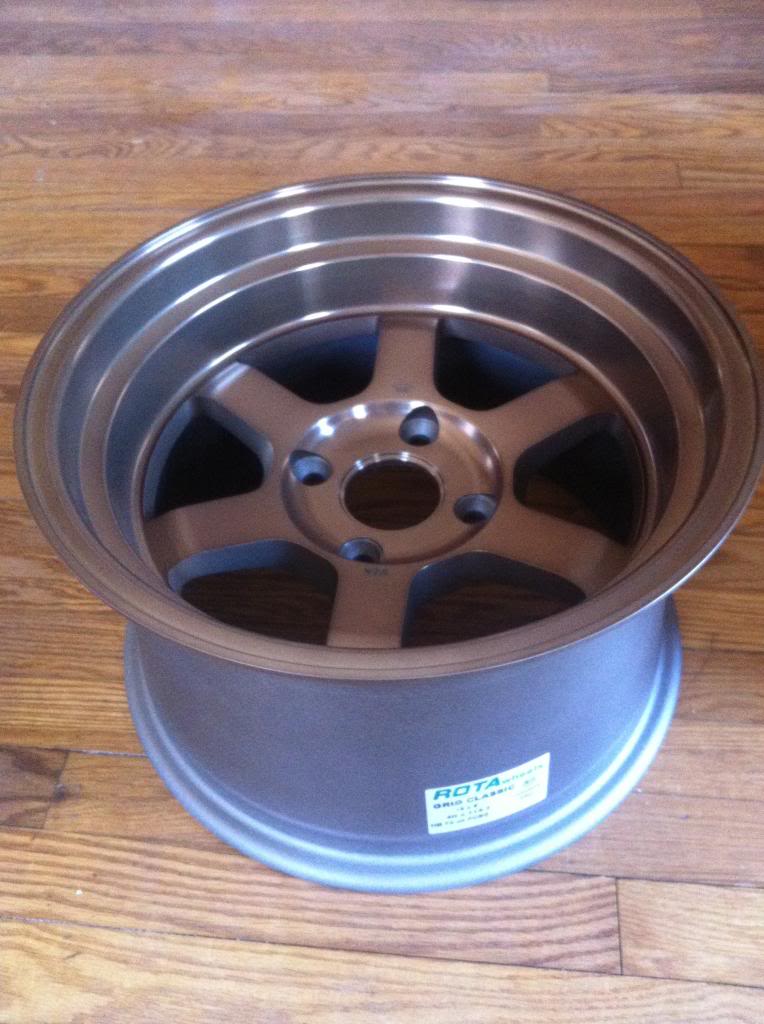
Also bought some rota grid v wheels for the car
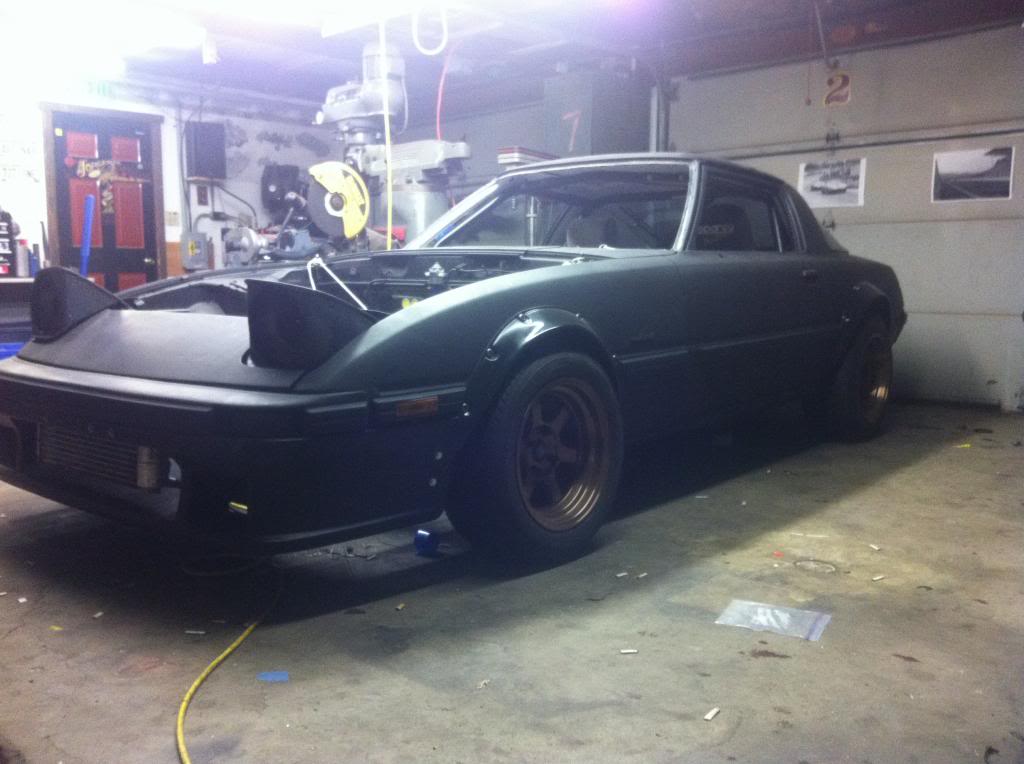
And then bought a front lip for the car, mounted the oil cooler out there and put the wheels on
For those interested, tires are 225/45/15. Wheels are 15x8 0offset front and 15x9 0 offset rear
One pleasant fact I discovered while looking for wheels is that the previous owner did the GSL-SE brake conversion, so I was able to get 4x114 wheels

I picked up some ZG fender flares, chopped and seam welded the fenders and put those on next

Also bought some rota grid v wheels for the car

And then bought a front lip for the car, mounted the oil cooler out there and put the wheels on

For those interested, tires are 225/45/15. Wheels are 15x8 0offset front and 15x9 0 offset rear
One pleasant fact I discovered while looking for wheels is that the previous owner did the GSL-SE brake conversion, so I was able to get 4x114 wheels
The following users liked this post:
ayeenomi (04-20-19)
08-13-13, 12:18 AM
#6
Full Member
Thread Starter
Found a sweet old school whale tail spoiler on craigslist and put that on
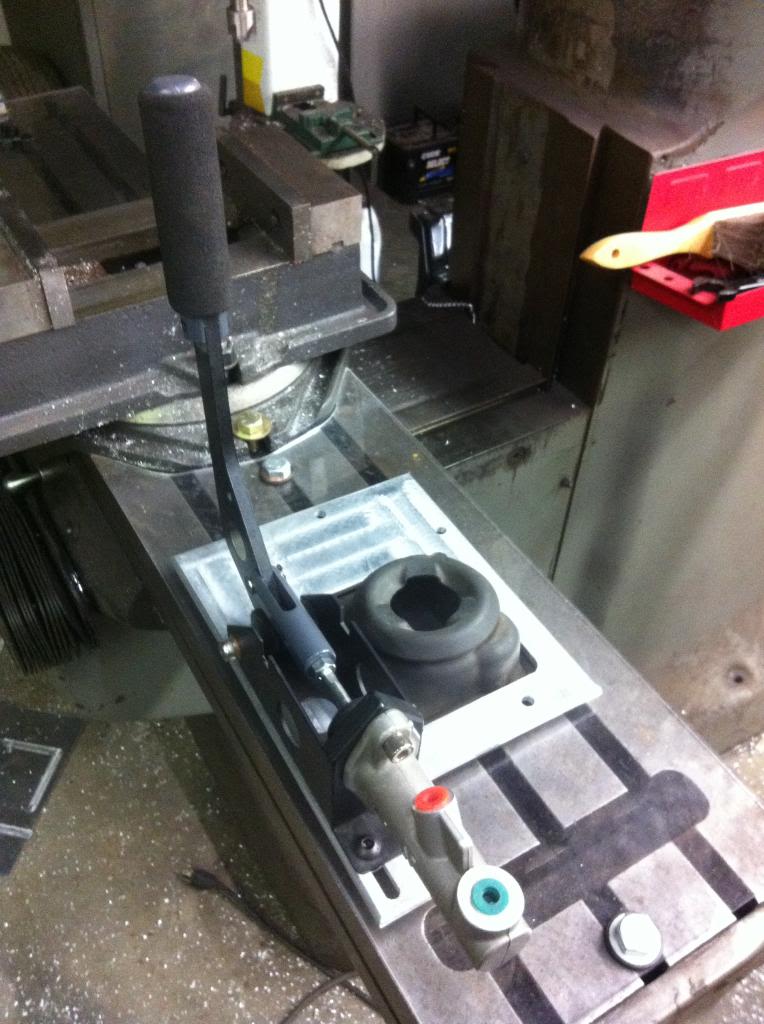
At this point I'm pretty convinced I would like to try my hand at drifting the car (hence the thread title) so I made a mounting plate around the shifter to attach a Ksport hydraulic hand brake to.
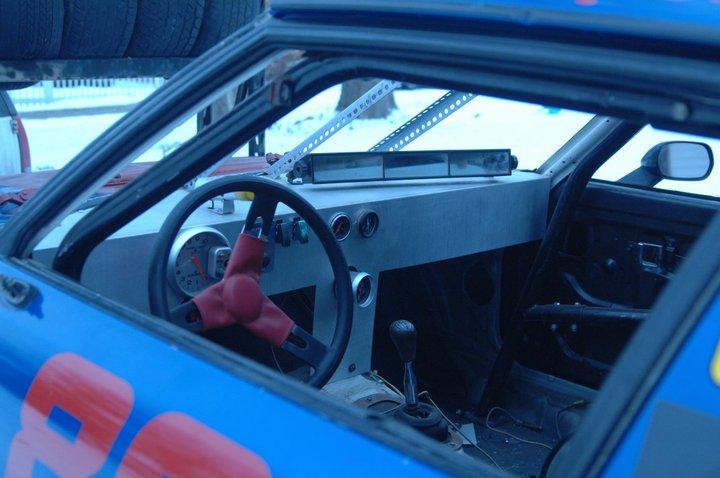
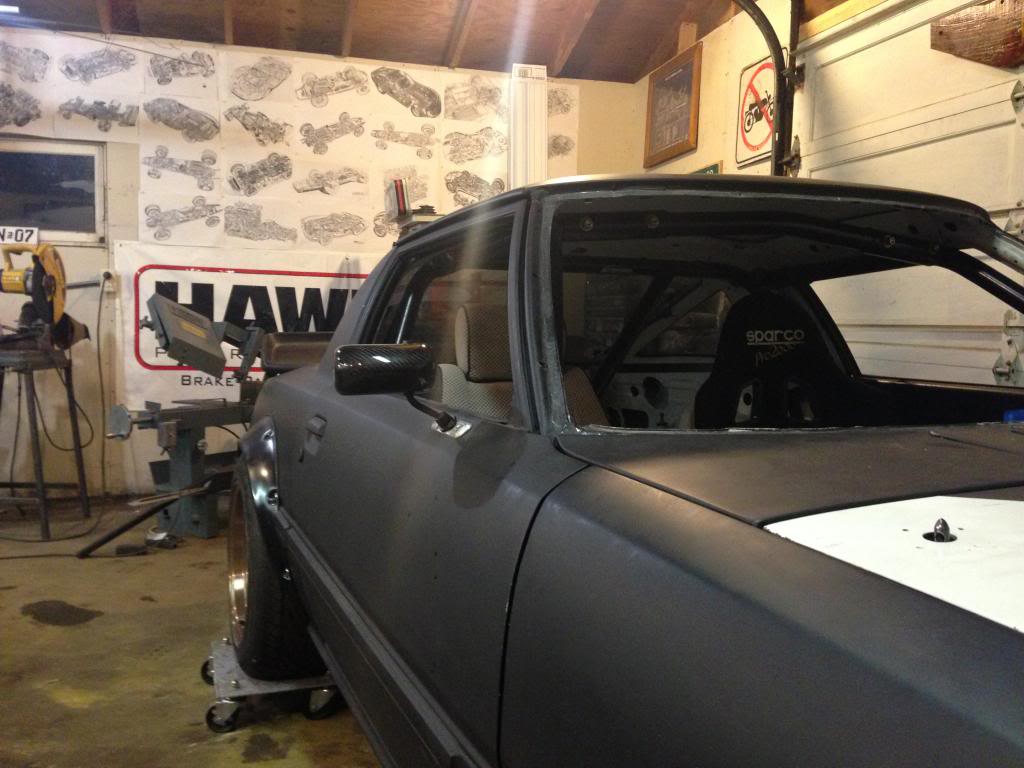
Then I got around to making a dash for the car since I didn't like the aluminum sheet one it came with. Nothing is wired up yet but it gives you a general idea of the layout. Using autometer tach, oil pressure, oil temp and water temp. Have a 14.7 brand wideband (the blue box) and a EGT on the far drivers side. Also got my dream sparco steering wheel! Switches are longacre brand and the two shift lights are summit adjustables. Thought I would run two shift lights since I'm not super used to hearing engines rev very high (8k+) so I think I will set one up 1k below rev limiter and one 250 below rev limiter so I can have the poor man's sequential setup
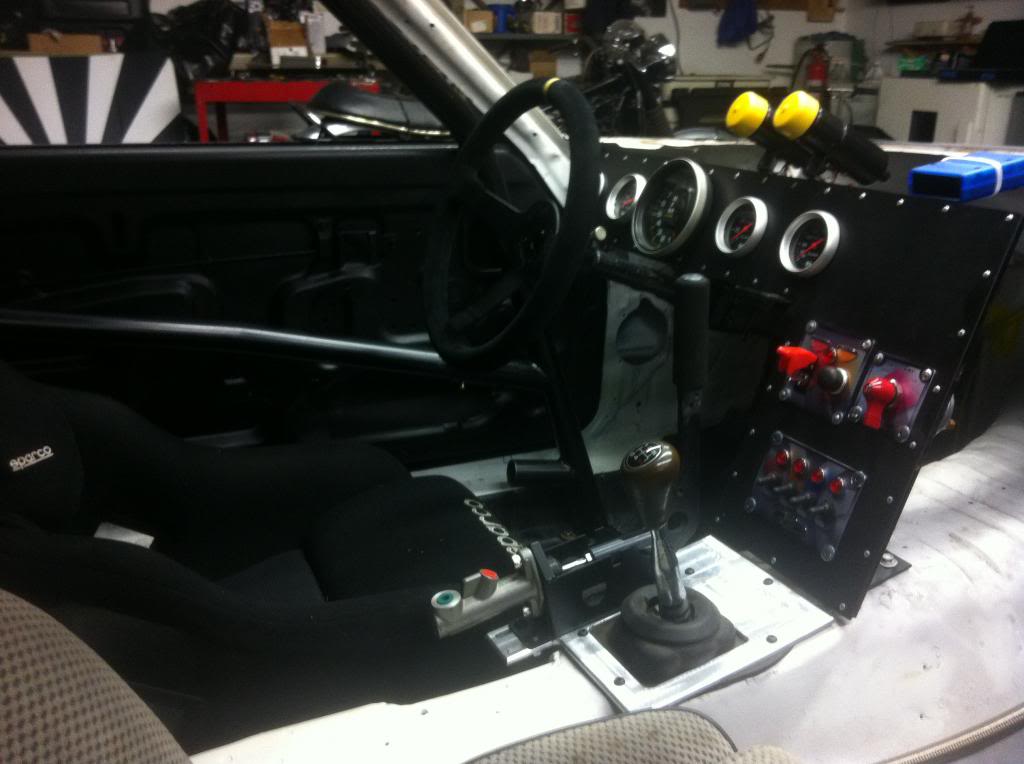
The cage in the picture is a bolt-in autopower setup but unfortunately I think it will have to come out as my head smashes into it while seated. I'll probably just end up running the roll bar until I get the car on the road and have time to weld in a properly fitted cage.

At this point I'm pretty convinced I would like to try my hand at drifting the car (hence the thread title) so I made a mounting plate around the shifter to attach a Ksport hydraulic hand brake to.

Then I got around to making a dash for the car since I didn't like the aluminum sheet one it came with. Nothing is wired up yet but it gives you a general idea of the layout. Using autometer tach, oil pressure, oil temp and water temp. Have a 14.7 brand wideband (the blue box) and a EGT on the far drivers side. Also got my dream sparco steering wheel! Switches are longacre brand and the two shift lights are summit adjustables. Thought I would run two shift lights since I'm not super used to hearing engines rev very high (8k+) so I think I will set one up 1k below rev limiter and one 250 below rev limiter so I can have the poor man's sequential setup

The cage in the picture is a bolt-in autopower setup but unfortunately I think it will have to come out as my head smashes into it while seated. I'll probably just end up running the roll bar until I get the car on the road and have time to weld in a properly fitted cage.
The following users liked this post:
ayeenomi (04-20-19)
08-13-13, 12:30 AM
#7
Full Member
Thread Starter
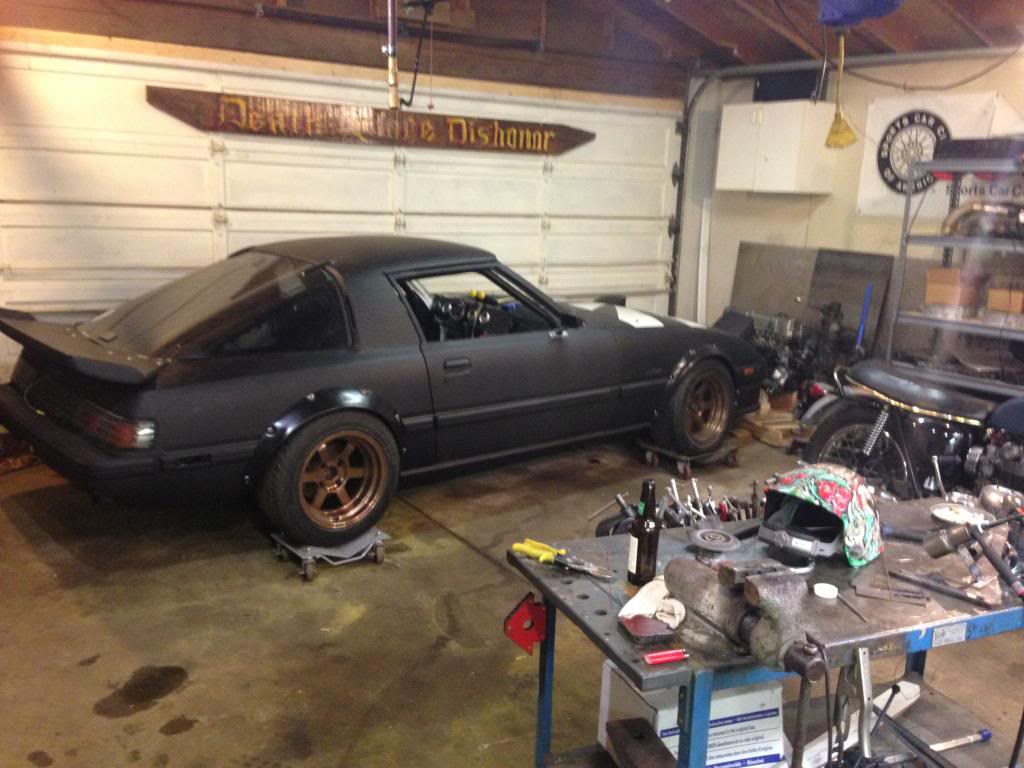
So there's a quick picture summary of the last few years with this car. Currently I'm preparing to build the engine. I sent the engine plates to a shop by my folk's house in wisconsin called TripleR to have them surface ground. The rotating assembly was shipped to Racing Beat for balancing and clearancing but USPS dropped my rotor box and smashed a corner of the rear rotor so I'm dealing with that whole saga right now. Thankfully Jim Tanner is a great guy and has been super helpful with the whole process so I should be getting one of their lightweight rotor assemblies later this month! Still working out the details if I can use my counterweights or not but I should be all set with a balanced assembly and a brand new E shaft (mine was worn out and not useable for a race motor application) by the end of the month! Of course it had to be the rear rotor, as I tore apart 3 engines to get one good rear rotor and have spares for the front... but that's how it goes. I'll post more as I get into the engine build and start plumbing and wiring the car.
Trending Topics
12-08-13, 05:09 PM
#10
Just saw this one, that's a pretty gnarly looking car man! Like stated, dash is spot on and the strip and paint must have been pretty cheap so you have one helluva drift machine right there. You're probably already used to solid rear axle feel with the Datsun so it shouldn't be too big of a jump to this car. Good luck with it! 
 12-16-13, 03:43 PM
#13
Full Member
Thread Starter
Thanks!
Dash is a welded frame of 1/2"x1/2" steel tube with a sheet of black abs plastic from menards attached with rivets. Total cost was probably less than $30
Moved back to Wisconsin a few months ago so progress has been slow but I'm setup in a garage now and should have updates on ignition system and exhaust within the next month or so.

 12-16-13, 10:17 PM
#16
Full Member
Join Date: Feb 2013
Location: Portales, NM
Posts: 126
Likes: 0
Received 0 Likes
on
0 Posts
Thanks! Dash is a welded frame of 1/2"x1/2" steel tube with a sheet of black abs plastic from menards attached with rivets. Total cost was probably less than $30 Moved back to Wisconsin a few months ago so progress has been slow but I'm setup in a garage now and should have updates on ignition system and exhaust within the next month or so.
12-16-13, 11:21 PM
#17
Junior Member
iTrader: (1)

Join Date: Jul 2013
Location: Wisconsin
Posts: 13
Likes: 0
Received 0 Likes
on
0 Posts
where are you located in WI, do you plan on hitting up USAIR for some dday events next year im in the middle of building a non turbo 13b 86 rx7, mainly suspension and cooling and of course making it look sexy
12-18-13, 06:31 PM
#18
Full Member
Thread Starter
I'm in Waukesha now. I'm planning on trying to make a drift day event with clubfr or something next summer but I'm not sure it will be done by then. I ran into a problem with my irons, I believe they have had too much material removed during surface grinding. I'm going to research the effects of running plates that are thinner than the factory specs but I think I will run into stackup issues.... So I might be tracking down another set of plates and redo the ports again.
12-23-13, 10:13 PM
#19
Full Member
Thread Starter
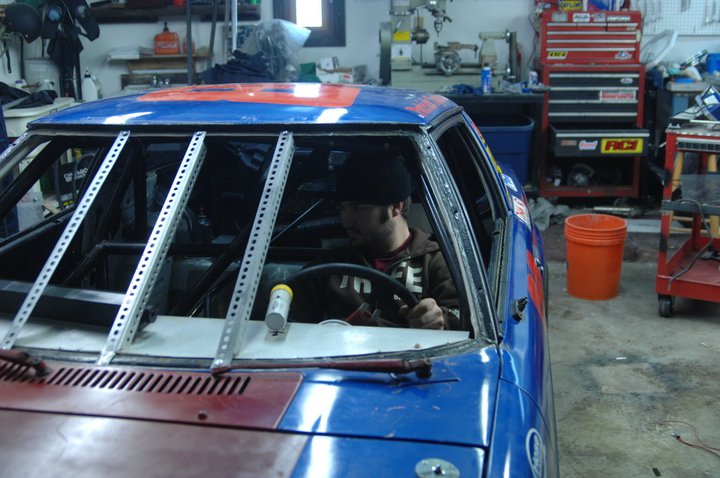
So i'm back in wisconsin, got a workshop together for the car and started working on it again. Here it is in the new shop.
Also picked up some APR mirrors and used some aluminum from the old front bumper to make mounts with the proper angle.
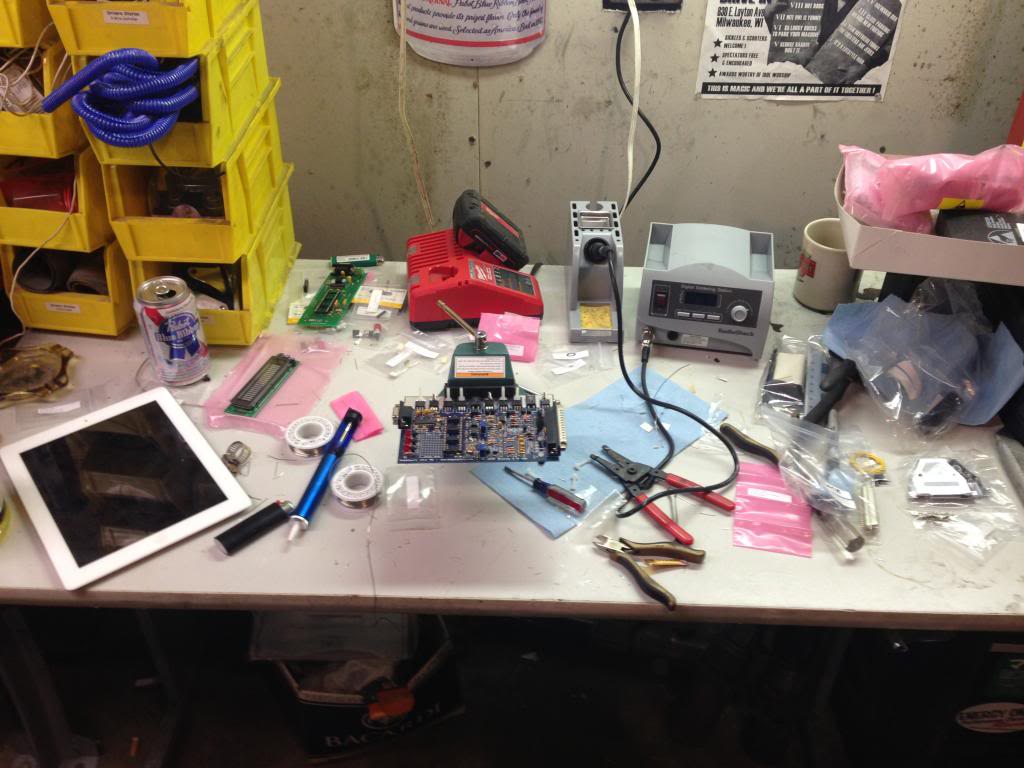
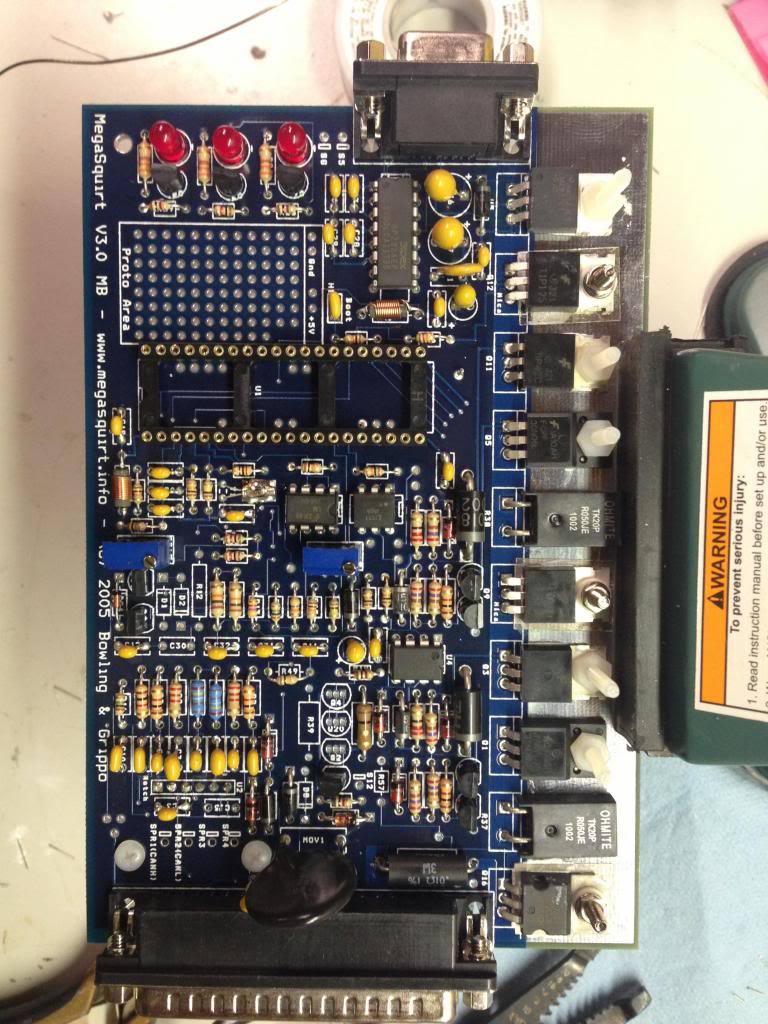
Recently I've been soldering the megasquirt together that I plan to use for ignition only. Also making a megaview panel for the dash. I'll figure out some sort of trigger wheel and run individual coils for now and stick with the weber for fuel delivery. Gives me room to grow into EFI if needed.

Also picked up some APR mirrors and used some aluminum from the old front bumper to make mounts with the proper angle.

Recently I've been soldering the megasquirt together that I plan to use for ignition only. Also making a megaview panel for the dash. I'll figure out some sort of trigger wheel and run individual coils for now and stick with the weber for fuel delivery. Gives me room to grow into EFI if needed.


 06-17-14, 01:17 PM
#25
Full Member
Thread Starter
Been a while since any update, lots going on.
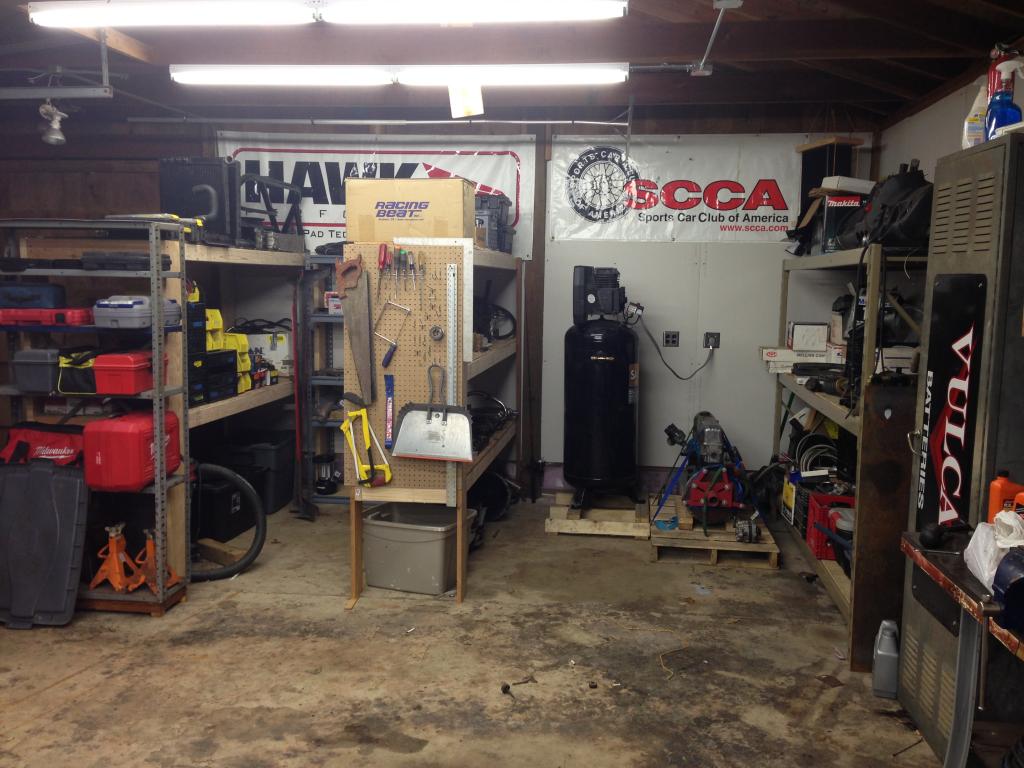
Bought a house and finally have a nice shop space. The boys helped me rewire everything with 4 outlet boxes and a bunch of 220v, insulate and sheet the walls, put in new light fixtures too so its nice and bright.
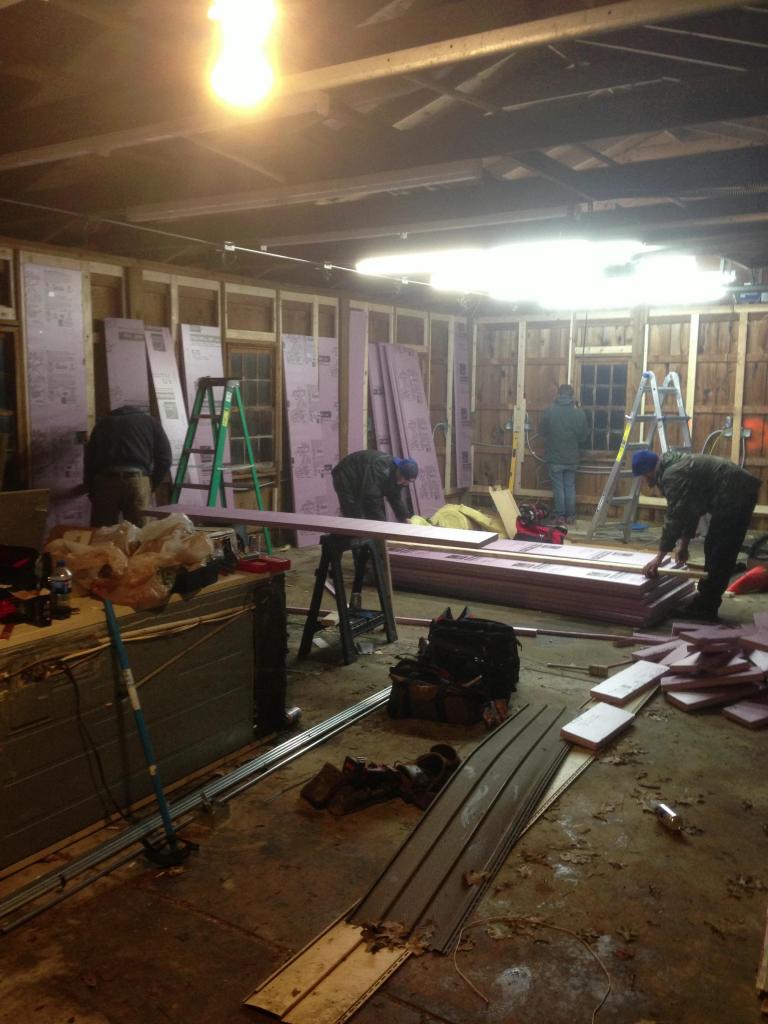
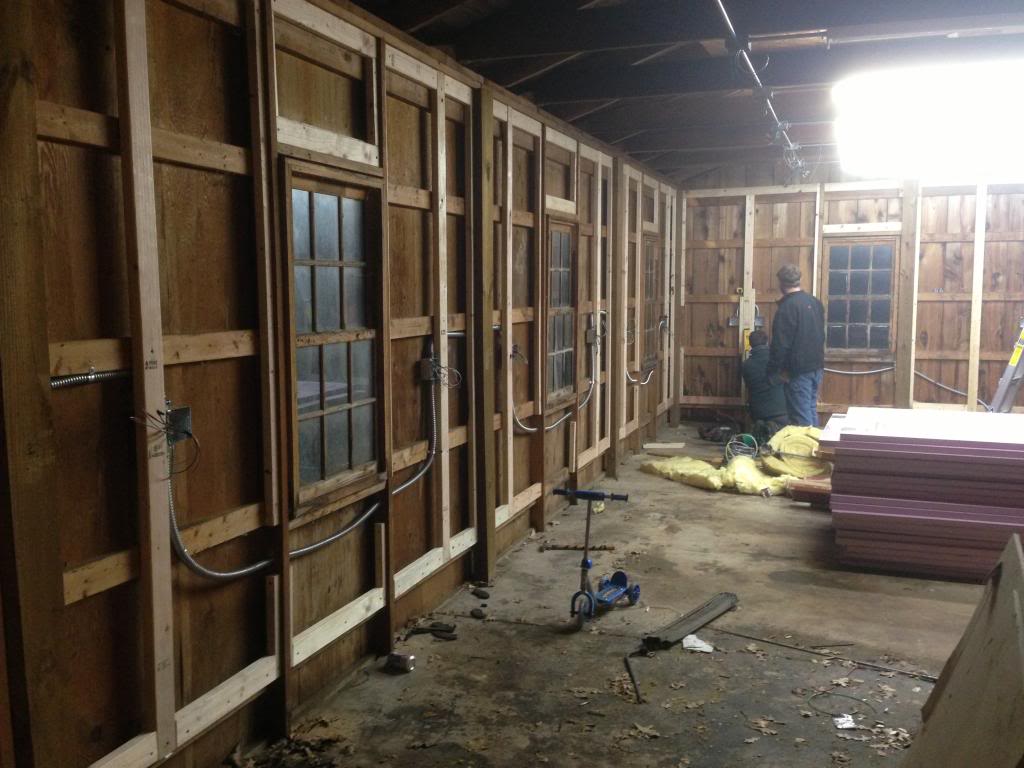
Heres the finished product

Built an area for shelving and storage too
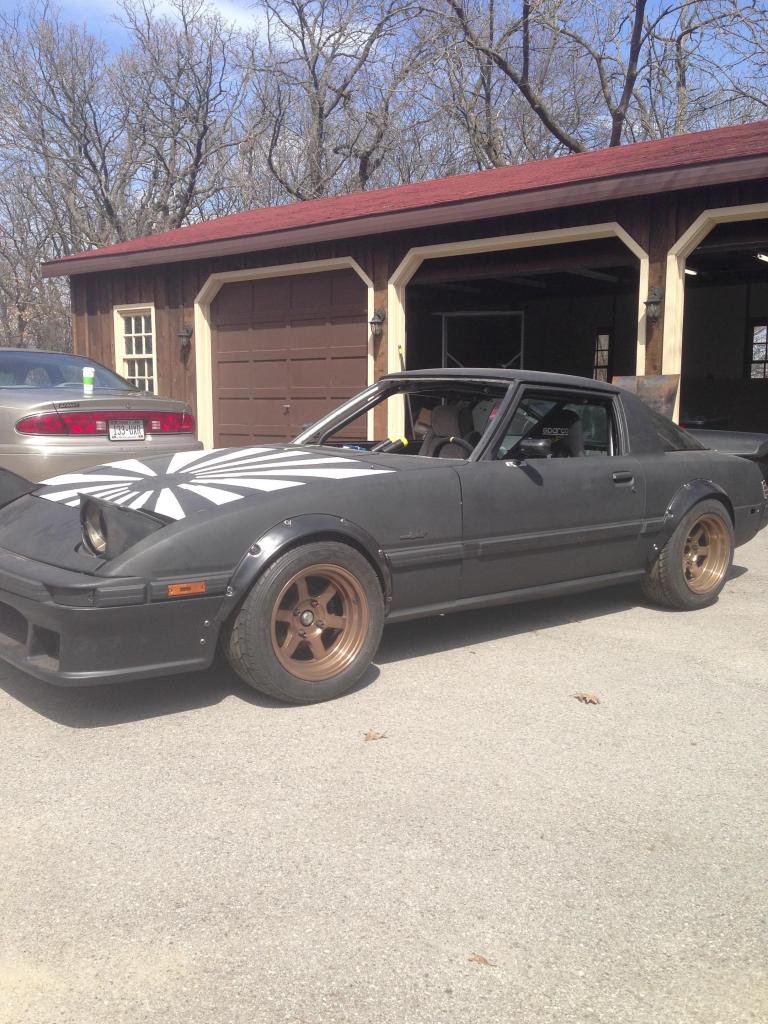
Few pictures of the car outside

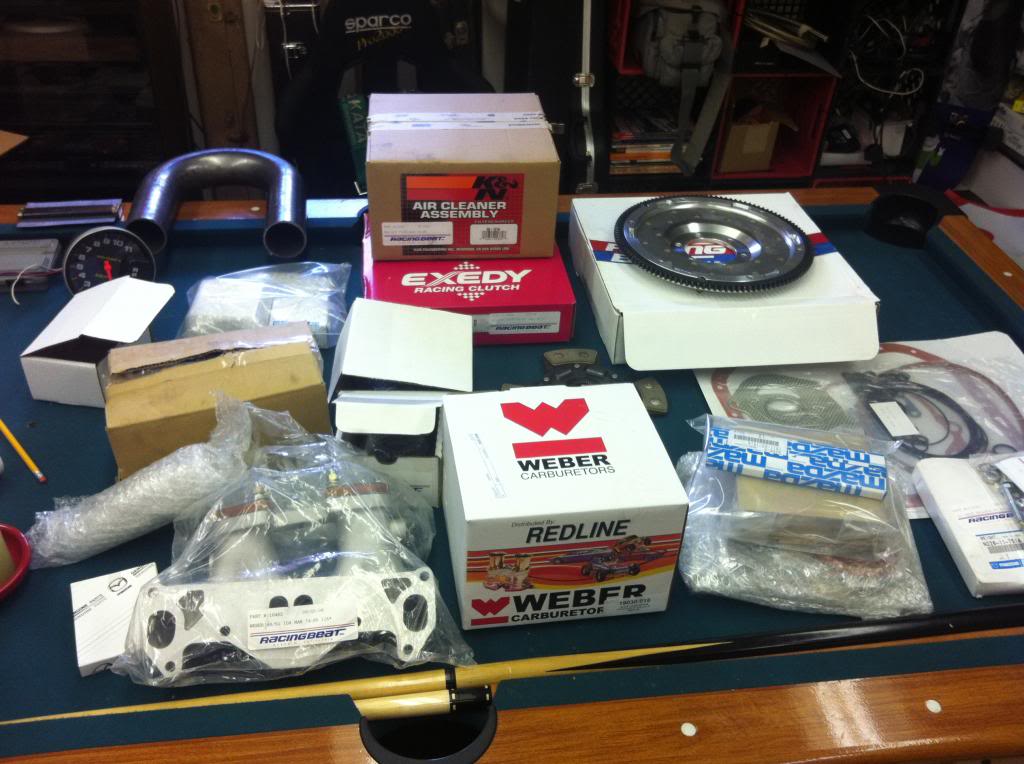
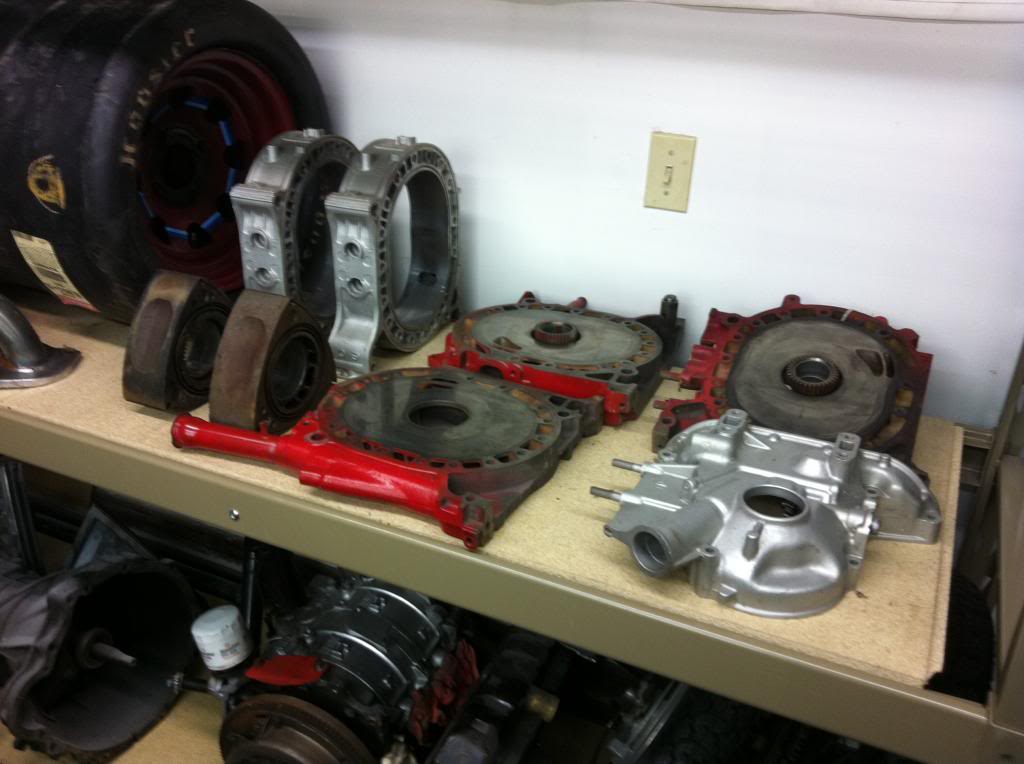
In more specific rx7 news, finally have all the pieces for the engine!
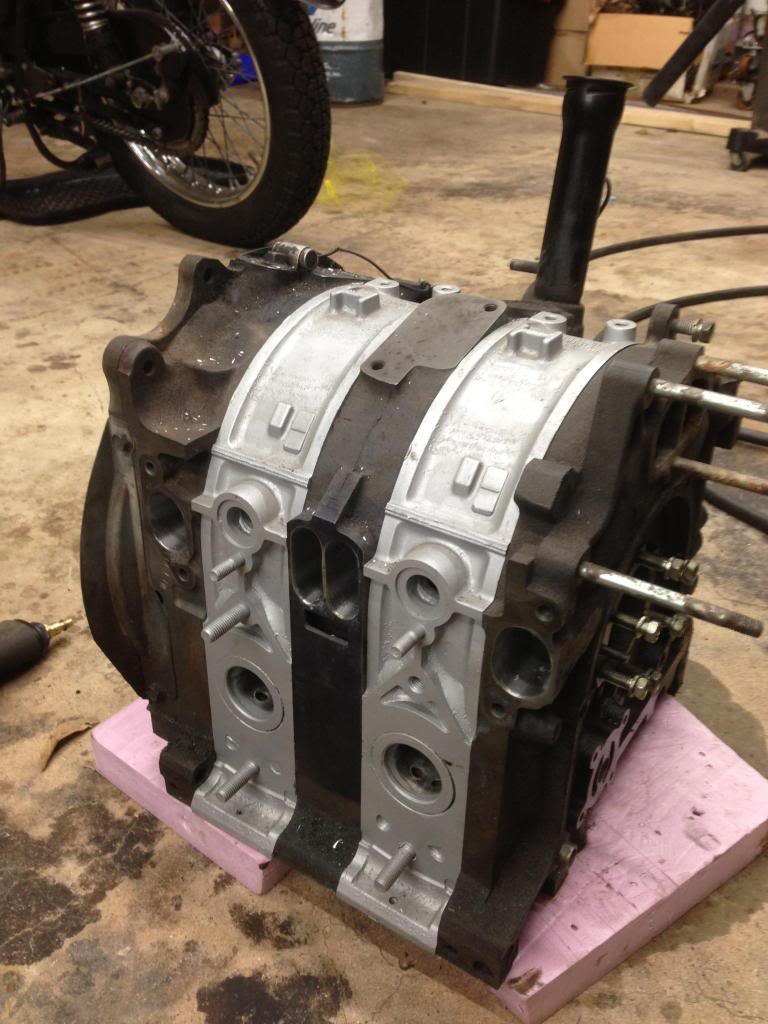
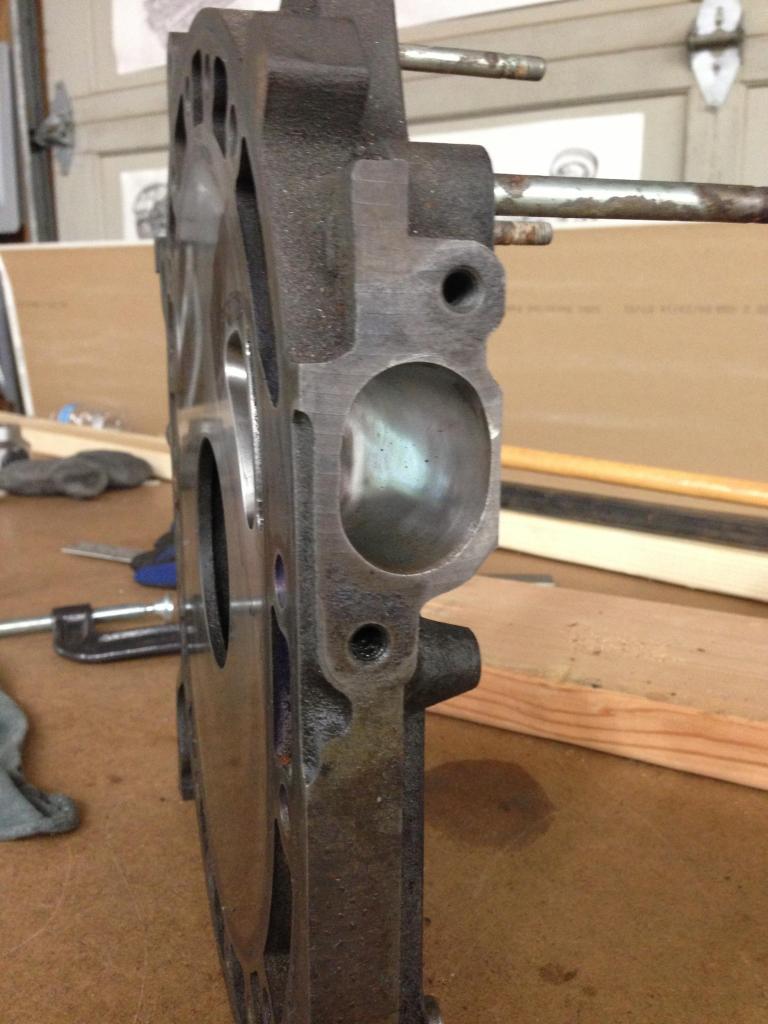
Heres the new bridgeported irons in detail

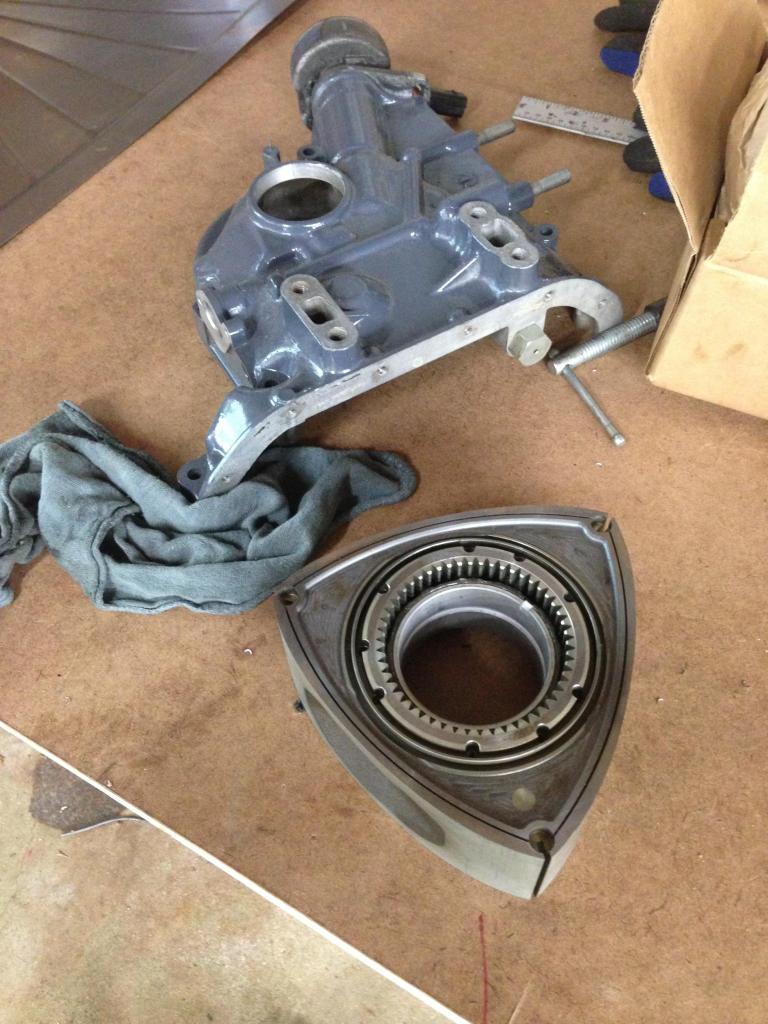
Got the intake manifold port matched and found a crank sensor to use for an ignition trigger too. Here's a picture of one of the racing beat lightweight rotors I will be using for the build.
So thats it for now, going to be a very busy summer but hopefully I'll have the motor together before too long.
Bought a house and finally have a nice shop space. The boys helped me rewire everything with 4 outlet boxes and a bunch of 220v, insulate and sheet the walls, put in new light fixtures too so its nice and bright.


Heres the finished product

Built an area for shelving and storage too

Few pictures of the car outside


In more specific rx7 news, finally have all the pieces for the engine!

Heres the new bridgeported irons in detail


Got the intake manifold port matched and found a crank sensor to use for an ignition trigger too. Here's a picture of one of the racing beat lightweight rotors I will be using for the build.

So thats it for now, going to be a very busy summer but hopefully I'll have the motor together before too long.