82 GSL Build
 03-06-17, 08:43 PM
#51
The darker colored transmission is an SA transmission. it will not work on an FB
The lighter colored blue transmission is from an FB. It will work on your car.
You can cut the shifter down on light blue transmission and make it fit an SA, but the same cannot be done for the SA transmission into an FB.
The tail housings are not compatible. Been down that road. Sorry.
EDIT: not centered? Do you know if the car whined when it last drove? Might have a bad output bearing in the tail housing.
Last edited by Qingdao; 03-06-17 at 08:51 PM.

 03-07-17, 05:05 PM
#53
Full Member
Thread Starter

Ah I thought that dark trans was from a different generation 7...Oh well. I'll have to crack open the blue one and check it out. It's probably salvageable; I just want the best scenario, while I had both of them out.
Other than looking at the gears/fluid is there a decent way to see if the trans is any good? What about the shaft not being centered?
Yeah the housings still looks flaky, but remember, non of the processes (outside Goopy's newest stuff) add any material, they're just averaging the wear. From what I understand all 12a's will flake. Kinda makes me rethink building a rotary at all, but I've gotten this far. I wonder if the MSP engines are any less flake prone? that would be my engine of choice for the next build
03-19-17, 01:59 PM
#55
Full Member
Thread Starter
Sorry for the long delay, I've been working, and not on the 7.
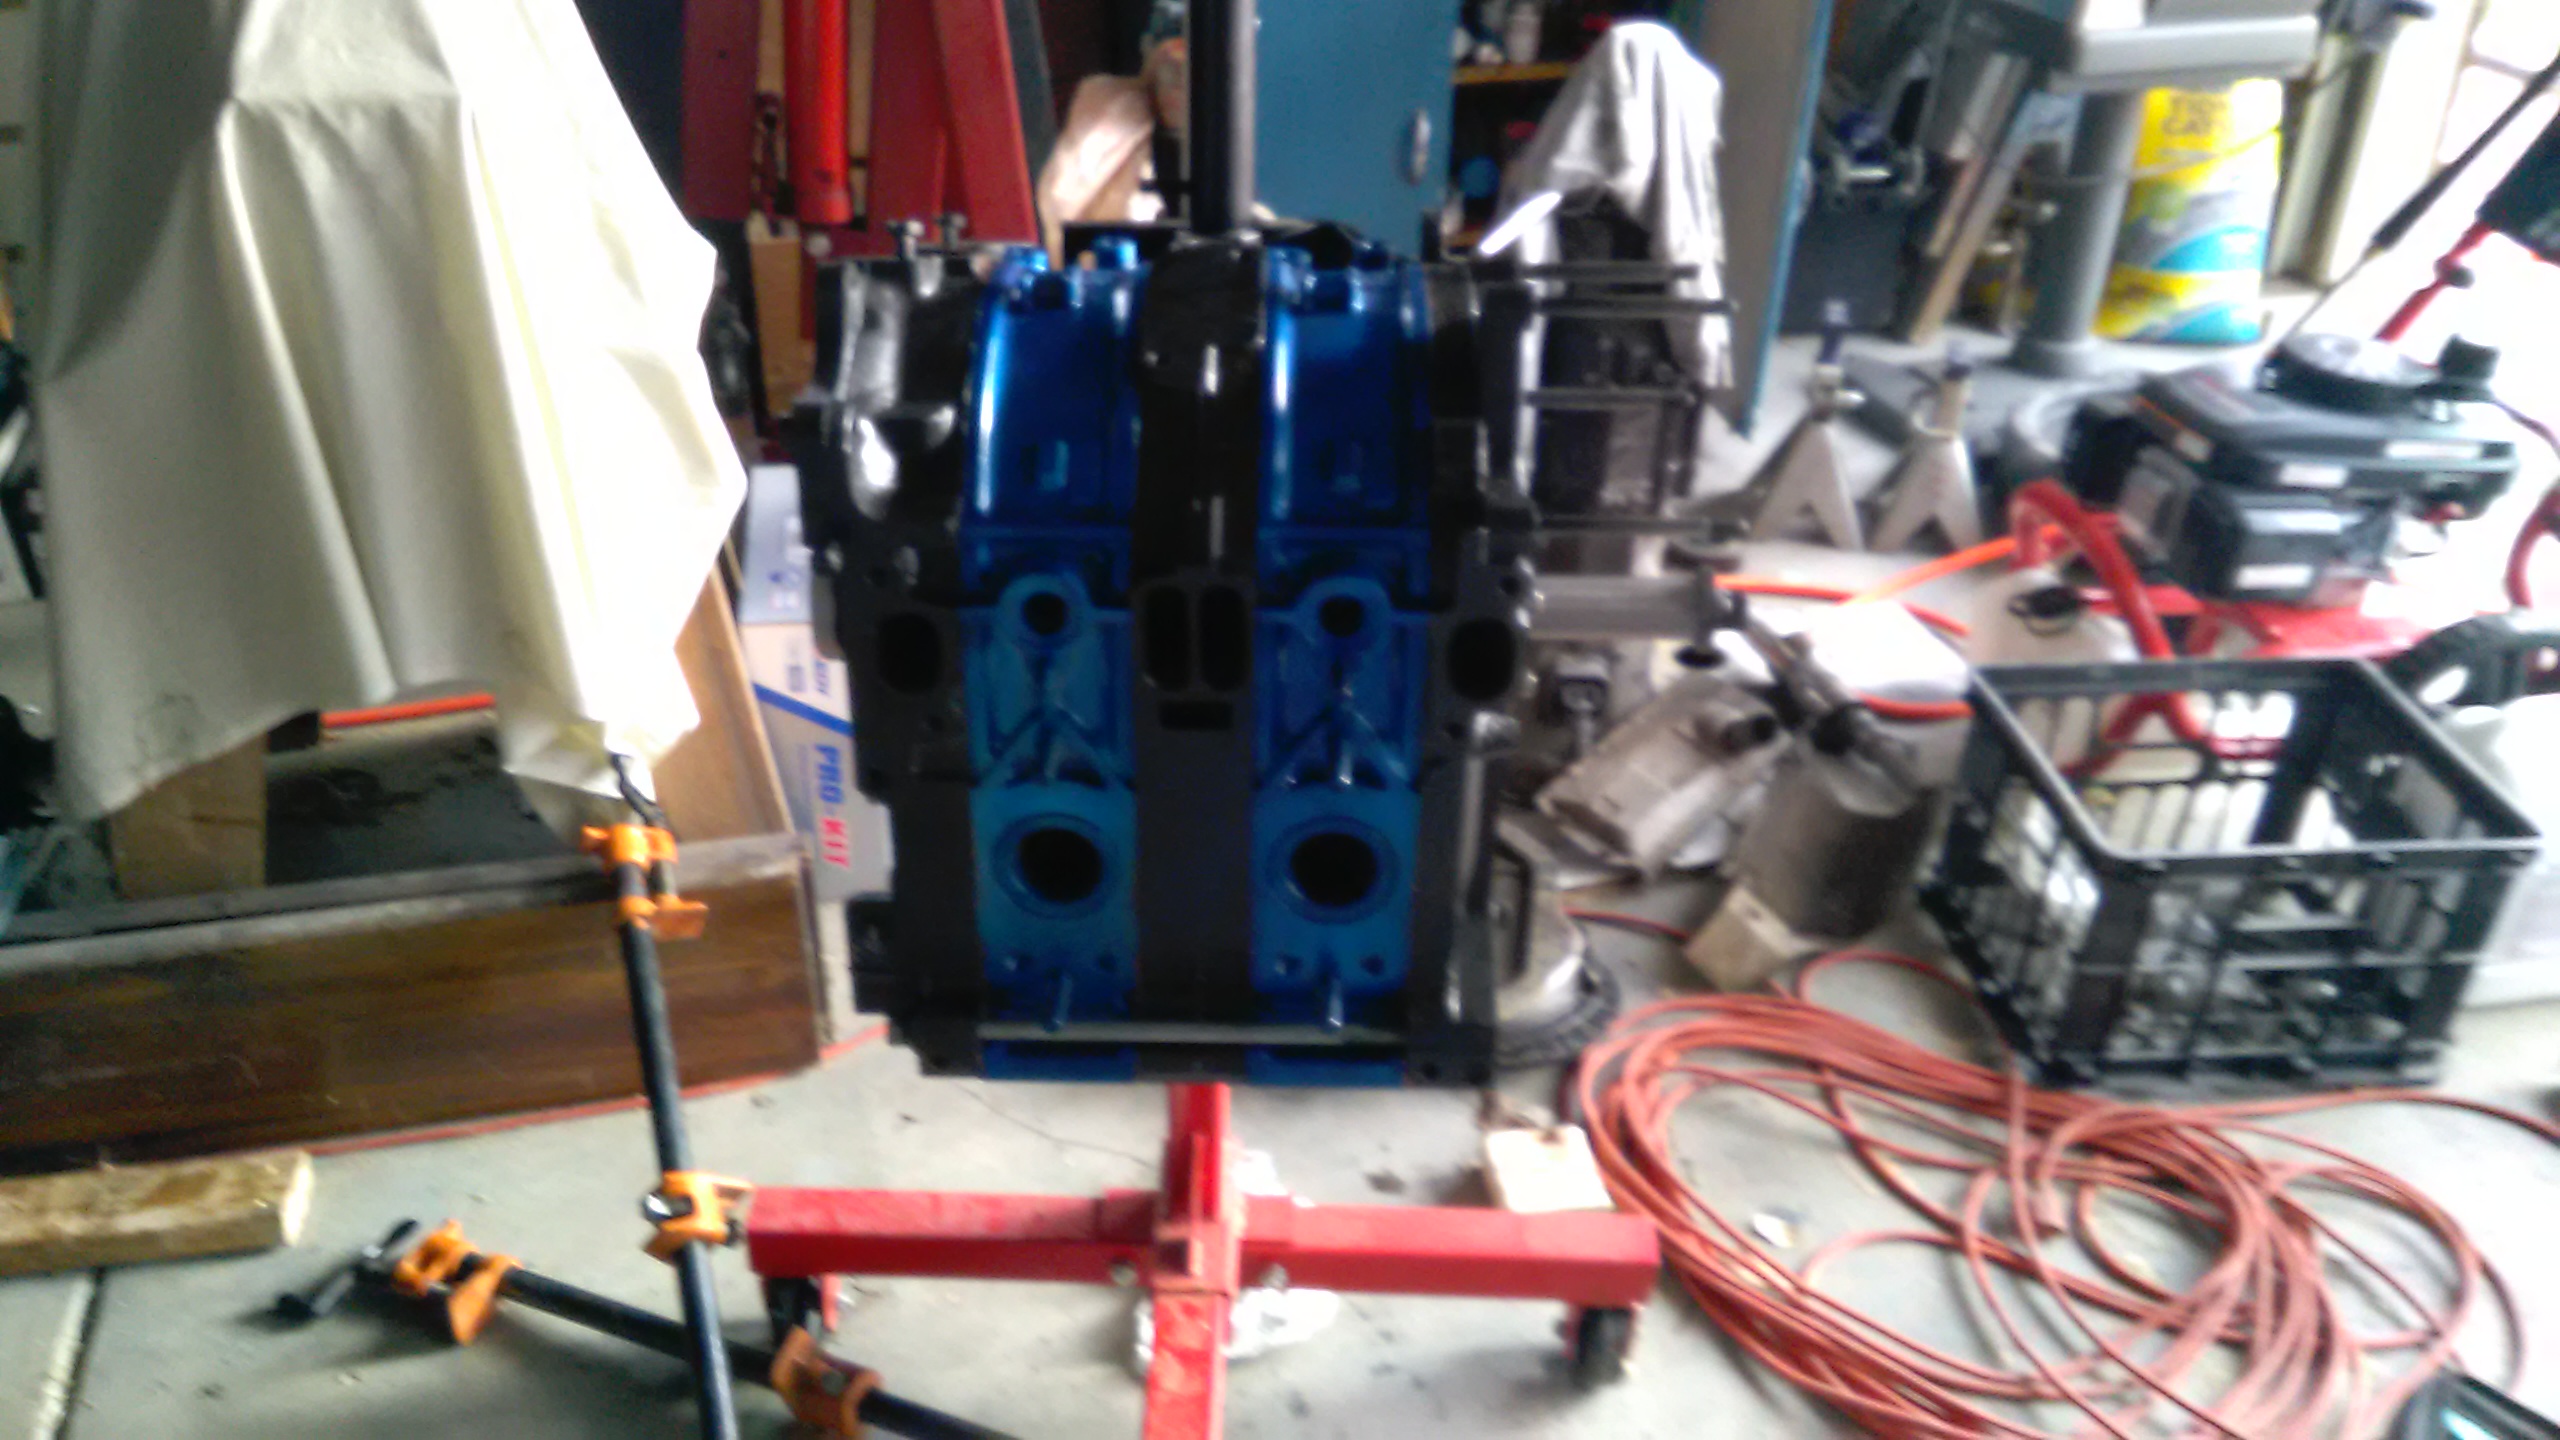
But this week I got a break and painted all of the engine components, and stripped the engine bay, mostly.
Shiny parts: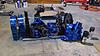
So I've got some greasy/stained stuff in the engine bay and GunkEngine cleaner won't touch it. Should I just power wash it? I'll have to run out and buy one I think.
Also, since I'm gettign ready to reassemble the motor, what sealant do I use on the coolant rings/legs of the housings? I've read dabs of vaseline to hold the seals in, and then RTV black for the legs?
Lastly, I thin I finally found the right thread for the Jets info: https://www.rx7club.com/1st-generati...nikki-1049641/
But this week I got a break and painted all of the engine components, and stripped the engine bay, mostly.
Shiny parts:

So I've got some greasy/stained stuff in the engine bay and GunkEngine cleaner won't touch it. Should I just power wash it? I'll have to run out and buy one I think.
Also, since I'm gettign ready to reassemble the motor, what sealant do I use on the coolant rings/legs of the housings? I've read dabs of vaseline to hold the seals in, and then RTV black for the legs?
Lastly, I thin I finally found the right thread for the Jets info: https://www.rx7club.com/1st-generati...nikki-1049641/
03-19-17, 06:44 PM
#56
For sure pressure wash it. I do on a regular. Keeps the normal road grime from building up to the point where its ugly.
I use vasoline. Just vasoline. I've never tried hylomar, but I hear its good stuff. And black RTV on the legs like you wrote. The black RTV keeps the oil in the oil pan.
That's a good start on jetting if you are boosting, but there have been a few addendums since that thread was started.
I use vasoline. Just vasoline. I've never tried hylomar, but I hear its good stuff. And black RTV on the legs like you wrote. The black RTV keeps the oil in the oil pan.
That's a good start on jetting if you are boosting, but there have been a few addendums since that thread was started.
03-28-17, 08:14 PM
#57
Full Member
Thread Starter
OK so I started assembling the motor tonight. And I think I ran into something wrong: I have 2 lengths of Dowels. Shorter and longer, about 1 cm longer. Which dowels go where? The FSM seems blank about this. Also, where do these dowel o-rings go? Thanks.
03-29-17, 05:47 PM
#59
Full Member
Thread Starter
I know the bolts are a bit longer for the ones that run outside of the case. I'm worried about the hollow tubular things, dowels. I have 2 sizes and am not sure which goes where. I got he engine in parts so I don't have a good reference. I did manage to figure out the O-rings, as being on the housings, inside of little depressions.
Either way I've got to tear the stack apart again, as the RTV dried before I was able to put any torque on it, and it will leak oil everywhere!
Either way I've got to tear the stack apart again, as the RTV dried before I was able to put any torque on it, and it will leak oil everywhere!
04-02-17, 07:17 PM
#60
Full Member
Thread Starter
OK sorry for the confusion. I figured it out, someone mixed in 13b dowels! So once I used only the shorter 12a ones it went together fine. that's what I get for putting an engine together from a box-o-parts.
After a few oopses (dropped a end seal into the midplate when assembling the second rotor, louter water control o-ring got out of its groove, ect), and re-does, I finally got the engine together! Woo

So one thing I noticed was the little apex seal corvers pretty much fell into place on one of the rotors, while the other rotor I had to really wedge them in to get the 'snap' sound. I wonder if I did something wrong on the first rotor that was easy to assemble?
I turned the engine over a few times, and it's really hard to turn, compared to the old one, I assume this is a good sign, no? I can't fit my compression tester between the stand and the plug holes so I'll have to wait until it's installed I guess to check comp.
I'm not really able to move the eccentric shaft at all, now that I have it together. Will it be easier to move to check end-play with the flywheel attached?
It's finally coming together, I'm super excited!
After a few oopses (dropped a end seal into the midplate when assembling the second rotor, louter water control o-ring got out of its groove, ect), and re-does, I finally got the engine together! Woo
So one thing I noticed was the little apex seal corvers pretty much fell into place on one of the rotors, while the other rotor I had to really wedge them in to get the 'snap' sound. I wonder if I did something wrong on the first rotor that was easy to assemble?
I turned the engine over a few times, and it's really hard to turn, compared to the old one, I assume this is a good sign, no? I can't fit my compression tester between the stand and the plug holes so I'll have to wait until it's installed I guess to check comp.
I'm not really able to move the eccentric shaft at all, now that I have it together. Will it be easier to move to check end-play with the flywheel attached?
It's finally coming together, I'm super excited!
04-02-17, 09:48 PM
#61
Take it apart. If you can't move the e-shaft you did something wrong.
You should be able to turn it over with a drill and a 19mm socket; and you should hear a woosh woosh noise coming from the sparkplug holes, intake, and exhaust.
The corner seals (and all other seals) should be able to move freely and not bind at any point. You should be able to push any seal with your finger and they will squash a little then spring back into place a millimeter or so from the rotor's surface. Obviously too much movement is a problem too, but not as big as no movement at all.
04-03-17, 06:33 PM
#62
Full Member
Thread Starter
I can move the E-shaft, by hand, with a wrench. I meant I can't move the e-shaft laterally. Um you know from the front to the back. It rotates fine!
I checked every singe springy piece and they all moved fine before I put it together. All sprung back with just a little finger pressure. Oil control rigns took a bit more to move, but seemed fine otherwise.
I decided to try to find the endplay, so I got a dial gauge, and that setup. Do I check endplay only after assembling the timing cover and the mess of bits at the front? The FSM shows the guy pulling on the Flywheel, which I tried doing, and I get zero change on my dialgauge. I think it should have some later play yeah?
Apologies if I'm not understanding. I wish the FSM was a little more hand-hold-y.
04-04-17, 07:47 PM
#63
Put all the bits on the e-shaft like the timing gear yada yada yada.... Omit installing the front cover.
Then put the flywheel on.
Then do your end shaft play. When you get the end shaft play amount you want re-assymble the front stack with the front cover.
Then put the flywheel on.
Then do your end shaft play. When you get the end shaft play amount you want re-assymble the front stack with the front cover.
04-07-17, 10:23 PM
#64
Full Member
Thread Starter
Ah thanks very much Qingdao, that made a bunch more sense.
I found another thread wit nice pictures showing the order of assembly (again the FSM isn't all that clear!). Does anyone know the proper torque spec for the thrust bearing plate bolts? I started tightening them, and one broke! Torque wrench was only at 20 ftlbs. Luckily lt it was easily extracted with vice-grips. I mean really easily, I don't think it even had the 20 ftlbs when it broke.
Here's a pic of the stack before I put on the front eccentric weight:

Is that little gap in height between the space and the Torrington correct? I see it in other threads, but damned if it looks off...
Oh yeah I made sure the bevel was facing the rotors and that the first torrington was not behind the spaces, i.e. the bearing is riding on the spacer, not behind it.
Again, thanks so much for the help guys!
I found another thread wit nice pictures showing the order of assembly (again the FSM isn't all that clear!). Does anyone know the proper torque spec for the thrust bearing plate bolts? I started tightening them, and one broke! Torque wrench was only at 20 ftlbs. Luckily lt it was easily extracted with vice-grips. I mean really easily, I don't think it even had the 20 ftlbs when it broke.
Here's a pic of the stack before I put on the front eccentric weight:
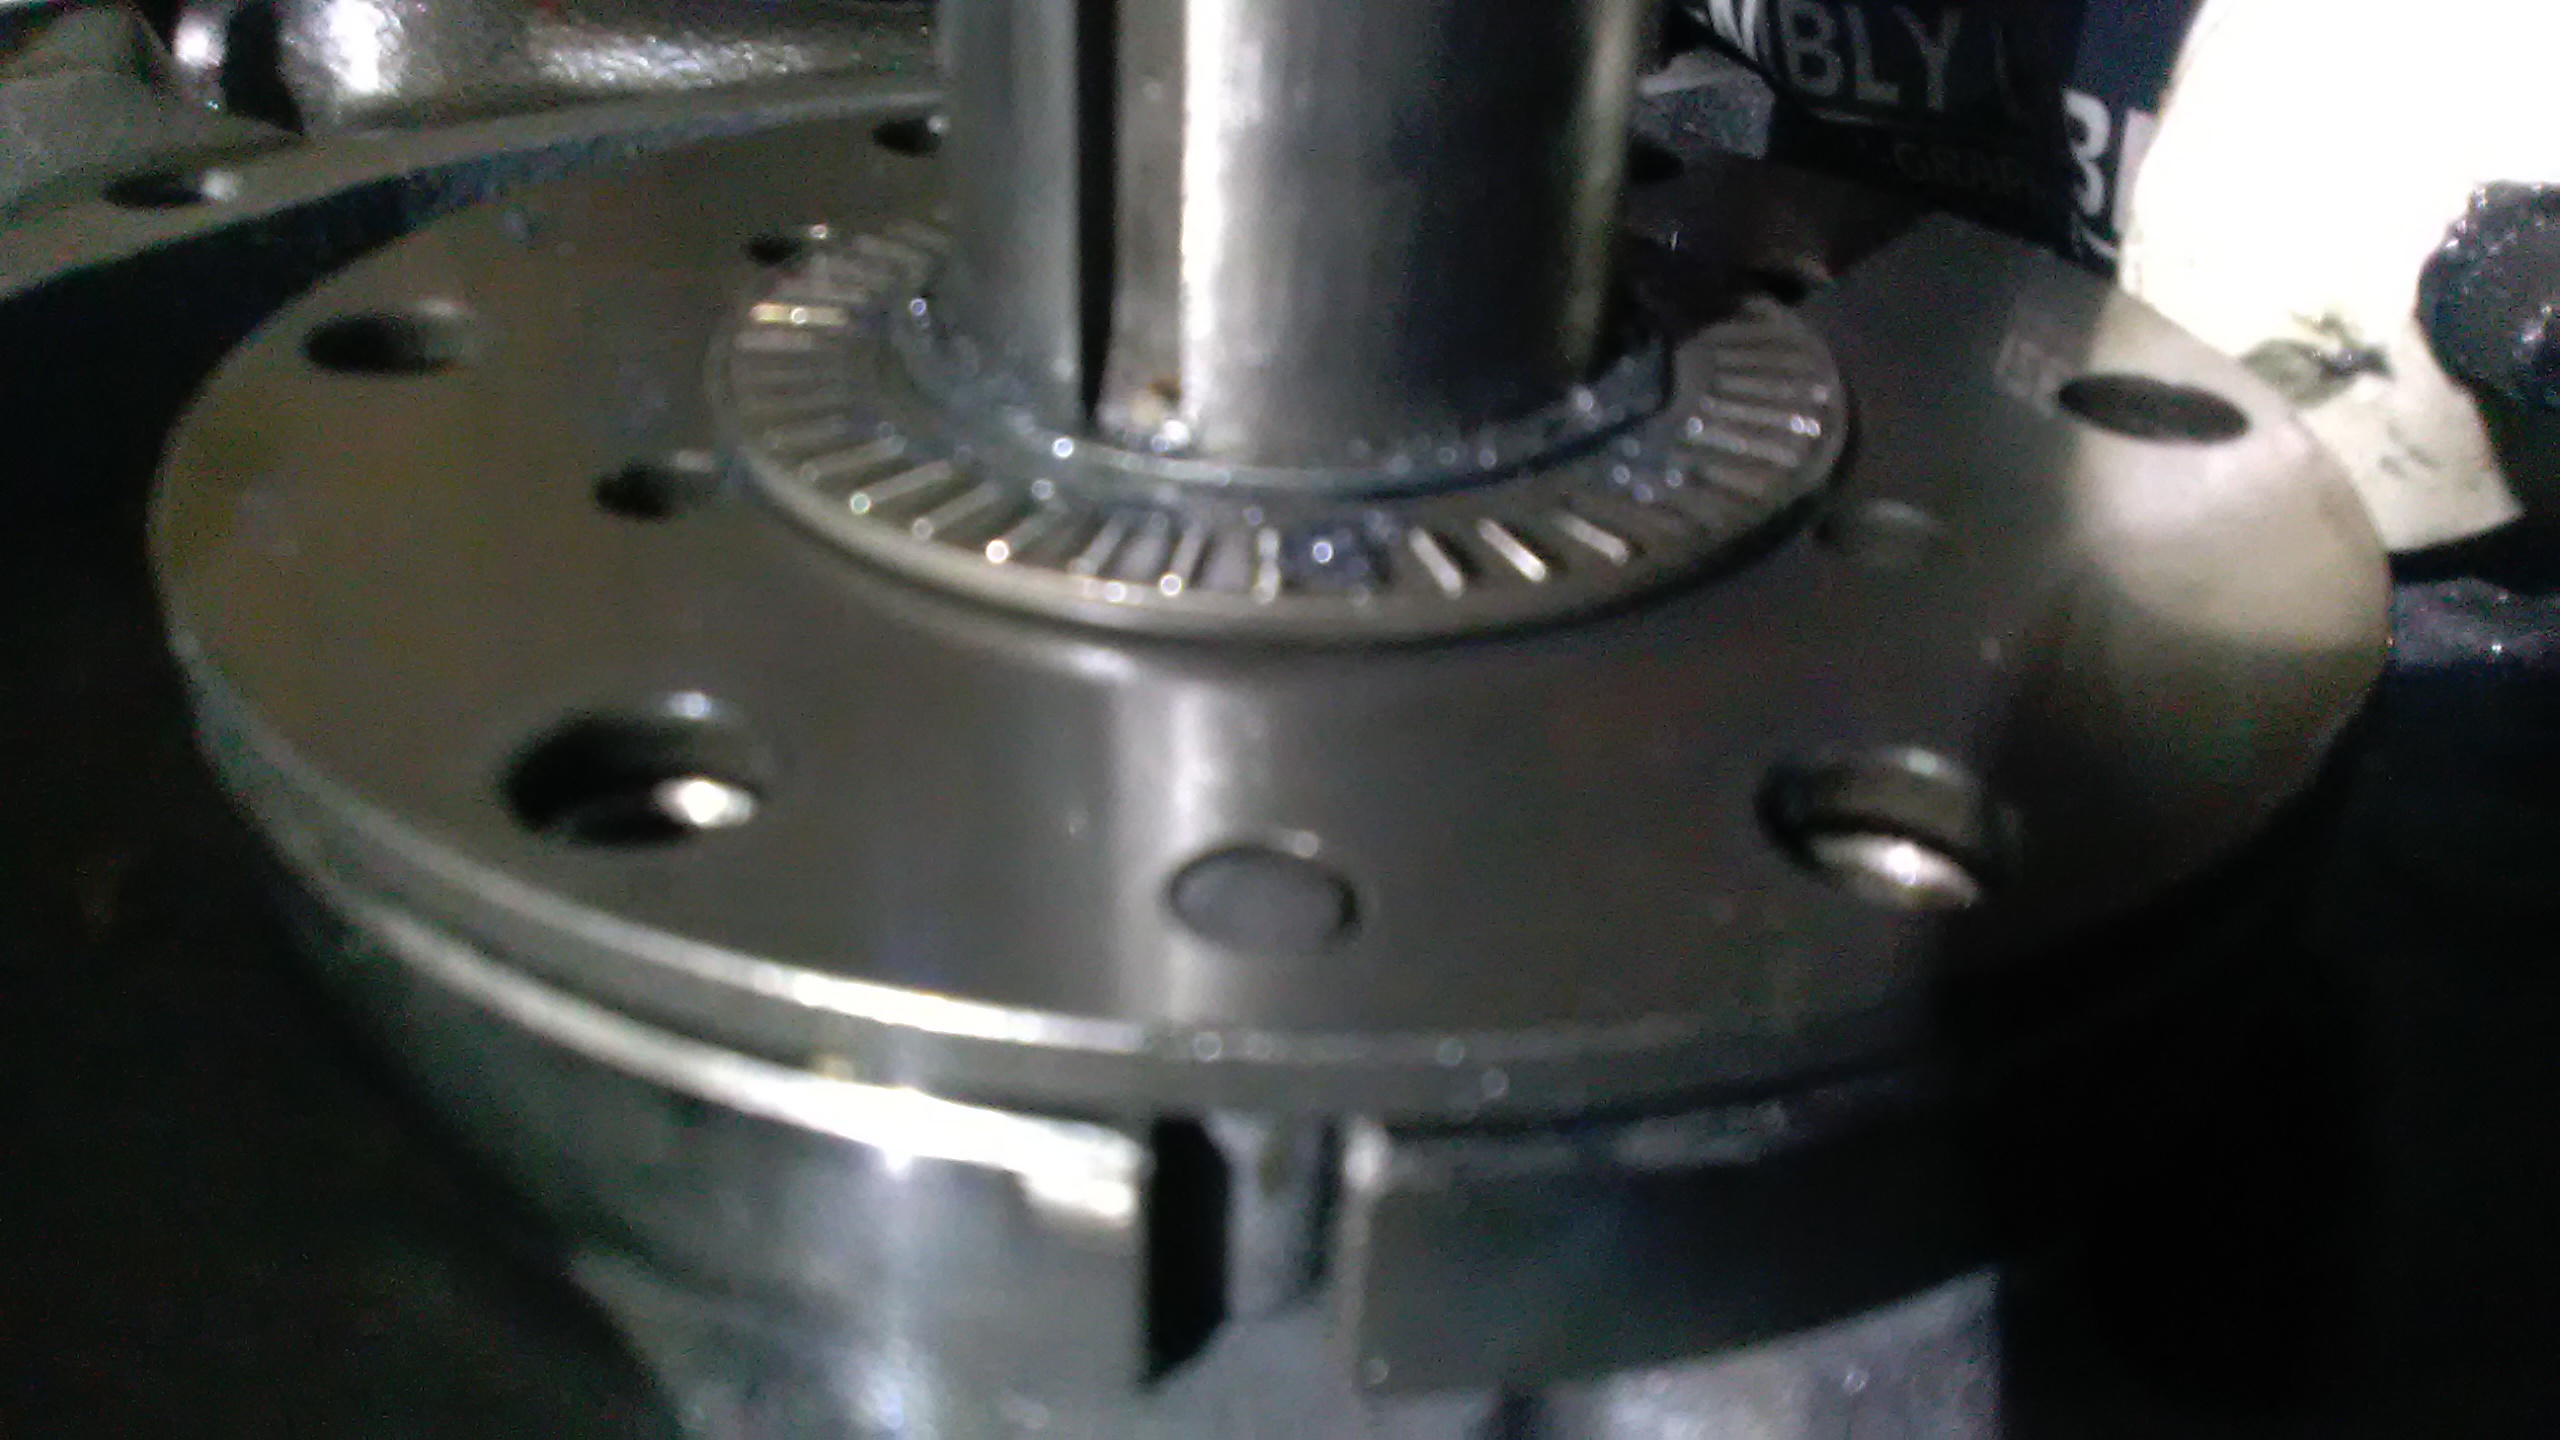
Is that little gap in height between the space and the Torrington correct? I see it in other threads, but damned if it looks off...
Oh yeah I made sure the bevel was facing the rotors and that the first torrington was not behind the spaces, i.e. the bearing is riding on the spacer, not behind it.
Again, thanks so much for the help guys!
04-08-17, 04:56 PM
#65
Full Member
Thread Starter
I pulled the entire engine apart today, as I could not get any endplay at all. I also found out the little thrust washer, was stuck to the eccentric weight, so that's why i couldn't find it...
Upon pulling it apart, I found out the outer case-seal O-ring had gotten twisted and was cut! it was blocking the path of the rotor I think, and not allowing proper endplay. So I'm glad I caught it now, just upset this will be the 3rd time I've assembled the engine.
Upon pulling it apart, I found out the outer case-seal O-ring had gotten twisted and was cut! it was blocking the path of the rotor I think, and not allowing proper endplay. So I'm glad I caught it now, just upset this will be the 3rd time I've assembled the engine.
04-08-17, 07:58 PM
#66
Full Member
Thread Starter
I started putign the enigne back together. This is seriously the most frustrating thing I've ever worked on. the little apex corner pieces popped out 2 times, and both times meant pulling the housings off as the pieces had fallen into the waterjacket...
I als noticed that there's a small gap between the iron and the housing when I put the mid-plate on. Is that normal? I clamped it down (the midplate, housing and front iron) as I need to take a break, but didn't want the rtv copper to have to be scraped off again.
I als noticed that there's a small gap between the iron and the housing when I put the mid-plate on. Is that normal? I clamped it down (the midplate, housing and front iron) as I need to take a break, but didn't want the rtv copper to have to be scraped off again.
04-08-17, 09:08 PM
#67
hehe, Yeah it takes some trials to get it right, but soon you'll be one of us. lol
Watch out with those little thrust bearings on the front cover. The ones with a lot of needle bearings in them; there are two. They have the tendency of getting crushed when you torque down the front bolt. This results in LARGE amounts of endshaft play and much head scratching.
Watch out with those little thrust bearings on the front cover. The ones with a lot of needle bearings in them; there are two. They have the tendency of getting crushed when you torque down the front bolt. This results in LARGE amounts of endshaft play and much head scratching.
04-08-17, 09:36 PM
#68
Full Member
Thread Starter
hah, thanks! I was very careful with the torringtons and the spacer/washer (different names in the manuals vs online).
My problem was that I had 0, yes 0 endplay. I could not move the flywheel even with a prybar.
I took a break as I was hungry, tired and frustrated. but it will be worth it so see the hours of work go brap-brap.
Er, just to be sure, it's normal for the middle iron to be pushed up a little by the oil control rings/whatever else right? I assume it will be forced down by the end iron and housing later. I just don't want to be doing something wrong. Videos are very helpful like this one:
. I know it's a 13b, but it's very detailed.
My problem was that I had 0, yes 0 endplay. I could not move the flywheel even with a prybar.
I took a break as I was hungry, tired and frustrated. but it will be worth it so see the hours of work go brap-brap.
Er, just to be sure, it's normal for the middle iron to be pushed up a little by the oil control rings/whatever else right? I assume it will be forced down by the end iron and housing later. I just don't want to be doing something wrong. Videos are very helpful like this one:
04-09-17, 04:40 PM
#69
Full Member
Thread Starter
Ok engine is all together AGAIN...flywheel torques to 300 ftlbs, front e-shaft bolt to 75 ftlbs...and no endplay! the spacer I have is the 'V' spacer. Would a different spacer help here?
I made sure, when I put the flywheel on that the e-shaft would move a little, about 3/16ths on an inch. After putting the front stack together and torquing down the flywheel fully, I now have 0 movement...
I have no clue what I'm doing wrong now.
I made sure, when I put the flywheel on that the e-shaft would move a little, about 3/16ths on an inch. After putting the front stack together and torquing down the flywheel fully, I now have 0 movement...
I have no clue what I'm doing wrong now.
04-10-17, 09:38 PM
#71
https://www.mazdatrix.com/getprice.a...m=23-1290-8871
That is the spacer I'm referencing.
If you want to know how much thicker a spacer you'll need just assemble the front stack but stick a feeler gauge in between two of the components. Use that measurement from the feeler gauge added to your spacer thickness to get the total measurement of the new spacer.
04-10-17, 10:33 PM
#72
Full Member
Thread Starter
Well, I went out to the garage and looked closely at the needle bearings I have...and they're smashed. All 4 of them. I ordered new need bearings, thrust washer, bearingplate, and that thin washer that goes between the last needle bearing and the counterweight. 
And a new oil pump chain. Lucky me I have the 17mm pump. BTW, do the little divets on the pump rotating parts need to line up when you put it together?
I have both a V and an X spacer. V is stock usually I think. the x spacer is .06mm larger and should work if I really need more endplay I think. Neither works now, but that is likely from the PO tugging on the flywheel and smashing everything in the front stack. I did not need to tug the flywheel hardly, just banged on the edge and it popped off.
I like the idea of using a feeler gauge, but I'd get a bad measurement because the parts are damaged, no?
I ordered new need bearings, thrust washer, bearingplate, and that thin washer that goes between the last needle bearing and the counterweight. And a new oil pump chain. Lucky me I have the 17mm pump. BTW, do the little divets on the pump rotating parts need to line up when you put it together?
I have both a V and an X spacer. V is stock usually I think. the x spacer is .06mm larger and should work if I really need more endplay I think. Neither works now, but that is likely from the PO tugging on the flywheel and smashing everything in the front stack. I did not need to tug the flywheel hardly, just banged on the edge and it popped off.
I like the idea of using a feeler gauge, but I'd get a bad measurement because the parts are damaged, no?
04-10-17, 11:32 PM
#74
Full Member
Thread Starter
Glad to hear that on the oil pump, I was al ittle worried.
I happen to have 4 needle bearing thingies because I had 2 motors to pull parts from. And probably a few spare somewhere that came wit the car for good measure... stupid 13b dowels of confusion.
I did manage to get 90% of the engine bay painted today! It looks great in a matte silver/metallic. I think I might do the whole car the same color.
I happen to have 4 needle bearing thingies because I had 2 motors to pull parts from. And probably a few spare somewhere that came wit the car for good measure...
stupid 13b dowels of confusion.I did manage to get 90% of the engine bay painted today! It looks great in a matte silver/metallic. I think I might do the whole car the same color.
04-14-17, 08:12 PM
#75
Full Member
Thread Starter
I went ahead and installed the all new stack parts (the timing gear, counterweight and pulley snout thing are used). And I still have 0 endfloat. I am stumped. I loose endfloat around 50 ftlbs on the torque wrench. Now to be sure, the way to check endfloat is to wiggle the flywheel back and forth with the engine horizontal, no? I cannot move the flywheel at all, by hand, in the lateral direction.
For reference, with the front bolt removed, I have approximately 3/16th inch movement of the flywheel. Is that around correct? Would an over-tightened flywheel cause this problem?
I'm using the 'x' marked spacer, and I have access to the 'v' as well.
For reference, with the front bolt removed, I have approximately 3/16th inch movement of the flywheel. Is that around correct? Would an over-tightened flywheel cause this problem?
I'm using the 'x' marked spacer, and I have access to the 'v' as well.

