1984 5-letter / S5 "Selene"
 02-08-13, 12:07 AM
#1
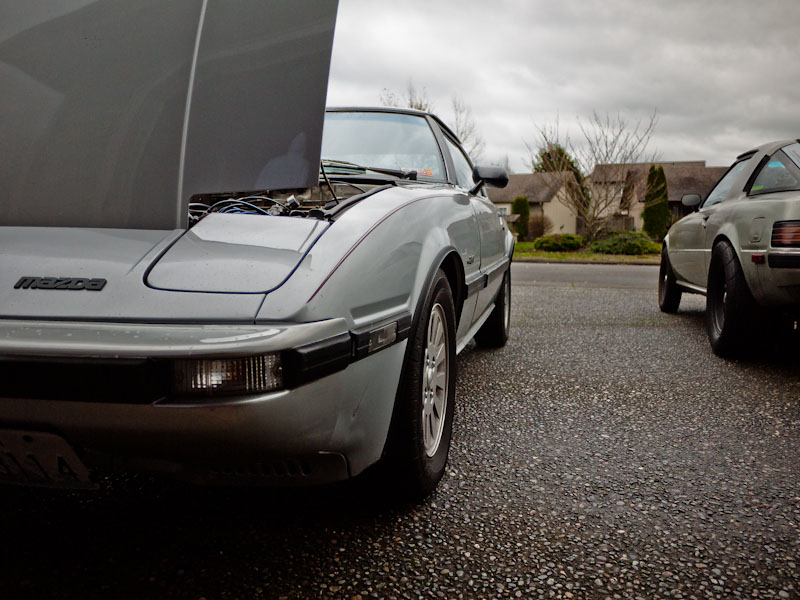
1984 5-letter / S5 "Selene"
This is my 3rd FB, all have been Series3. I've been dreaming and scheming on an S5 FB for many years now. This time around, it's going to be raw N/A rotary power.
After years of putting feelers out, emailing phony craigslist sellers, and almost giving up hope of getting back into an FB, I found the gem I had been seeking.
Meet Selene
Hm where's the RE-EGI?
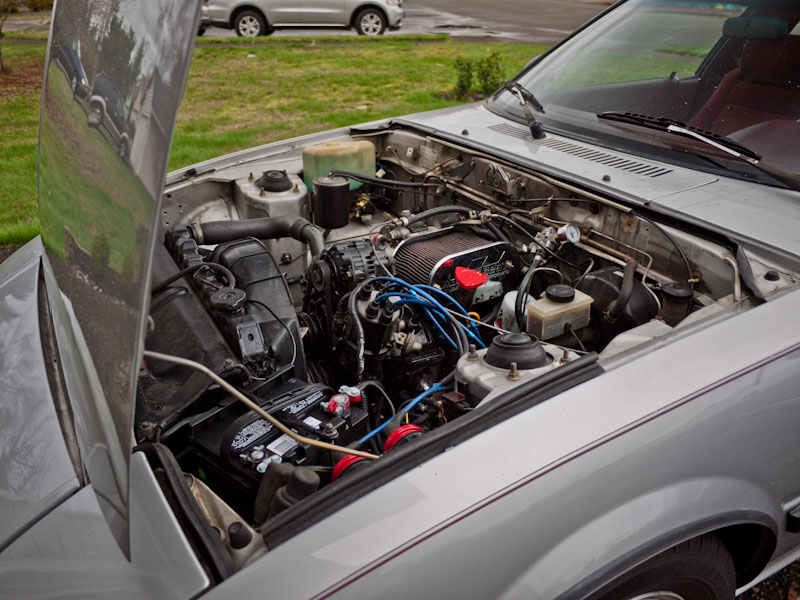
I see what u did there...
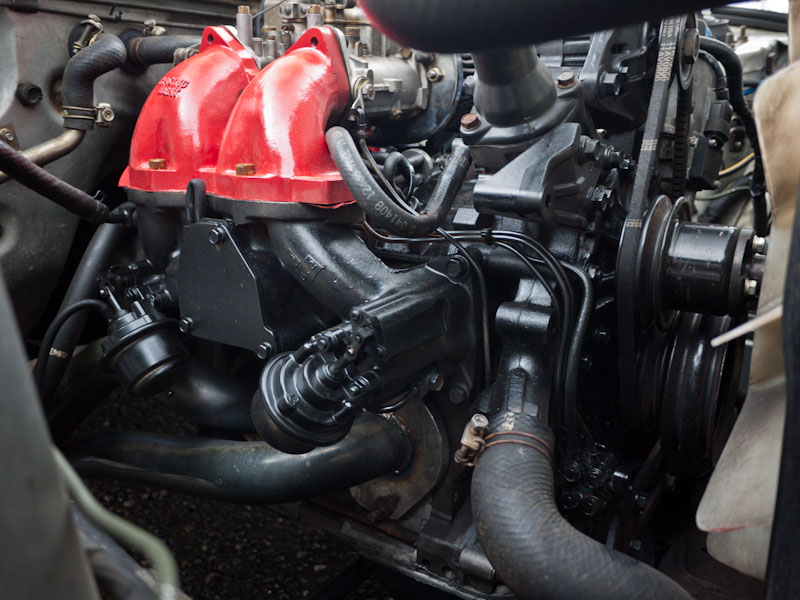
S5 block
Dellorto 48 side draft
Racing Beat collected header
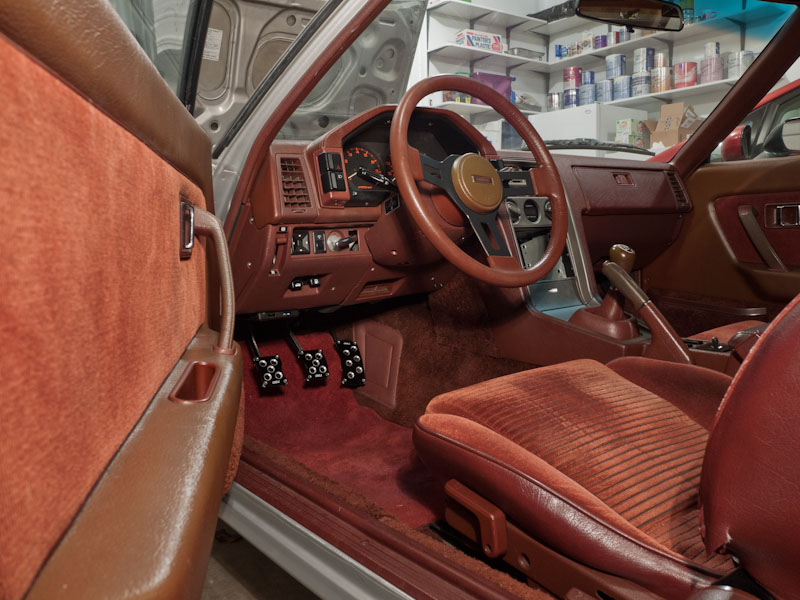
Got her home, picked up some decent foot pedals at Auto Zone
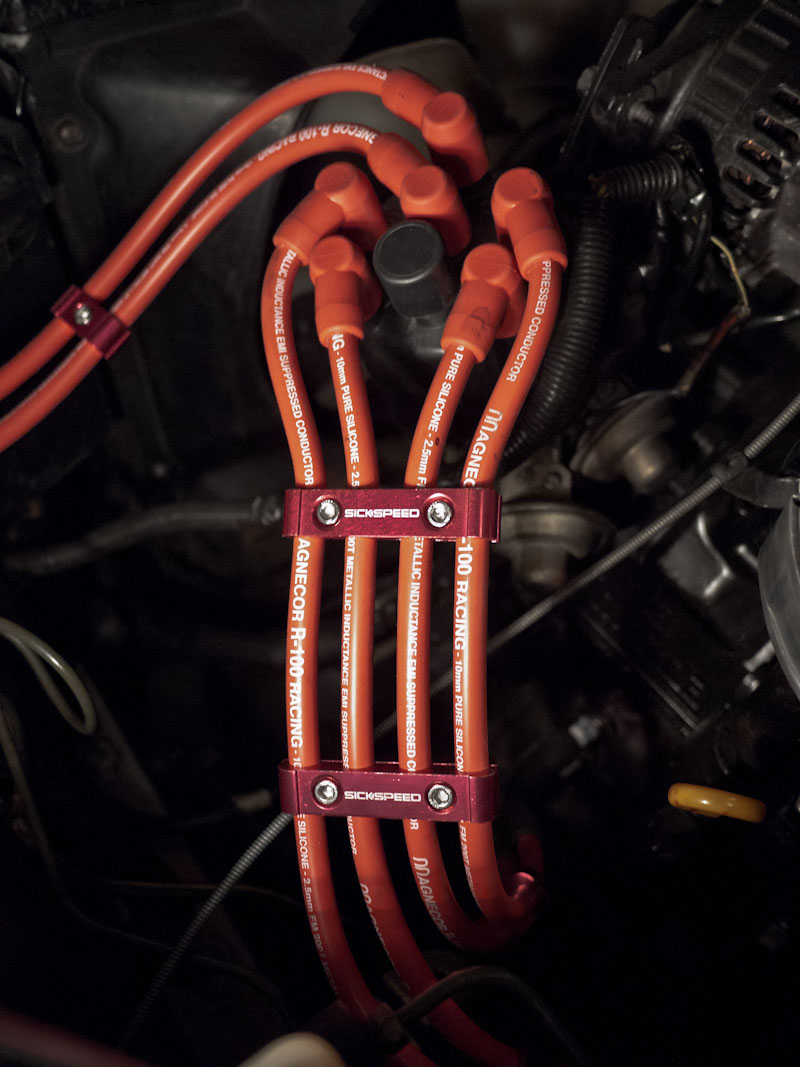
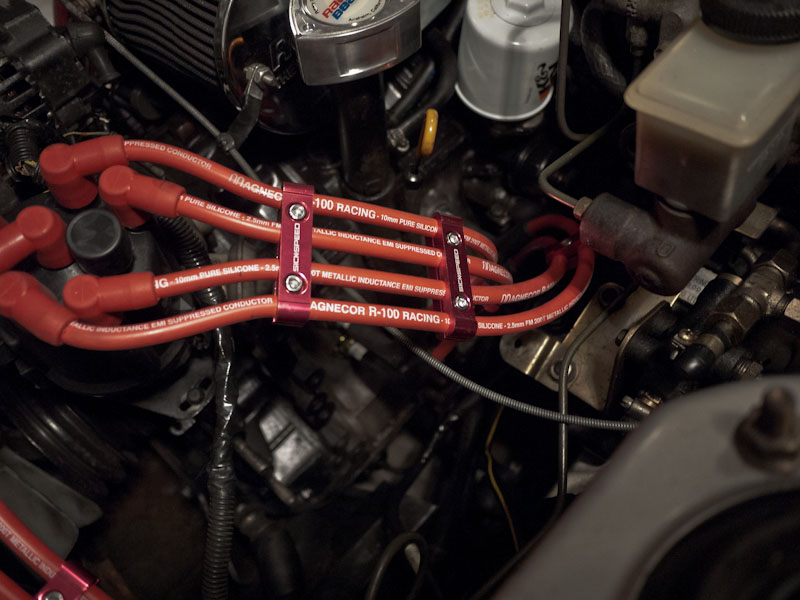
Some 10mm Magnecor wires
I seem to have acquired a ceramic Series5 EFI intake manifold.. will have to figure out something to do with this thing...

After years of putting feelers out, emailing phony craigslist sellers, and almost giving up hope of getting back into an FB, I found the gem I had been seeking.
Meet Selene
Hm where's the RE-EGI?
I see what u did there...
S5 block
Dellorto 48 side draft
Racing Beat collected header
Got her home, picked up some decent foot pedals at Auto Zone
Some 10mm Magnecor wires
I seem to have acquired a ceramic Series5 EFI intake manifold.. will have to figure out something to do with this thing...

 02-08-13, 10:31 AM
#7
Moderator
iTrader: (3)
Join Date: Mar 2001
Location: https://www2.mazda.com/en/100th/
Posts: 30,796
Received 2,574 Likes
on
1,830 Posts
nice car! looking forward to it (i remember the old one too  )
)
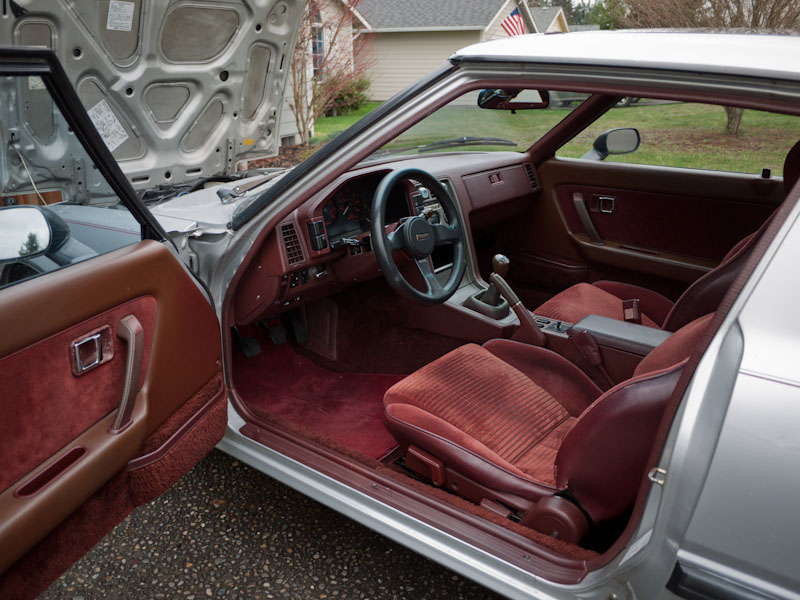
buy some SEM vinyl spray in burgundy, its a great match for the faded interior pieces
)buy some SEM vinyl spray in burgundy, its a great match for the faded interior pieces
Trending Topics
02-10-13, 09:49 AM
#10
I'd be interested in pics of the sound deadening install, I am considering the same thing on my car as it tends to sound like you're in an enclosed go-kart sometimes. It would be nice for sound quality and I wouldn't have to listen to the wind noise as much.
02-11-13, 07:33 PM
#11
What started as a simple wire fix...
Needed to fix the plug for my trailing ignition - the other day I was playing around with wire tuck ideas and snapped the 30 year old wire in half  no tach or trailing.

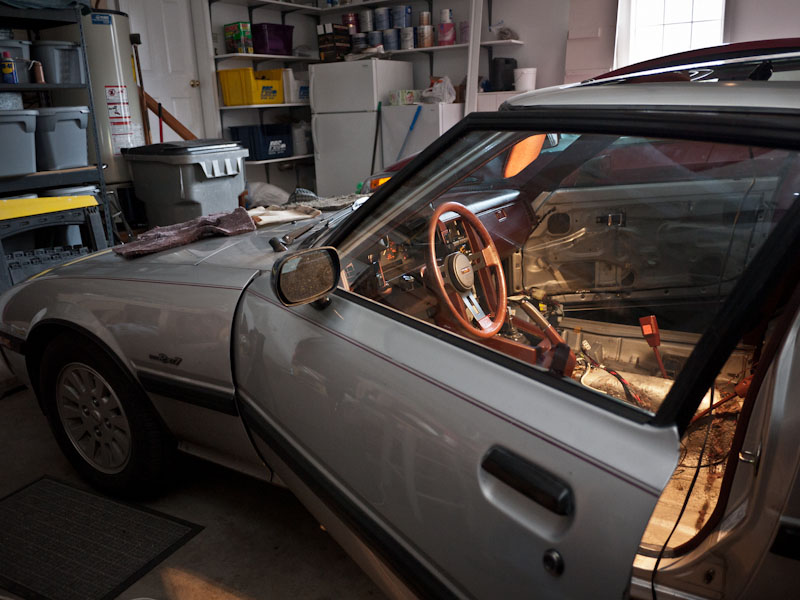
Then I noticed that my fan belt was TOAST. Literally falling apart and super loose. Thank's for holding out so long, baby! Sorry to push it like that. I promise I wont any more. Thankfully (thanks to ArmyOfOne) I had a spare belt lying around, so I pulled the fan to put that on. Well... I figure since the fan is off I might as well see how permanant the grime is....

Ah i see - it totally comes off. Well I can't just stop half way... so the rest has to come off.

And then Put it all back together. All this just to make a "quick trip" to the store to get ready for the interior re-do.

-----
You got it! 
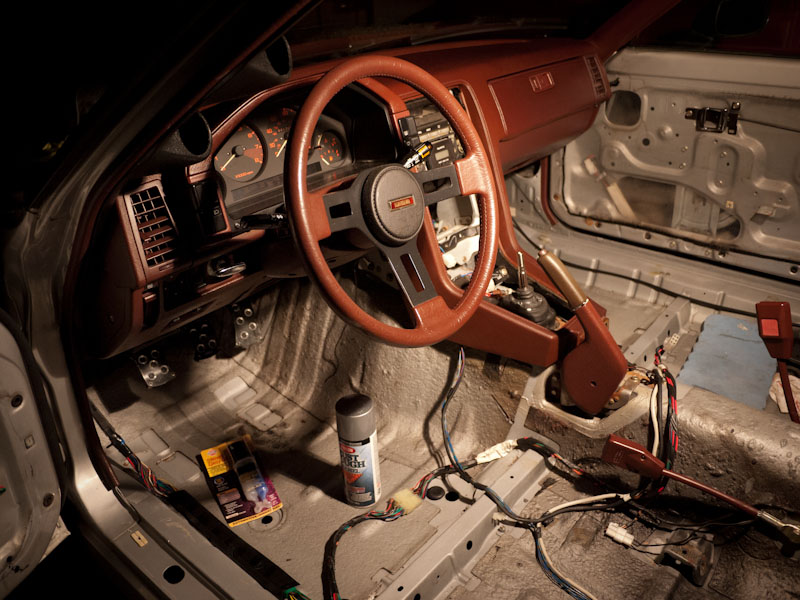
Interior re-do and Hushmat prep:
Ah yes. That smell. It's not THAT bad.... but then, it kinda is. Every once in a while you get a waft of it, and its like, "Is that me? No, no i'm fairly sure I showered sometime this week...." It is, in fact, the car. I mean, it's 30 years old so i'm not blaming it. But a lot can happen in 30 years. Smokers, water, spills, who knows. This car has definitely seen its share of all of it.
Time for a deep clean - get in there and clean up those hard-to-reach places.
Out come the seats.
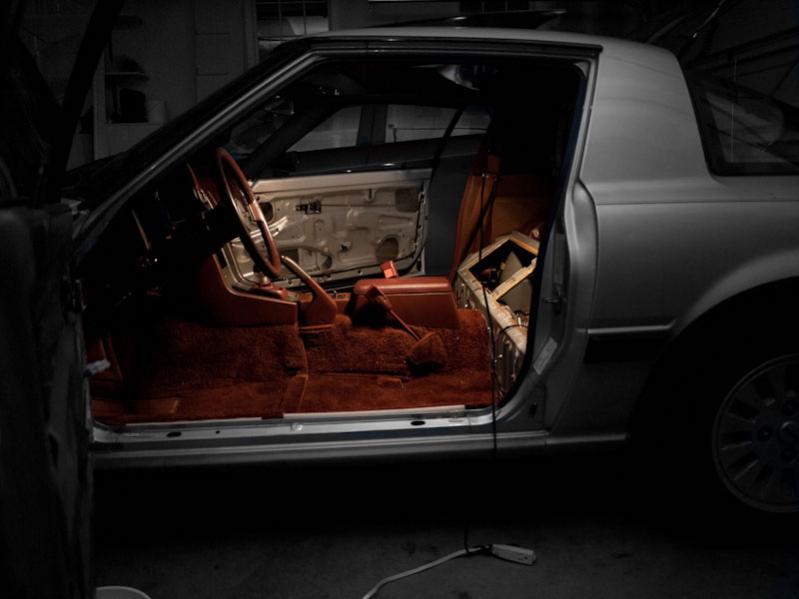
Center console and carpets - out they go. And... what's this? Ah HAH! I see you, water logged, mildew festering carpet liner! Out you go! We have located one of our leaks. More than likely the floor plug directly beneath.
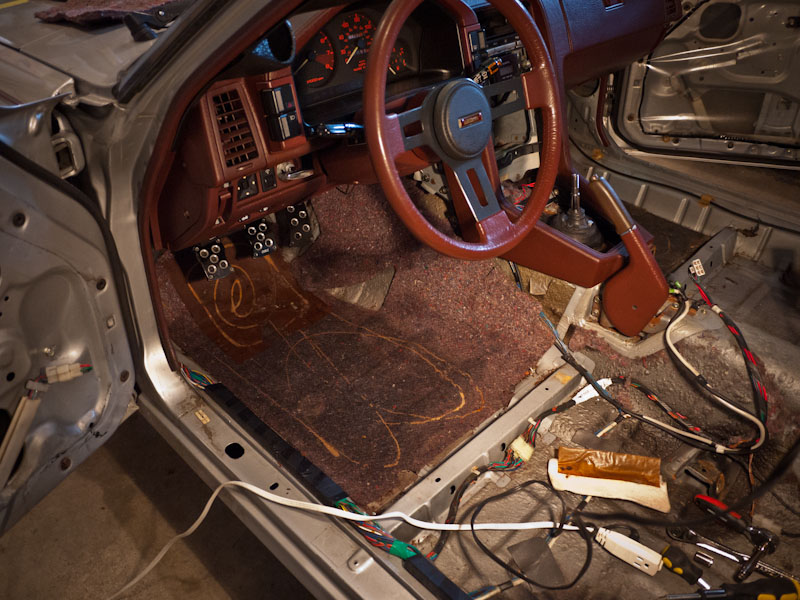
All carpet and liner removed.
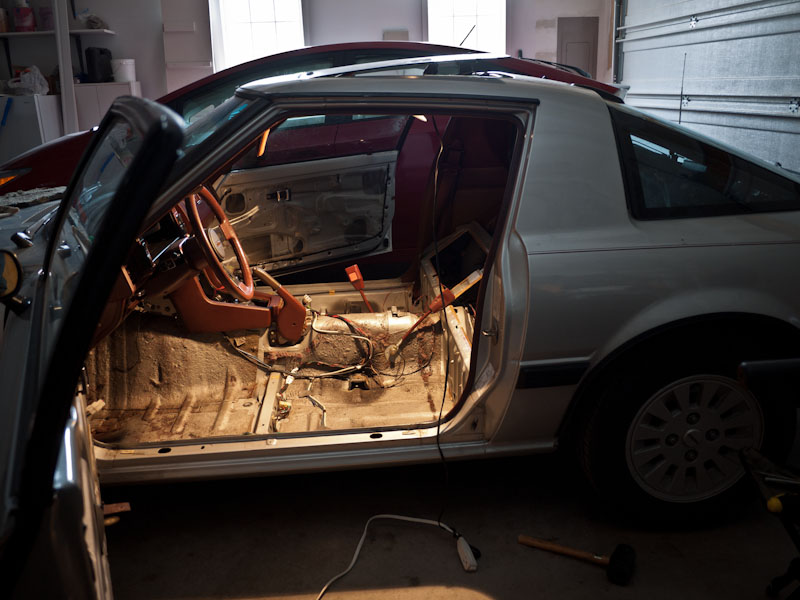
A wire brush to get the bits of liner that got melted into the sound deadening. After that, deep clean. Time to scrub off the mold from the pools of water - ended up both driver and passenger side were soaked. No rust though! Lucky! must be a newer leak. Will have to seal that up.
Plus, I need to clean the surface in prep for the Hushmat anyways
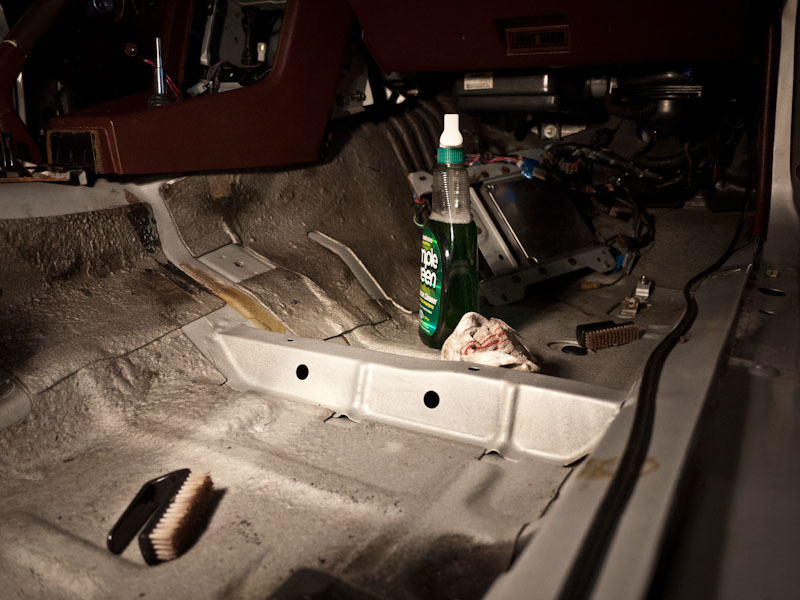
A few small spots of surface rust. Wire wheel them down and hit them with some Rust Tough, and we should be ready to install some Hushmat!
And that took me up to 8:30pm on Sunday. Time to call it. Will finish the hatch scrubbing, leak sealing, and rust repair up next.
no tach or trailing. Then I noticed that my fan belt was TOAST. Literally falling apart and super loose. Thank's for holding out so long, baby! Sorry to push it like that. I promise I wont any more. Thankfully (thanks to ArmyOfOne) I had a spare belt lying around, so I pulled the fan to put that on. Well... I figure since the fan is off I might as well see how permanant the grime is....
Ah i see - it totally comes off. Well I can't just stop half way... so the rest has to come off.
And then Put it all back together. All this just to make a "quick trip" to the store to get ready for the interior re-do.
-----
Looks like one sick car, looking forward to the build.
I'd be interested in pics of the sound deadening install, I am considering the same thing on my car as it tends to sound like you're in an enclosed go-kart sometimes. It would be nice for sound quality and I wouldn't have to listen to the wind noise as much.
I'd be interested in pics of the sound deadening install, I am considering the same thing on my car as it tends to sound like you're in an enclosed go-kart sometimes. It would be nice for sound quality and I wouldn't have to listen to the wind noise as much.
Interior re-do and Hushmat prep:
Ah yes. That smell. It's not THAT bad.... but then, it kinda is. Every once in a while you get a waft of it, and its like, "Is that me? No, no i'm fairly sure I showered sometime this week...." It is, in fact, the car. I mean, it's 30 years old so i'm not blaming it. But a lot can happen in 30 years. Smokers, water, spills, who knows. This car has definitely seen its share of all of it.
Time for a deep clean - get in there and clean up those hard-to-reach places.
Out come the seats.
Center console and carpets - out they go. And... what's this? Ah HAH! I see you, water logged, mildew festering carpet liner! Out you go! We have located one of our leaks. More than likely the floor plug directly beneath.
All carpet and liner removed.
A wire brush to get the bits of liner that got melted into the sound deadening. After that, deep clean. Time to scrub off the mold from the pools of water - ended up both driver and passenger side were soaked. No rust though! Lucky! must be a newer leak. Will have to seal that up.
Plus, I need to clean the surface in prep for the Hushmat anyways
A few small spots of surface rust. Wire wheel them down and hit them with some Rust Tough, and we should be ready to install some Hushmat!
And that took me up to 8:30pm on Sunday. Time to call it. Will finish the hatch scrubbing, leak sealing, and rust repair up next.
02-11-13, 08:09 PM
#13
 02-19-13, 01:20 AM
#17
Alright. Past weekend update.
I have scrubbed every friggin square inch of this beast with a scrubber brush and simple green. Removed all rust spots save for one around the shifter. Cut out some speaker mounts, and began doing the Hushmat install.
And now what matters most, the pics:
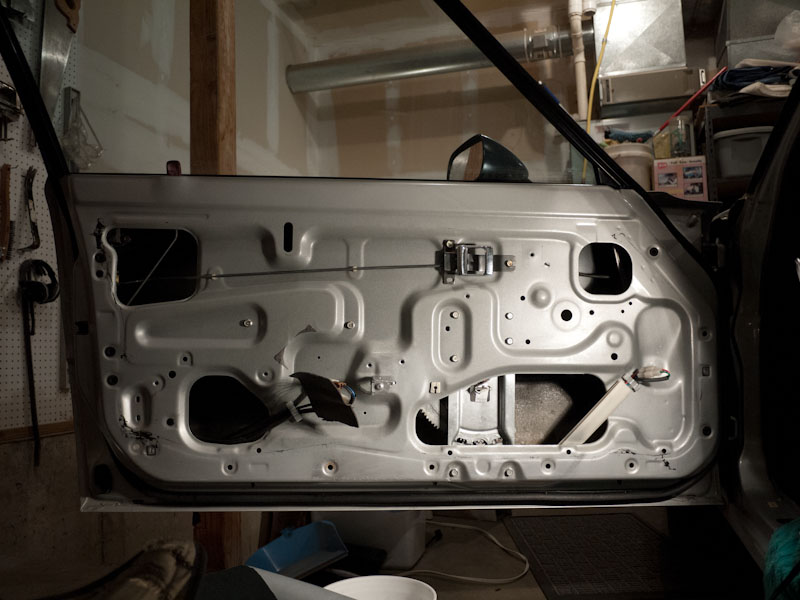
I'm choosing to leave the holes open. I have had to put the window back in its track enough times to know not to seal that **** up. i will need to replace the windows this year anyways, so might as well not waste the mat
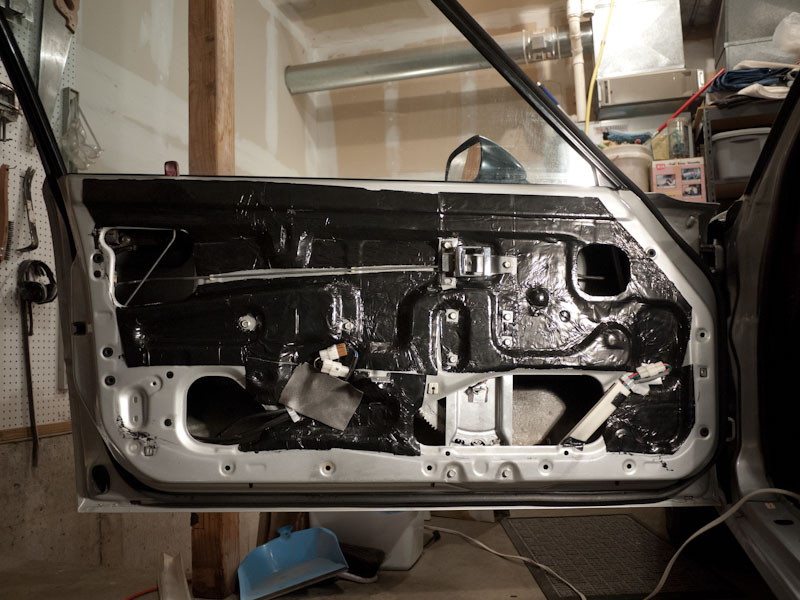
Speaker mounts - 3/4" MDF. BE SURE to wear eye protection and some sort of breather mask. You dont want to inhale **** when you're working. Especially MDF.
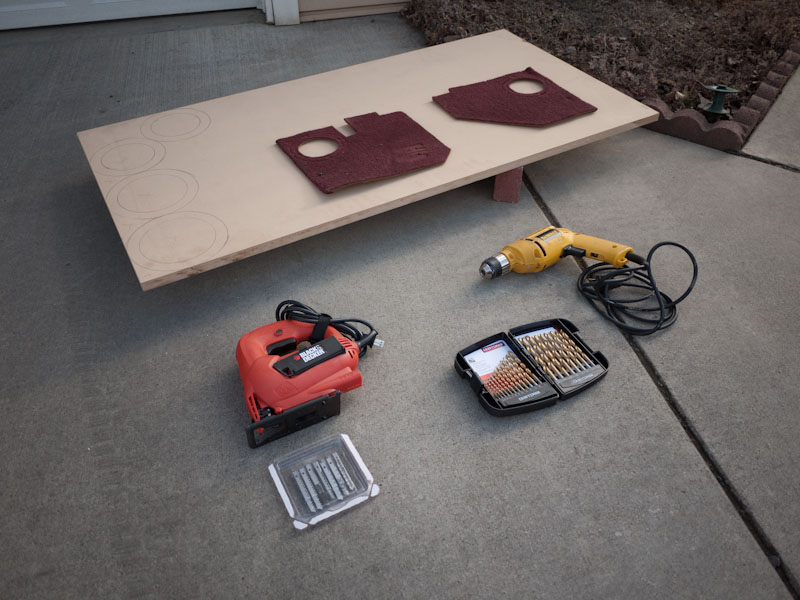

The GOODS

Wow this forum demolishes the quality of the photos... Once i get my blog up I'll post it all there.
I have scrubbed every friggin square inch of this beast with a scrubber brush and simple green. Removed all rust spots save for one around the shifter. Cut out some speaker mounts, and began doing the Hushmat install.
And now what matters most, the pics:
I'm choosing to leave the holes open. I have had to put the window back in its track enough times to know not to seal that **** up. i will need to replace the windows this year anyways, so might as well not waste the mat
Speaker mounts - 3/4" MDF. BE SURE to wear eye protection and some sort of breather mask. You dont want to inhale **** when you're working. Especially MDF.
The GOODS
Wow this forum demolishes the quality of the photos... Once i get my blog up I'll post it all there.
02-25-13, 11:55 AM
#20
Whew! So i told everyone I was dead so they would leave me alone for the weekend and locked myself in the garage. The interior has been completely pulled for about 2-3 weeks now and I'm getting antsy to go drive. So I gotta get **** done!
Last Friday I finally got all my seals, plugs, and cover plates in. Grind off any surface rust, use some silicone to seal them up, ready to be covered with some hushmat

Ground out some rust spots and spot painted with some Rust Tough (love that stuff)
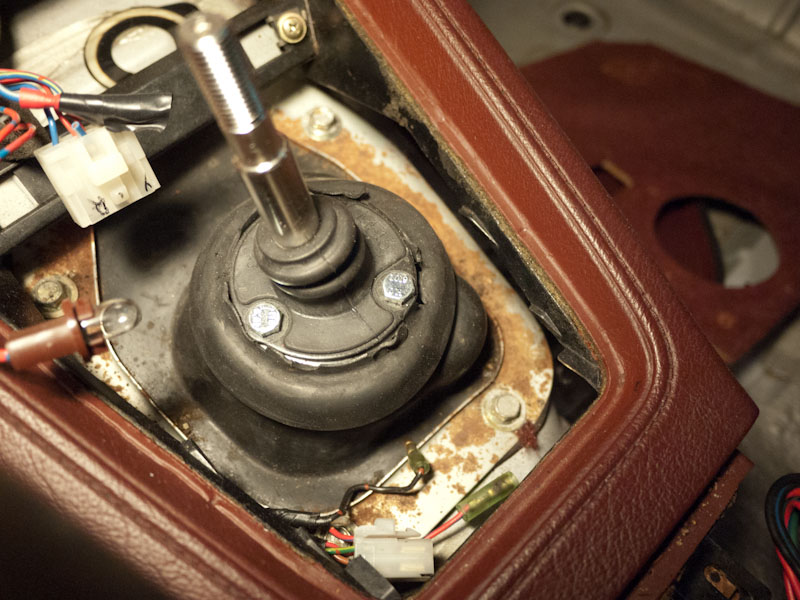
o noes! this is almost the last of it. I found a cancer spot on the passenger rear wheel well will have to take it in and have it welded up. This looks like just a bad seal around the shifter hole.

Now she's all prepped and ready for the next phase! FINALLY. I enjoy taking my time and doing things right, but I couldn't stand seeing those speakers taunting me on the floor day in and day out. Something had to be done about it, and she's finally ready:

Last Friday I finally got all my seals, plugs, and cover plates in. Grind off any surface rust, use some silicone to seal them up, ready to be covered with some hushmat
Ground out some rust spots and spot painted with some Rust Tough (love that stuff)
o noes! this is almost the last of it. I found a cancer spot on the passenger rear wheel well
will have to take it in and have it welded up. This looks like just a bad seal around the shifter hole.Now she's all prepped and ready for the next phase! FINALLY. I enjoy taking my time and doing things right, but I couldn't stand seeing those speakers taunting me on the floor day in and day out. Something had to be done about it, and she's finally ready:
02-25-13, 12:02 PM
#21
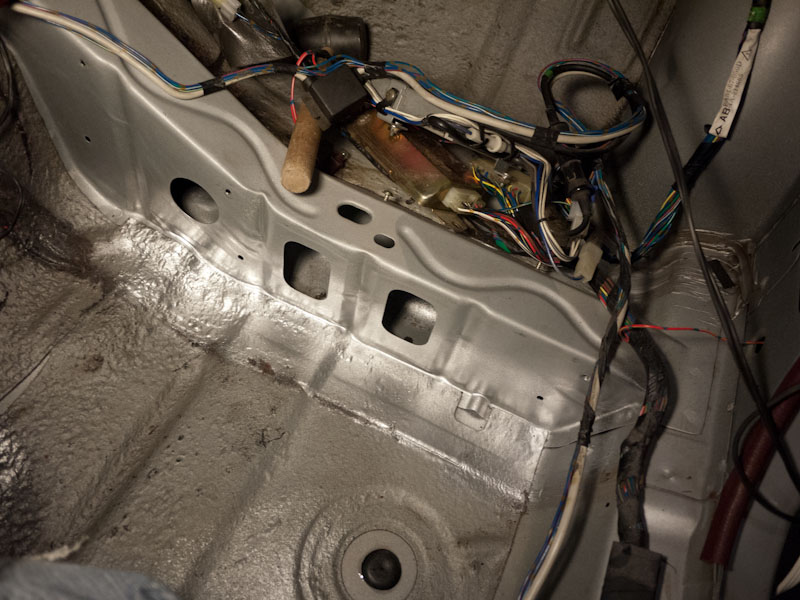
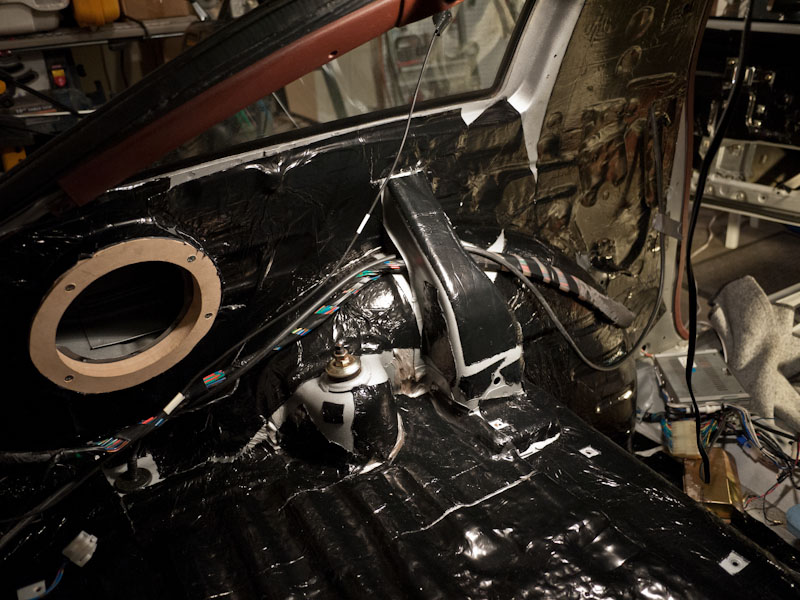
First to sheets of Hushmat down! Many more to go.

Rear speaker plate mounted
They suggested I use butcher paper to draw out templates. Honestly I found that to be a waste. I would cut the piece by eye / test fitting. This stuff is super handy.
A handy tip for installers: I discovered that if you start by sticking down the far corner, you can pull the backing off by pulling towards you, and as you pull it sucks the matting down to the floor while removing the liner. Its plasticized, so it (usually) wont tear.
You do this for each little bit or 'arm' of the matting, this method allows you to reach some really obscure places with the mat.
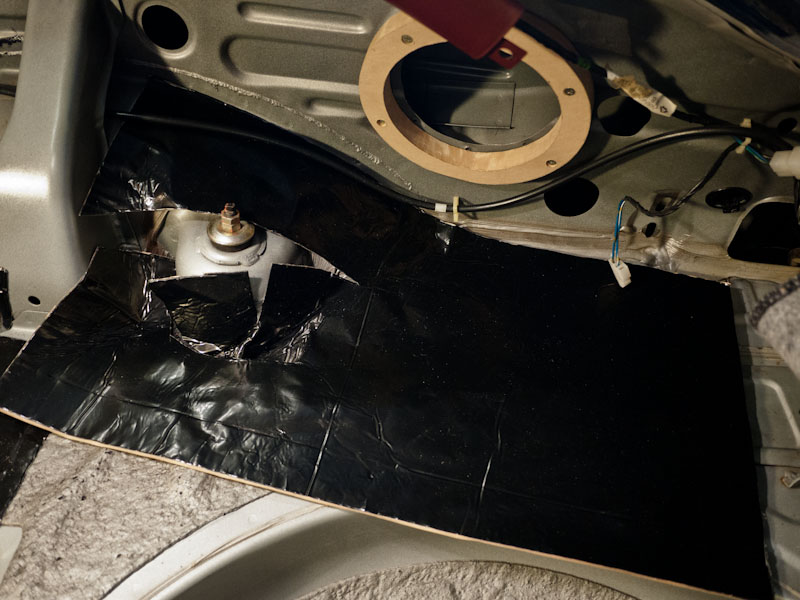
/\ That, leads to this \/
I went up inside the wall about 8-10", as far as i could reach my hand up. Tiny hole and wires / tubes to work around.
Rear speaker plate mounted
They suggested I use butcher paper to draw out templates. Honestly I found that to be a waste. I would cut the piece by eye / test fitting. This stuff is super handy.
A handy tip for installers: I discovered that if you start by sticking down the far corner, you can pull the backing off by pulling towards you, and as you pull it sucks the matting down to the floor while removing the liner. Its plasticized, so it (usually) wont tear.
You do this for each little bit or 'arm' of the matting, this method allows you to reach some really obscure places with the mat.
/\ That, leads to this \/
I went up inside the wall about 8-10", as far as i could reach my hand up. Tiny hole and wires / tubes to work around.
02-25-13, 12:18 PM
#22
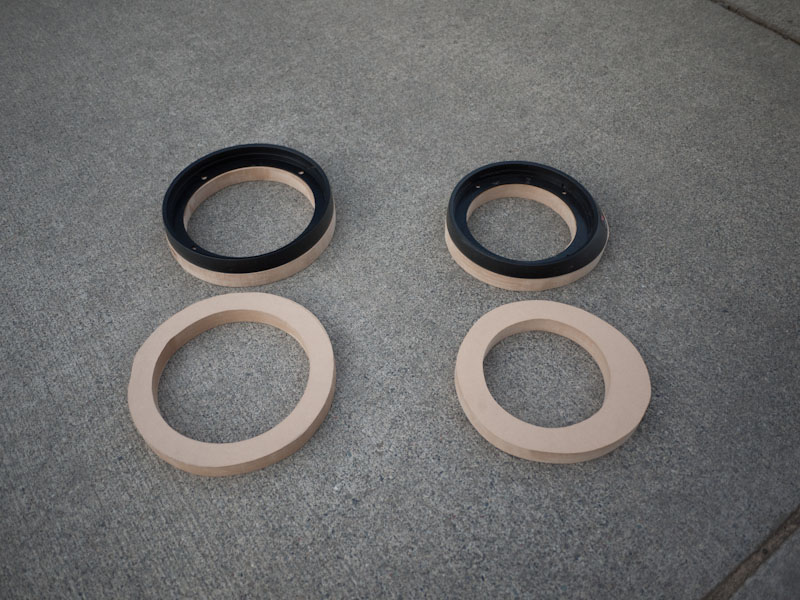
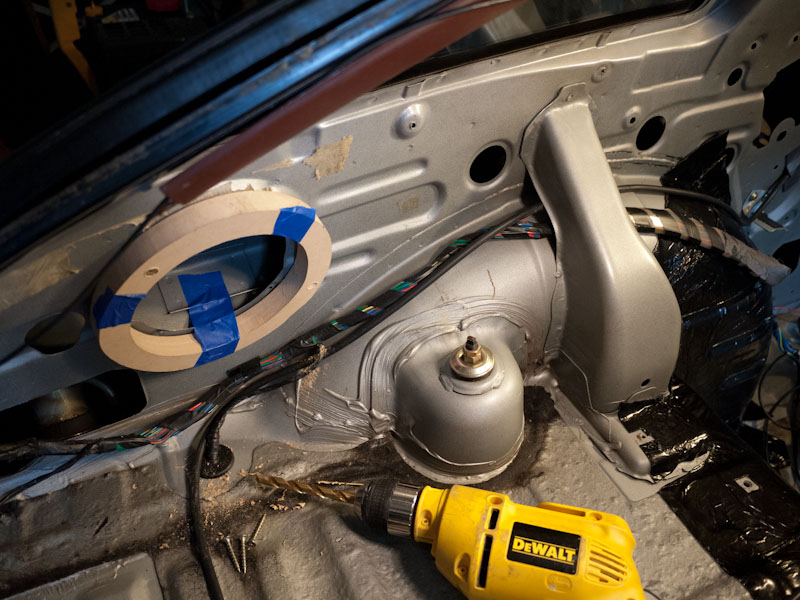
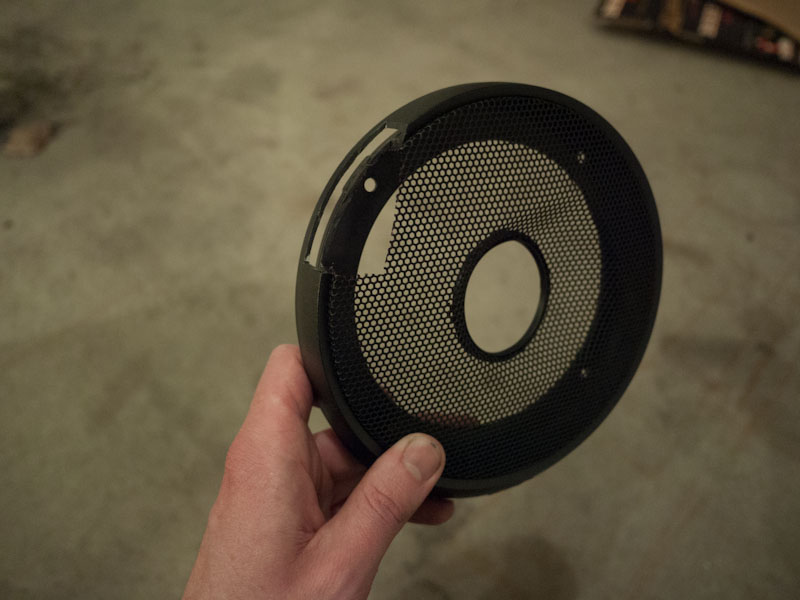
Front Speakers
Oh man. The front speakers. So this is my 3rd FB that I've done this on. I dont know why i keep coming back for more. These things are a royal pita. Seriously why do i insist on speakers larger than 2" in the front!?
Because they sound better and carry more mids. Thats why. And so here I go again. However, having done it several times already at least I knew what to look for.
I had to modify both speaker grilles, and the drivers side mounting plate as well. On the fronts I don't pre-mount the plate, its most efficient to get long screws that go through the speaker mounts, grille, mounting plate, and wall. I hate doing this, I hate drills anywhere near speakers. Don't ask me why. Ok I slipped and punctured a speaker once. And not just some shitty cheapo speaker, an MB Quart (old, better version) *hangs head*
PRE-DRILL. Don't ruin your speaker, MDF riser, or wall by trying to save time. You wont, you'll have to do it all over again and maybe buy a new speaker when the power drill slips and you punch through the speaker.
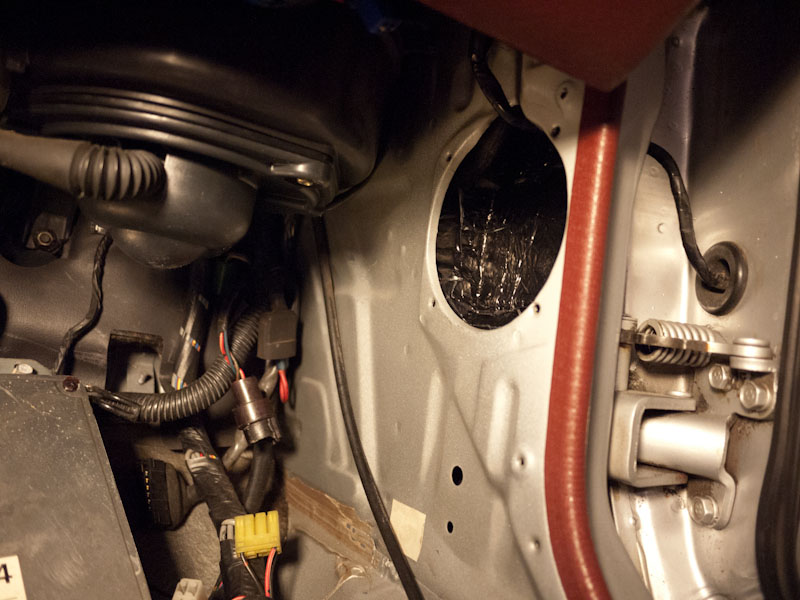
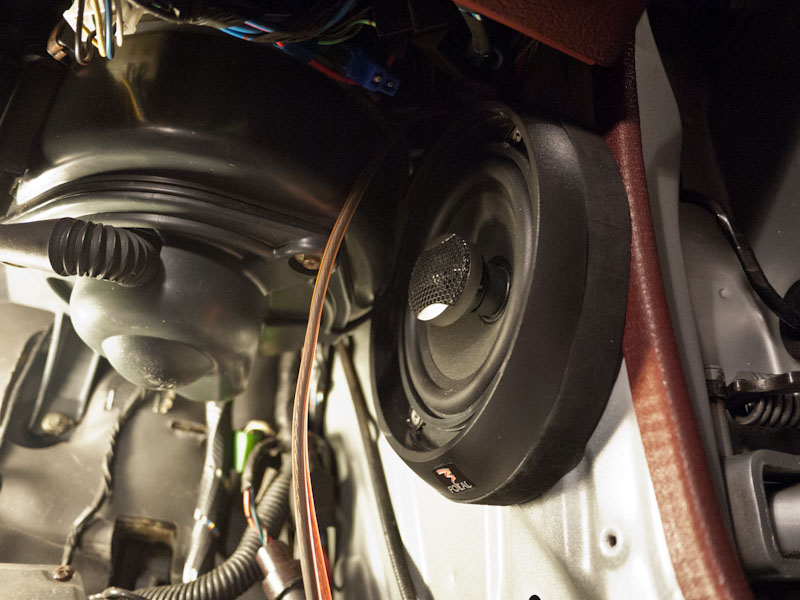
Passenger side front top corner is blocked by the heater. I usually pre-mount the speaker in this corner, then drill the other 3 bolts into the wall. I had to cut away the grille to get this to fit, the mount and speaker fit just fine:
Drape the speaker wire over the top of the speaker and line it up with the stock wire divot at the top of the speaker hole. we'll seal it up later with silicone at the final stage. The plate is made from MDF that i sprayed with semi-flat black Rust Tough. Have I mentioned yet I love that stuff? Dries enough to handle within 2 hours. MDF dries in 45min to an hour if put in front of a blower / heater.

The mount extends to the very limit of the stock kick panels. I mount it over the top of the door trim finish piece. Before permanantly screwing it on to the car I took some simple green and cleaned it real nice. Little scrubber brush from O'Reiley's for the win again!
Driver's side speaker you can access all 4 screws if you un-mount the fuse block and the little brown relay below the steer column. The hood release is in the way, so I had to cut out a bit of the speaker mount and grille frame. Didn't have to cut the grille like I did on the passenger side though.
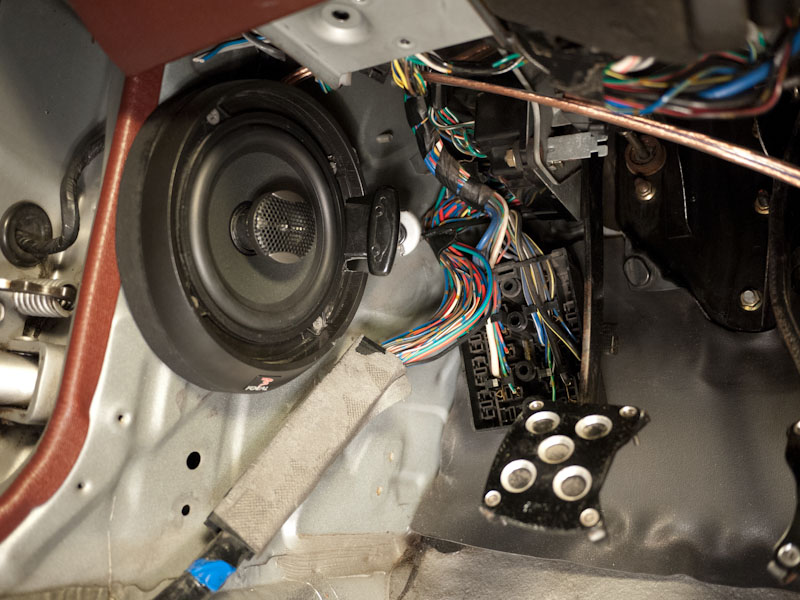
All up in my grill, yo
Because they sound better and carry more mids. Thats why. And so here I go again. However, having done it several times already at least I knew what to look for.
I had to modify both speaker grilles, and the drivers side mounting plate as well. On the fronts I don't pre-mount the plate, its most efficient to get long screws that go through the speaker mounts, grille, mounting plate, and wall. I hate doing this, I hate drills anywhere near speakers. Don't ask me why. Ok I slipped and punctured a speaker once. And not just some shitty cheapo speaker, an MB Quart (old, better version) *hangs head*
PRE-DRILL. Don't ruin your speaker, MDF riser, or wall by trying to save time. You wont, you'll have to do it all over again and maybe buy a new speaker when the power drill slips and you punch through the speaker.
Passenger side front top corner is blocked by the heater. I usually pre-mount the speaker in this corner, then drill the other 3 bolts into the wall. I had to cut away the grille to get this to fit, the mount and speaker fit just fine:
Drape the speaker wire over the top of the speaker and line it up with the stock wire divot at the top of the speaker hole. we'll seal it up later with silicone at the final stage. The plate is made from MDF that i sprayed with semi-flat black Rust Tough. Have I mentioned yet I love that stuff? Dries enough to handle within 2 hours. MDF dries in 45min to an hour if put in front of a blower / heater.
The mount extends to the very limit of the stock kick panels. I mount it over the top of the door trim finish piece. Before permanantly screwing it on to the car I took some simple green and cleaned it real nice. Little scrubber brush from O'Reiley's for the win again!
Driver's side speaker you can access all 4 screws if you un-mount the fuse block and the little brown relay below the steer column. The hood release is in the way, so I had to cut out a bit of the speaker mount and grille frame. Didn't have to cut the grille like I did on the passenger side though.
All up in my grill, yo
02-25-13, 12:34 PM
#23
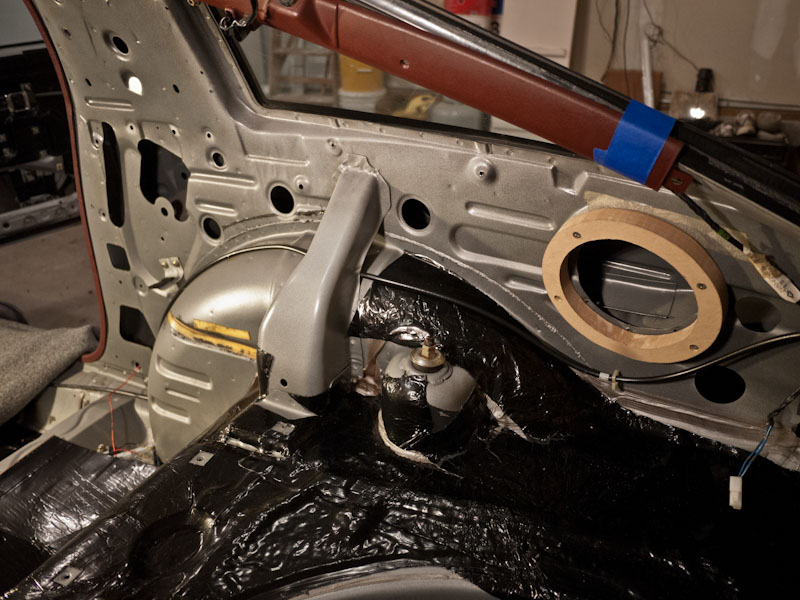
Speaker chamber isolation
So a lot of folks who have door mounted speakers talk about how much more mids and mid-bass they get by totally sealing the door chamber. Makes sense, as if you want a ported speaker you need to engineer the port length and diameter based on the speaker requirements.
I had originally planned on blocking off the sidewall channel where the speaker mounts and creating either a sealed or ported "box", using the holes in the frame as a port. So i ran the numbers on the speakers to calculate box size, both sealed and ported.
Basically what I came up with:
Ported: for a ported box built into the sidewall, it would need to be rediculously small with a port length of 74". I dont want to route 6 feet of 2" tubing through the sidewalls. So, sealed box:
For a sealed box, I wanted to isolate the narrow frame channel where the speaker mounts into. No go - there is so little volume in there it is too small. Bascially, I realized the Mazda engineers already solved this problem. Hm. Go figure. Using the same ideologoy as the door-mounted speaker, I sealed up the sides of the walls to direct the sound better, isolate road noise to speaker noise, and create a a large sealed(ish) box for the speaker.
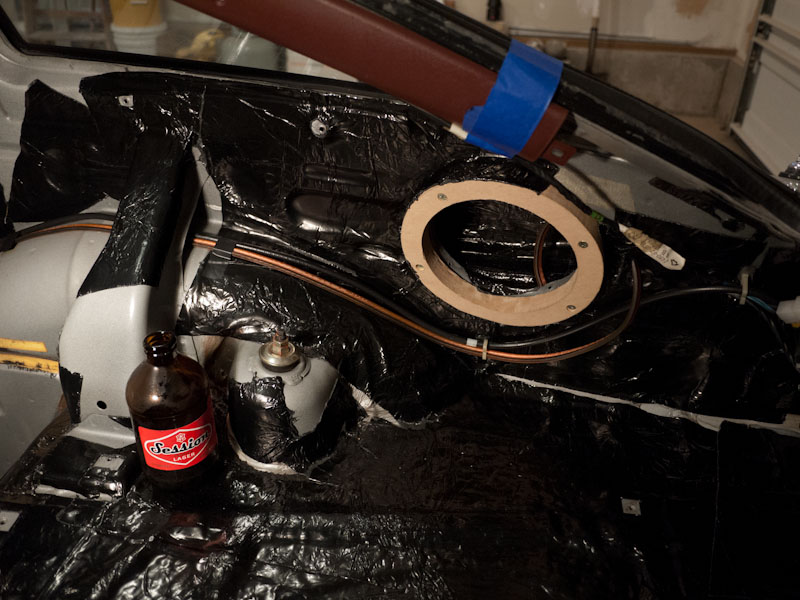
The only space left open is near the very rear of the car in the bottom corner, about this is about 2"x2" square. On the driver's side this is the hole behind the hole for the gas tube. On the passenger side its the hole where the antennae cable runs.

12 awg speaker wire run. Exhausting. Time for some refreshment
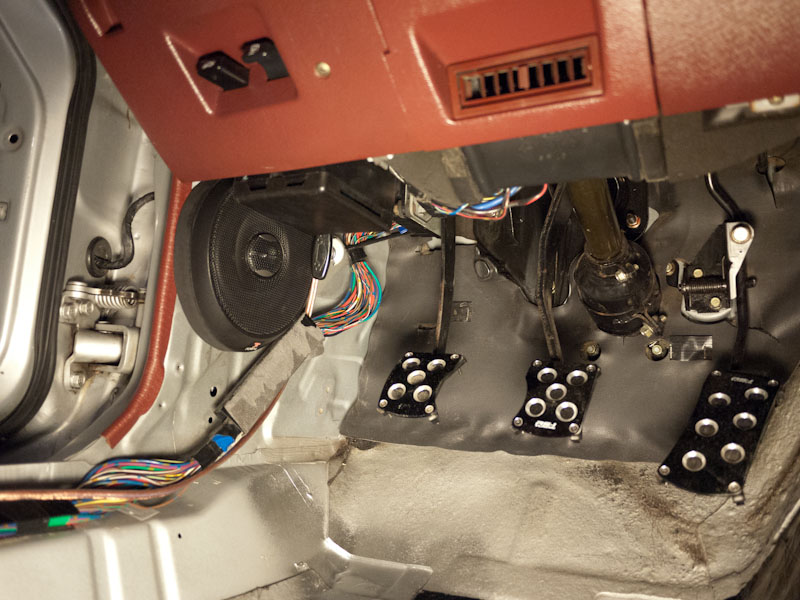
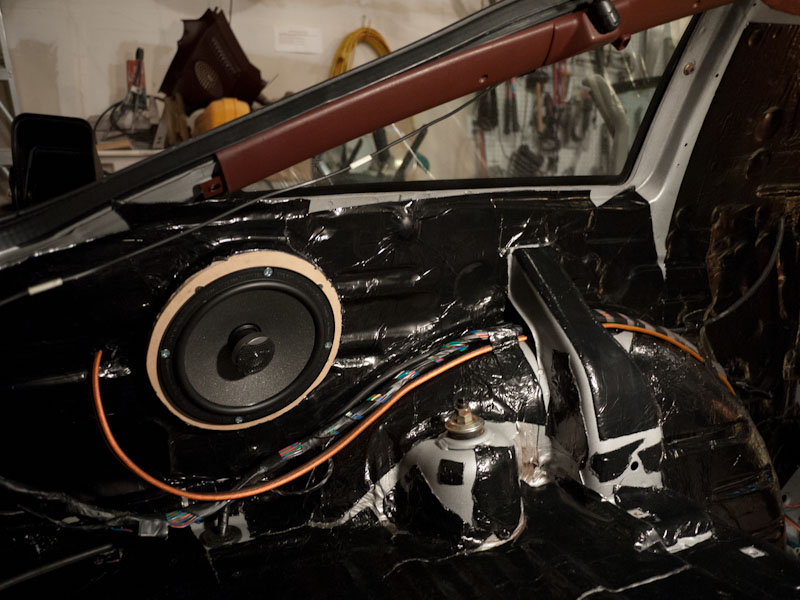
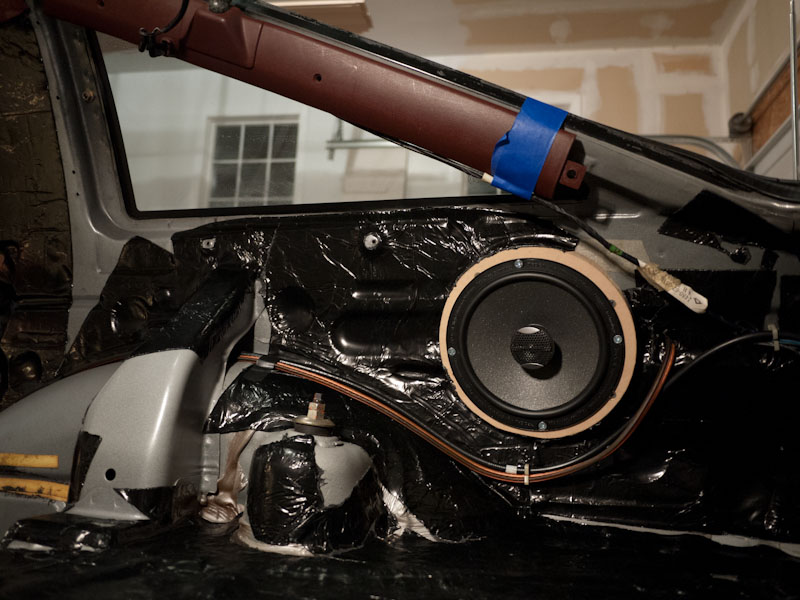
And finally! Sunday evening at 9:45pm, the fruition of all my weekend's efforts. Speaker cable run, speakers mounted, Hushmat installed
To finish things off I need to run the power cable, create an amp mount bracket (will go under passenger storage bin), and then tap into the factory head unit line-level output.
Oh and get that damned wheel well rust taken care of
I had originally planned on blocking off the sidewall channel where the speaker mounts and creating either a sealed or ported "box", using the holes in the frame as a port. So i ran the numbers on the speakers to calculate box size, both sealed and ported.
Basically what I came up with:
Ported: for a ported box built into the sidewall, it would need to be rediculously small with a port length of 74". I dont want to route 6 feet of 2" tubing through the sidewalls. So, sealed box:
For a sealed box, I wanted to isolate the narrow frame channel where the speaker mounts into. No go - there is so little volume in there it is too small. Bascially, I realized the Mazda engineers already solved this problem. Hm. Go figure. Using the same ideologoy as the door-mounted speaker, I sealed up the sides of the walls to direct the sound better, isolate road noise to speaker noise, and create a a large sealed(ish) box for the speaker.
The only space left open is near the very rear of the car in the bottom corner, about this is about 2"x2" square. On the driver's side this is the hole behind the hole for the gas tube. On the passenger side its the hole where the antennae cable runs.
12 awg speaker wire run. Exhausting. Time for some refreshment
And finally! Sunday evening at 9:45pm, the fruition of all my weekend's efforts. Speaker cable run, speakers mounted, Hushmat installed
To finish things off I need to run the power cable, create an amp mount bracket (will go under passenger storage bin), and then tap into the factory head unit line-level output.
Oh and get that damned wheel well rust taken care of
02-25-13, 03:06 PM
#24
Thanks a lot! Just one more thing to add to the To Do list for the FB I guess, the list goes on and on.
You used Hushmat here I see, how would you rate your overall experience with the product? I've done some researching on the different mats available but not many 7 owners will be honest about the experience.
Also, it would be cool if you had a sound clip of road noise, then a clip of music playing both before and after the installation. I know in my 7 the road noise is terrible and I can't hear the music to save my life even though I've upgraded everything possible.
Anyways, nice job and keep the pics coming
02-25-13, 03:54 PM
#25
Thanks a lot! Just one more thing to add to the To Do list for the FB I guess, the list goes on and on.
You used Hushmat here I see, how would you rate your overall experience with the product? I've done some researching on the different mats available but not many 7 owners will be honest about the experience.
You used Hushmat here I see, how would you rate your overall experience with the product? I've done some researching on the different mats available but not many 7 owners will be honest about the experience.
Also, it would be cool if you had a sound clip of road noise, then a clip of music playing both before and after the installation. I know in my 7 the road noise is terrible and I can't hear the music to save my life even though I've upgraded everything possible.
Anyways, nice job and keep the pics coming
Anyways, nice job and keep the pics coming
Second, I didnt have any speakers or stereo in the car previously, so there's no before / after there.