Zac's 1998 Series 7 RS
 09-04-15, 11:31 AM
#1
Full Member
Thread Starter

Zac's 1998 Series 7 RS
G'day All. This is my 1998 Series 7 RS FD3S. I live in New Zealand, and it's an import from Japan.
I purchased it pretty cheaply as the previous owner was fed up with it. He'd had it for a year or so, and it had never run right for him. Although he'd purchased it with a rebuilt motor, it didn't end up lasting long, and was down on compression pretty quickly. He rebuilt the motor, put it all back together, but could still never get it going properly. It would start and idle, but seemed very very rich, and would foul plugs constantly. After a heap of head scratching and spending quite a bit on diagnosis, he gave up. I had been looking for an FD for a while, and liked this one because the body was fairly tidy, and being an RS model it has the larger 17" wheels, bigger brakes, firmer suspension and (apparently) a shorter 4.3:1 ratio diff, for better acceleration. The key selling point, however, was that apart from a cat-back exhaust, it's completely stock, which is something I was really keen on. I pulled the trigger, drove up to the north island with a trailer, and hauled it back home.

My first port of call was the read the error codes:
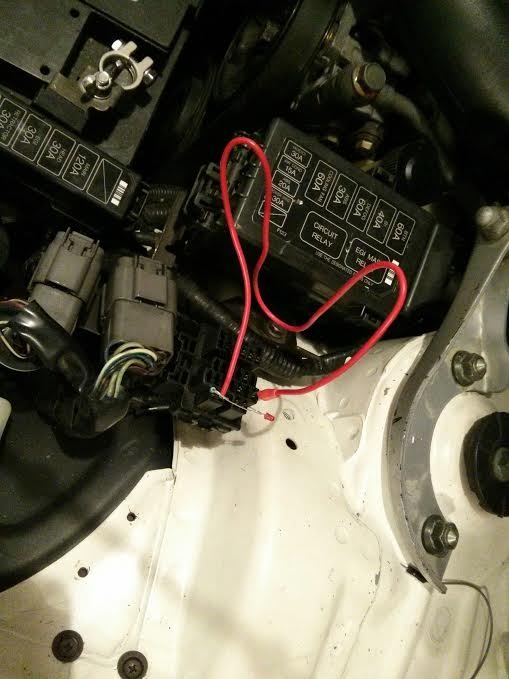
It had a couple for turbo control and emissions solenoids, and the TPS (as it wasn't set up correctly). I thought maybe I would get lucky and it would just need the TPS setting... However after doing this, and clearing the error code, the same problems still persisted.
Knowing that it had issues, I got stuck into some further diagnosis straight away. I went back to basic principles; What does it need to start and run? Air (+Compression), Fuel (In about the correct quantity) and Spark (At the right time). Although it's not strictly for this model, I've been using the Series 6 USDM FSM to get all my specifications from, and so far everything has lined up pretty well, as long as you look at things logically.
I tested spark (without fouling a brand new set of plugs) and it was spot on:
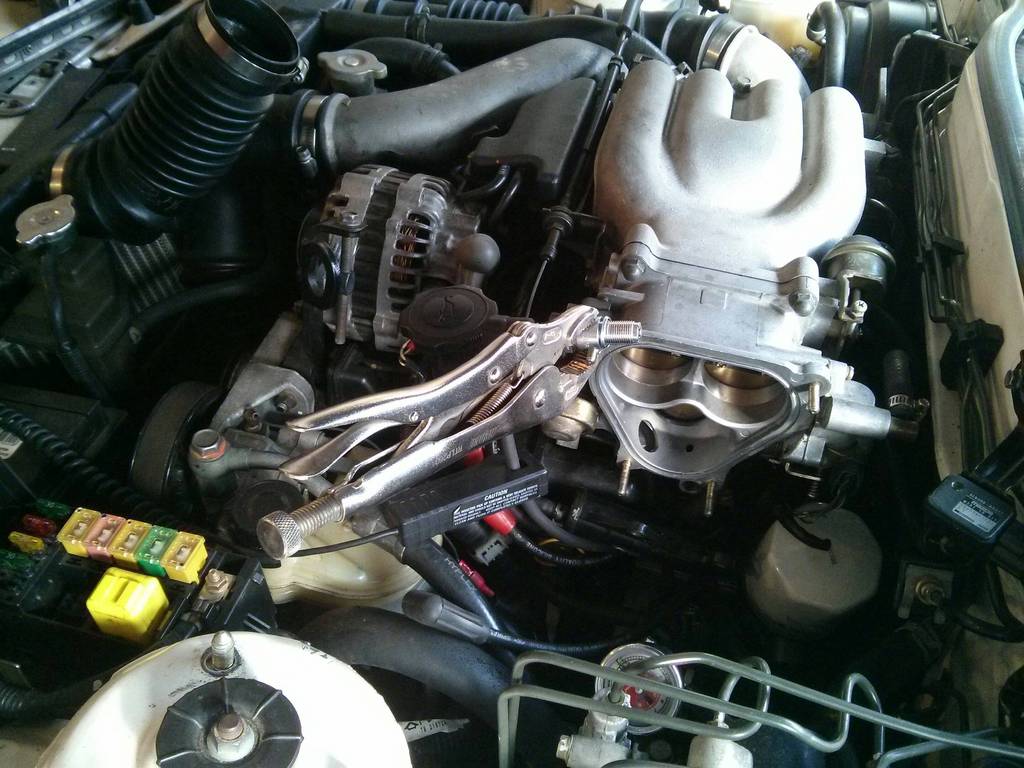
Listening to the engine cranking over, the compression sounded pretty good, but I wanted to get a clearer picture, so I made up an adapter to screw in a pressure transducer:
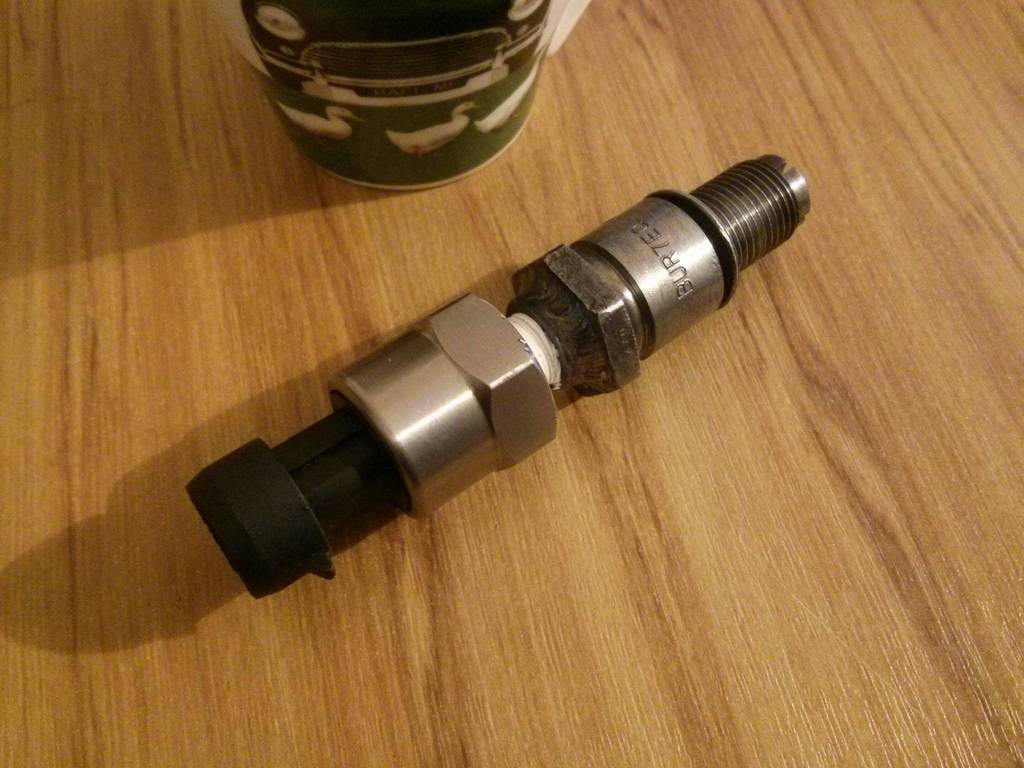
which gave nice even readings like this:
Front Rotor:

Rear Rotor:
Peak values are around 110psi for each rotor, so that side of things looks to be in good shape.
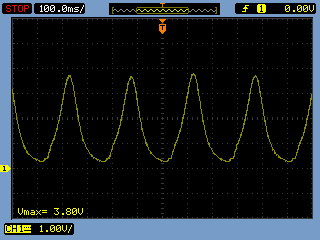
This left me with testing the fueling. I gauged the fuel pressure, and it was a solid 38psi with the pump running, bang on the factory specs, so the search continued. There was a receipt in the glove box for the fuel injectors being tested, and they were apparently in good condition. A scope of their driving signal looked pretty much on the money too:
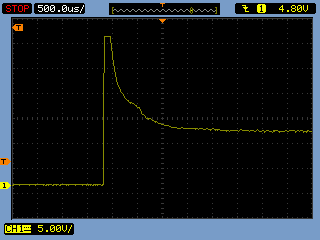
Pintle hump where it should be. The wave is clipped by the scope, it's actually a much higher inductive kick than shown. Poking around more ECU outputs with the scope showed everything to look how you would expect it to, so I started to lean towards it being more of an output problem, not an input one. I dug in a bit deeper, pulled the UIM, removed the engine control loom and vacuum control system. This revealed two distinct problems:
1) Many, many perished, cracked and barely sealing vacuum hoses.
2) The rear rotor had the primary and secondary fuel injector plugs swapped around.
This was a pretty decent 'smoking gun' as to the fueling issue, it would have been trying to use the secondary injector on that rotor all the time, giving it far too much fuel. A nice simple fix, but I had to take care of all those vacuum hoses too!
I purchased it pretty cheaply as the previous owner was fed up with it. He'd had it for a year or so, and it had never run right for him. Although he'd purchased it with a rebuilt motor, it didn't end up lasting long, and was down on compression pretty quickly. He rebuilt the motor, put it all back together, but could still never get it going properly. It would start and idle, but seemed very very rich, and would foul plugs constantly. After a heap of head scratching and spending quite a bit on diagnosis, he gave up. I had been looking for an FD for a while, and liked this one because the body was fairly tidy, and being an RS model it has the larger 17" wheels, bigger brakes, firmer suspension and (apparently) a shorter 4.3:1 ratio diff, for better acceleration. The key selling point, however, was that apart from a cat-back exhaust, it's completely stock, which is something I was really keen on. I pulled the trigger, drove up to the north island with a trailer, and hauled it back home.
My first port of call was the read the error codes:
It had a couple for turbo control and emissions solenoids, and the TPS (as it wasn't set up correctly). I thought maybe I would get lucky and it would just need the TPS setting... However after doing this, and clearing the error code, the same problems still persisted.
Knowing that it had issues, I got stuck into some further diagnosis straight away. I went back to basic principles; What does it need to start and run? Air (+Compression), Fuel (In about the correct quantity) and Spark (At the right time). Although it's not strictly for this model, I've been using the Series 6 USDM FSM to get all my specifications from, and so far everything has lined up pretty well, as long as you look at things logically.
I tested spark (without fouling a brand new set of plugs) and it was spot on:
Listening to the engine cranking over, the compression sounded pretty good, but I wanted to get a clearer picture, so I made up an adapter to screw in a pressure transducer:
which gave nice even readings like this:
Front Rotor:
Rear Rotor:
Peak values are around 110psi for each rotor, so that side of things looks to be in good shape.
This left me with testing the fueling. I gauged the fuel pressure, and it was a solid 38psi with the pump running, bang on the factory specs, so the search continued. There was a receipt in the glove box for the fuel injectors being tested, and they were apparently in good condition. A scope of their driving signal looked pretty much on the money too:
Pintle hump where it should be. The wave is clipped by the scope, it's actually a much higher inductive kick than shown. Poking around more ECU outputs with the scope showed everything to look how you would expect it to, so I started to lean towards it being more of an output problem, not an input one. I dug in a bit deeper, pulled the UIM, removed the engine control loom and vacuum control system. This revealed two distinct problems:
1) Many, many perished, cracked and barely sealing vacuum hoses.
2) The rear rotor had the primary and secondary fuel injector plugs swapped around.
This was a pretty decent 'smoking gun' as to the fueling issue, it would have been trying to use the secondary injector on that rotor all the time, giving it far too much fuel. A nice simple fix, but I had to take care of all those vacuum hoses too!
 09-04-15, 11:37 AM
#2
Full Member
Thread Starter
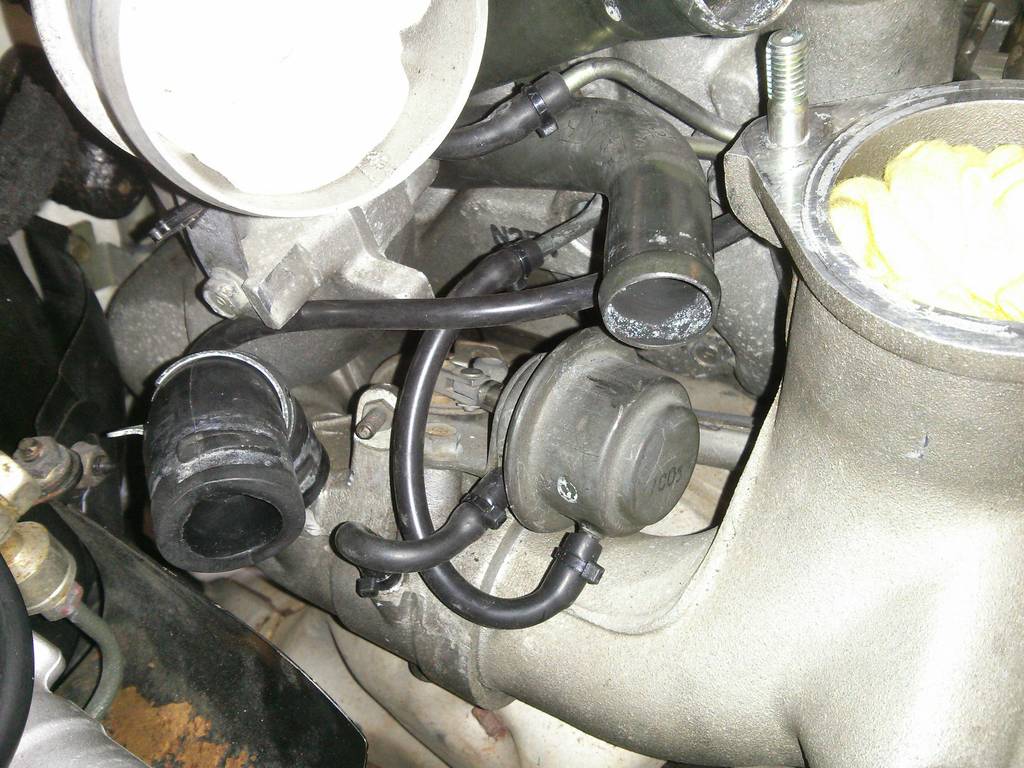
With the change to 16bit ECU's, the Series 7 and up cars also replaced the 'rats-nest' with a more aesthetically pleasing plastic manifold design:
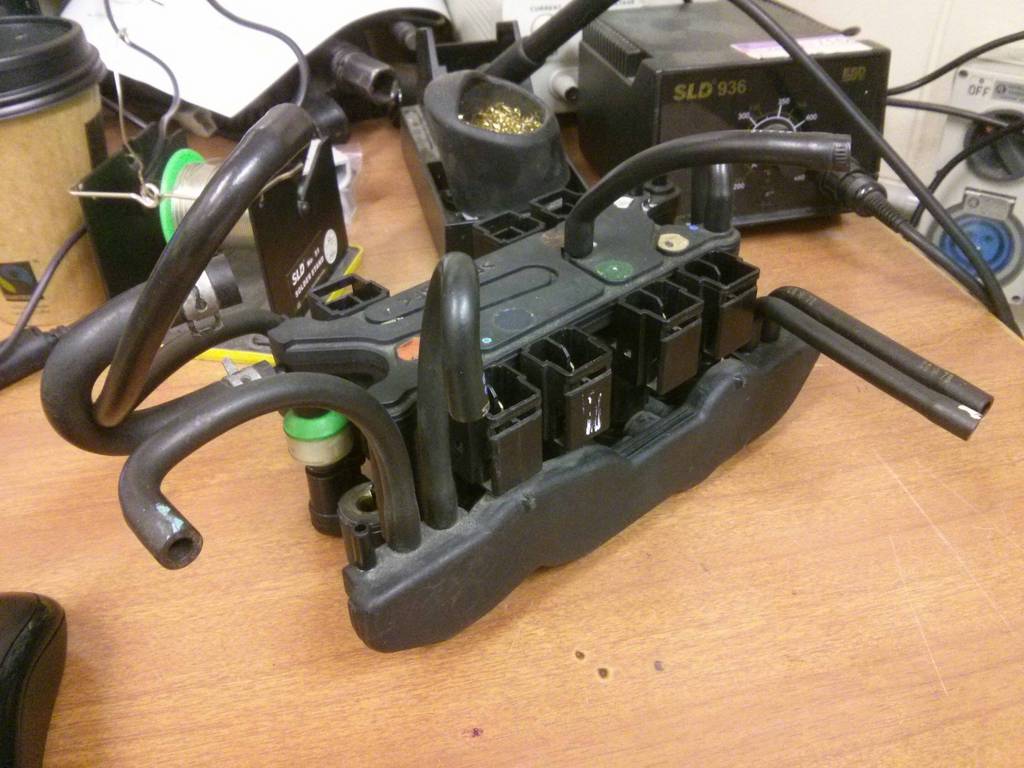
After many hours of internet searching, I came up pretty empty on series 7 specific info, regarding the turbo control and emissions systems, and how to plumb this unit up. I did find, however, looms for sale in Japan that allow a 16bit ECU to be plugged into an earlier 8bit car. This lead me to believe that while the appearance of the systems was changed, the actual operation must be pretty much the same. Armed with the series 6 USDM vacuum info, I pulled apart a scrap vacuum manifold I purchased locally and mapped it out:
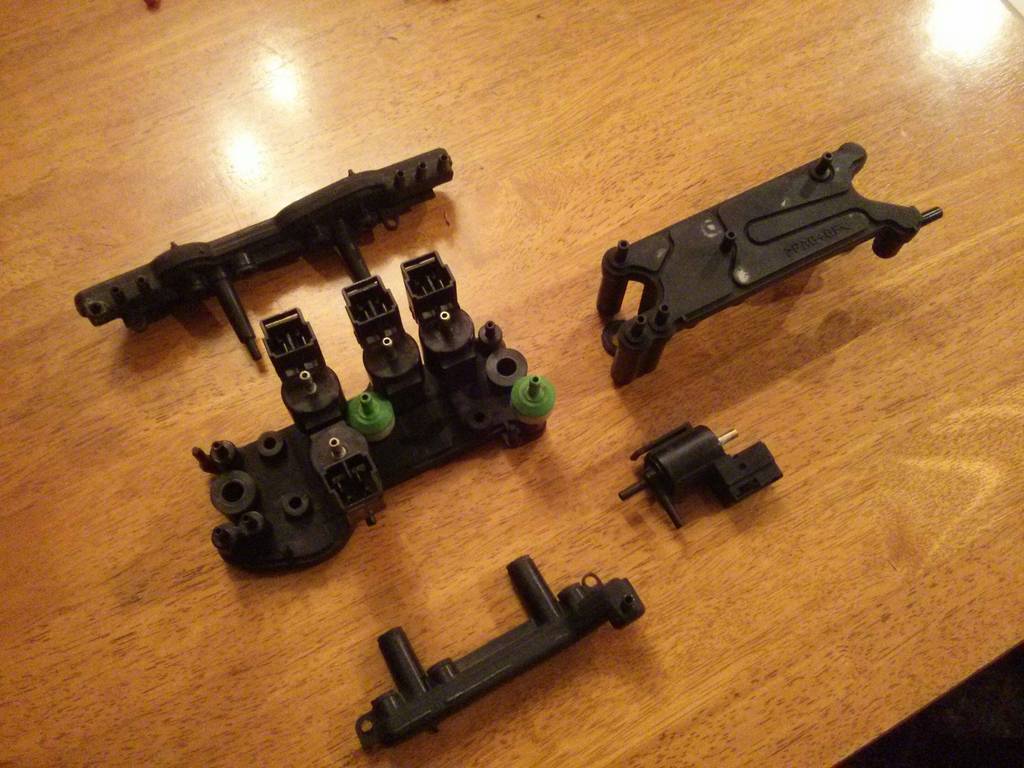
Which gave me this:

and this:
and this:

and all of these:


It took a bit of noodling to figure out what goes where, but in the end, the system is the same as the earlier models, just missing a couple of the emissions solenoids (presumably because the car never had a pre-cat).
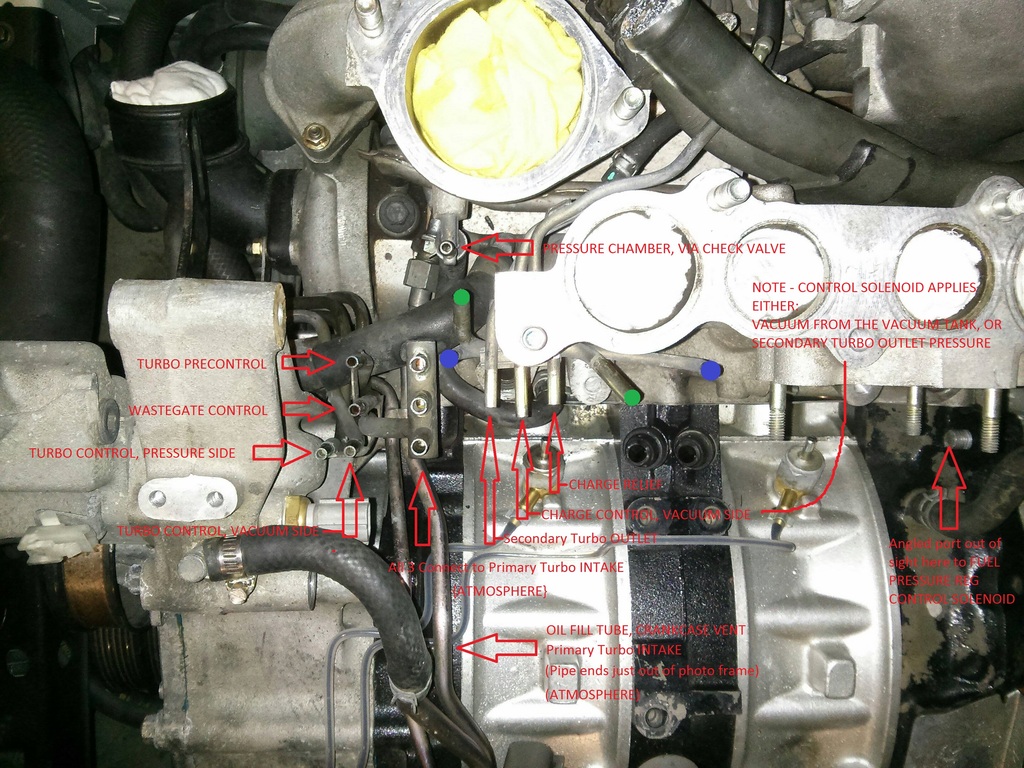
With that figured out, I went around the engine bay and tested all the actuators against the factory specs for pressure and vacuum, and found them all to be in working order, and holding pressure/vacuum like they should. That allowed me to make a map of what hoses needed to go where:
After many hours of internet searching, I came up pretty empty on series 7 specific info, regarding the turbo control and emissions systems, and how to plumb this unit up. I did find, however, looms for sale in Japan that allow a 16bit ECU to be plugged into an earlier 8bit car. This lead me to believe that while the appearance of the systems was changed, the actual operation must be pretty much the same. Armed with the series 6 USDM vacuum info, I pulled apart a scrap vacuum manifold I purchased locally and mapped it out:
Which gave me this:

and this:
and this:

and all of these:


It took a bit of noodling to figure out what goes where, but in the end, the system is the same as the earlier models, just missing a couple of the emissions solenoids (presumably because the car never had a pre-cat).
With that figured out, I went around the engine bay and tested all the actuators against the factory specs for pressure and vacuum, and found them all to be in working order, and holding pressure/vacuum like they should. That allowed me to make a map of what hoses needed to go where:
09-04-15, 11:50 AM
#3
Full Member
Thread Starter
With everything tested and sorted, the reassembly could begin! This actually took me quite a while, as I kept installing a part, only to discover I had to remove it again to get another part in place... It'll be faster next time... Not that I hope there will be a next time, but you never know...
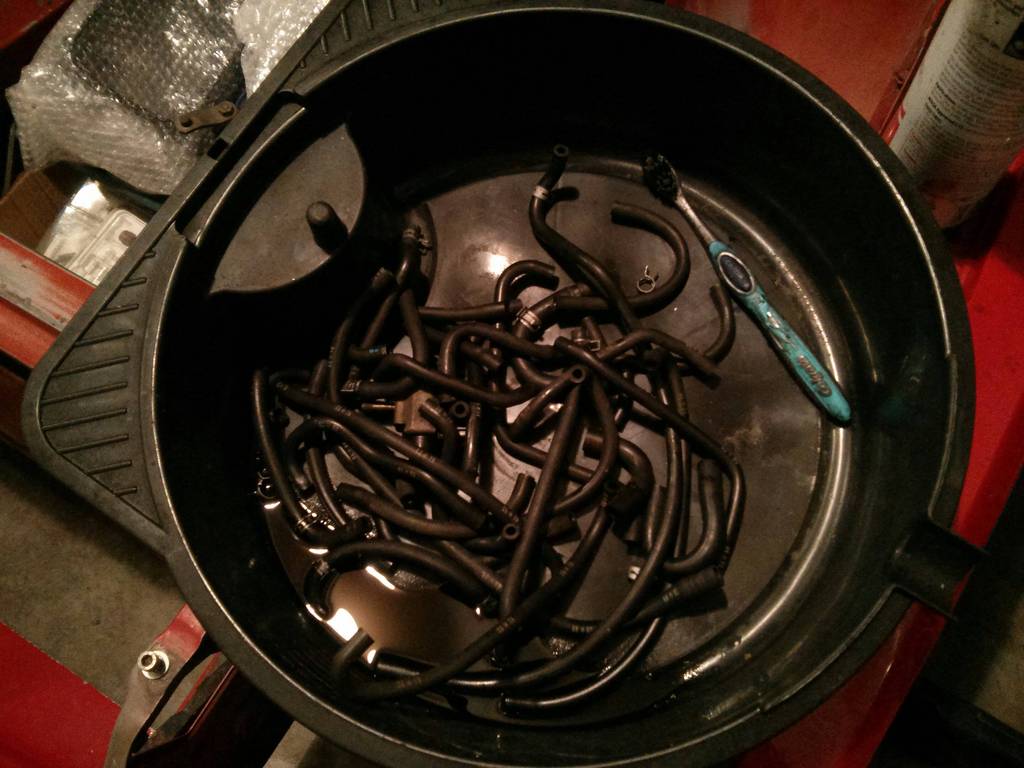
I replaced all the vacuum lines as I went, and cable tied them all so hopefully they'll last a long time:
Many of the original hoses were pretty stuffed, and there are just so damn many of them!
In the end though, it started looking more and more like a complete engine bay again:
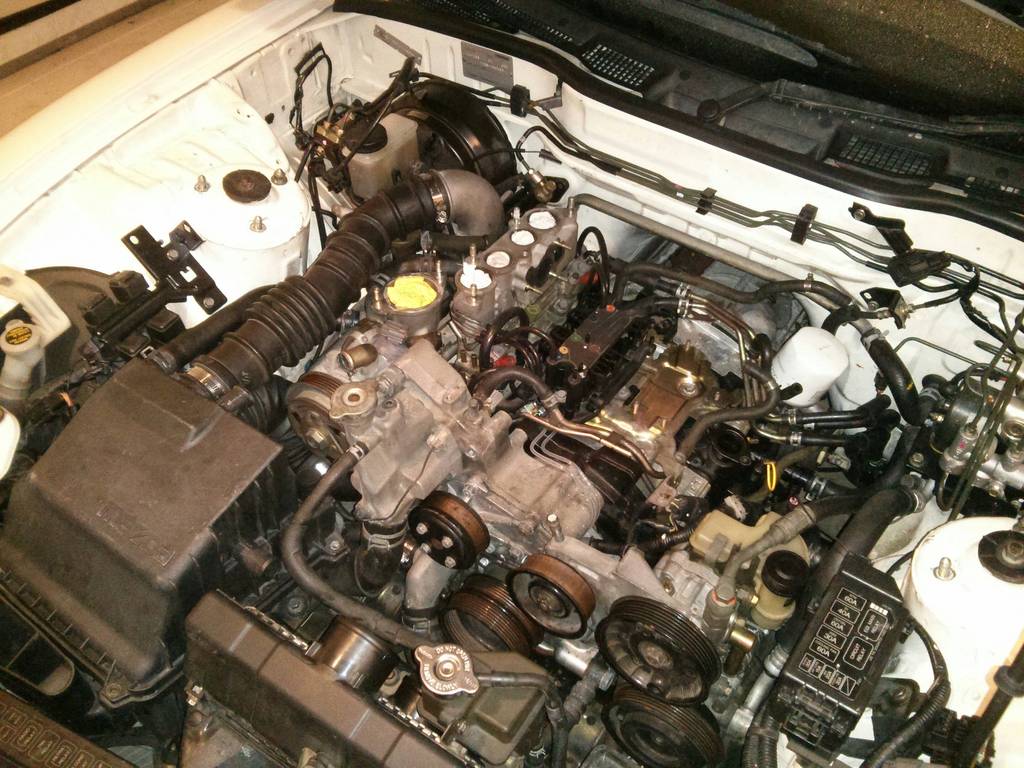
Until eventually:
That's not the first start, but it did start first time when it was back together, and after smoking for a while to burn off brakekleen and spilled oil, it was running great! I need to set the throttlebody up, as the idle is a little high, and I also forgot to plug the fuel vapour vent solenoid back in, but apart form those problems, its running great. I've done over 1000k's in it now, so the fresh motor is well and truely run-in, and its going strong. It pulls really well, and the twin turbo systems seems to work like it should. You can really feel the second turbo kick in!
Future plans:
Remove and refit door trims, as they rattle and are not fitted properly. Figure out what's going on in there with speakers, get a decent radio sorted.
Comprehensive interior and exterior detail. I'll probably pay to have this done, as I suck at doing it myself.
Replace the cat-back exhaust with a still high-flowing, but quieter and more stock looking item.
Remove the air pump, fit pineapple racing idler pulley, remove catalytic converter.
Replace downpipe with better flowing items, with bosses for an LSU4.9 sensor and EGT thermocouple.
Do some logging on the dyno of the twin turbo system, as I'd like to see if I can control it properly with an aftermarket ecu (not a power FC). I'm an electrical engineer, so I find this sort of thing pretty interesting ;-).
Rear suspension bushes and pillowballs need replacing I think, there is the odd knock and bang back there.
So plenty to keep me busy! I cant believe how nice it is to drive on a smooth road though, it has more than enough power (I got a pretty decent speeding ticket in it the second day I had it running!). It's a bit loose in the rear end, and will oversteer pretty easily... My wife discovered this the other day while driving it, much to our amusement.
I replaced all the vacuum lines as I went, and cable tied them all so hopefully they'll last a long time:
Many of the original hoses were pretty stuffed, and there are just so damn many of them!
In the end though, it started looking more and more like a complete engine bay again:
Until eventually:
That's not the first start, but it did start first time when it was back together, and after smoking for a while to burn off brakekleen and spilled oil, it was running great! I need to set the throttlebody up, as the idle is a little high, and I also forgot to plug the fuel vapour vent solenoid back in, but apart form those problems, its running great. I've done over 1000k's in it now, so the fresh motor is well and truely run-in, and its going strong. It pulls really well, and the twin turbo systems seems to work like it should. You can really feel the second turbo kick in!
Future plans:
Remove and refit door trims, as they rattle and are not fitted properly. Figure out what's going on in there with speakers, get a decent radio sorted.
Comprehensive interior and exterior detail. I'll probably pay to have this done, as I suck at doing it myself.
Replace the cat-back exhaust with a still high-flowing, but quieter and more stock looking item.
Remove the air pump, fit pineapple racing idler pulley, remove catalytic converter.
Replace downpipe with better flowing items, with bosses for an LSU4.9 sensor and EGT thermocouple.
Do some logging on the dyno of the twin turbo system, as I'd like to see if I can control it properly with an aftermarket ecu (not a power FC). I'm an electrical engineer, so I find this sort of thing pretty interesting ;-).
Rear suspension bushes and pillowballs need replacing I think, there is the odd knock and bang back there.
So plenty to keep me busy! I cant believe how nice it is to drive on a smooth road though, it has more than enough power (I got a pretty decent speeding ticket in it the second day I had it running!). It's a bit loose in the rear end, and will oversteer pretty easily... My wife discovered this the other day while driving it, much to our amusement.
09-19-15, 01:03 AM
#4
Full Member
Join Date: Mar 2013
Location: New Zealand
Posts: 59
Likes: 0
Received 0 Likes
on
0 Posts
Nice work ! very systematic and tidy. Good to see another series 7 coming back to life. I saw that one for sale on trade me......glad you sorted the issues out. I have done 2 vacuum hose jobs on the black box and your right, its tricky and you need to take your time. Couple of comments - 1. do you have a filler cap (no spring) or a pressure cap on the engine block coolant side? Just looks like a pressure one from the picture. 2. that old 90 rubber bend that comes off the 2nd turbo on the cross over pipe is troublesome. the rubber on mine was so hard it would not seal - I would replace that. Otherwise hope old Rangiora is good, am a Woodend lad myself! All the best. Rusty.