When you click on links to various merchants on this site and make a purchase, this can result in this site earning a commission. Affiliate programs and affiliations include, but are not limited to, the eBay Partner Network.
After nearly 9 months the single turbo kit from A-Spec tuning arrived! I started pulling the twins and all the twin related stuff out of the car this past Saturday and plan to have the single in and running by this coming weekend. Dear god, I had no idea how much was involved in the sequential twin operation. Every time I pull something off I find another cluster of things needing to go...what a headache. I'm looking forward to the simplicity of the single turbo now more than ever.
The hot side turbo housing was supposed to be ceramic coated. I'm working it out with the vendor now, but will be having it ceramic coated here prior to installation.
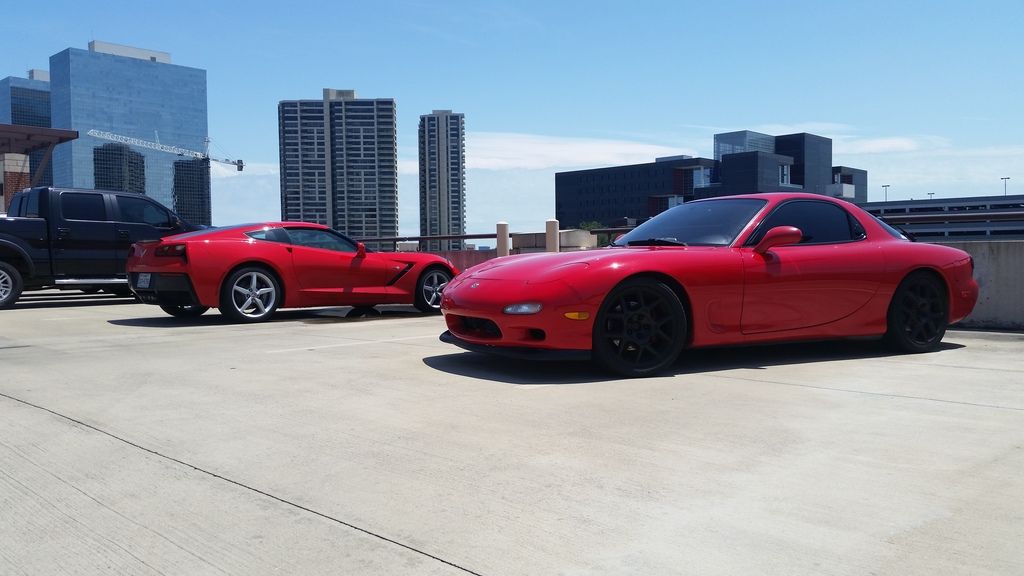
Here's a shot from the last ride of the twins...soon to be retired after a faithful 22 years of turbo service.
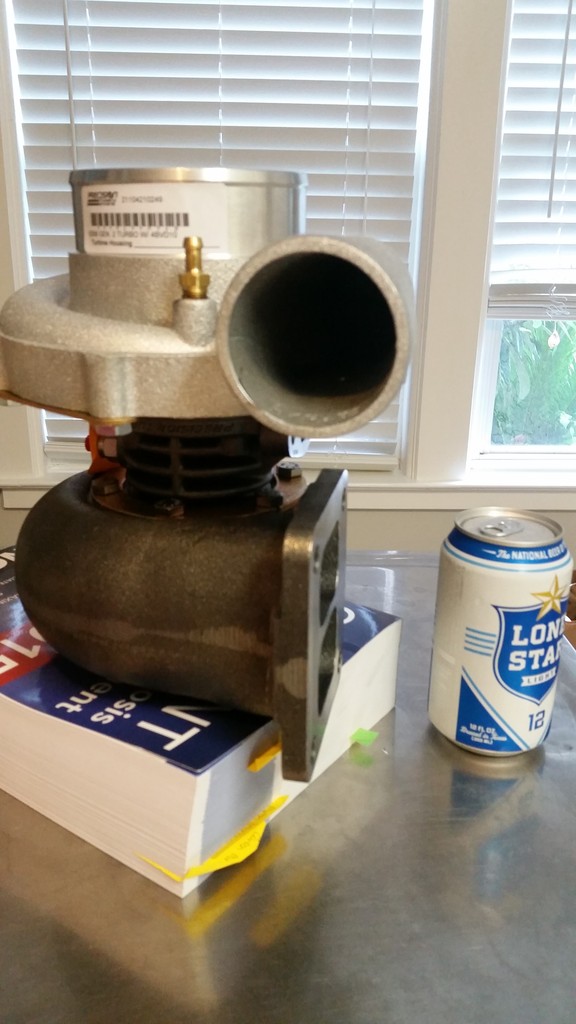
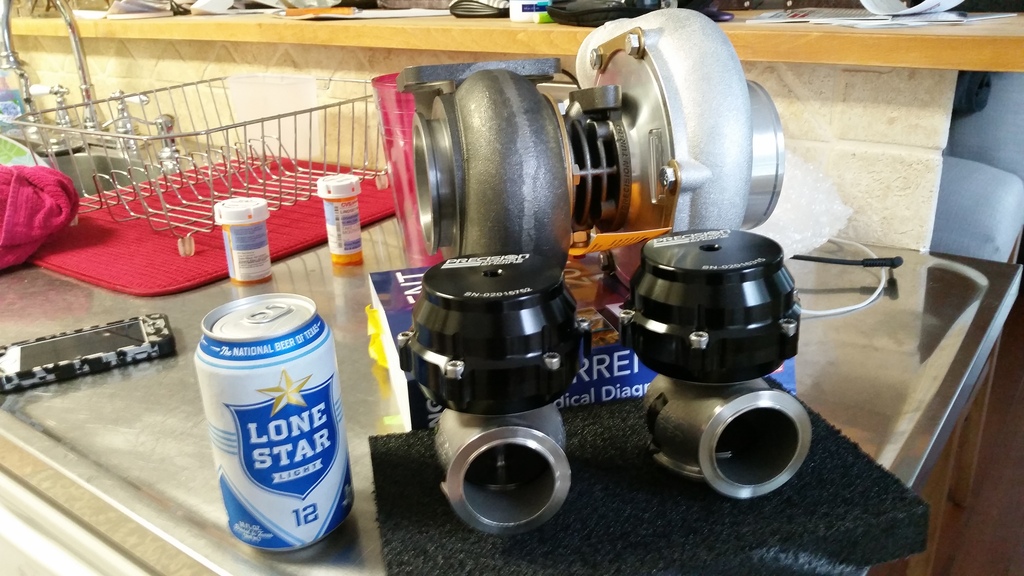
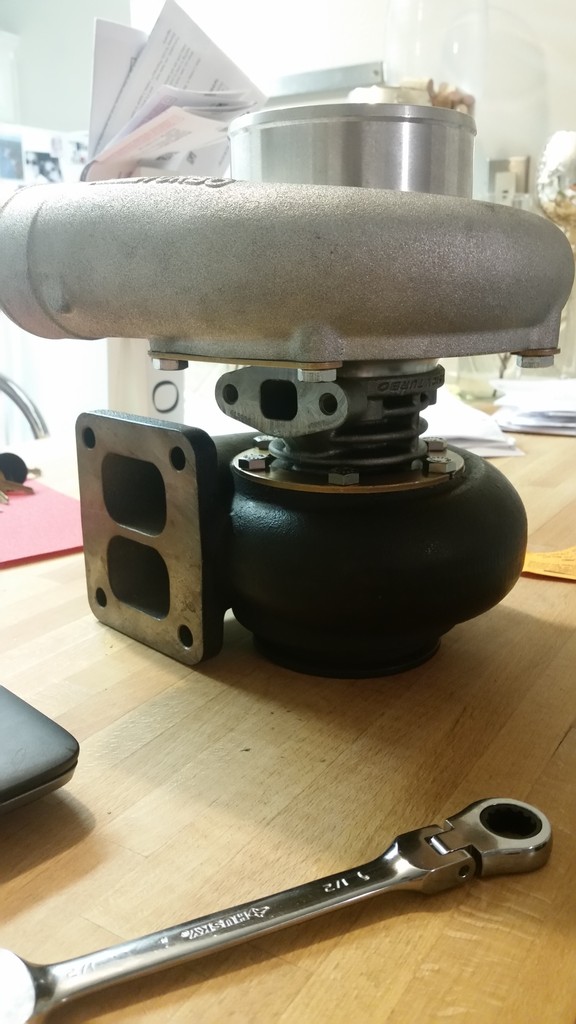
Precision 6266 Ball Bearing Turbo 1.0 Exhaust Housing T4 Divided Manifold. Lonestar for size reference...and pure awesome-ness
To be combined with twin precision 46mm wastegates
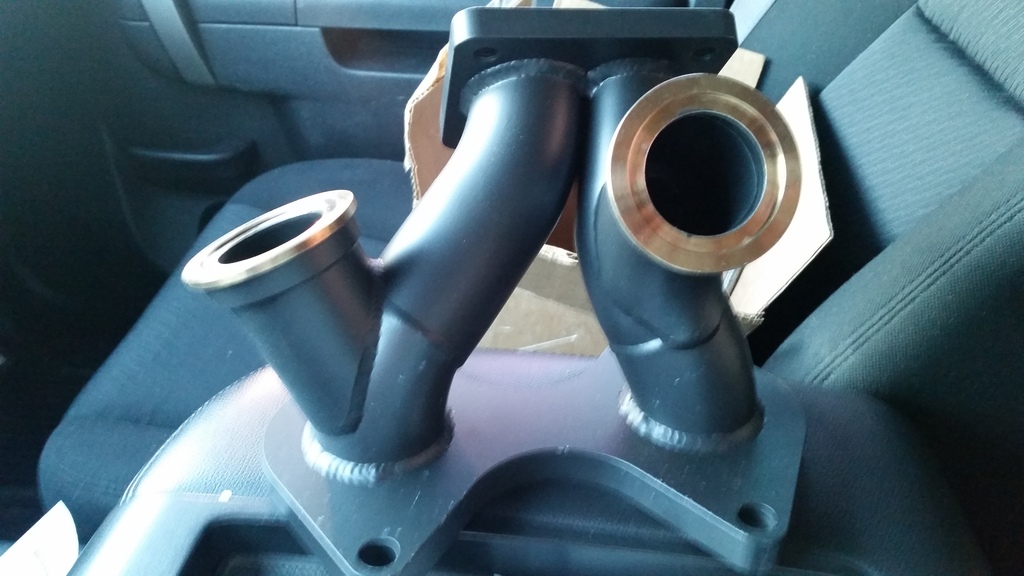
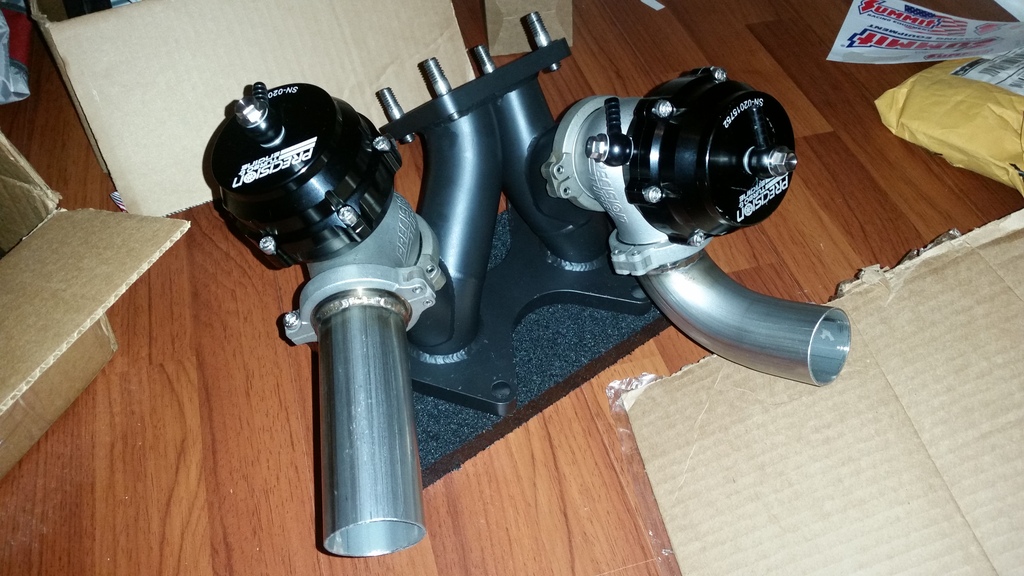
And the manifold
I've started the twin turbo removal and plan to have everything off by tonight. I'll be posting a twin turbo part-out thread here soon for anyone interested. The twin turbo system was working in perfect condition and all parts have less than 50K miles on them when removed. Hopefully the turn around will help me get my ignition and water injection sorted!
I couldn't take looking at the turbo sitting on my desk at home so after all of 1 day with it in my possession I broke down and started tearing off twin turbo stuff.
Everything came off relatively easily. Removing the studs holding the downpipe to the twin turbo manifold in such a tight space was the most difficult part. Other than that everything came off in the order it was supposed to and there were very few surprises.
Twins off!
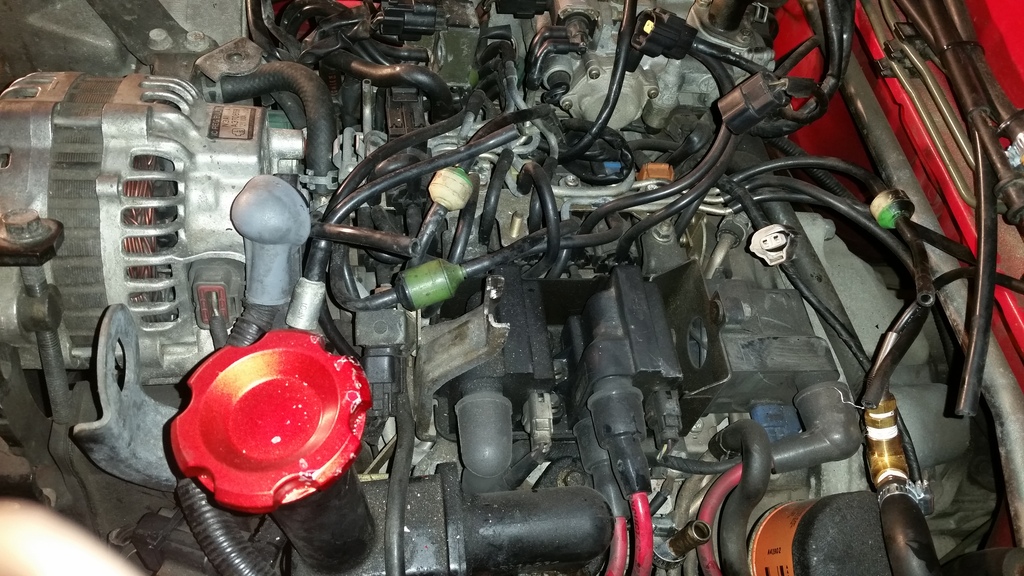
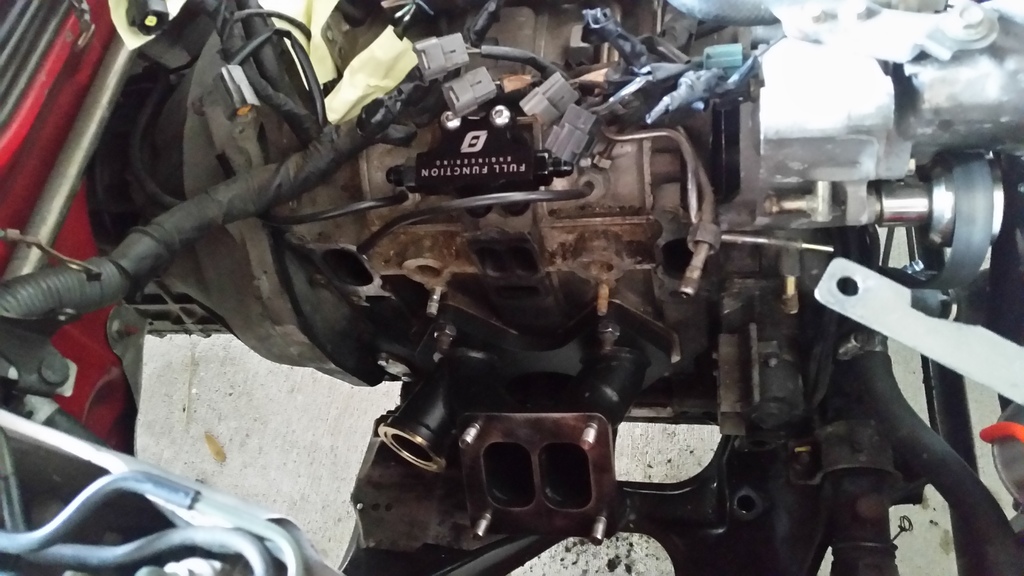
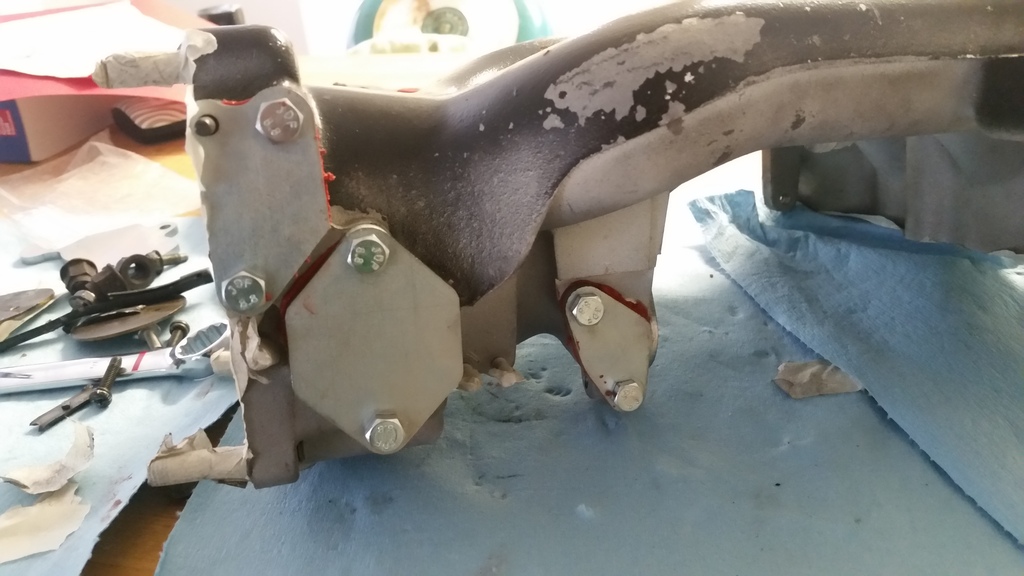
This was the first time I had removed the UIM since buying the car and I'm already glad I'm just removing this mess instead of troubleshooting it...
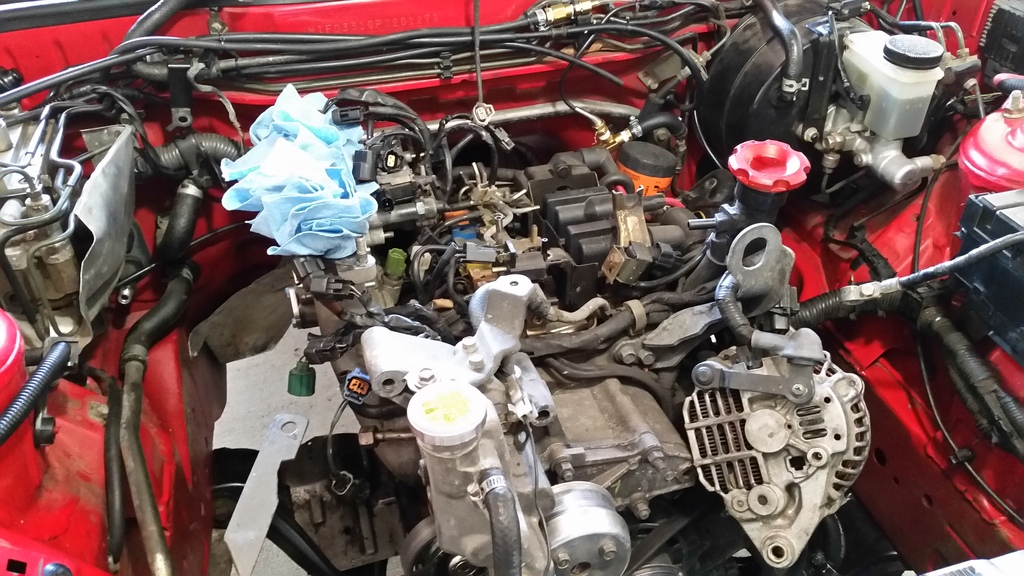
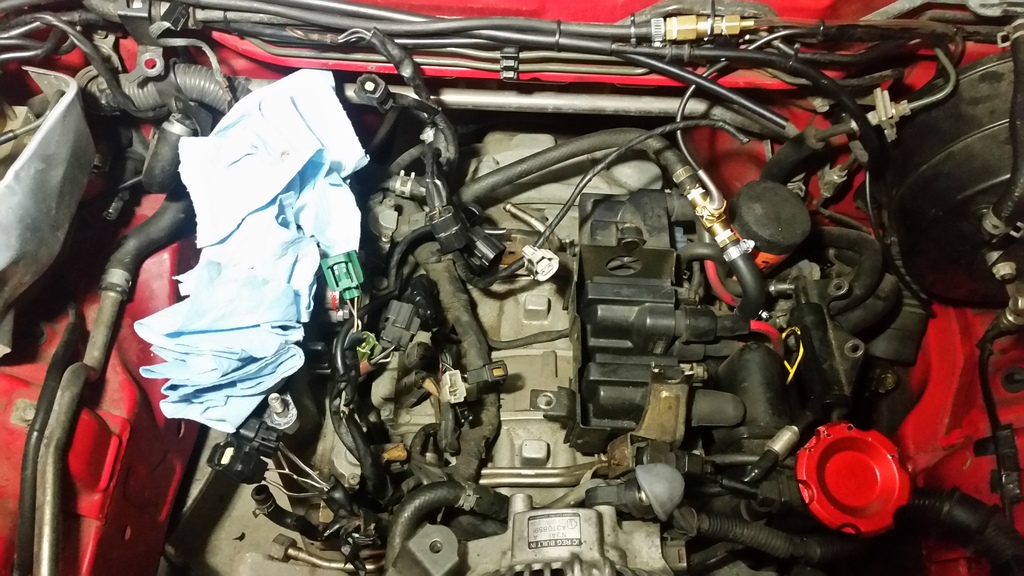
Prepped for solenoid/rats nest removal
Apparently there is a rotary motor buried under all that stuff. Ha this is the first I've seen of that guy.
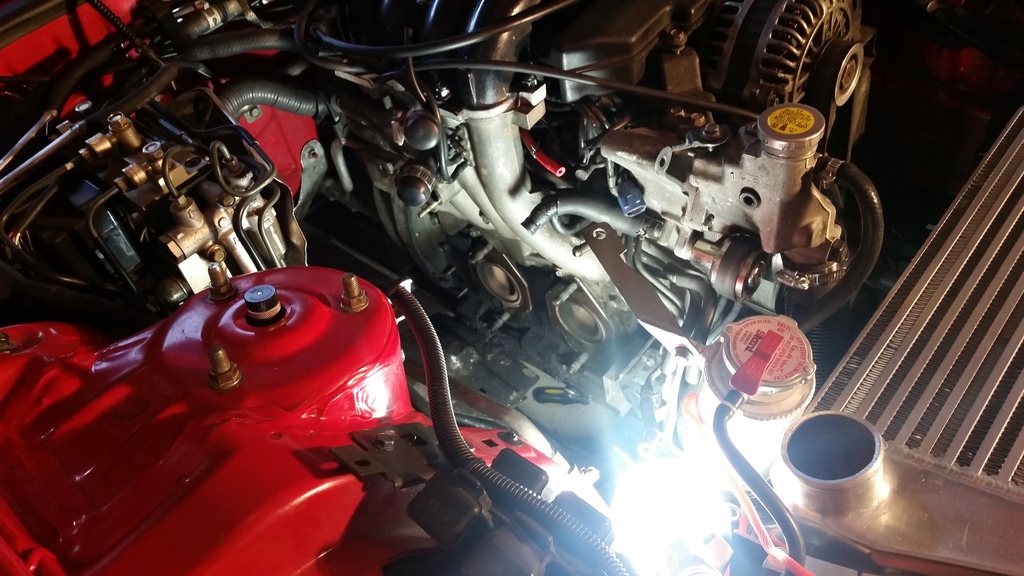
Turbo manifold and ID725/FFE primary rail installed
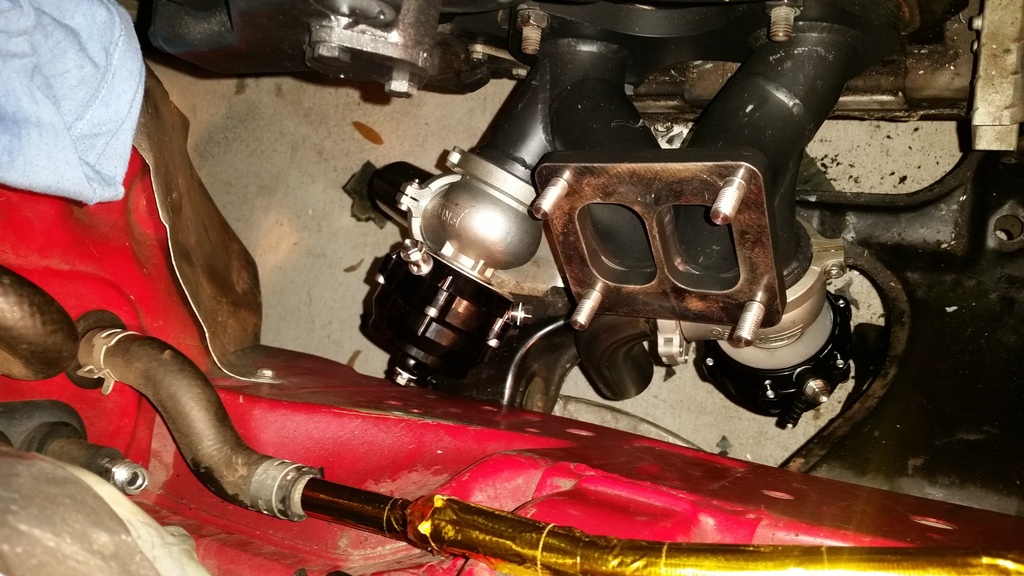
Wastegates/dump tubes installed
When removing the secondary injector diffusers I (not surprised) broke off one of them which fell into the LIM. When I removed the LIM to get it out I found that my LIM gasket had been reduced to what appeared to be a cardboard material. It was scraped off and then replaced with the OEM gasket I picked up from the local mazda dealer.
Ignore the heat reflective tape on the heater core line. I wrapped it out or boredom and plan on propery shielding it things get serious.
I also wanted to give a big THUMBS UP to Sean at A-SPEC Tuning for the turbo kit. The final product was well worth the wait and he's been A+ on answering my questions regarding the installation since I got started.
The kit was originally delivered without ceramic coating on the hot side turbo housing. Sean quickly sourced me another identical turbo housing that was coated from another shop near him and over-nighted it to me the next day. All in all I'm completely happy with the product. The lead time worked out well for me too as it allowed me to gather all of the other parts needed to correctly do the single turbo swap. Awesome guy.
Ceramic coated turbo housing installed
Dump tubes were quality stuff too. We had never talked about them or discussed it during the wait so I was happy to see them in a surprise box I got 2 days after the turbo.
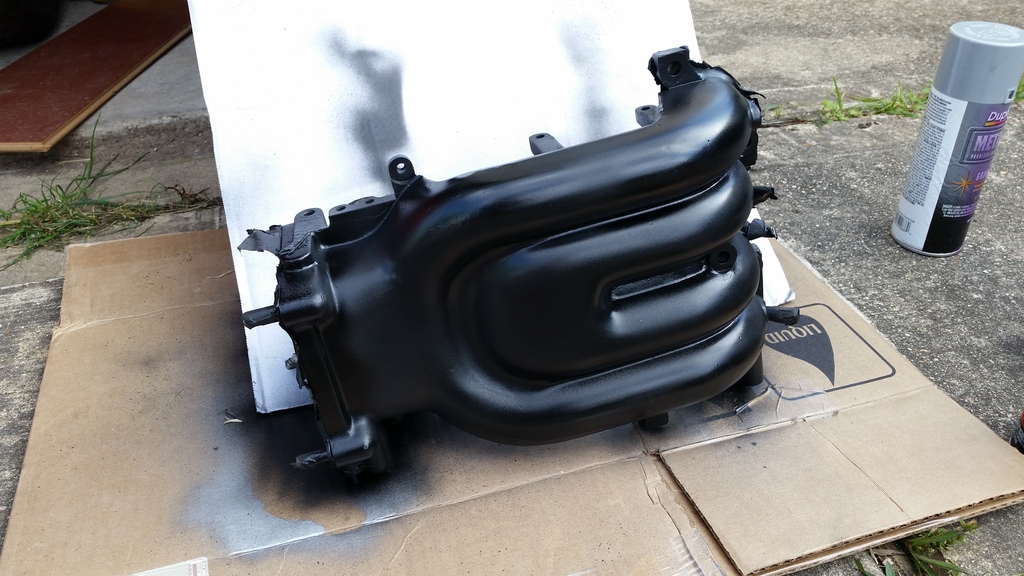
While the UIM and LIM were off I decided to touch up the black paint on them. The UIM had poorly been coated black and by the looks of the side and underside the previous owner had simply sprayed in WHILE IN THE CAR. Never ceases to amaze me.
Before:
All block off plates installed.
After sanding and paint with VFT high temperature gloss paint
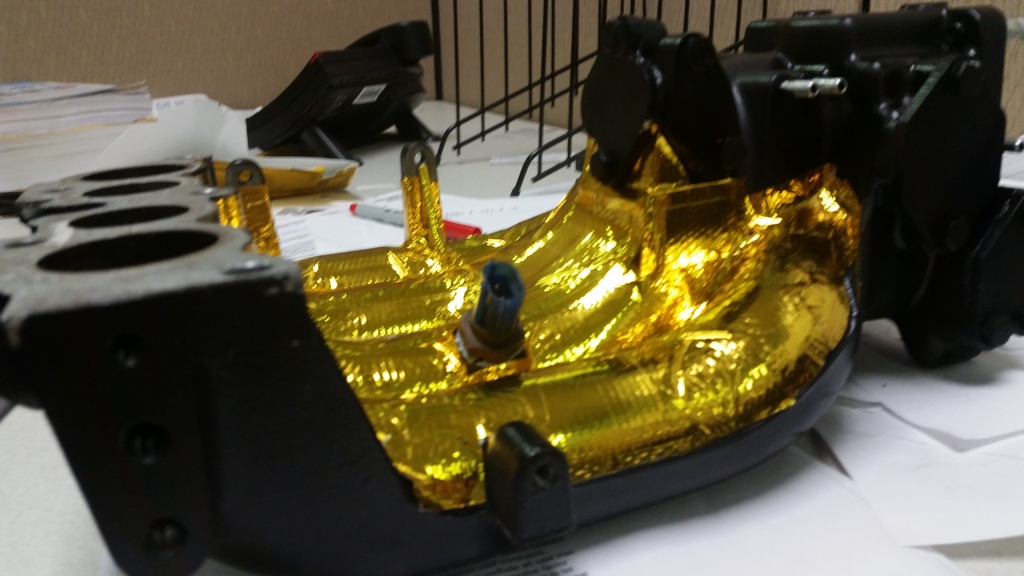
I then used my remaining DEI heat reflective tape to coat the bottom of the uim for additional heat protection. As expensive as that stuff is might as well use it all.
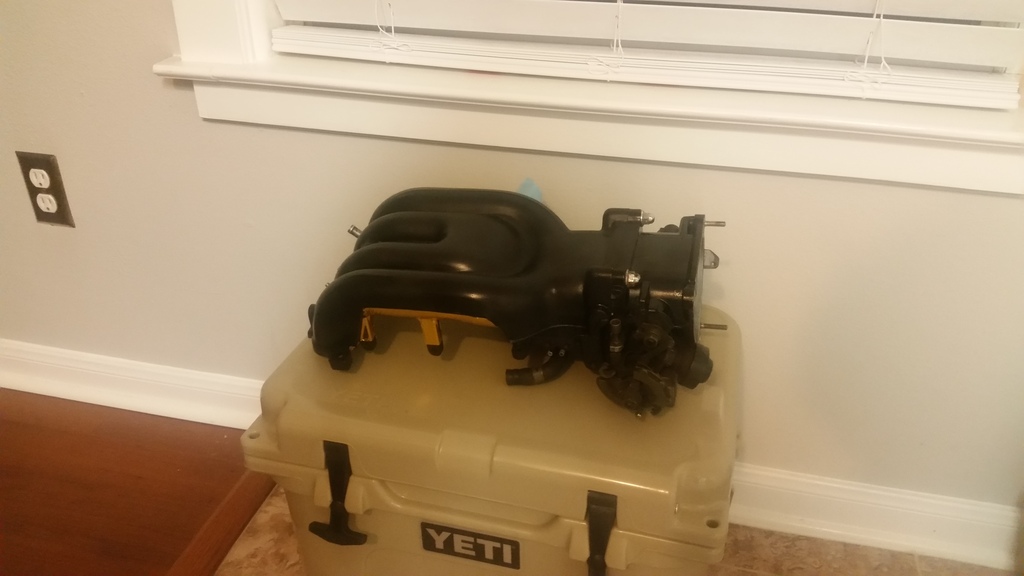
All dressed up and ready to rock.
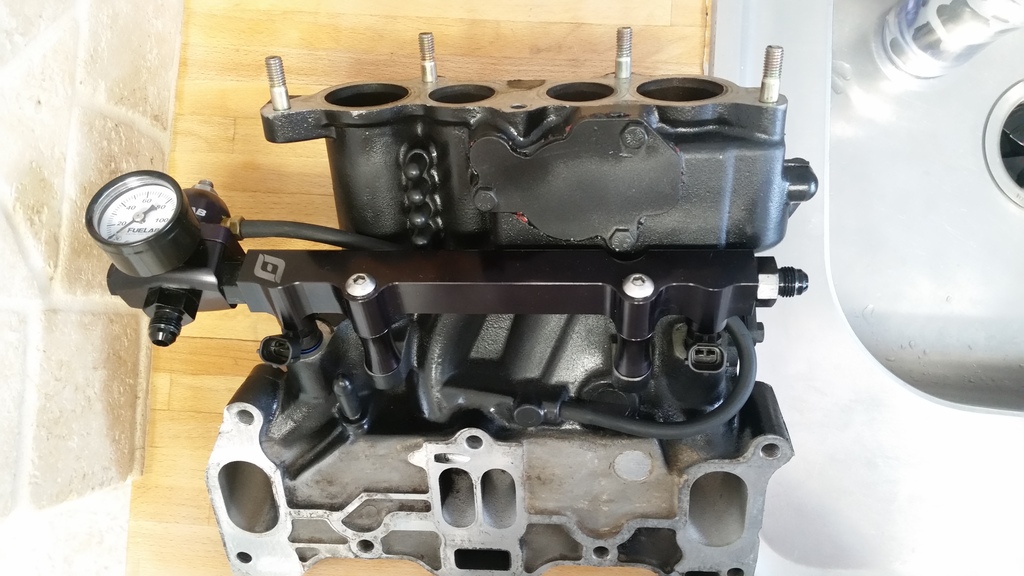
And lastly here is the LIM with the FFE secondary rail, Fuelab FPR, and ID2000's installed and ready to go in.
I'm super pumped to get this guy back on the road and start tuning. This entire experience has already been rewarding to me as I've learned EVERYTHING as I've gone. Given the amount of time I spend on here and the contacts I have who answer my stupid questions constantly, I am confident in what all I've done.
Next major steps from here are:
1. Install turbo oil feed & return lines
2. Cap off all unused vacuum ports
3. Route wastegate lines and setup mac valve (waiting on vacuum line to arrive)
4. Install fuel injector adapter clips for the primaries (courtesy of Socks as is half my random stuff I found I needed.)
5. Install hard line to AN adapters for fuel lines
6. Re-assemble all intake parts
If there is anything you see that is possibly out of line or of concern I am open to any and all input. Just let me know!
For now...I am planning to upgrade to the Triumph fast acting one before we are running and tuning again. I only recently realized the magnitude of the heat soaked reaction and how this causes the sensor to give a 'false' hot reading and causing a lean condition. Definitely on the short list.
In other news...the turbo is finally in the car! I know I move slow as mud compared to alot of the guys on here but work/commuting/non-rx7 required aspects of life have recently limited my garage time.
Since these were taken I have also installed the downpipe, run the new heater hose, blocked off the turbo coolant ports on the water pump housing, installed the MAC valve, installed and routed fuel lines to the hardlines, and re-routed my coolant line that used to go through the thermowax.
The next items up before firing are to plumb the wastegate lines and mac valve, re-pin the coolant temperature sensor plug that broke to the new one, clock the turbo compressor housing so the oil return line will clear the nut on the turbo that is currently in the way, and install the turbo oil feed line.
The kit came with one 14mm to -4AN adapter that was intended for use on the block to SS turbo oil feed line. I'm about to scrap this, buy a banjo bolt adapter and then an adapter for the line-turbo connection which I believe to be -4AN to 1/8" NPT.
Then...hopefully with any luck I should be ready for first single turbo fire.
I finally go everything back in and ready to go...I know I move slow as dirt.
Upon first turn of the key to the ignition ON position, I discovered a few fuel leaks that I have since fixed. The engine turned over and caught a couple times but did not really want to fire. I went on to find that my TPS was not sending a signal to the ECU and the little PC680 battery was struggling. Apparently the standard trickle or 12v battery charger will not work for this battery and there is a specific type needed in order to properly charge the battery and not kill it. Surprise.
SO...I pulled off the UIM, checked the TPS voltages which ended up being in spec, and fiddled with the mechanism and found that the 2 screws that hold the sensor to the spring that rotates were stripped and not holding enough pressure to cause the TPS sensor to move with the throttle. Picking up new bolts for this today. This is definitely one of those 'learn something new everyday' type of things that never crossed my mind before.
When the fuel pump primes the FPR jumps up to roughly 50 PSI and there are no longer any leaks across the system, the TPS issue should be fixed, and the adaptronic injector test show that all my injectors are functioning correctly. I went ahead and pulled the plugs and gave them an ole fashion brass brush scrubbin' for good measure.
For the sake of getting the car started, tuning basic idle, troubleshooting any fuel/oil/coolant leaks, and being able to back it out and wash it for the first time in 3 months I will simply be taking my truck battery and some 4 gauge extended battery leads and starting with my battery on the floor until I can get a charger suitable for the PC680. Will update tomorrow with results here.
I also wanted to mention that as I draw closer and closer to having a running single turbo car I keep thinking more and more about when the right time to replace/rebuild the engine will come. While I have a hard time bringing myself to spend the money fixing what isn't broken, it may be way more expensive to rebuild if I grenade this guy and then have to source new housings or rotors. I recently talked to a local guy here with a BDC built half bridge that makes 500+ on ethanol...and has been doing so for 3+ years since the motor was built. I ended up talking to Brian last week and got a quote for rebuild...tempting...ha this would be the 3rd time that after a long stint under the knife I manage to get my car running right only to rip it apart. I'm going to try and focus on the task at hand...but... the idea of half bridge rebuild is definitely floating around
Please ignore my lop sided coupler...was in a hurry to step back and look at it. This has only come back on/off 4 times since then due to UIM removal so no big
Got a huge update here. I've been making alot of progress and am extremely happy with how the car is coming along now. For the first time in a long time I can honestly say I am really happy with the car. Since the single swap everything is SO much easier to diagnose and I've had no issues to speak of. Things are simple. It idles smooth, cruises lean, spools hard, and pulls like a train when the turbo goes live...all still on super low boost. Completely worth the time and money it took to get here.
Since the last update with the pics of the completed single turbo install I have fixed all the electrical bugs, spent a few days tuning idle and cruise conditions, and then tuned for spring pressure at 9 lbs. I then wired in the MAC solenoid and set it up to control the boost through the adaptronic and tuned the 10 and 12 PSI boost cells. Due to a fuel pressure drop in the high rpms I rewired my fuel pump per Chuck's (cewrx7r1) guide which seemed to fix the problem.
Since getting back running I've made several meets and been back in the scene again and I've had the opportunity to spend some time talking with Chuck about his setup and tuning in general. Extremely nice knowledgeable guy.
I went on to sell my Bonez high flow catalytic converter a bought the pettit racing non-resonated midpipe. This combined with my 3" downpipe and apexi N1 dual is pretty damn loud...but its growing on me. I'm not sure if I'll go resonated in the future or not. I was pretty set on immediately buying a resonator for it after drive 1, but on the next ride with the girlfriend she actually said she liked it better as loud as it was soooooo I'm gonna let it ride for the time being. Figured she'd HATE it.
This swap cased me to spool ALOT quicker and required I drop my WG duty cycle a significant amount to stay at the 12 PSI target. I also noticed that my wastegates are now very sensitive in that 1-2% duty cycle change can cause a significant boost increase. They hold that boost value solid and don't waver at all. I'm looking forward to fine tuning this and then running closed loop boost control here soon. I'm actually working on a step by step adaptronic single turbo tuning document to eventually become a thread on here. I'm by no means an expert, but just looking to share my success with this ECU.
Anyways...on to the really good stuff. I picked up another old style exedy/mazdaspeed twin disc clutch. The pressure surfaces are in great condition and the discs measure 3.3+ on all pads so they have roughly 65-70% life. Given that this is a weekend warrior for the time being this seemed like the perfect deal for the money. This is a beefy b*astard for sure.
Started on the twin disc clutch swap in yesterday. HUGE thanks to my friend Jose for the help with the swap. While it may be possible to do alone, this really is a two man job.
Mad-dippin selfie.
Drive shaft coming out
Transmission dropped
OEM clutch coming off. Had the hardest time getting the collar to release, but with the help of my neighbors massive telephone pole screwdriver it slid right in
New lightweight flywheel and counterweight installed.
...transmission on the floor...
here you see my rx7, in its natural habitat.
Its on most commonly in this form due to me being addicted to modding. If I'm not moving forward or learning something new constantly I cant stand it. Which is why I really really got into tuning, I can always be updating and improving and it only cost me gasoline...so long as I don't mess up!
We are picking it back up today with the new clutch install and then putting back in the transmission and everything else that came out along the way. Once the clutch is in this weekend I'm going to be focusing on tuning up to 15 PSI. I'm set to have 2 full hours of dyno time in early September to fine tune my boost cells at 15 PSI.
The next big mod will either be the addition of a water/meth system that I'd be using the adaptronic to control spray OR I'll be adding an additional fuel pump and upgrading my primaries to ID1000's and going e85. I've read all I can and am still stuck in the middle here. I'm leaning towards e85 at the moment, but still haven't made a decision.
Below is a link to an idle video with the new midpipe and there are some 10-12 PSI low boost pulls on there on my channel too.
After a full weekend's work she's finally in! The flywheel and clutch went in easy enough but we had a b*tch of a time getting the transmission back in. The transmission spline would seat on the clutch hub spline and slide into the pilot bearing hole just fine but where the bottom would line up fine the top kept having a gap. Third time was the charm and it slid all the way on evenly and seated in. Trick here was not using the jack to hold the trans and instead getting directly under it with two people and physically getting it set in place gently and at the right angle.
While I'm sure there is a preferred method on here, we got it done.
All that is left now is to bolt back in the ppf, re-attached the starter, put back on the downpipe and midpipe, install the new clutch line, bleed the lines, fill full of fluids, change the fuel filter while it is up, and then drop it.
Anyways...here is the money shot.
Looking forward to being on the road again next week.
I hate to be "that guy," but every experience I've had (or secondhand story I've heard) about multi-disc clutches has been *terrible* as far as engagement/takeoff smoothness. the pedal pressure is quite light for the torque capacity (and good torque capacity) but the engagement is a killer for me.
I hate to be "that guy," but every experience I've had (or secondhand story I've heard) about multi-disc clutches has been *terrible* as far as engagement/takeoff smoothness. the pedal pressure is quite light for the torque capacity (and good torque capacity) but the engagement is a killer for me.
i'm curious as to your feedback.
I too have heard of engagement issues, but only with higher hp applications...
I hate to be "that guy," but every experience I've had (or secondhand story I've heard) about multi-disc clutches has been *terrible* as far as engagement/takeoff smoothness. the pedal pressure is quite light for the torque capacity (and good torque capacity) but the engagement is a killer for me.
i'm curious as to your feedback.
I figure it will take some getting used to but in the end make me a better driver. There seems to be people on both sides of the twin disc engagement fence some saying they hated it with others saying no big deal. Worst comes to worst I hate it and try something else.
I'm currently troubleshooting the clutch issue. We finished the install last night and got it buttoned up and back on the ground. When I first started the car with *NO* clutch adjustment the clutch was remaining fully engaged with the pedal 100% depressed. The line was backed out 50% or so from where it was which seemed to help the pedal pressure and allowed me to slide the transmission into both 1st and reverse...at which point it made this nasty loud grinding sound and it seemed it still wasn't fully disengaging with the clutch depressed.
The clutch line was then re-adjusted as far out as it would go which then allowed me to shift into 1st and reverse with the car idling and the clutch pedal fully depressed, however it makes the same grinding noise when I begin to let the pedal off the floor even a slight amount.
Everything you can see through the inspection plate appears to be functioning properly and I can't think of anything we missed here. There seems to be a ton of information online with people having this same issue but I can't find a verdict anywhere. I'm going back and fourth with exedy now about what it may be.
Soooooooo....I got it figured out! I lifted up the car this past Saturday and dropped the tranny for the second weekend in a row, this time solo. Upon removing the clutch and inspection of the flywheel it was obvious where the racket was coming from. The bolts that were provided with the counterweight I purchased a while back have this massive head that sticks out roughly 16mm from where the underhead of the bolt contacts the flywheel mounting surface. This was getting into the metal pins on the disc hub during engagement as the hub moved closer to the flywheel. It chewed up the top of the bolt heads and took some material off of the clutch disc pins, however I don't think it has rendered the disc ruined.
Here you can see the bolts with the large heads sticking out from the flywheel mounting surface and you can see where the contact was made.
And here is the back of the clutch disc hub. The metal through-pins appear to have had some material removed, however do not appear to be affected from a functionality standpoint. If you think otherwise...please advise.
I ordered a set of ARP flywheel bolts in M10X1.25 (APR P/N 203-2802) that have a under-head thread length of 26.6 mm that I will be picking up today. These have a head length of less than 10 mm which I'm hoping will be enough to clear the pins and engage the clutch without contact. Once they are installed, I'll be testing this clearance to ensure there is no contact prior to re-installing the clutch and tranny.
While this was an avoidable mistake this was my first transmission drop and clutch swap, so with most everything on my car it has been a live and learn experience. On a positive note I found through some more research that the *new* disc thickness on these older style clutches is 3.6 mm, meaning that mine has more life in it than I originally assumed given that the newer ones have an *new*thickness of 4.0 mm. As there is very very little information available anywhere on these older style clutches I'll be doing a write up here soon that includes all my findings including oem disc thickness, necessary flywheel bolt clearance specs, exploded view diagrams, part numbers, and driving feedback.
Will update once I verify the new ARP bolts clear the clutch disc pins and get everything back in. I can't wait to be getting the power to the ground and turn it up some! Dyno time is in the near future...
I can't tell if the last photo with the clutch on you're car has the step on it or not. I have heard of others having the issue I mentioned, but not with this particular clutch
UPDATE. Twin Disc Clutch Finally In - Issue Solved
Hey guys!
After 3 long weeks with the car up on jack stands, 3 weekends of HARD work, and two transmission drops/ transmission re-installs the twin disc is finally installed and functioning right. I learned ALOT during this process and am extremely happy with the final results. This thing grabs like an animal and doesn't let up. I find that I really really really like the heavier clutch pedal feel and picky engagement, it is a constant reminder that I'm driving a racecar and that what happens after engagement is no joke. With a little practice I shouldn't have any issues driving this thing in any situation. Anytime I spool more than 10 PSI in 1st or 2nd the tires immediately light up and 3rd is only slightly better. I get some slight disc chatter on idle, but its not enough to be annoying and in my opinion hearing that signifies a multi-disc clutch is in there...which is...simply badass in my opinion.
Huge thanks to my friend Jose Gloria for multiple weekends work of hard labor help and lending the tools and tools and experience needed to get this done!
I ended up having to order the flywheel bolts online and then wait a week for their delivery. The bolts that ended up working were M10X1.25X20mm grate 10.9 bolts that I got from CarID.com. The 20mm bolts stuck out of the back of the counterweight and only allowed for 1-2mm's of clearance to the rear main seal so I filed them down so that I now have 4mm of clearance. If someone else was looking to do this I'd recommend buying bolts with 16mm underhead thread length and avoid the filing.
While checking the bolt clearances I also found that my rear main seal was rotating when the flywheel was turned, which indicates that it had failed and that it was most likely the source of my oil leak. I picked up a new rear main seal from the local Mazda dealership and replaced it during the final install. Installing the new seal was simple. All you really do is remove the old one by pulling it out then use a hammer and socket head to gently tap the new one into place. I also re-torqued the engine bolts back to spec while I was in there given they likely haven't been hit in 22+ years now.
New bolts with lower profile head vs. bolts that were provided with the counterweight and contacting the clutch disc hub.
New counterweight-flywheel bolts with lower profile head installed.
Old leaky rear main seal.
New rear main seal installed.
Flywheel bolts sticking through counterweight after being filed down. I seriously suggest finding 16mm bolts if at all possible. Using a hand file to remove material from a grade 10.9 bolt takes some serious elbow grease.
Transmission input spline all lubed up and ready for install.
Tranny install in process.
Tranny being raised up for install.
ANNNNNDDDD She's finally back on the road and running with the new clutch!
Now that I can put the power to the ground (or at least to the tires) its FINALLY time to turn up the boost again. Right now I'm still on 13 PSI but plan to up it to 15 and have the tune set before this weekend.
AND...THE BIG NEWS...
I pulled the trigger on the E85-FlexFuel conversion. I'll be getting a Walrbo 450LPH E85 fuel pump, the GM flex fuel sensor, and all required fittings needed to plumb my new system to also include the weldon fuel filter that came with the FFE fuel kit. The main reason I decided to go this route was my realization that by utilizing the flex fuel sensor I can simply hook it up to the Adaptronic ECU and put the ECU into FlexFuel mode where it will read the ethanol content from the sensor and make the necessary adjustments off of my existed E10 (93 octane) fuel map. I may need to make some slight adjustments but per several professional adaptronic rotary specific tuners, the ECU is nearly dead on and doesn't require a substantial amount of re-tuning.
Soooooooooo hello E85 and more boost. Good things to come. I'll provide and update when the fuel system conversion begins. I'll be doing a write up on this rare older clutch with all of the information I have found as well as my driving impression after I get a couple weeks of ride time.
I've been rolling on the twin disc now for a couple weeks and can say that I do really like it. The engagement isn't bad or rough, but it is picky. This clutch setup isn't at all suited to someone else jumping in your car and going for a spin (which for me is REALLY unlikely to happen anyways). After a week of driving I managed to really smooth out the low rpm takeoffs and feel like after a few more weeks it won't even cross my mind when driving. I can barely barely hear some clutch chatter at idle, but it isn't something you'd notice unless trying to.
Make no mistake, this thing engages like an animal under throttle. I really do like the heavier clutch pedal feel and aggressive "grab" of the clutch when in throttle and am certain that my oem clutch had been slipping under load as the car is way faster now. All in all, I'm extremely happy with the $350 I had in it and will likely pick up another to have as a spare if I see one floating around.
I've began the flex fuel conversion and hope to be making the first corn fuel run this weekend!
I installed the new fuel pump:
Plumbed the FlexFuel sensor into the the fuel return line. I may remove the hose clamps as several friends have given me a hard time about them not being necessary on the push-lock fittings and it looking too gangster, however I may not.
And lastly I'm debating putting the E85 Flexfuel badge that fell off my truck on the back of the car. It would be kinda funny when people ask about gas mileage and emissions to point to it and mention it a flexfuel fed eco-vehicle.
I'm picking up the wiring pigtail for the flex fuel sensor on the way home today and plan to get everything wired tonight! I'm also swapping my 9lb wastegate springs for the 15lbs ones and wiring my mac valve to the fog light switch so that I can swap between spring pressure at 15 PSI and whatever higher boost level I decide to go to. I'm thinking I'll run 15 PSI on the street and then depending how the logs read on the dyno at 15 tune up a few PSI for an occasional use higher setting.
I forgot to mention that I'm going to take on the jumpy tachometer problem here soon. Sometimes it is completely dead and sometimes it works perfectly, however the majority of the time it erratically jumps everywhere! From all I've read on here all signs point towards the capacitors in the gauge cluster having gone bad and requiring replacement.
I've put this off as long as possible due to how much I hate circuit board work, but it really is time to deal with it. Driving a single turbo boosted rotor-mobile with no tachometer is about as Mickey Mouse retarded as it gets.
Here is a video of some erratic tach dancing I had last week. If you think there is anything other than shot capacitors causing this please advise ASAP!
I finally got the corn fuel flowing after a week of down time. Installing the new fuel pump was a breeze and wiring up the flex fuel sensor proved to be quite simple. I'm overly impressed with the Adaptronic ECU's ability to read the ethanol content if the fuel and then make the required changes from my existing 93 octane fuel map.
I'm in the process now of reviewing logs and leaning out the mixture in the 15 PSI cells. I'll be researching what leading timing I need to run with the E85 and updating my map soon. I am currently running a conservative timing map based on Chuck Westbrook's stock port GT35R tune for no water/meth injection which I believe is overly conservative given my new fuel.
With any luck dyno numbers and time slips will be following soon.
Here is a quick video of me playing with the 2 step settings in the driveway. I'm sure my neighbors love it.
Wooohooo! Finally update time! It has been a crazy few months but there has been some progress with the car.
Personal update: got laid off from NOV due to the oil industry taking a ****, but it ended up being a blessing in disguise. I landed another job, in a better position, in a better location, doing cooler stuff, making more money, with a better commute. Has been a crazy month since I got laid off and the car has fallen on the back burner but now that things are settling, for the better I might add, I'm ready to get back to it!
As of now the car is running on 15 PSI and the tune has been leaned out to 11.8 AFR. I project I've cracked the 400 hp mark but plan to hit the dyno and see here soon! The difference between the fat 11.0-11.3 AFR I was running and the 11.8 I'm at now was pretty substantial. I consistently blow the rear end out around peak torque in 3rd on the freeway at 70+ mph and 1st and 2nd are pretty much useless with my current 245 width tires...but loads of fun. I think now that it makes solid reliable power I'm going to focus on some of the smaller things like heat shielding, wiring simplicity, deleting random stuff, and as always working on the tune.
Thanks to Christmas presents in the form of summit racing gift cards I was able to finally pick up the AEM smart coils. They have been mounted and wired for wasted spark using a ludwig harness I picked up on here a while back. I'm not sure if I'll be modifying the harness for direct fire or if I'll sell it and buy a direct fire harness.
I also picked up the fittings necessary to plumb in the 10 micron weldon fuel filter, some stainless steel wastegate lines, a feed in tank fuel collector, and an efini wheel.
As I'm going to be moving (to a house with a MUCH larger garage) in the next couple of weeks I'm going to be dropping the car off to be stored at a friends place next week. I'm going to wait until I move into the new place to install the fuel collector, wastegate lines, and efini wheel so that move out date doesn't come and my car be in pieces. My goal is to hit the dyno and tune up another 2 PSI to 17 PSI before import faceoff at royal purple raceway on 2/29/16 and I should have some dyno results and time slips to post soon!


 04-28-15, 02:28 PM