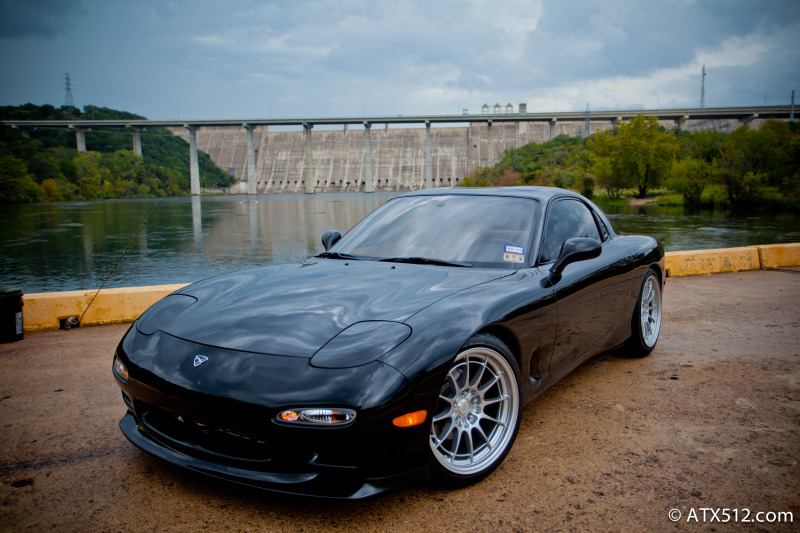
Shmacklepap's backyard fire ressurection + single turbo build
 05-04-13, 06:18 PM
#1
Shmacklepap's backyard fire ressurection + single turbo build
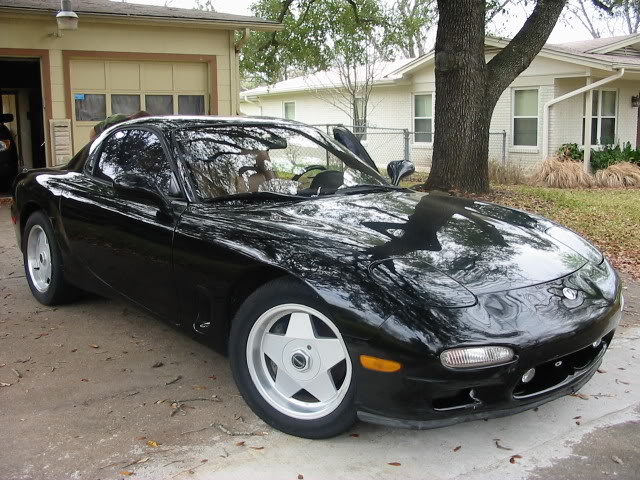
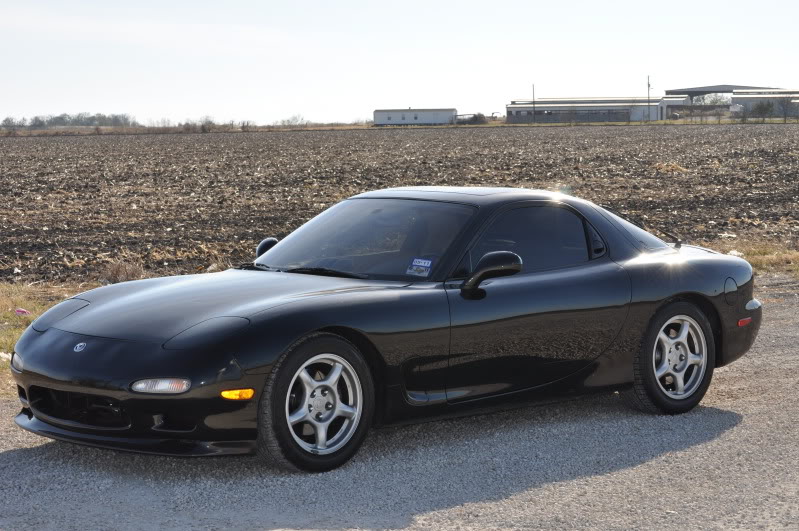
I figured it’s finally time to make a build thread. I probably should have started it years ago when I had first joined the forum and bought my FD back in early 2006.
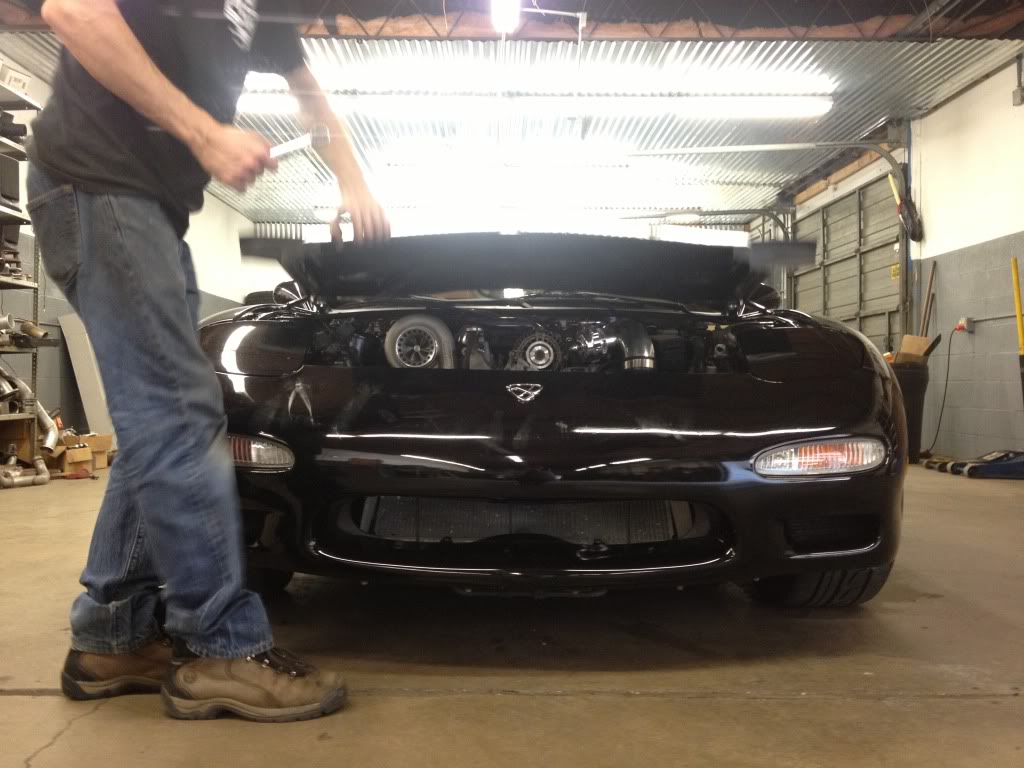
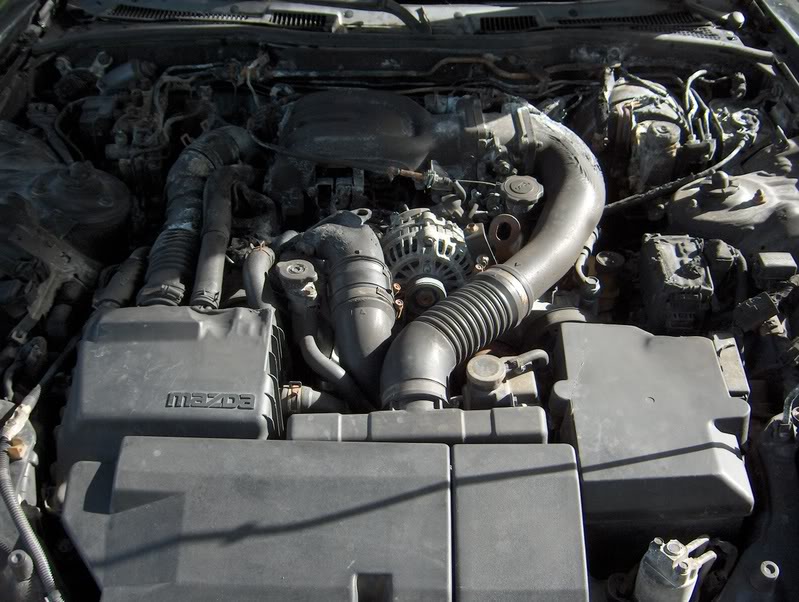
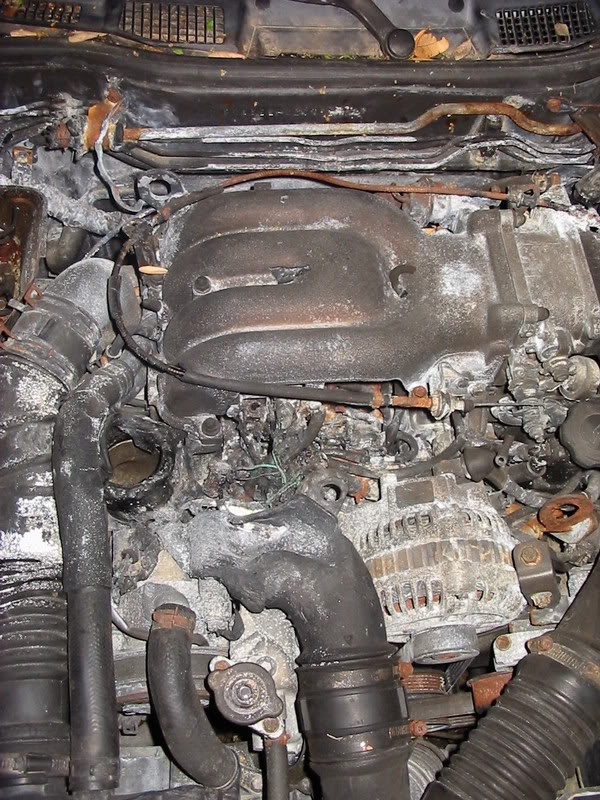
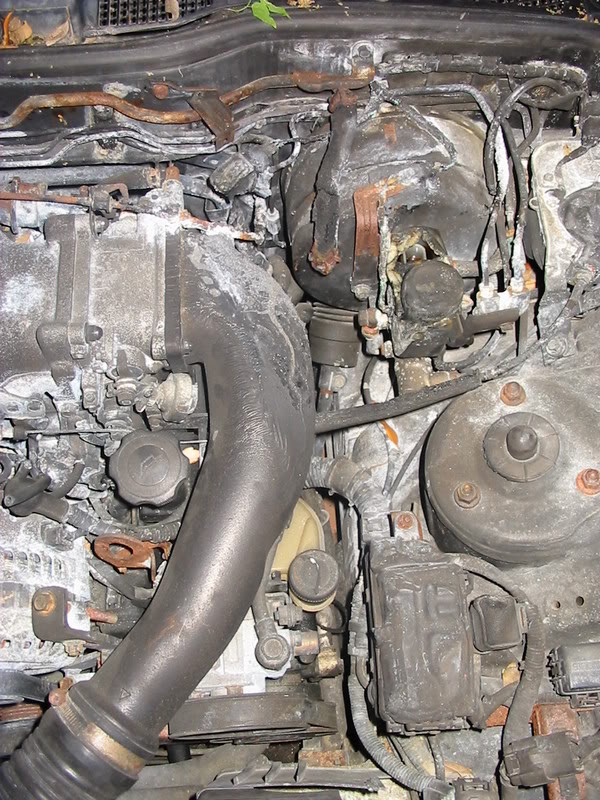
I found the car on craigslist with heavy fire damage. The fire was caused from the infamous leaky fuel pulsation damper. The fire roasted absolutely everything in the engine bay, not much was salvageable other than the wiper motor. Here's some pics of when I first picked it up Feb. '06
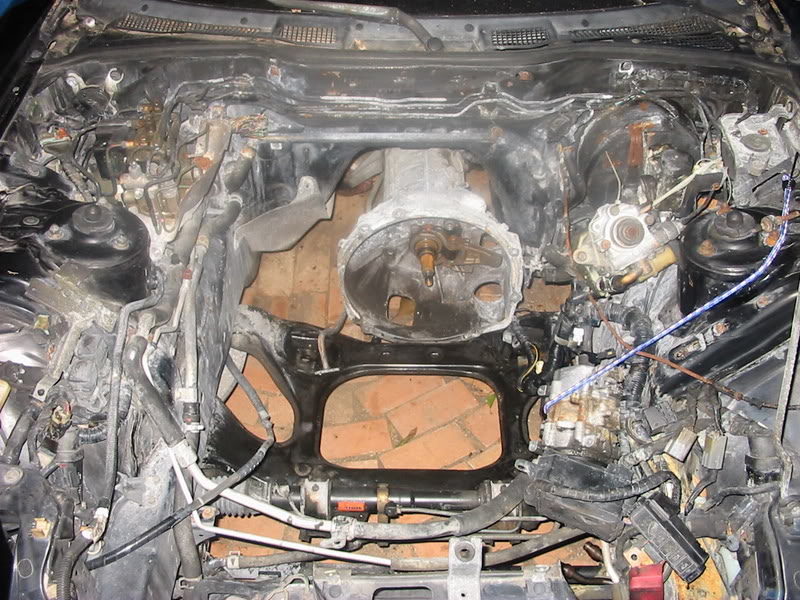
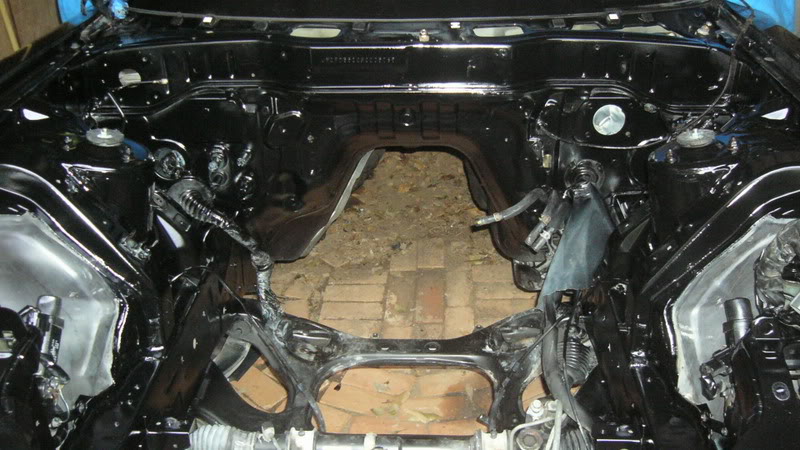
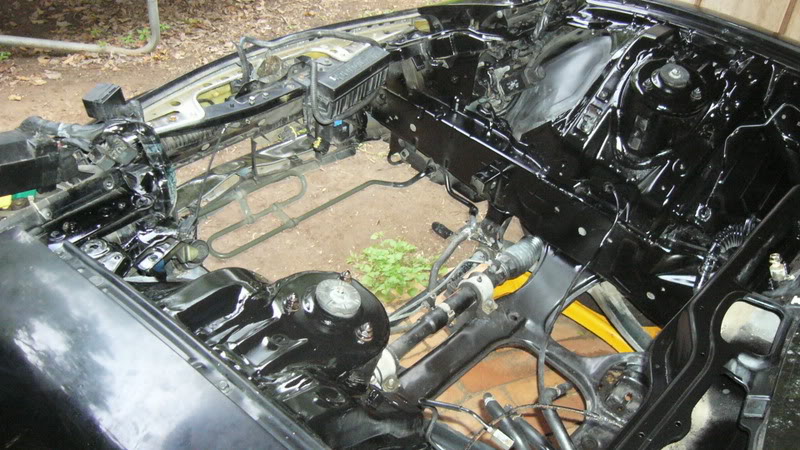
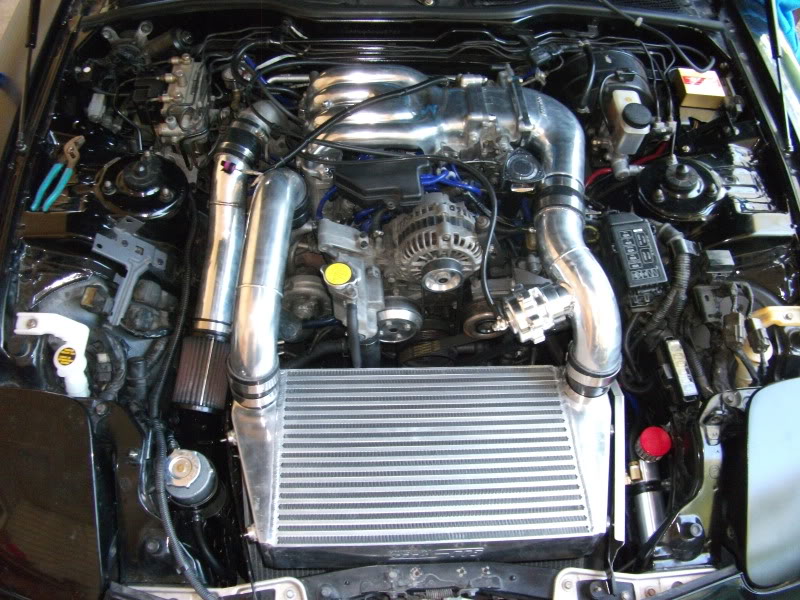
Pulled the motor and everything else out, prepped and painted the engine bay
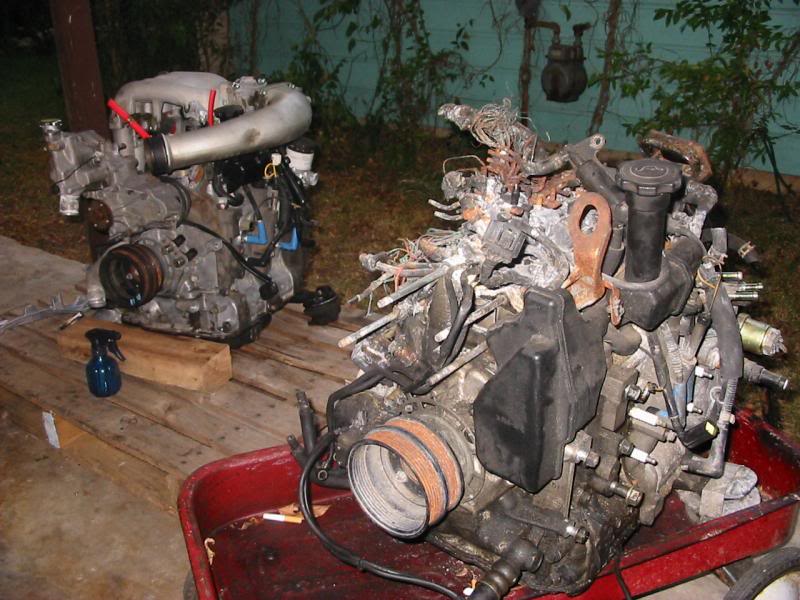
Found a used motor on craigslist for $700 unknown condition/mileage but decided to take the risk . Ended up having decent compression and has been in the car running healthy for over 4 years now.
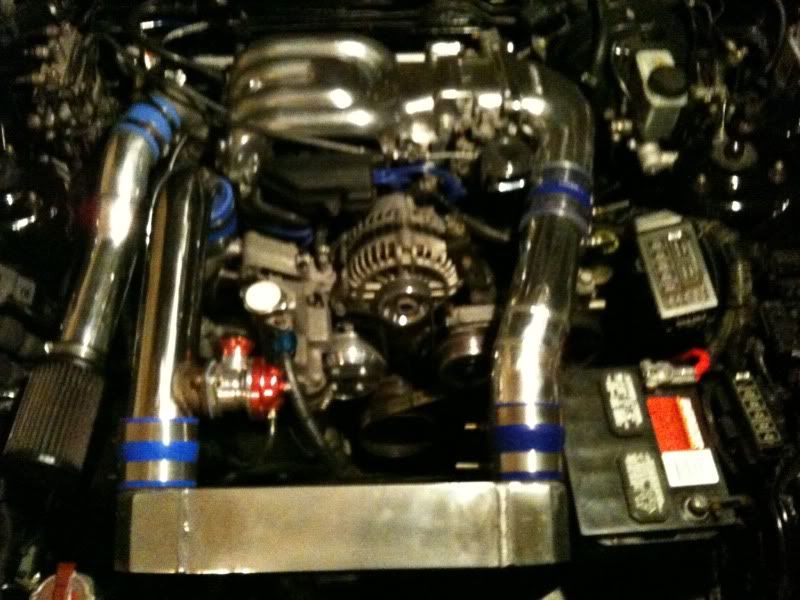
First running setup 2009 (off the top of my head):
- Greddy pulley Kit
- Custom intake hardpipes with K&N filters
- 3” Downpipe + 3” Midpipe + 3” Tanabe Touring Medallion Catback
- Petit Racing Aluminum AST
- Poor mans Non Sequential
- Emissions Removed (Block Off Plates)
- A/C Removed
- Double Throttle Removed
- Ported throttle body
- Vented Oil catch Can
- Hose Techniques Silicone Vacuum lines + Couplers
- Sard Fuel Pressure Regulator
- Greddy Elbow
- Greddy Type RS BOV
- Fast Reacting AIT Sensor
- Neo Synthetic Transmission and Diff Fluid
- Exedy Stage I Clutch (Organic Disc)
- M2 Performance Flywheel
- Automatic Counterweight
- SS Clutch Line
- Re-finished all interior plastics
- PLX Wideband
- Prosport Boost Gauge, Oil Temp, Oil Pressure
- FlyRx7 Triple Gauge Pod
- Greddy Profec B Spec II
- Greddy Turbo Timer
- Power FC and Commander
- Gotham Racing PFC holder
- Hawk HPS Pads
- Slotted Rotors
- Painted black Calipers + polished Mazda lettering
- SS Brake Lines
- GAB Adjustable Struts
- Eibach Lowering Springs
- Powerflex Differential Bushings
- 20% ceramic window tint
Current setup 2012:
Added parts
- Defined Autoworks V-mount kit
- Relocated WestCo Battery to passenger rear bin
- HKS Twin Power mounted to cruise control bracket
- Datalogit
- Aeromotive 340
- Tial 50mm BOV
- Atomic Rex Pillow Ball Bushings
- AST Delete
- 2002 Mazdaspeed Miata Nardi Steering Wheel
- JasonS Tan Floor Mats
- Interior LEDs
- Product Innovations Shift ****
- Rotary Extreme Hood Struts
- Shineauto Mazdaspeed replica front lip
- Sakebomb fire extinguisher passenger seat mount
- Pineapple Racing "big turbo" idler pulley
- IRP Motor mounts
- Garfinkle oil pan brace
I have pics of nearly every part I've ever installed, modified and restored, feel free to PM me questions or pics about anything.
Currently, my friends at EMSPowered are building an equal runner, twin scroll manifold for a 6766 turbo.
I'll be updating this thread often within the next couple of months showing progress and changes on the car.
I found the car on craigslist with heavy fire damage. The fire was caused from the infamous leaky fuel pulsation damper. The fire roasted absolutely everything in the engine bay, not much was salvageable other than the wiper motor. Here's some pics of when I first picked it up Feb. '06
Pulled the motor and everything else out, prepped and painted the engine bay
Found a used motor on craigslist for $700 unknown condition/mileage but decided to take the risk . Ended up having decent compression and has been in the car running healthy for over 4 years now.
First running setup 2009 (off the top of my head):
- Greddy pulley Kit
- Custom intake hardpipes with K&N filters
- 3” Downpipe + 3” Midpipe + 3” Tanabe Touring Medallion Catback
- Petit Racing Aluminum AST
- Poor mans Non Sequential
- Emissions Removed (Block Off Plates)
- A/C Removed
- Double Throttle Removed
- Ported throttle body
- Vented Oil catch Can
- Hose Techniques Silicone Vacuum lines + Couplers
- Sard Fuel Pressure Regulator
- Greddy Elbow
- Greddy Type RS BOV
- Fast Reacting AIT Sensor
- Neo Synthetic Transmission and Diff Fluid
- Exedy Stage I Clutch (Organic Disc)
- M2 Performance Flywheel
- Automatic Counterweight
- SS Clutch Line
- Re-finished all interior plastics
- PLX Wideband
- Prosport Boost Gauge, Oil Temp, Oil Pressure
- FlyRx7 Triple Gauge Pod
- Greddy Profec B Spec II
- Greddy Turbo Timer
- Power FC and Commander
- Gotham Racing PFC holder
- Hawk HPS Pads
- Slotted Rotors
- Painted black Calipers + polished Mazda lettering
- SS Brake Lines
- GAB Adjustable Struts
- Eibach Lowering Springs
- Powerflex Differential Bushings
- 20% ceramic window tint
Current setup 2012:
Added parts
- Defined Autoworks V-mount kit
- Relocated WestCo Battery to passenger rear bin
- HKS Twin Power mounted to cruise control bracket
- Datalogit
- Aeromotive 340
- Tial 50mm BOV
- Atomic Rex Pillow Ball Bushings
- AST Delete
- 2002 Mazdaspeed Miata Nardi Steering Wheel
- JasonS Tan Floor Mats
- Interior LEDs
- Product Innovations Shift ****
- Rotary Extreme Hood Struts
- Shineauto Mazdaspeed replica front lip
- Sakebomb fire extinguisher passenger seat mount
- Pineapple Racing "big turbo" idler pulley
- IRP Motor mounts
- Garfinkle oil pan brace
I have pics of nearly every part I've ever installed, modified and restored, feel free to PM me questions or pics about anything.
Currently, my friends at EMSPowered are building an equal runner, twin scroll manifold for a 6766 turbo.
I'll be updating this thread often within the next couple of months showing progress and changes on the car.

 05-07-13, 08:35 PM
#5
Thanks Benny! Thank you Gordan! A lot of blood, sweat and tears have gone into this car over 7 years. Your FD was one of the few that's inspired me to pay attention to the small details
A little bit of plastic interior restoration is one of the best and cheapest aesthetically pleasing mods you can do
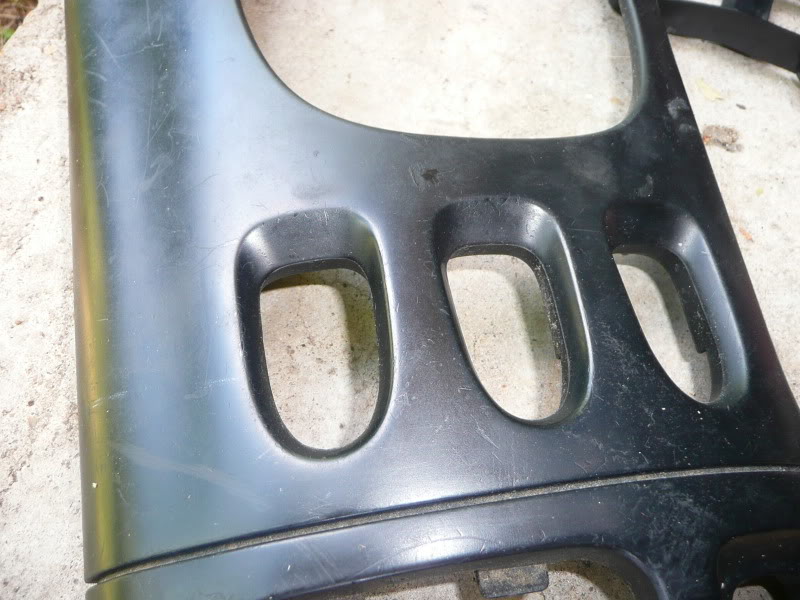


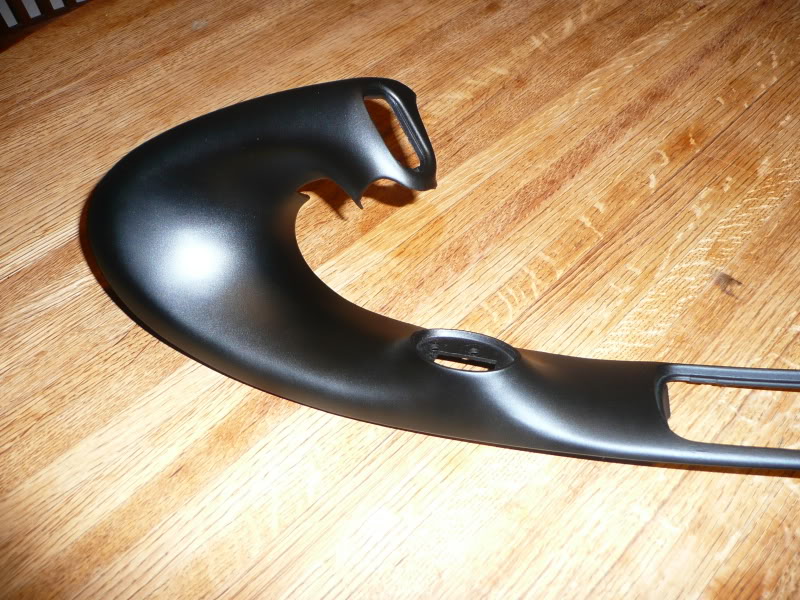
A little bit of plastic interior restoration is one of the best and cheapest aesthetically pleasing mods you can do

Trending Topics
 05-11-13, 09:58 PM
#10
https://www.rx7club.com/interior-ext...ishing-810859/
How-To on removing the gauge hood/cluster. Not as easy as it looks, I ended up cracking my gauge-hood when trying to remove it, but to get the A/C control panel it must be removed. https://www.rx7club.com/attachments/...val-remove-jpg
Both "Goof-Off" or nail polish remover works great for removing the original finish. Then about 5-6 light coats of Duplicolor Black Bumper coating. It drys to the touch in just a few minutes, but takes at least 24hrs to fully cure.
http://i7.photobucket.com/albums/y25...P1030858-1.jpg
06-29-13, 11:15 PM
#11
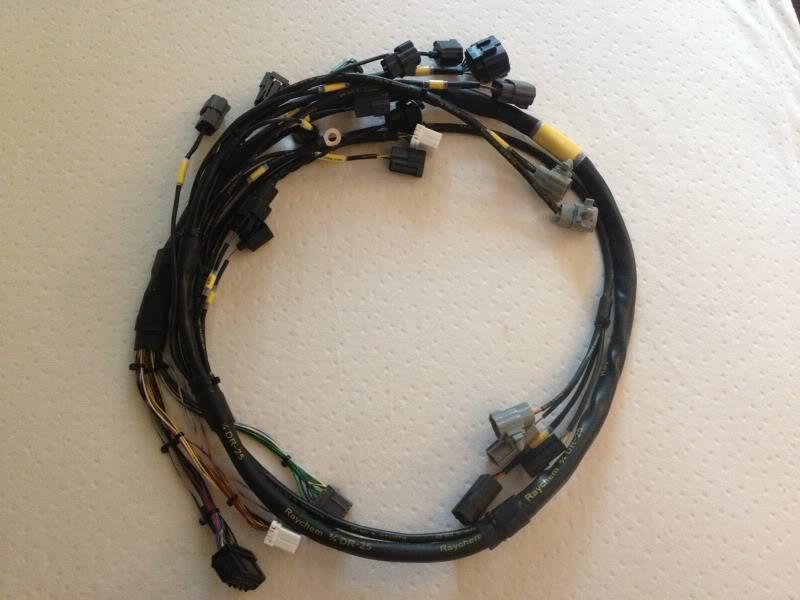
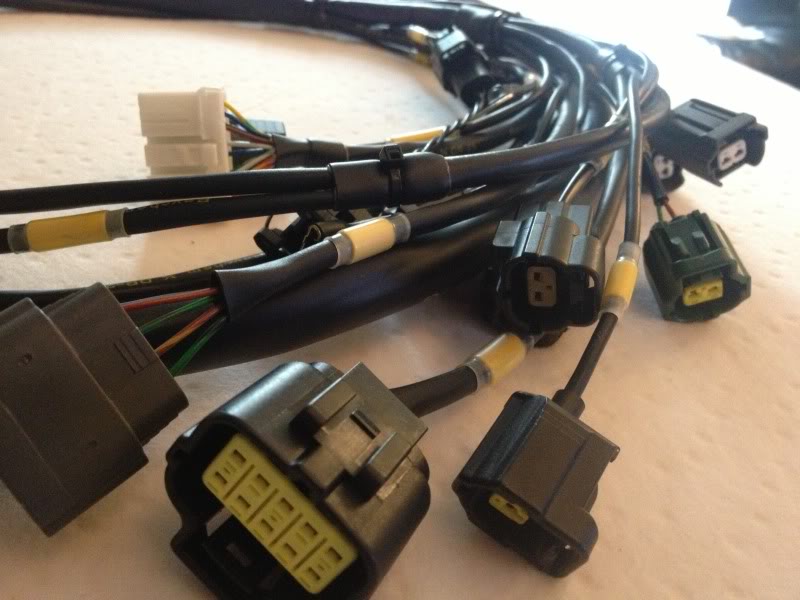
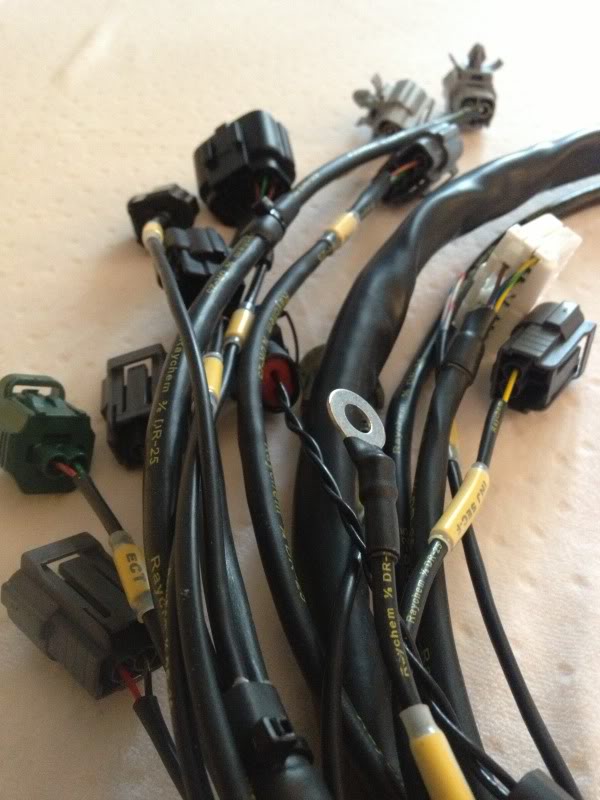
Just got my Rywire engine harness in the mail today. Ordered on the 20th, and received it the 29th. Each plug is coded on the wiring what it's for, should make install that much easier. Can't wait to take out that old brittle 20+ year old harness
06-30-13, 10:32 AM
#13
The car is currently still having fabrication work done, I'll post pics of how the panels have held up over the years as soon as I get it back
07-02-13, 06:50 PM
#14
i am also curious about that harness. i just made my own haltech harness (started as their flying lead kit) with all new mazda connectors. it turned out pretty nice, but not as nice as that rywire harness. he looks like he does a great job on those.
also, no firewall grommet?
also, no firewall grommet?
07-05-13, 06:19 PM
#15
Pistion to rotary
iTrader: (2)
Join Date: Jun 2012
Location: sioux falls
Posts: 305
Likes: 0
Received 0 Likes
on
0 Posts
Rywire harness fits awesome on the motor. Only thing sucks is no firewall like you said but I just used my old one. Been thinking about asking to send it bak to get a quick release plug thrown on.
 07-17-13, 02:42 PM
#19
i am also curious about that harness. i just made my own haltech harness (started as their flying lead kit) with all new mazda connectors. it turned out pretty nice, but not as nice as that rywire harness. he looks like he does a great job on those.
also, no firewall grommet?
also, no firewall grommet?
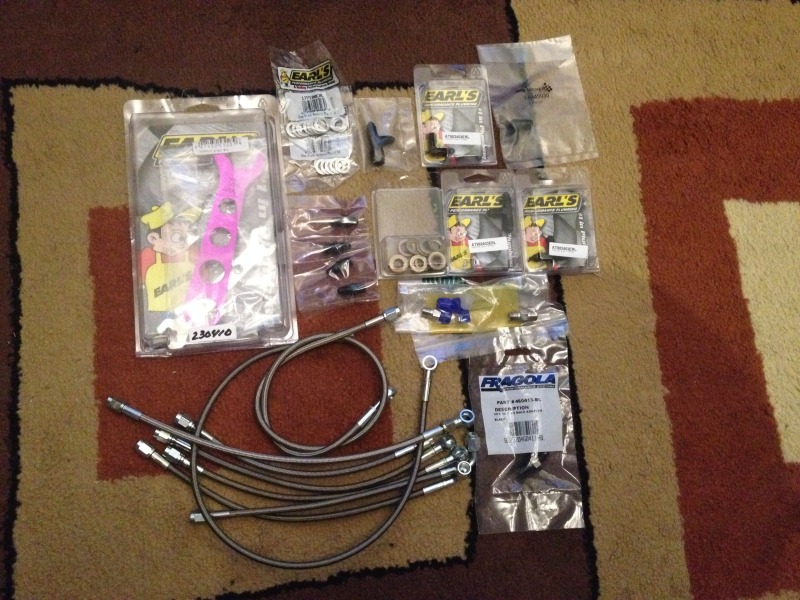
Picked up a few more parts over the past few weeks
Xcessive LIM
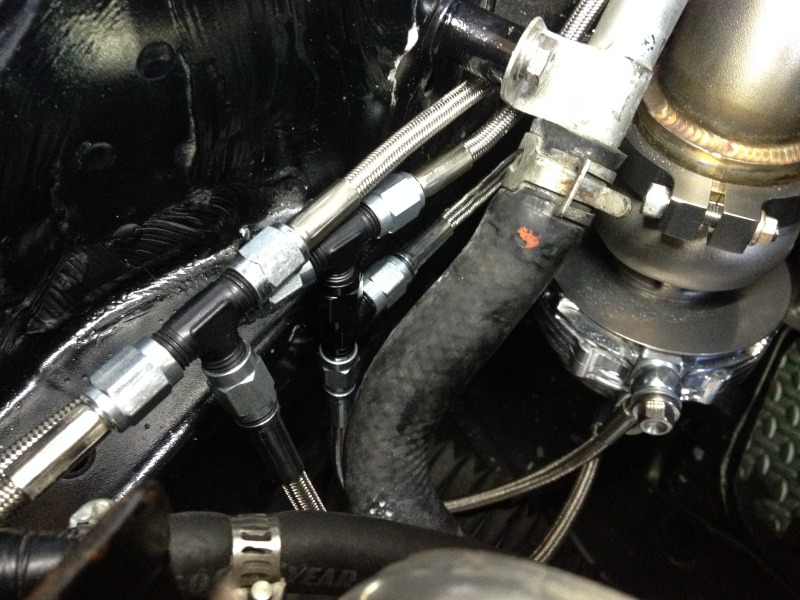
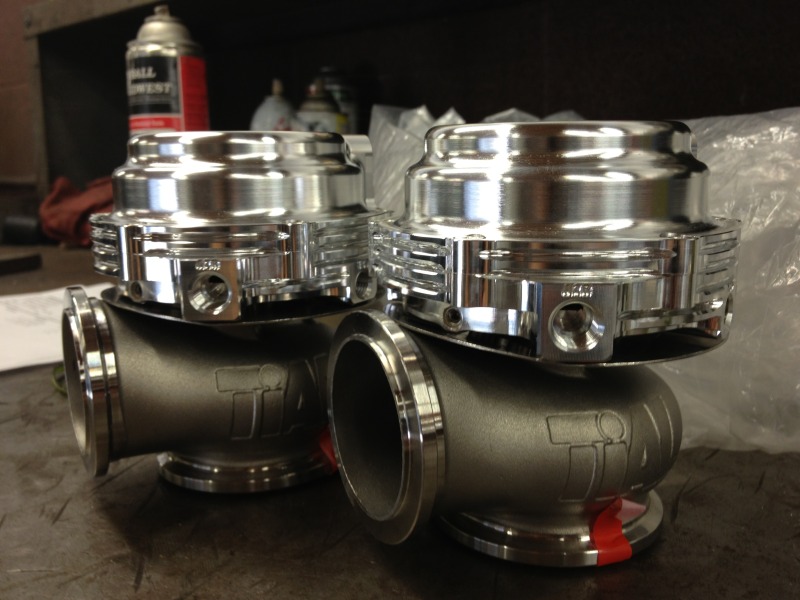
(2) 38mm Tial MVS Wastegates
GM 3-Bar Map Sensor + Sakebomb harness/mount
Shine Auto Feed skirts and lip spoiler (Did a GB with Turbo II FC to save on shipping)
Manifold flange just came in to start the manifold fabrication
5/8" thick SS Manifold Flange with 2 1/8" ID
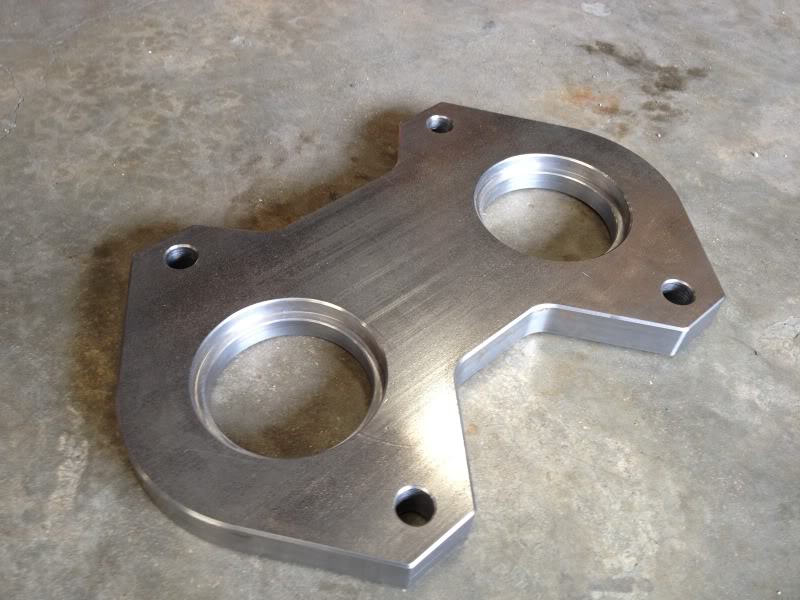
Should be less than a few weeks until I get the car back
 08-25-13, 10:58 AM
#21
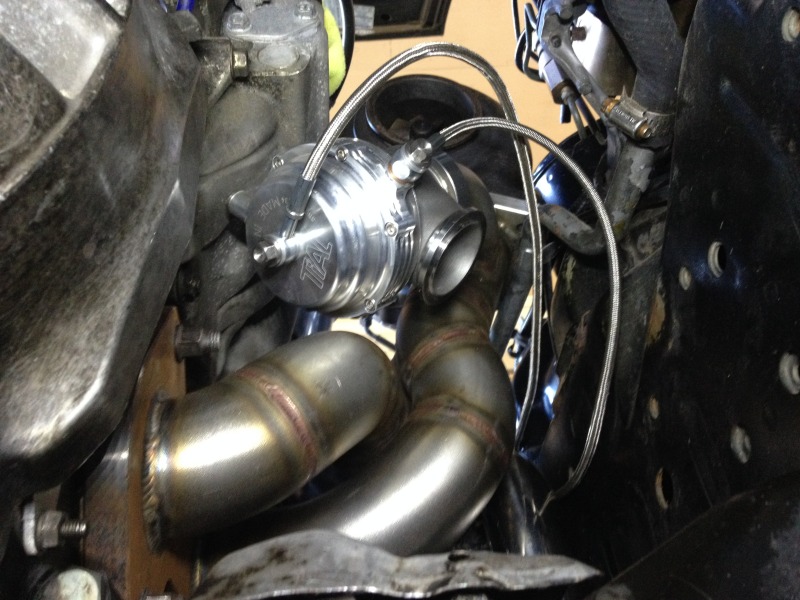
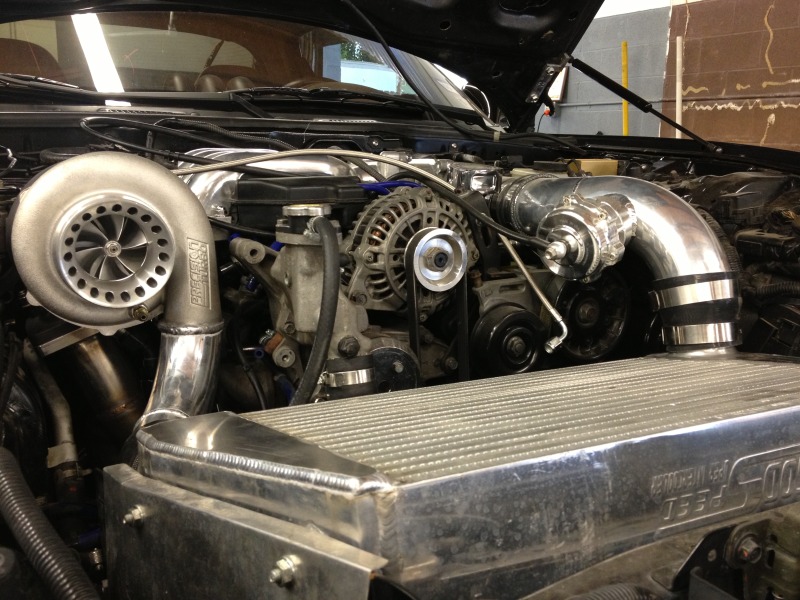
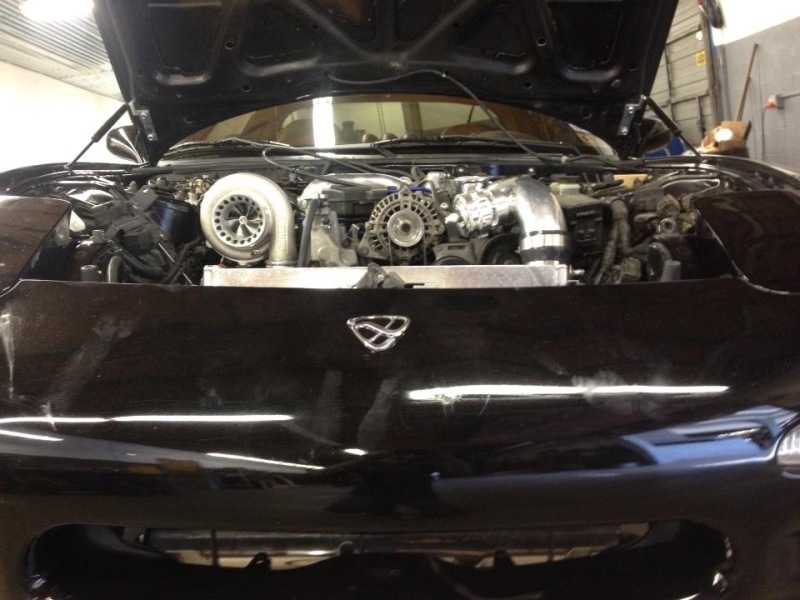
Update:
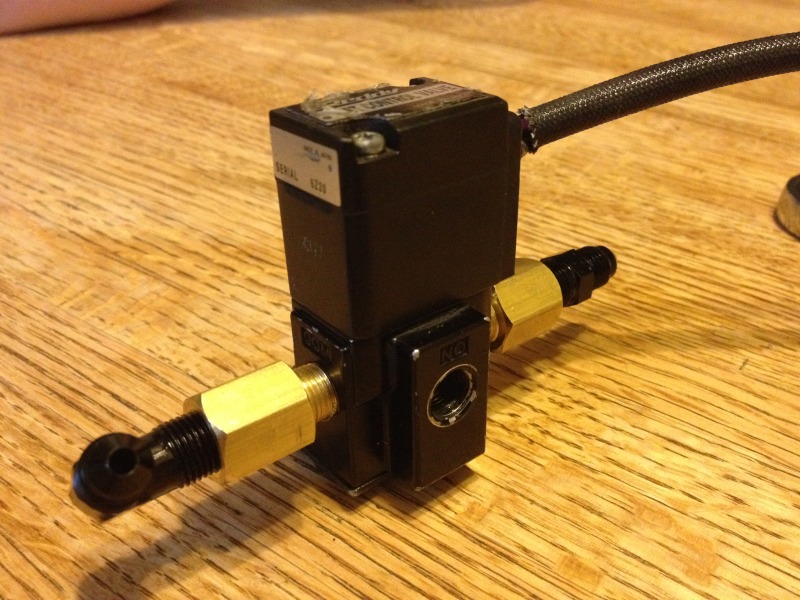
I traded in the 38mm MVS wastegates for 44mm MVRs to eliminate any chances for low boost options whenever I decide to switch to E85.
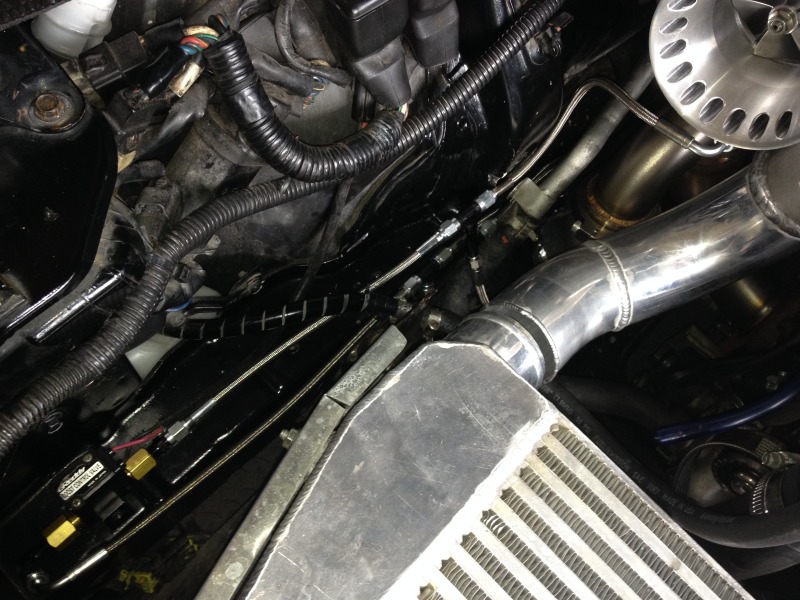
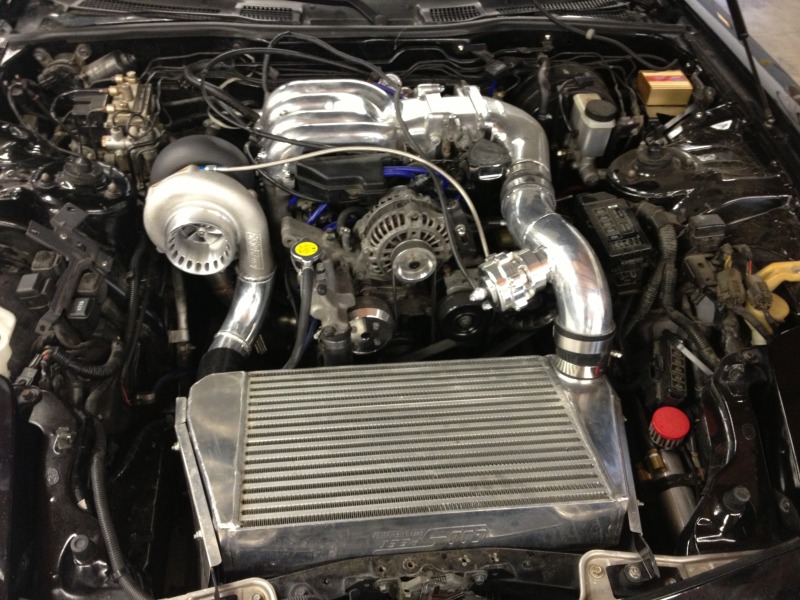
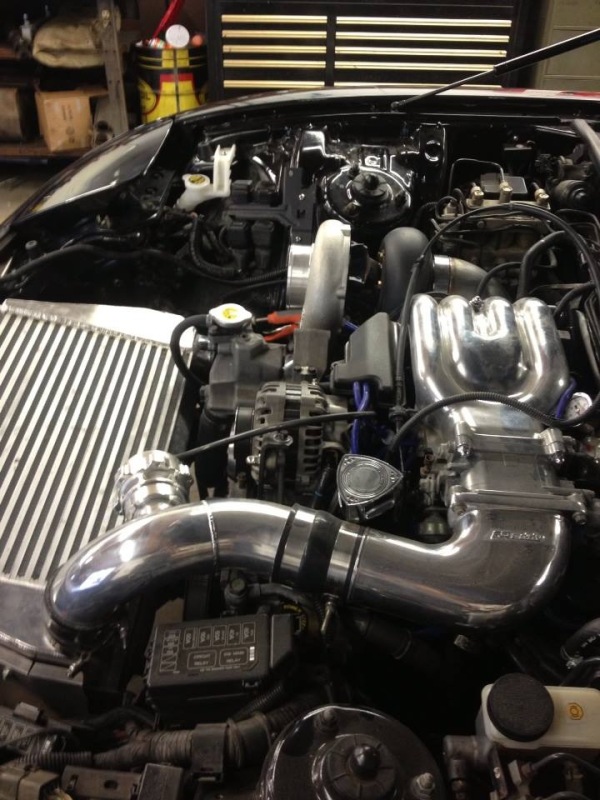
Completed manifold by Marc Evans: 2-1/8" ID Schedule 40, Equal length, dual wastegate, top mount, twin scroll T4. 4" downpipe, modified/relocated intercooler end tank inlet and compressor housing
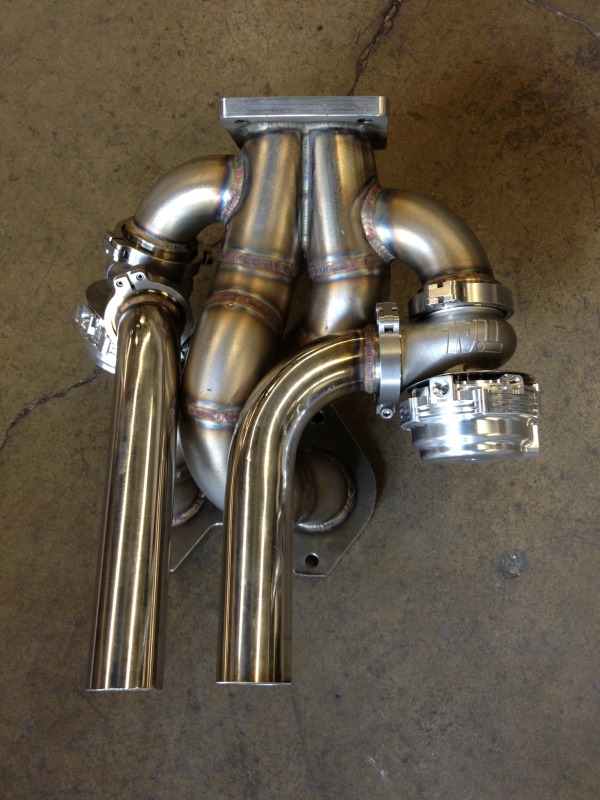
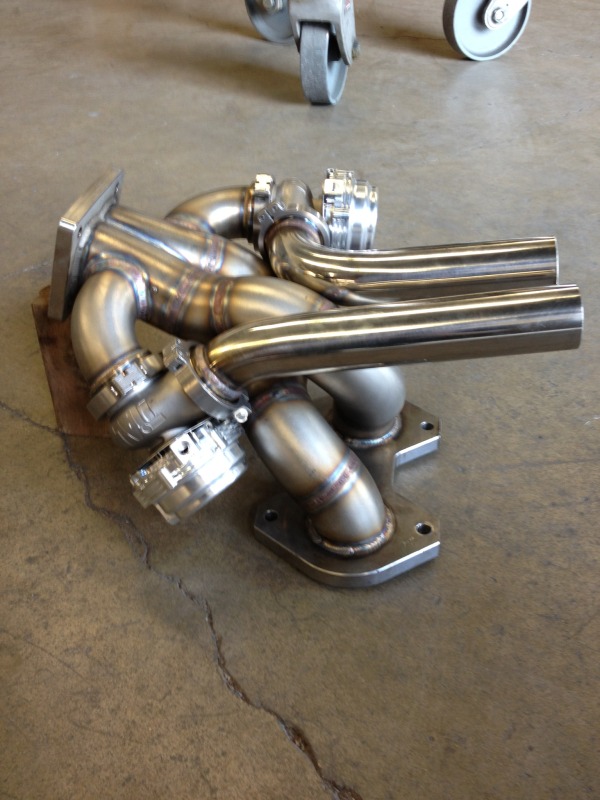
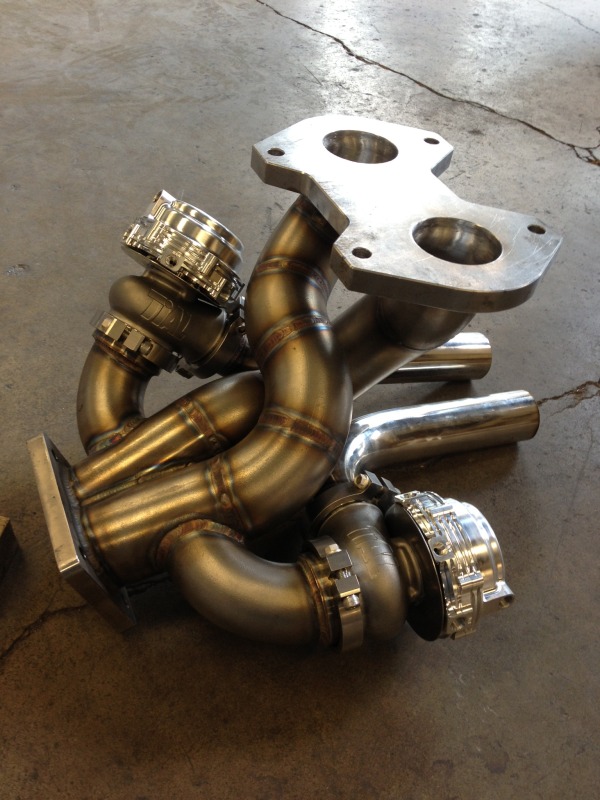
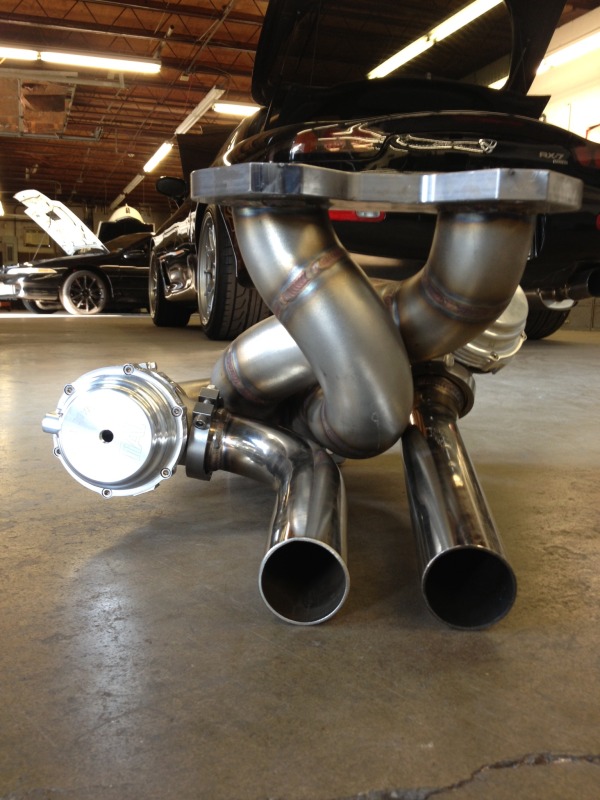
I still need to get rid of all of the stock twin solenoids, vacuum lines etc. But this is how the manifold sits on the motor with the 6766, some inspiration from silverfdturbo6port
800th post!
Last edited by shmacklepap; 08-25-13 at 10:59 AM. Reason: 800th post