When you click on links to various merchants on this site and make a purchase, this can result in this site earning a commission. Affiliate programs and affiliations include, but are not limited to, the eBay Partner Network.
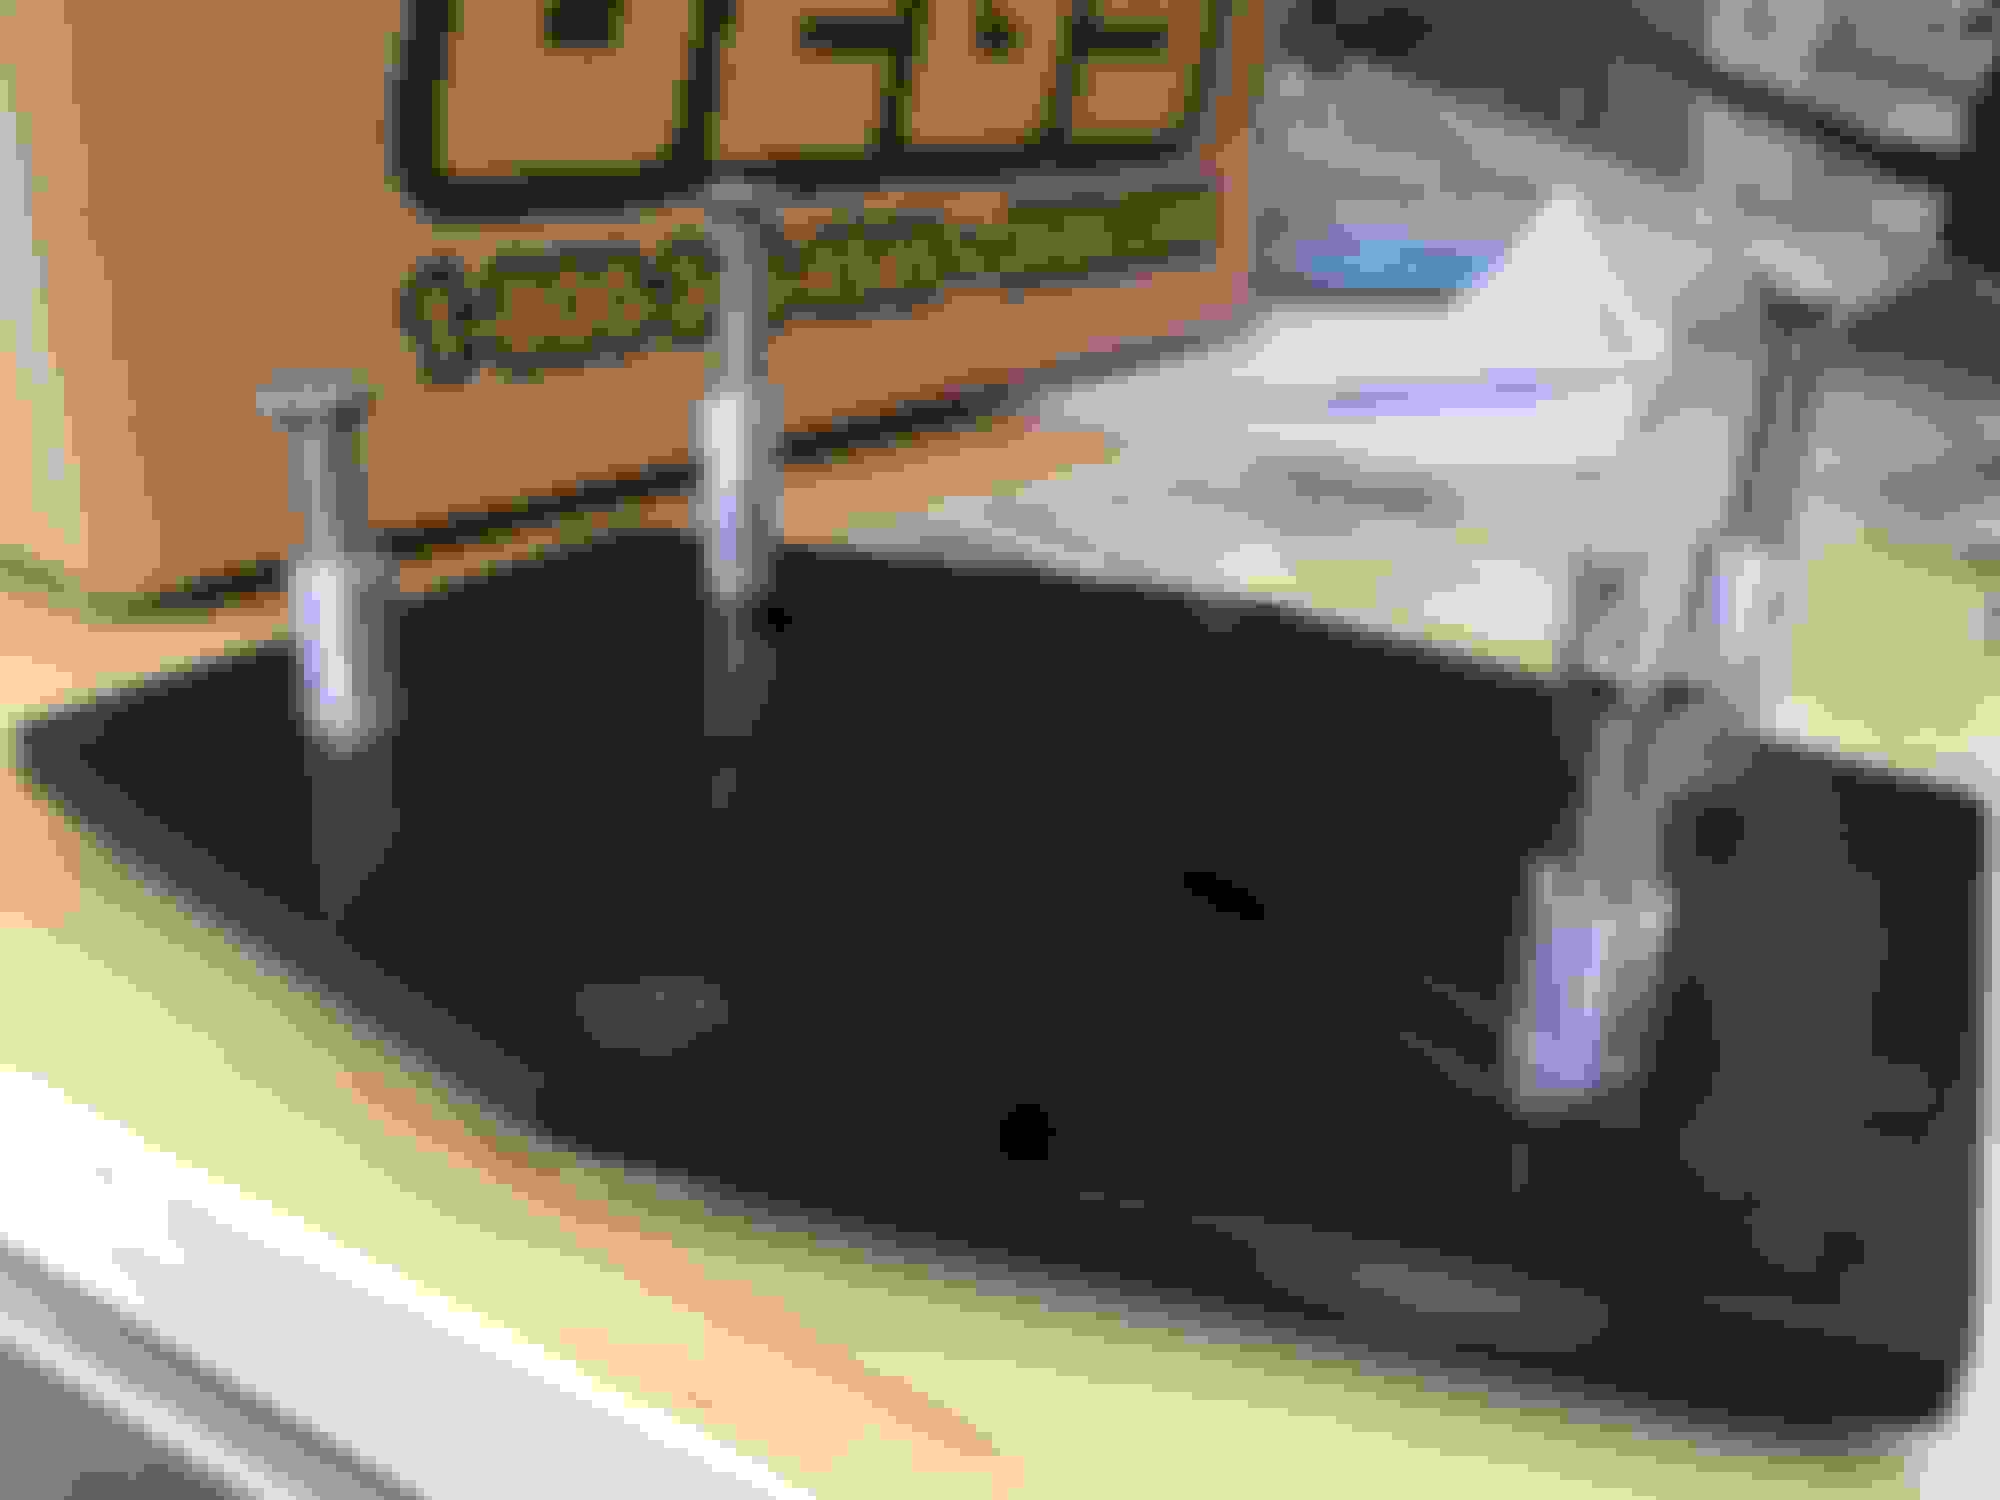
So I know I'm gonna relocate the battery to the passenger bin, but I was trying to work a mounting solution that will keep the battery level and stable. Here is what I've put together.
Using a series of aluminum spacers and #10 stainless bolts, I've come up with a way to shim the platform nice and level. I'm now working on whether I'm going to bolt the battery to the bin itself, or if I need to go further through and bolt it to the chassis. I feel the plastic bin is pretty tough and should suffice as the battery is only 15lbs. If it was a full size battery, I'd say I should go to the chassis. Any feedback on this for tracking purposes is welcomed.
I've seen a few threads on Evans NPG+ and I think the big advantage is the no pressure. Seems like a good load off the old coolant seals. I'll put some more research into it seeing as the cooling system is about to receive a bit of an overhaul.
So Day One, I began the teardown. Got the stock battery, intercooler, radiator, and intake out of the way so I can begin the V mount installation.
This is where I left her at the end of day one
My thermostat was DISGUSTING. I'm glad I bought a new one
Day Two
Today I began the install of everything.
The GReddy radiator really is a beautiful piece
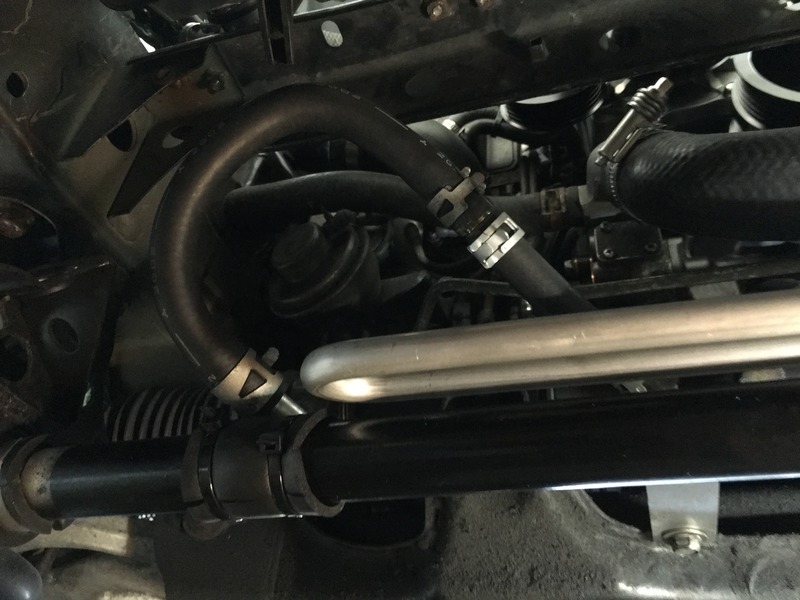
Got the power steering cooler line in. I need to get some universal power steering hose and make it work with the line. I think the stock line is just a hair too short to make that bend.
I got the AST deleted as well. Installed the 86 filler neck and plugged the nipple on the front by drilling, tapping, and installing a 1/2" set screw plug from ACE. I broke the wire sheath on the low coolant sensor so I'll have a new one on order.
The radiator and condenser are mounted. There are obvious differences between the MANA and Nippondenso systems. With the MANA system, I had to cut off a bracket on the condenser and the drier. I was able to make the brackets work to where it is securely mounted.
Using advice from the install thread, I moved the AC lines and secured them under the support beam with adel clamps. Now there is plenty of room. I also flipped the "S" tube around so I can hide the unused nipple for the AST. I plugged it with a hose and bolt.
This part took the longest. Using my buddies tubing bender, we straightened the line back out. Then we bent it, unbent it, re bent it, and we finally got it to work. I need to shim the drier inboard a bit for bettwe clearance between the sight glass and the wiring harness but besides that those are all set!
Tomorrow I'm gonna take the AC hardline to a local custom AC hose place and see if they can either remanufacture the same hardline with metric fittings or if they can replace them with appropriate ones. I'm also going to pull the transmission and prepare to replace the clutch and the rear main seal/rear stationary gear o ring.
2 days down, 7 to go before it needs to be road worthy.
Got the power steering cooler line in. I need to get some universal power steering hose and make it work with the line. I think the stock line is just a hair too short to make that bend.
The pipes are in different diameter, the rack end is 10mm and the cooler end is 12mm. I think the stock cooler might have been smaller than the GReddy at maybe 11mm, so the stock hose fits both end. Instead of looking for a hose that fits both end, I just extend the stock hose on the 10mm side with a 3/8" hose barb and ~4" of Gates 0.375" PS hose, both are available at local stores.
Glad to see someone got their OE condenser to work with the Greddy kit.
I got it to work! But man was it a PAIN. Here is my biggest advice to someone with a MANA system: take the adapter line they give you and throw it in the garbage. Route it like this and don't make the mistake I did.
The line is mangled because it was bent, cut, welded, bent, cut, welded, and bent again. I took the adapter line to an AC shop and they cut the metric fitting off, welded on a standard on the adapter and the condenser, and moved the fitting to the other side of the line, which in theory, should have made it bolt in. Here was the problem, when they added the SAE fitting, they extended the line about an inch. Between getting a tubing bender and trying to make it work, I discovered I could have just bent the condenser line down just like this and it fits with minimal effort. An entire day was wasted trying to get the adapter line to fit.
@Ze Power MX6
That is a great way to do it! With the fiasco with the AC adapter line, I ended up with a tubing bender. I just removed the power steering cooler line and bent the 45* exit to more like a 90* and the stock line fit like a charm.
The gaskets for the AWS and AWS tube are NLA from Mazda so I had to cut my own from some gasket materiel.
All blocked off and ready to go!
I had a pretty epic battle with my cat stud.
Finalized the AC drier mounting. Because I scooted it inboard a little bit, I used one of the radiator rubber mount bushings as a spacer between the wall and the bracket. This shimmed it inboard and gave it a little play. In this picture you can also see how the brackets don;t work as great for a MANA system. I had to notch the upper air guide and I was only able to use the lower mount holes.
I chose to cut, extend, solder, and shrink my fan harness.
After I finished the extension, I wrapped the harnesses in self fusing silicone tape. Then I used Adel Clamps to route it along the radiator mount.
So between the last few days, I essentially finalized the V mount install minus the intake piping. I'm waiting on new gaskets for the LIM -> UIM and the new 99 Y pipe gasket.
The V mount ducting is all installed!
Its finally coming together.
Nice shot of the intakes.
My rear stationary gear O ring was definitely leaking. It was square, hard as a rock, and snapped in two removing it.
My rear stationary gear removed. Someone described it as trying to disarm a bomb removing and installing this. I can agree to it.
I have a new rear main seal installed, new pilot bearing and seal in, and tomorrow I'm taking the flywheel to be resurfaced. I can button up the clutch and exhaust after that. I also got Banzai Racing's street mount retro fit kit. I'll have input on that install tomorrow.
Got the stock flywheel resurfaced. I opted to keep the stock flywheel because we installed a lightweight flywheel on my buddy's RX8 and it was a bear to drive that thing. I wanted maximum streetability seeing as this is still my daily.
New rear main seal installed, pilot bearing, pilot bearing seal, and rear stationary gear o ring.
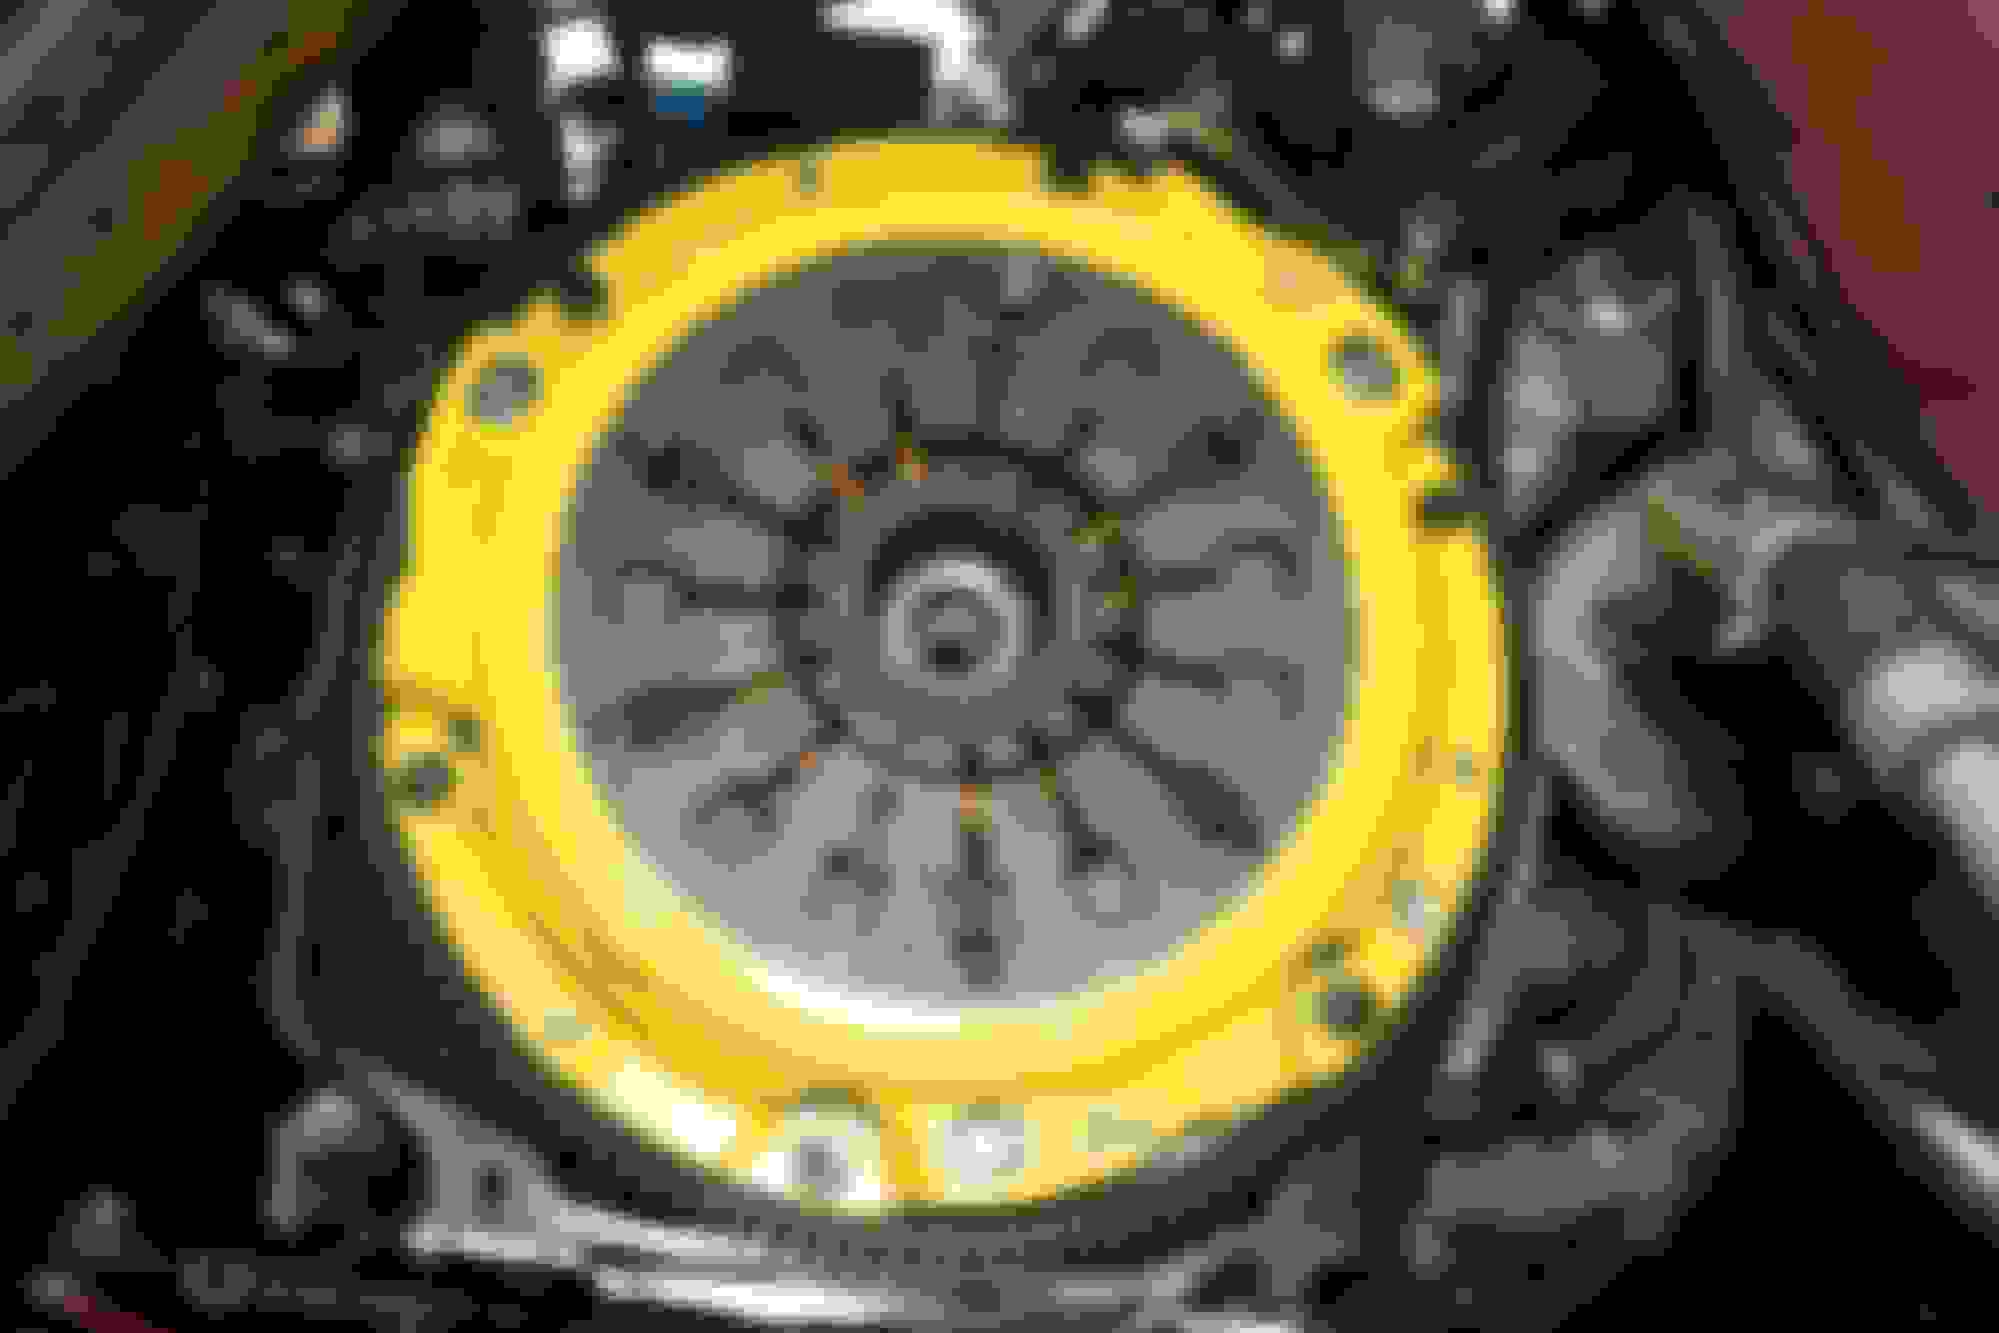
ACT HD SS clutch installed with a Monoloc collar. Engaging that monoloc collar was a BEAST. I don't think I was doing it wrong I think there is just not enough leverage through the tiny access hole to really pop that throwout bearing on there.
I got my gaskets in and completed the install.
Peak a boo
The transmission went as smooth as could be. Stabbed the first time with 0 effort. Its all in the clutch disc alignment I took the time to clean up all the pans and braces before reinstalling them so its nice and clean underneath. Hoping I fixed all my oil leaks now so it will STAY clean! I installed the Banzai racing street mount retrofit kit too. Its $20 for a set of longer bolts, washers, and sway bar bushings to put between the subframe and the mount so it's more IRP like. I've owned both IRP mounts and banzai. I had zero issues with my IRP mounts but had bad vibration issues with the banzai at low low RPM. (like 1500-1800) I mentioned something and Banzai quickly put out this kit. Banzai really is one of my favorite rotary shops.
I got the Bonez HFC second hand from Fritz. It essentially wasn't second hand; more like installed and never even started. The trouble is, I didn't have the provisions to hook up the air pump. So I gave Rx7.com a call and they were super helpful. Sent me just the tube/coupler/hose to get it installed. Shout out to Rx7.com for making some nice exhaust items
I've got all fluids filled and I'll be doing the battery relocation today. Once that's done, it'll be time to fire her up.
LOL on the Monoloc. I had the same problem and ended up mounting the pressure plate to the engine vs the flywheel (could get more leverage that way to engage the monoloc), then reattaching the pressure plate to the flywheel from the access port underneath. What a pain!
And FWIW, I have a 12 lb flywheel and find that's a good compromise between lightweight and maintaining inertia.
Great job on the build I might have to get me one of those V-mount thingies for myself
The GReddy V mount really is a very complete kit. The quality it beautiful and the fit and finish is nice. It needs some help to get it compatible with a MANA AC system, but other than that pretty straight forward.
I finished her up today and took her out for a shakedown.
Pulled a vacuum on the system and converted it to r134a. Was blowing so cold I had to turn it down.
I ran my power wire for my battery relocation through the factory channel. 4AWG is a PERFECT fit.
I used the Braille mount and drilled holes in the bottom of the bin. I then went through the chassis and using shim spacers, 2.5-3" bolts, self locking nylon nuts, and bonded sealing washers, I bolted her to the chassis. The circuit breaker is super convenient for disconnecting the battery.
All done!
On the shakedown I noticed a few things. I have the air pump moo. Man that is an awkward noise! Turns out I installed a didjeridu for an intake. I'll work out that bug another time. The undertray is currently not installed. I'm debating on how much I feel like chopping it up to get it to work, if I should try to get like 1/2" spacers and shim it down, or if i should go for an LRB tray? Some of the intake ducting also is rattling against the radiator. That's an easy fix though. Greddy provided some double stick tape that I can just fish in there to get it to stop. The banzai motor mounts with the street retrofit kit is nice. Mounts are vibe free now!
Tomorrow is gonna be a break from the car. Time to clean the garage.
Pulled a vacuum on the system and converted it to r134a. Was blowing so cold I had to turn it down.
Matt
What is your outside ambient air temp out there right now? I converted to 134a last spring and it was nice and cold and working great. Once I hit the dead of summer and temps went over 85 degrees I started to have issues. My car would have issues idling smoothly with the AC on and the system would stop cooling for many minutes and the. Start working again. Mine is a Denso and was purged and charged by a pro AC shop.
Ambient was probably around 72*. Once summer starts heating up I'll give you an update on how it does. I've got my little thermometer in the vent still. I'll just leave it in there.
I've been playing with the PFC/Datalogit a bit myself but I would feel better about a professional dyno tune. So I've contracted Dan from Garage Life in South El Monte, Ca. I'll be trailering her out there Saturday morning. Before I get it tuned, my catback from TGS should be arriving Friday, and I ordered a Supra TT pump. I also ordered all the bits to rewire it, including the in-tank wiring. I ordered most everything from McMaster including the chemical resistant mil spec wiring. It's 12AWG wire with PTFE insulation. I also ordered washers, threaded rod, lock washers, nuts, etc to pass through the pump hanger lid. This is using PTFE sealing plastic washers and I have fuel tank sealant as well. Pretty excited to hit the dyno and see what she can do!
Good workmanship buddy! I think you did an excellent job with that install. The battery relocation and silicone wrap for the fan harness was a nice touch.
Check out this site for more info on maybe "phase two" of your relocation project...
I myself went with the slight larger Braille battery; the B3121. I wasn't sure though how to mount it like you did. Do you have any more details for us on how you mounted the bottom "tray" to the chassis? Did you go through the floorboard?
I did use that write-up for a bit of inspiration. In order to mount the battery, I scribed the mount bracket holes on the bottom of the bin and drilled through. I then drilled through the bins and through the floor board. Using SS 2.5" #10 bolts, aluminum spacers in a variety of sizes, bonded sealing washers, and SS nylon lock nuts, I mounted the battery through the bin to the chassis. It was VERY tedious using the spacers in all sizes to try and shim the mount bracket level but it ended up with a very sturdy mount to the chassis. The bonded sealing washers will keep the rain and weather away from it as well.
 03-28-17, 03:56 PM


 I took the time to clean up all the pans and braces before reinstalling them so its nice and clean underneath. Hoping I fixed all my oil leaks now so it will STAY clean! I installed the Banzai racing street mount retrofit kit too. Its $20 for a set of longer bolts, washers, and sway bar bushings to put between the subframe and the mount so it's more IRP like. I've owned both IRP mounts and banzai. I had zero issues with my IRP mounts but had bad vibration issues with the banzai at low low RPM. (like 1500-1800) I mentioned something and Banzai quickly put out this kit. Banzai really is one of my favorite rotary shops.