When you click on links to various merchants on this site and make a purchase, this can result in this site earning a commission. Affiliate programs and affiliations include, but are not limited to, the eBay Partner Network.
This is such an awesome (re)build. I will be keeping an eye on this one.
Thanks!
Progress will be slow with the inability to get big-ticket items, but I have a laundry list of small things I need to get done in the mean time. I should have some updates pretty soon, as I should have some time to work on the 'Pit this coming weekend. Trying to order some odds and ends needed to get the car water-sealed, so I can wash and wax it properly. After that, I am trying to get all the under-dash HVAC tested, re-sealed, and installed so I can get the dash back in.
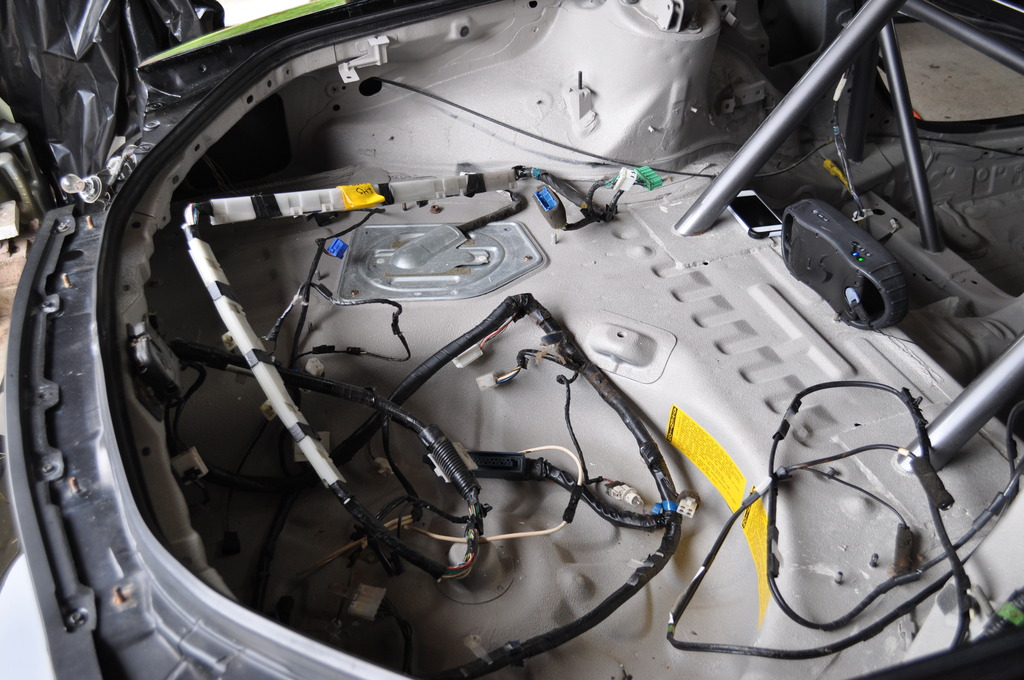
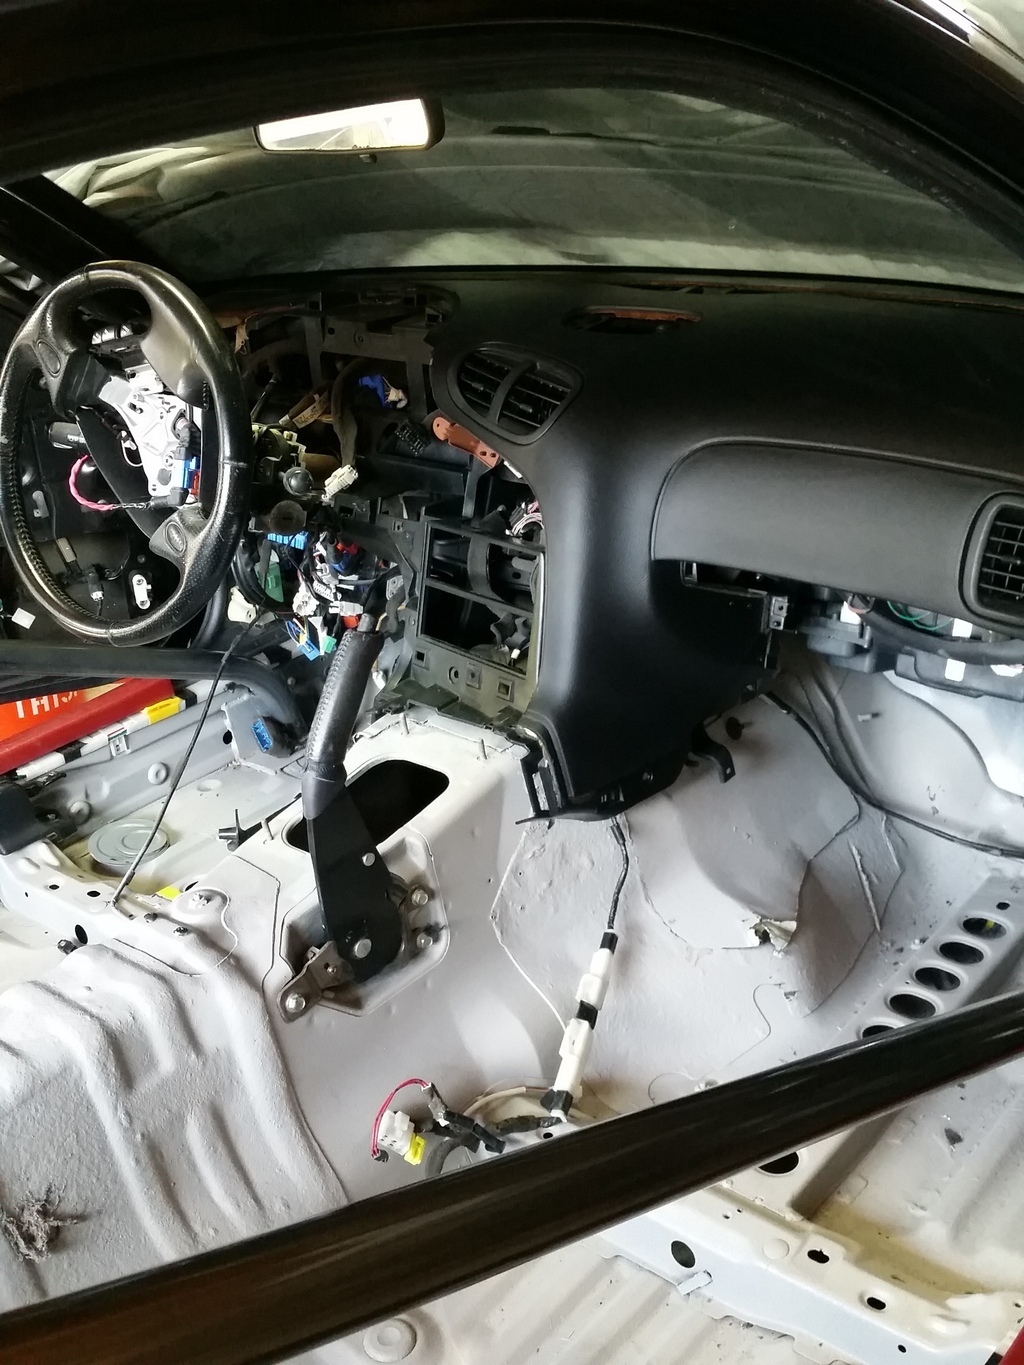
Had a little time to mess with the 'Pit today. I started re-installing the wiring harnesses in the interior. Labeling was a good idea.
Also greased the window mechanism cable on both sides. Used the spare battery to actuate a few times, and reinstalled. Nice, quiet, and smooth.
This was actually very easy.
Got the wiring all set in place, but not clipped in. I need some new clips, and I'm thinking of going with some of the zip-tie type. In the mean time, I shook out some miscellaneous Items I've gotten recently. My brother got me the Efini badges. Those are gonna look slick.
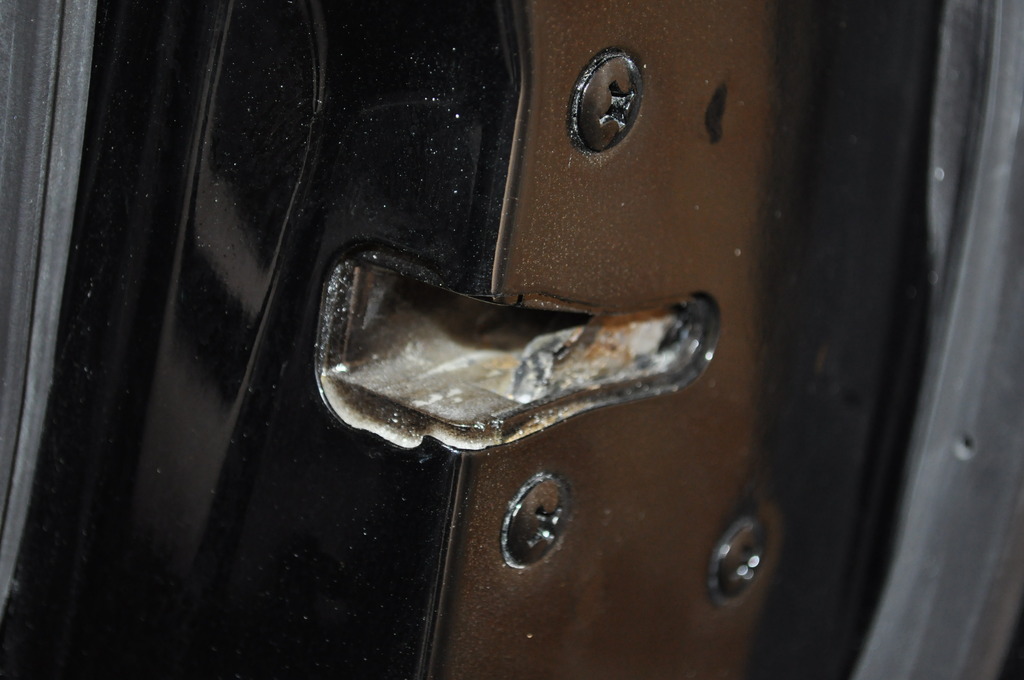
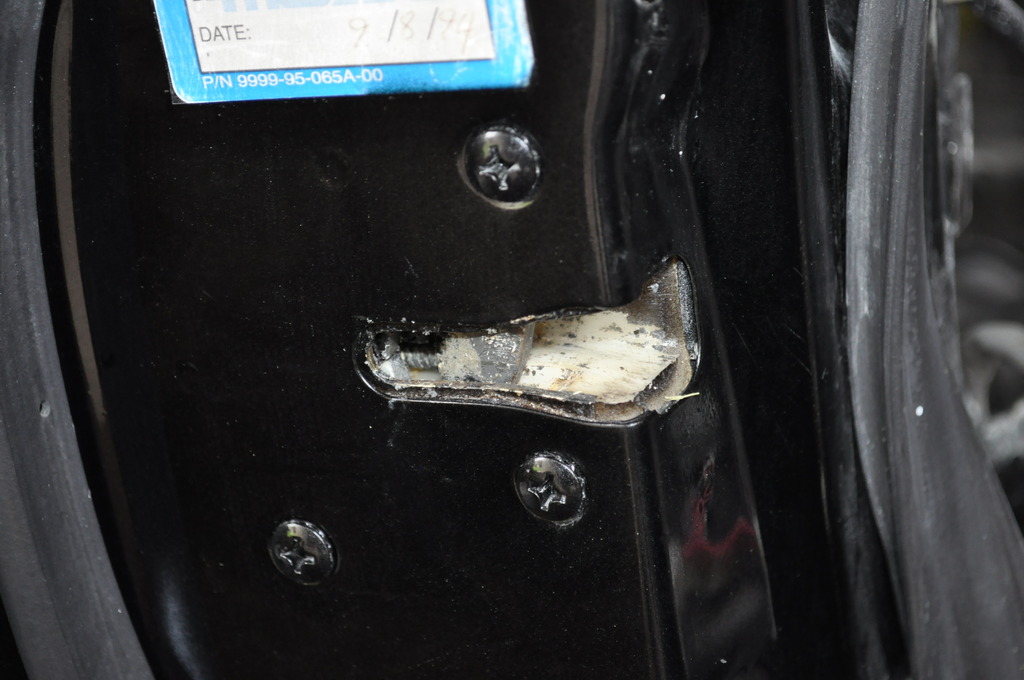
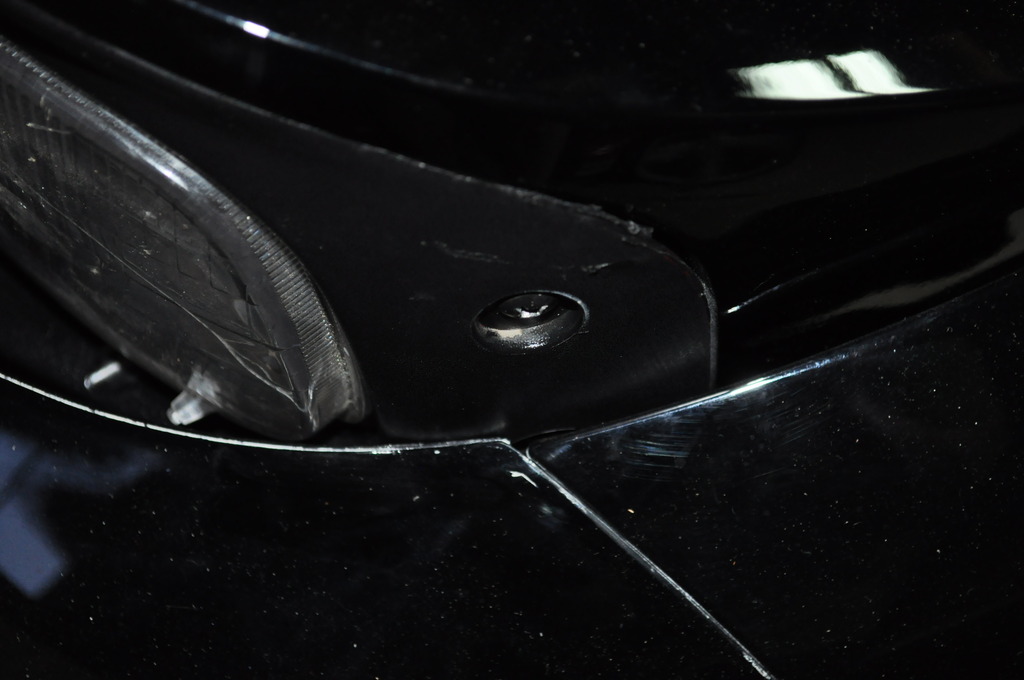
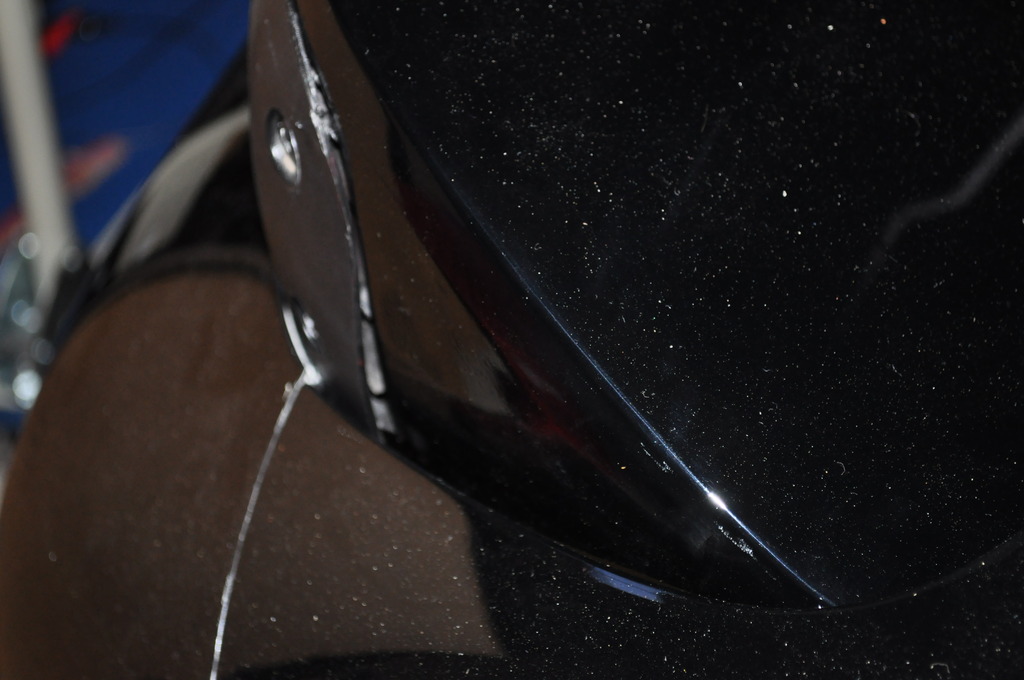
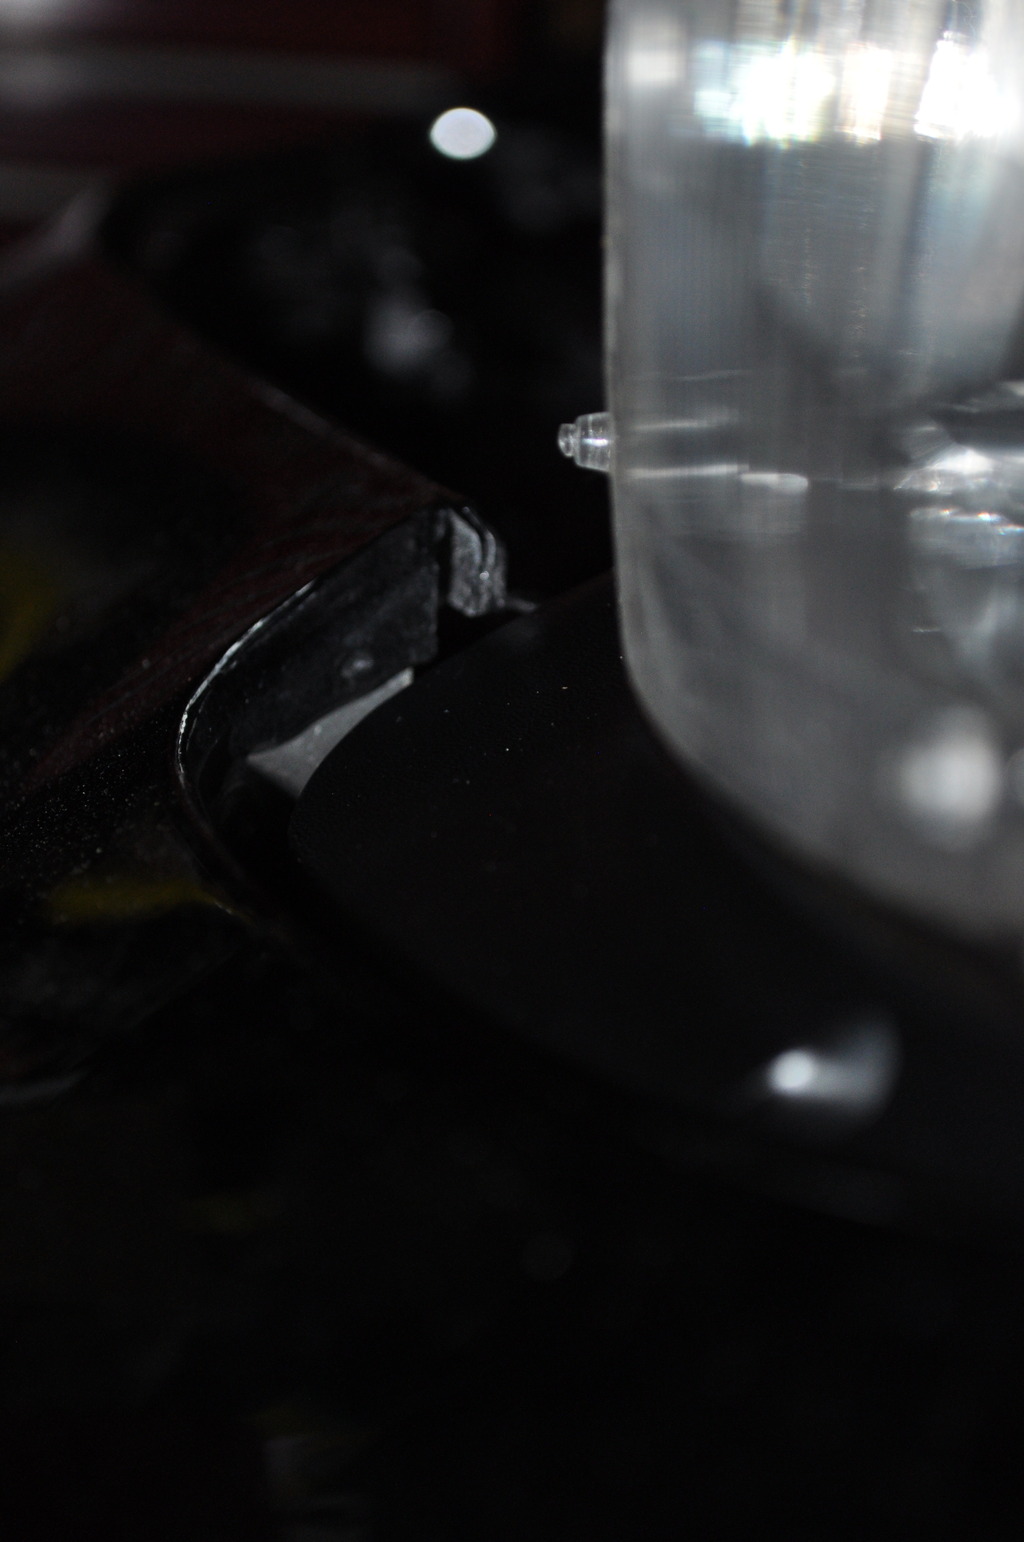
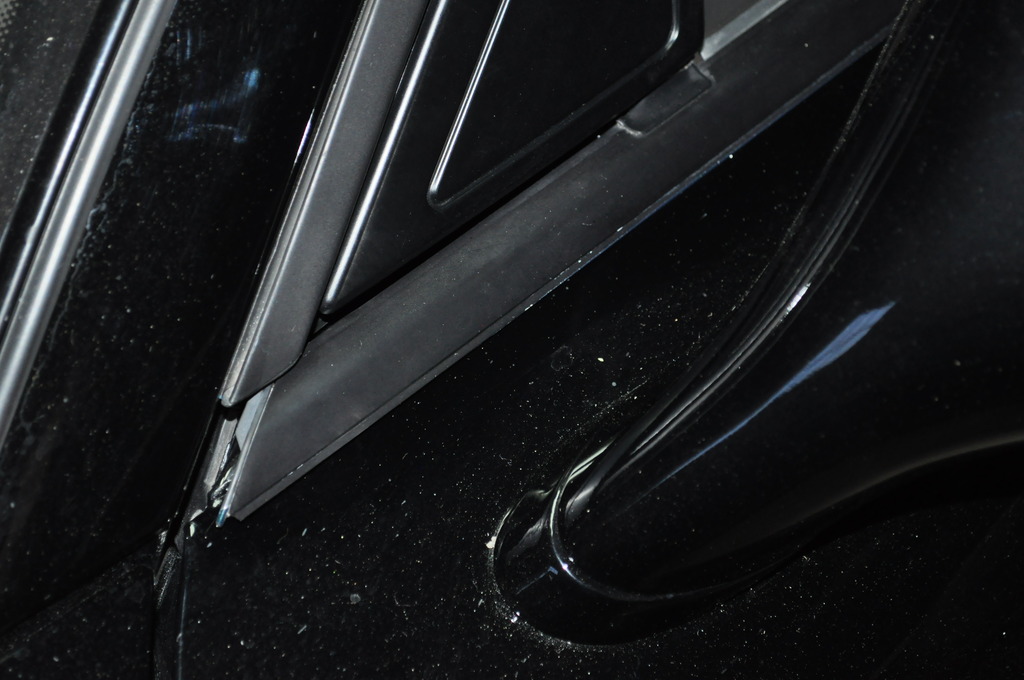
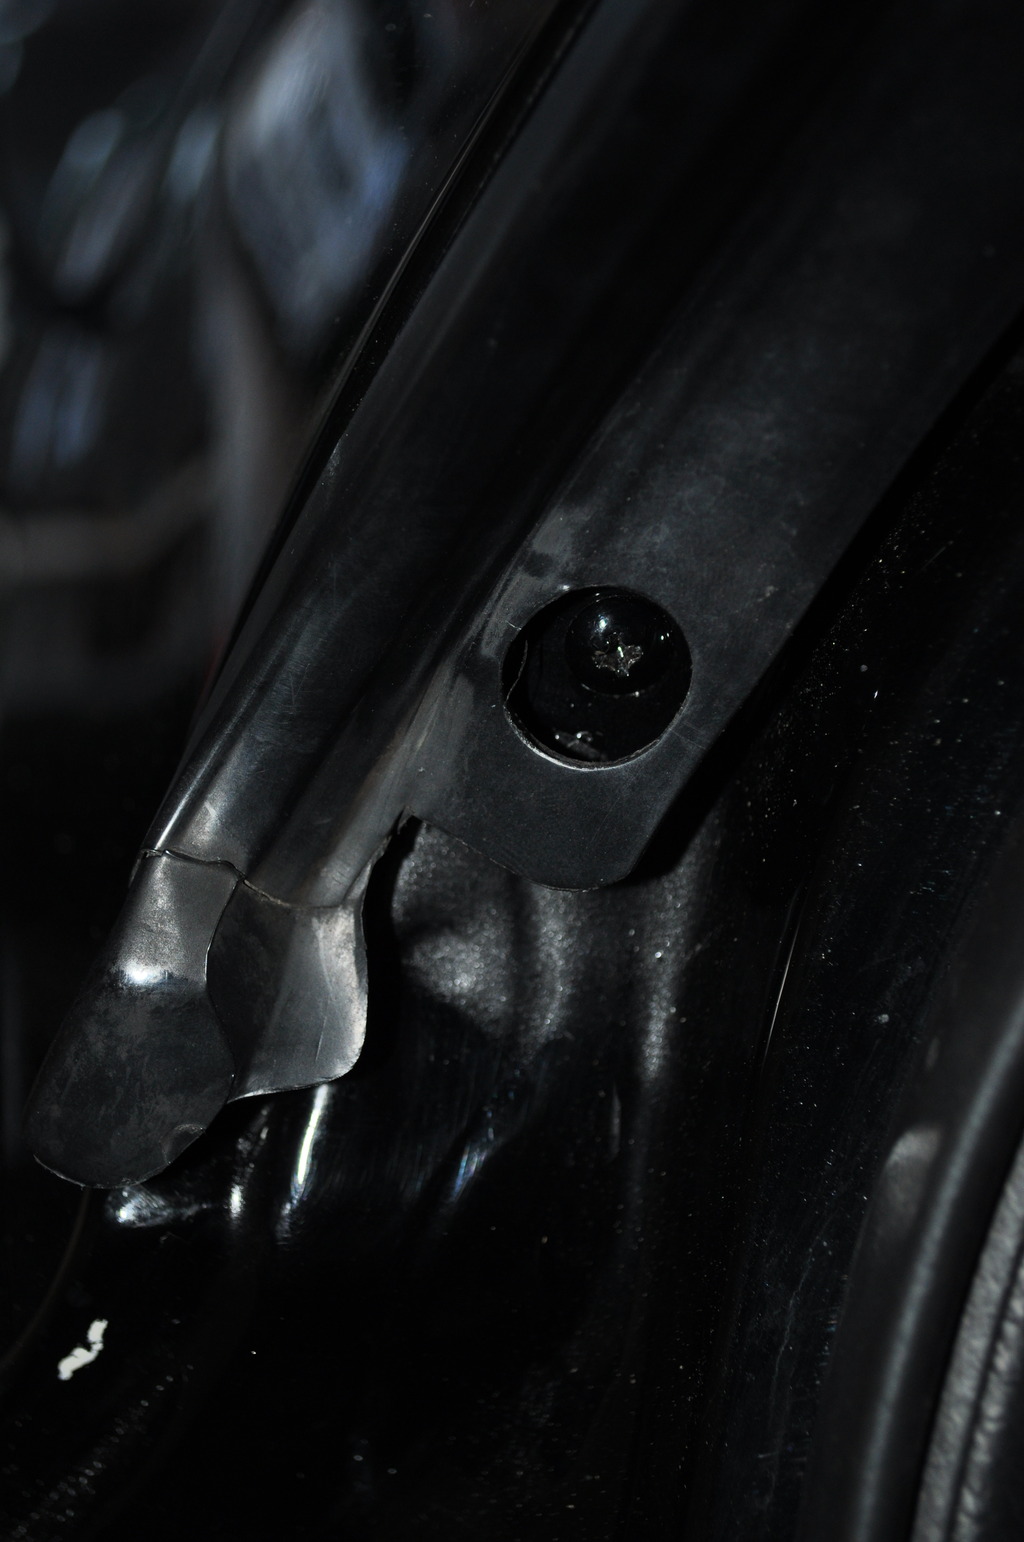
Here's my recent dilemma: I had a friend helping me take my door exterior handles off. To keep the door from latching, my buddy says, "Use a little screw driver to move the door striker piece so that the door won't lock." So, I did it. Today, I was trying to put the door handle assemblies back on, and the passenger side decides not to open from the exterior handle. The door unlatches from the inside, but no longer the outside. I can lock the door from the outside with the key, but the key won't unlock the door from the outside. This isn't the worst of it. I messed around with the door striker latch on the driver's side, and now that sucker won't even catch on the striker. It's like it isn't even moving. Here's a shot of the passenger side striker:
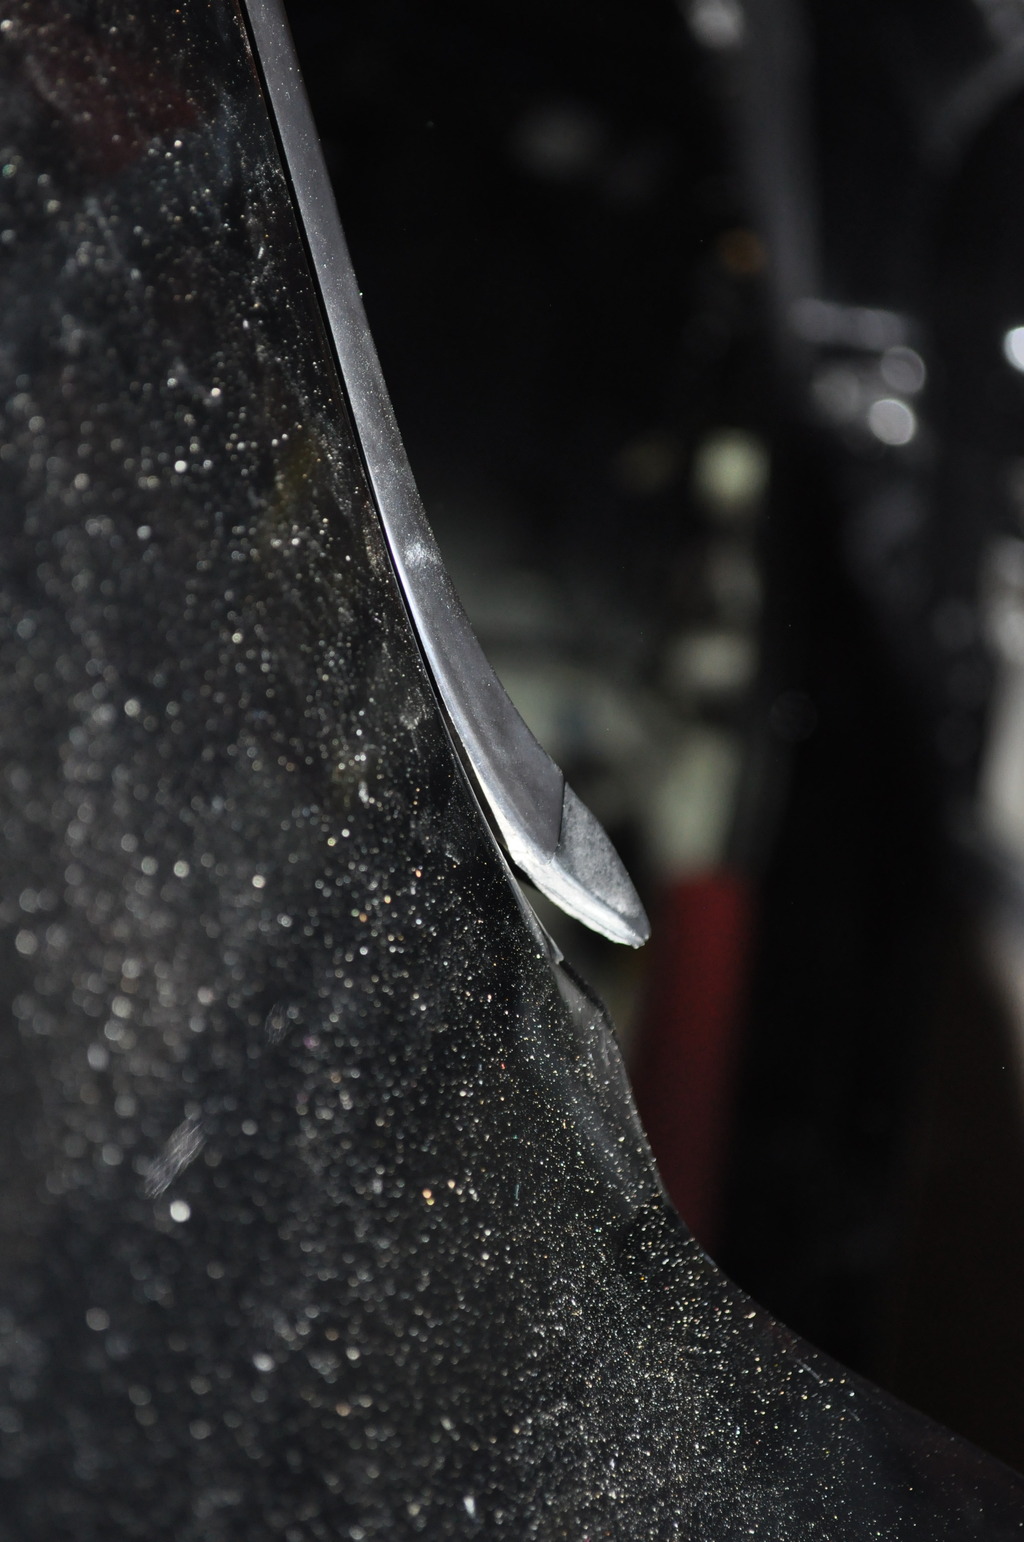
Here's my driver's side striker:
If anyone has any solutions, I'd greatly appreciate it. Usually a Google search yields some good results from this site, but not this time.
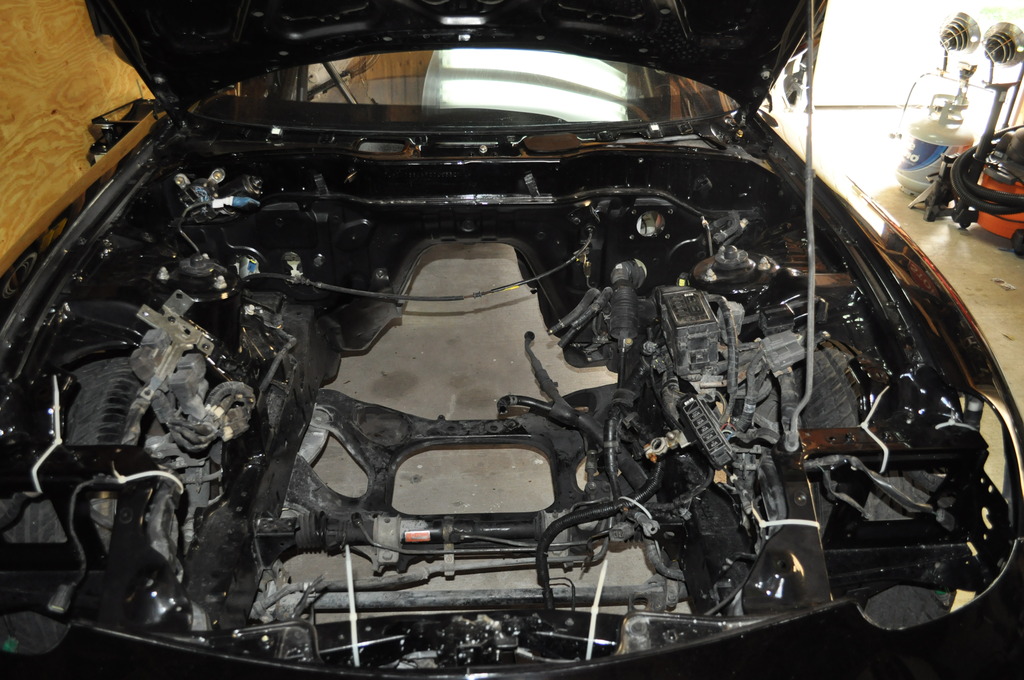
In the mean time, I want to get the wiring harness wiring all tacked down in the car and engine bay.
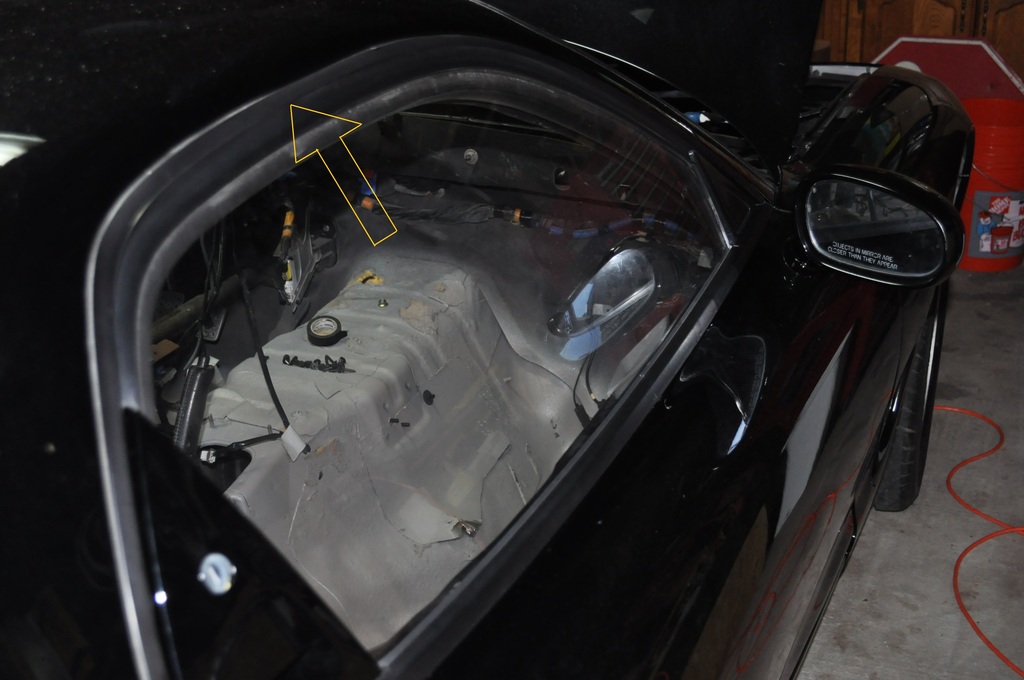
It looks like the latch is already in the closed position. I suspect if you put a screw driver in there and pull the handle it should move <- to the open position.
It looks like the latch is already in the closed position. I suspect if you put a screw driver in there and pull the handle it should move <- to the open position.
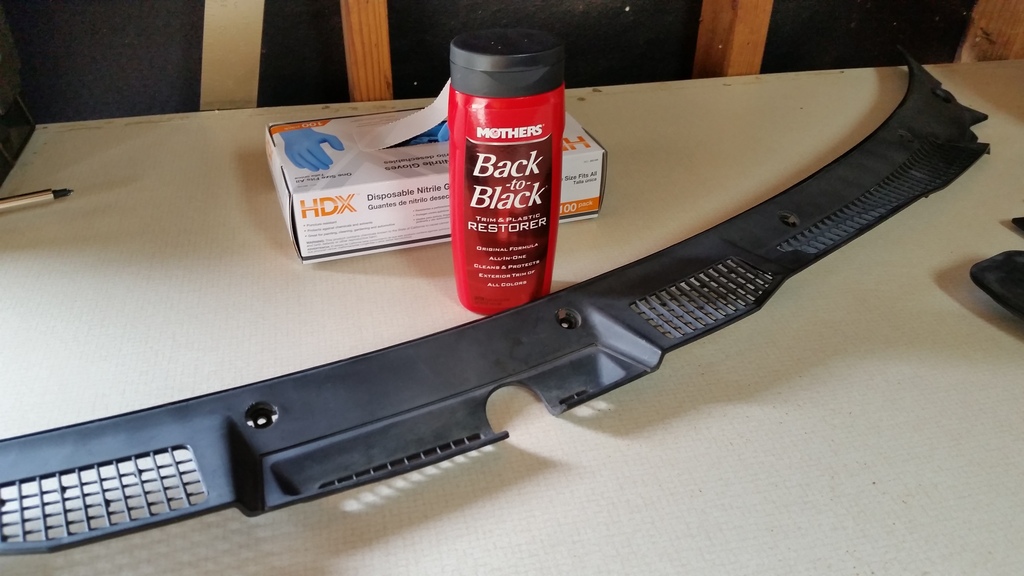
Sorted out the door handles (Thanks, Vince!), ans turned my attention to some of the crap that was laying around the garage. I'm waiting on a piece for the headlight assemblies, so I can't put those back in just yet. My windshield cowl has been very much in my way the past few weeks, so I decided to order the rubber trim for it. In the mean time, I put my recently-purchased Mother's "Back To Black" plastic restorer to the test. The before:
The after:
While I wouldn't say it looks brand new, It certainly looks like I won't need to spend any money on a new one.
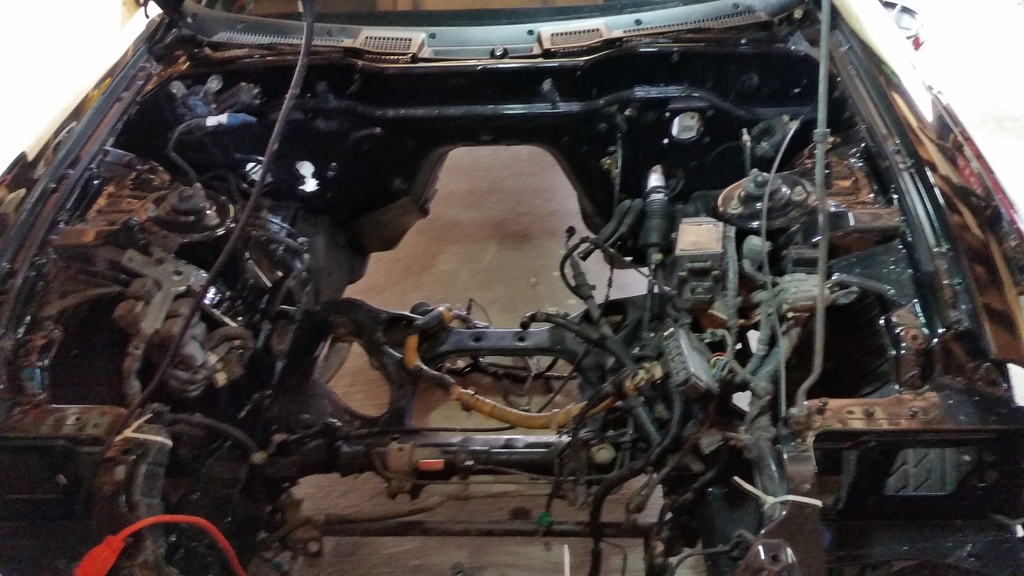
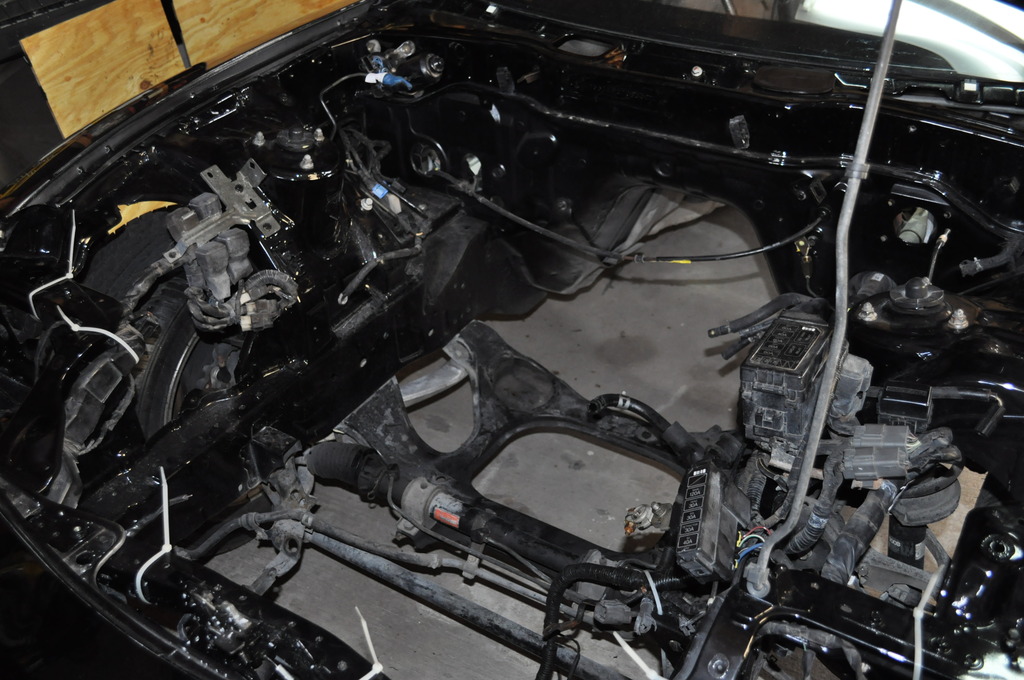
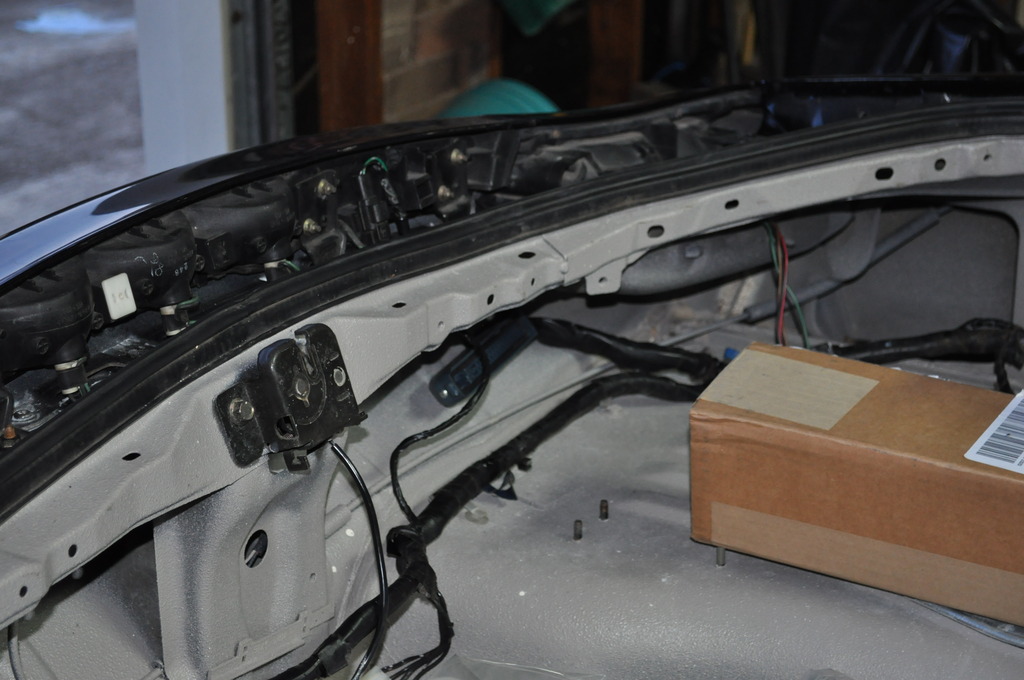
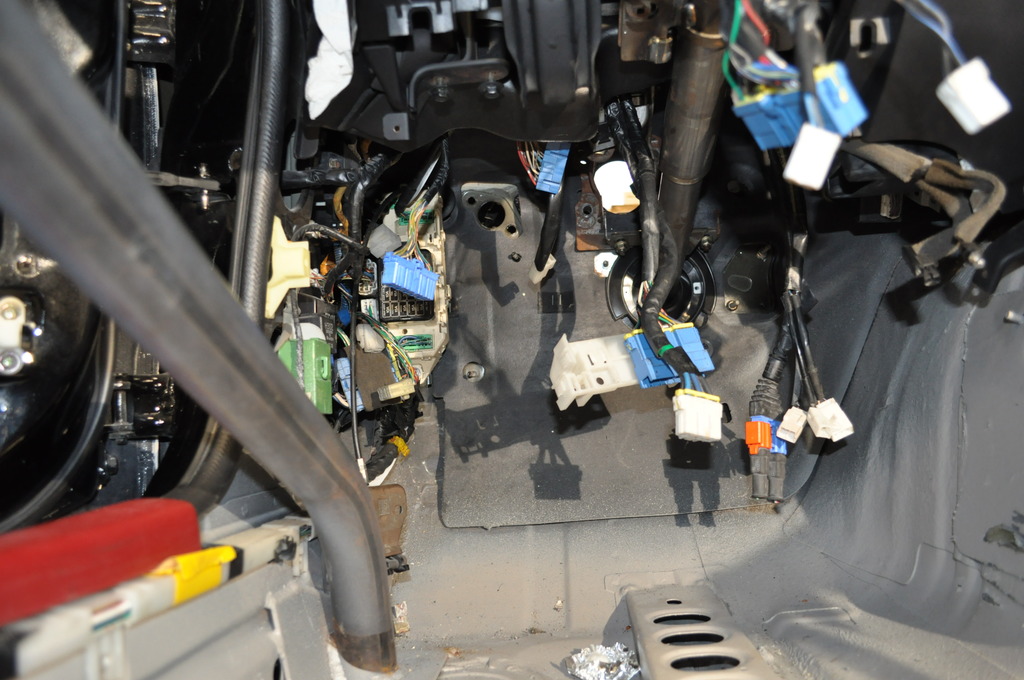
Next, I needed to clean up the under-hood wiring. The body shop made quite a mess of things, so a lot of the old clips have had it. Here's a fresh "before" crappy cell phone pic:
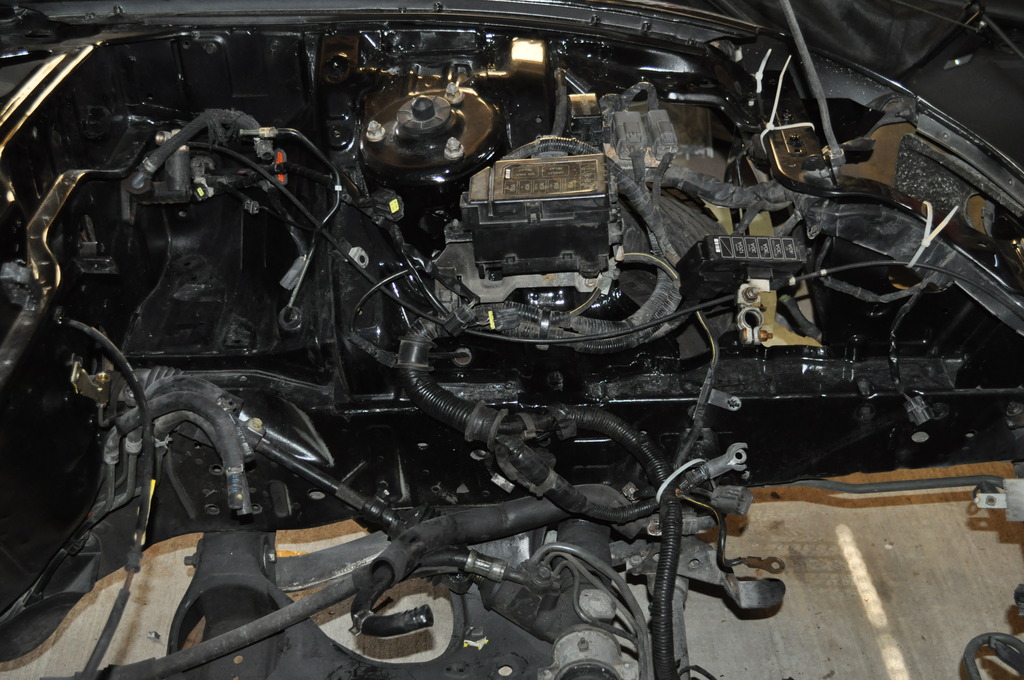
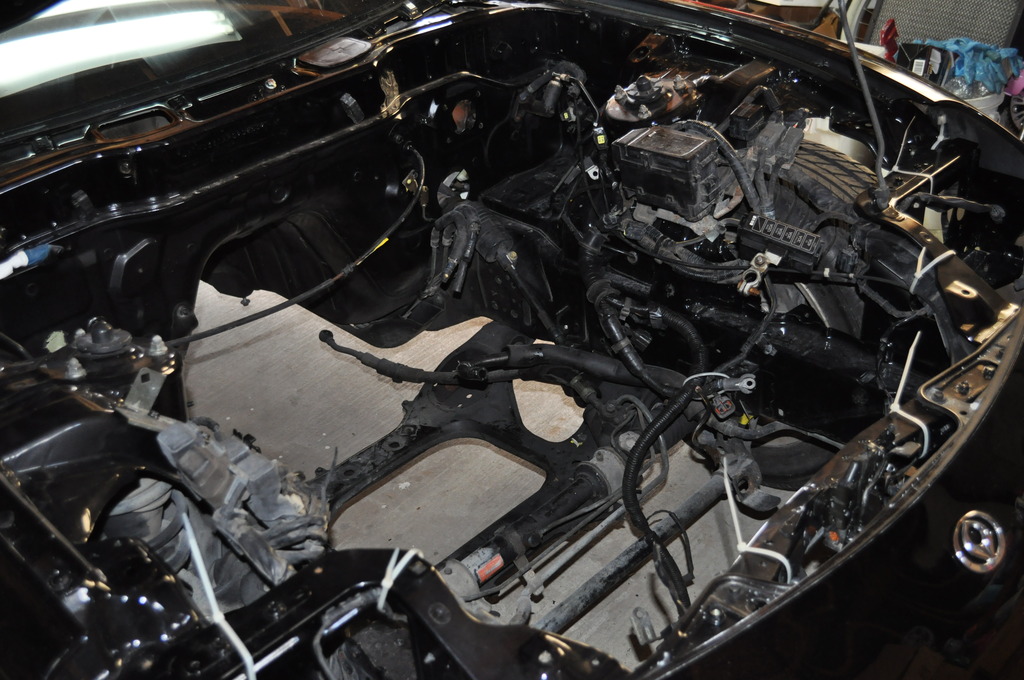
Since the harness was pretty unadulterated, it went back in pretty easily. Used some zip ties to hold stuff in place. I plan on cleaning a lot of this stuff before permanently clipping it in. I'd say it's starting to look more like an engine bay...
...as opposed to a bowl of spaghetti.
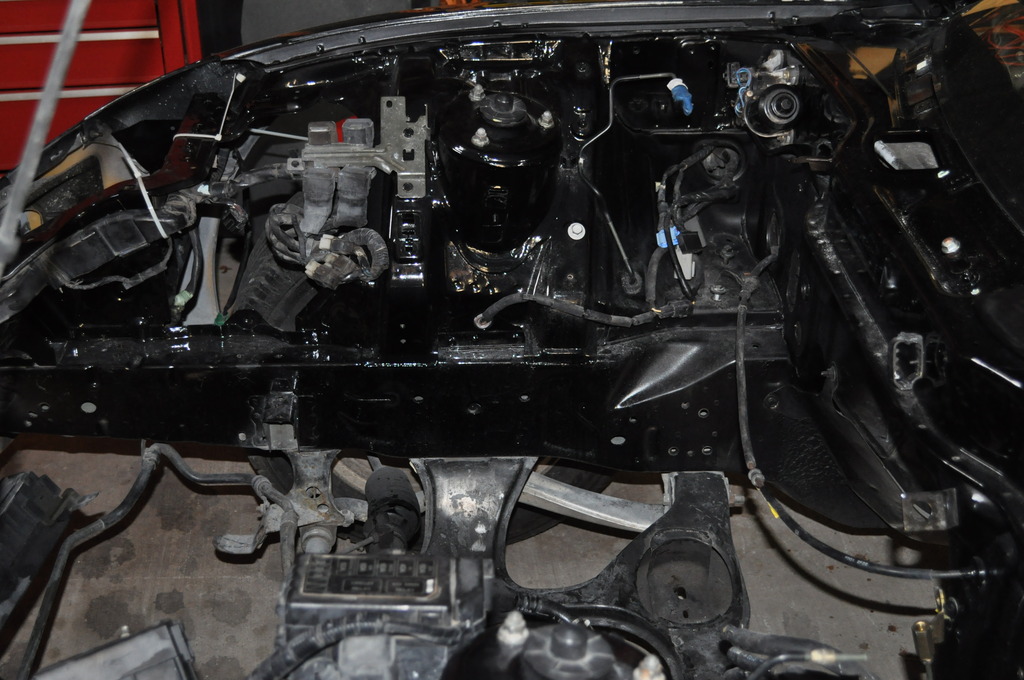
This was the most fun part. I had to shove all this into the firewall by the LHS foot well.
The body shop pulled this, and didn't put it back.
Any which way, I got it done. A surprising amount for a Mother's Day weekend!
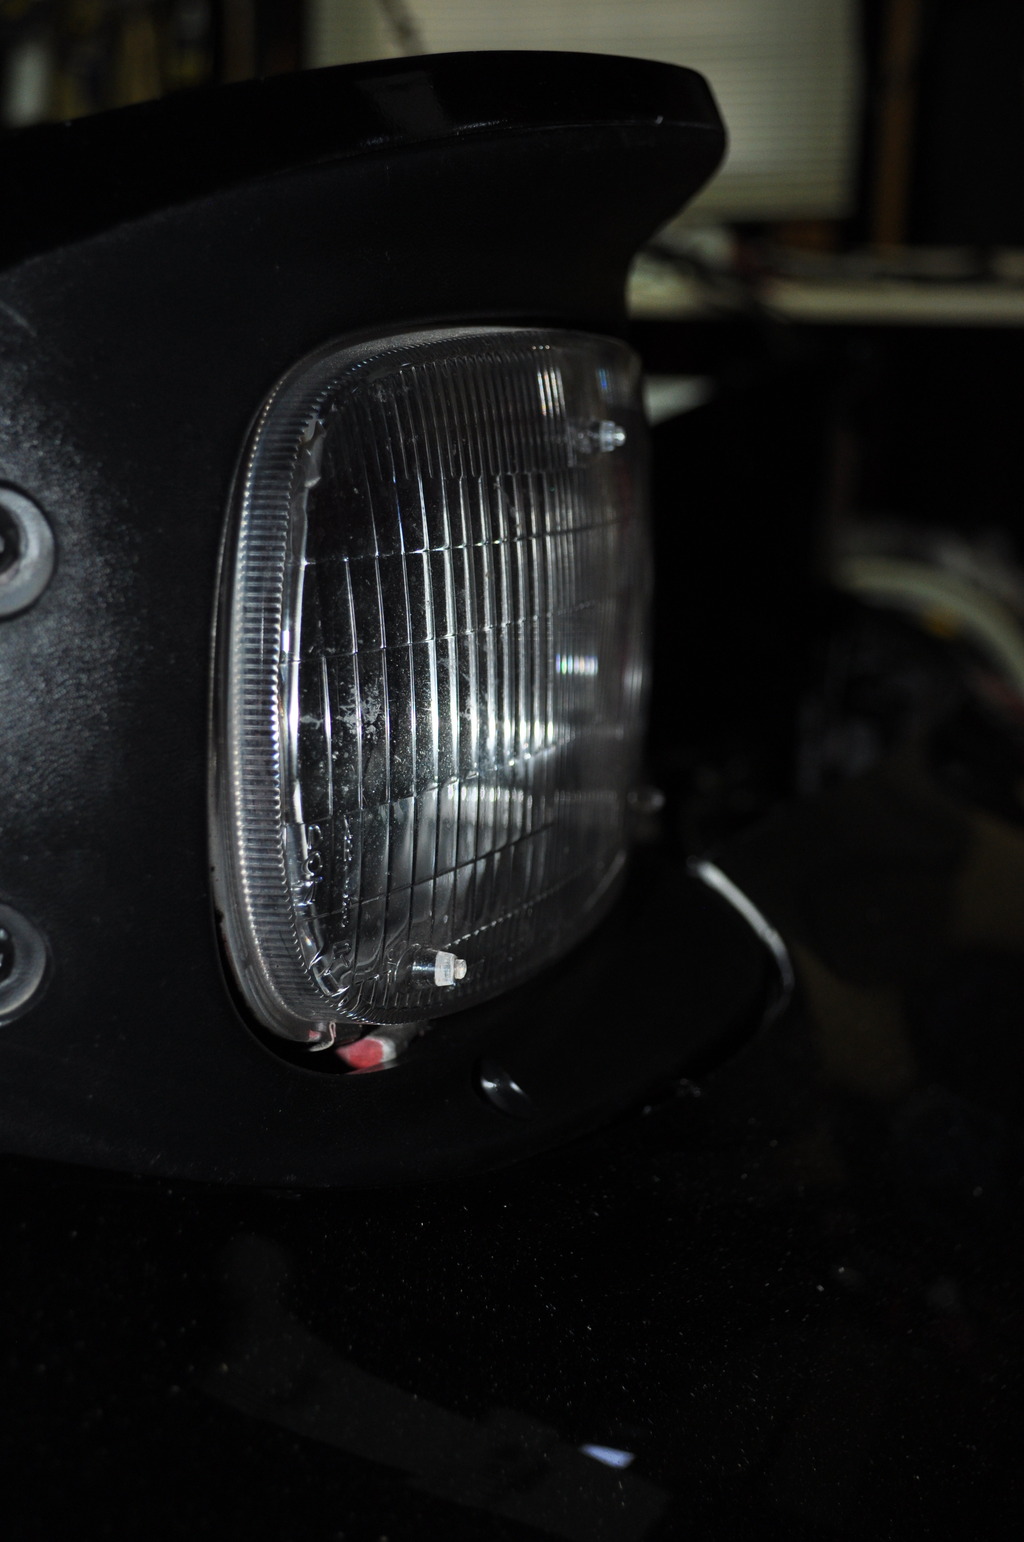
This past week and weekend, I cleaned-up my headlight bezels/shrouds/whatever you wanna call 'em, and made a couple of trips to the hardware store for headlight assembly hardware. Passenger-side assembly installed without much trouble
The driver's side was a different story. Bolted in fine, but when I gave the 'ole manual **** a crank, I noticed it was awfully close to the body work (as in �rubbing�):
In addition, the bezel was not easy to get on, and didn't easily mate-up to the headlight cover:
I tried moving the assembly around as much as I could before tightening the bolts, but it really didn't work. After all that, the assembly doesn't seem to pop up all the way:
So I'm planning to take the assemblies out this weekend, take them apart a little, and see what's wrong with the driver's side. I have a bad feeling.
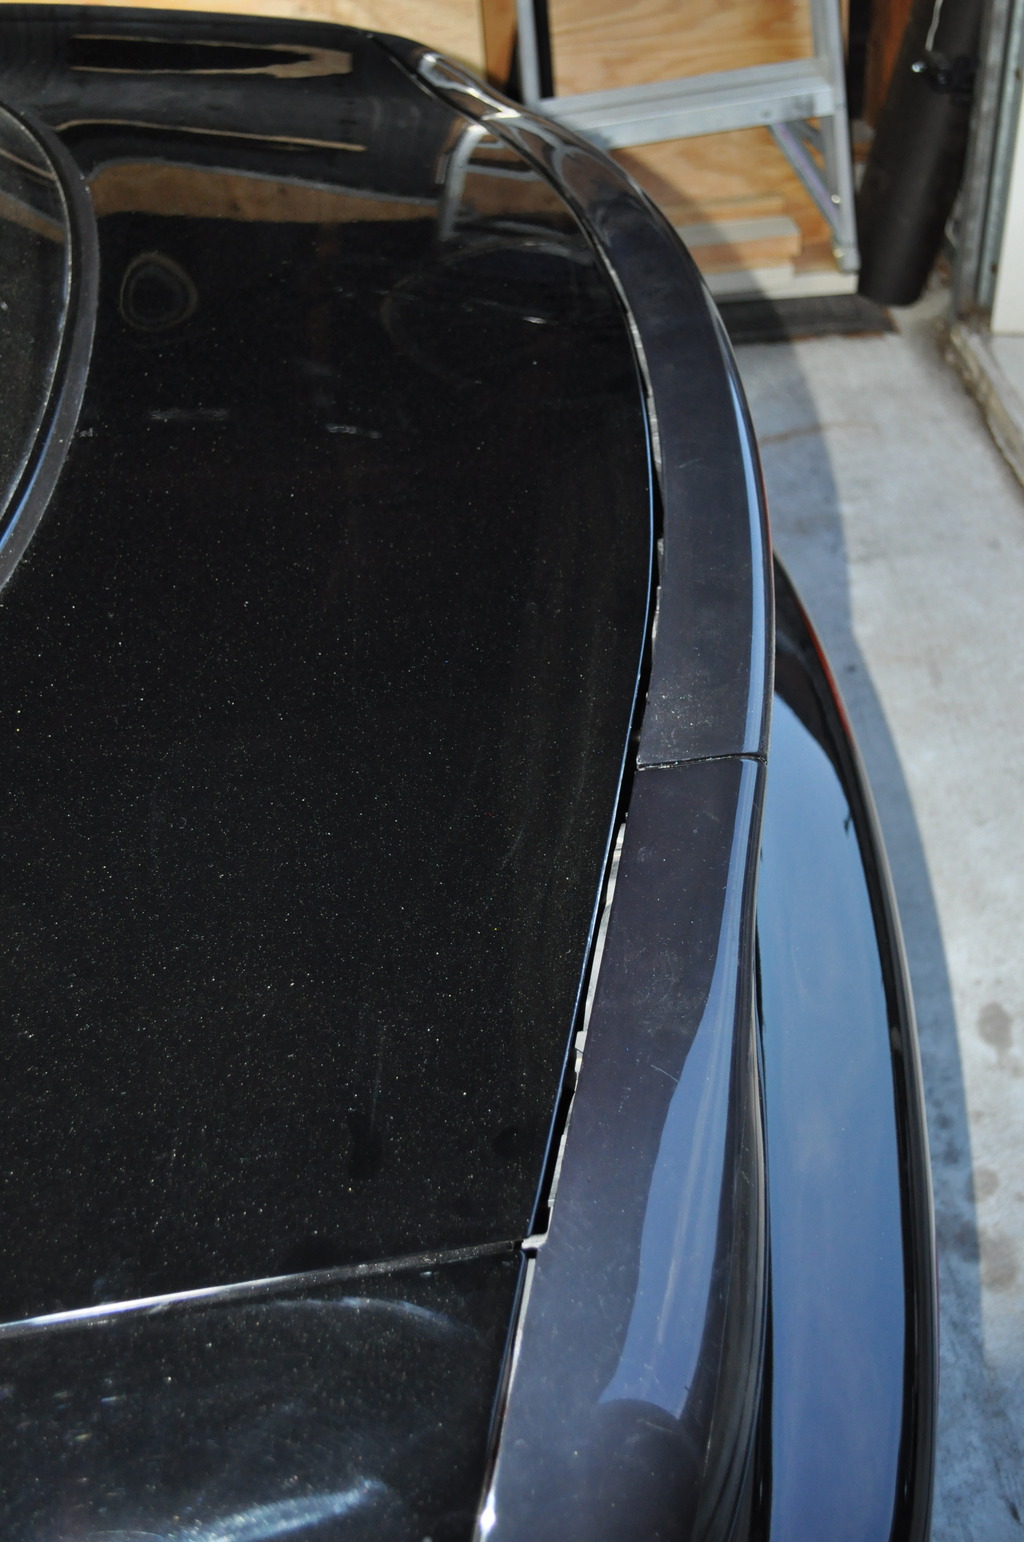
Frustrated with that, I turned my attention to the beltline moldings. Mine were shot, so I scooped some up from the classifieds. They installed fine, except the side close to the front triangles. BOTH sides were missing the tab on the end cap that clips in under the triangle. Now, it looks like this:
Two things about this:
1. I installed the triangles before I realized the cap clips were broken, so I need to remove the triangles before I can re-install replacements (IF I can find some). Can anyone point me to a tutorial for removing the triangles without breaking anything??
2. Can the front clip caps, with tabs, be obtained separate from the beltline molding, or is this a �buy the whole thing� situation?????
3. If #2 is the case, are there any hacks to make this work???
After fighting all that, I noticed my drip molding was bulging a little on the passenger side:
This began the fight at the part of this molding closest to the handle. After much colorful language and man-handling, I wound-up with something wrong with the tab at that location, and drip molding that�s all janky at that spot. Worst part is that I couldn�t even fix the bulge.
I finally decided to test fit my tail lights, which seemed to go well, just missing some pieces. What you see is what I got:
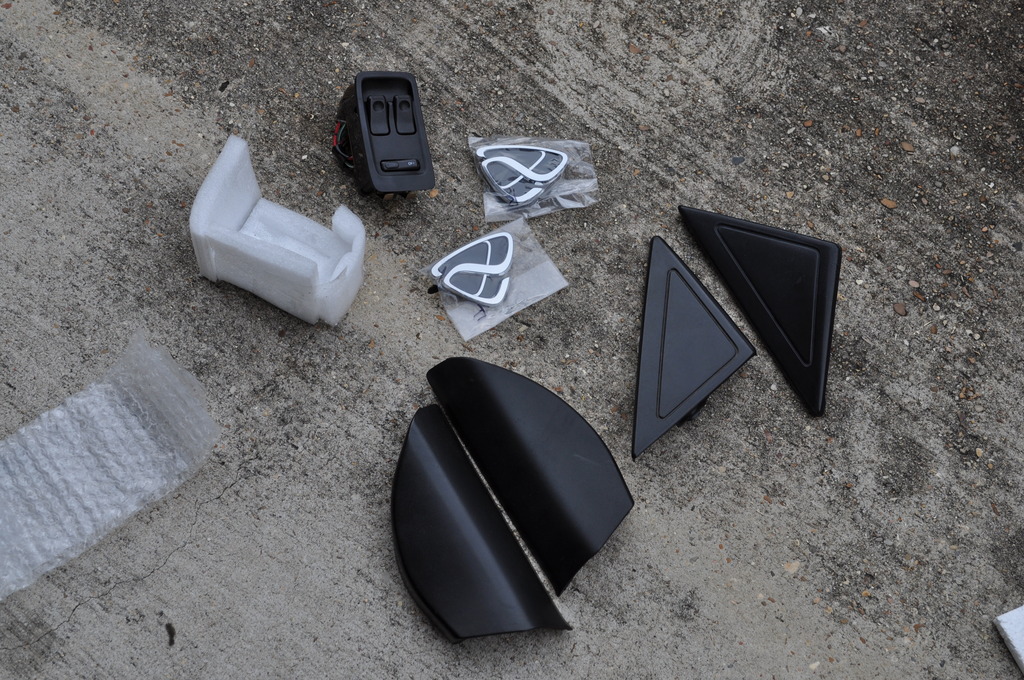
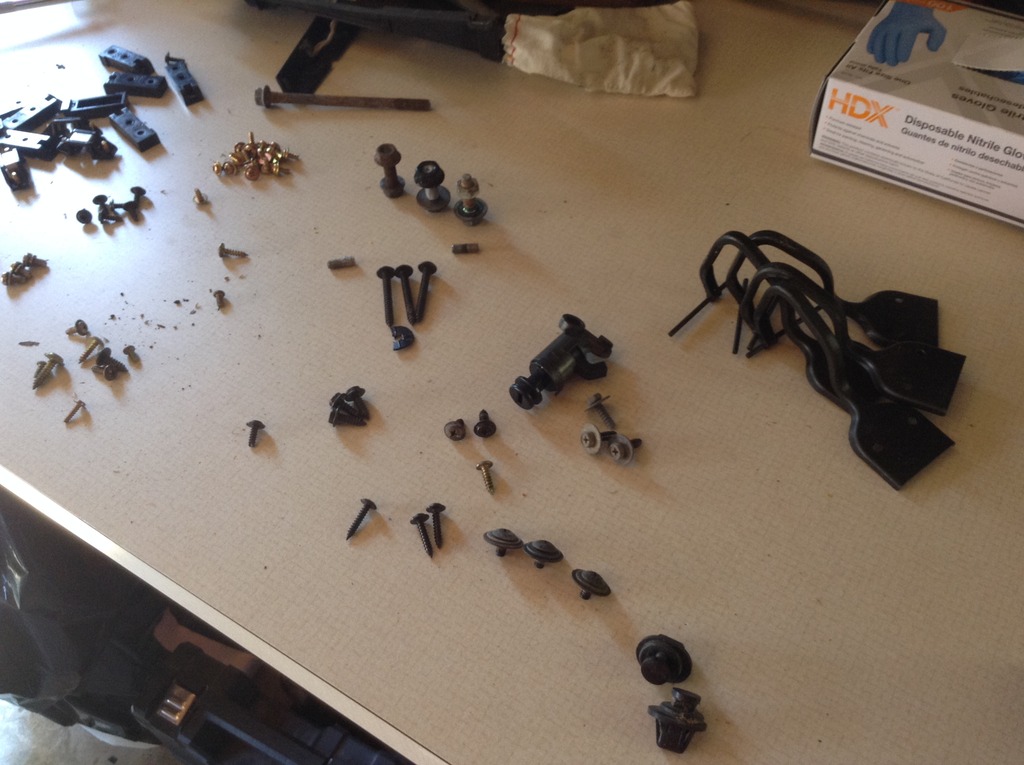
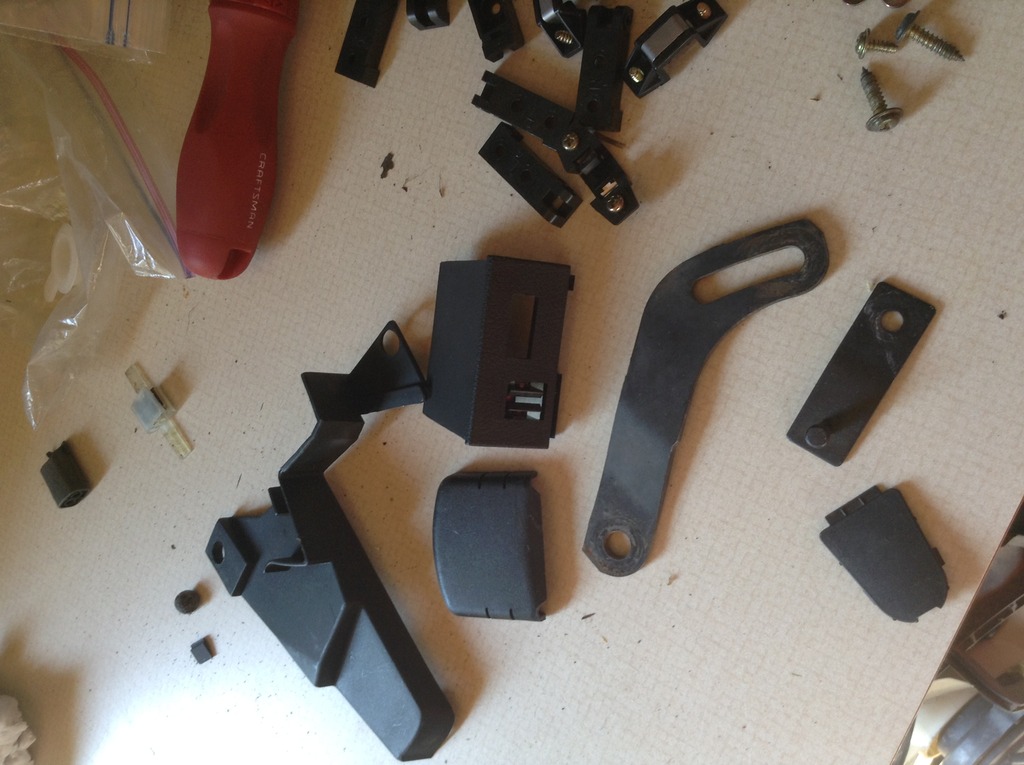
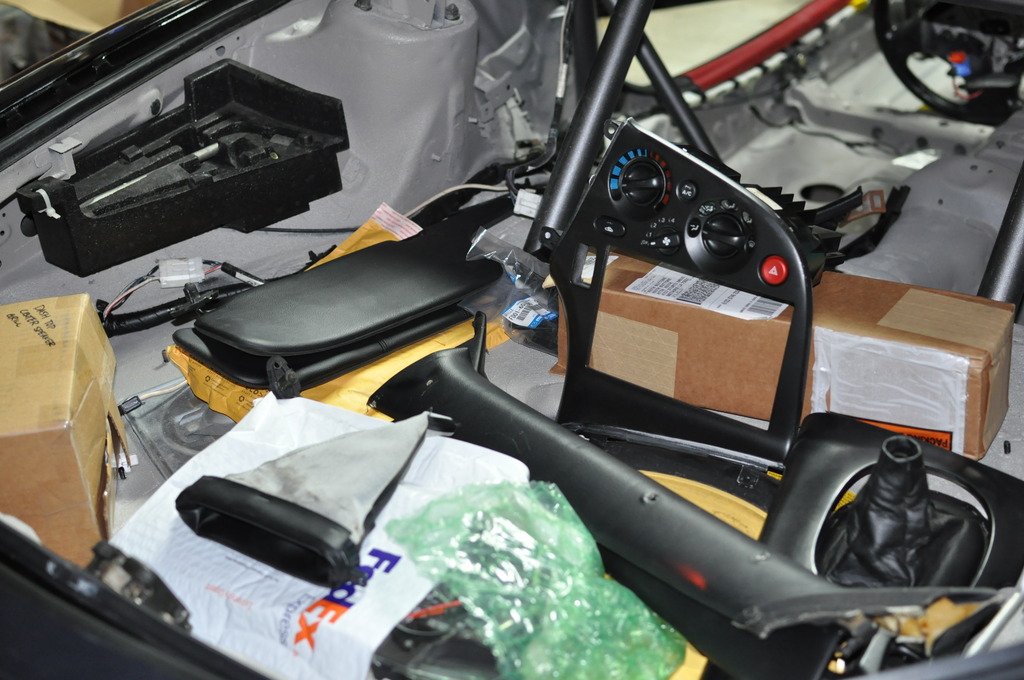
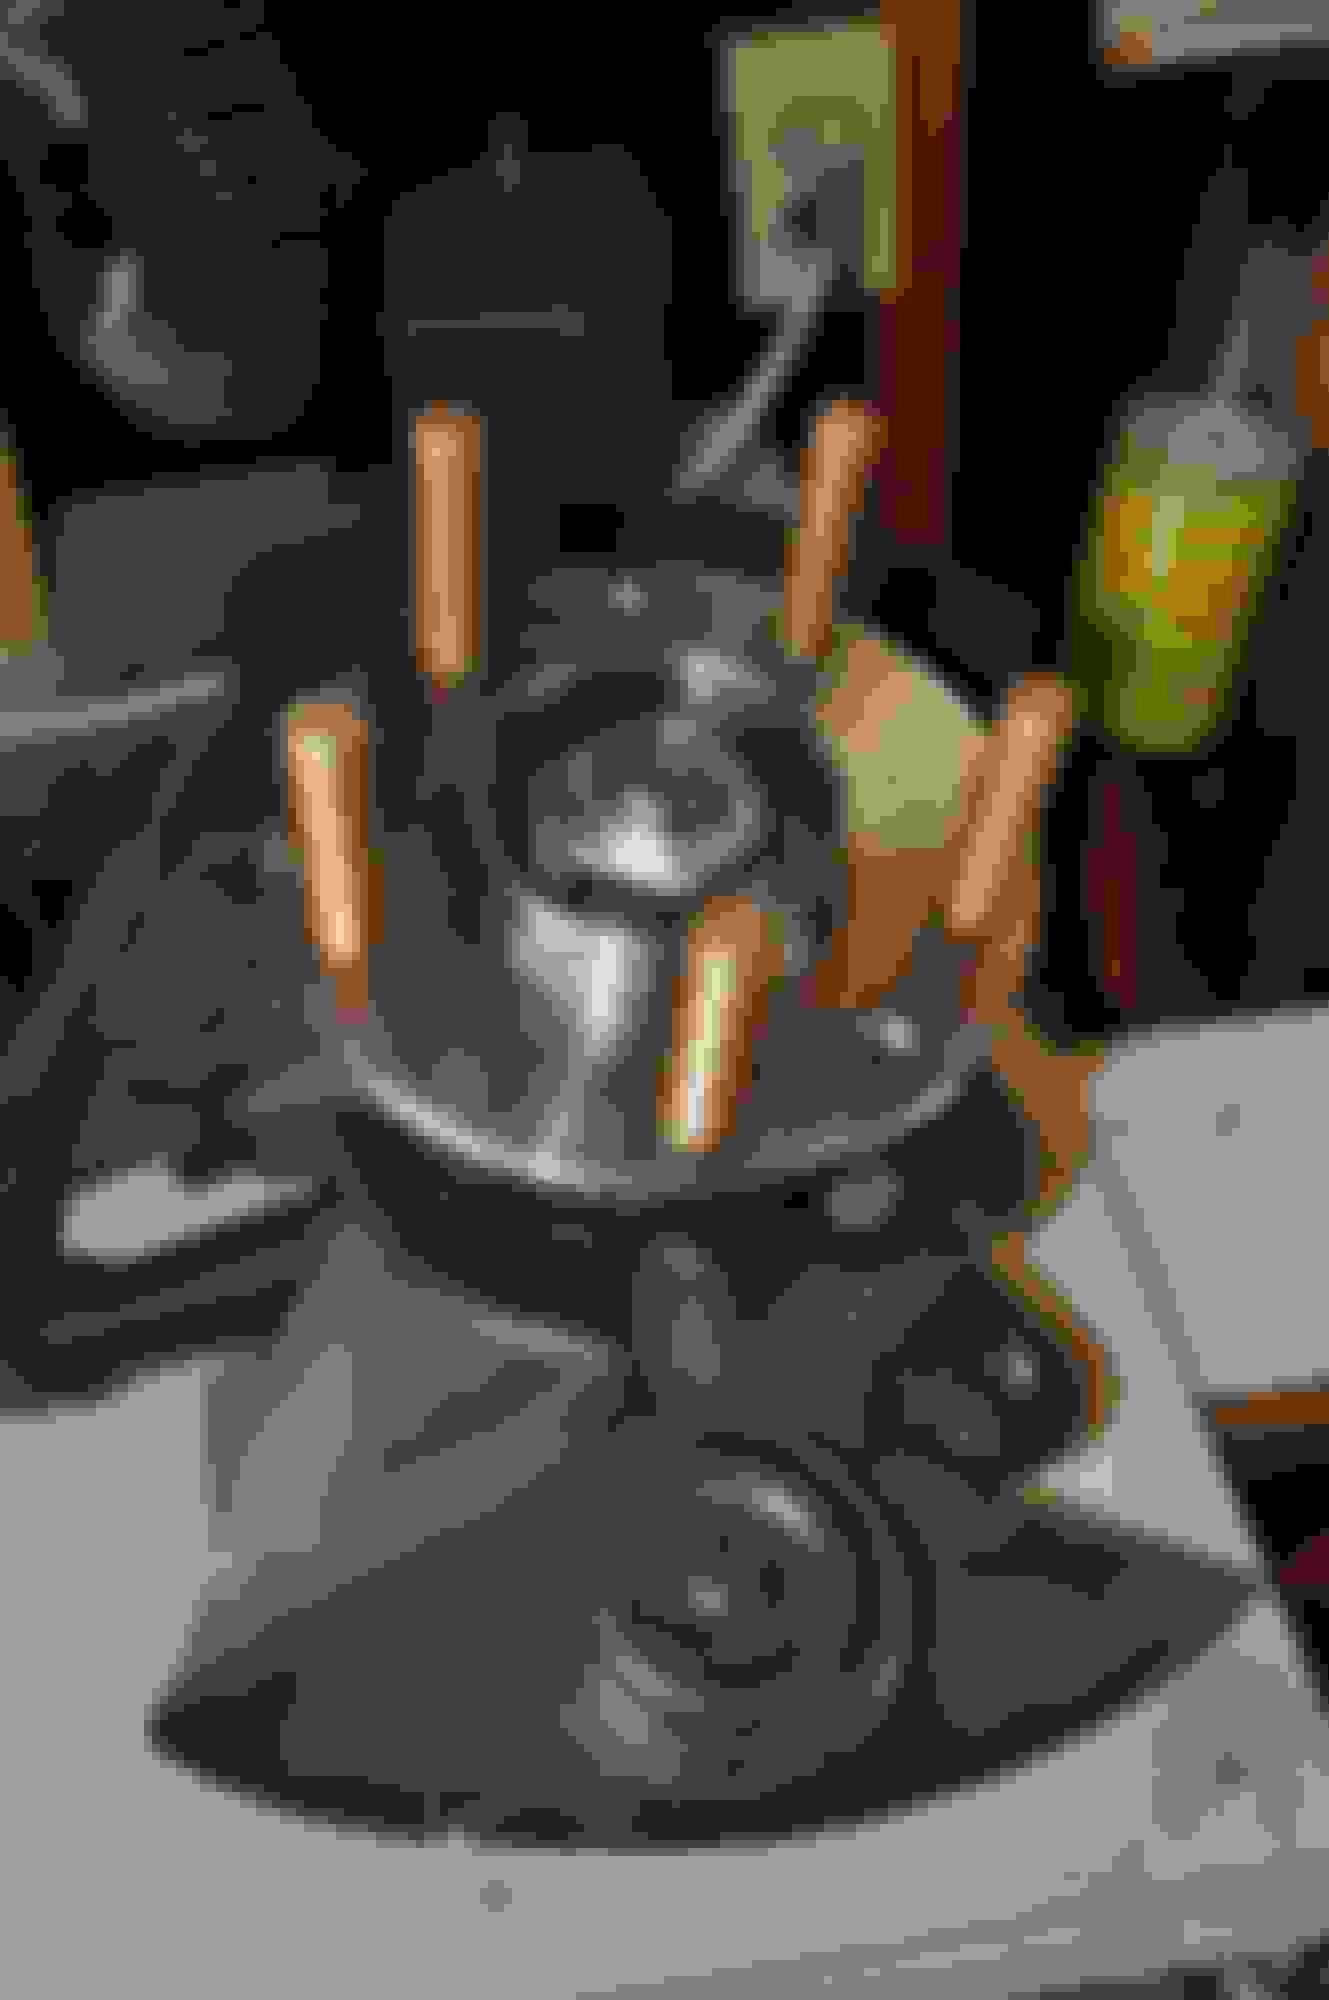
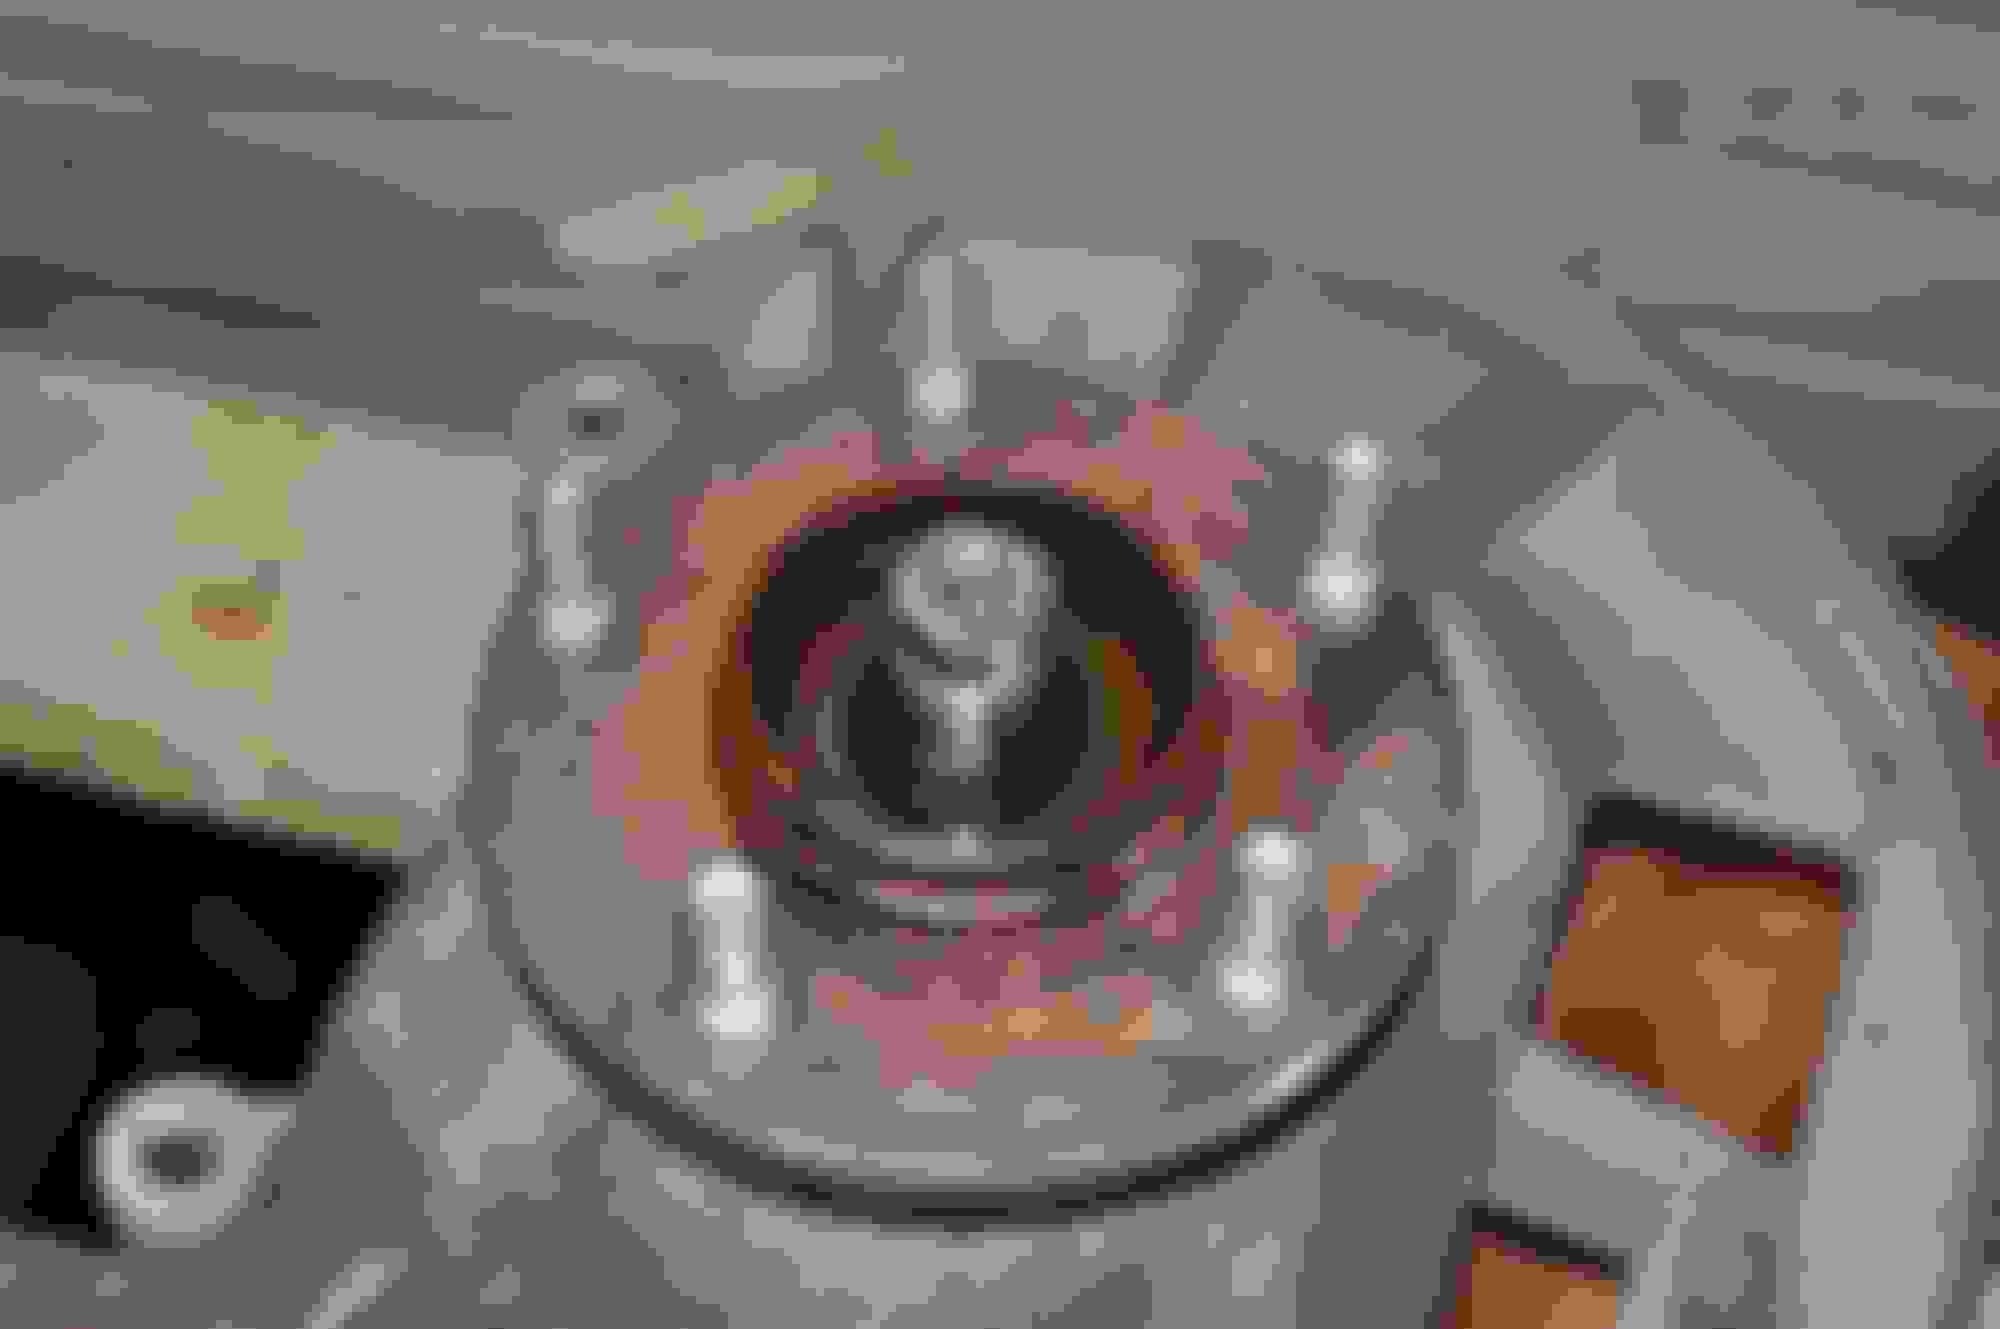
First off, shook out a "miscellaneous" bag-o-stuff that was given to me with the car. Not even sure if all this stuff even goes to my car, so any help ID'ing this stuff is appreciated:
I think this is mostly seat stuff, but please tell me:
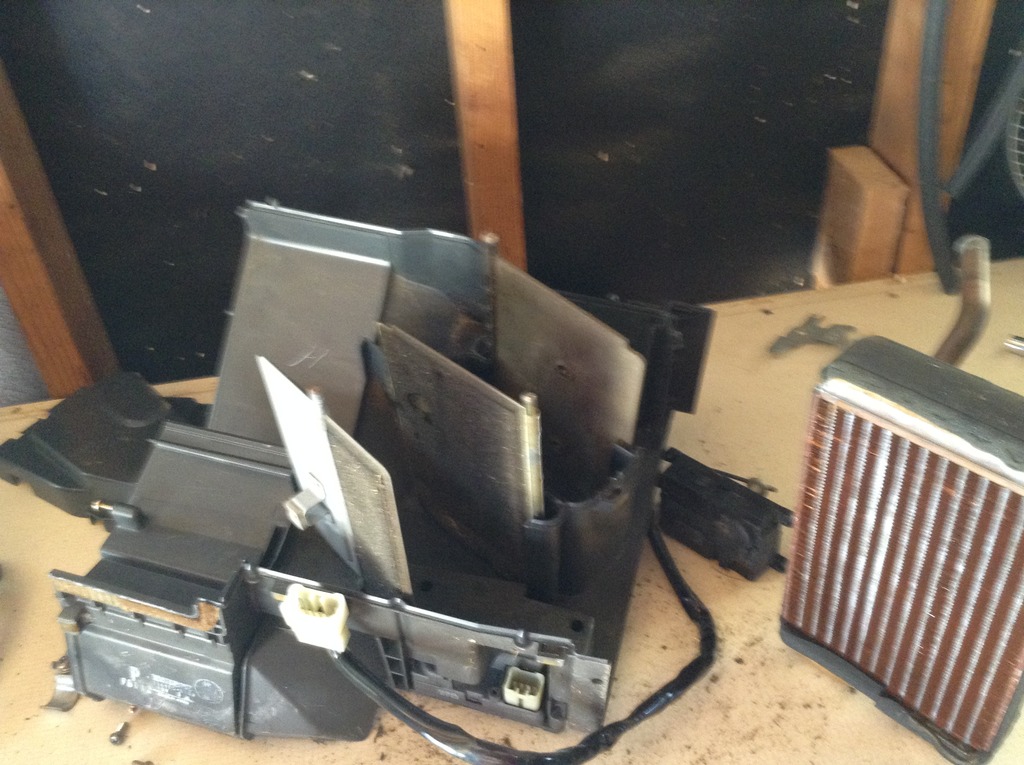
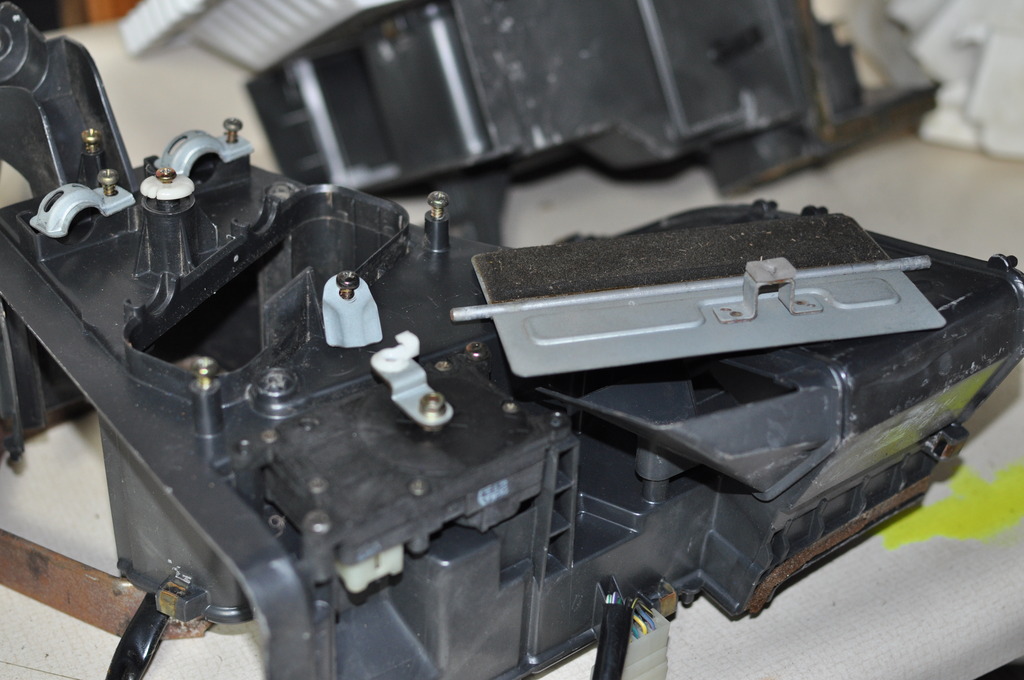
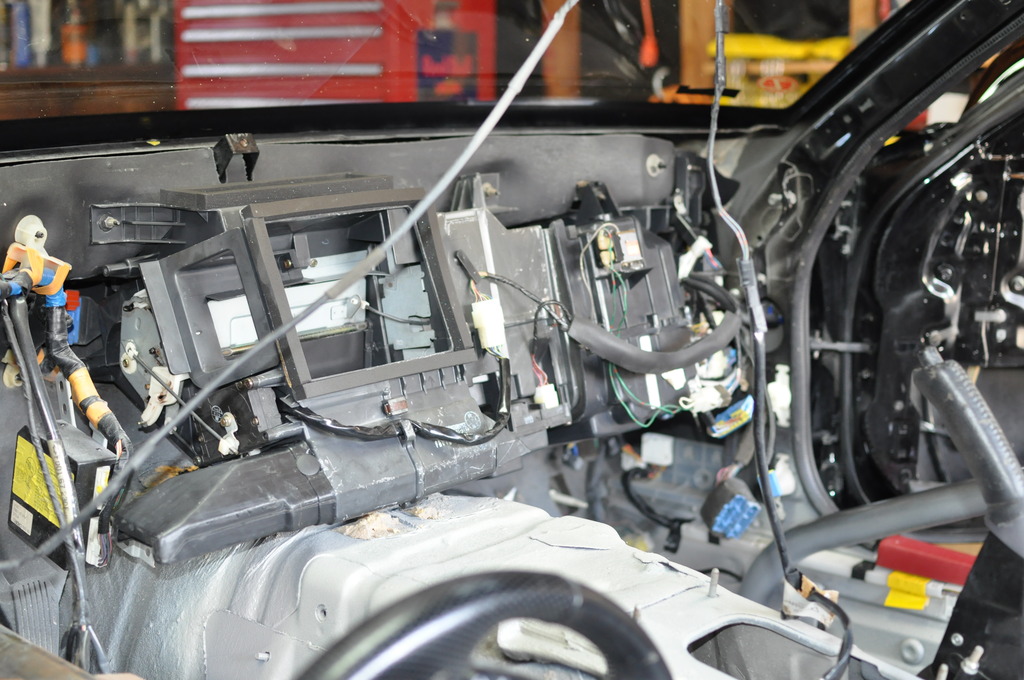
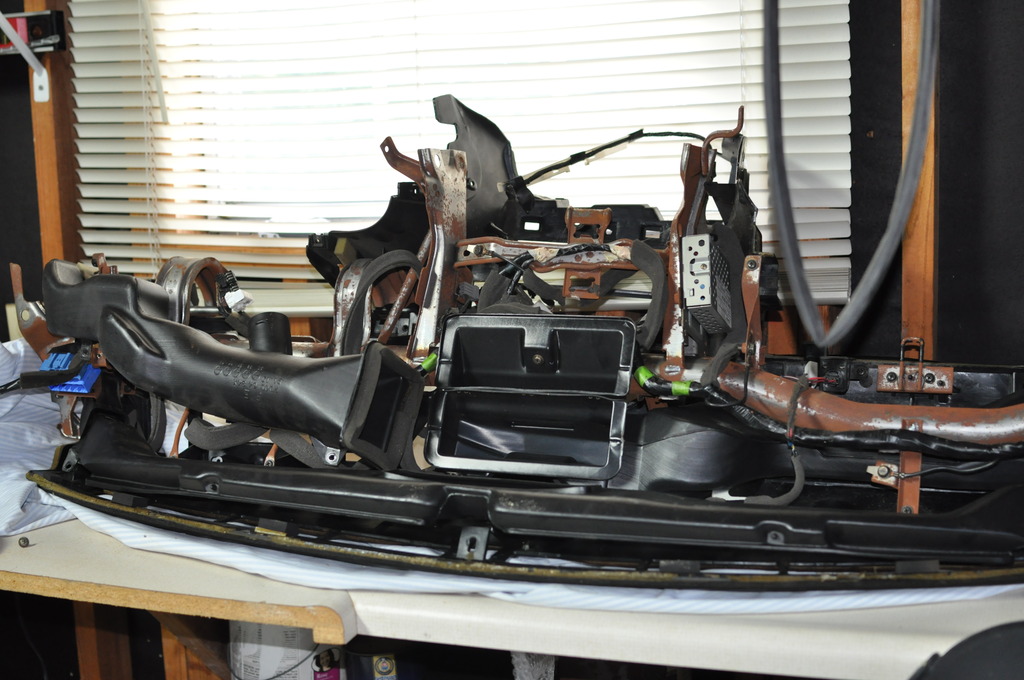
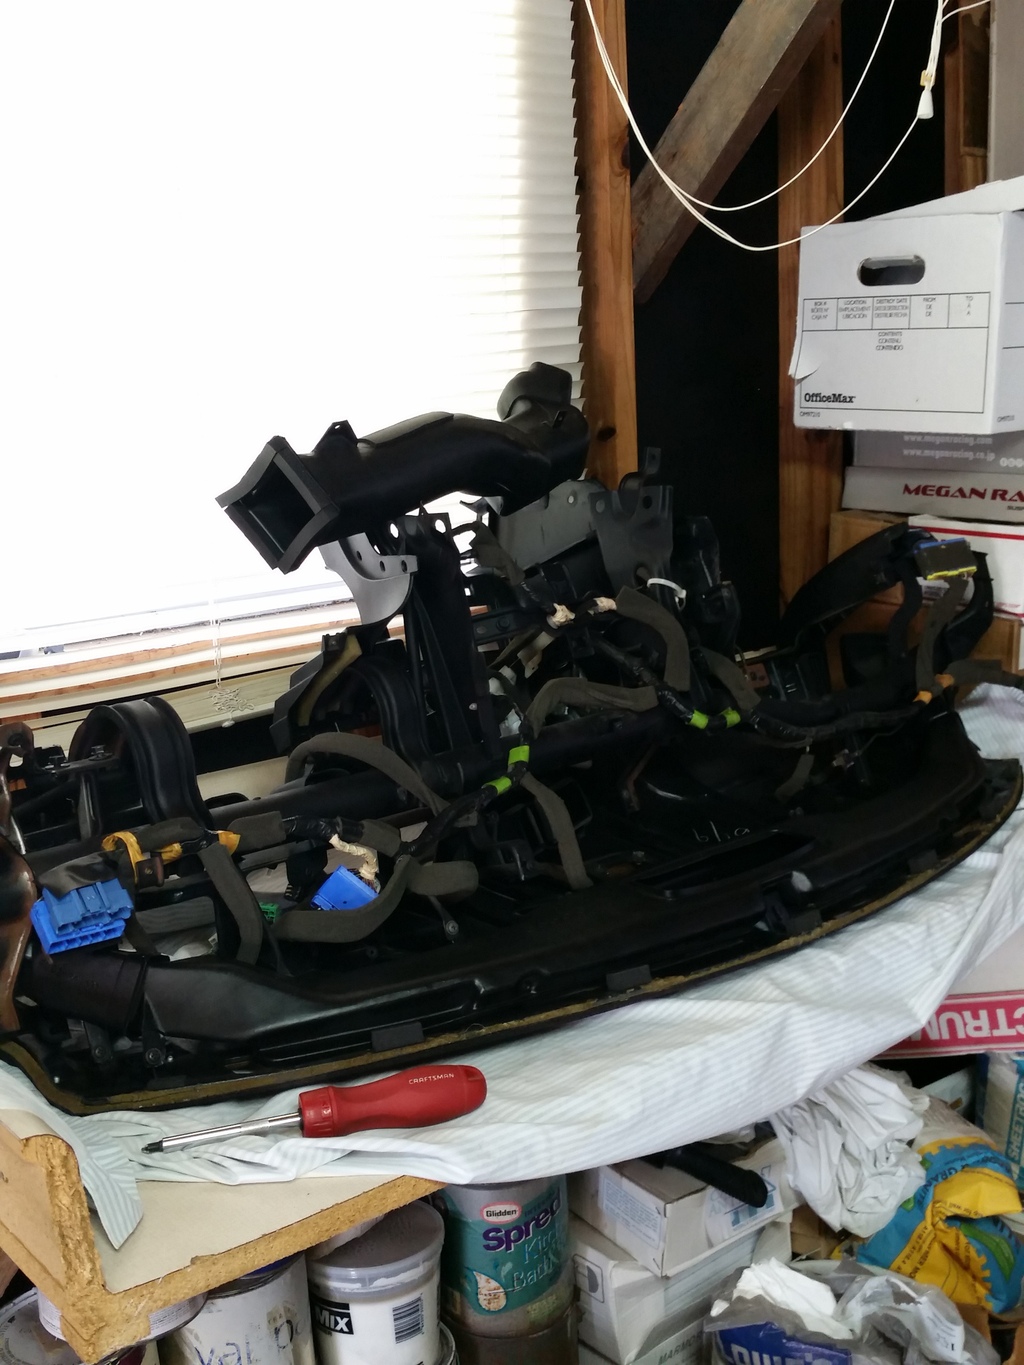
After that, I started the daunting task of evaluating my under-dash HVAC stuff. The car had sat in a field, presumably with these items already taken out. ALL the foam in there is bad, and there is a serious film of dirt and funk caked on there. I'll save all the grizzly details, but this and the blower seem to be the only 2 salvageable chunks (only if I can find a way to replace the foam).
Something tells me I have a WTB thread in my near future. Meanwhile, I've decided to leave the pop ups alone for the moment, and concentrate on getting the last few needed pieces to get the car weather resistant. Once that happens, and the car is washed/waxed/covered, I'll have some worthwhile updates involving a full suspension rebuild with those fancy Ohlins I pictured so long ago.
If anyone has any under dash HVAC pieces they don't need any more, PM me with sale offers. Thanks!
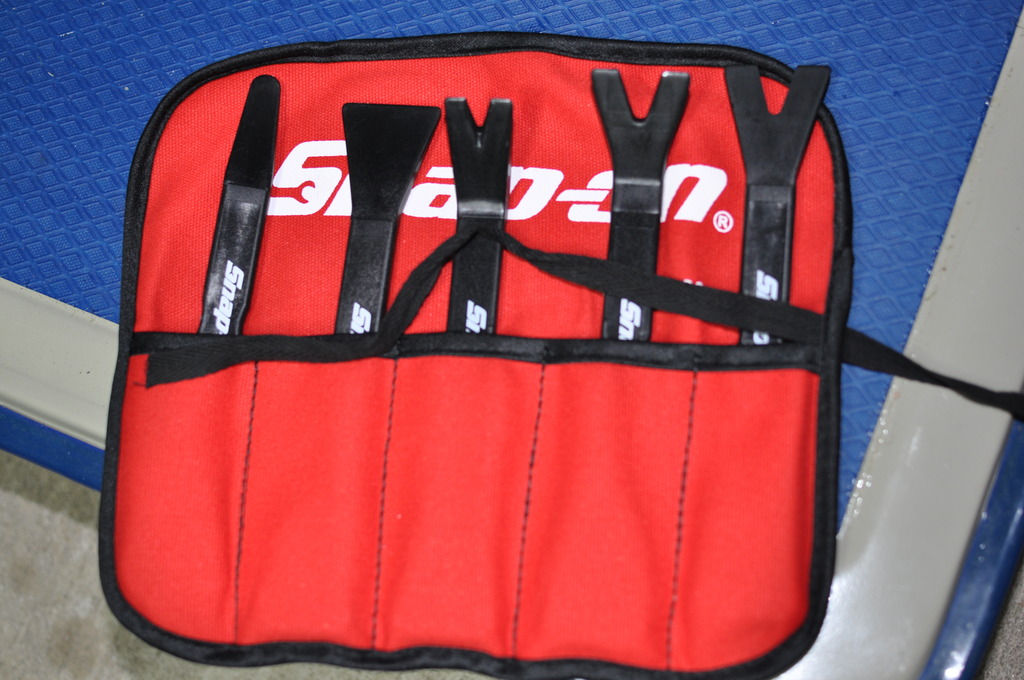
Moving right along with "operation: weatherproof." Ordered some items from Ray, and I can't say enough good stuff about him. Very helpful, and his pricing is great. 2 of the items I bought were to correct my beltline molding issue. Happy to find out that Ray had these "cap" pieces in stock. I was very careful on removing the molding, to the point that I just took the windows and door handle assemblies out for removal. Used a set of trim removal tools I got from my brother. Get something like this if you don't already have them:
Used them to get the triangles off. Removed the beltline moldings, installed new caps, replaced, and here we are:
Much better!!!
Also tested and installed all of my turn signal corner and bumper lights, tested with my handy testing rig:
Also installed all the tail light interior covers after using the Mother's re-blacker on them.
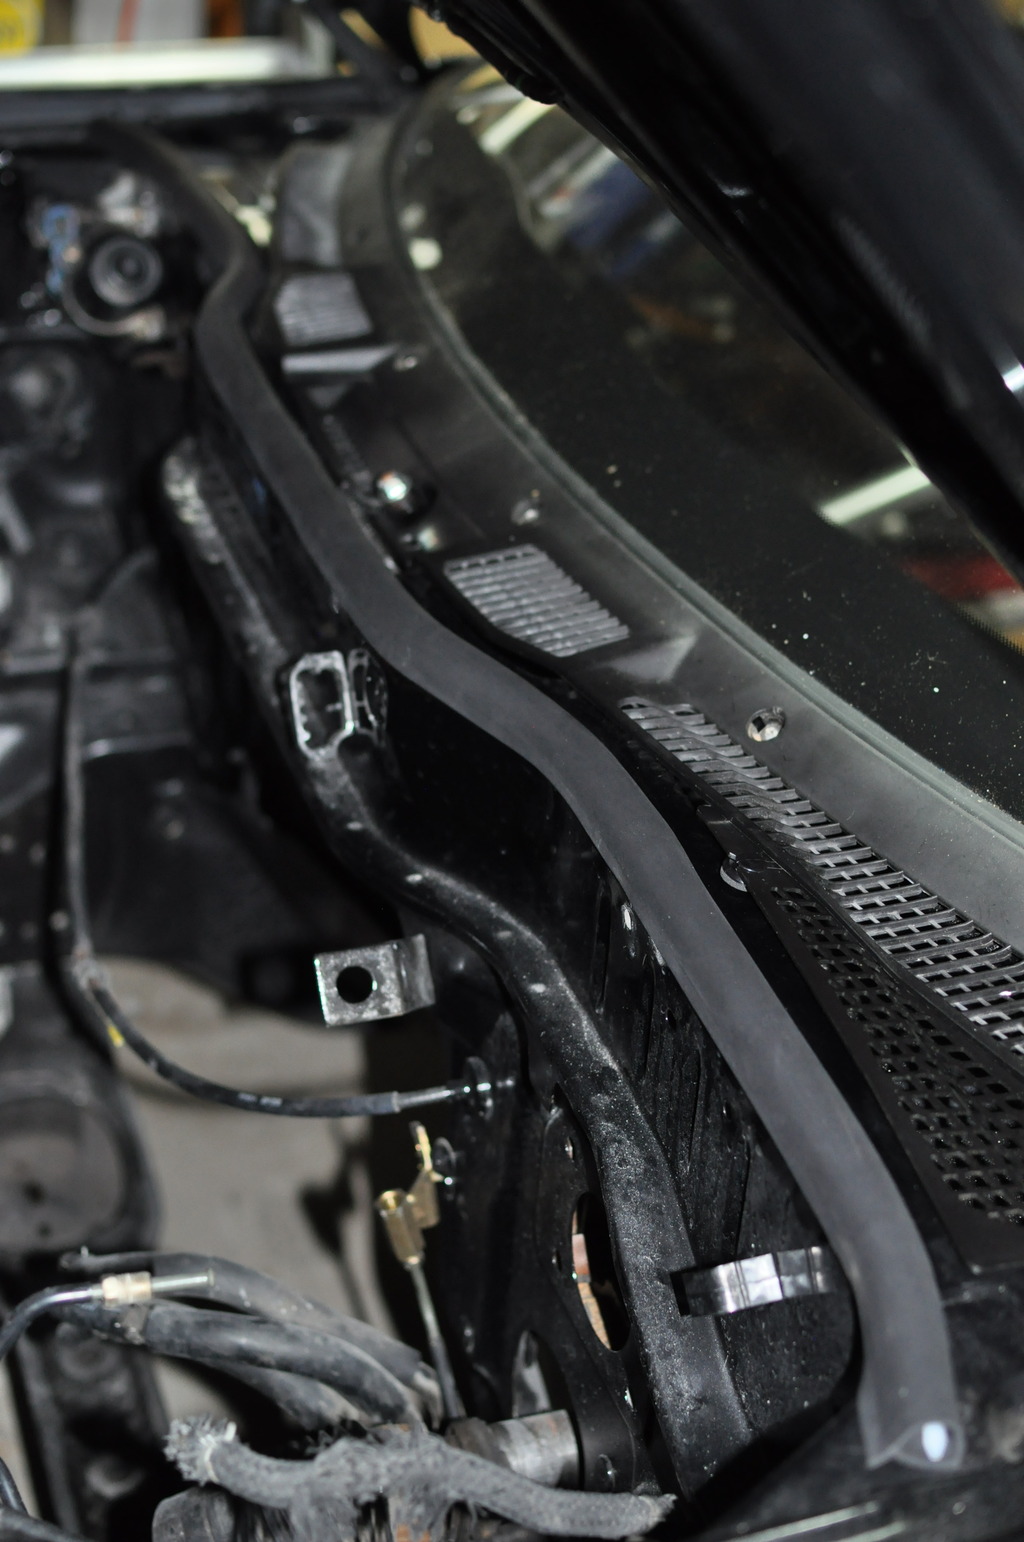
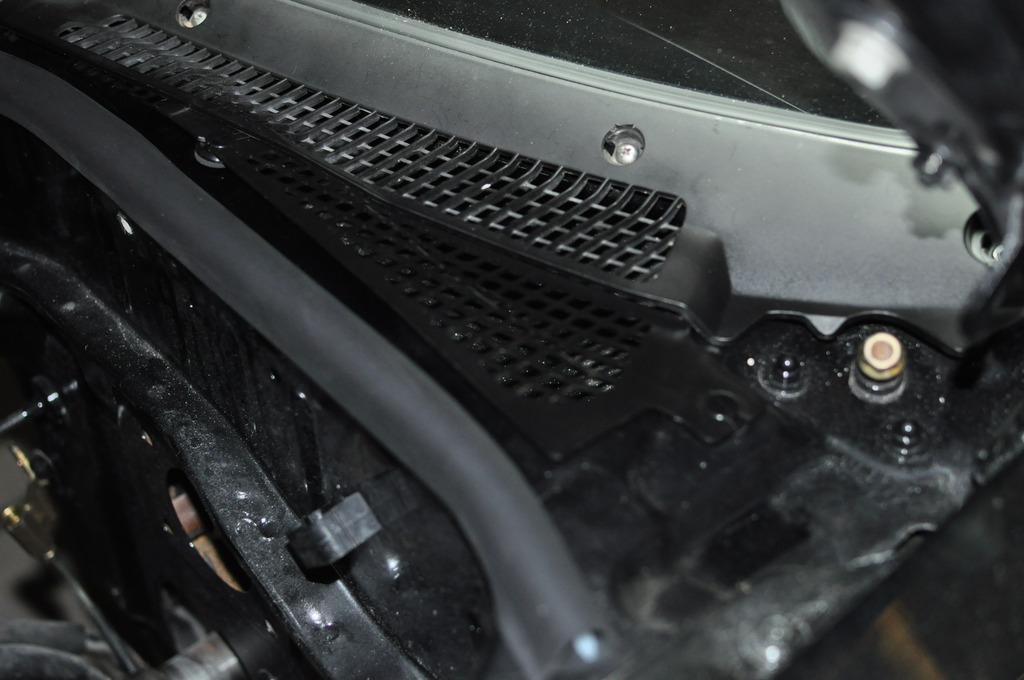
In the engine bay, installed a fresh new weatherstrip and triangle piece under the cowl.
Ray didn't have the clip that secures the end of the triangle, closest to the center of the car, but he did send another clip to use. It's not seated as tightly as I'd like, but it's in there. If anyone would like to donate the correct part, I'd be very appreciative.
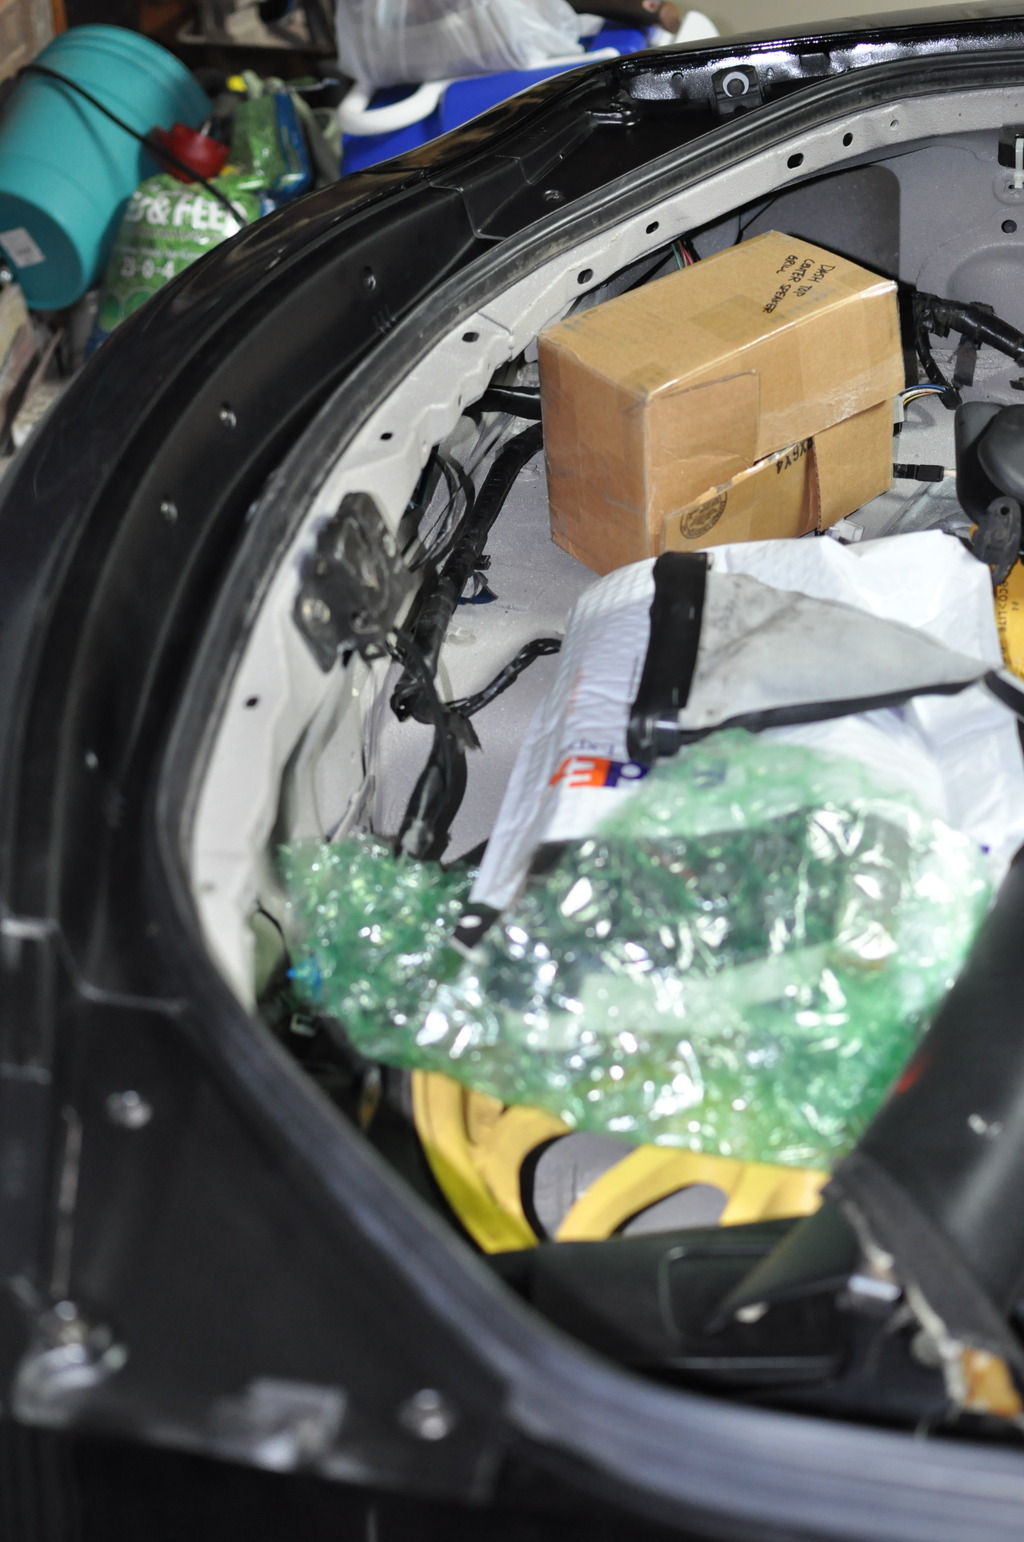
It looks like my hatch will be used as storage until I clean the garage and make some space.
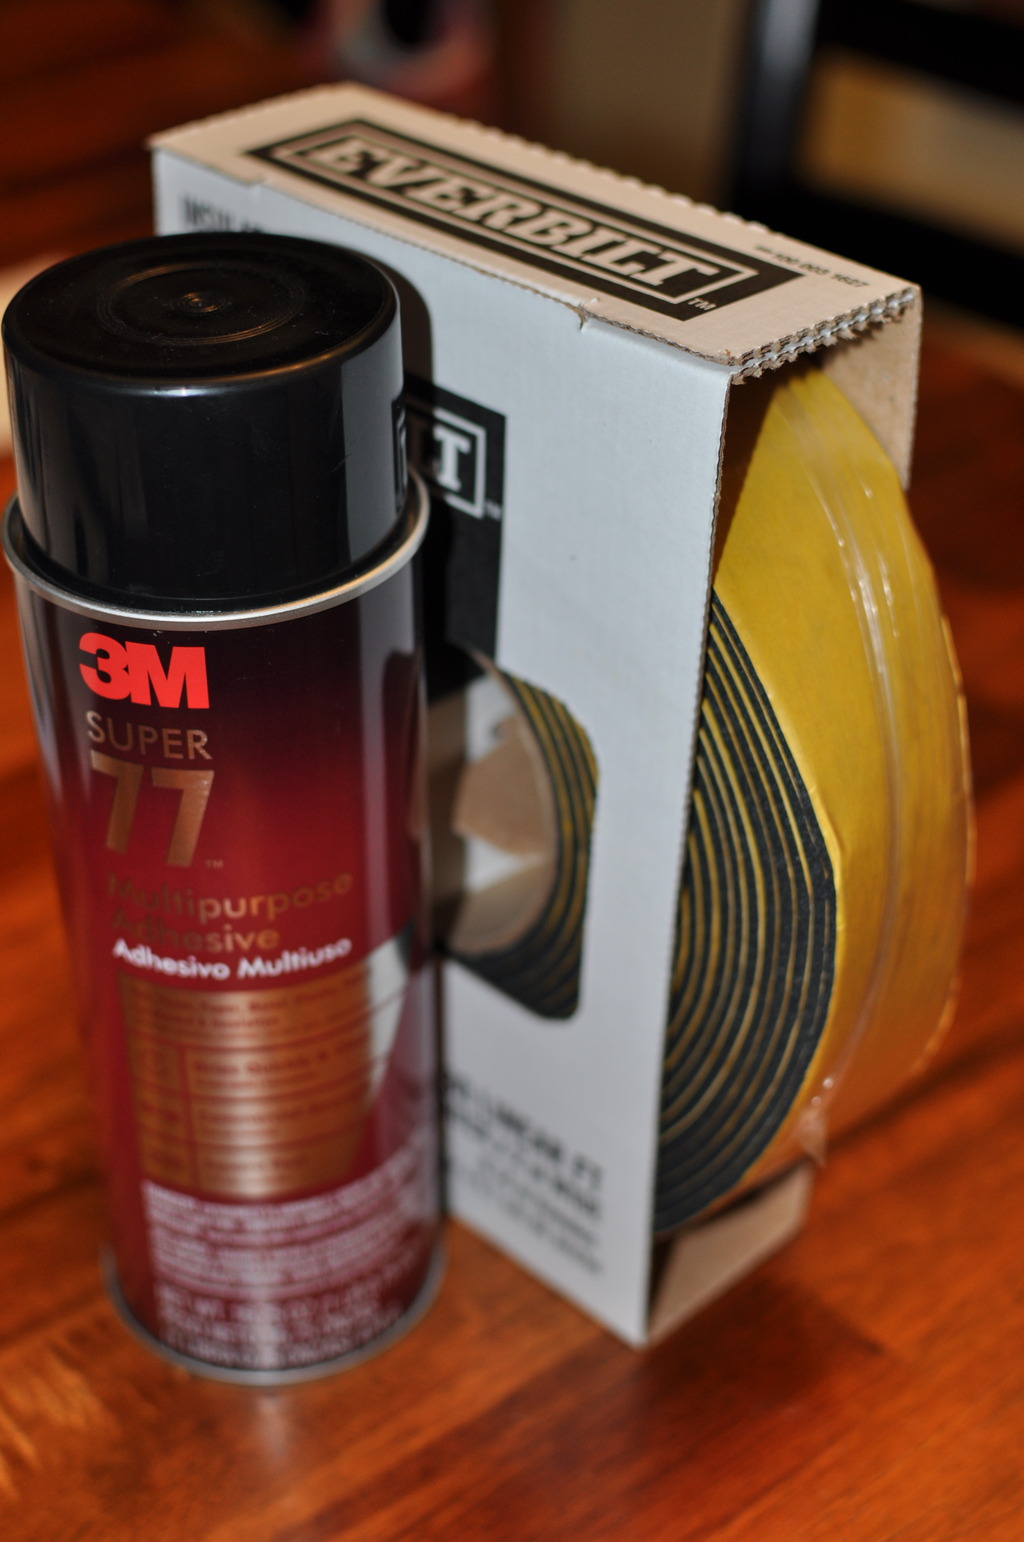
The car desperately needs a bath, as the layer of dust is getting quite thick. I am planning to wash/wax and cover her up by the end of this coming 4th of July weekend. After that, the HVAC and suspension work start. Speaking of which, I sent my heater core and A/C evaporator off to a local radiator shop for testing. The A/C evap. looked fine, but I asked them to test what they could. Heater core looked iffy. I was told that they could repair and even rebuild it if needed. This is gave me the confidence to start rehabilitating my interior HVAC system. It's too hot down here to run no A/C!! While that is out, I got some foam and adhesive to re-surface the baffles in the boxes.
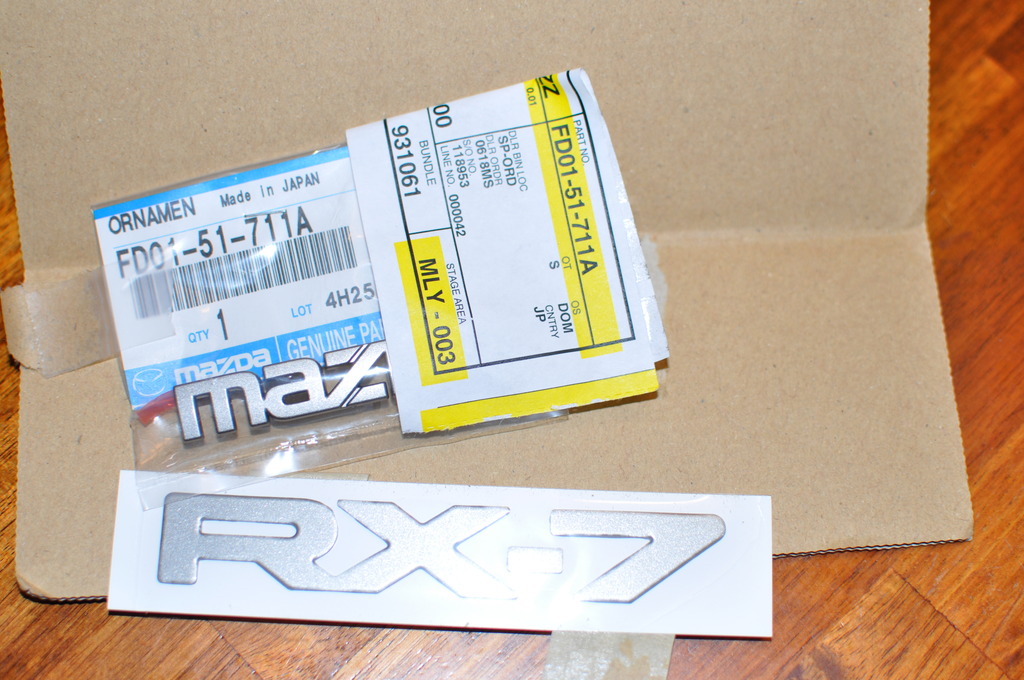
Also, when she's all clean and shiny, I'm going to stick these on, along with the efini emblems:
They were retarded expensive.
I'm getting there, slowly but surely. Next month, I plan to get the bulk of the suspension work done. This should include new arms, bushings, wheel bearings, my Ohlins, and wheel studs. After that, it's brake and steering rack rebuild time!
Now on Instagram as "brokebecausefd" so please follow and like!
Casual updates there, but the details will still be here. Speaking of which, the HVAC rehabilitation has been going well. I wanted to detail the process, but someone has already done a pretty good job here: https://www.rx7club.com/3rd-generati...photos-993190/ The rest of the boxes follow the same procedure. I had the heater core and A/C evaporator tested at a local radiator shop, and was told that they were in good shape. The only leak point in the heater core was the swivel joint on the inlet (or outlet, but I can't remember). They soldered that, and it was good to go. Waiting on some 1/2" thick foam to finish up, and then I can install (assuming I'm not missing anything, lol!) after the blower box is rehab'd.
This coming weekend, this dirty girl finally gets a bath!
Nice build.
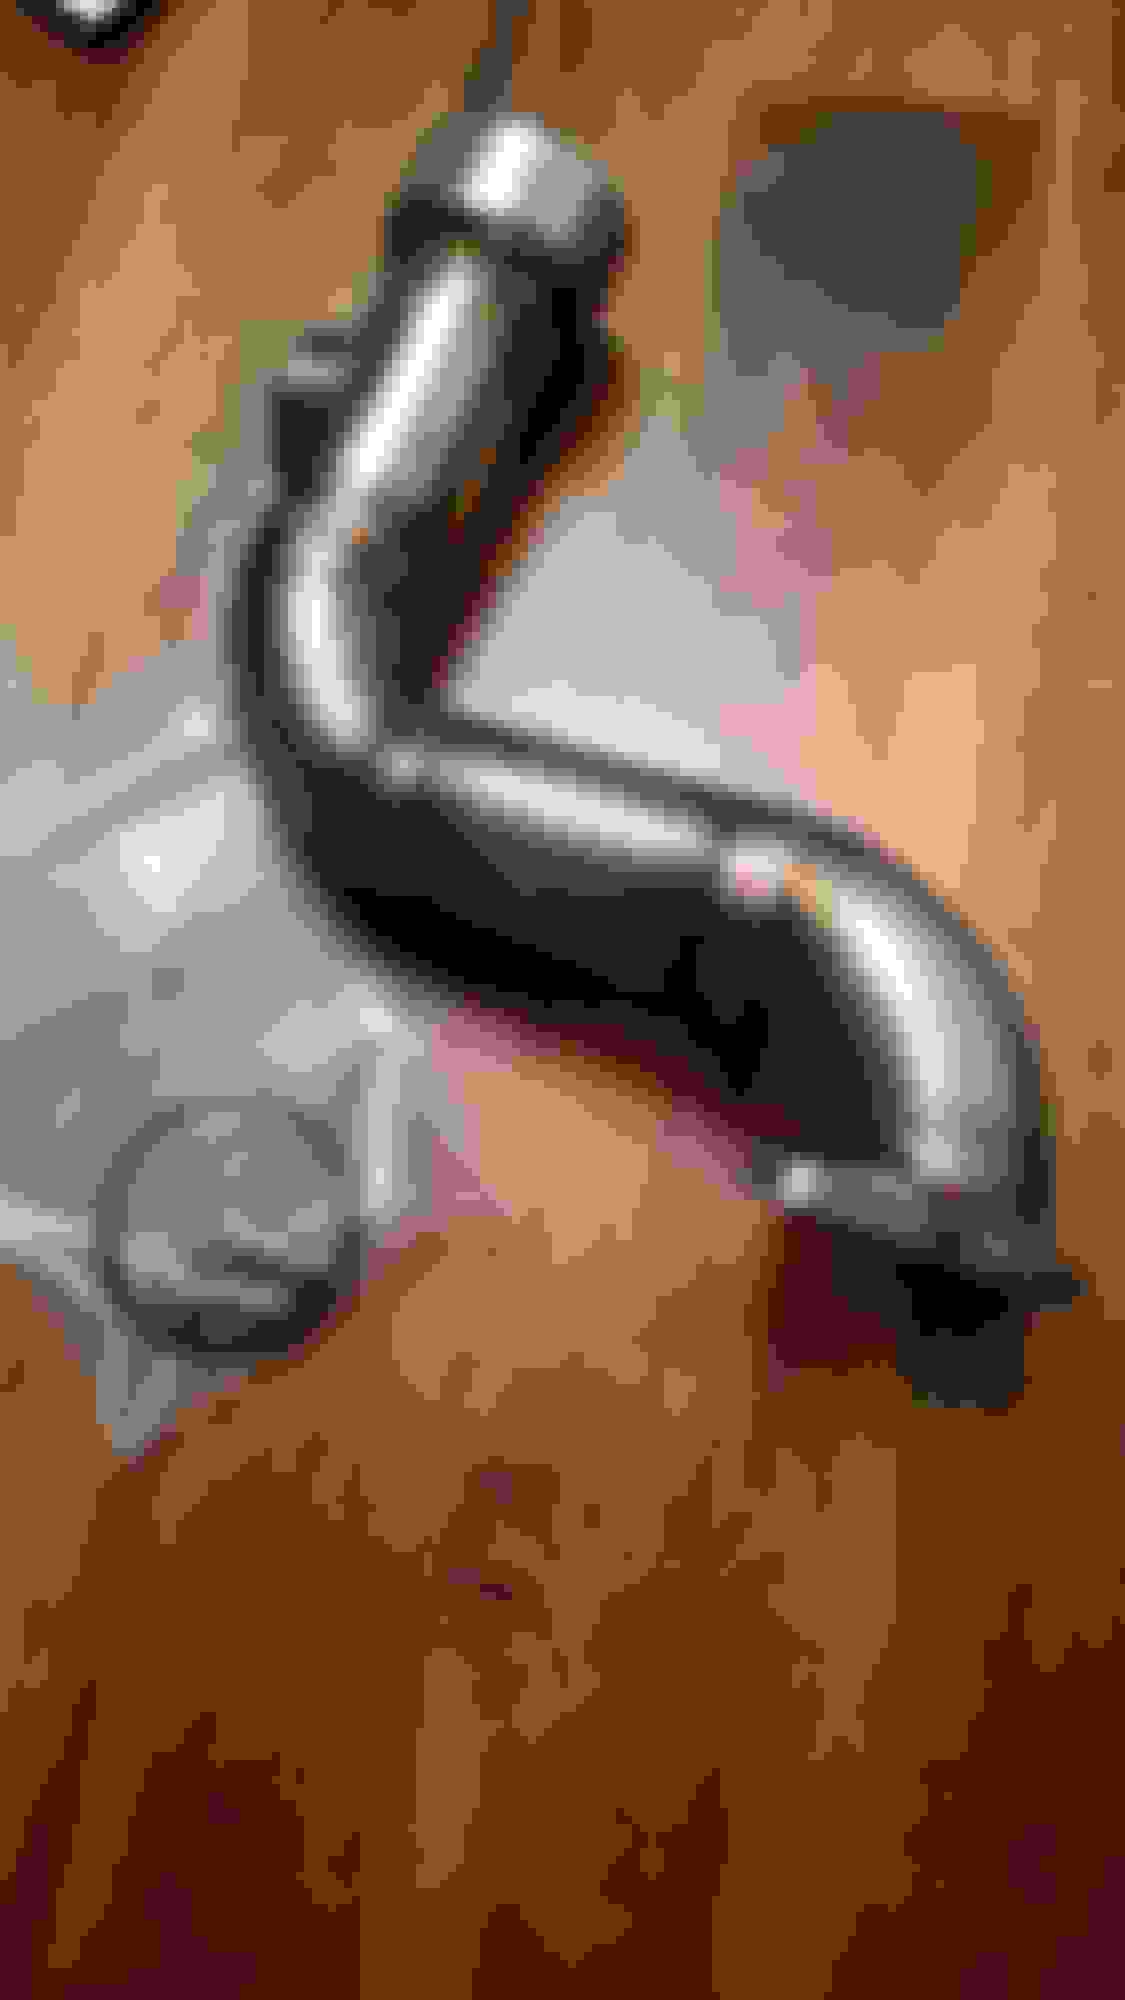
not much help, but the L shaped bracket / bracket shaped like a hockey stick in pic #2, of post number 33 looks to be the air pump bracket.
Nice build.
not much help, but the L shaped bracket / bracket shaped like a hockey stick in pic #2, of post number 33 looks to be the air pump bracket.
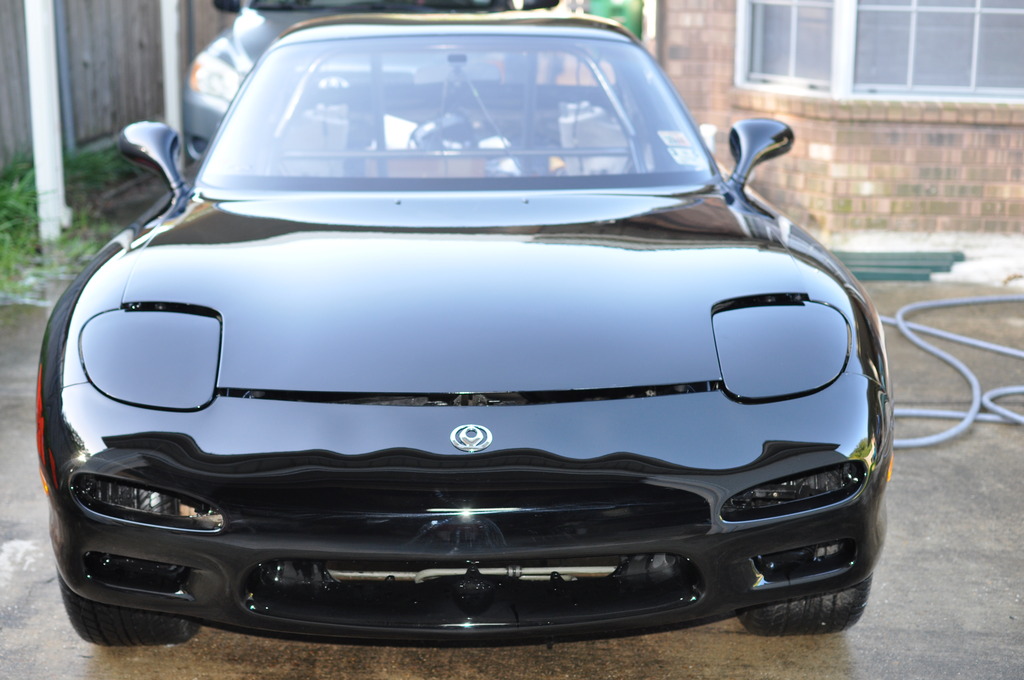
It was a fairly productive weekend. Started Saturday morning with a wash and wax on the old girl. I was a little worried as to the weatherproofness, as I'm still missing a few things, but all worked out well:
I used the following: 3 buckets, wool mit, Zymol wash, Mother's clay bar kit, Meguiar's compound, and paste wax. I was happy with the results. My paint job is not top notch, but it did come out quite good. Sunday, I found a couple of hours to throw the HVAC boxes in:
I used a thicker foam on the joints between boxes, as well as the center and defrost points where the box meets the dashboard ducting. I also used it where the blower box intakes from the car body, and it made the box not fit. I stripped the thick foam and used some of my 1'4" thick stuff there, and it fit nice and snug. If anyone reading this plans on removing or reinstalling these boxes, be sure to install them in the order of: Blower motor box, main big box (the biggest one over the tunnel), and finally the A/C evaporator box. It seems out of order, but that't the way it fits.
Finally, speaking of dash ducting, I started pulling mine apart for cleaning and refoaming.
Apart from the rusty bar in there, it all looks ok. I'd like to take that bar out and paint it, so I'll probably wait awhile before reinstalling the dashboard. I'm in no rush at the moment. Meanwhile, I took some garbage bags and covered up the HVAC boxes to mitigate dust and insects entrance as best as I could. If I can find time to pick away at it this week, I'll be trying to get everything out of the dash to clean it all up for reinstallation.
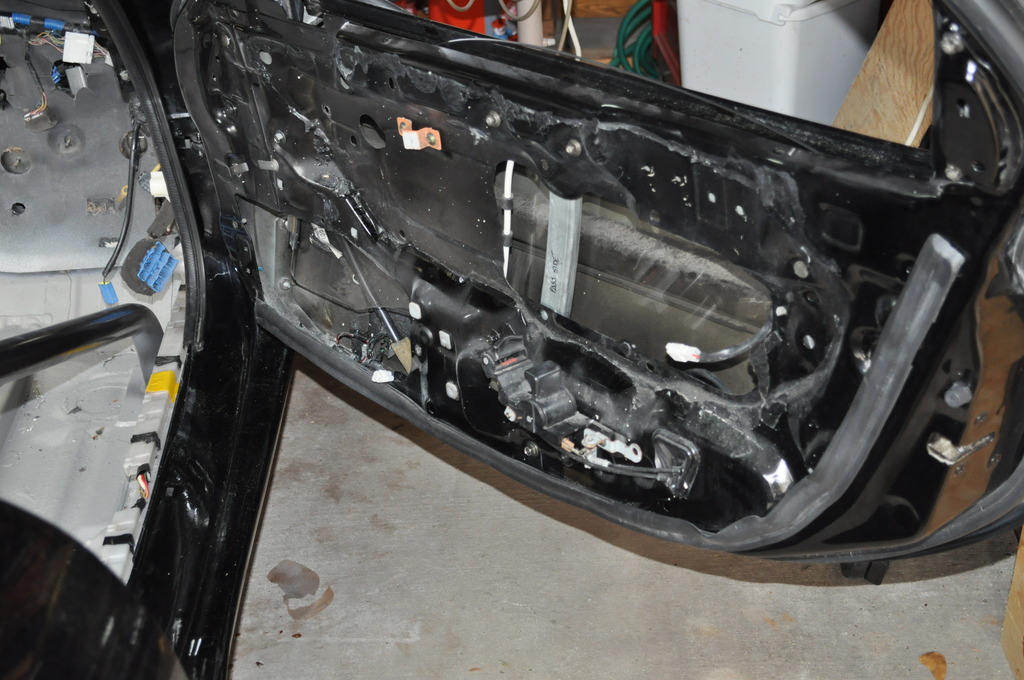
Finally, I got all the wiring back into the correct places in the doors. I'll be cutting some new plastic sheet to replace what was there to seal it up a little. Might pick up some Bubbletech interior door panels (if Benny starts selling them again), or build my own if that takes too long. Hopefully more updates to come!
Dash support steel bar painted, wiring all set back in, ducting all cleaned/refoamed/reinstalled:
Then the dash went back in!!!
Dash was surprisingly easy to put back in. Had an extra pair of hands helped, too. Hopefully, I didn't miss anything (fingers crossed).
Over this past weekend, ordered some SuperPro bushings, ARP 2.5" wheel studs, and axle nuts. Next month, I will be ordering brake rebuild kits all around and some other brake odds and ends. The plan is to get the suspension all replaced within a month's time. Updates to follow!
Looks like you are off to a nice start with a number of good quality parts. I like your idea of replacing the toe link and trailing arm heim joints with superpros. They always wear out and clunk. In my experience with track setups the twins have to go. They retain far too much heat (especially the cast manifold) and the control system and other nonsense clutters the engine bay leaving little room for air circulation. A properly sized single turbo on a well engineered kit will give up little in spool over twins. The car will run cooler, and be much easier to work on. A v mount setup and oil cooler setup like Sakebomb offers is also nearly mandatory. Meth injection will really help keep intake temps down and protect the motor. Of course this is all for nothing without a solidly built engine.
Bottom right, clip that goes inside the interior door handle cup.
above that, bolts to driver's side floor with an M6 bolt to hold the floor mat in place
left of that, as mentioned air pump bracket
The other three pieces are a cover for one of the seat bolting areas, the larger L shaped piece goes behind the glove box, and that smaller rectangular piece is (I believe) also for the glovebox, hard to see.
Still on small-time stuff.
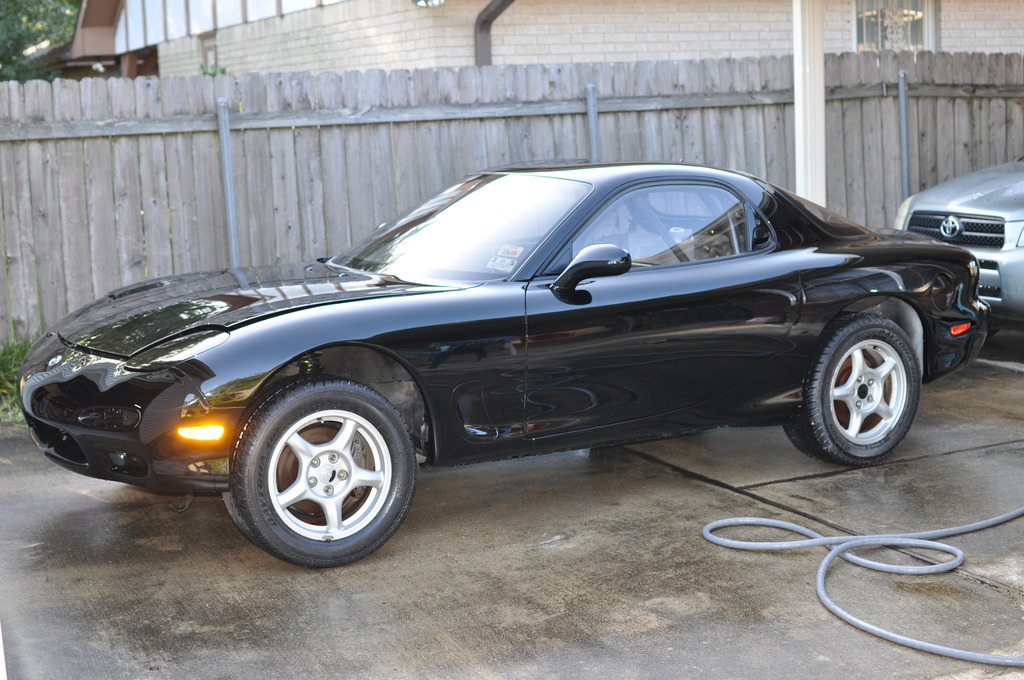
The car is weatherproof, so I've been keeping it cleaned. It's covered, even though it's indoors. Here she is, getting some sun:
Got around to cleaning up the tail lights and reinstalling. It wasn't bad, and I followed one of the "how to" threads. I don't think it came out too bad:
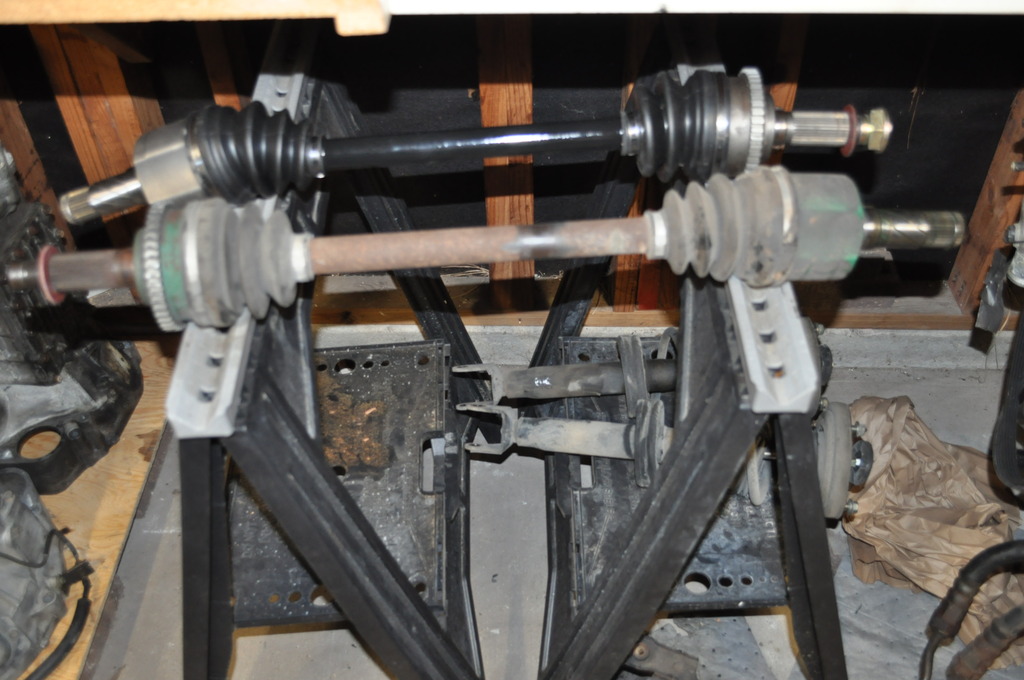
Started yanking the suspension and cleaning / rebuilding. Started with the front, which is still underway. I'm cooking up some tricks, and I'll have a detailed update when that's ready. I pulled the entire front suspension, along with all of the brakes. First, I cleaned off the front knuckles, cleaned the dust shield, and pressed new extended ARP wheel studs in:
Next, I tackled the brakes. These were quite a mess. Before:
Rebuilding the front calipers was relatively easy. I followed an instructable from this forum, and all worked out pretty well. The rear calipers were a different story. I made a write-up and posted it a week or two ago: https://www.rx7club.com/3rd-generati...en-fd-1099583/
That whole story is there.
After rebuilding, I painted them gold with the G2 caliper paint kit:
Before, and in the middle of this, I received my IRP oil filler neck:
And my LRB group buy defroster vent:
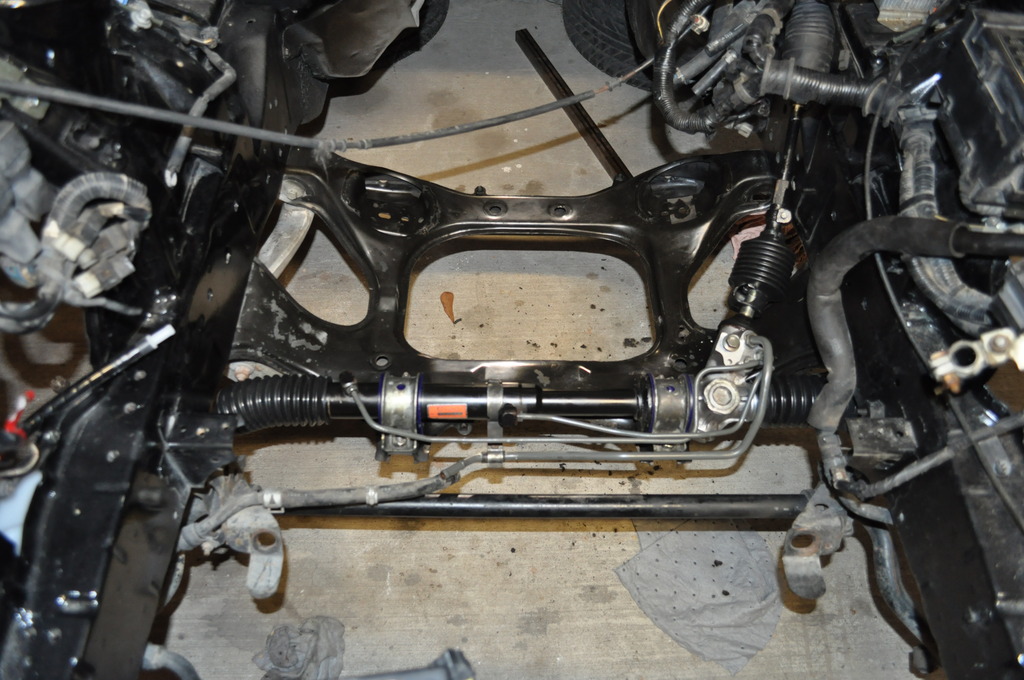
Finally, I started pulling the rear suspension. Getting to those bolts in tight spaces was one thing, but the rear knuckles required as much attention as a high school girlfriend. See, she has needs, and they aren't simple. First, you can just start undressing and groping. No way. You need to take your time, and be very delicate. First step was to attempt to put the axle nuts on backwards and hammer until the axle popped out of the knuckle. This, utterly, did not work - even though I liberally sprayed some penetrant. Then I thought I would be slick and use a hub puller...
All I managed to do here was make the little indentation, at the end of the axle, much bigger. This is the passenger side, for reference:
The take-away here, as has been preached before, it to just disconnect the axles from the rear differential with a simple pry bar. I am currently going though the penetrant-hammer-wait-penetrant-repeat process in this jig:
Once those axles are out, it will be time to replace bearings and clean that junk up. Afterward, here are the shape of things to come:
I'll be changing to some SuperPro bushings I ordered forever ago. If I can stay on schedule, I'll have the suspension and brakes wrapped up by this month's end (fingers crossed). Stay tuned, with more regular posts on Instagram under "brokebecausefd"
Some junk I got done.
Rebuilt the steering rack a couple of weeks ago. Not terribly difficult, just tedious. Cleaned-up the engine cradle with a little Simple Green, and used my fancy SuperPro bushings:
I never did get my axle out of my rear hub, so I sent it off to a shop. They tried pressing it, but even their 10 tons of pressure couldn't get it out. They had to cut it out, which meant I needed to find another axle and rear hub. Found each on the classifieds, so I sent it all to the shop for a clean-up and replacement of the wheel studs and wheel bearings. The shop wants well under $200, so I jumped on it instead of wasting too much time calling in favors to get all that done. When it all comes back, I'll stick these mis-matched axles back in with a healthy amount of anti-seize!
For some reason, the camera didn't feel like focusing on them, so you'll have to live with that.
With the steering rack all refreshed, it was time to reinstall the steering column. This meant the dash had to come back out. I took advantage of it by reconnecting the fuse panel box and removing the pedals. I plan to run un-powered brakes in a 3-pedal box, so I yanked them suckers out.
Since the bracket for the brake pedal holds the end of the column closest to the firewall, I had to remove the pedal from the bracket.
I debated installing my Ohlins and control arms, but I won't for now. I was laid-off from my job at the end of the last year, and it's proving difficult to find a new one. If anyone reading knows who is hiring Mechanical Engineers with oil and gas backgrounds, feel free to PM.
That said, it looks like this is "the wall" for the time being. Until I get some money coming back in, I cannot justify funding this turd. Not planning on selling (please don't ask), but this might be my last progress post for awhile. There is still some odds-n-ends stuff, but I might not have much content.
Spent way too much money recently on a full engine rebuild kit, REmedy water pump, oil pump, Mazda engine harness, and a Rotary Avation OMP adapter. Also, I'll be sending my twins off for some BNR goodness. I'm planning on some major updates when that work gets underway.
I'm also cooking up some plans for a full pedal box brake system.
what was the "cap" things for tour belt line that your talking about ?
is it the very front metal clip ? Im missing it on mine.
 04-06-15, 10:58 AM