When you click on links to various merchants on this site and make a purchase, this can result in this site earning a commission. Affiliate programs and affiliations include, but are not limited to, the eBay Partner Network.
Having passed emissions, put back the PFC and went to work replacing the intake. First step was getting a JDM UIM (top pic) which does not have the AWS system (on the bottom)
Then I removed the double throttle and honed the both the TB and UIM as best I could
Since one of my goals is to limit the Financial Disaster as much as possible, I sourced a used no name custom SMIC.
It's a fairly large IC and looks like an efficient design, but did not come with a duct which means more fabrication
I believe I mentioned I suck at fabrication (note the use of a fender liner and pieces from a window frame held tighter with racing tape). Will see how this does and probably will have to go the eventual V-mount route
The custom frame (came with the IC) and duct installed...
Unfortunately, there's not a lot out there for a good cold air intake so I went ahead and tried to hobble something together starting with a used Pettit intake I got used for cheap. Problem with the Pettit (and M2) is the intake for the secondary turbo is right on top of the filter for the primary turbo.
Since the fresh air is coming from the bottom, I'm not sure how effective the secondary filter placement is. If they could be staggered over the fresh air opening, that should improve air flow to the secondary turbo. I used CXRacing intakes to try to stagger the Pettit filters
Not super happy with the primary intake flange as it seems a little warped, but not enough that the gasket won't fix.
The CXRacing secondary intake was not long enough to extend the filter passed the primary filter, so I cut a stock intake to extend it and angle it down
Knowing the IC duct may not be the best, I added a fan to the IC
As well as adding a section with bungs for meth injection (don't really like the flex hose and will probably have a custom section fabricated). I also tapped the cold side of the IC for a second IAT sensor to measure the IC effectiveness before injection
It's also a rectangular gauge so I can put it in my DIN cubby vice needing to get another 52 mm gauge pod. Another benefit of the 14.7 unit is it has multiple sensor inputs. I ordered their IAT sensor so I can read intake temps before AI and also a fuel pressure sender.
Another fun electrical installation job
And another spilled box of connectors
Kind of a tight fit for the O2 sensor which I routed through the transmission tunnel. I used an AEM finned bung (Stainless Steel O2 Sensor Bung | AEM) that is supposed to dissipate heat which the 4.9 sensors are more sensitive to
And all installed. Must say I like the hideaway feature of the DIN cubby
Have not yet figured out how to do logs or get it to work with the Datalogit.
More into function over form so I went with '99 bumper to get bigger radiator and oil cooler openings.
An earlier shot fitting the bumper...
And attached and painted. More fabrication was needed to get a USDM license plate to fit the JDM frame. Cut a piece of aluminum and tapped some holes for the license plate holes. I'll admit tho that I kind of like the form of the '99 bumper.
Also went with a somewhat functional '99 spoiler
...and added the '99 taillights which are not functional, but what the hey
Somewhat function over form, but the old wheel is truly hideous
Went with a pre-drilled Miata/Nardi wheel with cruz control (just set it 100 and you don't have to worry about the accelerator )
Only minor problem was I had some problem getting the connectors to fit in the compartment. Something is keeping it from compressing the horn connection on the left side. Oh well, whenever I get around to taking it apart i'll deal with it then.
Only minor problem was I had some problem getting the connectors to fit in the compartment. Something is keeping it from compressing the horn connection on the left side. Oh well, whenever I get around to taking it apart i'll deal with it then.
It's really cram under that airbag, you have to play with the connectors position a lot to find a spot where they don't interfere with the horn bracket. Switching to the 99 Spec airbag connector will free up some room, I can send you the connectors if you want to try that down the road.
Looking good. Looks like you're getting an irp engine?
Not a new one, but they heavily massaged my low mileage reman (see posts #2 & #50)
Got their stage 3 motor build with aggressive street porting and 2mm RX Parts apex seals and viton water seals and oil control rings. Also had them port the water and oil passages as well as the wastegate
Did not have the rotor balanced or lightened tho, nor did I get any engine bolts/studs
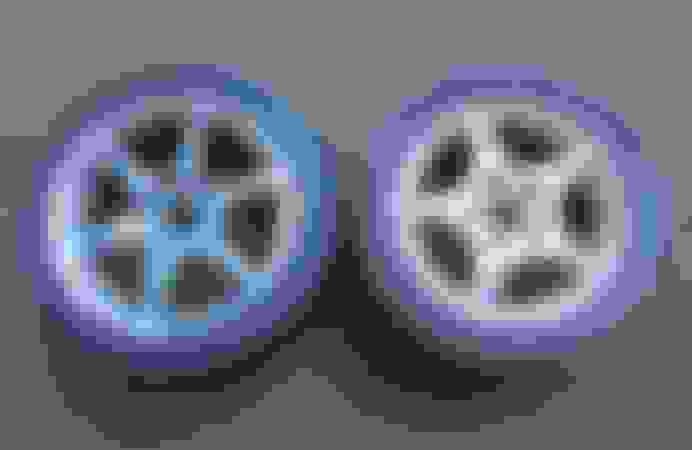
Got some 17x9.5 SSR Comps from Fritz. Not the best shape, but they are damn light. They came with 275 slicks.
Test fitted the 275 just to see how it would fit. Too bad I don't have a trailer
Since I can't run slicks on the street, decided to go with 255 RE-11s. Know the 71s are the latest thing, but i'd like them to last longer than a season
In comparison to the 275s
and in comparison to the stock 225s
I like the 17" SSR comps because they seem true to the stock wheel.
and mounted...
and from the rear.
(need to get a diffuser )
I was a little concerned at first about fitment of a 255 tire on the 9-1/2 rim since the 275 looked to fit nicely. I'm not into the stretched look, but I've read for track you want a slightly stretched tire. Turned out the 255's on 9-1/2 is pretty much perfect
So I added a FEED tow hook to a large RHD Japan buy and when I went to fit it, it did not seem to fit the '99 bumper
Oh well, so goes trial and error. I noticed Griffith Performance Engineering on ebay sells tow hooks so I tried it out. It's a horizontal hook which rubs somewhat against the radiator opening which I covered with some electrical tape.
I had to do a lot of massaging to the holes to get it to fit with the '99 bumper
Then I retried the FEED hook and wouldn't you know it, it fits
The FEED hook rubs the radiator opening as well and does not protrude past the opening. I opted to leave the Griffith hook in. It doesn't seem think he makes this style anymore and opted for vertical hook.
I first started tracking completely, I mean completely stock, including the brakes which quickly warped. I since upgraded to Hawk DTC 60/30 and found them to be great for track work and they seemed to do ok on the street. Only downside is somewhat forward brake bias and that they dust like crazy.
With seemingly working brakes and absolutely no data on brake temps, I purchased some home made ducted backing plates.
Painted and installed. The opening are directed squarely on the middle of the rotor.
The problem is there's nothing out there to connect to the '99 bumper/lip so I had to go the dreaded fabrication route once more. I ordered some small NACA bumper openings and hi temp hose
To get the NACA opening to fit, I cut all the flanges off and then cut some cut some slits to fit into the bumper. The bumper has a couple holes at the opening formed with the lip for a brake duct, so I drilled corresponding holes in the top of the NACA openings
This seemed to fit okay
Only problem was the depth of the NACA duct is larger than the bumper opening. This should be ok since it still pulls in air under the bumper. The problem is ground clearance.
I then connected the hose
I cut a small relief in the wheel well and zip tied the hose. Only problem is it seems to bind and kept pulling off the connection to the NACA duct. I've since done away with the zip ties and it doesn't pop off any more. There seems to be enough structural integrity to the hose that it doesn't need to be supported between the opening and the rotor. Time will tell if this works or not.
Nice update. I need to do some brake ducts eventually. Have you checked if the tires rub at full lock? Not much of an issue on track but it is on the street.
Nice update. I need to do some brake ducts eventually. Have you checked if the tires rub at full lock? Not much of an issue on track but it is on the street.
Think there's some rub. Will see how it does over time and redesign if necessary
 09-25-16, 09:25 AM


 which means more fabrication


 )
)