When you click on links to various merchants on this site and make a purchase, this can result in this site earning a commission. Affiliate programs and affiliations include, but are not limited to, the eBay Partner Network.
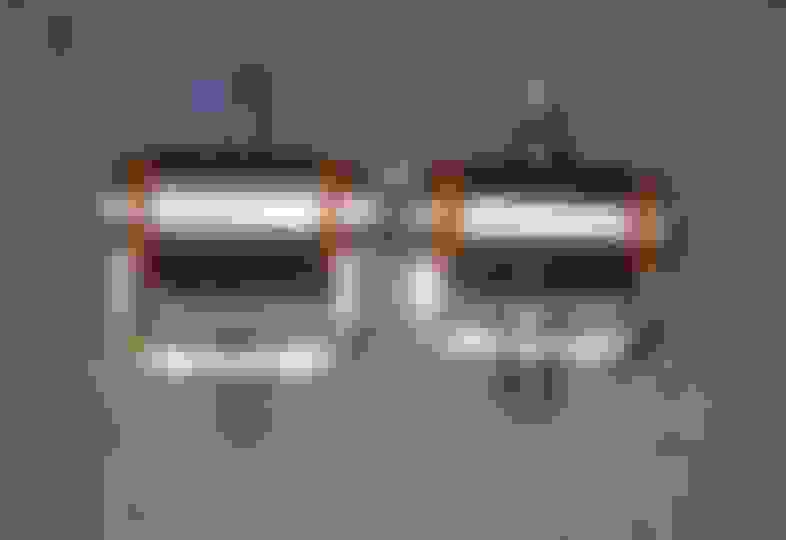
I decided to go external OMP tank route and installed a Rotary Aviation adaptor and practically new Mikuni OMP. Since I had an extra OMP, I initially tried to tap an oil feed into that, but couldn't find a good hose barb to fit the space so just went the RA/Mikuni route. The Mikuni OMP is necessary with the RA adaptor as it's thinner. The USDM OMP with the RA adaptor is too thick for the turbos. The only problem I had with this setup was that the bolts supplied with the RA adaptor were not long enough so I had to get longer ones
No pics, but connecting the transmission to the block was a real PITA. For the life of me, I simply could not get the transmission shaft to mate with the clutch wedge collar. The ACT clutch kit came with a monoloc collar which is supposed to be an improvement over the stock wedge collar. Only problem is I could not get the transmission shaft to click into it no matter what I tried.
Part of the problem might have been that the engine was still on the stand and I was supporting the transmission with the engine lift and I just couldn't get enough lateral pressure from the transmission against the engine, even with someone pushing against the engine. I ended up getting it mated by reversing the disassembly, I took the clutch off the flywheel and mated that to the transmission. That worked! Only problem now was getting the clutch bolted back onto the flywheel. Since the way I got the transmission separated from the engine was by accessing the flywheel bolts through the bell housing access plates, I just reversed disassembly and torqued down the bolts via same access plate. It worked, but would have been much easier if I could have gotten the transmission to mate that monoloc. What a pain.
Thought mating the transmission was a pain, but that was a cake walk compared to dropping the engine. How hard could it be, it was fairly simple to pull, right
OMG. It took me almost all day to get that mother in. The major problem was the Xcessive motor mounts. They are like a square peg going into a round hole. Compounding this was the Banzai oil pan brace. This and the mounts increased the effective height of the engine which was enough to make the install a real bitch. I also left the DP on, because it was on when I pulled it, which was easy. I tried all kinds of angles with the engine and it was either too steep and I couldn't clear the firewall, or not steep enough and I couldn't clear the subframe.
All of this in and out trying different angles really buggered up the aluminum heat panels. Ok then, off with the DP. This helped with the DP hitting the heat panels, but I still couldn't clear the subframe w/o hitting the firewall. Alright then time to lower the subframe. I nearly had to remove it to get enough clearance to get it to fit.
My short lived celebration ended when I noticed my shifter was way right in the transmission tunnel
Argh
So initially I tried unbolting the subframe mounting bolts and physically moving the shifter over. No go. After some back and forth on the forum https://www.rx7club.com/3rd-generati...nment-1085345/ thought it might be the motor mounts.
Sure enough. The Xcessive mounts I got were for the stock arms. The steel arm I have is slightly different than the stock aluminum arm. I contacted Xcessive and they got me a smaller mount
This seemed to do the trick
The smaller mount effectively rotated my engine/transmission counterclockwise as evidenced below. Don't think this should be a problem though. Back in business
Forgot to mention this one. While removing the DP made the engine install much easier, it left the tricky proposition of getting the DP on with the engine installed. The donor car came with some no name DP so I planned to use that. It had been attached with hex bolts which. I put back a couple of the studs to make it easier to hang. The problem was one of the created clearance problems, so I removed that and replaced it with a hex bolt. The next problem was getting one of the nuts installed at the bottom where there's not a lot of space between the pipe and the stud for the nut flange, esp with the heat wrap (see pic in post #56). In the end, after a multitude of stud/bolt combinations, I was able to get it installed.
Thought I had a lot of tools, but guess not enough. If you plan to work on the car yourself, plan a sizable investment for tools. While not comprehensive, below is a list of what I used
- Sockets and Ratchets (reg stubby/long, impact (stubby/long))
- Wrenches (reg and stubby)
- Torque Wrenches (3 for different torque ranges to include a 2' wrench*)
- Pliers (all sorts to incl c-clamp plyers)
- Hex Wrenches/Sockets
- Flaring Tool
- Taps/Thread Reamers
- Pullers (various to incl clutch pilot bearing puller)
- Drills and bits (to incl a right angle drill)
- Air Compressor and tools
- Various testers (compression, mityvac, coolant, fuel press)
- Grease Gun/Oil Injector
- Metal Brake
- Jig Saw
- Grinding Wheel
- Hole Saw
- Rivet Gun
- Engine Hoist/Leveler
- Engine Stand
- Screwdrivers (incl impact)
- Picks
- Bench Vise
- Clamps
- 20 Ton Press
- Jacks/Stands
- Electrical Tools (multimeter, crimpers, pin tools)
- Hose Cutter
- Breaker Bars (incl 3')
- Etc
So I'll be in the same spot you were in with the engine install. So you still left the trans in and just attached the clutch through the bellhousing? Was there enough space or was that the only way you could get it to work after trying with the clutch on the engine? I feel like with the engine in such a far back position, it will cause issues for me as it was right on the front metal of the engine bay.
Yes, I pulled the transmission with the engine. I have pulled several (non-FD) engines in the past and found it easier pulling the transmission with the engine rather than unbolting the bell housing and the subsequent pain of getting the engine aligned and bolted when installing.
While getting the transmission and engine out was a relative breeze, I had issues getting the transmission mounted to the engine out of the car. I replaced the clutch with a ACT SS clutch/HD pressure plate. This came with a Monoloc wedge collar which is supposed to be an improvement
Problem was I could not get the release collar to engage the monoloc to save my life, and I'm not the only one. Part of the problem was I had the engine on a stand and was trying to mate the transmission suspended from an engine hoist. Even with one person holding the engine/stand, I could not get enough force against the engine to mate the transmission. Maybe if I tried it on the ground it would have worked.
I eventually gave up and took off the pressure plate and was able to engage just the pressure plate (with monoloc) onto the release collar. I then had to get the pressure plate bolted to the flywheel through the small inspection access port in the bell housing. Not hard, but tedious.
Finally, while getting the engine and transmission out was easy, getting them back in together was a real pain in the ***. The problem was the motor mounts and DP. I had to remove the DP and lower the subframe to get the engine back in with my motor mounts (which were elevated by a new Banzai oil pan brace).
The obligatory engine harness rehab. I checked all wires for resistance/continuity and it checked out ok. The harness is temporary and will be replaced when I eventually go single. Even though it's temporary, and checked out, I'm still nervous that I put it back on. In the grand scheme of things, what's another $700 (or whatever a new harness goes for these days).
Since overheating was cause of premature death of my 13brew, cooling was my number one priority for this build. Plan is bigger radiator, dual oil coolers, and larger bumper openings, ala 99 spec.
For the oil coolers, I opted to design my own system vs. go with the tried and true Sakebomb unit. I'm not really sure why I did this as the cost was more and it took a lot of time designing, fabricating, and cussing (I really hate fabricating).
Dual 25 row Setrabs
Improved Racing 185F T-stat mounted on the frame
XRP fittings and push-loc hose
I'm a little worried about the lack of hose between the T-stat and the block. Too much vibration may break the hose or the fittings. Will keep an eye on that.
T-stat hooked up. Small amount of hose wrap to protect against chaffing
Sakebomb oil pedestal
The SB pedestal allows AN fittings as well as gauge ports with additional benefit of being smaller to allow use of larger 929 oil filter
Banzai oil cooler supports
Had to drastically shave down the lower outer support to get the 99 spec bumper to fit
Driver side cooler installed
Both coolers installed
99 spec rebar interferes with the large cooler
I could have cut the rebar down, but decided against it to preserve the rebar. Will reassess this when I see what oil temps I get
99 spec bumper installed
Opening is much larger than USDM, but the aftermarket setup is offset in the opening. Not too happy about that. Will have to fab up some ducts.
Nice setup. I went with dual r1 oil coolers with R magic ducts. Everything fit bang on.
Nothing beats stock fitment It seems to me, more often than not, aftermarket is a pain in the ***. It never fits right and you need to fab something here or there.
I neglected to mention in my last post that I ran the hose from the driver side cooler to the passenger through the rebar support. The problem I had was getting the fitting on the cooler snug with the rebar in place. The angles were tight and it was pinching. What I did was to remove the rebar support from the rebar, run the hose, then attach the rebar. You can see this in the driver side picture, but I went ahead and circled it below. The circled support is normally attached to the rebar. Taking it off the rebar made installing the hose a lot easier. I used double sided tape to hold it on temporarily until I got the rebar bolted up
Went with a Ron Davis radiator. These used to be popular back in the day and believe RD was supplier to Mazdaspeed. This is a direct fit replacement. No mods needed However, it's not cheap. If I had to do it again, would probably go with the N-flo
I also replaced all the water hoses prior to dropping the engine back in.
This thing will have no excuses for getting hot. I like the 25 row coolers but went with dual 19 row and got the SakeBomb Kit. I will still have to duct them but that should be all the custom fab I need. Fourtyounce did the 25 row coolers and said it was a real chore with fitment. That was enough for me to go with the 19 row coolers. You really made it extra tough on yourself here lol.
I have the exact problem with my trans laying over. I've yet to see if it's the PPF needing proper alignment or the motor mounts. I going to try the PPF first. Crossing my fingers.
I envy your garage. I have a small garage and I'm sometimes falling over myself trying to get work done.
That line for the oil cooler thermostat from the motor looks a bit short. I would be concerned with the engine torquing over and it not having enough slack and dumping all your oil if it fails.
This thing will have no excuses for getting hot. I like the 25 row coolers but went with dual 19 row and got the SakeBomb Kit. I will still have to duct them but that should be all the custom fab I need. Fourtyounce did the 25 row coolers and said it was a real chore with fitment. That was enough for me to go with the 19 row coolers. You really made it extra tough on yourself here lol.
While driving around to break in the engine, once the oil temps get up to 185, bam, the T-stat opens and it drop to like 165. This may actually be a little too cold, but since this will be primarily a track car I will see how the temps do in that environment. And yes, fitment was a little bit of a problem, but it did fit with the 99 bumper after I ground down the hangers. I think I'm making this entire build tough on myself
Originally Posted by ZoomZoom
I have the exact problem with my trans laying over. I've yet to see if it's the PPF needing proper alignment or the motor mounts. I going to try the PPF first. Crossing my fingers.
Yeah, I tried messing with the PPF but that never seemed to help. Did you replace the stock AL motor mount arm with a steel one? Think that's the culprit (combined with an oil pan brace and aftermarket mounts). The steel arm looks to be different thickness than the AL one which would mess with the alignment.
Originally Posted by ZoomZoom
I envy your garage. I have a small garage and I'm sometimes falling over myself trying to get work done.
Arlington VA is a compact suburb but I'm fortunate enough to have enough space for a somewhat decent garage (but not a 2 car attached). I had it built, but didn't have enough foresight to build it high enough for a lift.
Originally Posted by ZoomZoom
That line for the oil cooler thermostat from the motor looks a bit short. I would be concerned with the engine torquing over and it not having enough slack and dumping all your oil if it fails.
I'm concerned as well. When I installed it, I was guessing on placement of future adds (oil catch can, AI, etc) and tried to account for that as well as keep clear of the steering linkage. Now that it's all back together, I will probably relook at the routing. I'm not too worried though as I doubt the engine will twist that much with the xcessive mounts and banzai transmission brace.
Originally Posted by Narfle
What would it take to dual pass that RD radiator? Not looking forward to koyo fitment issues.
I think it's a dual pass, but not positive. It's perfect fitment, but is not cheap (shipped costs is ~ $600). Think you only need to mess with one tab (if that) on the Koyo to get it to fit.
Looking really good did you fix that oil cooler alignment ?
Unfortunately there's no real way to move the cooler inward due to the brackets. I do need to duct them but will wait to see what the temps are first. They are pretty close to the bumper so not much air is bypassing the top and bottom, it's only getting by through that gap.
Figuring I will probably upgrade to a BBK, I went ahead and upgraded to a 929 MC when I had the engine out.
You have to bend some custom brake line (circled) because the stock line in that location is a banjo fitting. Also went ahead and installed an IRP MC brace (to the right of the MC).
[And the crap on the shock tower is gasket material to keep the shock tower strut bar from scratching the paint]
After I got the MC mounted with custom brake line fabricated, found out about this...
Yeah someone posted that in my thread after I bought my 929 MC so I sold my 929 MC and went to buy Chips and he raised the price up. Maybe enough that I may be up for making my own brake line again. Lol
I've yet to repurchase a MC. BBK will have to wait since I started buying a bunch of expensive rotary specific bling parts.
Really, this was not that much of a pain, just meticulous. Important thing is when using silicone, which is not formed, is to not crimp it when everything is mashed back down under the UIM. The red color was chosen because I really hate having a matching color scheme (actually I used as much as I could off the donor car which was red - I'm really more into function vs form)
I went through all my solenoids and actuators and even though the car had 60k, half my solenoids tested bad hot and as well as my turbo actuator. If you're testing your solenoids, make sure you test them hot.
Before putting that rat's nest back on, I covered the block with a DEI heat blanket. I'm having second thoughts about spilled oil getting on it tho. Next time i'm down there, i'll rip it out
Also installed an IRP oil neck. These things are a work of art. Went with the dual -6 AN fittings, but now wish I got the -10. Eventually, i'll probably go single and could feed one of the lines to the rear oil return so think i'll keep it. The oil cap is Super Now that I picked up from RHD Japan when I got a bunch of other stuff.
 05-13-16, 12:34 PM


 However, it's not cheap. If I had to do it again, would probably go with the N-flo


 did you fix that oil cooler alignment ?