When you click on links to various merchants on this site and make a purchase, this can result in this site earning a commission. Affiliate programs and affiliations include, but are not limited to, the eBay Partner Network.
mjc1055's build thread (...I have no idea what I'm doing)
Hi guys!
Complete and absolute rotary newbie here. Previous cars include a Honda S2000, an STI and an Evo 9, but this one will be an adventure.
A little background on the car:
My wife and I recently moved to Tucson, AZ for her residency. We moved into a house with a reasonable amount of garage space, and I've always wanted a long-term project but never had the space for one, as my old townhouse only had a one car garage. I've wanted an FD since I was a kid, when I distinctly remember my neighbor bringing home a Montego Blue touring. Ever since, I've thought that the 3rd gen has been one of the prettiest cars to ever be produced, and given my new housing situation, I thought now might be the perfect time to find one.
I ended up contacting the guys at Rotorsport in northern California about an FD they had for sale. It was a Montego Blue touring model, with a pretty rough interior and a worse exterior. It was stock, other than Work XD9s and a Racing Beat catback, as far as I could tell.
However, upon talking to Paul at the shop, it turns out that the previous owner had actually abandoned the car there after racking up a bill that was too much to afford. I inquired about what they'd actually put into the car that would make somebody just cut and run, and when I got the list, I knew this would be the perfect platform to start with.
Here's just a sampling of the new parts in the car:
-Complete engine wiring harness replacement
-Complete rats nest replacement using silicone hoses and all new solenoids
-99 spec Efini twins
-New factory downpipe
-New factory midpipe
-Racing beat catback
-Koyo radiator
-Racing Beat silicone radiator hoses
-New water pump
-New spark plugs
-New coils
-New spark plug wires
-New factory AST (I know, I know)
-New EGR valve
-Tons of misc gaskets, seals etc replaced
-Complete fluid replacement (motor, coolant, transmission, etc)
Anyway, so I bought the car from them and had it trucked to Arizona. The plan for the car is produce a clean, moderately modified weekend streetcar that I can have some fun driving in canyons north of Tucson, and possibly do a few track days in. Power goals are modest, at about 350, but it's going to be awhile before I start getting into that.
First order of business is to freshen the interior, which I'll post about soon - I have a lot of parts sitting in my office waiting to go into the car.
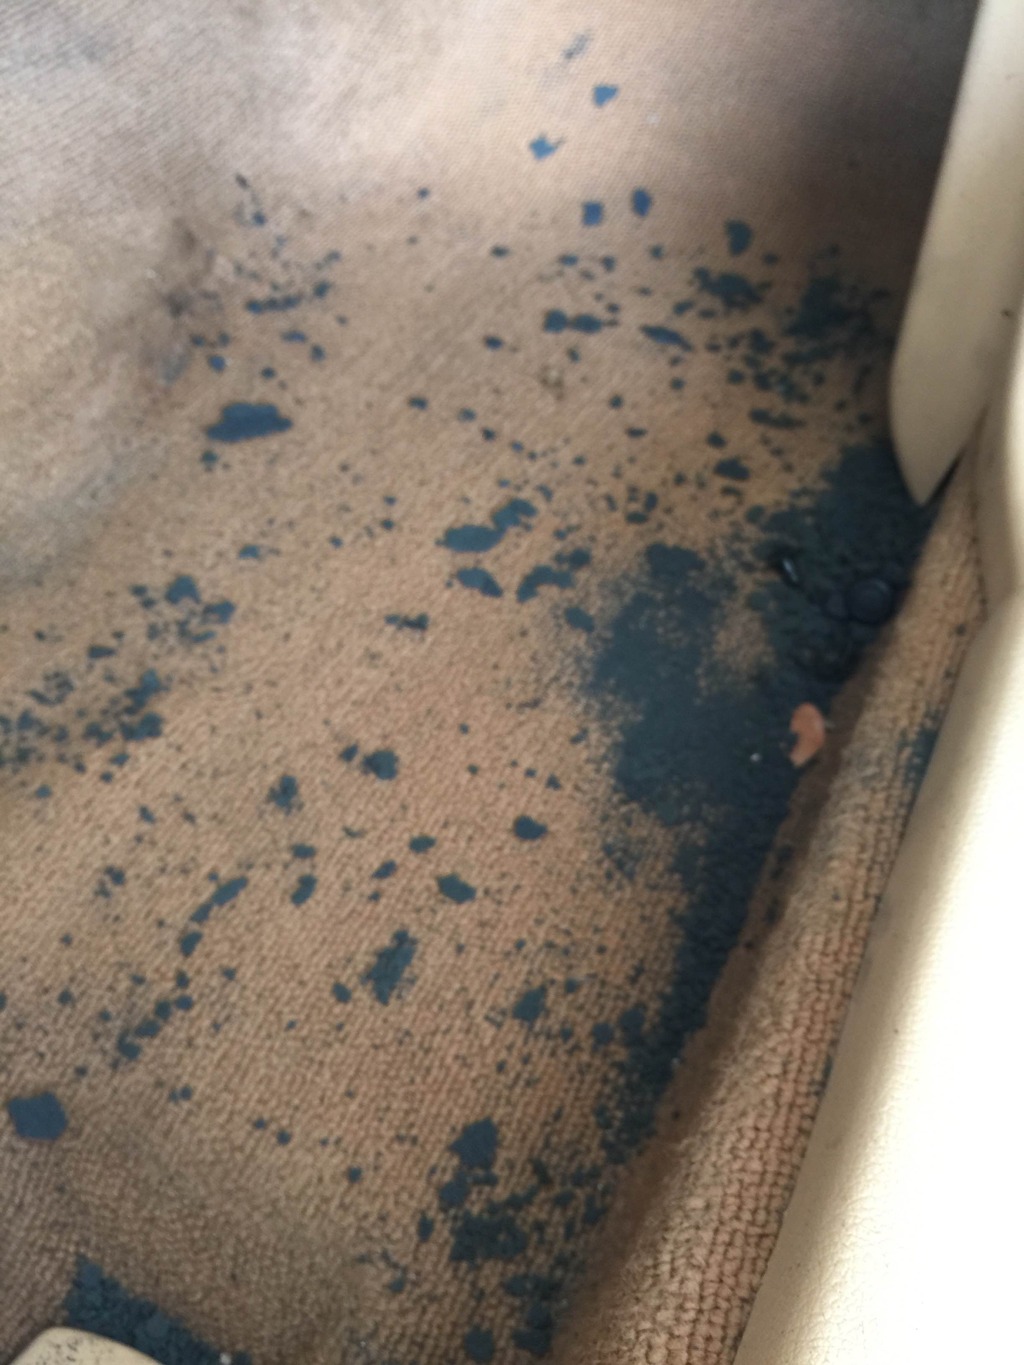
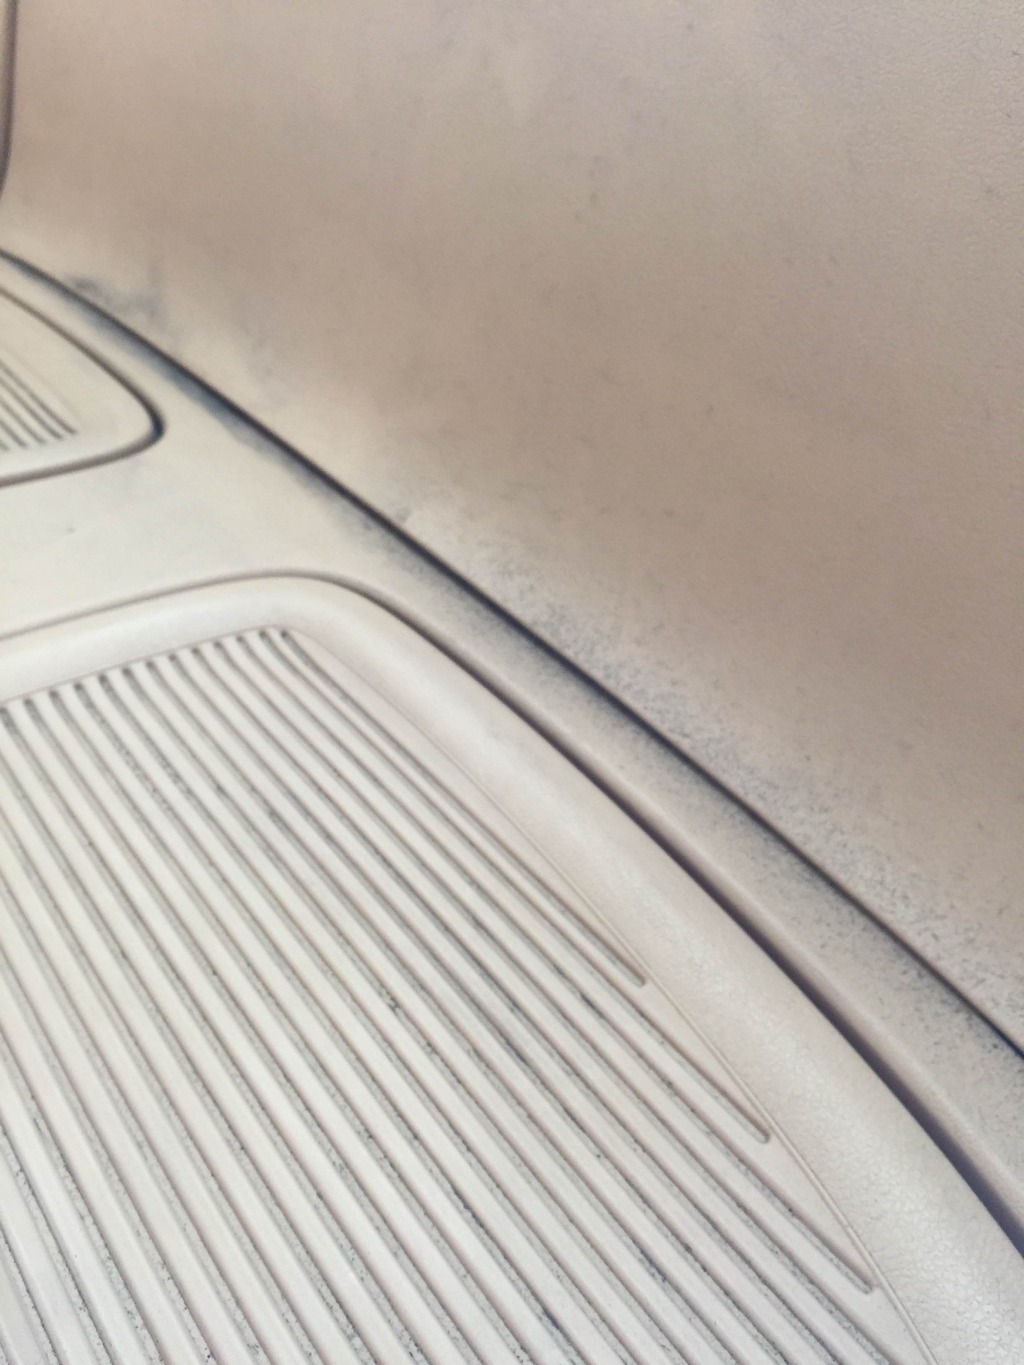
So the first thing I wanted to do was start to get the interior cleaned up a little bit. The interior was absolutely filthy. I actually have no idea what this crap is, but it was EVERYWHERE:
And i do mean everywhere...not just on the floors, but in the crevices between all the interior panels, rubbed into the carpet, and actually caked into the panels themselves (the door panels were gross):
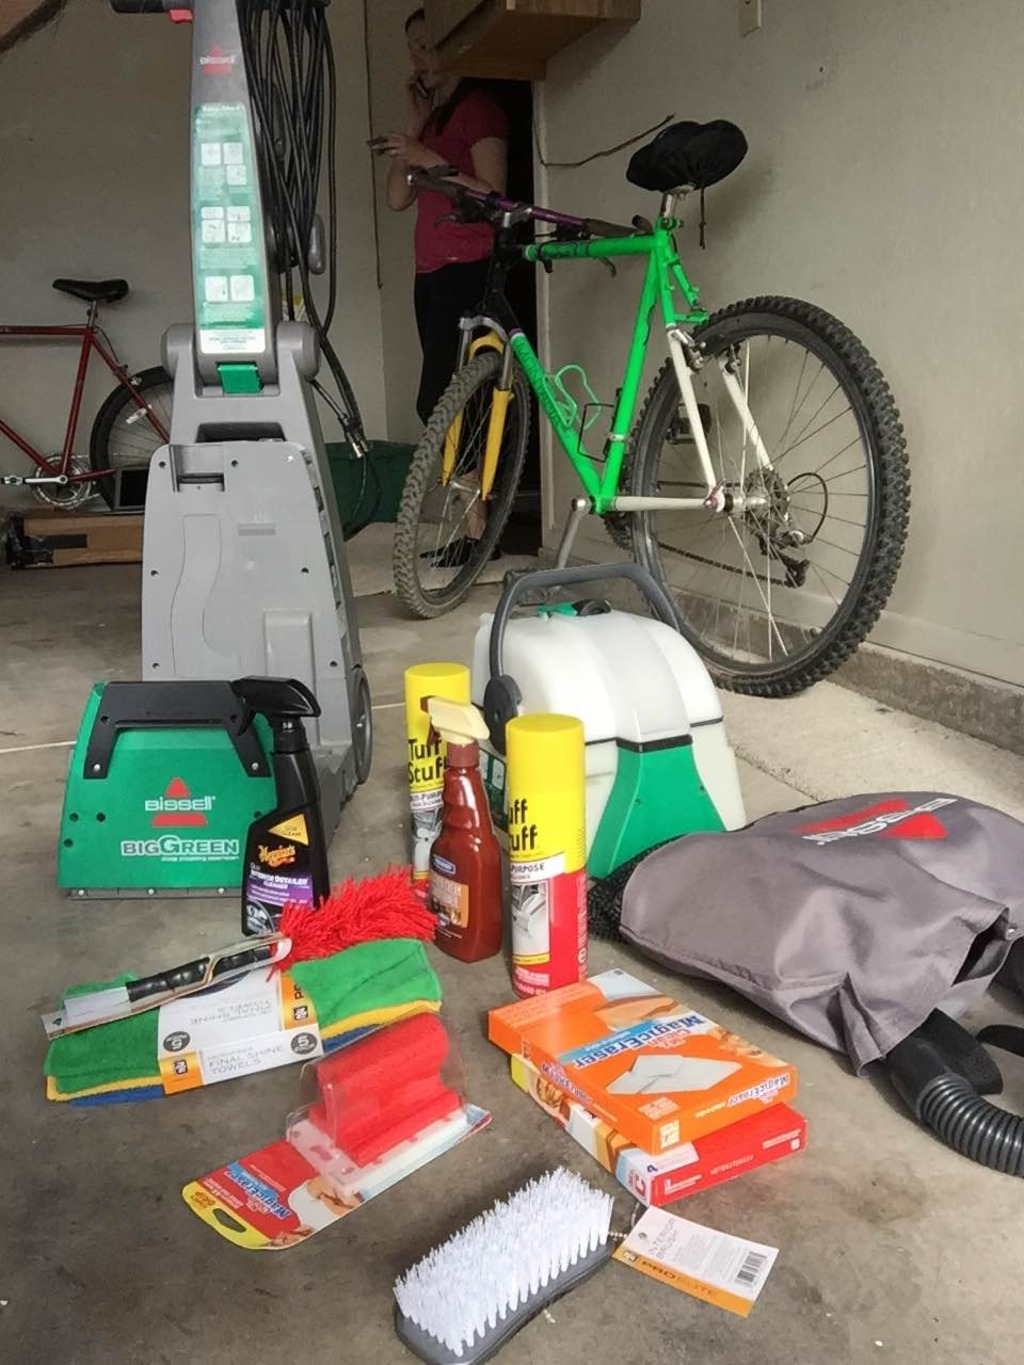
So, I went out and bought a bunch of stuff to try to clean the interior of this heap before I catch the black lung sitting inside of it:
Next up, the results (magic erasers are some kind of witchcraft) and the first interior mods, including replacing my torn seats.
Unrelated, has anybody ever had success restoring the cluster trim rings? I know from searching through some threads here that you can just order the new glass and rings from Mazda, but can anything be done to restore the rings on the car currently? The finish on them is flaking off pretty badly.
Nice starting point. The interior looks like it should be relatively easy to clean.
I'll have to search through my bookmarks, but I remember seeing a thread where a guy masked off the rings and painted them. *I don't think a new one is very expensive.
^Thanks! Yeah, a new one is about $90 bucks, I think. I'll probably just live with them as they are for awhile, and rather than replace just the lens/rings opt for a newer/better looking cluster in general.
Anyway, I've acquired a LOT of new parts over the last month or so. List goes something like:
HKS Hi Power exhaust
Tein Flex coilovers
Tanabe Revel boost gauge
Tanabe Revel water temp gauge
Greddy Profec II boost controller
Momo Mod 8 suede steering wheel
Momo hub
Corbeau CR-1 suede seats
Corbeau brackets w/ double locking rails
FEED shift ****
Replacement driver side door panel (thanks Fritz!)
Redline leather center column cover w/ tan stitching
Black housing corner markers
I've installed the new door panel, but realized after the fact that I still need a new door cup (or whatever the recess that the actual door handle sits in is called). So, I'll find one of those soon.
I pulled my stock seats after borrowing some air tools, because a few of the bolts were in there pretty hard. I finished cleaning things up a bit, and installed the Momo hub and wheel.
I had to remove the clock spring to make this hub work, unfortunately, and I'm not a big fan of just removing the bulb to stop the airbag light so I'll need to figure out how to wire a resistor inline to stop the light from blinking.
Related question: Does anybody know what the sensor is that connects to the driver seat? I would have assumed that it was for the seatbelt light, but I turned the car on today with no seats (and therefor nothing attached to that plug) and it didn't trigger any beeps or any lights on the dash.
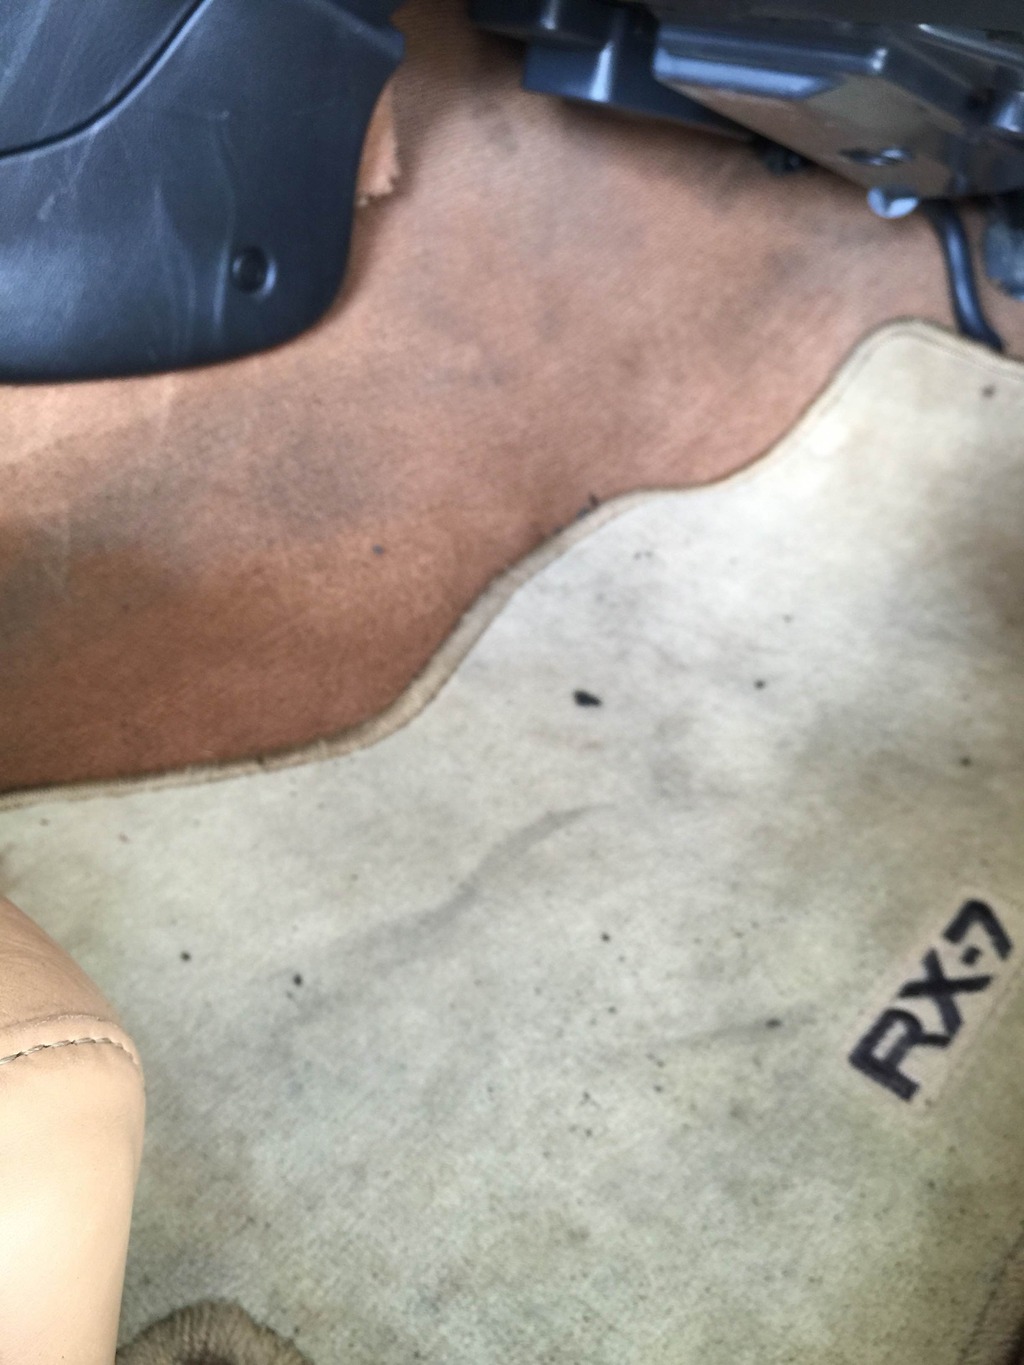
The black stuff on the carpet picture is degraded foam backing from the floor mats. You probably want to remove any remaining backing from the mats so the same doesn't happen again.
They're just the replacement floormats that rx7.com sells, unfortunately not new OEM ones. They do look good and fit well though, so no complaints
I need to figure out how I'm going to wire in the resistor for the airbag light now, as well as how I'm going to wire in the gauges and boost controller. I'm not an expert in electronics, and I dislike the idea of powering them all from different places, so time to do some research I guess!
FEED **** showed up today, so I went out to install that and to put the new seats in. Unfortunately, I accidentally received the wide version, and they don't even come close to fitting. Returned them for a refund and selling the brackets in the classifieds section.
I think I'm going to recover the stock seats, and possibly revisit the idea of something aftermarket later down the road after I address other more important things.
- I sold the Corbeau's, and am waiting for the for sale ad for the brackets to be posted here in the classifies.
- I ordered new leather seat covers for the stock seats. I'm sure it'll be an adventure putting those together, but then, I guess that's why I bought this car
- My coilovers, exhaust, and center console cover showed up today. Gauges should be delivered on Thursday.
- I tore off my old busted driver side door panel, and installed the much nicer one that I got from Fritz. Magic erasers work wonders on interior panels, by the way - highly recommended.
Also, sorry for the quality of the pictures so far. Kind of looks like they're being taken with a potato. Whatever mechanism the iPhone 6+ uses for image stability and focus is broken, so I need to go get it replaced.
Michael.... looking great! I purchased new trim rings for mine a couple of years ago. Might still have my old ones (if you're interested). They were in pretty decent shape, but not perfect! Great progress so far!
Thanks, Tim! I would be interested in buying those from you if the trim rings are in good shape - let me know if you find it laying around at some point in the future.
With regard to recovering the seats - I've read some how-to's, and it seems like a bit of a daunting task. We'll see how it goes, I guess, I'm really looking forward to not having the the torn bolster eye sore in my interior anymore.
Debating whether I want to rent a roller and do my own fenders, or pay a shop locally $200 for the service. The car is going to be repainted anyway, so I'm not particularly scared of cracking the paint, but I'm a little afraid of creating any accidental body damage that will cost me more when it goes to the body shop down the road for paint.
Speaking of which, I'm definitely respraying Montego, but I'm wondering about whether it would be possible to have them mix it slightly different than Mazda did originally. A little more green and a little less blue would be what I'm after. Something closer to this (I'm aware it wouldn't be 100% the same, but that's okay because it does still need to mostly match my engine bay):
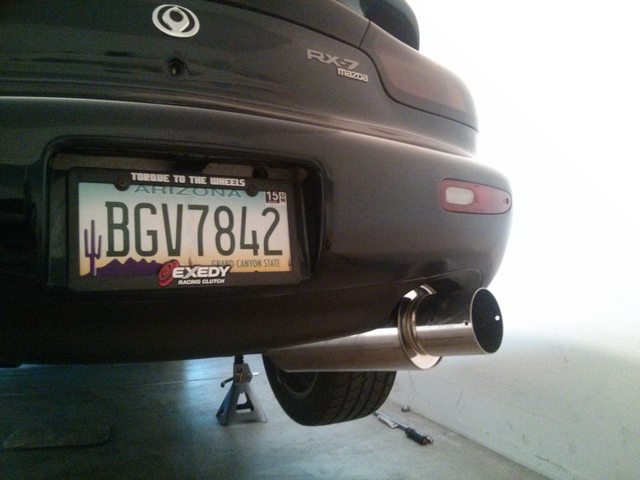
Another small update today: went out and installed my exhaust. Unfortunately, it's tough to get much work done in AZ in the summer, but this was quick so it wasn't so bad.
I actually really dislike the way that it sits relative to the bumper. There's a lot of space between the bumper and the top of the muffler tip. I'm not really sure why it's sitting that way, but I'm going to try to go back and take another look tomorrow to see if there are any adjustments I can make. If not, I may have to look into shorter rubber hangers at the rear, or possibly having different hangers welded on to adjust the location.
Plan for tomorrow is to remove the tranny tunnel cover and install my redline leather cover. I picked up some adhesive today, so we'll see how that one goes.
Thanks jsamerica. I don't really understand why mine is doing that. I'm not sure if I have the hangers misconfigured or something (I didn't check to see whether any of the three on the catback are different from one another).
I think I'm going to try loosening it at the cat, putting the jack underneath it and lifting it, and then retightening.
It's all there, the topmost bit looks like it might be a little melted, probably from an exhaust the previous owner was running (no idea what that could have been, but I'm guessing he wasn't the kind of guy that cared about fit an finish).
That's good to know, though. I actually just got back in from spending some time with it, and it looks like I actually have two different kinds of hangers - I have two rubber hangers that are about 4" long (just under) which accept the rubber sleeves, and I have one that's closer to 3" long and doesn't accept the rubber sleeves.
I'm still not exactly sure why it's doing this - I loosened it at the cat, put the muffler in the correct position by raising it with a jack, and then retightened. No dice. I then moved the short hanger around to both sides of the muffler, but neither one of those locations pulled the muffler any closer to the bumper. Maybe that one goes to the hanger rear of the muffler? I'll try it there next. If that doesn't work, I'm ordering 3 shorter hangers from Kartboy or something.
EDIT - looking at the diagram for the hangers on Racing Beat's website, it looks like the shorter hanger does indeed go on the rearmost mount (one of these things is not like the others..should have realized). I'll try it there tomorrow, it's just way too hot to spend too much time in the garage right now. I still don't see how that's going to erase the gap I have, but we'll see.
2nd edit - I moved the hangers around to the correct locations. Seems like I may have fixed a bit of the space, but that might be my mind playing tricks. There's still a large gap. I wonder whether these rubber hangers wear out and droop over time.
More slow progress this weekend (also Apple replaced the camera in my phone, so no more iphone 1 quality pictures):
-Leather seat covers showed up, and instead of buying the pliers/rings/coathangers and then ruining my seats myself, I ended up getting a great deal from a local shop to recover my seats using the kit. Dropped them off yesterday.
-Installed my redline goods center console cover, and installed the FEED shift ****:
It didn't come out perfect. I'm sure it was probably my fault, but it's still a major improvement over the stock vinyl. Also noticed that when I went to put the shifter panel back in, I must need to trim some of the leather in that area because it a couple of the clips didn't want to go back in very easily, and the one in the front driverside comes out on its own if you shake the whole assembly. Not worried about it for now, though.
Next up: I'm going to order new XD9s for the front in a 10" width and install the gauges. Still undecided as to whether I'll be putting them on top of the dash, or in a DIN panel.
I always liked the feed shift **** but I assumed those all metal ones would get crazy hot in AZ heat. The rx8 has a metal ring around the top and I end up shifting with like two fingers if it finds direct sunlight.
 06-11-15, 09:03 PM