jd's build - 13B-RE FD - try again, fail better!
 06-26-11, 09:16 PM
#1
brap brap mf
Thread Starter
iTrader: (14)

Join Date: May 2004
Location: clifton, NJ (north jersey)
Posts: 402
Received 0 Likes
on
0 Posts
jd's build - 13B-RE FD - try again, fail better!
Hey,
So, let me give you a little background info. I bought my rx7 when I was 18 years old with a mazda reman. with 2k on it. Mods included, downpipe, straight midpipe, apexi n1 duals, power fc w/ commander, apexi acv-r, hks greenie intakes. I was stupid and young, and blew rotor # 2 within 6k miles on it in my possession. Got a few quotes for someone to replace the engine, prices were all over the place and I didn't really know where to go. In the end, I bought a 13b-RE longblock and was told by the shop that was going to install it was a completely plug and play. Well, they were completely wrong, took them 2mo's and 60hours of labor, they charged me 5k just to install the engine. They estimated 1k to install the 1900 dollar motor I bought from an importer I know.
They slapped it together as best they could and gave me a car that would stall everytime I would step on the clutch (while driving) and a "tuned" engine that could barely idle. I was completely out of cash and parked the 7 in my backyard on my patio. 6 years later here we are, I finally have some extra money after my bills to actually get this thing back on the road!
I got the car running ok and found a stupid intake leak and adjusted idle, was running ok. So,
I bought the vac line kit on rx7-store.net (thanks Jason). While ad-mist of doing the vac job, I noticed all the soleniods were trashed and superglued back together.
Decided to go non-sequential, ordered block off plate kits from Banzai-Racing, and a crap load of epdm vac line plugs from mc-master carr.
 06-26-11, 09:22 PM
#2
brap brap mf
Thread Starter
iTrader: (14)
Join Date: May 2004
Location: clifton, NJ (north jersey)
Posts: 402
Received 0 Likes
on
0 Posts
So today, I got a break in the weather. So I decided to break this down to a short block, and start from scratch, besides, I had to get pretty far in to go non sequential. Man, this shop did a horrible job, everything was barely connected, **** the TCA wasn't even connected, vac lines missing, cracked vac line to the fuel pressure regulator. Pretty much everything u would find after you told a 5 year old to put something back together.
argh, I have tons of pictures from today, but apparently they are way too large, 250kb jpg cap. I'll have to resize them and upload them 2morrow.
Sorry to leave you guys hanging.
argh, I have tons of pictures from today, but apparently they are way too large, 250kb jpg cap. I'll have to resize them and upload them 2morrow.
Sorry to leave you guys hanging.
06-26-11, 09:30 PM
#3
brap brap mf
Thread Starter
iTrader: (14)
Join Date: May 2004
Location: clifton, NJ (north jersey)
Posts: 402
Received 0 Likes
on
0 Posts
Oh in the mean time, I'm sure your wondering.
13b-RE vs 13b-REW
differences are :
re has non hardened and 3 oil hole stat. gears
rew has hardened 9 oil hole stat. gears
re 90-94 has motor mounts only on middle plate, 95 had same motor mounts, but tapped rear plate for motor mounts.
rew has motor mounts on rear plate only.
re has massive secondary intake ports, people describe them to be a hair smaller then the largest streetport they've seen.
rew has tiny secondary intake ports...
re exhaust sleeves are pinned in place, are hollow, and are very restrictive.
rew exhaust sleeves are solid, and not as restrictive.
re was only mounted to automatics (prolly explains the restrictive exhaust sleeves)
at a minimum to get a re into a fd, you need to use the complete front plate from the rew shortblock, and either tap the rear plate for motor mounts (or get lucky with a 95 spec re motor), or buy a kit from some shop in FL (forgot the name atm) and use the rew oil pan. you really should do a rebuild to it and swap out stat gears, bearings, swap the exhaust sleeves and port exhaust to match how large intake porting is. This is what I will do next fall.
06-26-11, 09:51 PM
#5
Rotary Enthusiast
Jeeze that sounds like a bit of horror story.
So they got you to buy the incorrect engine for your car, and basically charged you for a custom engine install?
Best of luck moving forward!
So they got you to buy the incorrect engine for your car, and basically charged you for a custom engine install?
Best of luck moving forward!
06-26-11, 09:58 PM
#6
brap brap mf
Thread Starter
iTrader: (14)
Join Date: May 2004
Location: clifton, NJ (north jersey)
Posts: 402
Received 0 Likes
on
0 Posts
JD's Build - 13B-REW to 13B-RE
I'm still a newb.
"96fd3s
Jeeze that sounds like a bit of horror story.
So they got you to buy the incorrect engine for your car, and basically charged you for a custom engine install?
Best of luck moving forward!"
Exactly! To be honest, I was young and dumb and should have found out more info. on my own. The older you get the more you realize to never trust anyone unless you have good reason to.
Trending Topics
06-26-11, 10:21 PM
#9
brap brap mf
Thread Starter
iTrader: (14)
Join Date: May 2004
Location: clifton, NJ (north jersey)
Posts: 402
Received 0 Likes
on
0 Posts
JD's Build - 13B-REW to 13B-RE
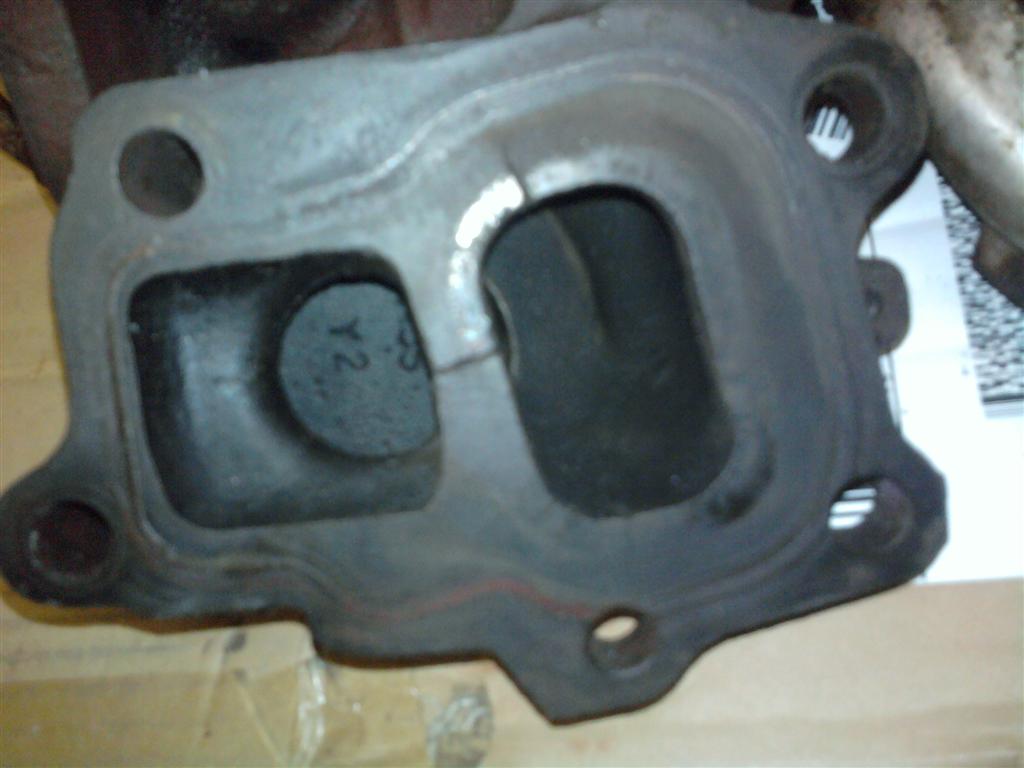
Overall picture of intake ports, pic #2 can any one confirm if theres supposed to be a gaping hole to the flywheel? Also, some pics of the turbos.
06-26-11, 10:25 PM
#10
brap brap mf
Thread Starter
iTrader: (14)
Join Date: May 2004
Location: clifton, NJ (north jersey)
Posts: 402
Received 0 Likes
on
0 Posts
JD's Build - 13B-REW to 13B-RE
Can anyone confirm if the 1st picture is the turbo control actuator (was under the turbos, and rod wasn't connected to turbos b4 removal)
Also, can any one determine the type of downpipe maybe HKS? or custom? should i replace this with one that's completely tubular even towards the turbo exhaust manifold and an o2 sensor further back?
If you guys think the downpipe is ok, ill just heat wrap it and have an wideband o2 bung installed 26" from the exhaust manifold.
Thanks
06-27-11, 05:54 PM
#13
brap brap mf
Thread Starter
iTrader: (14)
Join Date: May 2004
Location: clifton, NJ (north jersey)
Posts: 402
Received 0 Likes
on
0 Posts
JD's Build - 13B-REW to 13B-RE
Next summer I plan on ripping the block apart, swap out the exhaust sleeves with fd sleeves, and have them streetported. Also plan on sending the housings out to Goopy Performance to have them resurfaced. A lot of people think they add material after they cut the housings, they don't, they just take a minuscule amount off the rotor housings to bring it back to like new condition. Since the Apex seals have springs under them, with the resurfaced housings people are getting 140+ psi on rebuilds! And of course swap out the bearings, stat gears, and possibly the rotors as well. For seals, I'll either use the Goopy Seals or ALS Seals which are both very similar to each other, (softer seals, that bend to an extent, and supposedly will straighten back out.) Everyone I ask about the RA Super Seals say they're great, but eat up housings, others say they're great and don't eat up housings. Not too sure on who's right and who's not.
Anyways, not too much work done today, put the turbos on the bench and sprayed the crap out of it with PB Blaster. Hopefully in a day or two after stewing, I can pull the turbo cartridges off the manifold. I did get a chance to inspect the turbine impellers on the hot side, both look perfect, no bent or missing fins from what I've seen today. Also they spin great, but there's a little bit of shaft play up and down, about 1mill maybe less. When trying to spin the compressor impellers while pushed down or pulled up, they seem to spin fine without contacting the housings. Can anyone provide some insight on shaft play specs, so I can figure if these are within spec or not? They're n3a1's if that makes a difference for specs.
Thanks.
06-27-11, 05:56 PM
#14
brap brap mf
Thread Starter
iTrader: (14)
Join Date: May 2004
Location: clifton, NJ (north jersey)
Posts: 402
Received 0 Likes
on
0 Posts
Ill remove the rust, high temp paint and heatwrap or have it ceramic coated (depending on pricing).
Also, anyone have that transmission coverplate I seem to be missing?!
06-27-11, 06:43 PM
#15
All paint and some ceramic coating will burn off. Our EGT's are outrageous.
You should be able to search for ceramic coating suggestions/use cases fairly easily. Coating and wrapping is not recommended, usually. Apparently it's known to crack pipes. So, pick one or the other.
You should be able to search for ceramic coating suggestions/use cases fairly easily. Coating and wrapping is not recommended, usually. Apparently it's known to crack pipes. So, pick one or the other.
06-28-11, 05:41 PM
#16
brap brap mf
Thread Starter
iTrader: (14)
Join Date: May 2004
Location: clifton, NJ (north jersey)
Posts: 402
Received 0 Likes
on
0 Posts
All paint and some ceramic coating will burn off. Our EGT's are outrageous.
You should be able to search for ceramic coating suggestions/use cases fairly easily. Coating and wrapping is not recommended, usually. Apparently it's known to crack pipes. So, pick one or the other.
You should be able to search for ceramic coating suggestions/use cases fairly easily. Coating and wrapping is not recommended, usually. Apparently it's known to crack pipes. So, pick one or the other.
06-29-11, 07:08 PM
#17
brap brap mf
Thread Starter
iTrader: (14)
Join Date: May 2004
Location: clifton, NJ (north jersey)
Posts: 402
Received 0 Likes
on
0 Posts
Hey,
So I grabbed my 3' pipe and got the turbos partially disassembled today. Had it soaked in pb blaster since monday afternoon, no broken bolts. ;p
Also finished off installing all the block off plates on the uim and lim. Build is slowly comming along.
So I grabbed my 3' pipe and got the turbos partially disassembled today. Had it soaked in pb blaster since monday afternoon, no broken bolts. ;p
Also finished off installing all the block off plates on the uim and lim. Build is slowly comming along.
06-30-11, 06:05 PM
#19
brap brap mf
Thread Starter
iTrader: (14)
Join Date: May 2004
Location: clifton, NJ (north jersey)
Posts: 402
Received 0 Likes
on
0 Posts
removal of exhaust flappers
Hey,
So I had some time after work today. Didn't hear back yet from a few shops to do this for me, so I grabbed a grinder, my drill, and hammer and got to work on the flappers. So grinder sucked ***, so I ended up using my 18volt makita drill and a brand new 5/16" cobalt metal drill. I was surprised at how quickly I got thru the material.
Now to have some one weld up the two remaining holes, I tried to tap it, gave up, and refuse to use bolts + washers + nuts.
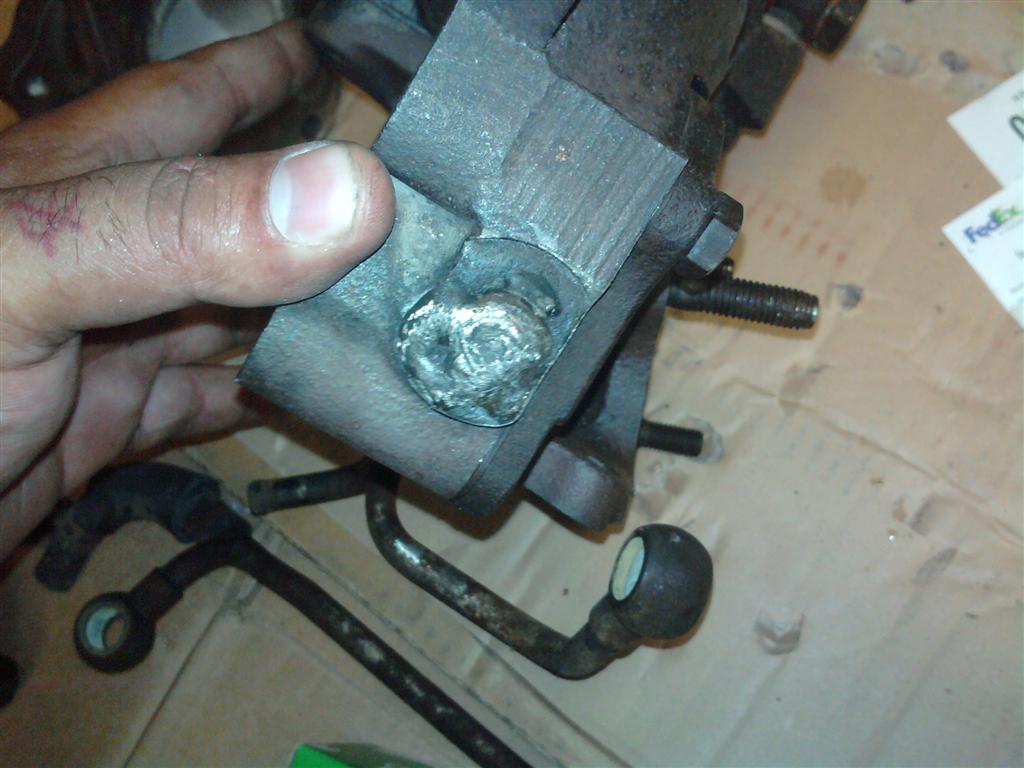
Here's some pics of the exhaust brick flapper removal and secondary turbo flapper removal.
So I had some time after work today. Didn't hear back yet from a few shops to do this for me, so I grabbed a grinder, my drill, and hammer and got to work on the flappers. So grinder sucked ***, so I ended up using my 18volt makita drill and a brand new 5/16" cobalt metal drill. I was surprised at how quickly I got thru the material.
Now to have some one weld up the two remaining holes, I tried to tap it, gave up, and refuse to use bolts + washers + nuts.
Here's some pics of the exhaust brick flapper removal and secondary turbo flapper removal.
07-28-11, 06:48 PM
#20
brap brap mf
Thread Starter
iTrader: (14)
Join Date: May 2004
Location: clifton, NJ (north jersey)
Posts: 402
Received 0 Likes
on
0 Posts
Been slacking on the updates,
Bought a set of bnr stage 2's with a blown compressor side of the secondary turbo.
Here's pics of the BNR Stage 2 primary
Had some cracking welded up, wastegate port and near the turbine exhaust gas output.
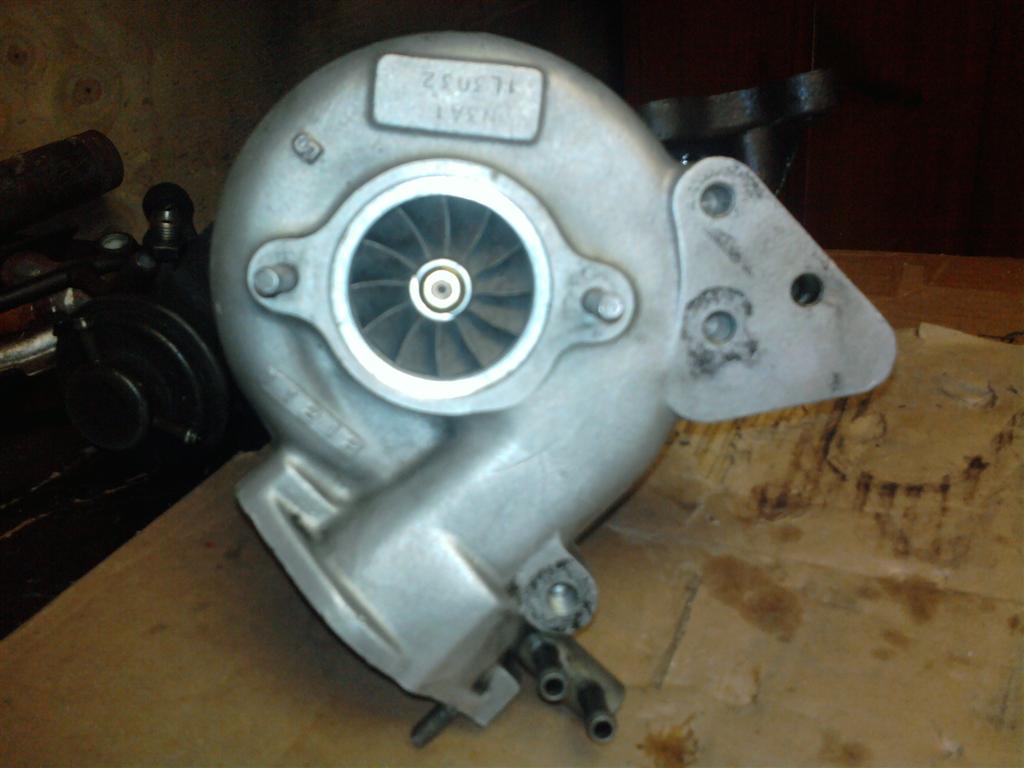
Here's a pic of the blown BNR Stage 2 secondary(compressor housing and compressor turbine gone, little to no shaft play up and down, zero place in and out, crazy. Seller said he was running a 1/4mi run @ the track and it just blew leaving parts all over the track.
Pic of painted parts
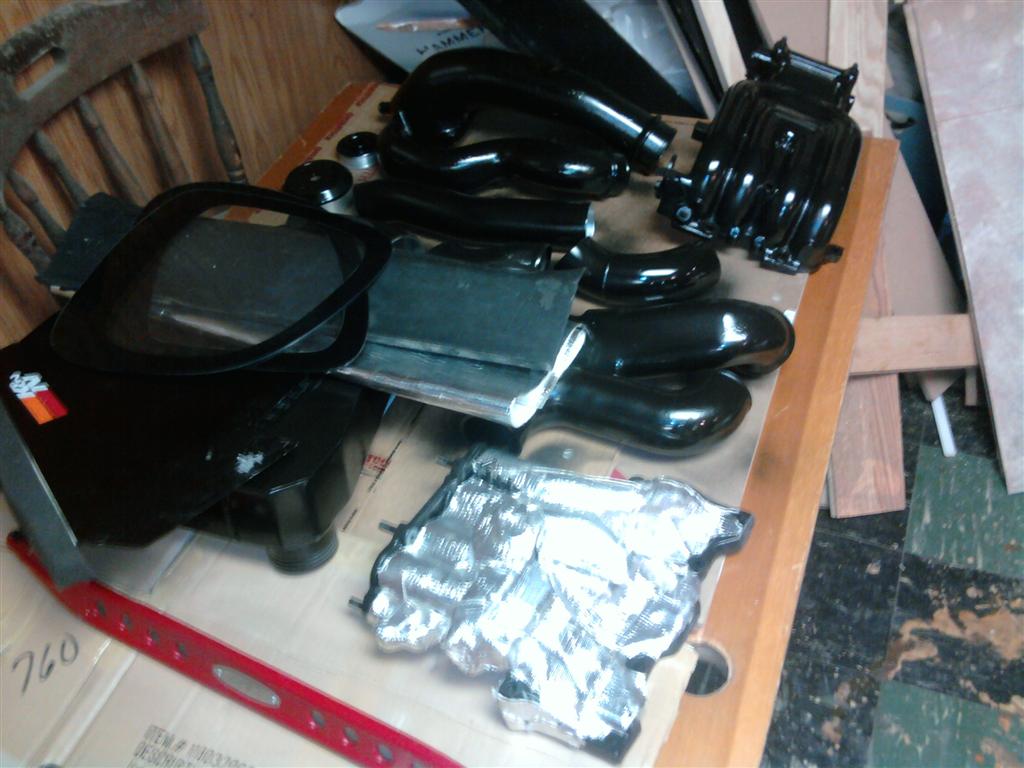
Bought a set of bnr stage 2's with a blown compressor side of the secondary turbo.
Here's pics of the BNR Stage 2 primary
Had some cracking welded up, wastegate port and near the turbine exhaust gas output.
Here's a pic of the blown BNR Stage 2 secondary(compressor housing and compressor turbine gone, little to no shaft play up and down, zero place in and out, crazy. Seller said he was running a 1/4mi run @ the track and it just blew leaving parts all over the track.
Pic of painted parts
07-28-11, 07:03 PM
#21
brap brap mf
Thread Starter
iTrader: (14)
Join Date: May 2004
Location: clifton, NJ (north jersey)
Posts: 402
Received 0 Likes
on
0 Posts
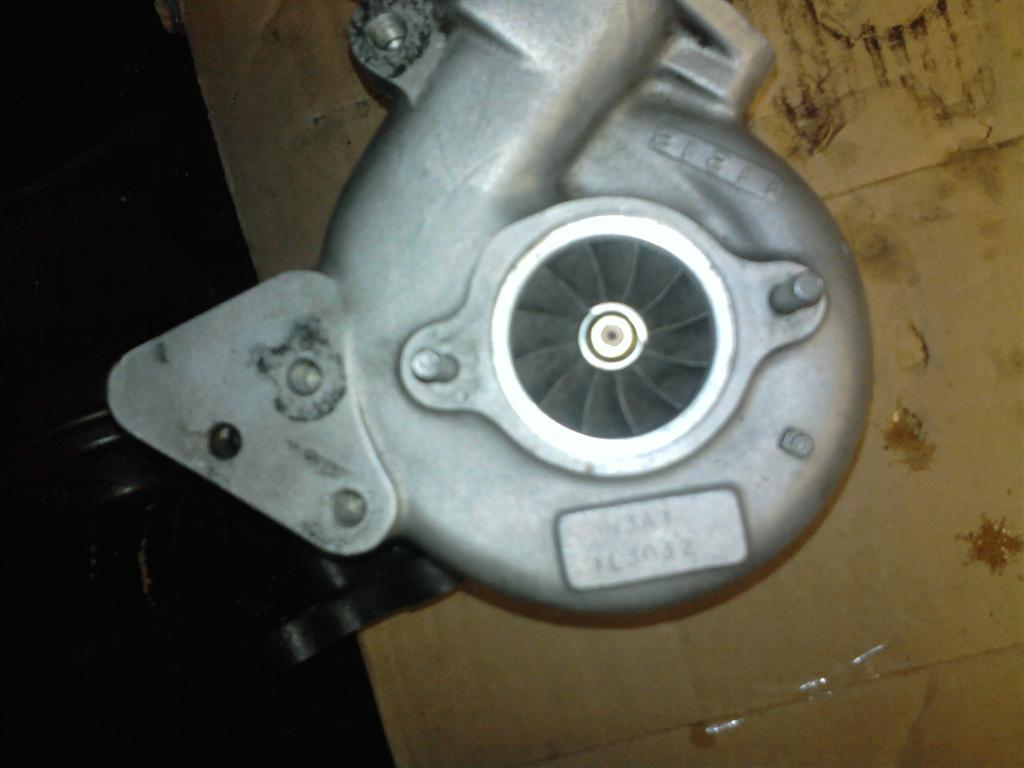
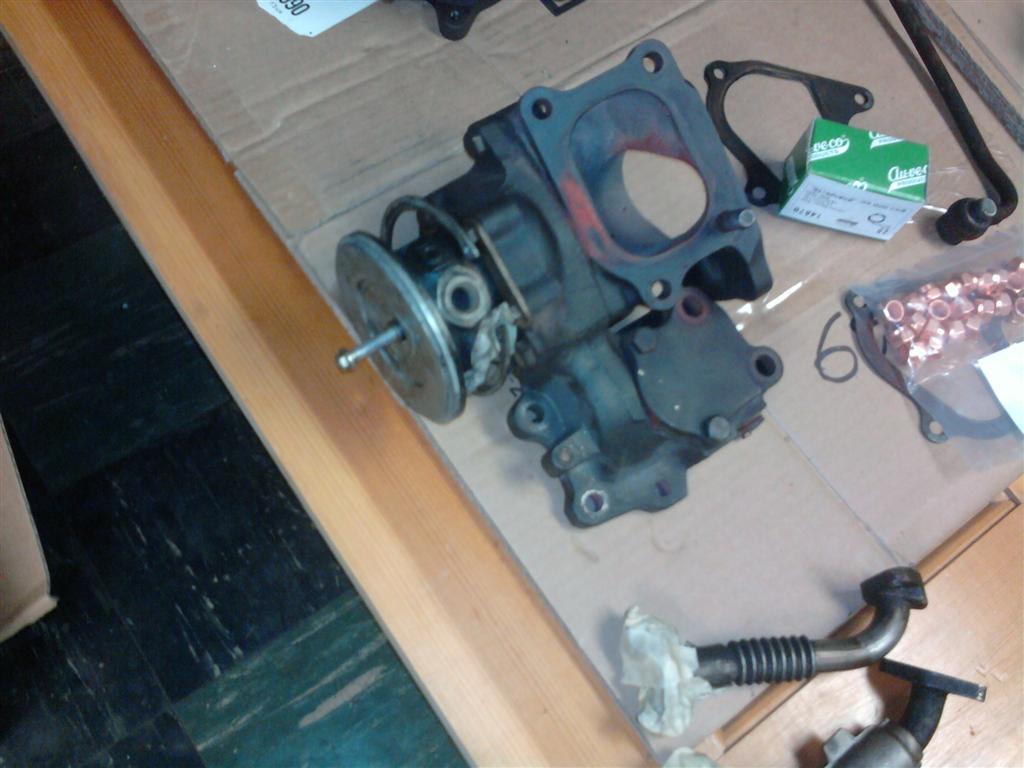
Using my stock secondary turbo along with the BNR Stage 2 primary turbo in my non-seq setup. If you guys are wondering the BNR Stage 2 turbo does take more effort to spin the compressor vs the stock turbo, I wonder if this will creating a type of mechanical sequential setup or just cause boost problems.
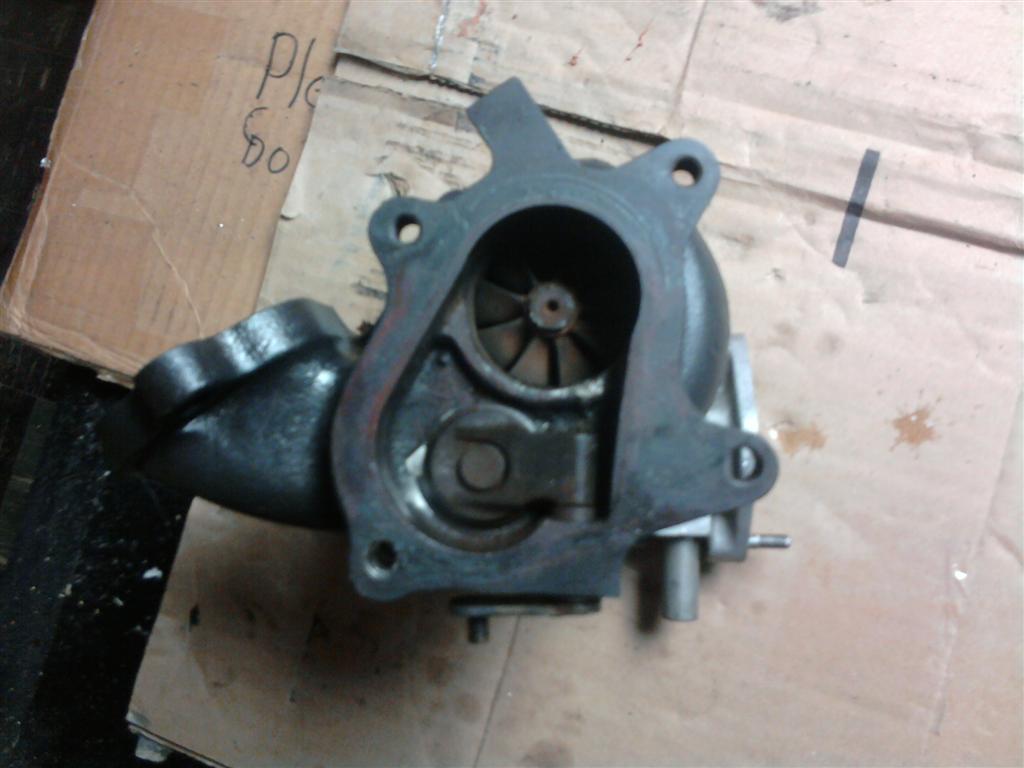
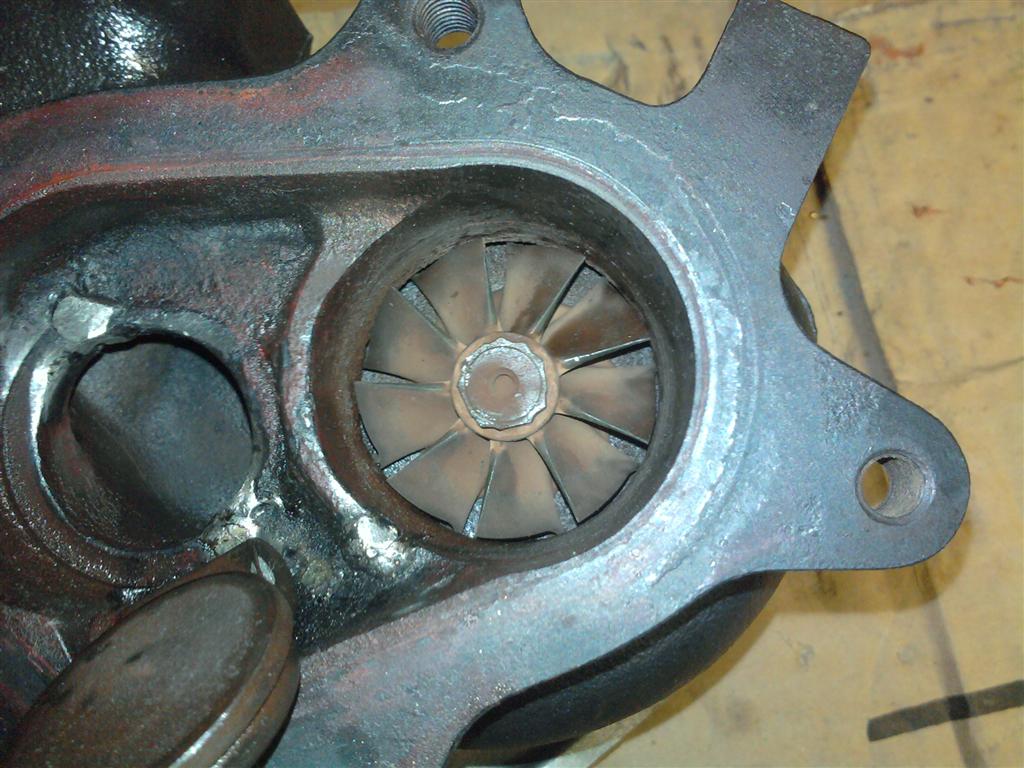
Here's some pics of the stock secondary turbo.
Exhaust side

Flapper removed
Hole plugged and welded over
Flapper removed in exhaust brick, hole plugged and welded over

I also purchased a 550/1300 injector/rail (with Garfinkle fittings) setup from Jason (mobeoner). Sent my tail lights to Tom (theorie) to have them paint converted to 99spec. I need to purchase all new push on fuel lines and AN fittings from aeroquip.cc ; also need an Aeromotive FPR.
Project is slowly coming along, I'm taking my time so hopefully I get stuff done right the first time and because I can't afford to buy everything at once.
I already have the turbos fully assembled and ready to go back on the car this weekend, I'll take more pics and post again hopefully Sunday.
Here's some pics of the stock secondary turbo.
Exhaust side
Flapper removed
Hole plugged and welded over
Flapper removed in exhaust brick, hole plugged and welded over
I also purchased a 550/1300 injector/rail (with Garfinkle fittings) setup from Jason (mobeoner). Sent my tail lights to Tom (theorie) to have them paint converted to 99spec. I need to purchase all new push on fuel lines and AN fittings from aeroquip.cc ; also need an Aeromotive FPR.
Project is slowly coming along, I'm taking my time so hopefully I get stuff done right the first time and because I can't afford to buy everything at once.
I already have the turbos fully assembled and ready to go back on the car this weekend, I'll take more pics and post again hopefully Sunday.
08-04-11, 11:11 AM
#22
brap brap mf
Thread Starter
iTrader: (14)
Join Date: May 2004
Location: clifton, NJ (north jersey)
Posts: 402
Received 0 Likes
on
0 Posts
Yay, my paycheck cleared today! Paid rent, bought the rest of parts I need to complete the new fuel system.
So I went with an Aeromotive A-1000 13109 FPR with Aeromotive gauge and fittings via amazon, about $191 shipped.
With the lines and AN fittings I went with Aeroquip push on black hose and Aeroquip socketless push on fittings in ugly *** blue/red. I used aeroquip.cc I was amazed at the pricing and Tony Price in cust. service/sales is awesome! Highly recommend these guys.
Fittings/Line break down @ aeroquip.cc
10 feet of Aeroquip -6an push on hose, black p/n FBN0600
1 female -6an 45deg Aeroquip socketless (for inlet of primary rail) p/n FBM1522
1 female -6an 180deg Aeroquip socketless (for outlet of secondary rail) p/n FBM1562
2 female -6an 90deg Aeroquip socketless (for inlet + outlet of FPR) p/n FBM1532
1 male -6an Aeroquip ORB Plug (for blocking off 2nd inlet on FPR) p/n FBM3724
1 bottle of 222070 Aerolube (gotta have the lube!) p/n FBM3553
about $111 shipped. (I think that's the best price your going to find.)
I'll finish up my fuel pump rewire, recheck all wiring for my shitty narrowband AFR guage, the wiring for my avc-r controller, mount the franken turbos and LIM by Sunday. The above parts should arrive by Weds. Aug 10th. I should be able to get it started by the end of next week!
Still have to fully bleed the brake system, refill with new fluid, install the SBG teflon SS brakelines, rebuild the front calipers with oem rebuild kit, replace all brake rotors and pads. That should be enough done for insurance and break-in driving. Before my dyno tune @ KDR/Speed1 I want to get an innovative wideband sensor kit, and rb duals to replace my crazy f'in loud apexi N1 duals!
09-06-11, 10:34 PM
#23
brap brap mf
Thread Starter
iTrader: (14)
Join Date: May 2004
Location: clifton, NJ (north jersey)
Posts: 402
Received 0 Likes
on
0 Posts
With all the rain, work, and overall laziness it's been a while since I've really got anything done on the rx7. Here's some stuff I've got done tho.
Got Tom(theorie) to modify my usdm tail housings to 99 spec (painted). And picked up some 1156 LED bulbs from Robert(rlee429). Installed.
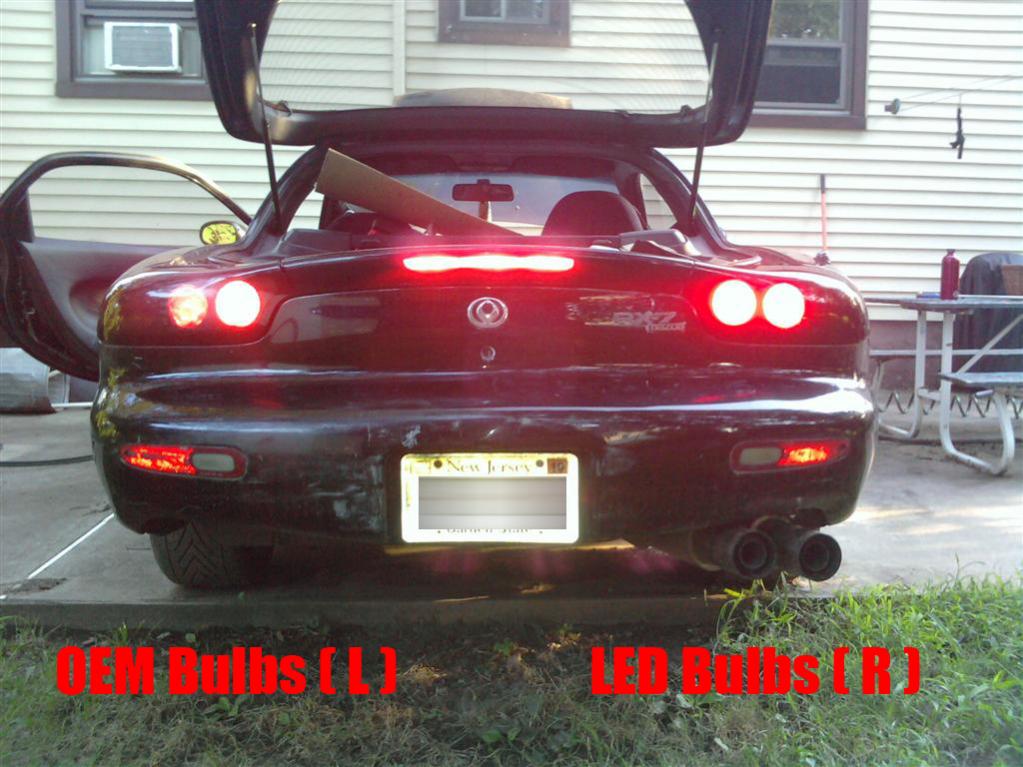
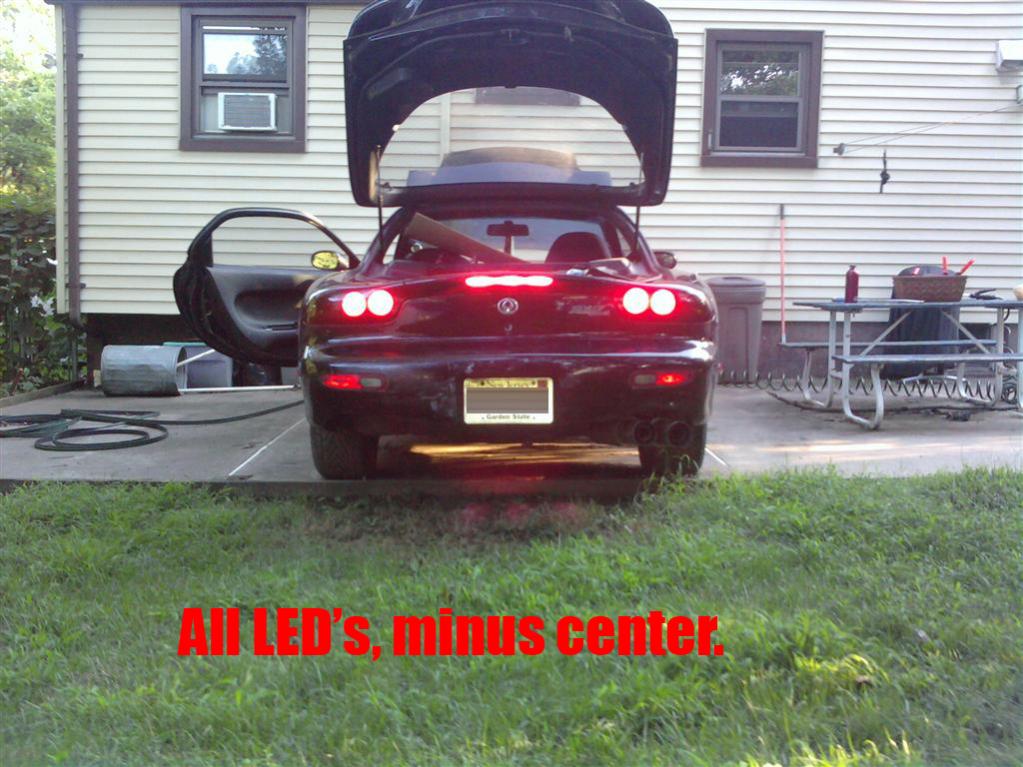
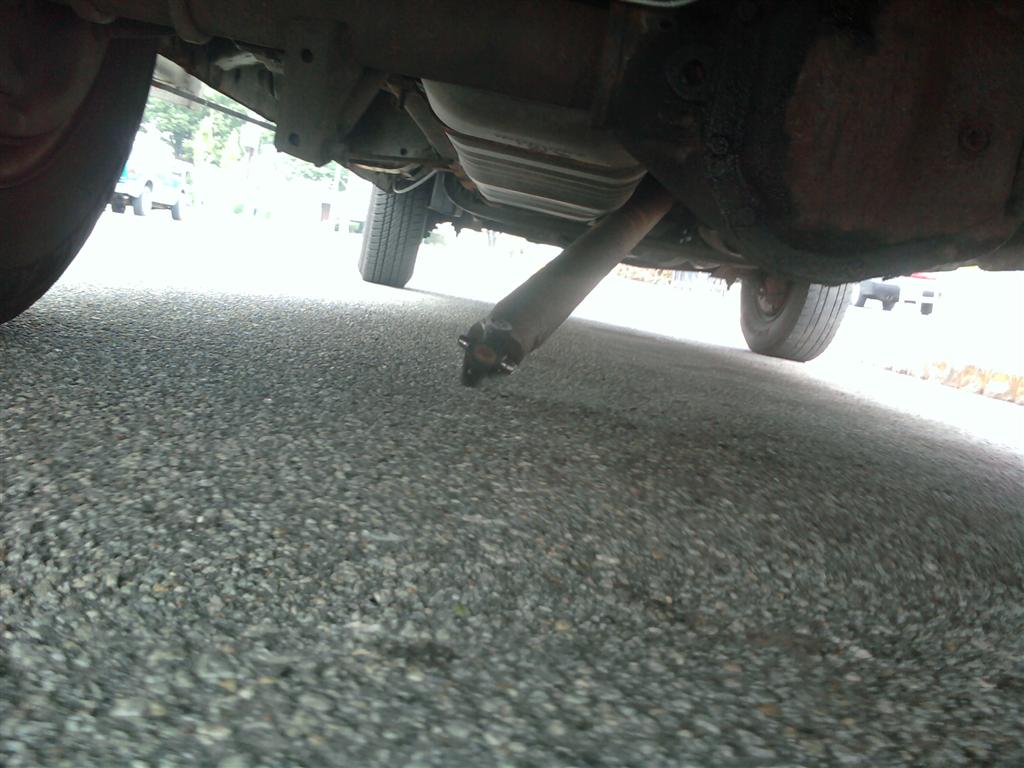
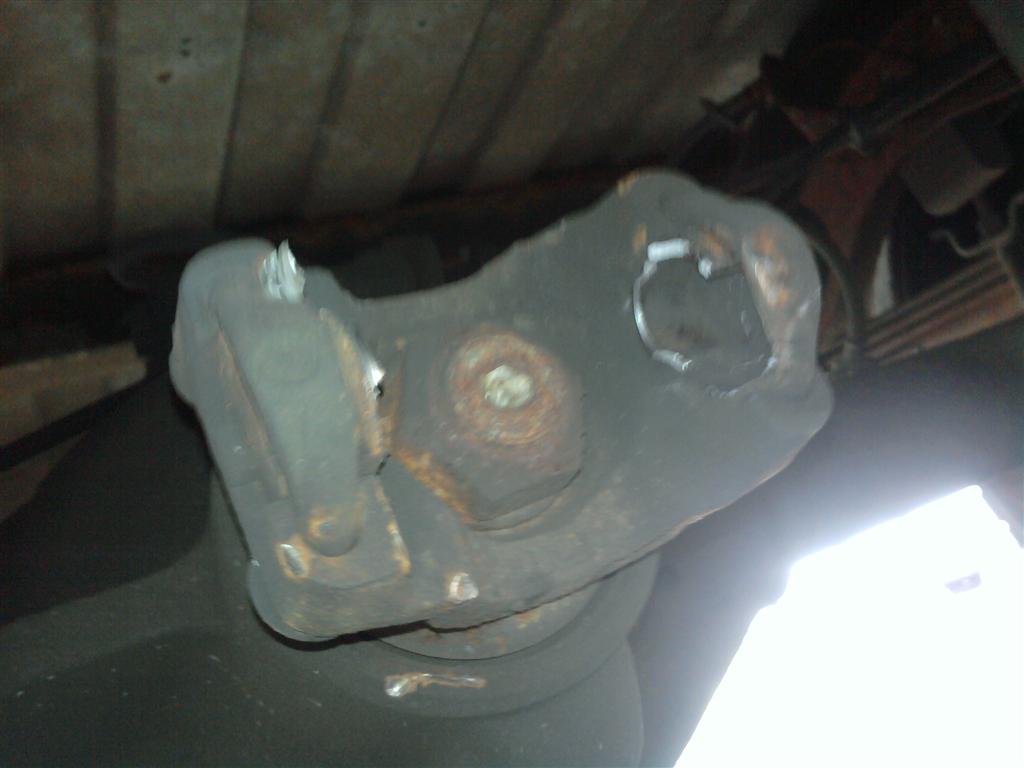
Snapped my work van's drive shaft at the rear diff u-joint.
Got Tom(theorie) to modify my usdm tail housings to 99 spec (painted). And picked up some 1156 LED bulbs from Robert(rlee429). Installed.
Snapped my work van's drive shaft at the rear diff u-joint.
09-06-11, 10:47 PM
#24
brap brap mf
Thread Starter
iTrader: (14)
Join Date: May 2004
Location: clifton, NJ (north jersey)
Posts: 402
Received 0 Likes
on
0 Posts
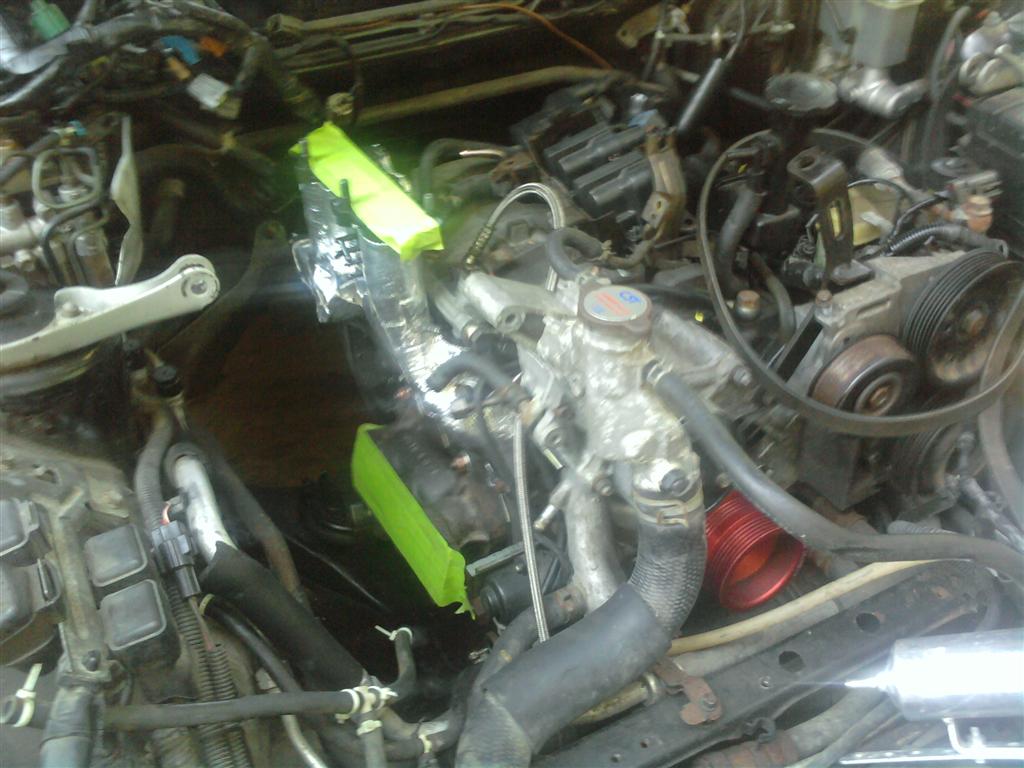
Here is some actual work on the rx7.
Exhaust brick on with washers and new cooper lock nuts. Got the LIM on, its painted black and wrapped with thermo-tech 13590

crappy overall picture
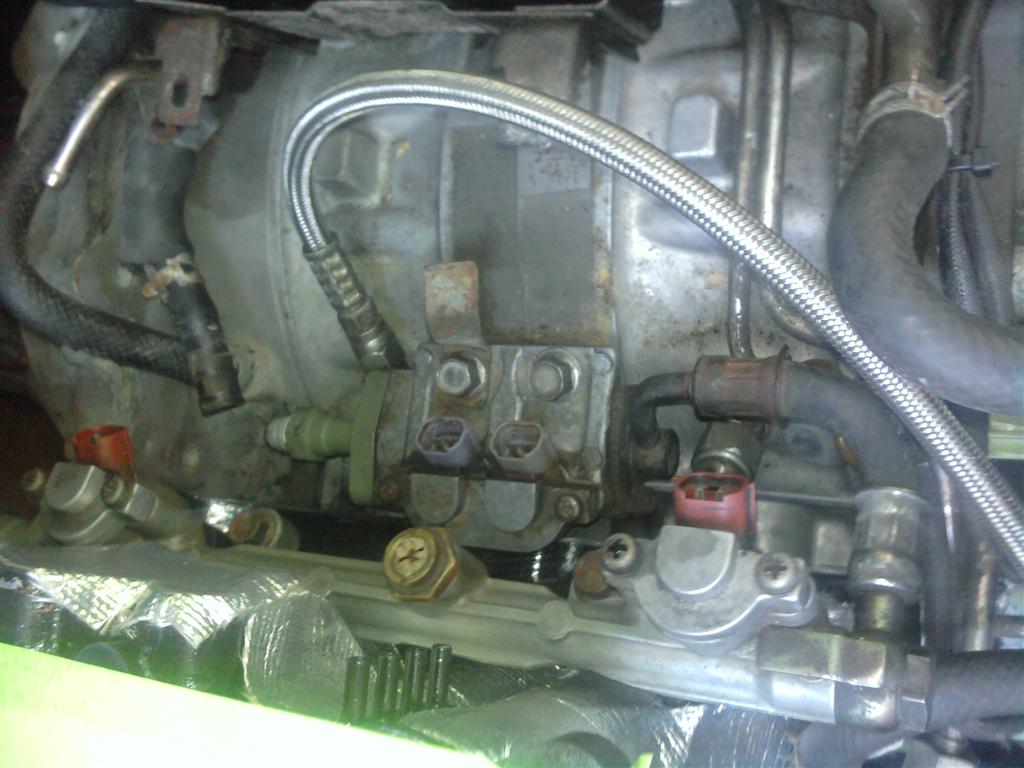
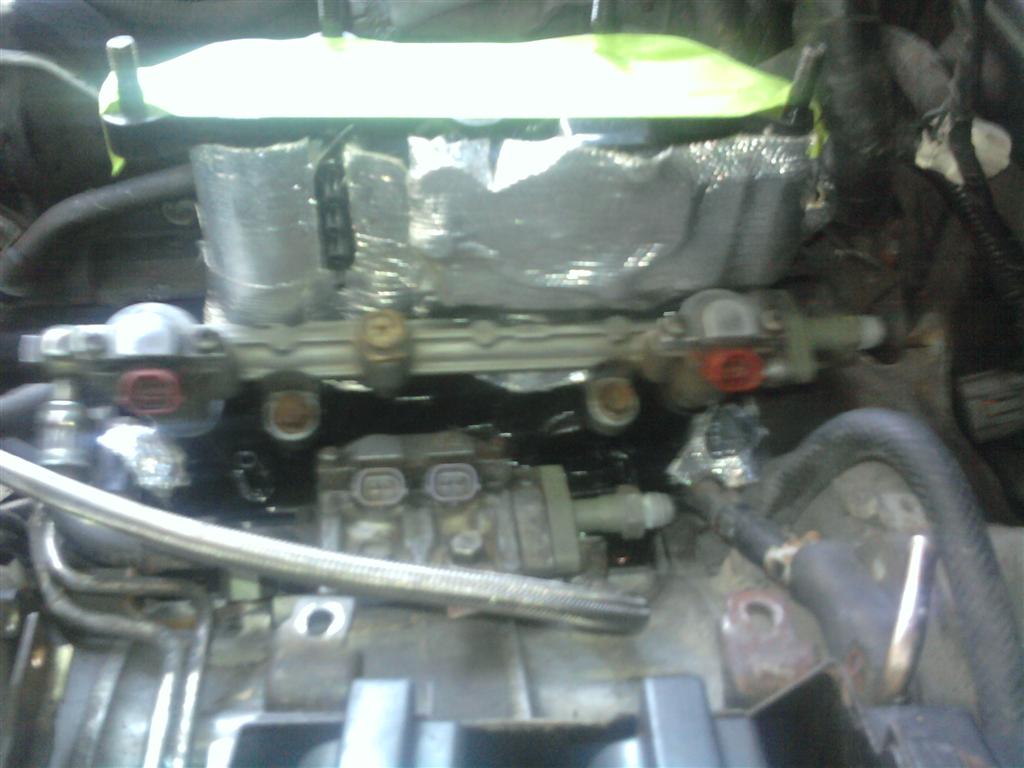
Got a 550cc/1300cc fuel injector setup installed. Thanks Jason (mobeoner). Stainless steel OMP lines in, thanks superjet3
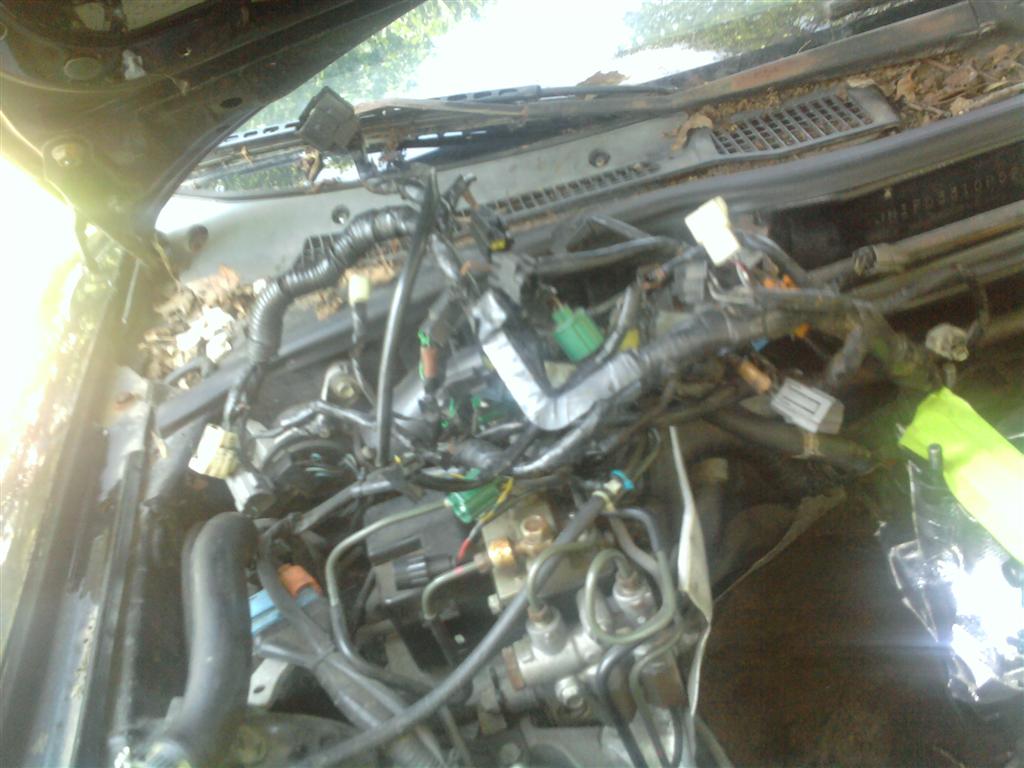
And a pic of my engine wiring harness, I am not looking forward to converting this to non-seq/single turbo and re-wrapping it.
I also got the turbos on last Sunday, I just haven't taken pictures yet.
Exhaust brick on with washers and new cooper lock nuts. Got the LIM on, its painted black and wrapped with thermo-tech 13590
crappy overall picture
Got a 550cc/1300cc fuel injector setup installed. Thanks Jason (mobeoner). Stainless steel OMP lines in, thanks superjet3
And a pic of my engine wiring harness, I am not looking forward to converting this to non-seq/single turbo and re-wrapping it.
I also got the turbos on last Sunday, I just haven't taken pictures yet.
