Engine Removal, Rebuild, and Install on a 95 RHD FD
 05-26-15, 07:16 PM
#51
I just wanted to pop in here and say thank you for this thread. I have been using it for my own build. For me, this is an easier to follow than the FSM, and much more detailed than the other walk throughs I had found in my research. Please keep the updates coming! My only critique of the thread would be I was disappointed the stripping of the engine bay was not detailed. From what I've seen in the build threads over the years, this seems to be a very easy and natural step for everyone....I guess it is just very intimidating for me. Again, your thread has been unbelievably helpful in making me comfortable enough to do something I've always dreamed of doing. Thanks again!
 07-09-15, 03:59 PM
#52
Full Member
Thread Starter

I just wanted to pop in here and say thank you for this thread. I have been using it for my own build. For me, this is an easier to follow than the FSM, and much more detailed than the other walk throughs I had found in my research. Please keep the updates coming! My only critique of the thread would be I was disappointed the stripping of the engine bay was not detailed. From what I've seen in the build threads over the years, this seems to be a very easy and natural step for everyone....I guess it is just very intimidating for me. Again, your thread has been unbelievably helpful in making me comfortable enough to do something I've always dreamed of doing. Thanks again!
When I put the car back together I will try to write a how-to on stripping it. That way that portion is covered. Thank you for the feedback.
So I know I've let this thread kind of fall off the map for a bit. It is due to the fact that I'm going through a divorce. However, I will be continuing on shortly.
The next task that I need to do is wrap all the harness intersections with self-amalgamating tape. At least, that's my solution for the harness for now. I've researched common ways people are wrapping harnesses and not finding a whole lot. So I'm kind of doing this my own way. Hopefully I'll have a pretty big update in the next week or so.
 07-10-15, 04:44 AM
#54
Full Member
Thread Starter
07-25-15, 05:32 PM
#55
Full Member
Thread Starter
Finally got back to working on the car. I had planned on updating this thread with a completed harness, however, I decide the tape I was going to use at the intersections of the harness was simply not durable enough, so now I have better tape on the way.
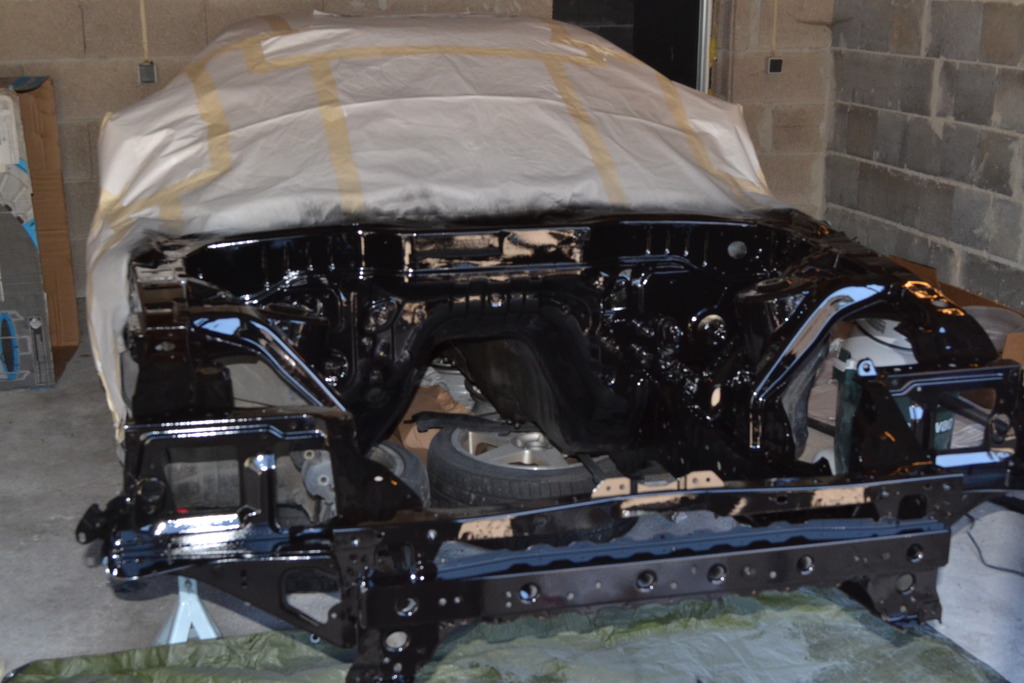
Although the harness has been a fail, I did have a majorly successful day on the car itself. I had a buddy come over and we went to town taping up the car, covering it, and then stripping the bay. We have quite a bit to do though before I start spraying here with primer.
First I had to get her home all cleaned up and then center her in the garage. That's my friend you're seeing.
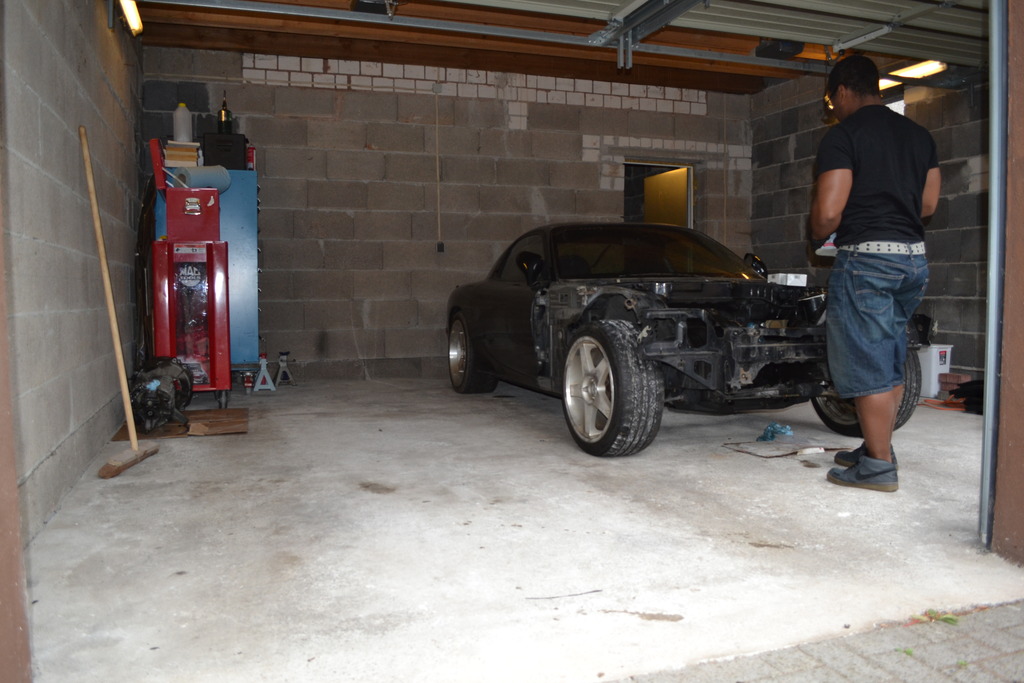
Then got her up in the air. These stock BMW wheels work perfectly for stands under the rear wheels of the car. She's all taped up and covered too.
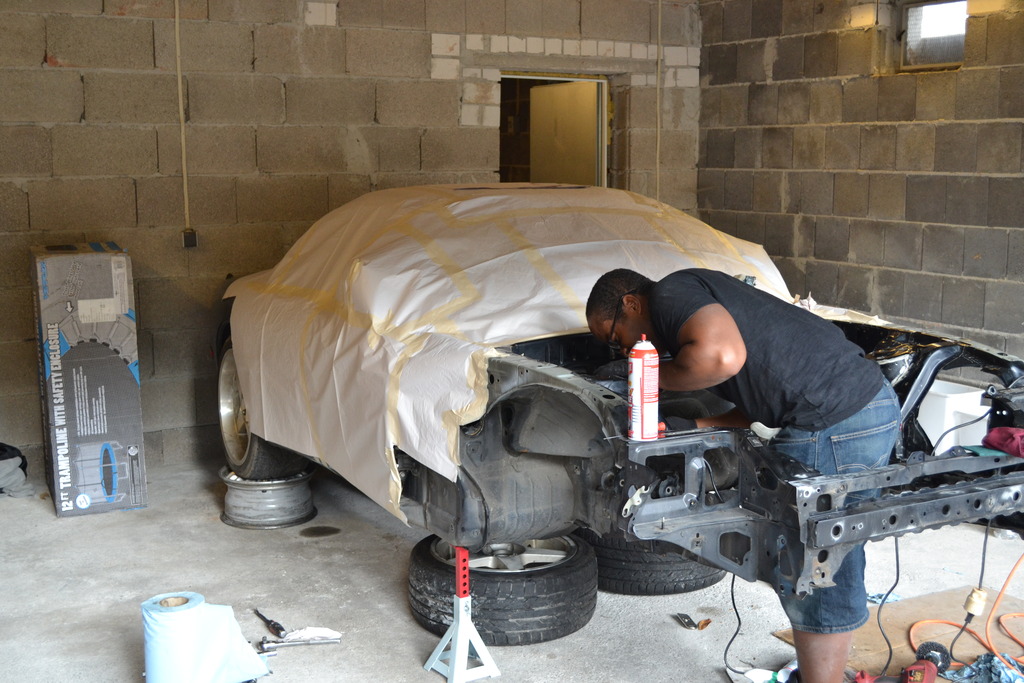
Getting her down to bare metal.
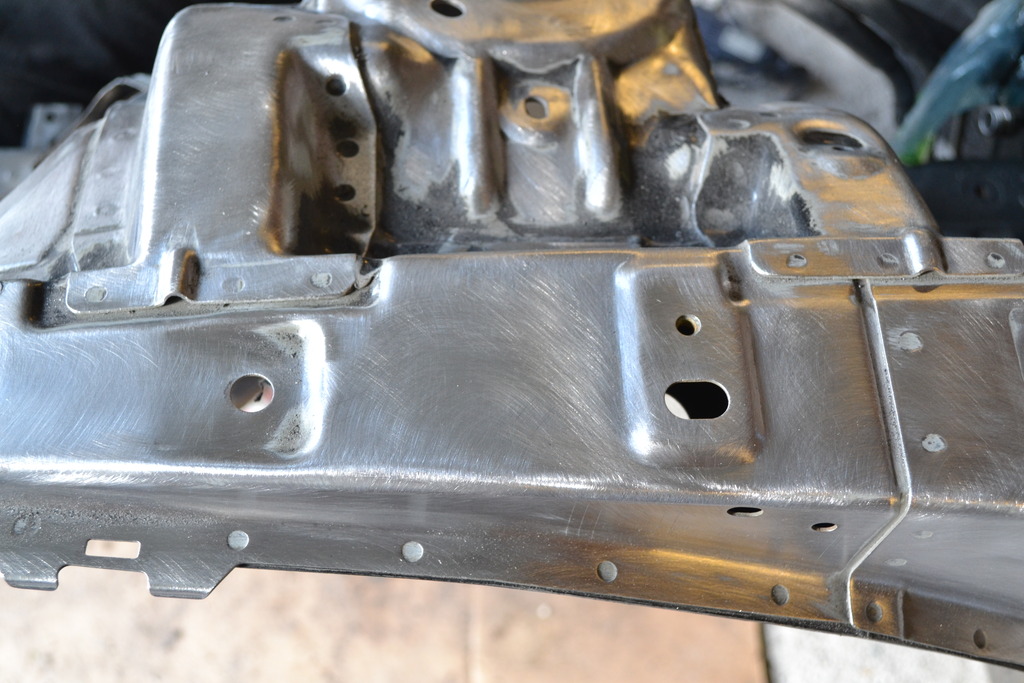
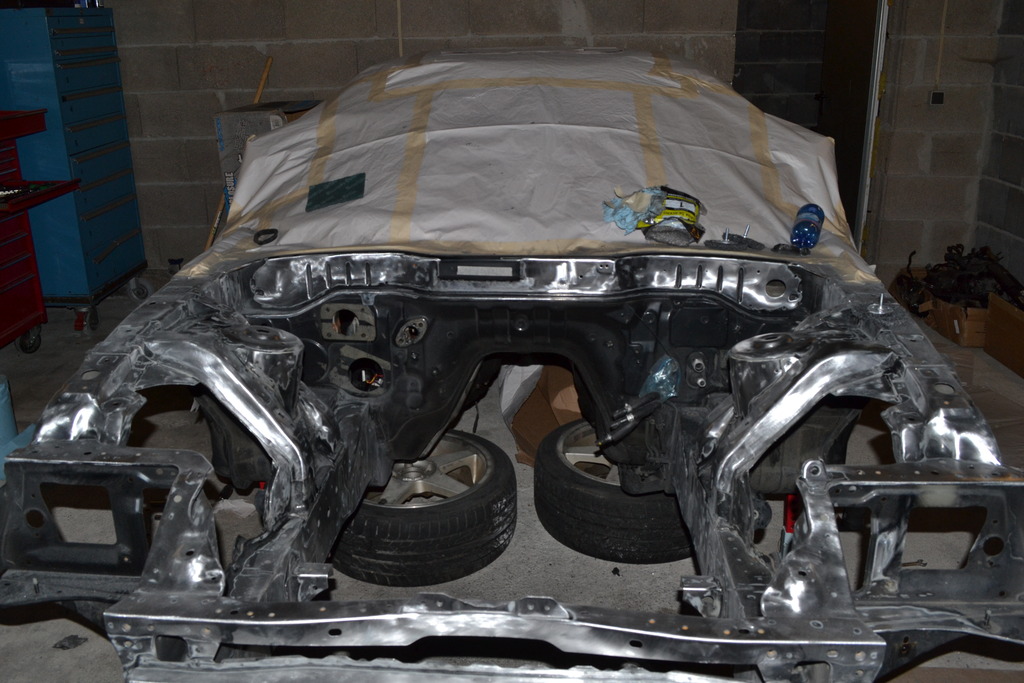
And this is where she sits. I still have a couple long days of stripping and then the primer goes on.
Although the harness has been a fail, I did have a majorly successful day on the car itself. I had a buddy come over and we went to town taping up the car, covering it, and then stripping the bay. We have quite a bit to do though before I start spraying here with primer.
First I had to get her home all cleaned up and then center her in the garage. That's my friend you're seeing.

Then got her up in the air. These stock BMW wheels work perfectly for stands under the rear wheels of the car. She's all taped up and covered too.

Getting her down to bare metal.

And this is where she sits. I still have a couple long days of stripping and then the primer goes on.
 07-27-15, 06:22 AM
#56
Full Member
Thread Starter
Car has been partially primed. I need to finish priming it then spray the black. Then I can move onto cleaning up the bottoms of the frame rails and the fender wells so they can be coated.


 07-28-15, 01:40 PM
#59
Full Member
Thread Starter

 08-07-15, 07:08 AM
#63
Full Member
Thread Starter
Please do, that's what this was made for. 
Thank you for the kind words.
I was able to spend a little bit of time on the car today, and now she's black again..................... The camera captured a lot in the 2nd pic that I can't see when I'm looking at it, regardless, the car isn't going to be a show car, so I'm ok with a certain margin of error. But overall, it came out looking great for rattle cans.
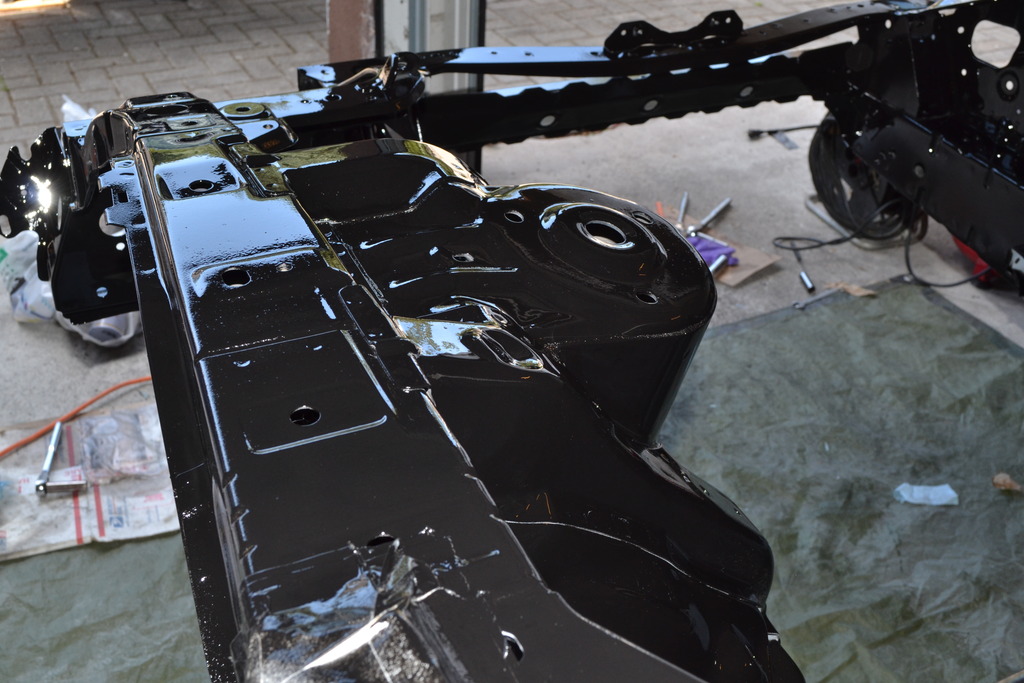
I was able to spend a little bit of time on the car today, and now she's black again..................... The camera captured a lot in the 2nd pic that I can't see when I'm looking at it, regardless, the car isn't going to be a show car, so I'm ok with a certain margin of error. But overall, it came out looking great for rattle cans.

 12-21-15, 01:51 PM
#65
Full Member
Thread Starter
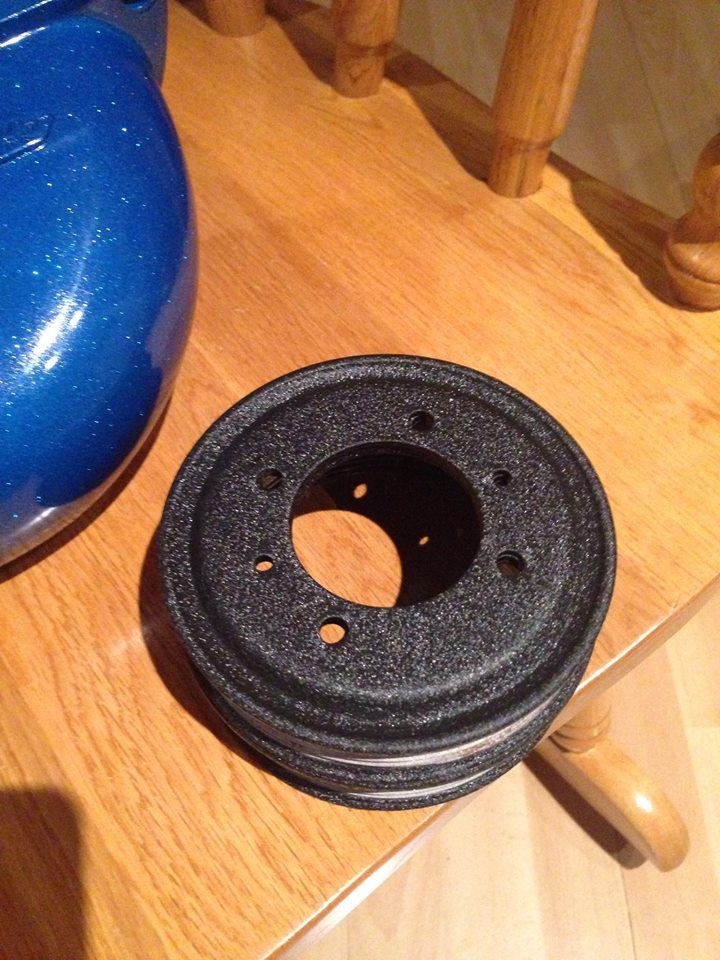
This thread has gone much too long without an update. Life's been busy, but I've been able to focus on the RX-7 a little bit more now. Nothing major, but finished up some powder coating for it.
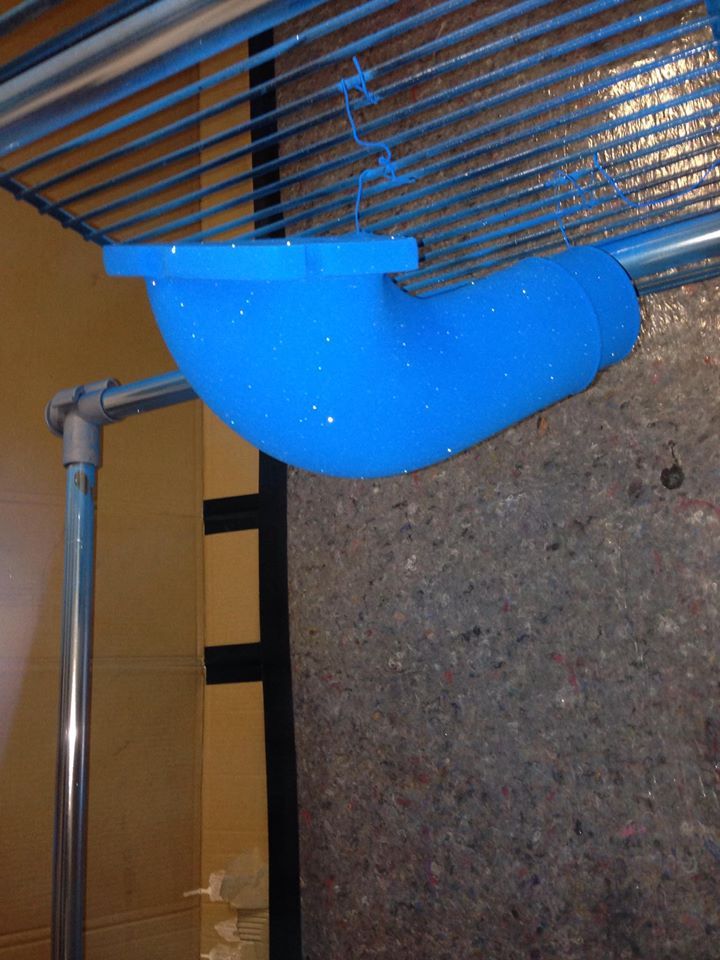
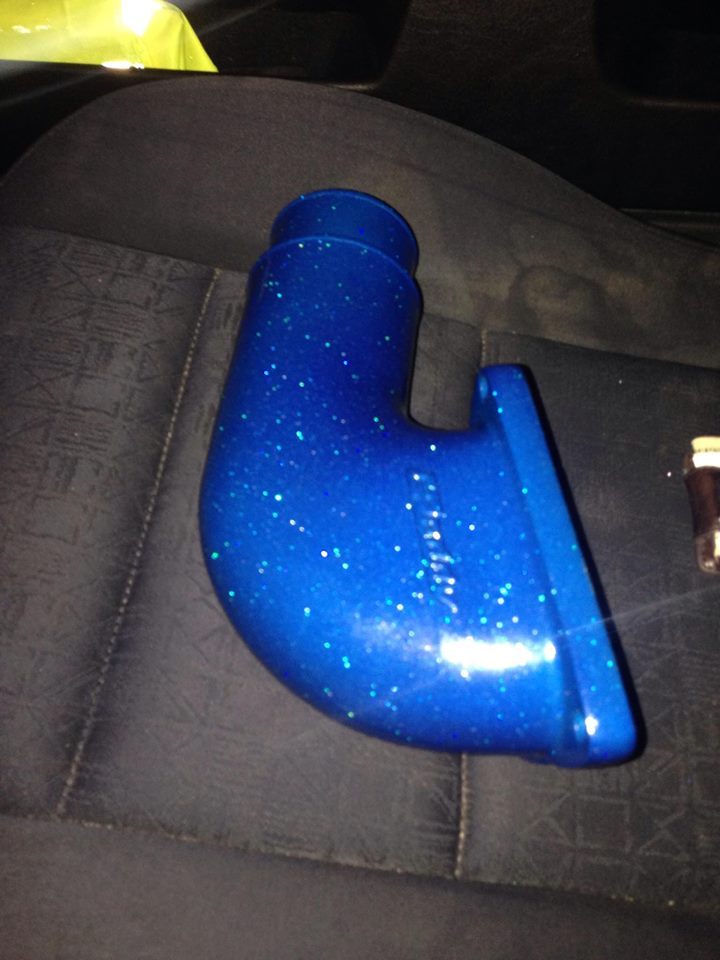
It's hard to capture a good picture of the blue I'll be using in the engine bay, it's a dark sparkly blue. There will be some blue accents, the majority of what's under the hood will be powder coated wrinkle black.
The first pic is the blue pre-baking, after that are a couple shots to try and get the finished product. It shows really sparkly due to the flash, but it's not that sparkly. Final pic is the black that will be used.

Hopefully over the next month I'll finish up the body harness.
It's hard to capture a good picture of the blue I'll be using in the engine bay, it's a dark sparkly blue. There will be some blue accents, the majority of what's under the hood will be powder coated wrinkle black.
The first pic is the blue pre-baking, after that are a couple shots to try and get the finished product. It shows really sparkly due to the flash, but it's not that sparkly. Final pic is the black that will be used.


Hopefully over the next month I'll finish up the body harness.
04-18-16, 09:08 AM
#68
Full Member
Thread Starter
Thanks guys appreciate it.
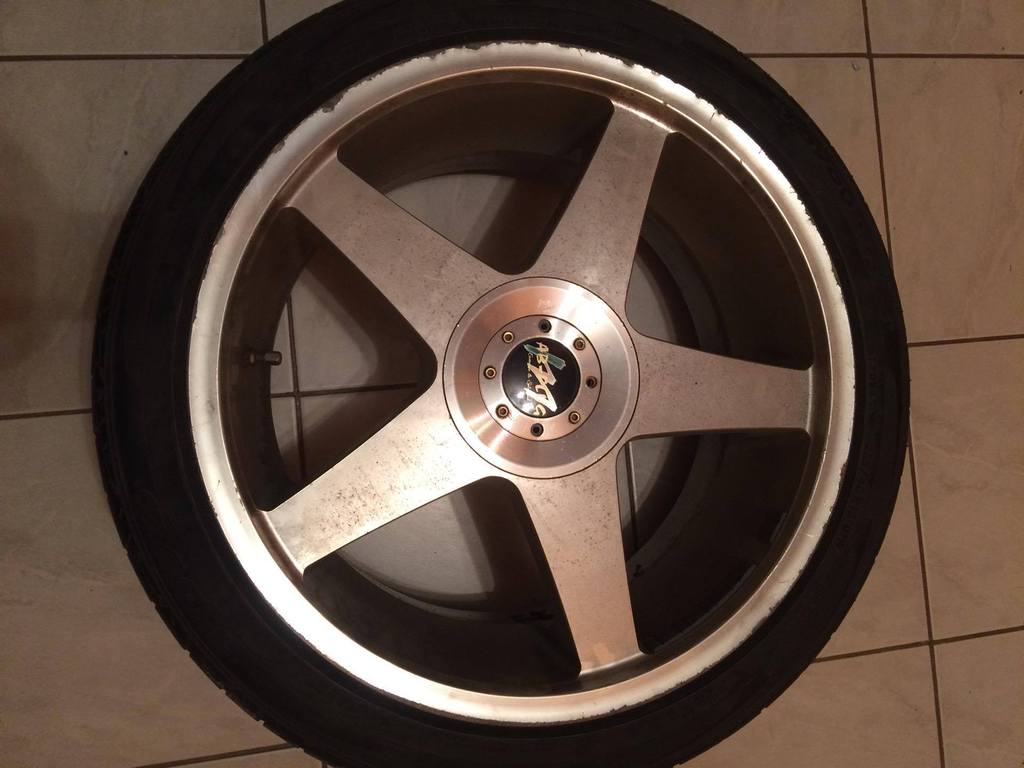
So quick question for you guys that may know a bit about JDM type stuffs. The wheels on my car are AB Flug wheels. Stamped on the back is '97 (presumable year of manufacture), HJ885R, and H/NODEX. I have no idea what these wheels are, or how they are quality wise. I've done research (aka Google) to find out more about them, but it seems limited. The only thing I can find is a "For Sale" thread that's a decade old which has the same wheels being sold.
Anyone have ANY info on them at all?
Here's some pics........ they could use a polish. lol


Last edited by RLaCasse1; 04-18-16 at 02:35 PM.
04-18-16, 09:20 AM
#69
Full Member
Thread Starter
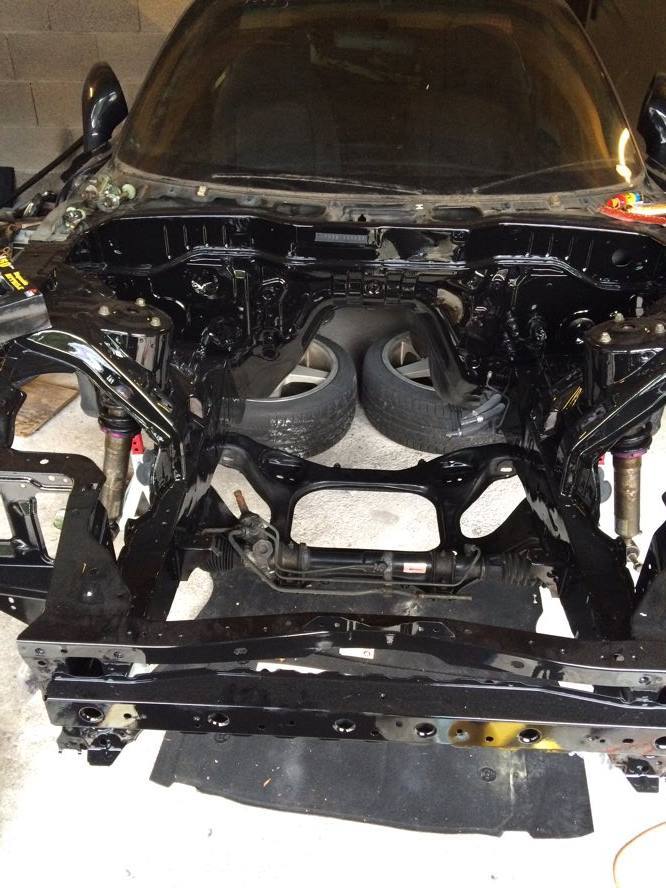
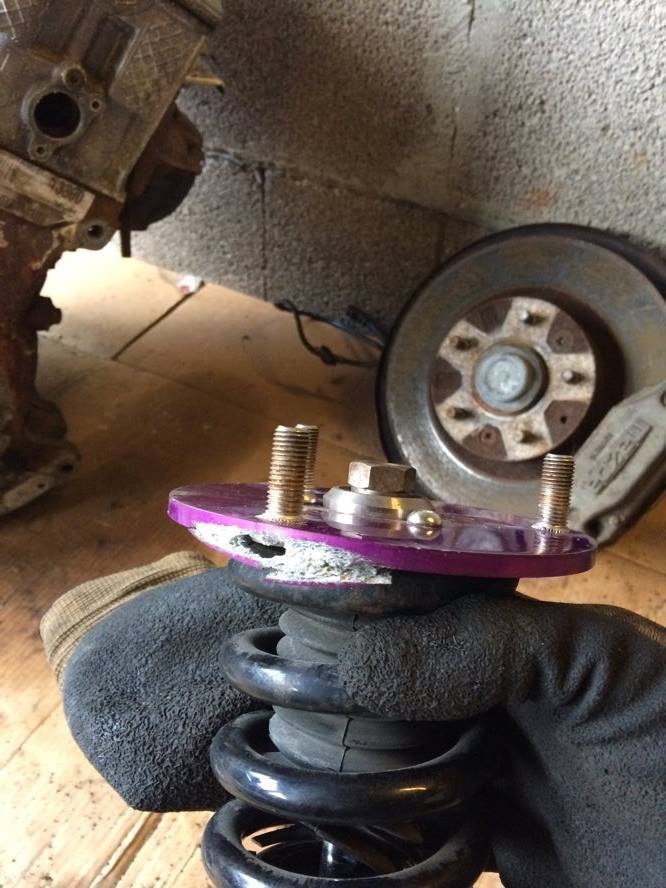
Now for a legit post. I've not accomplished much over the winter, been cold as **** and I've been dedicating my time to fixing/selling other cars as a hobby (currently have three for sale, lol). But, I finally got out and put some random stuff back on the car. Threw the coilovers back on and the subframe. However, the top plate on the right side coilover is falling apart, so I will have to pull it back off and replace it.
Pics....
Damage to top plate of the coilover.
The biggest part of yesterday is that I finally started scoping out where I would like to place the three large fuse/relay assemblies. I'm not going for a full tuck, but I would like those boxes out of the engine bay.
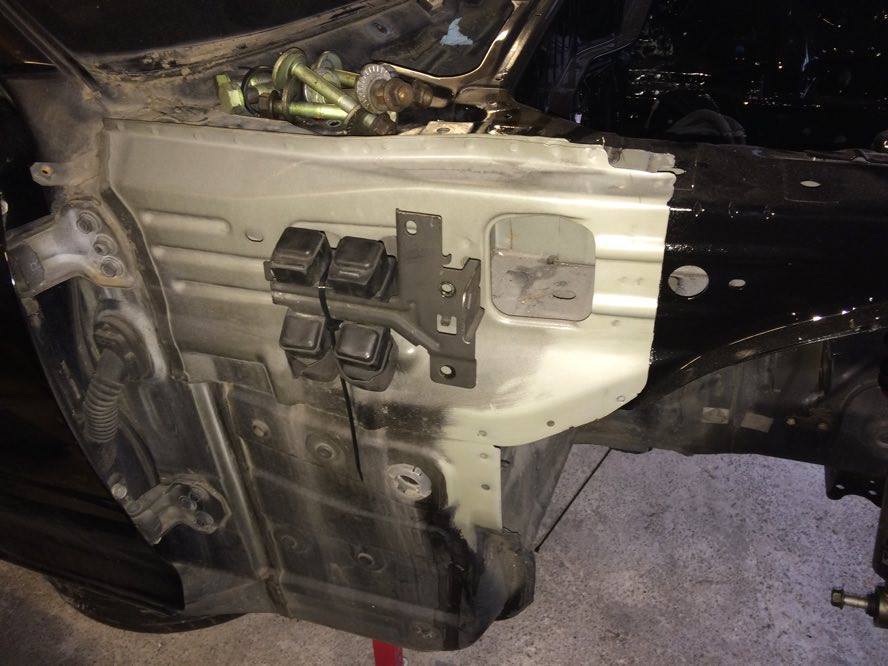
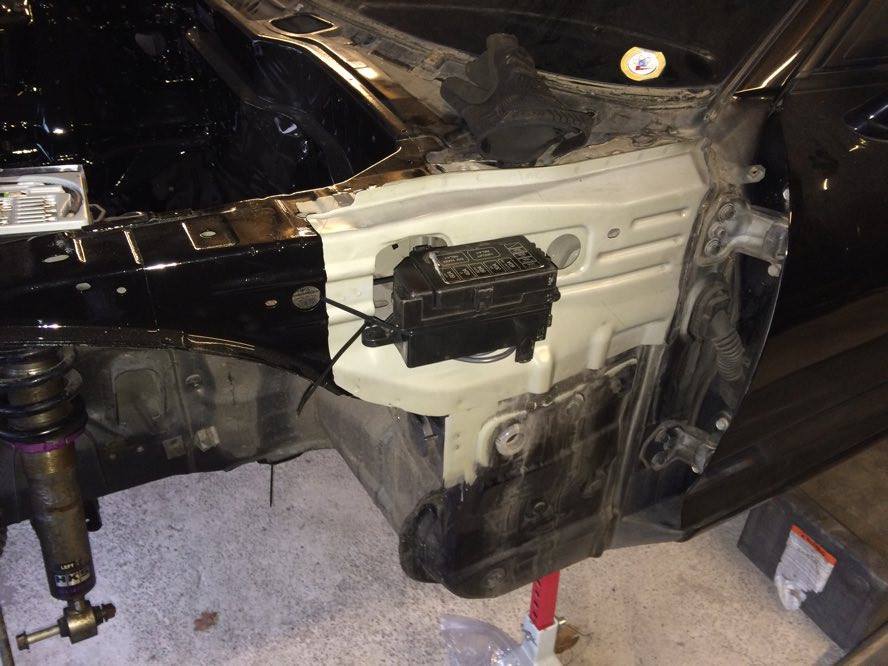
The following pics are my current version of where they will be placed. The two boxes under the fenders will clear the fenders (just barely on the left side) and the fender liners, and I believe will be away from the elements rather well. Additionally, after thinking about heat issues in those areas, I believe they will be safe as long as I make sure the seals between the fender liner and fenders are good.
Tentative locations. Right side first, left side second.
The relay box that is up front is going to be relocated as well. The following picture shows its location.
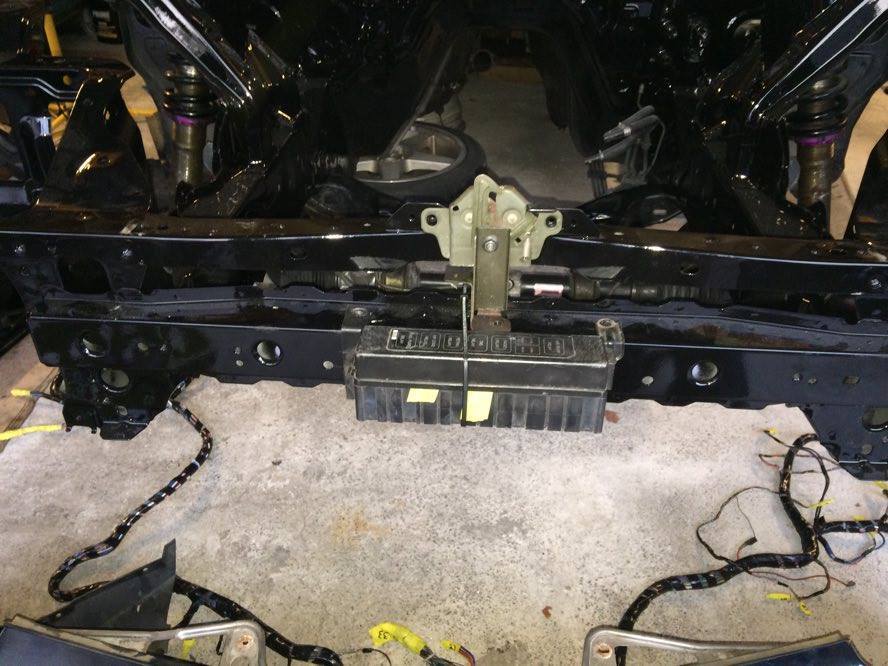
It clears the front bumper, crash bar, and hood latch/release fairly easily. However, it will be buried rather deep. The following pic shows how inaccessible it will be.
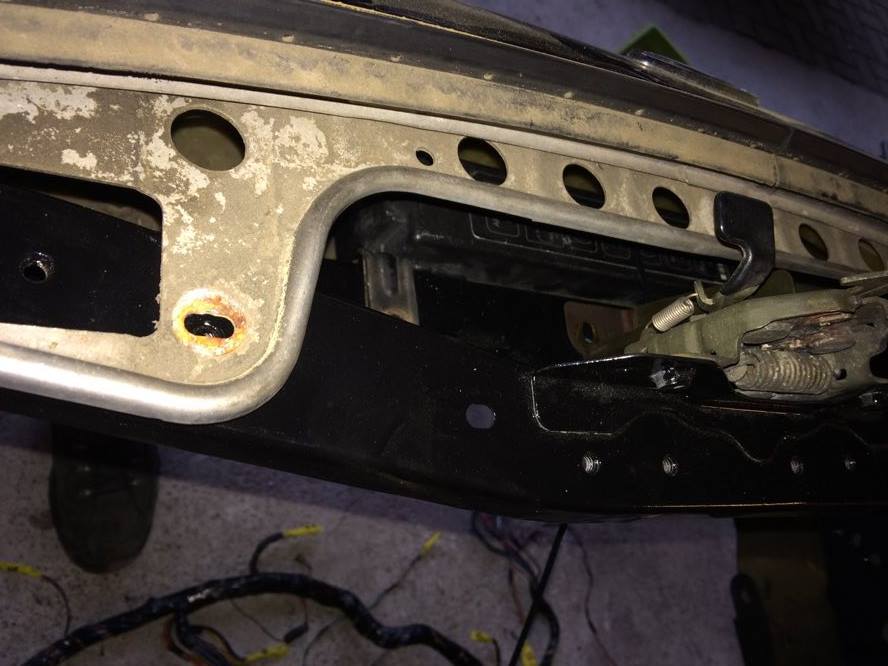
Since removing the front bumper just to do any work with the relays would be a pain in the ***, I have a plan to solve that. As of right now, the plan is to trim the metal bumper support just slightly for some clearance and then create an angled bracket that will set the relay box at an angle. So when opened, the top will rotate slightly to the rear to clear the bumper (I can take a pic for clarification if requested). At that point, all that will have to happen to open the relay box is the three bolts holding the release/latch will have to come out and then the release/latch will be set aside. Fairly simple solution I believe. We'll see how it goes.
Standby for more updates........ someday! (Soon I hope)
Pics....

Damage to top plate of the coilover.

The biggest part of yesterday is that I finally started scoping out where I would like to place the three large fuse/relay assemblies. I'm not going for a full tuck, but I would like those boxes out of the engine bay.
The following pics are my current version of where they will be placed. The two boxes under the fenders will clear the fenders (just barely on the left side) and the fender liners, and I believe will be away from the elements rather well. Additionally, after thinking about heat issues in those areas, I believe they will be safe as long as I make sure the seals between the fender liner and fenders are good.
Tentative locations. Right side first, left side second.


The relay box that is up front is going to be relocated as well. The following picture shows its location.

It clears the front bumper, crash bar, and hood latch/release fairly easily. However, it will be buried rather deep. The following pic shows how inaccessible it will be.

Since removing the front bumper just to do any work with the relays would be a pain in the ***, I have a plan to solve that. As of right now, the plan is to trim the metal bumper support just slightly for some clearance and then create an angled bracket that will set the relay box at an angle. So when opened, the top will rotate slightly to the rear to clear the bumper (I can take a pic for clarification if requested). At that point, all that will have to happen to open the relay box is the three bolts holding the release/latch will have to come out and then the release/latch will be set aside. Fairly simple solution I believe. We'll see how it goes.
Standby for more updates........ someday! (Soon I hope)
04-18-16, 09:33 AM
#70
Full Member
Thread Starter
Also, I would like to say, the reason I've chosen these places for the relay/fuse boxes is that I haven't found a good thread where anyone really details how they did their tuck or where they placed them. I've also been through quite a few build threads, and nobody ever seems to point out where they're putting these boxes.
So this is just where I'm at as of right now.
So this is just where I'm at as of right now.
04-18-16, 09:35 AM
#71
Think mounting some of that stuff behind the fender is a great idea if you need engine bay space. That said, I would not put anything there you'd need easy of frequent access to. That said, how often do you really need to get at the relays? Or even some of the fuses? You just have to decide on the trade offs. If you do put anything there, you may want something more robust than a zip tie (assuming that may just be temp)
04-18-16, 09:38 AM
#72
Full Member
Thread Starter
Think mounting some of that stuff behind the fender is a great idea if you need engine bay space. That said, I would not put anything there you'd need easy of frequent access to. That said, how often do you really need to get at the relays? Or even some of the fuses? You just have to decide on the trade offs. If you do put anything there, you may want something more robust than a zip tie (assuming that may just be temp)
I will be making/modifying all the brackets to fit them securely.
So on the trade-off aspect, that's something I've considered. My solution is that I have the car operational, running and driving, before the fenders end up back on the car and that all the relays and fuses are replaced with new ones. Hopefully, that will circumvent having to pull the fenders off all the time.
04-18-16, 10:13 AM
#73
Also, I would like to say, the reason I've chosen these places for the relay/fuse boxes is that I haven't found a good thread where anyone really details how they did their tuck or where they placed them. I've also been through quite a few build threads, and nobody ever seems to point out where they're putting these boxes.
So this is just where I'm at as of right now.
So this is just where I'm at as of right now.
I like your locations, I'm just worried it would be a pain in the *** to access them if need be.
Hopefully others chime in on other possible solutions
04-18-16, 12:12 PM
#75
has a Full Member
Not sure about these particular wheels, but usually japanese companies like Abflug that aren't technically wheel companies will outsource to other japanese companies that specialize in wheels. For instance Veilside, which is primarily known for aero like Abflug, had their designs made by SSR. I've never seen those particular wheels but I'd assume they are of fairly high quality and made by one of the Japanese big wheel companies, SSR, enkei, advan, or rays. They look cool, if they aren't too heavy I'd clean them up and keep them. Very unique. The only other place I found them was here
Auction Finds: Advan Model 5, Work Meister S1, Abflug, HKS, Greddy, etc | Rennstall
Says they were on an FD as well, so I'd say they probably made special offsets for the stock body rx7, and yours are the same +35/+45