AFGMOTO1978 Build Thread
 09-26-12, 08:31 PM
#1
Okay so if figured where I documented my build way back when wasn't where it should be. So here's a rehash of the build with a lot of the fat removed.
This build all started after having a very disappointing engine blow-up (motor three) at the track while running out of gas. lol
So what was going to be a basic build up became a five year and counting constant modification.
So enjoy!
4/3/06
"
Well, the motors out of the car and at Pineapple for a rebuild. Damaged the rotor bearings by starving them for oil and then detonating on top of it when I ran out of gas at PIR. Hopefully that's the only major damage done to the engine. Apex seals a Ianetti's and they look fine.
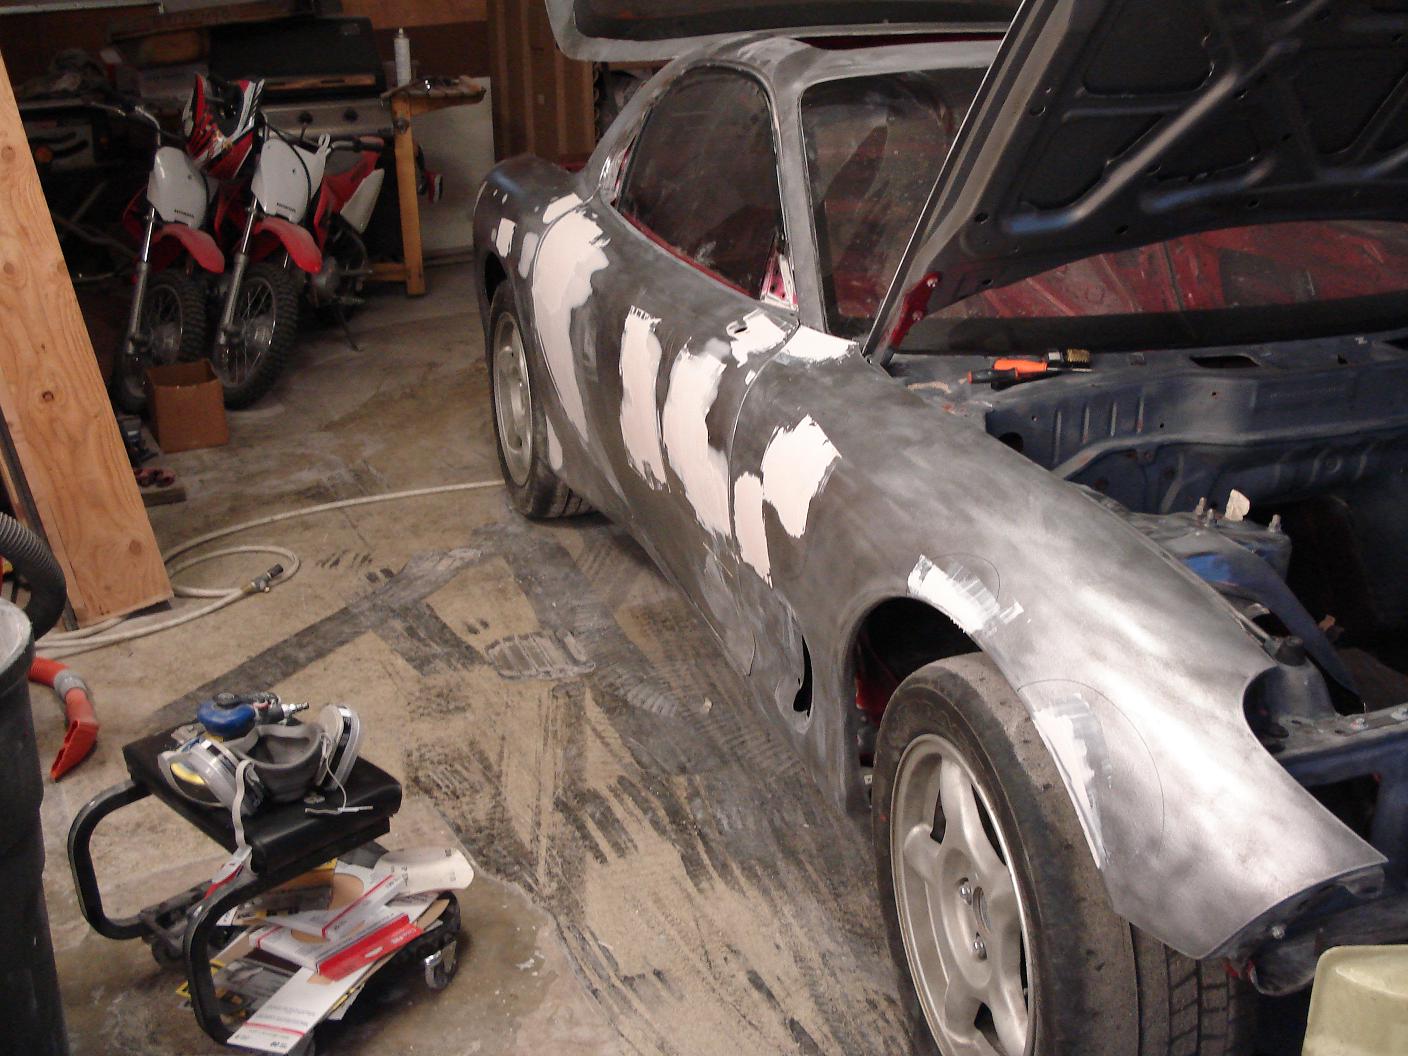
Starting to strip the car for a proper paint job instead of the Matco Special I have on mine.
Just got my SSR Comp-H wheels (15lbs each) and V710 tires in last week too. (Miss these wheels and those were great tires)
Things to do/get still:
Raceshop four point cage
Delrin Bushing kit (in the mail)
AutoExe under chassis brace and front tower brace (didn't happen, Winter 2012 CF Underbody / Chassis reinforcement in the works, finances willing)
99 Spec plateless front end turn signals, Feed side skirts (In the Mail).
Datalogit for Power FC (In the Mail)
Apexi BOV (Send Check) (Not enough air flow, went with Synapse unit!)
Rebuild Efini's (lol)
Another BOV for Secondary Turbo that I can plum back into the intake track.
Fabricate Custom Y-Pipe
Either fabricate DIY air box or buy HKS Racing suction kit and replace the foams for
K&Ns (By the way foam does jack all for filtering - Apex "Hint Hint")
Custom DIY V-mount - I really don't like what's out there (no ones putting vibration/durability in mind and the end tanks are a joke) and I have access to a full machine shop so why not.
Decide if I want to modify the wiring harness so the battery and all relay/fuses are in the Passenger storage bin, or heat wrap what I have and call it good for now. Majorly time consuming. (Holy Crap I had no idea what a bitch this was going to be)
Modify stock seats, DIY upper to improve lateral support and still fit within cage.
Jesus, this going to be expense and time consuming. "
^So true, lol


4/13/06
Oh ya this gonna cost me $$$$. Spun a bearing and broke a one piece ceramic apex seal.
Enjoy in my pain. Pan'n for gold are ya.
Yaaaa, I wanna go to Hawaii!! Yaaaa
This is still depressing to look at even after 6 years have past.


I'm smiling, but I'm crying inside.
This build all started after having a very disappointing engine blow-up (motor three) at the track while running out of gas. lol
So what was going to be a basic build up became a five year and counting constant modification.
So enjoy!
4/3/06
"
Well, the motors out of the car and at Pineapple for a rebuild. Damaged the rotor bearings by starving them for oil and then detonating on top of it when I ran out of gas at PIR. Hopefully that's the only major damage done to the engine. Apex seals a Ianetti's and they look fine.
Starting to strip the car for a proper paint job instead of the Matco Special I have on mine.
Just got my SSR Comp-H wheels (15lbs each) and V710 tires in last week too. (Miss these wheels and those were great tires)
Things to do/get still:
Raceshop four point cage
Delrin Bushing kit (in the mail)
AutoExe under chassis brace and front tower brace (didn't happen, Winter 2012 CF Underbody / Chassis reinforcement in the works, finances willing)
99 Spec plateless front end turn signals, Feed side skirts (In the Mail).
Datalogit for Power FC (In the Mail)
Apexi BOV (Send Check) (Not enough air flow, went with Synapse unit!)
Rebuild Efini's (lol)
Another BOV for Secondary Turbo that I can plum back into the intake track.
Fabricate Custom Y-Pipe
Either fabricate DIY air box or buy HKS Racing suction kit and replace the foams for
K&Ns (By the way foam does jack all for filtering - Apex "Hint Hint")
Custom DIY V-mount - I really don't like what's out there (no ones putting vibration/durability in mind and the end tanks are a joke) and I have access to a full machine shop so why not.
Decide if I want to modify the wiring harness so the battery and all relay/fuses are in the Passenger storage bin, or heat wrap what I have and call it good for now. Majorly time consuming. (Holy Crap I had no idea what a bitch this was going to be)
Modify stock seats, DIY upper to improve lateral support and still fit within cage.
Jesus, this going to be expense and time consuming. "
^So true, lol
4/13/06
Oh ya this gonna cost me $$$$. Spun a bearing and broke a one piece ceramic apex seal.
Enjoy in my pain. Pan'n for gold are ya.
Yaaaa, I wanna go to Hawaii!! Yaaaa
This is still depressing to look at even after 6 years have past.
I'm smiling, but I'm crying inside.
Last edited by RENESISFD; 09-28-12 at 07:01 AM.
 09-26-12, 08:52 PM
#2
Dude, can I use your shop....
Apex...sure (Damnit, another dead beat in my shop)
Without this guy cartapex aka John Farris letting me use his shop and being patient for 4 years while building my car it would have never happened.


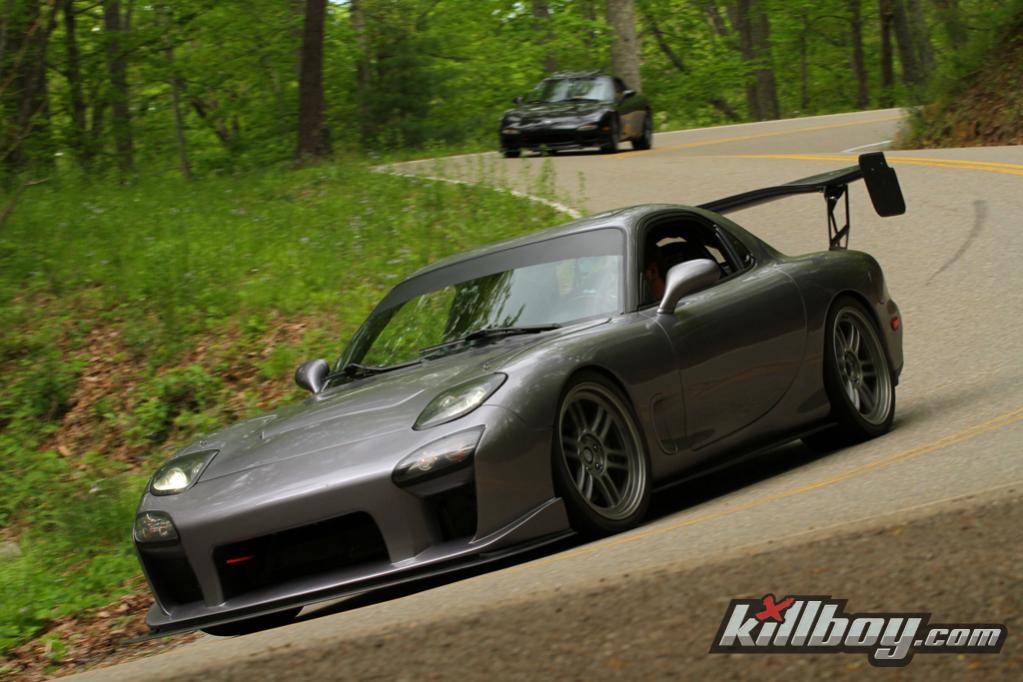
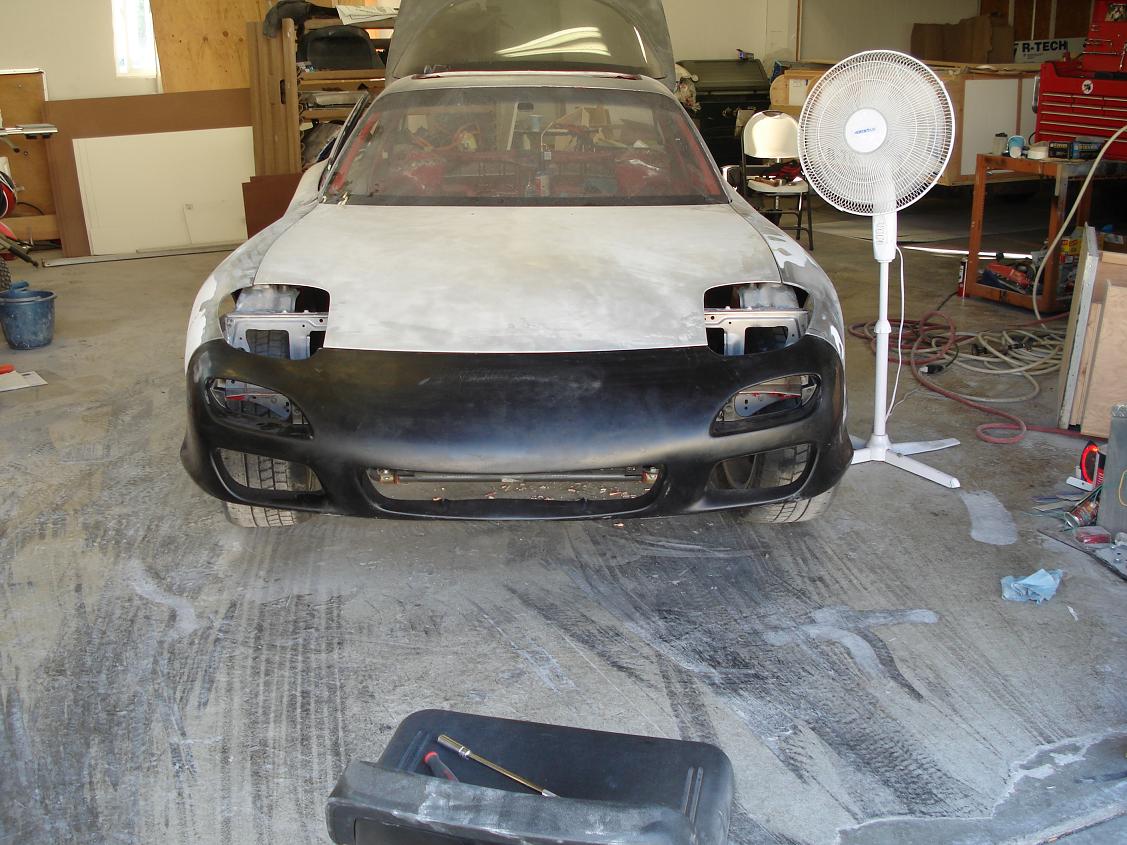
Photos of my car the day I blew the motor.


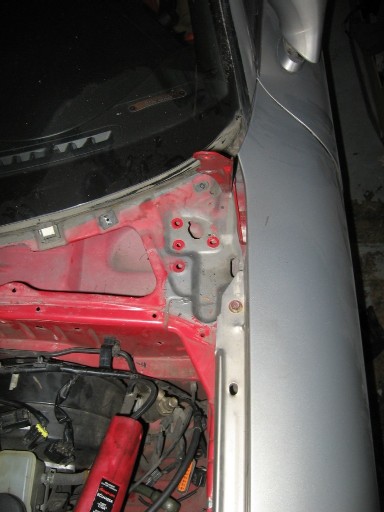
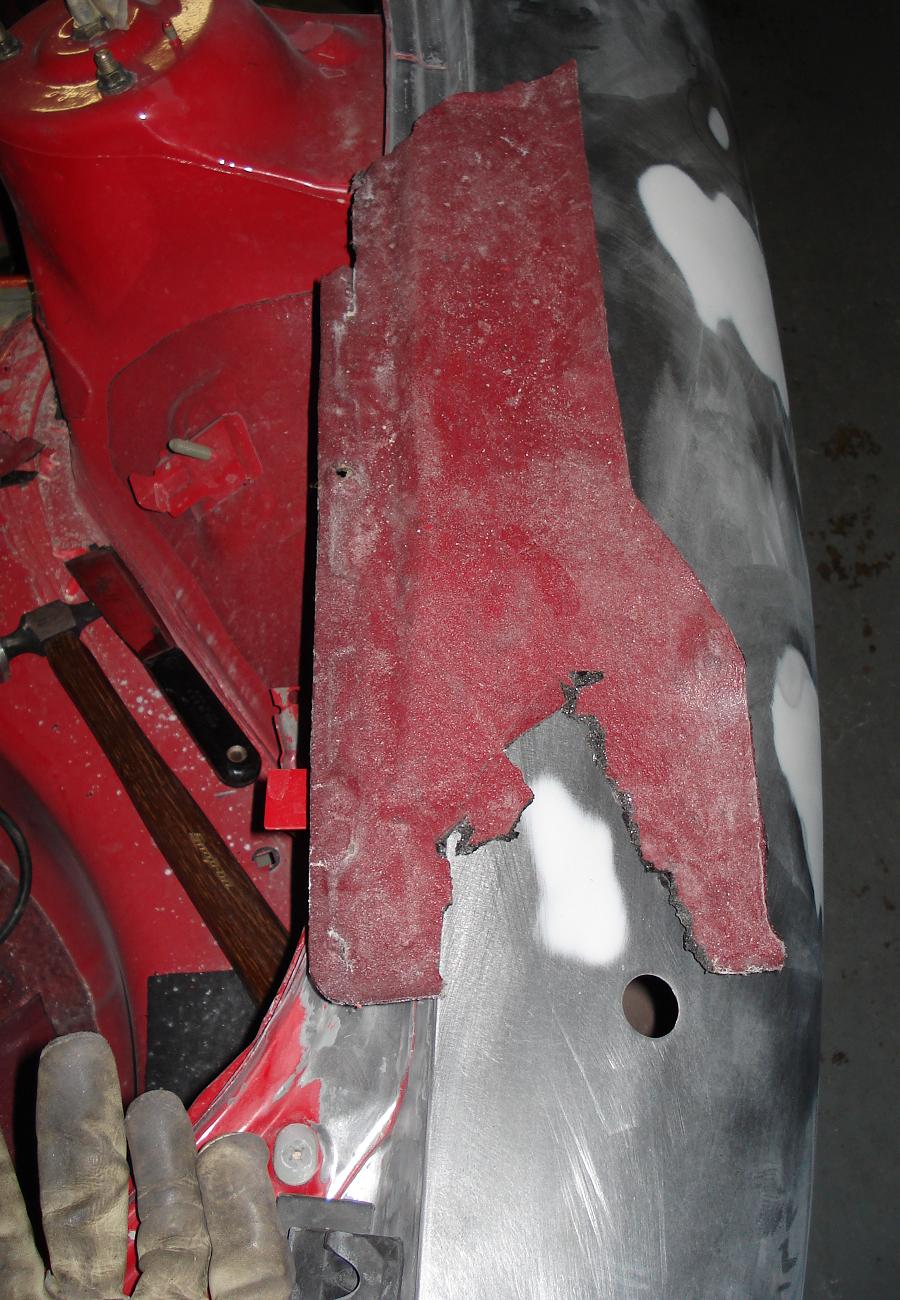
Well found some front end damage repair work on the right front. Whoever did it wasn't very good. Going to have to buy a replacement piece from Mazda and weld it on.
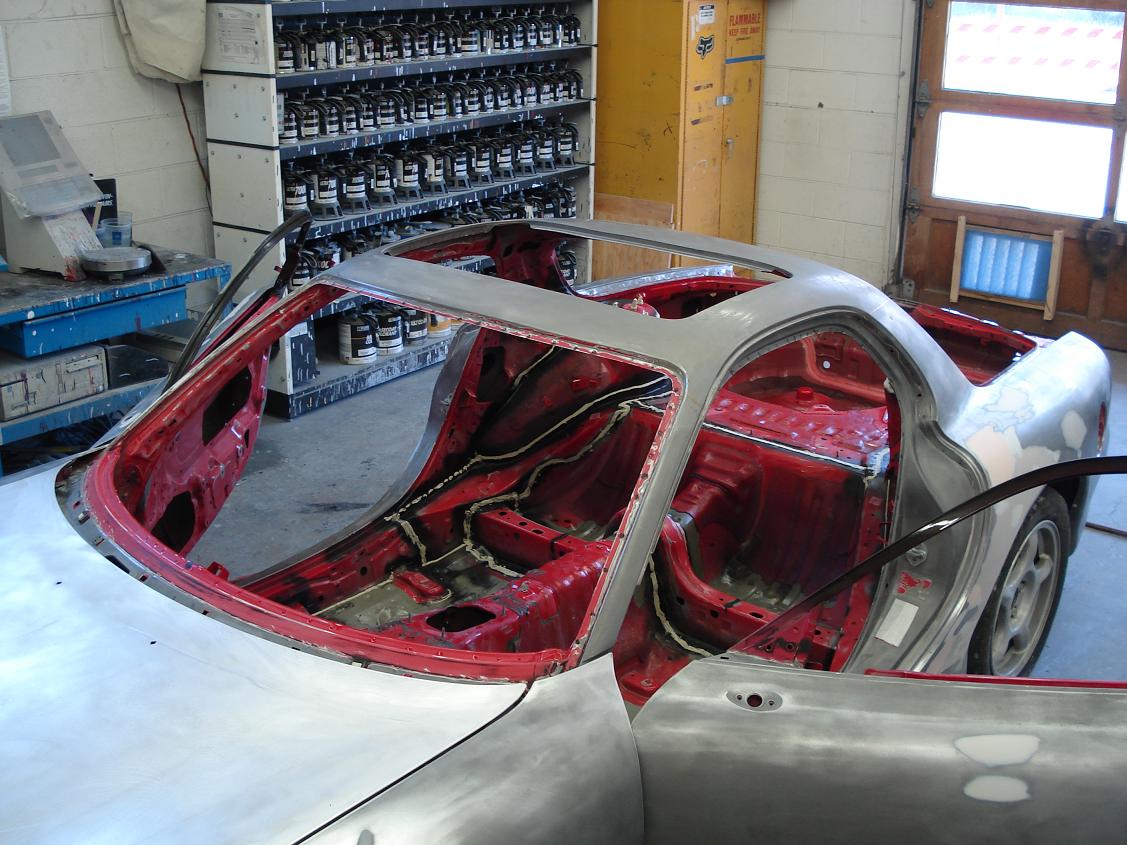
Soda blasting the chassis next week!! Soda Blaster guy is going to pick up the car Monday.
Got the fender that I won off of ebay; opened the package and I was like...WTF?! That's a green fender.
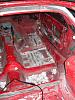
This picture of the interior shows how cheap my old paint job was.
Fender damage, going to have the body shop check if the chassis is even straight.


Apex...sure (Damnit, another dead beat in my shop)
Without this guy cartapex aka John Farris letting me use his shop and being patient for 4 years while building my car it would have never happened.
Photos of my car the day I blew the motor.
Well found some front end damage repair work on the right front. Whoever did it wasn't very good. Going to have to buy a replacement piece from Mazda and weld it on.
Soda blasting the chassis next week!! Soda Blaster guy is going to pick up the car Monday.
Got the fender that I won off of ebay; opened the package and I was like...WTF?! That's a green fender.
This picture of the interior shows how cheap my old paint job was.
Fender damage, going to have the body shop check if the chassis is even straight.
09-26-12, 09:08 PM
#3
4/22/06
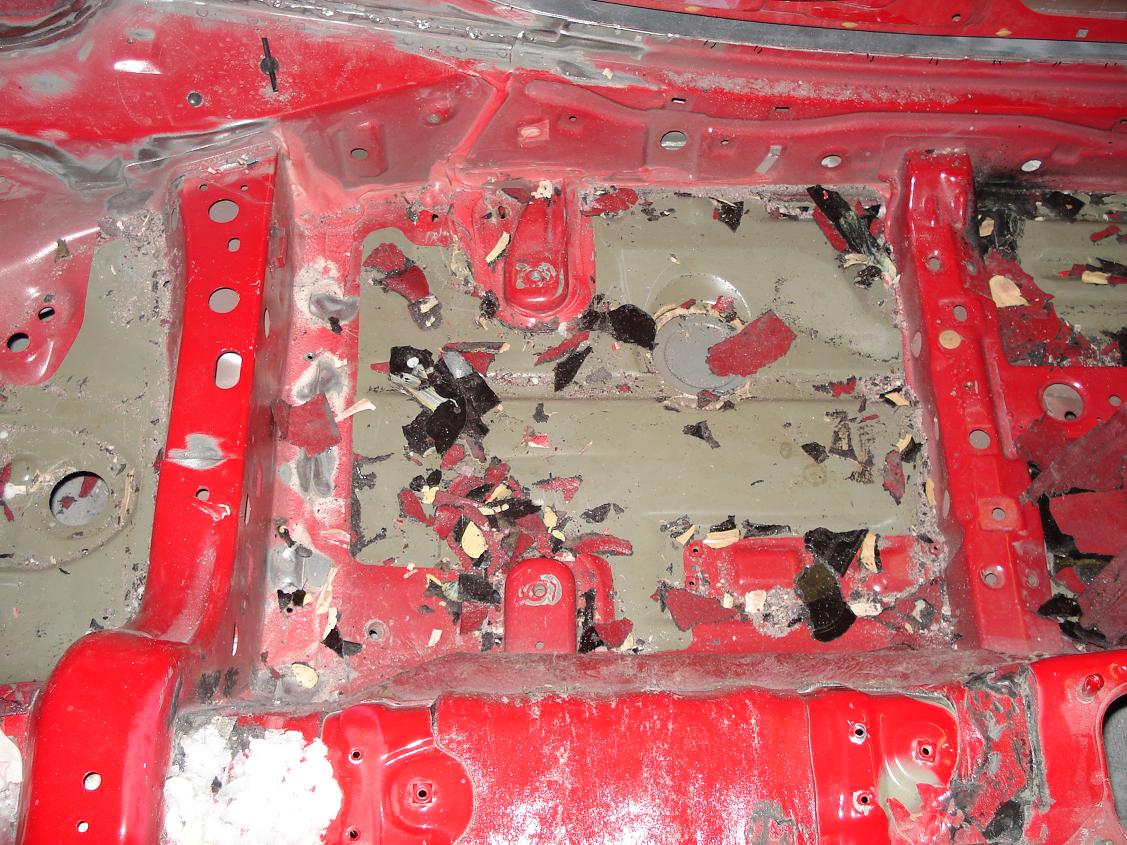
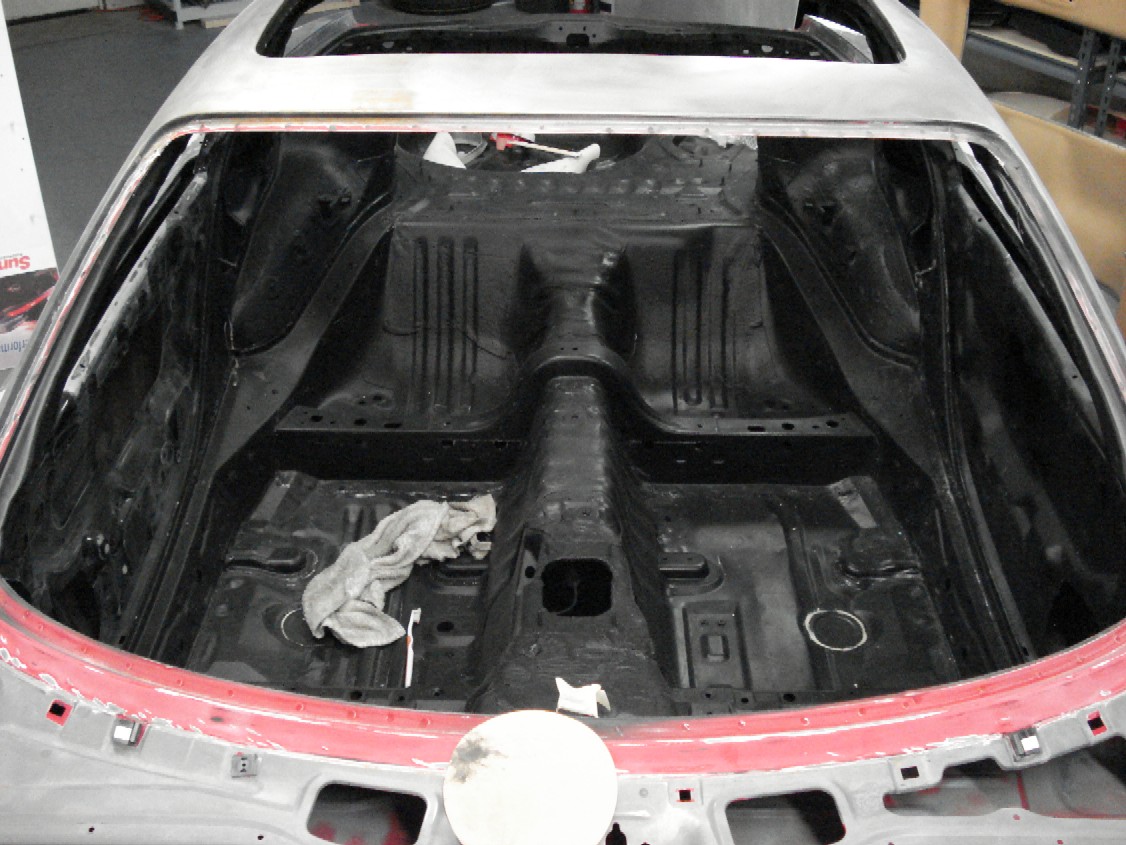
Well got more of the car apart, found 7 dolla in change, mostly pennies. Half of them embedded in the sound deadening or cough drop syrup. Found a few grapes and the carpet was wet with what must be 9 year old water. ewww
Dad is formally forbidden to have cough drops or grapes in the car as of now. Will get new carpet from the GB going on, will get black. Order a factory replacement that took 10 months to get.
Okay pics:
Even without the motor the 7's got POWA!
What the back of the dash looks like and the HVAC unit, which is pretty simple.
Long *** engine harness that weighs 30 lbs.
And last, the yummy stuff found under the carpet.


4/29/06
Update, got the car back from the soda blaster. He did a pretty good job, missed a few things but all in all a good job. Wish I had acid dipped this car actually
Prep and bondo now
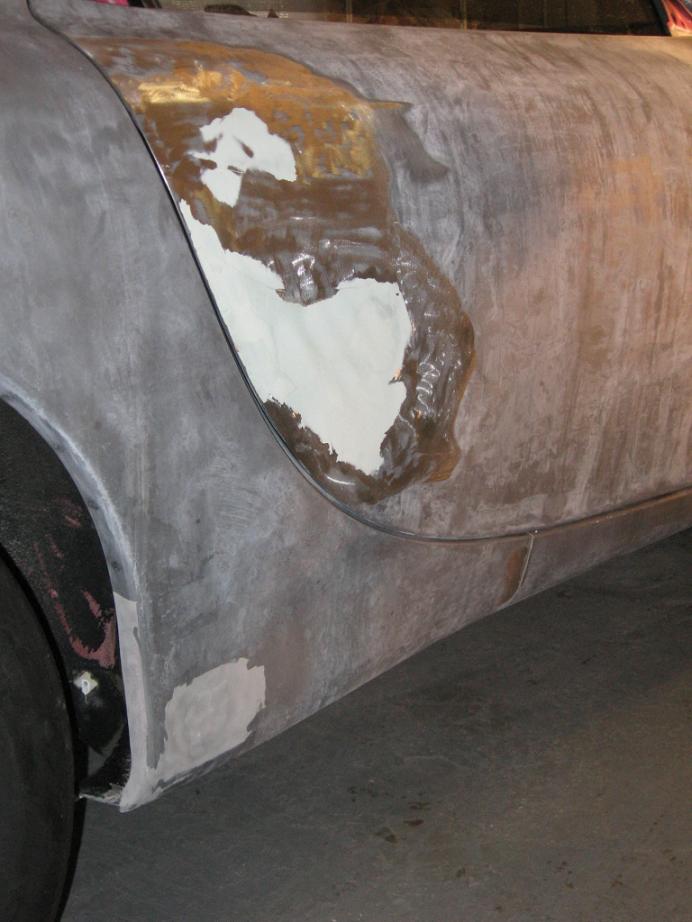
Speaking of bondo, I have some unexpected bondo on the driver side rear corner panel. I knew about the bondo on the passenger door. Remove and clean up for new stuff. Hoping the DR rear panel isn't fawked up too bad. Will find out tomorrow
Bodywork turned out to be a majorly long drawn out ordeal - knowing what I know now I would have paid some one to do it.


Well got more of the car apart, found 7 dolla in change, mostly pennies. Half of them embedded in the sound deadening or cough drop syrup. Found a few grapes and the carpet was wet with what must be 9 year old water. ewww
Dad is formally forbidden to have cough drops or grapes in the car as of now. Will get new carpet from the GB going on, will get black. Order a factory replacement that took 10 months to get.
Okay pics:
Even without the motor the 7's got POWA!
What the back of the dash looks like and the HVAC unit, which is pretty simple.
Long *** engine harness that weighs 30 lbs.
And last, the yummy stuff found under the carpet.
4/29/06
Update, got the car back from the soda blaster. He did a pretty good job, missed a few things but all in all a good job. Wish I had acid dipped this car actually
Prep and bondo now
Speaking of bondo, I have some unexpected bondo on the driver side rear corner panel. I knew about the bondo on the passenger door. Remove and clean up for new stuff. Hoping the DR rear panel isn't fawked up too bad. Will find out tomorrow
Bodywork turned out to be a majorly long drawn out ordeal - knowing what I know now I would have paid some one to do it.
09-26-12, 09:12 PM
#4
5/7/06
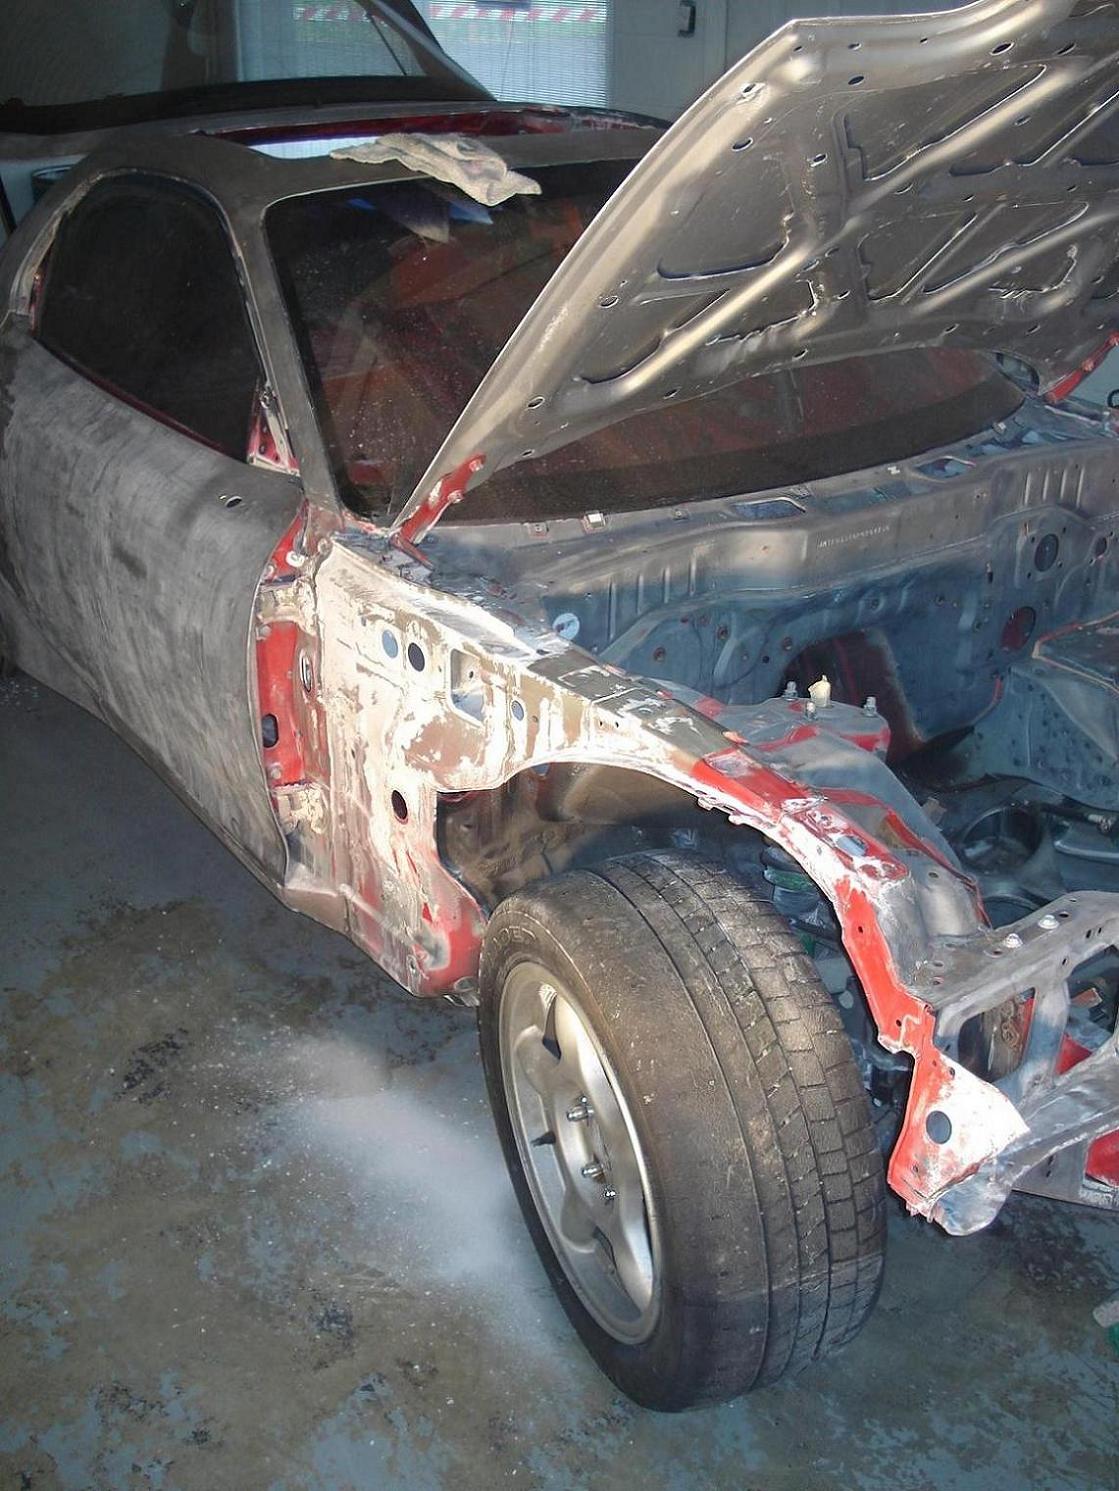
Found more bondo on the driver & passenger side under paneling. Did some more paint removal, two more days of this and a frame straightening and it will be ready for new bondo and primer/sealer.
I found out my car has a cocaine problem!


Good news, all my one piece ceramic apex seals are good except for the broken one. So, I only have to buy one replacement and a shyte load of other stuff tonight. Yaaa, I need a second Job, Yaaaa.
N3y2-10-s80 - Housing, Rotor - Rear $529.25 $529.25
1881-11-404 - Seal,oil $1.45 $1.45
N326-11-d03 - Bearing, Pilot $6.00 $6.00
Nf01-11-d54 - Bearing,needle $17.70 $17.70
Nf01-11-d53 - Washer,thrust $5.60 $5.60
N3a1-11-d00 - Shaft $341.40 $341.40
4352-11-363 - Spring, Rear Outer Oil Seal $3.35 $6.70
4352-11-353 - Spring, Oil Seal - Front Outer $3.35 $6.70
1202-11-343 - O-ring, Outer Oil Control $13.00 $52.00
0820-11-341 - O-ring, Inner Oil Seal $6.70 $26.80
Nf01-11-c17 - Spring, Side Seal $4.30 $51.60
4801-10-502 - Bearing, Competition Main $76.40 $76.40
4801-11-111 - Bearing, Competition Rotor $86.05 $172.10
Nf01-11-c24 - Spring,corner Seal $1.85 $22.20
8871-23-180 - Seal Set $54.30 $217.20
N3a1-10-507 - Seal, Front Main Oil $6.35 $6.35
1668-10-556a - Seal,oil $6.60 $6.60
Fd01-56-191a - Protector,pipe $10.35 $10.35
Fd01-43-860e - Insulator,master Vac $52.50 $52.50
B455-32-279 - $5.05 $10.10
P043-27-238 - $4.65 $9.30
P011-25-123 - $2.30 $9.20
1368-25-124 - $1.85 $7.40
E016-50-796 - $1.35 $2.70
G225-51-274b - Lens, License Lamp $4.00 $4.00
G225-51-273 - Gasket $2.05 $2.05
Ea04-51-146a - - $0.95 $0.95
Fd01-50-6g0b - Rr Window Mould $67.45 $67.45
Fd01-50-6ax - Mldg Up, Frt Wndw $44.25 $44.25
Fd01-34-313 - Ball Joint Boot $8.70 $17.40
Fd01-34-213 - Boot, Ball $9.00 $18.00
Fd01-59-821 - W/strip Lt $33.95 $33.95
Fd01-58-821 - W/strip Rt $33.95 $33.95
B455-56-149 - $0.80 $12.80
Fd01-68-601b - Insulator, Hood $109.75 $109.75
Fd01-50-794a - Protector $8.00 $8.00
Ga7b-50-795 - Cap $1.35 $8.10
0118-56-242b - $0.65 $2.60
Fd01-50-640b - Mould Rt, Beltline $78.90 $78.90
Fd01-50-615 - Joint, B/wndw Mould $4.50 $4.50
Ea04-51-146a - - $0.95 $0.95
Fd01-51-674 - Clip $2.45 $2.45
Fd01-50-650d - Mould Lt, Beltline $78.90 $78.90
Fd01-50-619a - Clip $2.00 $2.00
Fd01-69-320c-02 - Sun Visor Lt $59.70 $59.70
Fd01-69-270c-02 - Sun Visor Rt $66.25 $66.25
Hg31-69-220b - $56.10 $56.10
R504-17-470a - Case, Control $51.00 $51.00
Je11-40-355 - $3.40 $13.60
N326-14-151 - Chain $22.80 $22.80
$2,448.00, More to come later.
Found more bondo on the driver & passenger side under paneling. Did some more paint removal, two more days of this and a frame straightening and it will be ready for new bondo and primer/sealer.
I found out my car has a cocaine problem!
Good news, all my one piece ceramic apex seals are good except for the broken one. So, I only have to buy one replacement and a shyte load of other stuff tonight. Yaaa, I need a second Job, Yaaaa.
N3y2-10-s80 - Housing, Rotor - Rear $529.25 $529.25
1881-11-404 - Seal,oil $1.45 $1.45
N326-11-d03 - Bearing, Pilot $6.00 $6.00
Nf01-11-d54 - Bearing,needle $17.70 $17.70
Nf01-11-d53 - Washer,thrust $5.60 $5.60
N3a1-11-d00 - Shaft $341.40 $341.40
4352-11-363 - Spring, Rear Outer Oil Seal $3.35 $6.70
4352-11-353 - Spring, Oil Seal - Front Outer $3.35 $6.70
1202-11-343 - O-ring, Outer Oil Control $13.00 $52.00
0820-11-341 - O-ring, Inner Oil Seal $6.70 $26.80
Nf01-11-c17 - Spring, Side Seal $4.30 $51.60
4801-10-502 - Bearing, Competition Main $76.40 $76.40
4801-11-111 - Bearing, Competition Rotor $86.05 $172.10
Nf01-11-c24 - Spring,corner Seal $1.85 $22.20
8871-23-180 - Seal Set $54.30 $217.20
N3a1-10-507 - Seal, Front Main Oil $6.35 $6.35
1668-10-556a - Seal,oil $6.60 $6.60
Fd01-56-191a - Protector,pipe $10.35 $10.35
Fd01-43-860e - Insulator,master Vac $52.50 $52.50
B455-32-279 - $5.05 $10.10
P043-27-238 - $4.65 $9.30
P011-25-123 - $2.30 $9.20
1368-25-124 - $1.85 $7.40
E016-50-796 - $1.35 $2.70
G225-51-274b - Lens, License Lamp $4.00 $4.00
G225-51-273 - Gasket $2.05 $2.05
Ea04-51-146a - - $0.95 $0.95
Fd01-50-6g0b - Rr Window Mould $67.45 $67.45
Fd01-50-6ax - Mldg Up, Frt Wndw $44.25 $44.25
Fd01-34-313 - Ball Joint Boot $8.70 $17.40
Fd01-34-213 - Boot, Ball $9.00 $18.00
Fd01-59-821 - W/strip Lt $33.95 $33.95
Fd01-58-821 - W/strip Rt $33.95 $33.95
B455-56-149 - $0.80 $12.80
Fd01-68-601b - Insulator, Hood $109.75 $109.75
Fd01-50-794a - Protector $8.00 $8.00
Ga7b-50-795 - Cap $1.35 $8.10
0118-56-242b - $0.65 $2.60
Fd01-50-640b - Mould Rt, Beltline $78.90 $78.90
Fd01-50-615 - Joint, B/wndw Mould $4.50 $4.50
Ea04-51-146a - - $0.95 $0.95
Fd01-51-674 - Clip $2.45 $2.45
Fd01-50-650d - Mould Lt, Beltline $78.90 $78.90
Fd01-50-619a - Clip $2.00 $2.00
Fd01-69-320c-02 - Sun Visor Lt $59.70 $59.70
Fd01-69-270c-02 - Sun Visor Rt $66.25 $66.25
Hg31-69-220b - $56.10 $56.10
R504-17-470a - Case, Control $51.00 $51.00
Je11-40-355 - $3.40 $13.60
N326-14-151 - Chain $22.80 $22.80
$2,448.00, More to come later.
09-26-12, 09:18 PM
#5
Pricing for new carpet is $1700 at the dealer, $910 from Mazdacomp. It's so worth it have a membership with them.
More body photos


5/25/06
Alright! The car is finally at the frame straightener and he said the major parts of the chassis is on the money already. Just have to pull down the pressed in section under the driver side door and maybe a few small adjustments here and there.


Lookie lookie what I got in the mail today from Japan....99 Spec taillights!
Also got the paint, went with PPG Tungsten Gray Metallic, same paint color as the Mazda 6. Pretty similar to my bike and a lot easier to color match down the road in the event of an unfortunate fender bender with a tree. Came out to $827.15 for all material needed, got a 40% discount, thanks Industrial Paint Supply!

More body photos
5/25/06
Alright! The car is finally at the frame straightener and he said the major parts of the chassis is on the money already. Just have to pull down the pressed in section under the driver side door and maybe a few small adjustments here and there.
Lookie lookie what I got in the mail today from Japan....99 Spec taillights!
Also got the paint, went with PPG Tungsten Gray Metallic, same paint color as the Mazda 6. Pretty similar to my bike and a lot easier to color match down the road in the event of an unfortunate fender bender with a tree. Came out to $827.15 for all material needed, got a 40% discount, thanks Industrial Paint Supply!
09-26-12, 09:24 PM
#6
6/3/06
Okay, Got the car back from the frame straightening and they did a good job. Still need bondo under the driver side door, but not nearly as much. I added a pic of the damaged area for a frame of reference, sorry for the different view angles.
Got my Rotary Extreme sleek headlight kit in Thursday and they look sweet. Mounting for this kit was a total joke, decided to make my own framework.
I also got a free Mazda 323 last Wednesday. Man what a piece, but once I fix the things wrong with it, it will be an good commute/backup car. Thanks Apex for letting me use your Golf, you are truly a friend (notice the background advertising).
Started doing bondo today and will be doing tomorrow. (And the next twelve months) Having a DA saves a lot of time. Notice the amount of mud on the door, not sanded yet, but damn!


[img][/img]
Okay, Got the car back from the frame straightening and they did a good job. Still need bondo under the driver side door, but not nearly as much. I added a pic of the damaged area for a frame of reference, sorry for the different view angles.
Got my Rotary Extreme sleek headlight kit in Thursday and they look sweet. Mounting for this kit was a total joke, decided to make my own framework.
I also got a free Mazda 323 last Wednesday. Man what a piece, but once I fix the things wrong with it, it will be an good commute/backup car. Thanks Apex for letting me use your Golf, you are truly a friend (notice the background advertising).
Started doing bondo today and will be doing tomorrow. (And the next twelve months) Having a DA saves a lot of time. Notice the amount of mud on the door, not sanded yet, but damn!
[img][/img]
09-26-12, 09:29 PM
#7
6/12/06
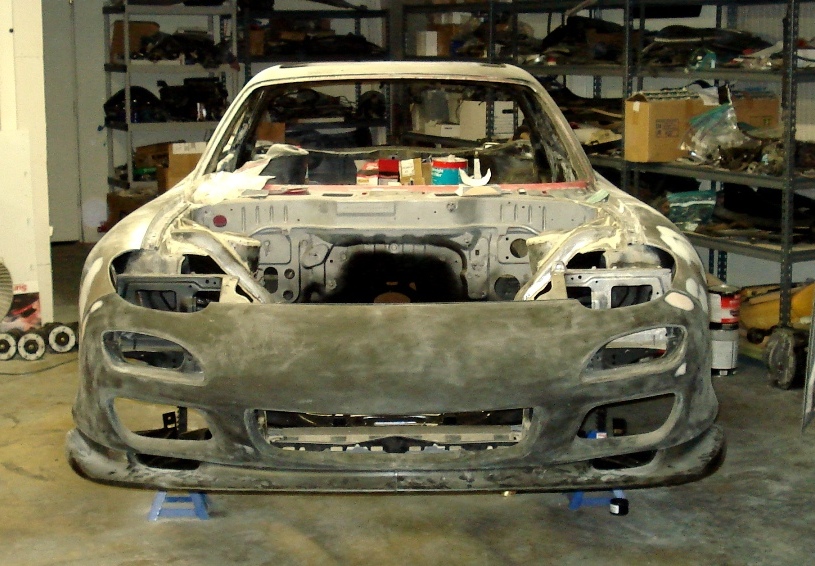
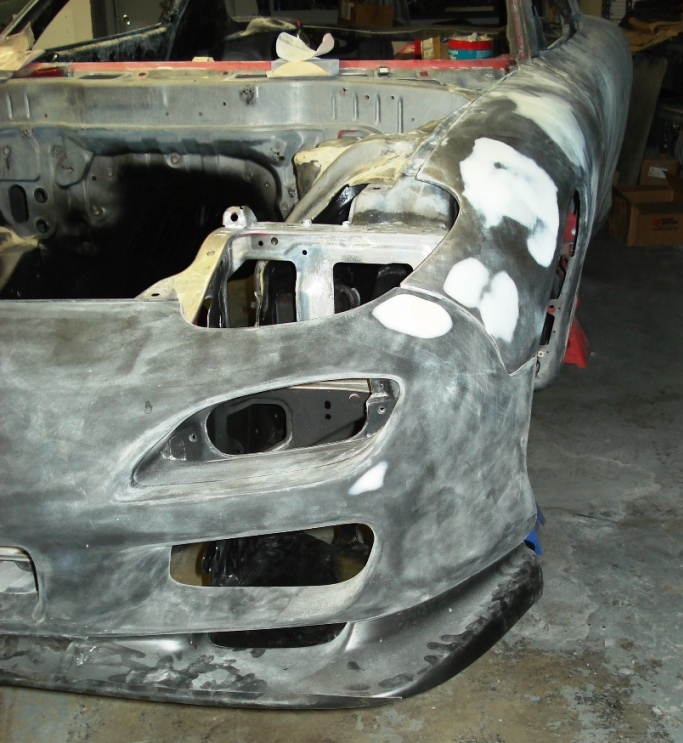
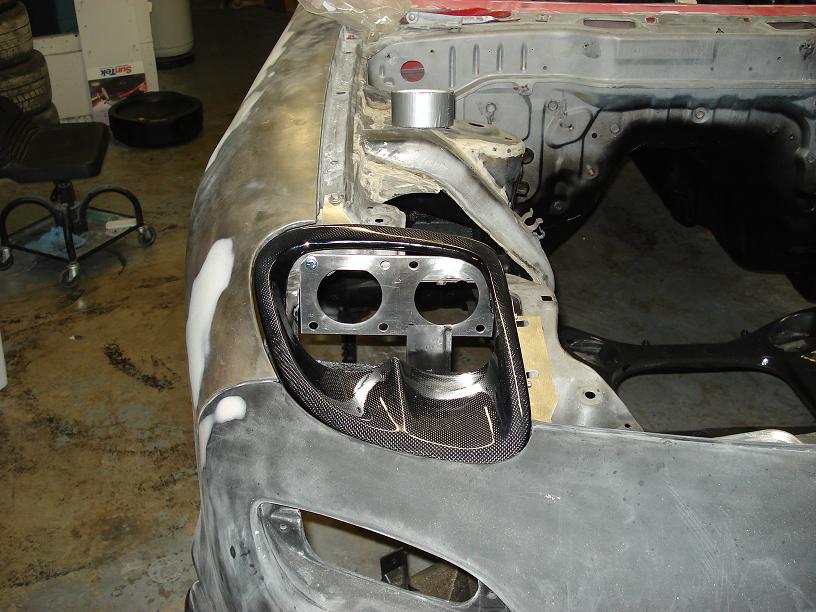
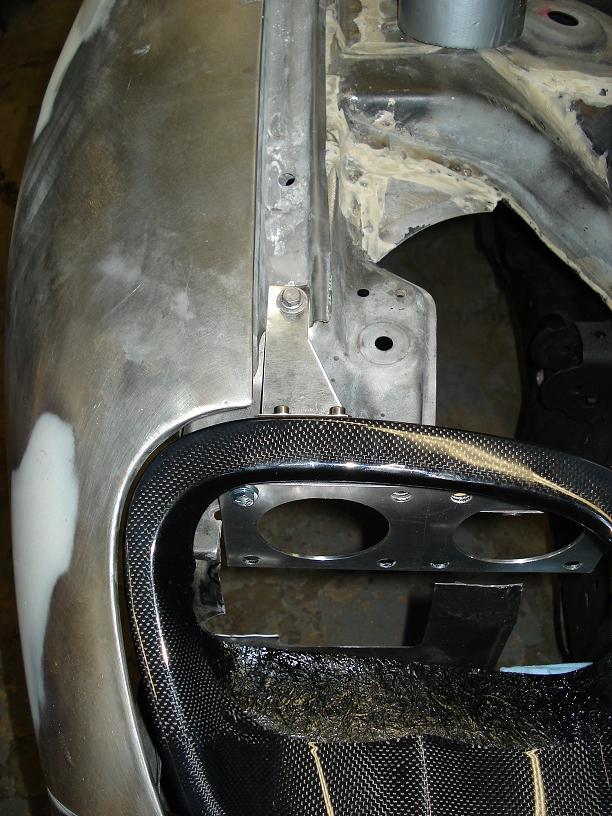
Started work on retrofitting the aluminum stiffening brackets from the stock front bumper the urethane 99 bumper. Some interesting details are in the pics. It will be interesting how well it fits up.


Got my motor back from Pineapple!! So pretty, so pretty. Another motor I miss


Started work on retrofitting the aluminum stiffening brackets from the stock front bumper the urethane 99 bumper. Some interesting details are in the pics. It will be interesting how well it fits up.
Got my motor back from Pineapple!! So pretty, so pretty. Another motor I miss
Trending Topics
09-26-12, 09:36 PM
#8
Got more bondo work done Yesterday. Started applying the skim coat before I left John's shop last night.
Started stripping the sealer in order to stitch weld some key areas. Not going to go all out and do the whole chassis. I know some of you may say "Why not?", but this car is a street car first, race car second. Who am I kidding, I'm an interior removal and eight point cage away from making it into a racecar. When I find a good R1/R2 chassis later down the road I will go all out and make it a race car. Had one, but traded it for another FD (Trying to sell it now)


[imghttps://www.rx7club.com/attachments/nw-rx-7-forum-33/180901d1150647603-fd-restoration-%24%24%24%24-damnit-forum-safe-81-jpg][/img]
6/20/06
Started stripping the sealer off the interior cabin yesterday and did some more today. Got 10lbs of dry ice after going to three different Baskin Robins. Put the ice on the sound deadening and chip it off once it got cold enough. What takes weeks to remove conventionally took about an hour and half to do with this method.

Started stripping the sealer in order to stitch weld some key areas. Not going to go all out and do the whole chassis. I know some of you may say "Why not?", but this car is a street car first, race car second. Who am I kidding, I'm an interior removal and eight point cage away from making it into a racecar. When I find a good R1/R2 chassis later down the road I will go all out and make it a race car. Had one, but traded it for another FD (Trying to sell it now)
[imghttps://www.rx7club.com/attachments/nw-rx-7-forum-33/180901d1150647603-fd-restoration-%24%24%24%24-damnit-forum-safe-81-jpg][/img]
6/20/06
Started stripping the sealer off the interior cabin yesterday and did some more today. Got 10lbs of dry ice after going to three different Baskin Robins. Put the ice on the sound deadening and chip it off once it got cold enough. What takes weeks to remove conventionally took about an hour and half to do with this method.
09-26-12, 09:45 PM
#10
6/24/06
I spot welded instead of seam, for the simple fact that the welder John has doesn't give me enough control and power to make a really good weld. So spot welding it is, I will see noticable gains in rigidity, but not nearly as much as if I did 1" stitches. Which may be a good thing since this is a street car primarily.
Stopped welding because I was sweating ***** with the welding gear on in the 90 degree heat today and started fitting up the front bumper. I need to massage some areas which was expected since this is a nok-off. It will look good when it's finished though.
Fitted up the bumper, cleco made the job a lot easier. I still have a low point at the center between the bumper - hood transition, but it's an easy adjustment.
Will be finishing "spot" welding the chassis and bondo throughout the week so I can paint it next weekend.
The glass guy is finally coming down to look at it Monday.
09-26-12, 09:59 PM
#12
7/4/06
Well, finished spot welding the chassis and put new 3M seam sealer on the interior cabin. I also finished the bondo. Rolled it over to the paint area to start the process of paint. Was able to get the interior painted, but Tyler the painter found out that the definition of Etching primer was lost in translation between PPG and the rest of the paint manufacturers out there. PPG's etching primer is an adhesive promoter and etching primer to other manufacturers is just that etching primer, something you can sand to find the unseen/unfelt low spots in the body. So here's my baby all prep and ready to get her first layer on and the tailor has the wrong fabric. ****!!
This turned out to be totally untrue, but it didn't matter. I used the wrong bondo in the end and had to redo everything. God I hate bodywork.
09-26-12, 10:08 PM
#14
8/15/12
Well, I'm back where I was when I was about to paint. Did everything right this time around, metal prep, type of bondo, etc.. It look a 1/5 of the time this time around. Hopefully by the end of this month I should have some paint on her. I did some organizing of parts while I was at it. man do I have a lot stuff for this car!


Alright, after looking at it, applying bondo the the rocker panel would be a bad idea considering how many times this car will be jacked up to change tires in the future, so I re-sealed and will be sanding the extra once dry to get a smooth transition. Final sanding of bondo now, paint is getting close.
I attached some pics of parts I got recently from Pineapple. Air pump elimination idler wheel and twin exhaust temp kit. Idler wheel is the ****, egt kit not so much.


Well, I'm back where I was when I was about to paint. Did everything right this time around, metal prep, type of bondo, etc.. It look a 1/5 of the time this time around. Hopefully by the end of this month I should have some paint on her. I did some organizing of parts while I was at it. man do I have a lot stuff for this car!
Alright, after looking at it, applying bondo the the rocker panel would be a bad idea considering how many times this car will be jacked up to change tires in the future, so I re-sealed and will be sanding the extra once dry to get a smooth transition. Final sanding of bondo now, paint is getting close.
I attached some pics of parts I got recently from Pineapple. Air pump elimination idler wheel and twin exhaust temp kit. Idler wheel is the ****, egt kit not so much.
The following users liked this post:
Nakd n Fearless (08-15-19)
09-26-12, 10:17 PM
#16
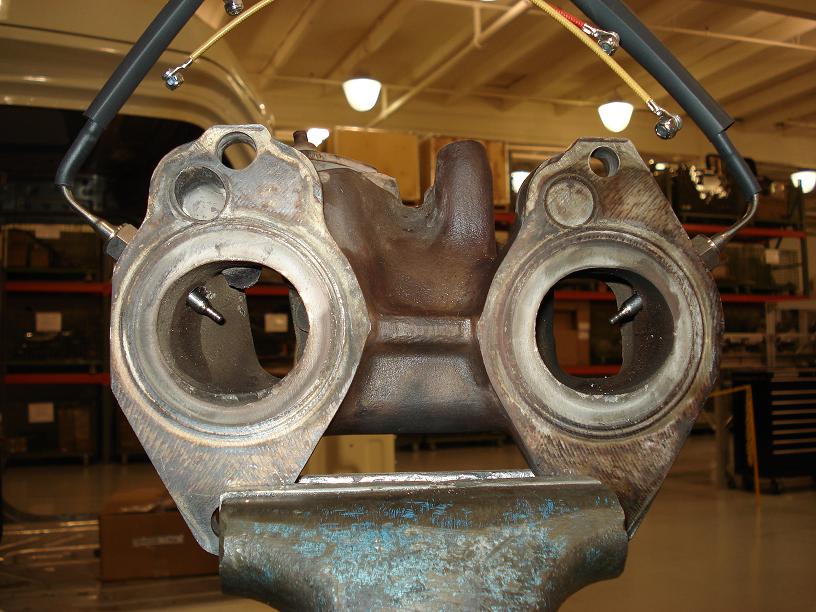
Here's another goody from Pineapple....Intake Air Flow Balancer. From this unit Rob say's you can balance the front/rear intake track air flow, which it isn't in stock config. One piece to the equation why the rear runs leaner than the front. You tune it by using the exhaust temp at the marker. Hence I recently purchased their exhaust temp setup. Interesting concept, never used it.

8/29/06
So last weekend was interesting, had three FDs in the garage getting work done on them.
I finished sanding the first main layer and applied glazing on my car, then worked on Vince H. 94 31K FD.


8/29/06
So last weekend was interesting, had three FDs in the garage getting work done on them.
I finished sanding the first main layer and applied glazing on my car, then worked on Vince H. 94 31K FD.
09-26-12, 10:22 PM
#17
9/1/06
I dropped the fuel tank today and will be fab'n up an internal swirl tank, that way it's in a protected environment and isn't in the way or visible. "Why no officer that's not a swirl tank in my cabin without any fire safety barrier, it's a water injection tank...ya, water injection tank.....what's that in the corner, my water injection tank, Doh! Never got around to doing this for myself, but did do it to two other tanks for other people, one day I will get around to doing it.
I got my Nardi steering wheel today too, I trying to decide if I want to Mod it and make it a D wheel or just leave as it is.


9/3/06
Spyder dropped off his new TIG welder so I could properly finished welding my front end. I finished spot welding today and started resealing. Need to do the under body now since I burn through the undercoat where ever I welded. The welds weren't all that pretty since I was welding over all the welding done previously with the 110 MIG. I did it to get better penetration into the sheet metal. Sanding, sealing and paint prep tomorrow and the first layer will be put on later this week! Yeeesss, sweeet.
Disclaimer - My welding has improved considerably since then.


I dropped the fuel tank today and will be fab'n up an internal swirl tank, that way it's in a protected environment and isn't in the way or visible. "Why no officer that's not a swirl tank in my cabin without any fire safety barrier, it's a water injection tank...ya, water injection tank.....what's that in the corner, my water injection tank, Doh! Never got around to doing this for myself, but did do it to two other tanks for other people, one day I will get around to doing it.
I got my Nardi steering wheel today too, I trying to decide if I want to Mod it and make it a D wheel or just leave as it is.
9/3/06
Spyder dropped off his new TIG welder so I could properly finished welding my front end. I finished spot welding today and started resealing. Need to do the under body now since I burn through the undercoat where ever I welded. The welds weren't all that pretty since I was welding over all the welding done previously with the 110 MIG. I did it to get better penetration into the sheet metal. Sanding, sealing and paint prep tomorrow and the first layer will be put on later this week! Yeeesss, sweeet.
Disclaimer - My welding has improved considerably since then.
09-26-12, 10:36 PM
#19
9/22/06
Got all the Delrin suspension bushings pressed in except for the trailing link bushings. Trying to decide whether to retain the RE trailing arms I have or put the stock units in. (Put the stock unit in) I had to machine a custom press tool for remove and install some pieces. Good stuff.
I opted to not put zerks on because it would have provided negligible gains in maintenance. I was total wrong, ended up putting them on and glad I did it. I will have to remove all the suspension at least once a year to check wear anyways. Yeah right! Haha Another reason is only two or maybe three piece I could actually do it on; all others would have had clearance issues. Wrong again
It will be interesting to see the pros and cons of this setup both at the track and public roads. Track...Awesome, Public Roads..No so much, my car is vibrating itself apart. Holding a conversion with someone is hard too.
09-26-12, 10:44 PM
#20
9/23/06
Alright got the Trailing arm bushing pressed in, but still trying to decide on which set to use. I also got some new goodies from Adrenaline Racing Adrenaline Racing | Your online performance parts portal, Tein EDFC version 2.0 and Tein hood dampeners.
While getting the underbody cleanup I noticed that the drive side sway bar mount had a few cracks, unfortunately it can't be fixed with a weld and grind. Total wrong, fixed it later down the road. This was caused by the stock sway bar mount being hit by a large rock a long time ago...man that was a long time ago...anyways I have an upgraded mount that tied into the engine cradle with a cross bar so this crack although not ideal isn't a show stopper.
The more you look at a car the more you find wrong with it.
09-26-12, 10:53 PM
#21
9/24/06
Finished sealing and painting the under body, cleaned up the suspension frames and installed the front engine cradle in order to attach all frontend plastics to finish the body work, looking good.


10/6/06
Finished stripping Brake caliper and applied the first coat of paint. Waste of time went to a BBK. Also got my Tein Flex's back from being rebuilt and all put back together.


Finished sealing and painting the under body, cleaned up the suspension frames and installed the front engine cradle in order to attach all frontend plastics to finish the body work, looking good.
10/6/06
Finished stripping Brake caliper and applied the first coat of paint. Waste of time went to a BBK. Also got my Tein Flex's back from being rebuilt and all put back together.
09-26-12, 11:05 PM
#23
11/25/06
I finally got my carpet that's been on back order for 9 months now. Directly from Japan. Glad I waited, fitment is OEM.
Started fitting up the RE flushmount headlight kit. Some missalignment issues with mounting plates, missing lexan lens and headlight adjuster springs shut me down. Some areas in this design could be improved (and will be), but overall an okay kit. Instead of going with the RE spring bolt adjuster combo, I ordered the specific adjusters for these head lights at: http://www.rallylights.com/hella/90mm_modules.asp. $60+ bucks, but adjustment will be a lot easier and the headlights won't eventually move on you like the bolt spring combo will. After looking at the plates and how they tie into the chassis, I'm going to create my own out of stainless and tie into at least two more points on the chassis to give it more rigidity and durability. I know overkill, but that's me.
Since I'm sooooooo far behind, I plan on spending at least a few hours every day to get things rolling again. LOL
09-26-12, 11:11 PM
#24
12/11/06
Well this last week was productive at work (60 hours), but thoroughly frustrating working on the car. Broke the wires on a switch on the tranny, broke a stud on the exhaust manifold, broke an easy out in the process of trying to get it out, not having the drill bits need to install my EGT probes, the list goes on.
Anyways, the lesson for today boys and girls is if you ever do something like this, make damn sure you separate and bag all your hardware if you don't you will waste countless hours trying to find that special 10mm nut you need.
Whatever you do don't do what I did with the following egt probe sensor location. EGTs in this location are well beyond 1000C and will burnout your probe in no time.


12/12/06
Alright, got the busted stud out; had to mill out the remnants, I wouldn't recommend breaking one of them.
Also got the EGT probes in place.
Whatever you do don't do what I did with the following egt probe sensor location. EGTs in this location are well beyond 1000C and will burnout your probe in no time.

Well this last week was productive at work (60 hours), but thoroughly frustrating working on the car. Broke the wires on a switch on the tranny, broke a stud on the exhaust manifold, broke an easy out in the process of trying to get it out, not having the drill bits need to install my EGT probes, the list goes on.
Anyways, the lesson for today boys and girls is if you ever do something like this, make damn sure you separate and bag all your hardware if you don't you will waste countless hours trying to find that special 10mm nut you need.
Whatever you do don't do what I did with the following egt probe sensor location. EGTs in this location are well beyond 1000C and will burnout your probe in no time.
12/12/06
Alright, got the busted stud out; had to mill out the remnants, I wouldn't recommend breaking one of them.
Also got the EGT probes in place.
Whatever you do don't do what I did with the following egt probe sensor location. EGTs in this location are well beyond 1000C and will burnout your probe in no time.
The following users liked this post:
Nakd n Fearless (08-15-19)
09-26-12, 11:19 PM
#25
12/15/06
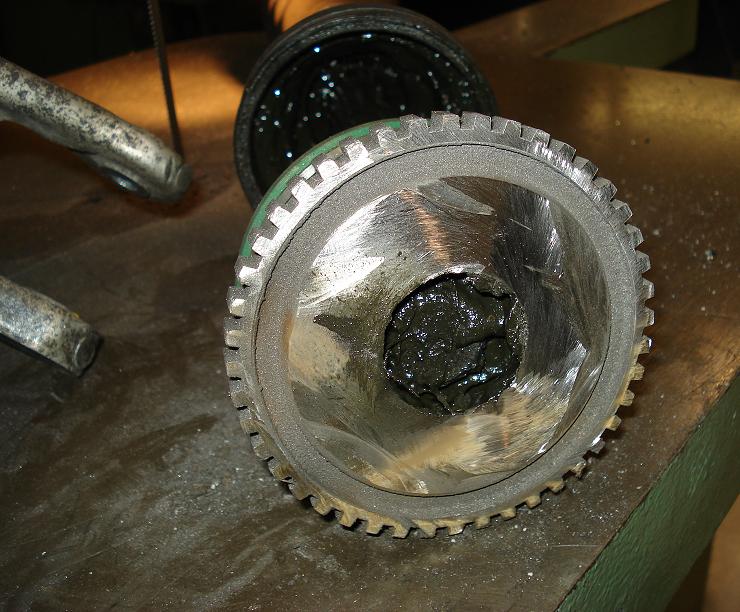
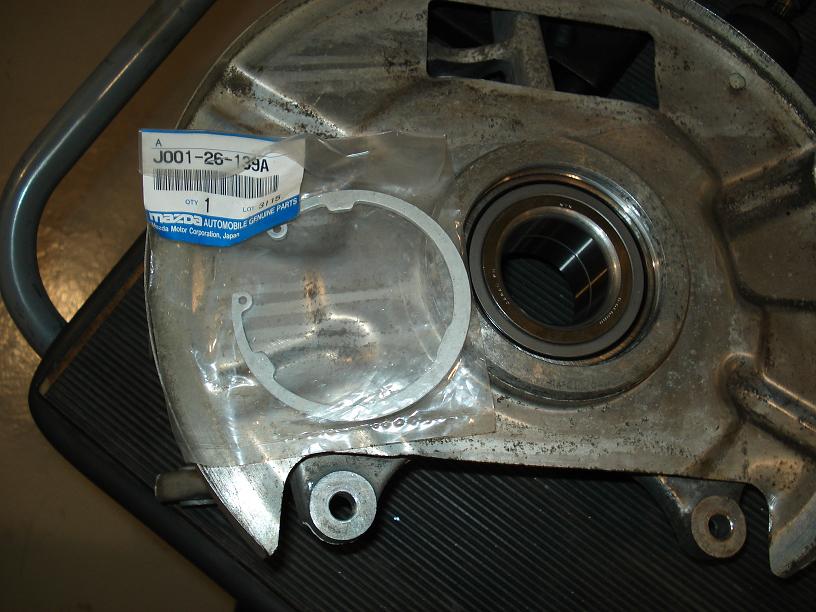
Got the hub out of the upright finally, had to buy a separator. However, I have yet to get the stubborn half shaft out of the other upright/hub assembly.


12/22/06
**** it! Okay the stubborn half shaft is finally out only after death wheeling the CV hub off (band saw was a futile attempt) and then putting 45 tons of press force with a solid footing. Only then, was able to get it off.
So new bearings and retaining clips are in place, getting new 10mm longer than stock wheel studs today and at least the rear hubs and uprights will be all together and ready to be used today.


Got the hub out of the upright finally, had to buy a separator. However, I have yet to get the stubborn half shaft out of the other upright/hub assembly.
12/22/06
**** it! Okay the stubborn half shaft is finally out only after death wheeling the CV hub off (band saw was a futile attempt) and then putting 45 tons of press force with a solid footing. Only then, was able to get it off.
So new bearings and retaining clips are in place, getting new 10mm longer than stock wheel studs today and at least the rear hubs and uprights will be all together and ready to be used today.