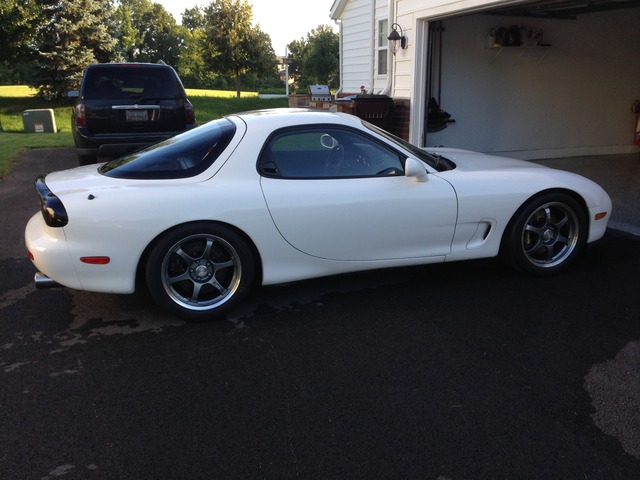
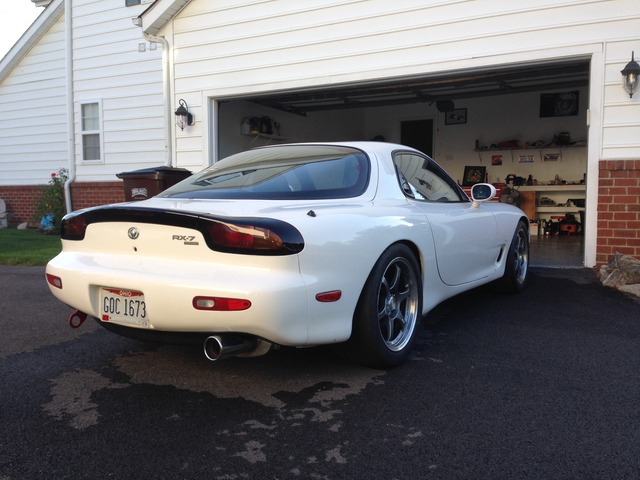
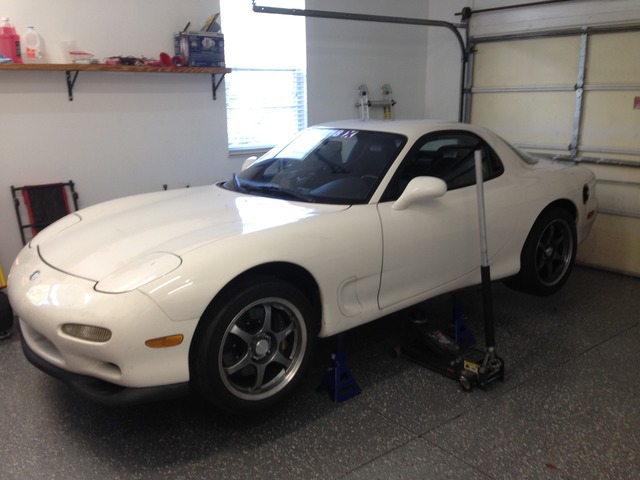
94 white track/street build. Simple but effective
 12-03-16, 10:51 PM
#26

Further prep for the July event
Still trying to get the catch can better sorted. This time I'm going to a new/different metal oil fill neck with a different baffle design. Also this one has a big -10 vent line. The thought there is that the larger line will not allow pressure to build up and therefore oil will just slosh and not get pumped out.
To do that, a bunch of stuff has to come apart
Here's the neck with the baffle design at the bottom. Really nicely made piece. Hopefully it works as well as it looks.
To get it to fit I had to remove the front engine hoist bracket because that's right where the -10 outlet would be. I also used this time to make the last of my home made ground wires and connect it to that point on the engine.
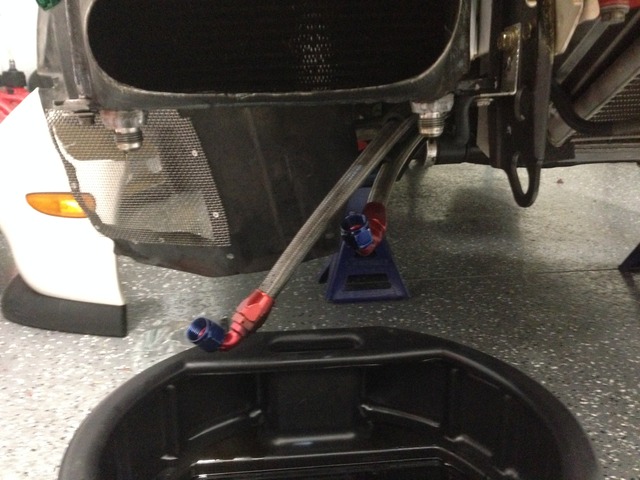
Here you can see the comparison of the new bigger line to the old, and how I routed it to the can
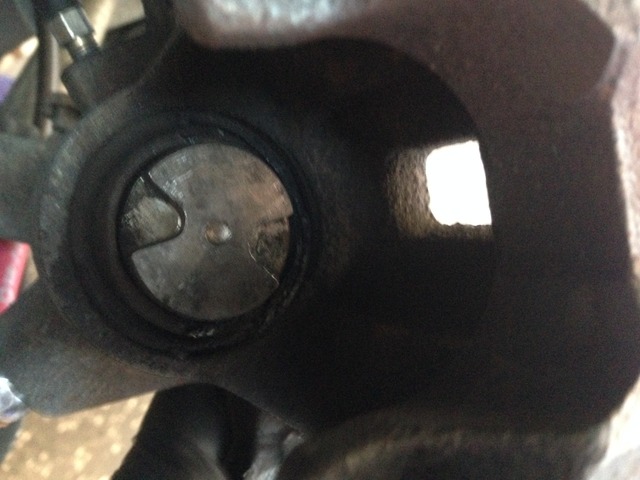
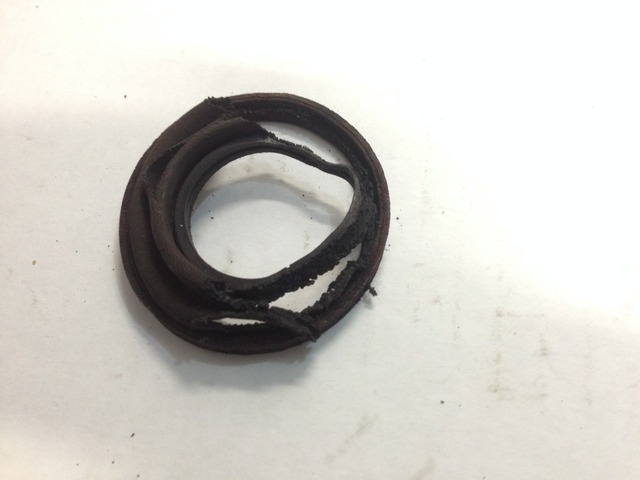
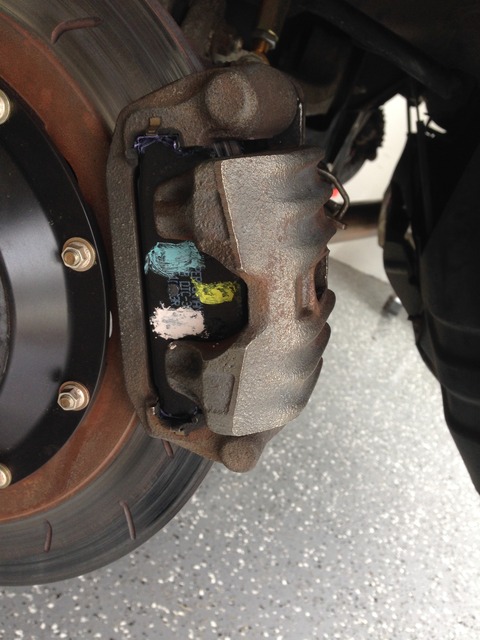
in the midst of changing pads I found that I had cooked a dust seal on the driver's side rear caliper. I took a donor from one of my old calipers to get me by for now since it was too late to do much else (ALWAYS THE CASE)
I replaced the passenger oil cooler since it was leaking. I used a new 19 row unit from Improved Racing (their brand) and have been very happy with it. I now use their coolers and thermostat for my setup and the only thing original to the Crooked Willow kit are the lines and ducts (which are key).
Sealed up the ducts on the coolers as best I could
Still trying to get the catch can better sorted. This time I'm going to a new/different metal oil fill neck with a different baffle design. Also this one has a big -10 vent line. The thought there is that the larger line will not allow pressure to build up and therefore oil will just slosh and not get pumped out.
To do that, a bunch of stuff has to come apart

Here's the neck with the baffle design at the bottom. Really nicely made piece. Hopefully it works as well as it looks.


To get it to fit I had to remove the front engine hoist bracket because that's right where the -10 outlet would be. I also used this time to make the last of my home made ground wires and connect it to that point on the engine.

Here you can see the comparison of the new bigger line to the old, and how I routed it to the can


in the midst of changing pads I found that I had cooked a dust seal on the driver's side rear caliper. I took a donor from one of my old calipers to get me by for now since it was too late to do much else (ALWAYS THE CASE)


I replaced the passenger oil cooler since it was leaking. I used a new 19 row unit from Improved Racing (their brand) and have been very happy with it. I now use their coolers and thermostat for my setup and the only thing original to the Crooked Willow kit are the lines and ducts (which are key).

Sealed up the ducts on the coolers as best I could

 12-03-16, 10:52 PM
#27
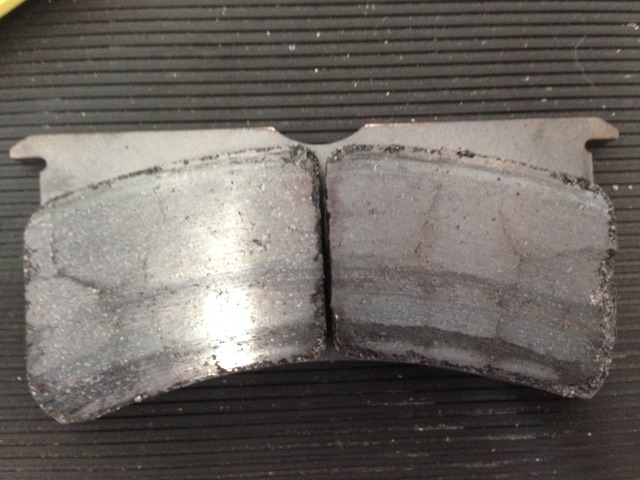
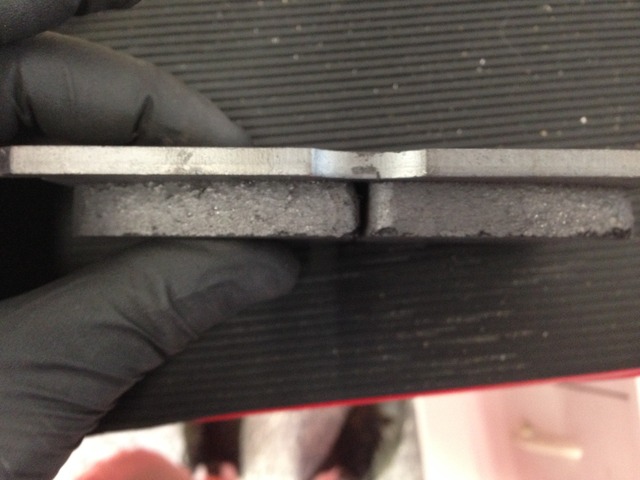
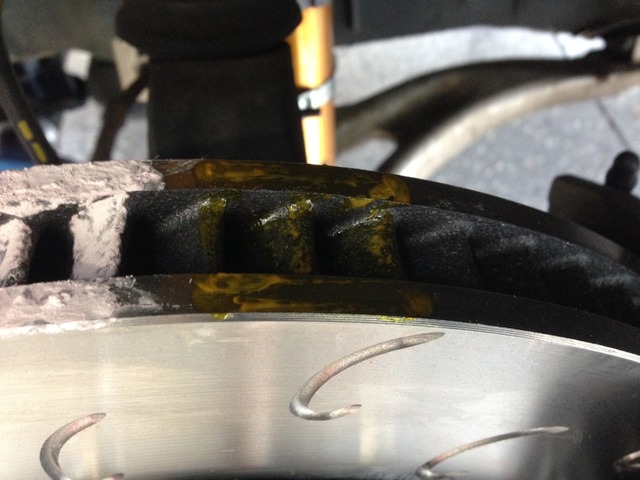
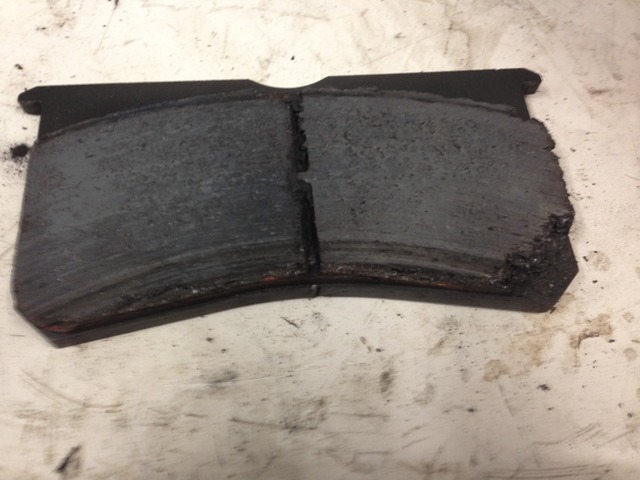
For the July event I was going to run the CL pads up front again and see how much I could get out of them. We were starting about half-life or so. They'd gotten hot as you can see, but nothing crazy and even wear.
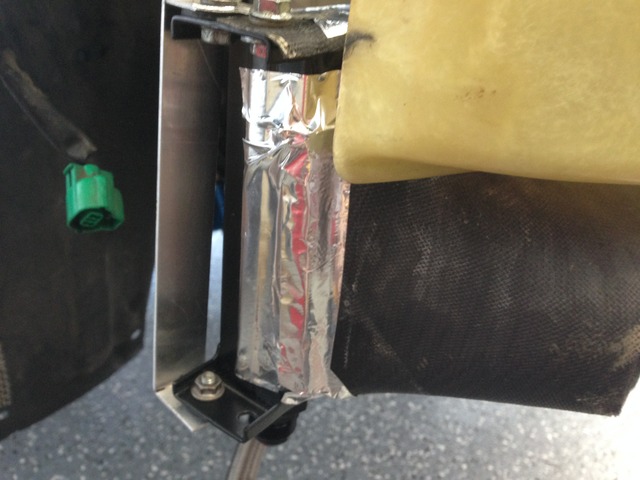
Here you can see my Janky radiator blockage. I glued sections of foam to the underpanel where air could bypass the radiator to try to force it thru the radiator. As crap as it looks this actually helped along with the opening of the oil cooler vents in the fender liners.
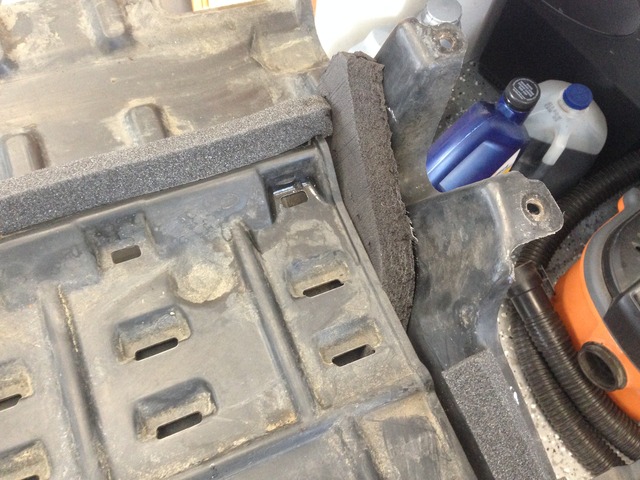
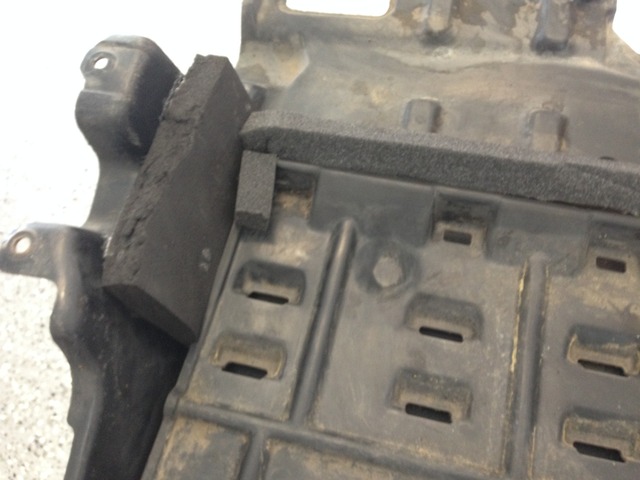


Here you can see my Janky radiator blockage. I glued sections of foam to the underpanel where air could bypass the radiator to try to force it thru the radiator. As crap as it looks this actually helped along with the opening of the oil cooler vents in the fender liners.

 12-03-16, 10:55 PM
#28
July event - Track event 3 for this car: Audi club at Mid Ohio. This event was tons of fun. The student groups weren't all that fast, but the instructor group was fast and fun and had tons of cool **** in there. UNFORTUNATELY I somehow forgot how to work a damn gopro so I don't have any good video. The first day I took it up and the battery was dead...no worries, I'll bring another tomorrow. Went up the next day, put in the new battery....no memory card. I still have never found where that bish went...it's gone. So no video which is a bummer.
Ever heard of a Ferrari 333SP? https://en.wikipedia.org/wiki/Ferrari_333_SP
There was one at the event. Has to be one of the coolest vehicles I've seen at a track event ever. Sounds like a 90s F1 car, runs real race gas (rare these days) and is FAST. We were out in a session with him and I pointed him coming out of the keyhole and never lifted...he had me gapped by the kink...that's fast. Talked to the guy too and he was super cool. Really wish I would have had that video.
The event overall was good and well run.
This investment in the side-wall for my canopy may have been some of the best money I spent all year..haha

STILL had problems with the fuel system. This time the line wasn't coming off, but it still wasn't running as low as I'd like. The good news is that as long as I kept the tank on the top 1/2 (easier said than done in a car getting 4mpg) it was fine and I finished the weekend without further trouble.
Also...the new catch can system did not make an improvement...bummer...back to the drawing board.
I had a new issue in that the water/meth worked awesome in keeping intake temps down, but seemed to cause the system to draw more vacuum than previous and was sucking the tank in on itself collapsing it and then losing prime on the pump
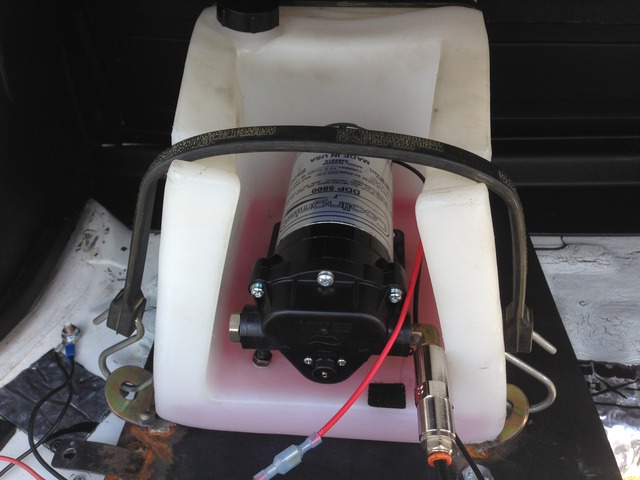
See those crumpled-in sides? not supposed to be like that. Good news is that drilling a VERY small hole in the cap relieved this issue and we solved it at the track.
I also had some brake fluid creeping out of the M/C reservoir and getting onto the booster. Nothing catastrophic, but will order a new cap to try to fix this.

I had made it all of the weekend with the car staying ok temp wise. I'd gotten up to 102C with my student in the car and making a full session, but that was ok to me. 105C was my limit where I'd have to back off and it's too hot. Then the last session they combined instructors and advanced students. I was chasing behind 2 Audi R8s. Evidently the owner of the R8 I was behind did not option the mirrors on it and couldn't see me wanting to pass. I followed him completely nose to tail for a lap before my car went too hot to 106C....bummer. It's a rare circumstance for sure, but in my mind that's a failure of the cooling system and the A/C has to go!
I backed off for 3/4 of a lap and the temps came back down quickly. As I was going slower on the back straight I pointed by a guy in a 996 Turbo on slicks that I had been playing around with all weekend. I couldn't help myself and decided to give chase.
I caught him and we had a great time going back and forth. Then Andy was slowing down and did the same thing when we passed him! the 3 of us got to play around for a few laps and it was honestly the most fun I've had at the track in years. Sometimes I need to remember it's not all about lap times and more about driving and having fun with it.
The guy later shared the video from his car, but since it's his I won't be posting it here as it's not mine to share. There will be more in the future though so don't worry.
12-04-16, 09:52 AM
#29
First all we have the same taste in cars. I love a CW RX-7 and I also was looking hard at an LS2 powered Saab. That's a very rare thing. I've currently been downsizing my dail drivers in hopes of building a shop and the Saab looked like a very cool vehicle. Just so hard to find. At least in the price range I wanted without a ton of miles.
Also the catch can issue can be worked out by using a 2 port can and having any overflow go back into the pan via a line. Yes it's not ideal but figure you change the oil often anyway and it only end up back in the pan if you top off the catchcan.
Btw I know you aren't into fancy things but you can use a -10an Banjo off the filler neck. I picked mine up from Radium. Radium will also have some fancy solutions for your fuel slosh issue.

I've seen cars run hard that have AC and PS. There are likely other solutions. Vmount possibly, vented hood. Larger oil coolers will help keep water temps down. You should also look at your oil temps when your water temps are getting critical. They go hand in hand on the rotary.
I have a like new Koyo N Flow I could send you at a nice price if you aren't already running one. RX-8 fan blades on the rad fans is a nice mod that may help.
Btw I will go back and re read, I just skimmed real quick as I am about to leave the house and liked what I have seen so far.
BBL
12-04-16, 01:24 PM
#30
First all we have the same taste in cars. I love a CW RX-7 and I also was looking hard at an LS2 powered Saab. That's a very rare thing. I've currently been downsizing my dail drivers in hopes of building a shop and the Saab looked like a very cool vehicle. Just so hard to find. At least in the price range I wanted without a ton of miles.
It's a Trailblazer SS with different bumpers/headlights/tail lights and a different dash inside. The rest is all GM stuff for better or worse. Good news is that parts are available everywhere and relatively cheap. The 6.0L makes tons of power/torque, it has bigger brakes than a standard trailblazer, and the rear air suspension is great for towing. Really the only downside is the gas mileage. With 4.11 gears and 8 big cylinders there's no way to get good mileage.
Also the catch can issue can be worked out by using a 2 port can and having any overflow go back into the pan via a line. Yes it's not ideal but figure you change the oil often anyway and it only end up back in the pan if you top off the catchcan.
Btw I know you aren't into fancy things but you can use a -10an Banjo off the filler neck. I picked mine up from Radium. Radium will also have some fancy solutions for your fuel slosh issue.
Btw I know you aren't into fancy things but you can use a -10an Banjo off the filler neck. I picked mine up from Radium. Radium will also have some fancy solutions for your fuel slosh issue.
Thanks for the heads up on the Radium banjo line, I'll consider it for future options. It would make it nicer to use the IRP neck as you might be able to not have to remove the front engine hoist hook. I'm aware of their surge tanks, but would like to avoid that solution as it has some complications such as if it's inside the cabin it needs a bulkhead made to separate it, and if it's under the car there's increased fire/puncture risk in the event of an off at the track.
I also don't mean to imply I don't like fancy/cool stuff, but more that my budget has to focus primarily on function over form as much of the budget goes toward USING the car at the track which is never cheap.
I've seen cars run hard that have AC and PS. There are likely other solutions. Vmount possibly, vented hood. Larger oil coolers will help keep water temps down. You should also look at your oil temps when your water temps are getting critical. They go hand in hand on the rotary.
I have a like new Koyo N Flow I could send you at a nice price if you aren't already running one. RX-8 fan blades on the rad fans is a nice mod that may help.
Btw I will go back and re read, I just skimmed real quick as I am about to leave the house and liked what I have seen so far.
BBL
I have a like new Koyo N Flow I could send you at a nice price if you aren't already running one. RX-8 fan blades on the rad fans is a nice mod that may help.
Btw I will go back and re read, I just skimmed real quick as I am about to leave the house and liked what I have seen so far.
BBL
BTW, not to jump too far ahead as I'm still updating the thread, but I removed the A/C and the temps have remained steady ever since.
I also forgot to mention that I really enjoy your build thread. Your attention to detail, choice of parts, and photos are always impressive and one of the ones I was referring to in the beginning of this thread as how great some of the builds in this section have gotten lately.
12-04-16, 01:33 PM
#31
Track day 4 prep: In August my brother and I were going to Watkins Glen. This was a big step for the FD as Mid Ohio is close enough if there's an issue I can go home and get parts/etc.
First up was poly sway bar bushings. I run an aftermarket Tri-Point front swaybar. It's great, but had been clunking more and more for the past few events. Hopefully the bushings will reduce the clunk. No pictures, it's pretty standard fare here.
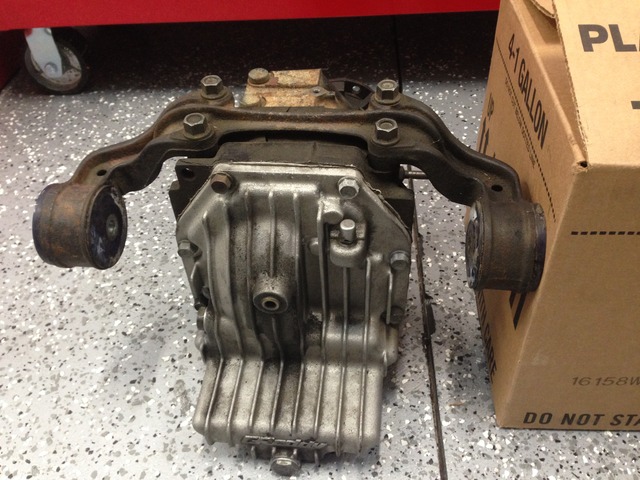
Differential - The unit out of the silver car was in this car and it was functioning fine, but at highway speeds and no load it was making a really bad noise. I was concerned that it might fail at Watkins and I didn't want that, so I'd be swapping it with the stock 60k mile unit from the white car.
Got the unit out of the car - I had forgotten how much crap needs to come out to do this. Not very hard, but time consuming and annoying.
Here's a shot under the car with the diff, driveshaft, and PPF out of the car. Pretty clean under there which I'm happy about.
Looking forward:
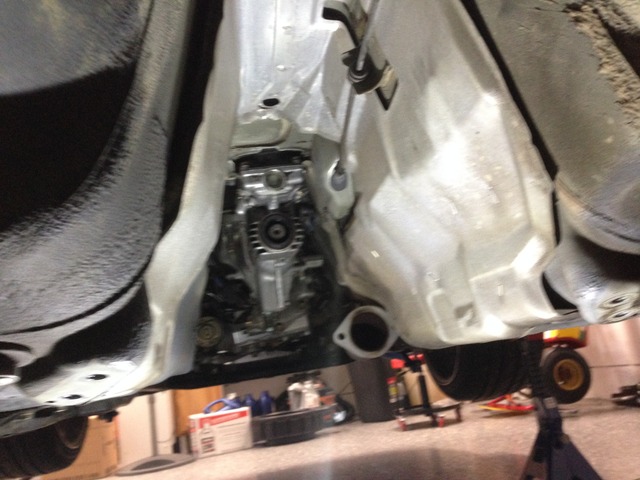
looking back:
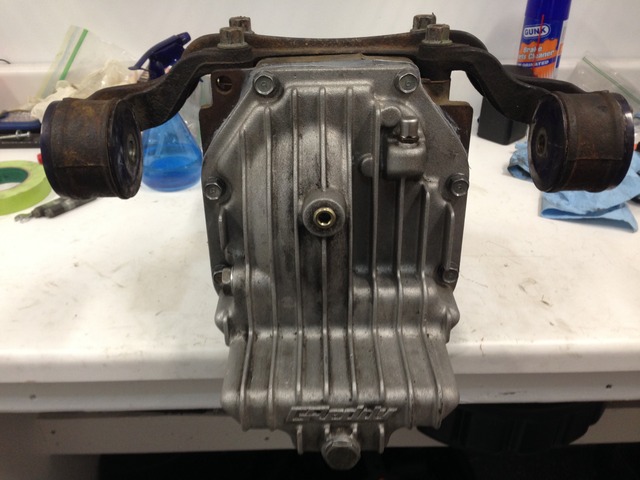
For the swap I'd be changing over the Greddy cover and mount with poly bushings to the new unit. The Greddy cover allows about an extra quart of oil which is nice for cooling/heat capacity. Sealed it up with my favorite HondaBond HT...use that crap on everything you'd want to use silicone for.
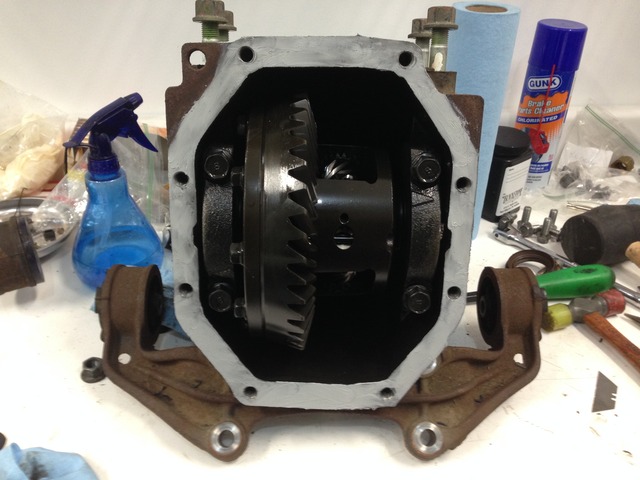
All sealed up with the mount that has Superpro bushings in it
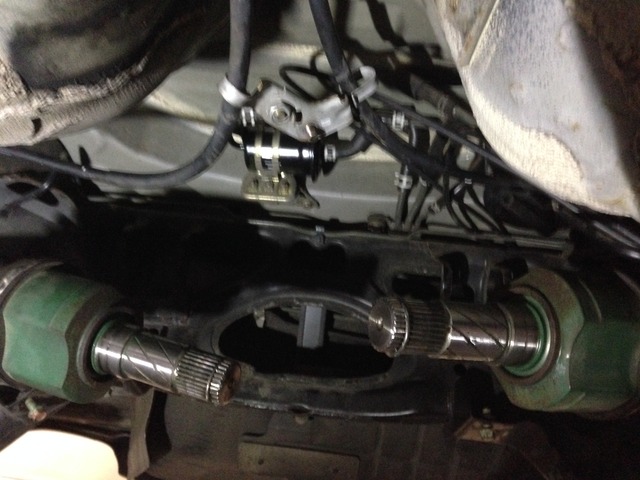
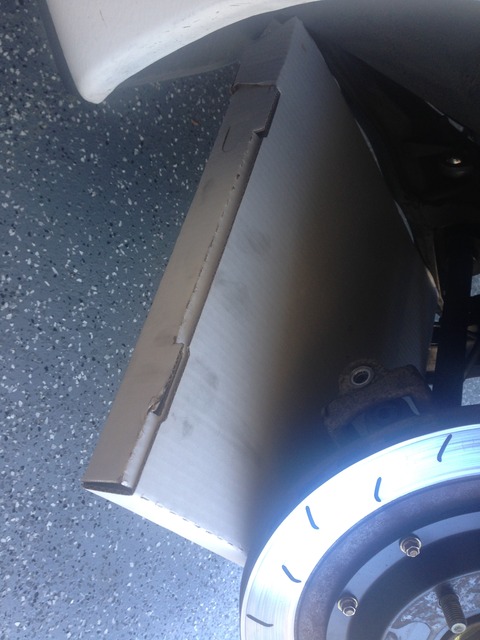
Not to forget my janky nature...this is why I don't fabricate things that I want to use on the track..haha. I needed to hold the axles/hubs away from the diff so I could pull it out and put the new one back in. Looked around for options in the garage and decided on this fine tool...pizza box..haha
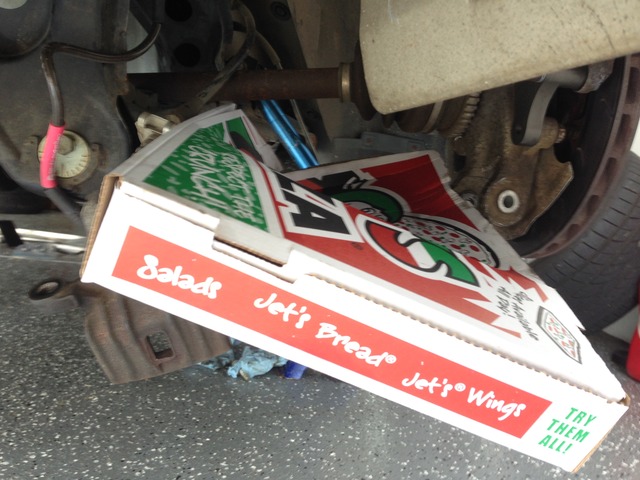
**** worked fine too
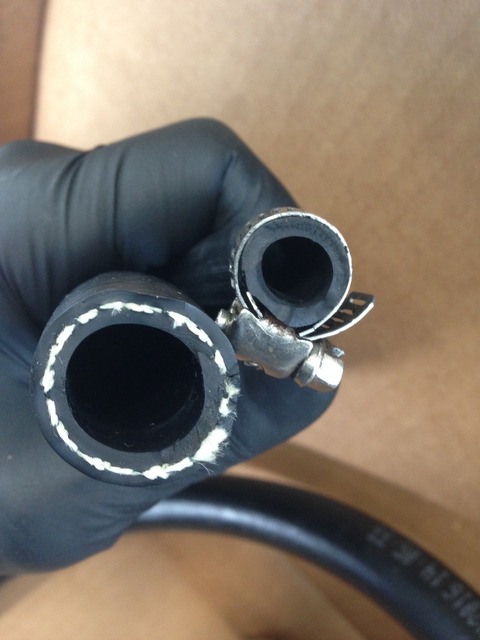
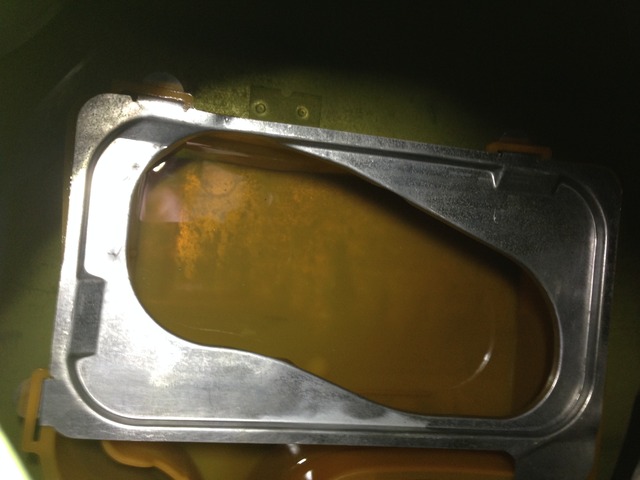
Next up was fuel system. I was done messing around with the in-tank surge setup for now. It's a sweet idea, but I just kept having issues. I'm going back to the "old" setup which was the factory metal plate that goes over the fuel pump tray in the stock tank. It effectively makes a small surge tank out of the bigger tray.
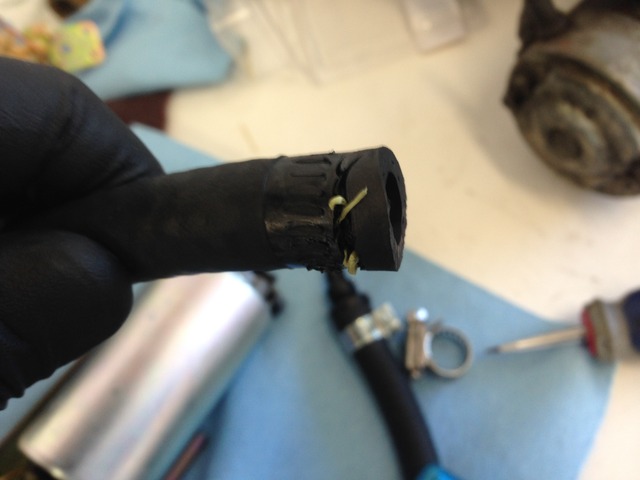
Here you can see the fuel line that was coming off the surge tank setup again. Turns out the line was torn which is why I was getting air bubbles. I fully believe this setup could work well if I didn't have the troubles with the line coming off, but for now I'm done messing with it. It's for sale BTW if someone else wants to take it on. I think it needs a better barb for the fuel pump side and it'll work a lot better.

Here's the plate I went back to for the setup to help hold fuel near the pump pickup. The fuel pump, sock, and return lines all go down in the open oval space.
First up was poly sway bar bushings. I run an aftermarket Tri-Point front swaybar. It's great, but had been clunking more and more for the past few events. Hopefully the bushings will reduce the clunk. No pictures, it's pretty standard fare here.
Differential - The unit out of the silver car was in this car and it was functioning fine, but at highway speeds and no load it was making a really bad noise. I was concerned that it might fail at Watkins and I didn't want that, so I'd be swapping it with the stock 60k mile unit from the white car.
Got the unit out of the car - I had forgotten how much crap needs to come out to do this. Not very hard, but time consuming and annoying.

Here's a shot under the car with the diff, driveshaft, and PPF out of the car. Pretty clean under there which I'm happy about.
Looking forward:

looking back:

For the swap I'd be changing over the Greddy cover and mount with poly bushings to the new unit. The Greddy cover allows about an extra quart of oil which is nice for cooling/heat capacity. Sealed it up with my favorite HondaBond HT...use that crap on everything you'd want to use silicone for.


All sealed up with the mount that has Superpro bushings in it

Not to forget my janky nature...this is why I don't fabricate things that I want to use on the track..haha. I needed to hold the axles/hubs away from the diff so I could pull it out and put the new one back in. Looked around for options in the garage and decided on this fine tool...pizza box..haha

**** worked fine too
Next up was fuel system. I was done messing around with the in-tank surge setup for now. It's a sweet idea, but I just kept having issues. I'm going back to the "old" setup which was the factory metal plate that goes over the fuel pump tray in the stock tank. It effectively makes a small surge tank out of the bigger tray.
Here you can see the fuel line that was coming off the surge tank setup again. Turns out the line was torn which is why I was getting air bubbles. I fully believe this setup could work well if I didn't have the troubles with the line coming off, but for now I'm done messing with it. It's for sale BTW if someone else wants to take it on. I think it needs a better barb for the fuel pump side and it'll work a lot better.


Here's the plate I went back to for the setup to help hold fuel near the pump pickup. The fuel pump, sock, and return lines all go down in the open oval space.
 12-04-16, 01:39 PM
#32
Next up was the A/C, unfortunately it was time to go. It's a shame to remove a well working R12 system, but it's a track car first and it has to be able to maintain temperature on the track.
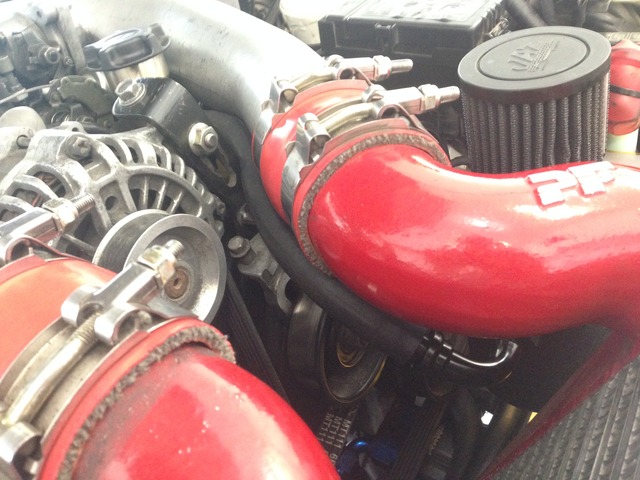
I had a shop pull the R12 out of the system so I wasn't a complete *** and dumping it into the atmosphere. Then came removal: Lots of the engine bay had to come apart again. Intake, intercooler, throttle elbow so that I could get all of the lines out. The good news is that removing the condenser and lines allowed me to put back on the better working primary turbo intake elbow that I couldn't run before.
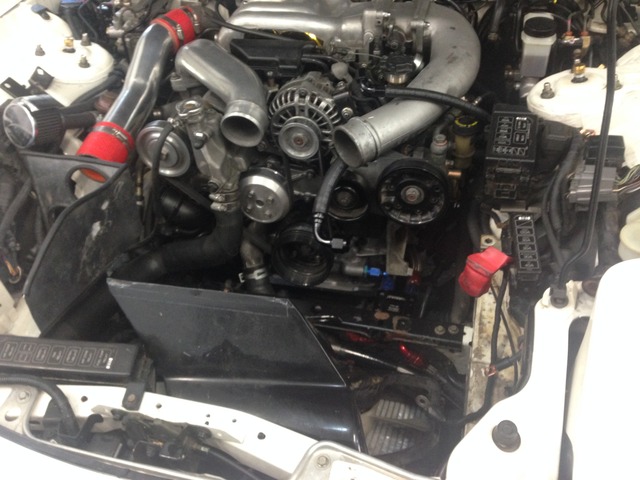
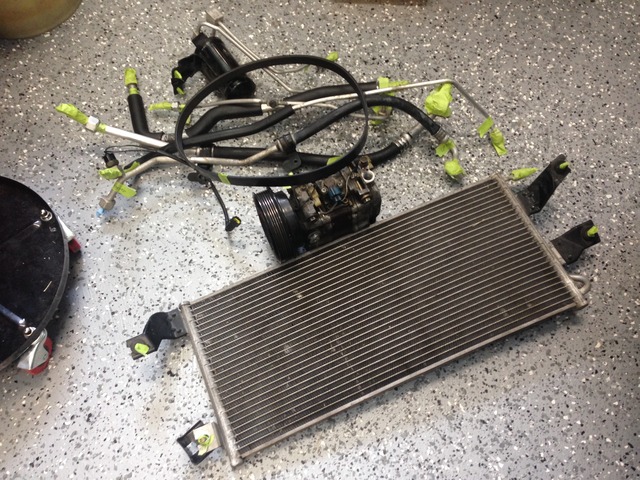
I left the evaporator box under the dash for now and just plugged it off. Perhaps if I get ambitious in the future I'll pull it out, but for now it wasn't worth the effort. Here's the stuff that was taken out and it gave me roughly 22lbs of weight savings.
I also took the time to clean/oil the K&N filters for the intake while everything was apart as they were nasty. I also had to get a new belt to run without the A/C but keep the P/S.
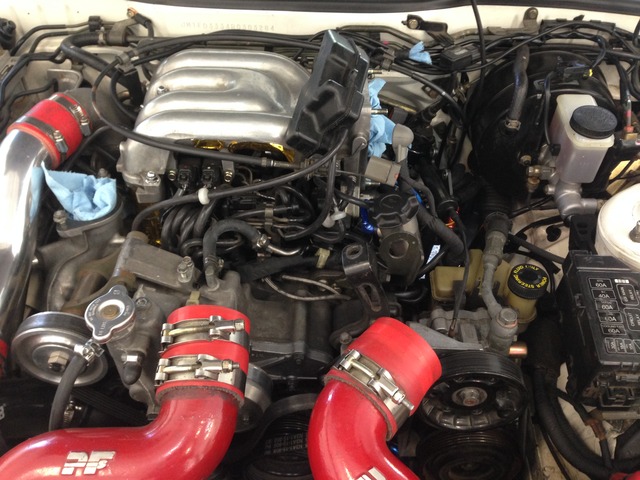
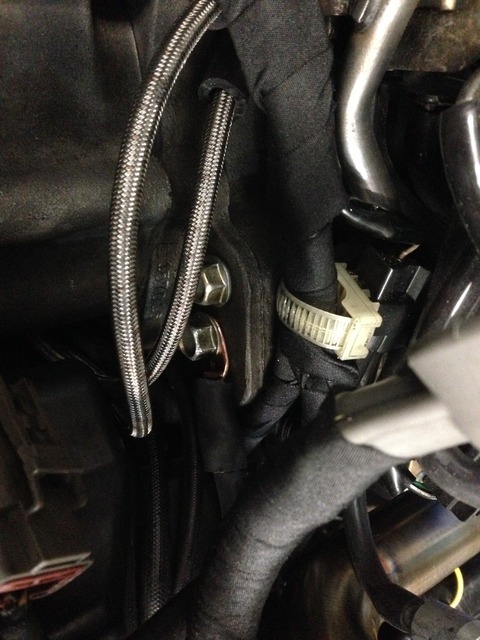
Next up was the next great idea on the catch can. The next theory was to try to vent from the passenger side of the motor. From the factory, the only vents are on the stock fill neck on the driver's side of the motor. During long/hard right hand turns (keyhole and carousel) the oil sloshes up the fill neck and gets pumped out into the catch can. Supposedly all of the guys who go single turbo use one of the oil vents (unused if going single) as an additional vent on the passenger side and it cures all catch can issues. So, armed with that knowledge, but still running twin turbos I thought I could create a vent on one of the oil vents and hope that it has low enough flow to allow some venting.
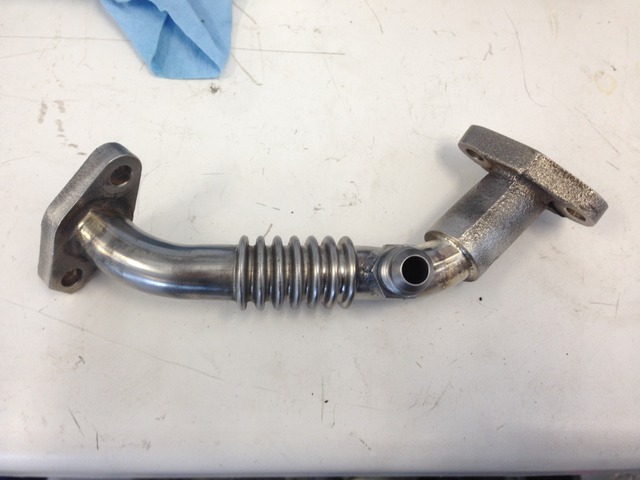
Here's the stock oil return/drain on the secondary turbo:
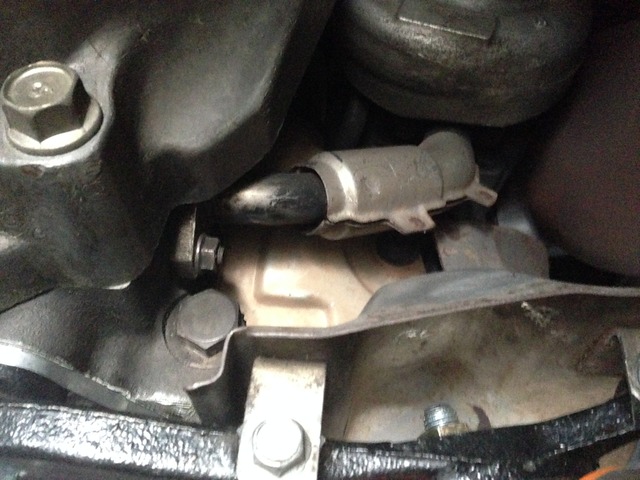
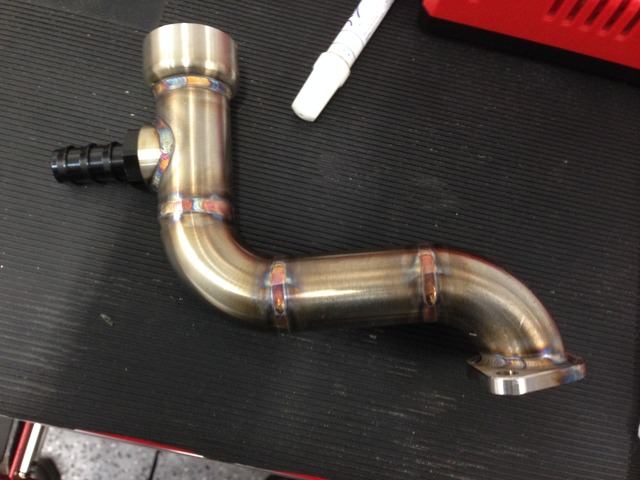
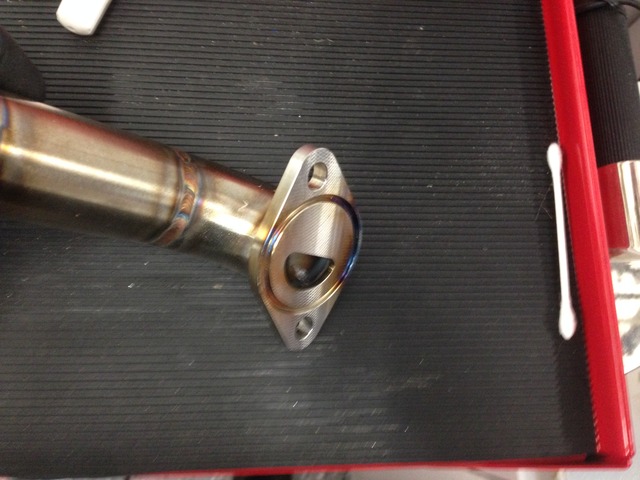
Here's the line modified with a -6 AN fitting welded on.
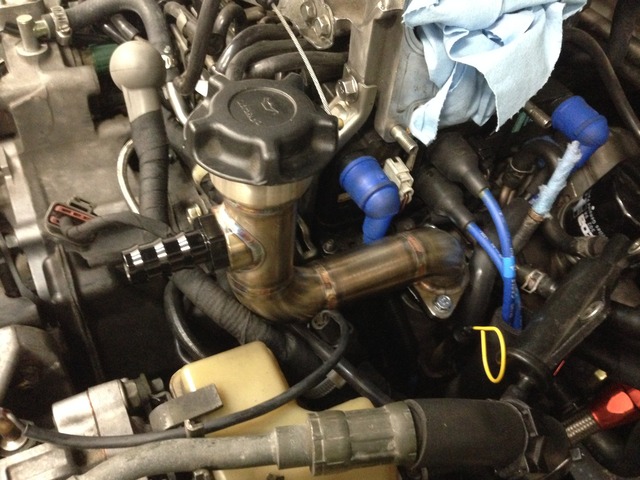
Here it is fitted on the car, and then with the line hooked up to it.
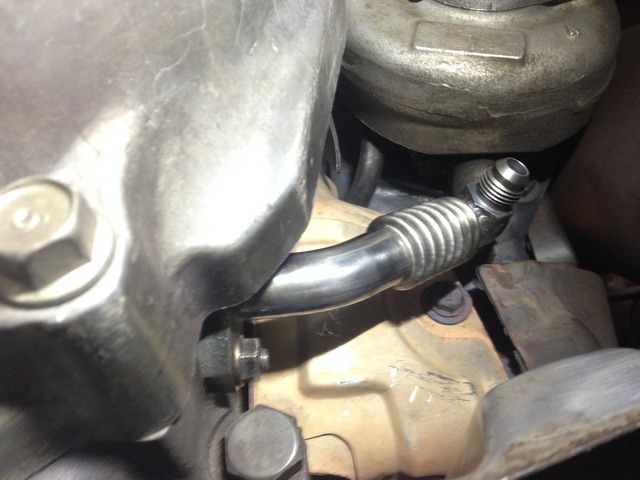
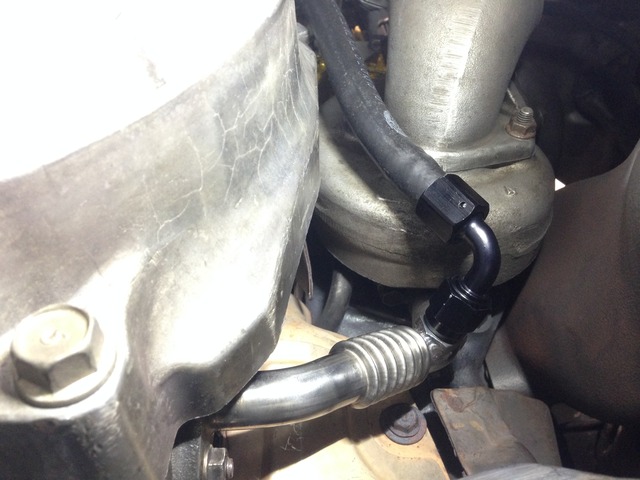
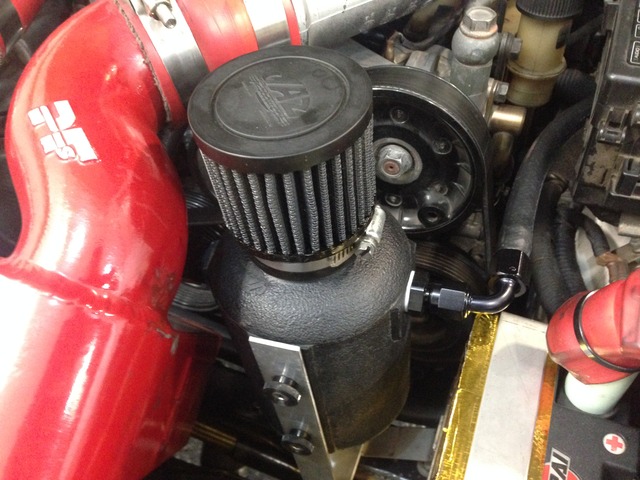
I later added DEI cool tube around the AN hose to protect it from the heat from the downpipe. The line got routed above the trans and around the back of the motor. The catch can was drilled and ran the -6 line to the other side of the can.
I had a shop pull the R12 out of the system so I wasn't a complete *** and dumping it into the atmosphere. Then came removal: Lots of the engine bay had to come apart again. Intake, intercooler, throttle elbow so that I could get all of the lines out. The good news is that removing the condenser and lines allowed me to put back on the better working primary turbo intake elbow that I couldn't run before.

I left the evaporator box under the dash for now and just plugged it off. Perhaps if I get ambitious in the future I'll pull it out, but for now it wasn't worth the effort. Here's the stuff that was taken out and it gave me roughly 22lbs of weight savings.

I also took the time to clean/oil the K&N filters for the intake while everything was apart as they were nasty. I also had to get a new belt to run without the A/C but keep the P/S.
Next up was the next great idea on the catch can. The next theory was to try to vent from the passenger side of the motor. From the factory, the only vents are on the stock fill neck on the driver's side of the motor. During long/hard right hand turns (keyhole and carousel) the oil sloshes up the fill neck and gets pumped out into the catch can. Supposedly all of the guys who go single turbo use one of the oil vents (unused if going single) as an additional vent on the passenger side and it cures all catch can issues. So, armed with that knowledge, but still running twin turbos I thought I could create a vent on one of the oil vents and hope that it has low enough flow to allow some venting.
Here's the stock oil return/drain on the secondary turbo:

Here's the line modified with a -6 AN fitting welded on.

Here it is fitted on the car, and then with the line hooked up to it.


I later added DEI cool tube around the AN hose to protect it from the heat from the downpipe. The line got routed above the trans and around the back of the motor. The catch can was drilled and ran the -6 line to the other side of the can.
 12-04-16, 01:46 PM
#33
Brakes: Watkins is known for being hard on brakes. On top of that it has a lot of downhill and/or off camber braking zones.
My CL pads up front were done to say the least...I got every last ounce out of them. Once I wore them down past the point they were knocking around in the caliper they were good pads. Were they good enough to deal with those issues again? Probably not. Same goes for the rears, once I modified them to get them to work they were good pads, but I don't think I'll be signing up to modify every set I get.
Additionally my AP rotors had held up great, but were getting down to their last legs. I intended on running them till they completely failed, but will keep them as a last resort backup for the future.
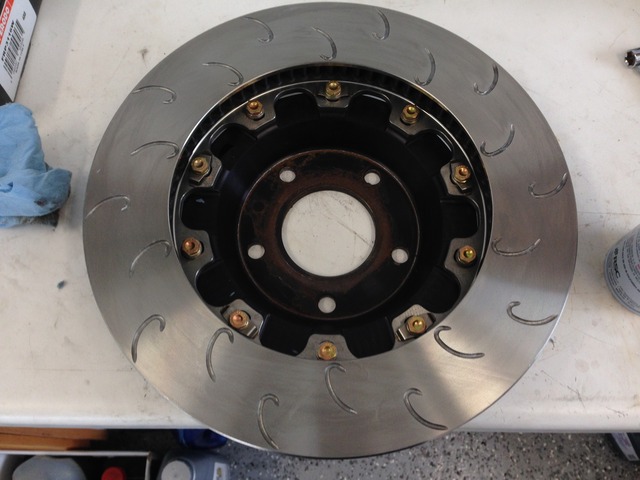
So that called for new pads/rotors up front. I'm putting on fresh AP rotors and will be running Ferodo DS1.11 pads. They're supposed to have good bite/grip but last a bit longer like an endurance pad.
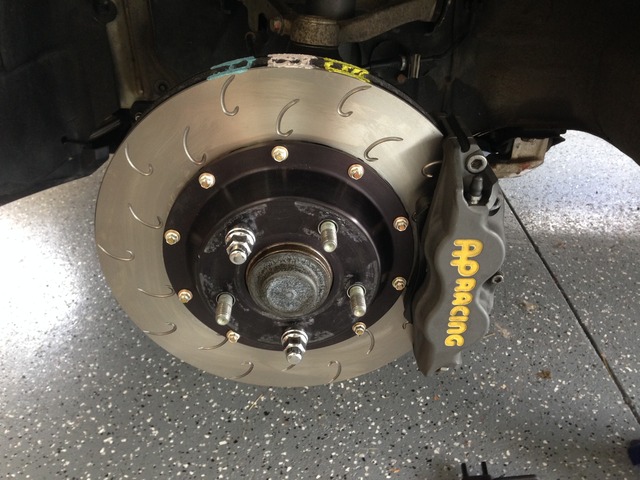
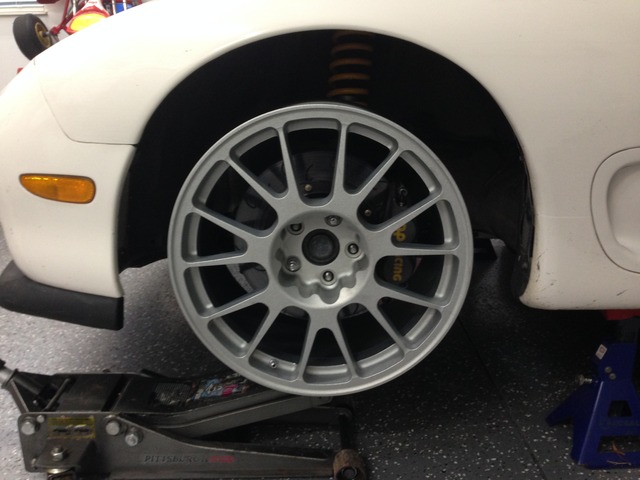
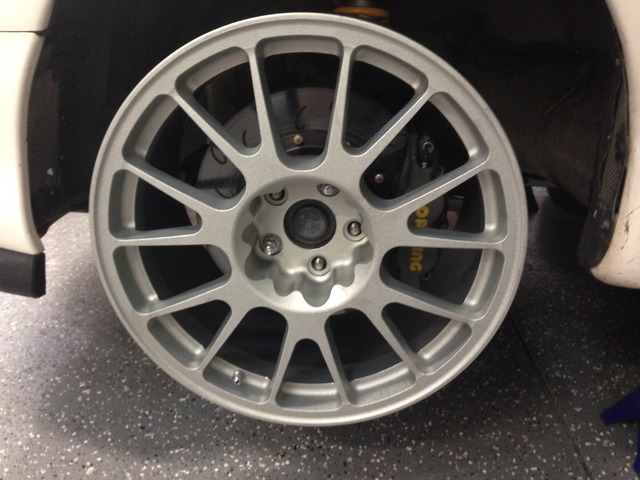
Here are the new pretty rotors mounted with new hardware.
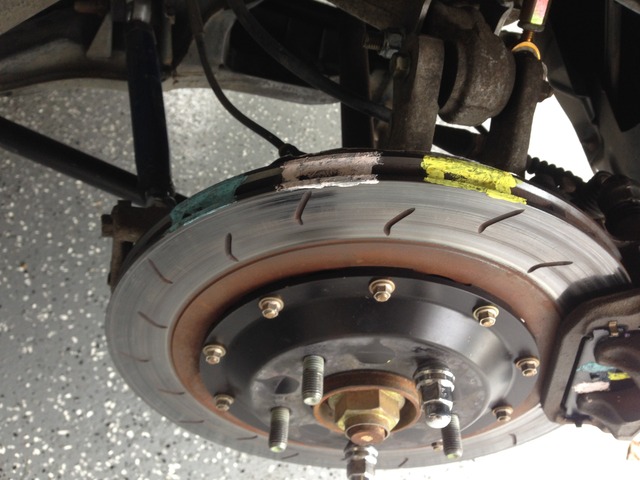
On the rear I went to a lesser compound pad to try to reduce some rear bias and make the car a bit less prone to moving the rear under braking. I also wanted to put on some brake temp paint to try to see what temperatures the brakes were getting to. I had purchased some a while back from Pegasus so thought I'd dig it out. Here I marked up just about every damn surface I could think of.
This stuff is a little hard to put on as it's chalky/chunky. Unfortunately I also had an issue where it rained while I had the garage door open (didn't get on the car at all) and the humidity seemed to ruin the highest temp paint....FUUUUUUU. Well there went that plan.
Oh well, won't be able to do much about it now
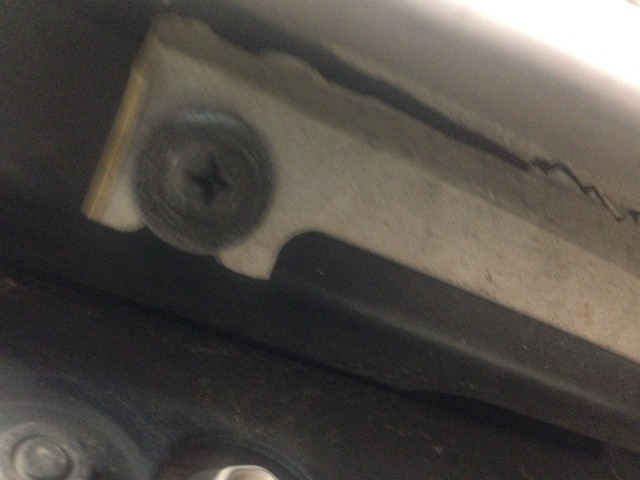
I went and filled up the car to prepare to leave. Finish filling and close the fill door....and it falls down to the ground...DOH. The previous owner had broken it and used JB Weld epoxy to hold it together and it finally failed. I ordered a new one but I won't have time to paint it until after the track season is over likely. So this is how it looks now.

Despite that, I wanted to get the car cleaned up as it was nasty and hadn't been washed in quite some time.
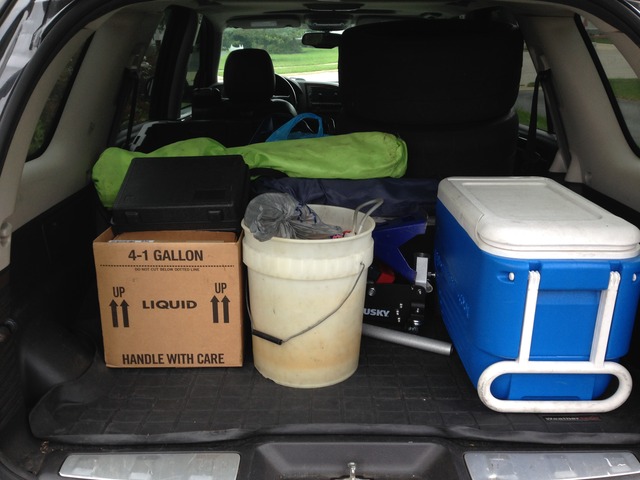
Got a ton of stuff and extra parts loaded up in the truck and ready to roll
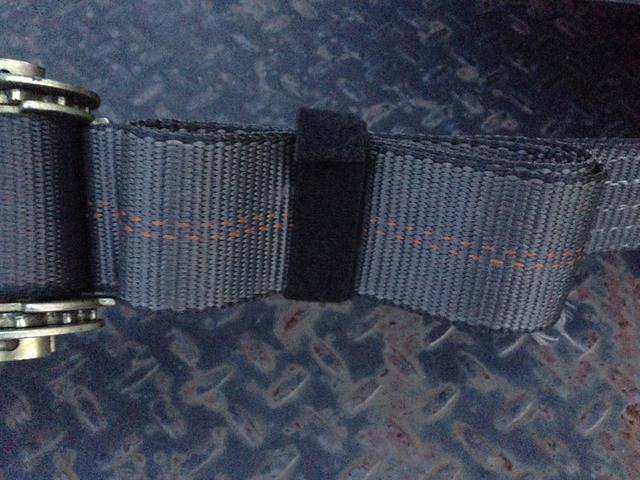
I also finally came up with a good solution for the extra strap length on the car straps. Got some strips of Velcro to hold them together. I spent so long trying to tie them or hold them otherwise and this is a WAY better solution.
My CL pads up front were done to say the least...I got every last ounce out of them. Once I wore them down past the point they were knocking around in the caliper they were good pads. Were they good enough to deal with those issues again? Probably not. Same goes for the rears, once I modified them to get them to work they were good pads, but I don't think I'll be signing up to modify every set I get.

Additionally my AP rotors had held up great, but were getting down to their last legs. I intended on running them till they completely failed, but will keep them as a last resort backup for the future.

So that called for new pads/rotors up front. I'm putting on fresh AP rotors and will be running Ferodo DS1.11 pads. They're supposed to have good bite/grip but last a bit longer like an endurance pad.
Here are the new pretty rotors mounted with new hardware.

On the rear I went to a lesser compound pad to try to reduce some rear bias and make the car a bit less prone to moving the rear under braking. I also wanted to put on some brake temp paint to try to see what temperatures the brakes were getting to. I had purchased some a while back from Pegasus so thought I'd dig it out. Here I marked up just about every damn surface I could think of.


This stuff is a little hard to put on as it's chalky/chunky. Unfortunately I also had an issue where it rained while I had the garage door open (didn't get on the car at all) and the humidity seemed to ruin the highest temp paint....FUUUUUUU. Well there went that plan.

Oh well, won't be able to do much about it now
I went and filled up the car to prepare to leave. Finish filling and close the fill door....and it falls down to the ground...DOH. The previous owner had broken it and used JB Weld epoxy to hold it together and it finally failed. I ordered a new one but I won't have time to paint it until after the track season is over likely. So this is how it looks now.

Despite that, I wanted to get the car cleaned up as it was nasty and hadn't been washed in quite some time.


Got a ton of stuff and extra parts loaded up in the truck and ready to roll

I also finally came up with a good solution for the extra strap length on the car straps. Got some strips of Velcro to hold them together. I spent so long trying to tie them or hold them otherwise and this is a WAY better solution.
 12-04-16, 01:51 PM
#34
Watkins Glen is a track we've talked about going to for a long time and never made the jump to go. I'm guilty in that typically I can do 2 Mid Ohio events for the cost of one "away" event because it's so close/easy. It's also great to shake down the car on a track I know so well. So in the past I've typically chosen to just go to Mid Ohio more often. So with the new car I've vowed to go to a further track at least once a year. This year is Watkins...next year?...maybe Watkins again cause it's AWESOME.
Before going, I ran laps on iRacing as much as I could, and watched as many videos as I could find of the new surface (late 2015+). Even so, nothing can prepare you for the elevation changes at that track in person. It's a rip to drive and frightening at the same time. It's a fast flowing track with tons of elevation change and an absolute rip...it's also closely surrounded by walls in all but 3 turns basically so any mistakes will cost you severely.
The facilities make Mid Ohio seem downright country. The location (especially coming from the West) makes Mid Ohio seem downright urban.
The new surface on the track is great. I can't compare to the old because I had never driven on the old surface, but it was grippy and predictable without chewing up tires which is always nice. The only downside is that the curbs are pretty prominent so you don't use much of them and there's a crown in the middle of the track the whole way around and it makes transitions over the middle of the surface a little goofy at speed.
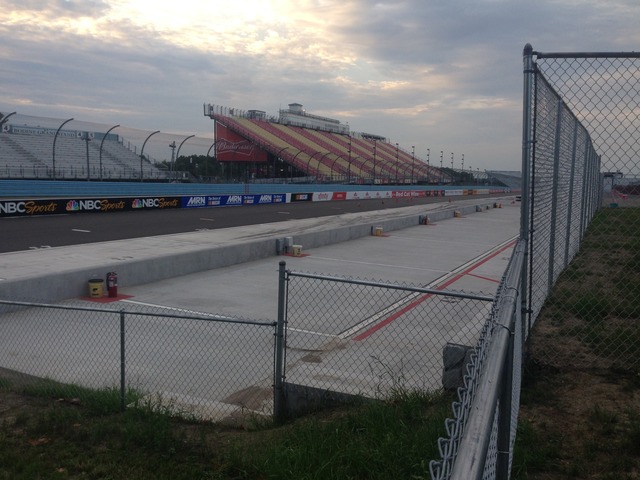
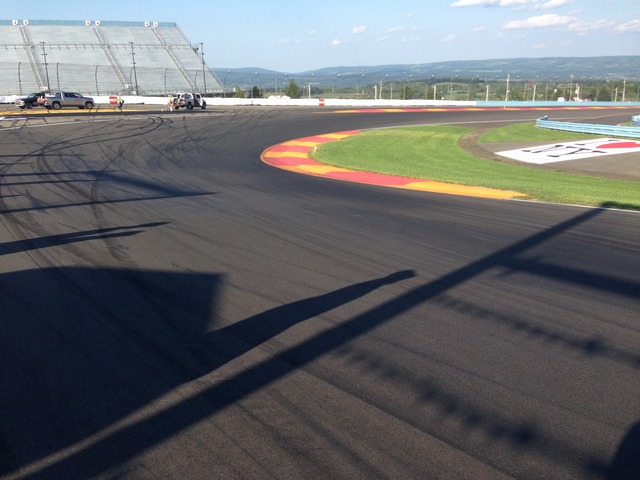
Here are some pics of the track walk we did, but even still you can't capture the elevation change.
Turn 1 looking both forward and back:
Here are the Esses, which is a series of fast sweepers that go up a strong hill. I will say that goin into turn 2 the first times you get up to speed and settling the car and then going to full throttle as you look up the hill and the track goes out of view...that's one of the most "hair on fire" things I've ever done in a car...at least on purpose. haha.
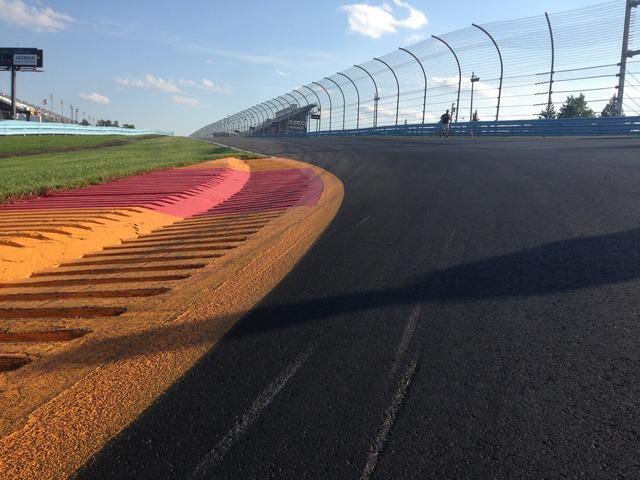
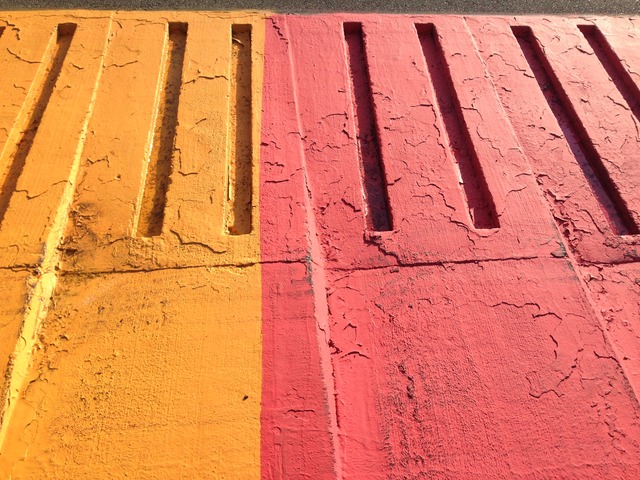
Here's a closeup of the new curbs. We got there and they told us "freshly painted curbs that nobody has driven on yet so they'll be slick" Thanks guys!!!
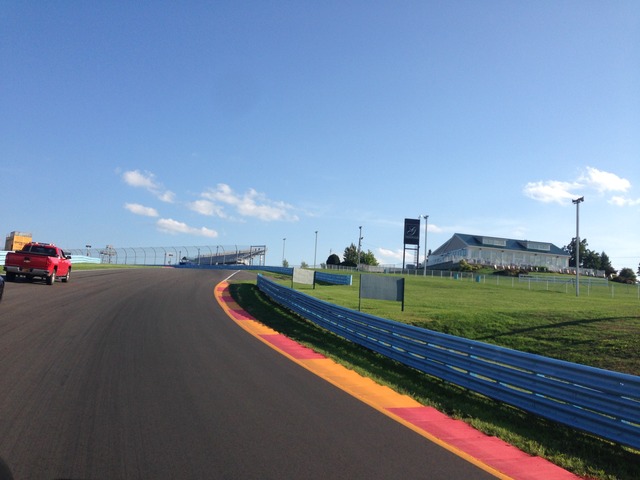
Here's everyone's least favorite Armco surrounding the entire track known as the "blue bushes"
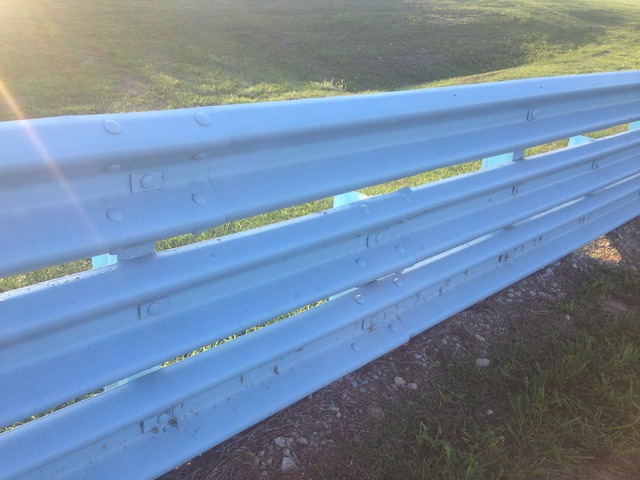
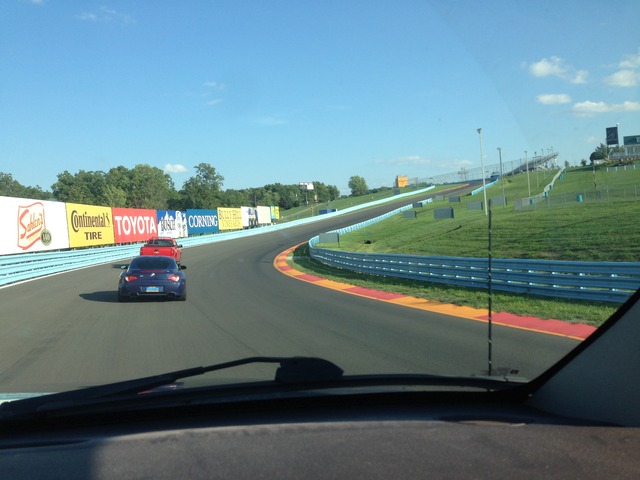
Here's an example of that Armco. this is the last turn going onto the front straight and fast right hander where you'll take it right out to the curb/wall. There's not much room for error at all.
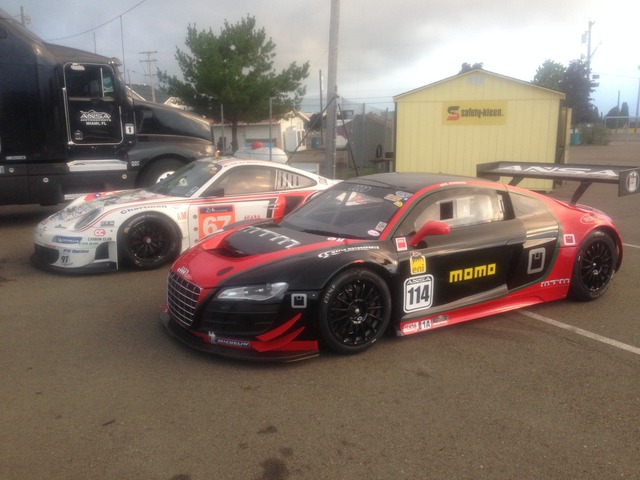
We unloaded Thursday night. There was this nice setup in the pits with us. A big rig hauling 2 former ALMS cars and 2 DTM race cars. I was completely geeked on the DTM cars as I've never seen any in person before. Turns out they were all for one guy. Must be nice.

Before going, I ran laps on iRacing as much as I could, and watched as many videos as I could find of the new surface (late 2015+). Even so, nothing can prepare you for the elevation changes at that track in person. It's a rip to drive and frightening at the same time. It's a fast flowing track with tons of elevation change and an absolute rip...it's also closely surrounded by walls in all but 3 turns basically so any mistakes will cost you severely.
The facilities make Mid Ohio seem downright country. The location (especially coming from the West) makes Mid Ohio seem downright urban.

The new surface on the track is great. I can't compare to the old because I had never driven on the old surface, but it was grippy and predictable without chewing up tires which is always nice. The only downside is that the curbs are pretty prominent so you don't use much of them and there's a crown in the middle of the track the whole way around and it makes transitions over the middle of the surface a little goofy at speed.
Here are some pics of the track walk we did, but even still you can't capture the elevation change.
Turn 1 looking both forward and back:


Here are the Esses, which is a series of fast sweepers that go up a strong hill. I will say that goin into turn 2 the first times you get up to speed and settling the car and then going to full throttle as you look up the hill and the track goes out of view...that's one of the most "hair on fire" things I've ever done in a car...at least on purpose. haha.


Here's a closeup of the new curbs. We got there and they told us "freshly painted curbs that nobody has driven on yet so they'll be slick" Thanks guys!!!

Here's everyone's least favorite Armco surrounding the entire track known as the "blue bushes"

Here's an example of that Armco. this is the last turn going onto the front straight and fast right hander where you'll take it right out to the curb/wall. There's not much room for error at all.

We unloaded Thursday night. There was this nice setup in the pits with us. A big rig hauling 2 former ALMS cars and 2 DTM race cars. I was completely geeked on the DTM cars as I've never seen any in person before. Turns out they were all for one guy. Must be nice.

 12-04-16, 01:56 PM
#35
Day 1 at Watkins: I'm pumped and excited to get out on track. Get out in the first session and I'm getting familiar with the track. Damn the esses are intimidating. on about the 3rd full lap I take the left hander going into the boot, drive down the hill and hit the brakes for the toe of the boot. The car pulls hard to the right...whoa. I take the turn and wonder if it was me or the car that did something goofy. Get out of the turn and the alignment is off...damn it's the car.
I immediate think it's the sway bar that I had been messing with trying to get it to clunk less. Must have come disconnected and I'm yelling in the car at myself that I shouldn't have messed with it. Get back to the pits and prepared to work on the sway and see this:
RF tire is flat....goofy. I got the tire off and couldn't find any punctures. I unfortunately didn't have time to mess with it because I needed to go out with my student.
Student is driving a stock '03 911 Turbo. We go out first session and 4 laps in go into the boot and go pretty hot. I mention we'll want to use more brake next time and he says "the pedal went to the floor....what do I do?"....uhhhh...we need to pit dude! This guy had never been to the track nor studied any videos so I had to walk him thru turn by turn and into the pits so that was interesting. When we got back I told him he needed to bleed his brakes to which he said he didn't know how, had no tools, nor any fluid....oh boy. SO my brother and I helped him bleed his brakes so that he wouldn't miss the weekend from the get-go.
By the time we got my student's car back up and running it was lunchtime. I took my wheel/tire down to a local Toyo dealer. I had brought a spare front tire fortunately so I asked them to please swap them out. He said sure, but it'd take a while....I looked around and we were the only people in the whole place for a shop with 4 service bays. Evidently he sends his whole crew to lunch at one time...doh.
I took my brother back to the track so he wouldn't lose any track time and headed back to the tire shop. When I got there they said it was all good to go. I asked what the problem was and he said "you just lost the bead, it happens at the track. We mounted that tire back on there" I asked about damage to the tire from driving on it flat and he said it looked better than the spare I brought in...ok, he's the tire guy so I'll go with that. I got back and mounted the tire before the first session in the afternoon. You can damn well bet I drove those first few laps on that thing very carefully thinking it'd give out at any moment, but it held up. Ran the rest of Friday without issue.
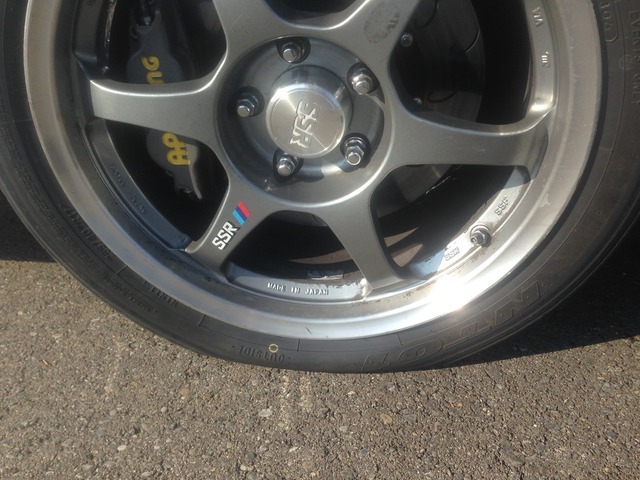
Saturday came around and I was able to get more familiar with the track and have some fun with it. Time were going pretty well for a car on Nittos I thought, but I was still hesitant in places. I came back to the pits in the afternoon and noticed this:
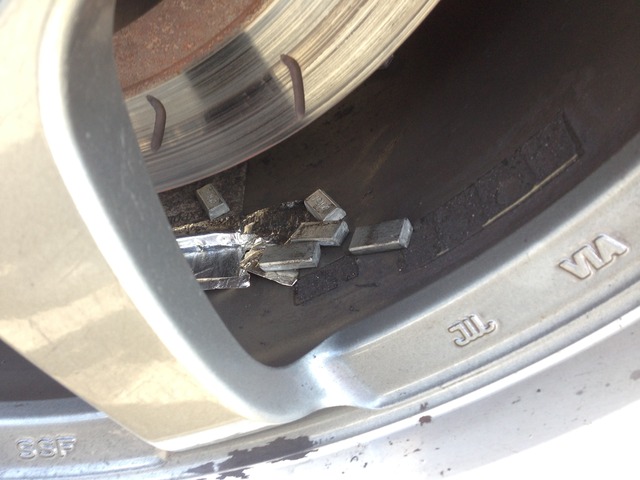
My left rear wheel had gotten so hot it popped off all of its wheel weights like they were skittles. I even tape over them with aluminum tape for reasons like this so that sucks. No major damage, but the car had some vibrations for the rest of the weekend for sure!
Last session on Saturday and I'm having tons of fun really able to go hard thru the esses and other portions of the track. I go down the back straight and notice they give me the meatball flag (black with orange circle) meaning I have a mechanical issue. I go offline and drive slow. everything seems ok so I limp back to the pits. They told me they were smelling gear oil. I had the guy at the black flag station look under the car but he couldn't see anything. I went to the pits to check it out. Sure enough my rear differential was spitting fluid out of the breather....DAMN.
I let the car cool down and then cleaned it up. It was the end of the day anyway so I had time to mess with it. I couldn't see leaks from anywhere else so I have to figure it was getting hot and coming out the breather. I had run pretty much back-to-back stints Sat afternoon and I think that did it. I got it all cleaned up and I'd test it out in the morning.
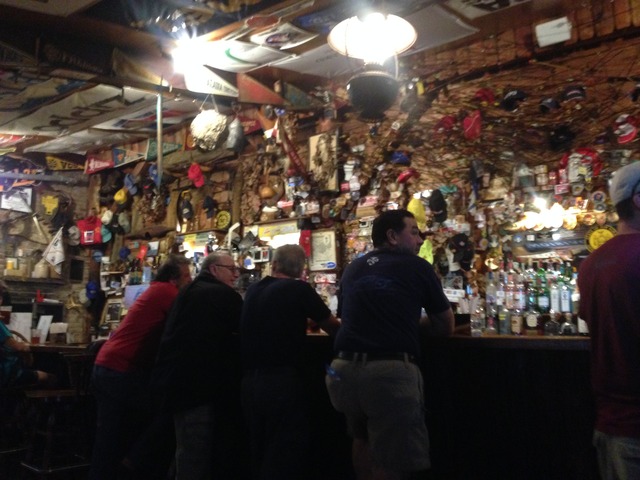
We went to have some drinks at the Seneca lodge which is where all of the racers of past would go hang out. It's cool with a ton of memorabilia, but we didn't stay too long.
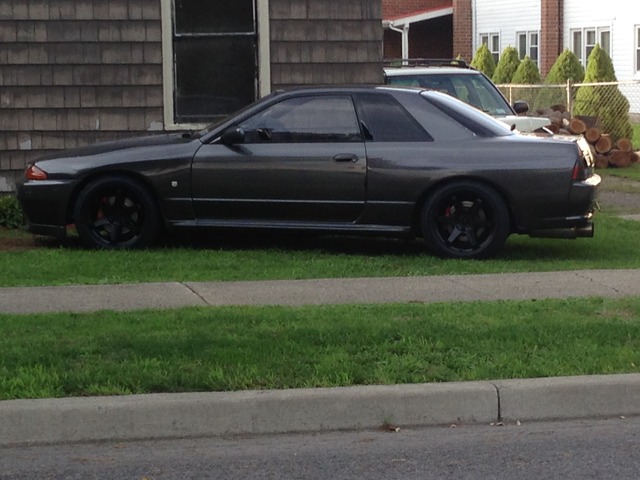
Also saw a random GTR (or clone) in someone's front lawn:
Sunday I tested the car for 3 laps and then came in....everything was ok. I ran Sunday morning where I'd only run 5 hard laps and then come in. That worked and I was able to still have some fun and get good laps.
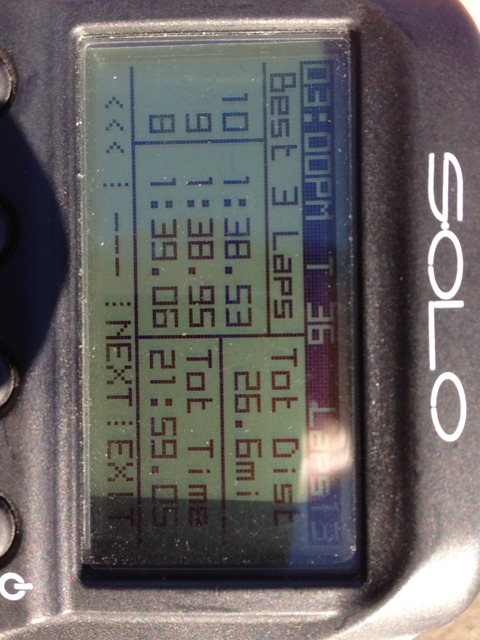
I was able to get a couple laps down in the 2:10.9x's which was beyond my goal for the weekend and in my opinion pretty good for an old car on Nittos.
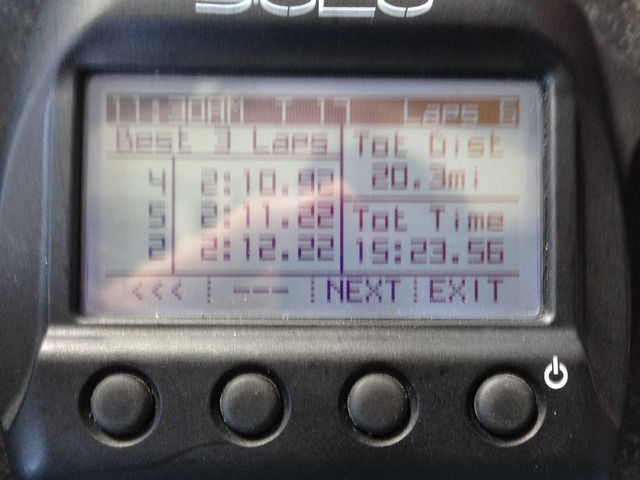
I was also able to run the tank lower with the new/old fuel setup so I was happy with that.
Unfortunately the differential issue reared its head again after the last morning session Sunday. That combined with the RF tire losing a bit of pressure instead of gaining thru the session I decided to pack it in and get a head start on the tow home. All in all though a great weekend.
Here are some videos of Watkins. I will be making a return there when possible.
I immediate think it's the sway bar that I had been messing with trying to get it to clunk less. Must have come disconnected and I'm yelling in the car at myself that I shouldn't have messed with it. Get back to the pits and prepared to work on the sway and see this:

RF tire is flat....goofy. I got the tire off and couldn't find any punctures. I unfortunately didn't have time to mess with it because I needed to go out with my student.
Student is driving a stock '03 911 Turbo. We go out first session and 4 laps in go into the boot and go pretty hot. I mention we'll want to use more brake next time and he says "the pedal went to the floor....what do I do?"....uhhhh...we need to pit dude! This guy had never been to the track nor studied any videos so I had to walk him thru turn by turn and into the pits so that was interesting. When we got back I told him he needed to bleed his brakes to which he said he didn't know how, had no tools, nor any fluid....oh boy. SO my brother and I helped him bleed his brakes so that he wouldn't miss the weekend from the get-go.
By the time we got my student's car back up and running it was lunchtime. I took my wheel/tire down to a local Toyo dealer. I had brought a spare front tire fortunately so I asked them to please swap them out. He said sure, but it'd take a while....I looked around and we were the only people in the whole place for a shop with 4 service bays. Evidently he sends his whole crew to lunch at one time...doh.
I took my brother back to the track so he wouldn't lose any track time and headed back to the tire shop. When I got there they said it was all good to go. I asked what the problem was and he said "you just lost the bead, it happens at the track. We mounted that tire back on there" I asked about damage to the tire from driving on it flat and he said it looked better than the spare I brought in...ok, he's the tire guy so I'll go with that. I got back and mounted the tire before the first session in the afternoon. You can damn well bet I drove those first few laps on that thing very carefully thinking it'd give out at any moment, but it held up. Ran the rest of Friday without issue.
Saturday came around and I was able to get more familiar with the track and have some fun with it. Time were going pretty well for a car on Nittos I thought, but I was still hesitant in places. I came back to the pits in the afternoon and noticed this:

My left rear wheel had gotten so hot it popped off all of its wheel weights like they were skittles. I even tape over them with aluminum tape for reasons like this so that sucks. No major damage, but the car had some vibrations for the rest of the weekend for sure!
Last session on Saturday and I'm having tons of fun really able to go hard thru the esses and other portions of the track. I go down the back straight and notice they give me the meatball flag (black with orange circle) meaning I have a mechanical issue. I go offline and drive slow. everything seems ok so I limp back to the pits. They told me they were smelling gear oil. I had the guy at the black flag station look under the car but he couldn't see anything. I went to the pits to check it out. Sure enough my rear differential was spitting fluid out of the breather....DAMN.
I let the car cool down and then cleaned it up. It was the end of the day anyway so I had time to mess with it. I couldn't see leaks from anywhere else so I have to figure it was getting hot and coming out the breather. I had run pretty much back-to-back stints Sat afternoon and I think that did it. I got it all cleaned up and I'd test it out in the morning.
We went to have some drinks at the Seneca lodge which is where all of the racers of past would go hang out. It's cool with a ton of memorabilia, but we didn't stay too long.

Also saw a random GTR (or clone) in someone's front lawn:

Sunday I tested the car for 3 laps and then came in....everything was ok. I ran Sunday morning where I'd only run 5 hard laps and then come in. That worked and I was able to still have some fun and get good laps.
I was able to get a couple laps down in the 2:10.9x's which was beyond my goal for the weekend and in my opinion pretty good for an old car on Nittos.

I was also able to run the tank lower with the new/old fuel setup so I was happy with that.

Unfortunately the differential issue reared its head again after the last morning session Sunday. That combined with the RF tire losing a bit of pressure instead of gaining thru the session I decided to pack it in and get a head start on the tow home. All in all though a great weekend.
Here are some videos of Watkins. I will be making a return there when possible.
12-04-16, 02:02 PM
#36
back in Ohio I had to prepare for my next event at Mid Ohio. Timing was going to be tight because I was going on vacation to the Dominican for a friend's wedding for a week which would only give me about a week and one weekend to prepare for the next event.
Items on the list:
Differential - what caused the issue as I hadn't dealt with that before? First thoughts were 2 things. 1) I run thicker than factory fluid at 75w-110 compared to the factory 75w-90. Was the extra viscosity causing more friction and heat? 2) Watkins is way longer and under power MUCH more than Mid Ohio, was that just causing things to get hotter? So my quick and easy solution was that I'd drain the fluid and refill with 75w-90. I use Amsoil Severe Gear in both weights. I can tell you that the fluid that got drained out looked bad, especially considering it only had one event on it, so it was getting hot for sure.
There was a small oil leak coming from the turbo drain where I put the catch can line. Oh BTW...that **** did NOT work any better. I'm kinda running out of ideas there and it's annoying as crap to keep draining/filling. I tried tightening the fitting along with using Teflon tape, but that didn't work. I think the cheap-o JEGS fitting I used is to blame as I replaced it with an Aeroquip unit and the leaking stopped (at least on the street).
The RF tire I had taken off, inspected for damage (it was ok) and then had the bead area on the wheel scuffed up to make sure it'd seal. Flipped the tire while we had it off.
Tightened up the front sway bar again to try to reduce the clunking. That's getting annoying too.
Brakes: Watkins is really hard on brakes, but I had to bleed mine during the weekend and I still had more pedal travel than I would have liked. The car remained consistent but just had the pedal going down further than I wanted. I decided it was time for a change.
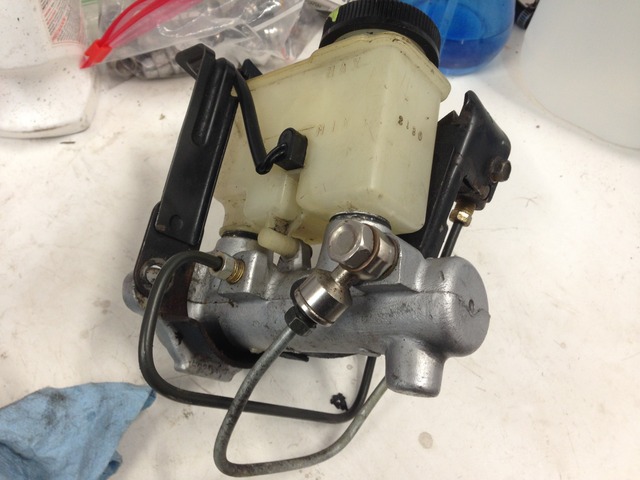
First up: 929 Master Cylinder. This goes to a bigger 1" M/C bore than the stock piece which should move more fluid per pedal movement requiring less pedal travel for the same fluid movement. That should give a firmer pedal feel too. Just so happens I had run one on my silver car, I just never got around to swapping it. Now as the time. You have to custom bend your own hard line to make it work...but that was already done on my old car so it was a swap.
Back in the car and my M/C brace from IR Performance installed (had been running previously)
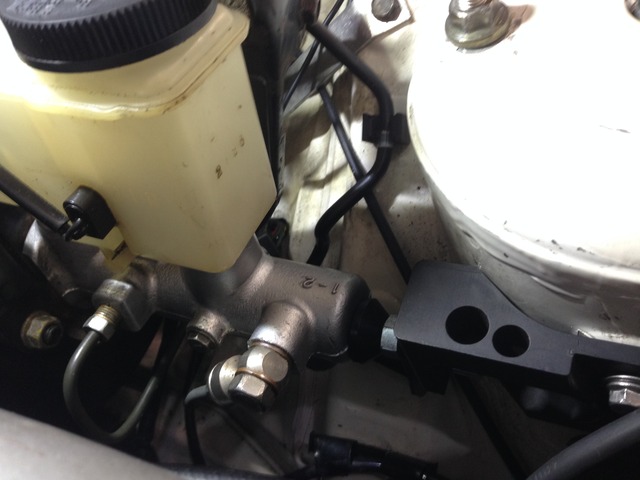
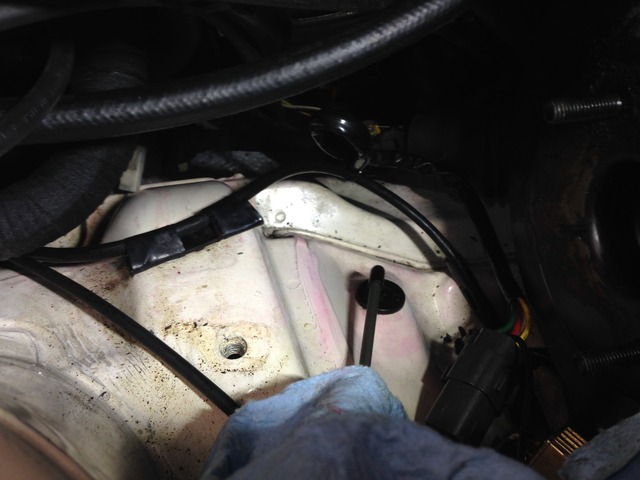
One bummer I found when doing that is that there was some staining on the paint from earlier in the year when I had a leak from the water/meth injection. Pink dye from the meth that unfortunately wouldn't come out...crap.
Fluid: it was time to stop messing around with crap I was having to bleed at the track. Andy had been running Endless and said it gave great pedal feel and WAY longer bleed intervals. Sounded good to me!
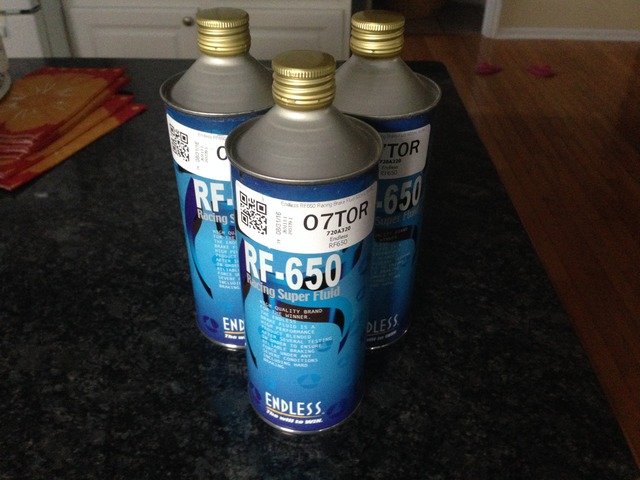
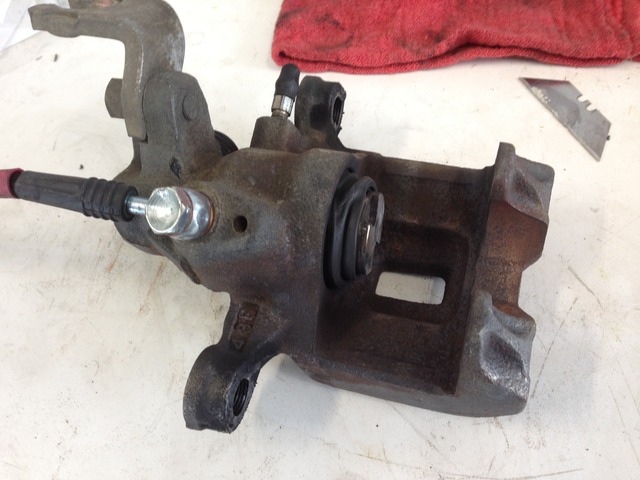
Here's the deal though: that **** is EXPENSIVE. $42+shipping per half liter...yeah that's $140 of brake fluid in those 3 bottles. Because of that I had zero intention of trying to break open the system again after flushing. So I also decided to rebuild my rear calipers at this time. Remember how my wheel weights melted off my LR wheel at Watkins? Well it turns out that caliper (the one with the bad dust seal previously) was hanging up anyway so this was a good idea to do now.
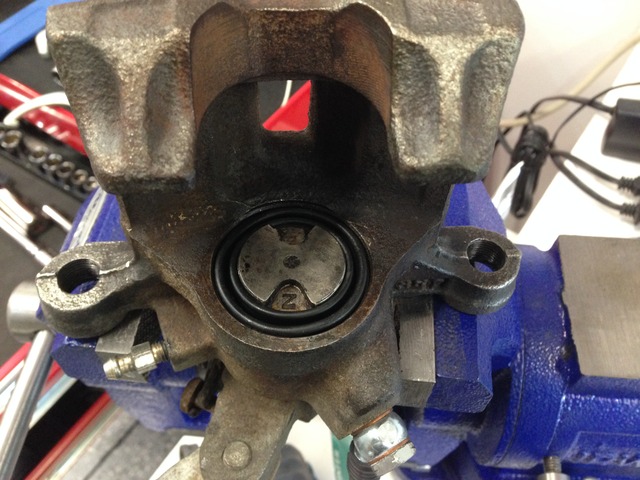
No in-progress pictures, but it was a pain just trying to get the snap ring out of the bore and then back in. Other than that, pretty straight forward. I used a factory rebuild kit which came with all of the appropriate greases, seals, and even a small bottle of brake fluid to lube the bore with for reassembly.
Also to protect the rear calipers a bit better I bought titanium pad shims. I had to buy their thicker 1mm ones as that's all they stock right now, so I plan on only running the shim that's on the piston side so that I don't have any clearance issues with new pads. Of course the new shims have the hole that matches to the mazda pad shape...except it didn't line up so I had to drill it out a bit to get the shims to work. No biggie, but a pain in the butt as it turns out titanium is hard to drill thru with a normal hand drill..haha.

I also put new sealant on the rear brake bleeders (speed bleeders).
Once that was sorted I could put the brakes back together. Everything went relatively smoothly except for the bleeding. I could not get a good pedal feel and it still felt like air in the system even after flushing all 3 bottles. At that point I knew there was only fresh fluid in the system so I started bleeding out fluid and then just putting it right back in the reservoir. I had to do A TON of bleeding before the damn thing felt good again.
As I'm shutting the hood feeling good about the work I see...is that headlight cover looking out of whack?
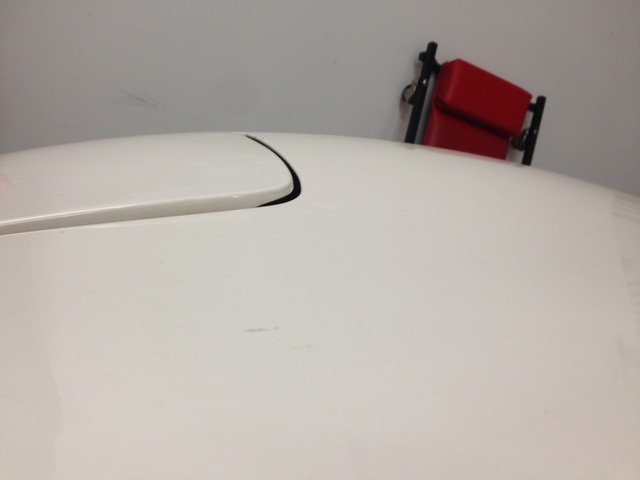
Sure enough the damn thing is cracked from age/vibration!
I really did not have the patience or time to mess with it, so for now it's epoxied back together.
At least the car was ready in time for the event though.
Items on the list:
Differential - what caused the issue as I hadn't dealt with that before? First thoughts were 2 things. 1) I run thicker than factory fluid at 75w-110 compared to the factory 75w-90. Was the extra viscosity causing more friction and heat? 2) Watkins is way longer and under power MUCH more than Mid Ohio, was that just causing things to get hotter? So my quick and easy solution was that I'd drain the fluid and refill with 75w-90. I use Amsoil Severe Gear in both weights. I can tell you that the fluid that got drained out looked bad, especially considering it only had one event on it, so it was getting hot for sure.
There was a small oil leak coming from the turbo drain where I put the catch can line. Oh BTW...that **** did NOT work any better. I'm kinda running out of ideas there and it's annoying as crap to keep draining/filling. I tried tightening the fitting along with using Teflon tape, but that didn't work. I think the cheap-o JEGS fitting I used is to blame as I replaced it with an Aeroquip unit and the leaking stopped (at least on the street).
The RF tire I had taken off, inspected for damage (it was ok) and then had the bead area on the wheel scuffed up to make sure it'd seal. Flipped the tire while we had it off.
Tightened up the front sway bar again to try to reduce the clunking. That's getting annoying too.
Brakes: Watkins is really hard on brakes, but I had to bleed mine during the weekend and I still had more pedal travel than I would have liked. The car remained consistent but just had the pedal going down further than I wanted. I decided it was time for a change.
First up: 929 Master Cylinder. This goes to a bigger 1" M/C bore than the stock piece which should move more fluid per pedal movement requiring less pedal travel for the same fluid movement. That should give a firmer pedal feel too. Just so happens I had run one on my silver car, I just never got around to swapping it. Now as the time. You have to custom bend your own hard line to make it work...but that was already done on my old car so it was a swap.

Back in the car and my M/C brace from IR Performance installed (had been running previously)

One bummer I found when doing that is that there was some staining on the paint from earlier in the year when I had a leak from the water/meth injection. Pink dye from the meth that unfortunately wouldn't come out...crap.

Fluid: it was time to stop messing around with crap I was having to bleed at the track. Andy had been running Endless and said it gave great pedal feel and WAY longer bleed intervals. Sounded good to me!

Here's the deal though: that **** is EXPENSIVE. $42+shipping per half liter...yeah that's $140 of brake fluid in those 3 bottles. Because of that I had zero intention of trying to break open the system again after flushing. So I also decided to rebuild my rear calipers at this time. Remember how my wheel weights melted off my LR wheel at Watkins? Well it turns out that caliper (the one with the bad dust seal previously) was hanging up anyway so this was a good idea to do now.

No in-progress pictures, but it was a pain just trying to get the snap ring out of the bore and then back in. Other than that, pretty straight forward. I used a factory rebuild kit which came with all of the appropriate greases, seals, and even a small bottle of brake fluid to lube the bore with for reassembly.

Also to protect the rear calipers a bit better I bought titanium pad shims. I had to buy their thicker 1mm ones as that's all they stock right now, so I plan on only running the shim that's on the piston side so that I don't have any clearance issues with new pads. Of course the new shims have the hole that matches to the mazda pad shape...except it didn't line up so I had to drill it out a bit to get the shims to work. No biggie, but a pain in the butt as it turns out titanium is hard to drill thru with a normal hand drill..haha.


I also put new sealant on the rear brake bleeders (speed bleeders).
Once that was sorted I could put the brakes back together. Everything went relatively smoothly except for the bleeding. I could not get a good pedal feel and it still felt like air in the system even after flushing all 3 bottles. At that point I knew there was only fresh fluid in the system so I started bleeding out fluid and then just putting it right back in the reservoir. I had to do A TON of bleeding before the damn thing felt good again.
As I'm shutting the hood feeling good about the work I see...is that headlight cover looking out of whack?

Sure enough the damn thing is cracked from age/vibration!

I really did not have the patience or time to mess with it, so for now it's epoxied back together.
At least the car was ready in time for the event though.
12-04-16, 02:10 PM
#37
Something else I was trying out this event. Carpet protector. I learned on the last car that taking the carpet out of these cars is a MAJOR pain in the *** as everything including the dash has to come out of the interior to do it...NO THANKS. On top of that good USED black carpet usually runs about $500 these days...pass.
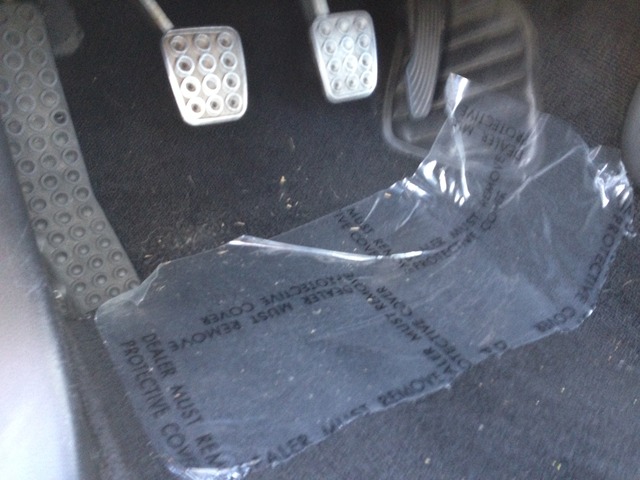
When we run at the track you have to remove your floor mats for safety to make sure your feet don't get obstructed by them. On the silver car I was starting to get some wear from my shoes on the carpet from track events and I'd like to avoid that on this car if I can. Remember I'm still dumb enough to think I can have a nice track car? So I bought this stuff which is the plastic they put down at dealers. Have to buy a big roll, but I'll let you know how it goes. THe first weekend it worked pretty good for me. I'll probably use a bigger size next time just to help with where I put my feet getting in and out. I can also make it smoother and better install, this was just a quickie at the track.
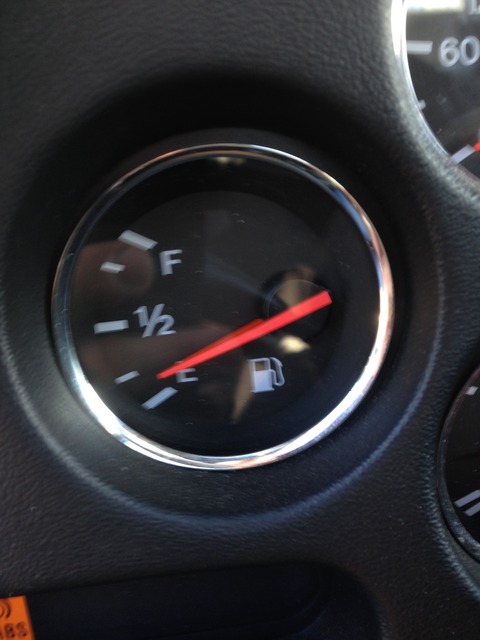
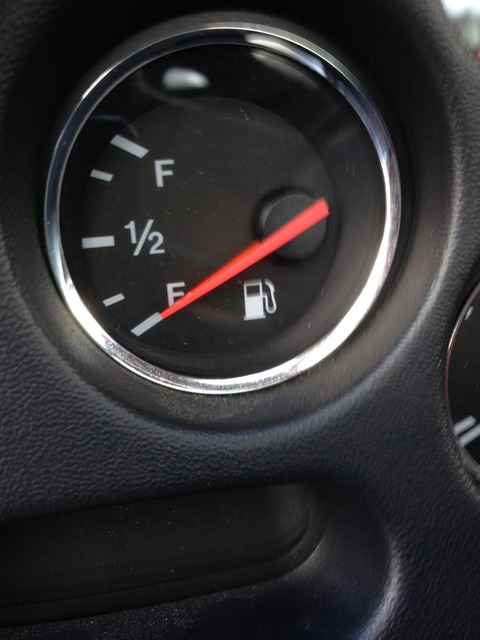
September event went well overall. I was able to really test out the fuel plate in the tank and I'm getting similar performance to what I did before. I know now that my tank sender is messed up from going in and out of the car so many times, but I'm still getting it down to about an actual 1/8 of a tank or so before fuel starve which is all I need.
Here's the lowest I got it after a run: in actuality I found that there's about 3-4 gallons at this level so the gauge is reading low.
I was also closing in on my best times at Mid Ohio that I had been chasing. The goal was to get this car as fast as my old silver car (1:38.7) to prove I hadn't lost my nerve driving and that I hadn't messed up anything with the build of this car. My car always runs the best in the fall at Mid Ohio. The combo of the cool air yet warm track make for the best combo there.
On Friday it was supposed to rain the whole day. Thankfully the weather held out and we got some good runs in the morning. There was also some cool company there, like this:
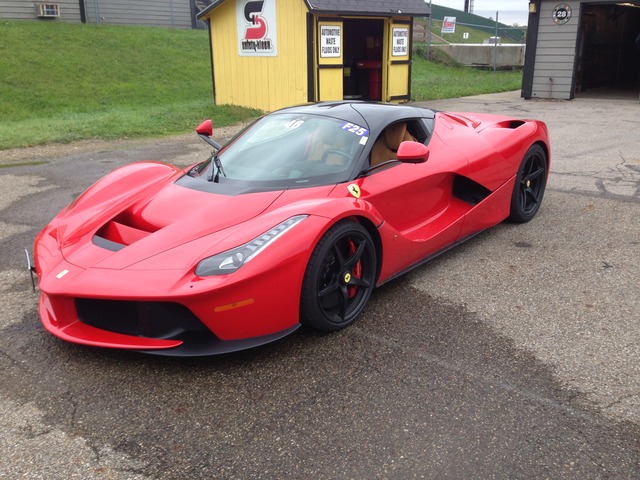
His son had his 918 up there as well. Got to go out on track with the LaFerrari. It was somewhat anticlimactic, but still cool as crap to see the guy using it appropriately.
The rear wing is crazy in that it constantly moves angle, but also depth and was mesmerizing when behind it..haha. Also have major respect to Mr. Ross for driving it on the track and then driving it home in the rain...baller.
Saturday had a pretty busy paddock with a ton of cars. Another cool one to see: Near stock white exterior, black interior, 6-speed. Love it.

It was his first event so I just told him to make sure he drove it home!
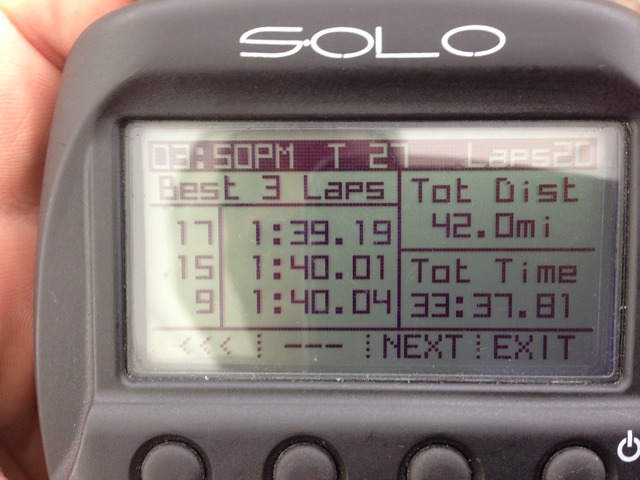
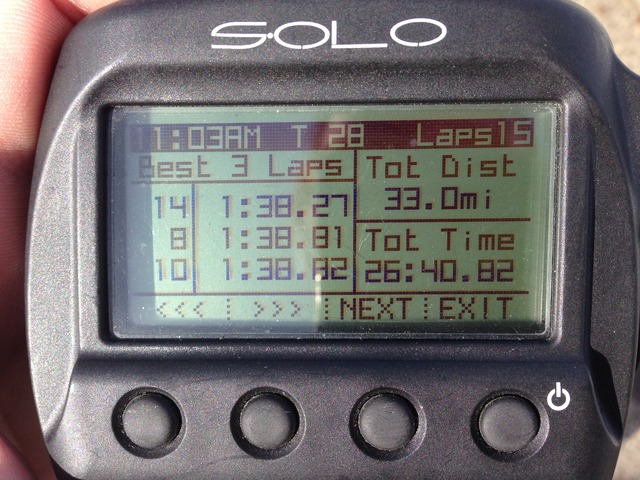
Car ran well, but it wasn't until Sunday that I was able to get some clear laps. Sunday afternoon I put together a 1:39.3 and then I was able to do better during the last session of the afternoon getting down to a 1:39.1. In my mind that was great, as that's pretty damn close to the :38.7 so that confirms that the car has the speed in my mind.
I did run into an issue. You'll notice that my :39.1 was on lap 17 of that session. They had combined the last 2 run groups (advanced and instructor) and I was having fun just hot lapping the car and ran a full 30 mins. Lo and behold the damn diff overheated again!! I was able to come in and confirm fluid had started coming out and I used my laser thermometer to see that the diff cover temps were 250F which means the fluid inside is definitely getting too hot. Gonna have to make a change before the next event it seems.
Here's some fun I had in the advanced group Sunday afternoon. Short version first, long version 2nd. I knew the gentleman in the red 991 GT3 and he was the rabbit I was chasing. His car is faster, but knew I could make it close if I drove it hard.
It was fun playing around with the 911 race car. Our cars were surprisingly similar in speed.
Here's the long version showing pretty much the whole session. You can see I have to work through some traffic on my quest for the red car.
When we run at the track you have to remove your floor mats for safety to make sure your feet don't get obstructed by them. On the silver car I was starting to get some wear from my shoes on the carpet from track events and I'd like to avoid that on this car if I can. Remember I'm still dumb enough to think I can have a nice track car? So I bought this stuff which is the plastic they put down at dealers. Have to buy a big roll, but I'll let you know how it goes. THe first weekend it worked pretty good for me. I'll probably use a bigger size next time just to help with where I put my feet getting in and out. I can also make it smoother and better install, this was just a quickie at the track.

September event went well overall. I was able to really test out the fuel plate in the tank and I'm getting similar performance to what I did before. I know now that my tank sender is messed up from going in and out of the car so many times, but I'm still getting it down to about an actual 1/8 of a tank or so before fuel starve which is all I need.
Here's the lowest I got it after a run: in actuality I found that there's about 3-4 gallons at this level so the gauge is reading low.

I was also closing in on my best times at Mid Ohio that I had been chasing. The goal was to get this car as fast as my old silver car (1:38.7) to prove I hadn't lost my nerve driving and that I hadn't messed up anything with the build of this car. My car always runs the best in the fall at Mid Ohio. The combo of the cool air yet warm track make for the best combo there.
On Friday it was supposed to rain the whole day. Thankfully the weather held out and we got some good runs in the morning. There was also some cool company there, like this:

His son had his 918 up there as well. Got to go out on track with the LaFerrari. It was somewhat anticlimactic, but still cool as crap to see the guy using it appropriately.
The rear wing is crazy in that it constantly moves angle, but also depth and was mesmerizing when behind it..haha. Also have major respect to Mr. Ross for driving it on the track and then driving it home in the rain...baller.
Saturday had a pretty busy paddock with a ton of cars. Another cool one to see: Near stock white exterior, black interior, 6-speed. Love it.

It was his first event so I just told him to make sure he drove it home!
Car ran well, but it wasn't until Sunday that I was able to get some clear laps. Sunday afternoon I put together a 1:39.3 and then I was able to do better during the last session of the afternoon getting down to a 1:39.1. In my mind that was great, as that's pretty damn close to the :38.7 so that confirms that the car has the speed in my mind.

I did run into an issue. You'll notice that my :39.1 was on lap 17 of that session. They had combined the last 2 run groups (advanced and instructor) and I was having fun just hot lapping the car and ran a full 30 mins. Lo and behold the damn diff overheated again!! I was able to come in and confirm fluid had started coming out and I used my laser thermometer to see that the diff cover temps were 250F which means the fluid inside is definitely getting too hot. Gonna have to make a change before the next event it seems.
Here's some fun I had in the advanced group Sunday afternoon. Short version first, long version 2nd. I knew the gentleman in the red 991 GT3 and he was the rabbit I was chasing. His car is faster, but knew I could make it close if I drove it hard.
It was fun playing around with the 911 race car. Our cars were surprisingly similar in speed.
Here's the long version showing pretty much the whole session. You can see I have to work through some traffic on my quest for the red car.
12-04-16, 02:19 PM
#38
prep for event 6: last one of the year.
Catch can: ****'s still not working as I'd like and I have to empty after every session. Didn't have time to try anything new for this event so it'll have to wait until next year. What I did need to shore up was that the line I added to the rear turbo oil drain was still weeping and driving me crazy. So I took it off and capped the line on the catch can. To do things properly on the turbo side I had to take off the line and replace it with the factory one and new gaskets. WHAT A PAIN IN THE *** that is while everything is on the car. I hope to not have to do that again.
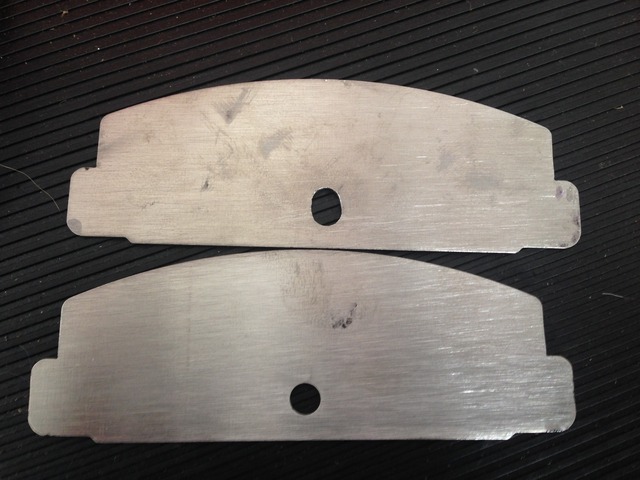
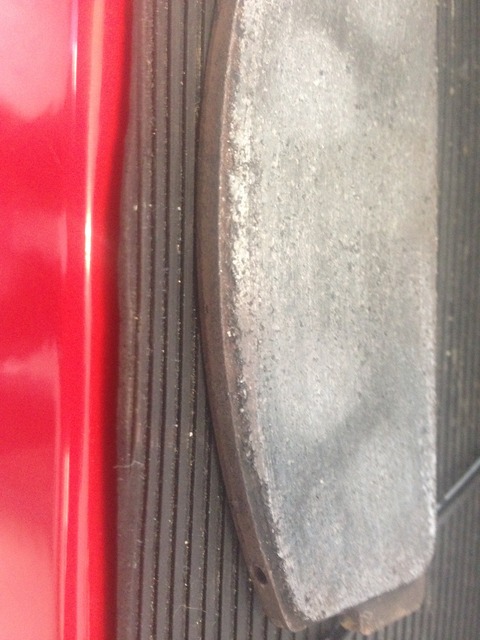
Brake pads: the front pads were low enough I wasn't sure they'd handle a full 3 days so I replaced with new ones. You can see I'm getting some chunking on the corners of the trailing edge of the pads as well which tells me they're running too hot and I need to work on brake cooling for next year again.
Here I compare new vs used pad thickness. The old ones aren't going in the trash by any means and will be kept for backups or use on 1-2 day events.
Rear brakes: despite the rebuild I'm still getting more significant wear and some tapered wear on the outside pad. More so on the driver's side than the passenger as well. I think that the sliders aren't working that great, so I'm going to a different grease and using the Yamalube Moly grease I use for things like pilot bearings. The ceramic NAPA grease I was using holds up great to the heat, but is kind of sticky. Here you can see that I hosed this set of rear pads pretty much to the core:
compared to the inside pad there's more meat there:

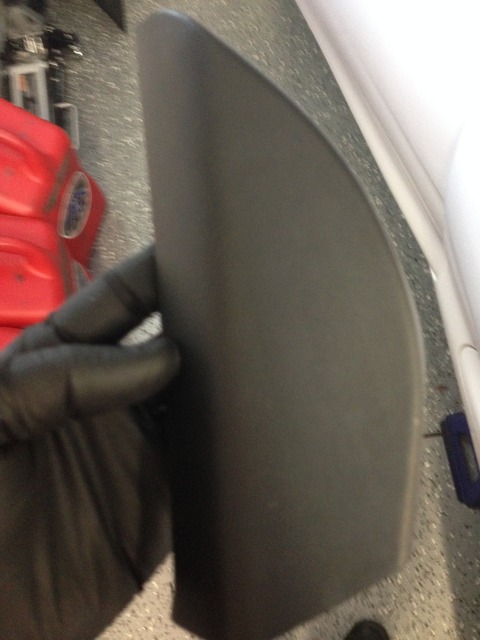
Quick interior fix: I had randomly lost the inner door handle cover on the passenger side - crap just flew off one track day earlier this year. Here's the replacement:

Differential: It's funny that I had changed the differential before the Watkins event because I was worried about the noise the old one was making. The one I put in is the stock 60k mile unit from the 94 car. Not sure what's going on with it. About the only thing I can think of is that it must have a bearing going out or something. I can tell you that after one event that it turned the Amsoil fluid pretty damn nasty.
I realize that running a diff cooler would be ideal here. That'd make sure it never got too hot to boil out the breather. However, that's one more complication on and already complicated track car. I'd like to avoid that if at all possible.
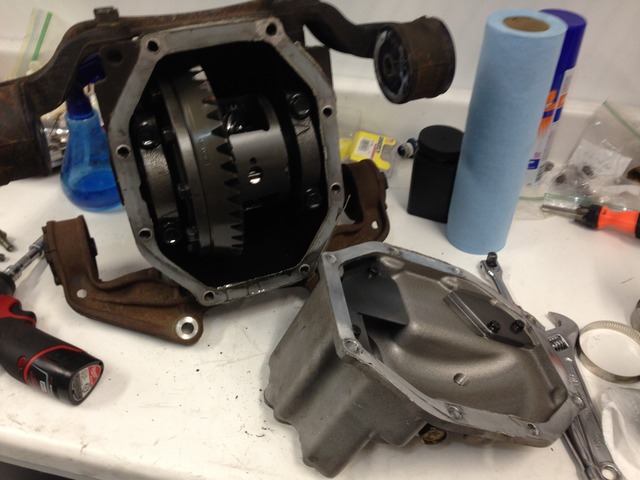
Instead I had a friend help me take the old diff and give it a quick refresh. We replaced the pinion bearings and races, oil seals, crush tube, and reset the backlash. The beginning backlash setting was out of spec confirming that was like the cause of the noise I was hearing.
So back in the familiar position for the car again:
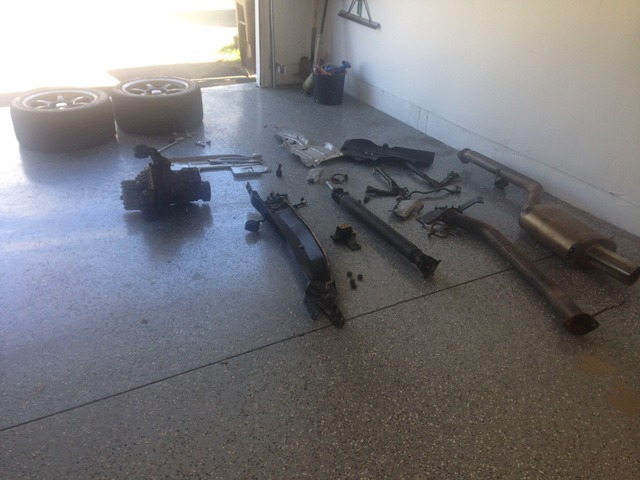
replacing the differential isn't super hard, but requires a lot of crap to come out of the car. It's further complicated when I have my transmission cross member just adding to the work both in and out. Here's a quick view of the fun that comes out of the car for the job
Also still used pizza boxes to hold the axles out of the way of the diff. Side note I eat too much pizza that these always seem to be available to me
Once back in the car I once again filled it up with Amsoil severe gear 75w-90.
Catch can: ****'s still not working as I'd like and I have to empty after every session. Didn't have time to try anything new for this event so it'll have to wait until next year. What I did need to shore up was that the line I added to the rear turbo oil drain was still weeping and driving me crazy. So I took it off and capped the line on the catch can. To do things properly on the turbo side I had to take off the line and replace it with the factory one and new gaskets. WHAT A PAIN IN THE *** that is while everything is on the car. I hope to not have to do that again.
Brake pads: the front pads were low enough I wasn't sure they'd handle a full 3 days so I replaced with new ones. You can see I'm getting some chunking on the corners of the trailing edge of the pads as well which tells me they're running too hot and I need to work on brake cooling for next year again.

Here I compare new vs used pad thickness. The old ones aren't going in the trash by any means and will be kept for backups or use on 1-2 day events.
Rear brakes: despite the rebuild I'm still getting more significant wear and some tapered wear on the outside pad. More so on the driver's side than the passenger as well. I think that the sliders aren't working that great, so I'm going to a different grease and using the Yamalube Moly grease I use for things like pilot bearings. The ceramic NAPA grease I was using holds up great to the heat, but is kind of sticky. Here you can see that I hosed this set of rear pads pretty much to the core:

compared to the inside pad there's more meat there:

Quick interior fix: I had randomly lost the inner door handle cover on the passenger side - crap just flew off one track day earlier this year. Here's the replacement:


Differential: It's funny that I had changed the differential before the Watkins event because I was worried about the noise the old one was making. The one I put in is the stock 60k mile unit from the 94 car. Not sure what's going on with it. About the only thing I can think of is that it must have a bearing going out or something. I can tell you that after one event that it turned the Amsoil fluid pretty damn nasty.
I realize that running a diff cooler would be ideal here. That'd make sure it never got too hot to boil out the breather. However, that's one more complication on and already complicated track car. I'd like to avoid that if at all possible.
Instead I had a friend help me take the old diff and give it a quick refresh. We replaced the pinion bearings and races, oil seals, crush tube, and reset the backlash. The beginning backlash setting was out of spec confirming that was like the cause of the noise I was hearing.
So back in the familiar position for the car again:

replacing the differential isn't super hard, but requires a lot of crap to come out of the car. It's further complicated when I have my transmission cross member just adding to the work both in and out. Here's a quick view of the fun that comes out of the car for the job

Also still used pizza boxes to hold the axles out of the way of the diff. Side note I eat too much pizza that these always seem to be available to me

Once back in the car I once again filled it up with Amsoil severe gear 75w-90.
12-04-16, 02:22 PM
#39
Event 6: Mid Ohio with OVRPCA. Weather was going to be pretty damn great for fast times. The only downsides is that it was COLD in the mornings. Friday morning it was 39 degrees when I showed up to the track!! that's a little TOO cold. First couple of sessions were pretty damn slick, but the good thing is that the track warmed up pretty quick.
As always there's cool stuff at the track. I didn't get pictures but the guy from Kentucky with the Ferrari 458 Challenge race car was there....that thing is insanely awesome. Definitely have to watch your mirrors for it as it closes FAST.
I also totally loved this C6Z that is painted Signal Green which is the Porsche color they put on select 911 GT3s.
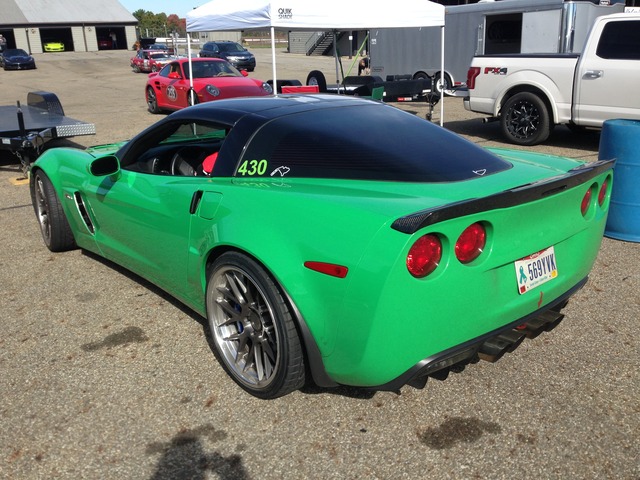
It had ZR1 carbon brakes and a bunch of motor work and sounded awesome. I ended up talking to the guy and doing a ride along with him later in the weekend and helping him find some time. It's his first year with the car and he's getting up to speed in it pretty well.
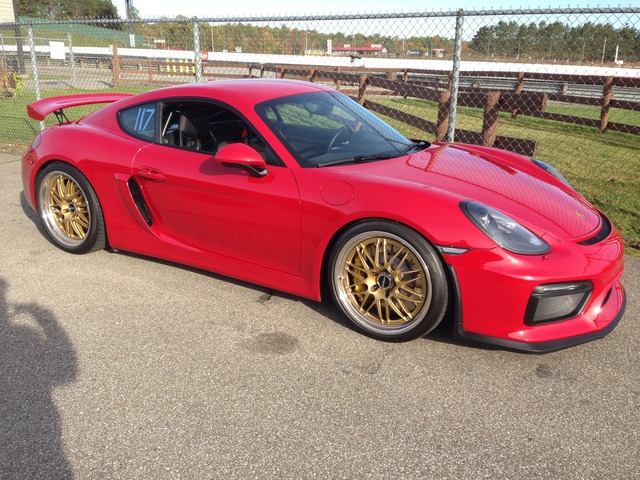
I also liked the gold wheels on this Carmine Red GT4. I could definitely see myself owning one of these...you know...when my kids graduate college or something...hahaha.
There was also this high HP GTR that was running Michelin slicks. Here you can see me point him by and hang close until the back straight where he straight WALKS away. I can keep him in sight on the back side, but then we get to the back straight again and HE GONE.
As always there's cool stuff at the track. I didn't get pictures but the guy from Kentucky with the Ferrari 458 Challenge race car was there....that thing is insanely awesome. Definitely have to watch your mirrors for it as it closes FAST.
I also totally loved this C6Z that is painted Signal Green which is the Porsche color they put on select 911 GT3s.

It had ZR1 carbon brakes and a bunch of motor work and sounded awesome. I ended up talking to the guy and doing a ride along with him later in the weekend and helping him find some time. It's his first year with the car and he's getting up to speed in it pretty well.
I also liked the gold wheels on this Carmine Red GT4. I could definitely see myself owning one of these...you know...when my kids graduate college or something...hahaha.

There was also this high HP GTR that was running Michelin slicks. Here you can see me point him by and hang close until the back straight where he straight WALKS away. I can keep him in sight on the back side, but then we get to the back straight again and HE GONE.
12-04-16, 02:24 PM
#40
Baby I'm back!!! Friday afternoon the weather was perfect and I was able to get my best time ever at Mid Ohio. I was pretty pumped. Unfortunately I'm struggling to get the data/video matched up, but here's the lap. All day Friday the car was loose...more loose than I'd like, but it sure was fast. [Days of Thunder Harry] "Cole, loose is fast but on the verge of out of control" [/Days of Thunder Harry]. Not my cleanest lap ever but still fun and not too crazy.
Additionally I was able to back it up later in the afternoon with a :38.5 to make sure it wasn't a complete fluke
Finally on Friday I was able to run the car a full 30 mins in the afternoon and the differential didn't overheat/spit fluid. Pretty happy about that. I also didn't make the noise it did before so that's a solid win. After the 30 min session I saw temps of 225 on the drain plug (little less on the outer cover) but that's still a 25 degree reduction over what I saw before when I had the issue. I know it's not scientific in that it's not a true fluid temp, but at least tells me there was a positive change. Additionally Friday was only Advance and Instructors driving for 30 min sessions on/off so I put a ton of time on the car that day and it handled it all great.

Additionally I was able to back it up later in the afternoon with a :38.5 to make sure it wasn't a complete fluke

Finally on Friday I was able to run the car a full 30 mins in the afternoon and the differential didn't overheat/spit fluid. Pretty happy about that. I also didn't make the noise it did before so that's a solid win. After the 30 min session I saw temps of 225 on the drain plug (little less on the outer cover) but that's still a 25 degree reduction over what I saw before when I had the issue. I know it's not scientific in that it's not a true fluid temp, but at least tells me there was a positive change. Additionally Friday was only Advance and Instructors driving for 30 min sessions on/off so I put a ton of time on the car that day and it handled it all great.
12-04-16, 02:32 PM
#41
The rest of the weekend was good fun. Lots of traffic and people, but still good times. I softened up the rear of the car to make it have less oversteer and be more predictable. It certainly did the job. I never ended up running a better lap thru the weekend, but was continually running mid to low :39s the rest of the weekend which is exactly where I'd want the car to be.
I was definitely aided by the cold air. Here's a good example in that the cold air, water/meth, and the GT3 cutting air for me helped me hang nose to tail with my brother (yellow GT3) here. Typically he'd put about 1-2 cars on me over the course of the back straight. As you can see though after, he's on slicks (Pirelli DH) and there's nothing I can do to close that gap on Nittos...until next year...
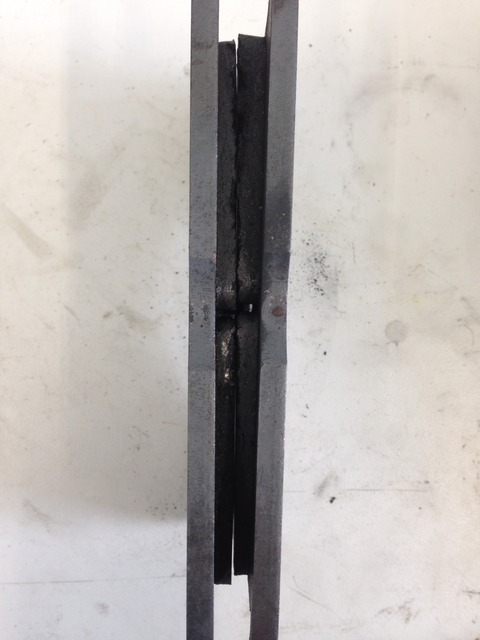
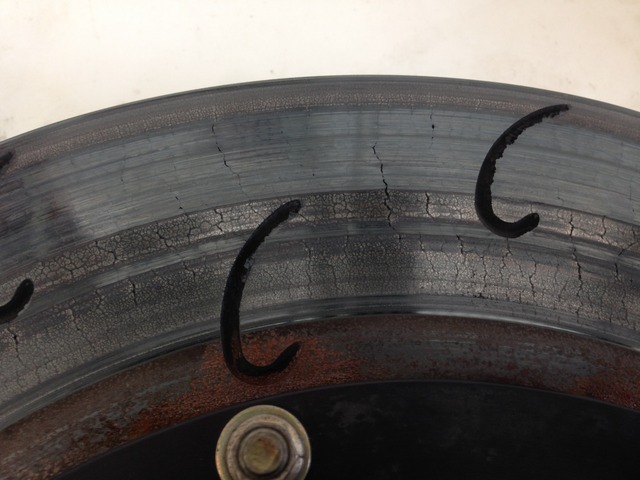
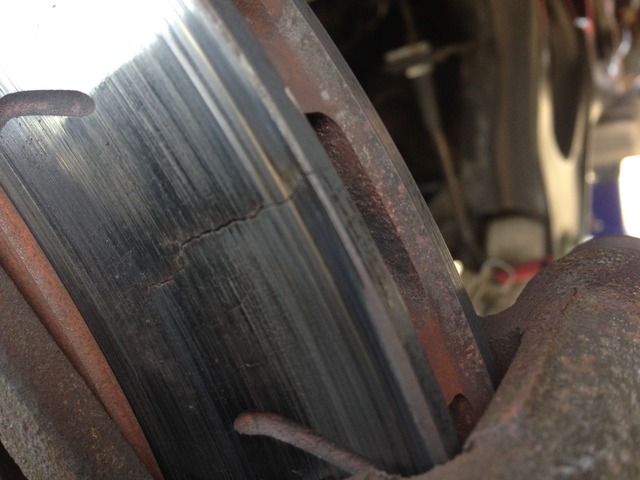
The only bogey for the weekend was that my Sunday got cut short. I had already run 3 sessions in the morning and went to change the rear pads when I found the driver's rear rotor cracked thru. I had replacement rotors, but hadn't brought them with me...doh. Not the end of the world, but I was looking forward to the open track (people leaving early) and good weather that was happening.
As that wraps up the track season for 2016 I'm quite happy with the car. To think of a car that last year was dead stock except for a crap stereo install and I was able to get it built/developed over this year was pretty good. Comparing to Monsterbox building a full turbo 4-rotor in the same time makes me feel like a slacker, but overall I think it was a victory..haha. It's never done though and there's plenty to make better/faster next year. In the end I ran 6 events and 17 days on track.
I was definitely aided by the cold air. Here's a good example in that the cold air, water/meth, and the GT3 cutting air for me helped me hang nose to tail with my brother (yellow GT3) here. Typically he'd put about 1-2 cars on me over the course of the back straight. As you can see though after, he's on slicks (Pirelli DH) and there's nothing I can do to close that gap on Nittos...until next year...
The only bogey for the weekend was that my Sunday got cut short. I had already run 3 sessions in the morning and went to change the rear pads when I found the driver's rear rotor cracked thru. I had replacement rotors, but hadn't brought them with me...doh. Not the end of the world, but I was looking forward to the open track (people leaving early) and good weather that was happening.

As that wraps up the track season for 2016 I'm quite happy with the car. To think of a car that last year was dead stock except for a crap stereo install and I was able to get it built/developed over this year was pretty good. Comparing to Monsterbox building a full turbo 4-rotor in the same time makes me feel like a slacker, but overall I think it was a victory..haha. It's never done though and there's plenty to make better/faster next year. In the end I ran 6 events and 17 days on track.
12-04-16, 03:04 PM
#42
here's a preview of next year. I figured I had 3 options for going faster:
1. Mechanical grip,
2. Aero grip
3. More power.
Power is a double-edged sword with putting more stress on the cooling system and drivetrain components. Aero is hard to do right and with balance, and I like the way the car looks now! haha. So I chose mechanical grip and I'll be going to a square wheel/tire setup all around and will try out slicks.
I will also be going to a squared Nitto setup as well. I still think that NT-01s are one of the best HPDE tires out there. I'll be running Nittos on 18x10 +50 Forgestar CF5 wheels.
For the slicks I bought 2 from Brent and will be ordering 2 more from CCW. C14s that are 18x10.5 +44. As you can see I'll have to run some more aggressive camber and unfortunately raise the car, but it'll be worth it. I plan to run scrub Pirelli DH slicks in 275/35-18 size.


Last edited by Smokey The Talon; 12-04-16 at 03:06 PM.
12-04-16, 03:10 PM
#43
when I got back I put on the new rear rotors so I could go to cars and coffee with my dirty unwashed car.
Looks like I ran the rear pads to the very bones!

The good news is that the tapered pad wear and wearing the outside pad seems better after completely cleaning out the caliper mounts and running the different grease. I'll keep an eye on it for next year.
Here's pretty new rotor rings that went on the car.
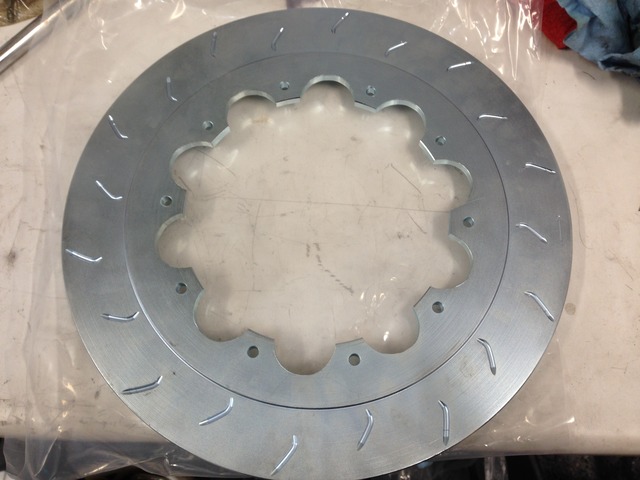
As for next steps, I've had to dedicate some time to house projects that I've been putting off during track season..haha. I also have some work that's needed on my DD/tow vehicle as well as my wife's car before winter sets in.
On the FD front I hope to get my new gas door painted, my shine tail light spoiler painted and mounted, put on the 99 spec tails and then actually clean the thing up. Right now it's still on the SSRs and Nittos which isn't the most street friendly setup but it's not like the car has a radio anyway.
12-04-16, 03:15 PM
#44
The big clean up
I haven't completely put away the car for the winter just yet. I've been focusing on fixing/updating some cosmetic things I've been wanting/needing to do.
I also decided that since I'm going to have to raise the car next year to run slicks and that'll make the car look stupid, that I'd like to get good pictures of the car now. So I've enlisted the help of my brother to help me clean up the car. I've taken about a week of nights/weekends work and gotten it fully cleaned/sorted.
First, the updates. I had to get that gas door fixed. Got a new one which came in primer black and had to have it painted. Good news is that the paint guy was able to get the paint match really well. It has some solvent pop and isn't perfect, but neither is the rest of the car.
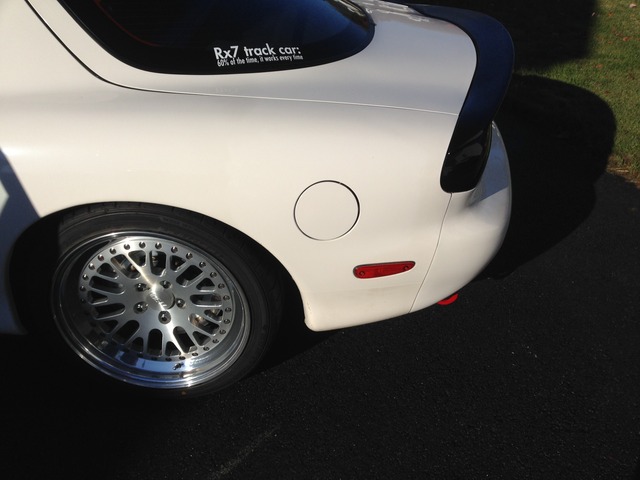
2nd exterior update was to put newer '99 spec tail lights on. I also put on a Shine tail light lip spoiler which I had painted black. I had some issues with the paint so in the pictures it's got some flaws and is currently getting redone. In order to hopefully not have the spoiler come off at speed at the track (140mph) I epoxied the spoiler to the center tail light and then used double sided tape on the tails.
Dealing with the lights would help me tackle something I knew I needed to anyway. Similar to what we saw with the other areas of the hatch and under hood, the areas under the lights were NASTY and needed cleaned up.
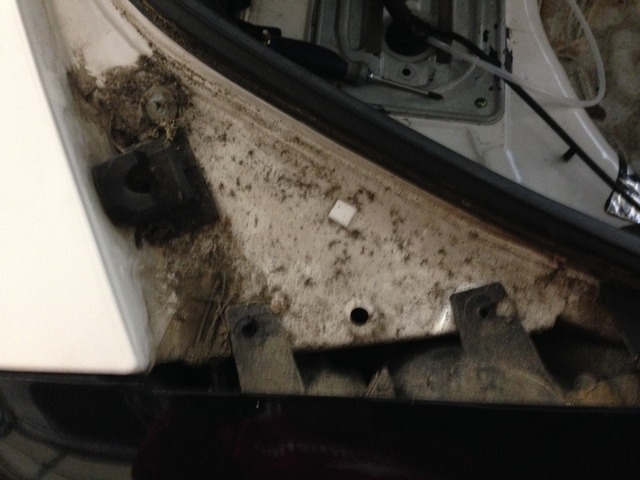
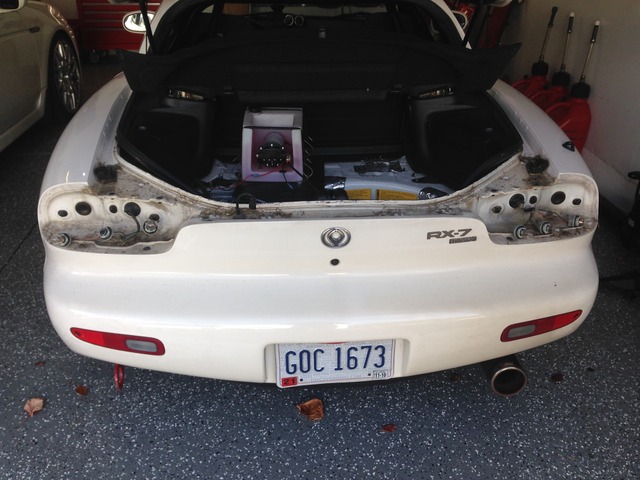
I was able to get things cleaned up and more acceptable there:
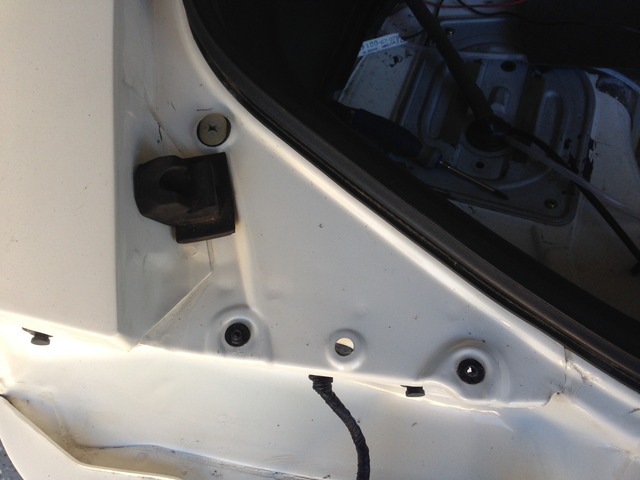
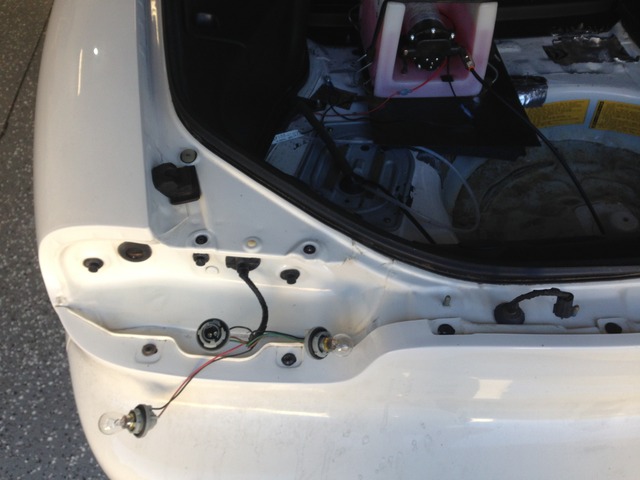
new lights with the spoiler (still needing repaint in this pic)
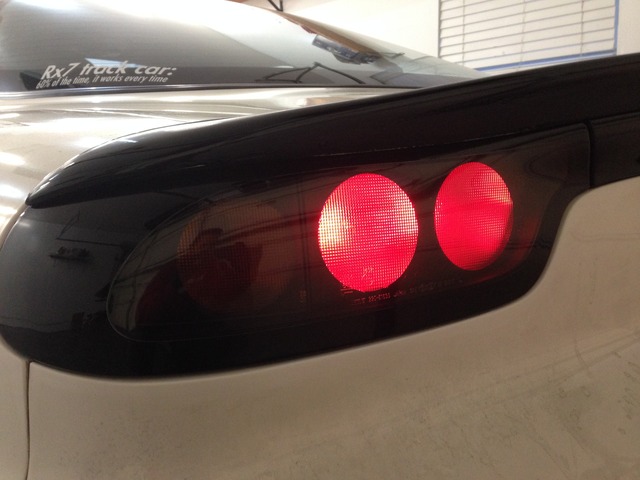
Here are some views of the rear spoiler. I like that it accentuates the rear lines of the car without being overly bold.
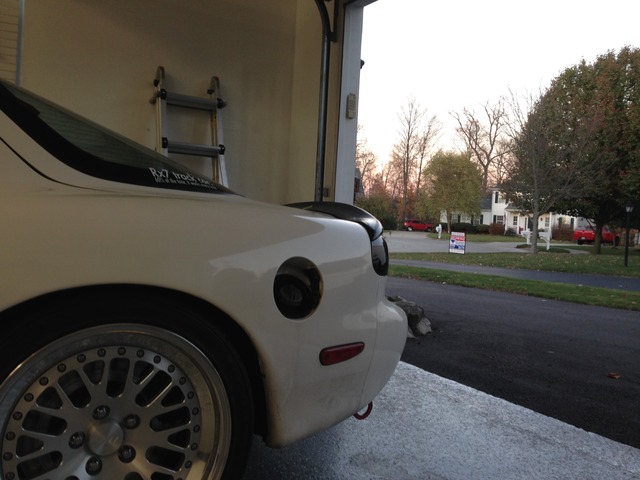

 12-04-16, 03:21 PM
#45
as a part of the cleanup I was also going to make some interior updates I had been holding off on for more important track updates. First was that I wanted to remove the door speakers and tweeters that the previous owner had installed. THANK JESUS that he didn't drill the door panel for the tweeters and they were just sitting there. You can see them flopping around in my track videos.
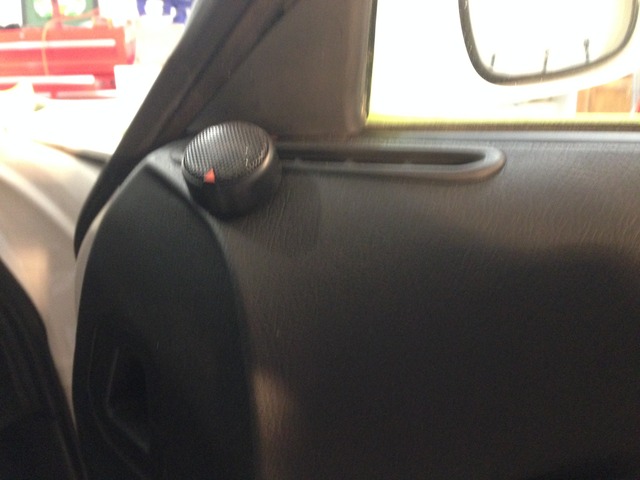
While I was taking off the door panels, I wanted to install the Sakebomb garage cast aluminum door handle that I've had for quite some time. I had bought it for my old car and never got around to installing it (familiar theme). I opened the box and saw the shipping statement...July of 2012...Parts hoarder status = PRO. The handle replaces the weak factory plastic handle which is prone to breaking. Here's the old plastic on the left and the new on the right.
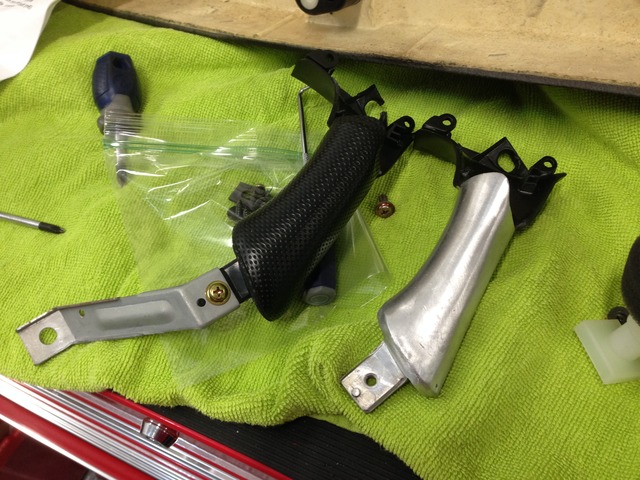
As a part of the install you remove the handle cover and glue it on the new aluminum handle. Now I don't have to worry about people breaking the handle while riding in my car. Here's the passenger door after removing the speakers and with the new handle installed.
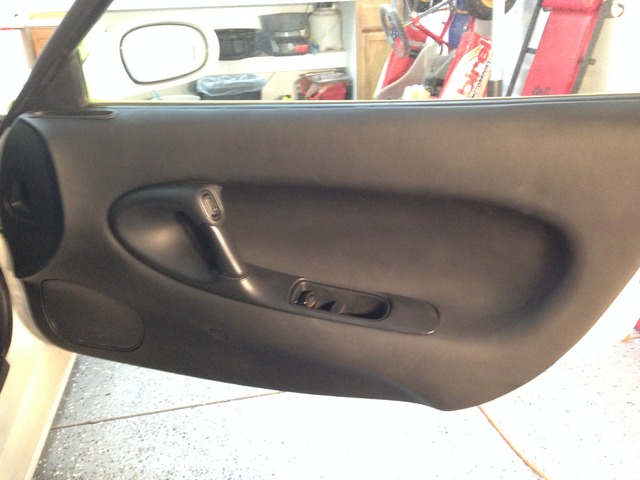
Next up, my defrost vents had the common issue that they were warping and pulling up on the edges. LRB Speed came out with a laser cut metal version which I installed.
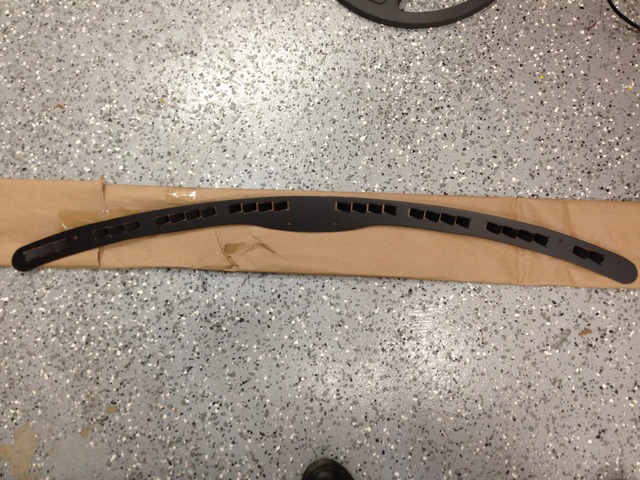
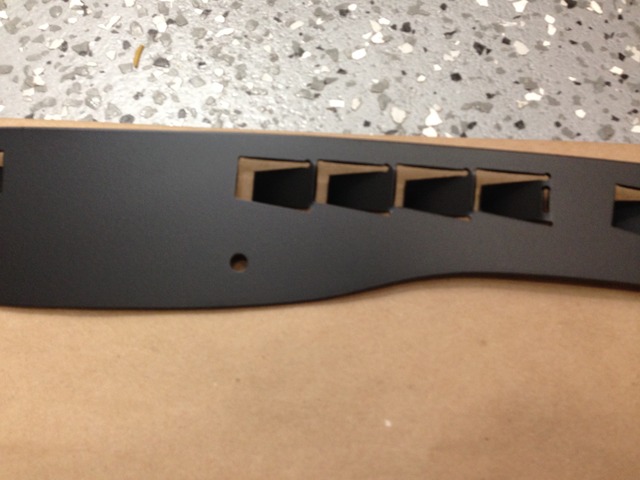
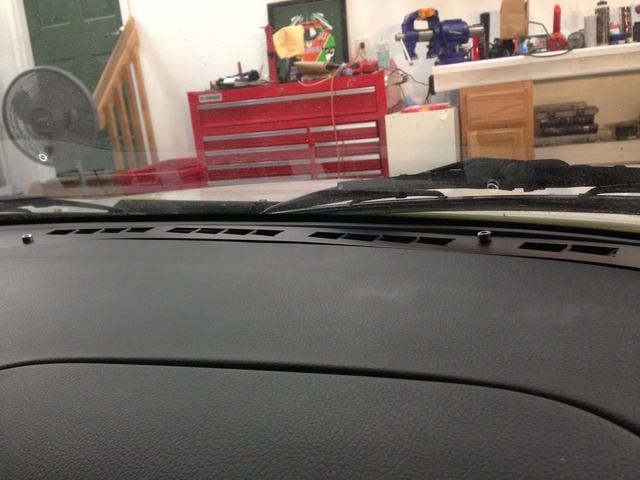
I have to say, I'm pretty MEH on the part. I should have thought ahead and tried to get black hardware so that it'd blend in more and look more factory. Also as you can see in the installed pic the fit isn't perfect. In hindsight I likely would have preferred to just get new factory vents as it suits what I like for the interior, but this will stay for now.
Lastly the interior got a good cleaning and protection. I don't like the shiny look on interiors but sometimes it's necessary to ensure UV protection and I leave this car outside in the sun a lot during track days so I'll take that trade off. Sorry the closeup pic is a bit washed out from the halogen lights.
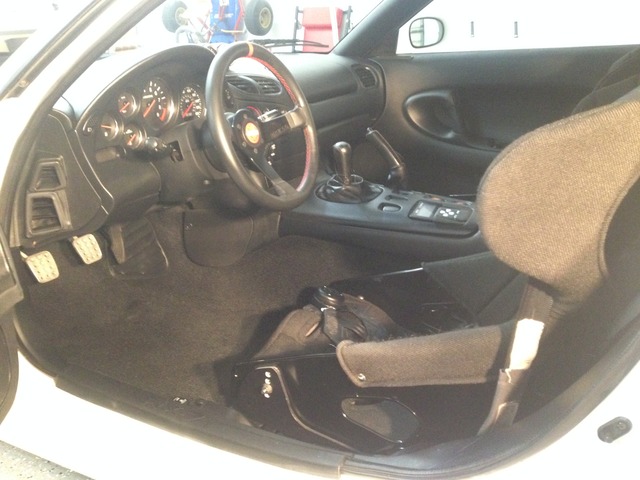
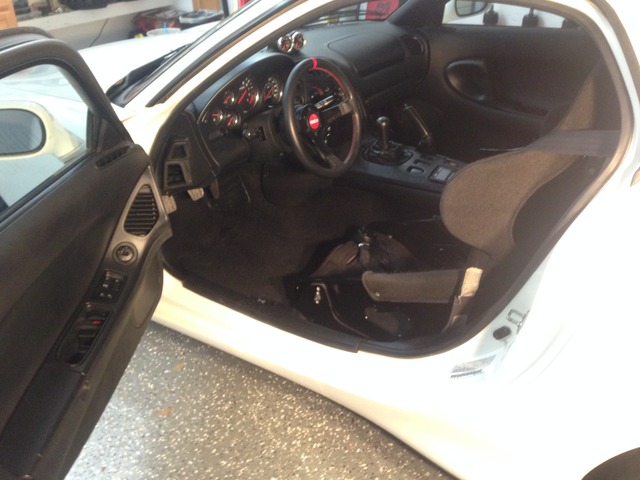

While I was taking off the door panels, I wanted to install the Sakebomb garage cast aluminum door handle that I've had for quite some time. I had bought it for my old car and never got around to installing it (familiar theme). I opened the box and saw the shipping statement...July of 2012...Parts hoarder status = PRO. The handle replaces the weak factory plastic handle which is prone to breaking. Here's the old plastic on the left and the new on the right.

As a part of the install you remove the handle cover and glue it on the new aluminum handle. Now I don't have to worry about people breaking the handle while riding in my car. Here's the passenger door after removing the speakers and with the new handle installed.

Next up, my defrost vents had the common issue that they were warping and pulling up on the edges. LRB Speed came out with a laser cut metal version which I installed.


I have to say, I'm pretty MEH on the part. I should have thought ahead and tried to get black hardware so that it'd blend in more and look more factory. Also as you can see in the installed pic the fit isn't perfect. In hindsight I likely would have preferred to just get new factory vents as it suits what I like for the interior, but this will stay for now.
Lastly the interior got a good cleaning and protection. I don't like the shiny look on interiors but sometimes it's necessary to ensure UV protection and I leave this car outside in the sun a lot during track days so I'll take that trade off. Sorry the closeup pic is a bit washed out from the halogen lights.

 12-04-16, 03:25 PM
#46
The exterior cleanup is where I needed help and enlisted the expert. The paint needed some love for sure and even after all of the work still has some RIDS and etching in the clear coat but still made a great improvement.
Car was fully washed/cleaned and then the trim was taped off for work to be done. Wheel was covered here for wet sanding work that was done on the LF fender. Also because the wheels had already been polished twice and waxed...haha.
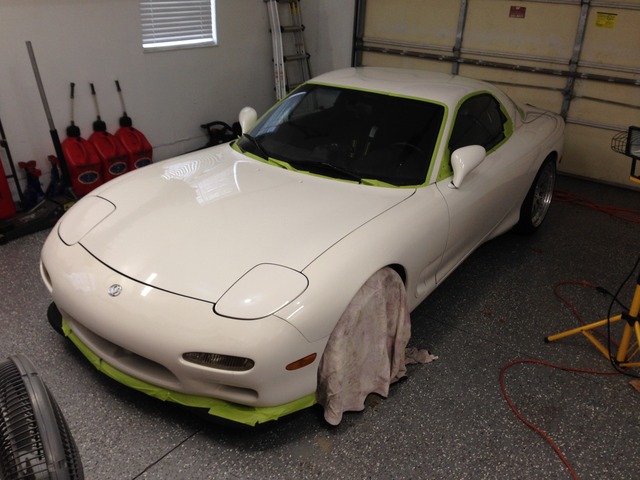
The paint was worked with a rotary, then smaller D/A around the trim/bumpers, then D/A polishing. Finished with a couple of coats of wax. After that is where I started to get a bit ADD on things to finish the cleanup. I polished the door jambs and inside/bottoms of the doors. Cleaned up the rest of the hatch area with polish. Cleaned up the windshield with a razor blade to remove left over rubber and sticker residue from the track season. Then I began to remove the bumper/marker lights to clean underneath. Just like other hidden areas of the car they were gross underneath.
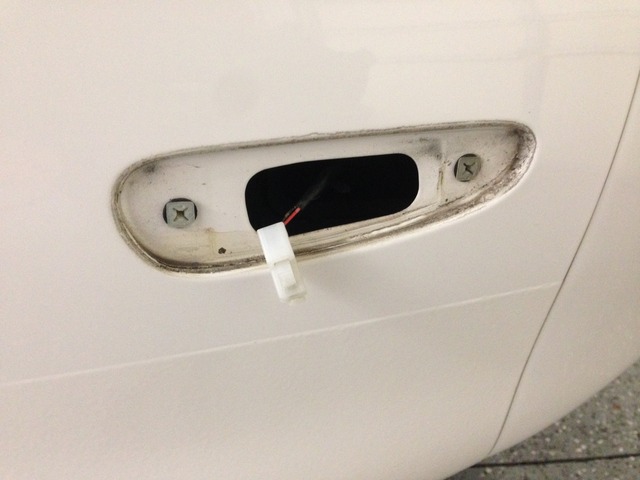
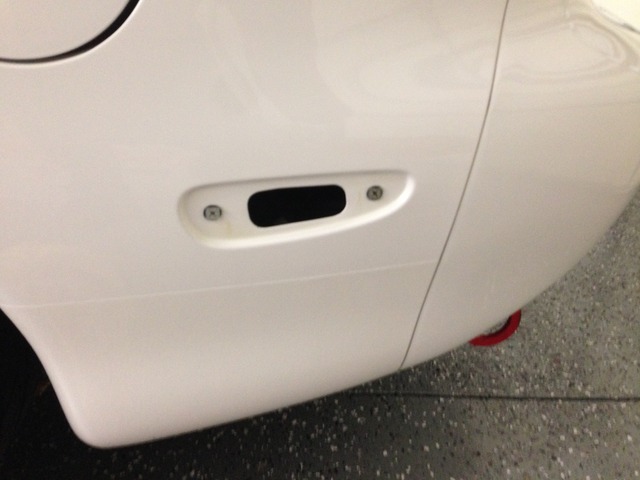
Also while the lights were out I used a tooth brush to scrub off old residue/polish/whatever that was caught in the raised lettering of the light lens. I also used Back to Black on the rubber trim.
Before: gunk in letters
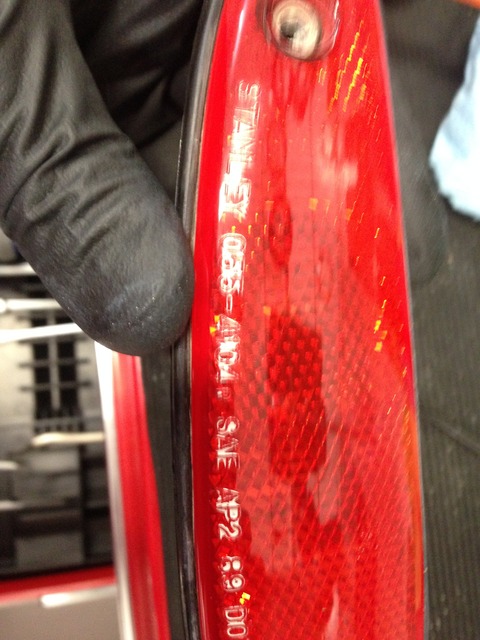
After:
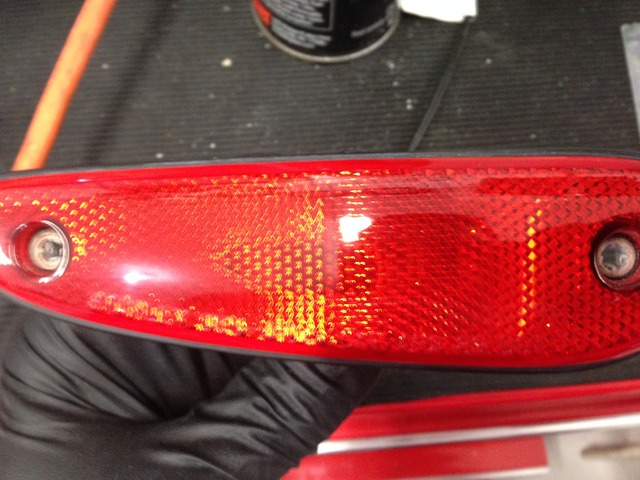
On the front bumper lights I pulled them out and disassembled/removed the lenses. That was a major pain in the ***. I did the same to the old lights I had from my 93 which weren't as yellow and in better shape. Then I removed the orange diffuser which I've never liked the look of in the front. I'll get some orange LED lights so that they light orange without having the egg-yolk look. You can see how nasty the old ones were with crud around the sides/edges under the lenses.
Before:
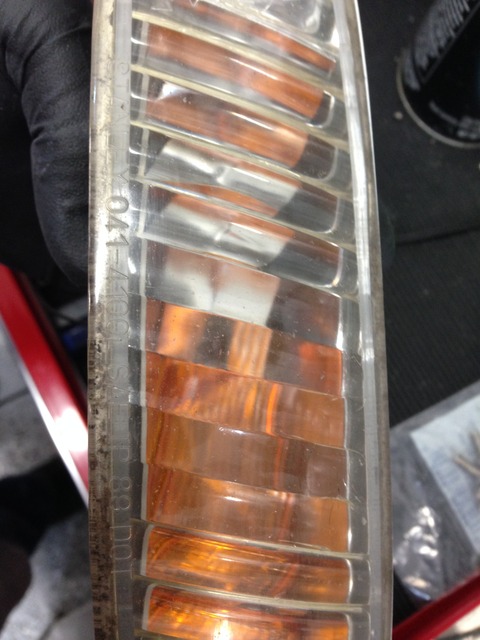
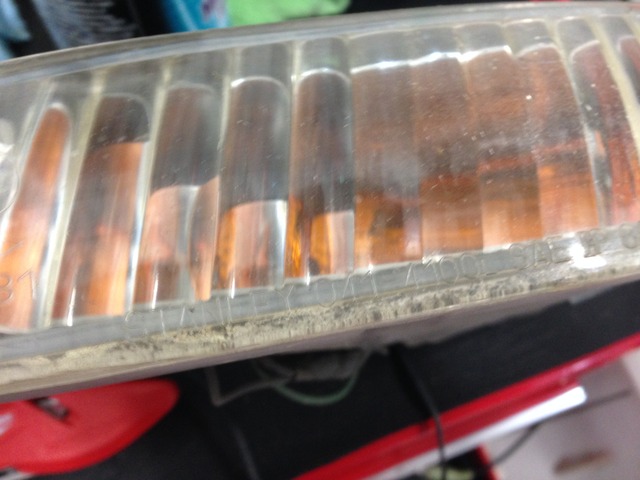
After:
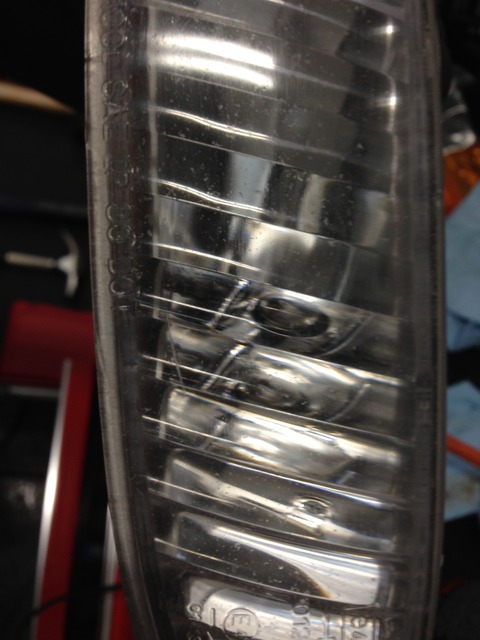
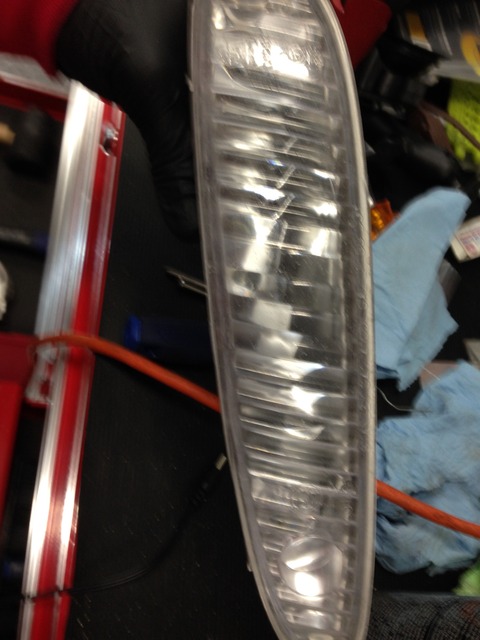
All in all this project took WAY too much time, but I guess I'm happy it's done
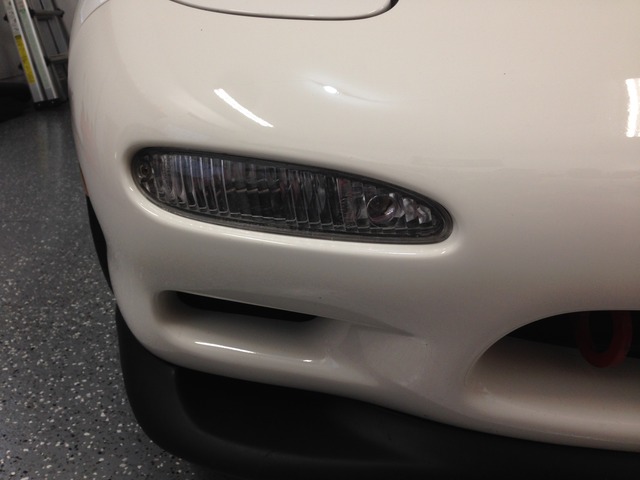
I put Mothers Back to Black on the remaining black trim including the front lip and trim under the rear rockers. I didn't have time to re-clean the engine bay, but it's passable. I also didn't have time to repaint the wiper arms which I'd like to do, but that'll have to wait. Otherwise the car is just waiting for the spoiler to come back and it'll be ready for its photo shoot.
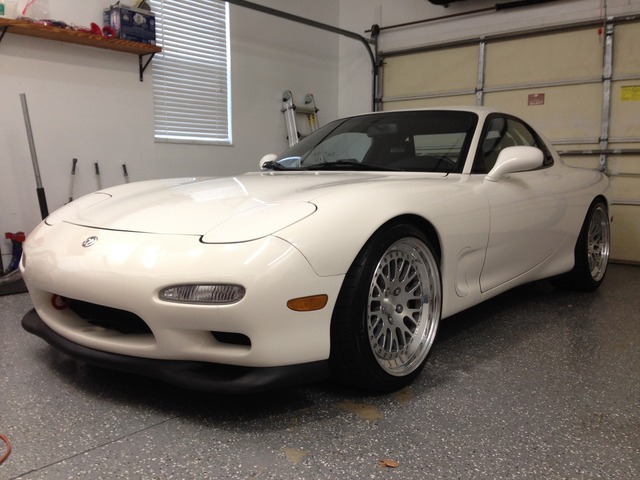

 12-04-16, 03:26 PM
#47
Photo shoot last weekend didn't happen due to scheduling issues. Bummer cause the weather was nice, so I grabbed my brother's camera and snapped some shots. Here are the ones I liked. Keep in mind, I don't know crap about cameras so please forgive the ones in direct sunlight that are a bit washed out.
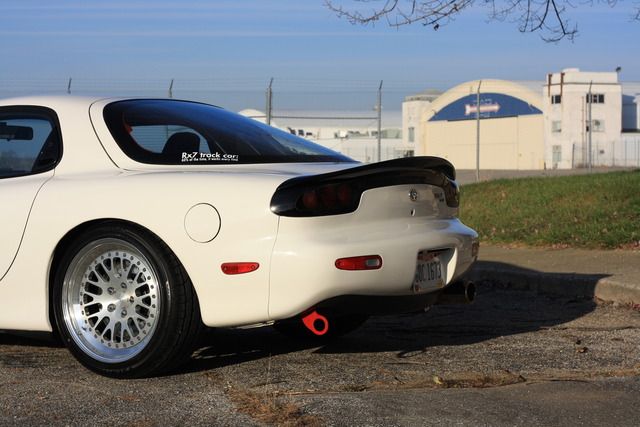
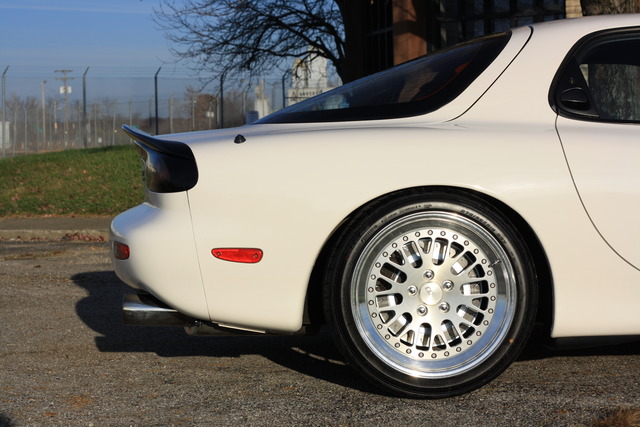
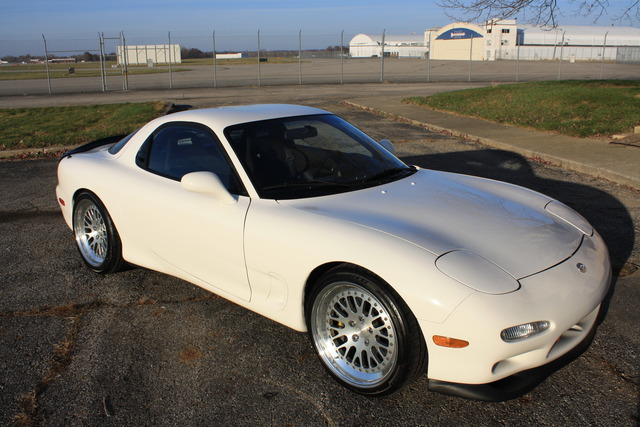
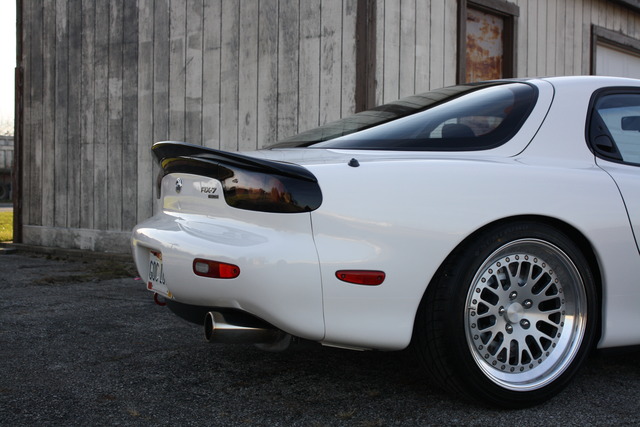
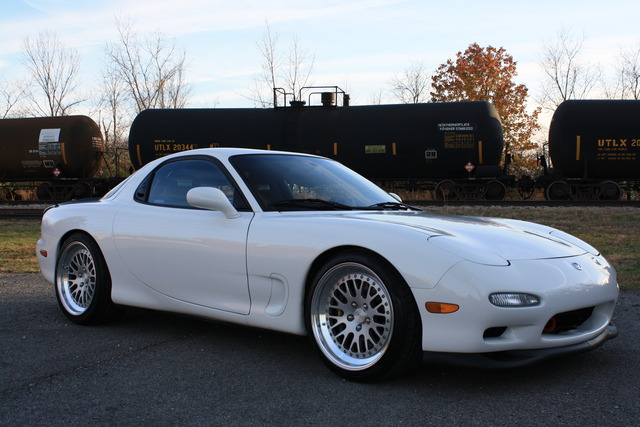
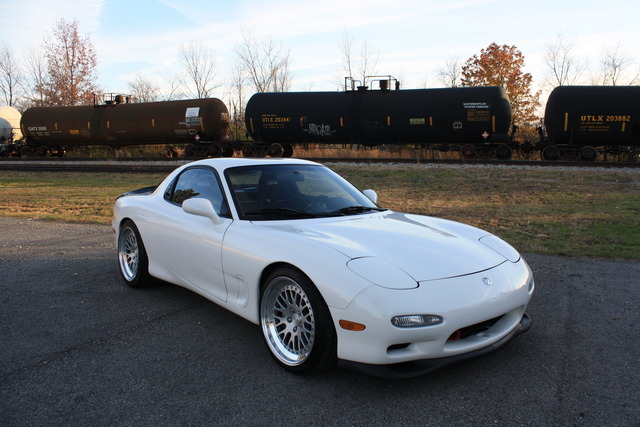


The following users liked this post:
RochX7 (08-14-22)
12-04-16, 06:51 PM
#49
That is a ton of updates. As far as the fuel line on the fuel pump there are better options out there. I know you said you run the Denso Supra pump. I think we all ran that pump. It was the best choice for a drop in pump for a long time. It's still a good pump. It pulls a lot of amps at higher pressures. Most high Flow pumps will. The stock bulkhead fitting won't hack it. I burned thru mine and many do. I'm not sure what you did for upgrading the wiring.
The fuel line you tore, there is a better solution. I am running the Walboro E85 pump. You can go straight to AN via this Radium Adapter. You can also get a nice fuel hanger if you have been following my build. This adds one more link to reliable fuel supply. You. You may have worked it out but here is the adapter. It's $25
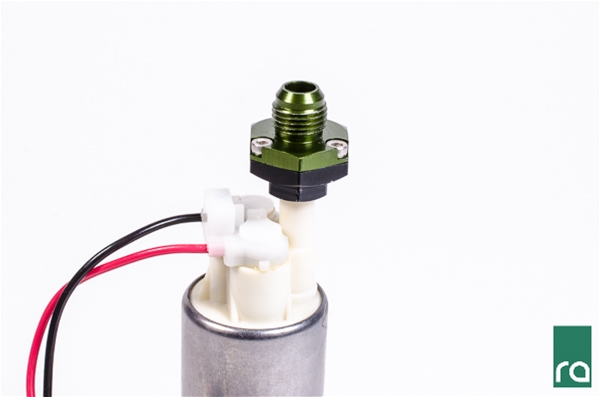
Your AC is gone so we can ignore that topic now lol.
I appreciate you trying to keep your car nice. Taking it to cars and coffee. I love that.
All race cars are show cars but not all show cars are race cars.
The rear fluid always cooks, even with the Greddy cover. You need a cooler. There are fittings on the Greddy cover that accommodate it fairly easily. Just repurpose that trans cooler you took off. I don't think you need a pump. It will likely circulate on its own plus more fluid with addition of the cooler/lines.
Talk to Heath at SakeBomb. He has a solution for your brake Bias issue. Nice new doodad he is making. I think you will like it.
Car looks great BTW.
Mike
12-05-16, 08:43 AM
#50
yeah you're getting about a year and a half of updates all at once! We're up to date now so the updates will come slower.
I'm avoiding trying to put a cooler on the rear end because it's just one more complication that leaves a failure point on the track. I may try to work up some sort of air scoop or something to direct air past it in the future, but not sure yet. I had tracked 7+ years on the old setup without the overheating issues. It would still beat up the fluid quickly (had to change every other event), but never boiling out the breather. I think the 60k diff must have been setup super tight or something to cause that. There wasn't anything visually wrong with it when I removed and inspected, but the issue was better once I went back to the "old" diff. We'll see how long I can hold out on the current setup.
I'm interested to see what Heath comes up with on the brakes. I think that even with the bigger rear sakebomb kit that the AP kit is too forward biased even for r-comps. I'm going through front pads pretty quickly and definitely getting them very hot. Still leaps and bounds better than my old Wilwood kit though and I will say that the AP rings have lived up to the hype and can take SERIOUS abuse. For next year I'm going to go back to my dedicated cooling ducts/backing plates on the brakes to see if that helps front pad life.