94 Build... GT35R, RE Vmount and a whole lot more............ NOW WITH PISTONS!!
 11-21-14, 10:51 AM
#976
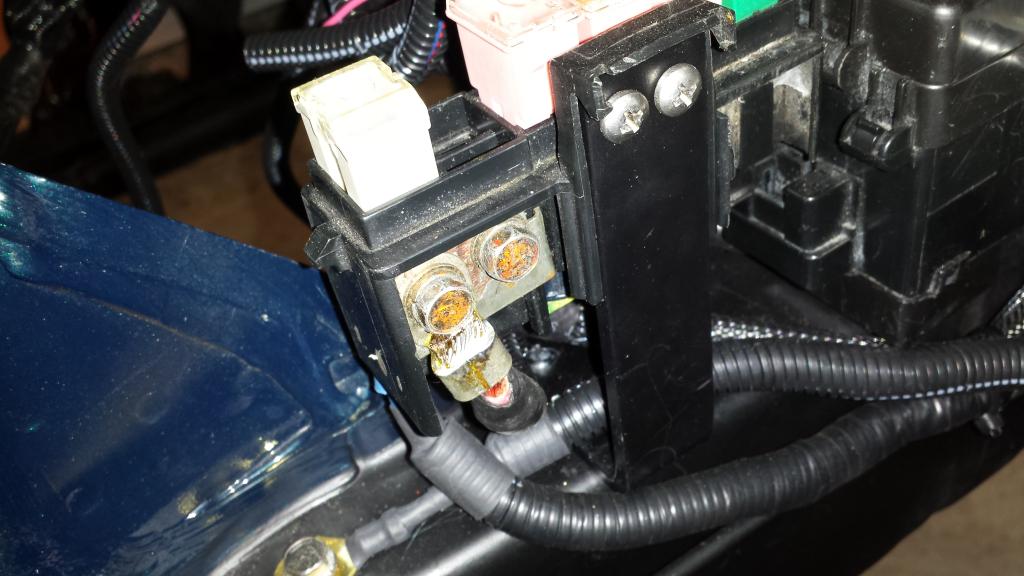
Below are some pictures of how I mounted the main fuse box. The larger box uses a single bolt, and a 2" spacer. It attaches on the end of the box through the boss. I just bolted it to a prexisting threaded hole on the frame rail. It can be seen from the previous pic posted. I had the exact issue a few years ago when I first relocated it to the lower rail, so I had to get clever. My solution is quite sturdy and I have had no issues.
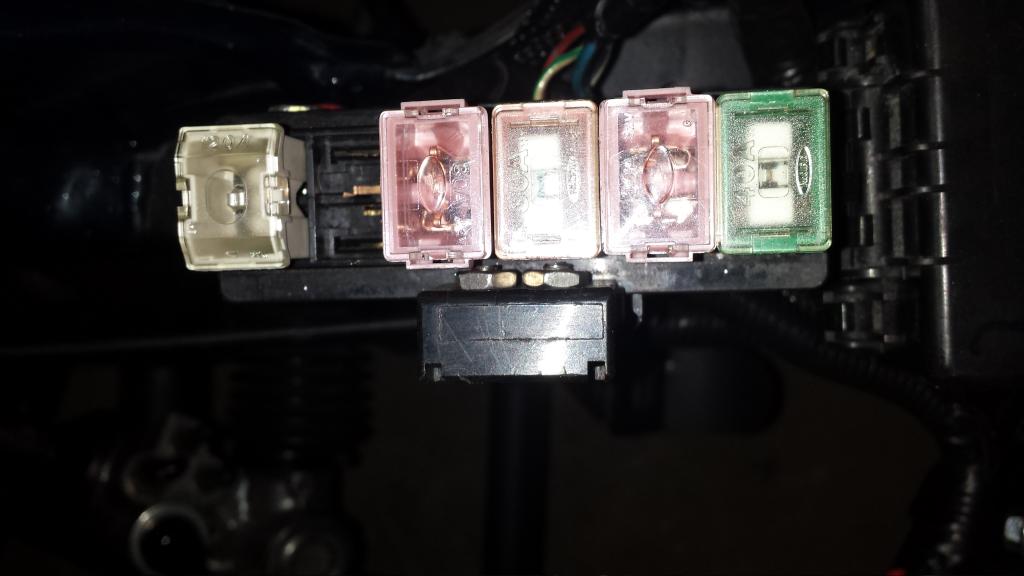
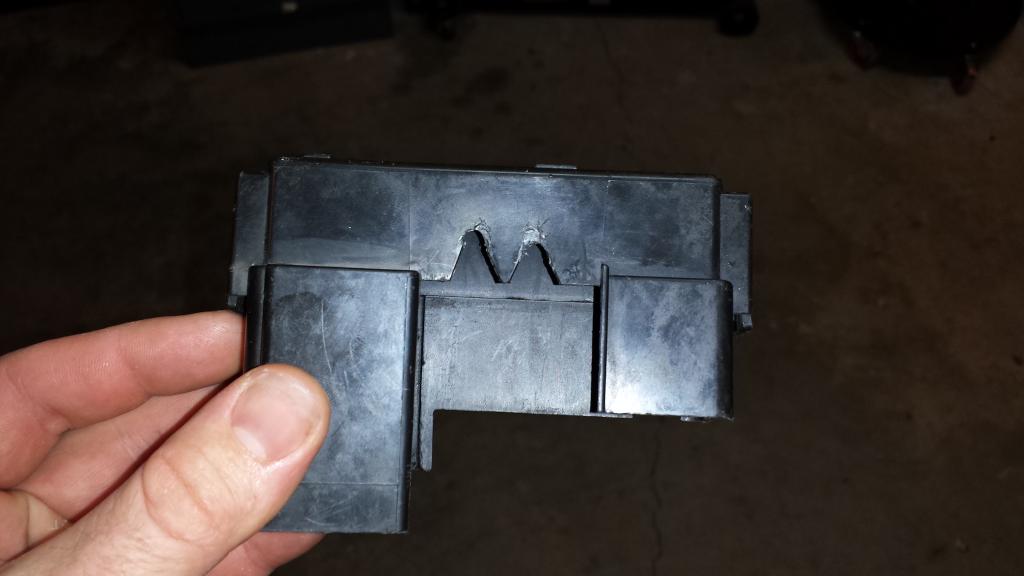
If you look at the side of the main plastic fuse box you see a slotted tab that slightly raises above where the fuses begin. The slot fits a 1" wide strip of aluminum perfectly. Of course, it slides in perfect but there is no natural way to mount it. I drilled 2 small holes through the plastic at the very top of the slot. There is just enough room to drill the holes in the plastic, and clear where the fuse plugs in on the other side. Beyond that, drill matching holes in the aluminum strip, use some short screws with thin nuts...boom. I bent the bottom of the aluminum strip to make an "L". From there, you can mount it virtually anwhere. For the cover, I had to slot it to clear the screws. After that, it snaps into place as normal. The slots are completely hidden. Hope this helps.
 11-21-14, 10:58 PM
#977
Make an assessment...

iTrader: (3)
Thanks! Yeah I've been wanting to do this for a while but I hadn't thought about bolting the strip of metal to the plastic like that. I was trying to figure out how to bolt it to where power is applied but how to isolate the bracket from the power so I wouldn't be grounding out to the frame haha.
If I move my OMP 2-cycle tank, maybe I'll do this instead of relocating them to the rear bins. This would be much easier lol.
If I move my OMP 2-cycle tank, maybe I'll do this instead of relocating them to the rear bins. This would be much easier lol.

 12-22-14, 11:35 AM
#988
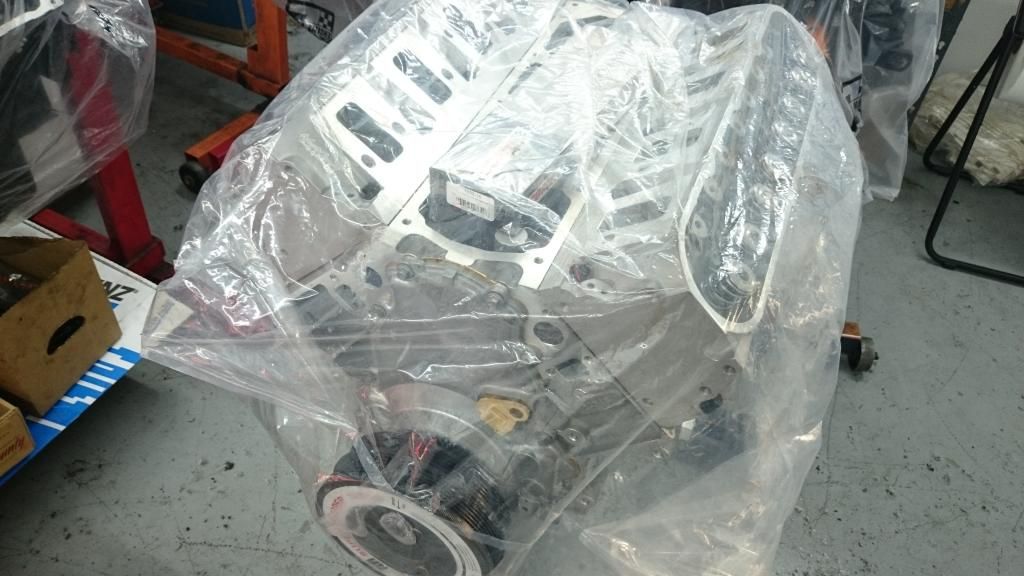
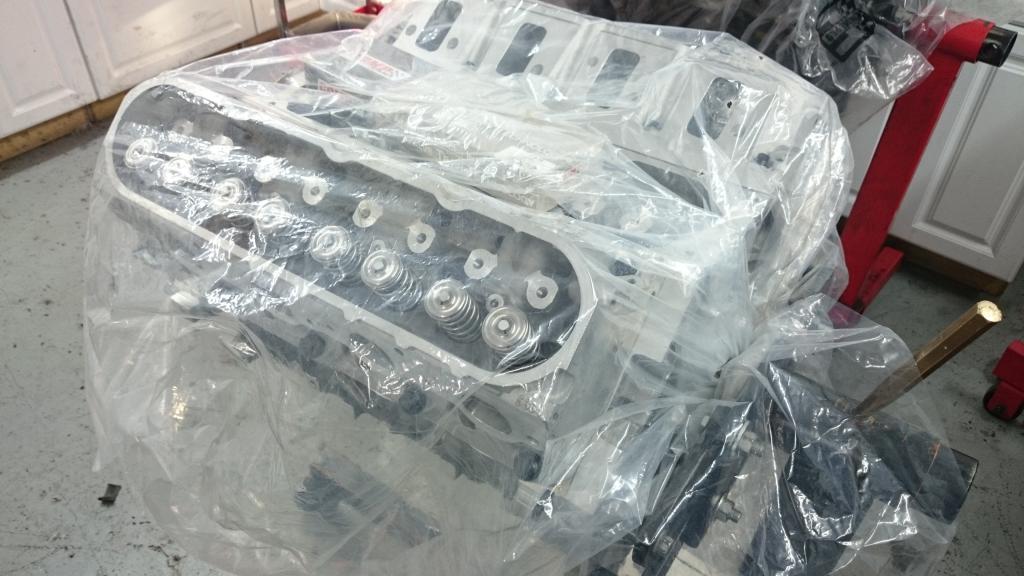
It should ship tomorrow or Tuesday. I just sent my final invoice amount this morning. "Not a bad way to spend $10k"
Once it's in my garage, inspected thoroughly for no shipping damage, and I can FINALLY relax.... I plan to dry hump it for a solid hour.
Once it's in my garage, inspected thoroughly for no shipping damage, and I can FINALLY relax.... I plan to dry hump it for a solid hour.
 12-26-14, 11:49 PM
#994
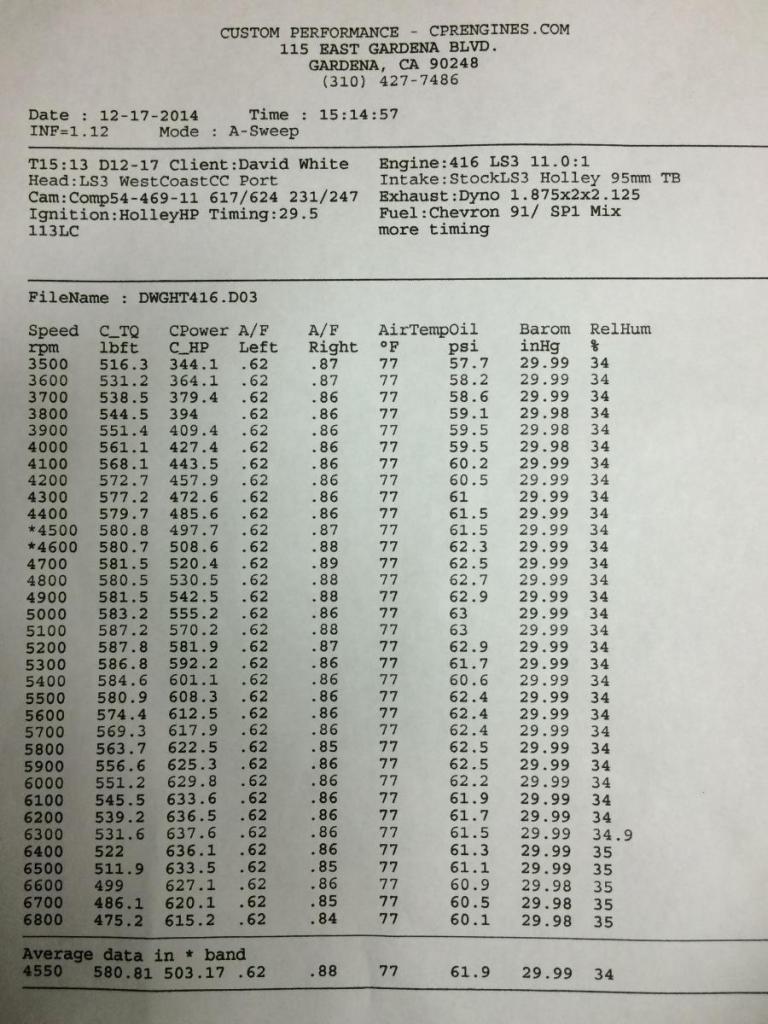
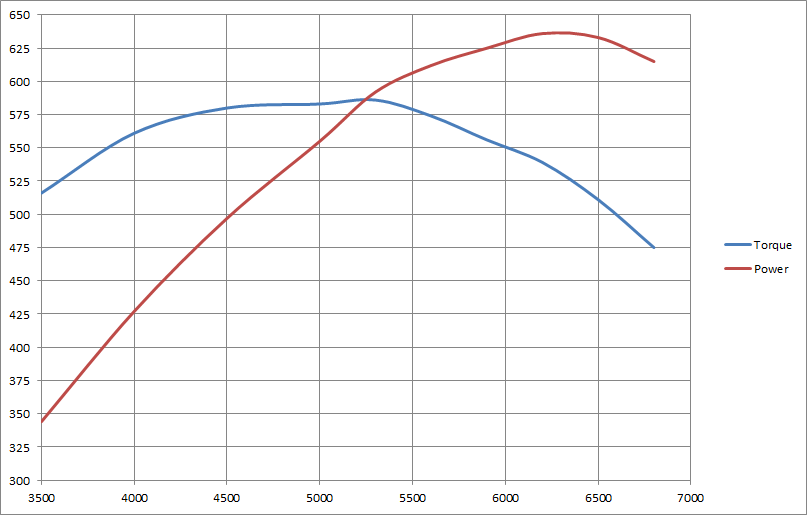
I have heard good things about them. Dave (my builder) said he had known them for 10+ years and they knew the Holley ECU very well. I am very anxious to get my hands on their map to see where things lye. All I have to go on now is the dyno sheet notes saying "29 degrees" and "more timing". It easily has another 20-30hp in there. Especially with 93.
12-29-14, 06:36 AM
#996
Wastegate John
iTrader: (13)
Join Date: Feb 2008
Location: Long Island NY 11746
Posts: 2,979
Likes: 0
Received 9 Likes
on
9 Posts
Almost 2 days and no comments... guess you are not wanted here anymore Josh. 
I think I watch too many rotary dyno vids as the whole time I was watching the vid I was thinking to my self "that engine sounds a bit weird" LOL
Good to see the new engine guy came through.
I think I watch too many rotary dyno vids as the whole time I was watching the vid I was thinking to my self "that engine sounds a bit weird" LOL
Good to see the new engine guy came through.
