6766 Rocket Bunny FD!
 11-10-14, 08:05 PM
#1
Loading...
Thread Starter
iTrader: (3)
Join Date: May 2006
Location: PA
Posts: 78
Likes: 0
Received 0 Likes
on
0 Posts
6766 Rocket Bunny FD!
TurbosaurusRX's FD Build
I'll preface this thread with why the build initially began... and how it started to snowball out of control.
I've owned my FD since early 2006. I was in high school at the time and rather than enjoy the car, I spent more time being paranoid about breaking something on it. At the time, I was only putting a couple thousand miles on it per year. The following year, I went away to college and, as a result, the car was barely driven. One day in early '08, I asked a close friend to take the car out for a drive. He reported back that everything went fine during the drive. Two weeks later, I asked him to take it out again and that's when the problems started. He got the car onto the highway out of nowhere the car began to backfire. Any attempt at giving it gas caused backfires and sputtering. My buddy was able to limp the car back home and the car sat. Since I was still away at school, I could only mess with the car when I came home for breaks or after work during the summers. Essentially, the car sat for 3-4 years as I tried small unsuccessful fixes and diagnosing.
Fast-forward to early 2012 when I got my first job out of college that just so happened to be at a growing company in the automotive industry. Through this job, where I continue to work, I met a lot of knowledgeable people who helped breathe new life into my RX7 build. After debating a turbo'd LS1 swap for a short time, I decided I'd try my hand at rebuilding the 13b... and so it began...
Disclaimer: I'm a very DIY person and plan to learn/teach myself throughout this whole project. I welcome everyone's input and plan to follow a road less traveled with this build. I want to spark new ideas and encourage people to tell me why something I'm doing is great or stupid. This community has provided me with a ton of valuable content over the years and I hope this is the time I can give back
*I'm a little ways into the build already, but I'll post some pics and info to bring this thread up to the car's current state. I've been keeping current updates on my instagram (@m3tron) as well. Stay tuned!
The beginning:

 11-11-14, 09:39 AM
#3
Loading...
Thread Starter
iTrader: (3)
Join Date: May 2006
Location: PA
Posts: 78
Likes: 0
Received 0 Likes
on
0 Posts
I'm pretty sure my issue stemmed from my Power FC. I had a buzzing BAC, a fluctuating idle that would eventually cause the car to flood, and I was getting odd readings on my multimeter when I checked the wiring (I have another thread that covered this a bit more: https://www.rx7club.com/3rd-generati...blems-1045517/) I happened upon another thread on rx7club recently that described similar symptoms and ended with a faulty Power FC.
That being said, I've been hearing more and more good things about Adaptronic, so I think my future holds a new ECU.
That being said, I've been hearing more and more good things about Adaptronic, so I think my future holds a new ECU.
11-12-14, 09:43 PM
#6
Loading...
Thread Starter
iTrader: (3)
Join Date: May 2006
Location: PA
Posts: 78
Likes: 0
Received 0 Likes
on
0 Posts
Yep, Rocket Bunny kit is in the plans... In fact, I've had one on order since May! Unfortunately, it seems SEMA cars got first priority  The latest update I got was "about a month," but I'll continue to wait patiently and focus on other things during the wait time. I can't say I'm in a rush to get the wheels on order.
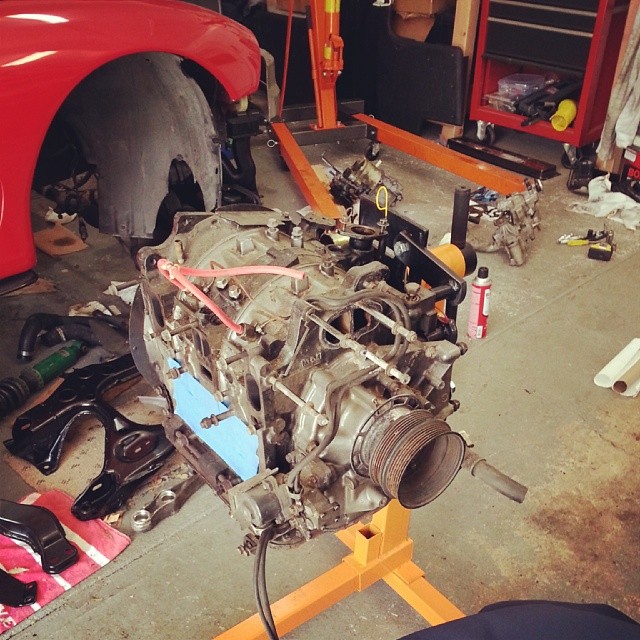
At the end of 2013, I put the car up on jackstands and began the teardown:
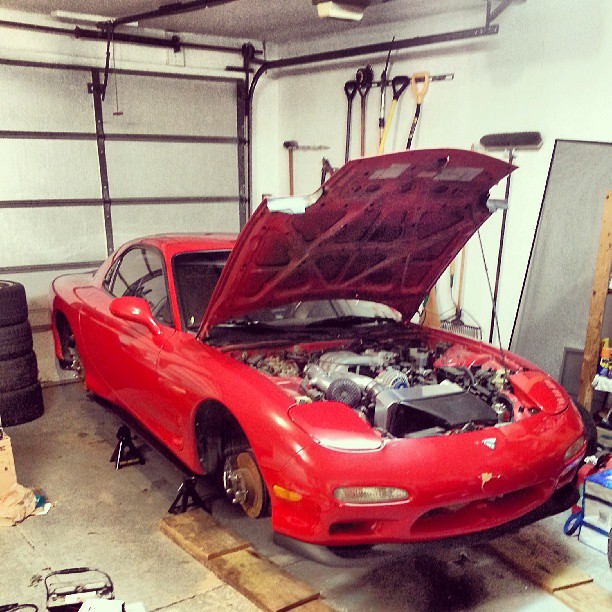
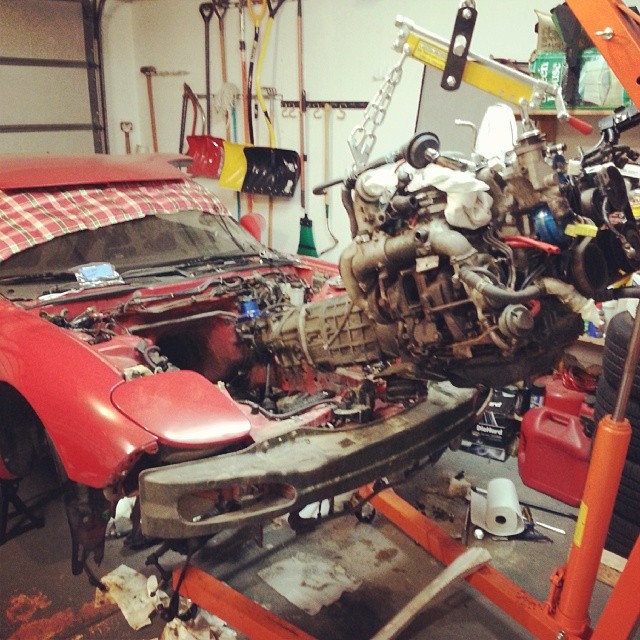
Over the course of the following few weekends, I slowly worked on pulling the motor (and took tons of pics in the process to help me remember where things belonged).
Around this time, I was still heavily considering an LS1 swap and began to look for parts. At the same time, I had been helping a friend piece together his big HP Supra build and had been getting more and more comfortable tearing our cars apart.
Pics of said Supra:
The horsepower bug had bitten and thoughts of a twin turbo'd V8 filled my head. I continued to gather all sorts of tools and spent countless hours on RX7Club looking up specifics for the V8 swap. I had joked with my Supra buddy for a while about buying a Tig welder, so we could make his intercooler piping and build my turbo setup... until one day, I pulled the trigger.
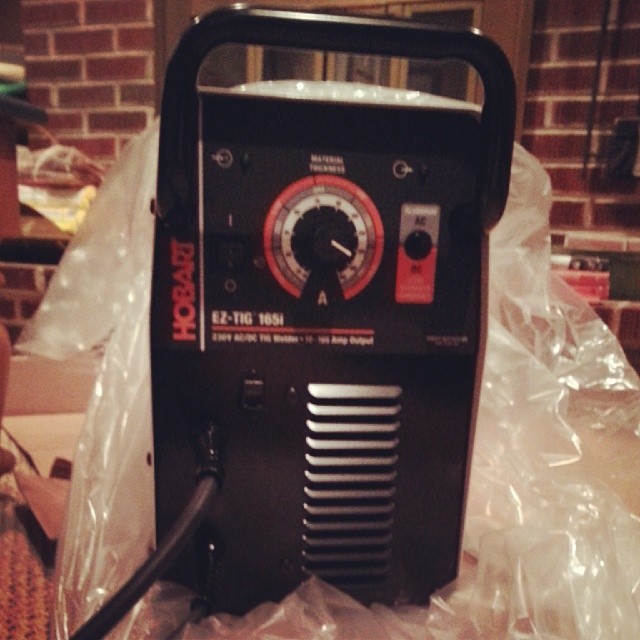
I spent a few months practicing how to weld and became engrossed with fabrication. I wanted to build everything I could and decided it was time to start getting wild with my build. This new DIY outlook forced me out of my normal comfort zone, but it was for the better. This build was all for me... no sponsors, no deadlines, and no commitments. If something breaks... it breaks... but at least I know I'm capable of fixing it (or at least learning how!). Back to reality though... I had a change of heart on the V8 swap and decided I wanted to learn more about the rotary engine inside and out. I wanted to try my hand at building the 13b. Naturally, the next step was to tear it down!
The latest update I got was "about a month," but I'll continue to wait patiently and focus on other things during the wait time. I can't say I'm in a rush to get the wheels on order.On to more updates to bring everyone up to speed!
At the end of 2013, I put the car up on jackstands and began the teardown:

Over the course of the following few weekends, I slowly worked on pulling the motor (and took tons of pics in the process to help me remember where things belonged).

Around this time, I was still heavily considering an LS1 swap and began to look for parts. At the same time, I had been helping a friend piece together his big HP Supra build and had been getting more and more comfortable tearing our cars apart.
Pics of said Supra:

The horsepower bug had bitten and thoughts of a twin turbo'd V8 filled my head. I continued to gather all sorts of tools and spent countless hours on RX7Club looking up specifics for the V8 swap. I had joked with my Supra buddy for a while about buying a Tig welder, so we could make his intercooler piping and build my turbo setup... until one day, I pulled the trigger.

I spent a few months practicing how to weld and became engrossed with fabrication. I wanted to build everything I could and decided it was time to start getting wild with my build. This new DIY outlook forced me out of my normal comfort zone, but it was for the better. This build was all for me... no sponsors, no deadlines, and no commitments. If something breaks... it breaks... but at least I know I'm capable of fixing it (or at least learning how!). Back to reality though... I had a change of heart on the V8 swap and decided I wanted to learn more about the rotary engine inside and out. I wanted to try my hand at building the 13b. Naturally, the next step was to tear it down!
 11-13-14, 12:31 PM
#7
rx7 killer
Yep, Rocket Bunny kit is in the plans... In fact, I've had one on order since May! Unfortunately, it seems SEMA cars got first priority The latest update I got was "about a month," but I'll continue to wait patiently and focus on other things during the wait time. I can't say I'm in a rush to get the wheels on order.
The latest update I got was "about a month," but I'll continue to wait patiently and focus on other things during the wait time. I can't say I'm in a rush to get the wheels on order.SINCE MAY!! damn and I was gonna place my order this month, I think its one of the best new kits out there. I also thought about an ls swap but i opted for a 20b. Progress looking good!
Trending Topics
11-13-14, 12:37 PM
#8
Loading...
Thread Starter
iTrader: (3)
Join Date: May 2006
Location: PA
Posts: 78
Likes: 0
Received 0 Likes
on
0 Posts
The wait is completely atypical I'm sure... I placed my order right before the SEMA madness began, so I'm sure if you order soon you won't have such a long wait. Now let's see that 20b Rocket Bunny car!
11-30-14, 06:21 PM
#10
Loading...
Thread Starter
iTrader: (3)
Join Date: May 2006
Location: PA
Posts: 78
Likes: 0
Received 0 Likes
on
0 Posts
Thanks, I'm hoping to break 600 on 93 like some of the other guys running this turbo. I saw TheGoat had broken 700 not too long ago w/ a 6766 and e85!
With the holiday time fast approaching, I've been slacking a little on updating this thread. I do still have a few more updates to bring everyone up to where I am today.
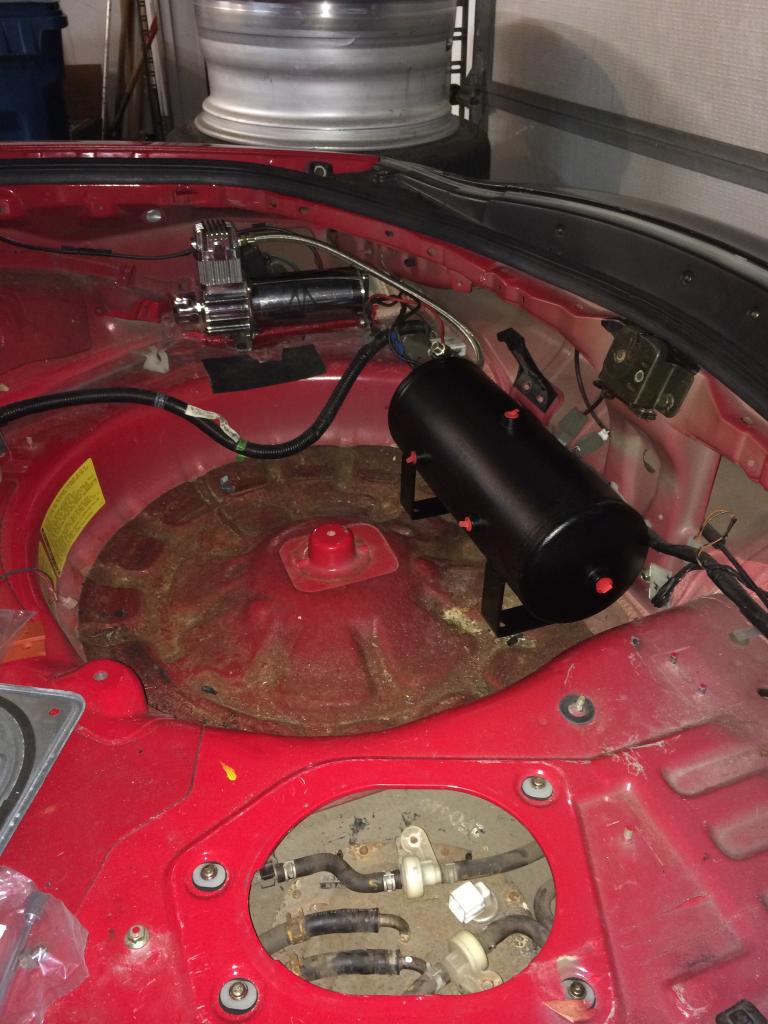
I had said original I wanted to step outside the box with this build, so what better way than to throw some air cups on the car! I know this has been done before and I remember seeing a thread a few years back where someone had machined their own cups. Recently, Fortune Auto had released their Muller air cups, so I bought a set of Fortune Auto 500's (with the cups already installed) and decided I'd piece together my own setup. A friend of mine had provided me with a Monster Compressor and I bought a 2 gallon tank from Air Lift... it was time to get to work. The compressor seemed like the perfect size to be tucked in the rear passenger's side corner of the car. I figured with a bit of massaging, I could get it to fit behind the rear plastics and what do you know... it worked!
The original plan was to have the air tank and a surge tank mounted out of sight and underneath the rear carpet, but two things changed the idea:
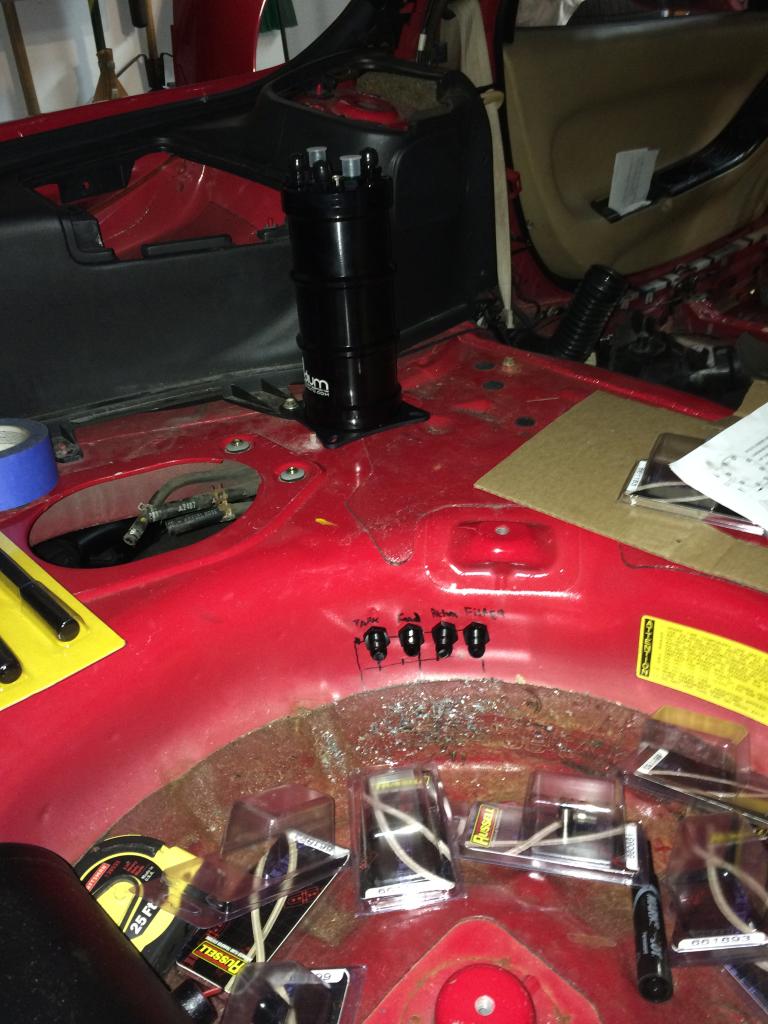
Regarding the surge tank: While looking through the surge tank directions, I noticed that all of their multi-pump surge tanks needed to be mounted vertically (I went with a Radium Engineering twin pump surge tank containing two AEM 50-1000s). I didn't want half of the surge tank poking through the center of the trunk carpet, so I ended up settling on a spot on the driver's side by the rear strut tower plastic. From here, I figured I'd run some lines through the spare tire well to the bottom of the car.
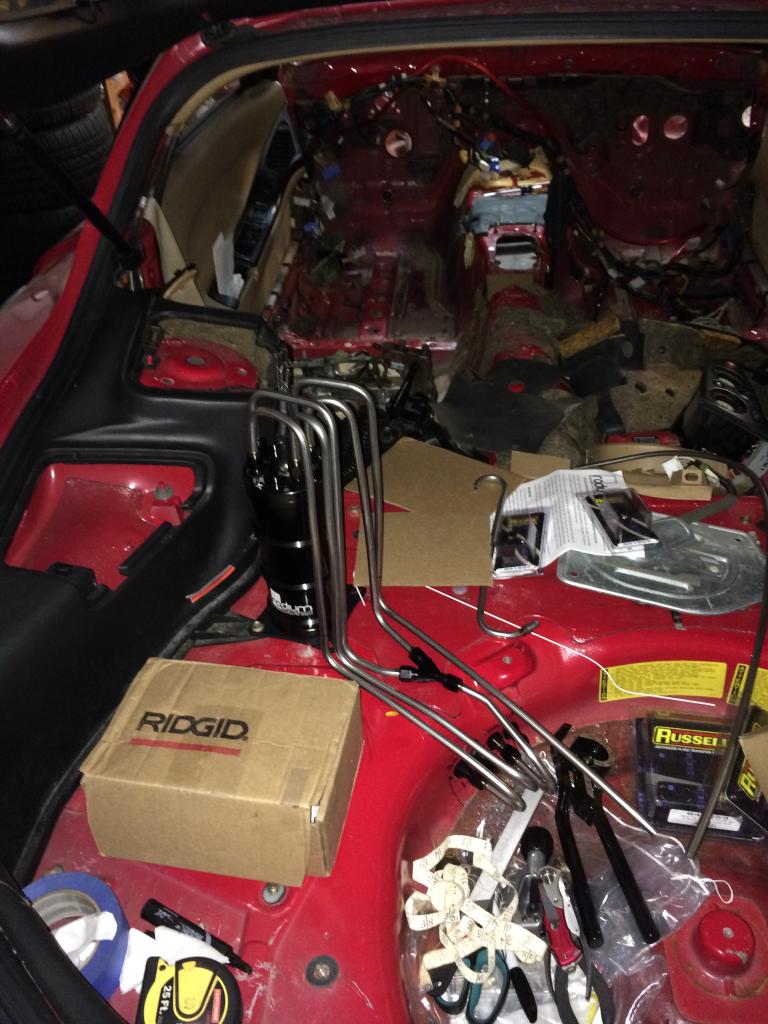
Since some of these lines were going to be exposed, I wanted them to look nice. In typical go big or go home fashion, I bought a flare tool, a line bender, and some 3/8" stainless steel tubing to make my idea come to life.
Now at this point in the story, we're pretty much up to Oct/Nov of 2014. I've gone over most of the past milestones and will start to post some current updates as I progress. Over the past few weeks, I've been attacking random odds and ends as parts have begun to show up.
Before the end of 2014, there are a few things I want to get done:
- Finish mocking up the fuel lines in the rear of the car (I'll be bending new 3/8" steel line under the car, but I have a few hard/braided line transitions that need to be sorted)
- Run the air lines for the cup setup
- Have suspension arms powdercoated, so I can put in brand new Superpro bushings/OEM pillowballs (I bought the Superpros during a group buy back in '07... they've been sitting in my room mocking me ever since!)
- Remove stock sound deadening in the interior to prepare for Lizardskin
**The goal is to have a rolling chassis before the end of January 2015
More Updates!
With the holiday time fast approaching, I've been slacking a little on updating this thread. I do still have a few more updates to bring everyone up to where I am today.
I had said original I wanted to step outside the box with this build, so what better way than to throw some air cups on the car! I know this has been done before and I remember seeing a thread a few years back where someone had machined their own cups. Recently, Fortune Auto had released their Muller air cups, so I bought a set of Fortune Auto 500's (with the cups already installed) and decided I'd piece together my own setup. A friend of mine had provided me with a Monster Compressor and I bought a 2 gallon tank from Air Lift... it was time to get to work. The compressor seemed like the perfect size to be tucked in the rear passenger's side corner of the car. I figured with a bit of massaging, I could get it to fit behind the rear plastics and what do you know... it worked!


The original plan was to have the air tank and a surge tank mounted out of sight and underneath the rear carpet, but two things changed the idea:
1) I was having trouble finding an air tank that was dimensionally small enough to fit inside the spare tire well.
2) The surge tank I went with required vertical mounting
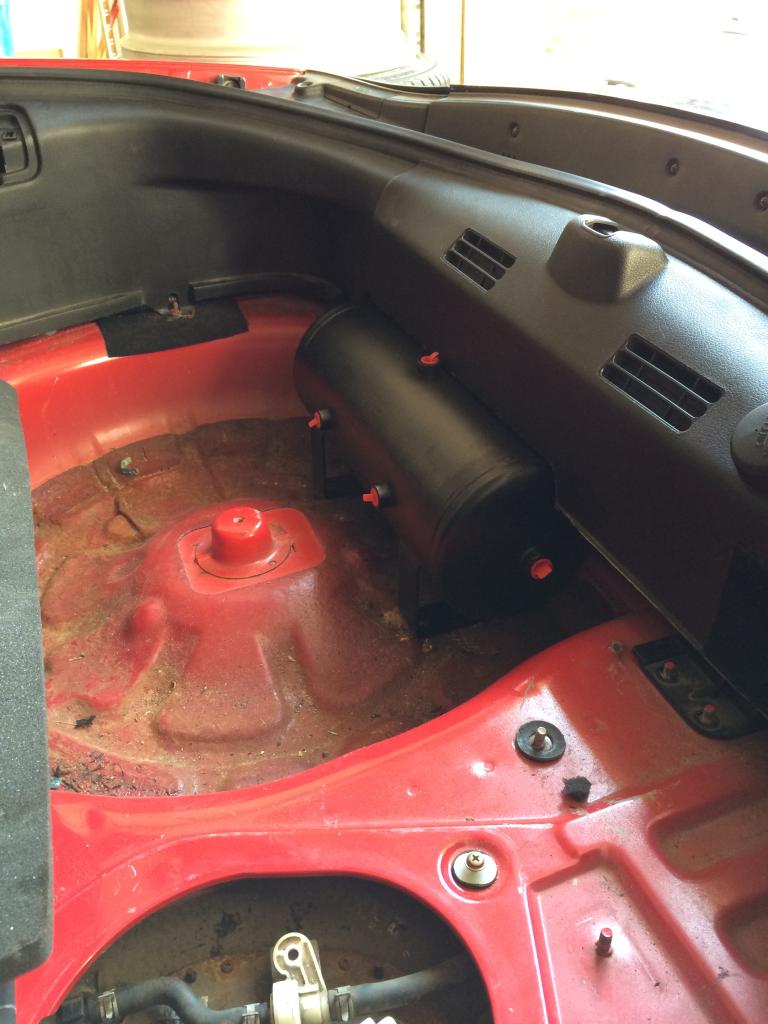
While flipping through a magazine at work, I stumbled upon a beautiful orange E30 M3 that gave me a new idea for the exposed air tank... The tank will be wrapped in suede. I don't know why I hadn't considered this before, but I'm sure I'll be pleased with the outcome.Regarding the surge tank: While looking through the surge tank directions, I noticed that all of their multi-pump surge tanks needed to be mounted vertically (I went with a Radium Engineering twin pump surge tank containing two AEM 50-1000s). I didn't want half of the surge tank poking through the center of the trunk carpet, so I ended up settling on a spot on the driver's side by the rear strut tower plastic. From here, I figured I'd run some lines through the spare tire well to the bottom of the car.

Since some of these lines were going to be exposed, I wanted them to look nice. In typical go big or go home fashion, I bought a flare tool, a line bender, and some 3/8" stainless steel tubing to make my idea come to life.

Now at this point in the story, we're pretty much up to Oct/Nov of 2014. I've gone over most of the past milestones and will start to post some current updates as I progress. Over the past few weeks, I've been attacking random odds and ends as parts have begun to show up.
Before the end of 2014, there are a few things I want to get done:
- Finish mocking up the fuel lines in the rear of the car (I'll be bending new 3/8" steel line under the car, but I have a few hard/braided line transitions that need to be sorted)
- Run the air lines for the cup setup
- Have suspension arms powdercoated, so I can put in brand new Superpro bushings/OEM pillowballs (I bought the Superpros during a group buy back in '07... they've been sitting in my room mocking me ever since!)
- Remove stock sound deadening in the interior to prepare for Lizardskin
**The goal is to have a rolling chassis before the end of January 2015
11-30-14, 07:17 PM
#11
Loading...
Thread Starter
iTrader: (3)
Join Date: May 2006
Location: PA
Posts: 78
Likes: 0
Received 0 Likes
on
0 Posts
It's a double update kind of day!
Over the last two weeks, I've continued to attack the fuel lines in the rear of the car. I'm using Russel Performance for all of my fittings/braided lines and getting my stainless line from Summit. I had already cleaned and painted my rear subframe, so I had to come up with a solution to mount my massive AEM filter. Russell happens to make fuel filter brackets that fit the AEM filter perfectly, so a couple of rivnuts later left me with this:


I got side tracked a little today (and had some boxes were going to be trashed), so I spent a little time mocking up some cardboard floor templates for the trunk. Since I no longer have a spare tire, I wanted to create a false floor to hide the fuel lines and still let the trunk have some functionality. I started out trying to make a 2-piece design, but since the plastics stick out around the strut tower (and with the surge tank in the way), I had to cut the top section in half. Here's what I ended up with:


There is still some exposed floor around the surge tank, but I think I'll be able to get creative enough with the carpet that most, if not all, of the floor will be hidden.
On a side note, I had two interior parts show up recently that I'm very excited about. The first being a Bride Japan Stradia in CFRP. I waited 2 months for this to come in, but it was worth it. This seat is absolutely beautiful and pics don't do it justice... but here's some pics anyway!


I have a ton of interior ideas I can't wait to make a reality and these seats will pull the whole look together. I have a set of Seibon carbon interior door panels waiting to be installed as well and I've got the color scheme for the inside pretty much nailed down. Hopefully everything looks as good in person as it does in my head

The second part that came in recently, I bought on a whim... a Tilton 600 Series floor mounted pedal box. I've seen the brake/clutch pedal overhead mount assemblies in an FD, but I don't know if anyone's gone with the floor mounted versions yet. I set them in the car and they sit roughly 4 inches closer to the driver (leaving some room in the back for the master cylinders).

I've love to make this idea work and I can envision a beautiful final product in my head, but don't all ideas start out that way? I also plan to steal an idea from a close Honda friend and mount the reservoirs underneath the wiper cowl. Once I get to this point in the build, I'll be sure to keep some proper updates and dimensions if anyone wants to attempt to travel down the same path. At the same time, if someone actually has this pedal box installed, please do share some pics/horror stories!


 12-03-14, 06:20 PM
#19
Loading...
Thread Starter
iTrader: (3)
Join Date: May 2006
Location: PA
Posts: 78
Likes: 0
Received 0 Likes
on
0 Posts
Thanks for following along! I'll have to get in touch with you when I make the leap to the Adaptronic

I believe retail is $2030 a seat. I got my seats through More-Japan and the guys over there were very helpful!
Thanks for following along! I'll keep the pics flowing!
Thanks Danh! The sooner I get those wheels on order, the sooner I can get this thing rolling around properly!
Small update:
Jonathan from Goopy Performance called me the other day to let me know the machine work was done! I brought my housings and irons to Goopy to have a half bridge and some rotor housing refurbishing done. While I was there, he sold me on a few other bits. I should be stopping out this Saturday, so I'll post some motor pics shortly!
01-16-15, 06:19 PM
#20
Loading...
Thread Starter
iTrader: (3)
Join Date: May 2006
Location: PA
Posts: 78
Likes: 0
Received 0 Likes
on
0 Posts
Overdue Updates!
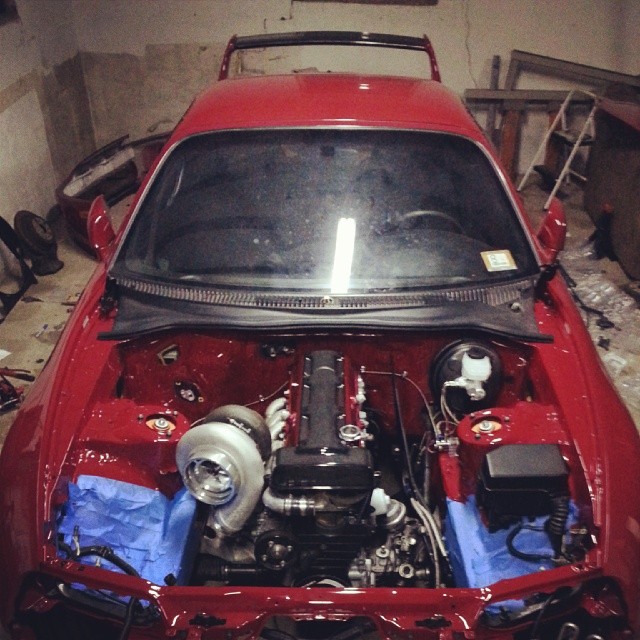
Well the holidays got in the way of my actual updating of this thread, but I do have updates! First is the motor I got back from Johnathan at Goopy. The bridgeport looks awesome (I went this route from RenesisFD's feedback in his own thread regarding his own bridge). At the same time, Johnathan talked me into machining the irons/housings and doing thick studs through the entire engine. The pic below is just the engine mocked up with the four studs going through. It may be a bit overkill for the 6766 I have planned, but I wanted to leave some room to grow. The newer 6870 has sparked my interest, but after going through some of the math on Howard Coleman's threads I think I need more fuel in that scenario. However, I'd love for someone to tell me otherwise!

I finished mocking up what I could of the fuel lines coming from the rear. Right now I have the Radium surge tank in place with 2x AEM 50-1000's going from -6ANs into a Russell 2x -6AN inlet to 1x -6AN outlet Y-fitting. From there, it's a -6AN braided line up to a bracket I made in the front. I used existing fuel line bracket bolt holes and welded up a bracket to fit in this spot. There are bulkead fittings passing through the holes, colored different for feed/return. I'll find a way to finish this bracket, so it looks a little less out of place.


Finally, I got a vibratory media tumbler for christmas from the girlfriend, so I put that to use on the suspension bolts. What a difference! I let the bolts soak in vinegar over one evening, cleaned them off, the threw them in the tumbler for a few hours with some corn cob media. I was extremely impressed at how they came out. You'd swear they were brand new bolts (aside from the wear from age).

Unfortunately, after doing this and stumbling across a TwinsTurbo build thread on Supra forums, I've since decided that everything underneath the car will be cadmium plated. Oh well, the tumbler will come in handy for other things!


